LastRonin
-
Posts
1,079 -
Joined
-
Last visited
Content Type
Profiles
Forums
Articles
Gallery
Downloads
Events
Everything posted by LastRonin
-
I light mine by holding a propane torch to the side of the opening. Then turn the gas on. It lights up easy peasy.
-
Thanks for replying. I'm glad you approve. Yessir, it will weld. I want to try a bit of mokume sometime, I'm hoping I can turn it down far enough. Lol, just kidding. It seems pretty stable as low as 4 psi. Highest I've turned it is about 17 psi. It was screaming at that high. I ran it at about 12-13.
-
Thank you Charles. Yeah, I expect it'll crack some. Just hoping it lets my fuel efficiency improve. Next project for this is a blower upgrade, rework or mod.
-
Ok, got them loaded.
-
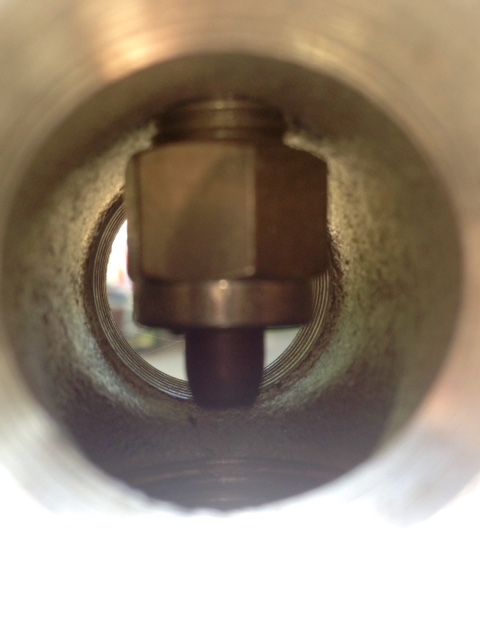
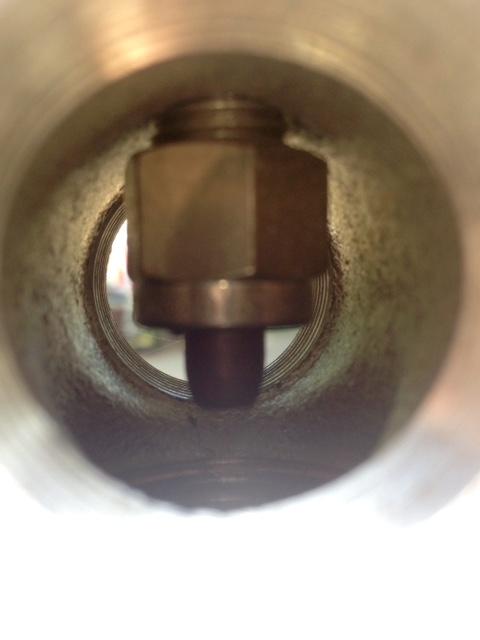
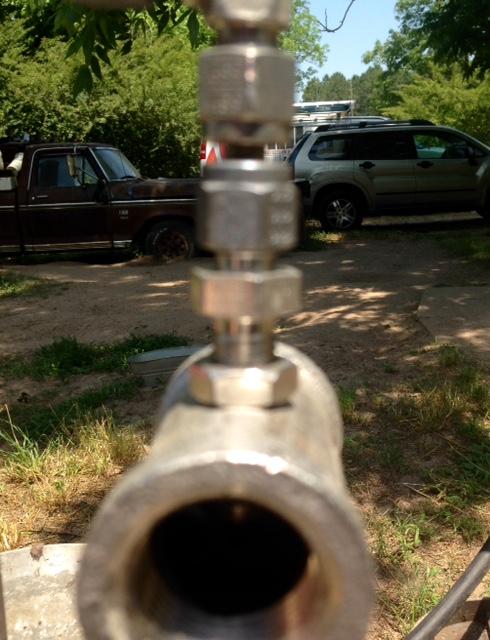
Here are a couple pics showing the propane feed into my Frosty T-burner and the minor mod to his plans. I'd love it if Frosty would give me his opinion on it. ok, my phone is giving me trouble uploading them. I'll try again in a moment.
-
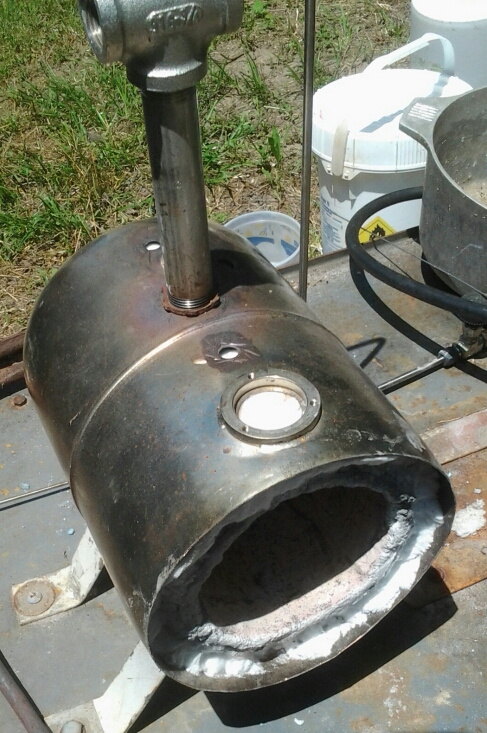
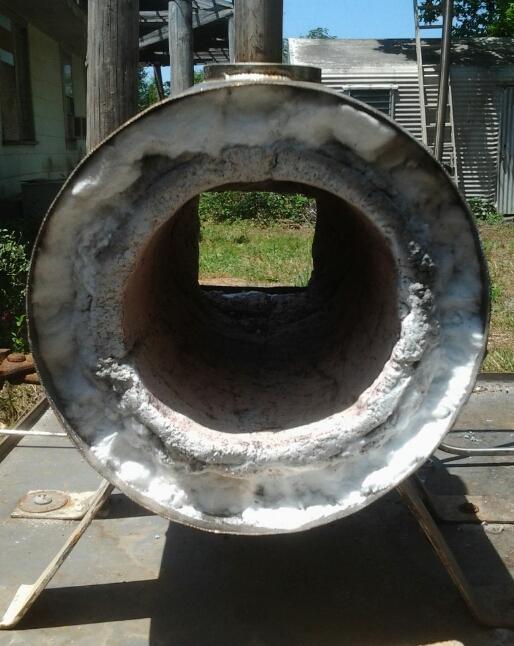
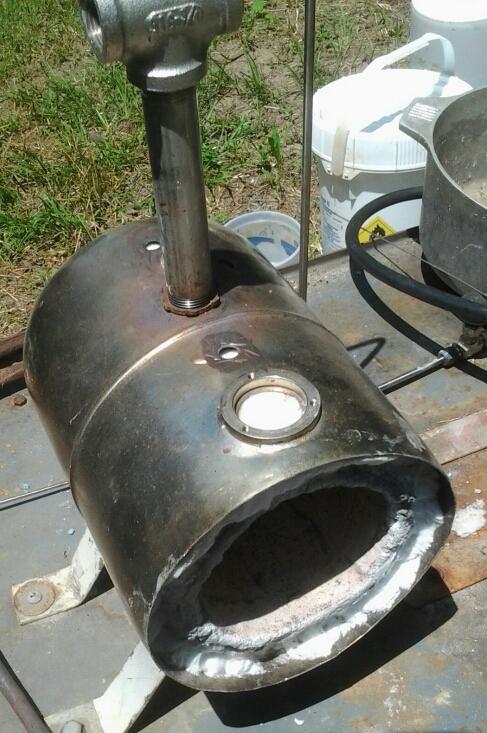
I'm attaching daytime photos of the lined forge. Any comments will be appreciated. I do plan to make a flat insert from the BlueRam HS to bring the floor up level with the bottom opening of the pass-through in the back.
-
-
I don't think The White Horse LHS was asking about period correct forges, just info on how to line his existing brake drum forge to create more of a bowl shape.
-
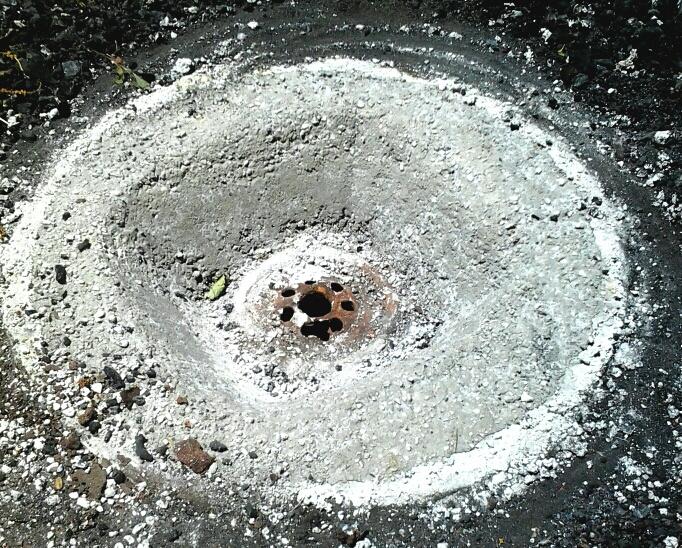
I've been planning for a while now to rework my brake drum forge. The drum I used is off an old house trailer and has a 13 1/2" inner diameter and a depth of 3 1/2" it just burned too much coal. It helped after a while that I had built up a good bit of coal ash and such filling in thecorners and making it more of a bowk, but it still was too spread out for my liking. I had been given most of a bag of PacoCast 28 li castable refractory and had been planning to use it to make a more restricted and slope sided firepot. Well Friday I gave half of the refractory to a young guy I met who works at the local Walgreen's that is getting into smithing so he could use it to help him get a better forge going than what he described to me. (I've also recommended ifi to him several times.) Anyway, I went ahead yesterday (Saturday) and mixed up some refractory and did what you see in the pic. The top is about 7" x 7" and has about a 50º slope down to about 4" × 4" at the bottom. Did I mess up doing this? What's you guys' opinion? I've already built a small propane forge and do believe my next one will probably be a welded firepot side blast.
-
One more note... PICTURES, we all love pictures. And not necessarily only of forged works, anything cool, neat and interesting that may be relatable to any of the topics this vast forum touches on.
-

Today was a good day
LastRonin replied to Michael Cochran's topic in Blacksmithing, General Discussion
Have you looked at the Frosty T-burner? If you can't find the parts for it, you must be living waaaaaaay out in the boonies. I built a 3/4" one with all scavenged scrap, except the .30 mig tip. And it's xxxxxxxx awesome! Shoot... I bet someone would be willing to ship them to you using USPS flat-rate box. Probably just at cost. -
I absolutely agree with you Thomas. It is rediculous for a novice to modify a proven working design when they have no relatable experience. And especially disturbing for them to then complain about it not working. But... in those rare instances where a novice in this field has relatable experience and applies that to the design, I can understand. Though if it doesn't work, they still have no right to complain. For instance, the Frosty T-burner... instead of the type of coupling and connector he listed for the propane input, (and due to the experience I have working with pressurized tubing) I used a stainless 1/4" cbu bulkhead union. Tapped the hole drilled into the back side of the T for the threads on the union and threaded the long end into the hole. The nut I left between the T and the flange of the union, that way I could use it to lock down the coupling once tuning was done. The .30 mig tip fits perfecrly into the inside part and is clamped in place with the ferule and nut. I came off that with about four feet of stainless 1/4" tubing to an adapter to fit my propane hose. Luckily, it worked wonderfully. But if it hadn't, I would not have posted complaining that 'Frosty's design sucks' because I understood that I did not follow them exactly. I recommend to anybody I talk to about building a burner to follow Frosty's plans.
-
Small Sickle for clearing the edge of my ditch
LastRonin replied to LastRonin's topic in Axes, Hatchets, Hawks, Choppers, etc
Also want to thank all of you guys who have given me some of your valuable time by posting replies, ideas, suggestions and such. Shoot, I'm one of those who can take snarky, sarcastic remarks for the humor they're meant to be. (Been known to make a few myself.) -
Small Sickle for clearing the edge of my ditch
LastRonin replied to LastRonin's topic in Axes, Hatchets, Hawks, Choppers, etc
Regular yard work. No brush thicker than 1/4". I used it for about two hours and don't need to re sharpen it yet. So I'm happy with it for what I made it for. Now, when I get ready to tackle the back lot... I think I'll follow your advice and find some 5160. -
Small Sickle for clearing the edge of my ditch
LastRonin replied to LastRonin's topic in Axes, Hatchets, Hawks, Choppers, etc
Yeah, that was completely unintentional. Gotta be more careful how far I dip the next one in. -
Novice to all but the very basics, in need of help
LastRonin replied to Jonathan Dracon Michelin's topic in Knife Making
I'm not a knifemaker, but the basic physics in this question are the same. If you hammer your stock to lengthen it, you will thin that area out and therefore have a thin spot and potential gap between the steel and scales. I recommend heating and bending the stock before pattern application, then you can grind the thickened inner part of the bend back to proper thickness, apply your pattern, cut it out and continue from there with stock removal. -
Small Sickle for clearing the edge of my ditch
LastRonin replied to LastRonin's topic in Axes, Hatchets, Hawks, Choppers, etc
Bigfootnampa: Because I had read your post on that topic, it originally did have about a 24" haft... then I made the beginner mistake of trying to adjust the angle cold... "TINK" followed by inappropriate for this forum declarations of my stupidity. So, back in the forge to draw out the 2" piece that was left into the tang. Tried to mitigate it some with the long handle. Ianinsa: Nah, those are supposed to be silver. At least the ones used for important ceremonies. -
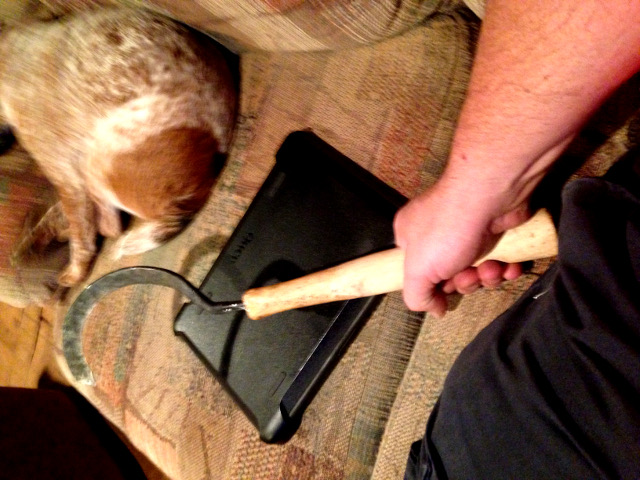
Made this Sunday after my weedeater died. I like it better. works great. Piece of a coil spring and an old carpenter hammer handle.

-
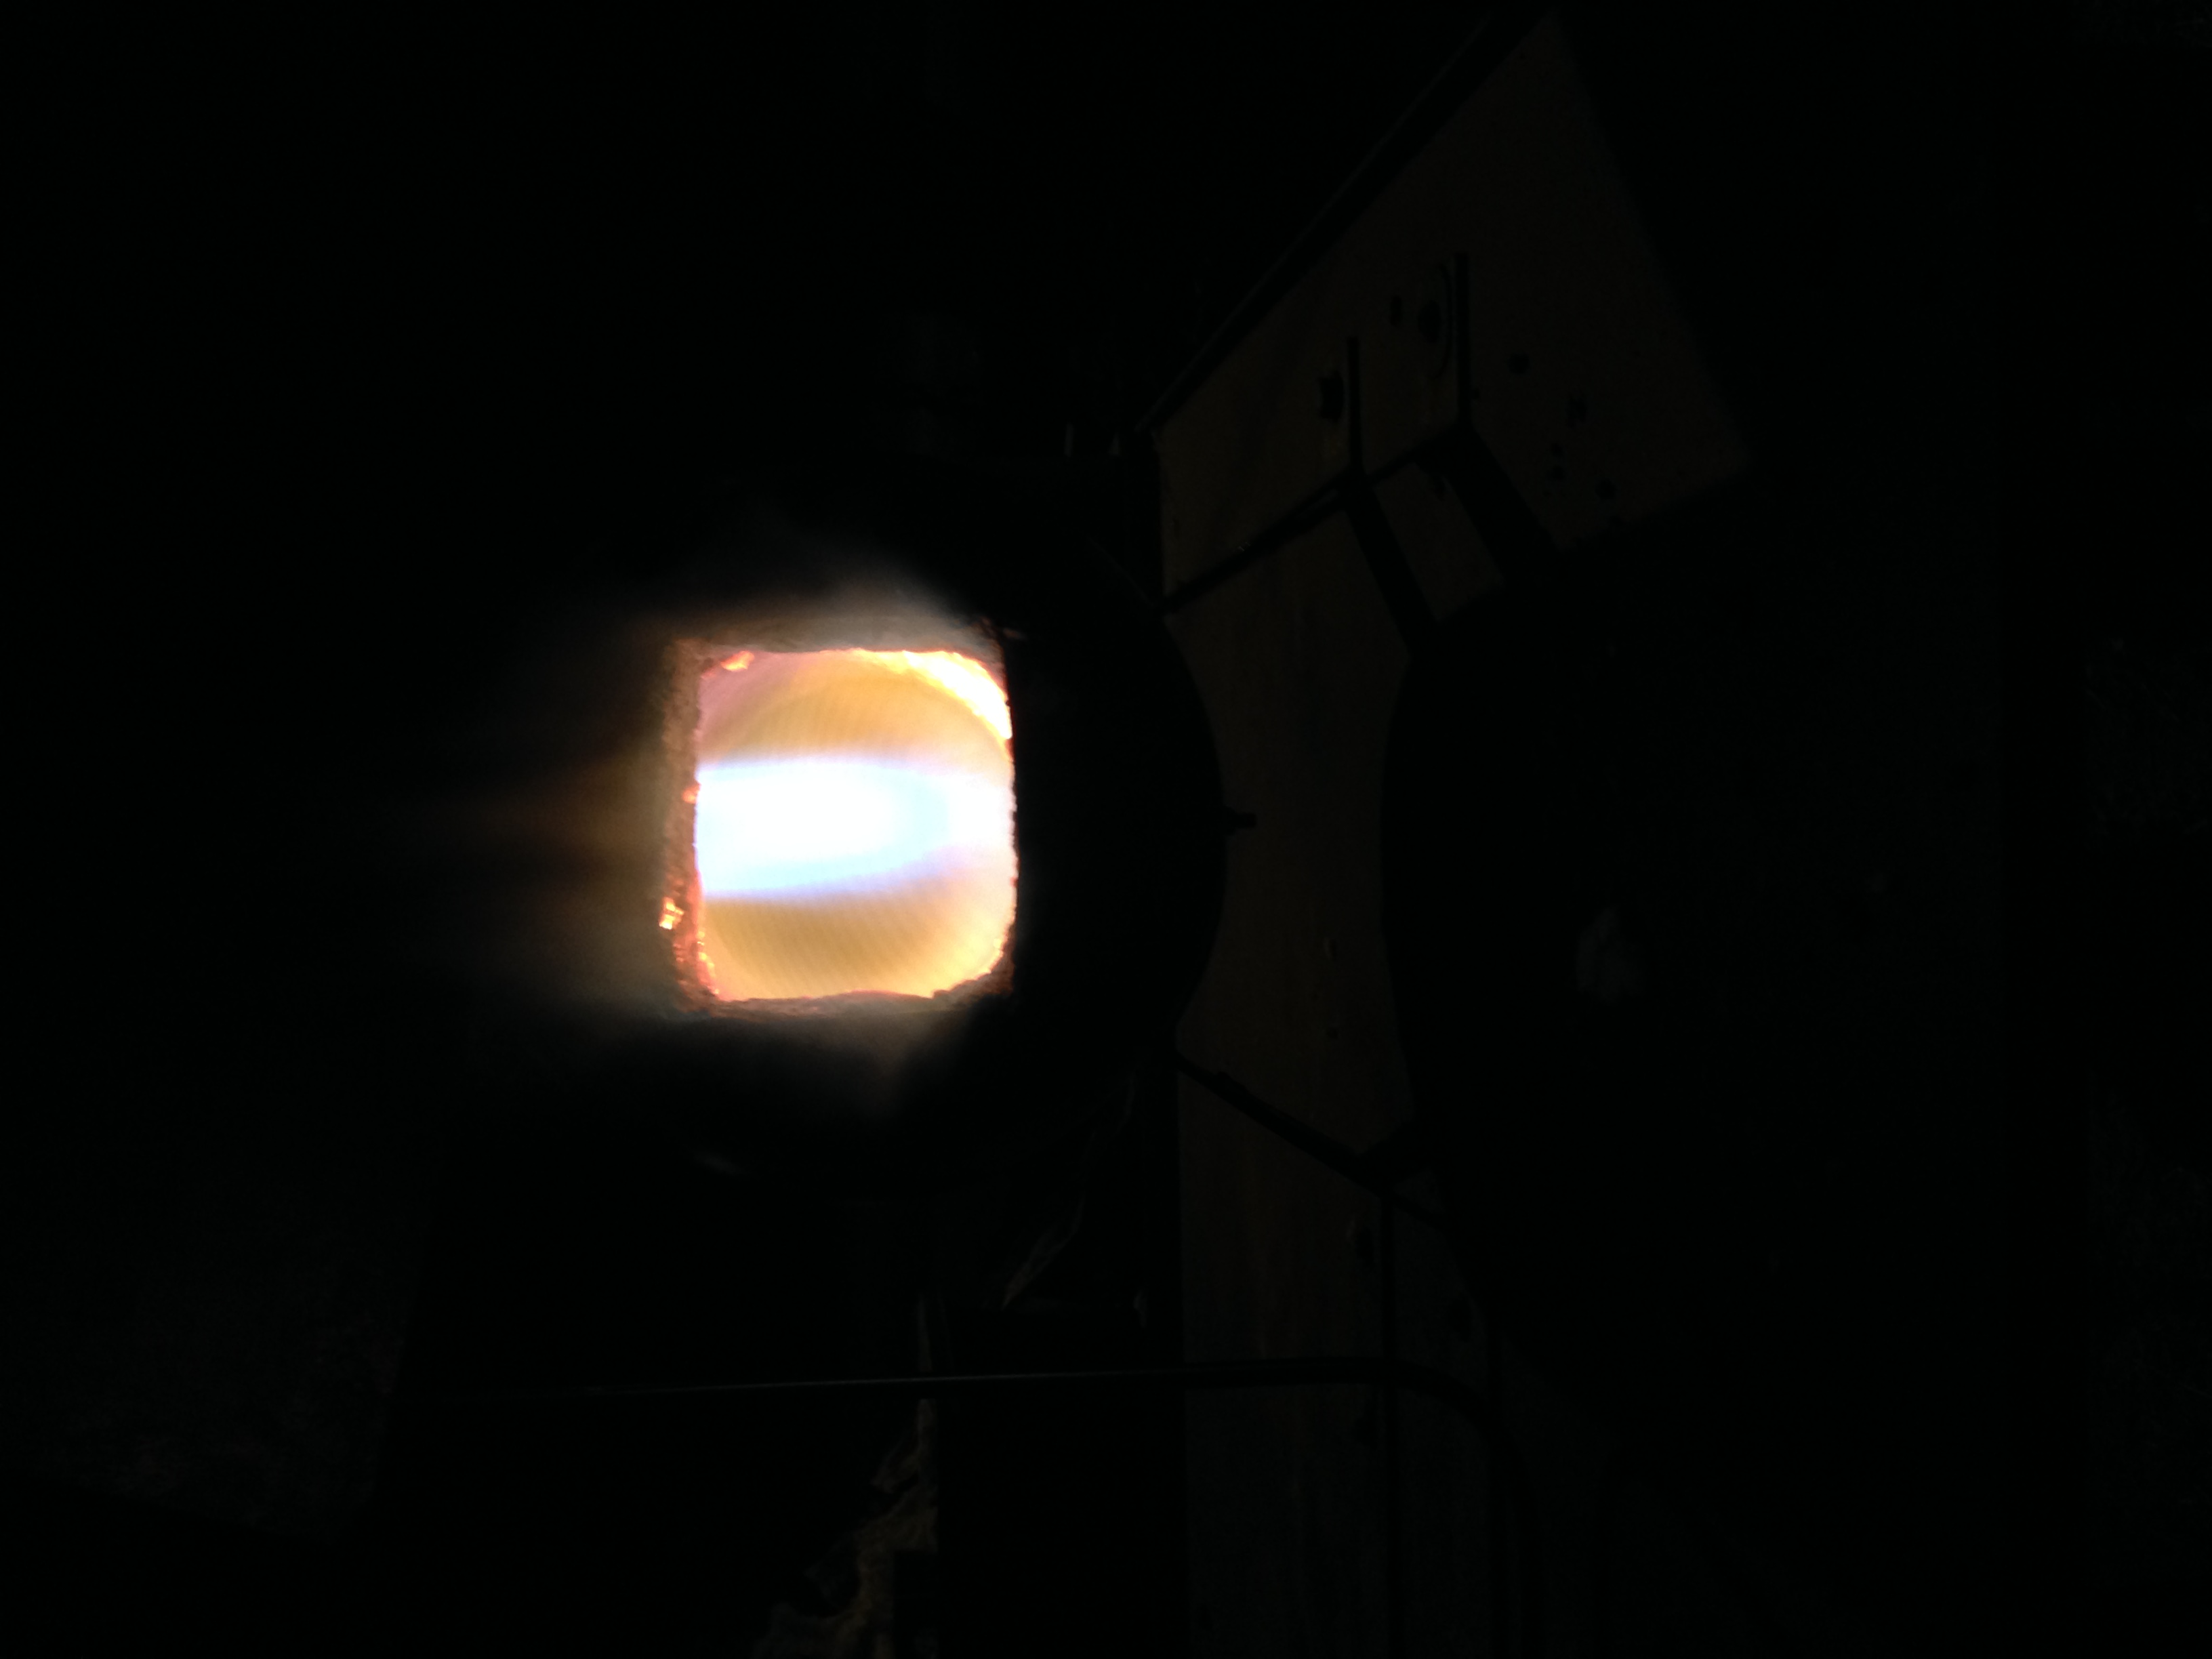
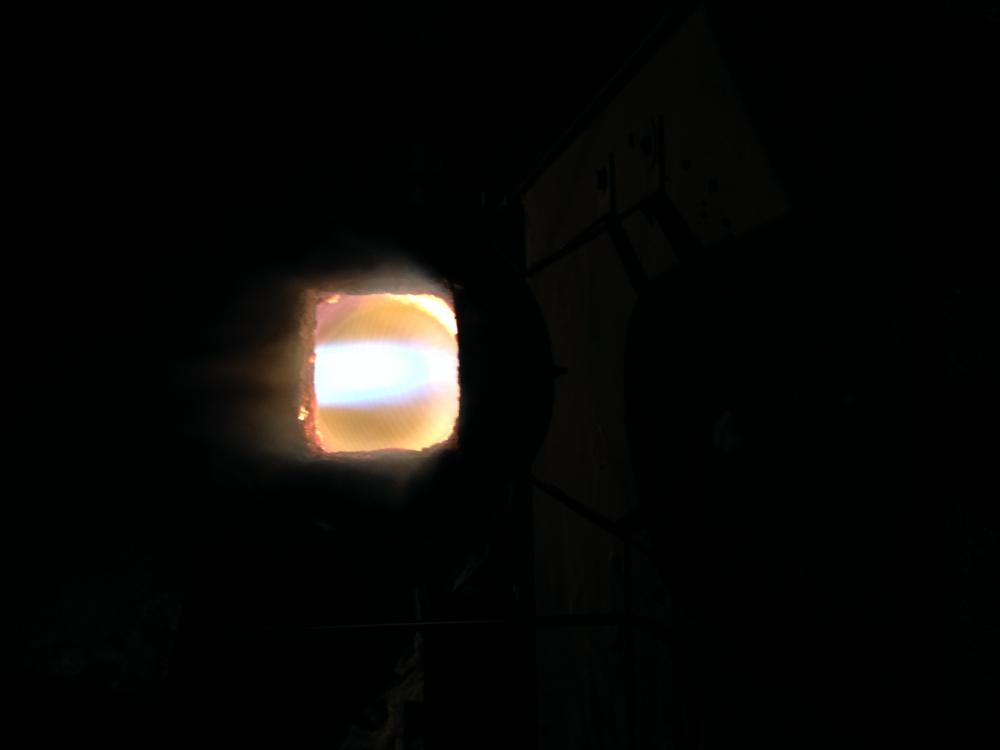
A shot of the flame shape.
-
Latest. I relined it using BlueRam HS. Did it the way I understood Frosty to have done... two cardboard tubes with a 1/2" gap between them mounted on end on a board. Then used a stick and mallet to ram the refractory in, packing it until the mallet bounced off without noticeable further packing. Added a little at a time this way until the space was filled. I then unfastened the tubes from the board and inserted them into the forge body to mark the burner hole location. A quick two minutes with the right size hole saw while the refractory was still fresh and voila... a nice clean hole. Let it set for two days then removed the inside tube and stuck a 100W bulb in it for four days. Took the outer cardboard off and wrapped two layers of 1" thick Inswool around it... and dropped it. After a few choice words, I wet the broken edges, used some fresh refractory to pack between them and coated the outside with about a 1/4" coating (after packing by hand) all around . Carefully re wrapped the Inswool.. Wrapped that with the Sunday funnies and taped with paper tape. Barely managed to slide that into the body. Too frustrated to wait longer, I reinstalled the 3/4" Frosty T-burner, set my pressure to 4# and lit it off for about five minutes. After letting it cool for thirty minutes I lit it for ten. Let it cool an hour and turned up the pressure to 10# and ran it for ten minutes. By this time, the refractory was no longer blue. It had turned a light grey and when I tapped it with a piece of steel, it went "rink" instead of "think" and didn't leave a mark. Thrilled, I lit it off and made a hand sickle for clearing the weeds along my ditch. Used a piece of spring about 3/8" diameter to make it from. I'll have to get pics of the sickle later. I used a claw hammer handle I picked up that someone had snapped right at the head and threw away.
-
Some non knife shaped object work.
LastRonin replied to Malice9610's topic in Blacksmithing, General Discussion
And you may wanna think about some consideration for the reduction in coordination by the time the bottle is getting closer to empty. -
I think he'll love it. I hope you weren't driving.
-
It looks nice the way she painted it. Personally I liked it better before it was painted, but it is hers to do as she wishes. Great job on forging it though.
-
Pictures! Please? oh yeah, and congrats
-
Oh. If you had been over into the panhandle near Pensacola, I would have offered to give you a chunk of rail.