

anvil
-
Posts
3,246 -
Joined
-
Last visited
Content Type
Profiles
Forums
Articles
Gallery
Downloads
Events
Everything posted by anvil
-
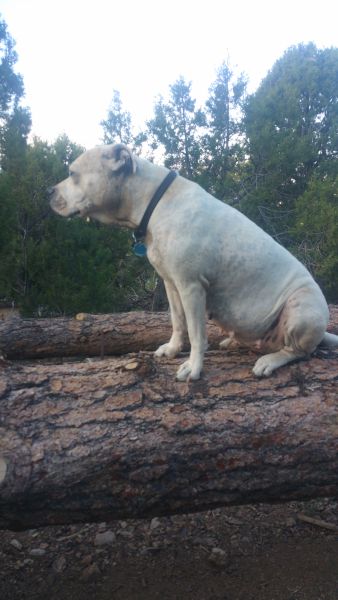
My thoughts go out to Clay and family!
-

What did you do in the shop today?
anvil replied to Mark Ling's topic in Blacksmithing, General Discussion
Nice trivet, Jen. -
Thanks for the innard description. I agree with Georg and use straight slot round head screws for my joinery. It seems to look better, but that's pretty subjective. Nice work!
-
nice! Any pics of the works?
-
Excellent start! Make sure you keep them and note your improvement over time. I still have my first forged iron.
-
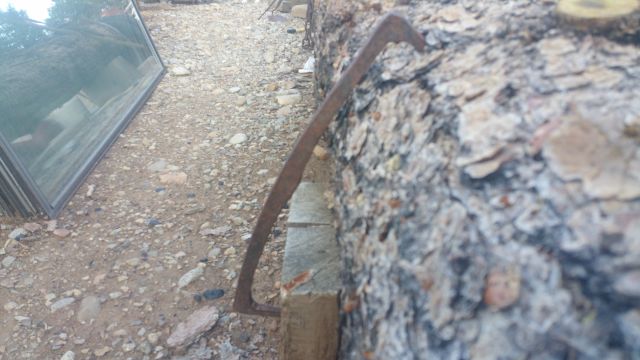
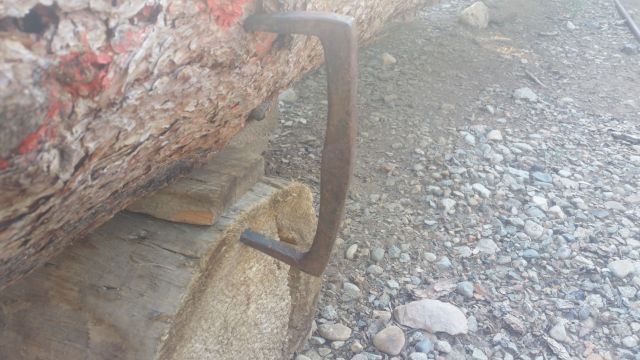
A real log dog and pics of how i make mine. The boss in the middle and the bend in the dog act as a spring. Notice the boss in the middle of all three "log dogs" When driven in, half square mild steel will bend. Done this way, they don't bend and give spring tension so they hold better. Also, when tapping them lose, the extra mass helps. I do a forged right angle bend instead of an upset like in the vid. Another reason for the chisel's to be opposed is that if the grain isn't cut, it will swell back together and leaves no tool tracks.
-
Depends on how hard you hit it,,,A resting blow, another name for what we are talking about is not a forging blow.
-
What did you do in the shop today?
anvil replied to Mark Ling's topic in Blacksmithing, General Discussion
Bayard, what Jobtiel said. You should check it with a magnet and just past losing magnetism, put it in lime to let it slow cool. Thats how to anneal. -
What did you do in the shop today?
anvil replied to Mark Ling's topic in Blacksmithing, General Discussion
also known as " Buenie" Cripple Creek, not Cripple Crick,,, unless you are from Victor,,, -
And never forget, you can tell the quality of a Blacksmith by the quality of his scrap pile!
-
What did you do in the shop today?
anvil replied to Mark Ling's topic in Blacksmithing, General Discussion
Awesome! the journey is always more interesting than the destination. I followed what you said with ease and thanks for the insights! -
What did you do in the shop today?
anvil replied to Mark Ling's topic in Blacksmithing, General Discussion
Awesome tongs! Thats all I can say. It's amazing taking what the minds eye sees to a physical reality. Lol, I'm not going to ask how you got yer mind to that point. As far as blacksmith competitions, I've never been into them. Just my opinion. In the past, Farrier conferences were always competition oriented and blacksmith conferences were always demo orientated. I know this changed a long while ago, but I watched it, from a distance, emerge. Jen, I meant no critique, just a general comment on procedure and being able to forge as much as possible on a straight bar and other uses for right angle bends. good job and hope you had fun. -
What did you do in the shop today?
anvil replied to Mark Ling's topic in Blacksmithing, General Discussion
nice stuff! Shainarue, on your watering can, if you poke some holes on the sides of your can, you will have better control of where you put your water. 3 or 4 holes about a third or so of the way down from the top on both sides works pretty well. TWISTEDWILLOW, I really like your bells. For your metal handled ones, if you punch a square hole and forge a square tenon, when you peen it over, it wont spin. Also, after threading it, you can peen it over instead of using a nut. I do this with a round punch. \ jlpservicesinc, Jen, nice work! On your heart, at the bottom a forged right angle bend with a tapered(pointed) bottom corner would create a nice ending. Didn't I see you did one in a previous post? Altho its prolly not quite what they meant, you could make the fire crane out of one piece using two right angle bends at the bottom with 0 distance between them to get the square mass and tenon material. , then a light forgeweld for extra length. When having the confidence working to dimension, both tenons, the slit and drifted mortise and the scroll end could be forged on a straight bar which is the quickest and most convenient way. The heart could be done the same way and the leaf finials could be done first on a straight bar. Not a beginners approach, but certainly doable at the intermediate level. -
I agree with Charles. Having done hot shoeing, you bring a lot of skills to your new endeavor. To name a few. a basic understanding of hot metal, Bending iron to fit a pattern by eye meaning fitting a shoe to a hoof or any iron to the pattern you draw full size on your layout table, Leveling by eye meaning every shoe must be brought into plane meaning if you can bring it into a plane, you can bring it into 3 dimensions, Filing a level surface and setting basic angles by eye meaning this is a good starting point for filing other shapes such as filing the edge of a leaf from crotch to point and from vertical to flatsmoothly and other file flourishes. Not to mention these similar skills that you bring from your jewelry. Have fun!
-
Heres another way to forge weld cable with a basic setup like yours, altho it does require a vice, preferable a blacksmith leg/post vice. Take a handling length of your cable. A handling length is a length long enough to hand hold and keep your hand cool. Tie off the far end with bailing wire or tie wire. Take a 3" or so forge welding heat on the far end and forge about a 1" square on the end. Now heat up a long enough piece, say about 6"-7" inches to a nice yellow heat and clamp the square end in your post vice. Now twist it tight. Keep the pressure on the tightened twist and let it cool. Now you won't get any of those snags sticking out and the twist will stay tight. Now take a forge welding heat about the length of your tight twist, or whatever you are comfortable with, and start welding from the far end and work up twards your hand. As you hammer, rotate the wire in the direction that tightens your work as you hammer weld it. Take as many welds as necessary, but keep in mind that the more heats taken the more harm is done to your steel, including loss to scale. Also, use your wire brush and brush it alot to keep the scale off your work. When your weld is past the tightened wire, cut it off at the end of the weld. Doing it this way keeps your wire tight which helps prevent voids and takes minimal tools, including no tongs.
-
What did you do in the shop today?
anvil replied to Mark Ling's topic in Blacksmithing, General Discussion
Sorry for your bad news, but like a great smith once told me,," Isn't it nice that when things get bad, We can spend some time making beautiful things" Francis Whitaker. Nice first forge. Lol, you should have seen mine! The bottom of an old cast iron hot water heater with the same twyre setup and metal tee posts for legs. The air source was a 12 volt car heater fan. One lead to the battery and the other I tapped on the forge at different rates to get the needed heat! -
pea coal or nut coal
anvil replied to Bud in PA's topic in Solid Fuels: Coal, Coke, Charcoal, Wood, etc
Well said Frosty and George. Peter Pan, May he live forever in all of us! -
you are not hot enough. get it to a welding heat. you are not even close. forging with no experience, especially forgewelding outside, adds immensely to the difficulty. However, if you have enough time,patience and cable,to gain the needed experience, you will succeed. All difficulty is overcome by patience and invested time. good luck and have fun.
-
pea coal or nut coal
anvil replied to Bud in PA's topic in Solid Fuels: Coal, Coke, Charcoal, Wood, etc
Im a youngin,,, 75 and still smithing. Water or size makes no difference. We, in Colorado used to be able to get the fines below the tipple for free at the Carbondale mine, or a 6 pack to the loader driver. mix it with water to make a slurry, and it makes a great heat source. -
I think I will break an old habit and head down in that direction as well.
-
pea coal or nut coal
anvil replied to Bud in PA's topic in Solid Fuels: Coal, Coke, Charcoal, Wood, etc
ditto what George said -
I've got this years costume ready. Think I'll be a blacksmith.
-
What did you do in the shop today?
anvil replied to Mark Ling's topic in Blacksmithing, General Discussion
Jen, you covered a lot of ground, and nice right angle bends too. Hitting that third dimension is pretty addicting! Thats where the horn really shines. -
pea coal or nut coal
anvil replied to Bud in PA's topic in Solid Fuels: Coal, Coke, Charcoal, Wood, etc
Good score! -
What did you do in the shop today?
anvil replied to Mark Ling's topic in Blacksmithing, General Discussion
Jen I like your scrollwork! Congrats and I'm looking forward to seeing more! Pat, if hitting all the details on a 3 dimensional project is beginners luck, then you need to buy a lottery ticket.