TheoRockNazz
-
Posts
863 -
Joined
-
Last visited
Content Type
Profiles
Forums
Articles
Gallery
Downloads
Events
Everything posted by TheoRockNazz
-
Coming along nicely The blade 1/16" thick? Does it flex enough with the HT? Seems to me if you're going that thin you'll want a more flexible blade so it won't snap on ya. I like the stacking, and think it'd look better with a buttcap of some sort, or maybe a fully rounded-off end. I would also recommend a ricasso
-
Wow! Look at that, nice save, still got a handy blade there
-
WOW! Looks fantastic, can't wait to see more.
-
I'm lucky to have such fantastic friends. My buddy AJ put together this great video for me; it was recorded last summer at Marsha Trattner's forge in Brooklyn where I had been renting space and forge use. I was very fortunate to have access to her equipment, which made for some pretty awesome filming. Let me know what yall think
-

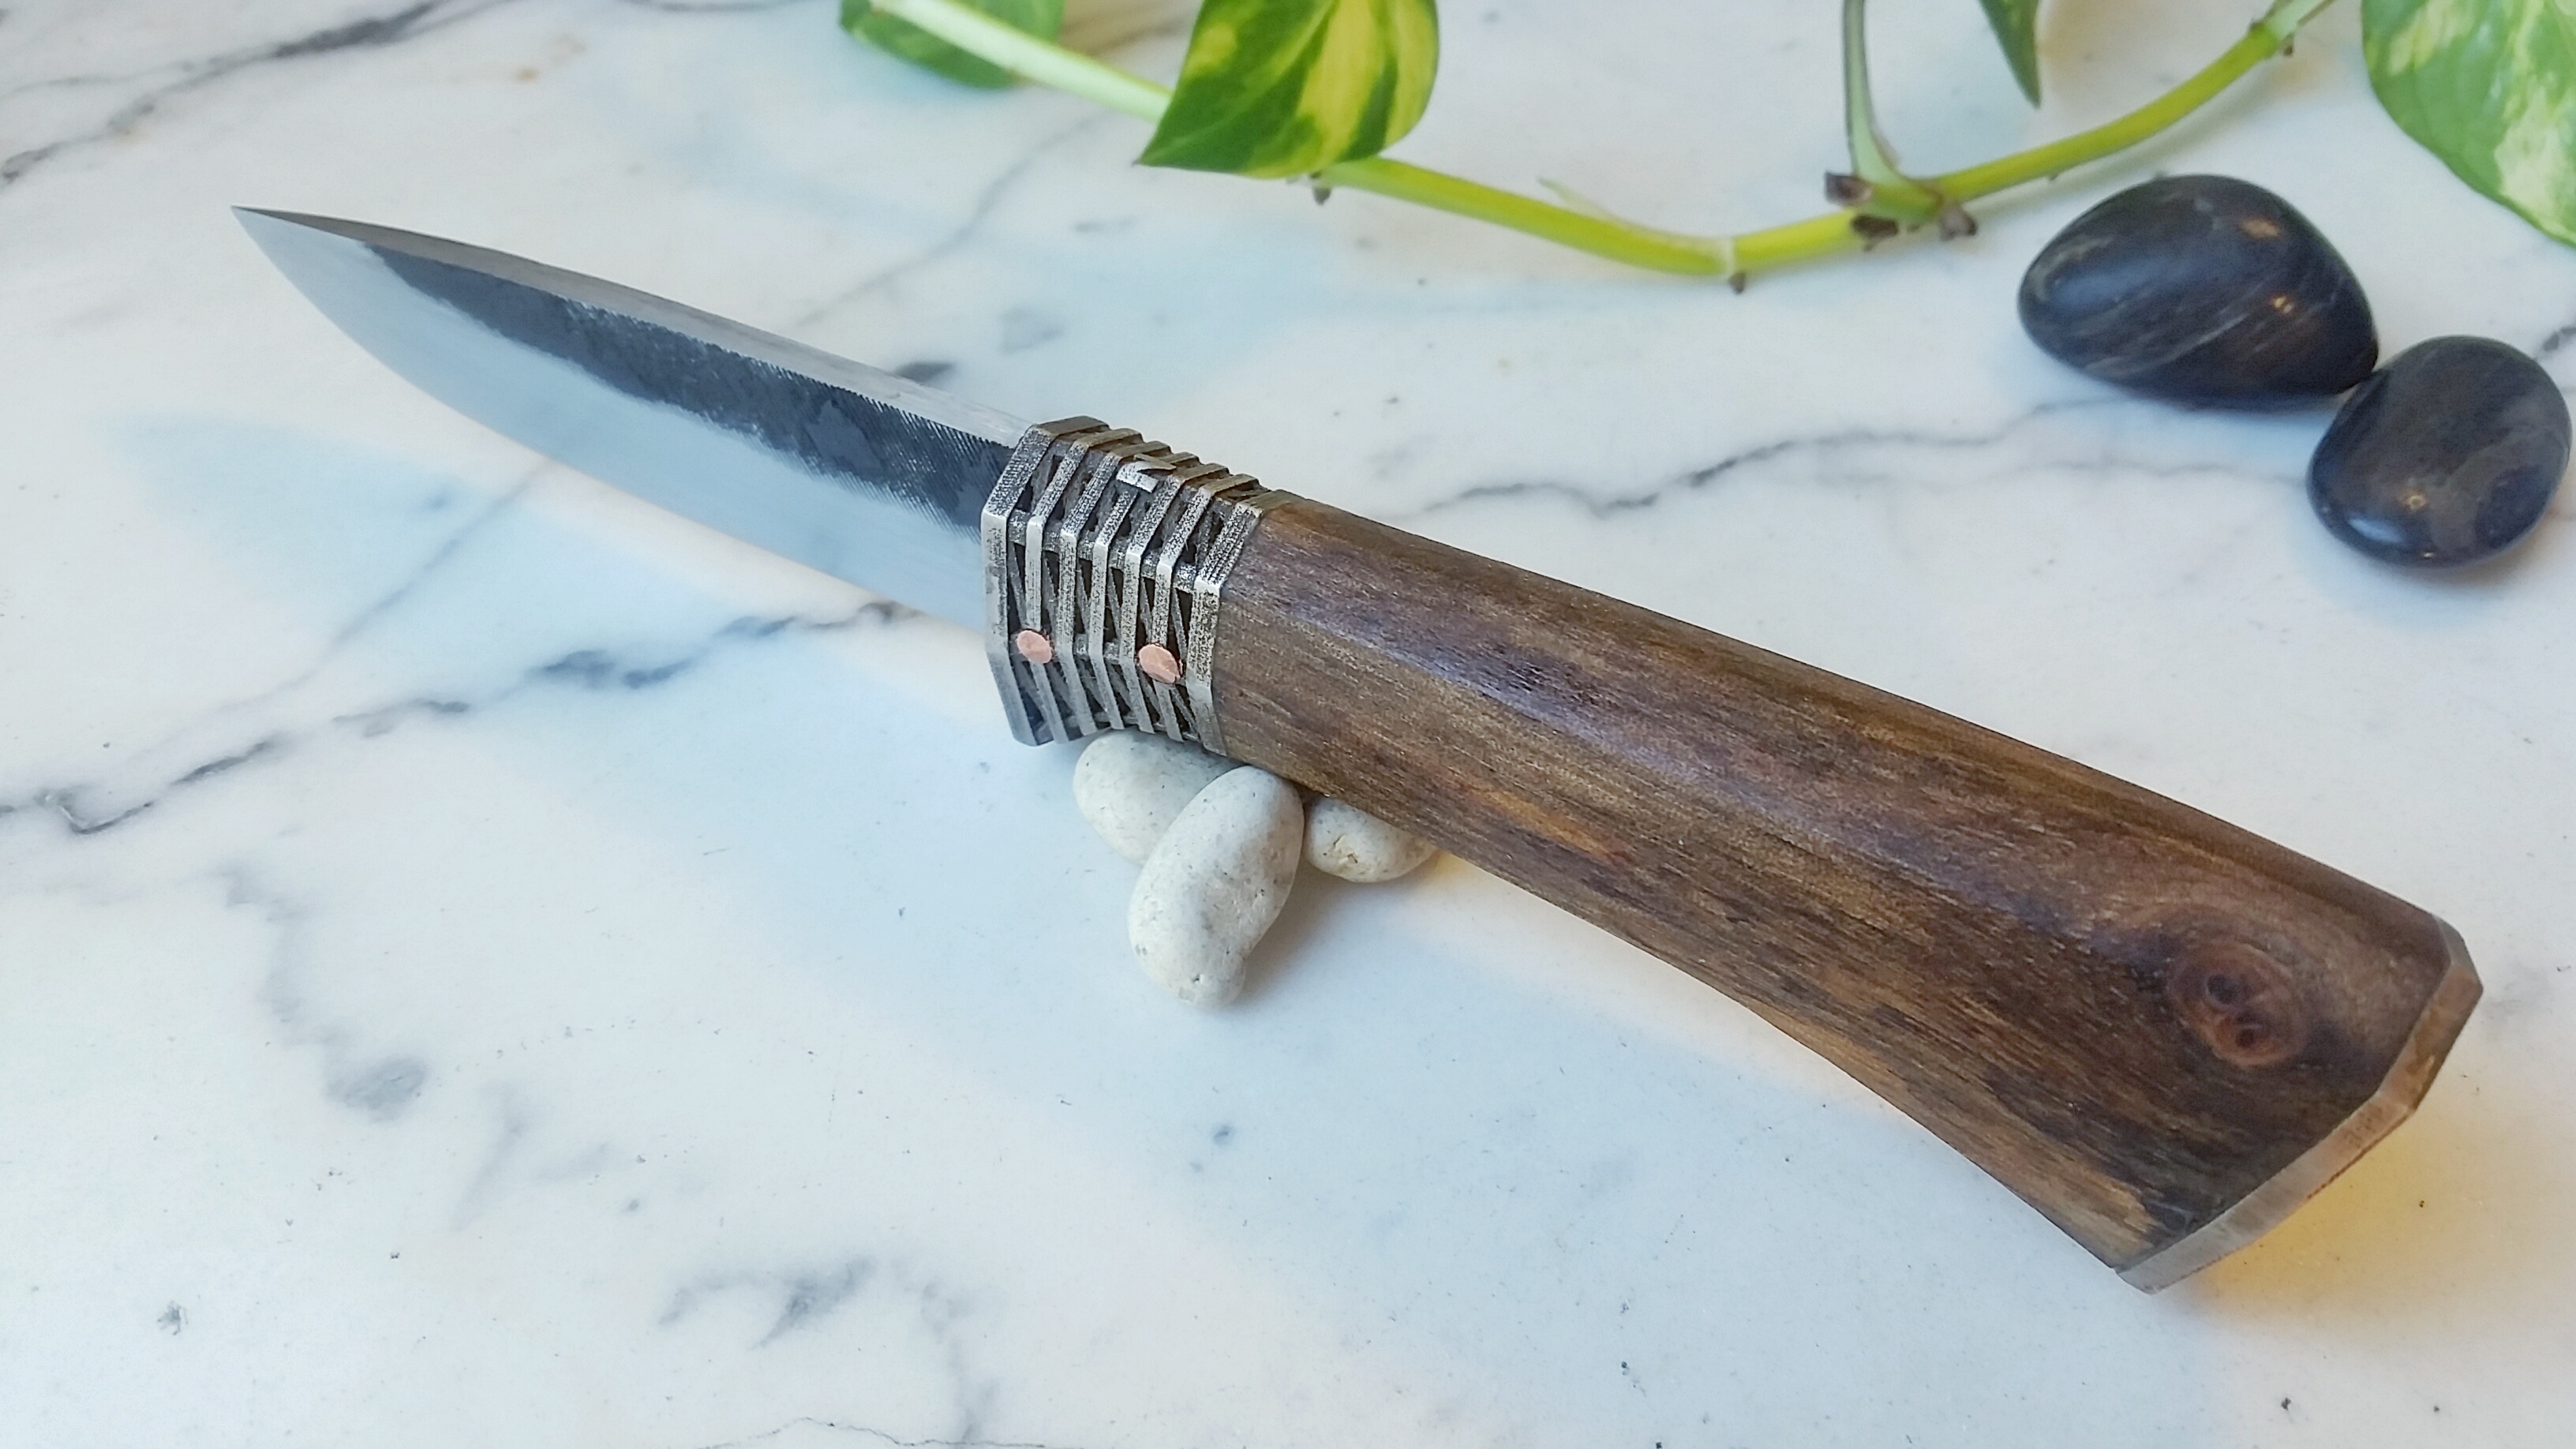
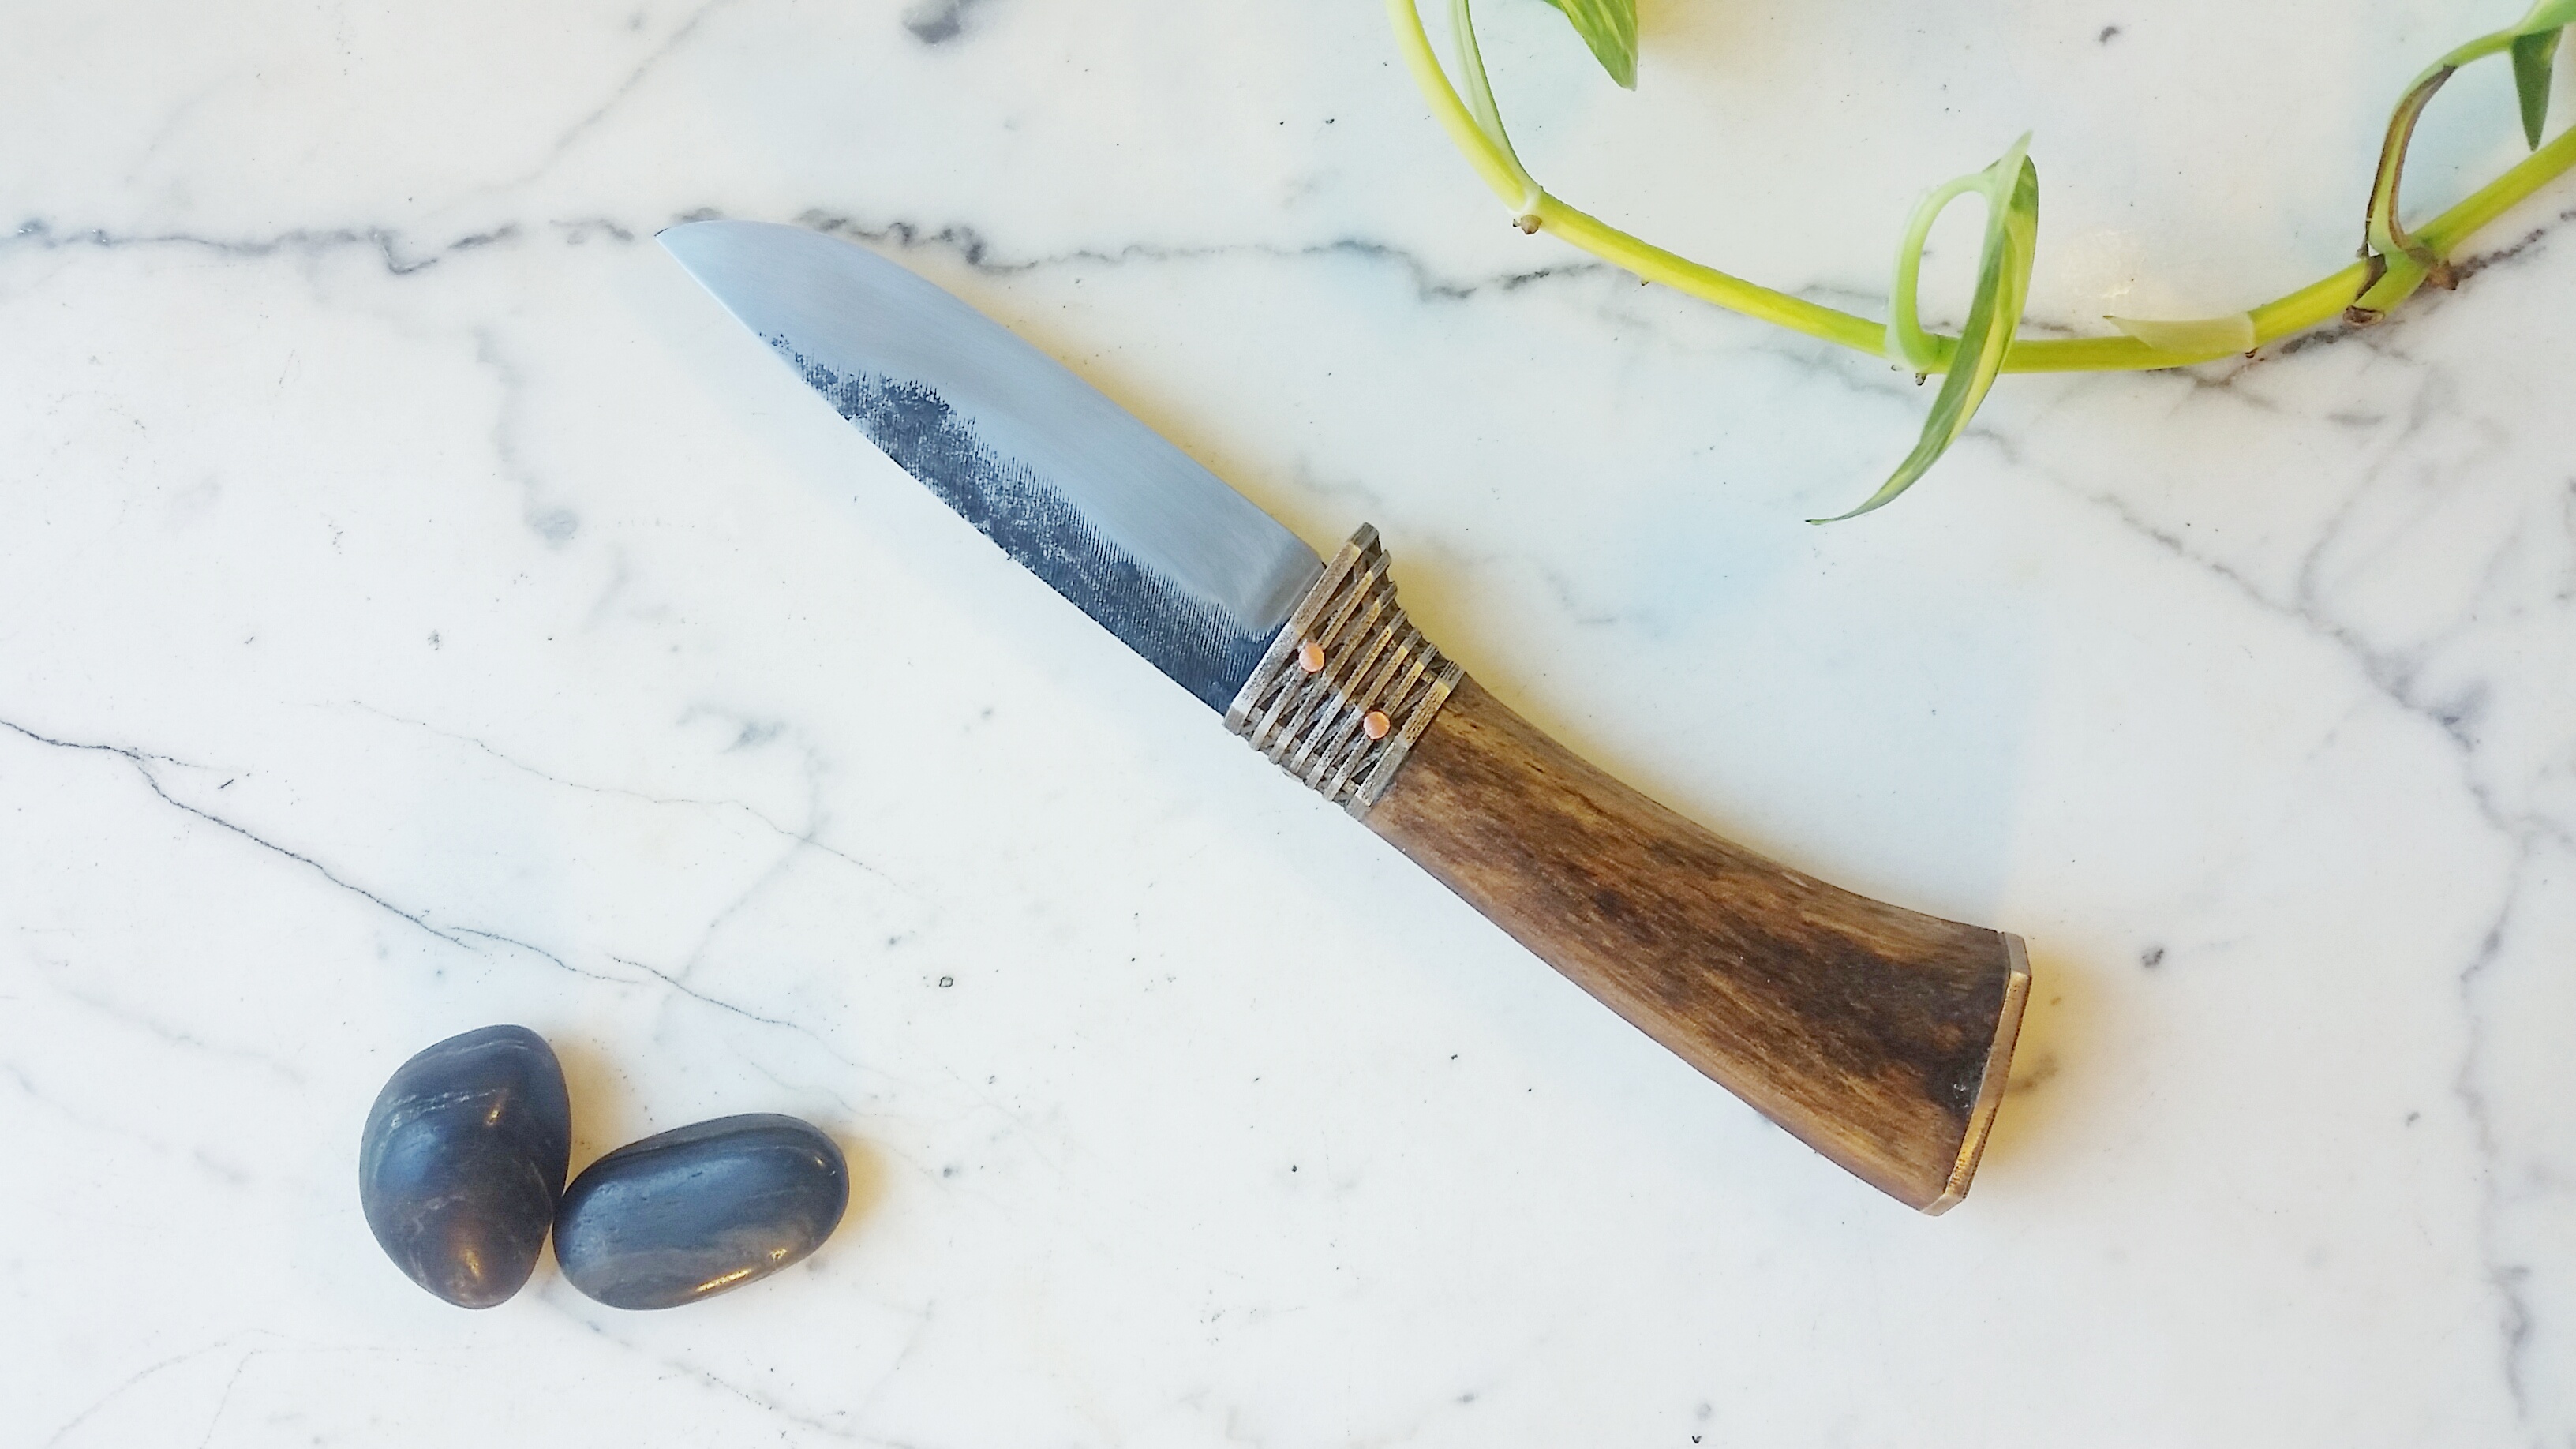
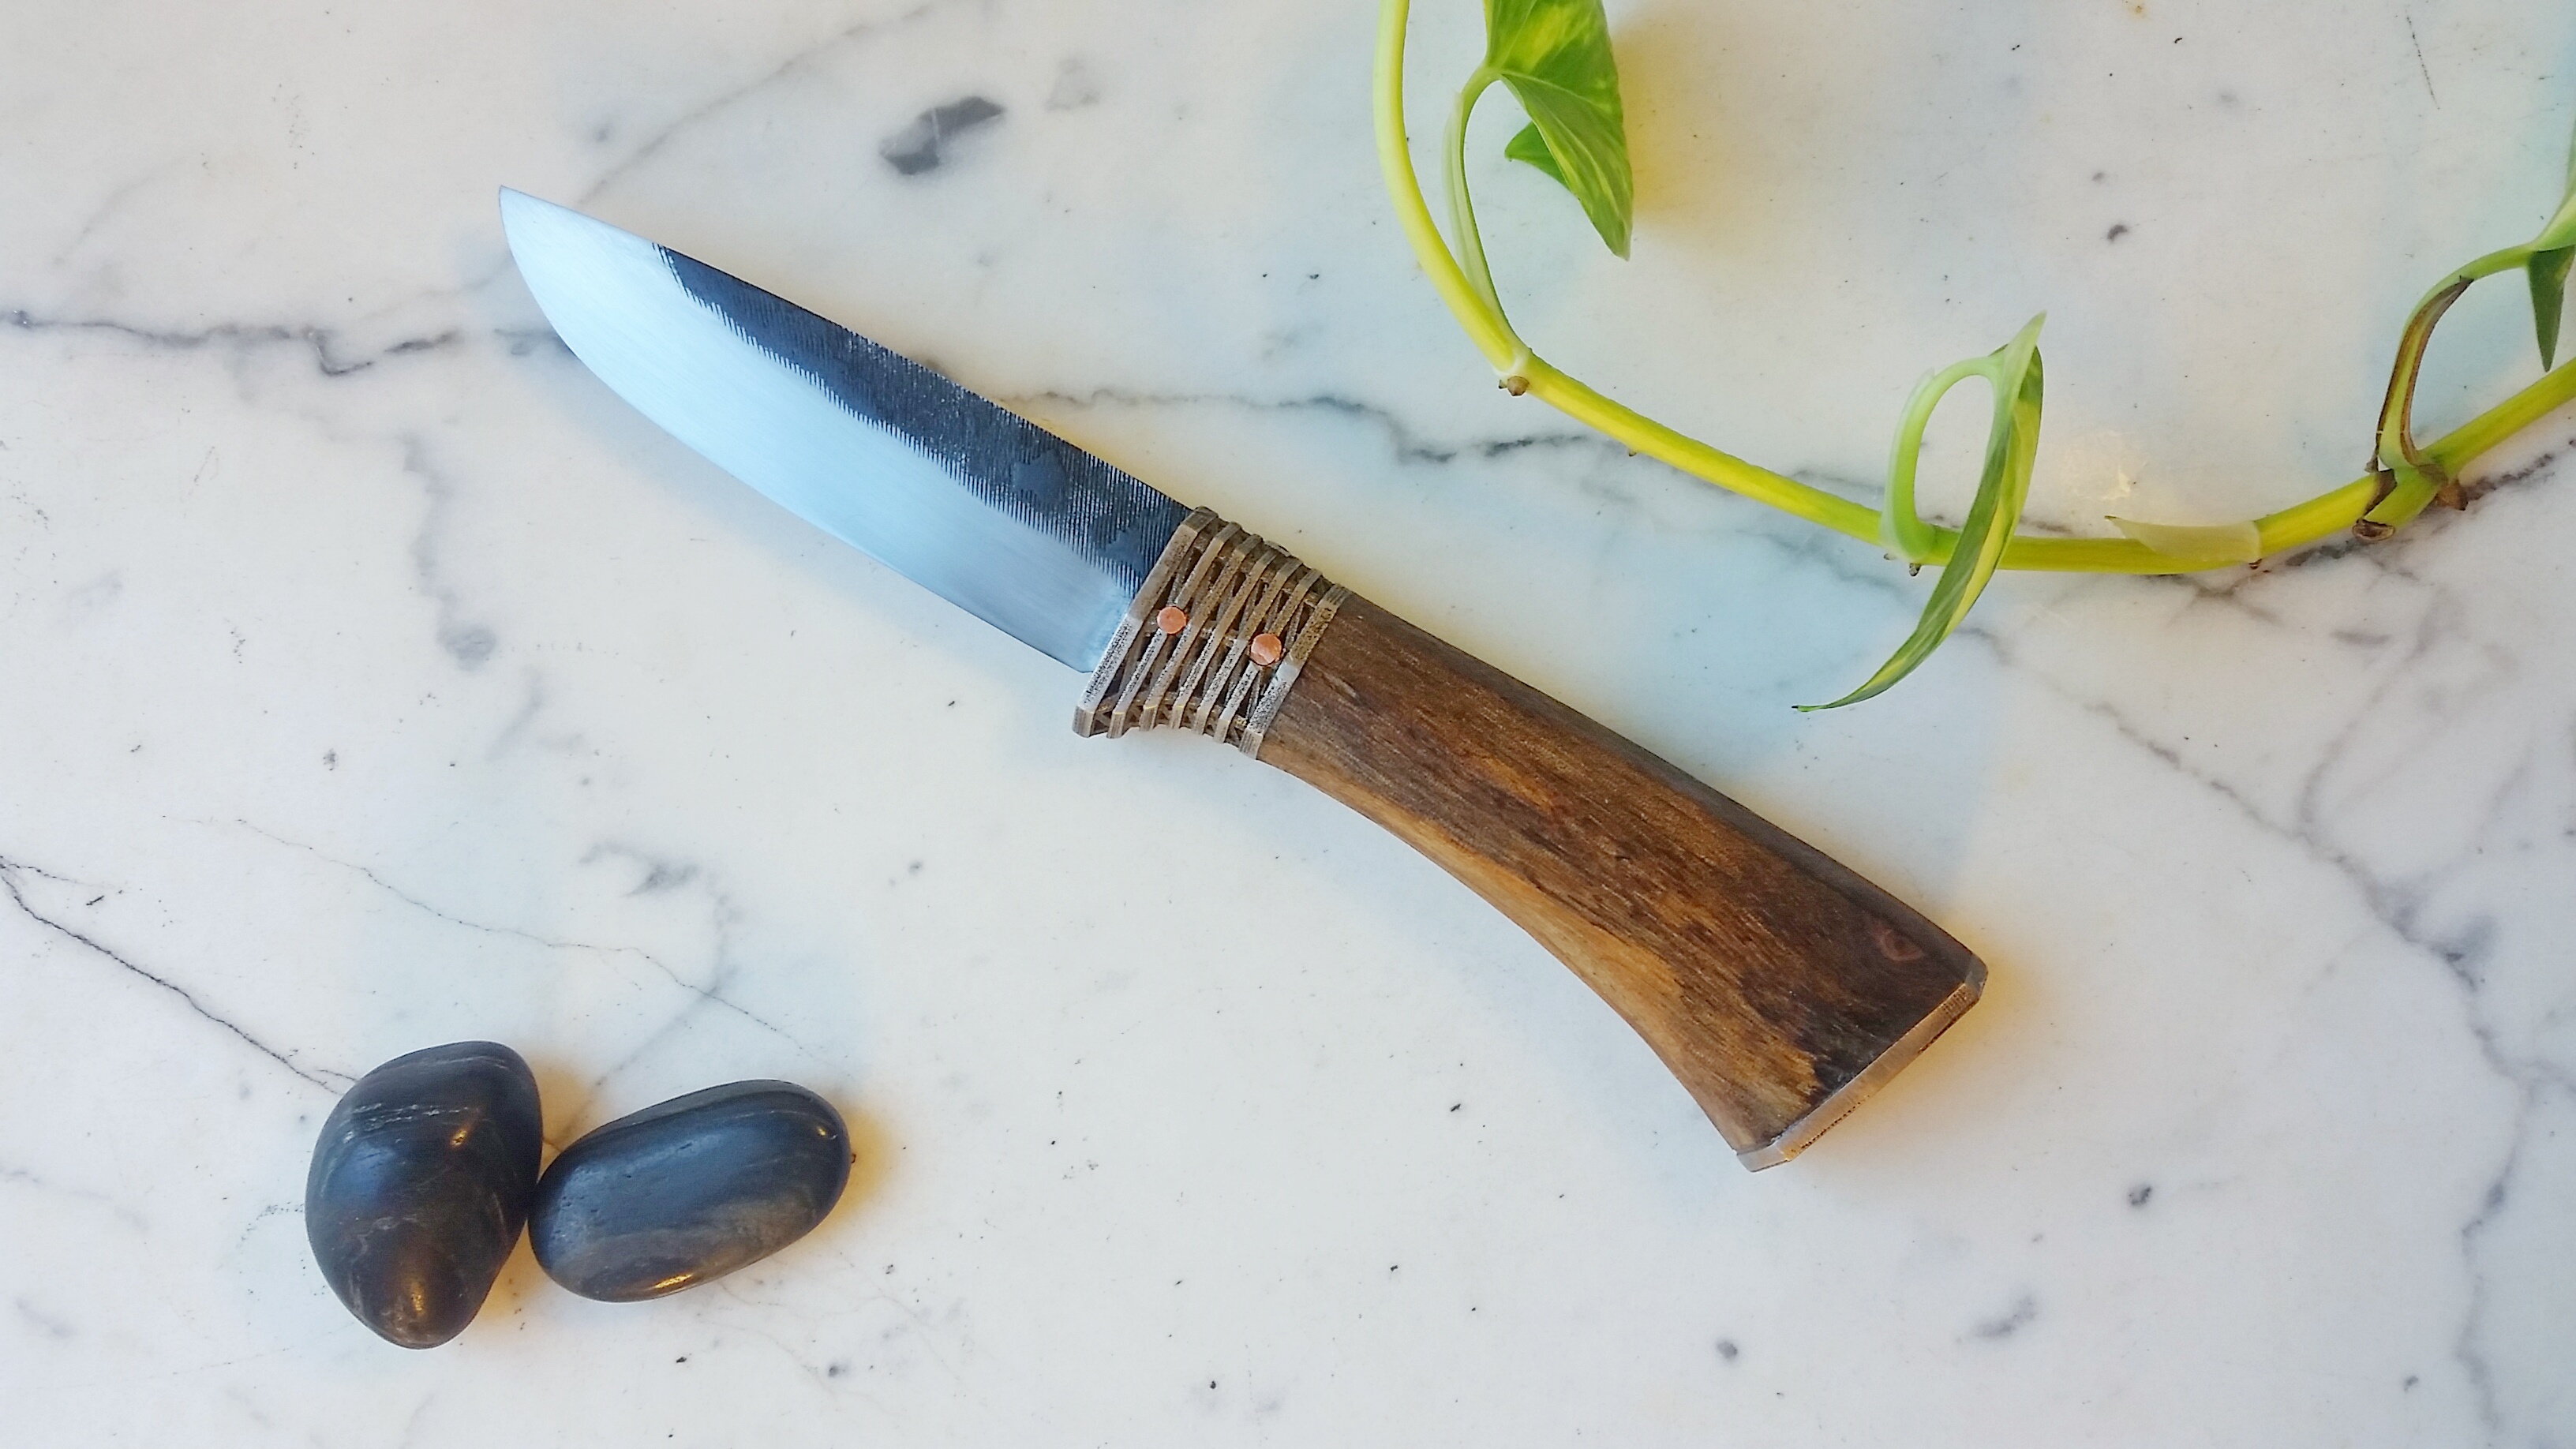
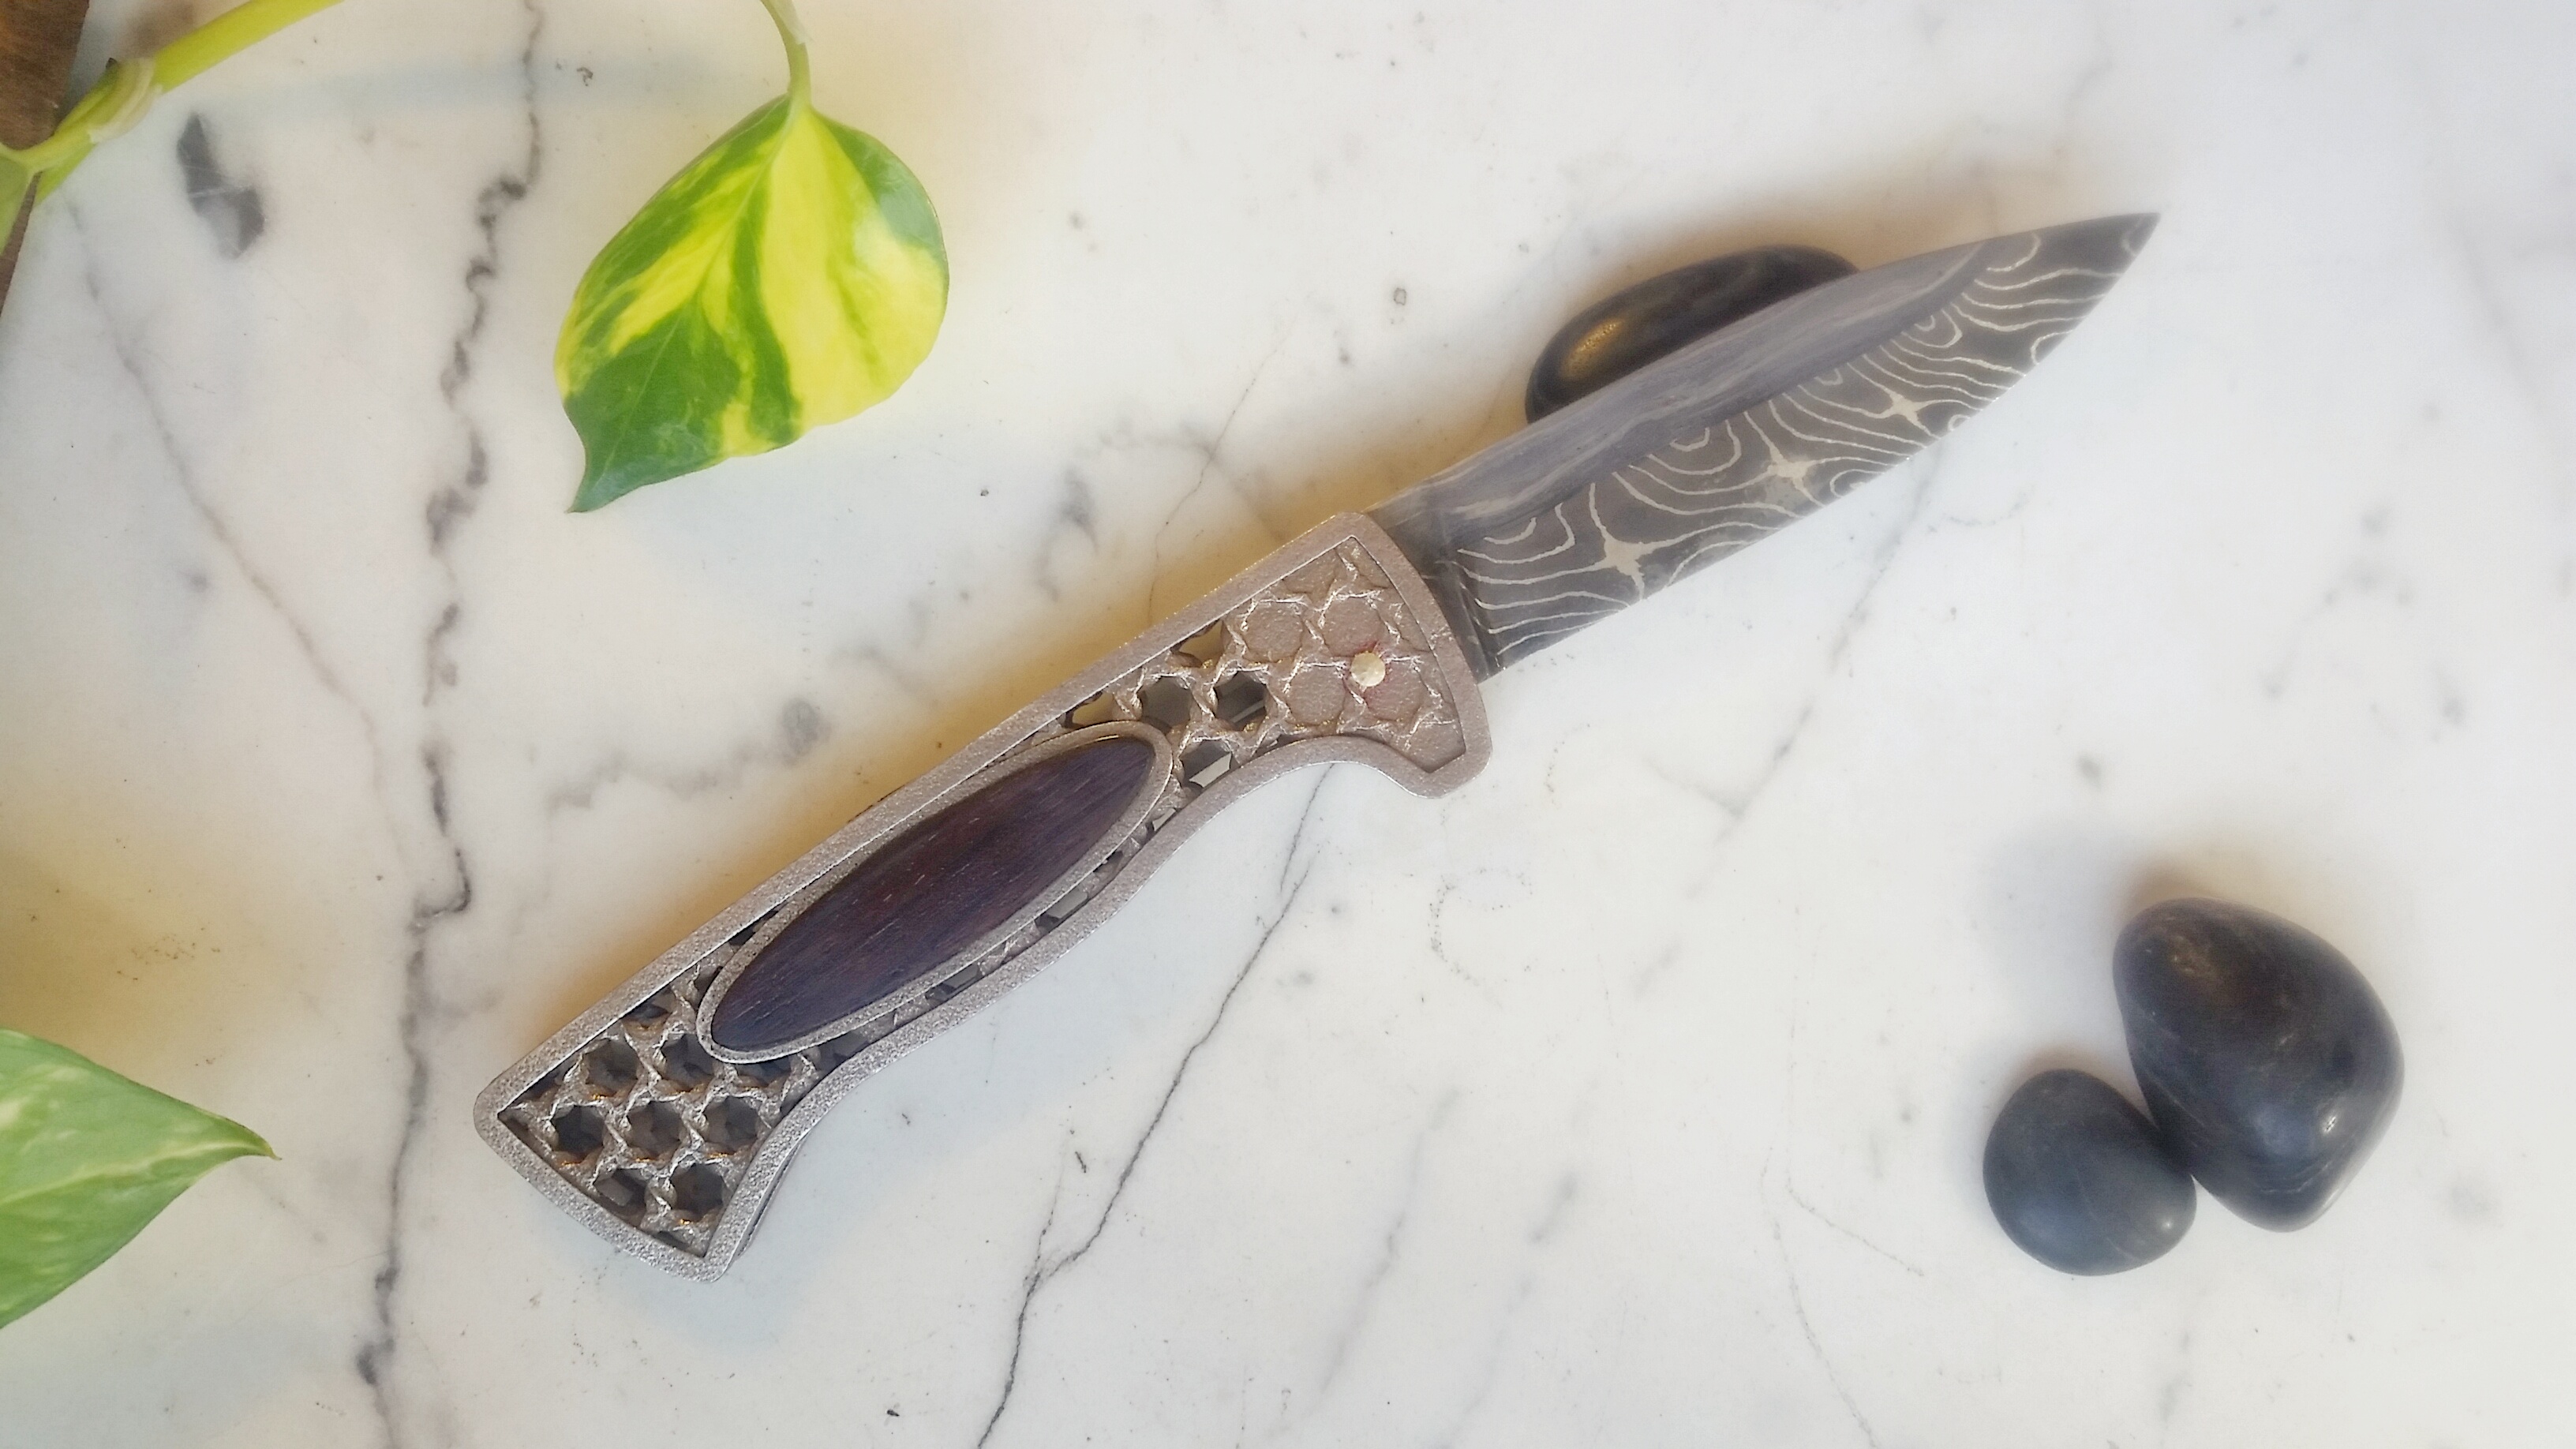
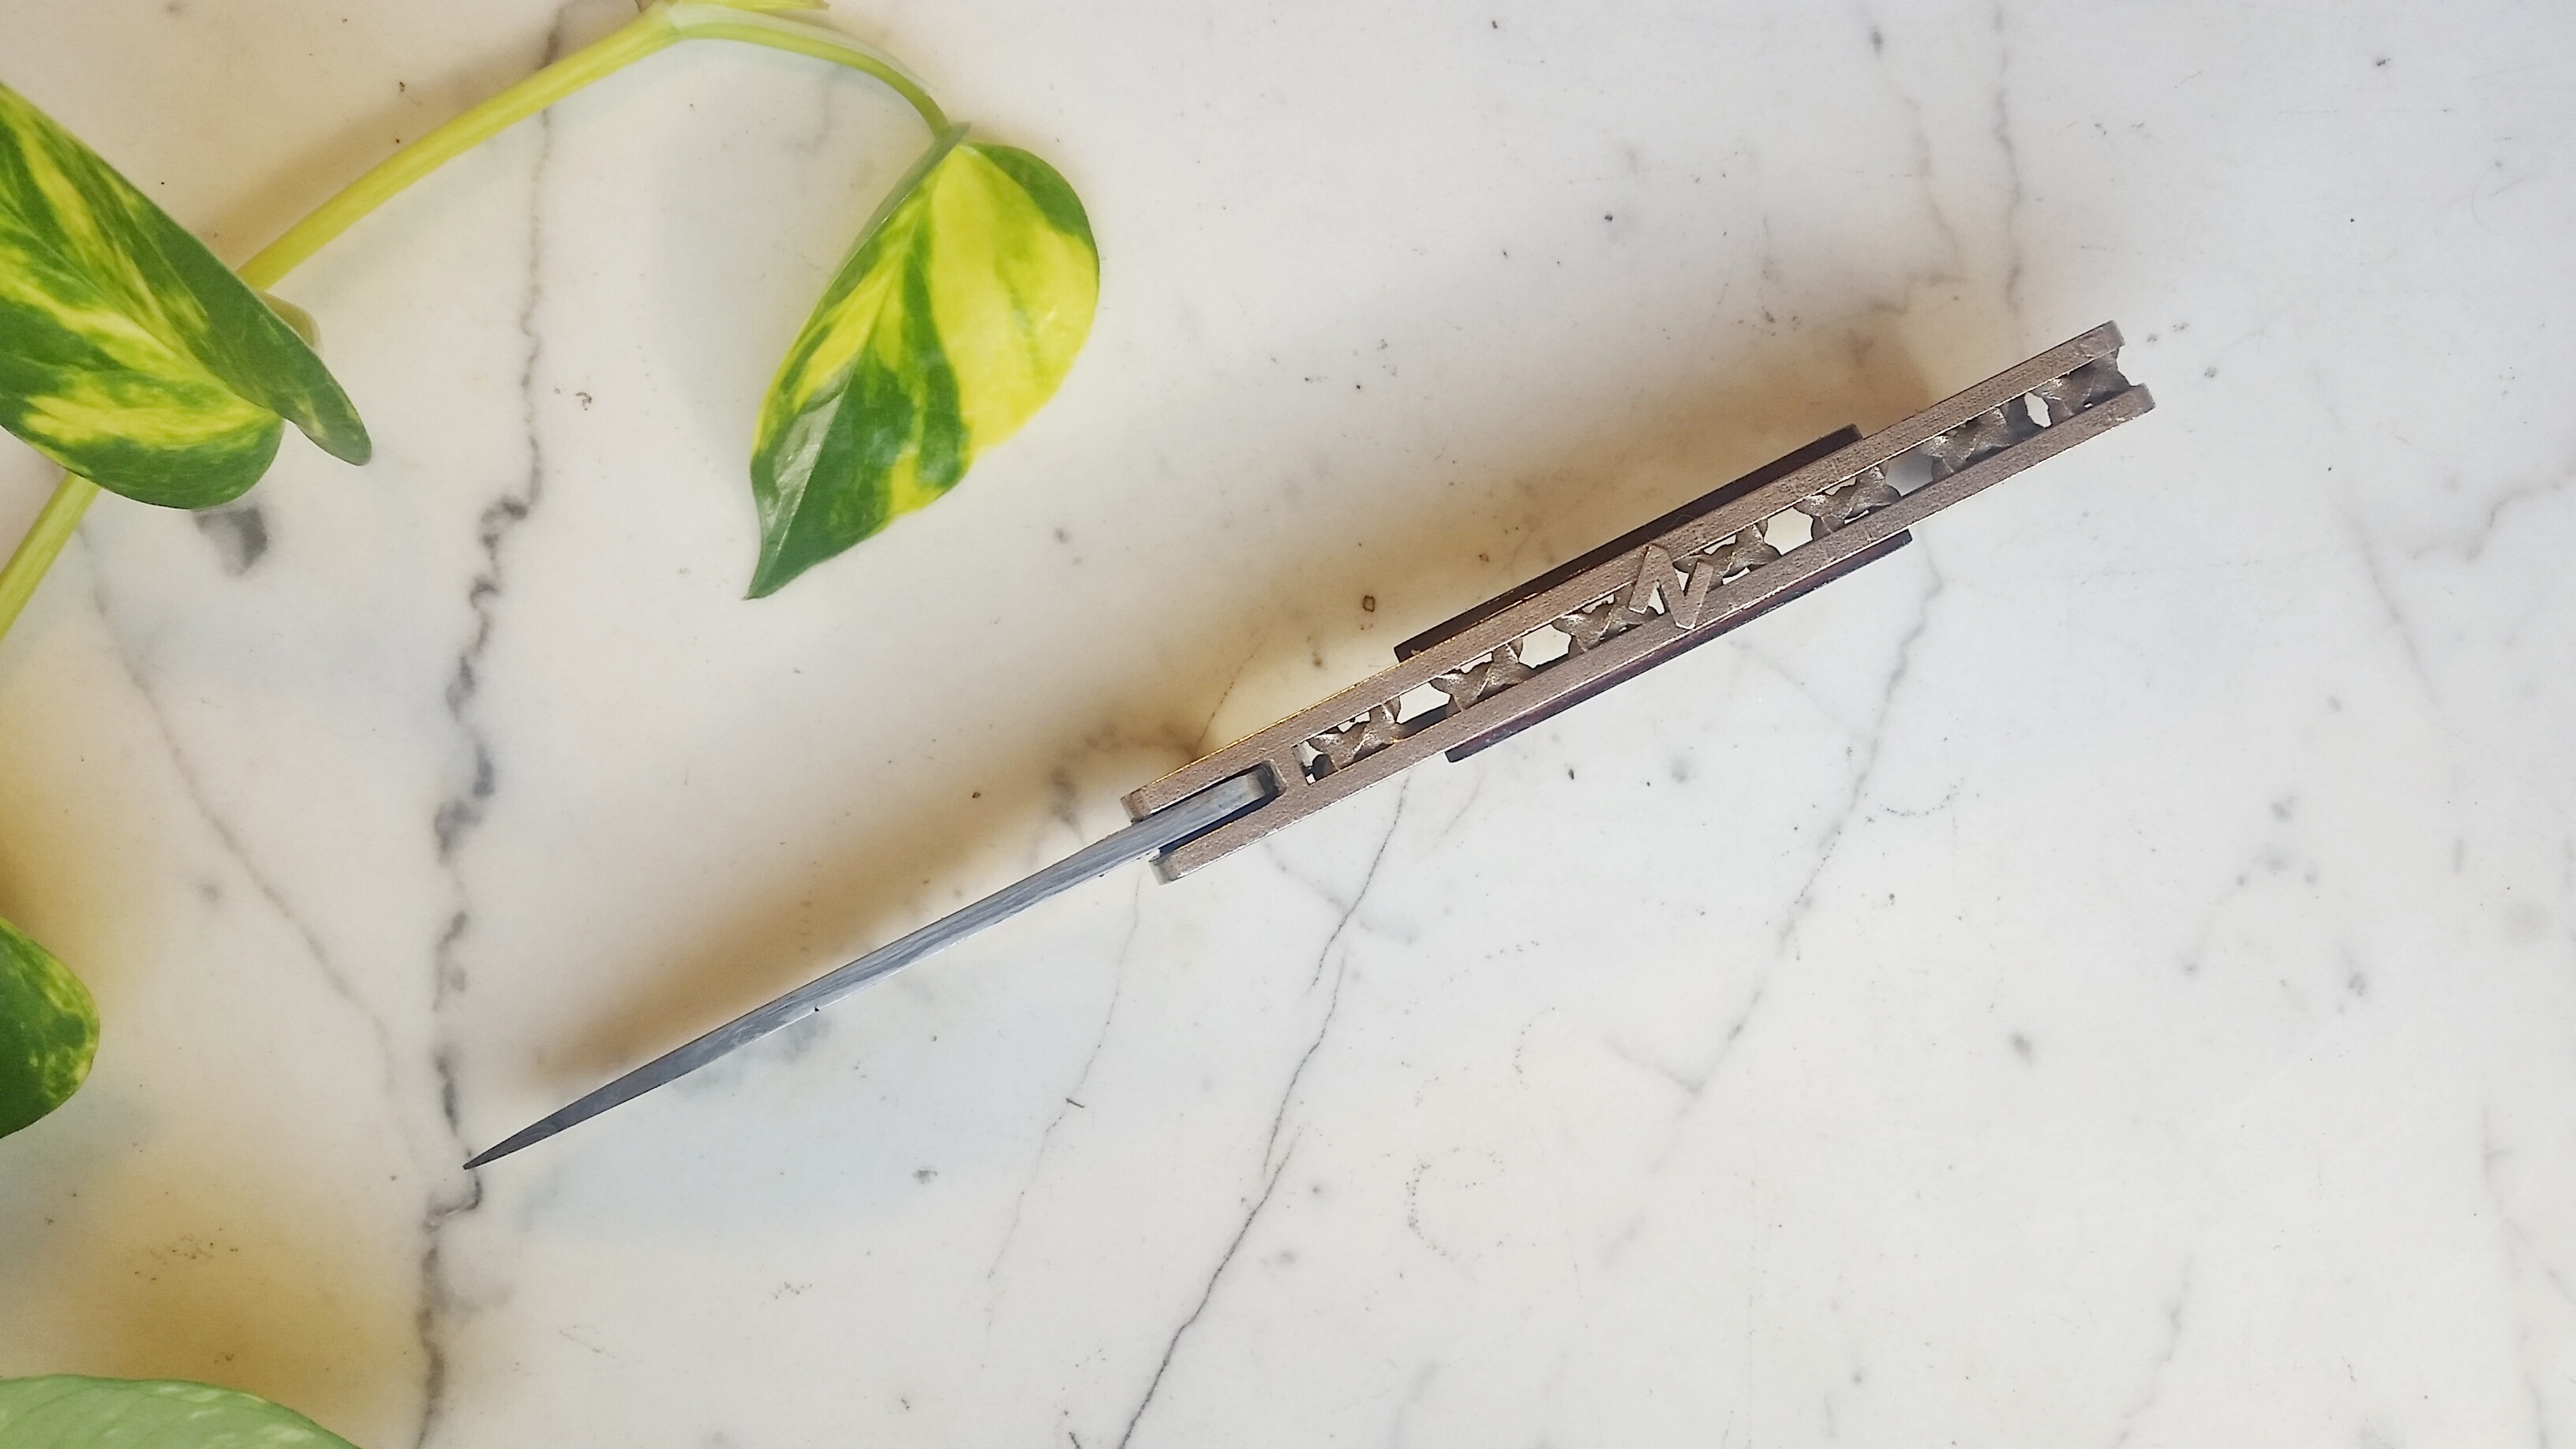
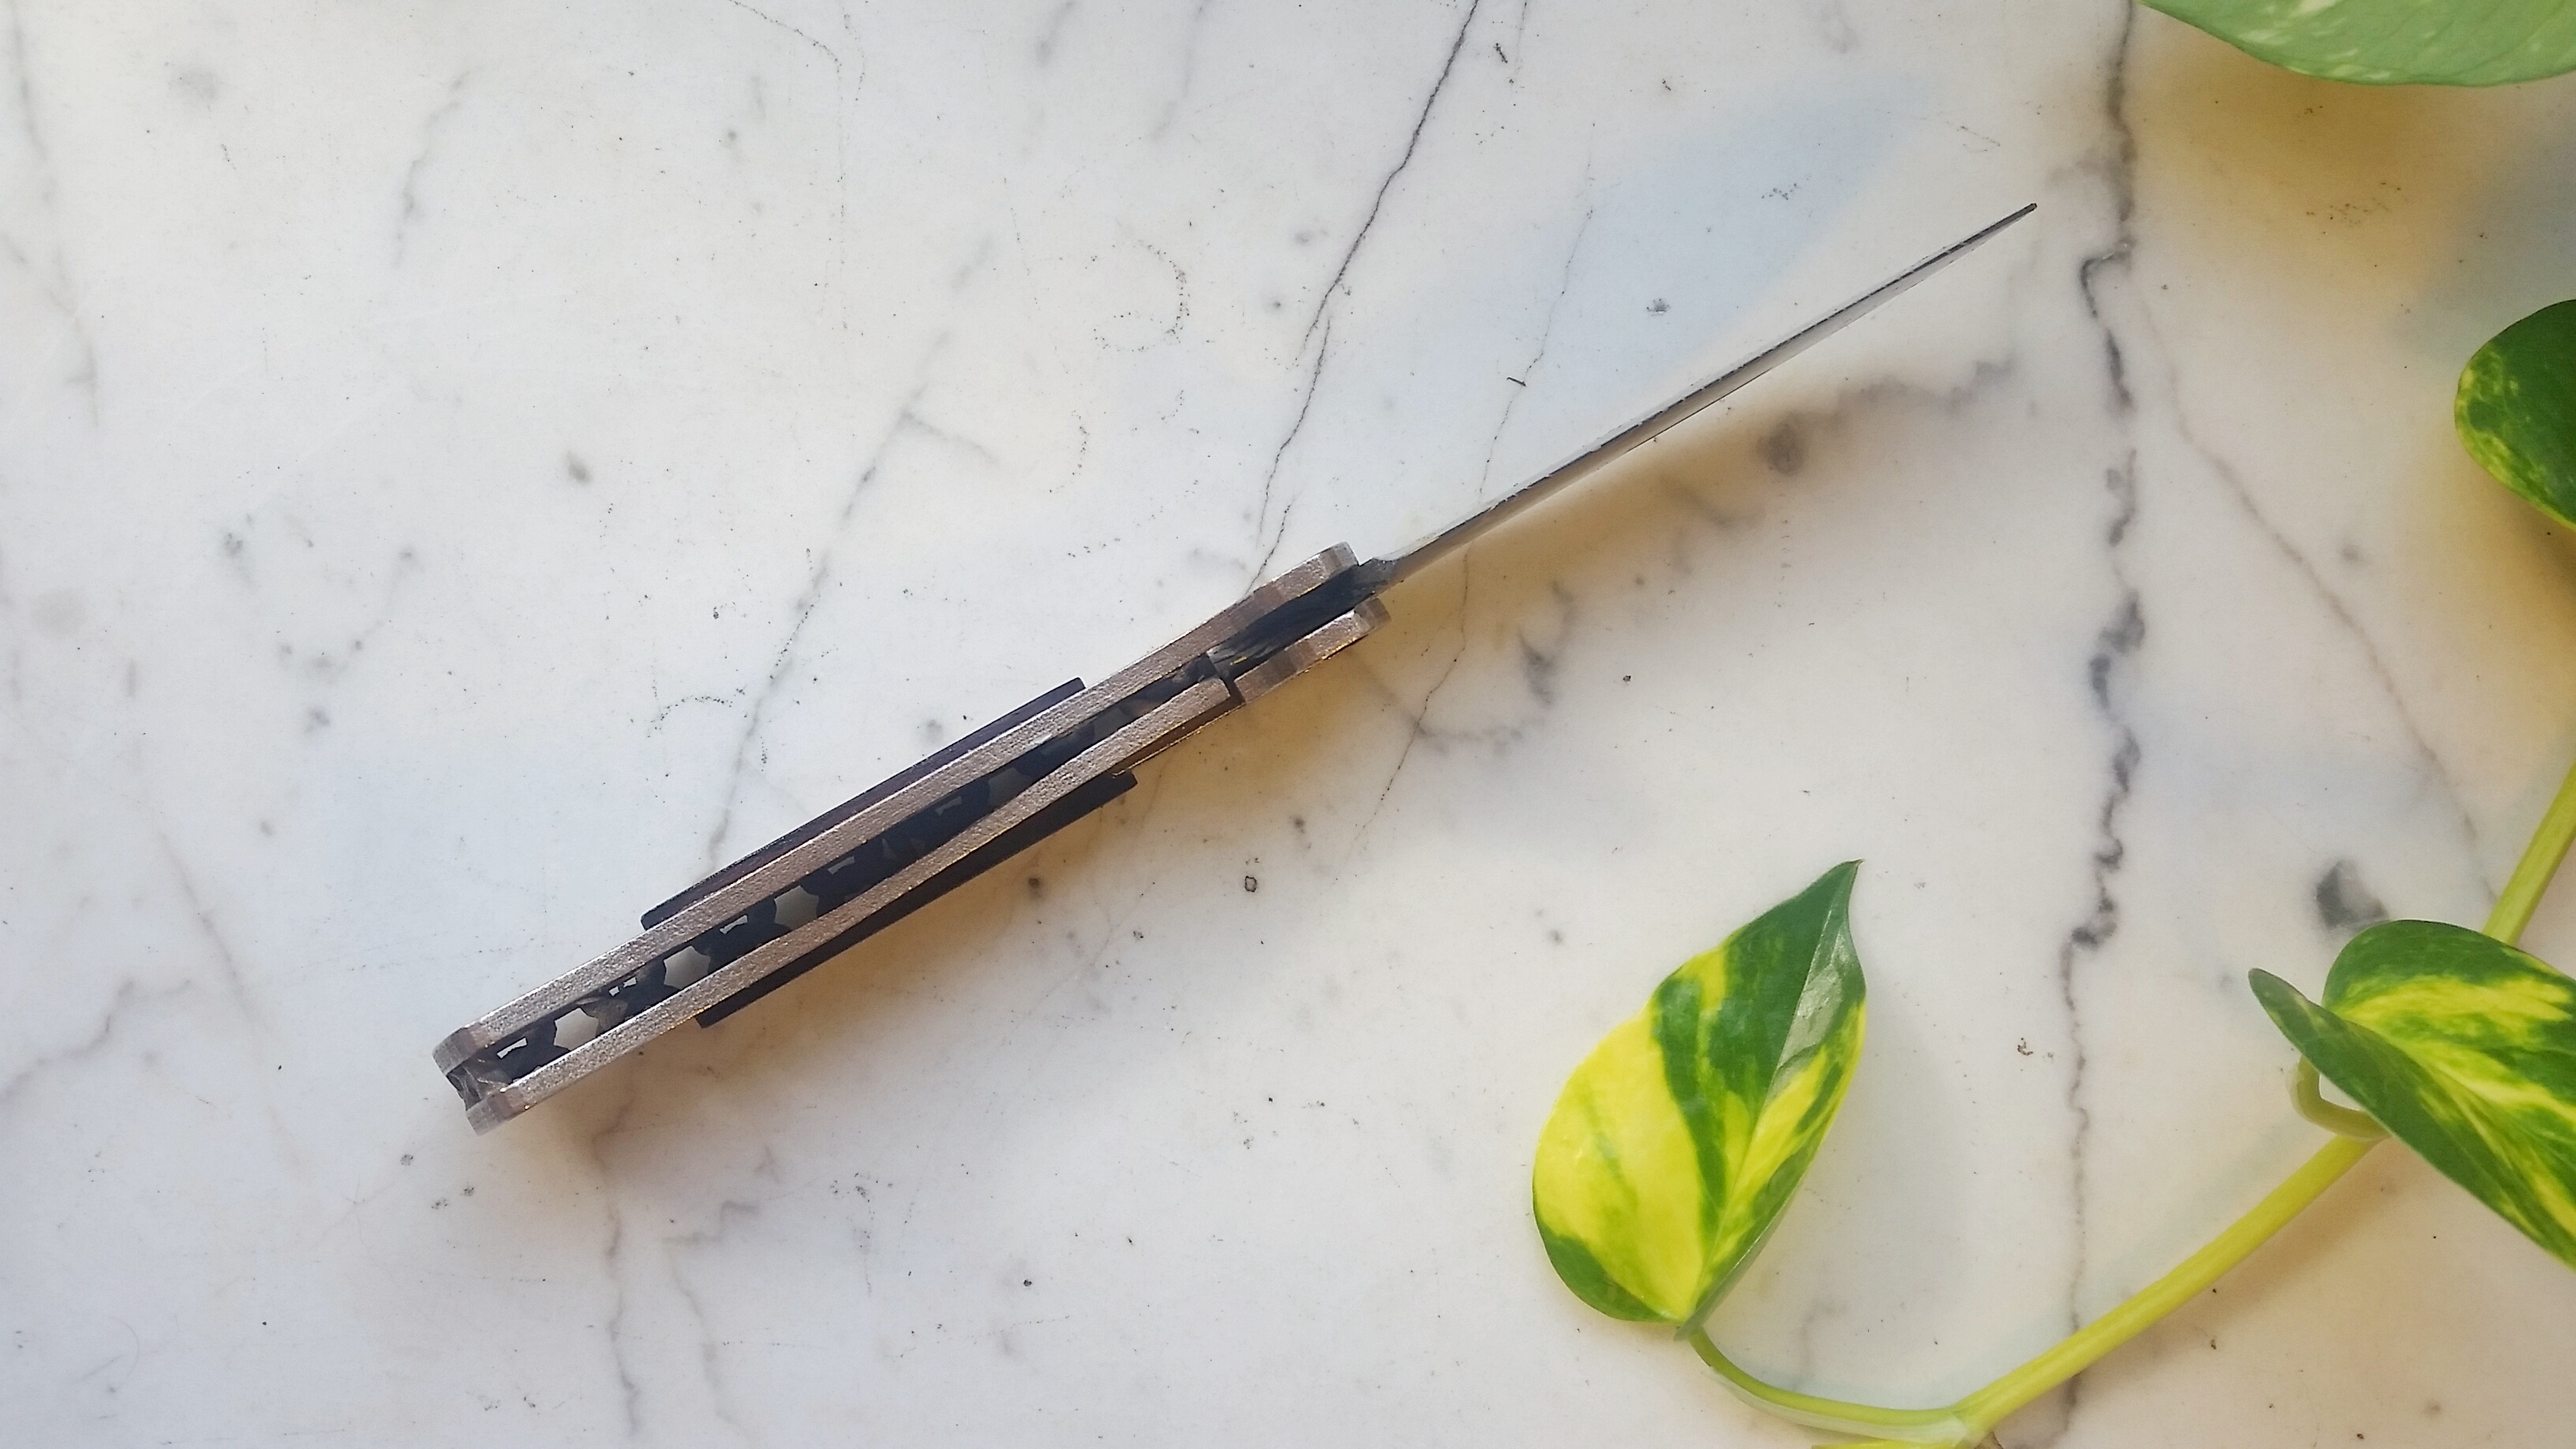
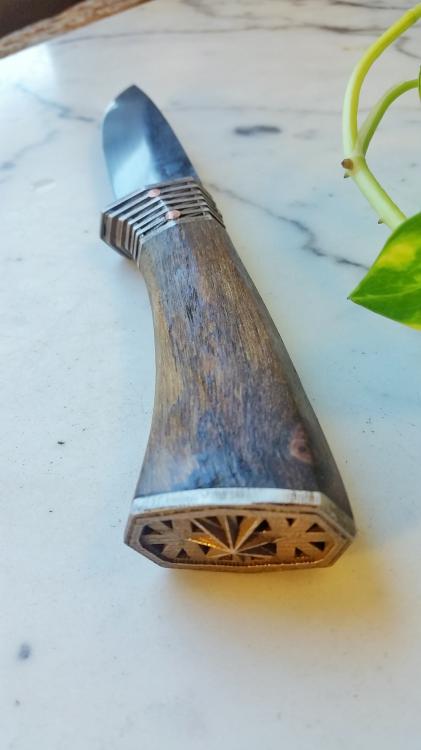
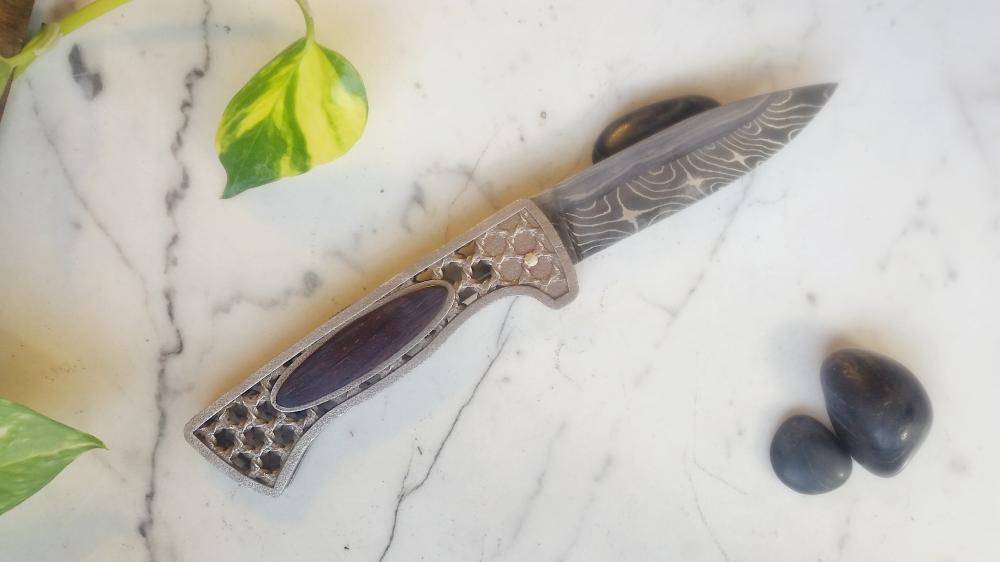
Utility with 3D printed cast bronze fittings
TheoRockNazz replied to TheoRockNazz's topic in Knife Making
Yeah, it needs something more than boring ol walnut. There's a tiny 1/8" ricasso, but it could be bigger for sure. -
Here's another 3D printed piece with reforged file. Handle is black walnut. Jim Merola, a far more experienced knifemaker in NYC I have been hanging out with, gave some great feedback. I wasn't really digging my choice to use copper pins - he said he doesn't mind them, but would prefer no pins at all; the epoxy he (and now I) use will be a secure enough bond. I also like his suggestion of having the guard stick out a bit farther. He was not happy with my choice of wood... I really should be using something stabilized. He says in general my choice of handle materials don't match the quality of my work, and in some cases is a detriment to the value of the finished piece. Makes total sense, good advice. Anyways, it seems like in two months or so I'll be trying to launch a crowdfunding campaign to drive down the price of 3D printed components by purchasing a SLS 3D printer. This knife, the "Chassis" knife http://www.iforgeiron.com/topic/42881-chassis-3d-printed-cast-bronze-liner-lock-with-w2-and-iron/ and the "Titan" knife (still under construction) will all be part of the campaign, so all critique is appreciated since it helps me better the design. Theo


-
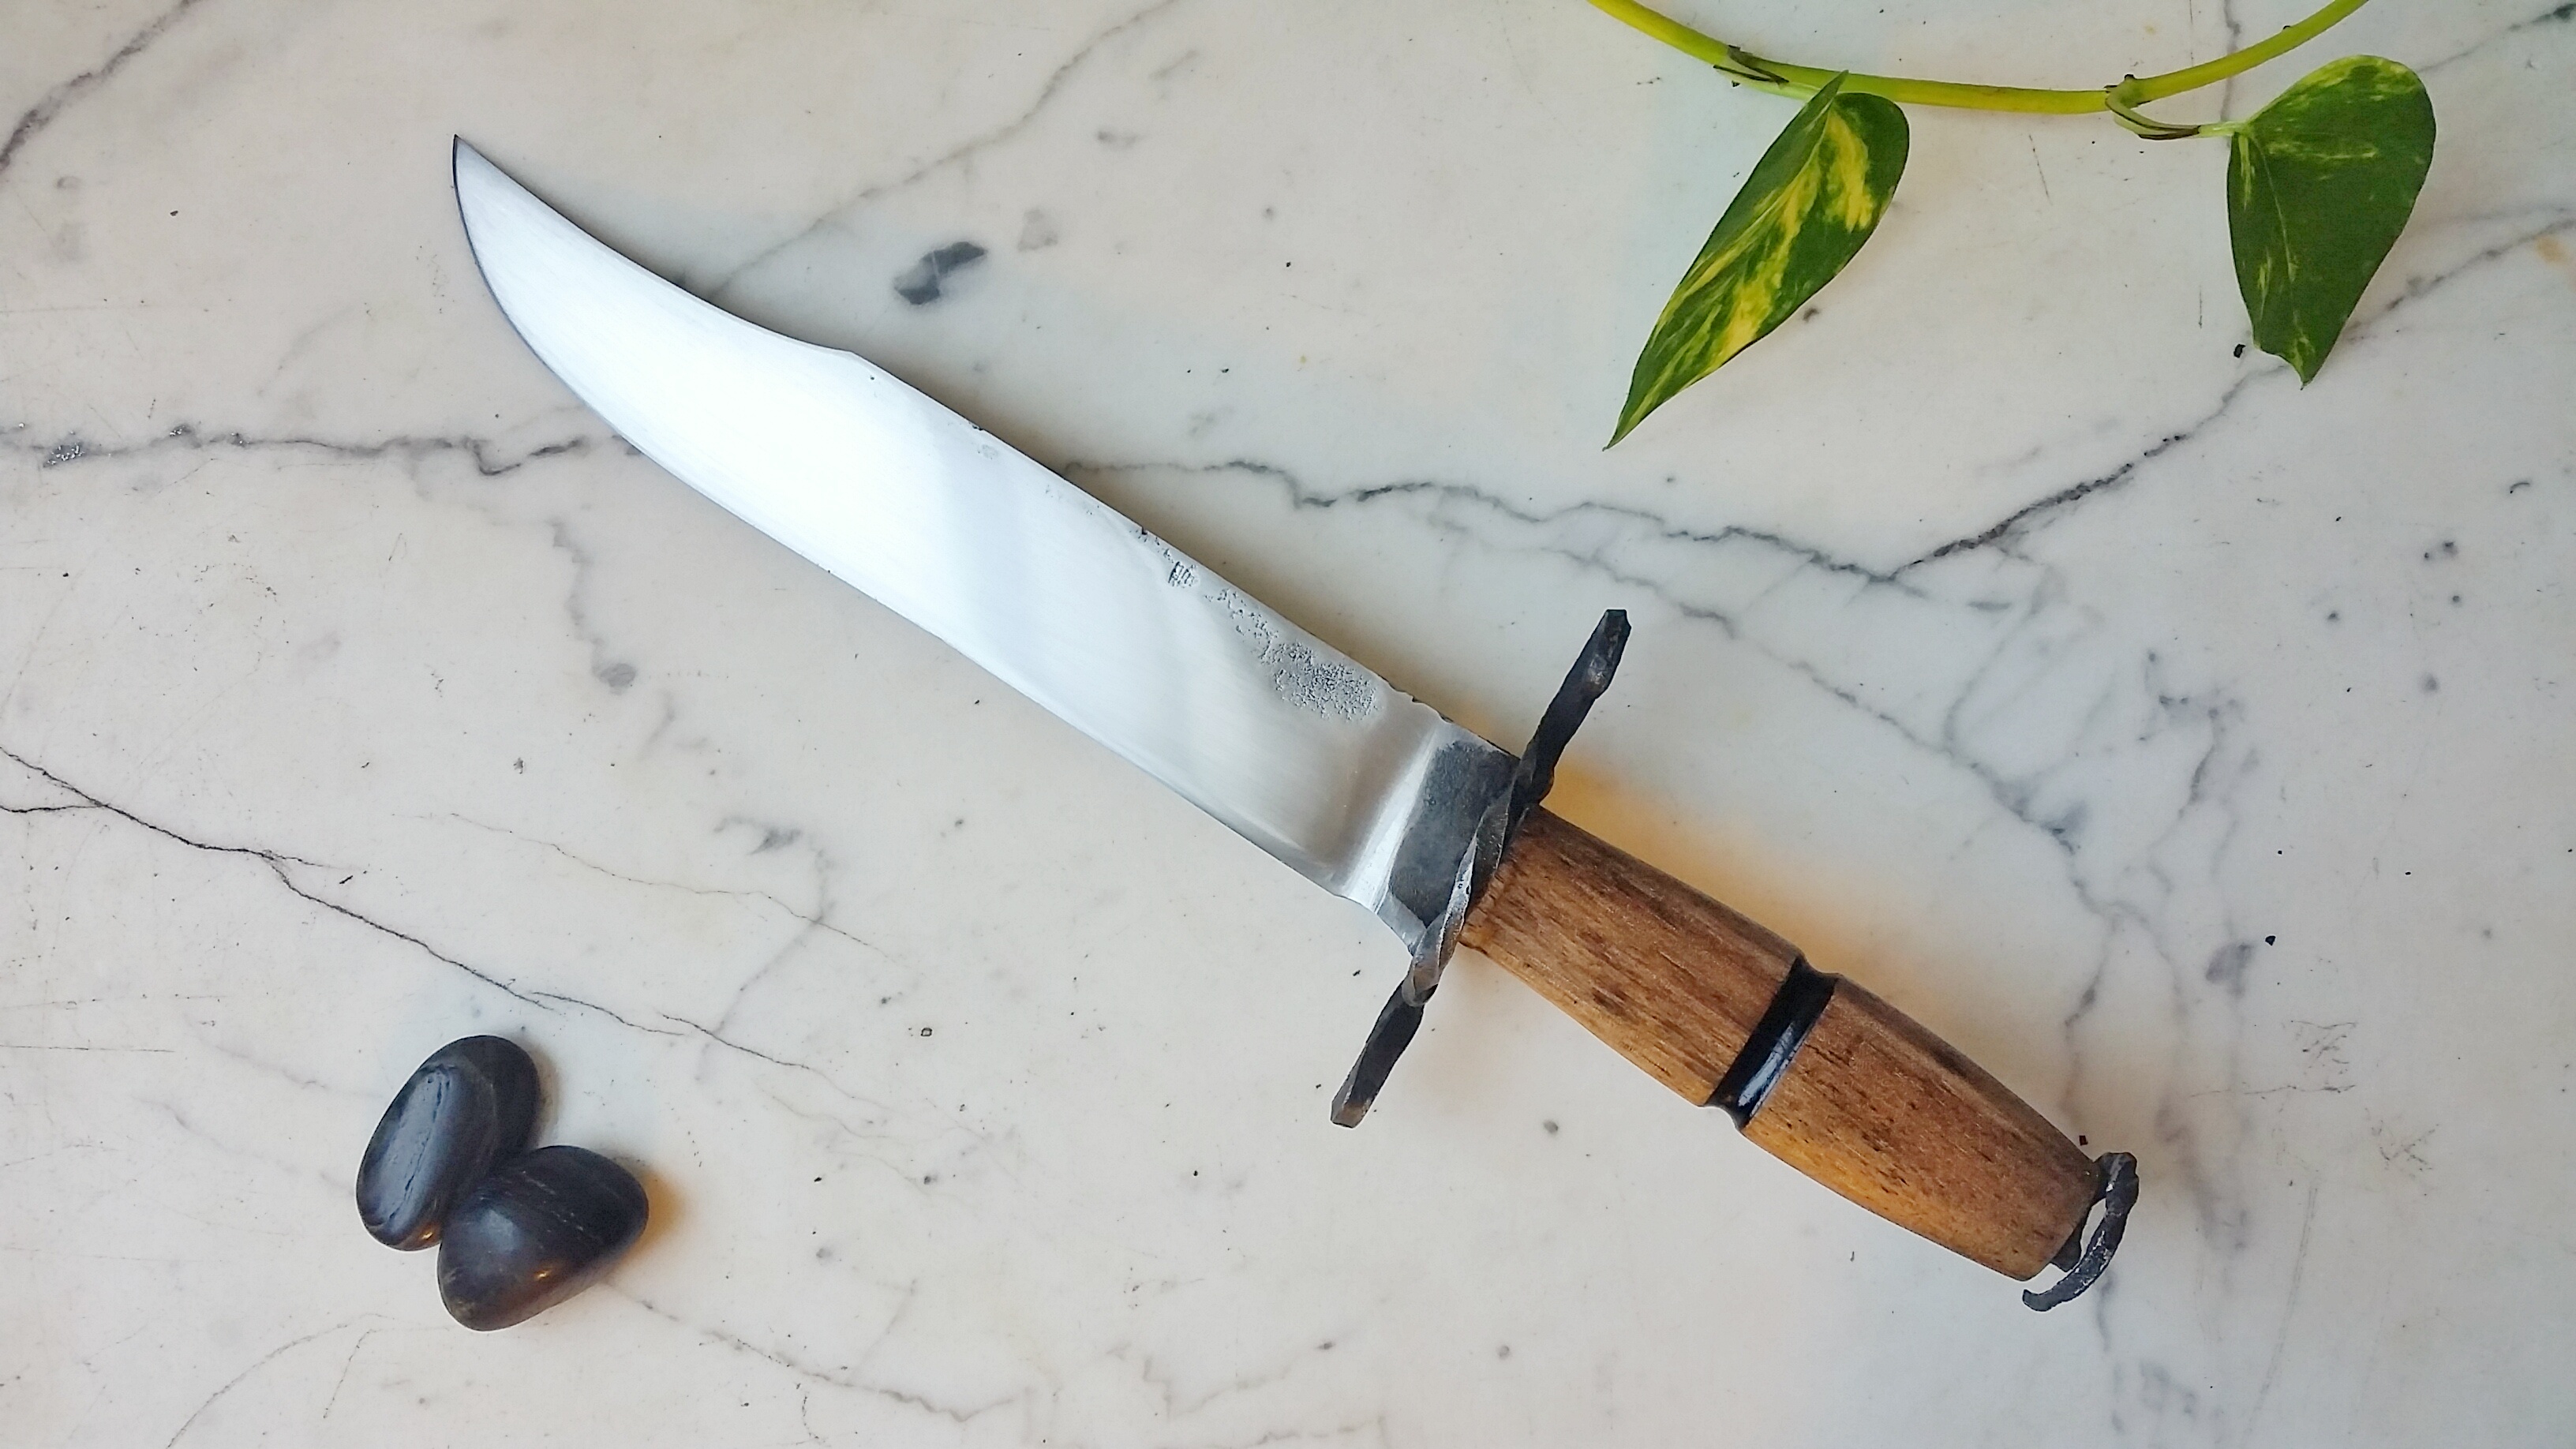
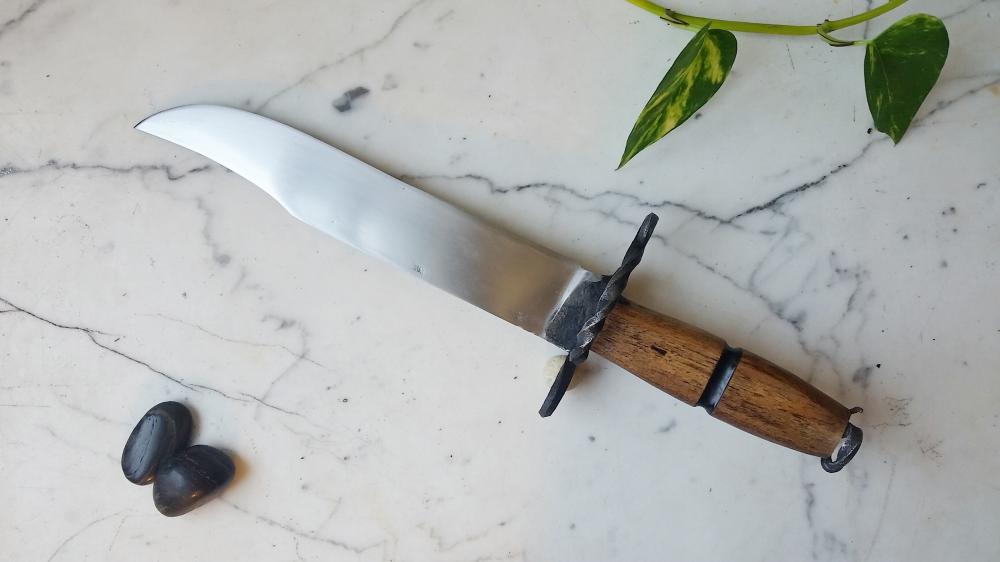
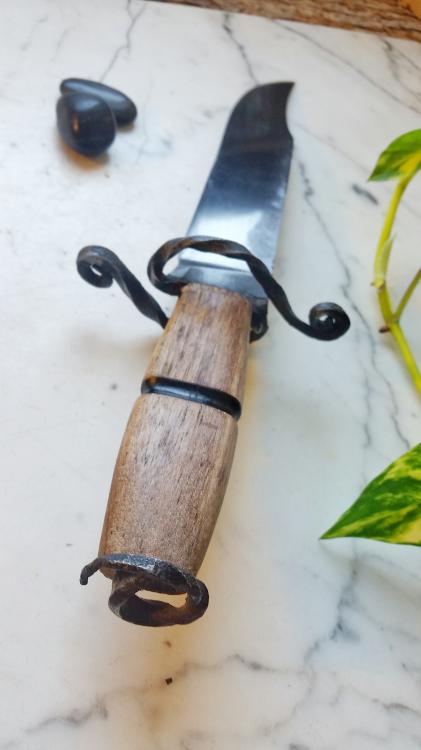
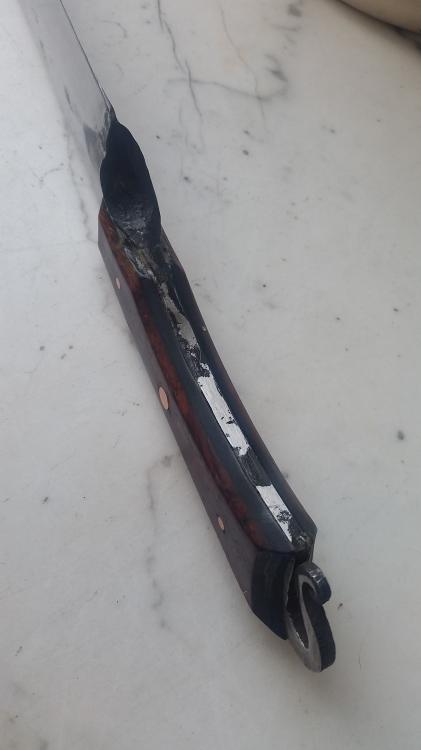
80CrV2 integral bowie with black walnut and ebony
TheoRockNazz replied to TheoRockNazz's topic in Knife Making
Thanks guys! -
80CrV2 integral bowie with black walnut and ebony
TheoRockNazz replied to TheoRockNazz's topic in Knife Making
Thank you It's all one piece of metal, the guard metal was split off from the tang -
Oh yeah, I'm diggin it. Show me moar!
-
Looking good! I love file/rasp knives. I also really like seeing the teeth. I recommend throwing some pins in that handle - especially full-tang. Looks like you established some flat-grind bevels with your plunge lines that would look nice continued the length of the blade. Overall I'm really digging it. What's your HT?
-
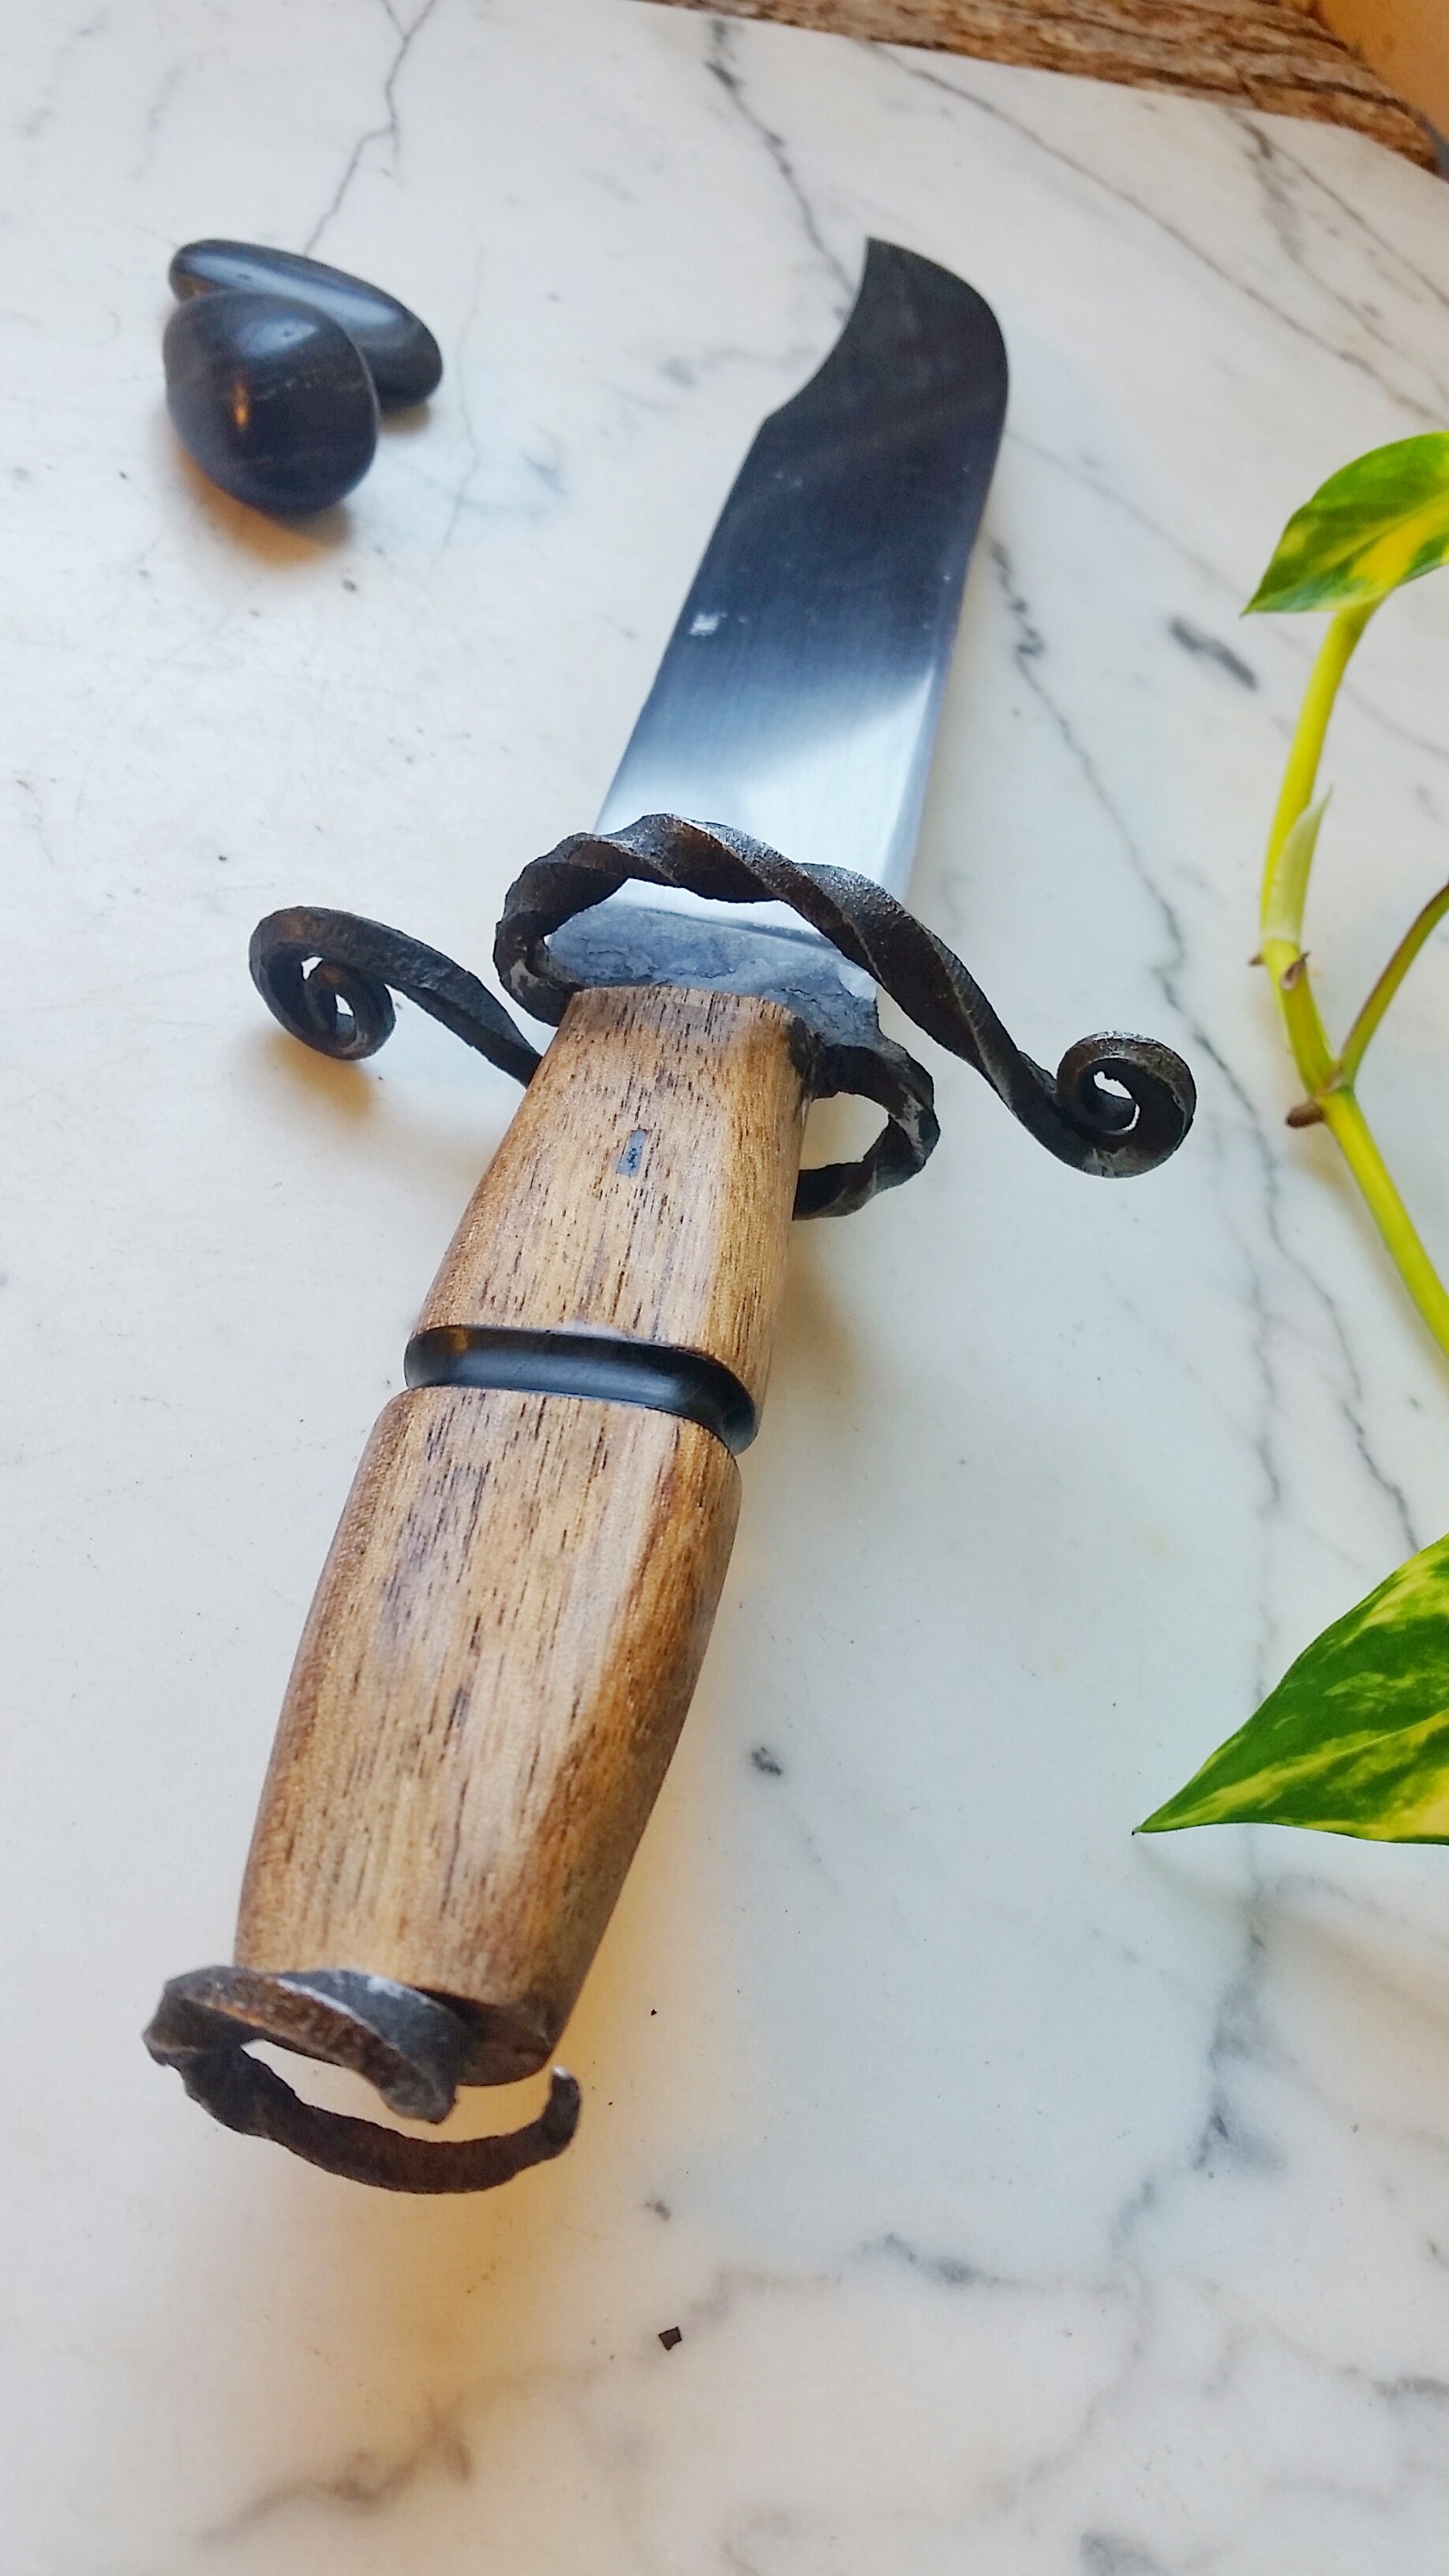
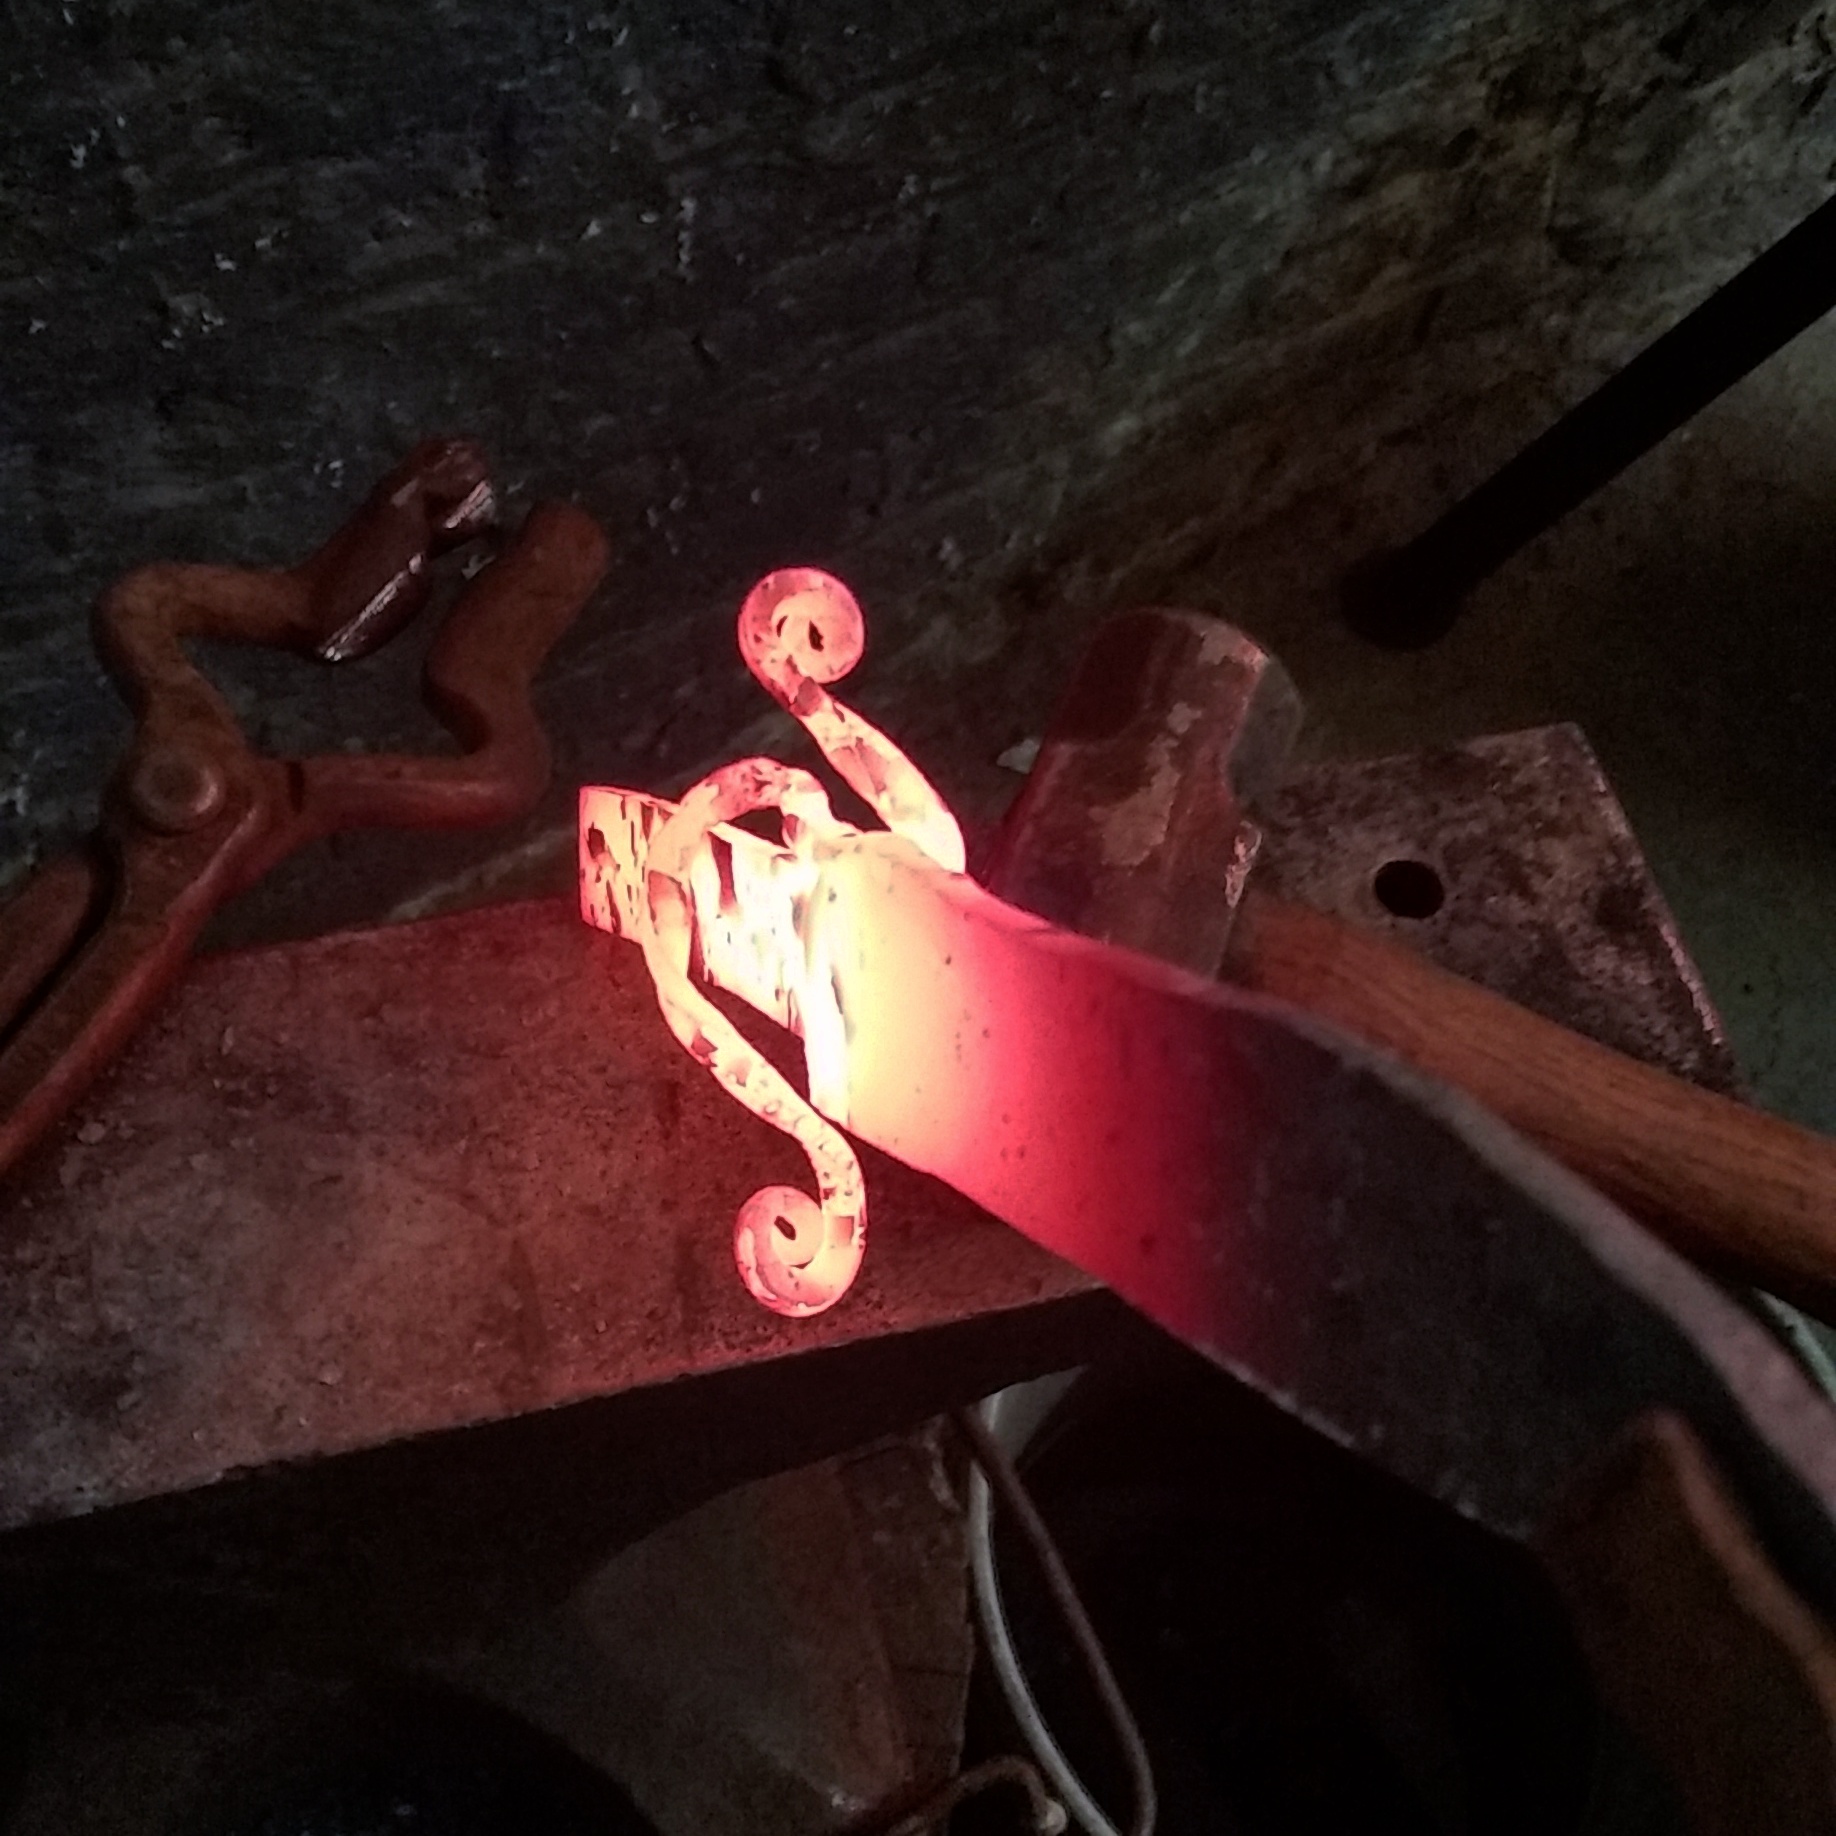
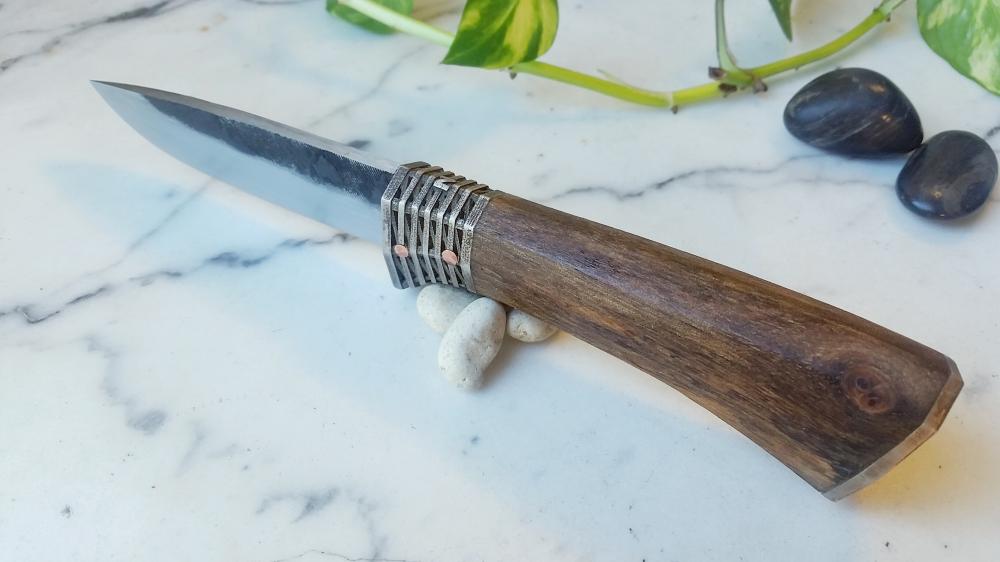
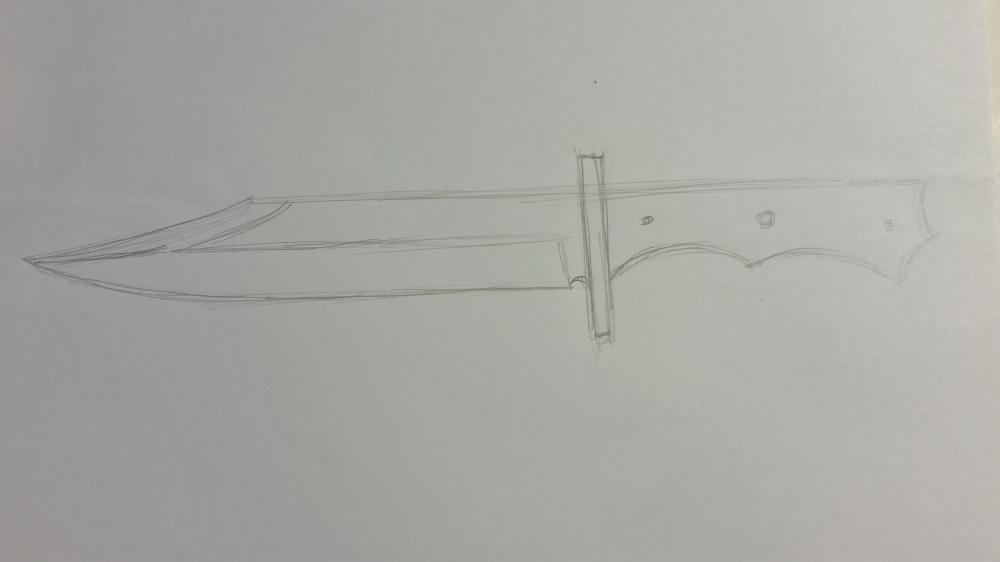
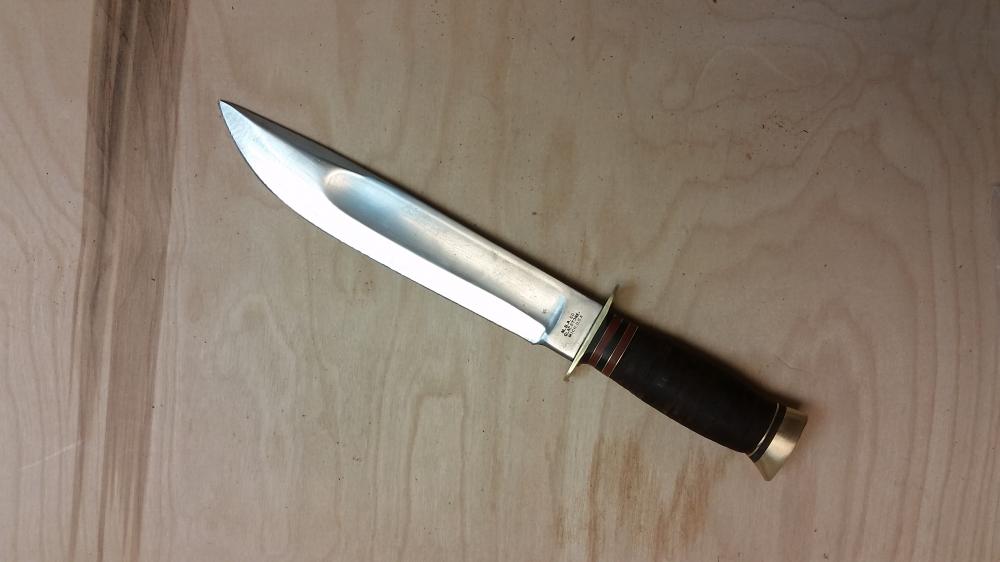
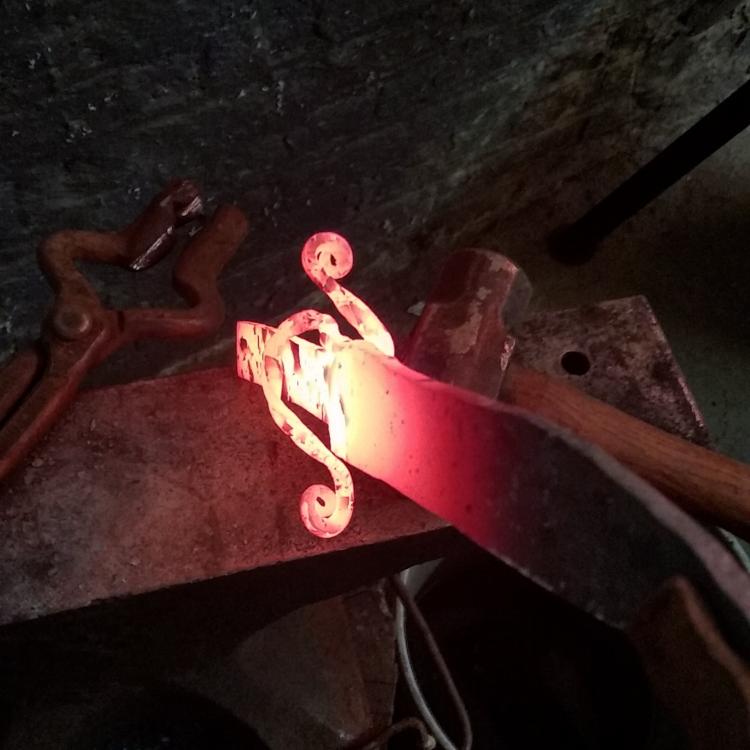
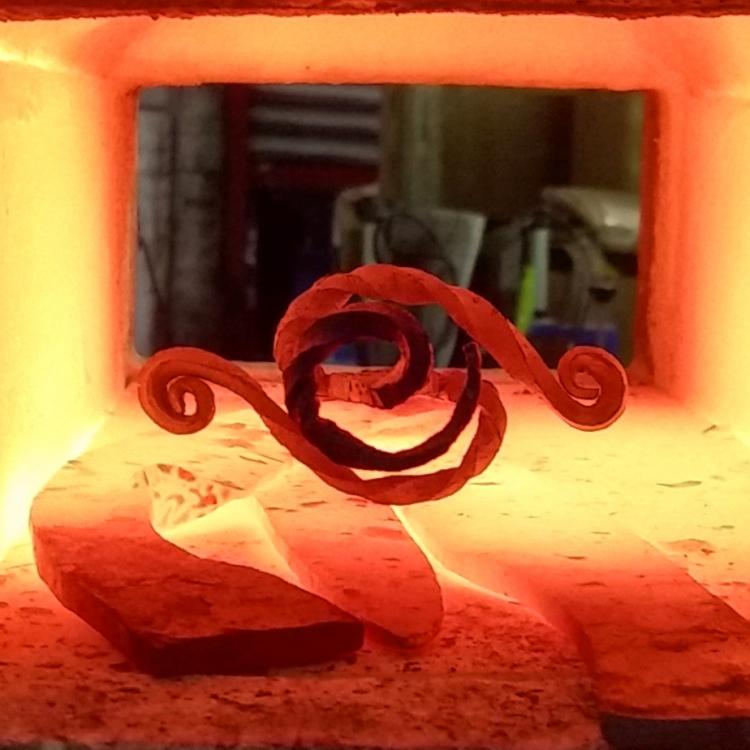
Had a lot of fun forging this one. The sketch started off as a pretty aggressive blade... ... then I picked up this quickie repair of a fellas grandfather's WWII knife where the pommel had come off (also repolished and sharpened the blade a bit)... ...which made the steel change it's mind in the middle of the forging process... ...and all of a sudden it's a totally different blade. Thankfully the customer loved it, and I got off the hook for taking artistic merit to the extreme. Still applying oil to the handle, was too eager to show off haha. Should have drawn a longer tang to get more curls out of the pommel (I rounded off that point). The black walnut came from a downed tree that was properly cut and seasoned, but unfortunately my cuts came from the surface and had inconsistent/spotty coloration; light brown, reddish in spots, small blotches of black. I need to practice choil and plunge lines... I'm thinking of leaving a little more meat to grind instead of forging to shape. Comment and critique always appreciated, Theo


-
Inspiring!
-
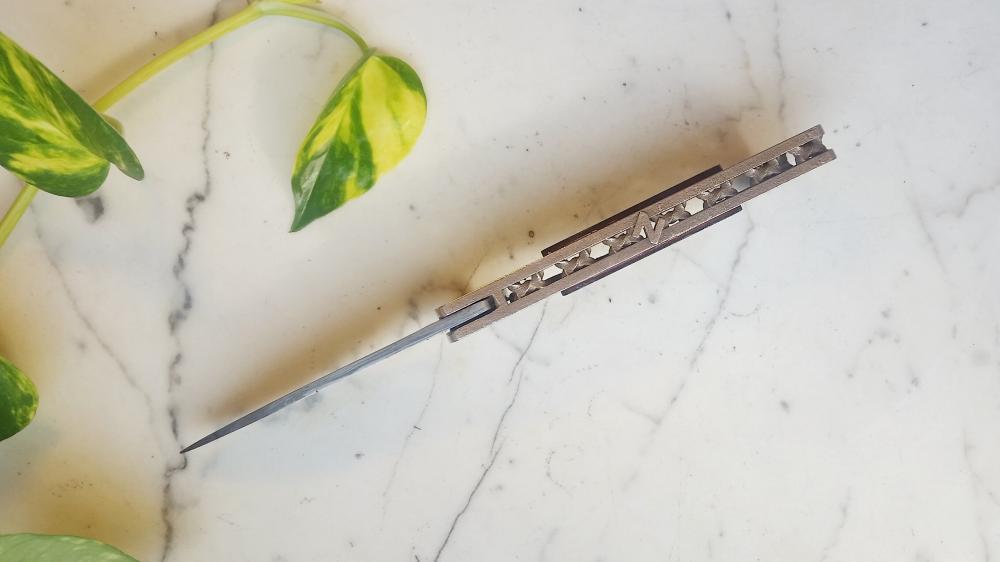
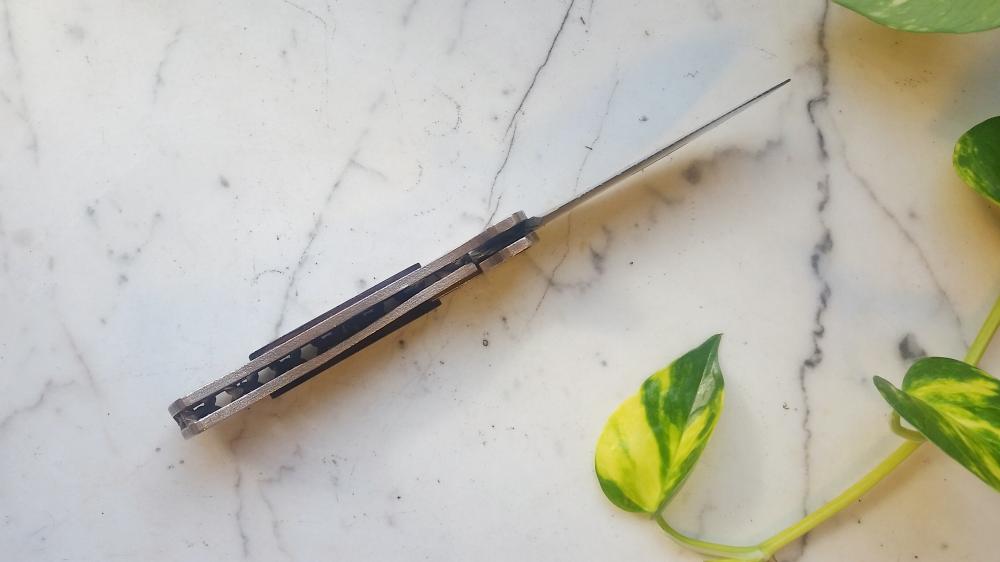
"Chassis" 3D printed cast bronze liner lock with W2 and iron
TheoRockNazz replied to TheoRockNazz's topic in Folding Knives
Haha, yeah, was in a rush to take pics, fixed it since then. That is a good point about the mosaic... admittadly I've been mulling over ways to affordably and effectively selective laser sinter tool steel blades -
"Chassis" 3D printed cast bronze liner lock with W2 and iron
TheoRockNazz replied to TheoRockNazz's topic in Folding Knives
Here's some better pics. No critique huh?... please feel free to be critical. I can see how using 3D printing may be controversial, I'd love your opinion.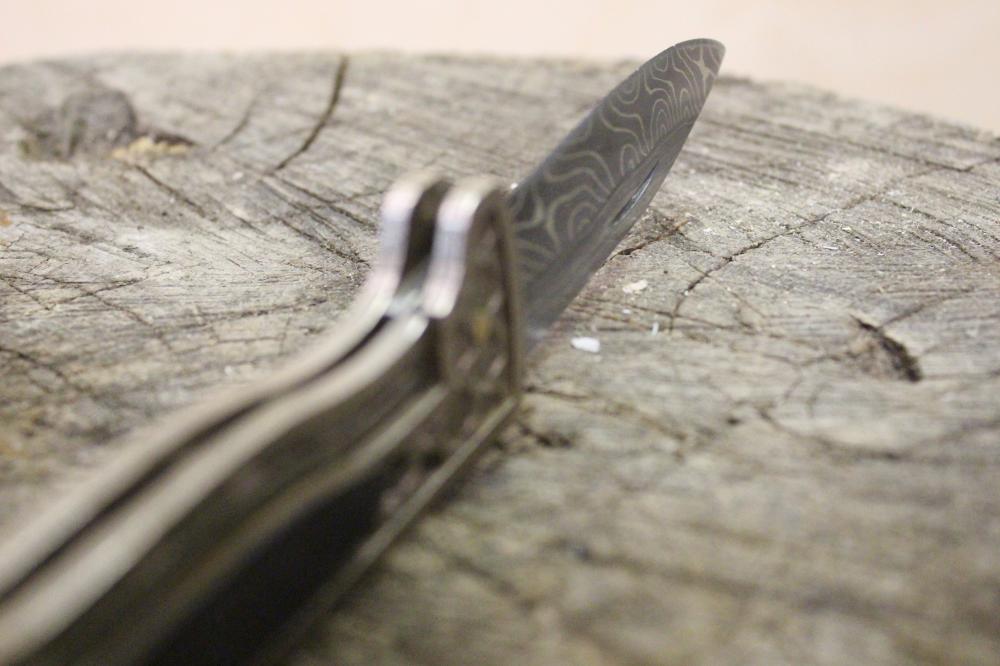
-
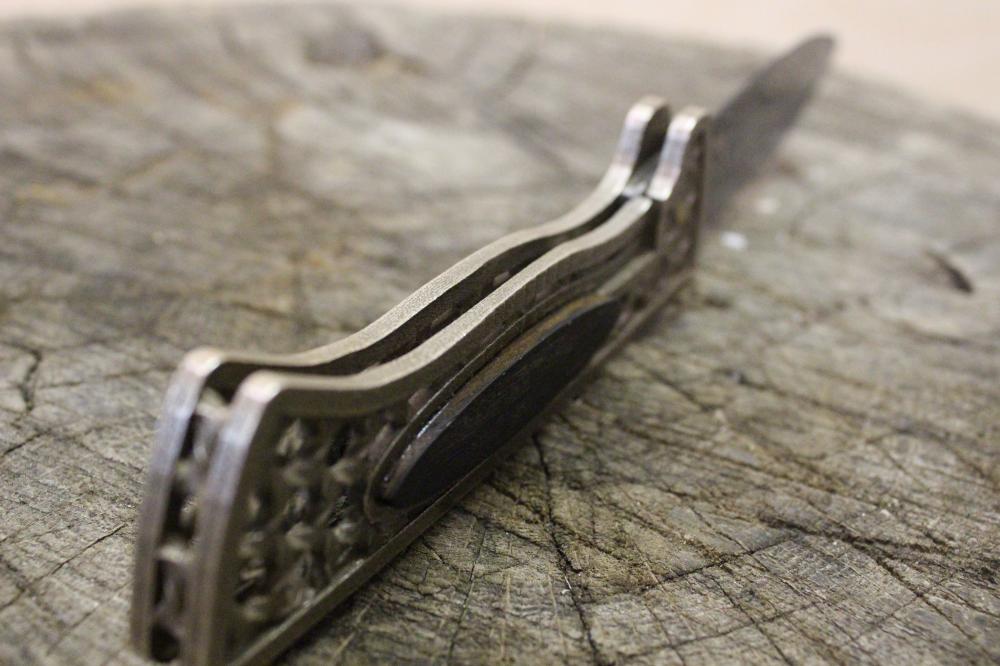
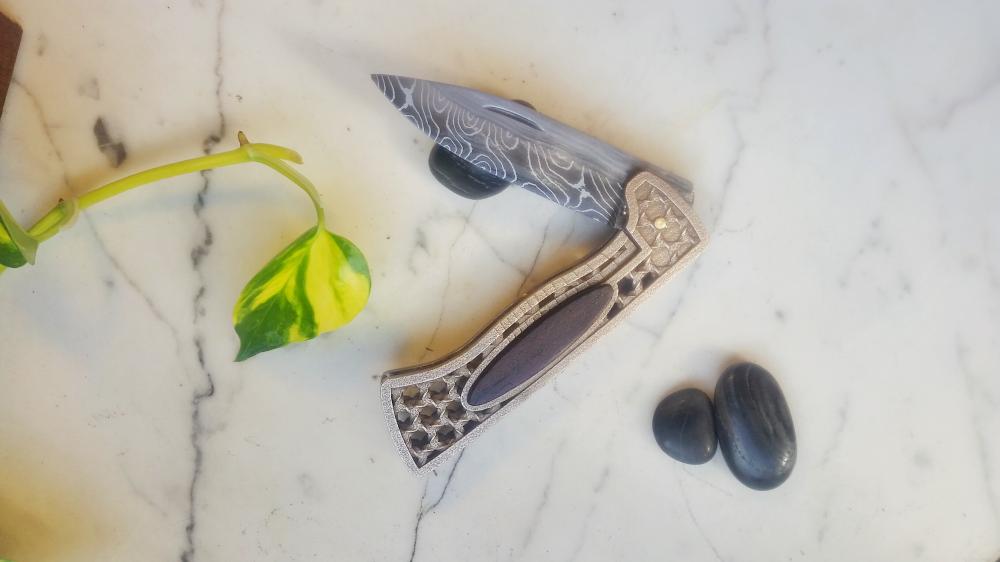
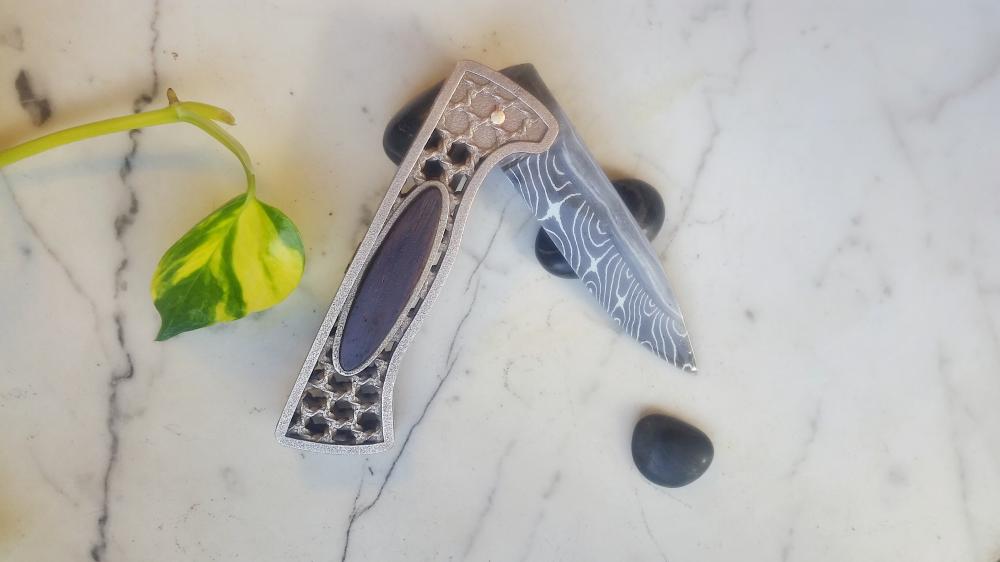
Howdy all, I'm back with my newest 3D printed shenanigans. Blade is W2 and pure nickle twisted together, wrought iron spine - can you guess what fellow IFI member inspired the pattern? The frame is printed in plastic then lost-wax style cast in bronze. I designed it so the locking arm is built into the frame. The action is quite smooth, and the release pressure is just where I want it. Several flaws stand out to me about the fit n finish and the action could be tweaked. I am considering a more modern pin; I've had to repin several times to adjust the action. Obviously this is the prototype, so I would love to hear input/critique as I make improvements for a series. Theo

-
Looks fantastic! Blows away the hulking mess that was my first patternwelded blade. I especially like your profile. Why did you bevel the top of the guard like that?
-
Beats the snot outa my first knife! I'm worried about that handle; in my opinion you should switch it out for a sturdy wooden one. Do you need to keep your forge setup mobile? I recommend finding a spot you can settle into and get properly grounded; make sure your forge can't roll off the table, and maybe swap out that table for something solid (stumps are awesome!) ... just make sure to give yourself more space - who's liable if you damage that car? An anvil is a handy tool, and there are many hunks of metal that can serve as one too, save that handy vise if you can. All in all, well done, I hope it gets used.
-
Thank you all for your words of wisdom. I am now mulling over the idea of having some business cards printed with the backside containing information on how to care for the knife. I really like that leatherclad box, but that's far beyond my skill level at the moment.
-
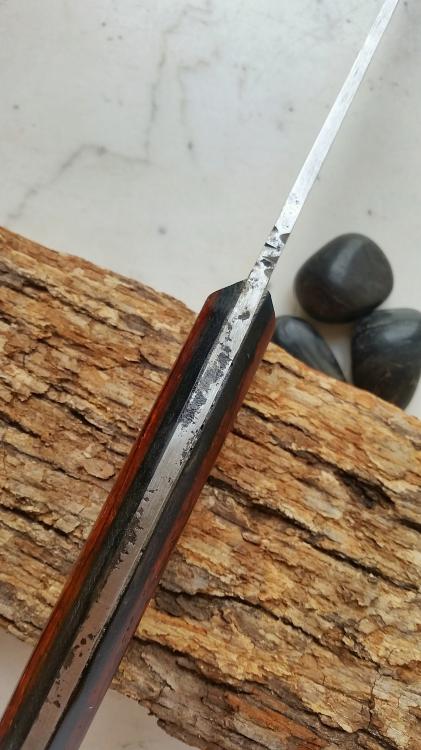
13.75" blade
-
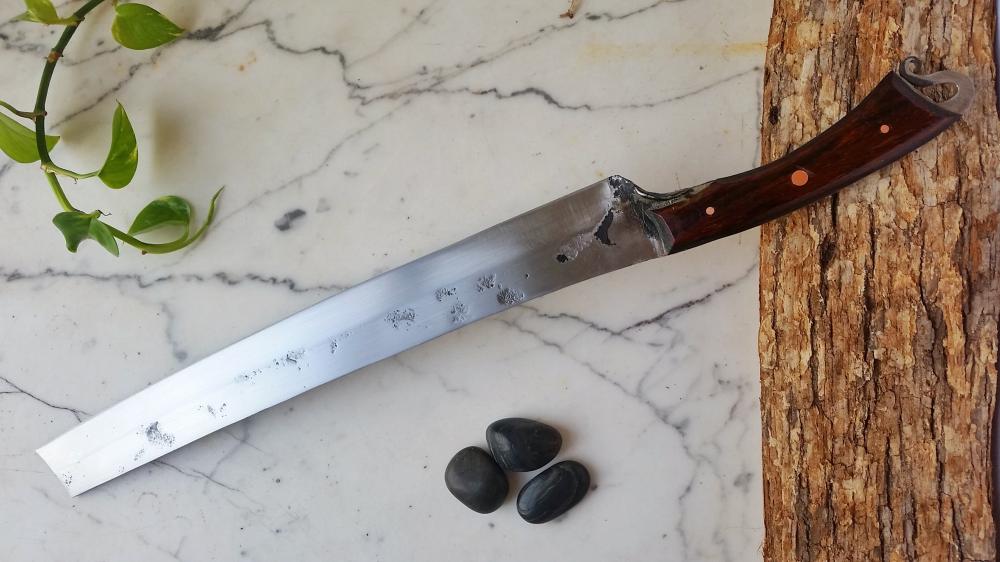
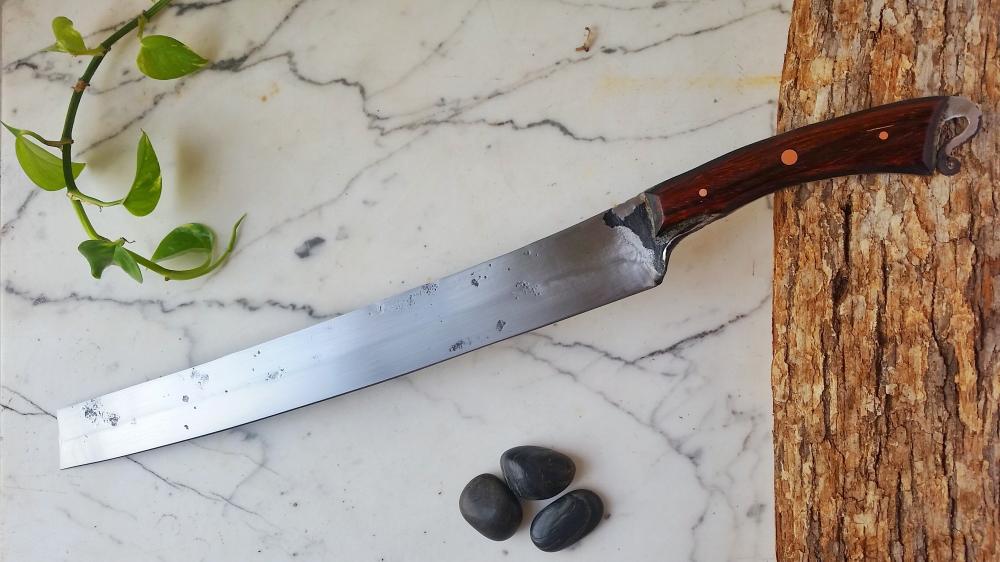
Yeah, macheax is machete seax. The fella that commissioned it wanted something meaty to get through brush and small trees. My previous macheax had too much of a broken-back seax look that would have put the tip at risk of breaking off
-
This is my second attempt at a macheax. Like the previous one, it's going to be used (hopefully heavily) by the client. 80CrV2 forged to shape with G10, cocobolo, and copper pins. 19.25" OAL, 5.5" handle, 3/16" thick blade. Surprisingly light in the hand, but I think I'll try and fuller the next one. I've been playing with 45 degree bevels on the handle scales, I rather like the result on a "meatier" blade. I should have moved the guard/flair down a bit, shortening the handle a tad.
-
Very good point that I had not even considered
-
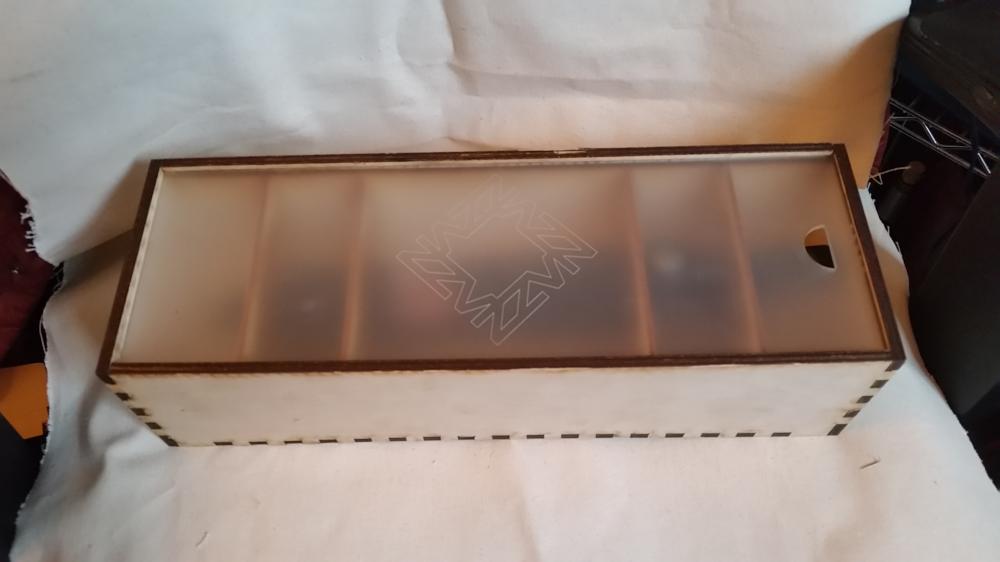
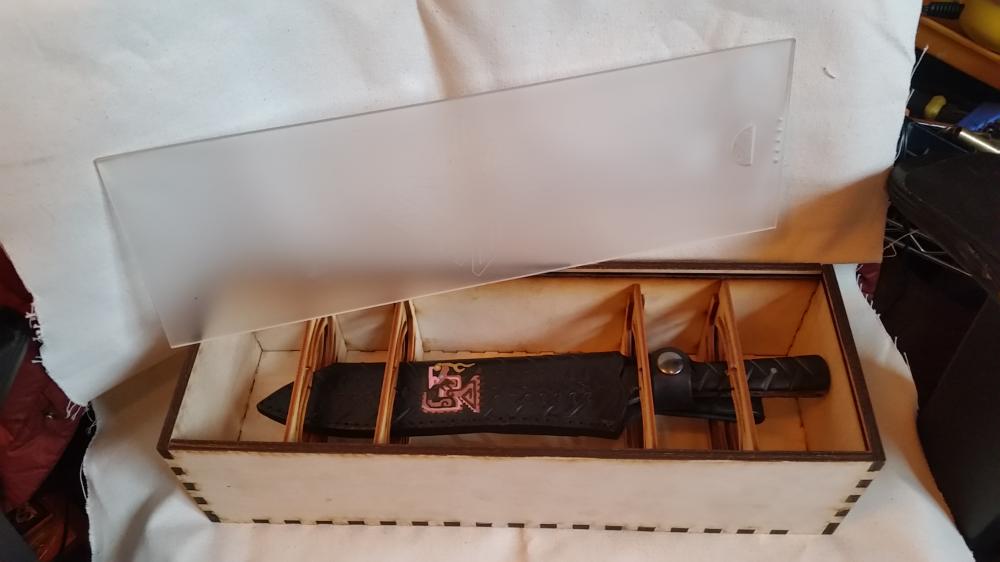
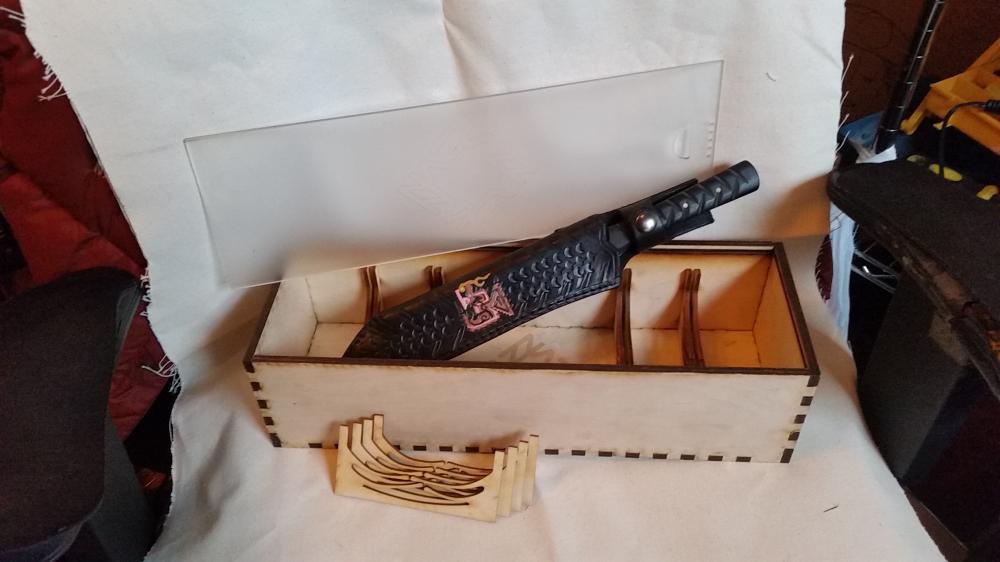
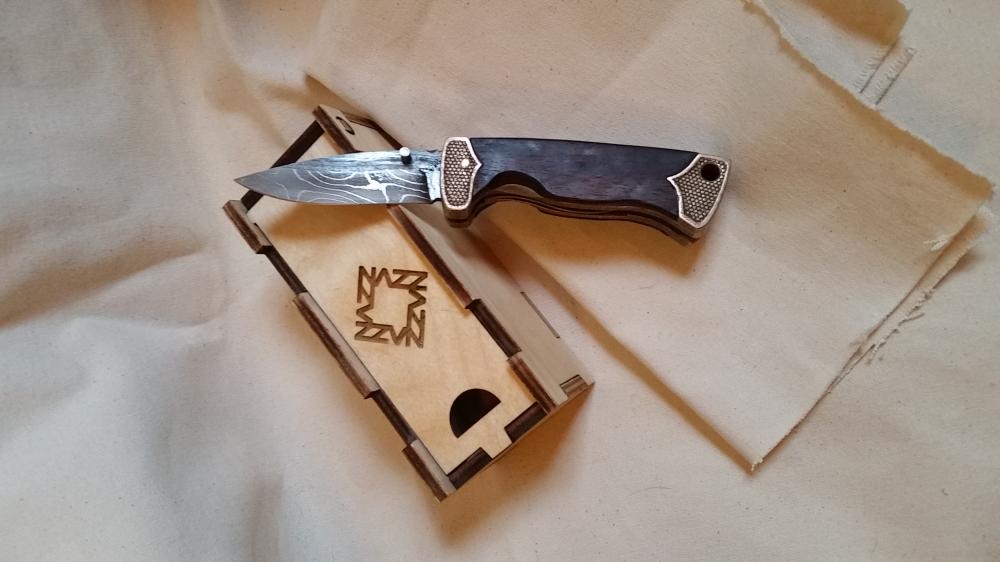
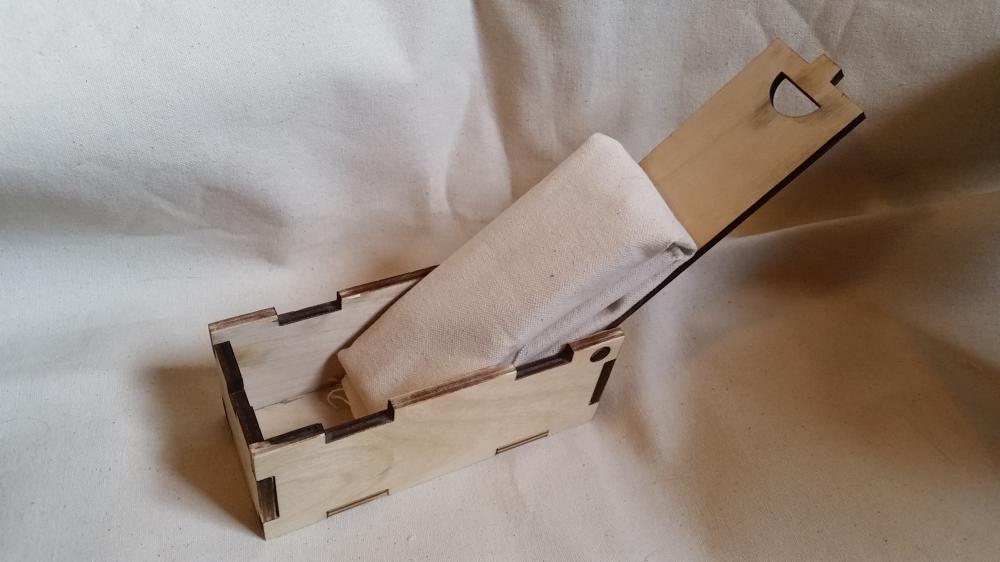
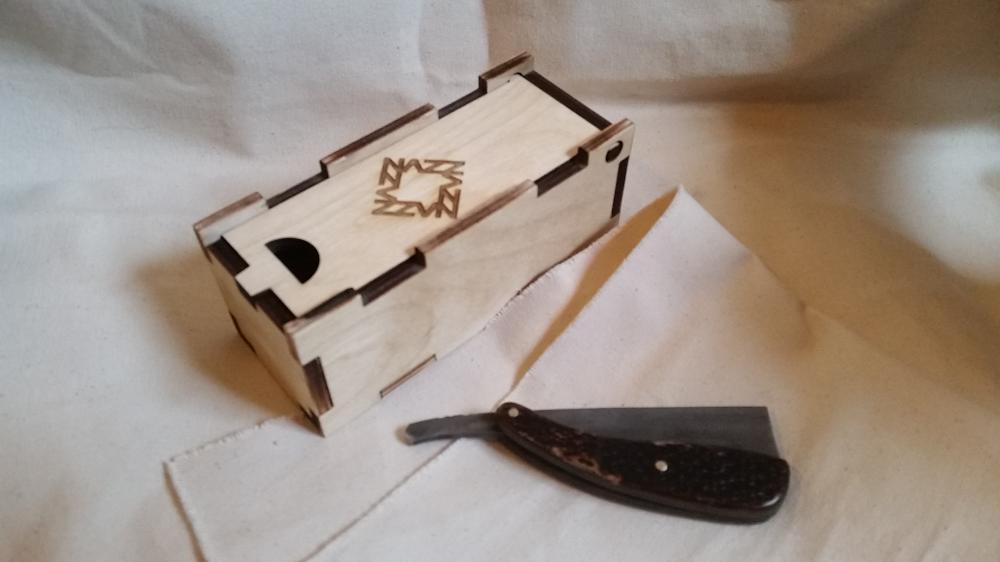
Hello gents, So I've been working at this new lasercutting shop for about three months now, and have been taking advantage of their scrap material. Designed and cut some boxes for shipping finished knives. They use toothed dovetails that have to be soft-hammered together, but then never come apart. The big box needs serious work, I've got to make the spacing of the dovetails wider, it's too hard to hammer together without risking splintering. The folders are these guys http://www.iforgeiron.com/topic/42242-patternwelded-bronze-beast-liner-lock-san-mai-razor/ and the other knife is just an old forging. Got me thinking, what other methods (besides the standard padded zipper-pouch) do you guys use? I've seen some beautiful boxes that are art themselves. I roll them with canvas, but there's probably a better option...? Comments and critique always appreciated, Theo

-
Beats the snot outta my first knife! Well done. How'd you heat treat?
-
This is a fantastic evolution upon a traditional design! True innovation