TheoRockNazz
-
Posts
863 -
Joined
-
Last visited
Content Type
Profiles
Forums
Articles
Gallery
Downloads
Events
Everything posted by TheoRockNazz
-
Well said - I think I'll take one of those actually
-
Haha, I'll let you two duke that one out
-
Haha, yeah, I'll ship it tomorrow Just gotta beat the snot outta it see how it holds up and feels. A finer pattern would probably be better, but the printers that can achieve that level of detail are out of my budget
-
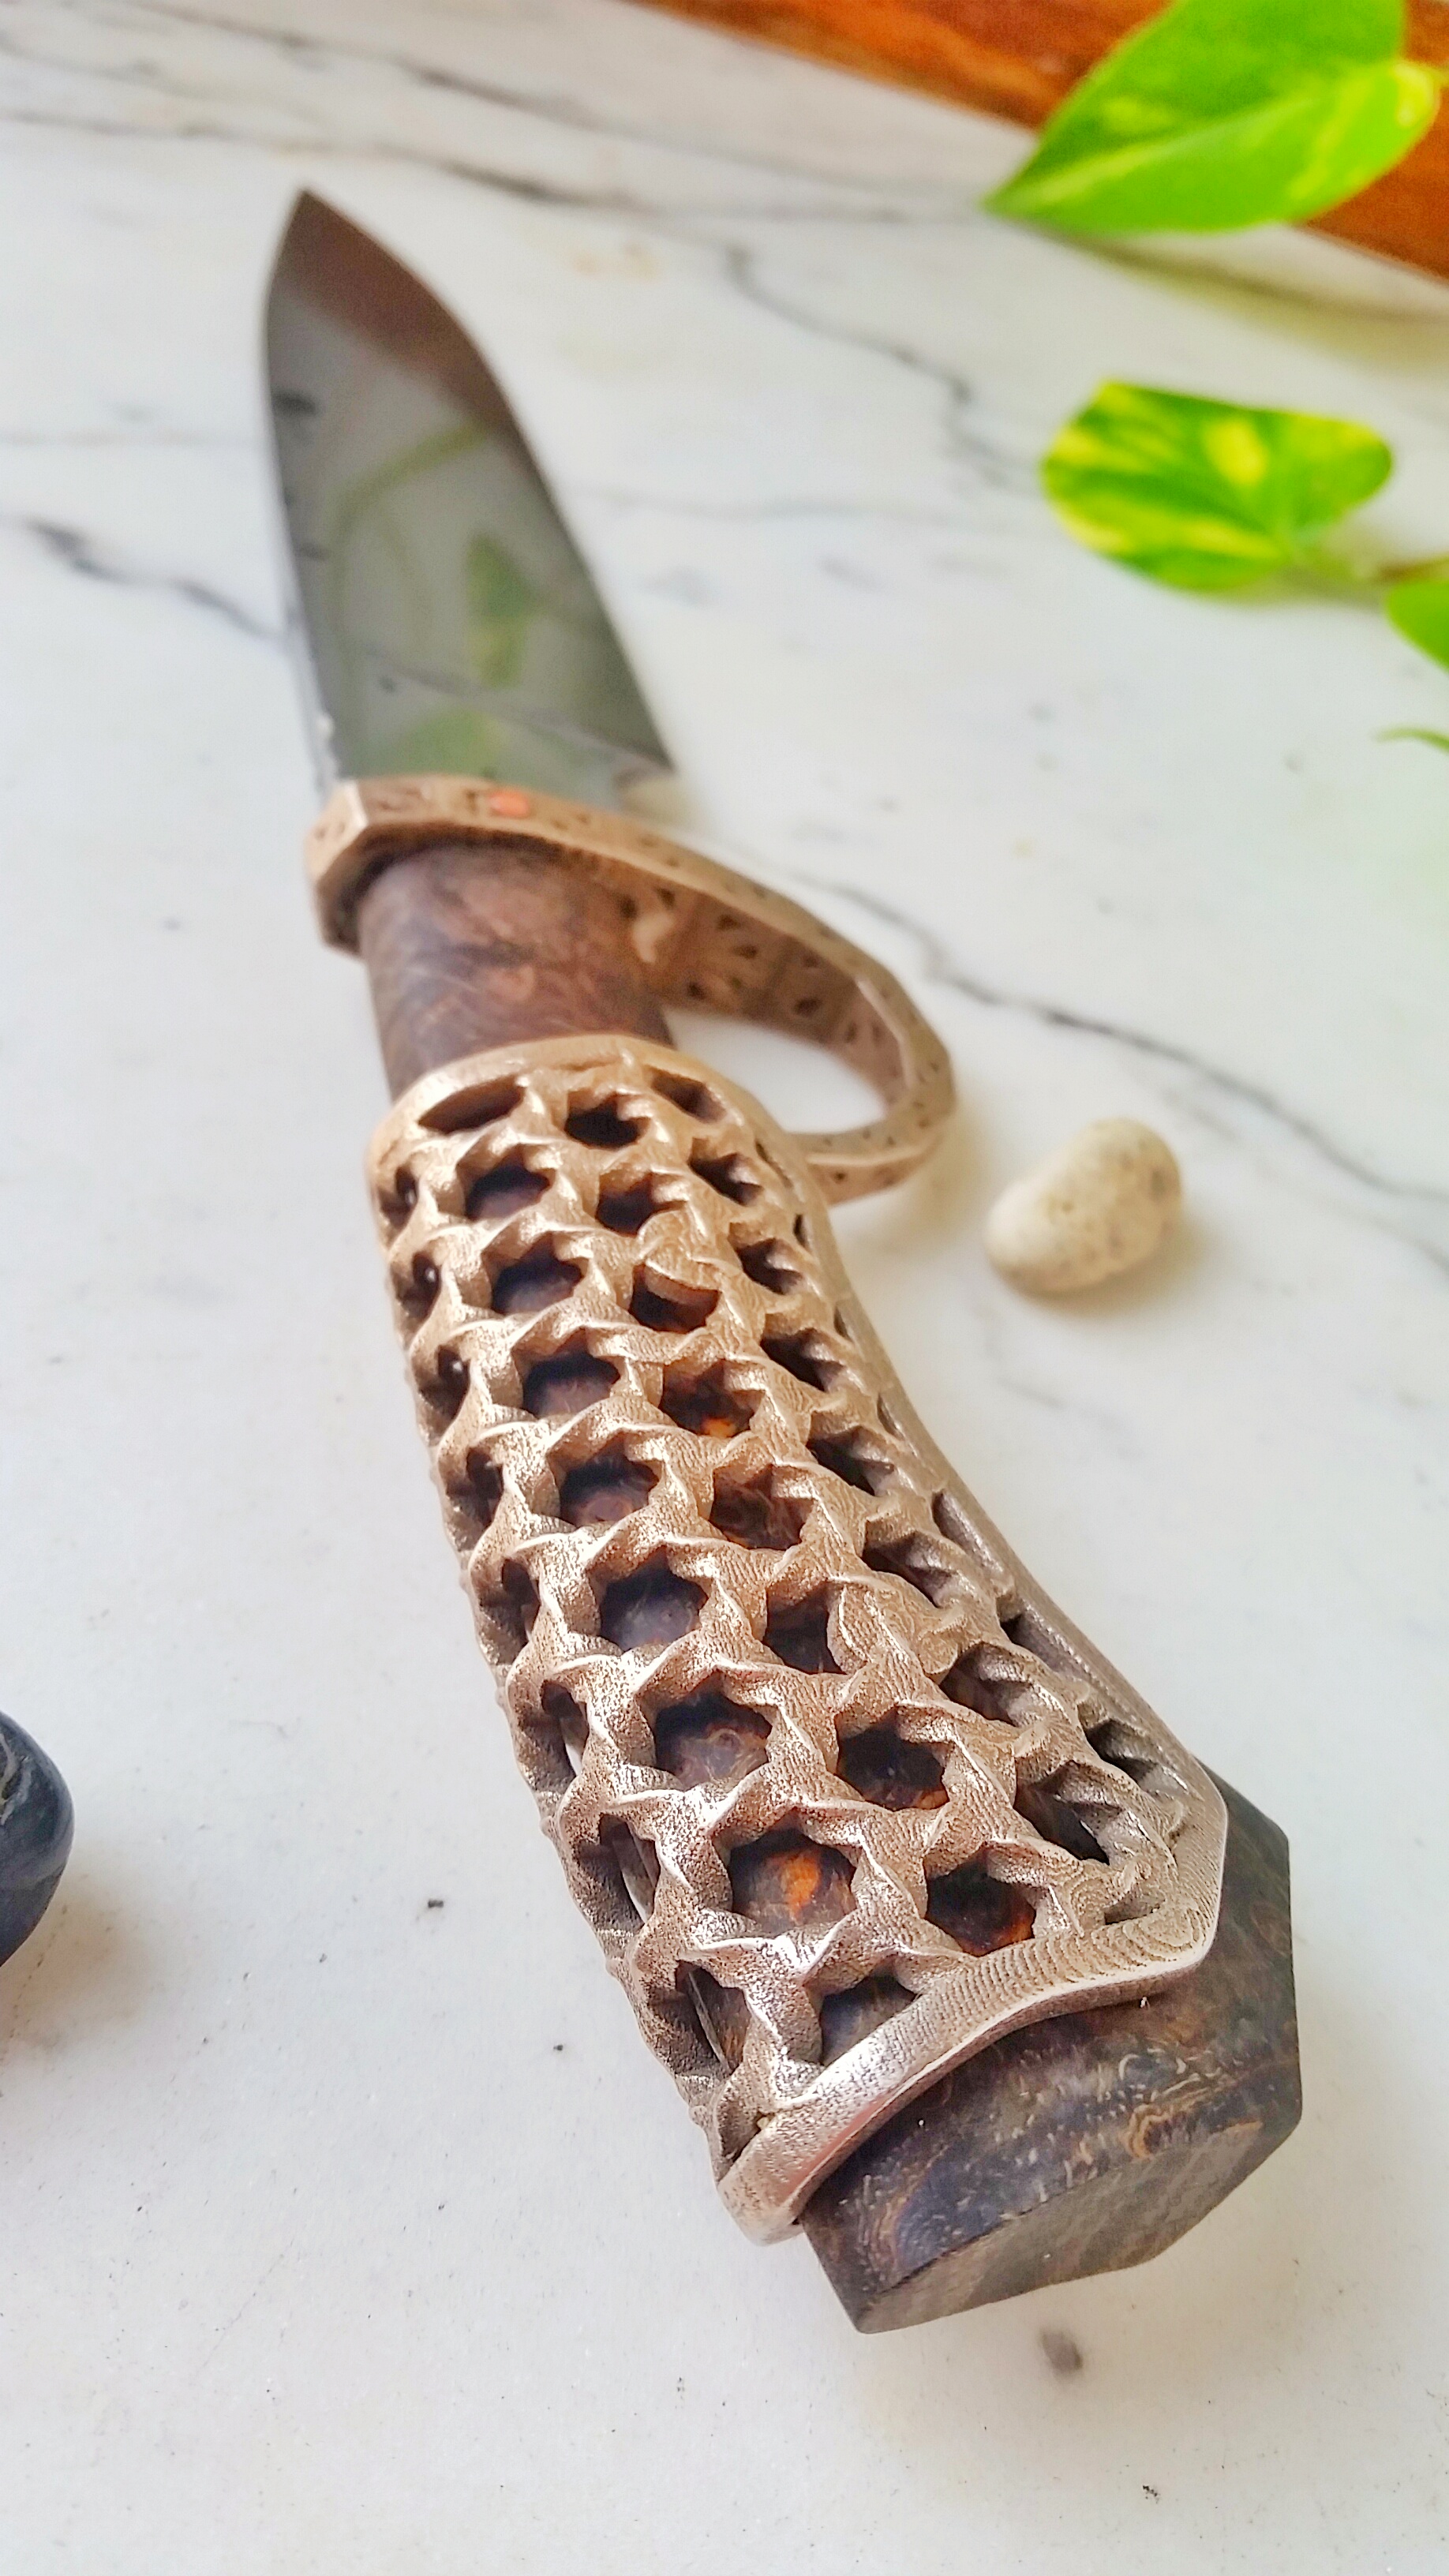
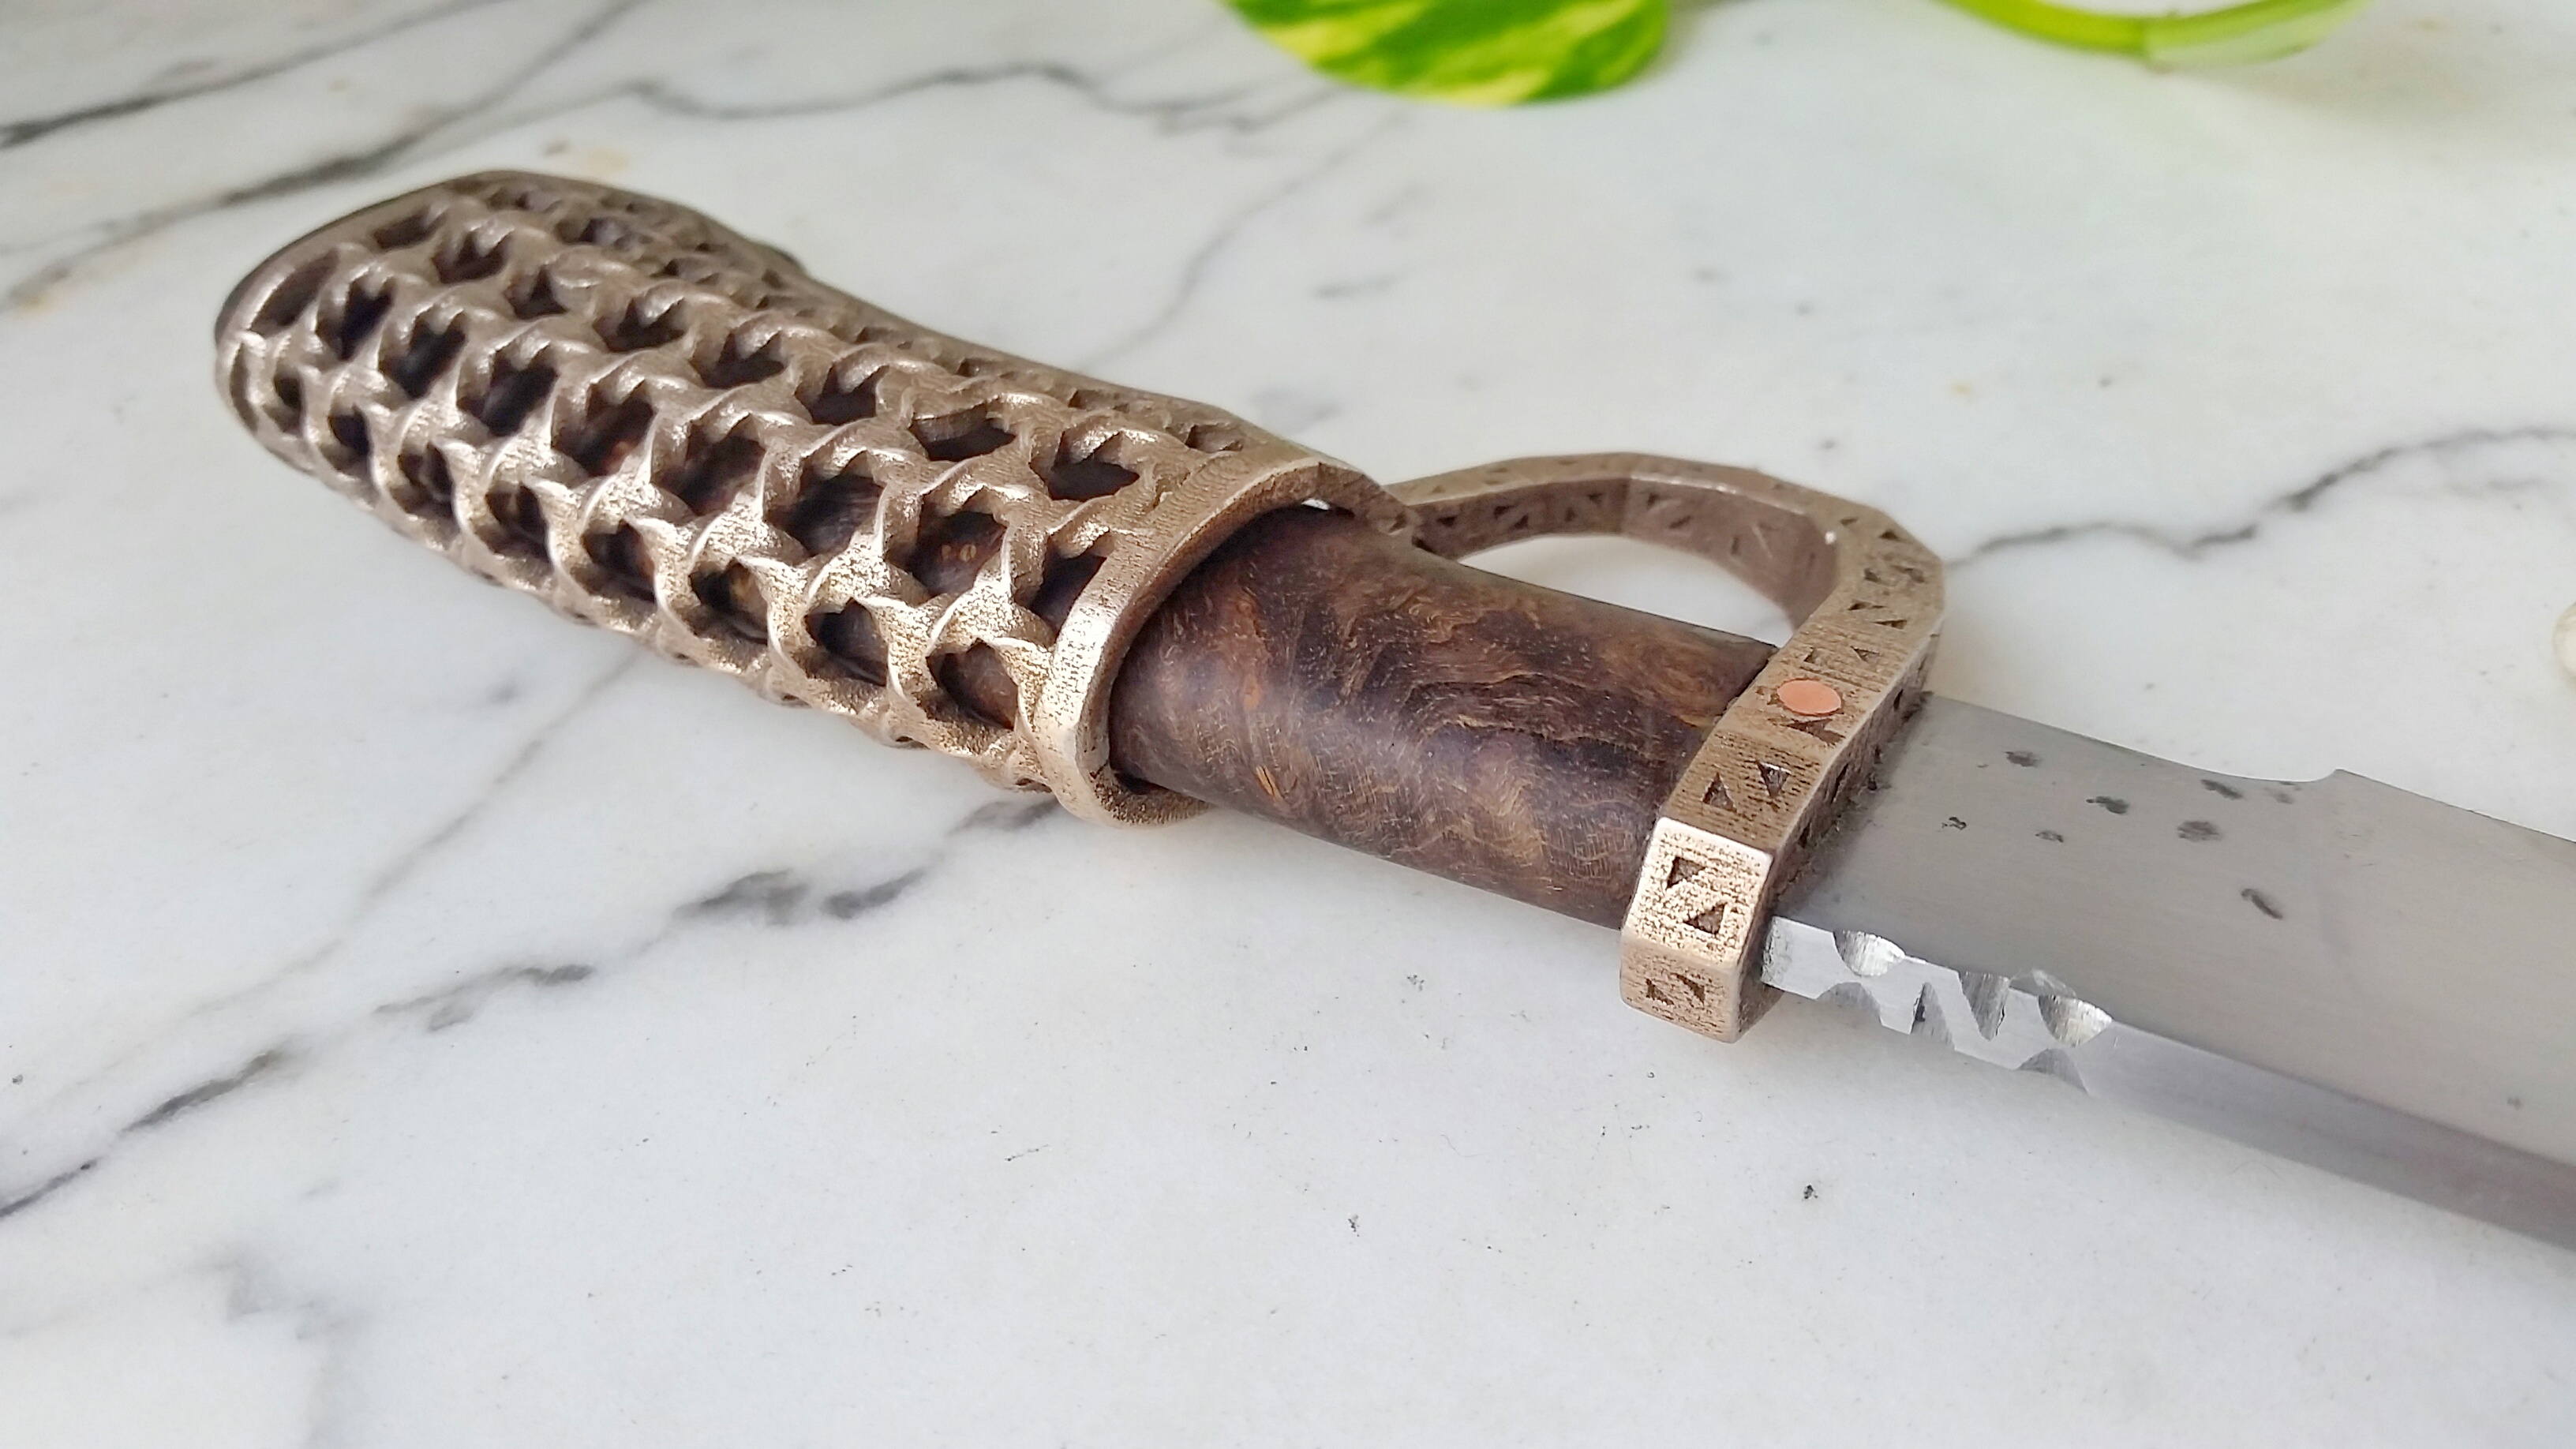
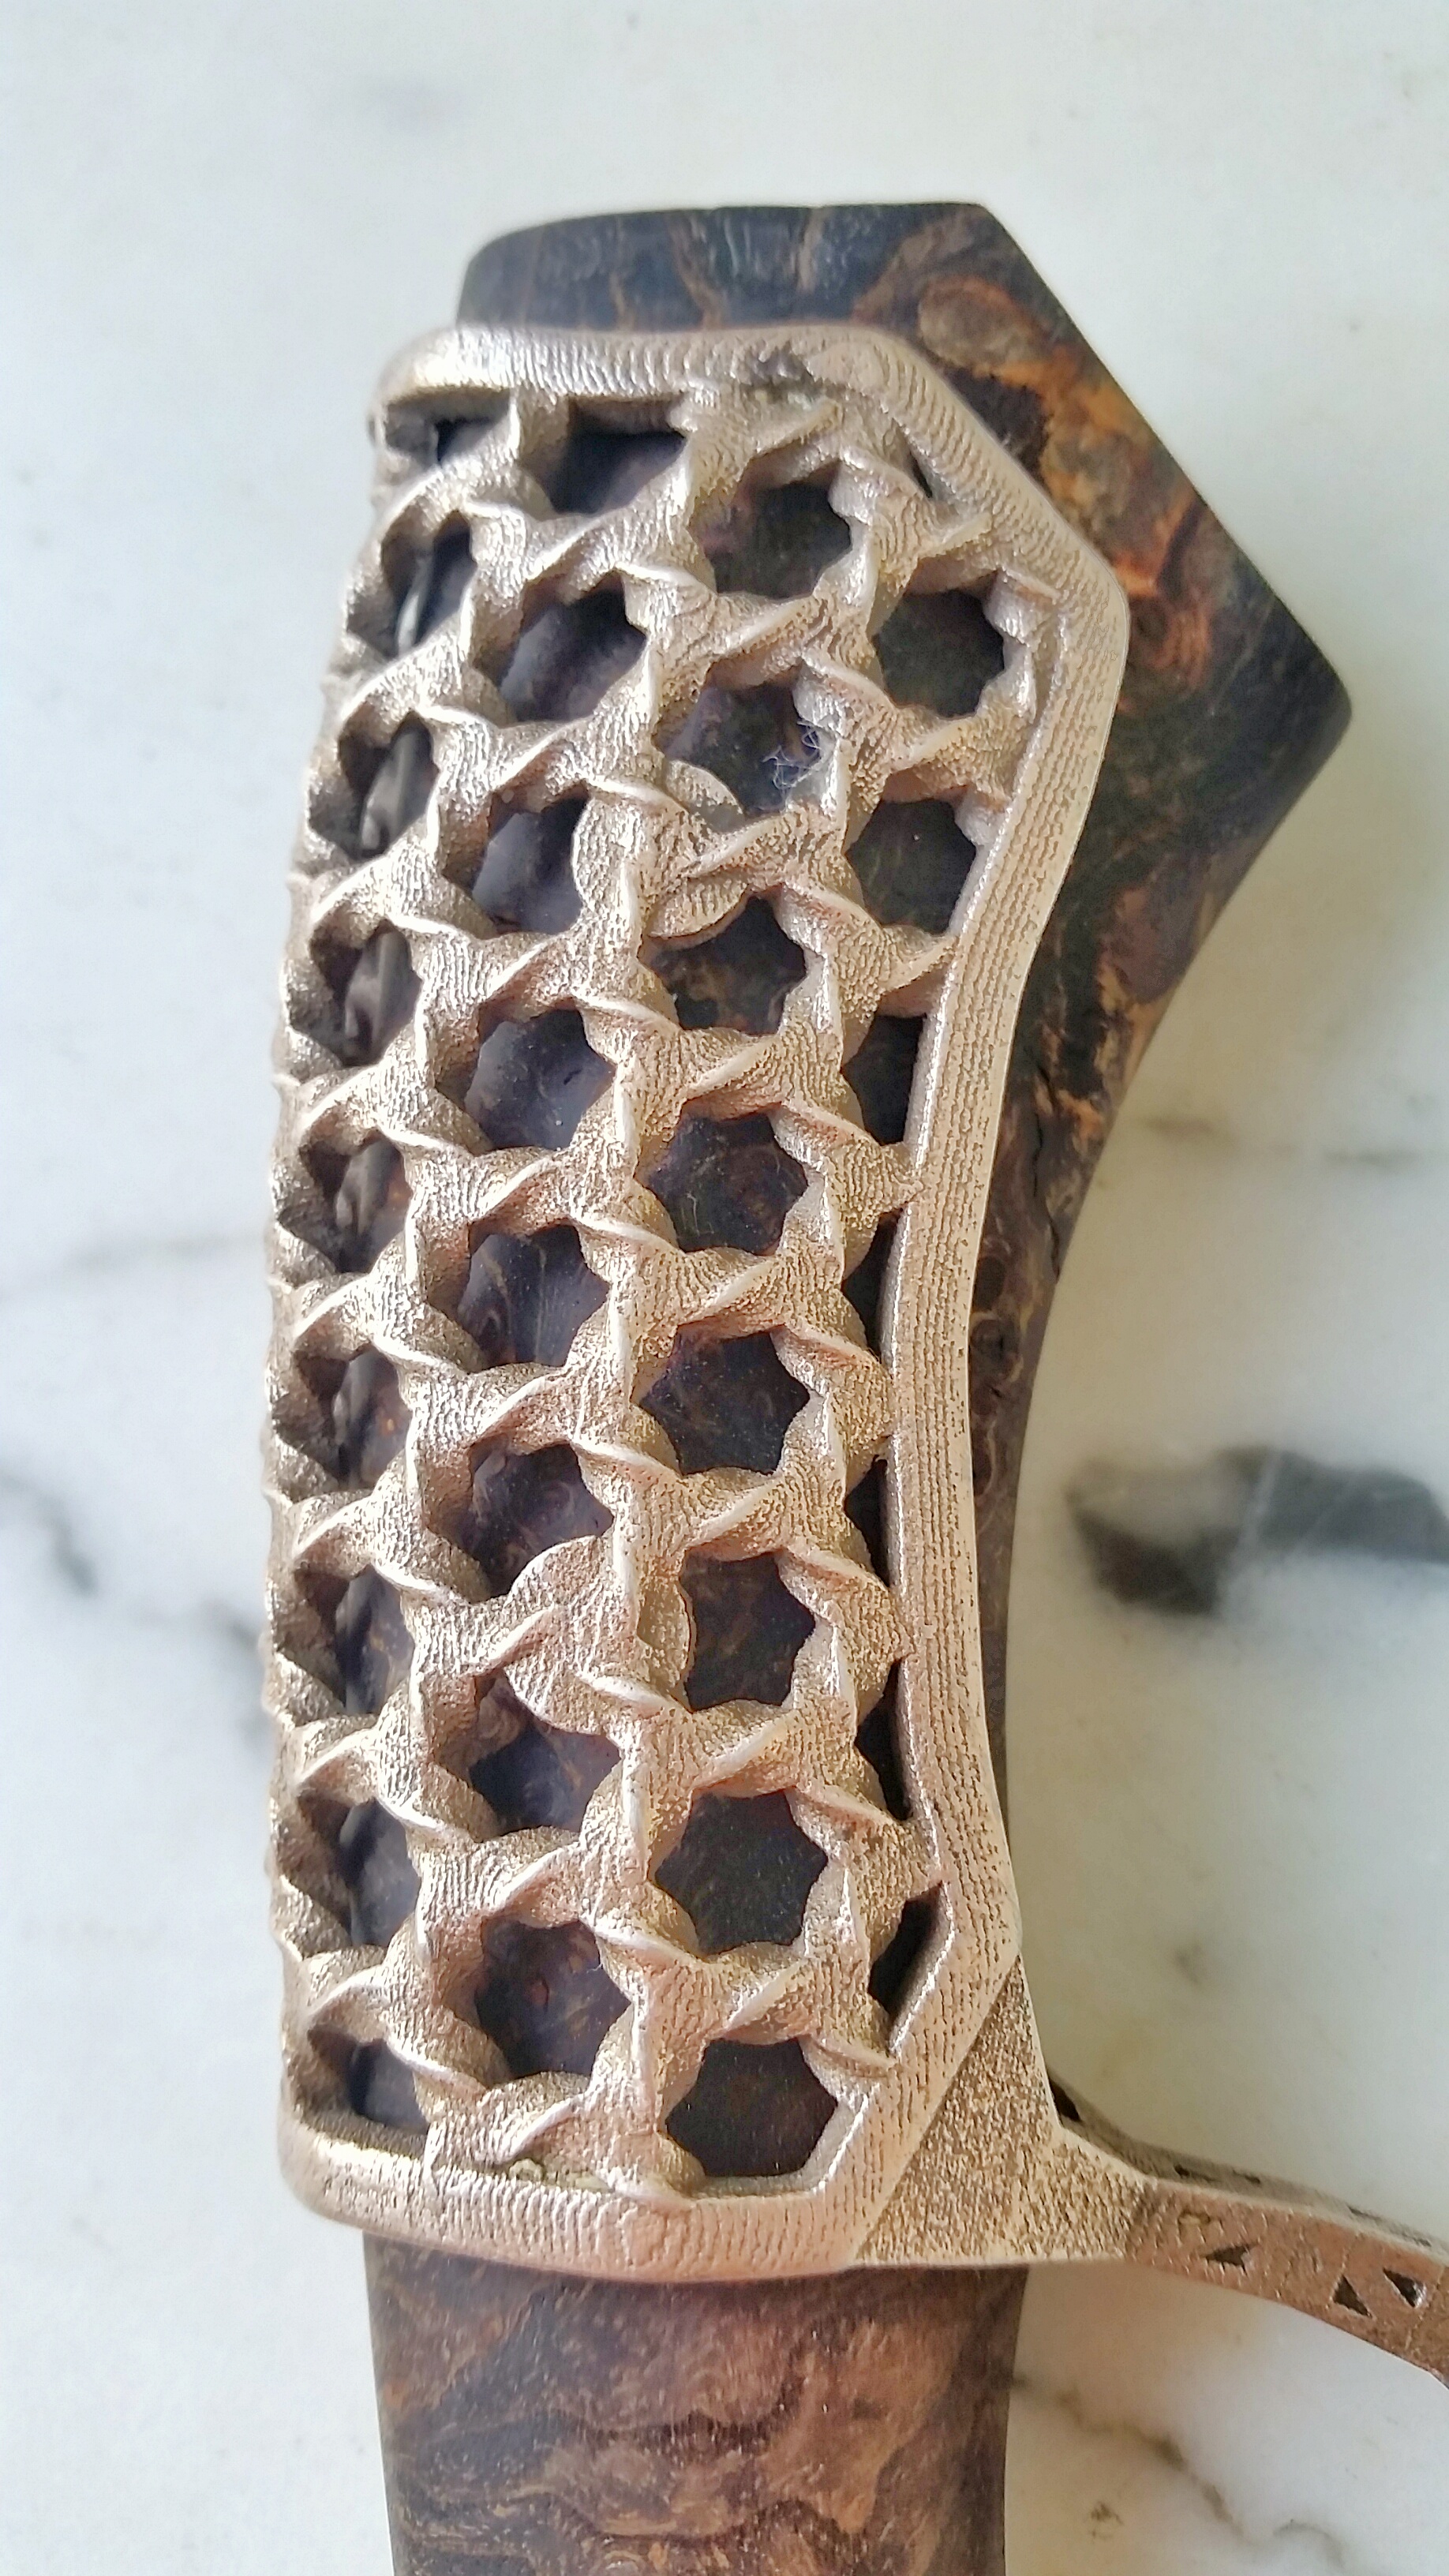
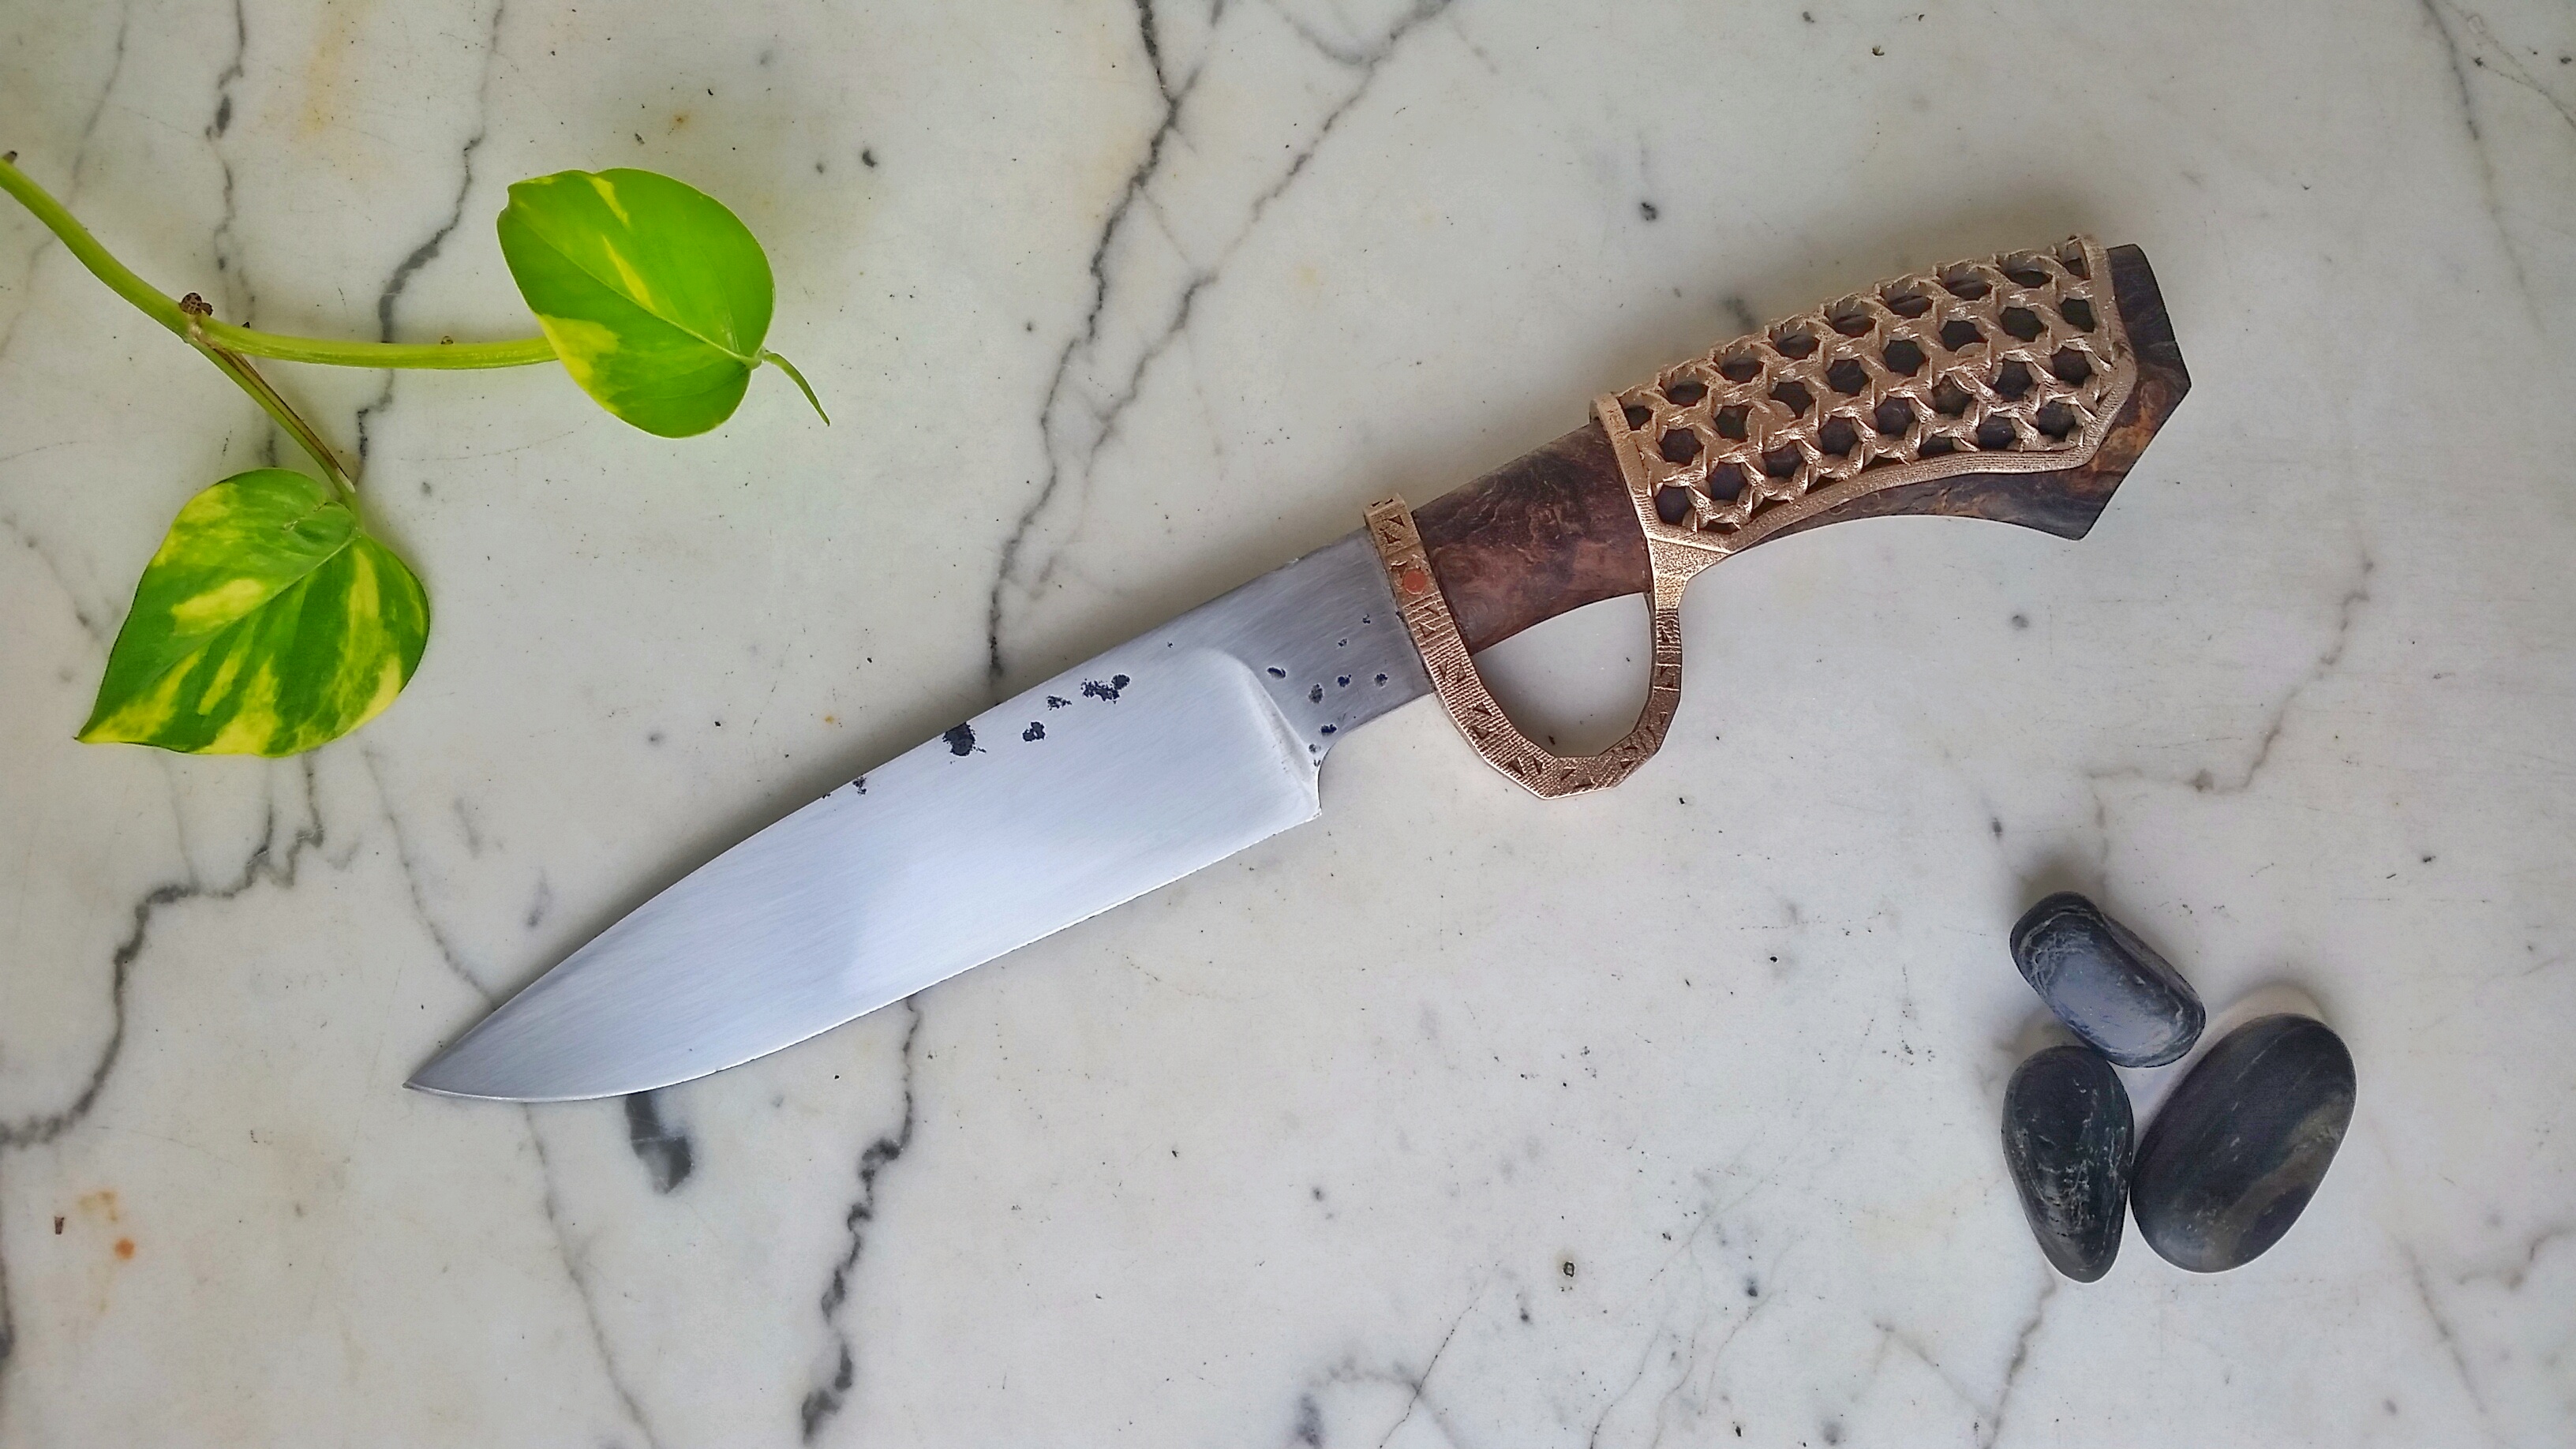
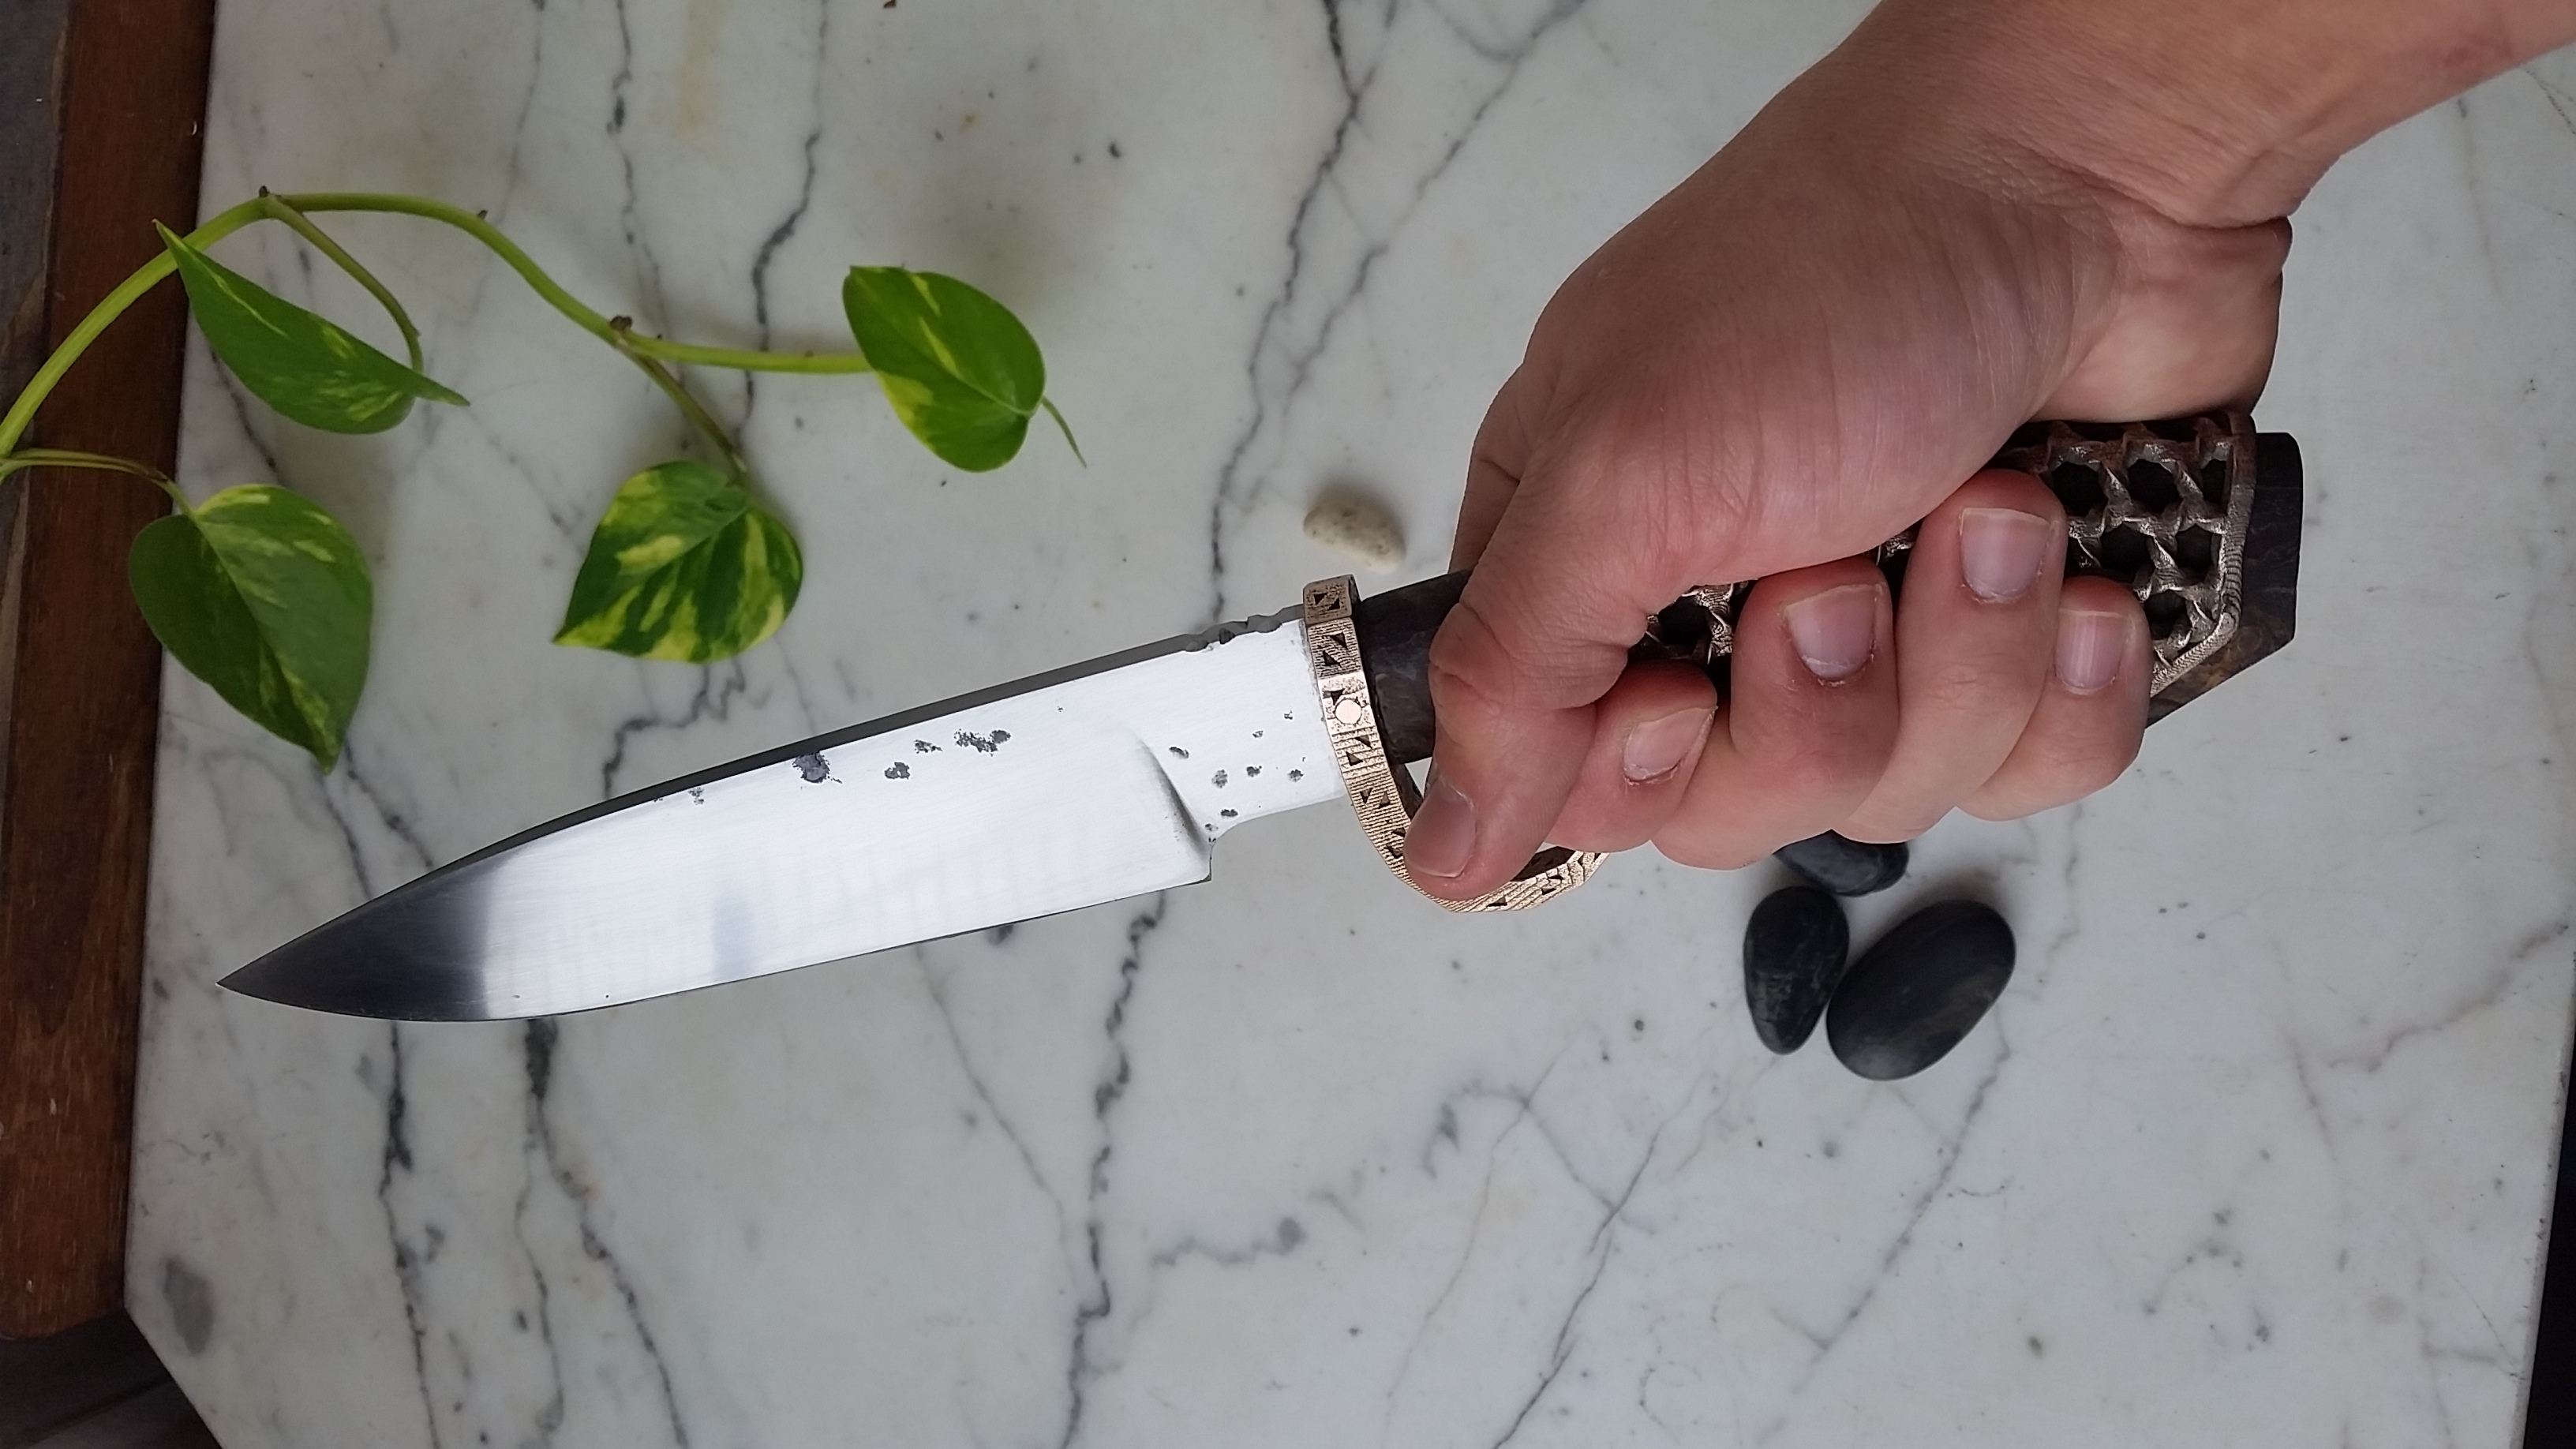
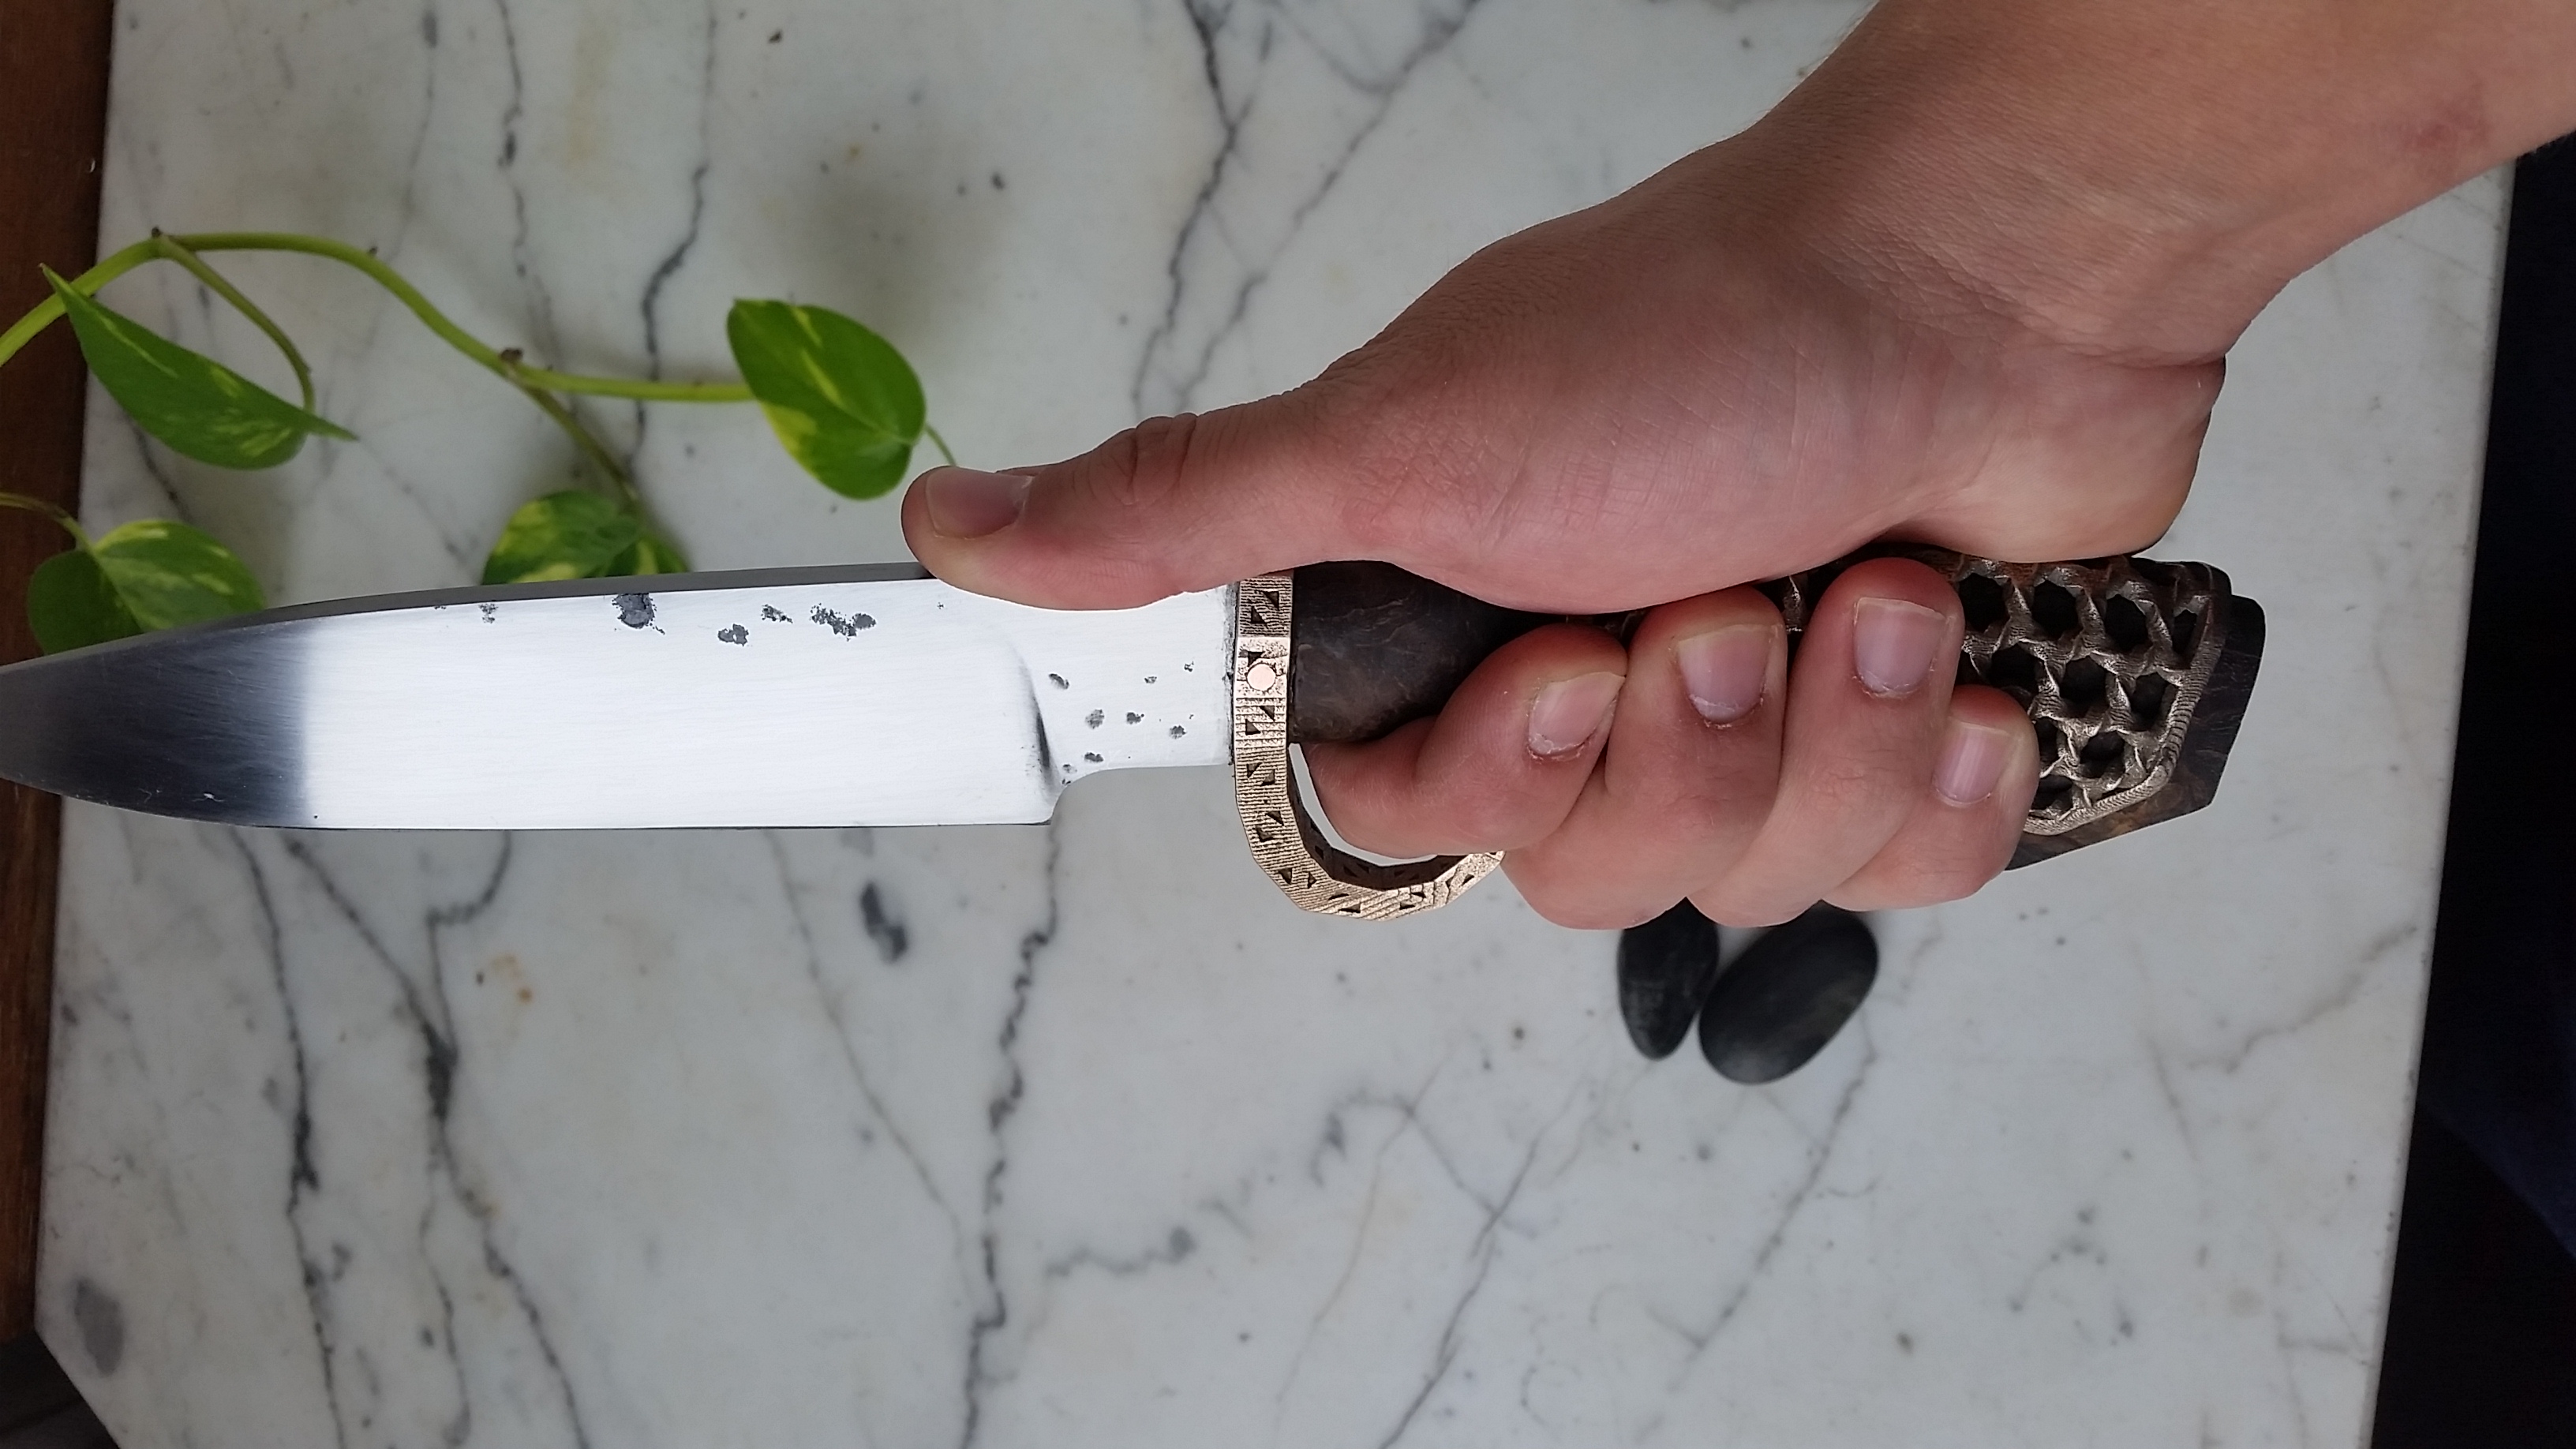
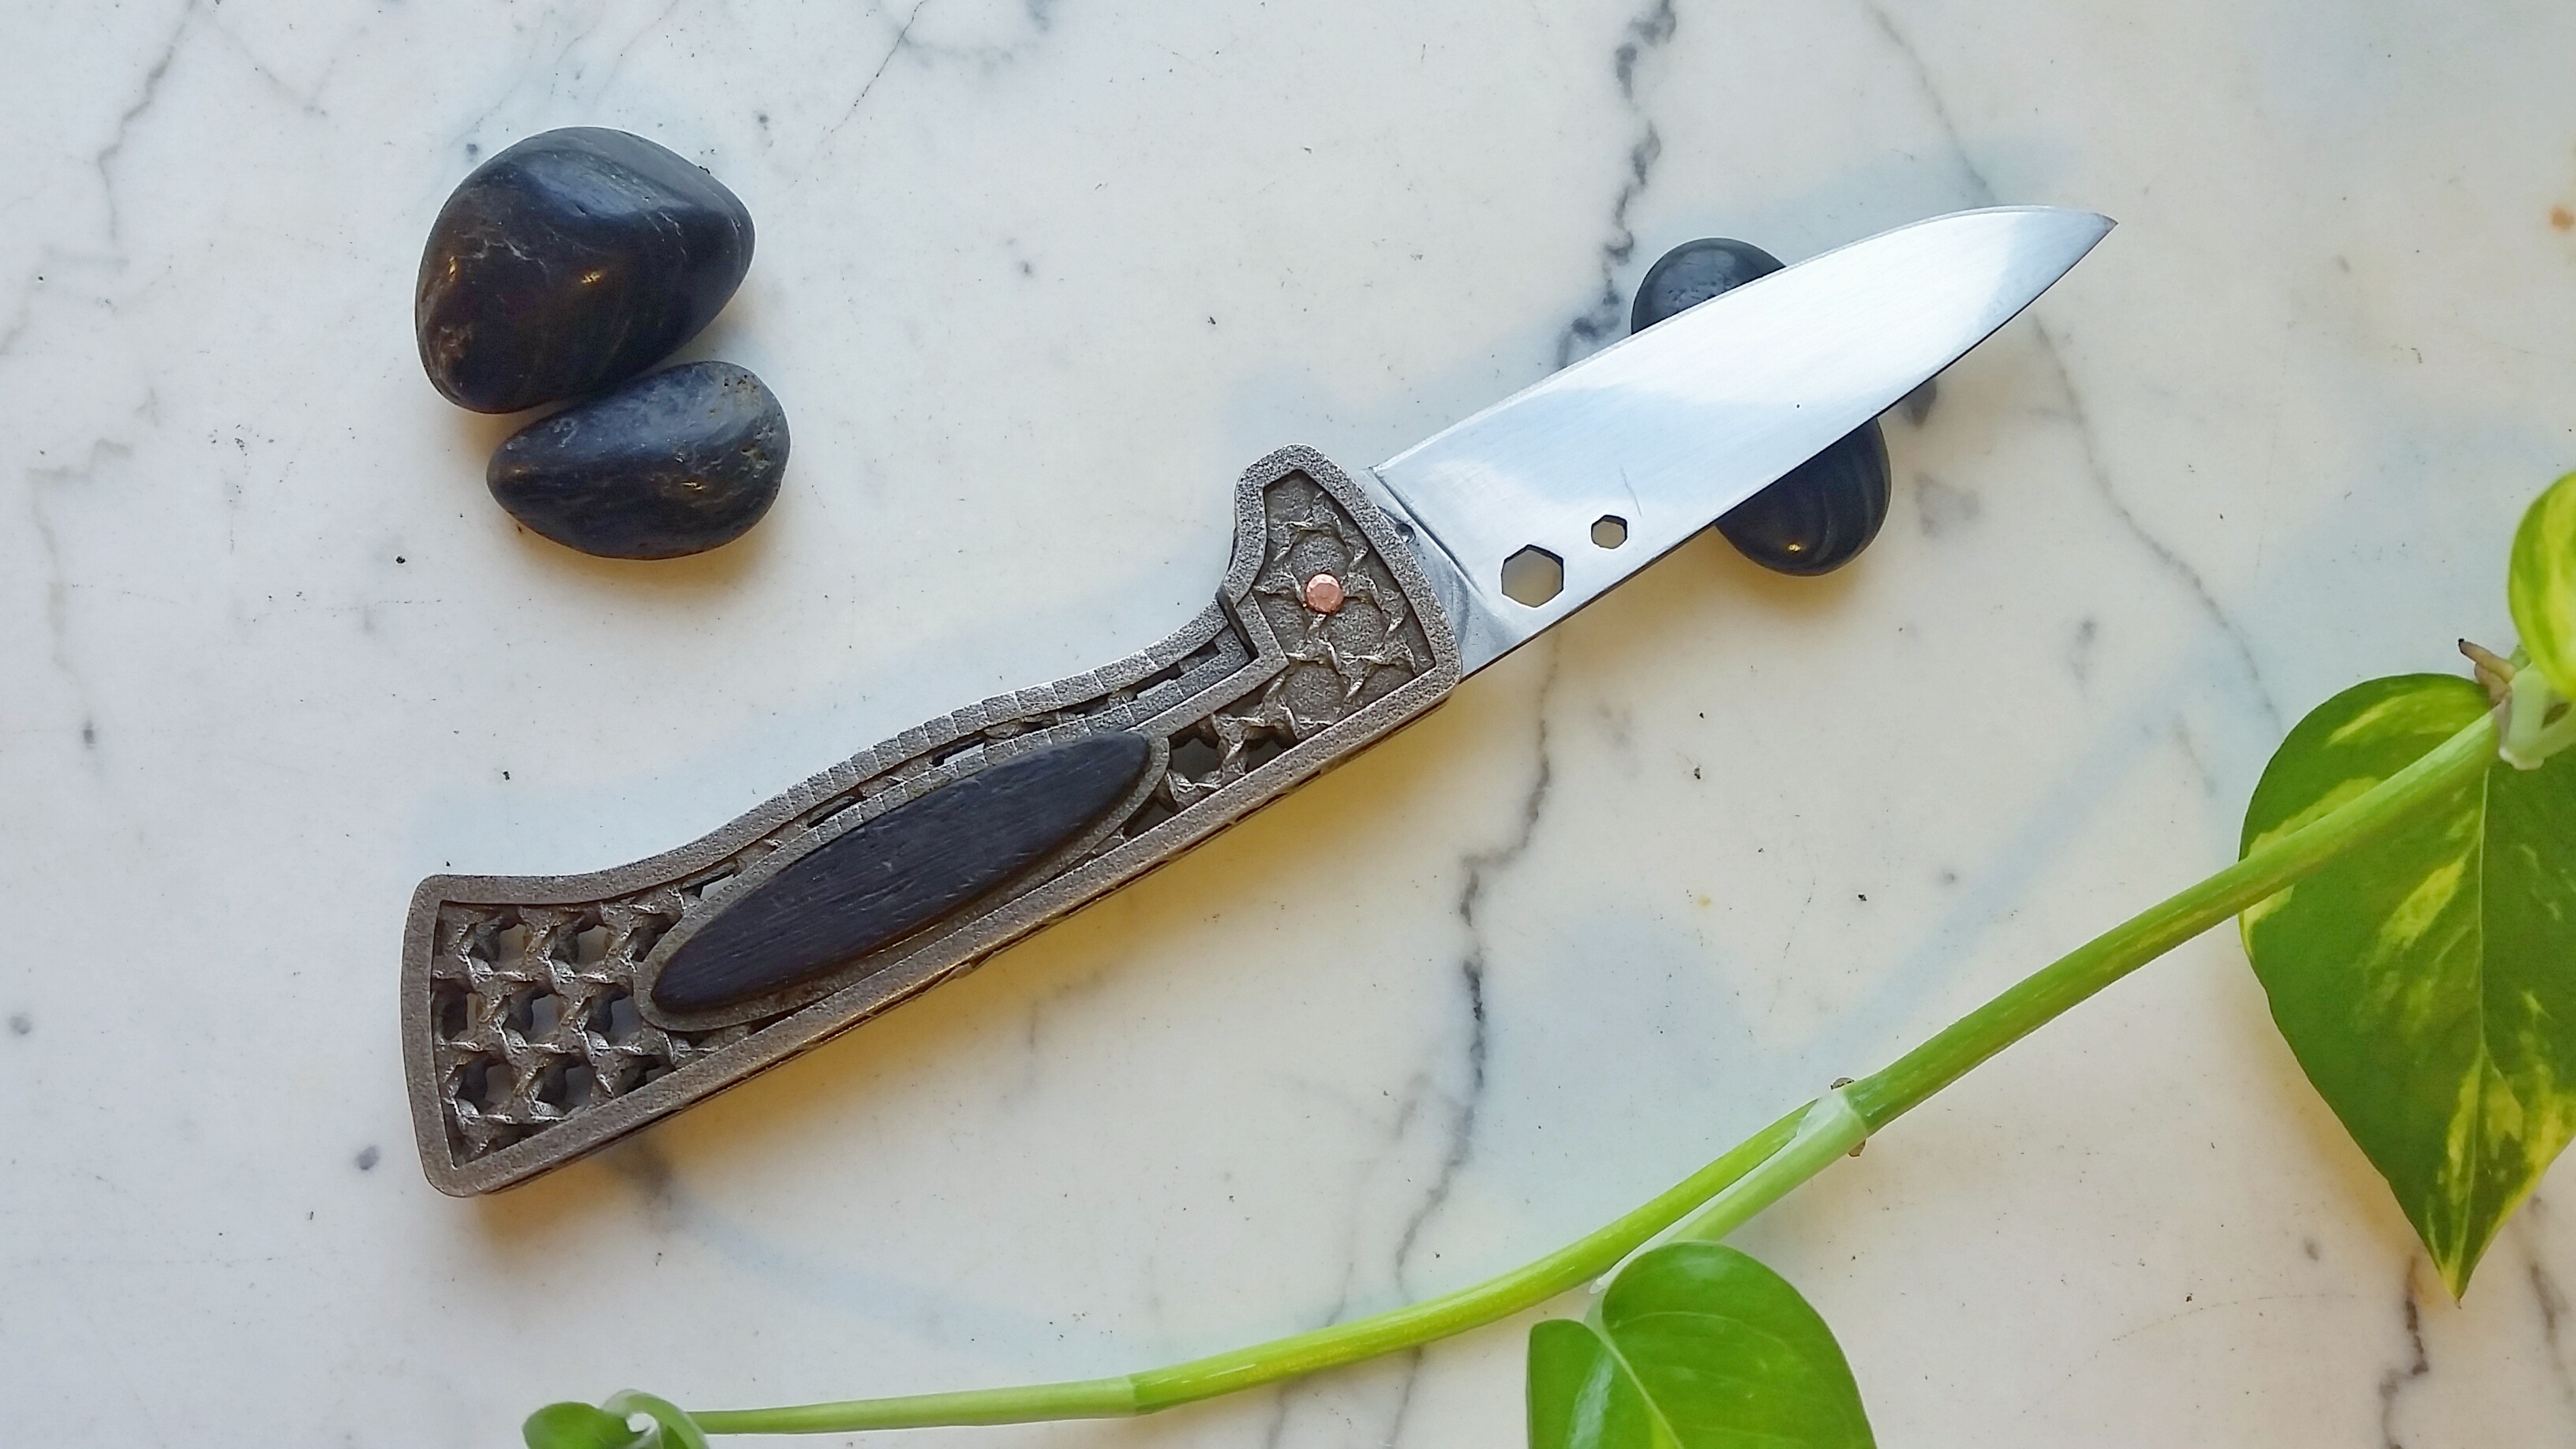
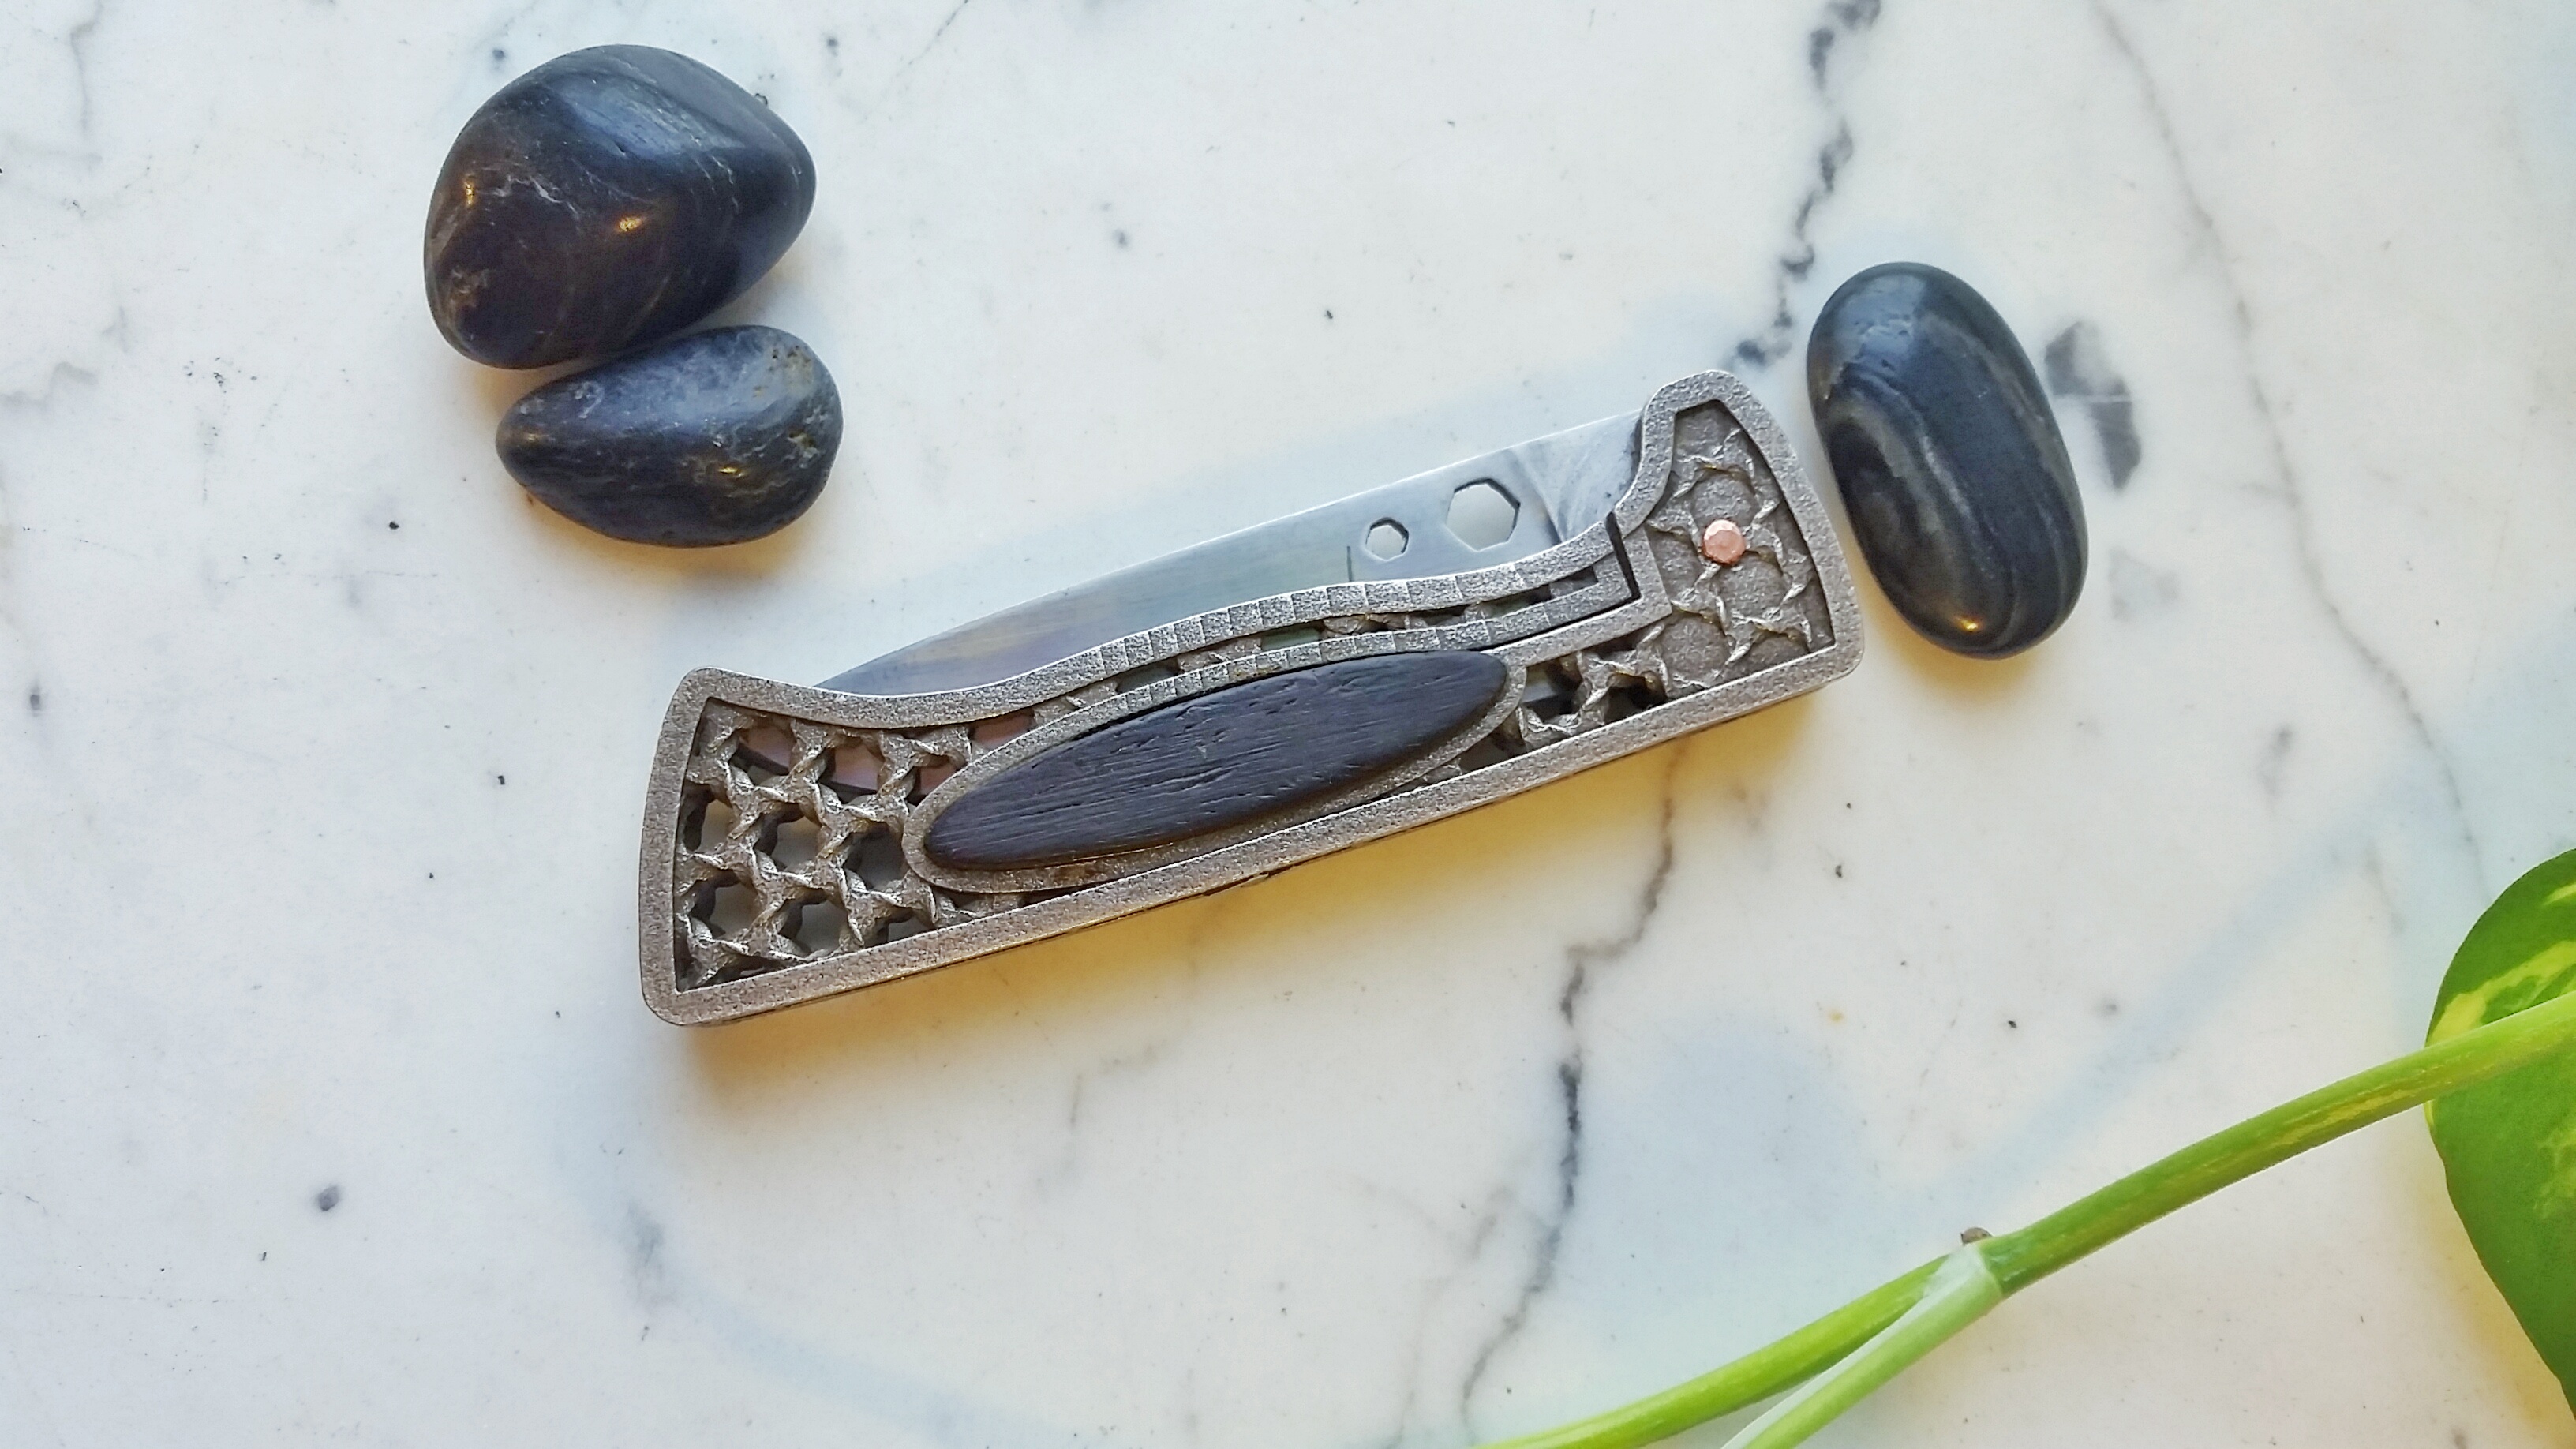
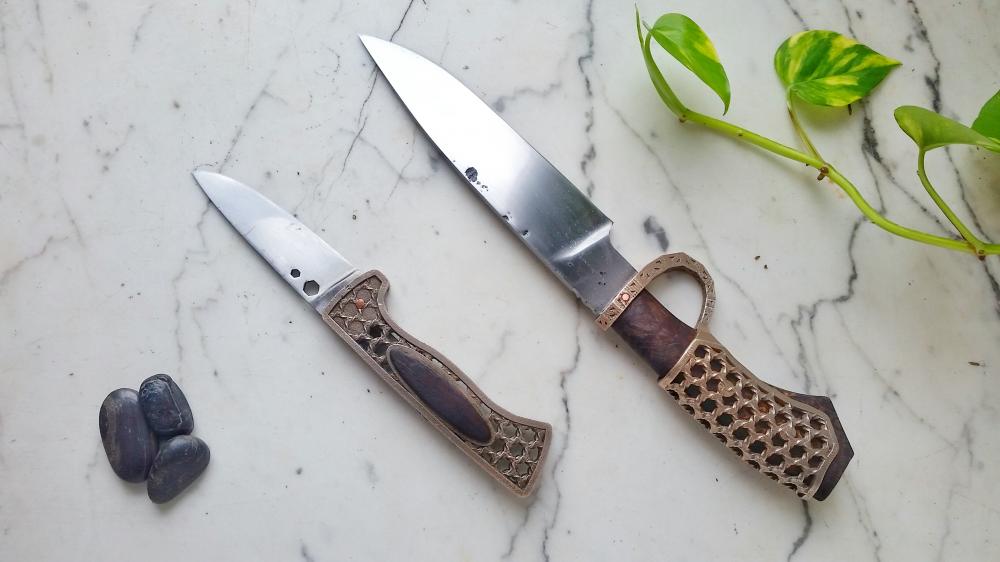
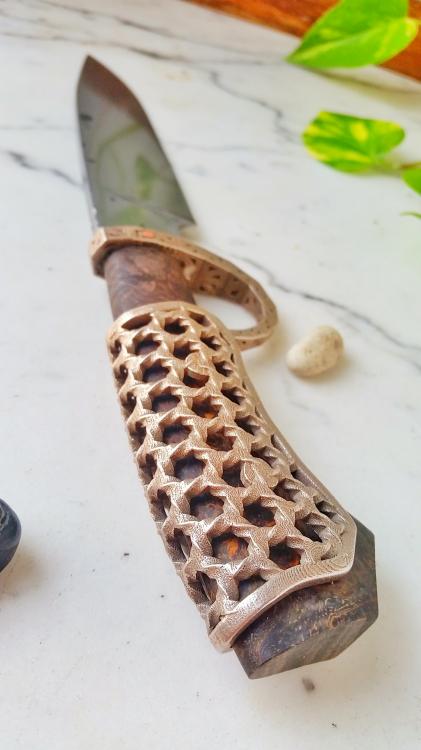
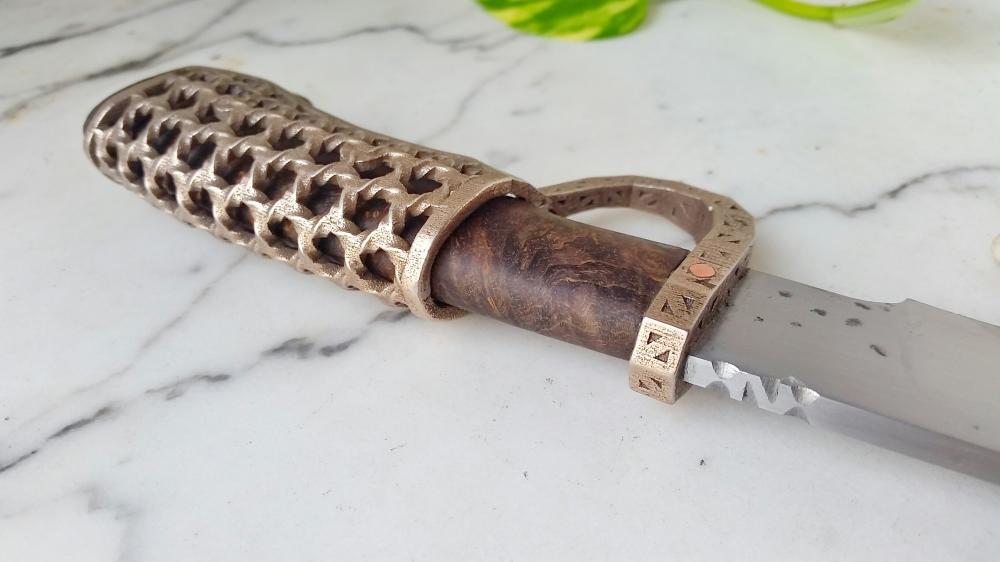
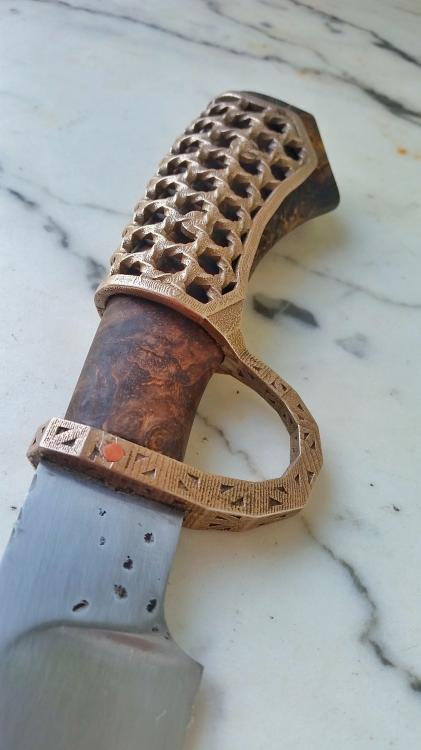
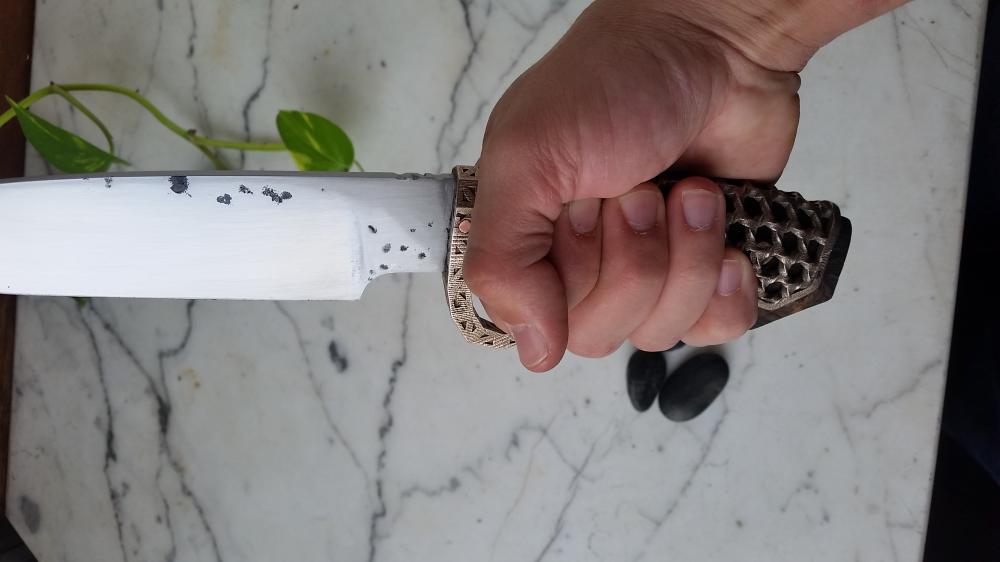
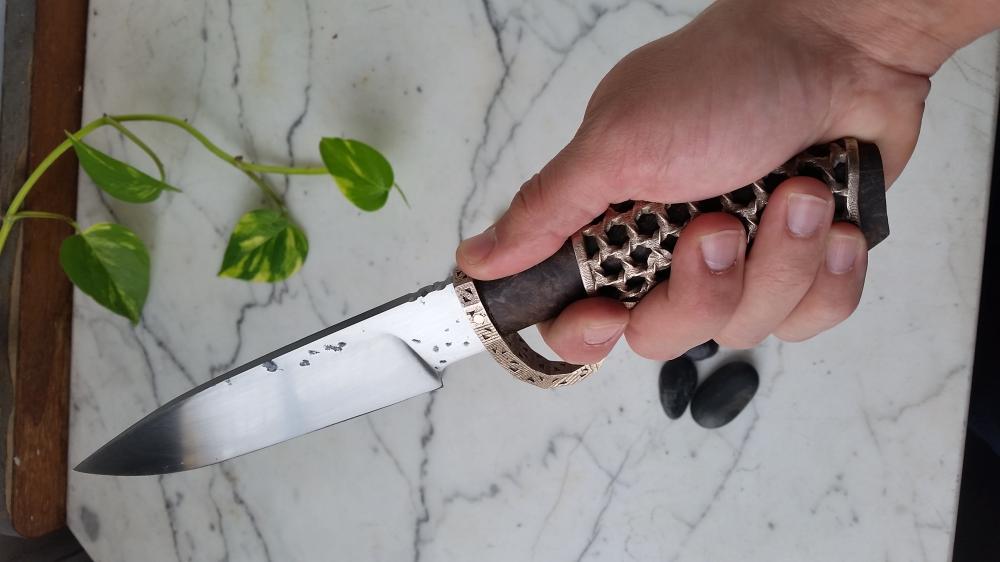
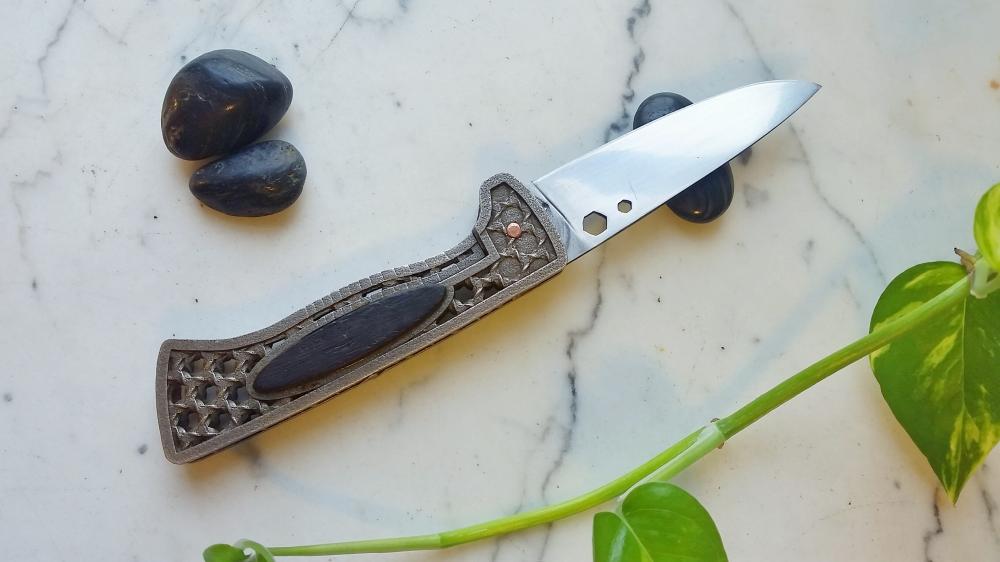
Hello again, Here is the piece I've been working on for several months, and even have a patent pending for aspects of. The honeycomb mesh is lofted 1mm-2mm, and allows for air flow under the palm in an attempt to maintain a solid grip through sweat/blood/etc. Swinging it around you feel a slight breeze under your hand. Here it is with the folder version (that I've been using heavily): The blade is W2 with a random hamon. After polishing to 1200 I gave it a quick hot blue, something I want to start doing for all my blades... however I then made the mistake of wiping it down after with 1200 grit in random directions, fudging up the satin finish a bit. Wood's stabilized burl for easy cleanup when it does get dirty, which it will; I plan on putting this design through it's paces after some more glamour shots. This'll probably be the first knife I send off to Sharp's or Point Seven... then I'll beat the living snot outta it. This is a prototype, and I can already see there are areas that can be improved. Where the ring join in the subhilt area needs to be perpendicular. I have to print and cast a thinner mesh to reduce weight and reduce the offset of the lofted mesh. The flow from the blade to handle could be smoother. While the edges of the printed components are rounded off and comfortable to hold, only once I start using it will I know for sure if they will need to be rounded off more. Let me know what ya'll think, Theo


-
Let's see what happens to that warp after HT; otherwise she's looking pretty good to me. The fun part happens after you HT, can't wait to see what comes of it. Whatcha thinking for the handle?
-
Thank you all It's nice to hear that Frosty, you're one of the many reasons I love this community so much. I only have three forging hammers; ball pein, 2lb cross pein, and a 4lb cross pein. Since I was forge-welding a long surface of wrought iron to steel I went with my lightest hammer as not to deform the iron and break the weld as I moved along. I should study up on my hammer types and uses, and probably invest in a couple more... or make em, although that's not typically my thing. Maybe a trade is in order.... I'm always happy to have people visit my shop space... all 80 square feet of it. Gotta come one at a time though haha
-
Here's another huge benefit of living in NYC; blacksmithing is magic to everyone here. To some it's a "lost craft" and to others a art form. Whatever they call it, it's all just good marketing to me This video was made by Matt Mandrus, his documentary series can be found here: paradiseproductions.squarespace.com/ Obviously there's a couple things I would like to change the wording on, or would have liked to put some more PPE for the shot... but overall what a fantastic job he did! He has thing for using the first take to show the more human side of me... and my inability to form a complete sentence haha. I love how he added a touch of himself too it to when he reaches out to grab the hearing protection. Leme know what y'all think
-
Looks good, can you tell us a bit more about it?
-
Unfortunately he never reached out to me - he didn't give me a business card or email or even a phone. It's my fault for not asking for one, but he seemed so interested in the deal I thought it'd be a sure thing.
-

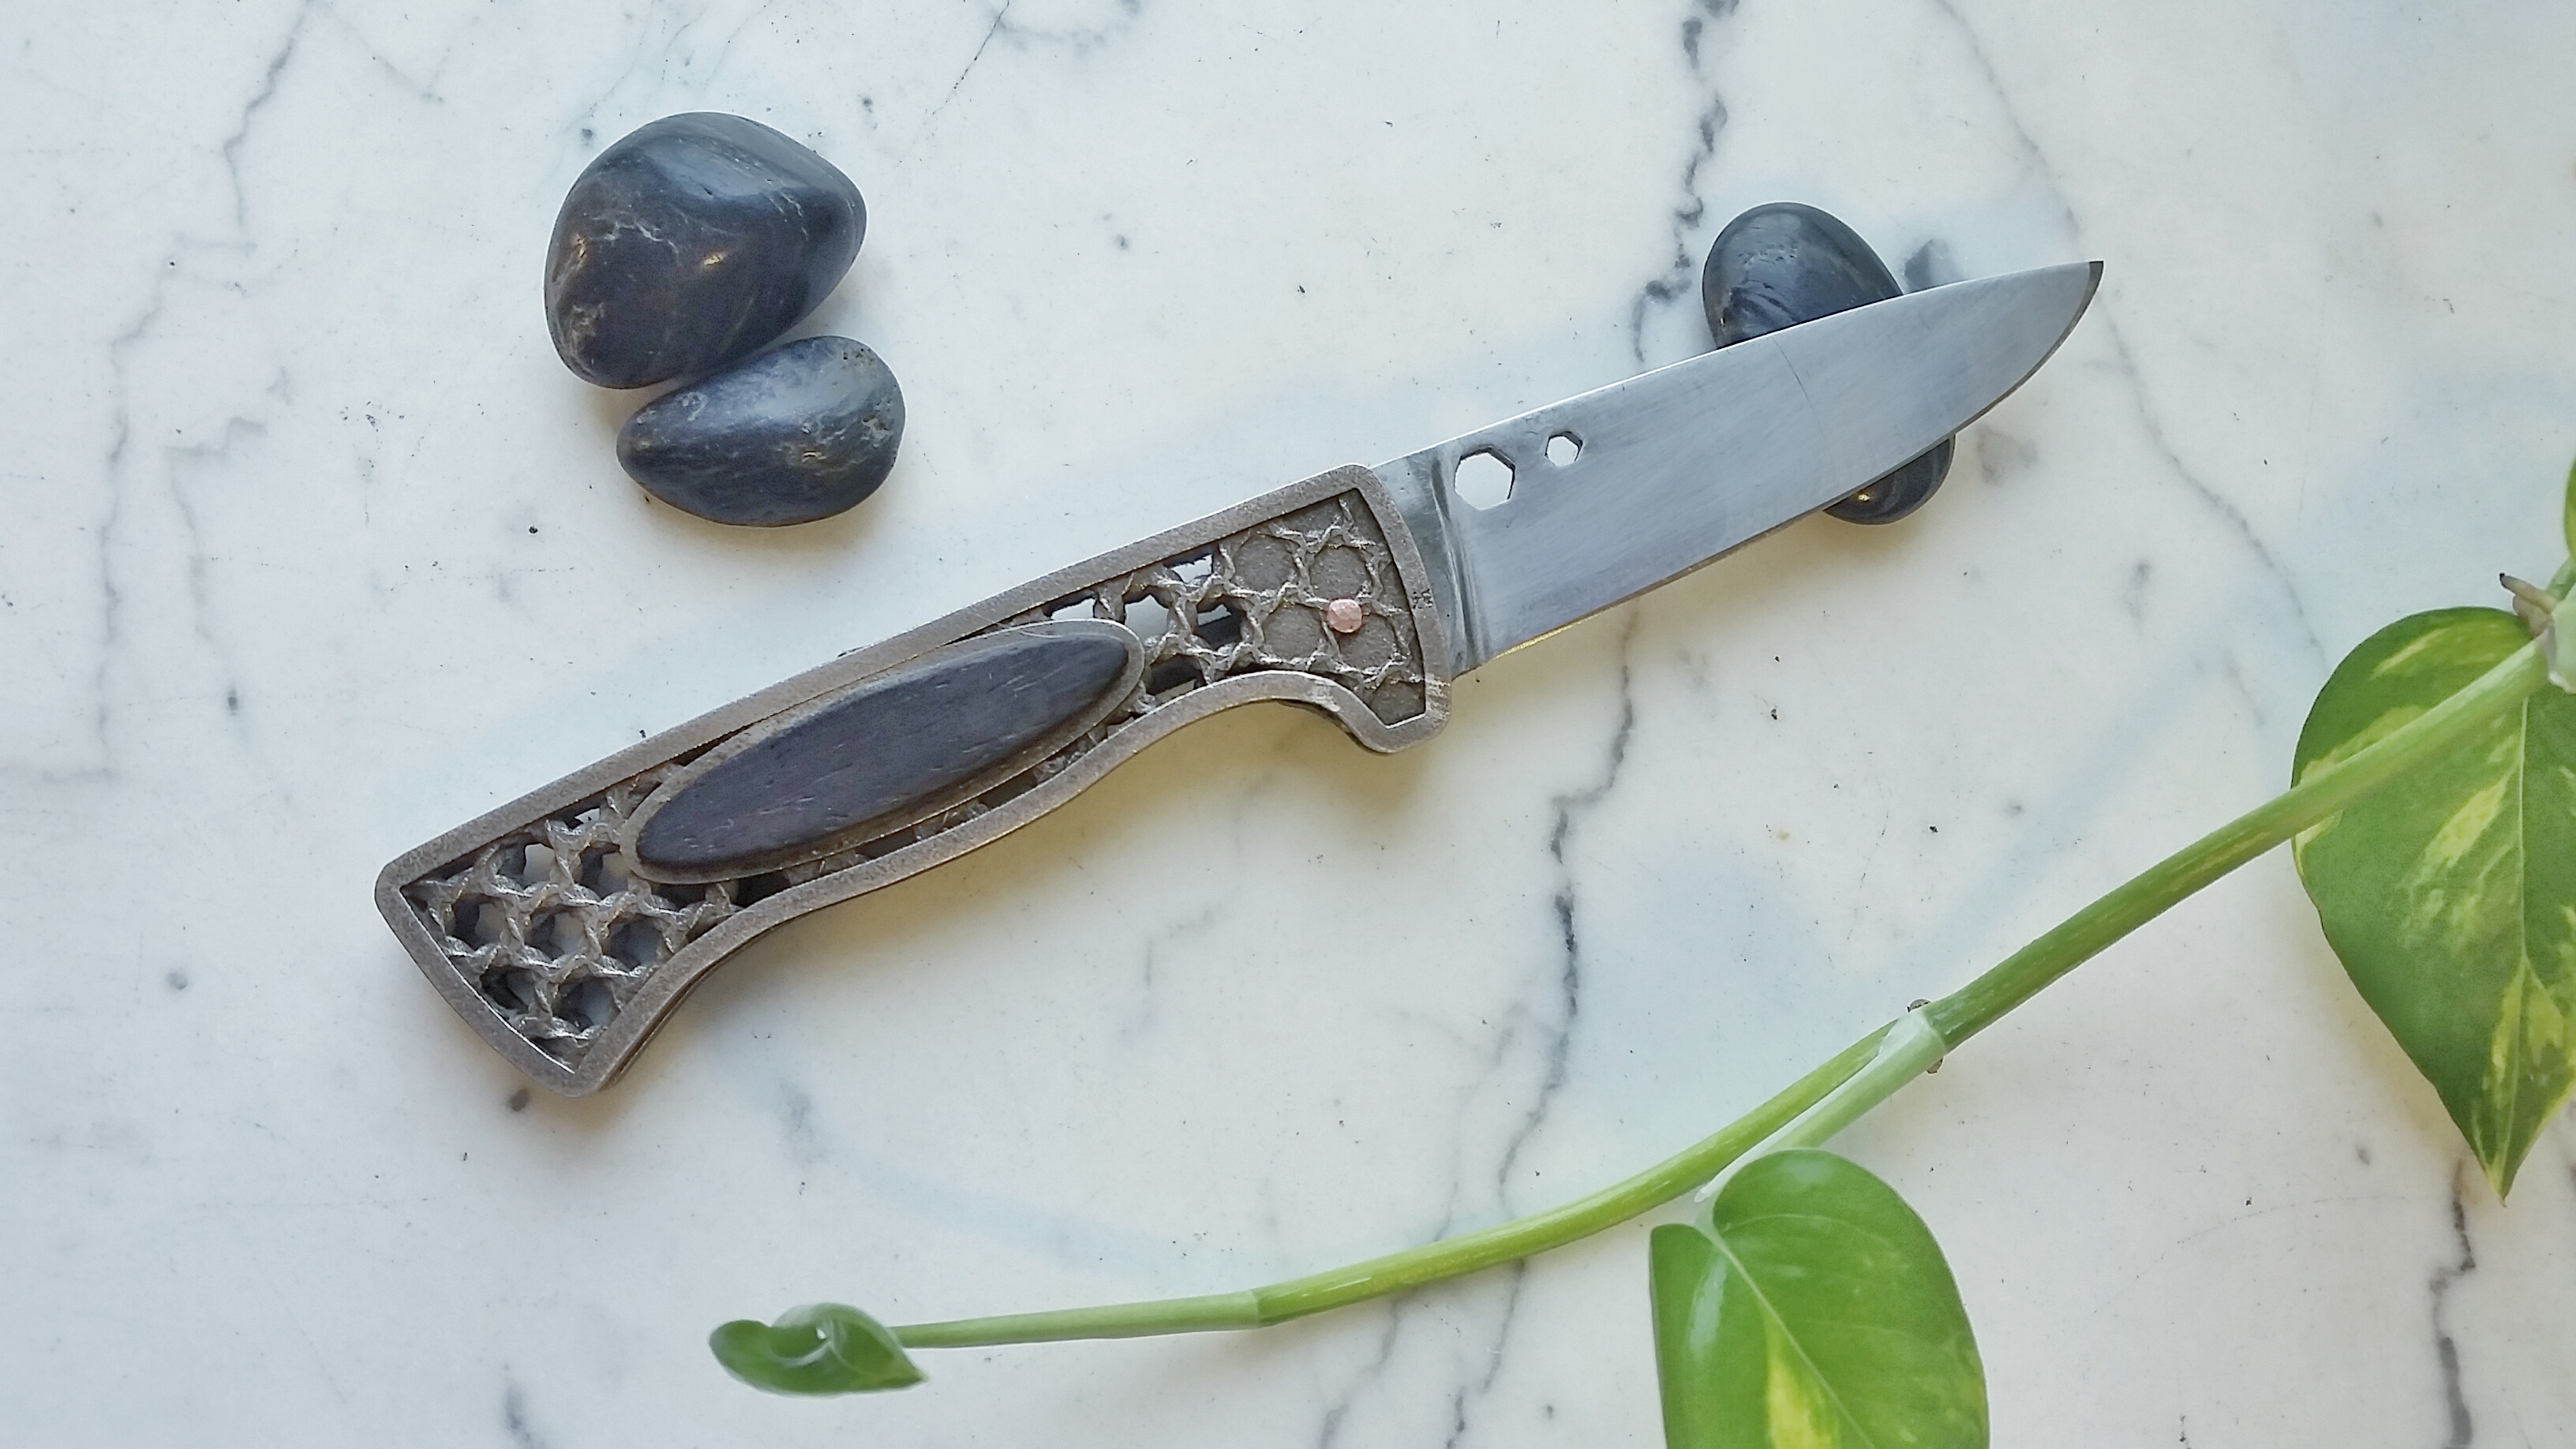
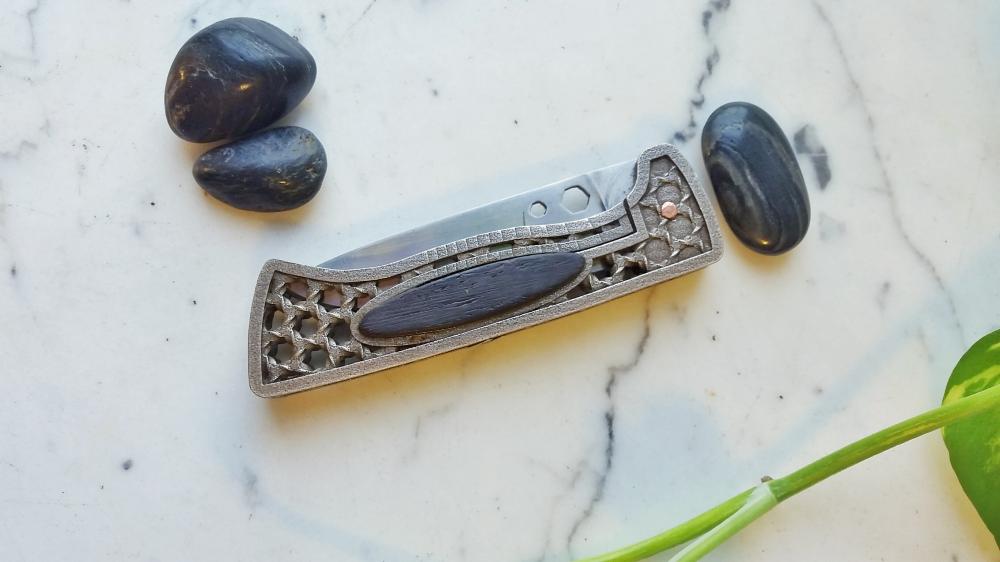
"Chassis" 3D printed cast bronze liner lock with W2 and iron
TheoRockNazz replied to TheoRockNazz's topic in Folding Knives
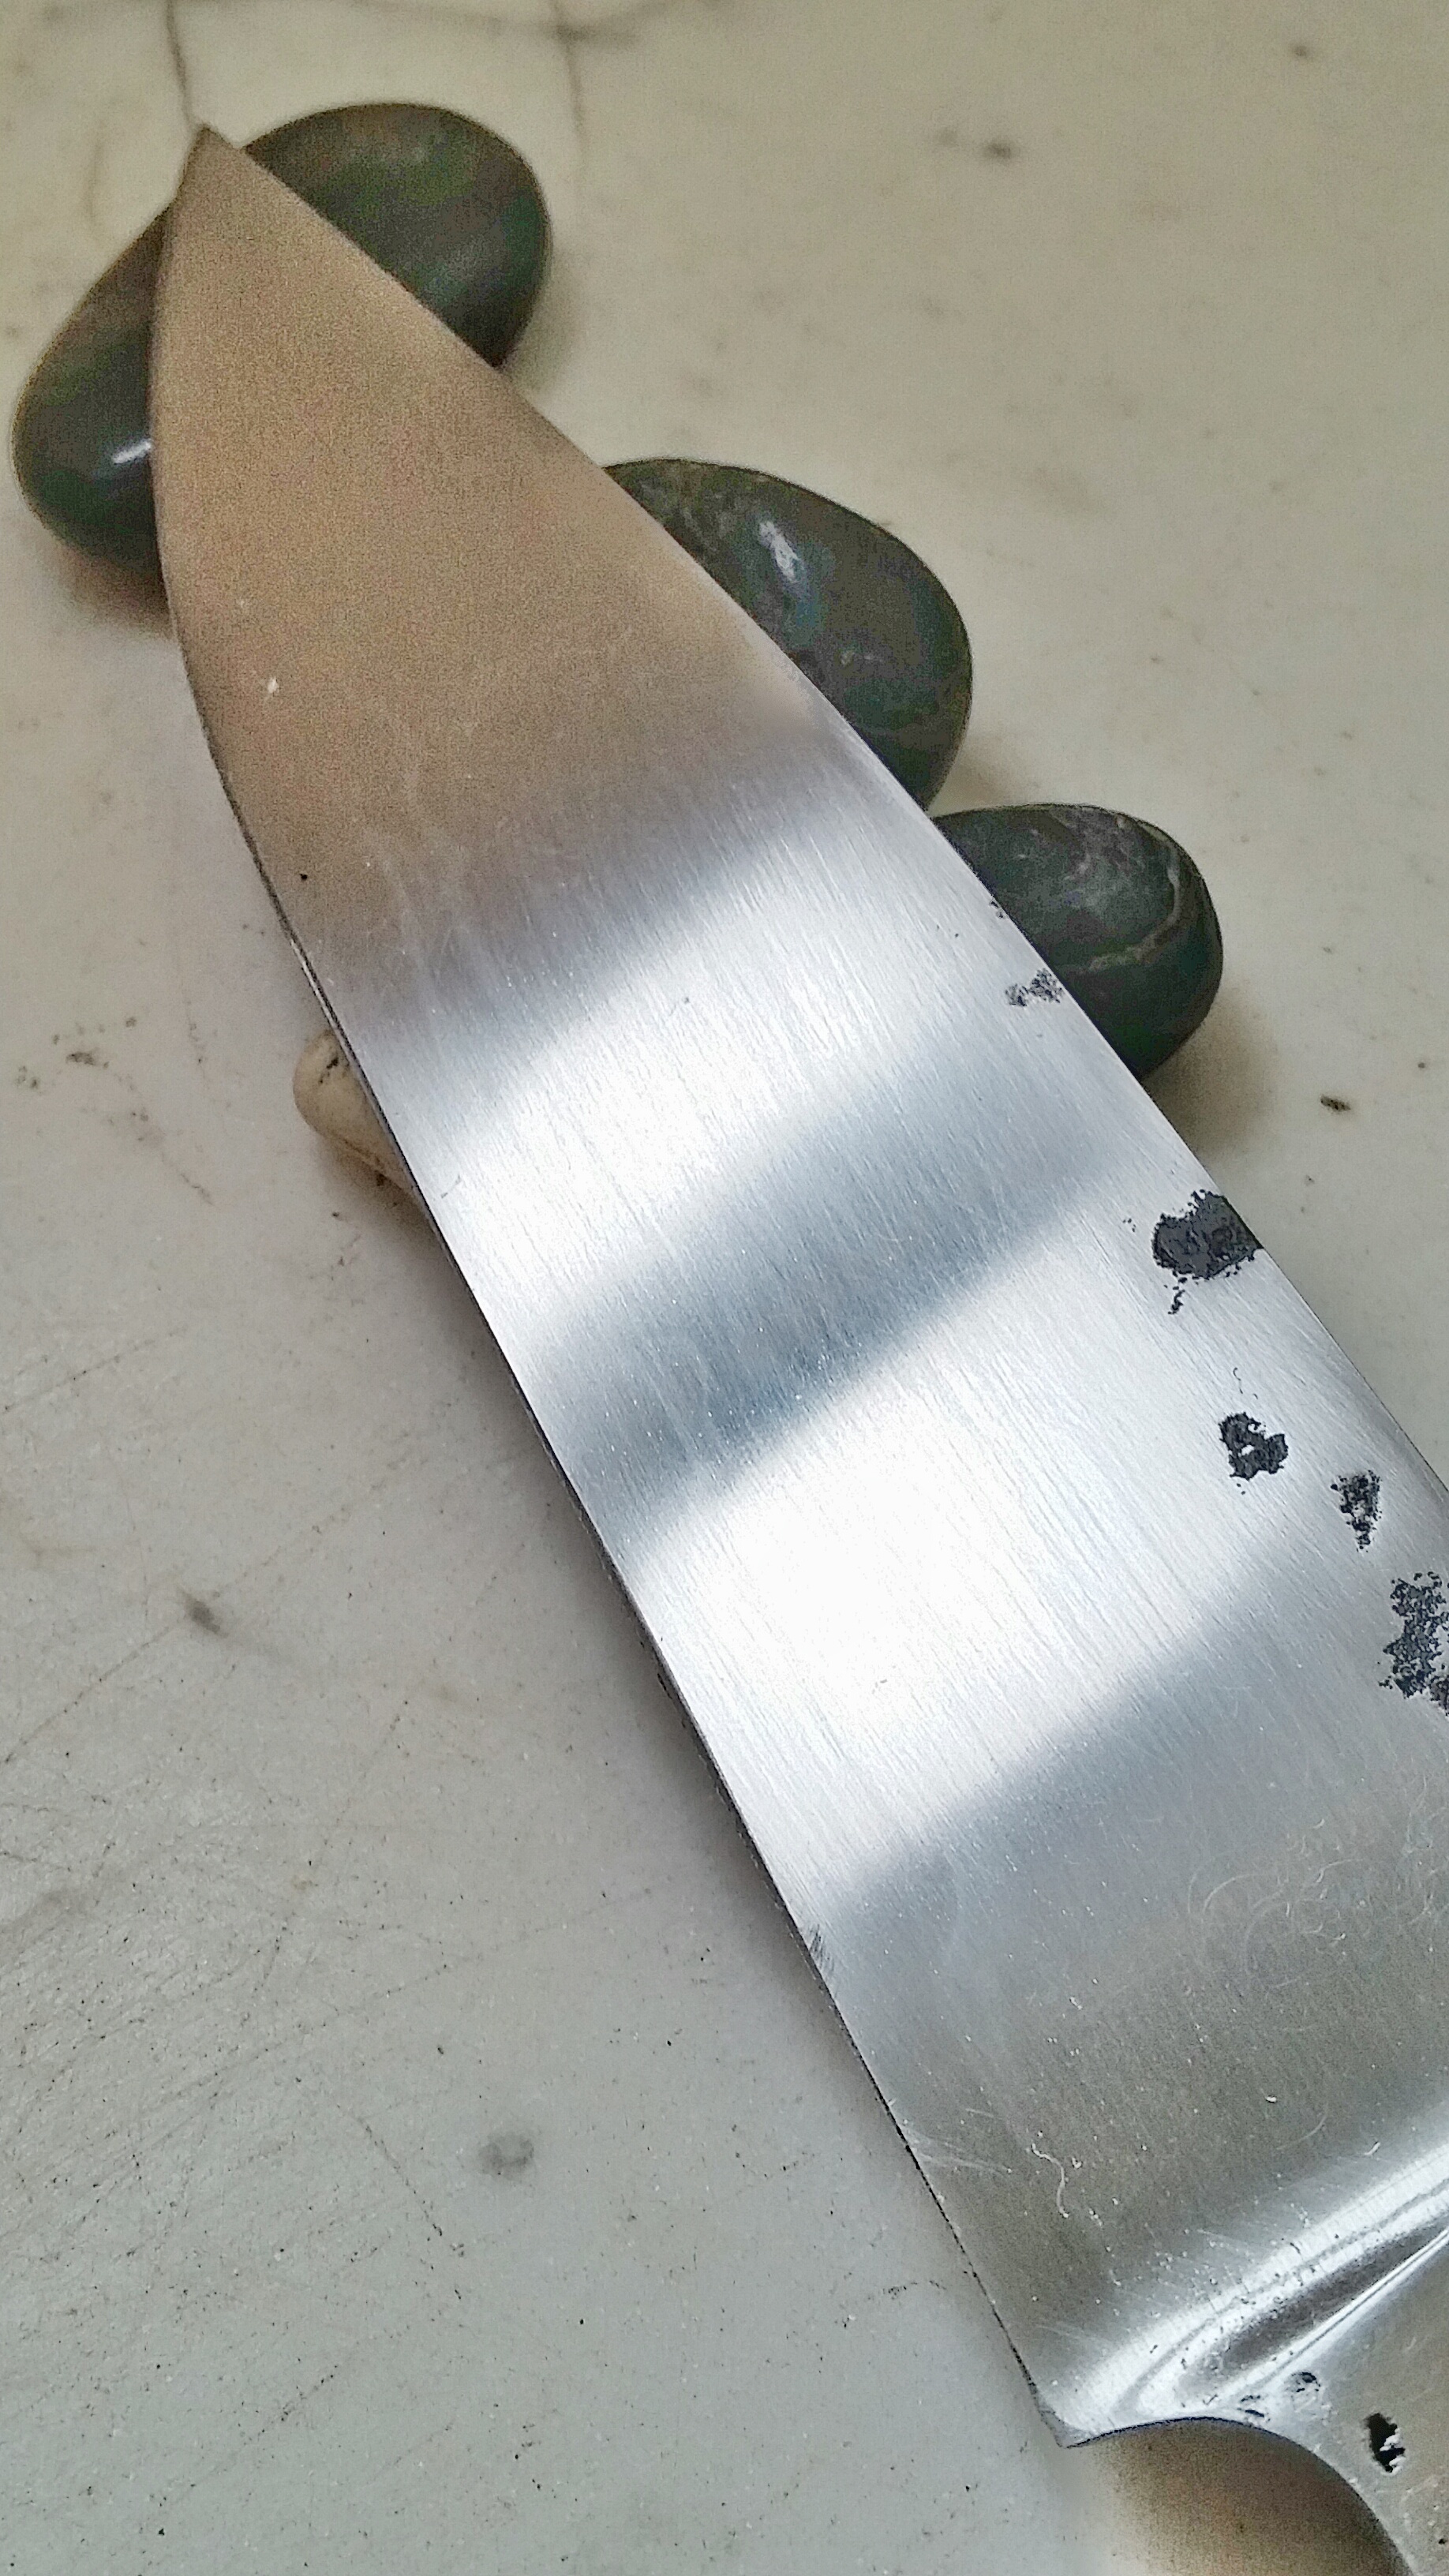
Experimenting with different blade shapes, I think I like this more W2 blade differentially hardened - I would never put a hole with a sharp edge in a hardened area, so the hamon is 1/4"" away from the edge. Gave this guy a quick hot blue, my first time doing that on a blade. Stupidly have been using it like crazy before taking pictures and got a nice scratch going already. Which blade shape do you like more?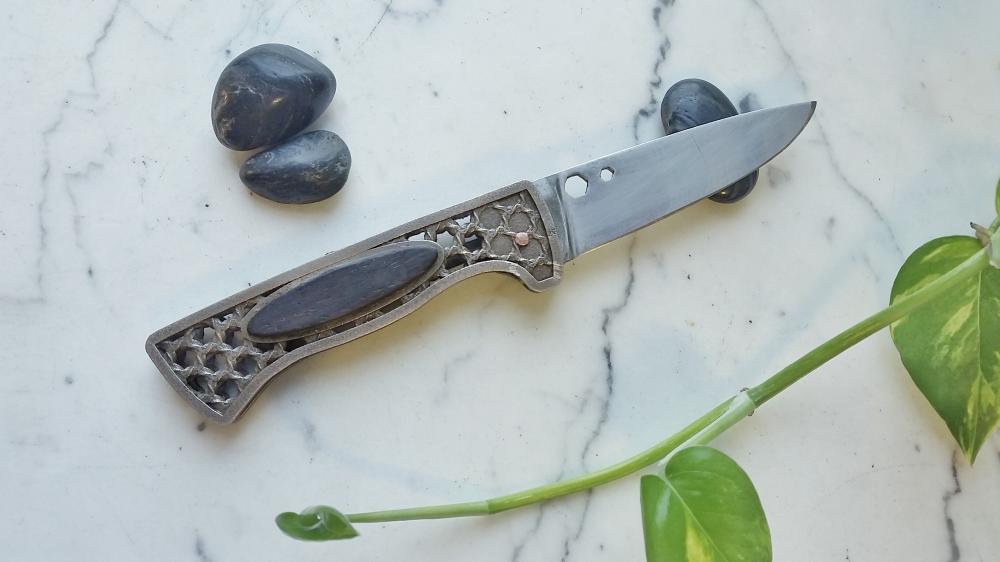
-
You better call yourself a blacksmith, not enough of us as is There are definitely spots where the steel is starting to stick. I would say focus on successfully welding up a san mai billet and then move on to more layers. The only reason that your first attempt at san mai failed was because you didn't grind off the teeth. It's important that the two layers are clean and have the same surface area, otherwise one face will constantly be moving and shifting. Try welding a clean file with mild steel, then a file and mild steel with saw band shims, then move on to low layer damascus. There's going to be a temptation to rush to more advanced stuff but it's important to get used to the way the layers want to shift before tackling a fat stack of em.
-
Interesting... no I have not... like a flower pattern or actual words/text/symbols?
-
Did that for this guy, would like to do something a little more elaborate

-
Haha, hobbit feet. Just kidding - outside the shop I always wear sandals, something I got from my old sifu.
-
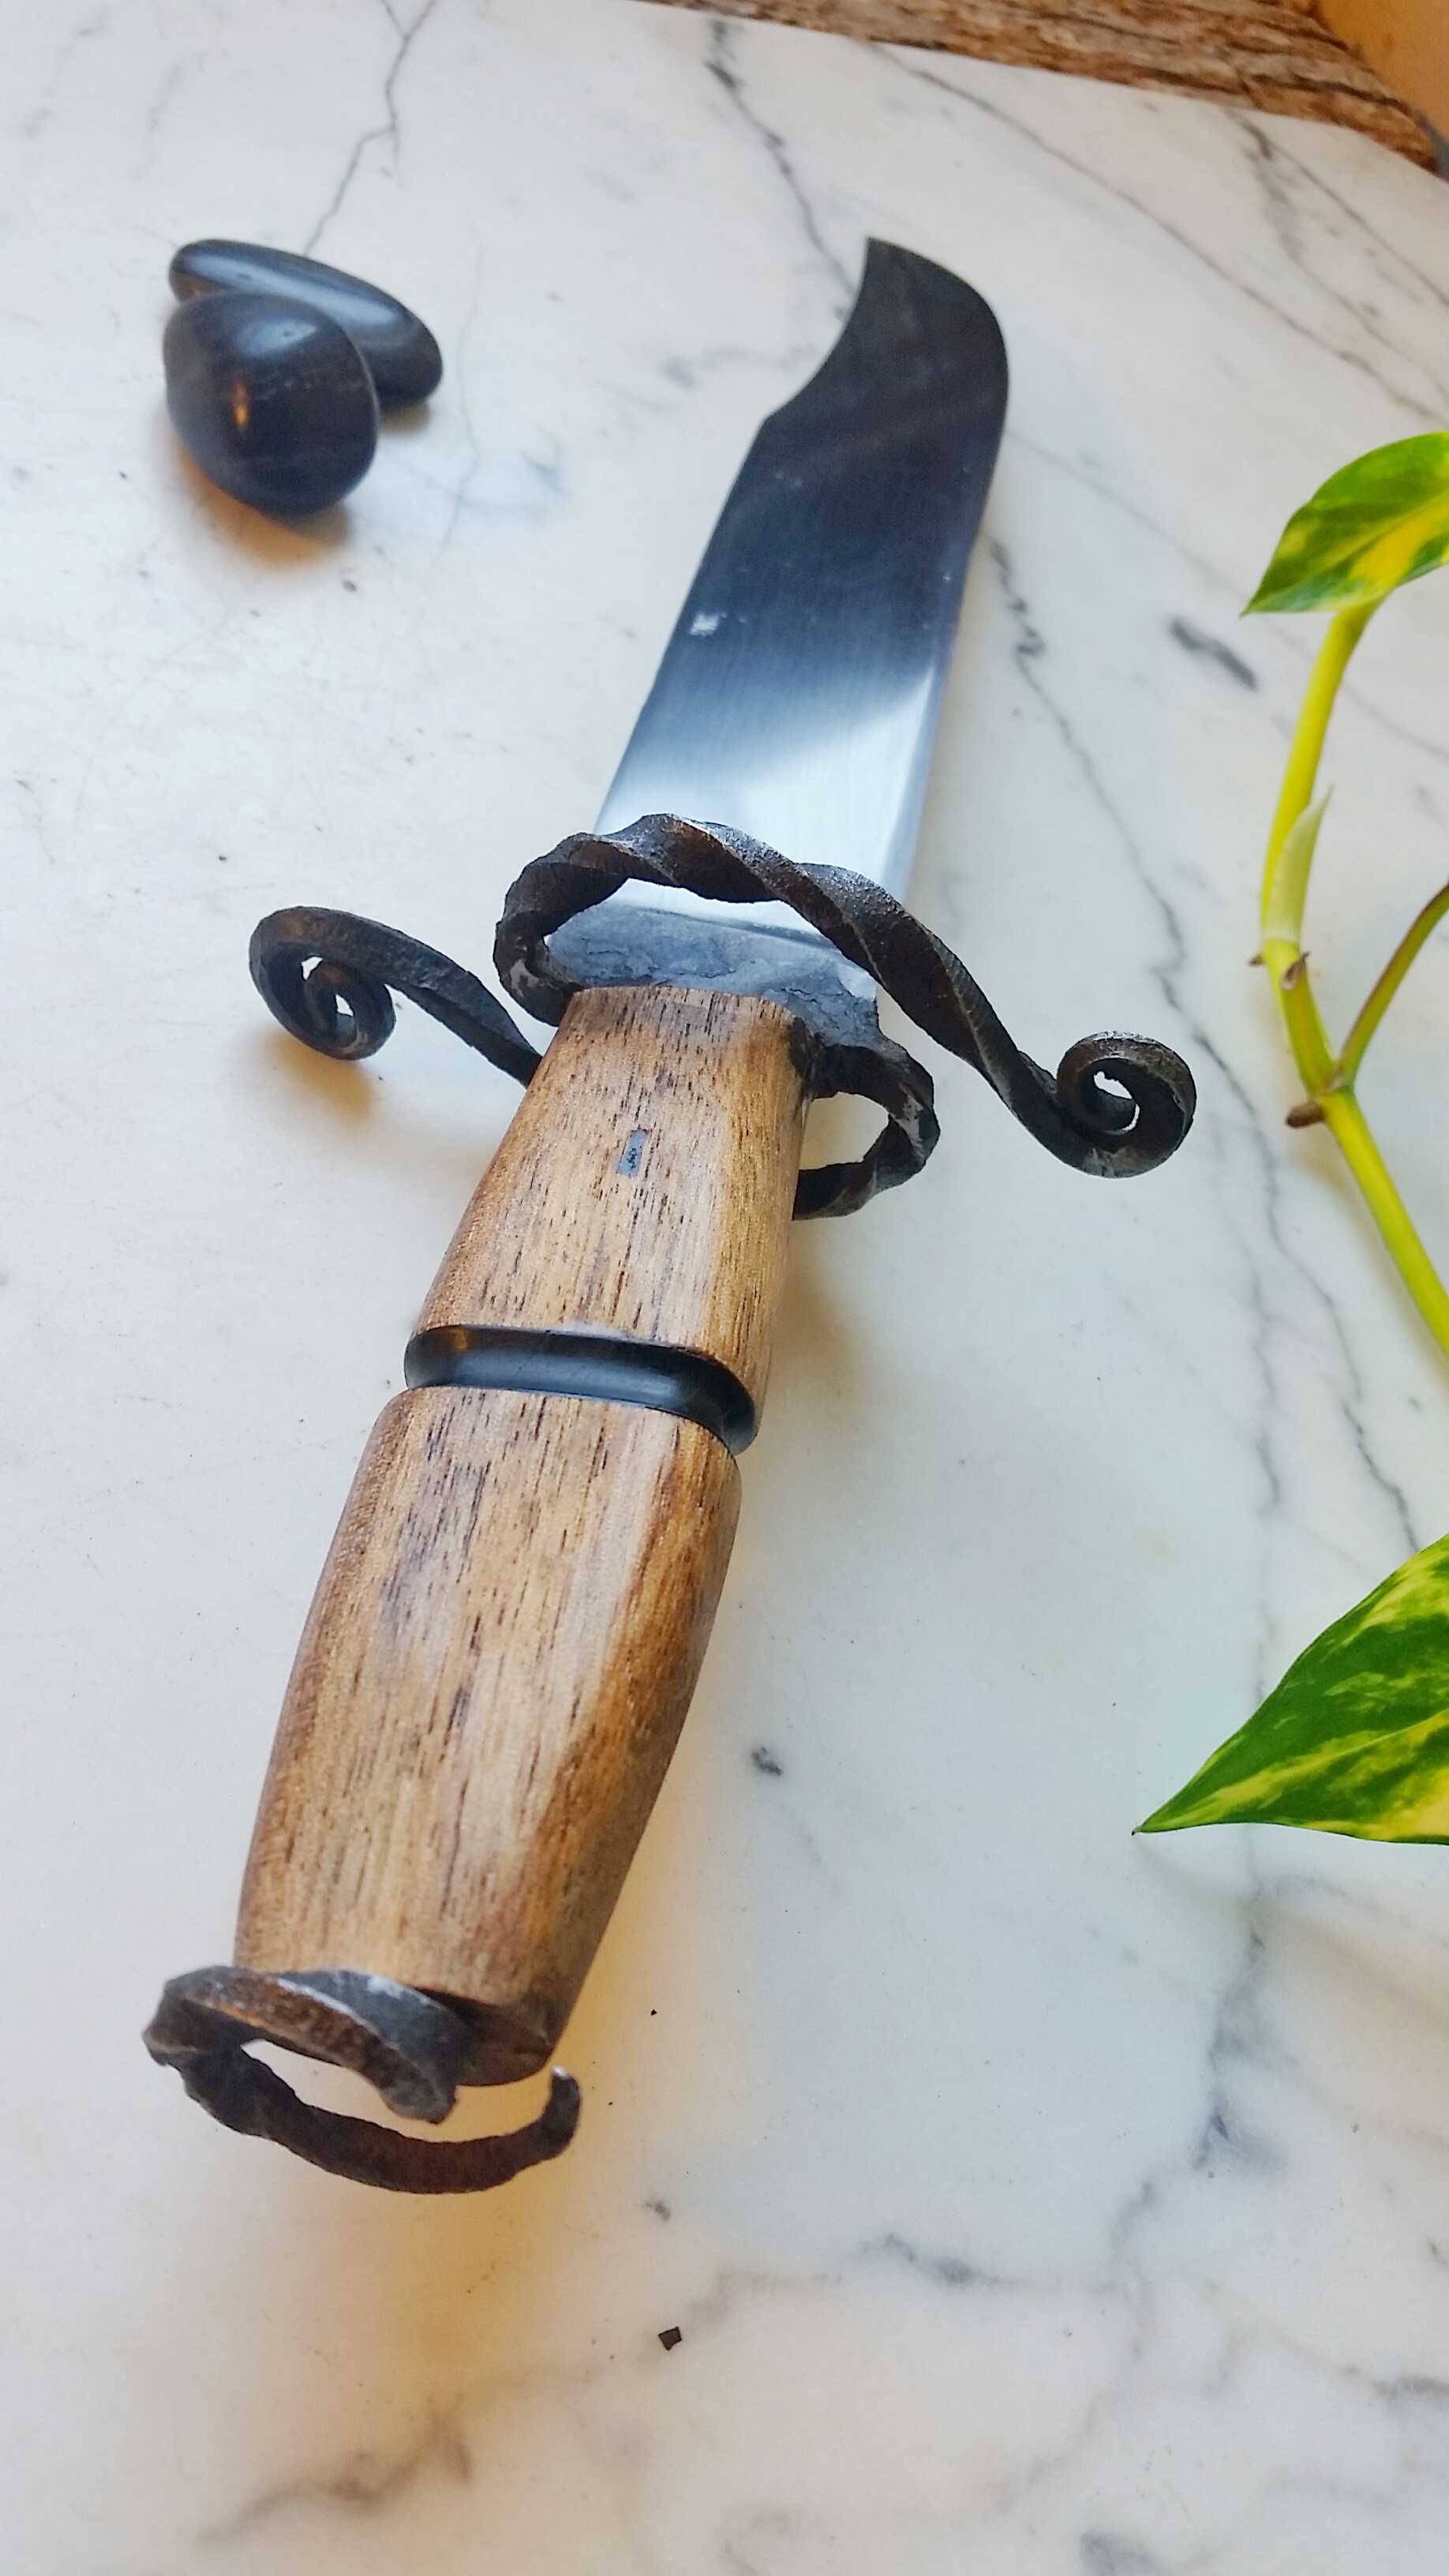
JWS: Yep, okay, you're right. I love integral knives, and thought the katzbalger was perfect for an integral guard on a sword. I also like a challenge, haha JME: That one seems to be everyone's choice. I have no mild steel in my stocks, gotta pick some up. Ah geez - why didn't I remember this before? - I should get some clay!
-
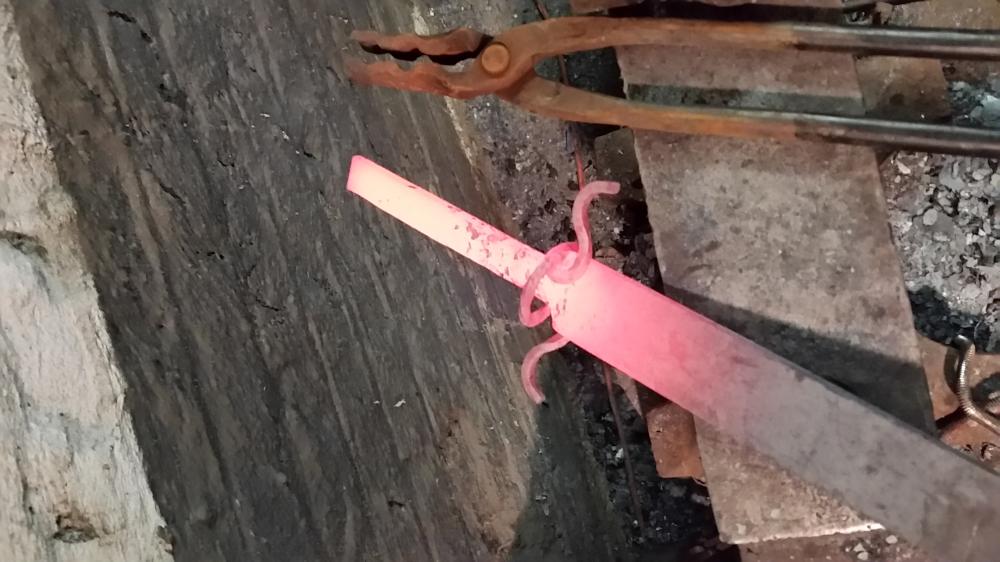
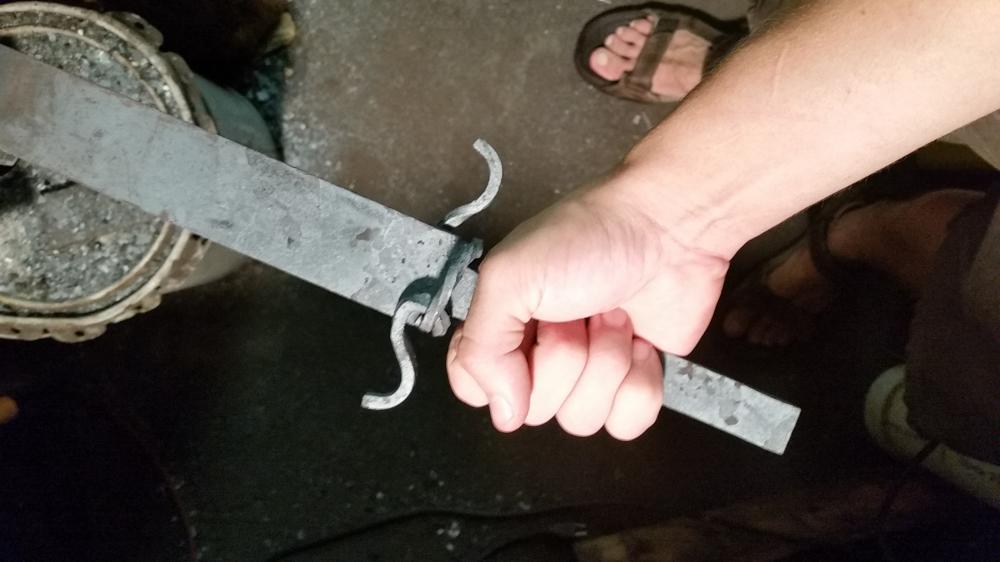
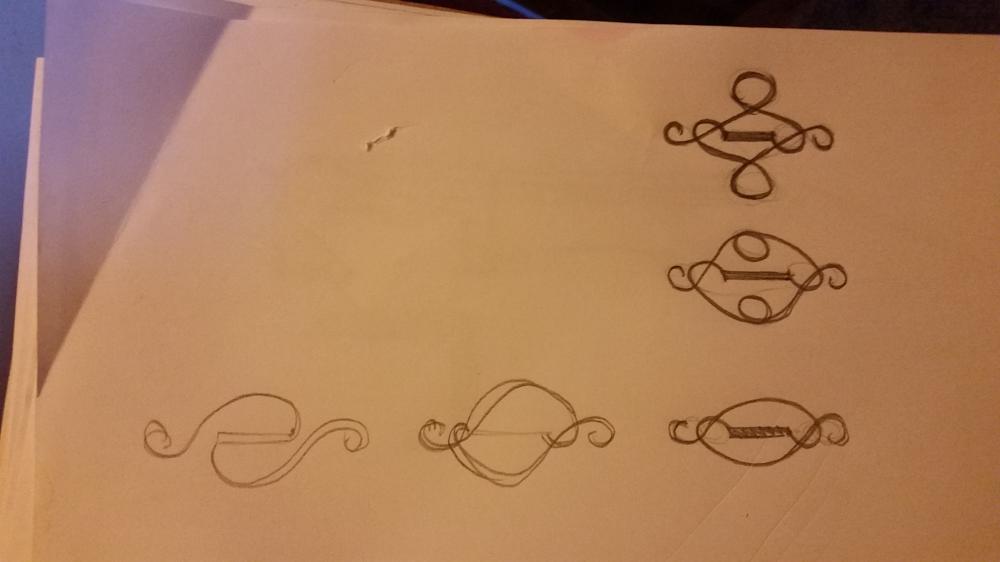
I've been working on another blade inspired by the katzbalger style sword... and honestly can't figure out if I like it. I think I want the whole guard to be broader, which would mean I need to untangle and untwist then draw out. I rather like the perfect squareness of the guard material though (I cheated and did the cuts with and angle grinder), and don't trust myself to perfectly squarely draw out the guard. Then I started doodling some other neat ideas I like a bit more, but only work if I draw out... but is it worth it? Maybe I set this guy aside and experiment. In retrospect I should have played with this design in mild steel first before cutting up a bar of S7

-
I love where this thread has gone The hand and power tools you already have will most likely do the trick. Drill, files, sandpaper, pins/roundstock, epoxy and boom you're good to go. HOWEVER there are many all-metal handle types to explore too if you don't feel like adding other materials. For instance, there have been several recent evolutions on the "viking"/"blacksmith" style all-metal knife by other IFI members that bring the blade's practicality and ease of use to new levels (and looks absolutely beautiful while doing so).
-
Looks great! I'm with Charles, now get started on the next one!
-
Hmm, guess I've been spoiled with the relatively modern iron I've worked with haha Should I fold it a couple times to try and unify the piece, or keep it as is and run with whatever intense grain pattern I get? I was going to twist it and use it for the spine, so impurities would matter less and maybe lend to the pattern?
-
Lookin good. How did you harden? I'd love to see a handle on the next one
-
FINALLY had the opportunity to start working that old iron. I need some advice from folks with more experience than myself at working iron: It moves and works like some of the wrought iron and pure iron I have forged in the past, and isn't cracking or falling apart like when you hammer iron or meteorite too cold... but I noticed if I try hard I can tear it. I first noticed this when I used the edge of the anvil to cut, it sort of tore the final bit through. Impossible to take pics of, but it looked to me like when you beat the snot out of copper without annealing it, then bend it til it tears... except with fibers/strands like torn leather. Afterwards I continued to work the metal with no issues, and no signs of tearing or cracking elsewhere. This has got to be because of the impurities in the metal - it is well over 500 years old - right? Has anyone seen/heard of this before?
-
Personally, I think the pins should be moved 1/4" away from one another - the way they currently divide the handle material into equal thirds isn't doing it for me. Are you still doing a bolster with the leftover damascus? I think that'd look awesome. Mosaic pins all the way
-
Those gaps usually happen when there's a burr, either in the slot for the tang or around the contour. I'm diggin the results, hurry n finish this guy up so we can see that next one
-
I like it a lot - big fan of file knives. I'd love to see a straight profile shot. Bladesmiths typically forge a knife specifically geared towards the ABS tests - I hope you don't plan to bend this puppy 90 degrees in it's everyday use haha
-
I know a few members like to forge to shape for heat treat, without grinding or minimal grinding. Can put you at risk of warpage if your blows aren't precise. After HT you'll have much less grinding and sanding, and will have some hammer marks. Occasionally customers request a forge-finish blade, which I'll usually do the above for.