
knots
-
Posts
734 -
Joined
-
Last visited
Content Type
Profiles
Forums
Articles
Gallery
Downloads
Events
Everything posted by knots
-
No 220V outlet. 110V or Oxy/Acetylene?
knots replied to Harris Snyder's topic in Welding/Fab General Discussion
Flux core welder ? That was a question for others on the forum who might have had experience with them. Just asking for information that might have been helpful. Nothing wrong with a stick welder other than for delicate welds it will require a lot of clean up grinding. Basically a good first choice with a broad range of capability. When you get a chance show us some of your work. Good Luck -
No 220V outlet. 110V or Oxy/Acetylene?
knots replied to Harris Snyder's topic in Welding/Fab General Discussion
Very true. However In hsnyder's case money seems to be a barrier to making the easy choices. One point not discussed is the cost of an OA welding set up and refills of the tanks. I rent my tanks at a cost of close to $200 a year. Buying in the long run is cheaper but the larger sizes are generally not for sale and small tank refils get to be expensive if you are really doing some welding. A decent torch set is not cheap so OA welding is not economical to maintain and use for welding. An arc welder OTOH can be puchased on Craig's list for $150. A stick welder is basically plug and play. For a tight budget you can't beat that option. There is one other option that I have never tried that may be a decent choice for someone on a budget that needs to weld up small and uncomplicated things. For a little weld here and there what about a flux core wire welder ? Could that be a decent option ? -
No 220V outlet. 110V or Oxy/Acetylene?
knots replied to Harris Snyder's topic in Welding/Fab General Discussion
hsnyder - Understood . Welding sheet metal with a stick welder may be a bit more difficult than you expect. But there are a couple of things that will help with that and other welding proceedures. First get an auto darkening welding hood. When welding thin materials that want to burn through find a piece of copper plate to place below the weld to act as a heat sink. Weld with dry electrodes. My rod drier is a 1 gallon bucket with a 75 - 100 Watt light bulb mounted inside bottom of the can . Place the rods inside the can with the light on and then put another slightly larger can over the paint can. Let them cook for a couple of hours before use. The pros will find this contraption little better than a joke but even a semi dry rod welds smoother than a rod at ambient moisture content. If at all possible purchase an AC/DC welder. My first welder was a Sears AC/DC buzz box that I got back in the late 70's. Sometimes the welding polarity really makes a difference. Research that. These machines have been around a long time so you may be able to find a used one. Used buzz box welders seem to go real cheap in Craigs list. Maybe ciladog's carbon arc torch would offer more control for welding thin metal ? I have never used one so maybe someone with experience could chime in. Good Luck -
No 220V outlet. 110V or Oxy/Acetylene?
knots replied to Harris Snyder's topic in Welding/Fab General Discussion
Personally i do not and never have liked flame cutting. I have kept a oxy acetylene welding torch in my shop for many years. I also own a plazma torch but seldom use either for cutting. I just do not like dealing with finishing flame cuts. That is except for cutting up scrap. So torch cutting is not something I use much. There are many other cleaner and more useful means of cutting metal than with a torch. To many to cover here but for a small sparsley furnished shop you might look at a good quality saber saw equipped with a metal cutting blade. A cheap beverly shear rip off from HF would be very useful for sheet metal. Abbrasive cut off saws are a staple for many small shops. There are even metal cutting blades that can be used in a hand held power saw available today. Then there is a world full of high quality new and used metal cutting equipment to aspire to own. A mig welder on the other hand is a basic tool that will open new doors of oportunity. They require little skill to make good quality welds within their claimed material thickness range. By using a copper back up heat sink behind thin sheet metal joints, these joints can be welded easily using .023 wire ( avoid galvanized sheet metal). Or if needed thicker metal can be welded in a pinch, with preparation . These are operations which require much more skill and heat ( which creates warpage) when using OA. IMO, the OA set is most useful for heating iron to bend, twist and and form where a forge is not practical. If you are doing a lot of twisty, bendy things that cannot be put back into a forge then an OA set will be indispensable part of your kit . If you want to weld things fast and easy get a mig. If you want to make welds the traditional way learn to forge weld. The nature of your work is not clearly described so I cannot know what is of most importance to you. However I am a believer that MIG is a basic piece of equipment for any metal working shop where iron is being fabricated. -
Nice repair. One thing that I have done to make the face really flat is just touch the face with a belt sander between grinds. This shows where the high and low spots are. Then grind accordingly. But as we all know less is more where grinding an anvil face is concerned.
-
No 220V outlet. 110V or Oxy/Acetylene?
knots replied to Harris Snyder's topic in Welding/Fab General Discussion
Or make (or buy) an extension cord to take power from the wifes electric drier out let. I welded with that provision for years before getting a propper shop with 220 v power. -
Although you can do what could be called forging with a fly press forging is not an ideal application for one. They are better suited for die forming, slitting, punching, flattening, embossing, and other operations requiring a limited number of strokes for each operation. If you want a to do forging go for a hydraulic press or a power hammer.
-
Looks like a nice serviceable anvil. Good price. I wouldn't worry about the side clip horn. From what I can see it was arc welded on. It being gone is no loss. Bottom line I would have bought it.
-
These presses were generally used as tool room presses for testing dies and tooling being made for fly presses that were used for production . When I first discovered google books I was able to find an old Waterburry Ferrell catalogue which described its use. The 1 1/2 " pitch screw is considered less than ideal by some and undesireable by others however the old time tool makers found them useful. Mine was probably manufactured in the 1920's - 30's. Presses identical to mine were manufactured by Waterbury Farrell form the 1850's on . Somebody must have considered them indispensable. It is old technology replaced by hydraulic presses but I still like mine.
-
Search "Oil Quenching Container" or have a look at my gallery for pictures of my quench tank made from a 40 pound propane tank. You will see that the domed tank top is used as a lid ( the dome side flipped and hinged drops down to seal the tank with a tight seal ) The lid domed side down really does seal the tank, really wedges home . An old metal wheel barrow wheel was used as a base. I also fabed a basket tray with a long handle to catch whatever you pitch into the tank. The tight seal of the dome dropping down to seal the tank reduces the amount of smoke being released into the shop. I have been very pleased with this QTank . The 40 pound tank size will hold enough oil to quench power hammer dies , hammers, and other similar sized forgings. Here is a link to the thread - Go to post No. 18: http://www.iforgeiron.com/topic/16859-oil-quenching-container/#entry210050
-
Using a chisel as an anvil?!
knots replied to caotropheus's topic in Anvils, Swage Blocks, and Mandrels
Well a 4 1/2" grinder with a cut off blade will not cut deep enough for a through cut. It would probably take an 8" cut off to do the job, and then by cutting from all around the piece. What tools are available to you . When cut it occurs to me that if you could create a socket sleeve to a fix to a stump. The "sharp" end could be ground to a rounded profile to serve the same function as the anvil horn. The socket would allow you to easily flip end to end for flat and rounded forging surfaces . The socket could be a close fitting piece of pipe with a mounting plate welded to the bottom. Good luck. -
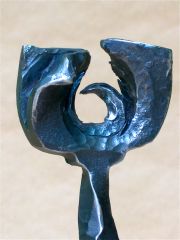 kalevera - Very strong image. I look forward to seeing more of your work.
 -
If the problem was only the access for clearing the air tube, You could just chop out the lower front opening and install a wider arch back to a convenient depth. That might also allow access to the air tube so that you could reroute for your electric blower. The fire pot might even be moved forward for better vision. Additional information would be helpful. Is the forge table concrete or steel, the support blocks solid or hollow, is the height a condition that can be lived with ? To remove and modify the masonry may seem an impractical task. However if you use a hammer drill to drill out the mortor joints it can be done neatly and with relative ease. I hope you can fix it because tearing it out would really be a loss. One other thing - You should be able to fasten tong racks to each side without limiting access to the forge.
-
If all else fails use lump charcoal. But not the briquettes. I used charcoal for a couple of years before switching over to Propane. Works just fine but is consumed faster than coal.
-
I posted a similar thread a while back, probably a year or more ago. You might look for that thread. I have a really old steel from my grand mother's estate. I used an extra course diamond hone and draw the hone down the length of the steel. It doesn't take much texture to do the job. Some say none ( no texture) is needed for a properly sharpened blade.
-
Seems like finding a piece of round 3/4"plate the right diameter on any scrap pile is a non starter. However a nice square piece of plate near the correct size might be findable and workable. The corners of a square plate could be trimmed to form an octagon for a close approximation to round. If your welding table is 3/4" plate why not build it into one corner of the top ? Or if really desperate laminate a couple of pieces of plate together to form the base..
-
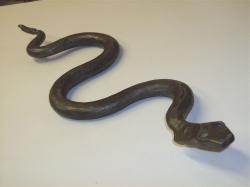
Basically a doubled tuning fork chime element. That is a unique Idea so far as I know. Very cool.
-
Is that line at the step the exposed edge of a plate ? If so it looks like the plate is about 1/4" thick. Cute little anvil. 4 x 12 + 48 pounds ?
-
Lots of good surfaces to work on. How about finding a piece of round bar that will fit into one of those holes for a horn. Shove it through and have a double horn ?
-
New Find 50Lb Anvil, is it a fisher?
knots replied to PaulKrzysz's topic in Anvils, Swage Blocks, and Mandrels
It is kind of light for any real forging . The lightest anvil that I have ever used was 85 pounds, a nice little Brooks. I used that one for demonstrations It was a cast steel anvil so you could beat the living daylights out of it without damageing it. But it had to be fastened to the stump or it would move around a lot. It does look like you may have a Fisher. If it is and is like mine the plate is really to thin for heavy hammering. Mine was not used all that much but still deformed along the edges. OTOH a lot of folks have started out with steel rails or blocks lighter that your anvil. To be sure it is a keeper. Just start out with a lighter hammer , say 2 or 21/2 pounds. start with 1/2 or smaller bars until you get a feel for how much it will take without damaging it. Be sure you iron is up to forging heat and stop forging when the metal stops moving. Fasten the anvil down securely before any serious work is attempted. I like Z clips for securing the anvil to stump. Nice anvil use it It will always be a decent demonstration anvil . -
New Find 50Lb Anvil, is it a fisher?
knots replied to PaulKrzysz's topic in Anvils, Swage Blocks, and Mandrels
I just tested the sound of my small Fisher. No ring but a higher pitch sound than my 300 pounder. The sound is more close to a "clink" than a thunk . Never used this one. Saving it for a grand daughter who is developing into a jewler. -
New Find 50Lb Anvil, is it a fisher?
knots replied to PaulKrzysz's topic in Anvils, Swage Blocks, and Mandrels
I have a confirmed FISHER that size. It is marked FISHER on the front of the anvil base. I looks like yours and has a cast recess in the base mirroring the base shape. That is the base recess is formed by a 1" wide border all around. The anvil appears to be cast. No handling holes. And has a raised feature below the plate on the side of the anvil. The plated top on mine is no more than 3/16" thick. It looks right for a Fisher, BUT Fishers do not ring, they go thunk. At least none that I have ever known of ring. Also are you sure about the anvil being welded segments. Fishers are cast solid with casting mold lines that could be confused as welds if you don't know otherwise. What about the diagonal feature that appears to be a crack ? -
It appears that my post is the one referenced in the quote posted above. The last statement is the most problematic. The Implication is that my comments have no substance or basis to justify serious consideration is just wrong. I have been involved is forging Iron for 38 years. I bought my first anvil in 1974 and have been forging since then. For the last three or four years age related deterioration of and arthritis have take their toll on my body joints, including my hands and wrists. Consequently I have given a lot of consideration to how I hold and use hammer. The picture below shows the condition of my hand and wrist. The swelling is chronic, yet I can still forge iron by hand using the technique posted above using a loose grip and limiting the rotation and loads applied to my wrist. And this with out serious discomfort if my forging sessions are limited to a reasonable period of time. Although I do agree that we should should seek out the best source of advice when at all possible, the idea that we should make no attempt to "self evaluate" when problems of any type crop up seems outrageously narrow minded. The question "Wot would you have them look for and how would they know wot they were seeing or feeling?" is answered in the text of my post. Which focused on the moment of hammer rebound from the anvil, and one way of using that rebound to position the hammer to reduce stress on the wrist and forearm. I believe that the best part of this forum is generating a robust discussion while keeping the tone of posts civil .
-
I would add only that you should take time to study your current technique and analyze each segment of your swing to identify and then modify any part of your swing that feels uncomfortable. A good time to perform this analysis is when you are having problems because the discomfort will be more obvious where there is a problem. As has been stated before use the Hammer rebound off of the anvil . My preference is to use the rebound to position the hammer above the hand immediately as the hammer rebounds from the anvil. Check out post # 52 in the link below to see how this old guy avoids exposing the wrist to overloading. Contrary to some opinions I believe that a small amount of body motion is good to get the hammer moving up used with the anvil rebound. Loosen your grip as the hammer rebounds off of the anvil to allow the hammer to rotate up above your hand. Keep a loose grip and use your three lower fingers to manipulate and accelerate the hammer during the swing. Close your grip on the down swing to accelerate the hammer using your thumb and index finger as a fulcrum. If I were to identify the moment of most stress applied to the wrist it would be on the upswing if you are using your wrist as a primary source to propel the hammer up or even leaving the hammer in the extended position while your arm and shoulder raise the hammer. We each have our own methods. There is no one best way yo do anything. Use all of the above to find a way that works for you. Then share your method. /www.iforgeiron.com/topic/25575-mark-aspery-hammer-challenge/page__st__40#entry260134
-
I got either an anvil or a boat anchor.
knots replied to bhardy501's topic in Anvils, Swage Blocks, and Mandrels
If it is a Vulcan and you are intent on repairing it. You will need to use a special electrode for the first weld pass or two to provide a transition from the CI the the new steel alloy weld repair . There are a few repair electrodes that are recommended for welding cast iron and for joining dissimilar metals. This intermediate weld will bond to the cast iron and the following courses of weld will bond to the special alloy foundation weld. However these special alloy rods are pricey so may impact the decision of whether to repair or not.