
knots
-
Posts
734 -
Joined
-
Last visited
Content Type
Profiles
Forums
Articles
Gallery
Downloads
Events
Everything posted by knots
-
Here is a magnetic sweeper that I find very easy and convenient to use. The sweeper is made from a commercial roofing nail pick up magnet on a handle. The magnet is 3 1/2" in diameter and fits neatly into one of those cheap plastic storage containers usually used to store food. Mine came with the purchase of lunch meat. The only fabrication required is cutting a small opening in the end of the lid for the handle stem to pass through. Once assembled and swept over the floor release of the collected steel filings from the container bottom by raising the magnet above the container bottom. I have used this magnetic sweep for years with a zip lock bag which allows quick release of filings but this lunch meat box system works much more easily.
-
Nice scrounge ! It looks to me like it might be a die that was part of a big tube bender kit. If so it is very likely heat treated which is very good. If it were mine I would look for a piece of round bar that was a good fit for the hole and Insert for use as a horn. At 60 - 70pounds Just find yourself a stump, rout a recess in the top to fit your new "anvil" and forge away. If a router is not available picture frame the stump top with 1 x 2's to fit . Improvements can be made later. You might want to weld some bolt down tabs on it sometime in the future but for now it is just important to get to work so keep it simple and make adjustments as needed, when needed. That "anvil" is plenty large enough to do some serious work on. Have at it.
-
Most used hammers. The cross peen and the straight peen are my main forging hammers. The cross peen was a Pennsylvania find. The straight peen started it life as a MOB drill hammer but was converted, by me 14 maybe years ago, into it's current state . These hammers both have blunt peens which I prefer. The third hammer is my bowling hammer which I made to deep forge steel bowls for bird feeders that I make. It is included mainly because it was in the picture. It is however one of my favorites a62rambler, Try a heat gun or hair drier to remove those irritating labels. I salvage handle material from sledge hammer, and ax handles. However most of my handles are modified commercial handles or come out of my firewood supply . Usually hickory. In the past I have gotten some nice handles out of discarded furniture found curbside .
-
I like the idea of baseball mallets and of refitting a commercial clamp style mallets with a wooden strike faces. I especially like the idea of making a wooden faced mallet held by a wood handled iron framed mallet clamp. However I don't think that the one pictured would be a model I would choose to make. It seems to me that the protruding flanges would present a hazard if used with hand held tools. I think a safer model would be to extend the metal saddle beyond the handle connection to allow through bolting. This modification would eliminate the flanges and the potential hazard that they present. The pictured tool does however illustrate that effective tools can be fabricated using simple welding and metal forming skills. Thanks for showing us this tool.
-
Scortched cross hatch of burned lines are about the only finish I have ever applied. Old base ball bats would would be a superior source of hardwood. However the firewood concept just shows that you do not need any special materials to make something useful. So you use the mallets . What do you use for handles ? Before I started whacking out firewood mauls I did have an old croquete mallet that I cut down to a manageable size. That one was not ideal. However the rule is that anything that works is good . For this application nothing is particularly long lived.
-
Nice barn. Gud luck with your project. You might also Google "sistering joists" FYI .
-
A few years ago I needed a wooden maul to straighten a red hot twist . Not having one I improvised by walking over to my firewood storage area and selecting a likely piece that could be held and used as a maul without modification. The makeshift fire wood maul did it's job and the hot iron was straightened. After the forging session I decided to retrieve my carpenters ax and refine the handle to make it more comfortable to use. That first maul is still hanging around my shop but has been joined by a succession of others. It is shown in the thumbnail below. I started making these useful tools using only a carpenters ax . That worked well. A good sharp ax, used alone, can produce a functional or even beautifully subtile and refined shapes. As shown above even crude club-like shapes function well for the straightening of hot steel. Since that first maul I have made a number of these mauls for my self and friends. However, in addition to my ax, I now use my band saw to rough out the mauls and planes and a draw knife to finish them. Example below. Other examples below are promising pieces of fire wood band sawed and waiting for shaping and finishing. Although some species of wood are better than others for maul making I generally make them from whatever is currently available since they are easily made and therefore expendable.
-
First of all: No Chain Sawing. At least until you understand the what is going on and make some repairs. Even with all of the pictures it is hard to understand exactly what is going on there. So here are a couple of questions that you need to consider: 1. It looks like one of the beams ends at mid span and is supported by a post. Is that the case. If so that post has to stay until other means of supporting the span are provided. 2. It looks like the bottom of one of the beams, which as been re-supported, has a deep notch in the bottom. This beam will, most likely, need to be reinforced with additional members before removing the supporting post. 3. What are the spans of the damaged floor framing members? You will need to refer to framing span tables to determine the size of additional members needed. 4. How much imposed total load is being supported by the damaged members ? Total load is live load ( contents of the space above, or as required by code in pounds per square foot over the entire floor area above which is supported by the member), plus dead load ( weight of the existing structure). In general it appears that the floor was framed using timbers salvaged from an older structure. The notches have weakened the member. They would have been seats for secondary framing members called purlins. The beam, in it's original installation , would have been installed with the notches up. The bottom line is that the floor can probably be reinforced and the posts removed. However additional framing will need to be installed before the supports are removed. There is not much more that we can offer here except to say that the exact nature and scope of the repair needs to be determined by a qualified craftsman/engineer on site.
-
Well, yes except that I find the modified locking pliers useful for small light forgings . Most of my tongs are Atha or Champion. However when age and dissabilty come into play, light weight is good when it works.
-
Thanks Phil. I use modified locking pliers frequently . My hands are authritic and the locking feature reduces the strength of grip required to hold and manipulate the work piece being forged. They really do hold things firmly. I modify only the jaws for my on use. However since Dave's friend may not be able to get a shortened thumb around two reins, this solution seems a natural.
-
Here is a mock-up of something to get him started. Once he gets going I am sure that he will work out other solutions and find what works best. The idea is that he may not be able to grip and manipulate two reins so use modified locking pliers with a single rein of an appropriate size and shape to allow him to firmly grip the "tong". The single rein could be bent/configured and lengthened to allow one end of the rein to slip under a velcro wrist band for additional stability.
-
Give him a set of tongs and let him work out what modifications he needs to make them a comfortable fit. Help him fabricate the modification. Test and revise as needed. He has a thumb and a palm to work with maybe nothing more than a wrist band to secure/stabilize one tong rein will be needed.
-
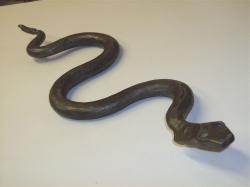
RATS! Power hammer yard art
knots replied to macbruce's topic in Power Hammers, Treadle Hammers, Olivers
Most counties have property records on the computer these days. They are public records so anybody can look them up. If an address can be assigned to the property you could look it up on line and get a name . Next time you see him a "Hi Bob" greeting might help -
Punches and a chisel
knots replied to K. Bryan Morgan's topic in Hot Cuts, Anvil devils, metal cutting on the anvil.
Opps, The thumbnail didn't take. -
Punches and a chisel
knots replied to K. Bryan Morgan's topic in Hot Cuts, Anvil devils, metal cutting on the anvil.
Yes to all of the above. However there is another way to use twisted wire handles . The following thumbnail shows a bowl making tool used as atop tool for a matching bowl form in one of my swage blocks. The swage block and matching top tool are used under my screw press working hot to make bowls. The wire handle is made of 1/4" round rod . The top tool is drilled to receive the twisted wire handle. This arrangement allows removal of the wire handle for more compact storage of the tool. I have used this style of mounting for larger punches as well. -
Punches and a chisel
knots replied to K. Bryan Morgan's topic in Hot Cuts, Anvil devils, metal cutting on the anvil.
Actually for tongs used for this purpose lighter is better. You want them to be light weight and flexable so that they don't transmit vibrations through the reins. I made mine so long ago that I can not remember what size bar mine are forged from. 5/8 x 5/8 inch bar Seems to big to start with. !/2 x 1/2 inch will be plenty big enough . These are a good size to practice your moves making tongs. The good part is that they are small enough to be easy to forge but very useful when used for this purpose. Make them strong enough not to deform under your grip and to hold the tool firmly with a spring like grip. These will not replace the need for handled tools but will reduce the number needed significantly. -
might be a great cold forming tool
knots replied to matto's topic in Blacksmithing, General Discussion
Now I get the picture. The jack hammer is mounted on the skid steer. That is a creative use of available resources. What you have is a giant Zip Max. Keep us posted on your progress with the sculpture. -
Punches and a chisel
knots replied to K. Bryan Morgan's topic in Hot Cuts, Anvil devils, metal cutting on the anvil.
Bryan, I don't know exactly what that "top/handled cutter" is but I suspect that you are looking at making a handled slitting chisel. If it is a handle that you want for your chisels, slitters, punches and etc, you might give the following a look see. For my smaller size hot work tooling I made a couple of small tongs to hold the tools of different diameters. You can bind or secure the reins with links, or clips to hold the tooling in place for use. Advantages of this approach is that the tools can be reforged without disassembly, only one handle set is needed for all tooling of a given size, and a lot of space storing multiple handled tools is not needed. -
might be a great cold forming tool
knots replied to matto's topic in Blacksmithing, General Discussion
Do you use one of these 90 lb compressed air jack hammers or a new fangled electric units ? Seems like it would be kind of hard to control unless it is compressed air and the air pressure varied to modify the strike force. Since steel work hardens, it seems like you would come out with something more like train wreck damaged metal than a bowl. However maybe you can start a new school of sculptural art. There was a NOVA program on ship wrecks last night on TV. At one point they showed underwater shots of the twisted/ gathered shapes ripped out of the Costa Concordia hull. There were long strips of the hull ripped out and gathered into shapes that were quite sculptural. You never know what will come out of an effort until you try. -
RATS! Power hammer yard art
knots replied to macbruce's topic in Power Hammers, Treadle Hammers, Olivers
I bet his dad would have choice things to say if----. -
Punches and a chisel
knots replied to K. Bryan Morgan's topic in Hot Cuts, Anvil devils, metal cutting on the anvil.
Looking good. You must be in Blacksmithing heaven with the temperature highs being in the mid 50's. Time to thaw the anvil and get going again. Very good start. -
Not really sure what your problem is so here are the basics: You will need an adjustable regulator which mounts directly to your propane tank. You will then need a hose, of which one end will connect to the regulator and the other end to the burner. Both the regulator and the hose will be available at any good welding supply. I would take the burner to the welding supply and let them help select and assemble the kit. The only other thing is mounting the burner to the forge furnace. If you need help there post some pictures.
-
My drill press is a clausing 15" floor model that I fitted with a VFD. The VFD allows the spindle speed to be reduced to the point that you can count spindle revolutions. The lower spindle speed allows me to use hole saws to drill holes up to 2 1/2" to 3" . Using a good sharp hole saw I have cut holes through 1" plate by drilling the saw center guide hole through the plate and then cutting 1/2 way through from both sides. This is not a method that you would want to use for production but for an occasional hole it works. It is, however, time consuming. It occurred to me that your Canedy Otto might have a spindle speed low enough to use this method . However if you do try this be sure that the work piece is well secured .
-
Anvils are not only wonderfully functional tools but are also beautiful objects. They are a prime example of form following function. There are ways to secure anvil to base and reduce or eliminate the ring without chains or other unattractive accessories . My PW was a ringer before I fabricated and installed the Z Clips pictured below. The stump was routed flat and 30# roofing felt installed under one corner of the anvil which did not rest firmly on the stump. When firmly bolted down the anvil now clinks rather than ring. I have also used this method to fasten a Mousehole Style anvil to it's stump as well. The top Z flange just needs to lay on the slope. After Installation I heated the upper flange and hammered it to conform to the anvil body. I use an over head track and chain hoist to move my anvils around. The Z clips are very secure, there have been no problems with lifting the stump along with the anvil.
-
Years ago I purchased a hand held belt sander at a yard sale for $5. Clamped the handle in a vice used it to sharpen chisels and knives for 10 years before purchasing my Wilton belt grinder. That is about as cheap a solution as there is to be found. The 6 x 48 belt sander sounds like a winner. The only thing, if sharpening finished hardened tools, you need to cool your blades frequently or the blade will over heat and the temper will be drawn.