January 4, 20206 yr Hey all! So, I arranged for a gentleman to bring me a vintage coal bowl and stand next time he is down this way. But in the meantime, time to punch out some excuses. 1x8 common board from HD, 2x 6' lengths (was raining that day and I had to fit it in the car) 1, 2x2 plywood board, 3/4" thick. I got to use my 2nd hand chop saw my brother-in-law gifted me this Christmas, worked a charm! Tuyere is a 2 foot section of SCD40 3/4" iron pipe. Air mover is a Wal-Mart double-acting mattress pump. Base is a Harbor Freight "Work Station" that was open-box discounted. I assembled the floor of my box ~1.5" up the walls (I spaced the ply up with a pair of 2x4 trimmings) to help mitigate slip-off. Placed on the stand, the tops of the walls are ride at the wrist bump height. I have 6 red brick pavers and 5 fireplace-fire bricks. I have 100lbs of cheapo un-scented kitty litter. In the pictures, two 25lb bags are in the box. I have right about 100lbs of lump charcoal (the Walmart down the street had it on clearance, torn bags taped over for about $5.50/15.6lbs) I figure that is a good place to start and learn before I try to nail down a good source for bituminous or coke, if it goes that way. So... Any input, suggestions, critiques? I haven't gone any further than what is in the pics... till tomorrow anyway haha
January 4, 20206 yr I say you are of to a good start. When you wet the kitty litter, mix in some builders or play sand (I forget the amount %) to make adobe. I'm sure someone will remember that. I have used that W/M charcoal and found it's a little too big of pieces and I broke it into smaller chunks works well. Just remember charcoal takes very little air compared to coal/coke.
January 4, 20206 yr Looking good so far. I had it pointed out to me that the pump with the tube at the base is better or probably easier to use but that has a long enough tube and should work fine. I'll be looking to see how it goes.
January 4, 20206 yr The pump with the tube at the bottom is a little larger but the one pictured above with the tube attached to the handle is the one I have. It works but I got a real blower and soon as I could. If you have access to electricity the AC pump from the same company works great but it makes too much air so you have to use a ball valve or a waste gate. Are you going to be using the kitty litter dry? Pnut
January 4, 20206 yr 7 hours ago, pnut said: Are you going to be using the kitty litter dry? I think the next one I build will be straight sand with clay only in the duck nest. That's the only place it vitrify's. The rest gets crumbly. Any body ever done this?
January 4, 20206 yr I used clay that I dug up. It only vitrified in the trench but the rest of it dried so hard I had to use a hammer and crow bar to break it apart to rebuild it. I've only made test batches of hydrated bentonite but it did seem pretty crumbly. Have you looked at the MarkIII jabod? The firepot is made from bricks and surrounded by dry kitty litter straight from the bag. I thought that was what you're building. Pnut Edited January 4, 20206 yr by pnut
January 4, 20206 yr I tried making the firepot with bricks but like the duck nest formed in sand best. The clay in my duck nest is only about 1/4" thick but has vitrified solid. I could probably pick it up intact. 7 hours ago, pnut said: you have to use a ball valve or a waste gate. I use the manual pump with the hose coming out the bottom. I also put a ball valve in and close it after every forging. Keeps critters from crawling in.
January 4, 20206 yr It looks like the pump in your picture has the hose coming from the handle. That's the only one they stock at the Wal-Mart by me so that's what I got. I quickly replaced it with an AC pump when I got a rechargable jumpstarter with a 120V AC outlet on it and could use electric at my forge. I got lucky and a very nice member here knew I was looking for a hand cranked forge blower and graciously offered me one for next to nothing so I gladly took him up on the offer. It only takes about five or six rotations of the handle per minute to keep the fire up to forging temps. It's much easier than the hand pump. If you can get one It will make forging much easier. Pumping the one from Walmart was a lot of work especially during the summer heat. It would actually fatigue me after a while. What matters most is that it works for you at your smithy. That was a lesson I learned pretty quickly. Keep us posted on how it's going. I still need to rebuild my jabod but I keep changing the design not to mention the weather won't cooperate and my forge is outside. I'm going to work on it today in the rain if I can get motivated. We'll see how that pans out. Pnut
January 4, 20206 yr You need to build a leanto over your smithy. You said you used clay you dug. Did you mix sand or use it as is? We have red clay around here. I may try that next time.
January 4, 20206 yr Straight from the ground. I just made sure to get any rocks or pebbles out. I've been thinking about mixing some sawdust in with it to make adobe. I kept it covered when not in use and didn't have to repair any cracks for about six or seven months and then they were tiny. After about a year it did start to crack but it was after about two weeks of low humidity and temps in the upper nineties with no rain. I patch the cracks with worm castings. Mainly because I looked down and they were all over the place so I didn't have to walk over by the creek to get a handful of clay. I was surprised at the quality of the clay out back. The property used to be a spa in the 1920's called Carlsbad mineral springs and sanitarium so I shouldn't have been surprised there's good mineral clay nearby. I have a tarp and some poles I just need to get to it. Pnut Edited January 4, 20206 yr by pnut
January 4, 20206 yr Author I was thinking of doing the v.III style at first with loose litter and a brick pot. See how it plays out. The hand pump will probably be a fair amount of work, true enough, but I figure it's a great learning and starting point. I'm also limited by a single outlet in the garage of the house we are leasing, and one socket is occupied by the deep freezer. I figured manual wouldn't be a bad thing to get used to, though who knows, that may change in the first few hours haha I'm on a pretty tight budget, so I'm working around what I can make happen for now. I think that even once I can get my hands on the pan, experimenting with my little box may prove very useful- the pan and stand is basically a round rivet forge. Needs a tuyere, grate, and blower as well as a crack repair.
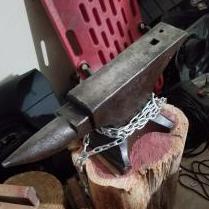
January 5, 20206 yr Author Well, I officially made a functional JABOD. Then I heated a piece of 1/4" round and made a weird shape. Mostly just as a proof and so my wife could record it. The anvil is not on its proper mount (haven't made one up yet) and is too low. The forge height is pretty good for me! I only used a couple handfuls of charcoal tonight (you weren't kidding, these lumps are substantial!) So I could proof it. I need to build the fire higher next time, it was challenging keeping the rod in the right place with the fire so low. I wasn't able to start back on it until about 5:00PM, I had to help a buddy with a few of his projects. Depending how tomorrow goes, maybe I'll get more time on it! 50lbs of cheapo Walmart kitty litter, 9 red bricks (6 HD, 3 Lowes... oops haha) and 4 Tractor Supply firebricks. Some of it I had laying around, some I had to buy. As one of my nieces would say, "I did a learn!"
January 5, 20206 yr Looks good. You'll have to make modifications as you go but for now, looks like you're cooking.
January 5, 20206 yr Author Might be able to make a fuller out of this- S60 rebar, supposedly hardenable carbon steel. I have maybe 10 feet of 1/2" and 4 feet of 3/8". Throws lots of bursts from the grinder and belt, and took quite some swinging to flatten out. Forge is cooled off. Man. Thanks folks. So cool.
January 5, 20206 yr If you haven't already you might want to pull your air pipe back even with the bricks or put a glob of clay on it or it will burn away pretty quickly. Otherwise it looks great. In the pictures it looks like you don't have much fuel in the firepot and the firebrick doesn't look burned. It should be piled up high enough that Your stock can go into the fire horizontally not angled down. Keep it up be safe and remember it's supposed to be fun. Pnut
January 5, 20206 yr Ok, those look like cement pavers, don’t know how long they will live but it’s a start. If you reconfigure things. To use the 1/2 bricks (hard fire brick from TS) against the fire and the red pavers to back them up things will live longer. Tho I have melted fire brick and red clay brick eventually crumbles. Looks like a serviceable hot cut chisel with some grinding, your on your way. Trick with rebar is to test how it behaves and relies that the stuff from the building supply can change with in the same bar (same thing with A36 stock).
January 5, 20206 yr Author I have the pipe pulled flush now. The half bricks are longer and fatter, so I may need to do some trimming. They were on sale for $3 when I got them, so if they are still at that price I'll snag another handful so I can try to trim to fit. I believe my buddy has a masonry saw, I'll check for nice clean edges. The fire was most certainly low, I just didn't want to push it too late and upset the neighbors (hooray city life... I miss the country!) So I kept it at just a few handfuls to start. Oh, and yes that little pump puts you to work. I'll need to figure a mounting method. I have enough of that size rebar I may try to make some hand-held hot-cut chisels as well. That one has about the profile of what I used to make the mane on my bottle opener in class. I'll probably trim it off and try to get a heat treat in the hammer end, drawn back to royal-blue probably to keep mushrooming low but minimize spalling chances. Thoughts? I'd imagine straw would leave too much hardness in... but then again, I'm very green here (sooo green) so input is of course appreciated. I may not get a chance to fire it up today, still stuck doing errands catching up from being gone a week and a half.
January 5, 20206 yr 8 minutes ago, CtG said: I'll need to figure a mounting method. I think the way Charles has the pump mounted in this thread is how I would do it.
January 6, 20206 yr Author I did get to play for a couple hours today! Built the fire up a bit above the side bricks, I need to go even higher I think. Getting fuel chunk size closer I think, it is definitely small to massive in the bag. I hot-cut the "fuller" off using a Harbor Freight cold-chisel (I doused it every 3rd blow or so to keep it from losing whatever excuse for temper HF gave it- it never dulled though!) Then I formed a bit of a chisel profile in the rebar and cut it off. I then heated and quenched both, still need to temper them. They skate a Nichols Chainsaw File as is! So, work goodies aside... One of my tuyere siding bricks has already cracked- they were both glowing while I was getting after it. A fire-brick facing is probably in order. As for the floor, it held up very well, but I do have some mild charring of the plywood. It seems to be around the gap between the bricks, so I will likely play around with either a double layer of firebrick, staggered, or maybe a dovetail of the redbrick, though I think it will be more crack prone at that point. I would like to avoid tweaking the tuyere height too much if I can avoid it, as my box is already cut for it. Though in all reality, I can always make a new side-board. Or even fishtail in an adjusted piece. I purchased 2 small Behrens metal "trashcans" to put the litter and some bricks in- worked a treat, fit all but 2 redbricks and the firebricks. That way, I have a nice convenient breakdown size without having to worry about my cats using the litter for its intended purpose. I'm pretty happy so far! IF&C, I was considering that method amongst my options- the sawing motion mounting has its appeal, to be certain. Did I mention I already had a couple neighbor kids come watch? Already drawing a crowd and I barely know what I'm doing!
January 6, 20206 yr 3 hours ago, CtG said: . I would like to avoid tweaking the tuyere height too much if I can avoid it, as my box is already cut for it. Just rotate the box and drill a new hole and put a wood scrap inside the box to cover the old hole if you have to adjust your tuyere height. My Jabod forge took some tweaking. I've refined it every time I've rebuilt it. The one I was too lazy to finish when I got off work today will be the third iteration. The second one I used for about eight or nine months. Keep at it and keep us posted. Pnut.
January 12, 20206 yr Author Well, the wind finally calmed down today and I got to play for about 4 hours. I used a double stack of the TS firebrick, each layer staggered to try and mitigate the seam heat flow on the floor. About 2/3 through I noticed a slightly glassy look on my tuyere wall brick, around the tuyere pipe. After I cleaned it out and inspected the bricks and box, it looks like the wall brick and floor brick melted slightly- not crumbly though. The box under the brick turned to charcoal on the first ply layer directly under the fire. So it seems that these bricks aren't quite cutting it, I imagine the next 4-8 hours might crunch a hole through. Maybe time to rethink? The advantage to the brick and litter is easy breakdown for storage, of which is at a bit of a premium. I can get about as much frac sand as I can carry from one customer, which is a fairly fine grain sand. Possibly some mixed grain, but it isn't kilned and screened. Regardless, enjoyed the time today!
January 13, 20206 yr I think you need more depth or a more fire resistant base---like sheet metal---just sheet metal no wood. When I build an adobe forge on a wooden bench I learned to space the base---slab of soapstone---off the bench top by sticking pieces of 1/2" sq stock between them to allow for air flow. That worked great for my use. Of course this on an open bench so air flows, not just an air gap in a sealed system.
January 13, 20206 yr Author 6 hours ago, ThomasPowers said: I think you need more depth or a more fire resistant base I was thinking along similar lines. I thought I might try a half inch of litter under the brick bowl next session and see how she goes. Quite frankly, I may very well turn my old trusty Matco service cart into a JABOD- wall up the edges for more depth. Probably the full 8inches? I dunno, spitballing. I need to check relative height for comfort. Another advantage to that approach is.. wheels!! Less need for breakdown, just let her rip! I've been a bit tentative in my fueling and air supply knowing my box charring issue. I have not achieved what I assume to be a welding heat (we didn't learn FW in class, but I have a decent idea of where that color range may be)
January 13, 20206 yr 2” of brick or soil seems to be the minimum between the fire and wood seems to work. You may consider either lowering the hight of the top of the cart to your anvil height. You may have to build a fire bowl of sorts to fit in the tool cart. To make the fire bowl deeper or you lower the top farther and build up the height.
Join the conversation
You can post now and register later. If you have an account, sign in now to post with your account.