-
Posts
622 -
Joined
-
Last visited
Content Type
Profiles
Forums
Articles
Gallery
Downloads
Events
Everything posted by Shainarue
-
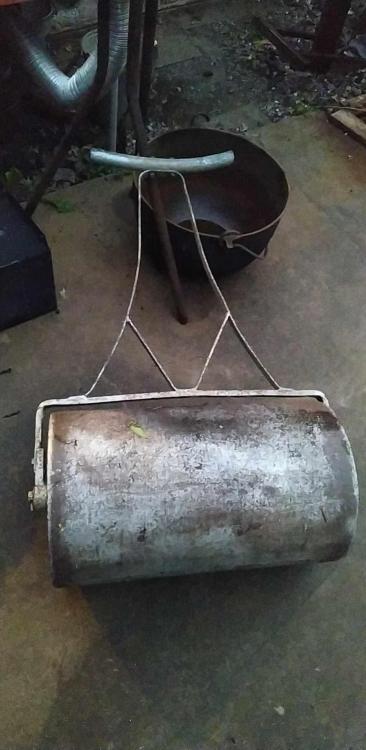
Picked up this steel lawn roller this evening. I plan to remove the handle and cut off one end, then stand it on end and fill it with sand to mount the railroad rail, which I intend to play with as an all-in-one nail making station.
-
I'm lovin' this thread! Bluegrass & Blues are top on my list of vibe music. I don't have much to share, lol. When I'm forging, I'm listening to anything I can dance to and not get too distracted by (like lyrics) - so mostly pop and edm. Neighbors probably get a kick out of watching me dance while forging, lol
-

What did you do in the shop today?
Shainarue replied to Mark Ling's topic in Blacksmithing, General Discussion
Just look at all the space waiting to be filled up! -
This looks like an excellent course! I love that you started with nails and I've always loved that you consider forge welding to be a beginner skill. This is gonna make me seem dim, but I didn't realize there were different kinds of nails, lol I've found your videos on nails and saving them to watch over my lunch break.
-

Repurpose Air Hammer Chisels????
Shainarue replied to stickermigtigger's topic in Tools, general discussion
Glenn Horr was a demonstrator at the Missouri blacksmithing conference this year. He had reshaped pneumatic air tool bits into various punches and fullers. He still used them in the air gun. Made quick work of animal faces! -

What did you do in the shop today?
Shainarue replied to Mark Ling's topic in Blacksmithing, General Discussion
Yes, she has a wheel and these are tested and approved! -

Anyone forging button hooks?
Shainarue replied to ausfire's topic in Blacksmithing, General Discussion
Thanks Frosty! -

What did you do in the shop today?
Shainarue replied to Mark Ling's topic in Blacksmithing, General Discussion
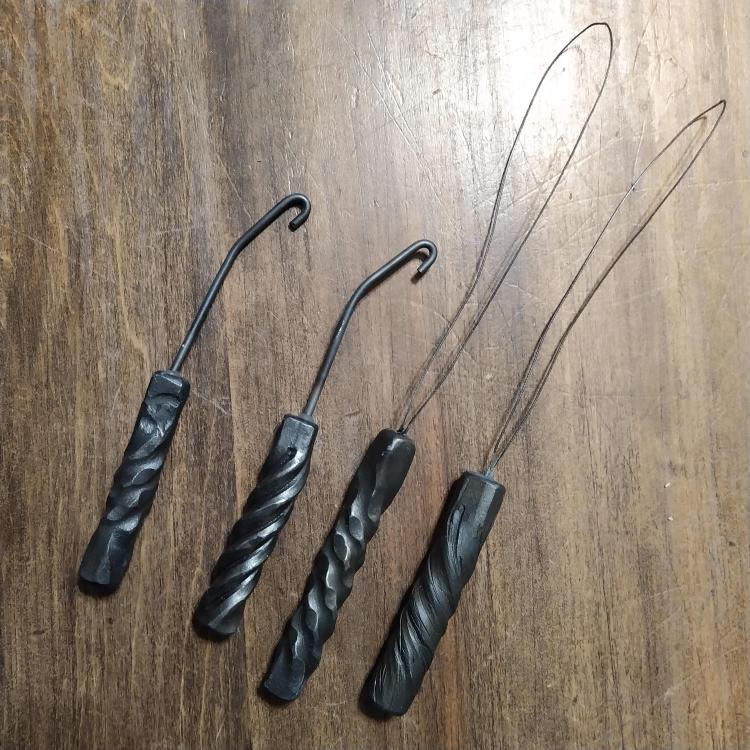
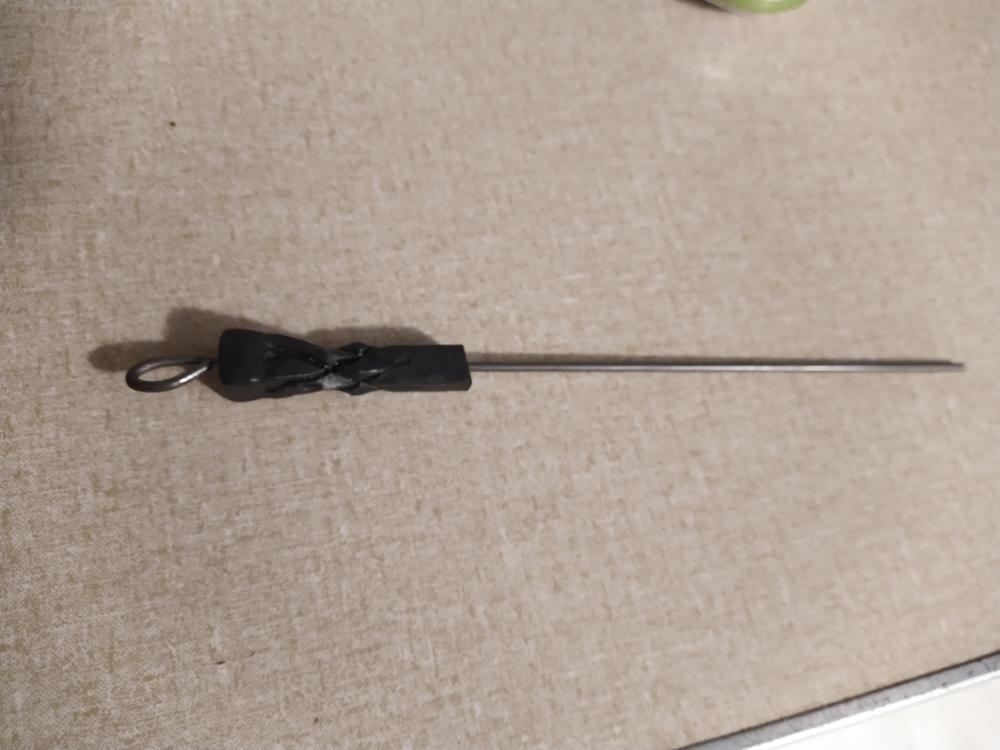
Whoa! That's a lot of copper flashing! Tonight I finished the orifice hooks requested by my wife for her spinning group friends. Two in standard style. Two in "loop" style. Hole drilled into end of handle and hook inserted. Held in place with JB Weld because I didn't have a tap & die small enough to thread the two pieces. Considered a few other options but ultimately, the deadline and the heat made the decision for me, lol I've got one more to make for a friend in the local blacksmithing group who also spins. I played around with various twists and I think the third from left is my new favorite. -

Anyone forging button hooks?
Shainarue replied to ausfire's topic in Blacksmithing, General Discussion
The final product, tested and approved. Two in standard style. Two in "loop" style. Hole drilled into end of handle and hook inserted. Held in place with JB Weld because I didn't have a tap & die small enough to thread the two pieces. -

What did you do in the shop today?
Shainarue replied to Mark Ling's topic in Blacksmithing, General Discussion
John, that's an awesome chair! -

What did you do in the shop today?
Shainarue replied to Mark Ling's topic in Blacksmithing, General Discussion
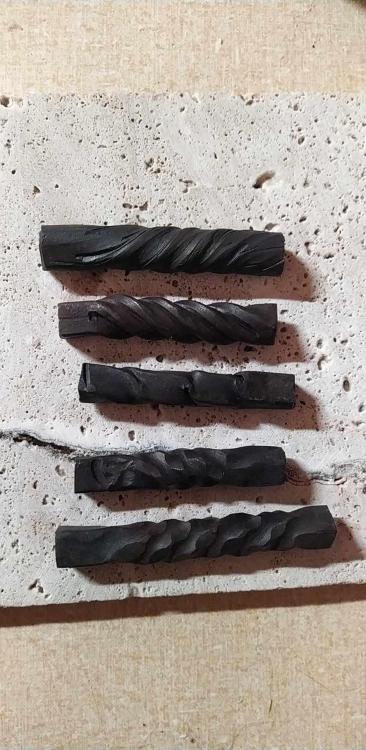
Well, it didn't turn out to be as hot as expected. Just mid 90s. So I lit up the forge to twist the bar I had scored up yesterday. Then I twisted one too far and snapped it. Oops. So I made another that didn't need any scoring. Then decided to try texturing on the round bar and twisting that. Kinda looks like a vine. The one in the middle is my least favorite. I saw it on Black Bear Forge. He took a square bar and drilled holes all the way through, then twisted it. His bar was thicker than mine though so that probably makes a difference. Initially, I just twisted but it looked really bad. So then I squared up the twist and tried to upset the bar to smash the holes closed. Then a slight twist again. I'm not loving it. I'm gonna have Ashley pick the 4 she wants me to use for her orifice hook handles. The one left over will be the test piece for tapping and adding a set screw. These are all 2" to 2-1/2" long in 3/8" square bar. And the one 1/2" round bar. -

What did you do in the shop today?
Shainarue replied to Mark Ling's topic in Blacksmithing, General Discussion
Alex, job well done! That is beautiful and handsome. -

Anyone forging button hooks?
Shainarue replied to ausfire's topic in Blacksmithing, General Discussion
Damascus would certainly be beautiful! It'll have to go on the 'futures' project list though, since she wants these by Sunday and I've never done damascus before, lol. Oh, and it's in the 100+ around here for awhile so I'm trying to keep the heating parts to a minimum. Last night I used a cold chisel to create the lines for the rope twist and marked the cut lines for each handle along my square bar. I had initially wanted to do one where the 4 lines went all the way through to form an open twist, like a basket twist without the forge welding. But with the size this short, all my power tool cutters would cut too long so I'd need to hot cut - and that's not happening this time. Tonight I'll light the forge and get the various sections twisted to my liking - shouldn't be more than an hour tops even with the multiple water breaks and stepping inside to cool off. Then I'll go to the basement where it's coolest to do the finish work. -

Welding Chair Suggestions for Aging Dad
Shainarue replied to Donal Harris's topic in Everything Else
A chair used while welding or a chair fabricated using welding? A chair used while welding: is it possible to raise the table he welds at? If so, then a higher seated chair with stabilizing arms should be good. Not so high of a seat that he has to heft himself up. But high enough that he can basically just lean back into the chair. -

What did you do in the shop today?
Shainarue replied to Mark Ling's topic in Blacksmithing, General Discussion
This is actually how I did do it. Each step I did both. Learned that lesson when I started trying tong making. The only thing I didn't do was matching the very last brace and that was because I was scared I'd just the tenon. It was a bit on the thin side compared to the others. I had actually started the brace with a notch cut out which I had intended to draw out as a twig extending. But I cut into it to far and it fell off. This was the same bar that the tenon fell off of, lol. Just wasn't going well on that brace! Anyway, yeah, I want to try again sometime when I'm not rushed to get it done and really play around with ideas. I was also limited to the stock I have on hand. I'm out of play money till end of August. -

What did you do in the shop today?
Shainarue replied to Mark Ling's topic in Blacksmithing, General Discussion
I actually commented on that to my mom when I shared with her. It bothered me that the curve was different between the set but I was accepting it as a 'natural' look since not all branches look alike, lol If I hadn't been trying to meet a deadline, I likely would have redone that one arm. It's also thinner - not just to look different, although that's what I sticking to (lol), but because I hadn't noticed a stress crack in the tenon and it fell off while I was re-texturing. So I had to draw it out a bit longer to account for that loss & make a new tenon. I should have compared the bend to the first one while I was doing it. I think I was just scared I'd break another tenon that I didn't want to mess with it too much, lol I did not make my own chisels. I had a pretty good set I had picked up from an estate sale way at the beginning of this adventure into blacksmithing. At the time, I didn't even know there was a difference between cold and hot chisels, lol I did re-grind a few of them to make them work how I wanted though! -

What did you do in the shop today?
Shainarue replied to Mark Ling's topic in Blacksmithing, General Discussion
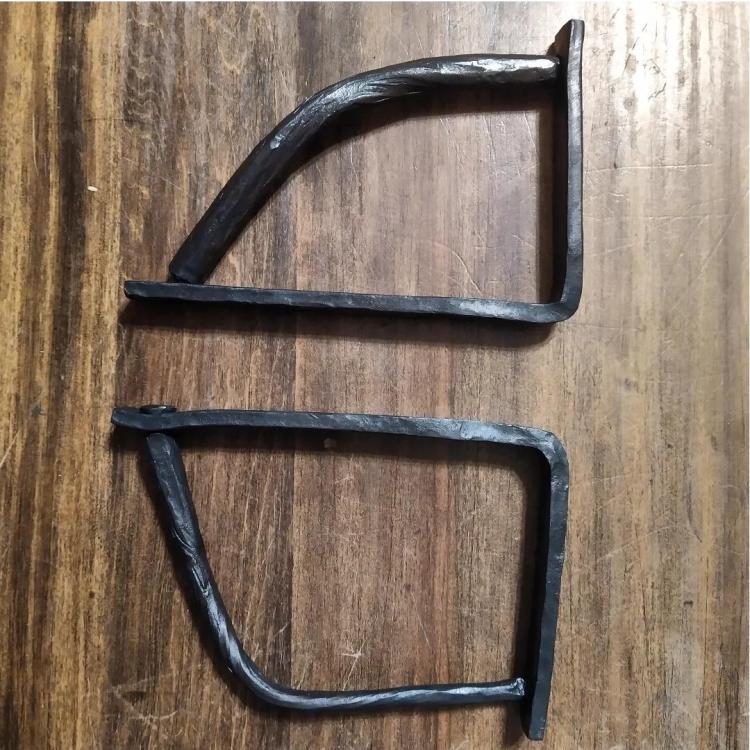
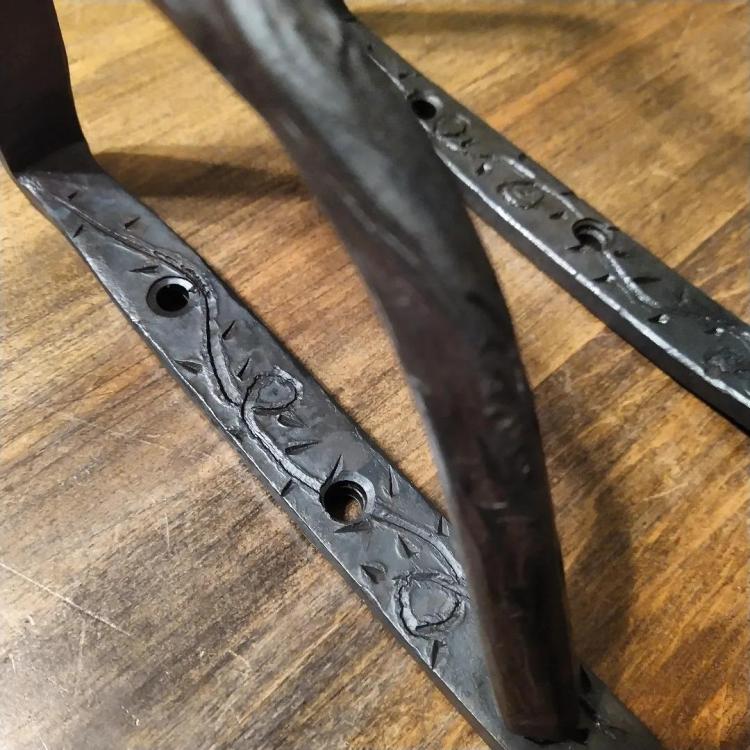
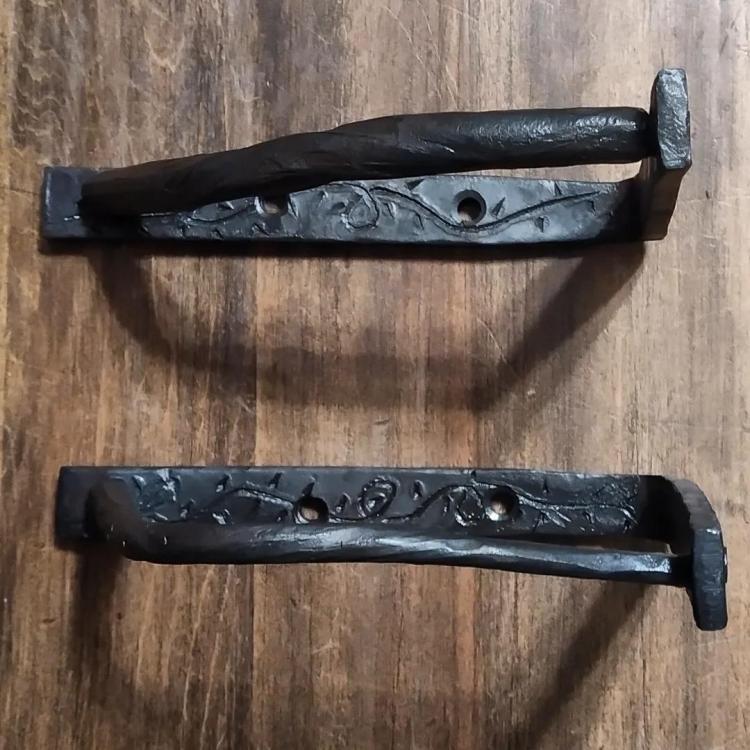
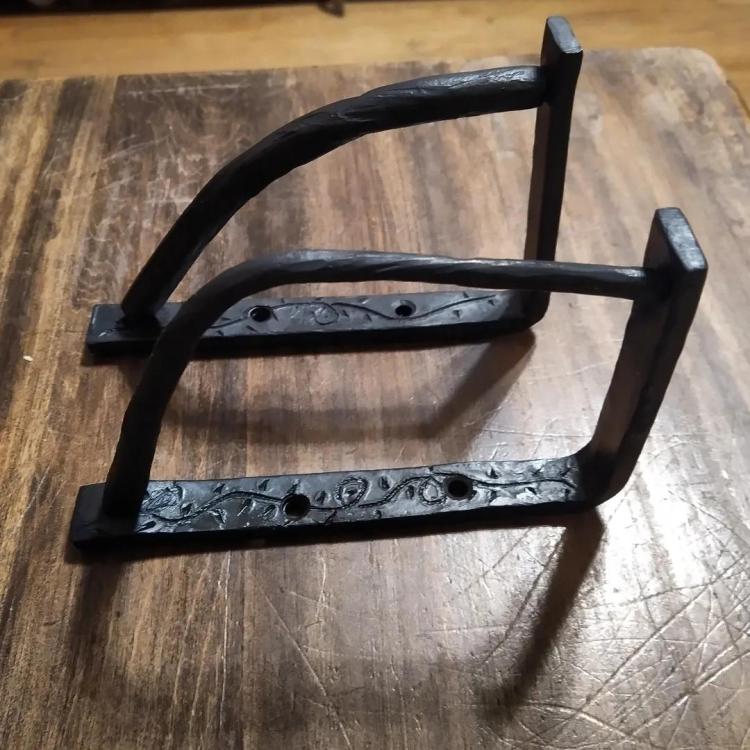
Wow John! Your shop is gonna be spiffy soon! I worked on a pair of shelf brackets last night. This was a two-fer project. I'm in a Facebook "Weekly Blacksmith Challenge" group and this week's challenge was "decorative work with files or chisels". Deadline was Tuesday night and I submitted the photos just under the wire! Then this morning there was an update that they extended the deadline until Sunday. Oh well. It's gonna be SO hot this week that I appreciate having one of my projects finished. The August blacksmith club trade item theme is a pair of shelf brackets. So whoever pulls my name at the meeting will get these. I'd like to try the concept I had in mind again sometime but I've got 3 other projects to finish in just a few weeks so... Later, lol I need to cut the texture in my texturing hammer a bit deeper, I think. The dark finish really hid the bark texturing/twisting I did. At bare metal, it looked good. Not too pronounced, which was just what i was looking for. -

Anyone forging button hooks?
Shainarue replied to ausfire's topic in Blacksmithing, General Discussion
It all makes perfect sense, yes If a diamond twist is the pineapple twist, then yes I've done it before. As chance would have it, that's actually the piece I scrounged out of my test pieces pile to drill into and show Ashley as a concept. I cut it in half and drilled through. Definitely not finished or refined in any way, lol. Just to show the concept before I went to the trouble. You're right, drilling lengthwise was a pain but it wasn't that bad. I do like the suggestion to drill just a bit on one end though. As for the twist, I thought the corners would be to pokey for comfortable handling. Ashley agreed. Which is fine because I had smoother twists planned anyway. Here are some more ideas that George sent me for anyone else that might hit this thread later. -
So, I've been working on this - slowly but surely - and came to realize last night that I'm pretty sure one of the wheels I thought was done is actually not done. Pretty sure there are bits on there that should move but are not moving. So I was going to let it soak for longer (and make certain to wrap all individual parts) but I had already coated it with BLO. Do I need to remove that before putting it in the electrolysis bath? And if so, how do you remove BLO once it's dried? (Apologies if this is stated on the can. I'm at work and trying to get my projects for the week planned out.)
-

Anyone forging button hooks?
Shainarue replied to ausfire's topic in Blacksmithing, General Discussion
Makes sense Frosty. Ashley specifically requested the handle be made of metal but that may have been because she knows how poor both our woodworking skills are. Maybe I'll try creating a turned handle with my drill press and show her to see what she thinks. I have a five different handles detailed out to try: Measure 5 cuts of 3/8" bar to length of 1/8" drill bit. 1st bar (sq): Cut lines down 4 sides 2nd bar (sq): Use drill press - equal spaced holes offset on 2 meeting sides (holes all the way through) 3rd bar (sq): Use drill press - equal spaced holes on one side (all the way through) \ 4th bar (rd): wood texture 5th bar (sq): made to octagon Twist all to preference. (Wood texture will get short back & forth twists.) Make sure all are absolutely straight. Find center on end & mark. Clamp securely to drill press and drill hole through center lenthwise. Straight hook will feed through hole in handle & then loop at top to secure in place. Filament line will feed both ends through hole in handle & then connect at top with bead or crimp or something to hold in place. -

Anyone forging button hooks?
Shainarue replied to ausfire's topic in Blacksmithing, General Discussion
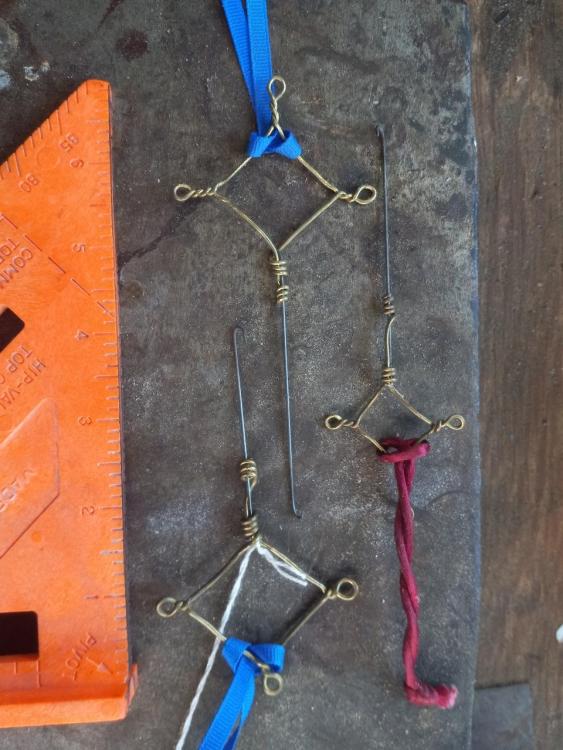
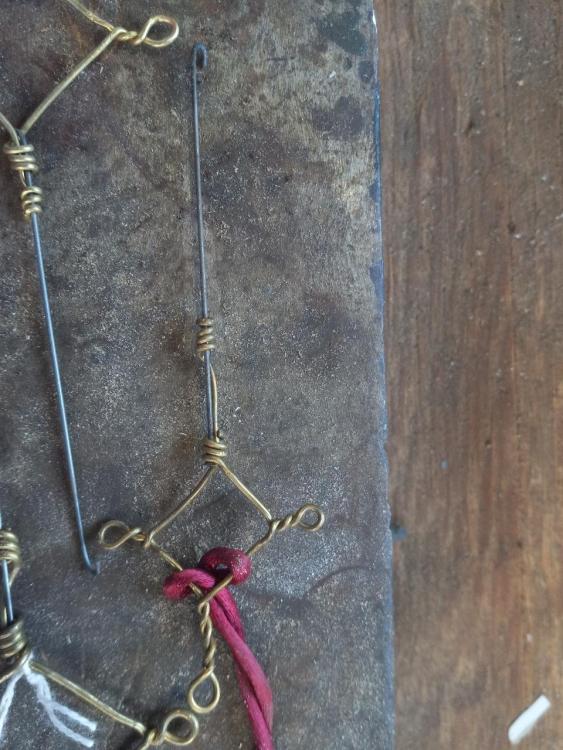
That's an adorable doffer, Frosty! So - something totally weird just happened. A local blacksmith I'm friends with on FB just posted her first completed bobbin of spun fiber. I knew she also spun, but it's just weird that she posted a pic TODAY showing her wheel with her orifice hook hanging visibly in the shot. Hers is just a paperclip she straightened with a tiny hook at the end - which I know is a thing some spinners do in a pinch. But when I asked if she could list any improvements to it were she to make one herself, she said she didn't like the design of the straight one at all and wasn't sure how to make it better. Said she has an antique wheel with a very small orifice and it's hard to get the hook in there and fished through the other side sometimes. So now I think I understand better the use of the loop style! I guess I'm making one more of that style now, lol. I told her I'd bring one to the next meeting. I also found a video of someone showing how it works. The link should go directly to where she starts using it - so you don't have to sit through all the talking bits like I did, lol -

Anyone forging button hooks?
Shainarue replied to ausfire's topic in Blacksmithing, General Discussion
As of now, I'm only making the four that my wife requested so she can give them as gifts to her spinning group. As for questioning the long twisty orifice - I will trust my spinning wife to know what she's talking about, lol. She's not always the best at describing things, so "long and bendy" might not actually mean long and bendy. I was able to get a few examples when I searched "flexible loop" "orifice hook" (with quotes). One of the results marketed it as being more gentle on the orifice & also easier to use than fishing around with the hook. So there's that as well I guess. The straight hooks are definitely easier to make. Heck, I'm seeing them also made with copper wire & various pliers, reinforcing the handle with a smaller gauge of wrapped copper wire and sometimes beads threaded on - which wouldn't even require me to fire up the forge or torch (and maybe sweetie would even be willing to try doing them herself). The pipe I was thinking of was for use on the handle - not the part that goes into the orifice. So it wouldn't have to be super tiny - just reasonably sized for a handhold. I was thinking 1/4". Even better if I can find square tubing - then I could twist it without needing to square up a round tube. Anyway, then attach some sort of removeable cap to the end, so that the jewelers wire or fishing line can be attached to the underside of the cap and replaced if needed. I think if I had more time, there's loads of ideas for making it work. A few more ideas I came up with this morning: a split twist on 1/4" square bar, then drilling a hole in the closed top/bottom sections a 1/2" x 1/16" flat bar bent lengthwise (so basically angle iron but I'm not sure I could find 1/4" x 1/8" angle) twisted - which forms a hollow center as well as a beautiful twist ... I have no idea how I would bend lengthwise though. In my head it looks like everything would go wonky. I was thinking a jig in the clamp - line it up and hammer it over the edge of the jig. But usually the stuff that seems simple like that in my head turns out to go all awry in real life, lol And as soon as I had the idea to drill a hole through the top of a bar, I started coming up with other ideas for handles on both straight hooks & loop hooks! Because really, as long as it's short enough to drill through lengthwise, it could be made into a handle. With the straight hooks, the back end would just have a loop formed after it's threaded through the handle. And with the loop hooks, they would have some sort of bead or other stop mechanism attached. I guess I've kind of answered my own question. I just needed more time to think on it I guess. But really, when I posted this last night, I just wanted to see the pics that were already in this thread but are no longer available. Seemed like there were a lot of good ideas already here in the thread but I couldn't see them, lol George has also messaged me privately and is going to send me some pics as he is unable to upload to the site currently. -

Anyone forging button hooks?
Shainarue replied to ausfire's topic in Blacksmithing, General Discussion
I don't want a wood handle, as in horrible at carving wood, lol I was just saying that was the only handle example I could find for that style and wondered how I would make it with metal. This morning I had the thought to do a ball end and drill a slanted hole through it. Although, when you mentioned hollow, my brain thought of pipe. So now I'm turning over ideas for small diameter pipe... You're correct, the lasso/snare style aren't common. Ashley says they're used on wheels that have a really long and bendy orifice. She said a few of the women in her group have that style for their wheels so that's why she wanted a few of that style. -

Anyone forging button hooks?
Shainarue replied to ausfire's topic in Blacksmithing, General Discussion
Yes, that's exactly what I'm referring to. When I look online for examples without turned wood, all I'm finding are single wire designs where the hook and handle are all one piece... Like squiggle line art ish. Ashley likes the few ideas of line art I showed her but she also wants a few of the loop variety. These have a handle (wood is all I'm finding) and a very thin flexible piece of wire or heavy nylon like fishing line. And it you pull the end of the handle to close the loop around the yarn. Now I'm trying to figure out how to make a metal handle that would be able to function like that... In regards to your wire suggestion, do you think the spring would work? I'd guess it's about the same diameter as "middle tones" piano wire, if not a bit smaller. Can you share pics of some of the metal and wire handled ones you've made? -

Anyone forging button hooks?
Shainarue replied to ausfire's topic in Blacksmithing, General Discussion
Hello all! This is the only thread that comes up when I search for "orifice hook" using the site in the search parameter. Anyway, I was hoping to see if anyone has a way to get the pictures restored? Or barring that, if anyone on this thread could share the orifice hooks they made and what they used. I have some spring of some sort that I picked up from a scrap yard. A little smaller in diameter than the standard wire clothes hanger. So I was thinking that would work well. Just wondered if there was any advice before I dove in. Wife just came home tonight with this last minute request to make 4 of these for gifts that she needs by Sunday.

