-
Posts
622 -
Joined
-
Last visited
Content Type
Profiles
Forums
Articles
Gallery
Downloads
Events
Everything posted by Shainarue
-

6" of 1/2" square bar challenge.
Shainarue replied to BillyBones's topic in Blacksmithing, General Discussion
Ha! The November BAM meeting trade item is the 6" of 3/4" bar challenge! When I read your challenge I was hoping it was the same as the BAM one but alas, I'll just have to do it twice -
If I recall correctly, I had it very close to the specs provided in the drawing. I don't know that the instructor would have split hairs over a fraction longer or shorter though. Mostly he was focused on the bends and dimensions of eye and hook ID.
-
After looking more closely, the catalog image with the ball design wouldn't have even been used on the Buffalo No. 0 because it states that it's removeable. The No. 0 is only removeable if you want to take the blower off, lol Actually, now that I'm looking, none of the images really appear conducive with the design of the No. 0. I guess the upside to not being able to find any detailed images of the Buffalo No. 0 that show the inside of the firepot is that I guess I can kinda get away with whatever I want to put there. I'm gradually coming into acceptance that I'm just gonna have to create an air gate / clinker breaker / whatever to block the hole - that works for me and scrap the nonsense of trying to keep it accurate to original parts shown in the catalog.
-
I dunno if anyone is watching this thread - but just in case, lol I'm starting on fabricating the missing parts. One of those parts is the clinker breaker. The catalog shows it as a slotted ball. I'm thinking I'll cut two circles, cut the slots into them, then dish two sides (so two half-balls) so they form a ball when welded together. My question is: how thick should the metal of this ball be? I've found plenty of threads discussing thickness of the firepot but nothing of the clinker breaker.
-

What did you do in the shop today?
Shainarue replied to Mark Ling's topic in Blacksmithing, General Discussion
I promised my wife I wouldn't work outside until the heat index was under 100. So I'm cleaning the workbench in the basement. It's not zen, but I'm making a bit of progress anyway. I get overwhelmed with big tasks like this so my goal is to work on it at least an hour each evening. Whatever I end up accomplishing will be better than nothing, lol Tonight I mostly got rid of all the trash and put similar things together. A few things were moved to the tool shelf which will also need to be dealt with soon. -
Omg grilled pineapple and angel food kabobs drizzled with a bourbon caramel sauce. #drool# I think y'all are on to something with the veggie toppers. I could see them on skewers used for kabobs for sure. Gonna have to jot that down in my notebook. Another idea for the rack would be a decorative handled mop brush.
-

What did you do in the shop today?
Shainarue replied to Mark Ling's topic in Blacksmithing, General Discussion
John, I think that is beautiful. -
Scratch that, lol I didn't start on Wednesday because I had another project that needed done first (the paper towel holders in another thread). So I figured I'd work on it this week, since the meeting for this trade item is this coming Saturday. But we're in 105+ temps all week so maybe this trade item wasn't meant to be, lol I love forging not I'm not trying to compromise my health for it. I'll be doing some inside work this week. But when I do start working on this, I'll update!
-
No, it was just a single fold over. My double fold (with the filler material) kept showing side seams and the coach didn't like that since he couldn't tell from a photo if it was a weak weld it just a visible seam from the weld. He suggested a single fold over instead so that's what I did.
-

What did you do in the shop today?
Shainarue replied to Mark Ling's topic in Blacksmithing, General Discussion
Yup, I noticed the hidden design after the fact. This might be their only year in use though, as the 115+ degree heat prompted a discussion about finding an indoor venue. Next year (and likely following years) will take place in an air conditioned community center. Only a few people knew I made them (or even made a trip to the bathroom to notice, lol). Jennifer, that's a nice looking trident. Looks similar to the colonial fork you have a video of. I'll have to give it a try. Billy, that's good clean work on the hook! -

What did you do in the shop today?
Shainarue replied to Mark Ling's topic in Blacksmithing, General Discussion
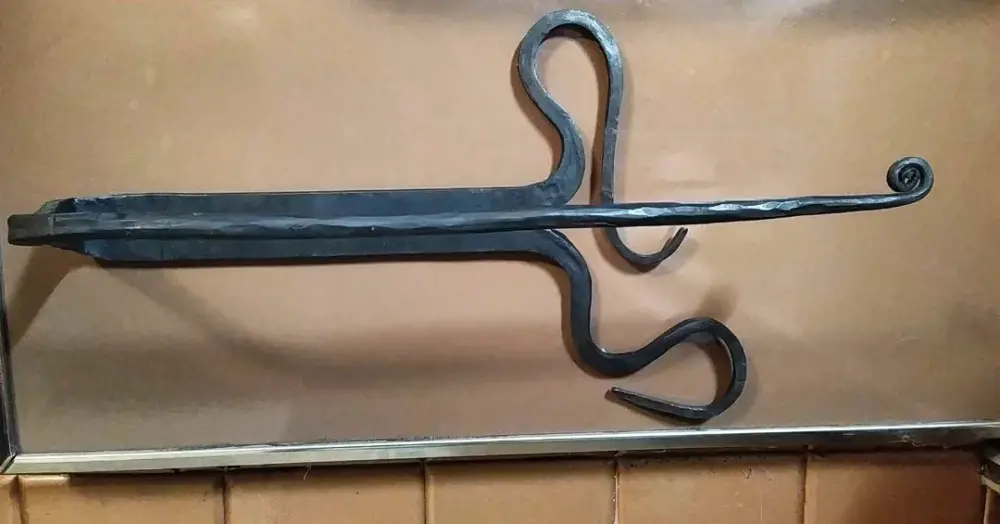
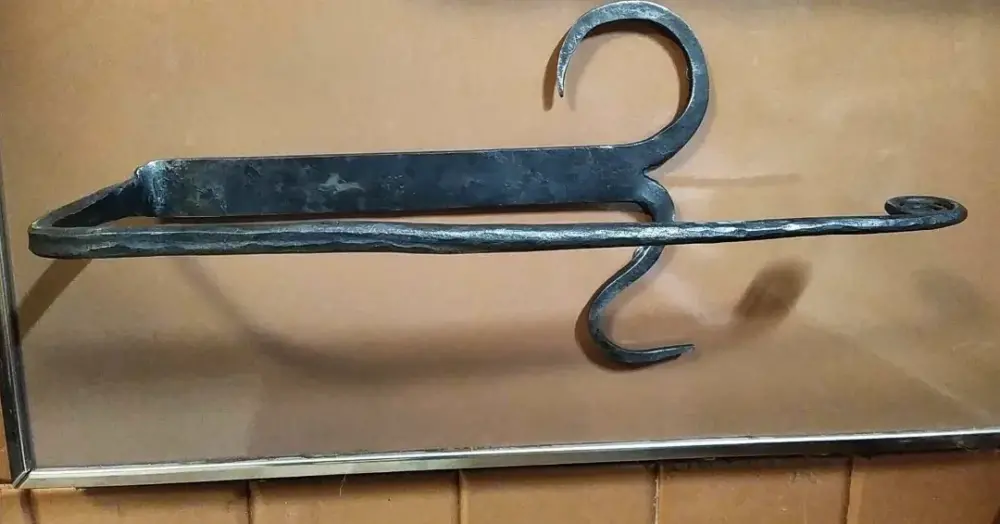
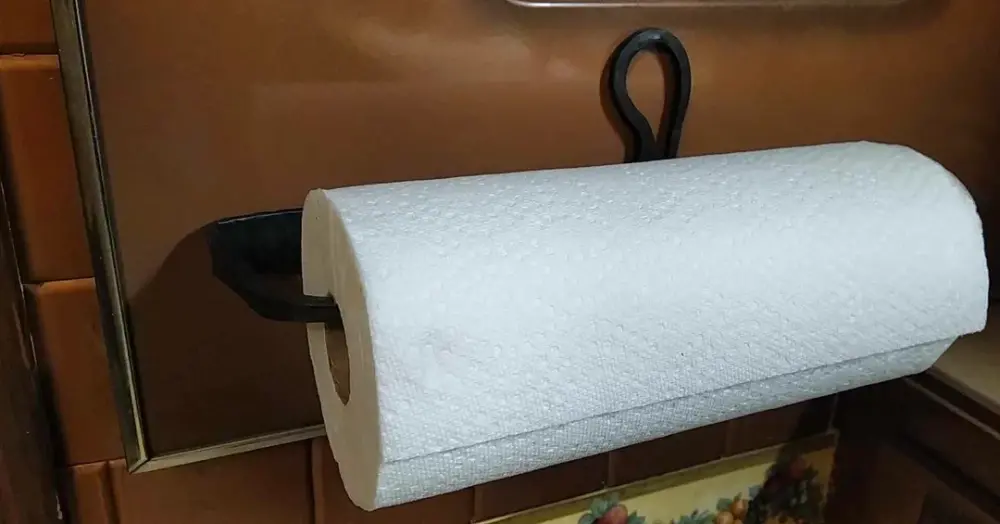
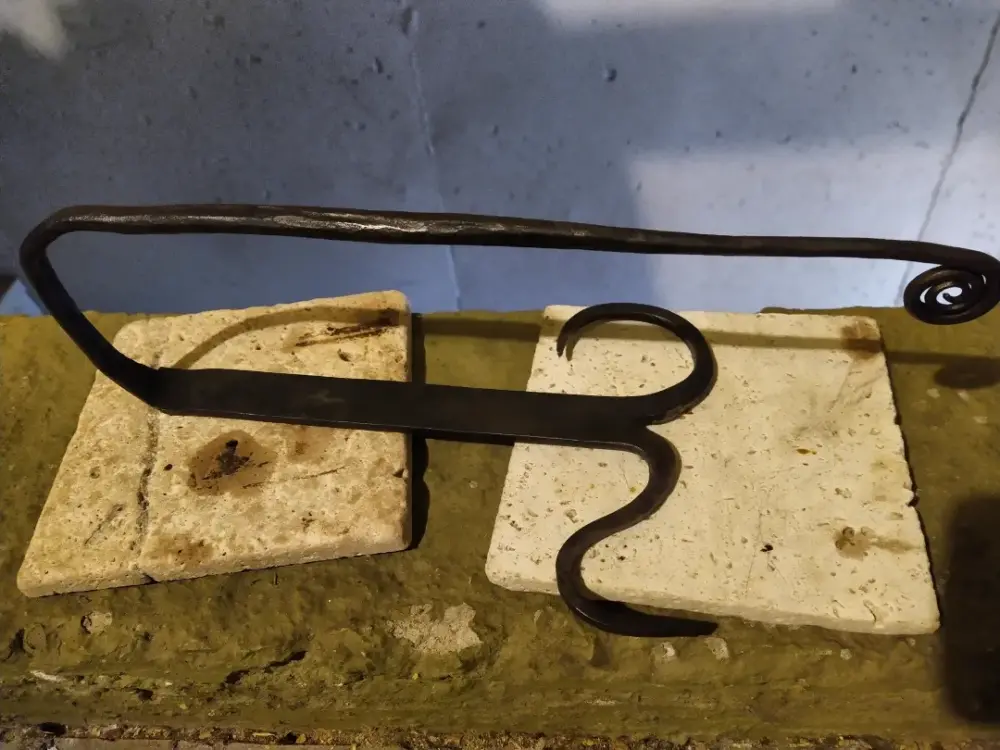
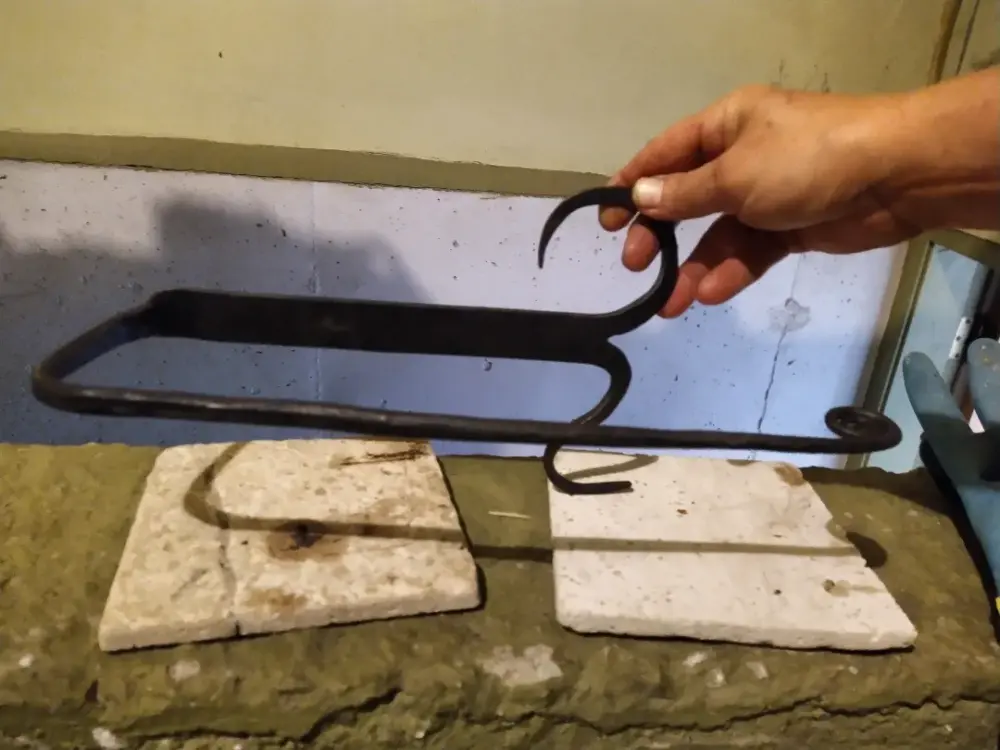
I finished the magnet mounted paper towel holders for the park bathrooms. These are for the family reunion on Sunday and I have plans all day and night Saturday so they had to be finished tonight. Whew! -

What did you do in the shop today?
Shainarue replied to Mark Ling's topic in Blacksmithing, General Discussion
Frosty, thanks for the fireweed advice! I'm like George's wife - my bites swell up (not a silver dollar but about quarter coin size). Arthur, my hot cut hardy was cut from a mason chisel and is shaped much like yours. I left my stem a bit longer than the heel so I could hammer it out if needed. Turns out, it's needed just about every time I hot cut. My hardy hole is in worse condition than yours, lol. Not just rounded but chipped areas are smooth. It's been chipped & worn for decades I'd say. I'm currently working on the second paper towel holder for the park bathrooms at the family reunion this Sunday. Hopefully I'll have pics to share tomorrow evening. I volunteered in the blacksmithing tent with BAM at the Missouri State Fair on Tuesday. 10 hours of smithing. Every time I do something like this that allows me to just forge all day long, I start thinking of how I would make that work as a full time job. I don't think I'm there yet, skills wise, but it's definitely a dream to strive toward. Anyway, I made a TON of nails because most of the kids (and some adults) thought it was just so cool and it's the one thing I know I can do fast before kids lose attention and wander off. I gave them all away. The night prior, while waiting at the airport, I made notes from 'Objects I forge with children' thinking that would be easy enough to try even though I'd never done it. I made a heart on a stake to use as a garden decoration, which someone wanted to buy but asked me to alter to have a hook at the end for BBQing. I obliged, lol - so I have no picture of that. Looked like the one in that post I linked to though. I made a few of the other different style hearts with no intention, a simple S-hook, tried a few skeleton keys but didn't have the right tools to finish the teeth, and started a bottle opener out of a piece of wrought iron another blacksmith gave me to play with. I couldn't decide what I wanted to do on the design so it's sitting in my bag. I think I've decided today that I want to try another skeleton key with it. That would look really cool if the etching brings out that old grain texture. -
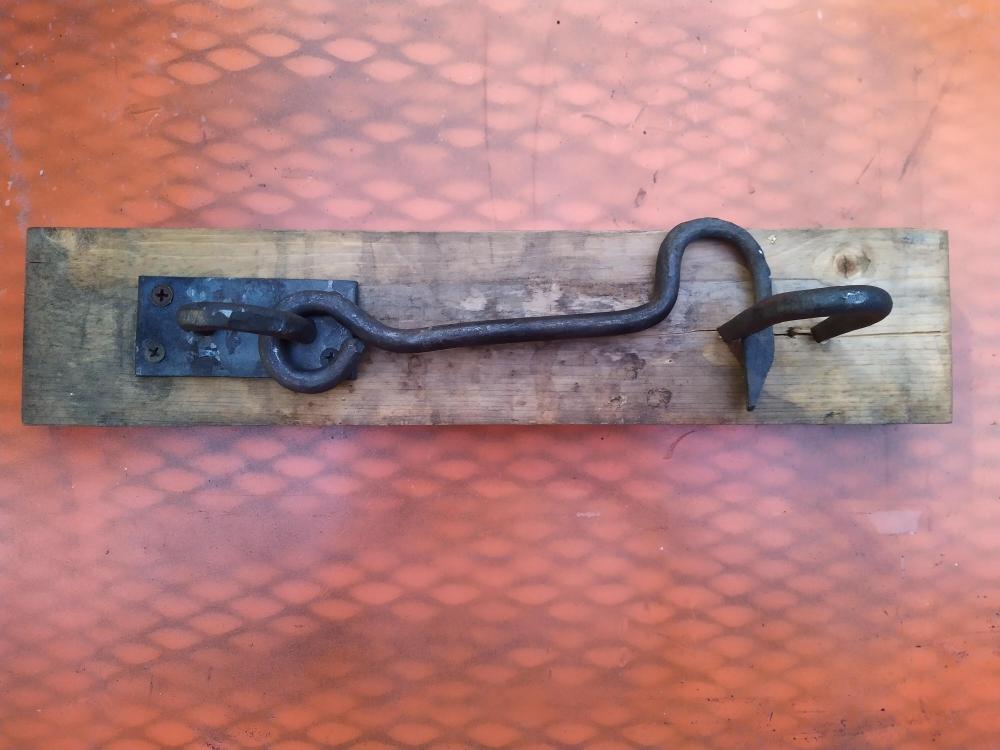
Were you in the course? And if so, have you asked your coach for any feedback? They should be helping you - that's what you're paying for, lol I don't mind trying to help - I'm not trying to get out of it - I just wondered if there was a coach not holding up their end of the deal. So, here's the pic of my finished and approved hook latch: He had declined my previous submission noting the eye wasn't correct - and sent me an image of what the eye should look like. I took my hook eye and laid it above the picture he sent to show him they looked the same to me and asked what I was missing. I also sent him step-by-step pictures of the hook so he could hopefully tell me exactly where I was steering wrong. But he ended up passing it, lol If you don't have a coach - hit me up in the Messages and I'll share my coaches notes with you to see if that helps.
-

Setting up a temporary shelter in a backyard?
Shainarue replied to Thr's topic in Building, Designing a Shop
This is exactly the method I used for gathering all of the pallets I collected! Pallets won't fit in my car so I had to tear them apart in order to take them home. I kept a a pair of gloves, a small sledge (machinists hammer?) and two 4-ft 2x4s in my trunk. Whenever I saw a pallet either driving around or on FB Marketplace, I'd be ready to tear it down and throw into my car! I hammered/pulled all the nails out at home. I got pretty quick at the teardown part, lol -
John got it as I was sketching, lol Gosh, that makes so much sense I'm a bit bonkered that it escaped me! I also like that I could use the same swage as a single ball end if I ever wanted to.
-
Apologies if this has been covered - I tried searching but after about 30 minutes I gave up and started this post. I'm wondering how I would create a spring swage that would create a mid-ball. So you insert a square bar and it creates a round spindle looking thing - round ball in the center with rounded ends meeting each side. I hope that makes sense. I can sketch something up if I need to. I'm making skeleton keys. I really love the ball segmented look. Since I intended to do this semi-frequently, I thought it would make sense to make a spring swage. All the swages I've made have been done from an existing shape. So - if I want a 3/8 round then I take a 3/8 round bar and smash it into a hot block halfway. So for this one - I'm looking at the shape and thinking: I could give a round bar a blunt taper & round that up (so basically like a tapered punch?) and use that as the thing to smoosh for either end. But how to get the ball impression in the center? Or how do I hand forge this design so I can create a master that gets smooshed? Or am I going about it all wrong? lol
-

What did you do in the shop today?
Shainarue replied to Mark Ling's topic in Blacksmithing, General Discussion
I keep a fan running, which helps cut down on the blood suckers quite a bit. I'm generally a magnet for skeeters, so I usually still end up with a few and those are probably from when I'm standing behind the fan or while I'm cleaning up and the fan is off. -
Thanks for the input. I'm hoping to get started on this on Wednesday evening.
-
You can totally "steal" the idea, lol If I get it done, it will be before the 26th cause it's for a trade item at the August meeting.
-
I hadn't even thought of split tenons, thanks! I like all of your ideas. I think I'll try the flat bar approach.
-
So, I have an idea sketched out for a hook rack that (hopefully) resembles a tree branch. I can give more details/images of sketch if needed by my first question I think is pretty basic in regards to how things function. I want the 'back plate' (the part that attaches to the wall) to be flat against the wall but round facing the person. If I start with a round bar and place it into a round swage and hammer the top flat - would that effectively give me what I'm after? It seems logical in my head but I won't have a lot of time to play around with what works and what doesn't by the time I get back from vaca and start working on this. The other consideration I had was cutting a pipe in half lengthwise, then tack welding a hanging bracket to the open backside (the kind with the large hole that slides into an oval so you just slide the piece onto the screw rather than screwing into a hole on the piece). I'd prefer the solid bar though, because I'm going to use tenoned joins for the hooks and I can't quite imagine trying to hammer a tenon into place from the backside of an openfaced pipe, lol
-
Yes, I finished mine. And yes, I laid it on top of the full page printout when I sent the photo to my coach. I made 4 before I finally got it perfect. What part isn't lining up for you? Have you talked with your coach about it? Tomorrow (Tuesday) is the final video session and they'll be covering the latch project. Hopefully you get some good tips.
-

What did you do in the shop today?
Shainarue replied to Mark Ling's topic in Blacksmithing, General Discussion
Thank you Jennifer, Anvil, and Frosty. I'm sure the second one will be even better. Yes, Frosty, I'm using rare earth magnets. Just glued them tonight. I'll test with a roll tomorrow evening. -

What did you do in the shop today?
Shainarue replied to Mark Ling's topic in Blacksmithing, General Discussion
I finally finished one of the paper towel holders I'm making for the upcoming family reunion. Divots punched into the back for magnets as this will attach temporarily to a metal door. I need two by August 20th, and we'll be on vaca for 7 of those days. We are our own worst critic, but even so... I'm glad this isn't a gift for anyone because of it were, I'd be remaking it. Just too many aspects I'm not proud of. BUT, it will hold a roll of paper towels which is what it's intended to do! Sorry, no pic of it actually holding a roll, lol

