Shainarue
2021 Donor
-
Joined
-
Last visited
Everything posted by Shainarue
-
My state of mental well-being is the same. I'm hoping the Dutch studies with be sufficient though. That's a cool idea for the vase! Looking forward to seeing it finished
-
I figured I could use tong clips! Then just let the tongs 'rest' in my right hand. We'll see. Right now I don't even want to test the waters. I thought I'd work on my needlefelting but even that started aggravating it last night so it's definitely not ready for anything more. I'm going to dive back into Dutch for awhile and maybe finally get the workshop organized but I'm sure within a few weeks, I'll be itching to beat on metal again, lol I will have to be extra careful to not go and mess up my left arm from improper handling of the hammer though!
-
I made some edits to the original feather before bringing it for the trade item last Saturday. I was much happier with the results. I messed up the elbow on my hammering arm over vacation. The symptoms are pointing to tennis elbow AND golfers elbow... But I'm hopeful that I'm wrong, lol So far I'm 5 days into babying it, trying to remember ibuprofen, trying to remember to wear the forearm arm brace, and just not using it as much as possible. I tried grinding on some pieces for a new anvil stand I was working on and it made it worse so I guess I really need to be serious about resting it. Which sucks because I'm really not good at that. Might get more proficient with my left arm, lol

-
Very nice! This style is one I really need to make soon - as I keep starting projects that work with flat bar which I don't have a set of appropriate tongs to hold, lol.
-
-
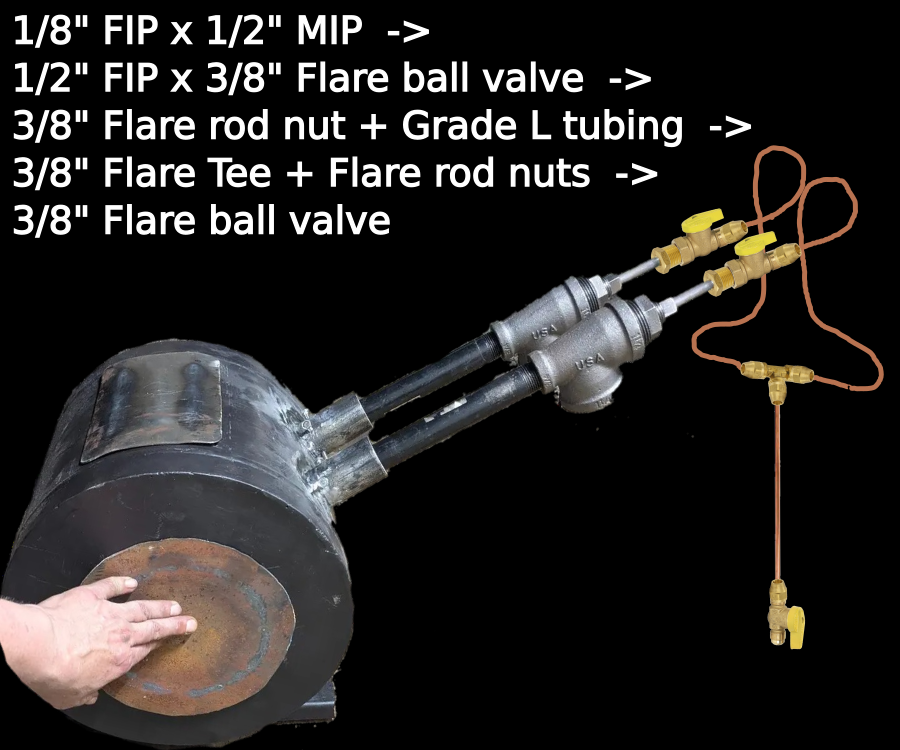
Curious if anyone can tell me if one configuration is better than the other - or suggest a different configuration. I assume I'll need to come up with some kind of brace to support all this? Since I will sometimes have the top port open, I wanted to use copper tubing until it is well out of danger of a rubber gas hose being at risk. For ease of reference, let's label them "with loops" and "without loops" - even though there are other differences.

-
Tonight I practiced square corners while making brackets for the new gas forge I'm building. 3 of the 4 finished. From right-to-left: "Lee Sauder" method, first attempt. I did something wrong and ended up with a fold on both sides when I worked the upset down. "Lee Sauder" method, second attempt. Better. Both attempts have crease on the inside corner that I couldn't get worked out short of filing (tried fullering and using the cross peen, even tried hammering into the soft edge of the anvil knowing it would thin that area). Not sure if that's something I'm doing wrong or just a thing that's expected with this technique. The 1st way I learned, through a class teaching techniques for ABANA curriculum level 2. Basically, bending just short of 90 and then upsetting into the bend from each side. Most work done in the vise. Repeat and periodically clean up any twisting or bulging on the anvil. Took longer, but the inside corner is cleaner.

-
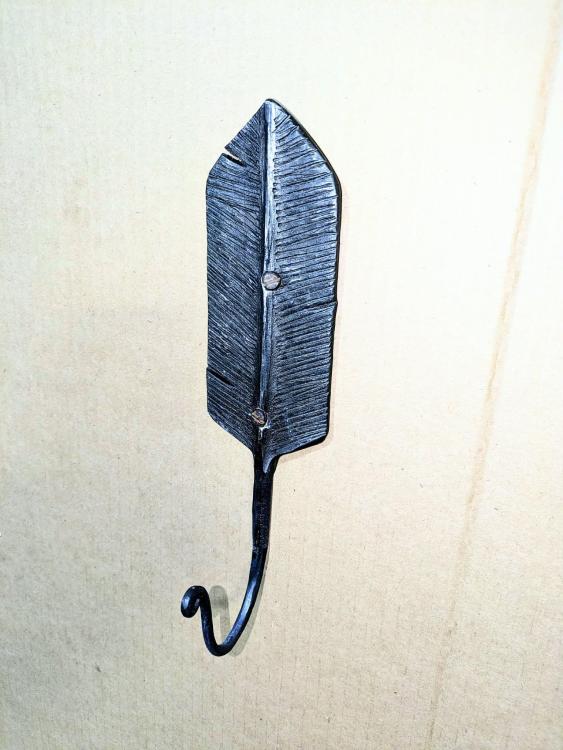
Tonight I finished my first ever feather J-hook from angle iron. This is for a trade item for the June FSBC meeting.
-
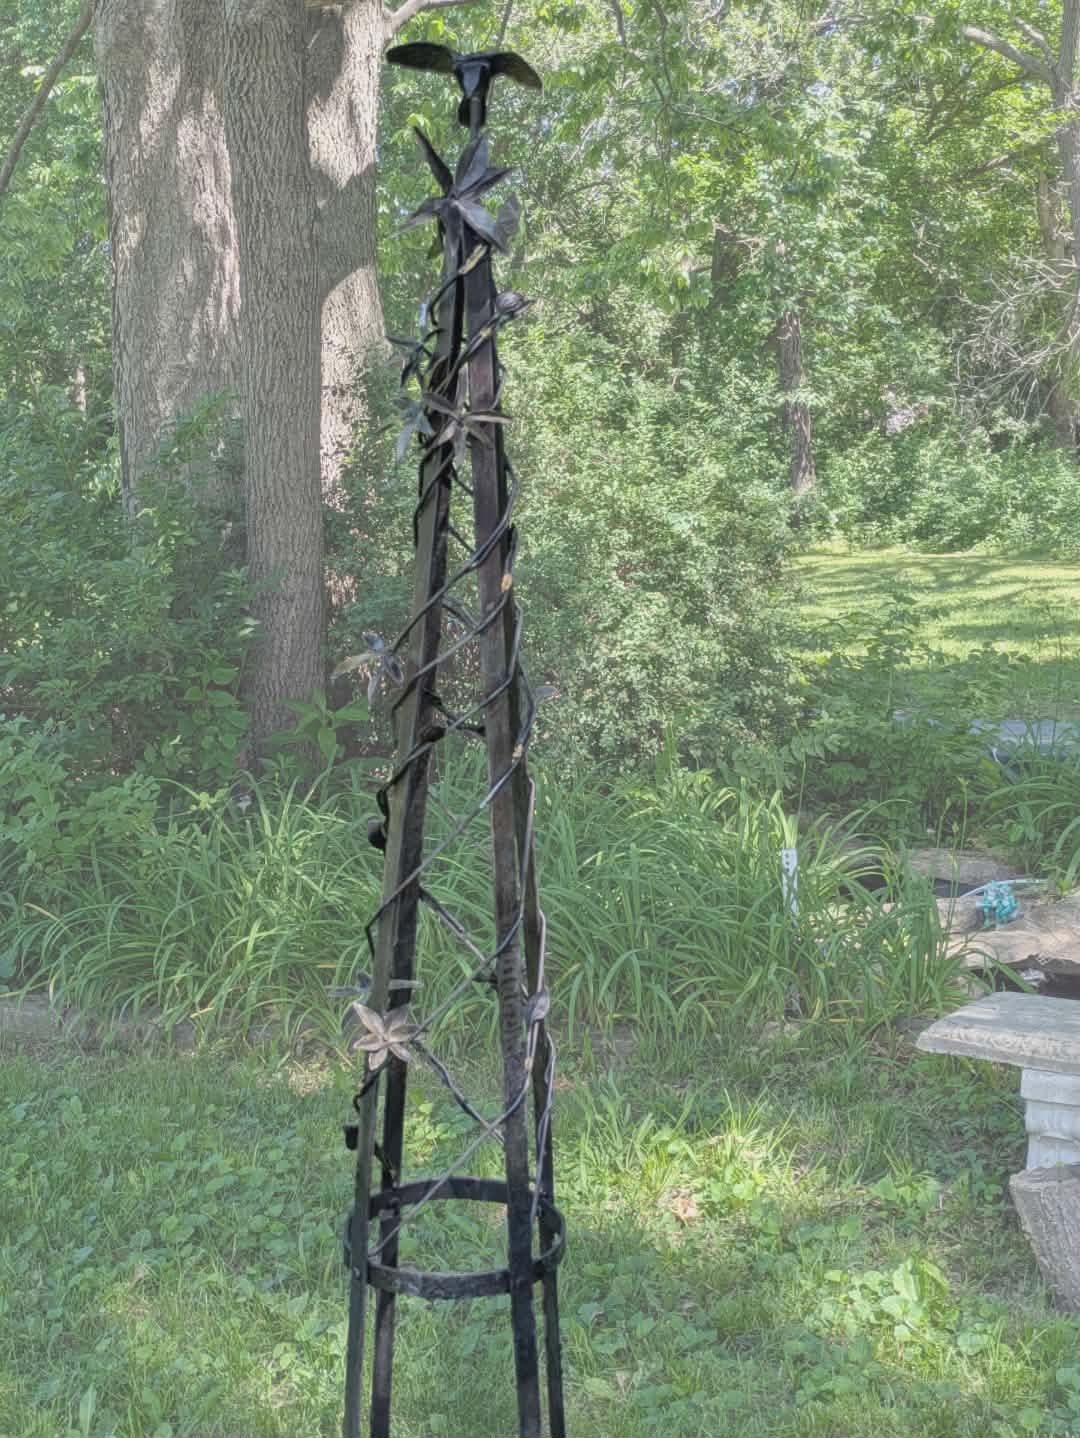
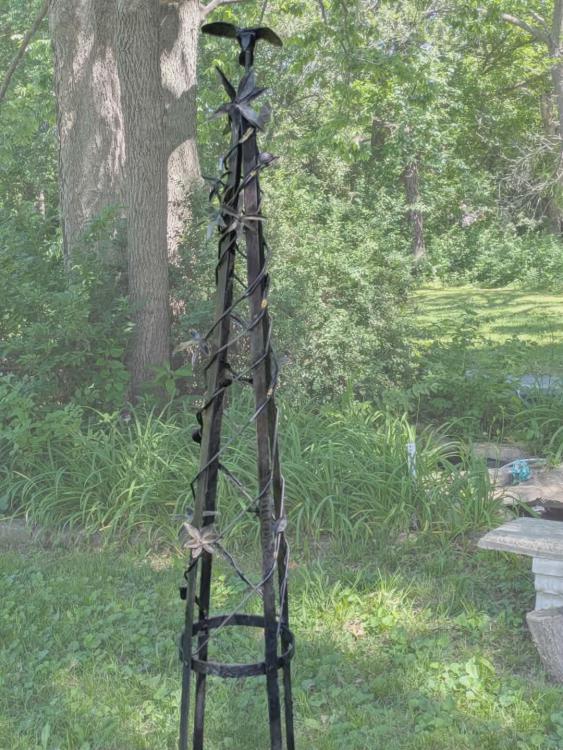
I finished the trellis for my friend and brought it to her last night. She loves it. I edited the photo to lighten the background so the trellis is more visible. Black trends to blend into green backgrounds!
-
This is more in like with what I was wanting. Not that anyone will ever see it, lol
-
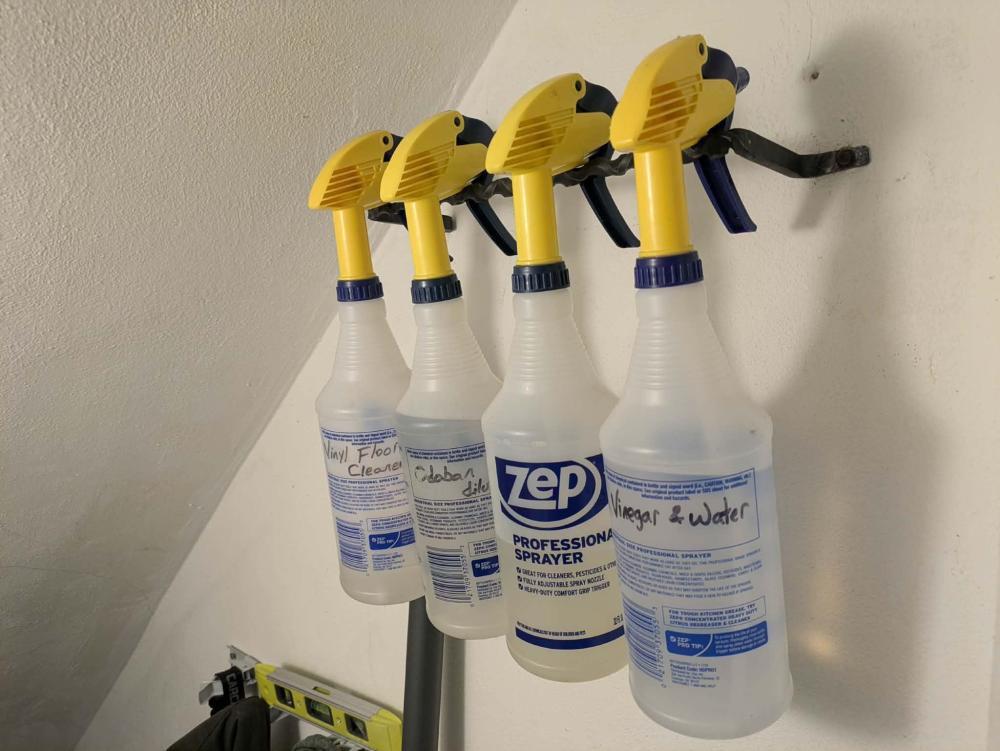
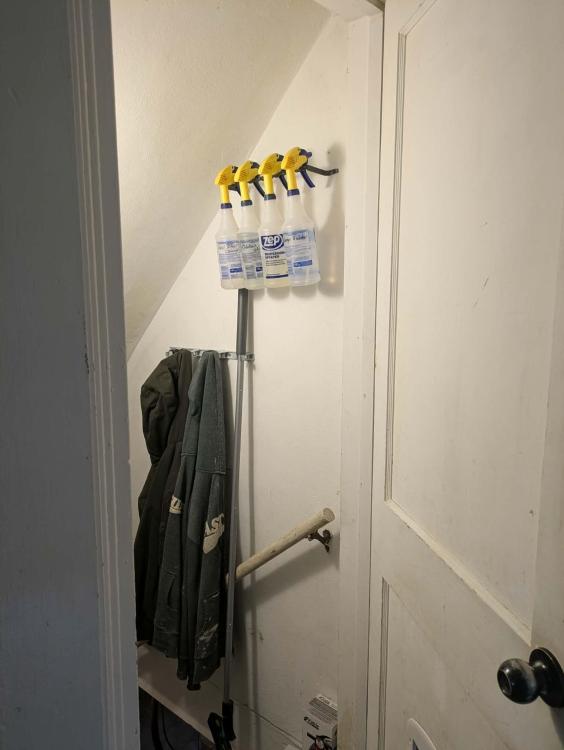
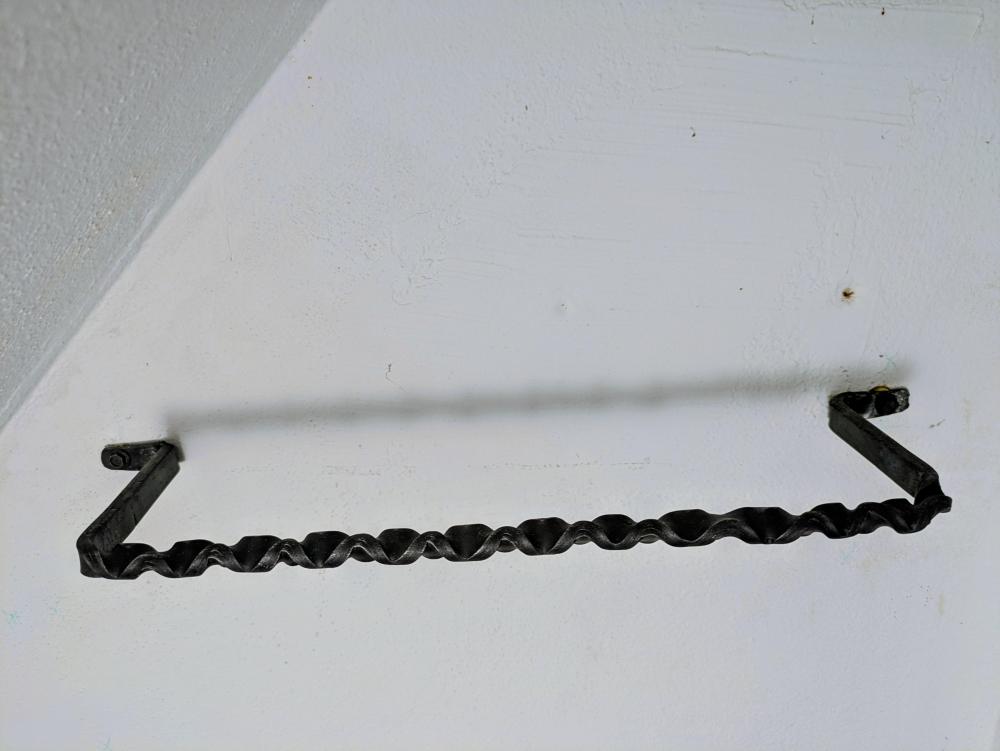
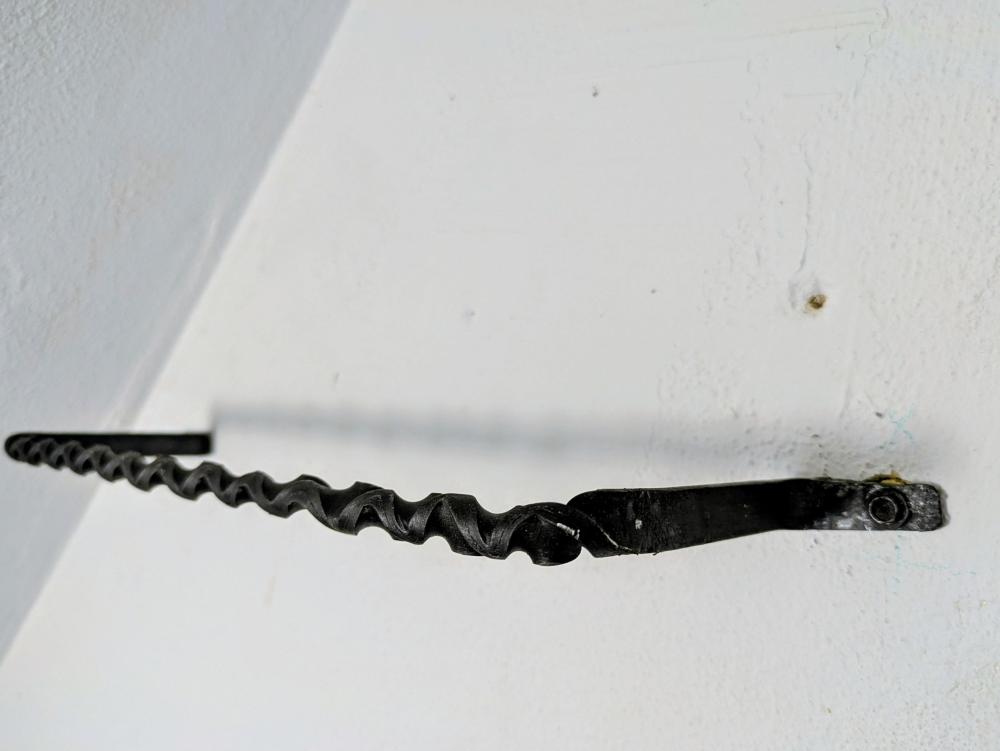
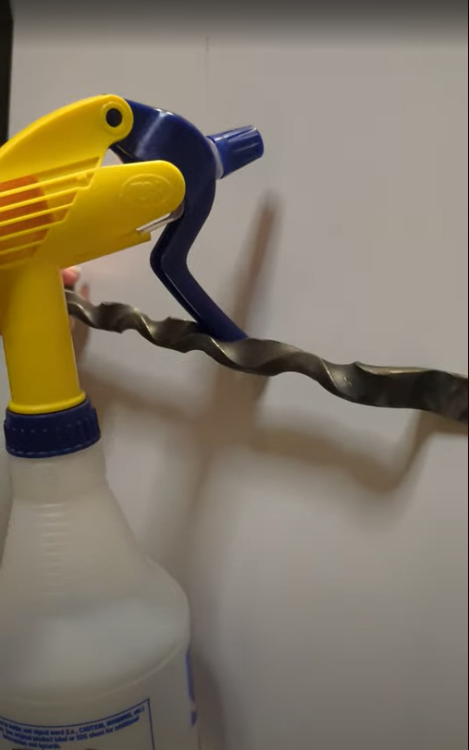
I've been in a fairly low funk lately and haven't even wanted to forge since Friday. Last night I decided to whip out something simple that would help clean up the spray bottles we currently have grouped in a corner of the kitchen. I've been wanting to try that reverse twist pattern in flat bar and this was the perfect project for a fun twist. Well, a few critiques of my own work: 1. It's not even. I don't know how that happened. I measured, I marked, I VERIFIED (but obviously missed it, lol). One end has a shorter leg than the other, creating a slanted opening. 2. I think it would look better with the twists closer together. Or maybe even twisted 3/4 rather than 1/2. I'll play with that. 3. I measured the required length but it didn't occur to me to measure the depth required for dropping the spray bottle handles in there! So, it doesn't really work for its intended purpose. I'm going to mount it in the basement bathroom to replace the cheap plastic towel rod that's currently in there.


-
Haha, I should have remembered those!
-
Congratulations on the commission! Have you done a railing before?
-
I like that candlestick.
-
Good enough for me, lol I did try a quick search using site: iforgeiron.com and then "rigidizer" and "dilute" but kept coming across posts just instructing to use rigidizer, not commenting on whether diluting was good/bad/other. So I appreciate your working memory
-
One follow up question. "Wet the insulation with water" as in mist it with a spray bottle or douse it with a sink sprayer? I mean, I know it doesn't need to be dripping wet, lol. But wet all the way through or just the surface?
-
Just about every time I post, I try to imagine what Frosty would have had to say. Thanks for the advice, I'll try that tonight.
-
I have some INS-TUFF ceramic fiber rigidizer. The instructions do not specify to dilute but the two online kits I've gotten in the past that came with an unbranded rigidizer instructed to dilute 50/50 with water. Does anyone know if diluting affects the hardening?

-
John, that's awesome. Your son is fortunate to have a father who can make that for him! David, nice work. I haven't seen the spiral iron before but I'm guessing it's for heating things like a slice of bread? We had our Free State Blacksmiths Club meeting today and part 2 of the gas forge building workshop. He covered insulation, refractory options, and burner placement then set us loose to get to work. I didn't know I needed to bring a sleeve for the burner to attach to the forge so I had to finish mine at home. I didn't have any flux core wire so I had to use the stick welder, which I'm obviously still pretty bad at, lol. I guess I could have practiced some patience and waited to weld those on until I replaced the flux core but ... well, I'm not patient Hoping to get the rest of the accessories (plug handles, latches, side supports for the top portion, rail for the bricks when ends are open, and the extendable work rest) finished tomorrow. Then add the insulation and apply the 1st coat of Greenpatch 421.


-
Looking forward to the progress, John! Tonight I stripped the rust and paint from the vessel which will become a new 2 burner dual function forge. Then I painted it with heat resistant stove paint. Inside, I took nice pictures of the finished paperclips.

-
You have been smiled upon indeed! That is a heck of a score! Regarding the table - can you take a picture showing the full table? I'm thinking it'd be easier to just use the frame to make your own firepot but seeing the full table might get better advice from others in here.
-
I feel you gewoon. I only get 2 hours each night and if I'm lucky, up to 8 hours on Sat/Sun but that's assuming we don't have any other plans. It seems it's never long enough, lol Billy, I like that. It's simple and clean. Last night I tried my hand at brazing. I didn't want to clean the spatter of flux core and I don't have mig. I also thought my friend would probably appreciate the little splashes of "gold" throughout. I practiced on some scrap of similar sizes before taking a run at the actual trellis. Could be better - for sure - but it's definitely holding! Next up is to use the torch to spot heat the stems and wrap them along the structure, give everything a good cleaning with degreaser, then Ospho & wax. I would love to have this done by Saturday but of course, this is the week that I have appointments after work 3 of the 5 days, lol. So probably won't. The only full size pic I have - complete with a messy shop in the background, lol


-
Today I welded the paperclips to 2x2 plate bases. I cut some 4x1 board into square blocks, ran them through the router to fancy them up, torched them and coated with blo. Tomorrow I will paint the plates and affix them to the blocks. I finished the boot scraper. I decided to heat paint and clear coat. I gave the Sasquatch a good brass brushing.


-
Nice work on the hinges Billy! Irondragon, that's a nifty use of materials for your door handle. Rust-Away sounds like Ospho? If you've used Ospho, can you speak to how it compares? I have made considerable progress on the boot scraper. I'm pretty happy with the rivets and tenons. All that remains is to attach the little sasquatch, clean, and apply a finish. I also remembered to grab a pic of the paperclips with their various finishes.


-
The friend whose shop I work out of sometimes requested some of my jumbo desk paperclips to put in his retail shop in time for a big event he's having soon. Up until now, I had only made 3 and each time was as a one-off mentality but his request spurred me to make a jig. I made one on Tuesday night but phone died and I didn't get a picture. That night, I also tried forming one cold with the jig. It's 3/16 round and apparently that's just barely too big to get nice graceful bends. Maybe if I had two small bending forks - but the one I have (and I'd consider it small) is too beefy to fit inside the jig bits. I went ahead and cut the remainder of the 12ft bar into 18" lengths since that test piece (while a bit rough looking) proved that it worked well with that length. I also chiseled on the underside of the jig to indicate the length and diameter rod intended for the jig. Last night, I heated up all pieces and wrapped using jig. I ended up with 7 total finished (plus the one janky one making 8). I was running really low on paste wax so I decided to try an experiment. I coated three with the last of my Johnson's paste wax, two with boiled linseed oil, and two with canola oil. The event he wants these for isn't until the 15th so I'm curious to see if any of these finishes will show any differences between now and then. At some point, I need to attach them to bases as well. My phone died last night while applying the finishes (the live streaming sucks that juice right out, lol) but here are some screen grabs from the live stream I was doing while working.