M3F
Members
-
Joined
-
Last visited
Everything posted by M3F
-
It definitely will be. Like I said 1.5" worked for me. The refractory does compress that down a bit though. For my forge floor I can't use a standard firebrick. I have to cut them in half. After messing with that and them cracking I switched to kiln shelf tiles. I suppose it depends on how large your work pieces are.
-
Mr. Anderson I had the same issue with my Hells Forge. I was able to achieve welding heat by re-lining it with 1.5" of kaowool. (its recommended you have 2" but there's almost no space left inside that forge then.) After that I followed the standard refractory and ITC 100HT coating methods and made sure the burner was tuned correctly. It works fine now but if I had the cash I'd buy a Chile Forge.
-
Hope you have a speedy recovery!
-
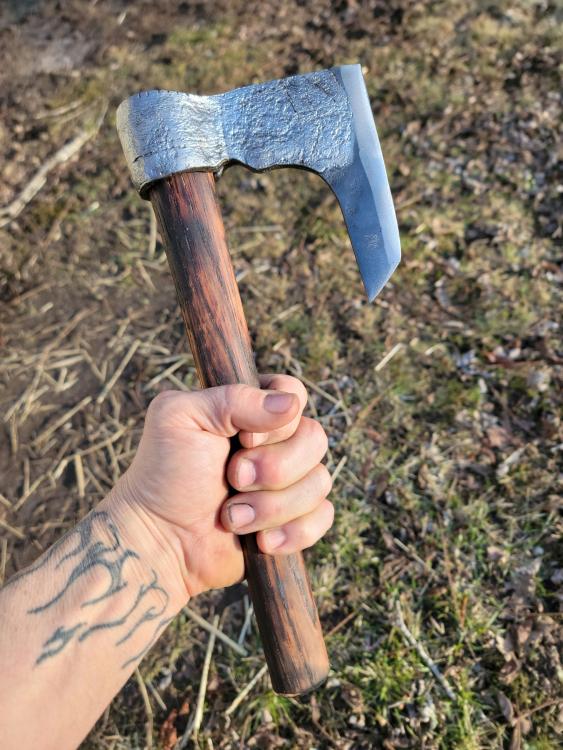
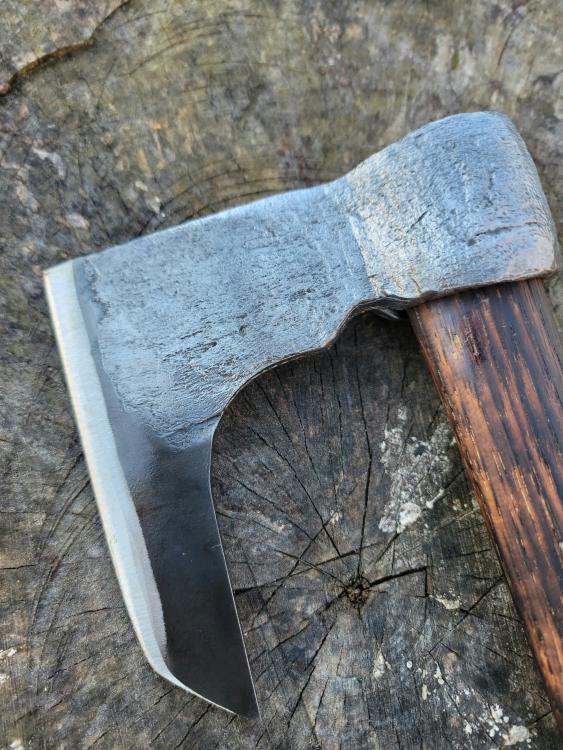
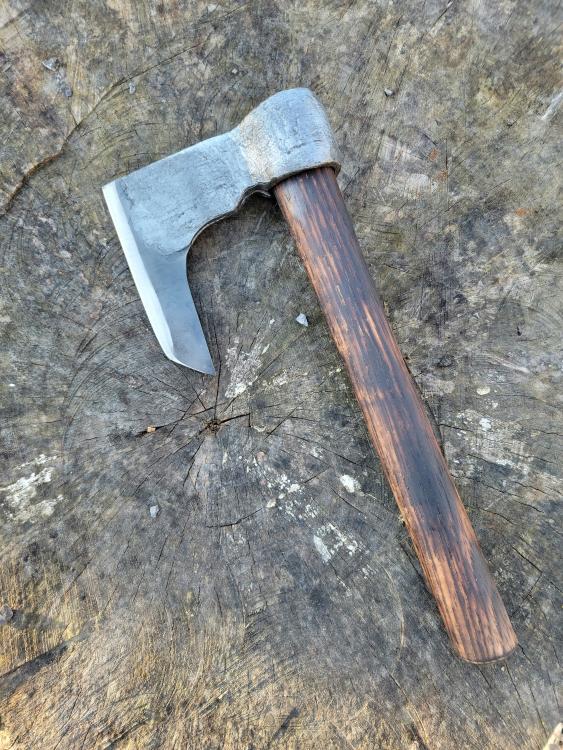
Finished a small wrought kindling axe. It started out much larger but pre-heat treat I noticed a decent crack on the cutting edge so I had to improvise haha.

-
Thanks! Great points thank you, I'll reverse the direction and the handle was a bit rushed since it was the last thing but that makes sense too, I have the tools to make another.
-
All done and well worth it! I'll be keeping an eye out for an original stand or at least the mounting bracket. I'll fab a decent one for the time being. 20230214_144412.mp4 20230214_144631.mp4


-
-
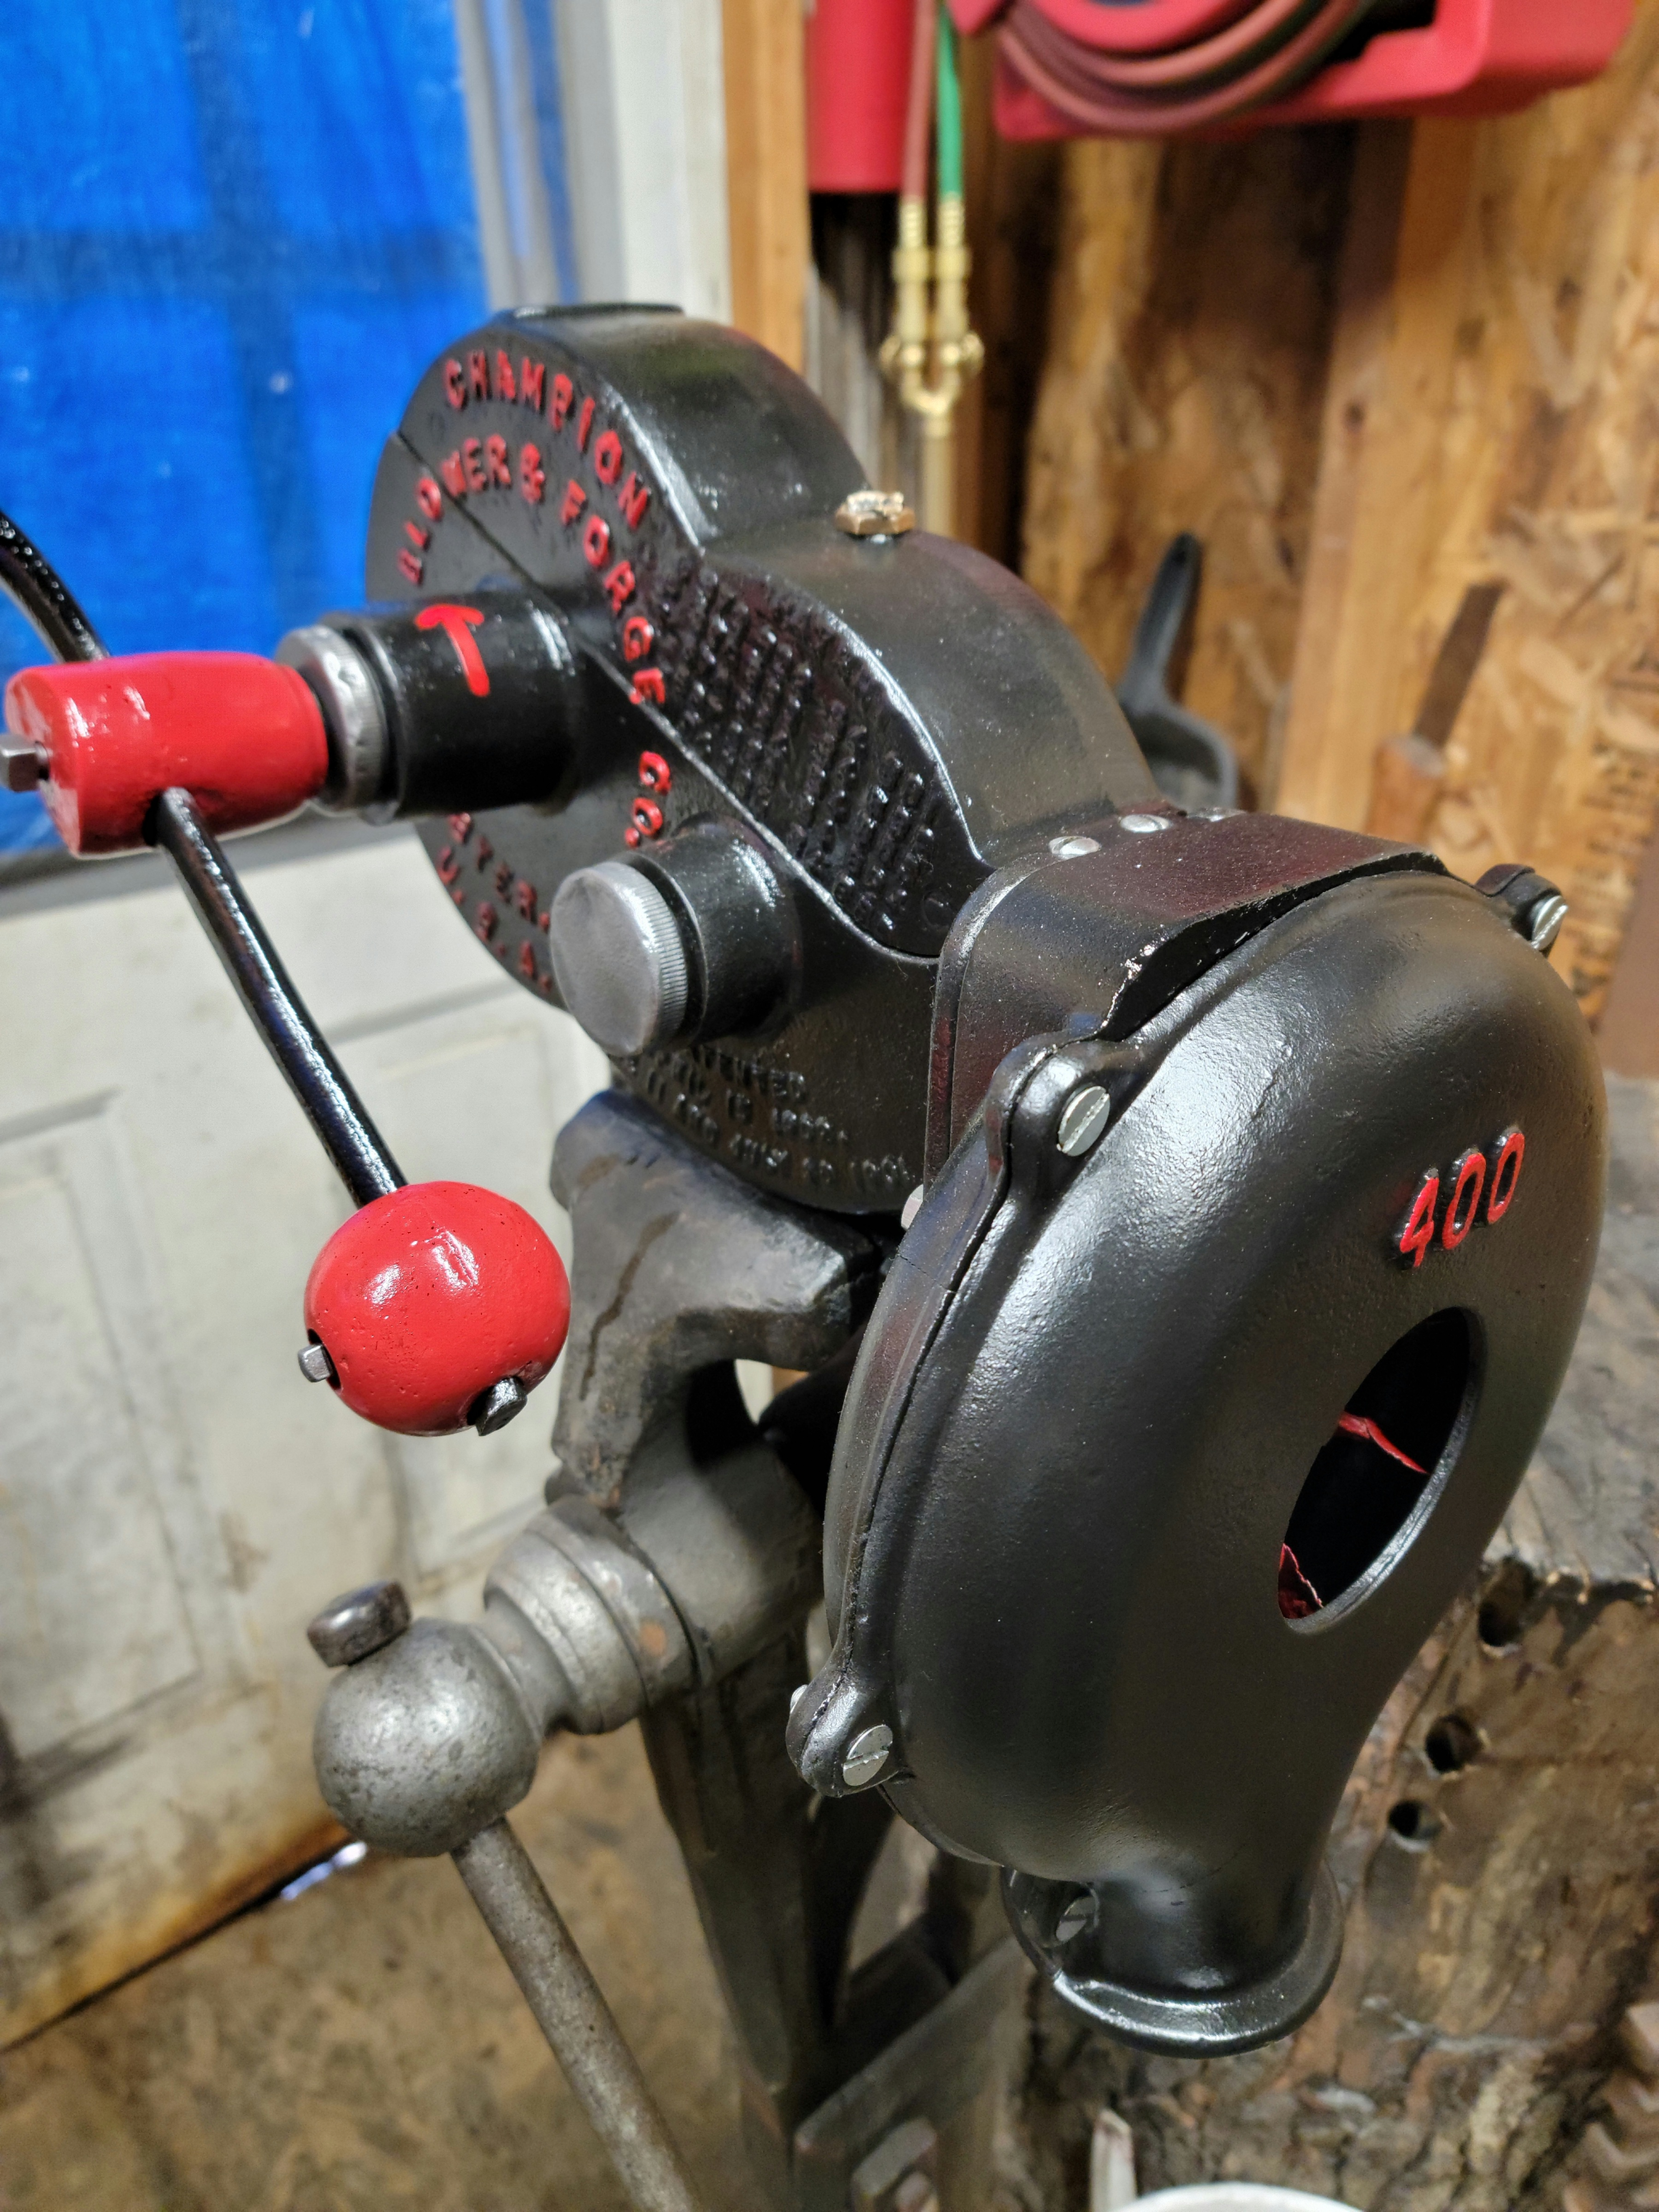
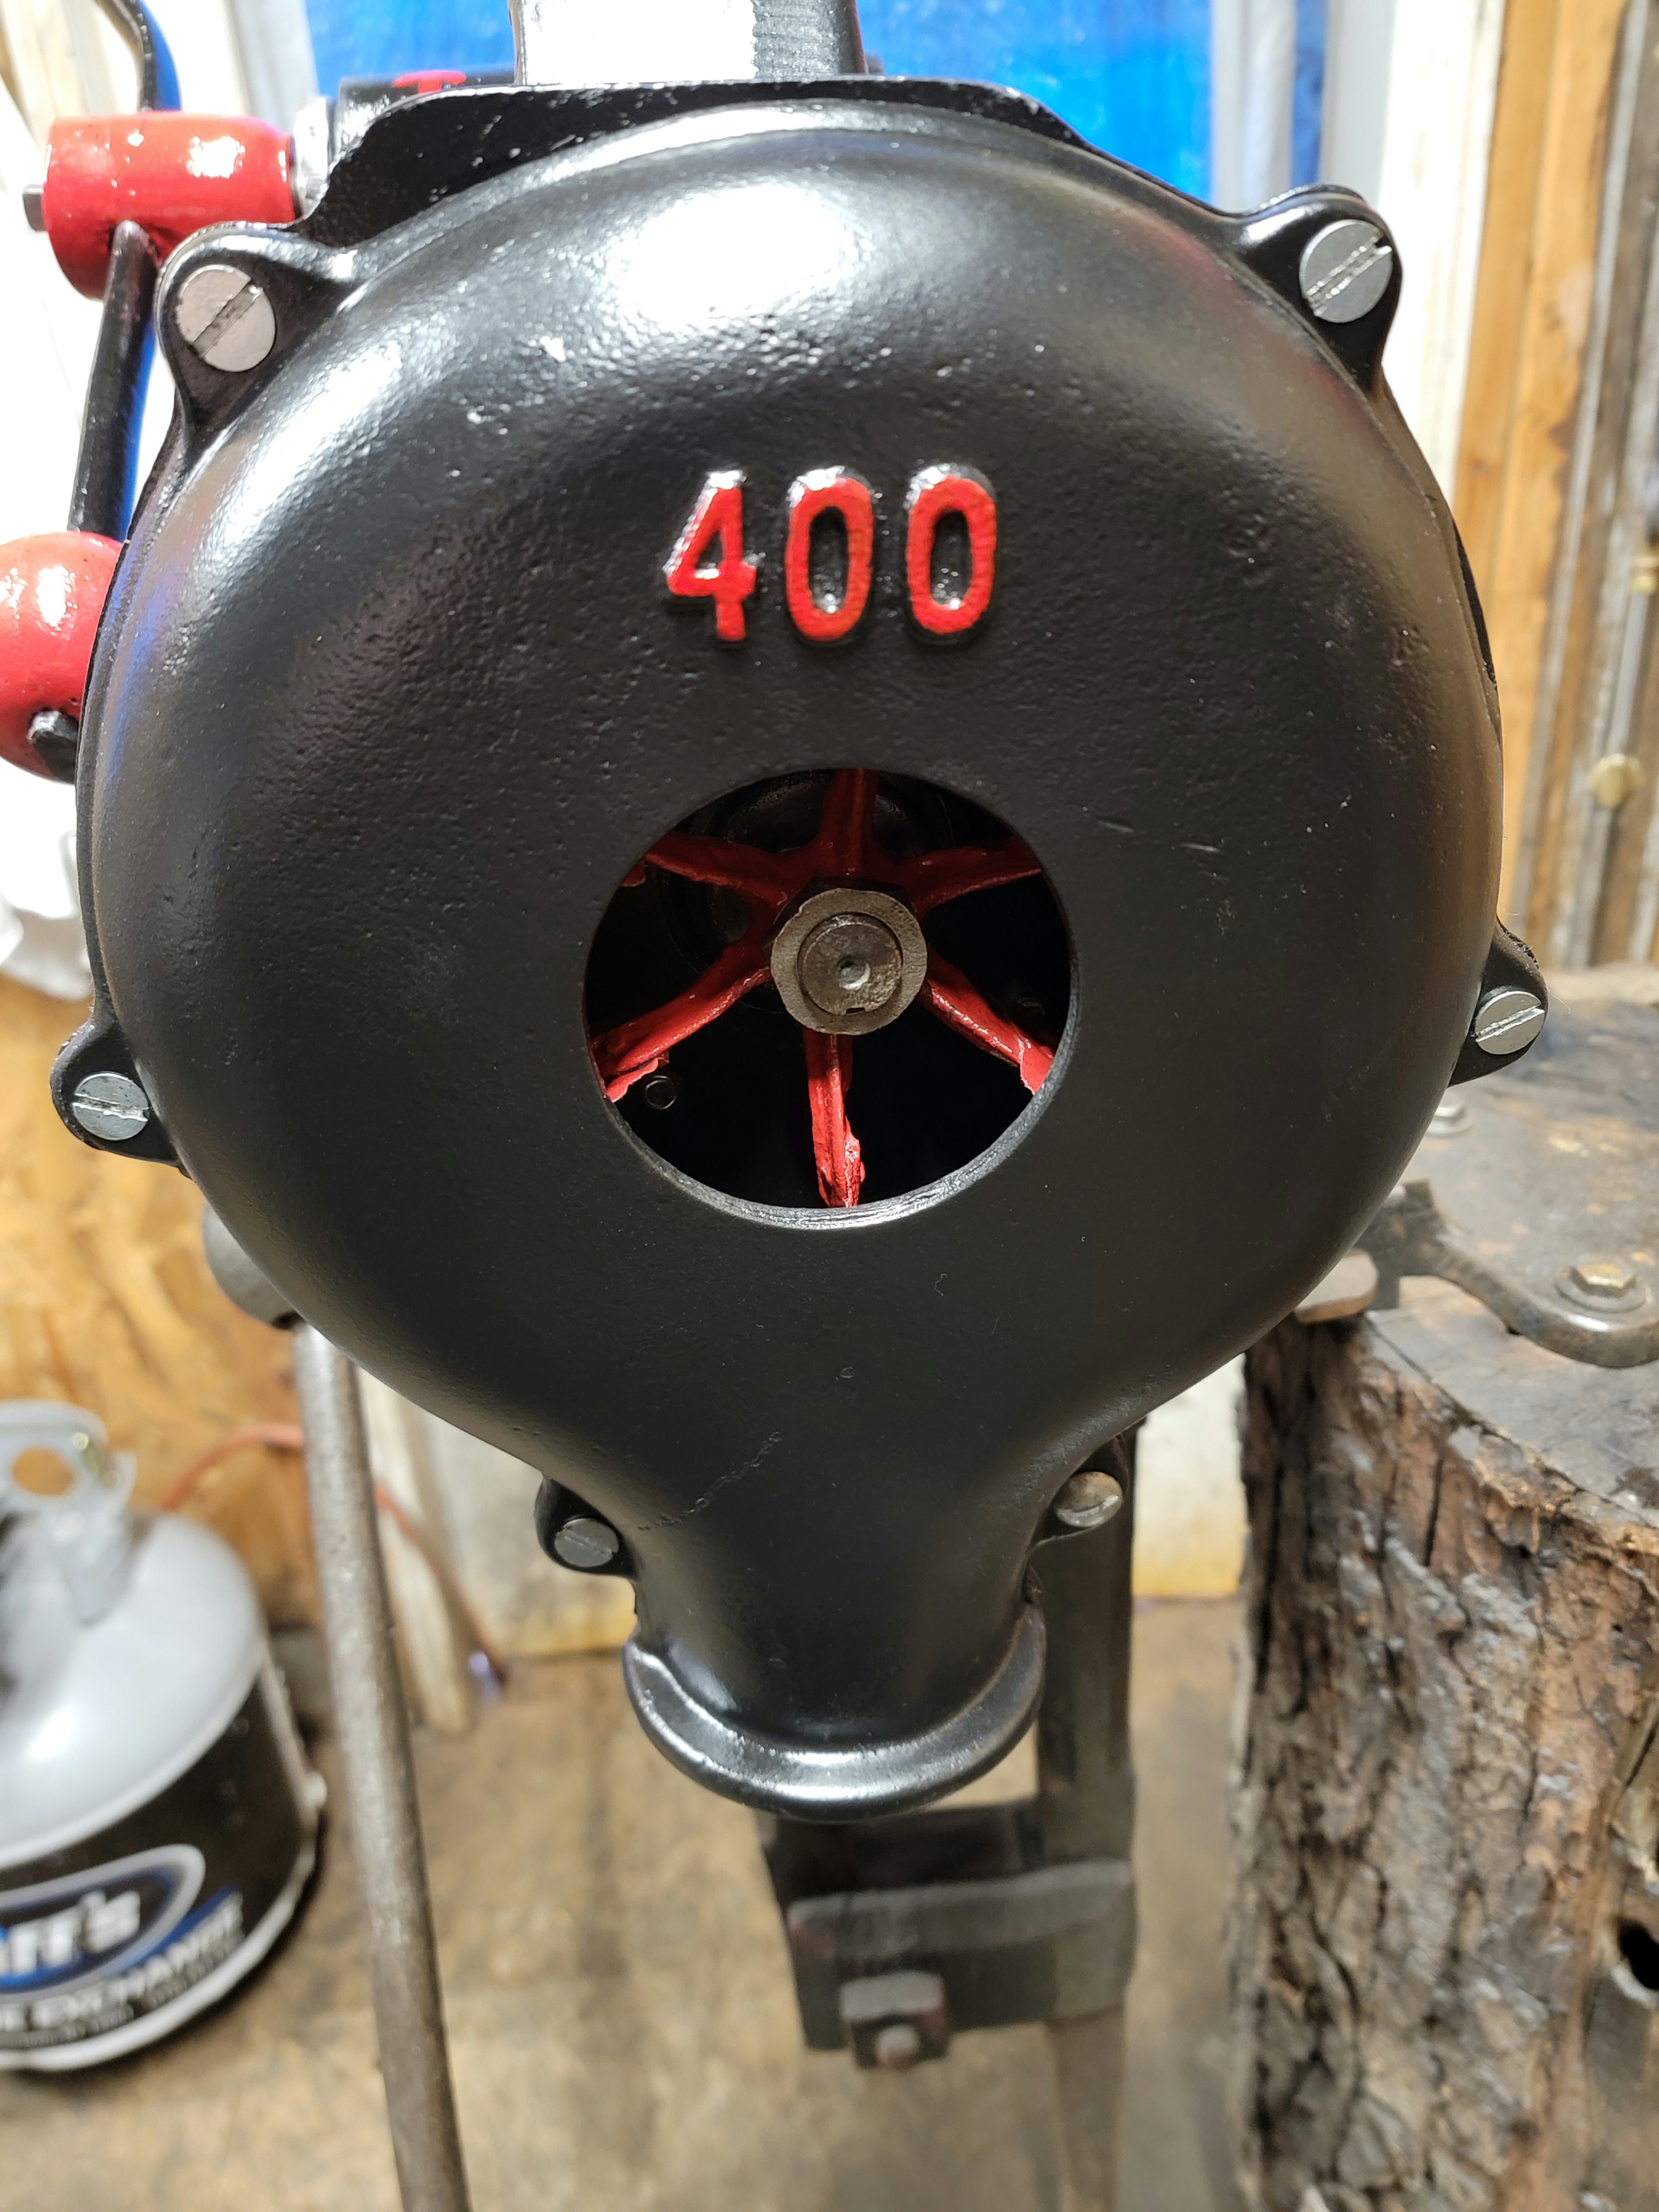
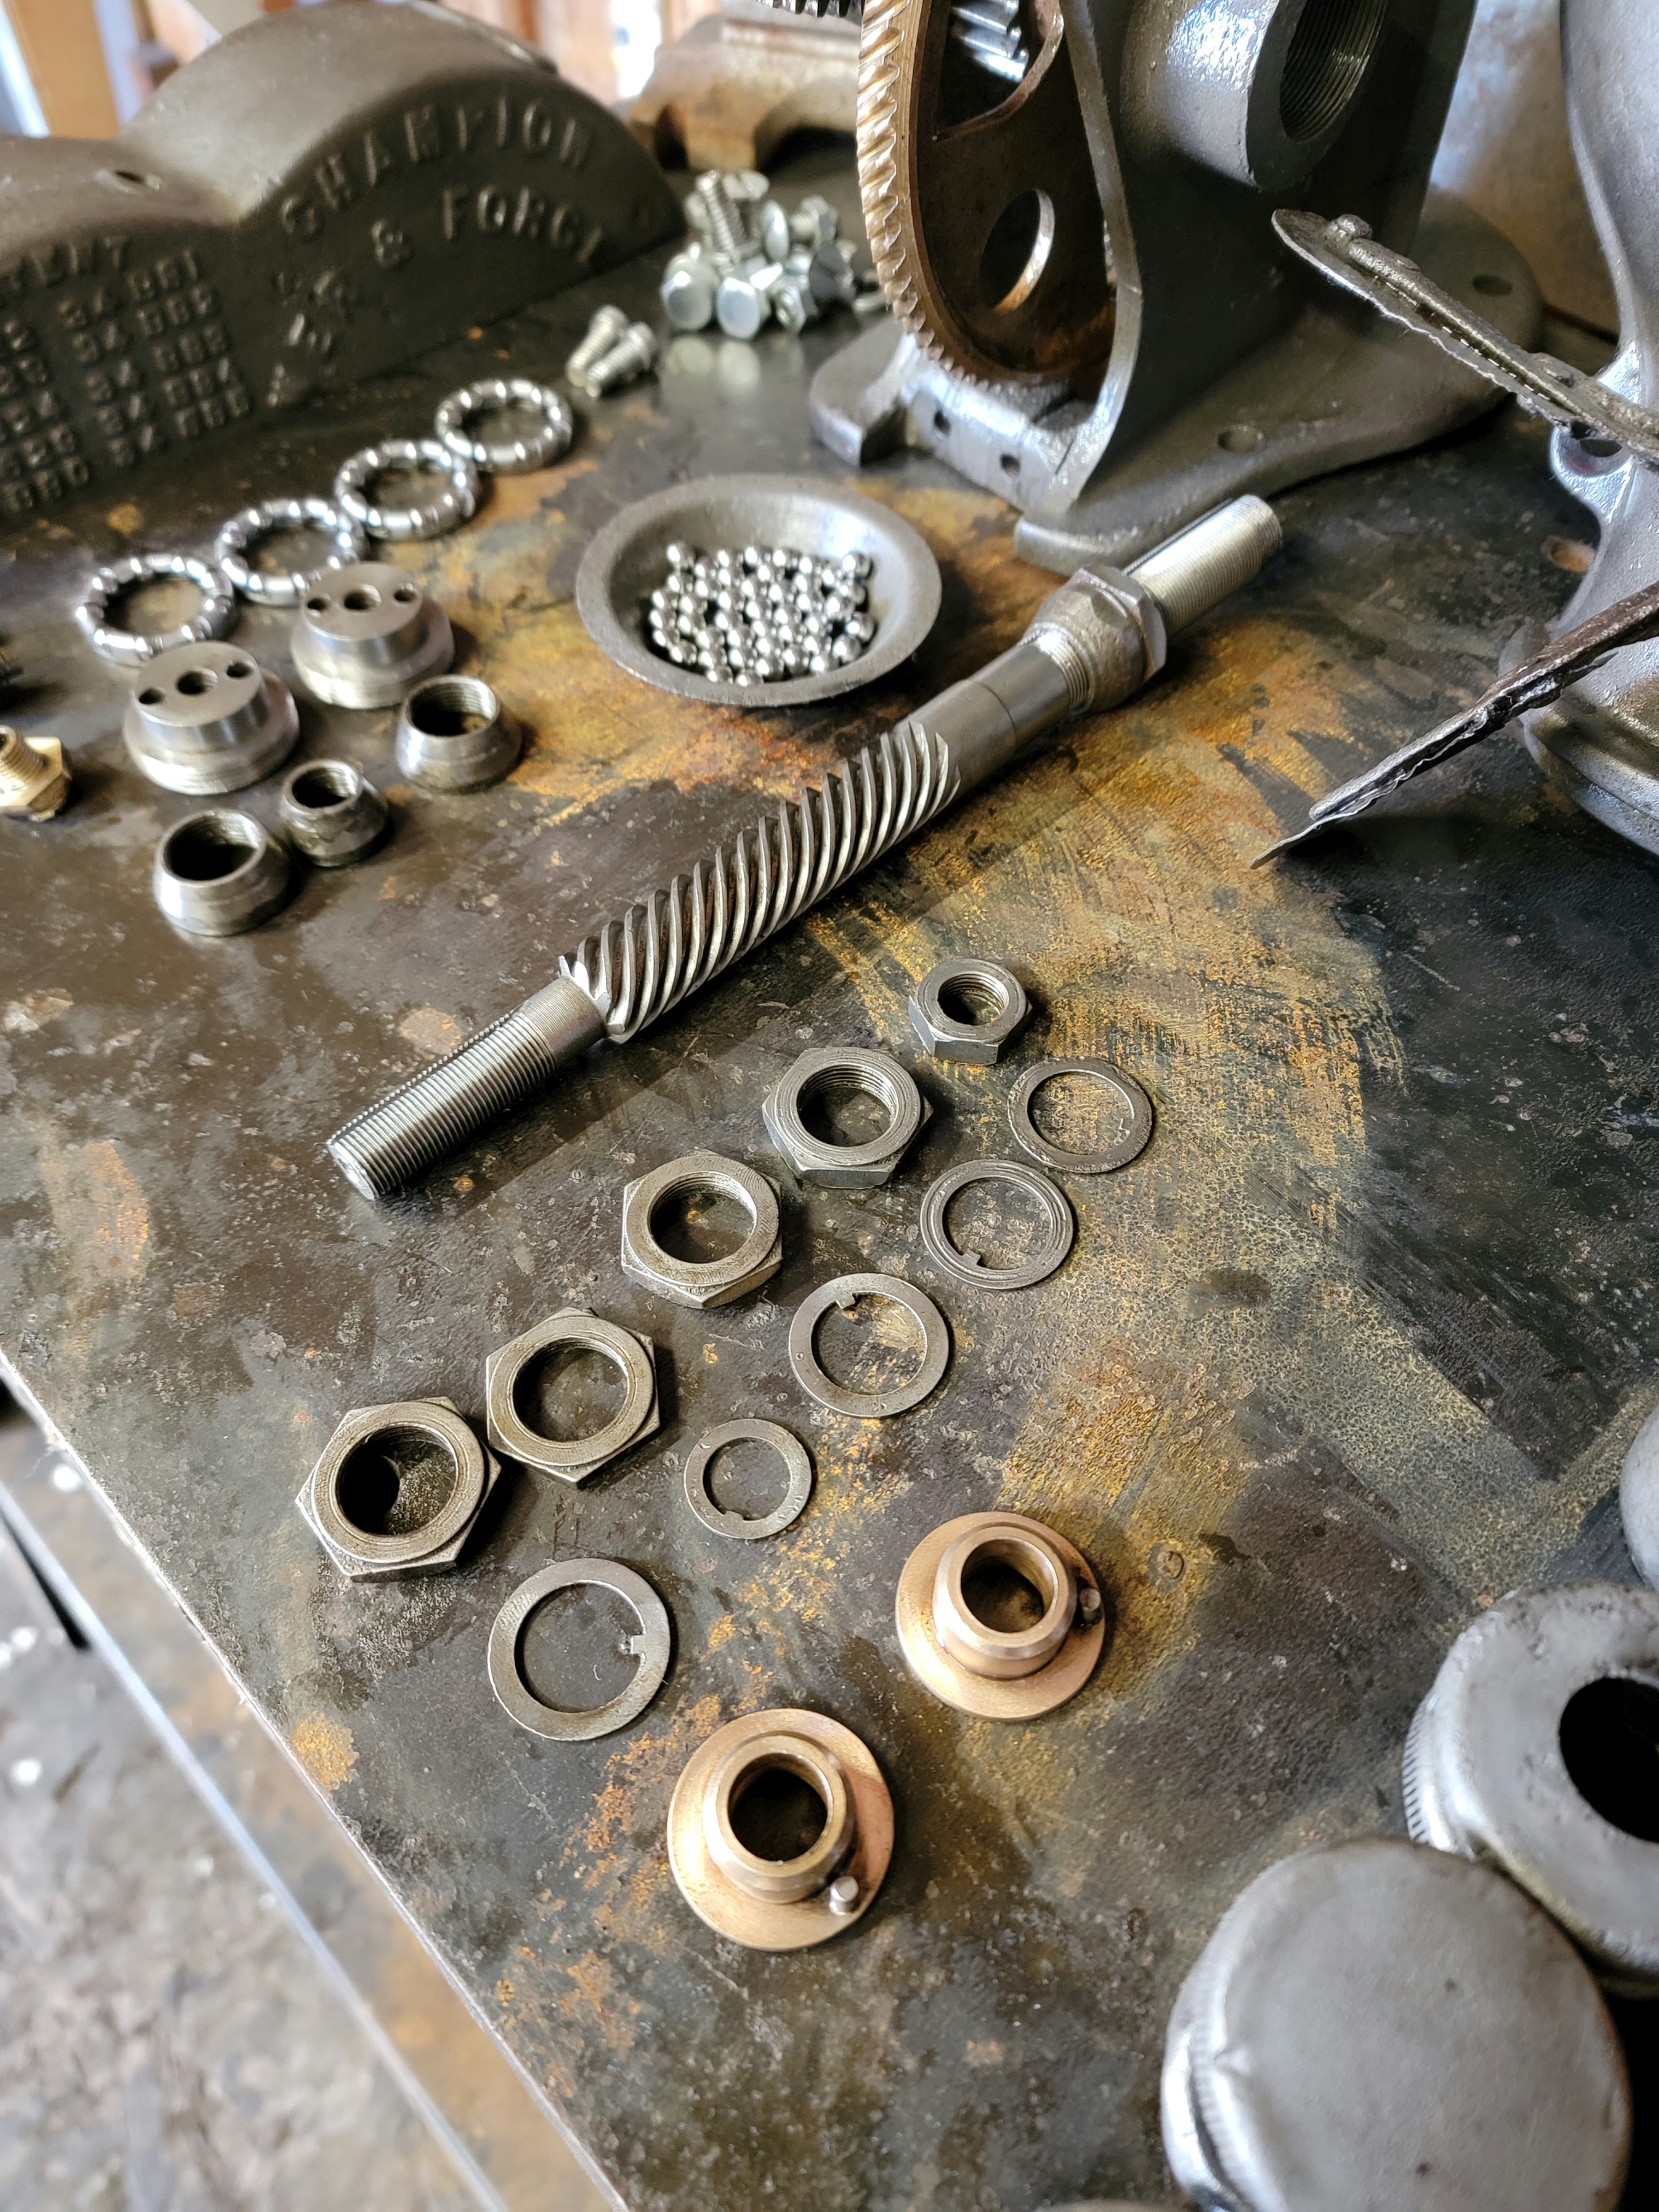
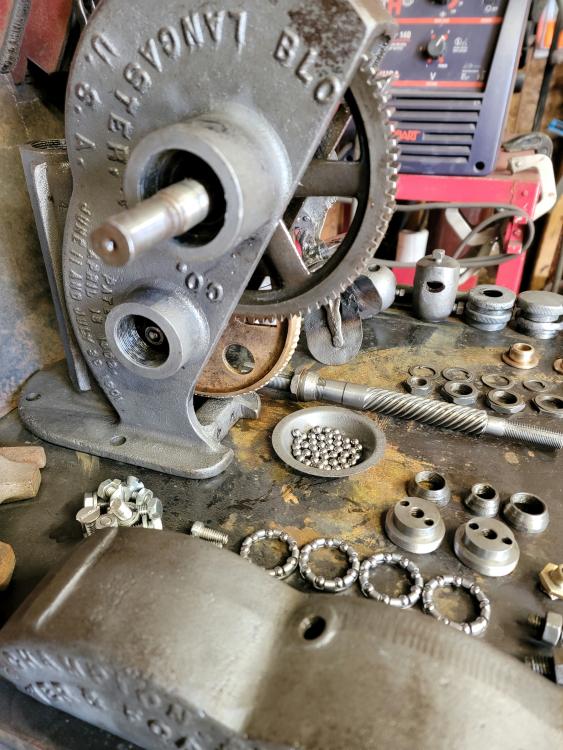
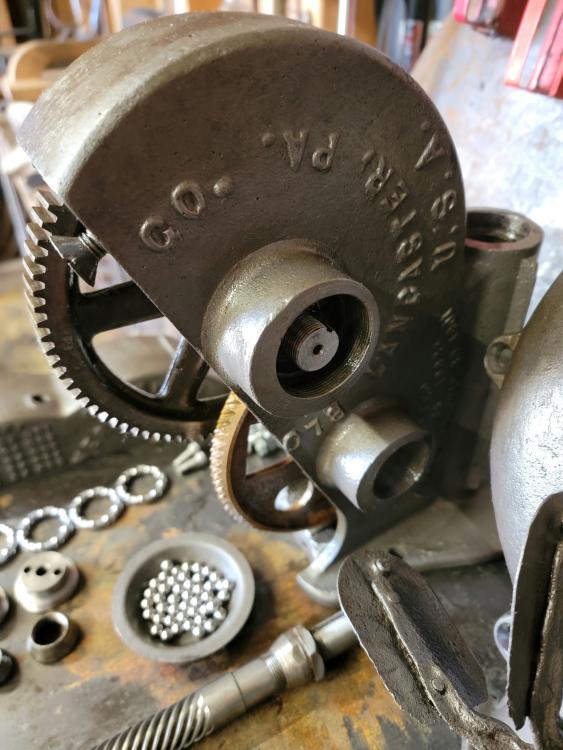
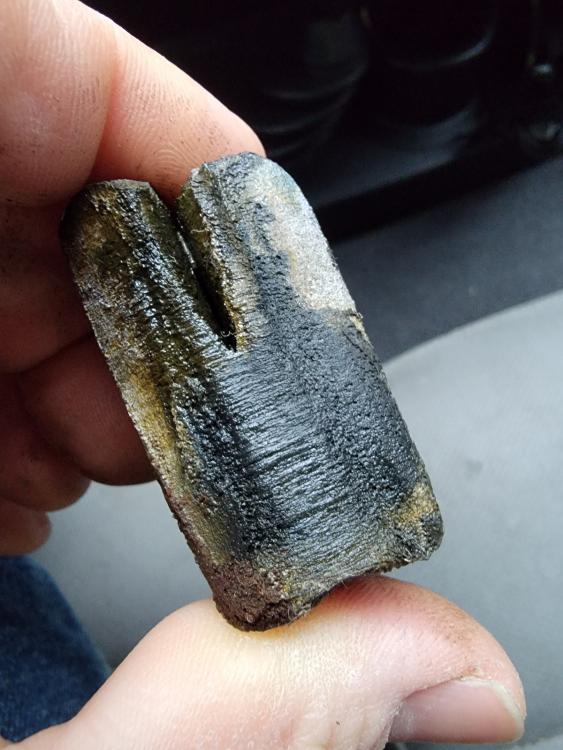
I'm having one issue maybe someone has an answer to. Reattaching the fan assembly. From all videos, pics etc it appears as though the fan assembly simply threads on the worm gear all the way to the grease cap. When I do that and start cranking the fan threads tighter causing the worm gear to become so tight it won't spin. Seems like I'm missing something obvious. I have two indexed washers left and two nuts, one being thinner than the other. Obviously one set goes on after the fan. What about the other set? Thanks! Also if it goes according to what I've seen I'd have a left over washer and nut. It spun before so i'm doing something wrong. I don't know if there's slight variations from blower to blower or if someone along the line altered it or what.
-
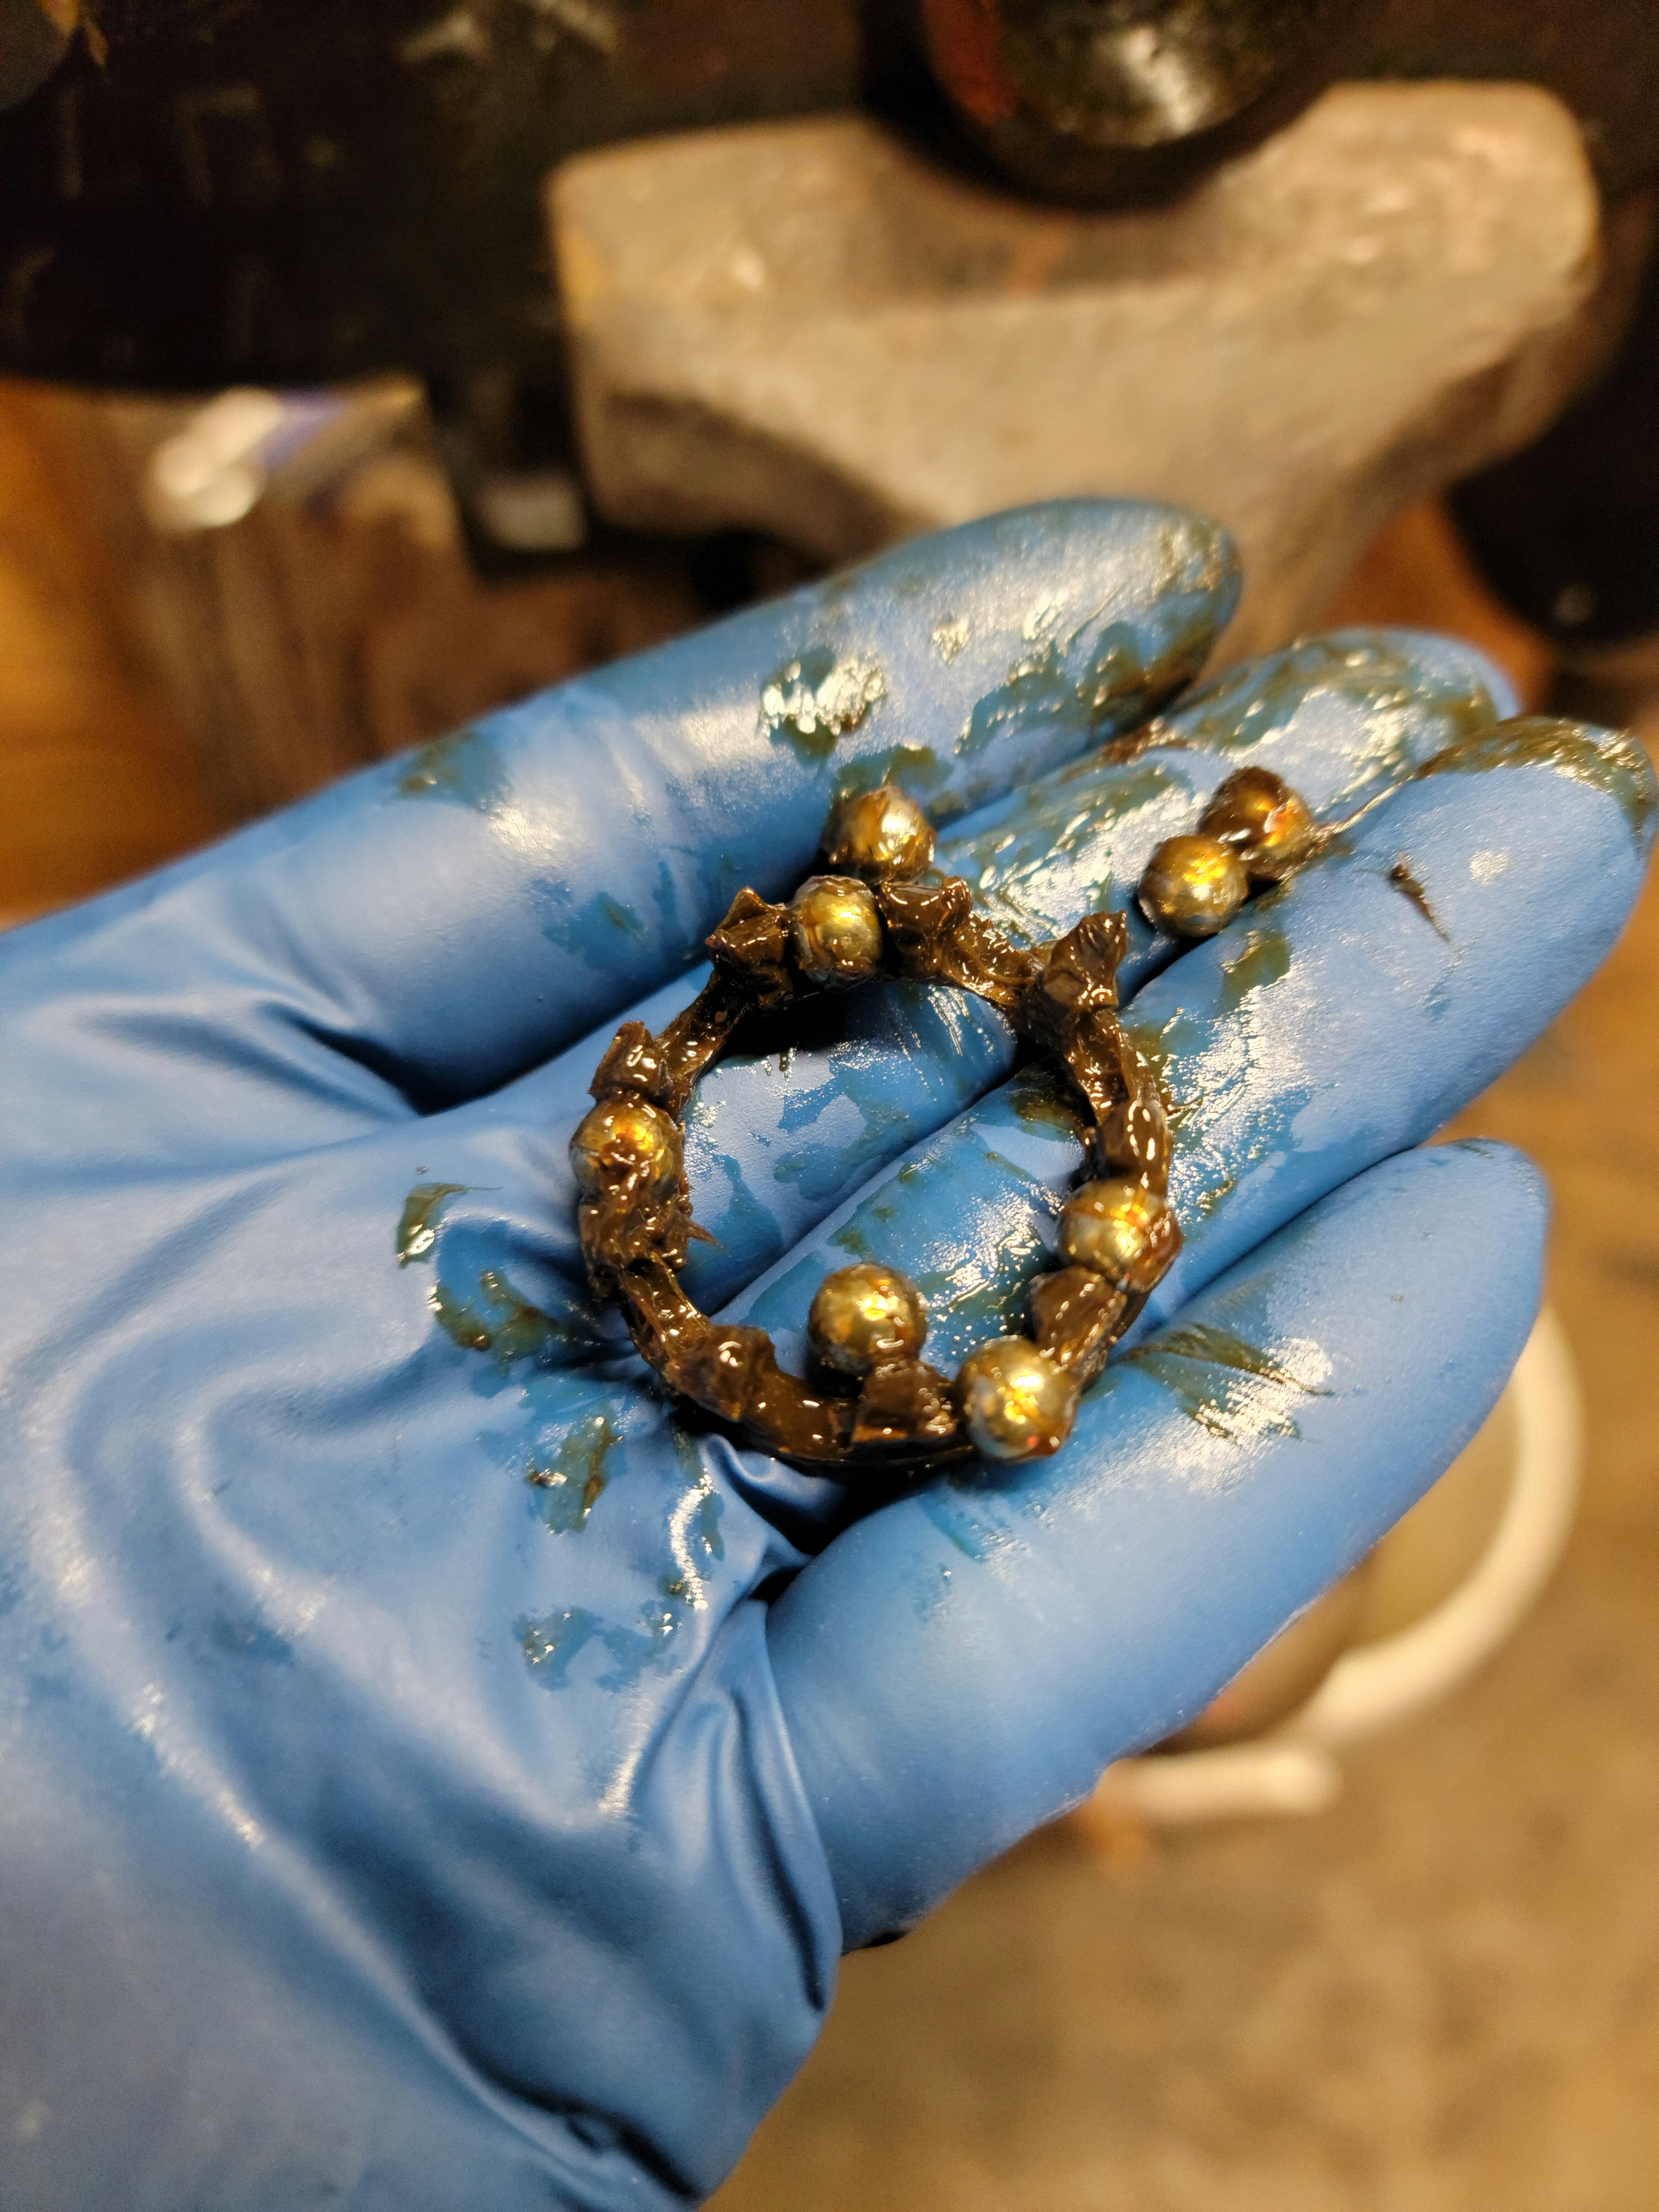
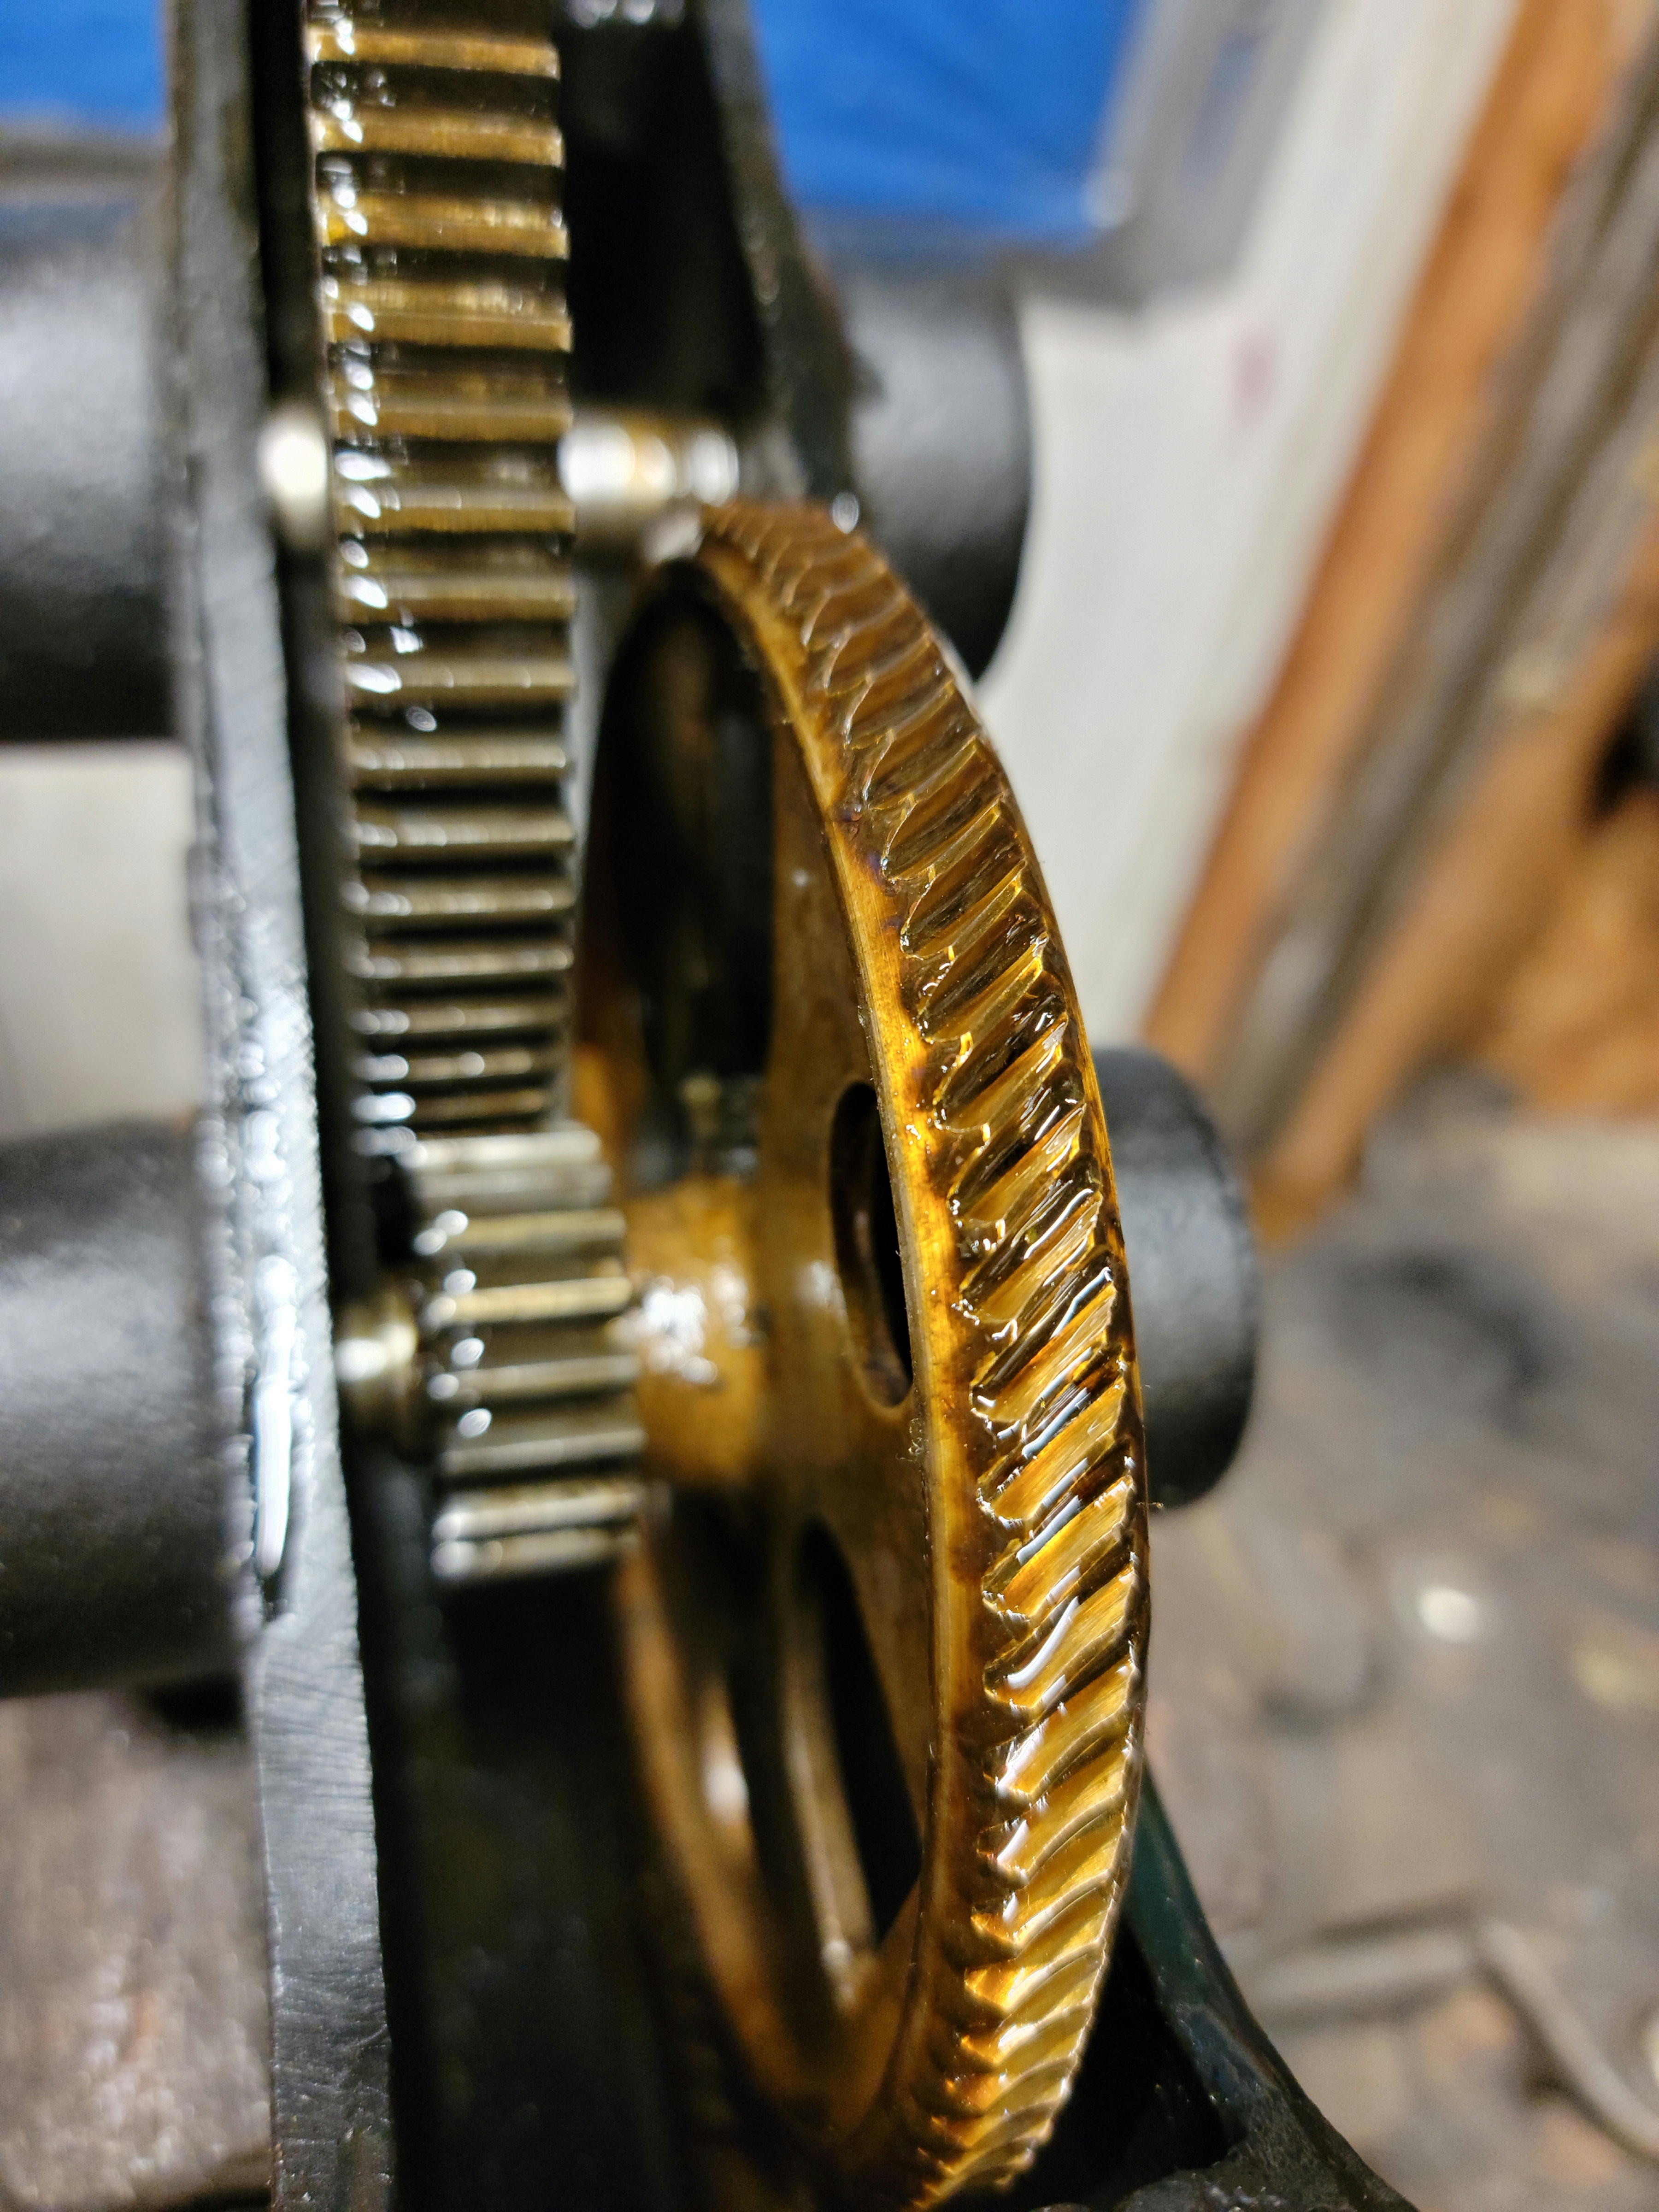
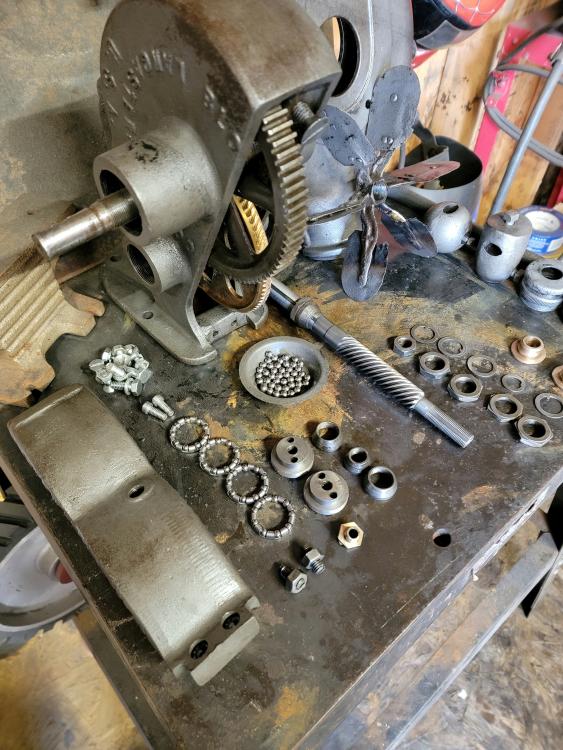
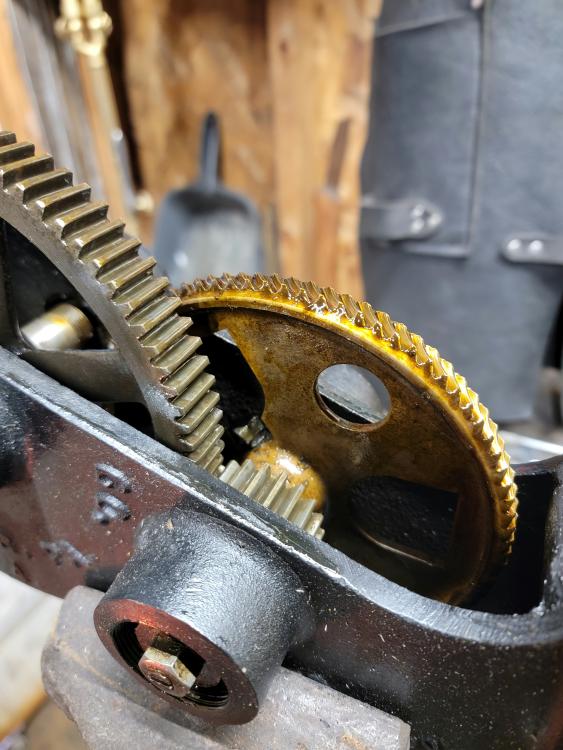
That ATF/Acetone mix works like a charm. Brought everything down to bare metal and cut right through all the grease. The races are in good shape, some wear, I have the replacement bearings and 30wt oil. I just need to fab a handle and reassemble. Then make a stand and paint. Color scheme TBD.


-
-
-
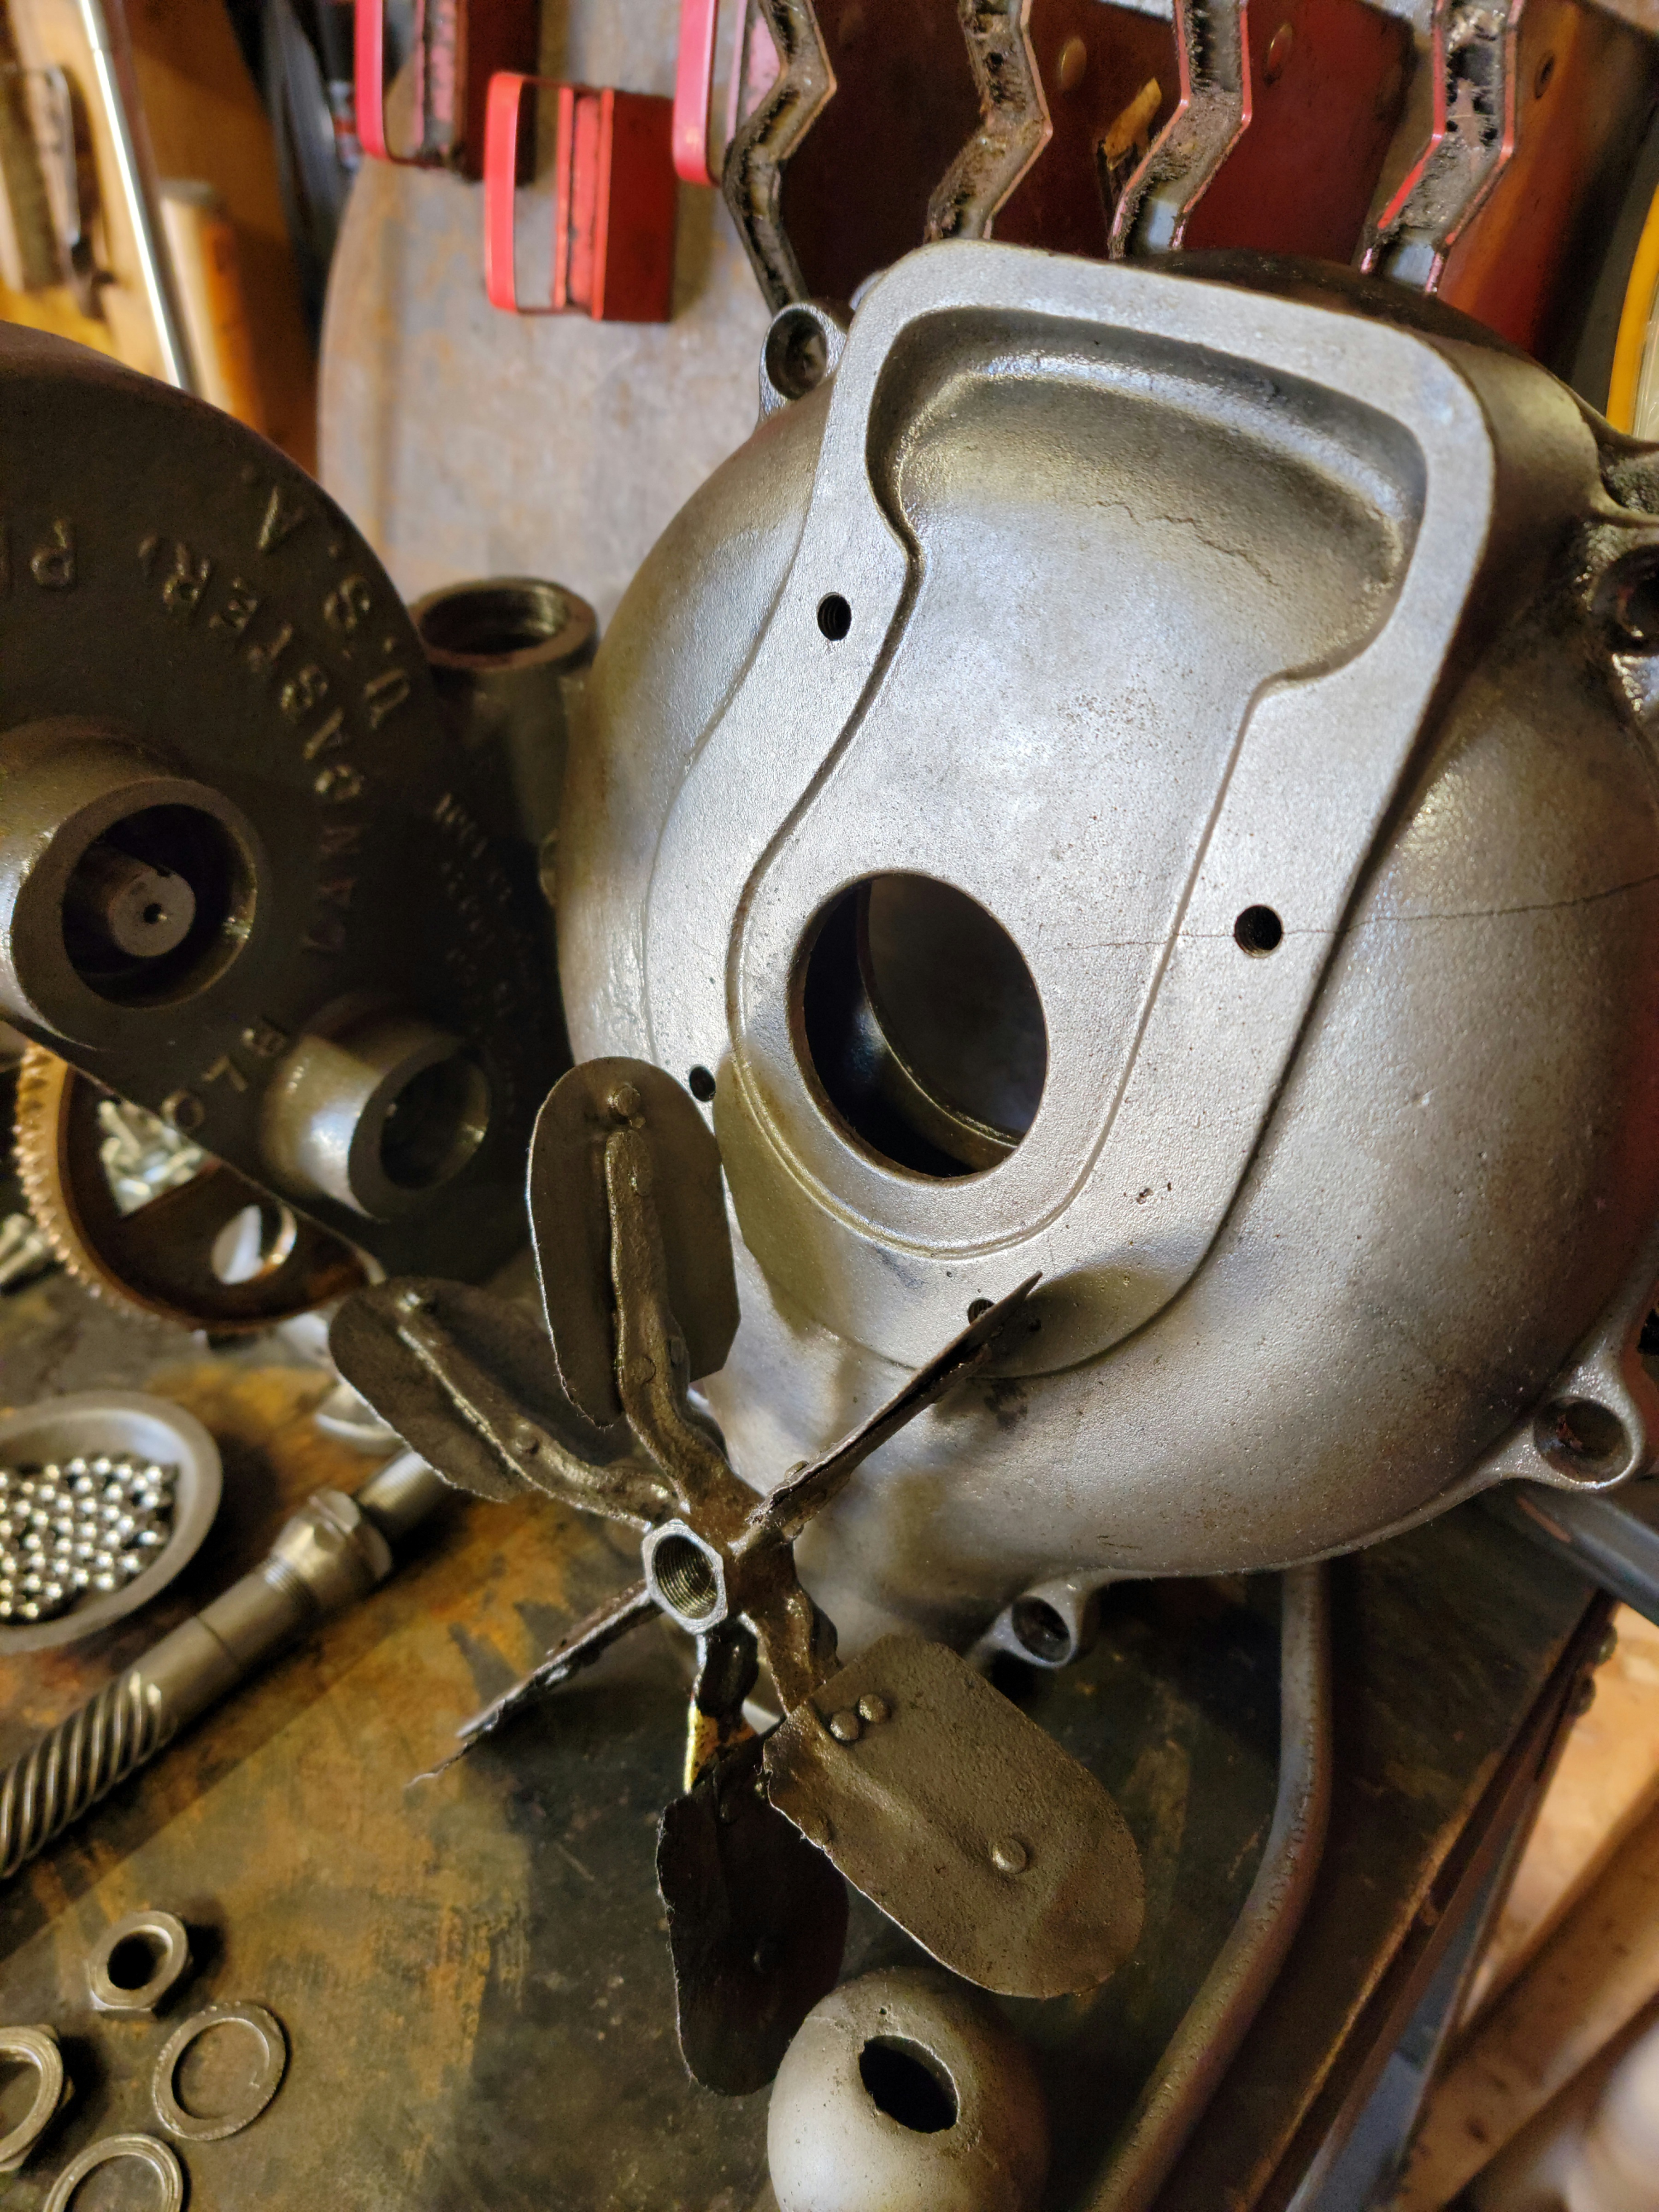
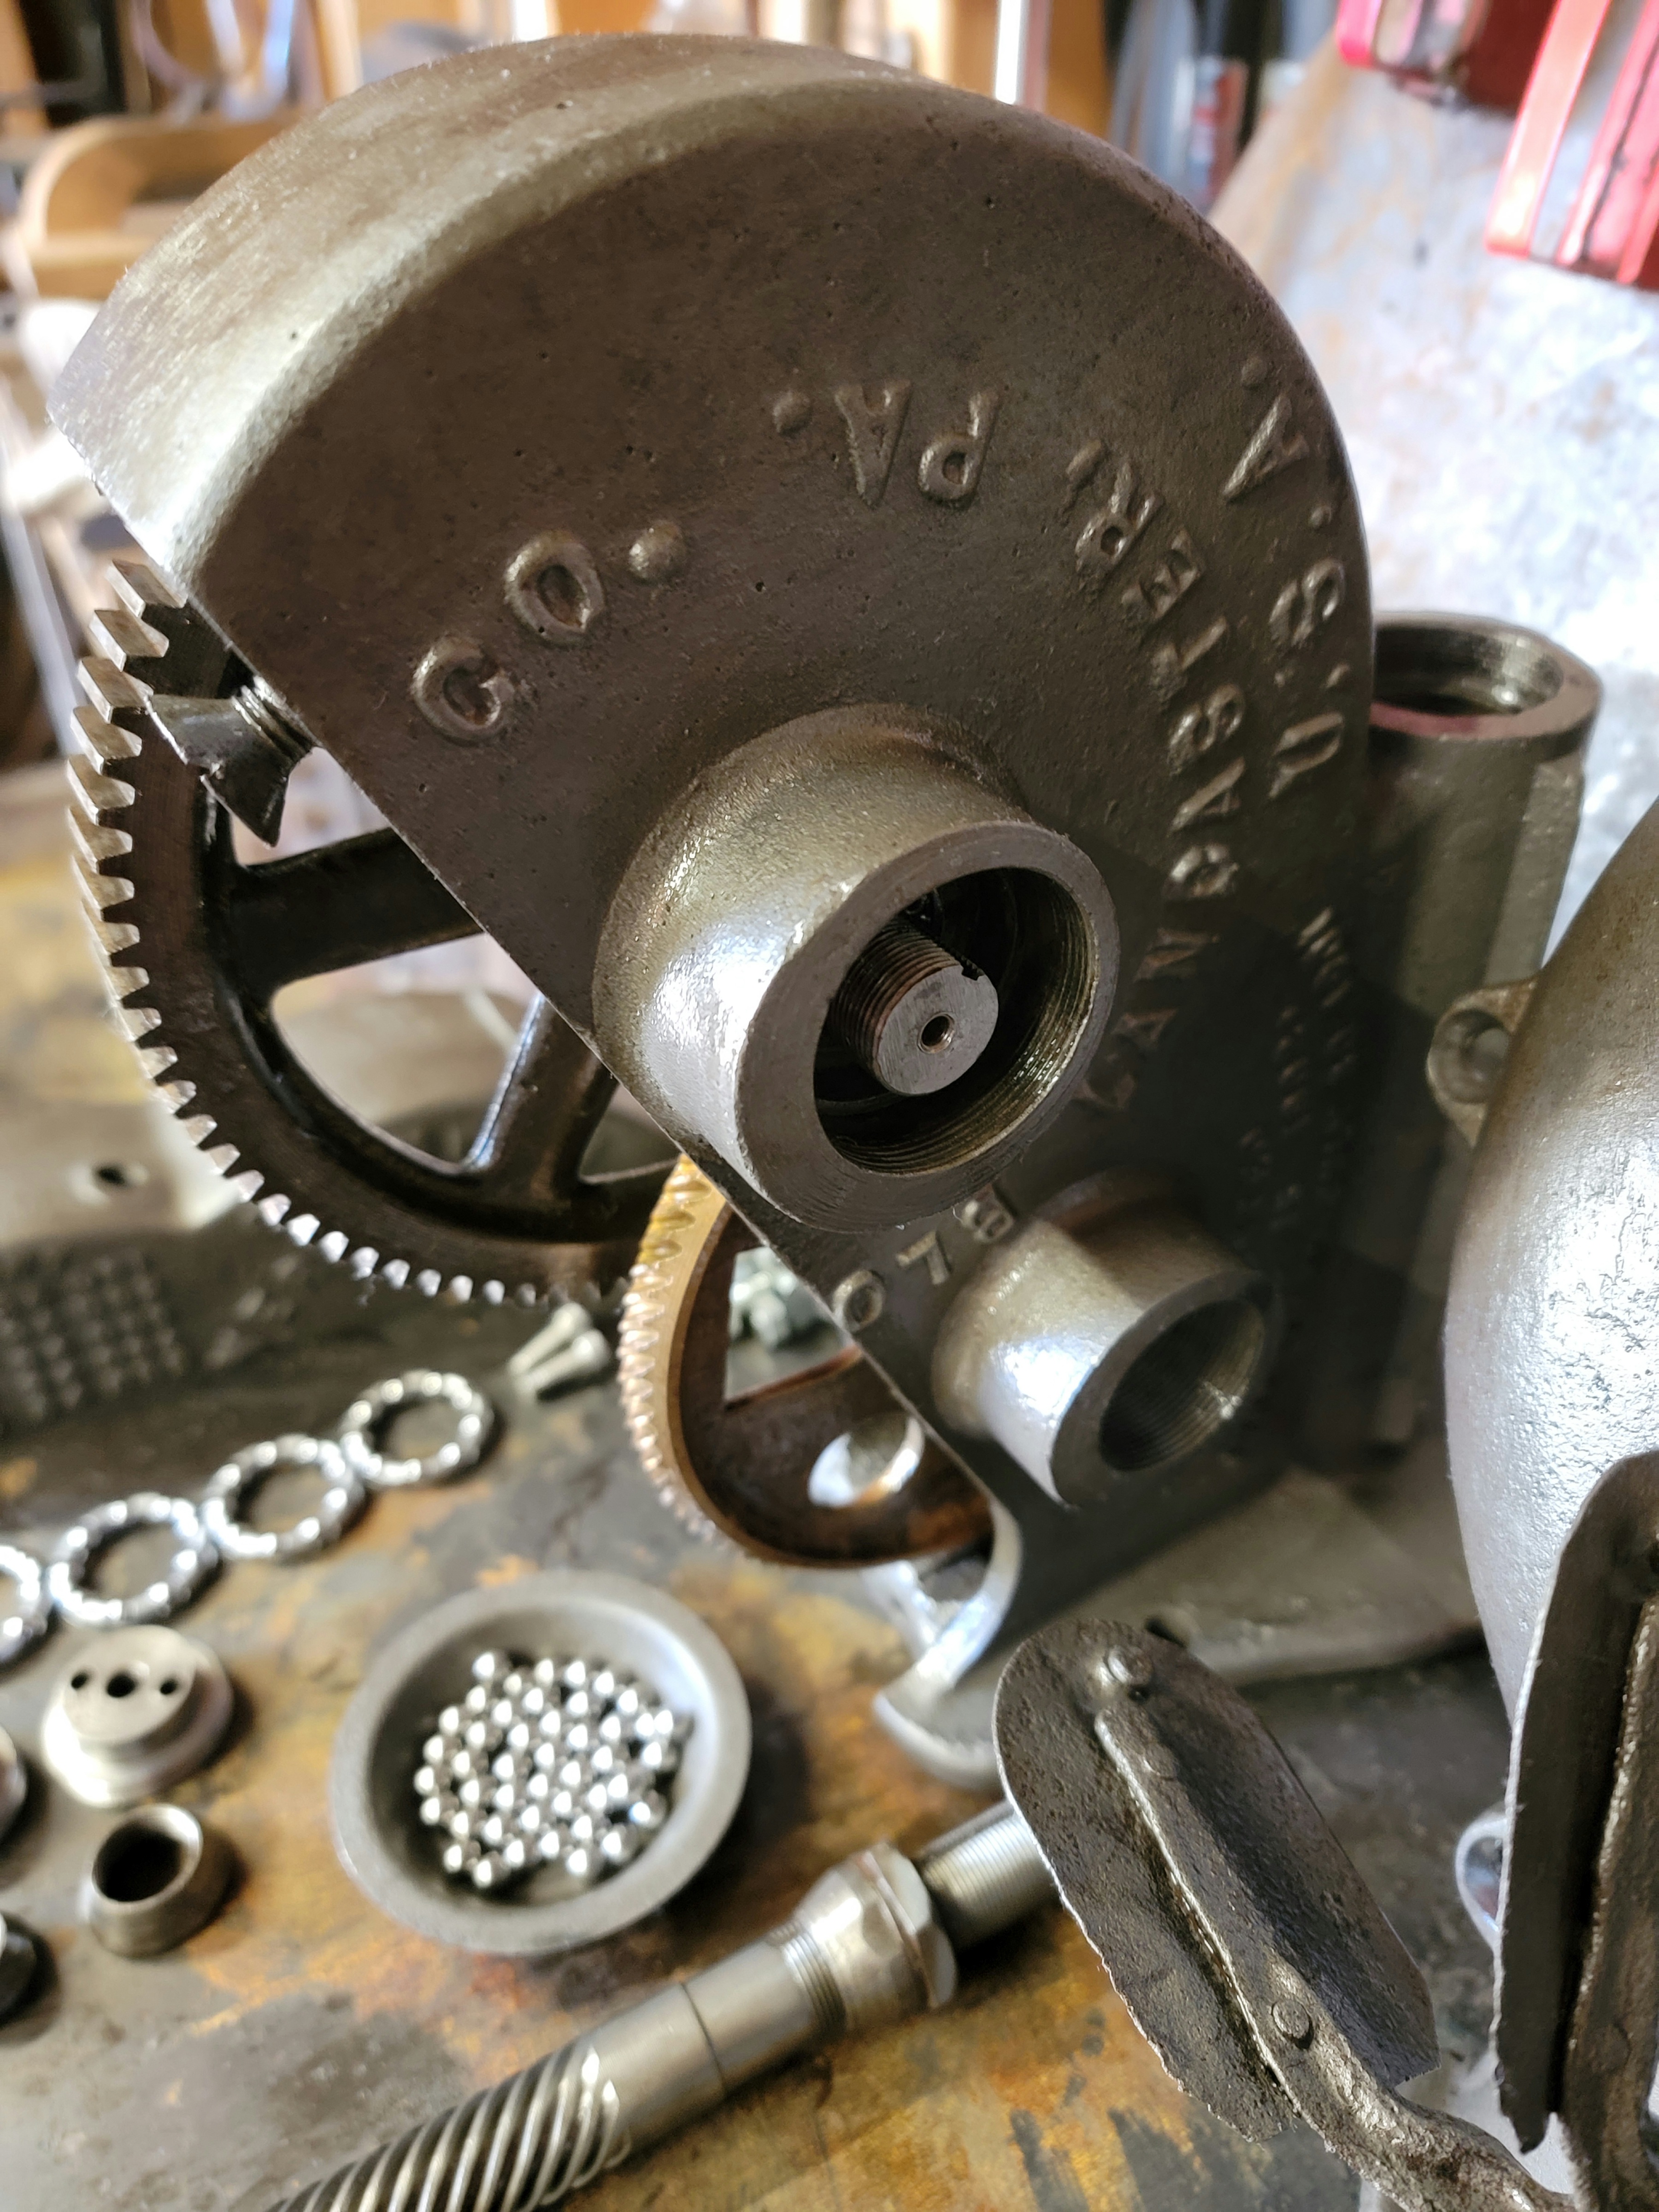
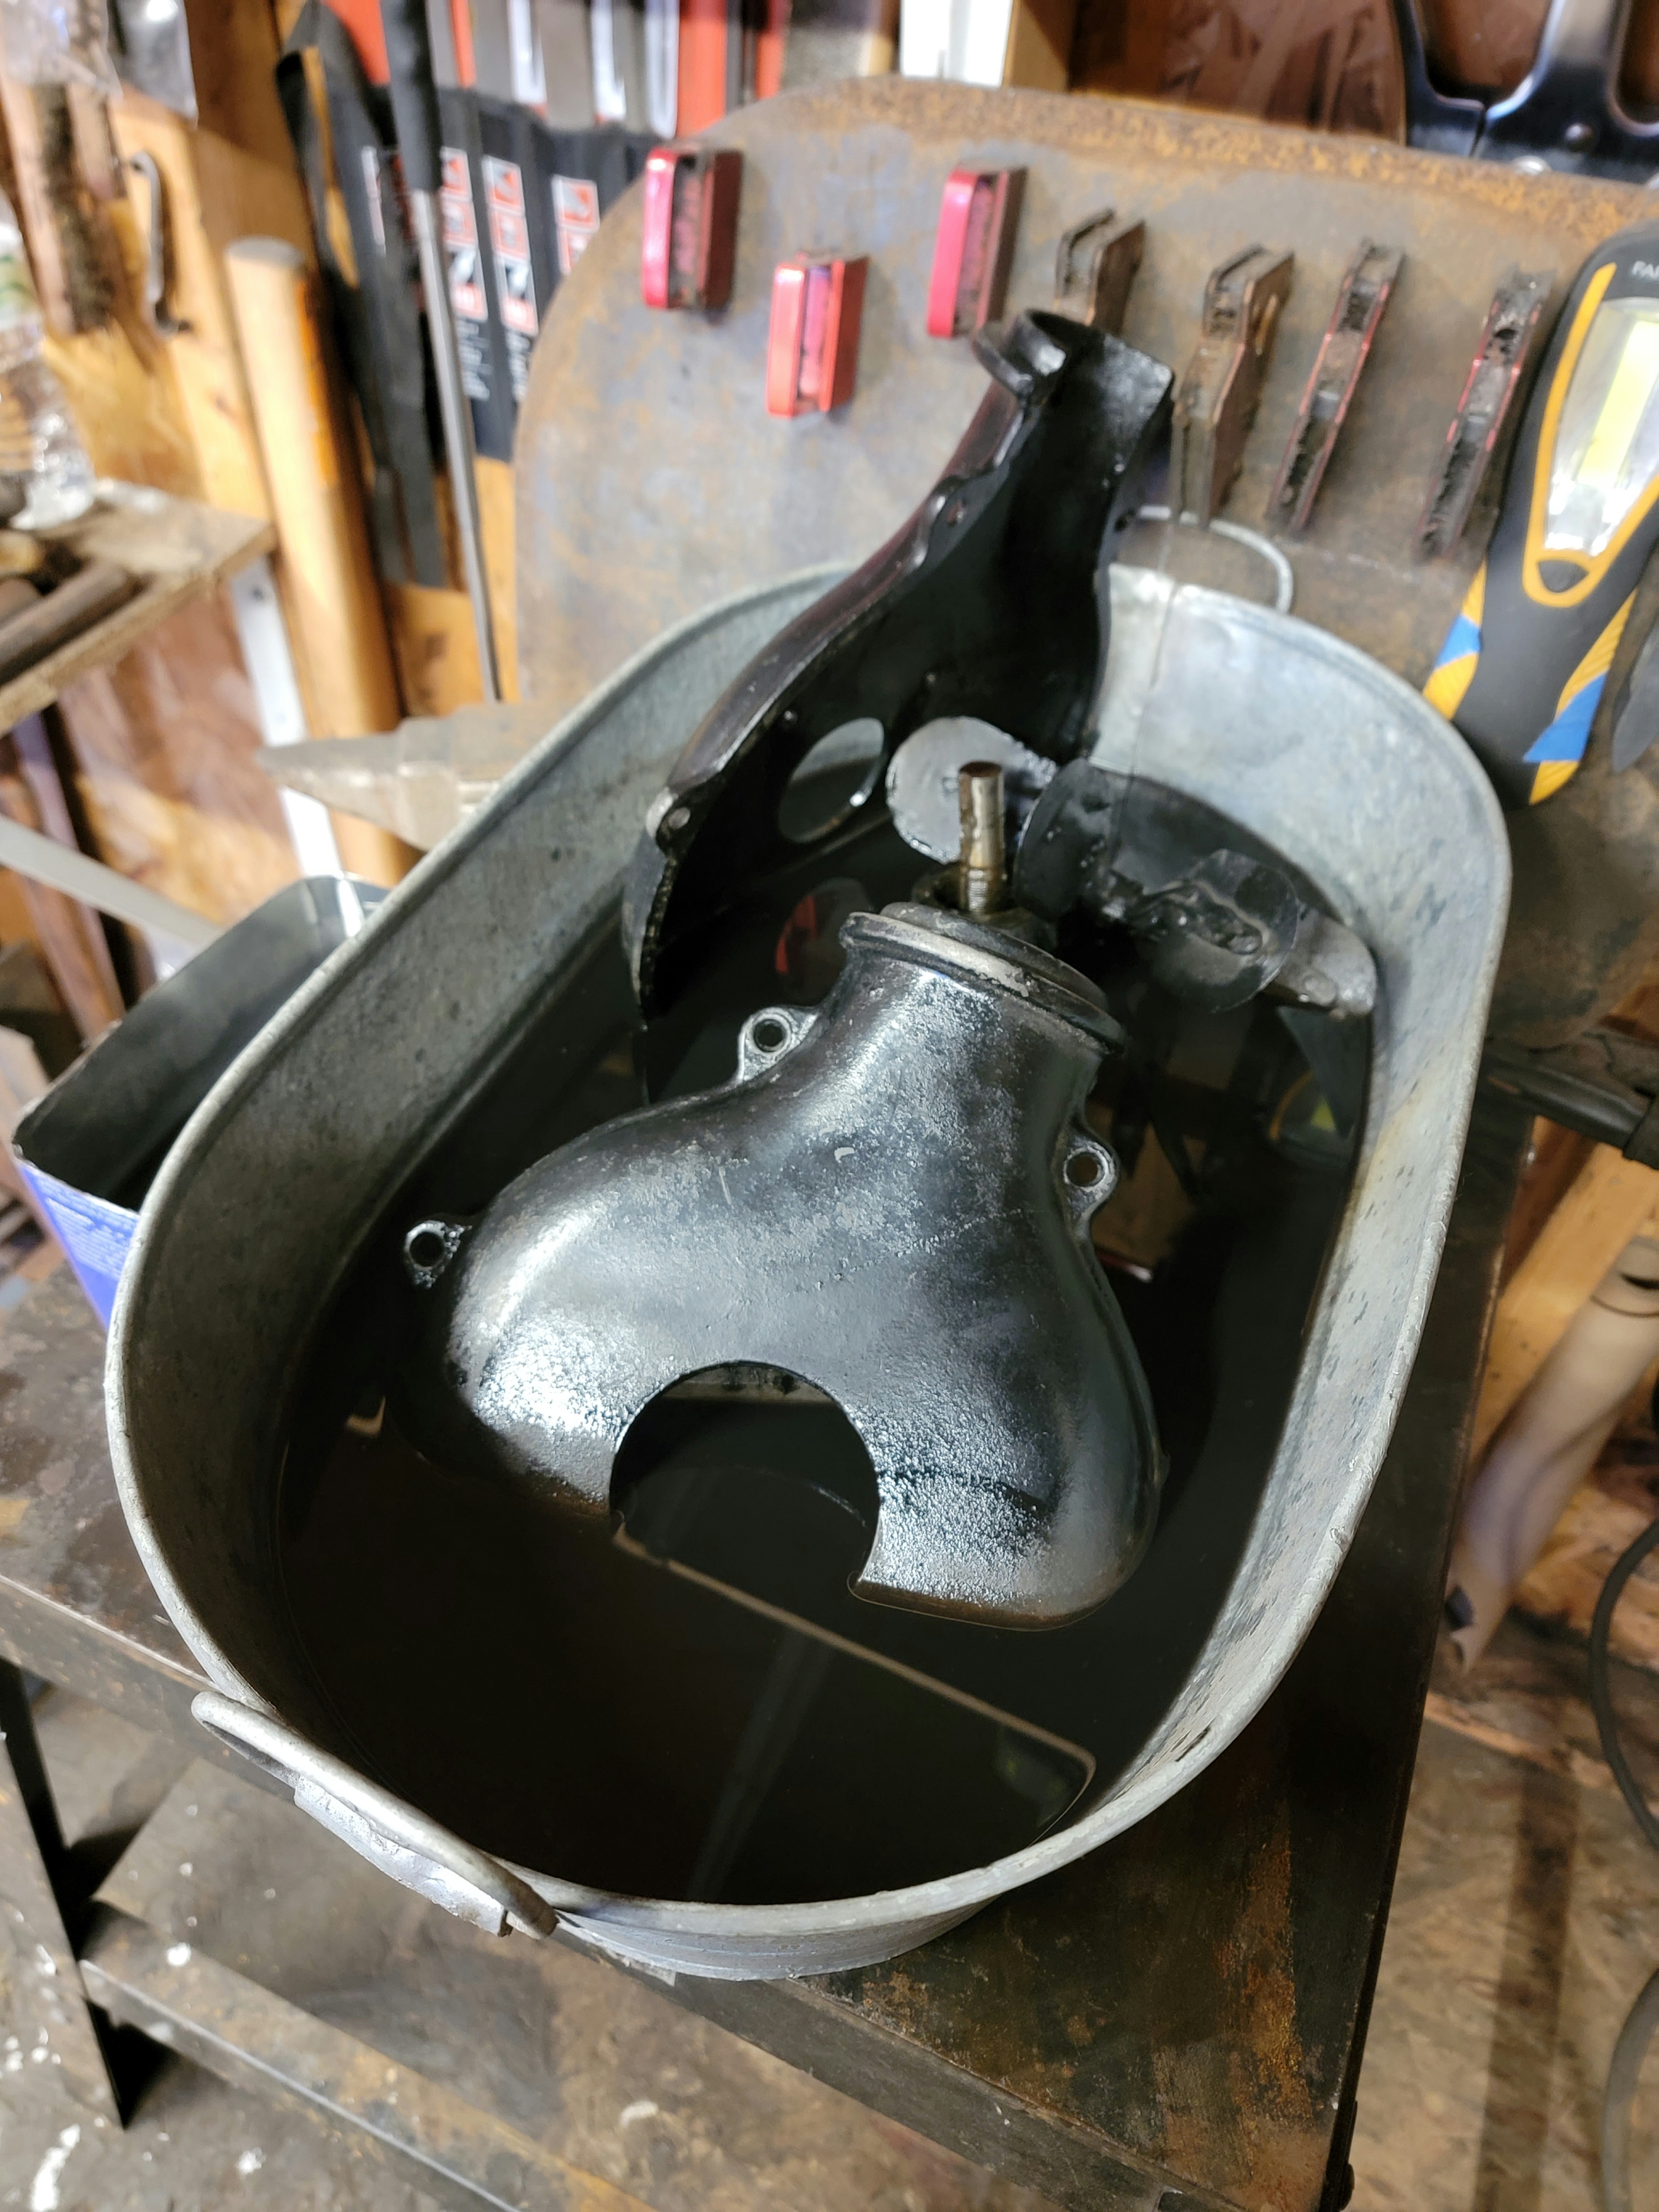
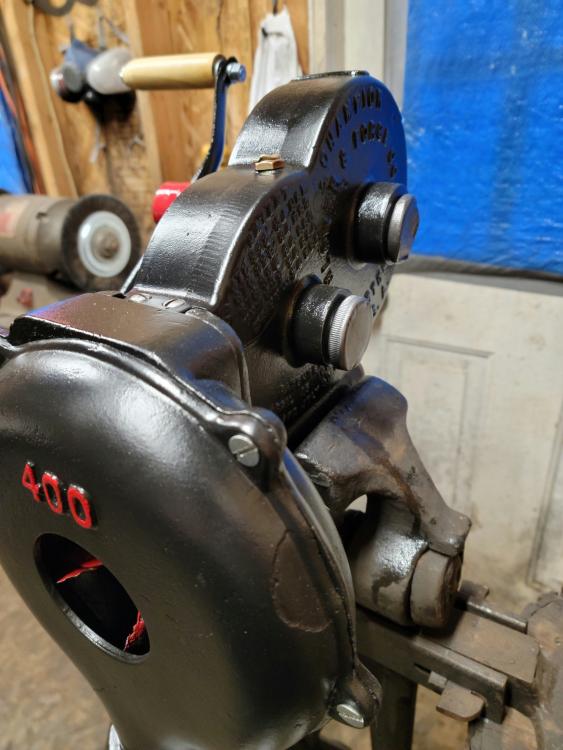
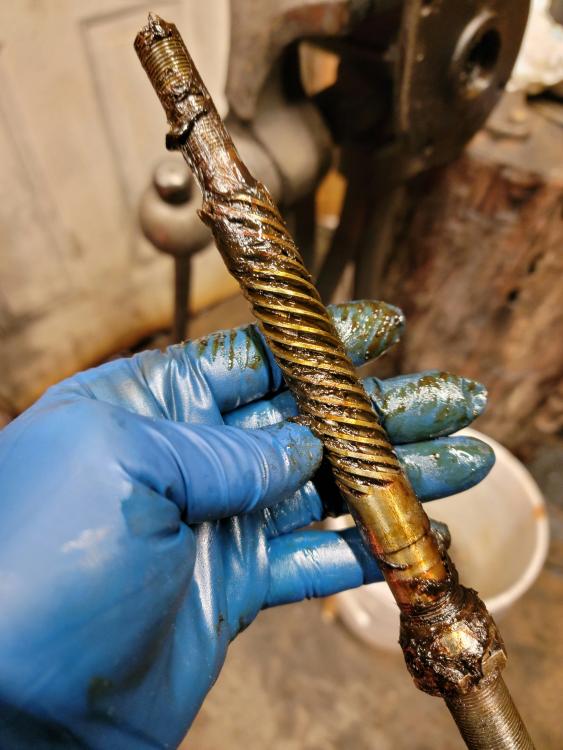
So here it goes... This is my first 400 and I'm really looking forward to breathing new life into this blower. As is, it sounds like broken glass when cranked and grinds to a halt. 20230211_125059.mp4 Someone along the line did some "work" on it. The disassembly couldn't have been any easier! BUT every inch was CAKED with grease and It had NO bearings on either side of the front shaft and 1 broken caged bearing on the rear shaft. The worm shaft had the bearings but man no wonder why it grinds to a halt. Gears are in good shape. All apart soaking in ATF/Acetone. I left the gears and shafts in place. I'll update as I go.


-
Any updates Buford? Curious how you made out.
-
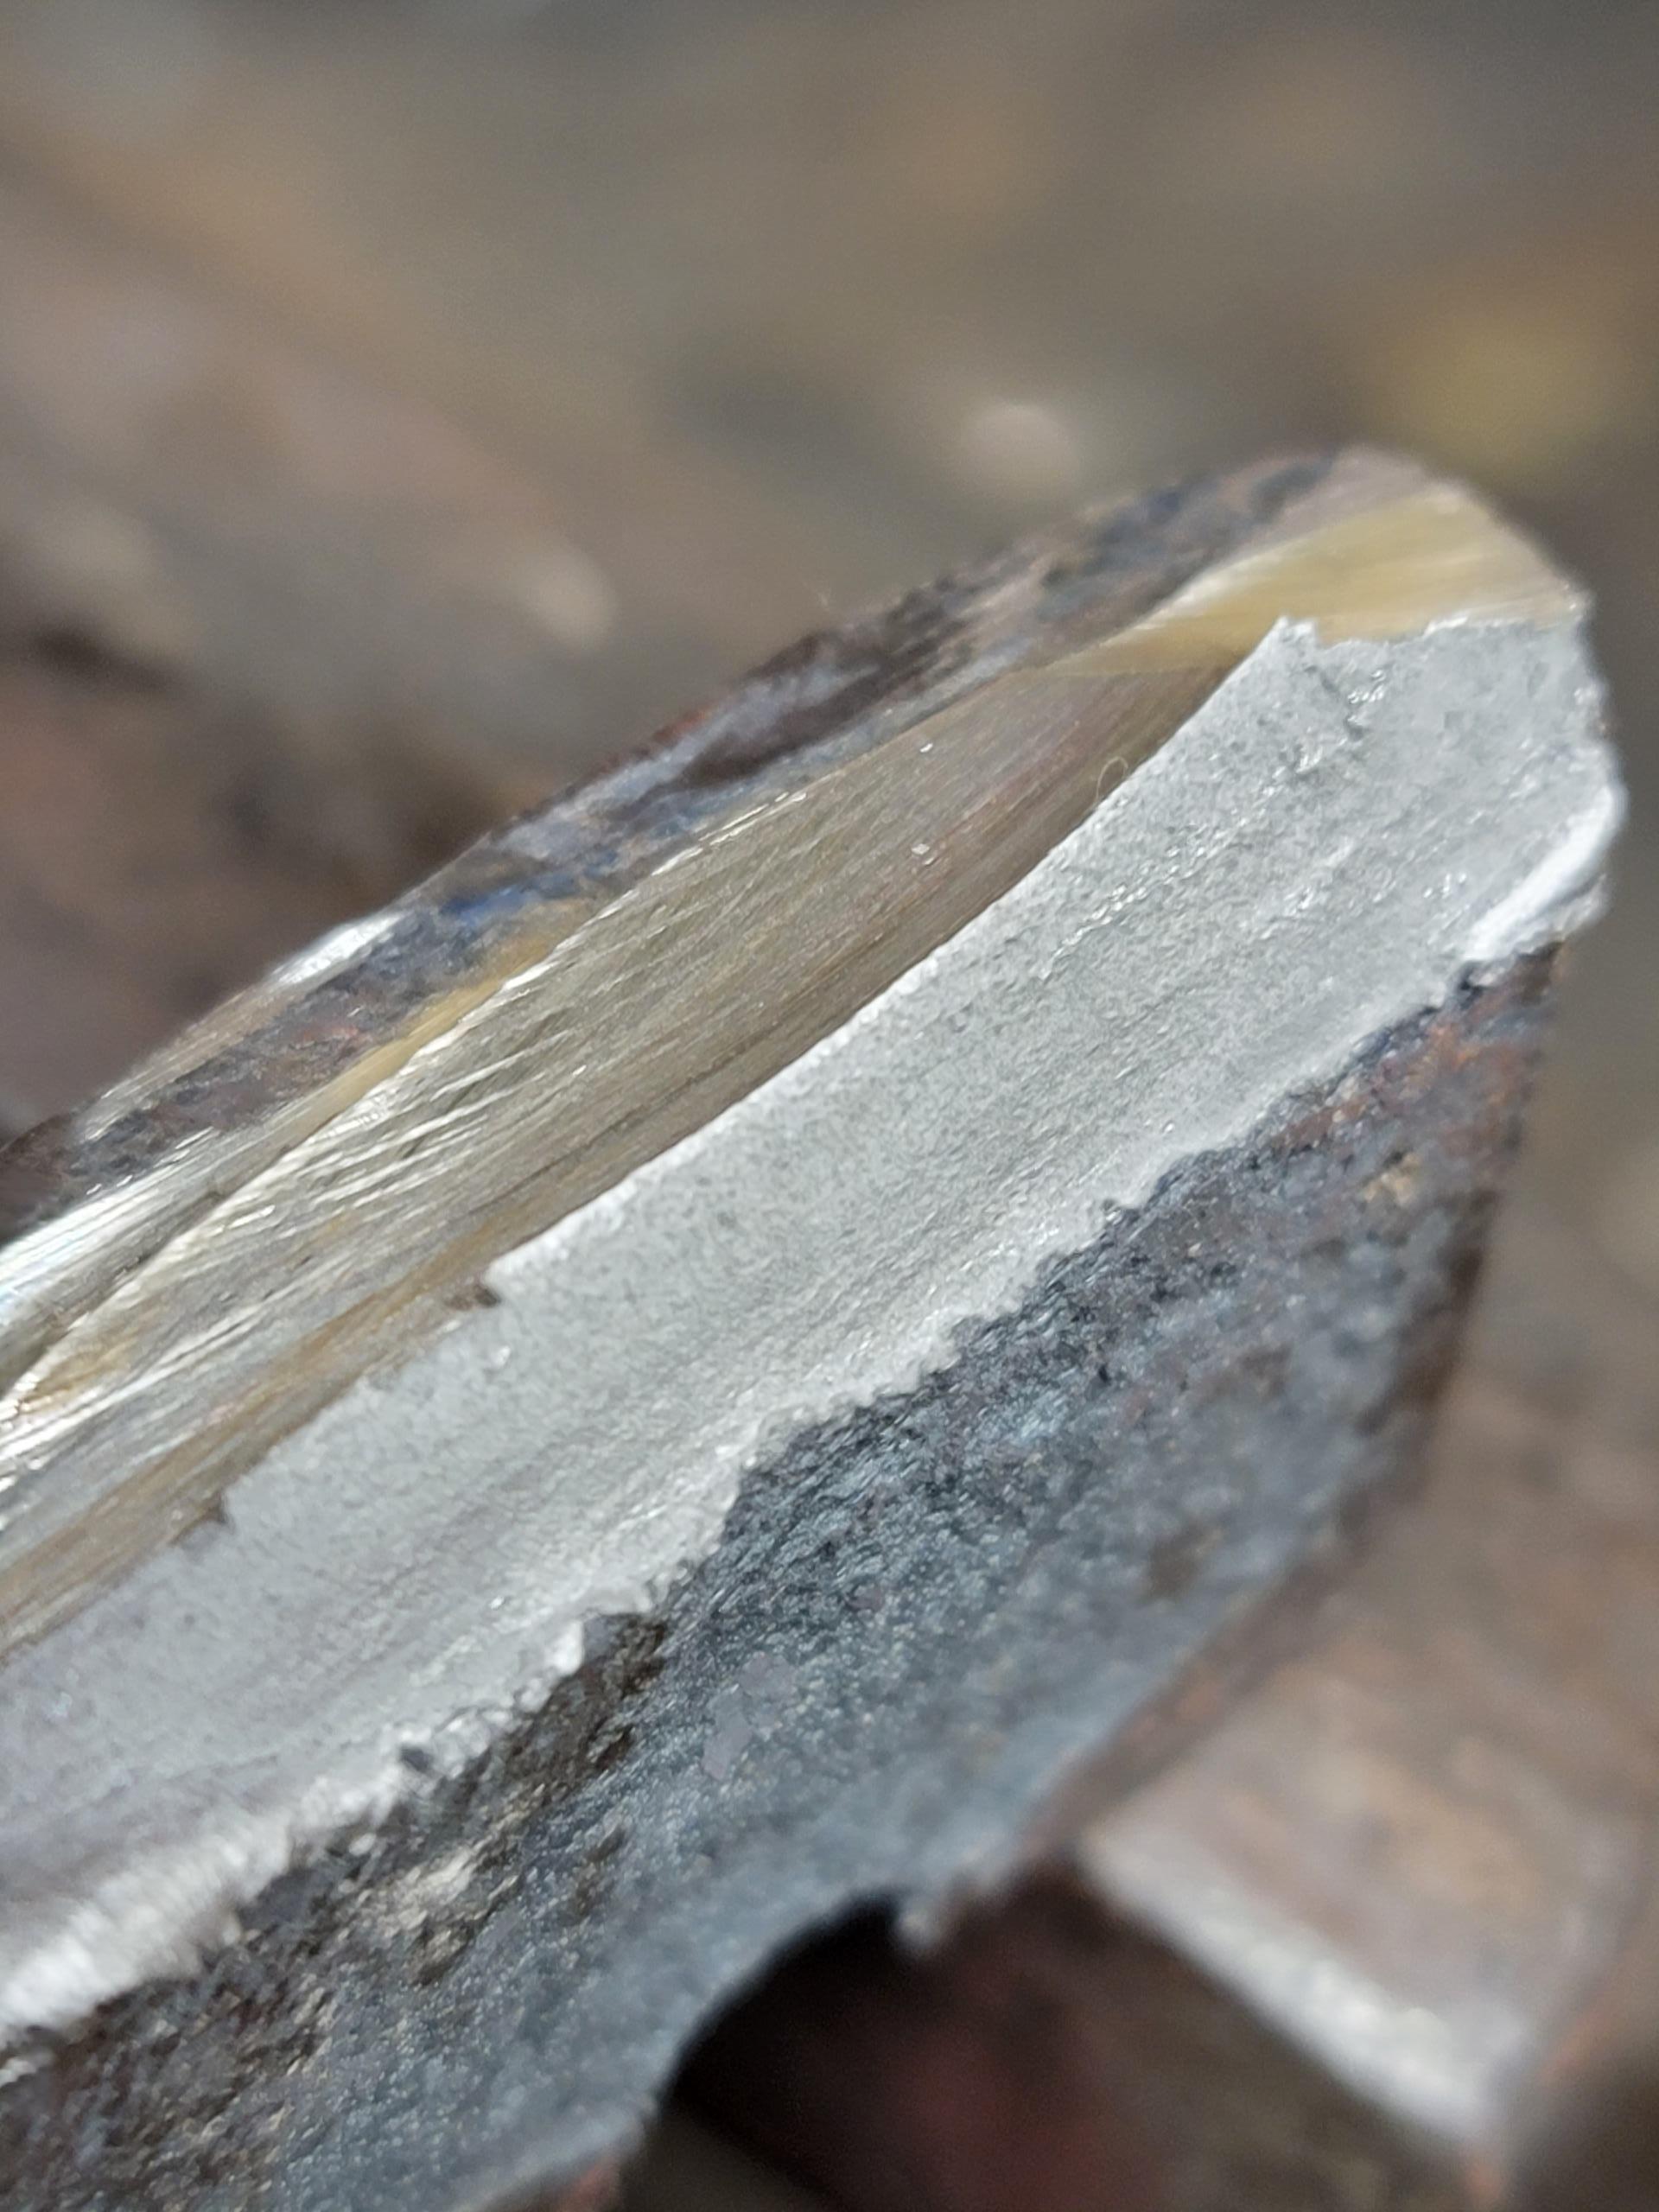
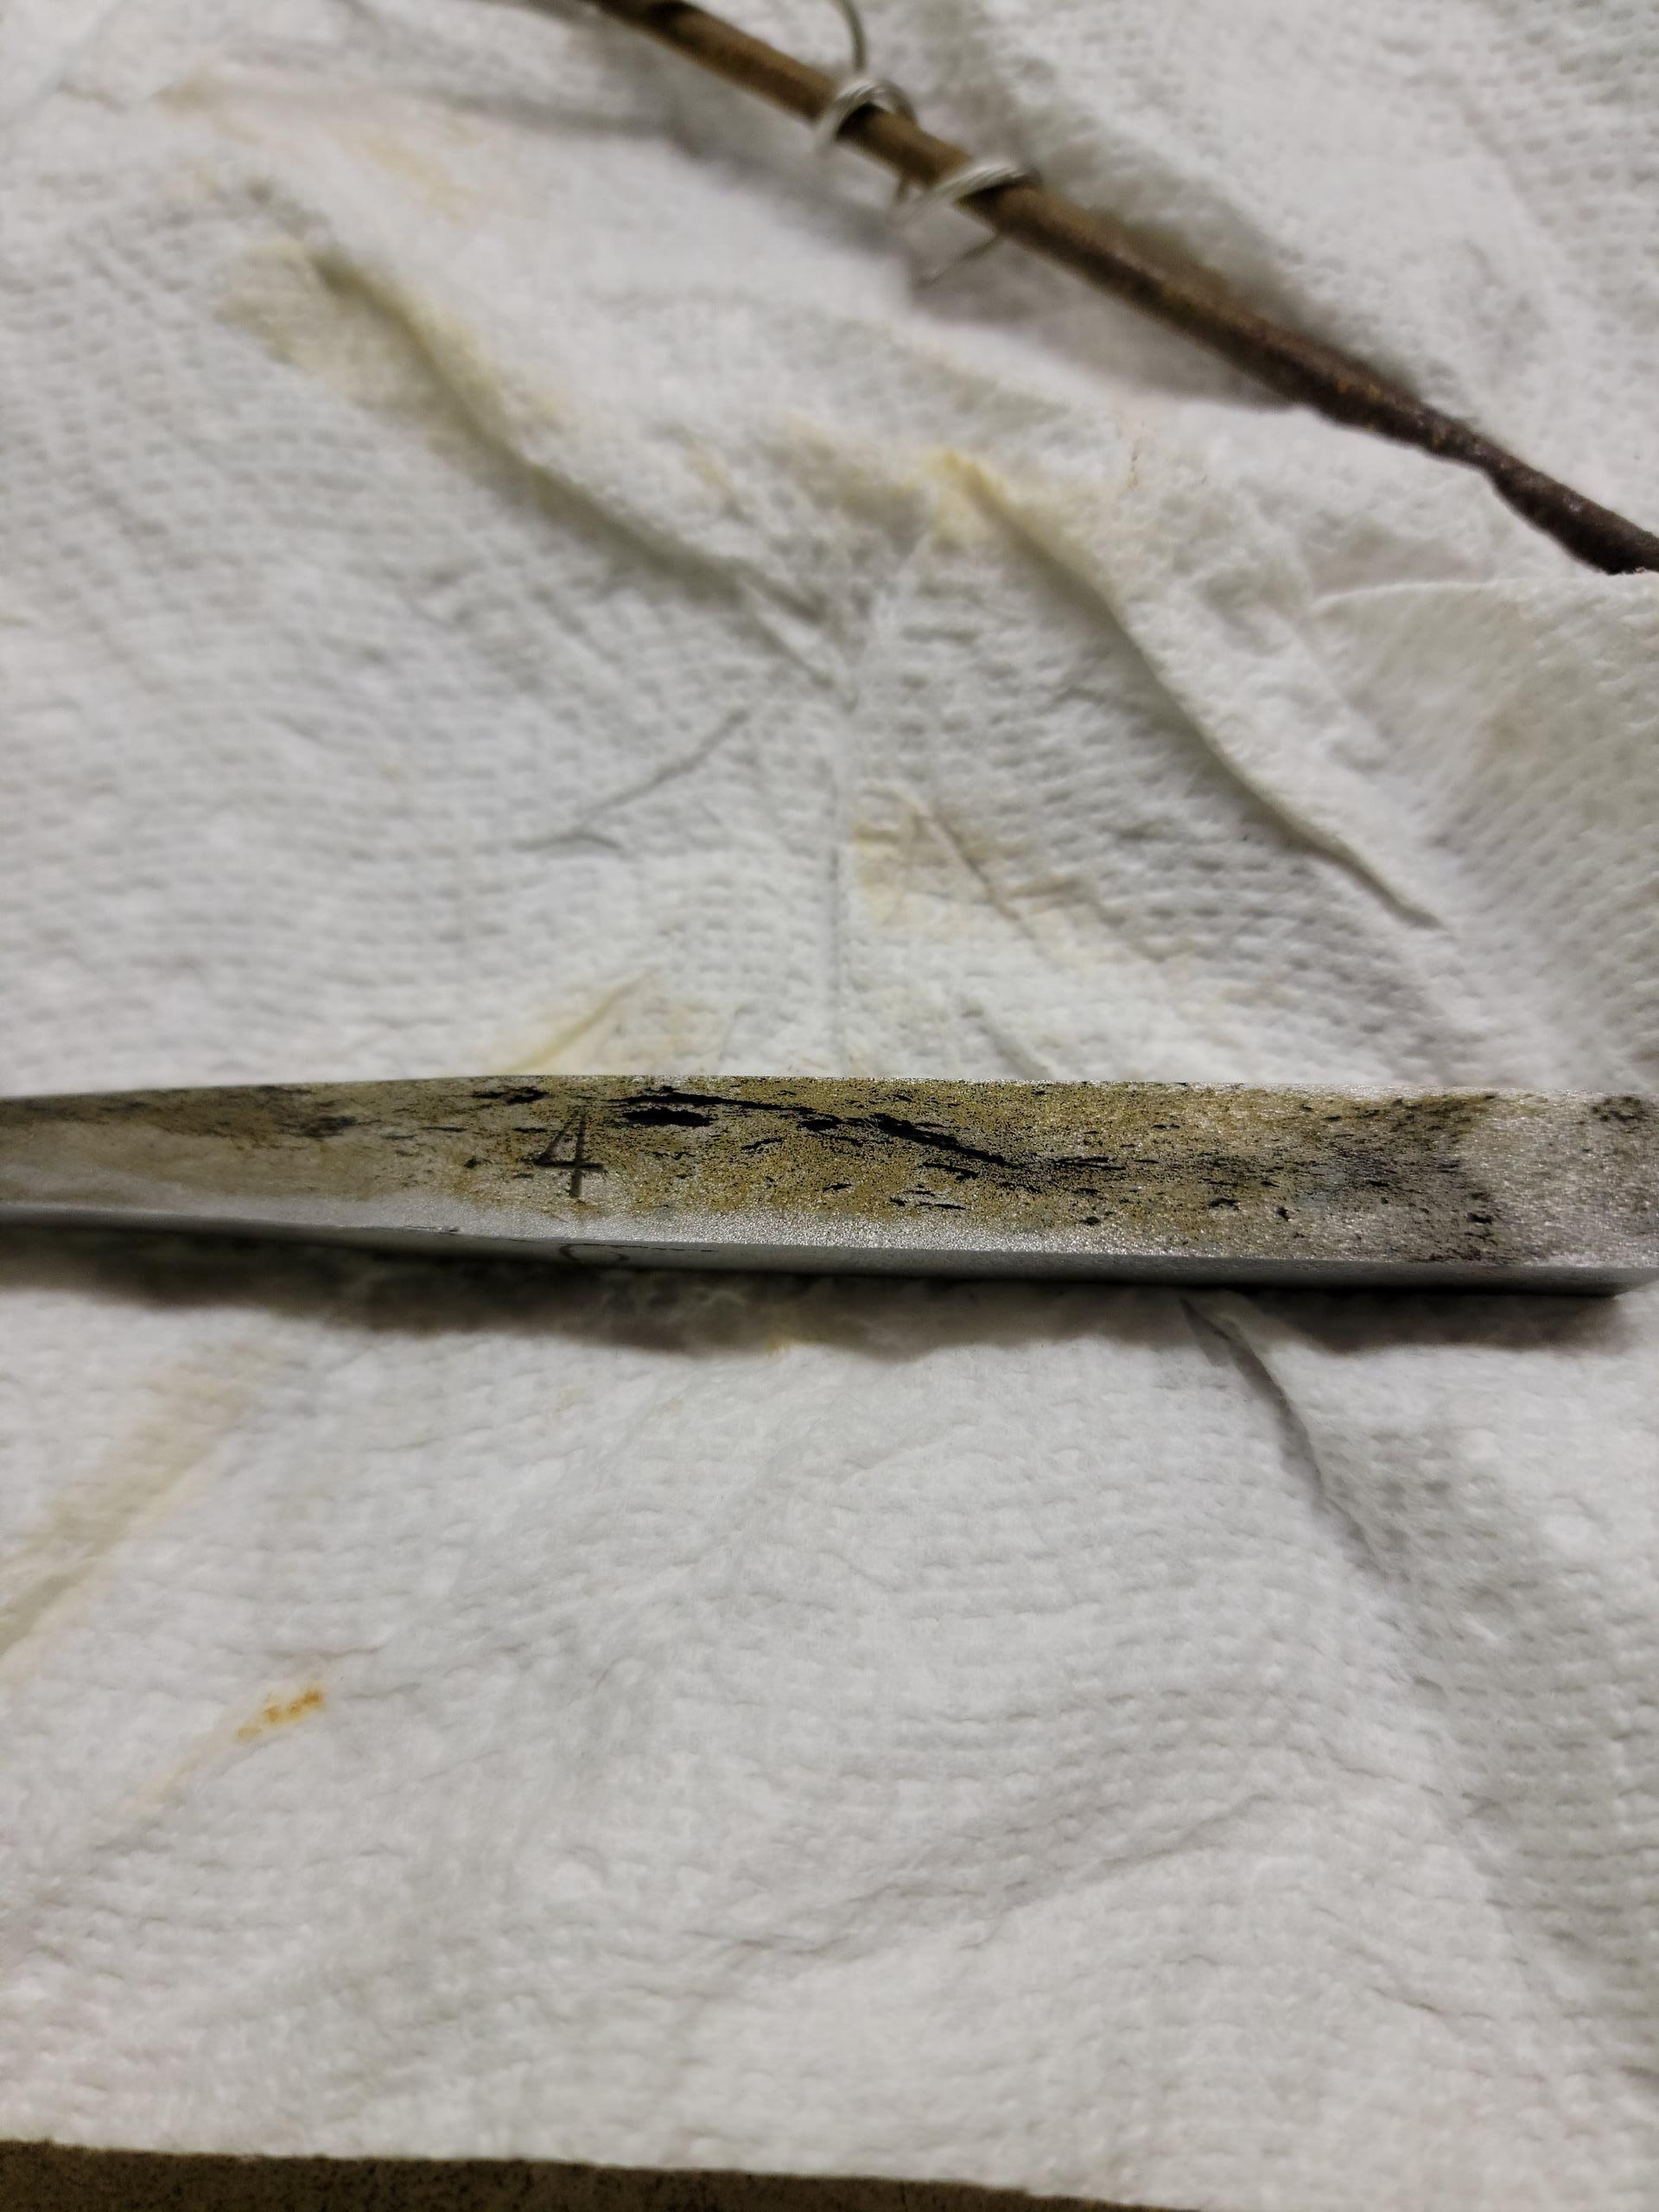
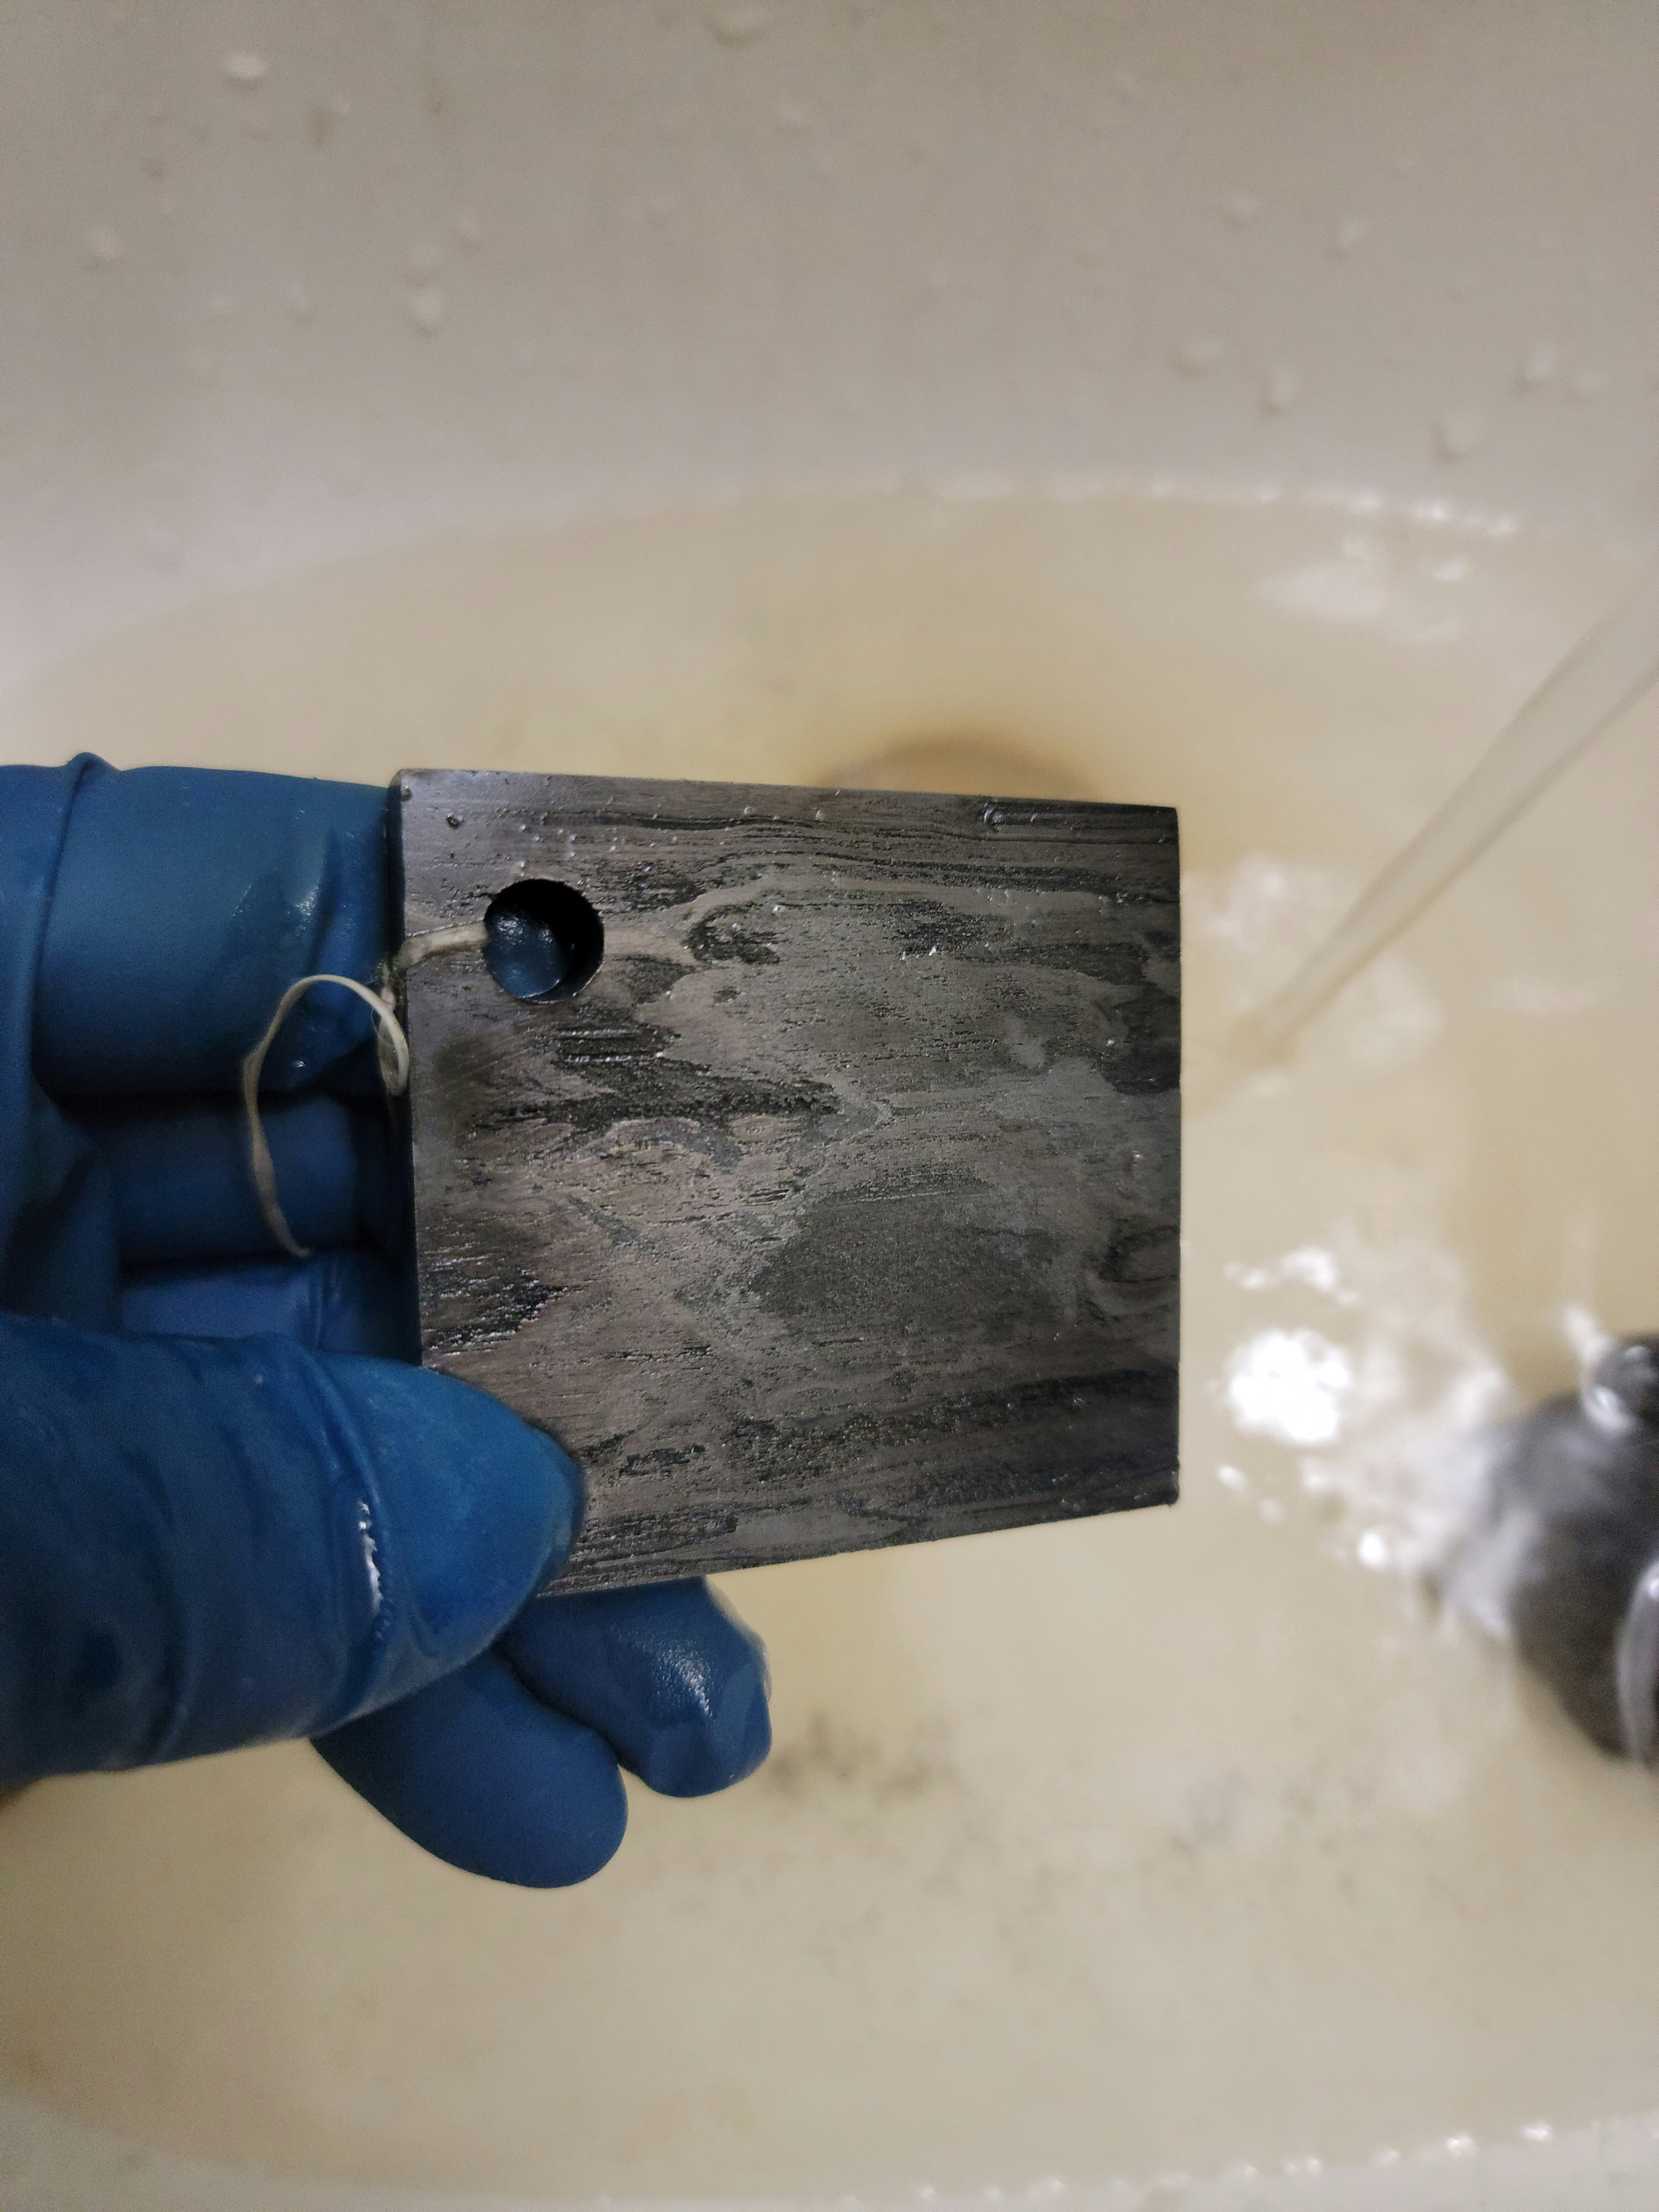
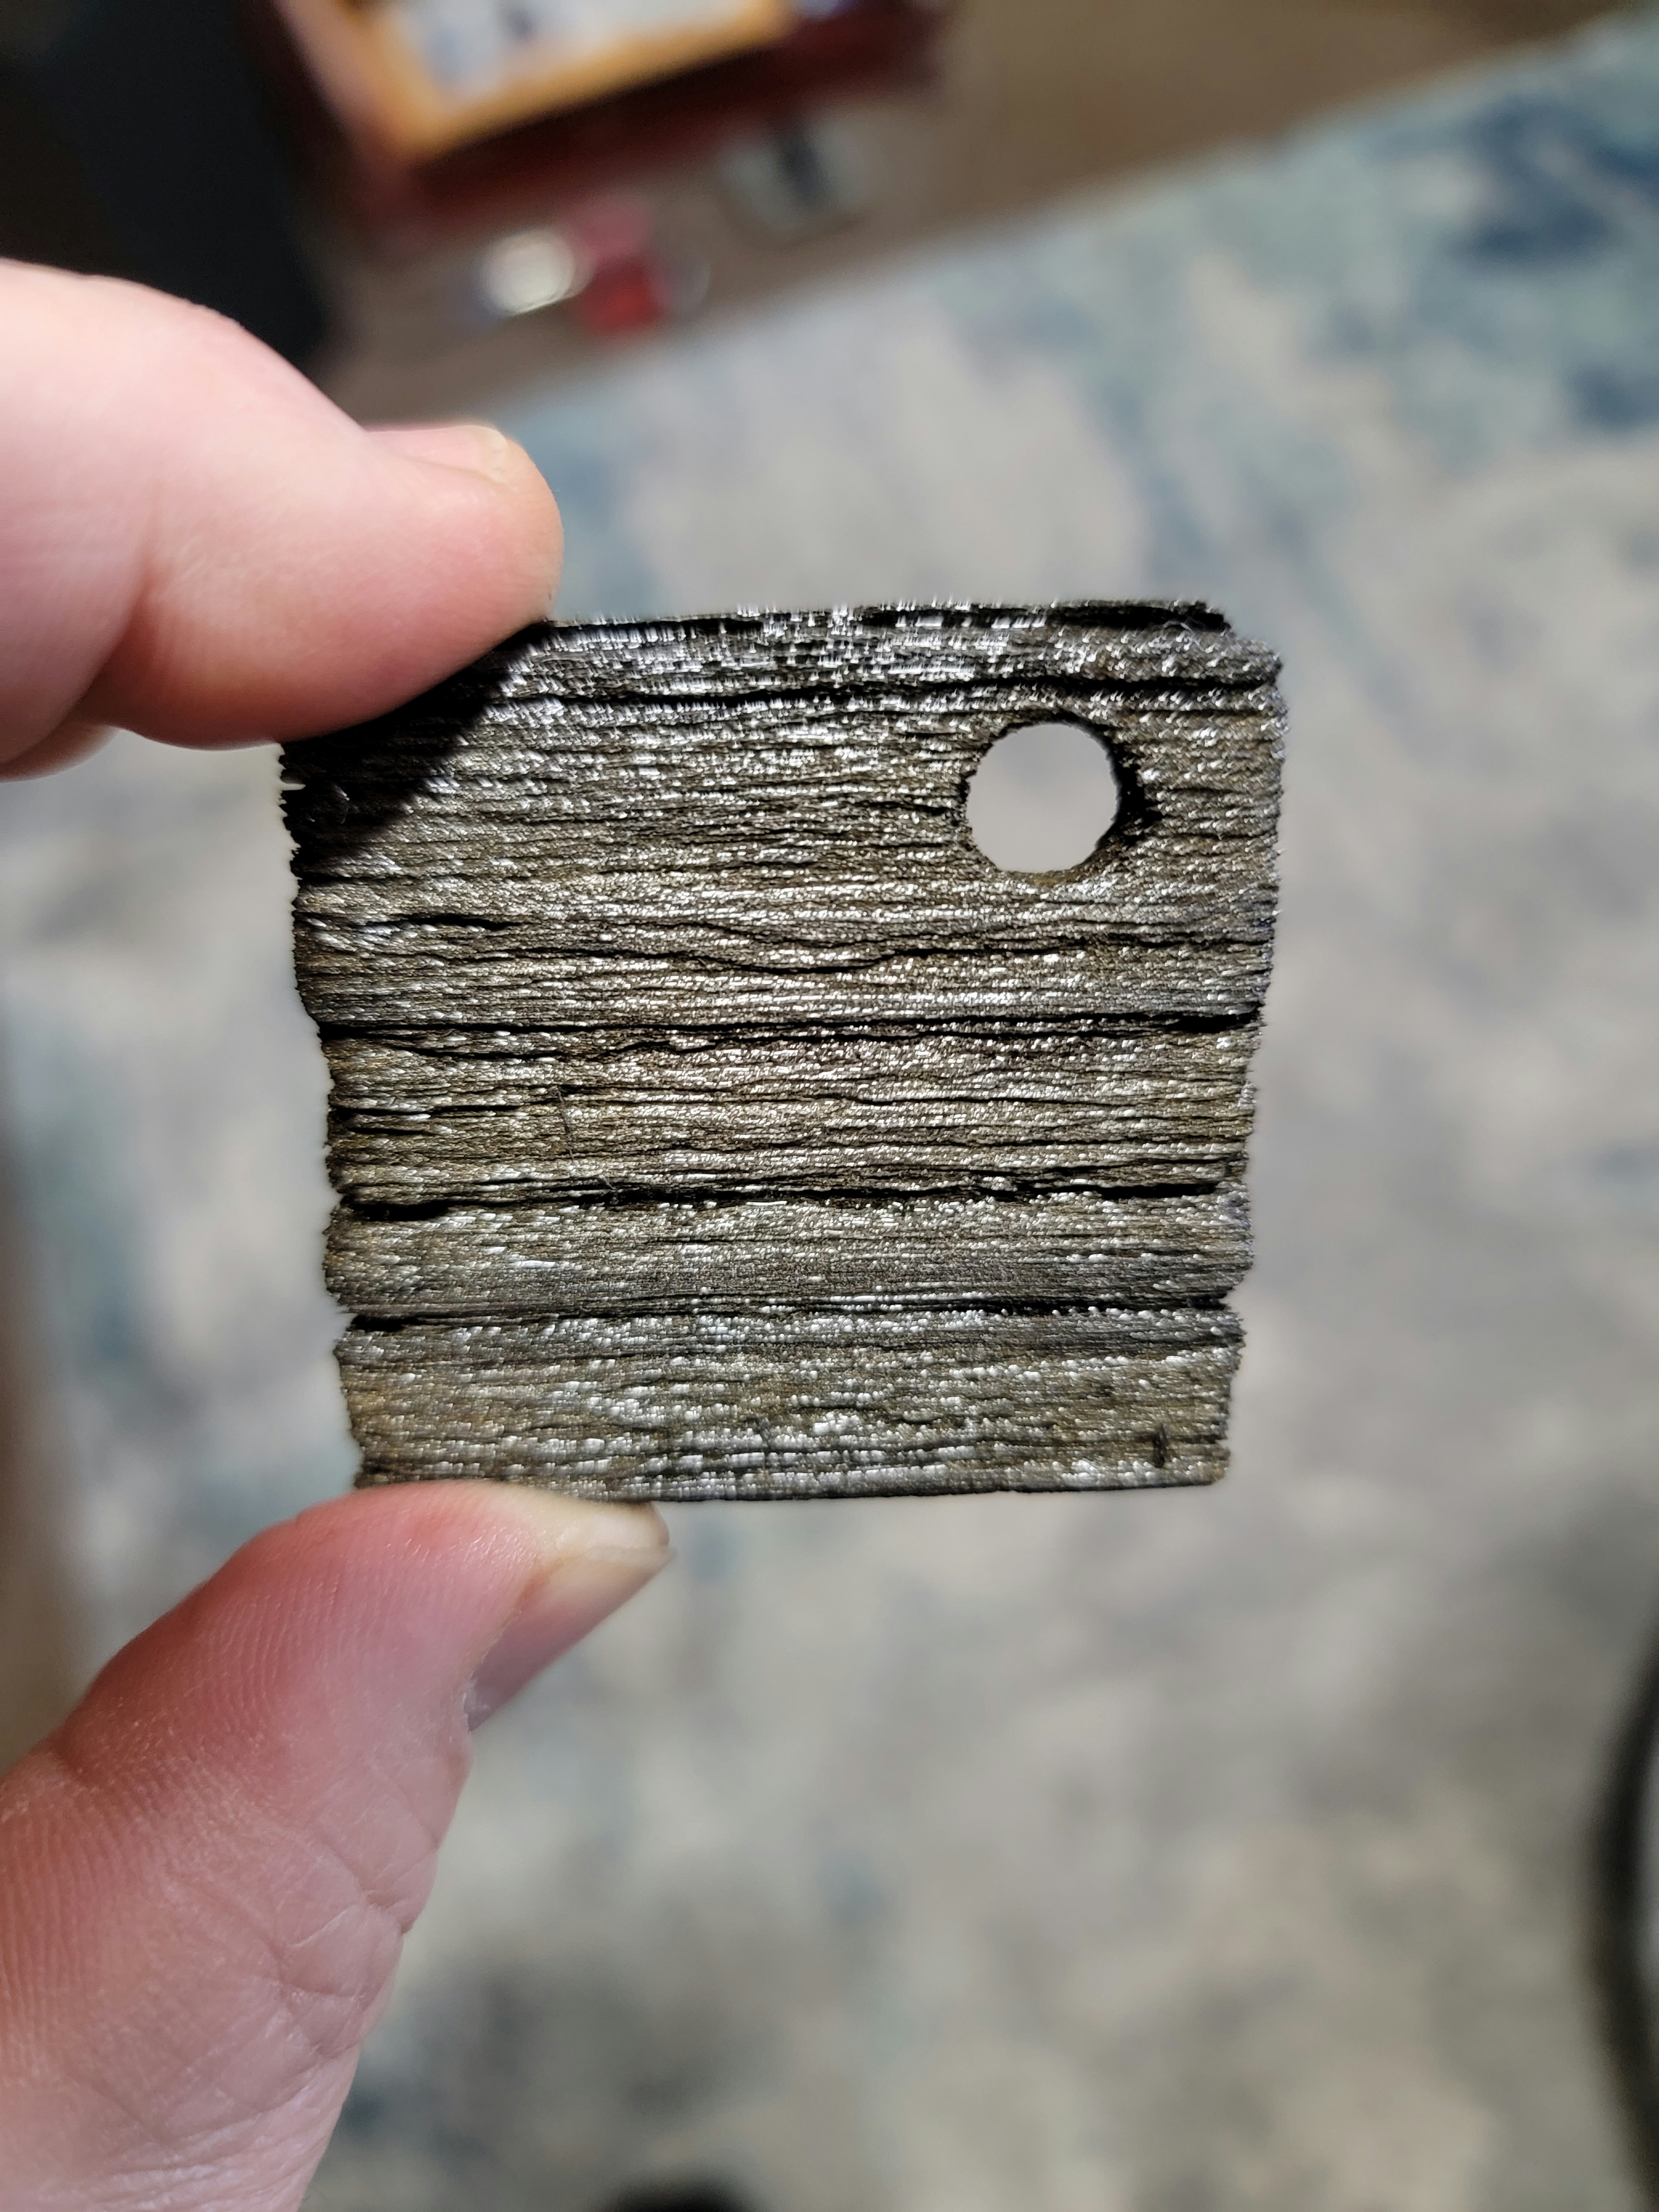
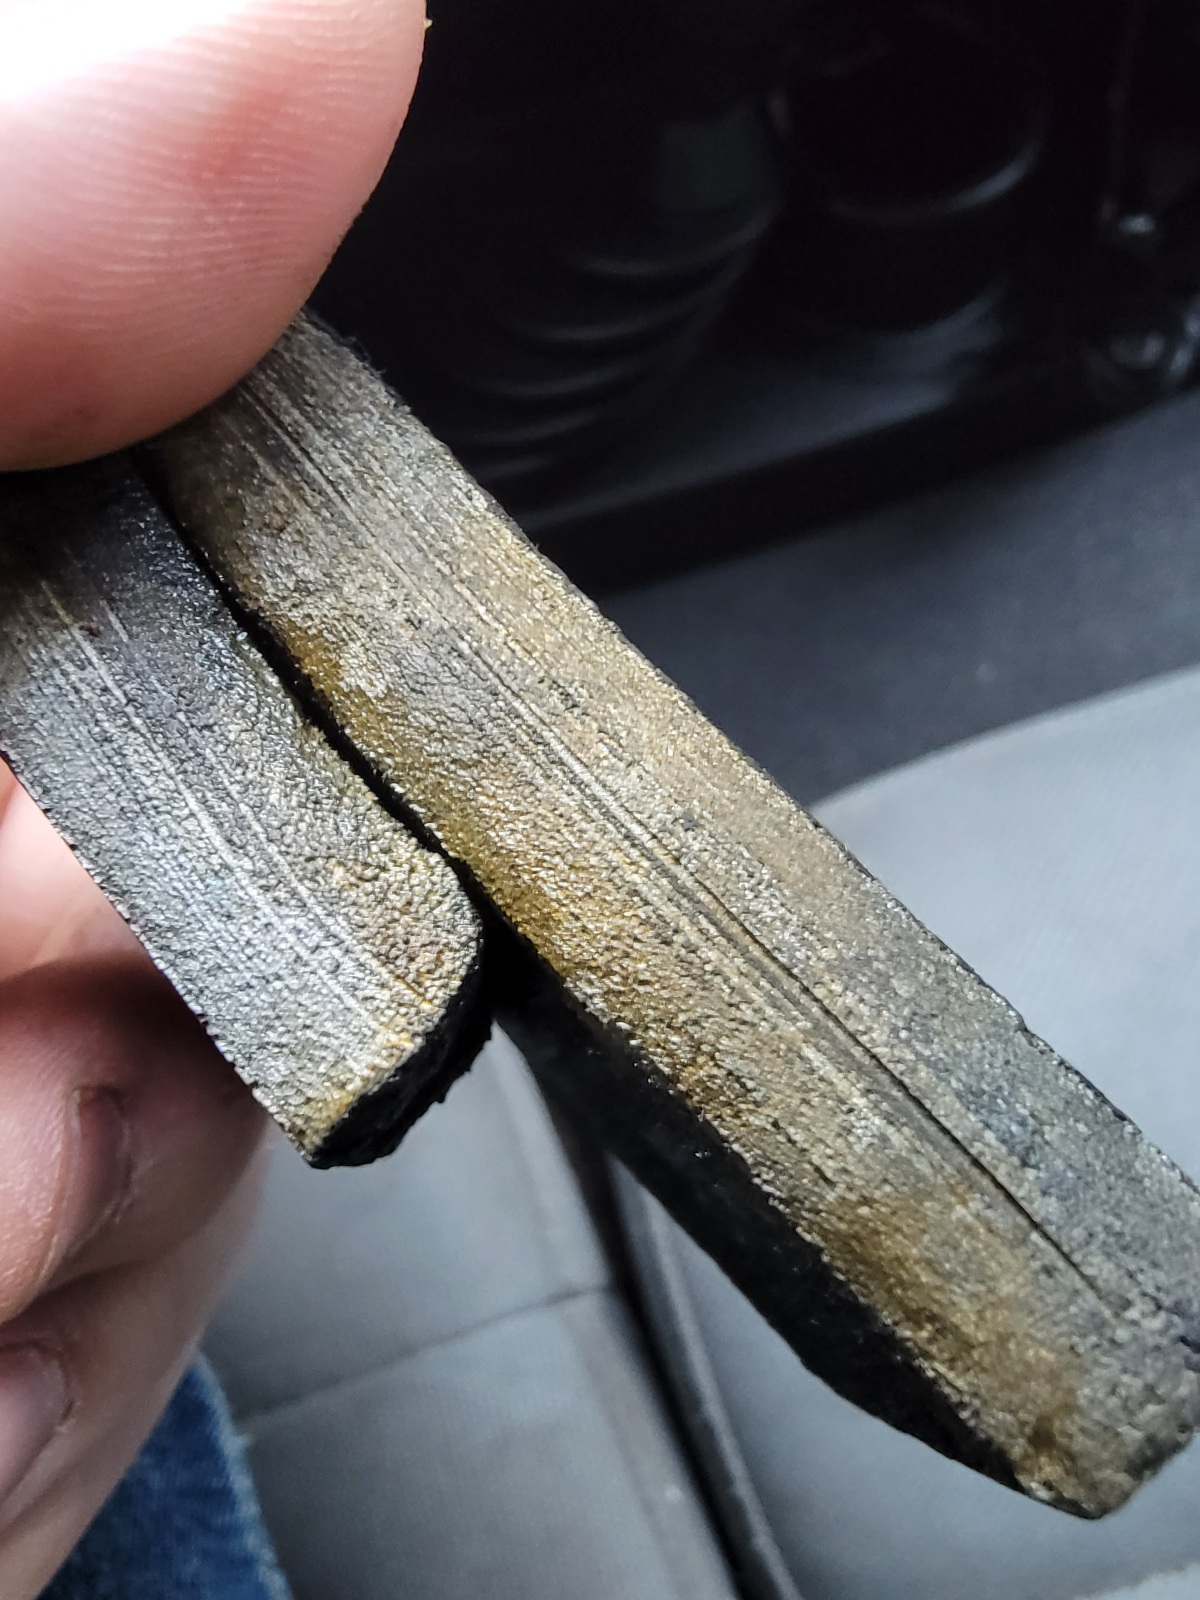
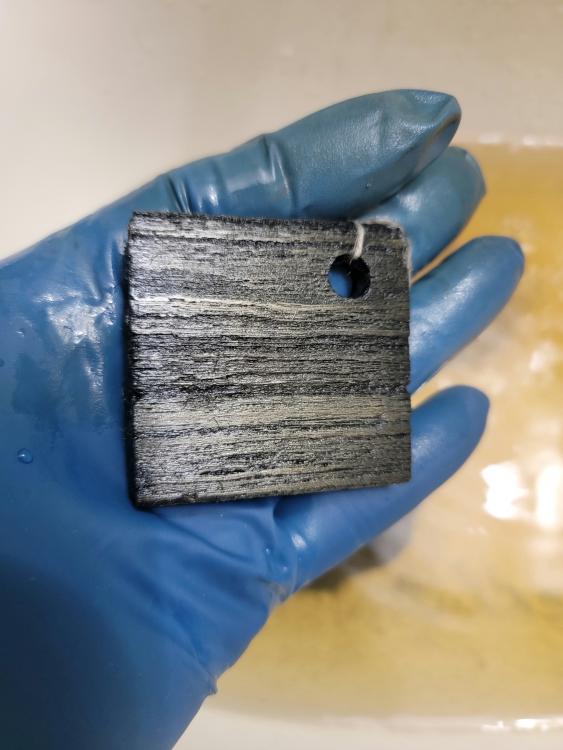
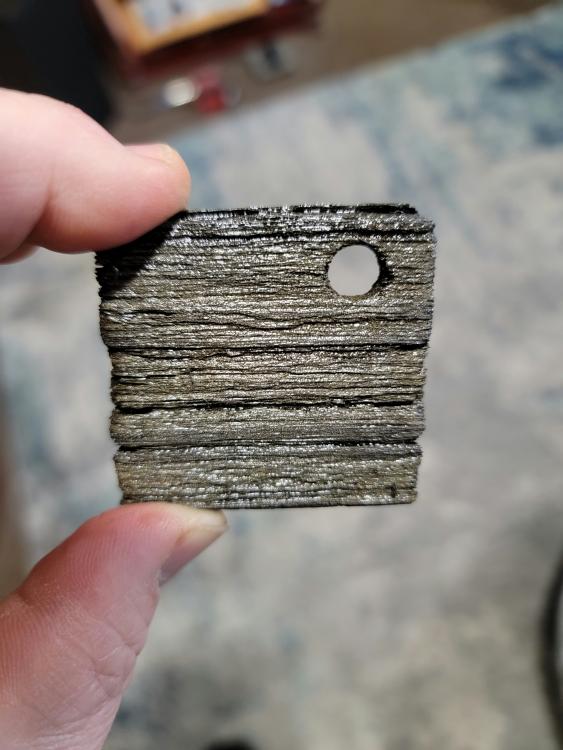
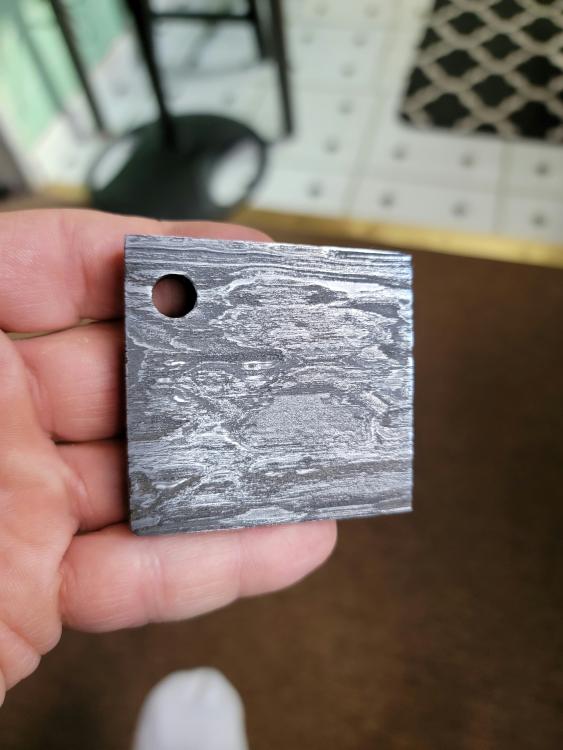
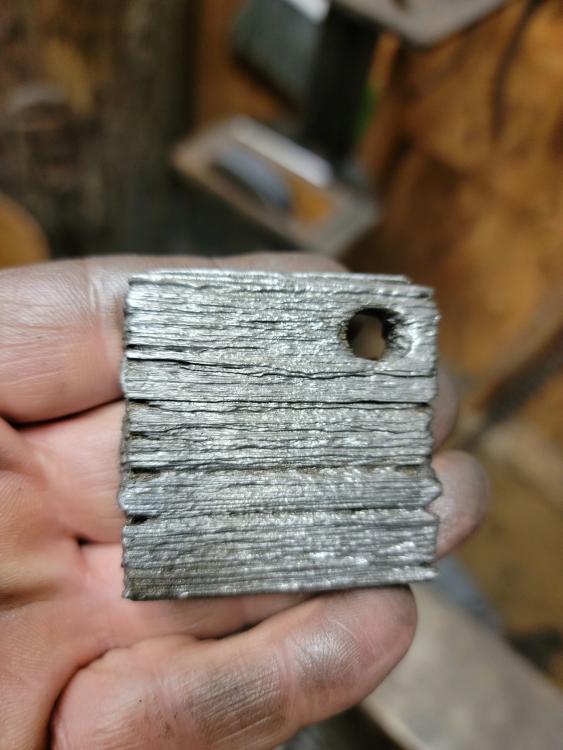
This is going to be a long one... This won't be how to work WI as there are many threads on that topic. This is more my experience for how different grades compared. I hope some find it useful. It sure helped me and I'd love to get your thoughts. I had no experience with WI and after reading through the threads, which have a ton of great info, I decided to do my own experimenting. Now that it's done why not share. The first WI (sample #1) I got was what the seller described as "high quality." Well that was my 1st lesson... I assumed that would mean more refined and after forging and etching I would get a nice pattern. To me that means wood grain topography, not necessarily a dark/light contrast. If I want that I'll make damascus. Problem was after the snap test, spark test, forging and etching I wasn't sure what i had. The oddest part to me was I could forge it at dull red temps. I tried to get the material to split and couldn't. Here are pics of that material. After these tests I had a spectro-analysis done. I just had to know. This may tell some of you more than it tells me. I was told this is as close to pure iron as it gets. Etching this in both ferric and muriatic had the same effect. Fe 99.55 *** Al 0.009 Si 0.01 P 0.009 S 0.024 C 0.00 *** Mn 0.37 Ni 0.01 Cu 0.02 Sn 0.004 V 0.001 W 0.010 Co 0.010 Any thoughts on uses for this material? After all that the next step was to get my hands on some less refined WI. Naturally my assumption now was LESS refined WI would give me the aesthetic I wanted, which seems to be the case. I tested these samples in both ferric and muriatic. I found etching in ferric gave a more damascus like finish while etching in muriatic gave the more wood grain topography appearance. This was WI sample #2. (Less refined from sample #1?) Taken to 400 grit, etched in room temp diluted ferric 4 hrs. Etched another 2 hours, hit high spots with 1000 grit. Id like to keep working on how to finish it this way. WI sample #3 (less refined than samples 1 & 2?) Etched in muriatic 4 hrs. I really likes this one. Same piece etched another 2 hrs in a muriatic/h202 mixture which significantly decreased etching time. and wire wheeled... Back to sample #2, this one etched in ferric 4 hrs wire wheeled clean. Sample #2 etched in muriatic/h202 4 hrs. So that's it. I may have a spectro-analysis of sample #2 done just to compare. So all in all it was a fun experiment. To sum it up it looks like grinding to 400 and etching in ferric gives a damascus like finish while etching from a forge finish in muriatic gives a wood grain appearance, at least in these samples. Again any thoughts are welcomed.


-
Arkans lookin good, keep on forging! It may have been said already but a good starting stock for tongs is 3/4" sq bar. Also you mentioned you bought the steel at Lowes. If you have a steel provider near you they may have a rack full of off-cuts and charge by the weight. I find I get alot more steel for alot less money that way.
-
They're really amazing. Thanks for sharing!
-
You'll find that of you ask 5 blacksmiths a question you'll get 8 different answers. The bottom line is not all forges are created equally. What works for me may not for another person and visa versa. I think what we all can agree on is you bought an unusable product due to the plastic components. Not your fault, shame on them for selling it hoping to scam beginners. I think the easiest thing for you to do, to just get forging with your son, is to buy a different model and use their materials. I've never had an issue with my Hells Forge and their customer service is very good. You don't need to follow all these crazy detailed methods with kastolite and SATANITE and everything else. The only thing you have to do is seal the ceramic fiber with A refractory so your not breathing it in. Read up on the subject while your forging for when you need to re-line it down the road. You'll find after you gain experience that you want your forge to perform a certain way and you'll know what to buy then, but for now a 2 burner or even a 1 burner forge from a better company will do just fine. Let us know how it goes and good luck!
-
With all due respect I think you may be set in your ways on some topics. Of course people are going to have issues with every product. They're people. If I'm saying I use it and others use it without any issues and it's described uses are there as plain as day, how can you be so definitive in saying it has no business being used?
-
I just looked up info on the product. It is labeled satanite refractory mortar. Uses include sealing the lining of your forge or as a coating to produce hamons. If what your saying is correct, how can anyone that uses this product run a forge without any issues?
-
"Buttering" the ceramic fiber and the cook off process are good for whatever refractory you use. If it were me I'd get a full refund, and buy a different forge. I use a 2 burner Hell's Forge and it has served me well. It's plenty of forge. You can use the products they send for noe and that'll give you the opportunity to get forging w/o having to diagnose and rebuild a brand new forge. You can worry about different refractory and reflective coating like ITC 100HT down the road. The only reason I say that is because IMO there shouldn't be plastic anything on a forge. Those plastic sleeve chokes are pretty concerning. Those areas get damn hot. You should be able to run your forge at welding temp, shut down and not have to worry about removing burners or melting propane lines. To be clear about closing the ends of the forge off to conserve heat you can put firebrick there as a "wall." You can do that with the forge running full blast. If that's not an option then you have to re-line the forge and start over. Satanite has worked just fine for me and it was $22. The ITC 100HT was $28. I let the satanite air dry, apply the 100HT, let it air dry then cook off the moisture and I'm up and running the next day. I've had melting lines before and it was because I tried replacing the burners that were different than what came with the forge. (maybe they were less quality I don't know) I put the stock burners back on and have never had the problem again. So again it's just my opinion but with plastic pieces, burners conducting enough heat after shut down to melt the gas lines and melting refractory I'd swap to a different model and chalk it up as a learning experience.
-
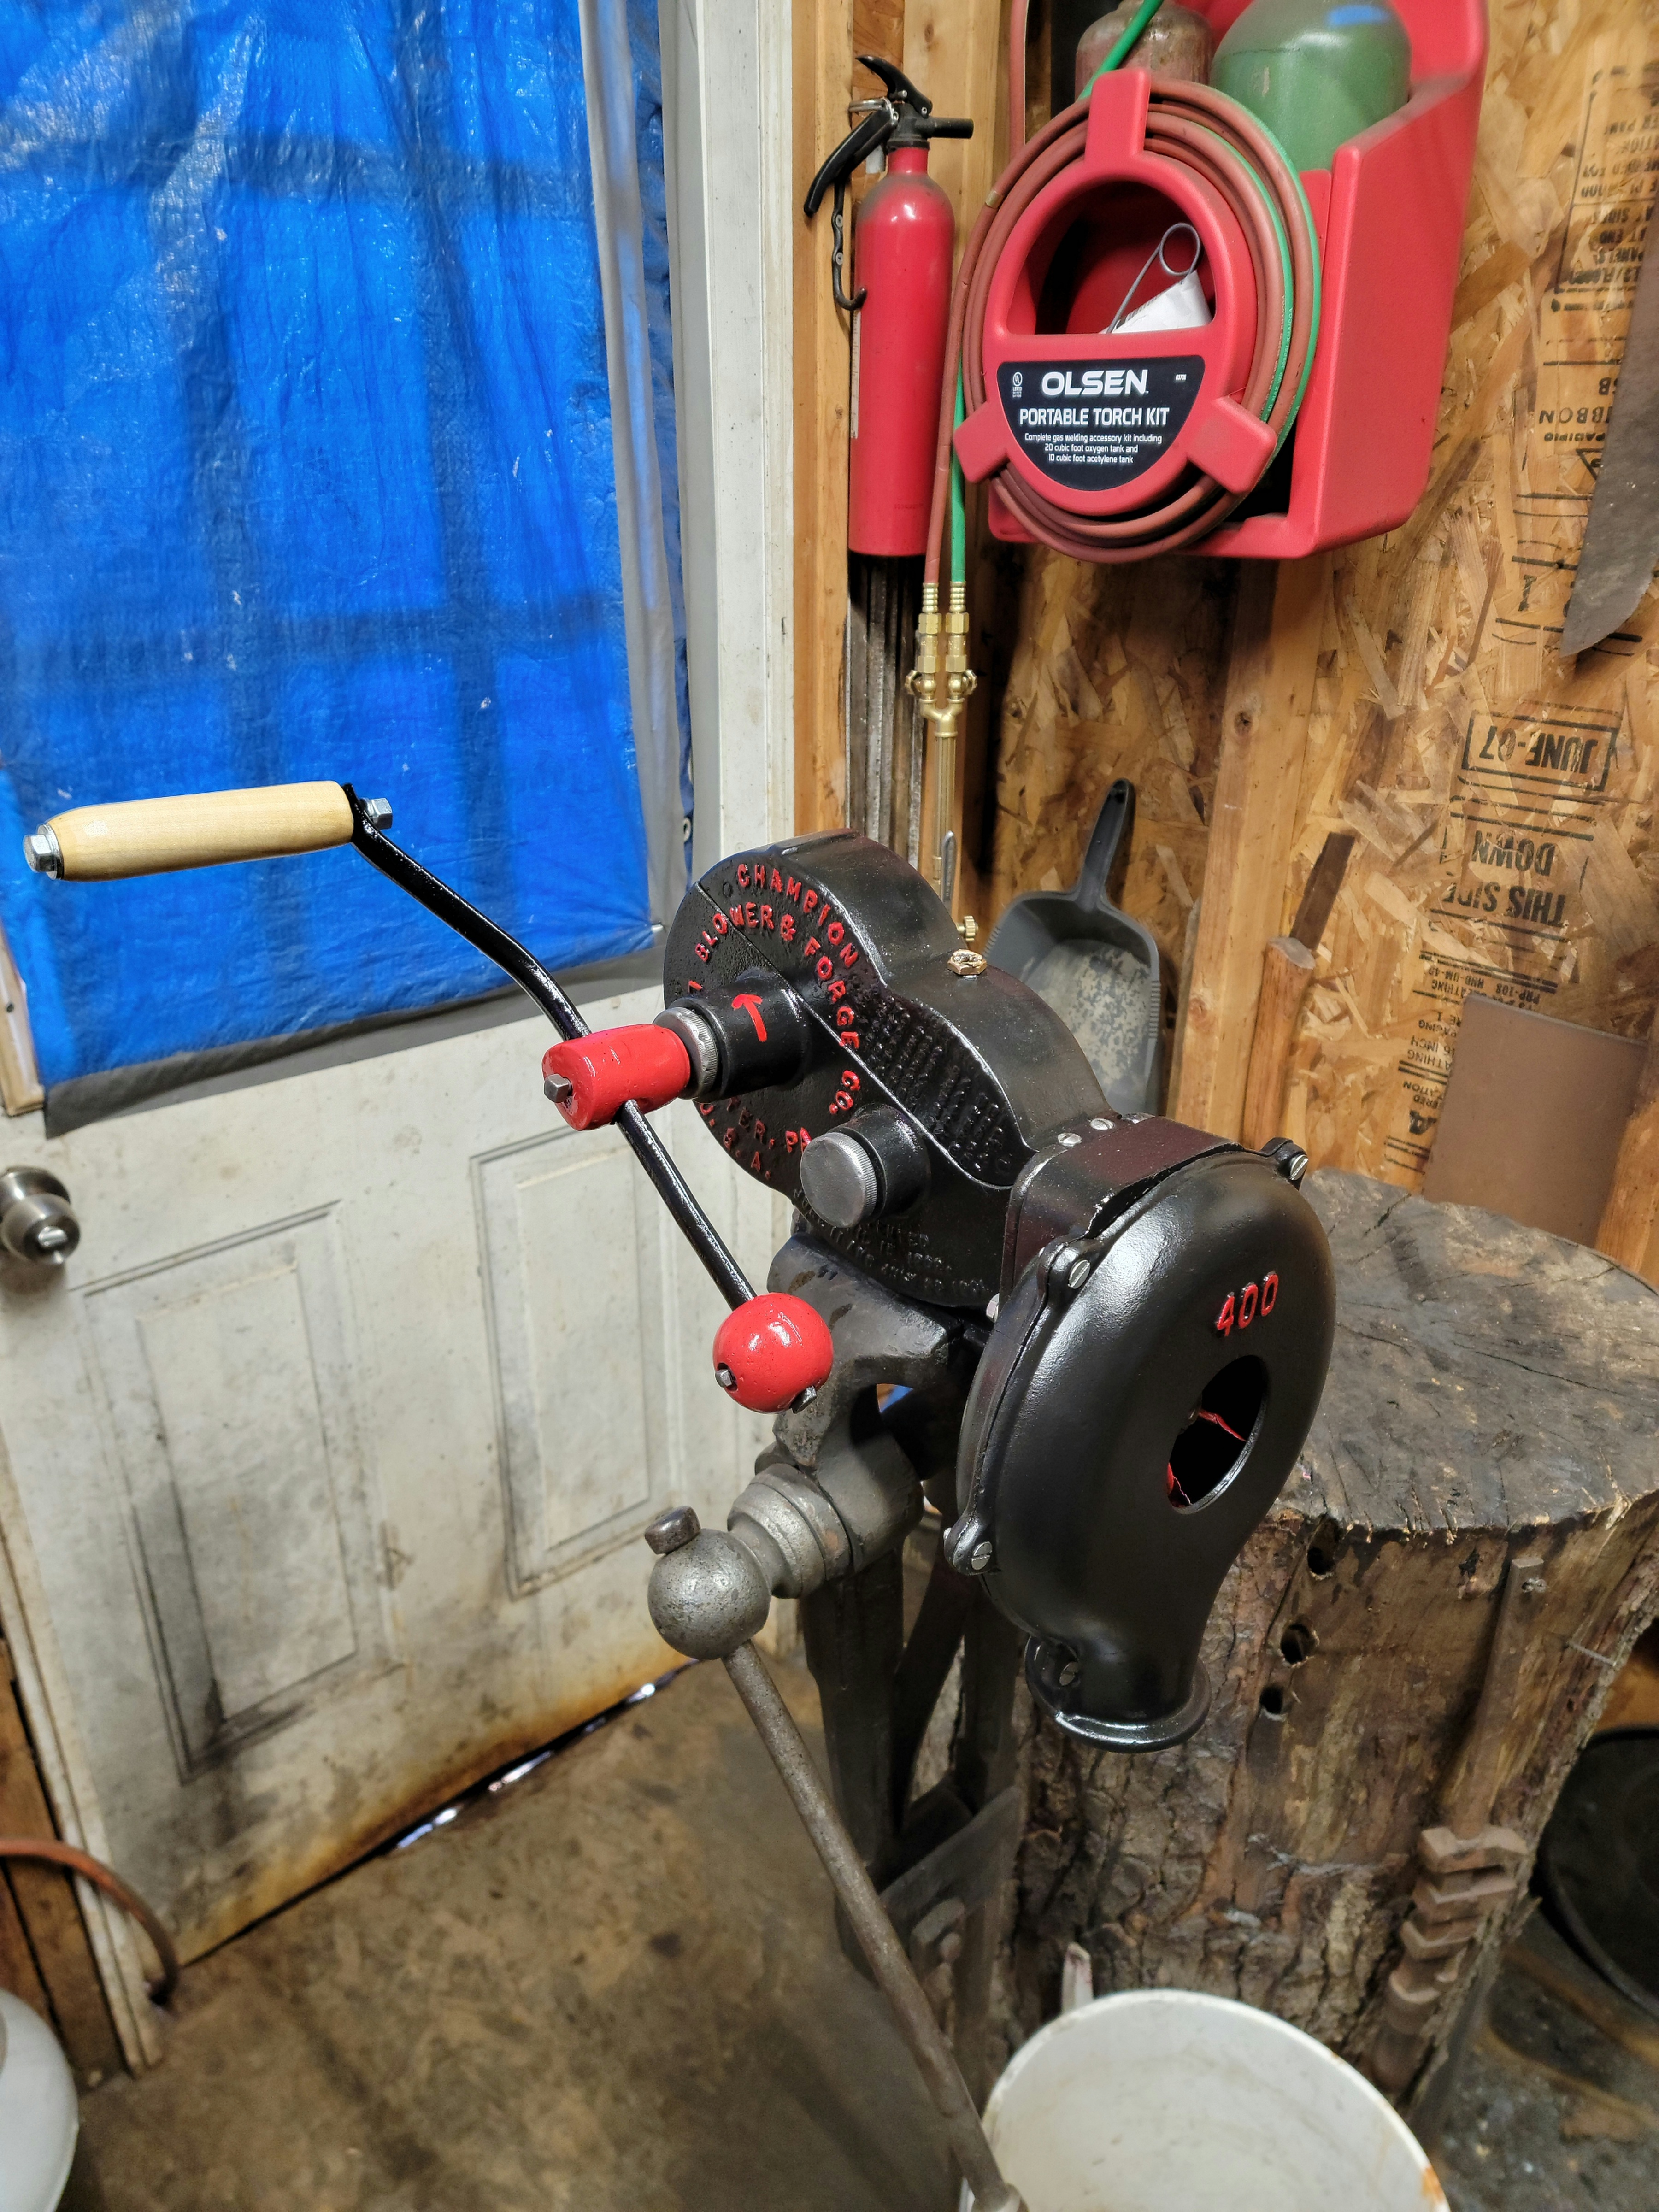
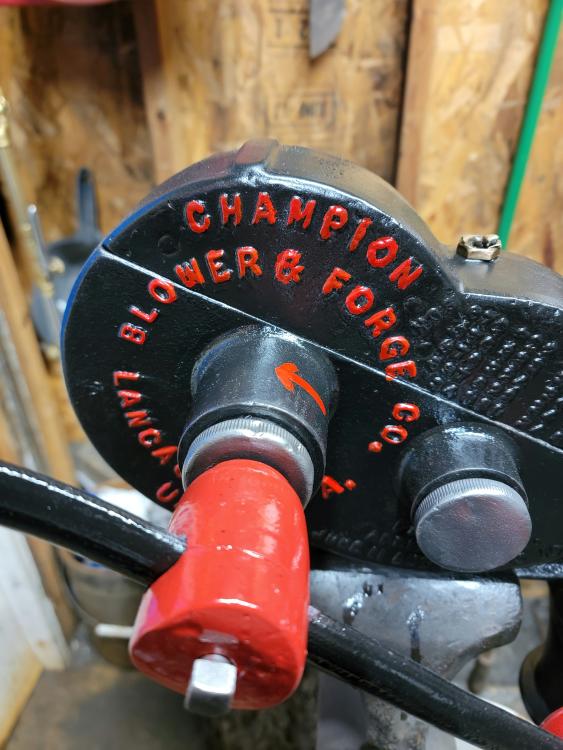
Personally I prefer the hand crank blowers. I have more control of the heat, I don't need electricity for it, it's pretty effortless to crank and I can quickly get the steel to the anvil without fiddling with on off switches or airgates. I used a cheaper Buffalo forge blower for years till I upgraded to a Champion 400.
-
A few thoughts... I wouldn't say you did anything "wrong." This journey is going to be a lot of trial and error. I would buy satanite refractory and not use what they send to Irondragon's point and I would also coat the refractory with ITC 100HT after it dries. To your question about running the forge too hot the answer is no BUT you may have run it too hot too soon. The moisture in the cement needs to be cooked off to prevent cracks and blowouts. The next time you set it up even after letting the cement air dry, run all the burners the 1st time just enough to warm up the cement, you'll see a bit of steam coming out of the front and back of the forge. Shut it down, wait till it cools and then run it again a little hotter, repeat the process till there isnt steam then fire it up full blast and let it cool overnight then you'll be good to go. As to what you said about the chimney affect that shouldn't be an issue. There are no rubber seals. Do you mean the top of the burner where the gas line connects got hot enough to melt the end of the gas line? You should be able to run that forge with any one of those burners so if there's some kind of leak or melting anything you have bigger issues. Finally, to conserve gas, close off the back of the forge with fire brick and run just the middle or just the front burner or both depending on the size of the piece your heating up. You won't need to run all 3 till you start getting into forge welding.
-
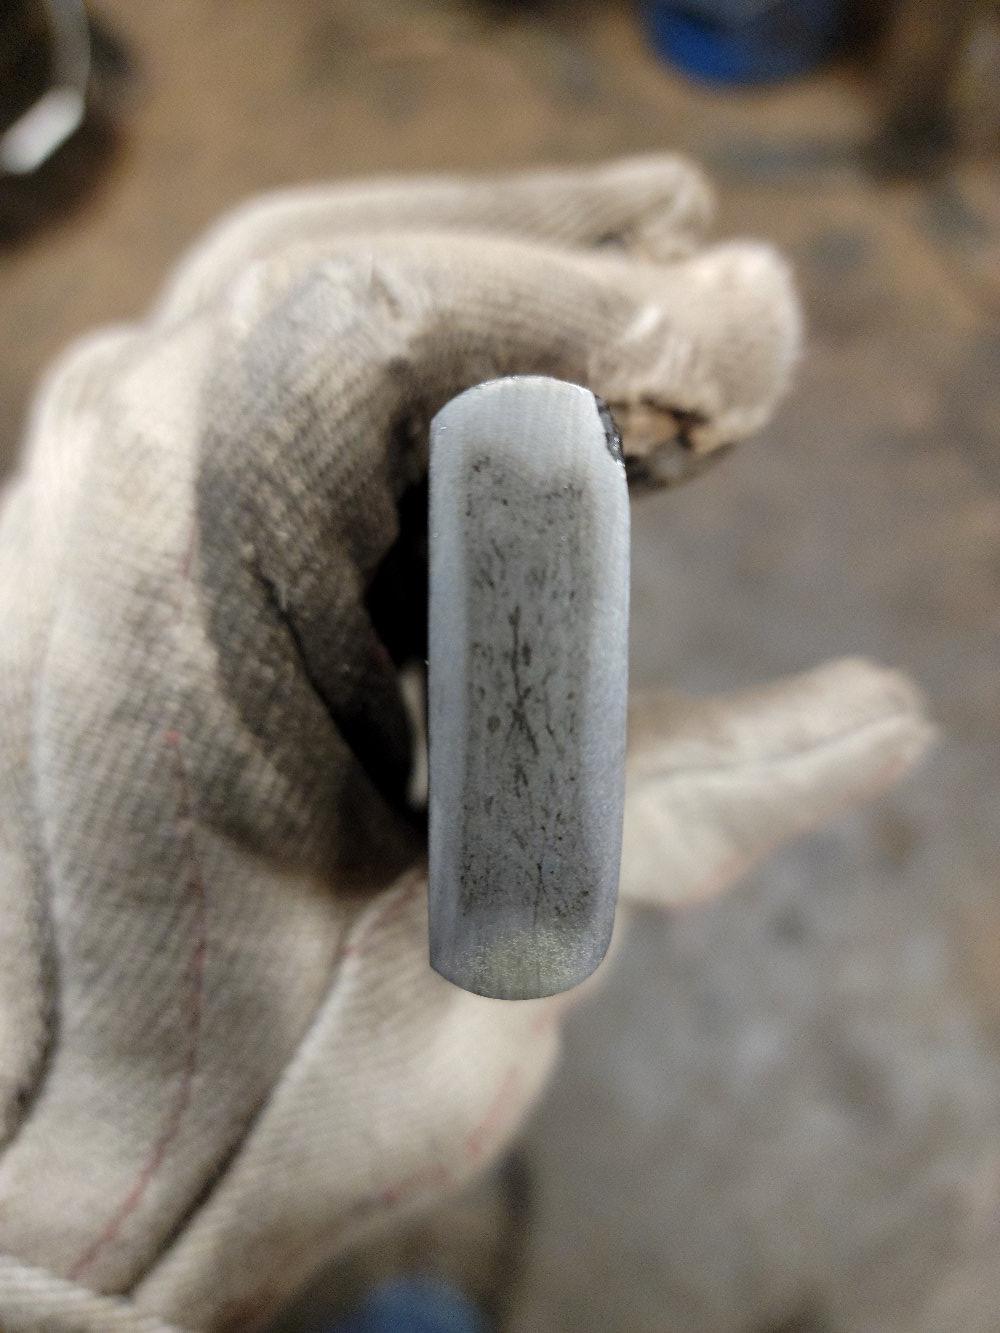
UPDATE. Here are more pics of an untouched sample after a long etch. I'm also having a full spectro analysis done. The PMI gone showed the following. Zn 1.22%, Pb 0.37%, Fe 94.97% +/- 1.55 I'll update again after I get the spectro analysis. Just curious what you guys think. Thanks!


-
Thanks for the input, yes I read what Thomas wrote in an older thread. Very helpful. I'll work what I have as is then and see how it comes out. I am in Clarence, a baseball throw away from Transit. Small world...
-
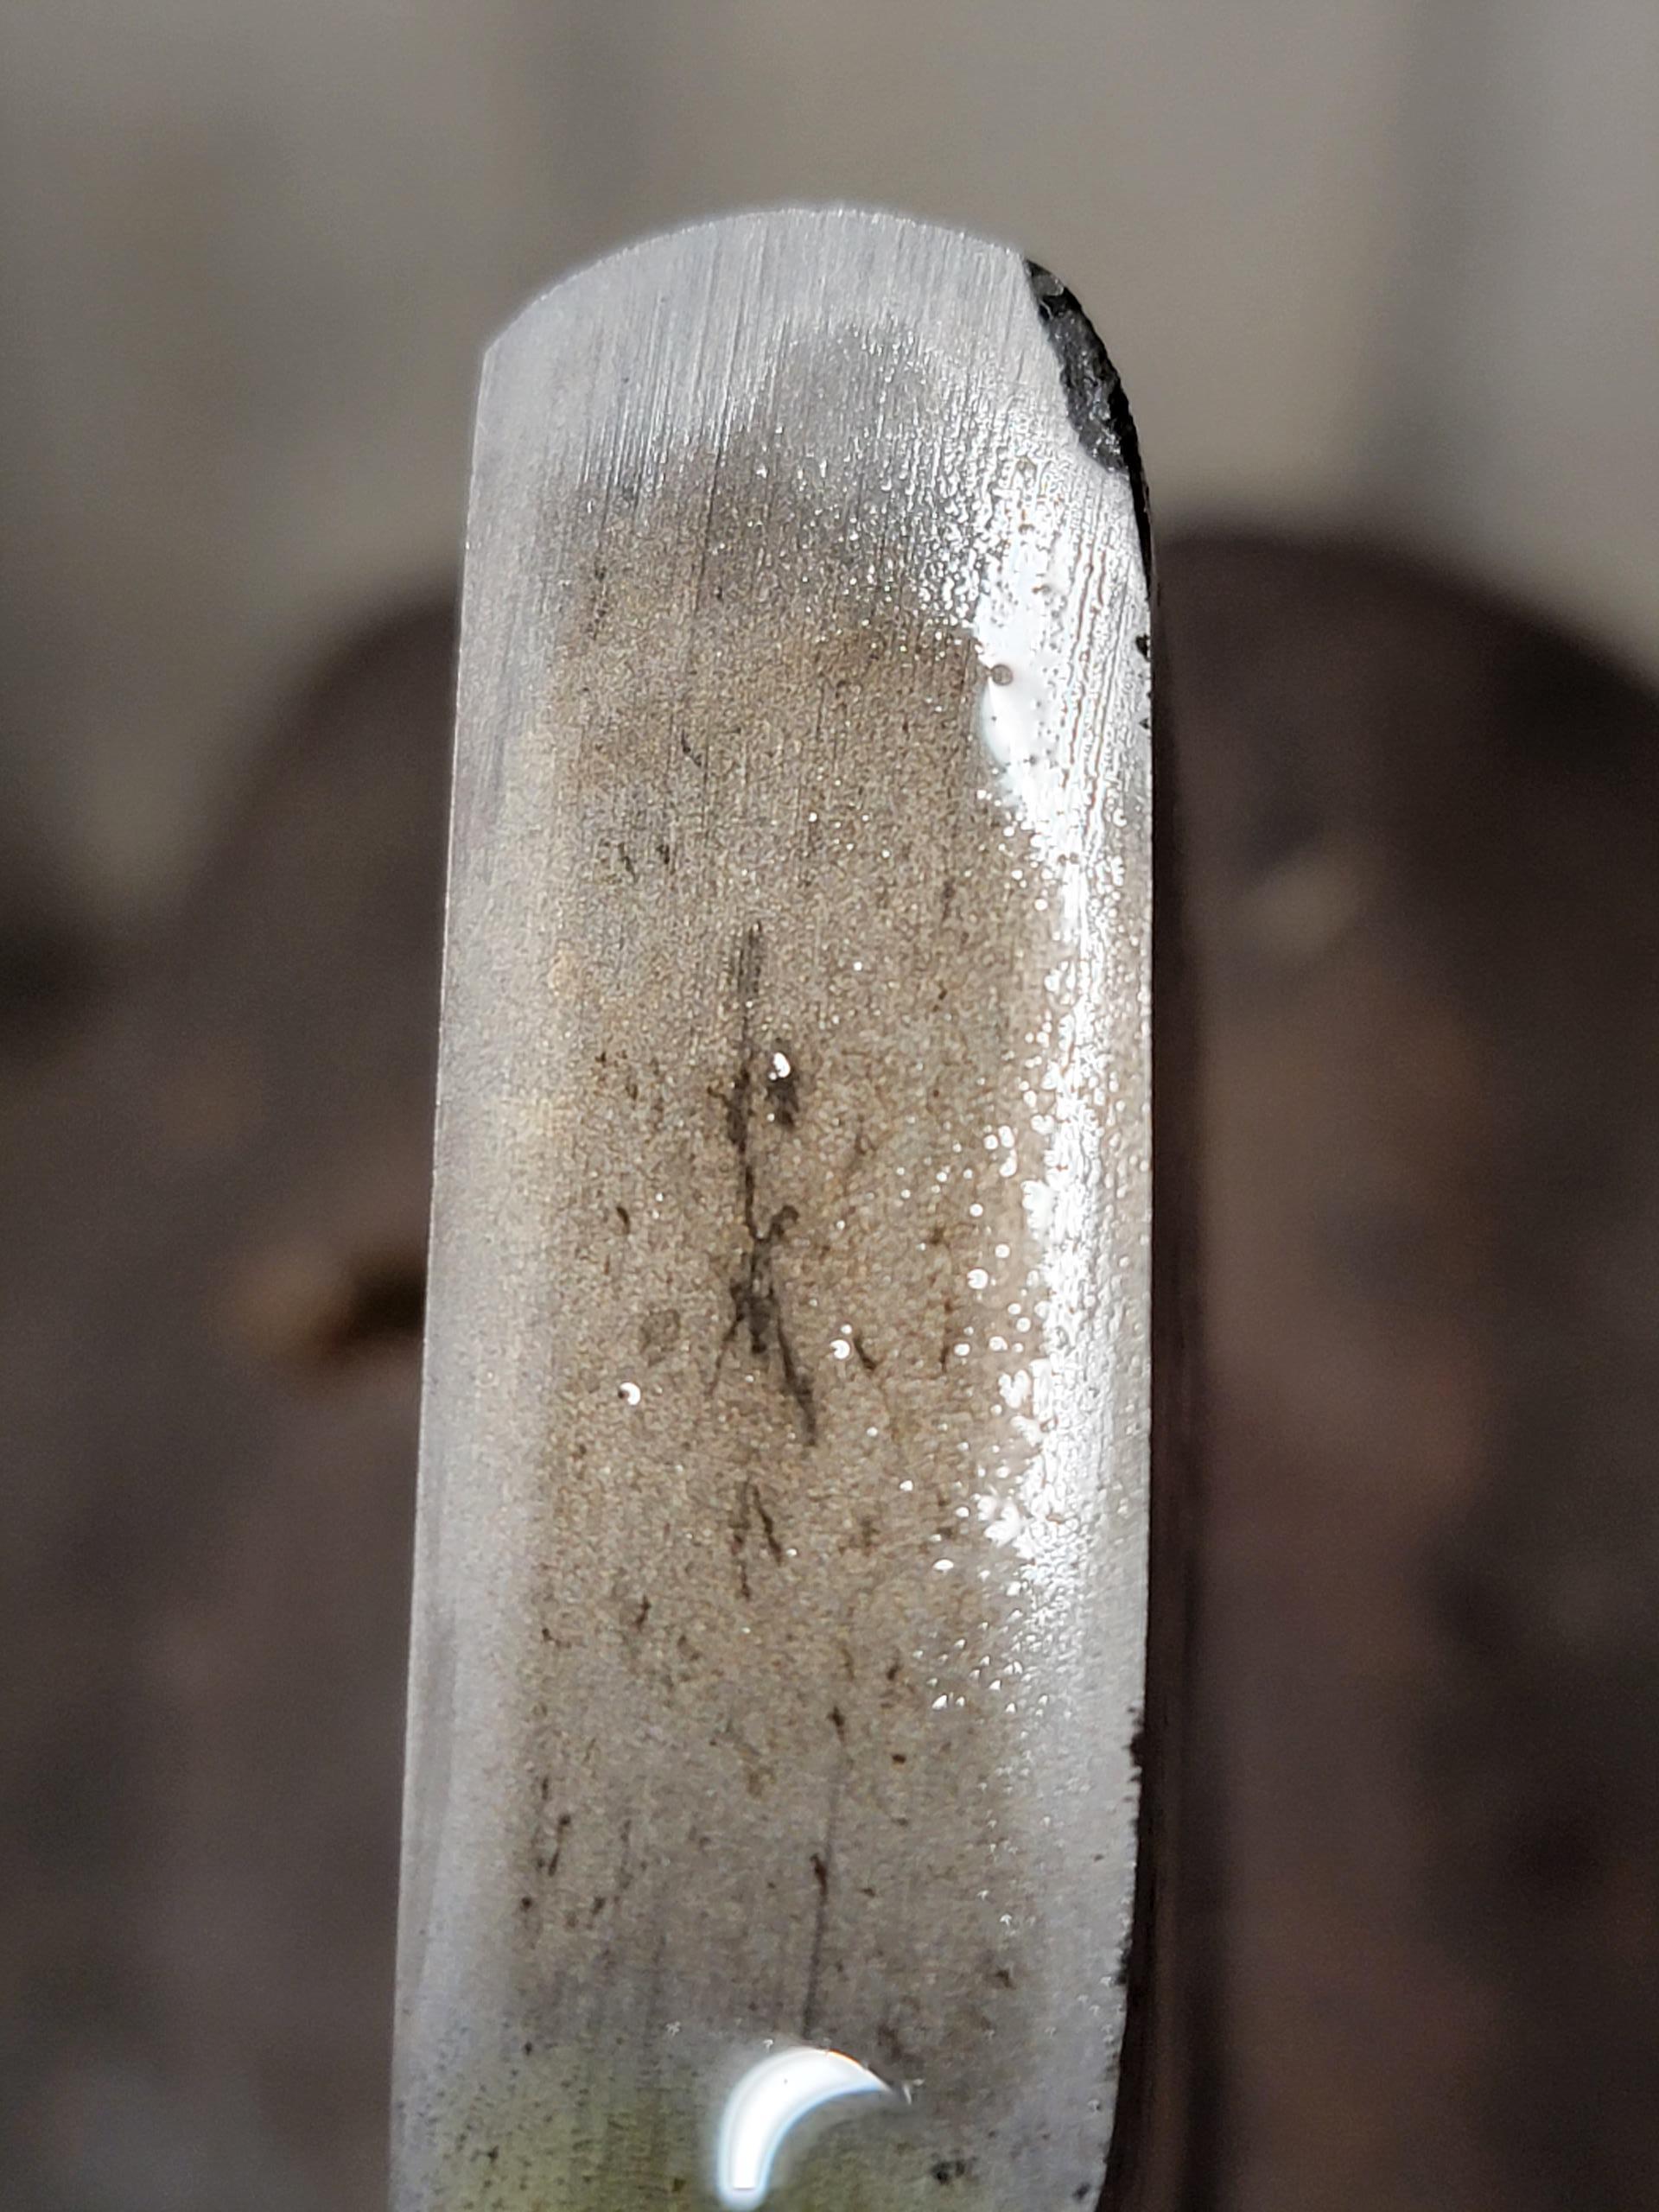
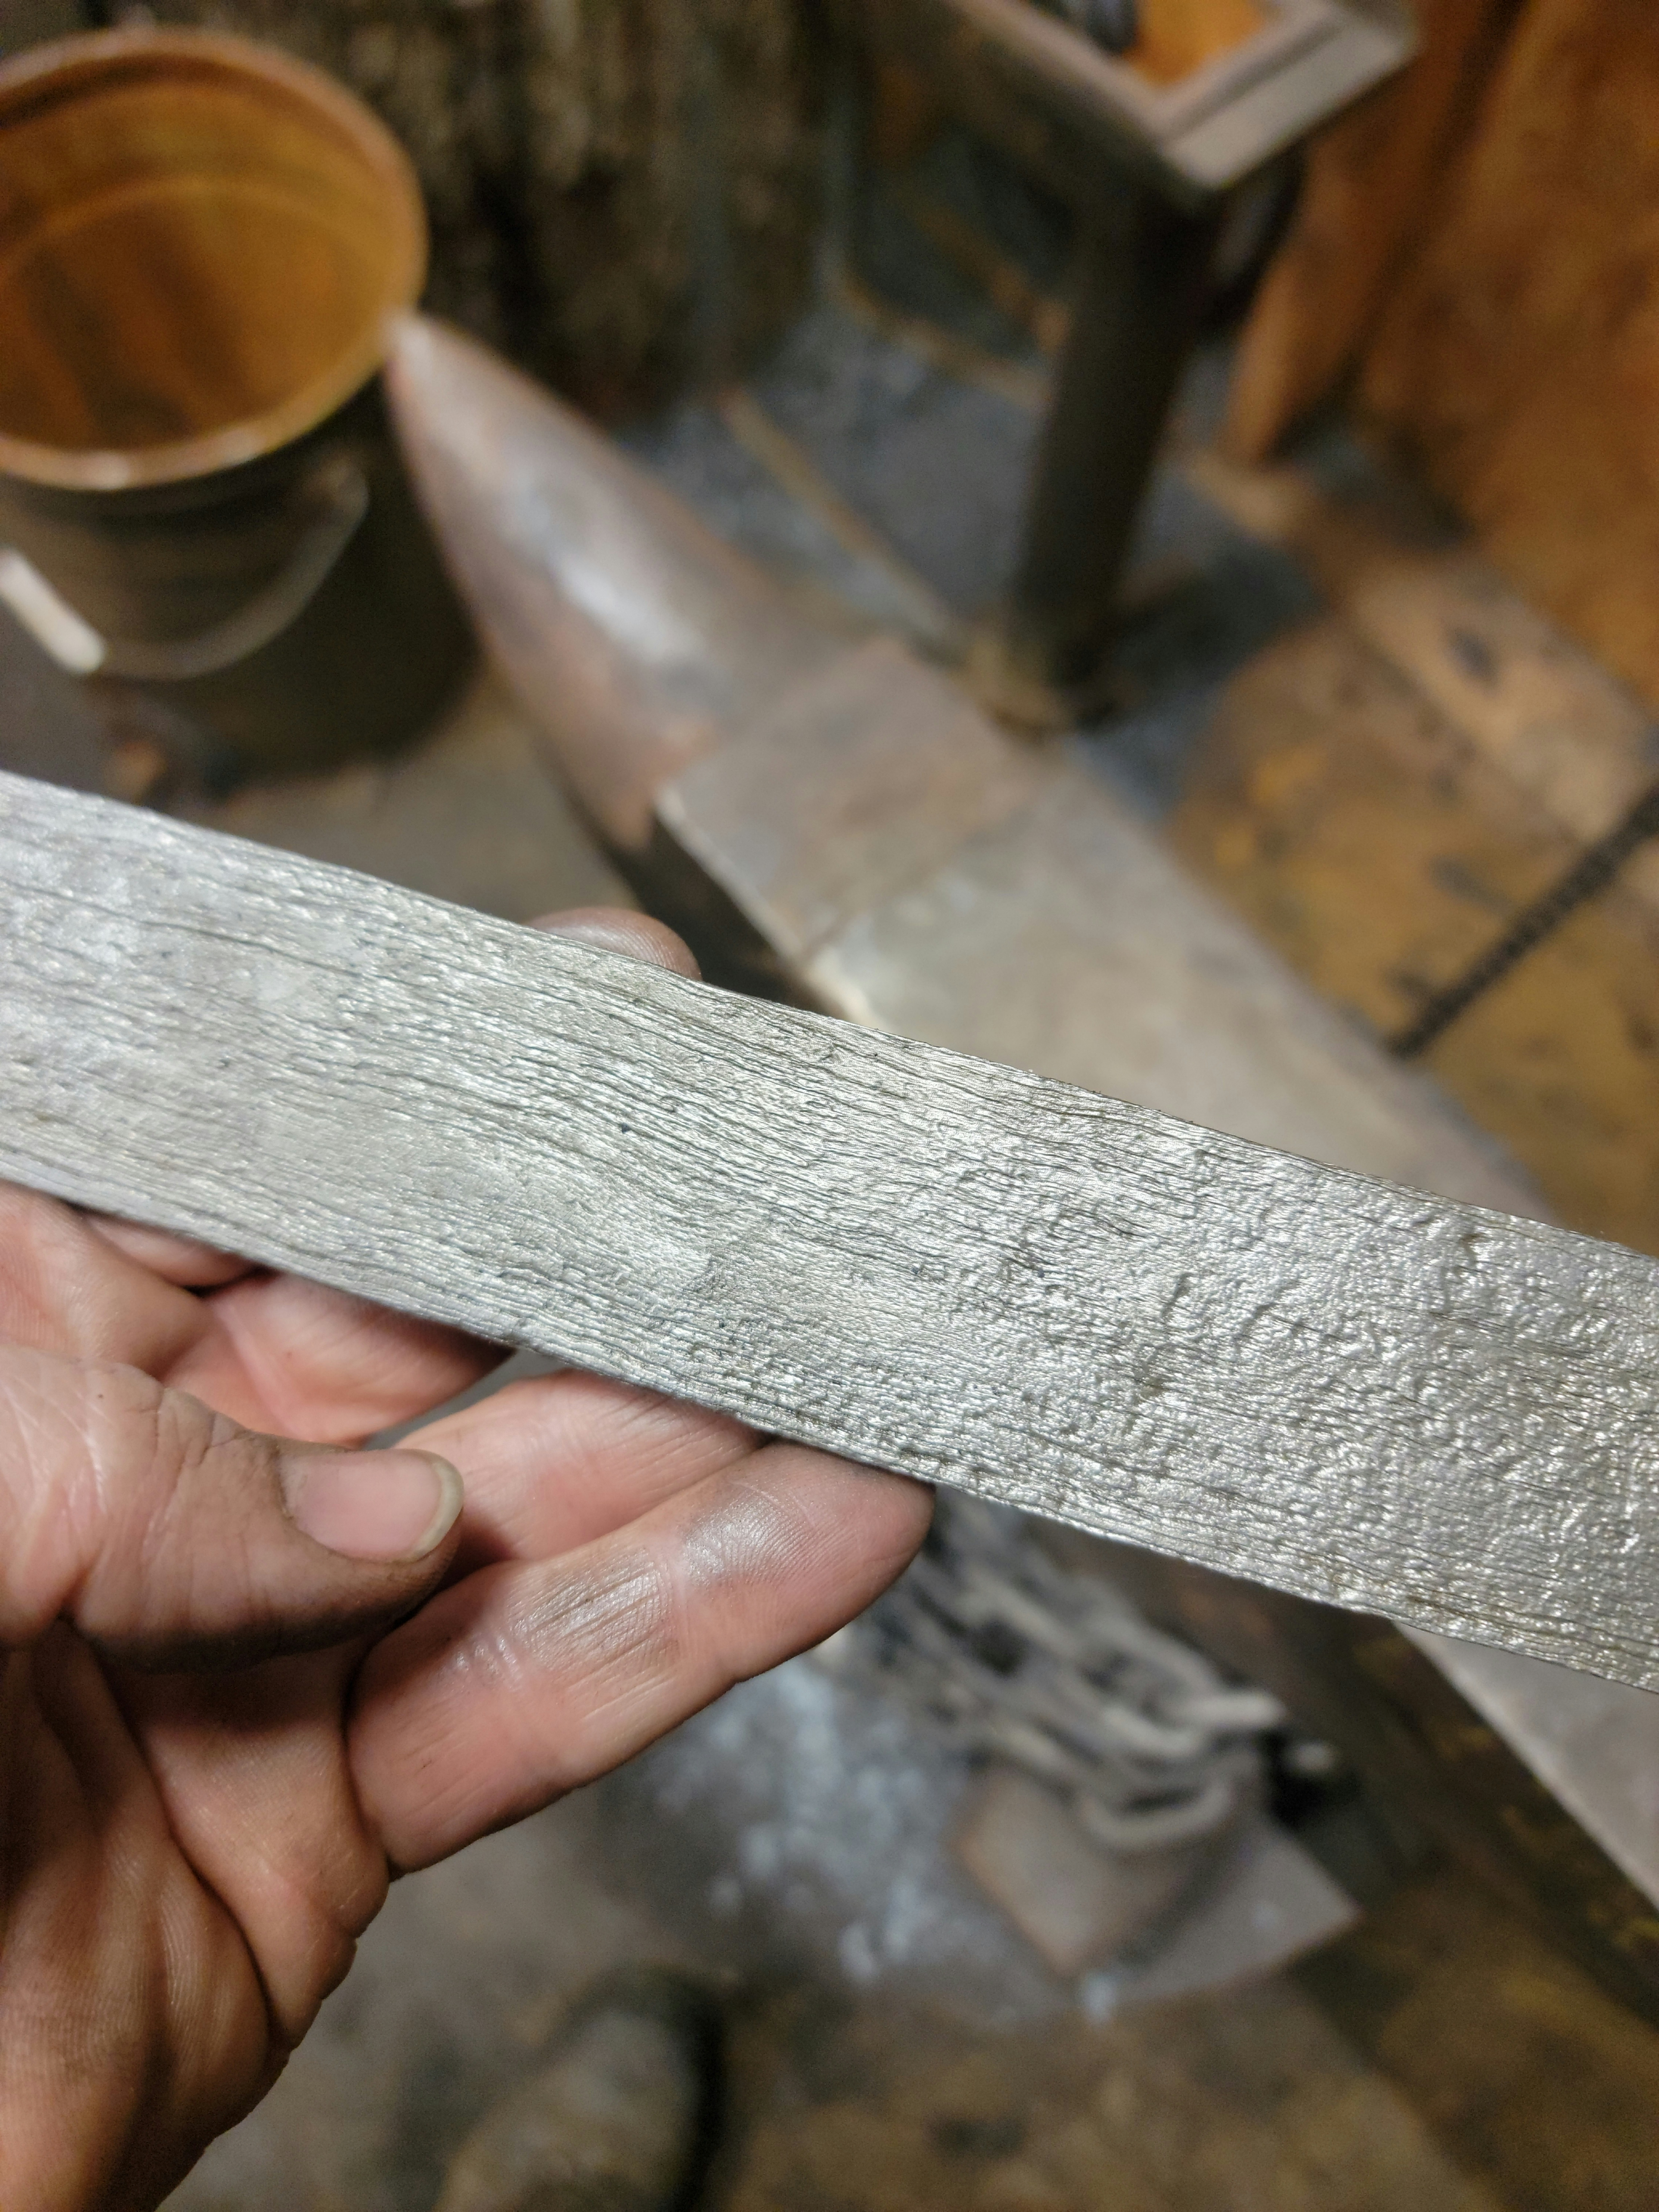
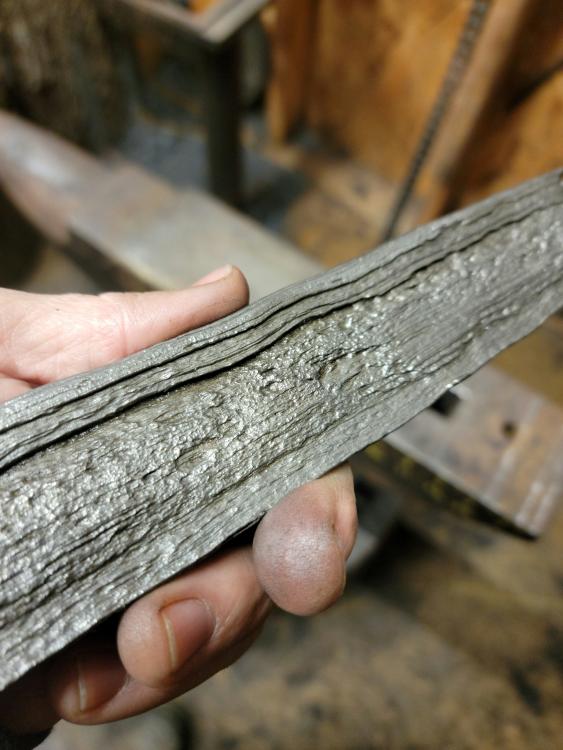
Hello. Looking at some pieces from other makers, some wrought items have a distinct layered pattern when etched. Does the WI need to be cut, stacked and welded to achieve that look or will working/drawing it out do it? That's pretty much it. I've read through the forum about everything WI and think I have a better understanding of what I have. It seems to be more refined to me. It works at lower temps without splitting and the tear test showed a tight string cheese look. Here is a few pics of what mine looks like as is for g-whiz. Any observations are welcomed.