

M.G.
-
Posts
229 -
Joined
-
Last visited
Content Type
Profiles
Forums
Articles
Gallery
Downloads
Events
Everything posted by M.G.
-
Could I forge weld them? Like in mokume gane?
-
Oh yeah thanks Thomas. The sleeves may be perfect. But the pipe I was finding was too light of a wall to get the shape I want out of it. But having a little more material than the pipe offers would be perfect. Ill see what I can find at the hardware store next time im by there.
-
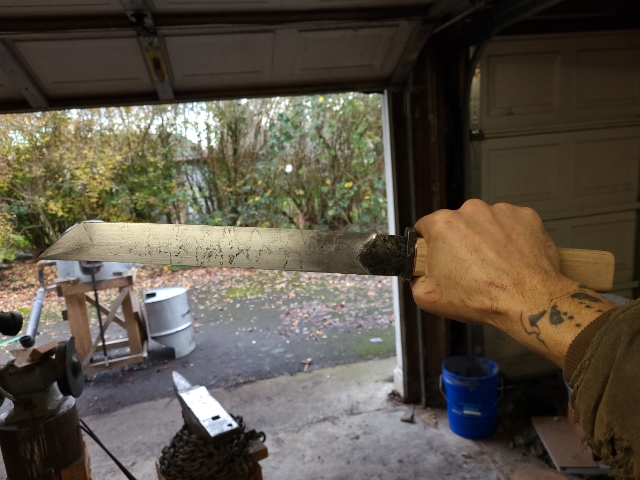
Oh put, sorry to disappoint, but I havnt done a habaki for this one yet. Ther is just a layer of oxide and crusties on the area making it appear darker.i still have some file work to do there, and I need to find a source of copper flat bar to make a habaki from. Like I said still a lot of finishing work to do. But thank you.
-
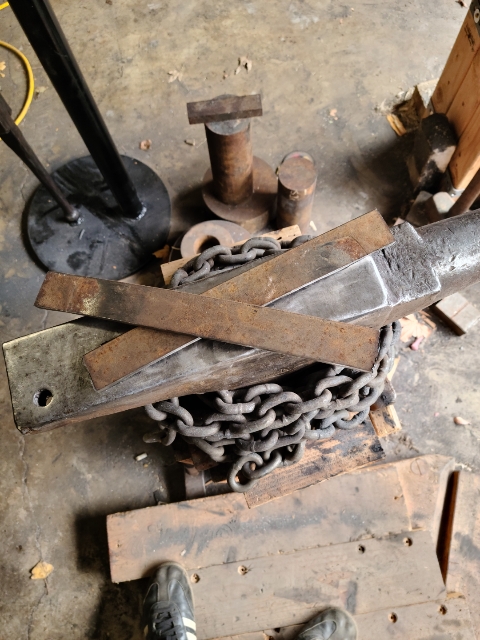
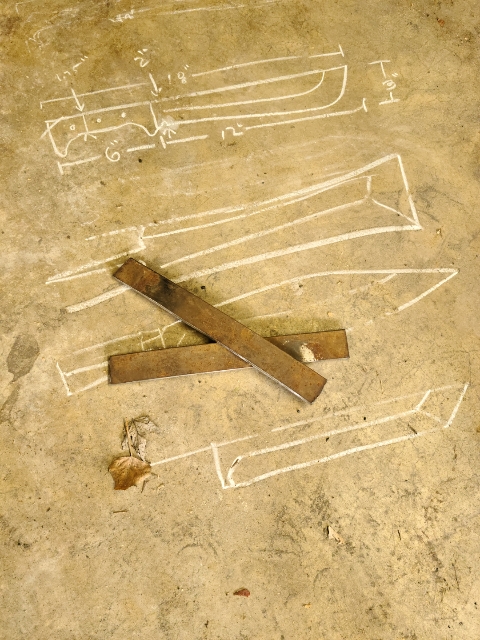
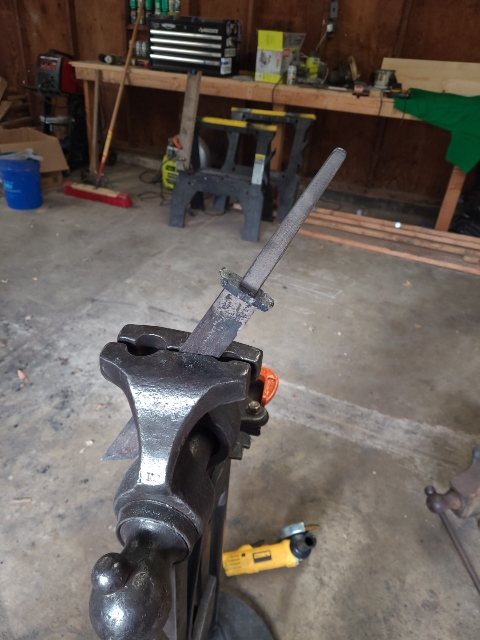
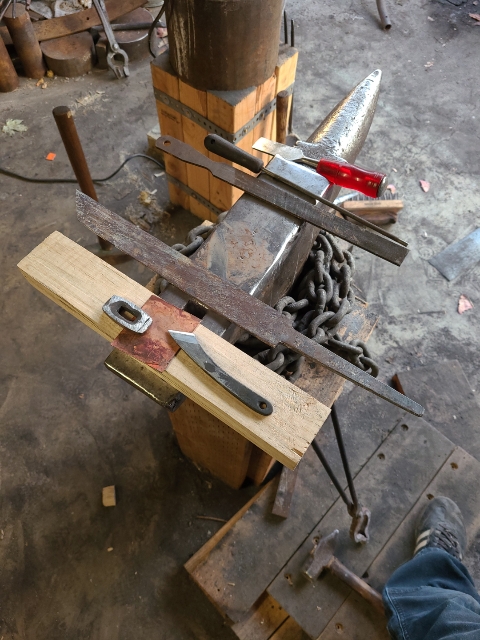
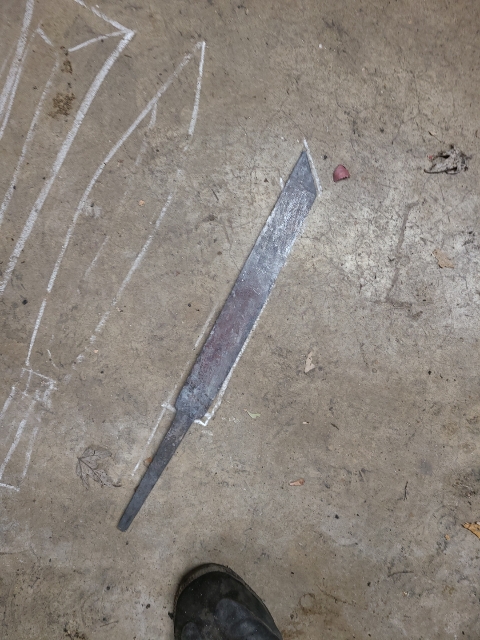
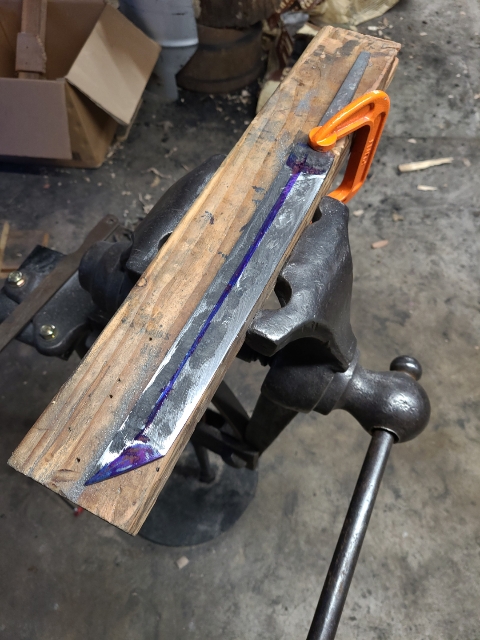
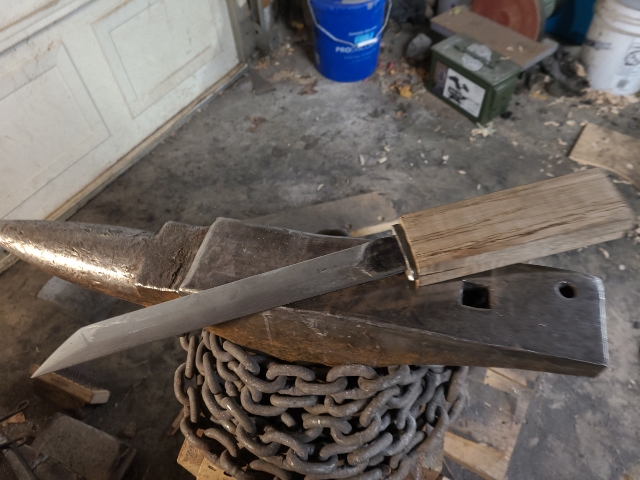
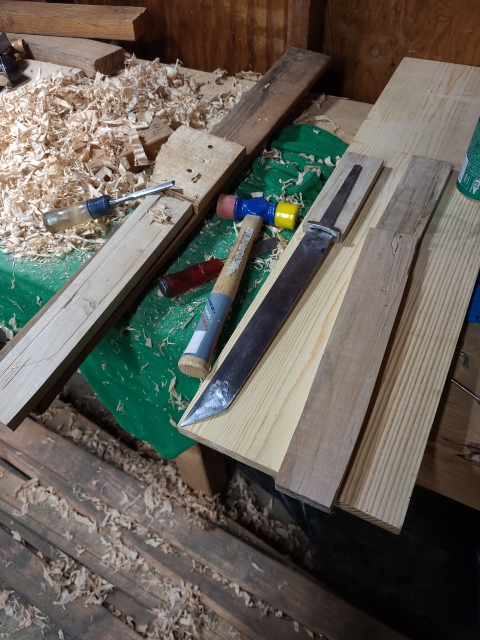
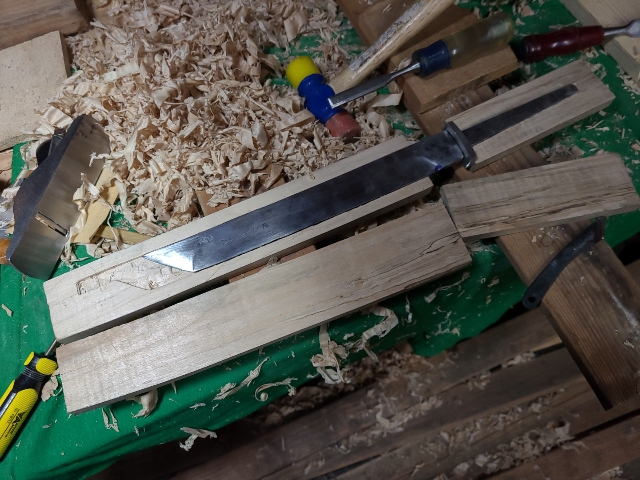
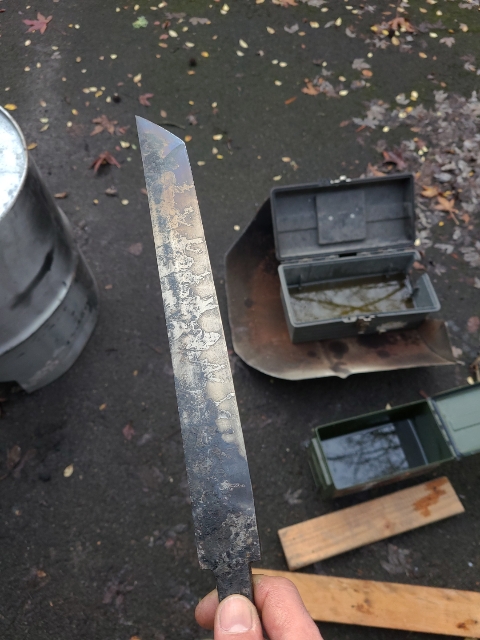
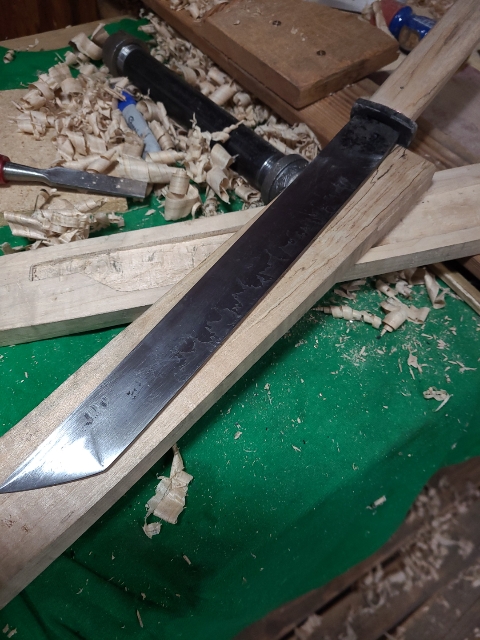
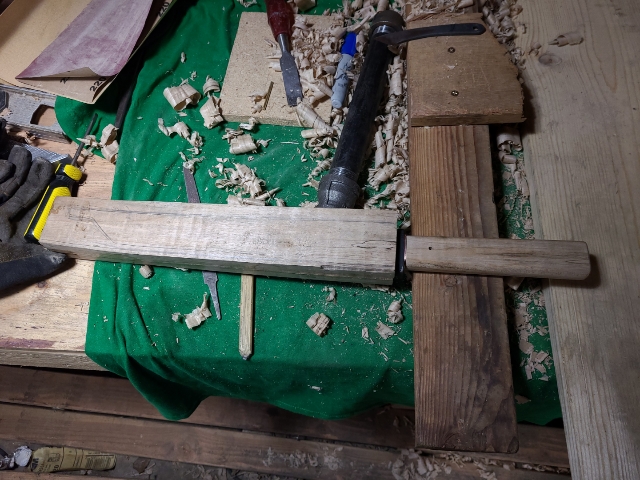
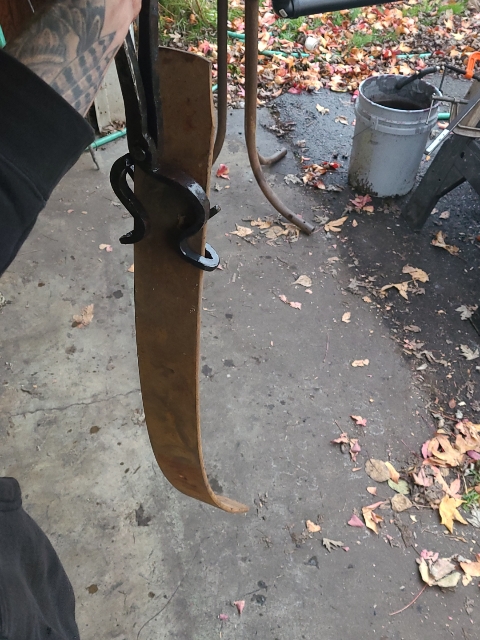
Last week I started into my stack of leaf spring. With the help of a striker, we forged out a couple of preforms. This is my first full blade build, perhaps I've dove straight into the deep end on this build... but I've been learning a lot.. The only other knife build i have done,, being a super simple Kiridashi, which I've used quite a bit on this project. So expierence is not on my side. That being said, I am not claiming to actually know what I'm doing. This will be an ongoing thread as I progress through my tanto build. Yesterday the blade survived the heat treating process so all the heavy lifting on this project is done, now just a bunch of finishing work, and to put an edge on it. Rather than take the time to write a book on the process, I will just do a huge photo dump. And highlight a few of the steps that may or may not be obvious. If you have questions I may or may not have answers, but I will definitely have questions myself. As always, looking forward to hearing your feed back and suggestions. Started with unknown leafspring, the big stuff. Then broke it down with an angle grinder. Did a couple heat treatment test coupons, It hardened in both oil and water, but the grain was much nicer in the oil. So I got to forging, preform went pretty ok with a striker. May have over forged it just a touch,( leaving some hammer marks that I won't beable to grind out). After beveling the blade was darn near spot on to my original plans (a huge relief and a nice small victory for the inexperienced smith such as myself.) I forged the guard from some 5/8" round mild steel, then hot fit it to the tang. Using an iron pipe and a couple of fittings to hammer the guard evenly down around the tang. Next come a little clean up with an angle grinder. And a ton of work with draw files. The handle and scabbard are locally sourced maple. All shaped by hand, I broke down the lumber with an axe and hand saw, carved the tang and blade cavities with hand chisels and a kiridashi, shaping is being done with a hand plane and sand paper. For the heat treatment I decided to attempt to achieve a Hamon by "clay" coating the spine with furnace cement, then quenching off in oil. And then right back into the forge coals to temper. I may have over tempered the tip a little. But I will roll with it. Handle spacers are being made from coper pipe. The handle will be epoxyed and pinned with a brass pin. Thats the progress up to this point. Might not get around to finishing until after the holidays. Hope everybody is enjoying as much festivities as possible. Thanks for looking! Matthew


-
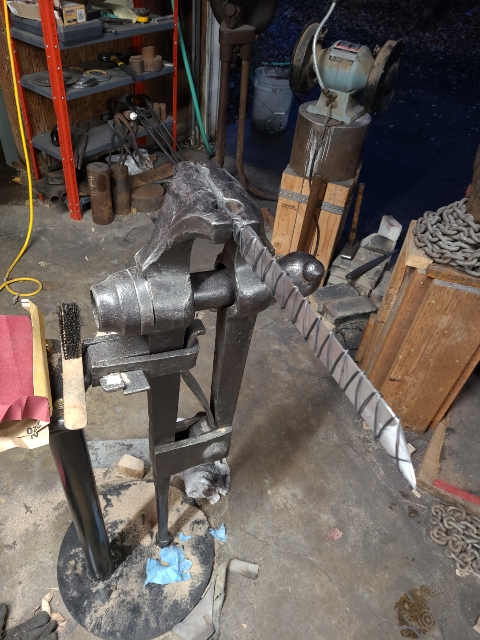
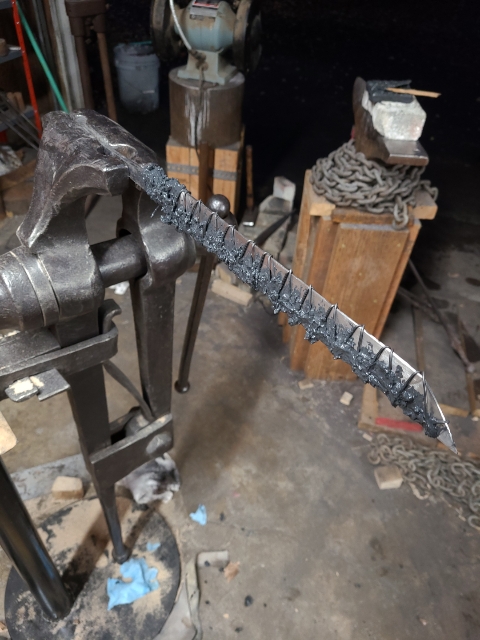
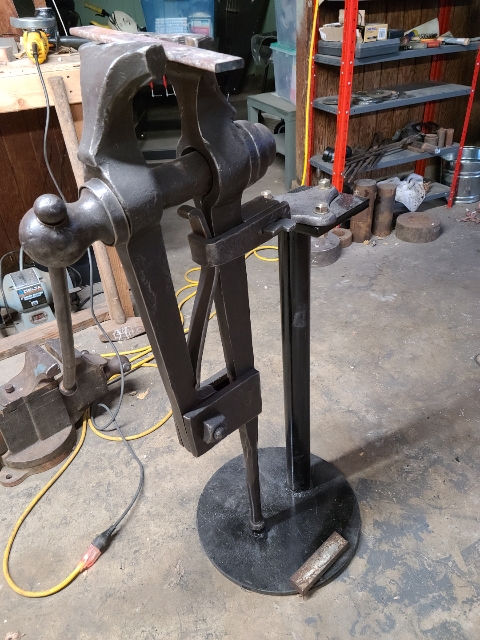
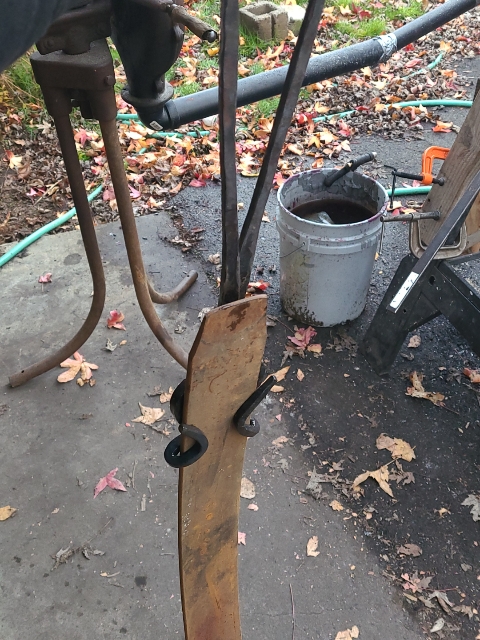
Its true Thomas. I can usually get a foot on it to keep it from moving on me if I'm really torqueing on it. But as I sit here I realize that I may not always be able to do both stand on the base, and reach the end of my work piece. But looking around the shop I notice that I could just ratchet strap the stand to the leg of the wall anchored work benches if I really need it to stay put. I do like the mobility of it though. The whole set up is about 160 or 180lbs. So it weighs more than my anvil set up (as well as more than myself). When I eventually land my own workshop I will anchor to the floor. Or drive a post in to the dirt. But this is a borrowed space so im trying to be non invasive and mobile around the workspace. But over all, I am just super stoked that it is no longer laying down on the job, lazy sucker is finally holding its own weight. Hahahhaha
-
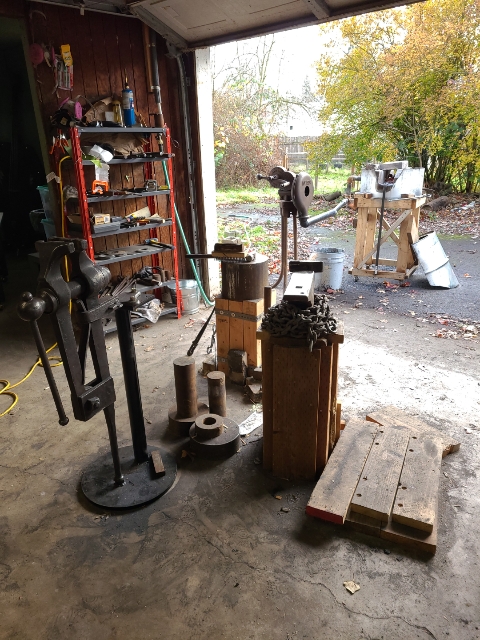
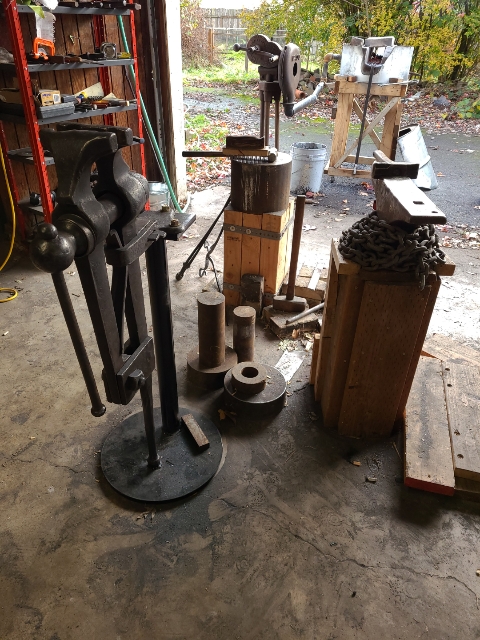
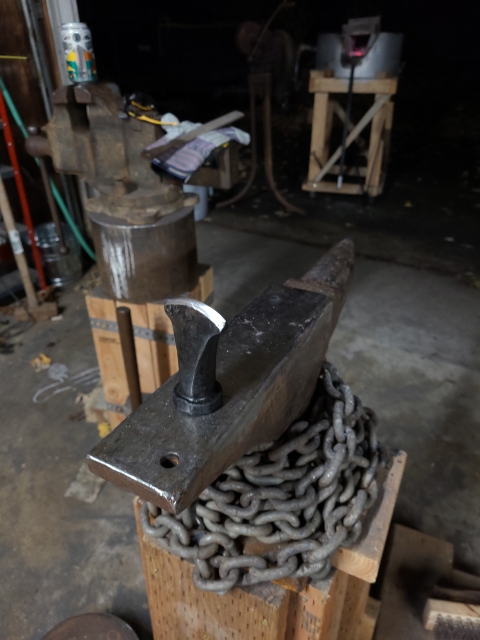
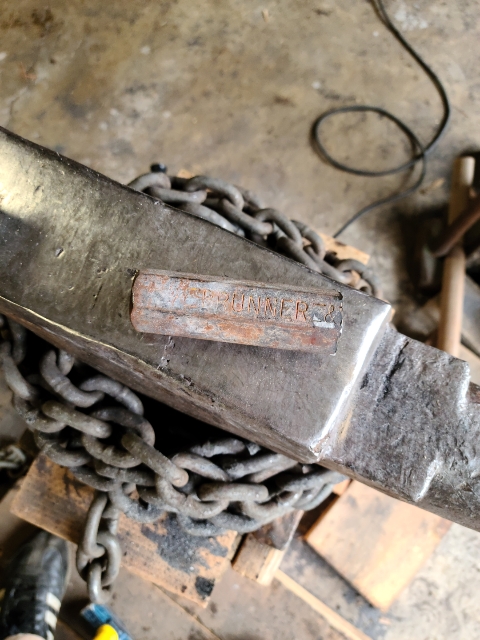
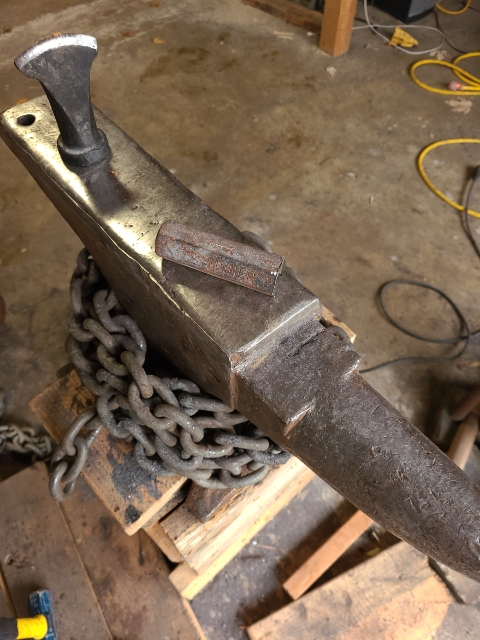
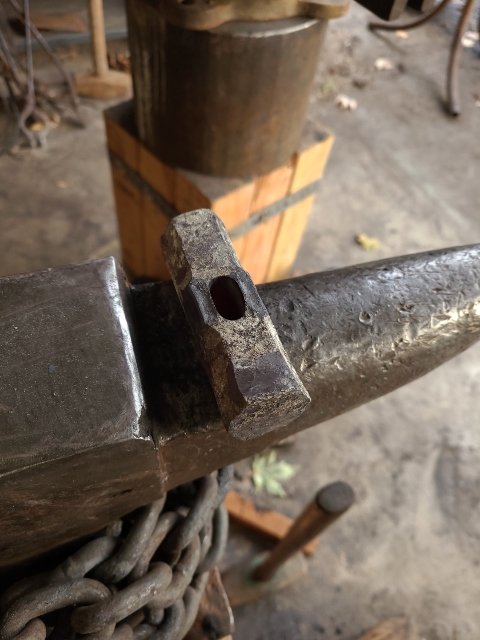
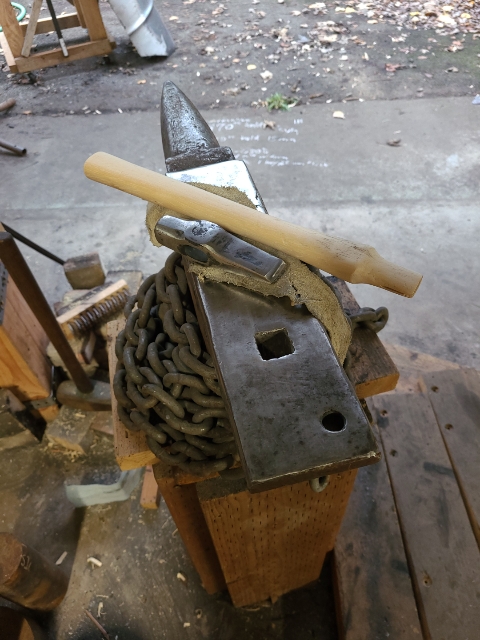
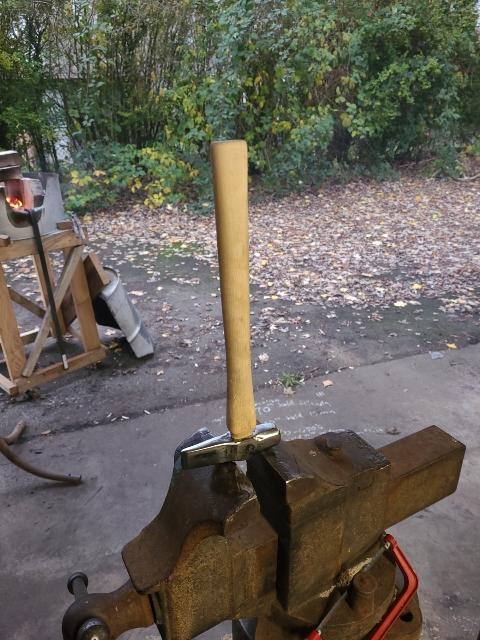
To all that have been following, I have finally gotten my vise stand put together and vice mounted. Here are some shots of the smithy and vice on its stand. It went straight to work!
-
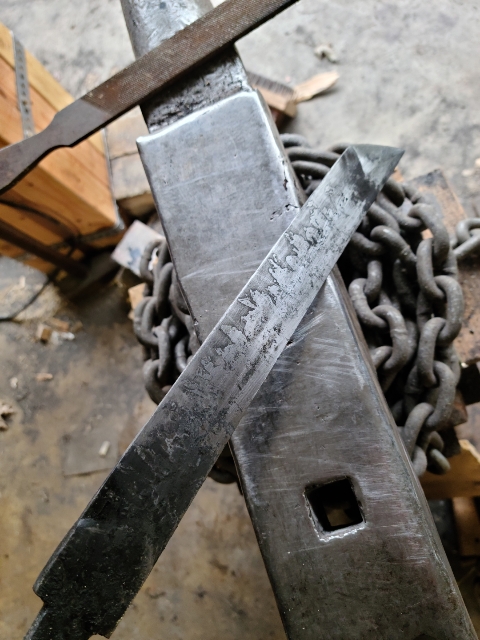
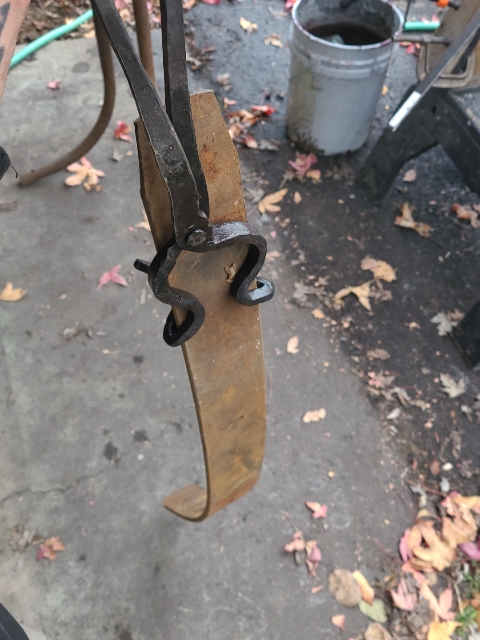
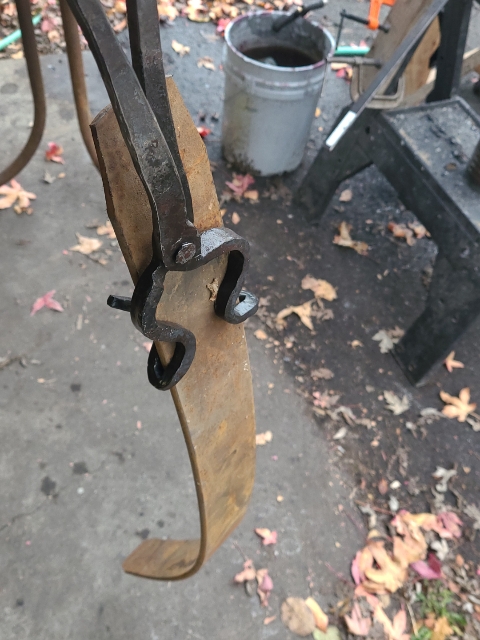
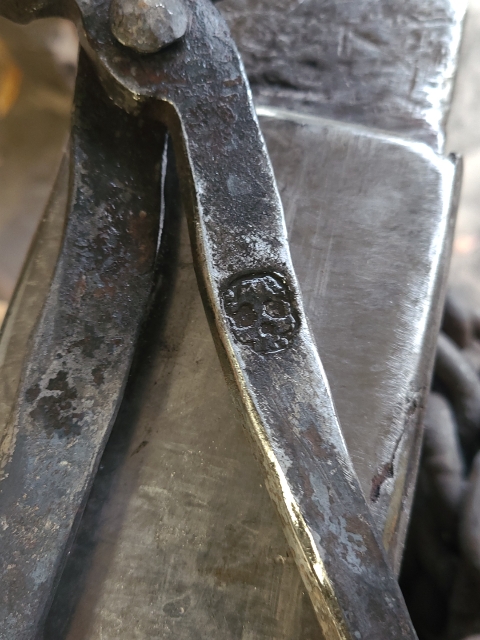
Finally got a clean transfer from the touchmark that I forged from coil spring. Then scribed a loose sketch into a layer of sharpie on the working end of the punch, and carved the pattern using engraving tools that I forged earlier. And did some clean up using a rotary tool. Here is the stamp and the impression in the reigns of a set of tongs I just finished up.

-
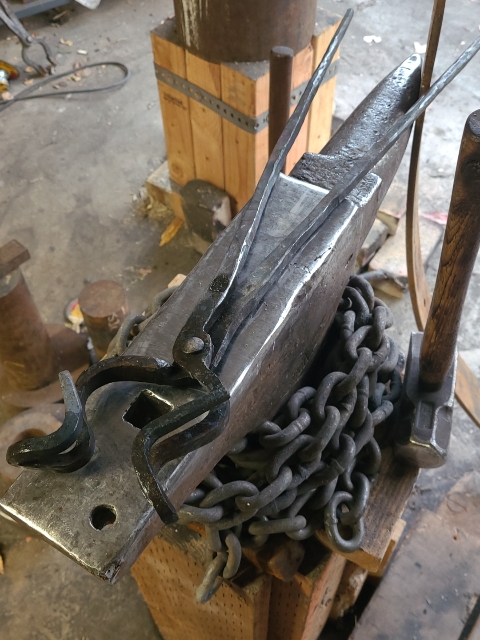
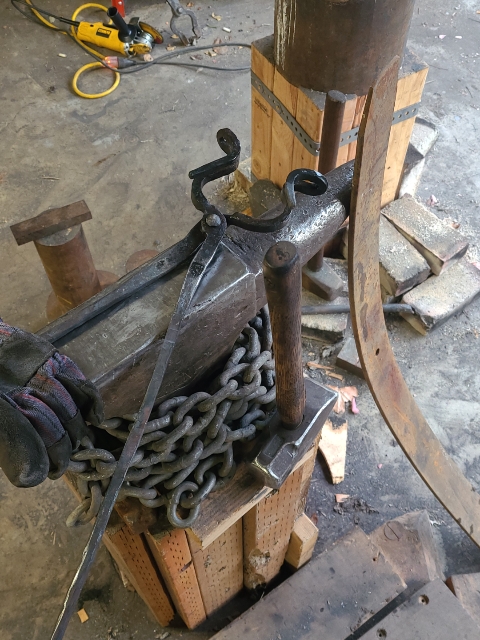
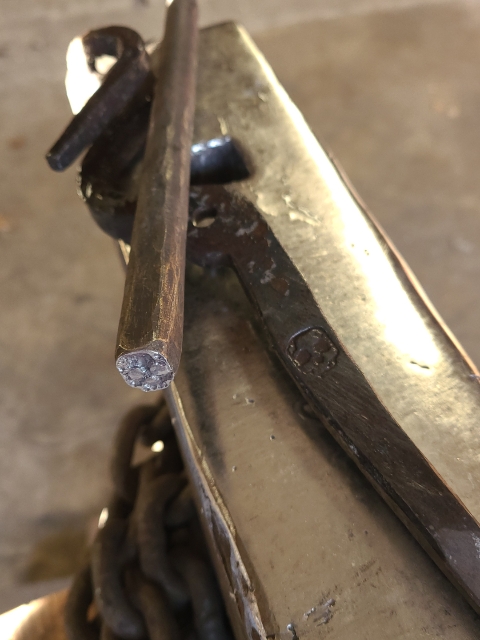
Very true, irondragon. The leaf spring pictured, along with the rest of the pile I have, will be broken down to usable stock size as needed. And will be more than manageable in these tongs. I really just wanted to see if they held with the stability I had hoped for. And I was pleasantly surprised, so I got some action shots, hahah.
-
Thanks SLAG
-
Here is the latest project from the forge. Some bladesmithing tongs. Definitely not pretty. But they do the job. I made these for working with large leafspring. The next set will have to have heavier reigns, these ones have just a little too much flex im thinking. First time doing a rivet as well. Lots of fun learning along the way with these ones. And I finally got a clean impression from my hand made touchmark.
-
 Thanks, yours looks super clean!
 -
Here is the one I've made
-
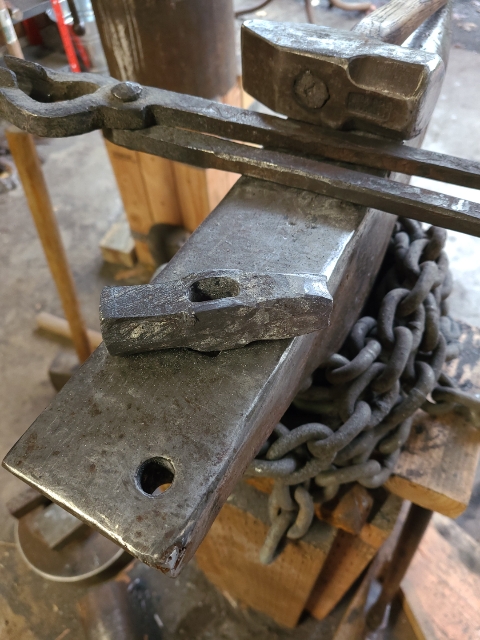
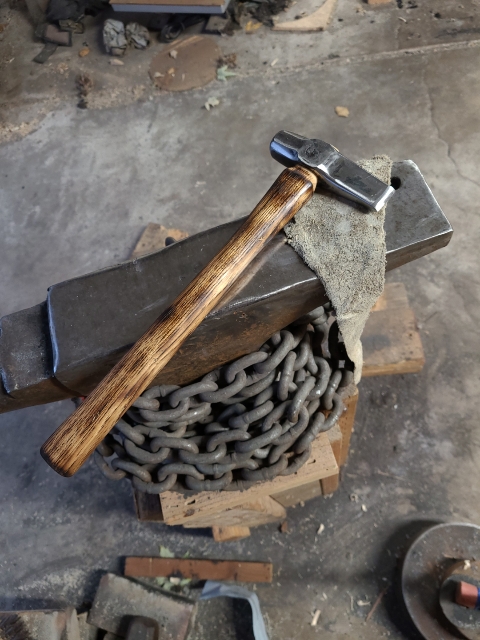
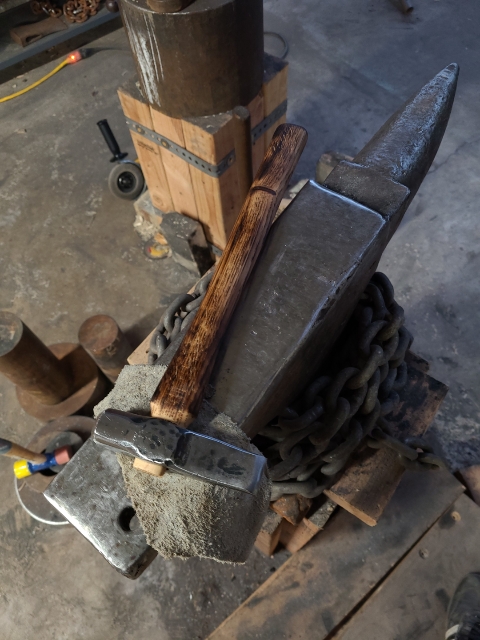
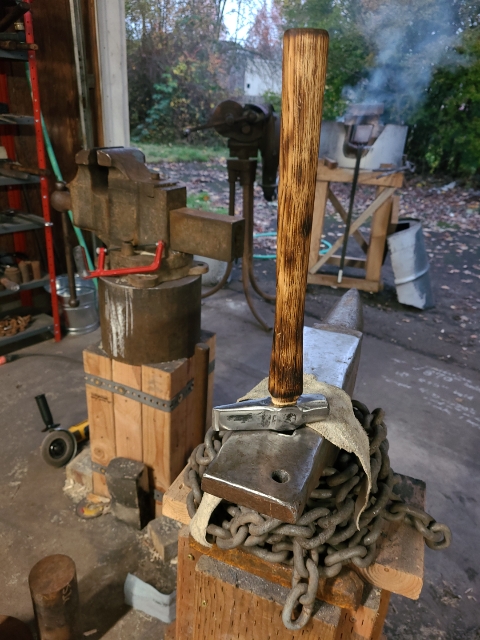
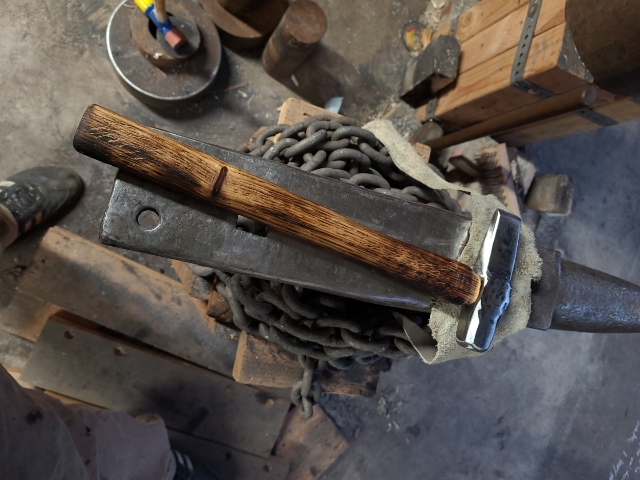
This weeks project fresh out of the forge is a handled hot cut. Made from another hunk of the old jackhammer bit. The same bit I made the eye punch and drift used in this project from. (Super fun to think I made tools to make this tool from the same piece of reclaimed "trash") The couple of issues I had along the road were miniscule, but will need to be sorted out as I make more top tools or hammers. My initial punch bent and went a bit wonkie on me. So I used a different slot punch made from coil spring steel to finish the job. Then went back to the initial punch to just drift the eye a little bigger so as to be able to fit my hammer eye drift in the hole. (Which straightened the buggered punch! So now it just needs a new heat treat and re dressing, then it will be back to new.) The only other issue I had with this project came in the form of my eye hole being askewand not perfectly parallel with the bit. (Not hugely off but enough to make me want to do it better) I was able to correct this during the handling of the tool. As always thanks for checking it out, and I'm always happy to hear thoughts on how to avoid common issues. Thanks guys. Enjoy.


-
And another great handle!! I'll be looking to thus thread for inspiration later.
-
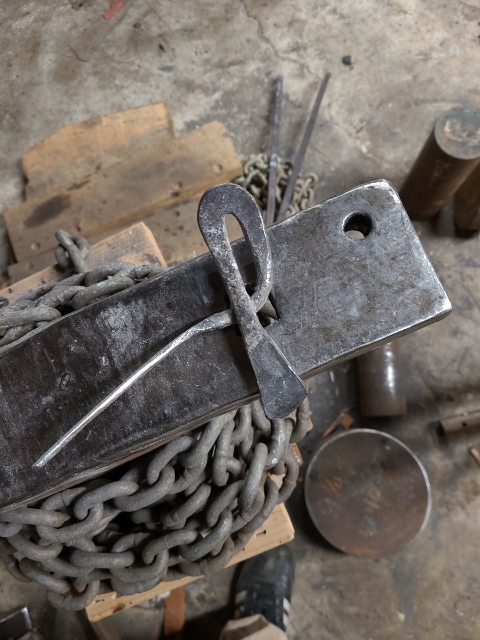
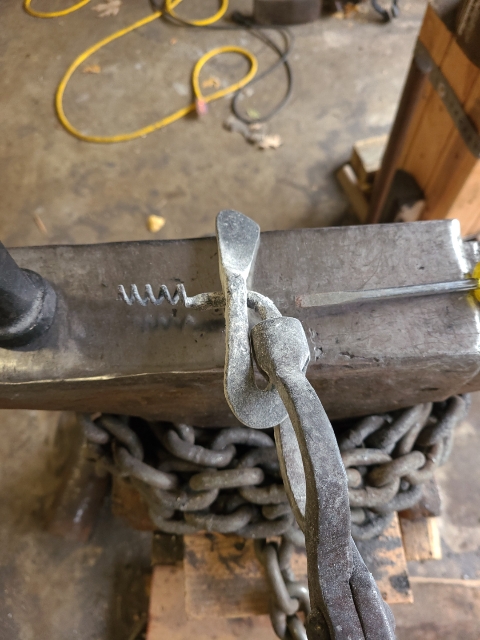
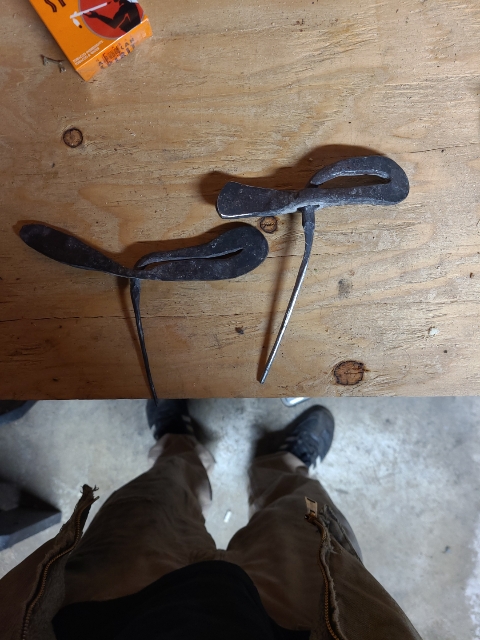
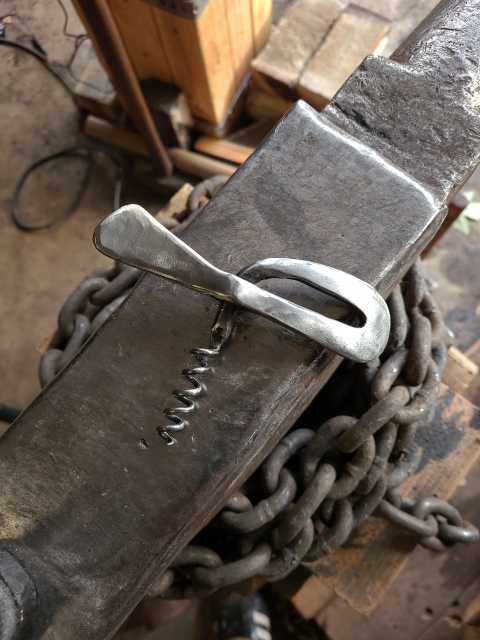
Oh. Humm. This one is free floating in the pass through. With a little more gap than I would have liked. Im also not super stoked on the comfort level of this style of handle. I may try a similar method but with different shaped wings as well. Im definitely going to be making more corkscrews with different design and construction. Maybe when I start getting really consistent screws I will try making a folder with a foil knife too. And thanks!
-
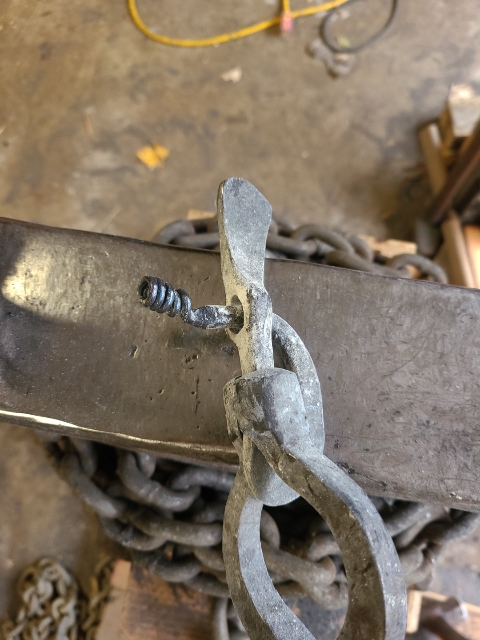
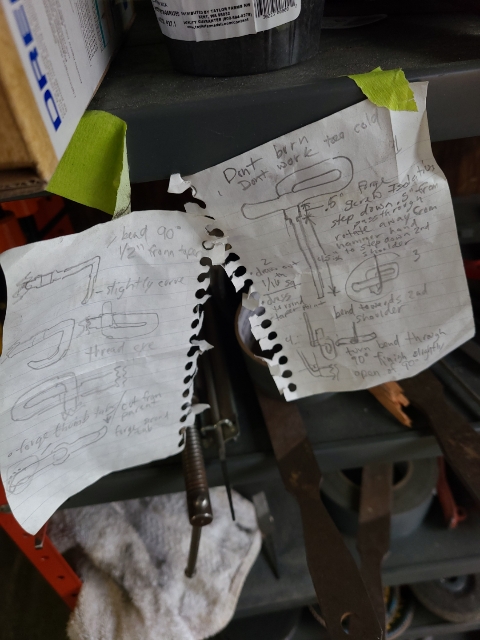
Today I finished up my second attempt of making corkscrew. Drew up some plans based on a Mark Asprey video I found on the tube. Made from reclaimed automotive coil spring. I missed photos of the pre form and the slot punch and drift, as well as threading the eye. But here are some shots of what I did think to capture. Side by side of first and second attempt at the same stage...


-
Thanks Frazer. Its wonderful what a little pre planning can do for a project. I'll do a project thread in members projects soon. Just wanted to share with those who helped first.
-
Hey guys, thanks for the tips, as always. Here is a quick update on the cork screw. Second try went much smoother. This time I drew up step by step plans to follow.
-
Thanks Nobody Special. About what I pictured
-
How does forge brazing work?
-
Thanks frosty. Just a bit of curiosity about the toxic alloys. Ill definitely ask for sure. I was thinking peined over tenon. But I was also thinking about ways to lock the screw in place in the handle to keep it from twisting. Ie. A square or slotted hole and tenon.
-
True, I have noticed. Talk about dirty jobs. Breaking up lump is flicking messy. And some of that Cowboy charcoal comes out pretty large. But it burns great. I noticed that Royal Oak likes to send streams of exploding fire fleas everywhere. I think it's more dusty than the cowboy...???
-
Frosty, working with rod at that size, how would you go about fixing the screw to the handle? Also what would be considered toxic?
-
thanks. The hot cut works pretty well, but I may have tempered it a bit too soft. Probably a good call for my current skill level. But I think I will be dressing the hot cut every couple projects,until I decide to re heat treat. As for the forge. I think I like it, especially now that I have upgraded my blower a few times. The Champion no. 400 is a great blower. Previously I was using a tiny Buffalo Forge blower, which required about 3x the cranking power to get the air I needed. And before that I was using a giant box bellows, which was plenty of air, but also took about 4x the amount of work and attention at the forge. I have been burning scrap dimensional lumber for fule, up to recent, where I got tired of processing fule in the rain and cold. And decided to try burning hardwood lump charcoal, Cowboy brand. Which seems to burn a bit hotter and longer, and makes a much more dense coalbed. I finally feel like I'm able to get up to forge welding temps. I definitely got some material up to a bright yellow, shooting a stream of sparks yesterday, oops. Havent attempted to forge welding anything yet though. As for the current forge configuration, I won't be in the workshop for a couple days, as I will be at my day job, so it will be tough to give you exact dims on the layout. But if we keep intouch and you remind me to jot down the measurements, I can get you some specs in the next week or so. But in the meantime, here is the full thread of the build up to this point.. with some pics of the tuyre relative to the firepot at the time of the build of its current configuration. Also the other members here have dropped some really good design info throughout this thread. Pics are at the top of this page. I think the tuyre has settled a little bit,, and may sit about an inch or so lower than pictured. I typically will drop a brick in at the back of the forge on an angle so I don't push any fule out the back door, but leaving a little shute to feed fresh fule from the back side as well. The bricks that top the forge, as well as the one that creates the rear shute come and go depending on how much room I need for my work piece. Occasionally I the tuyre will get blocked by fule and shoot an explosion of sparks and charcoal chunks into the air as the air pressure clears the way. But havnt really noticed any major issues or headach trying to keep fule in the fire pot. Although, I do spend a bit of time fiddling with the coals to build up and adjust the fule in and around the hotspot when introducing or adjusting the workpiece or adding fresh fule. But I figured this was just normal fire tending when dealing with a light fule like charcoal. But im still a noob so I could be missing something that would make life easier at the forge. Hope this helps. I may also be willing to say that the entry and exit slots cut in the 55, could be trimmed a bit closer to the top of the bricks of the forge floor, to make for better pass-through capabilities, without really having to worry too much about fule exiting the forge in an unwanted manor. @wirerabbit
-
Wirerabbit, thanks! But in attempt not to muddy the waters in the hot cut thread, I will post a thorough reply in my forge build thread and tag you in it, we can pick up this discussion over there. Frazer, as for using mild, I would only be doing that as practice, to work out my preform proportion and technique without wasting time and energy on carbon steel just to toss it in the scrap bin. I figured that mild would not be suitable for actually extracting corks.