M.G.
-
Posts
229 -
Joined
-
Last visited
Content Type
Profiles
Forums
Articles
Gallery
Downloads
Events
Everything posted by M.G.
-
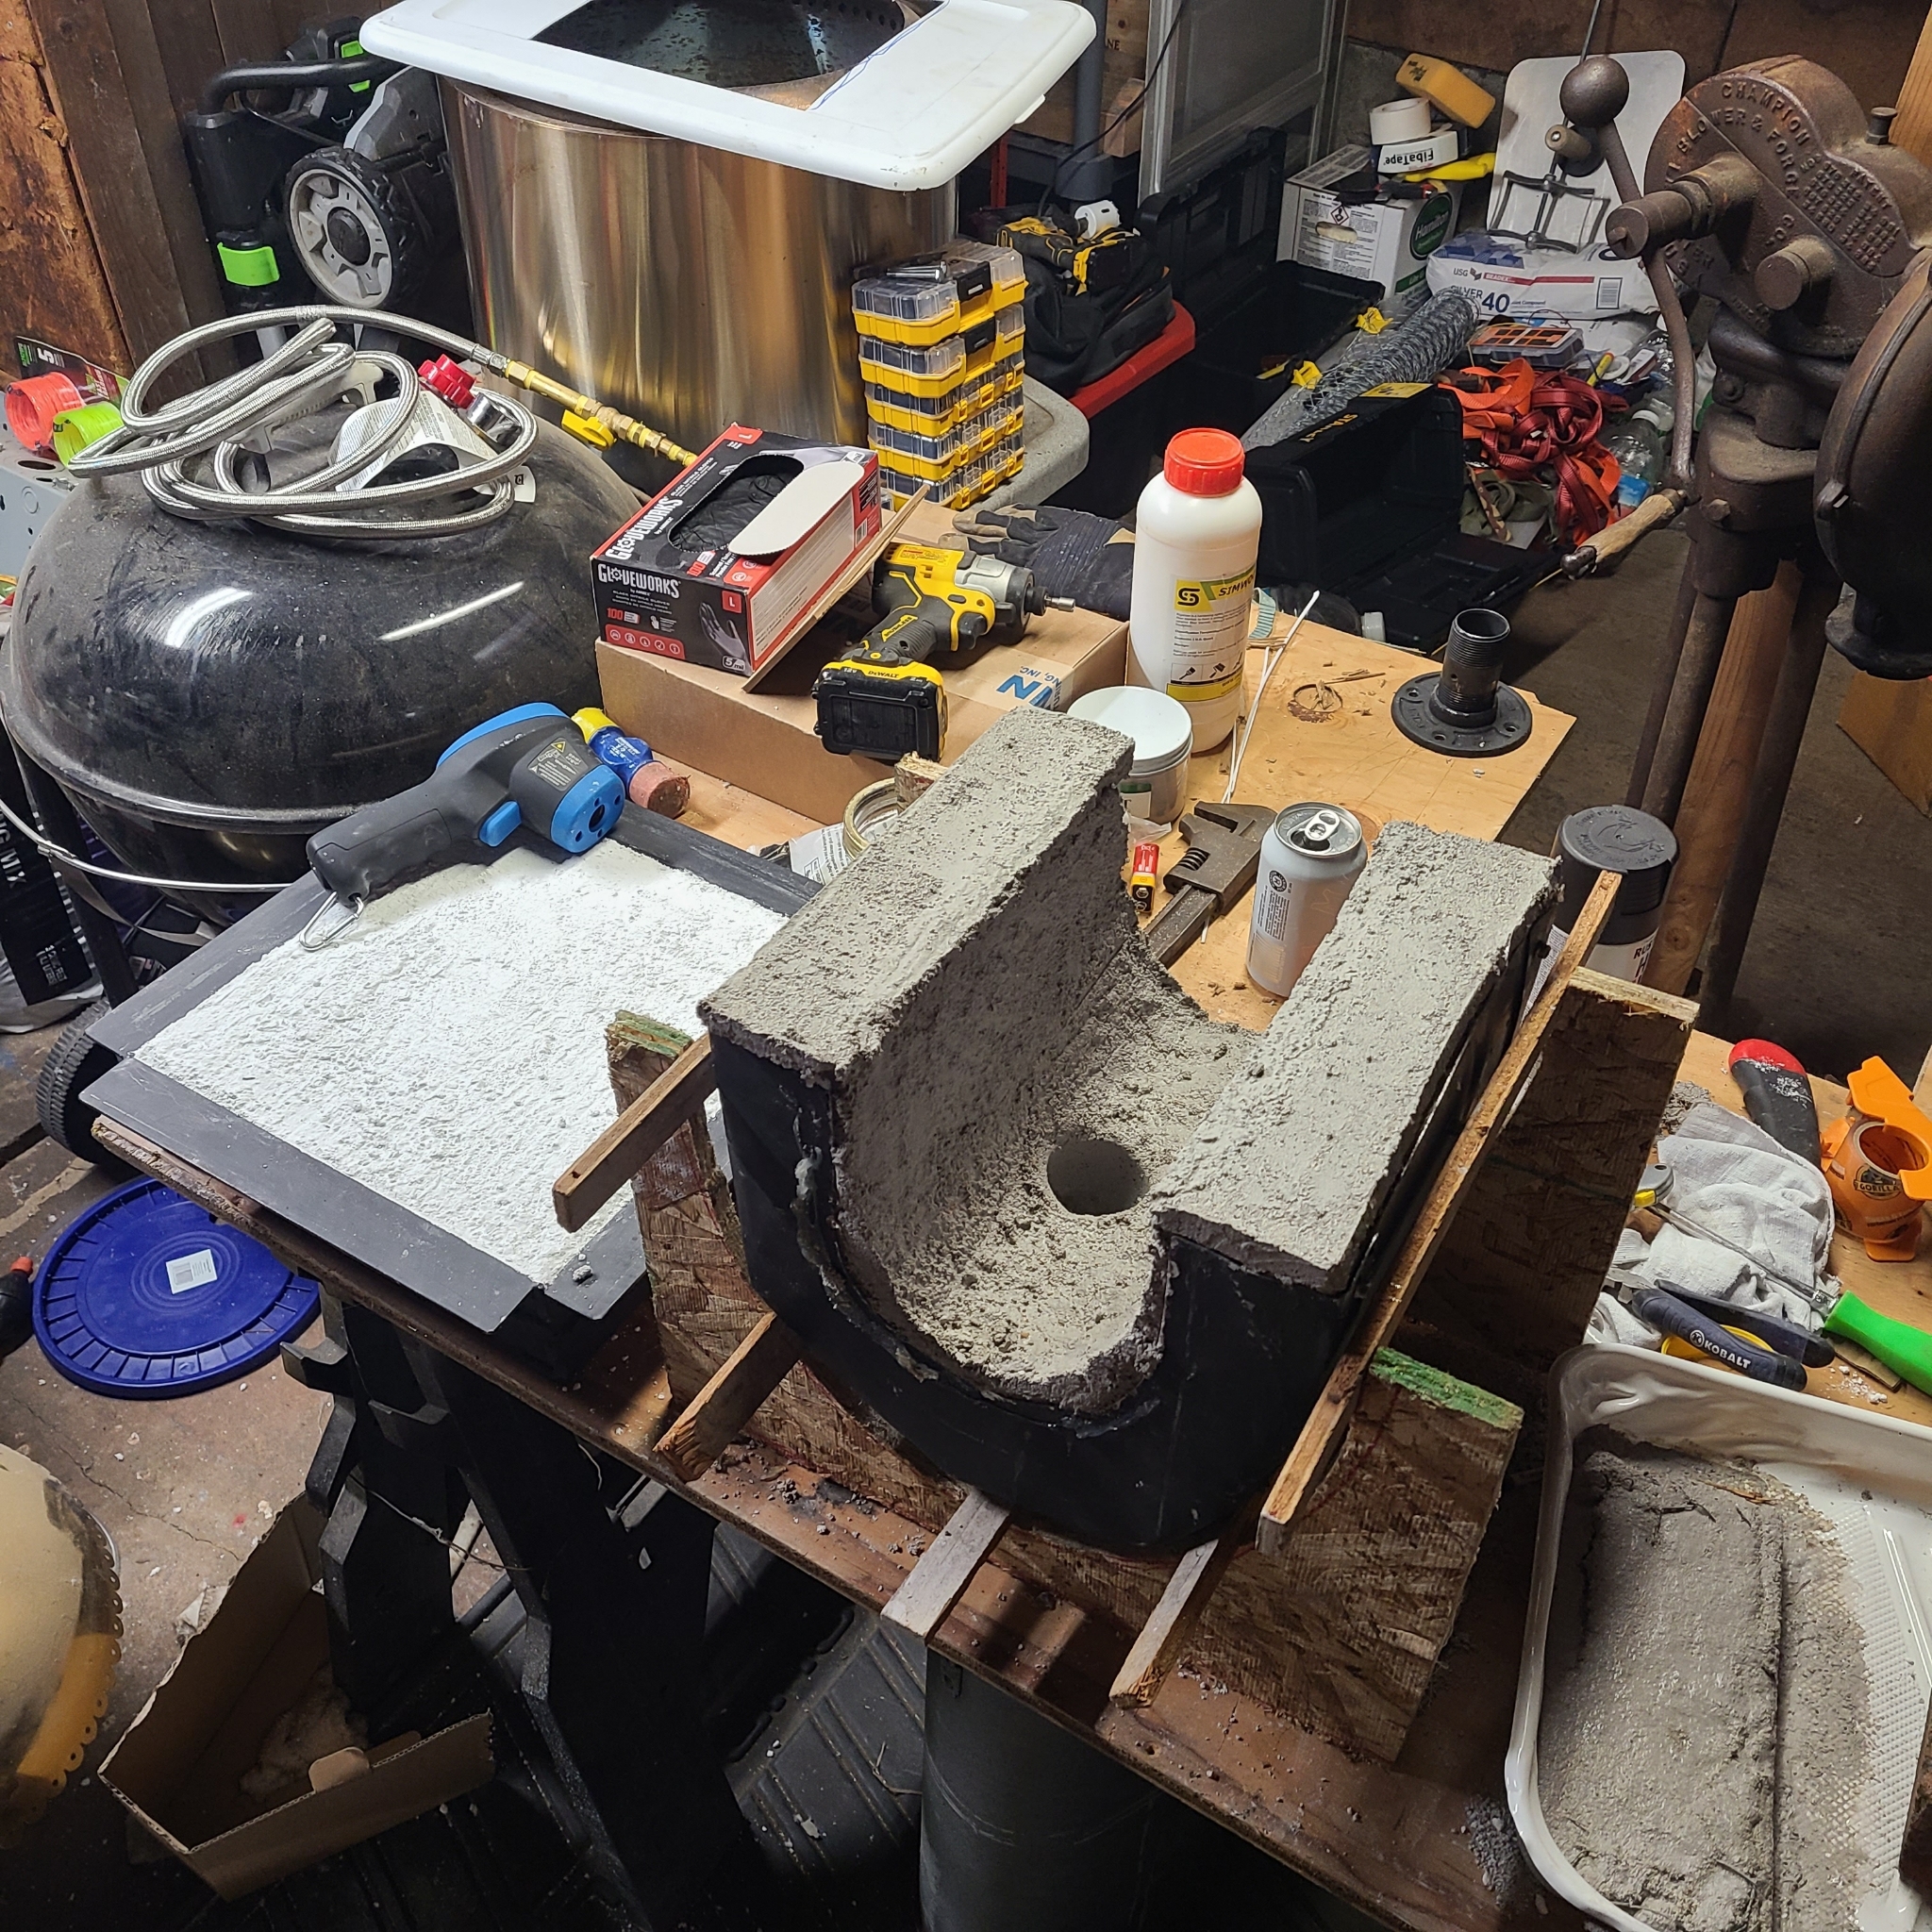
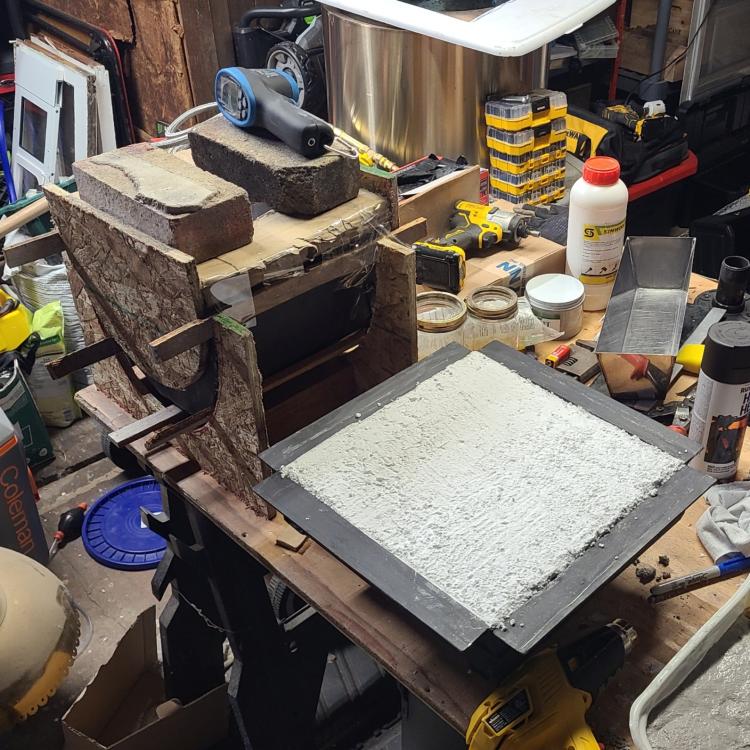
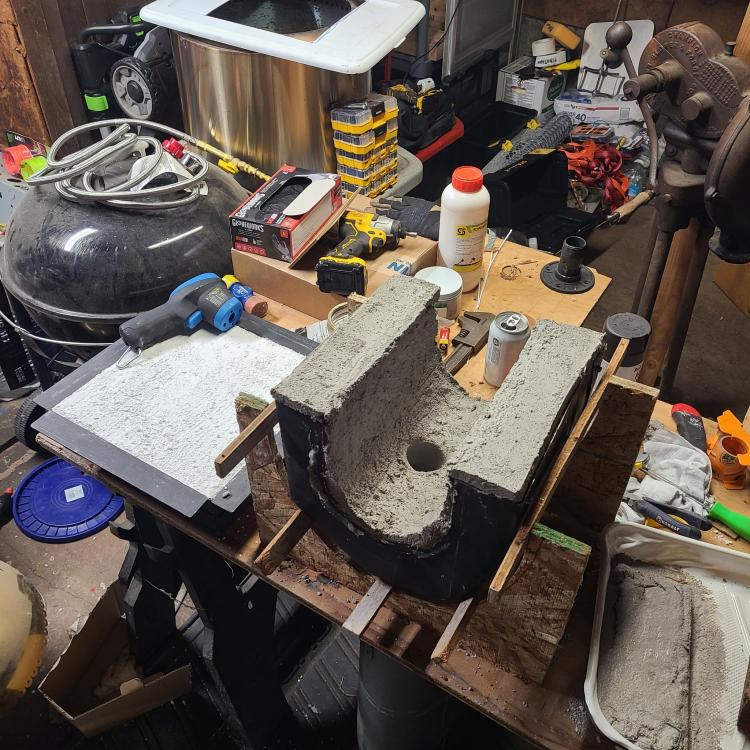
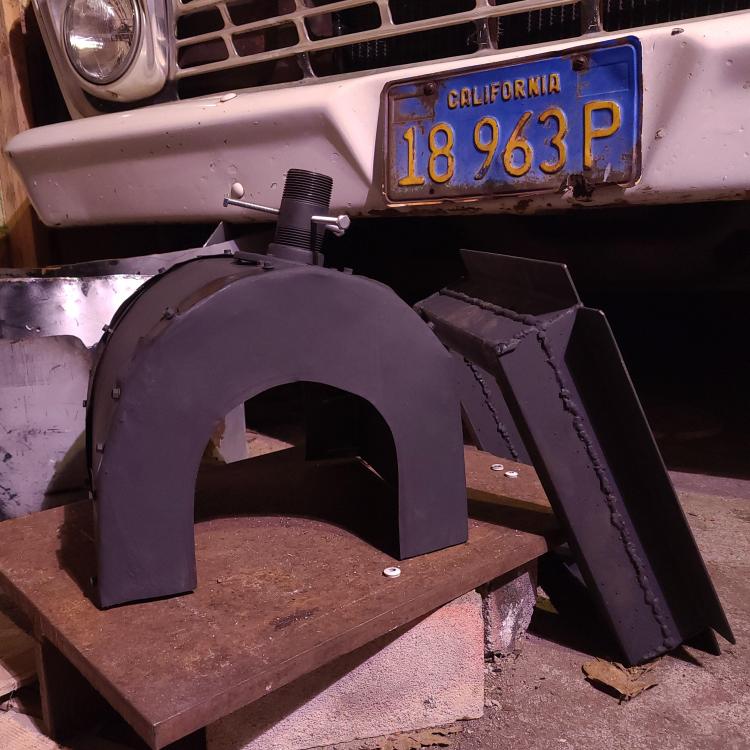
Ok, time for an update. Thanks to some great input from you guys I finally have a running gas forge. Over the last couple days I got the insulation wool installed and rigidized. Got the refractories cast and set. Went through the process of baking off the residuial moisture. And finally upd to full heat. And was registering about 2200°F consistently. I still have some work to do before it is put into service but it's looking bright. I still want to lay on a couple coats of ITC 100, then I will weld on a couple bits of angle iron to act as brackets to hold brick doors in place. And I'll fashion a work rest for longer stock. As well fab up a portable stand of some sort. Here are a few pictures and short video clips from the last couple of days. I used firebrick and tabcast 94 for the floor. I may do insulation wool and tabcast 94 when I end up having to refine the floor at some point down the road. The body is lined with insulwool and kast-o-lite 30 The first firing super low, short run time. To start evacuating the excess moisture from the refractories. 20230201_121044.mp4 Started to crank it up a little bit after about an hour or so of cycling on and off. I delt with the burner going out from time to time on the initial firing cycles. But here it is running more steadily. 20230201_172712.mp4 AND finally after a long day of babysitting and slowly bringing it up to temp, it's finally flying. 20230201_173024.mp4 Hope you all enjoy, ill throw up some more updates as I wrap up this project over the next couple weekends. 20230201_173216.mp4
-
Latticino, thanks for the clarification. Ps. I got some kast-o-lite 30 on the way, after reading these responses and reading a bit deeper into the Tabcast I ordered. I decided to go with the tabcast for the forge floor,and I will use the kast'o for walls and ceiling. I saw somewhere in my digging, that ITC-100 is not ment for forges... I was going to coat all my surfaces with it, but now I'm not so sure. Any thoughts...??
-
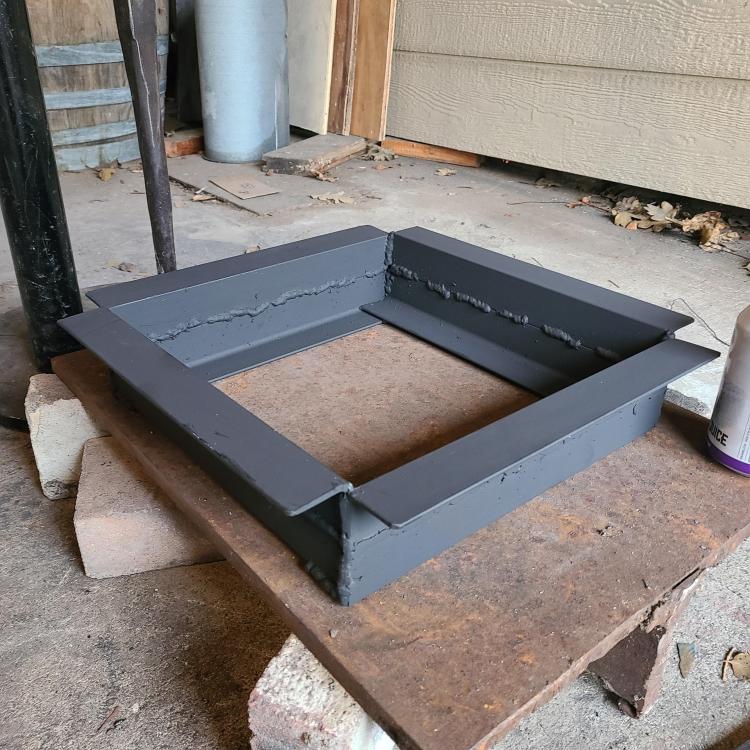
Yeah Frosty, that IS why I choose the TABCAST. It had a really high alumina content. How did the Greencast do ya? Guessing it didn't perform as highly as the cost would have suggested? And I'll take a look at re configuring the jet plumbing next time I make it in to town. And here is my update for today. I got the forg body put together. Just some light sheet metal, reclaimed from an old oil drum, cut and pounded to shape. I'm using a floor flange and 1.5" nipple that I drilled and tapped with set screws to hold the burner.

-
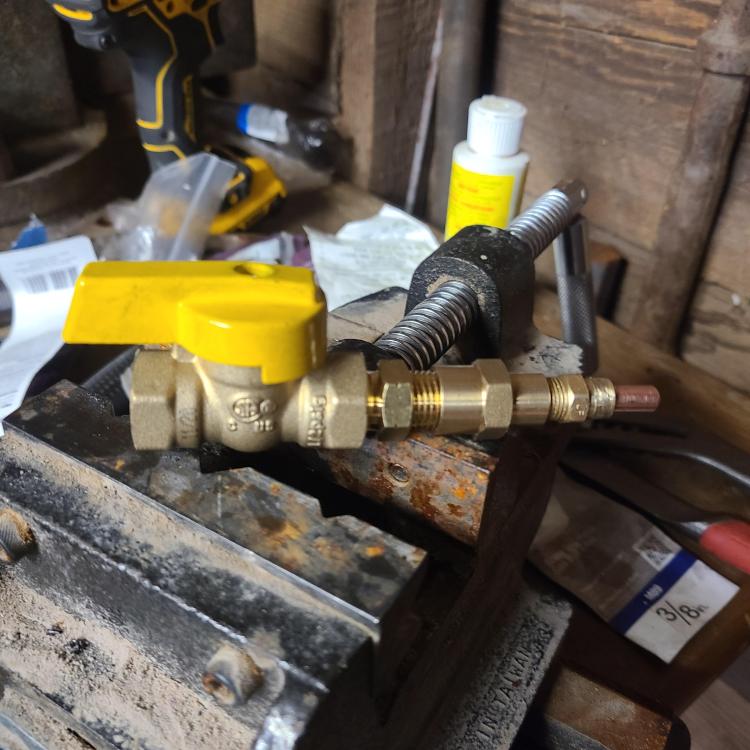
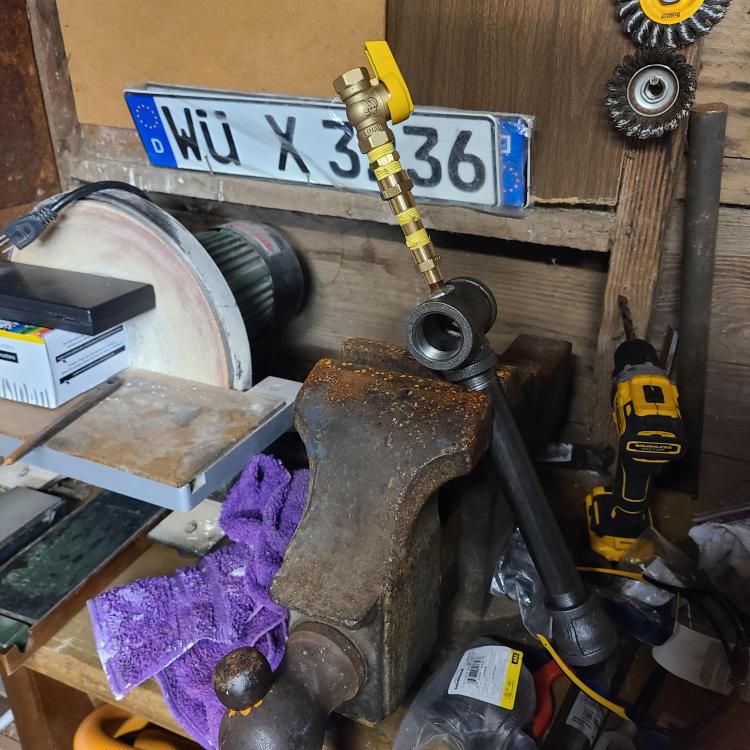
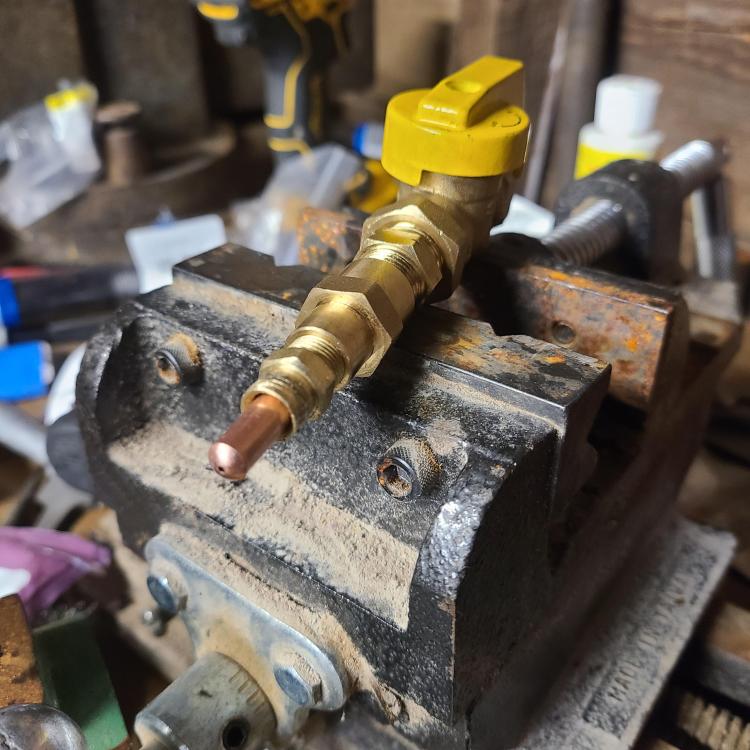
Frosty, thanks for stopping by. The fittings from the jet, back.. (as noted above are not to the plans, but everything else is) Unfortunately this was the only way I could get from my jet, to my shut off valve, and out to my regulator. With the available fittings locally. I am planning on building a support bracket to prop the fittings and to relieve any undue stress on the jet assembly. (I think my location hasn't been updated. I'm about an hour from Portland now.) As far as the refractory goes... not sure why I picked this over that. Next time I will save my money. Thanks for the advice. I always look forward to hearing from you.
-
Sorry Mikey, the specific product I have coming is a high alumina castable refractory cement, going by the specific name TABCAST-94, it has a temp rating of 3270°F. Sorry for the confusion. Hope that clears it up.
-
It has been a while since i have been regularly active here on ifi, if yiu care ill catch you up. If you just want to check out the build feel free to skip ahead. "Cue flash back music" ~~~~~~~~~ I had just barely started my journey in to blacksmithing (maybe about a year deep) when I was stopped in my tracks, and forced to forge a new path forward. Two years ago i was told i would be loosing my workshop space. I tore down my forge, and started looking for a property. My wife and I found a home to buy and fix up to make our own. We're talking full remodel of living spaces in the home. But, the property came with a workshop. In need of much repair its self, but that is a long process. Anyway, after a year and a half of making the home habitable and dreaming of the day I can finally have enough of the responsibilities out of the way for long enough to start setting up the smithy once again. It's finally time to do some work for Me. ~~~~~~~~~ So, here we are. Its time to build my first gas forge. I've chosen to build a naturally aspirated propane 3/4" T burner, as close to the "Frosty T burner" as I could with avaliable fittings. I followed Frostys' design to a T (pun intended) from the jet to the nozzle. From the jet back to the regulator was cobbled together with what was available at the box store. I'll save you the details, if you want em, go read Frostys posts. All of them. I got the burner running pretty well for being in open air, and not contained in a forge. I'll insert a video if the internet gods will let me. 20230116_122559.mp4 The forge body will be a 2 part construction, a 12"x12" floor. Made from angle iron and sheet metal Consisting if 2 inches of kayowool, then about an inch to inch and a half of satinite castable refractory, coated with ITC-100. The and ceiling will be an arched top filled with the same composition of insulators and refractory. Over all forge cavity should be right at 332.5ci. 7" wide 6" tall and 10" deep. I will be using fire brick for doors. ~~Which brings us to the present.~~ Today I welded up the frame for the floor, as well as got all of the sheet metal cut. I am still waiting on refractory to show up in the mail, then I will finish out the body and post updates as they come.
-
Noted
-
Hahahaha. That might be a bit brittle for the job. Interesting, does that help counteract de carb from forge welding?
-
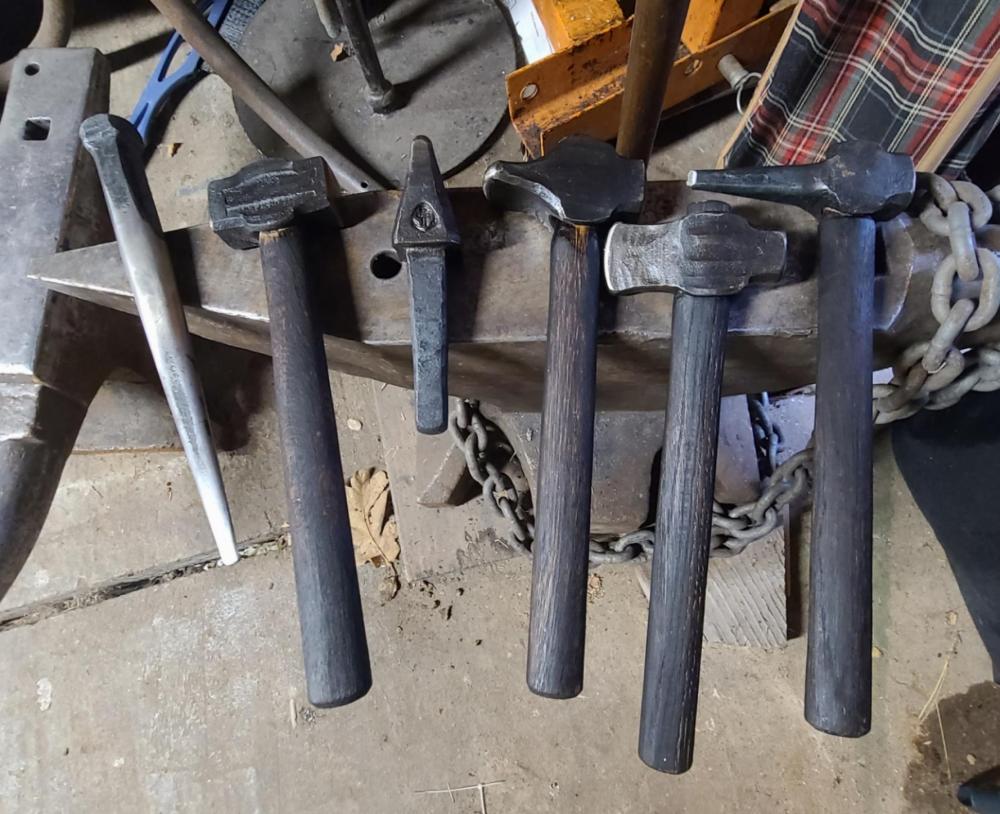
Also sorry for the typo in the OP it was meant to specify that we mostly used 4140 (Not 40140) for pretty much all these tools. Excluding the punch, which was made from H13.
-
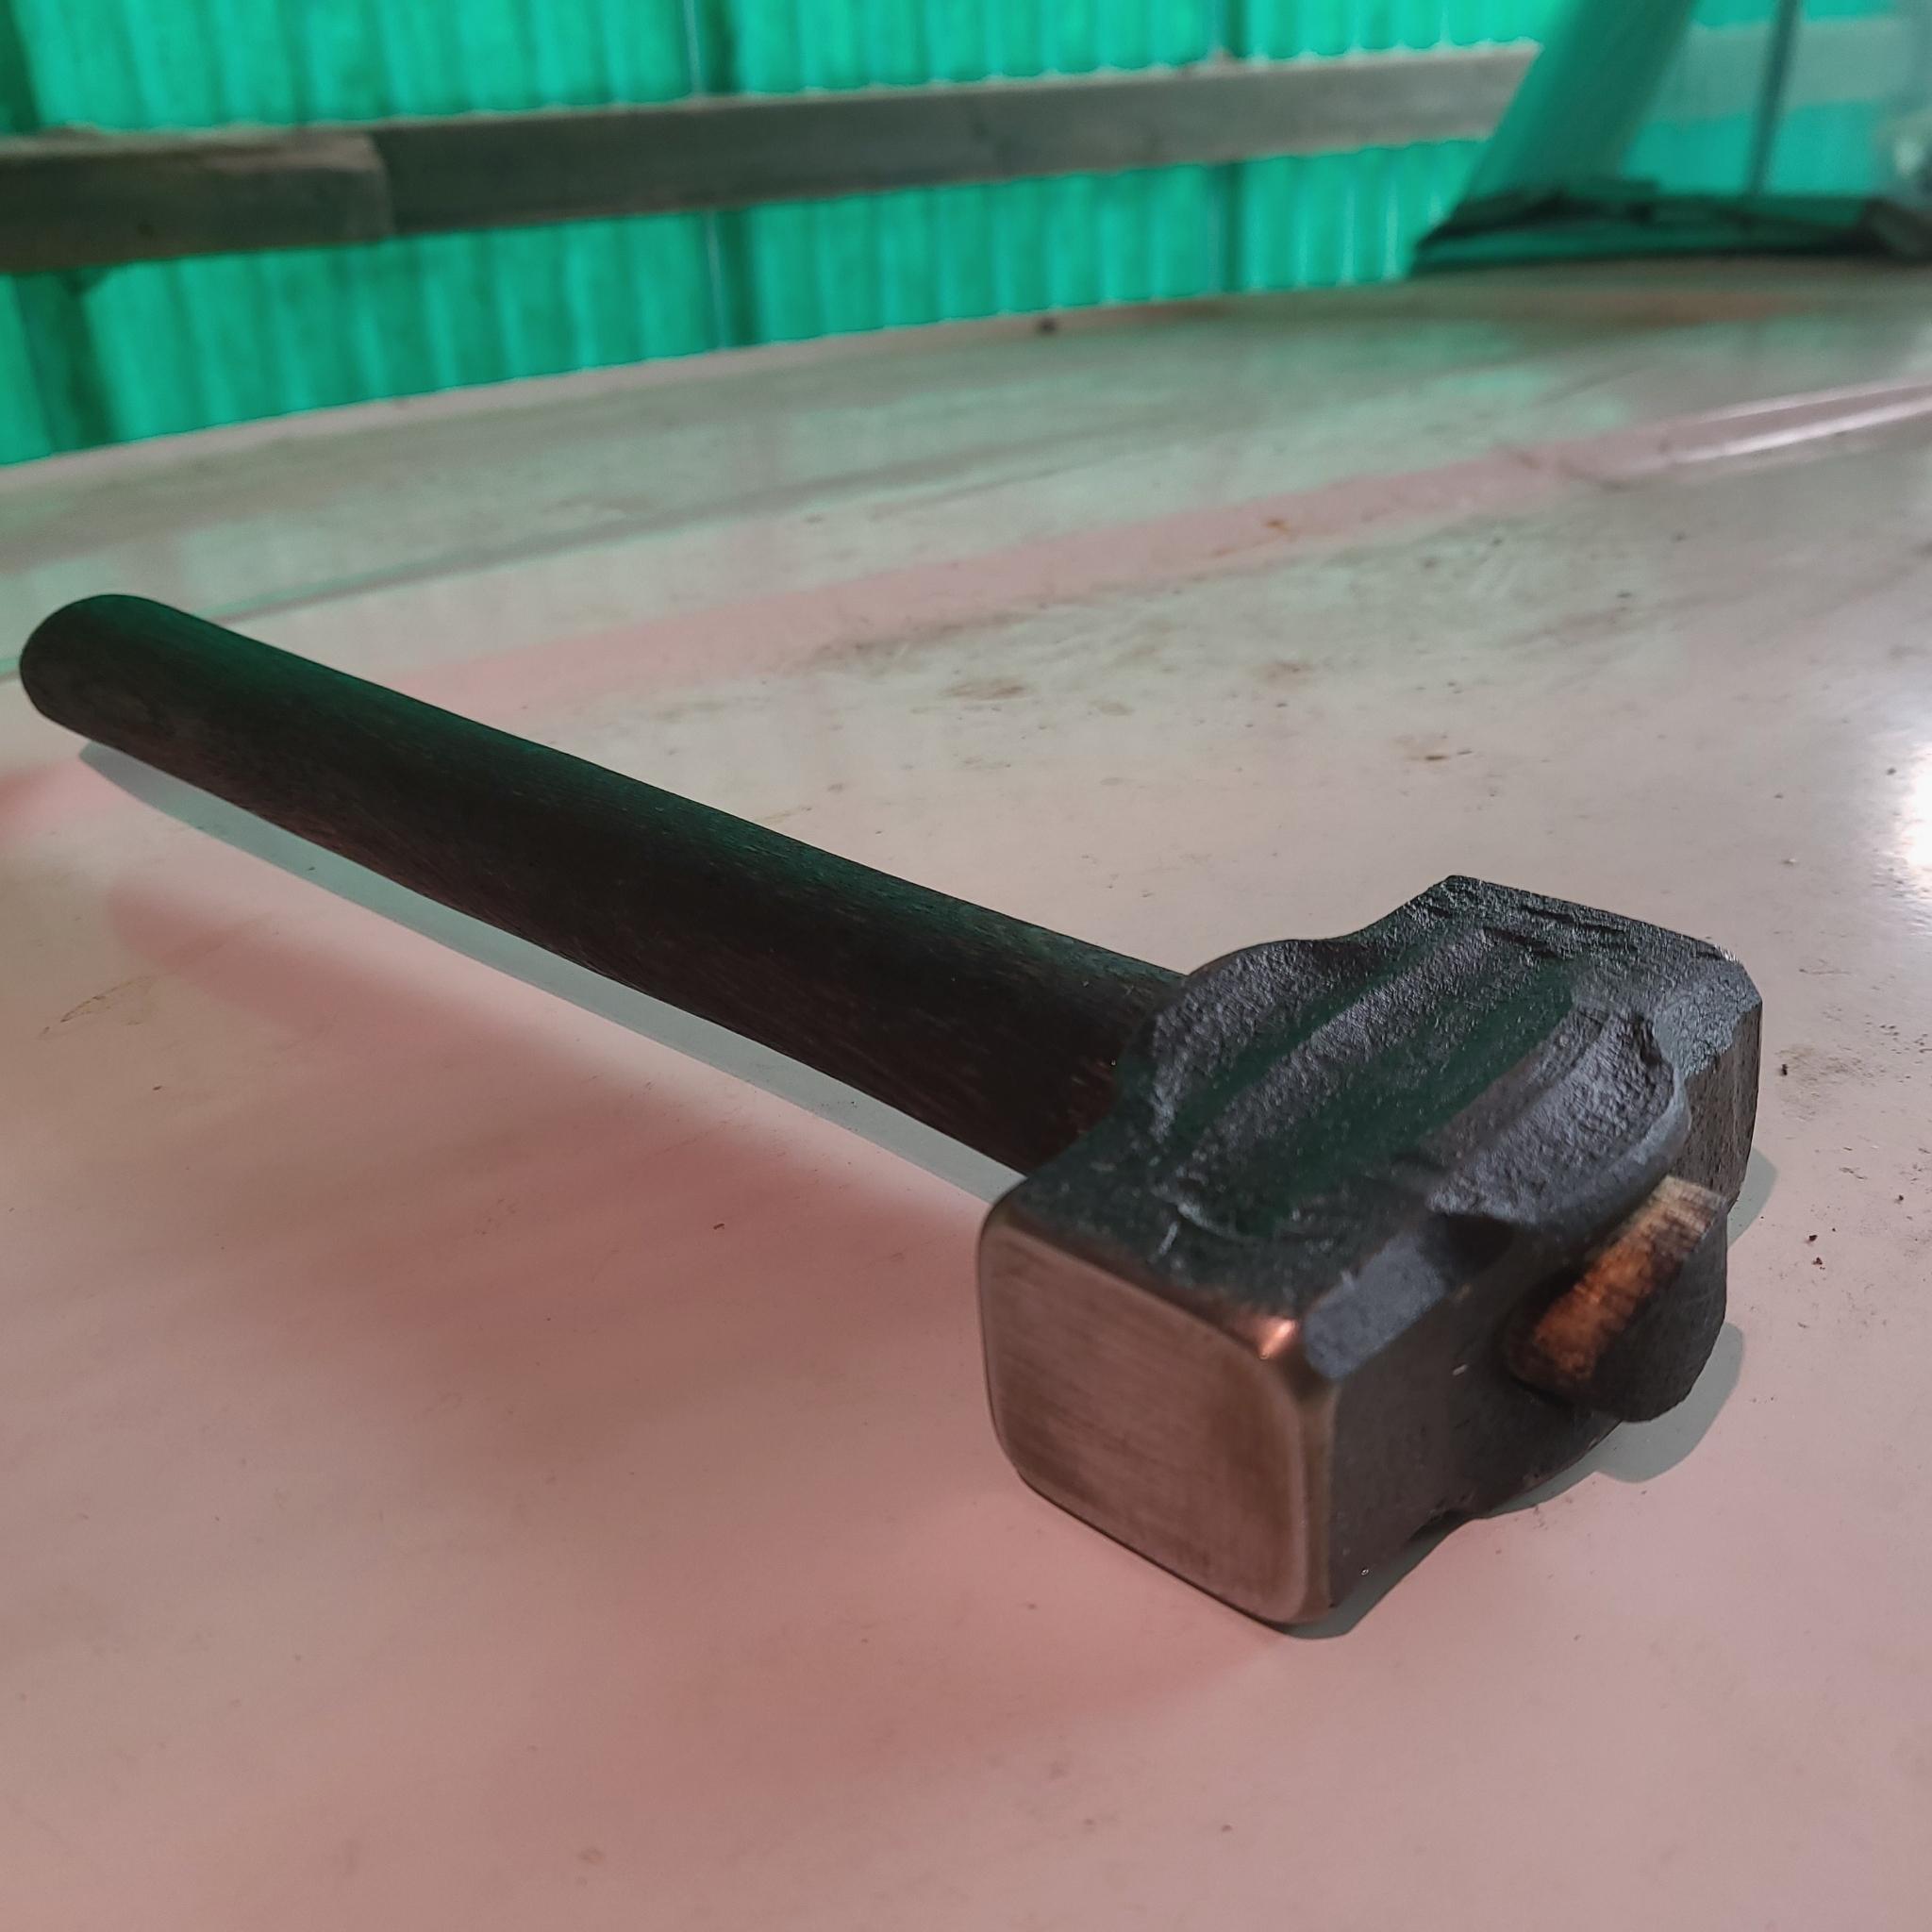
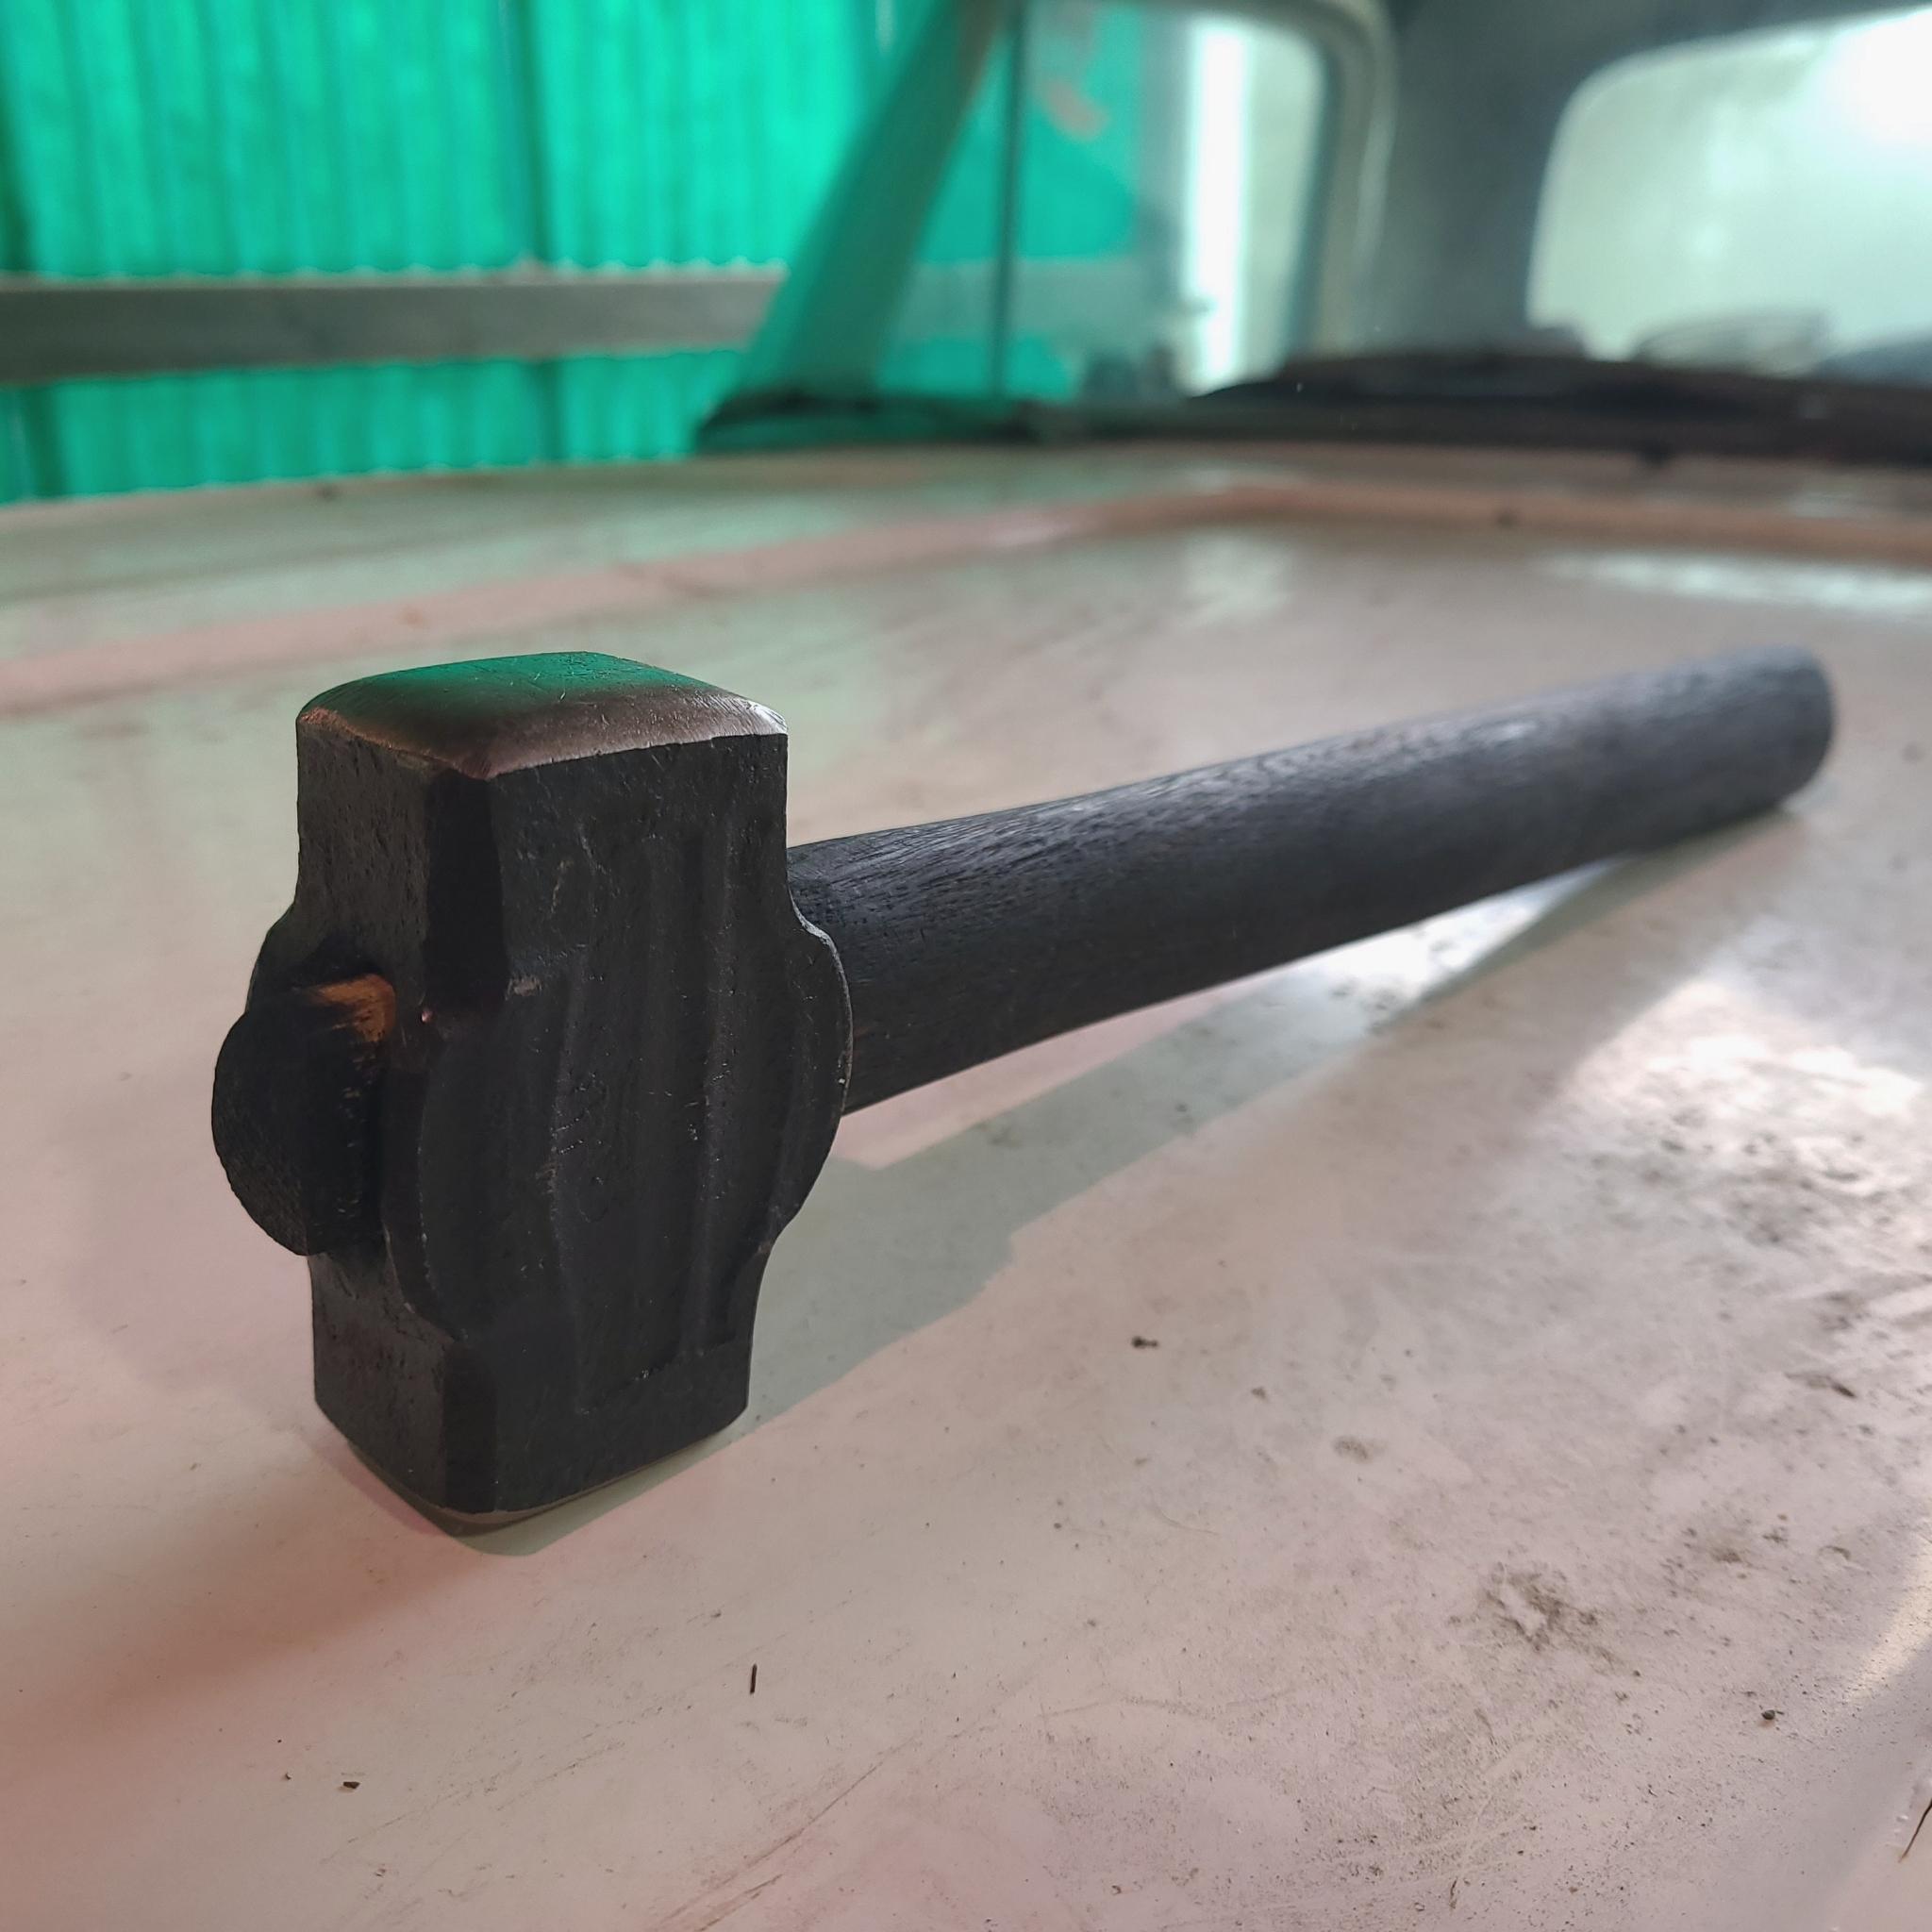
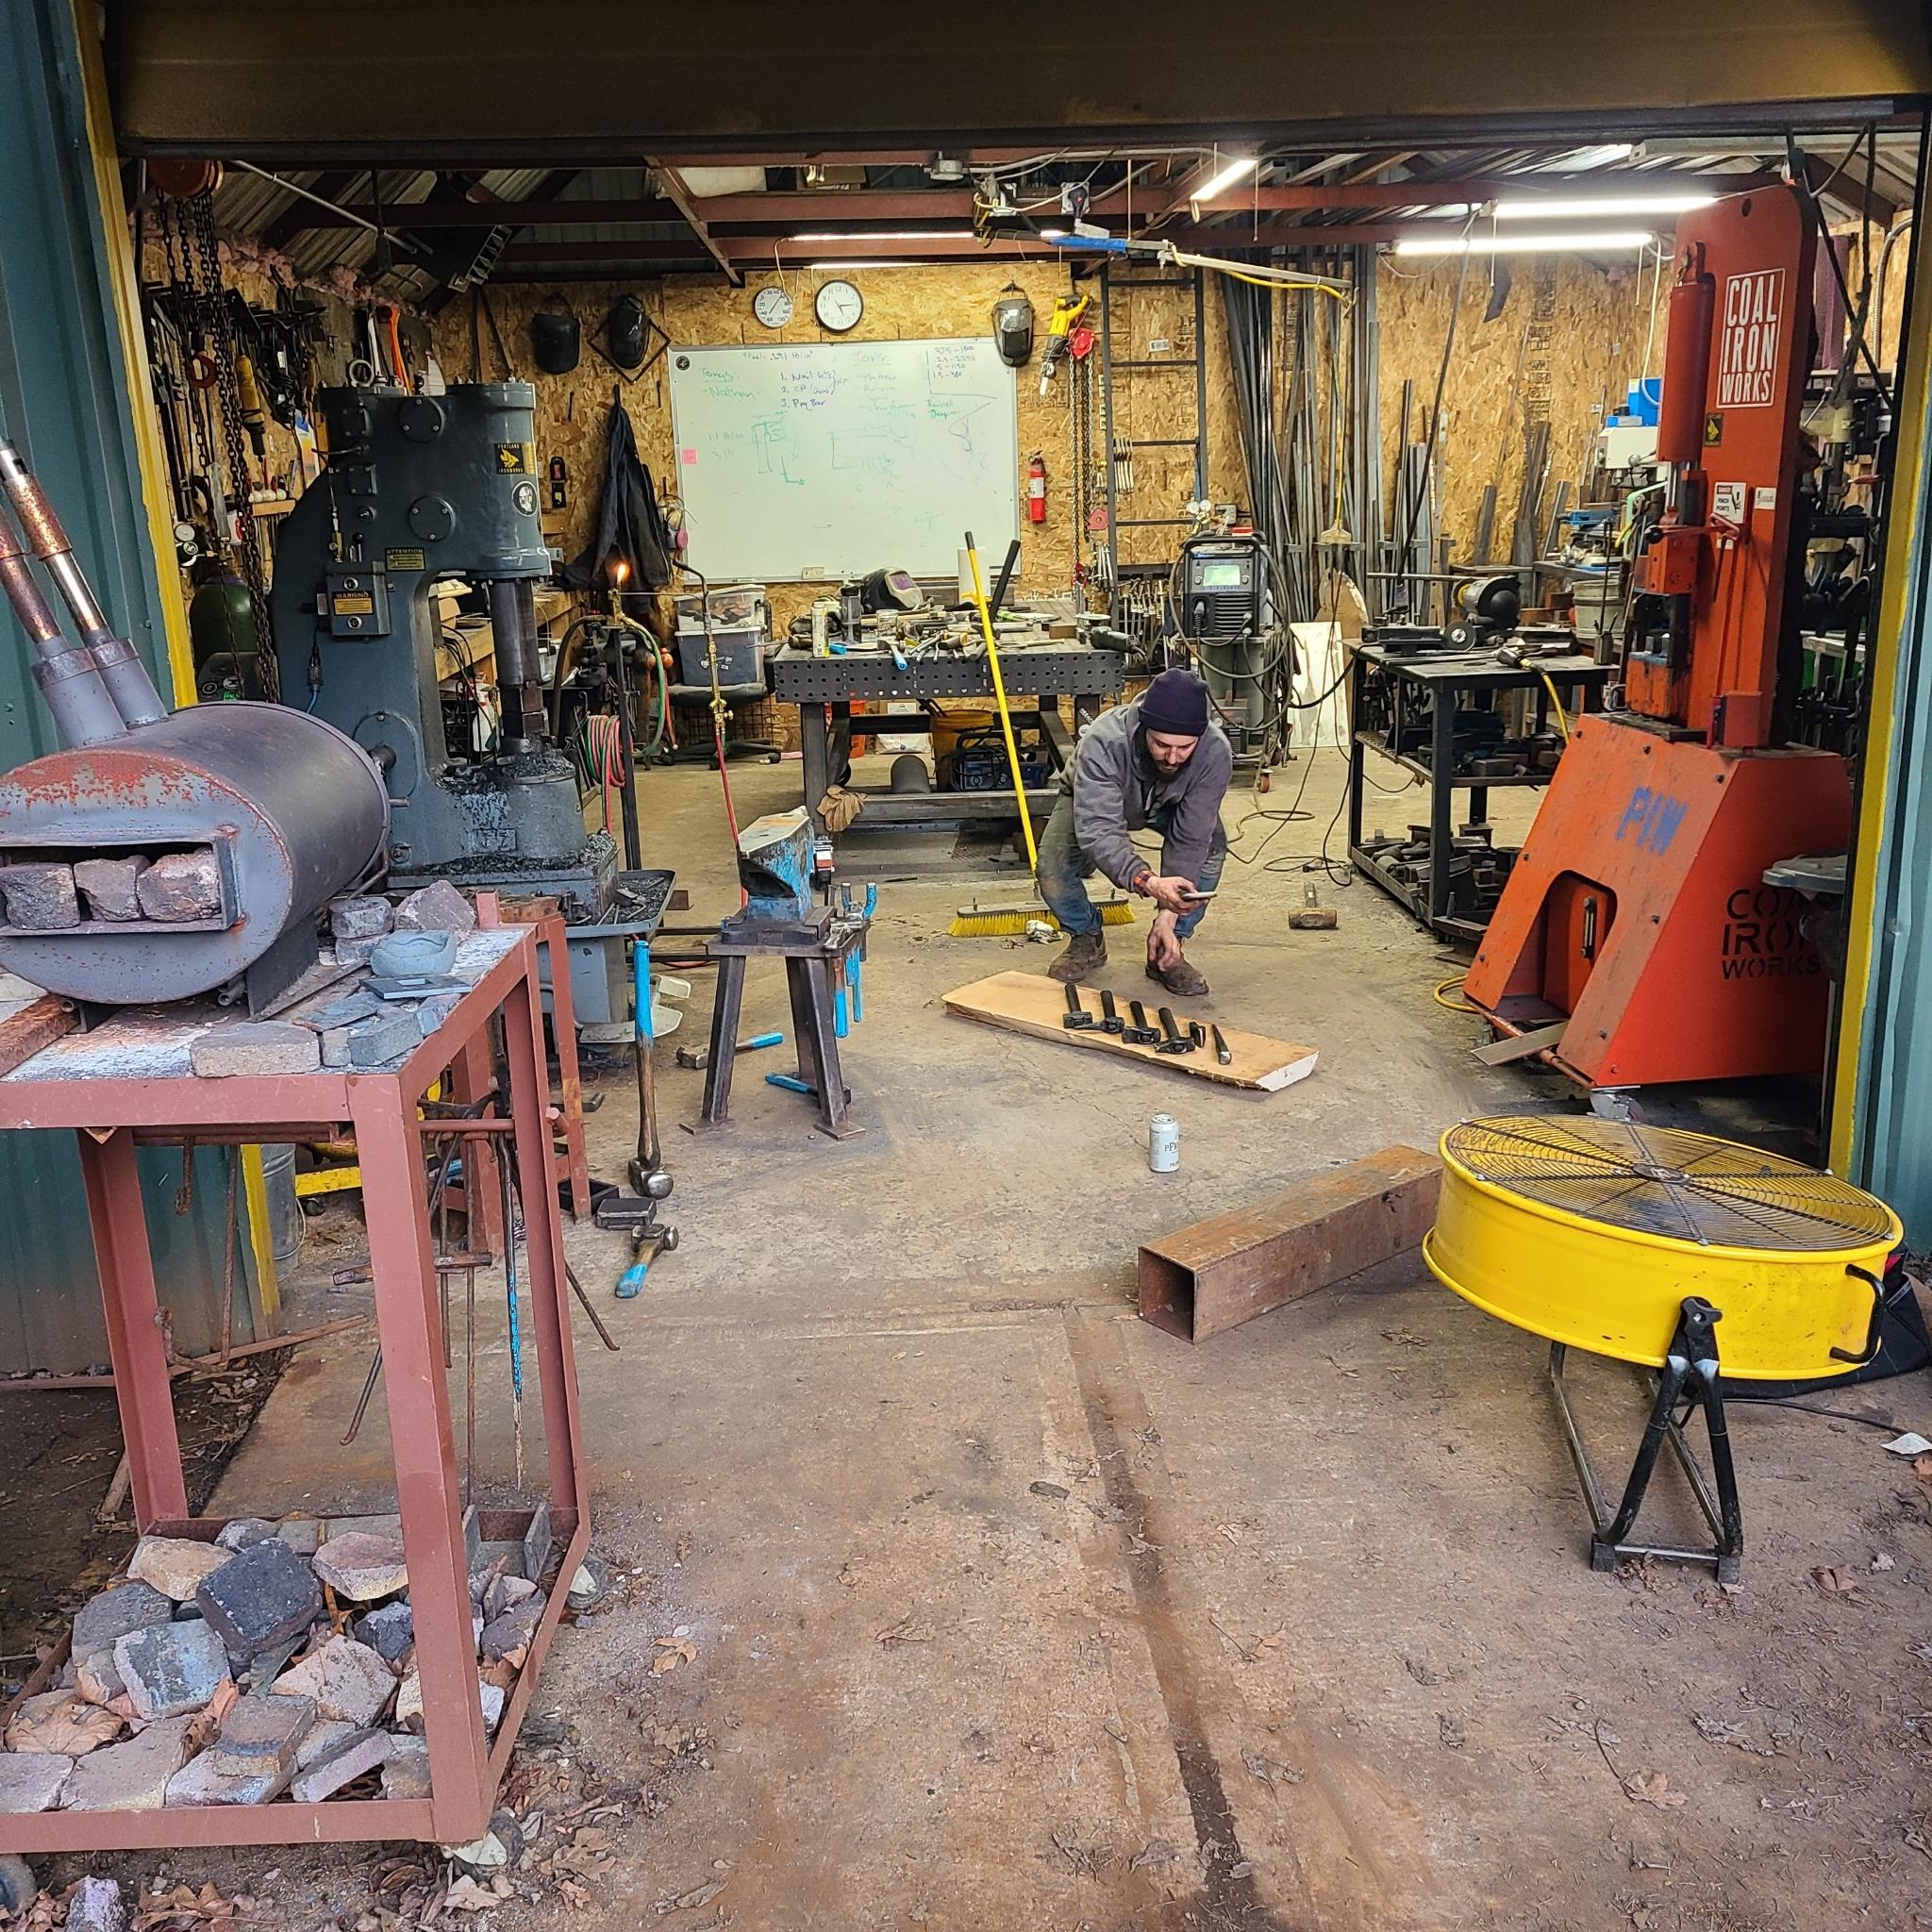
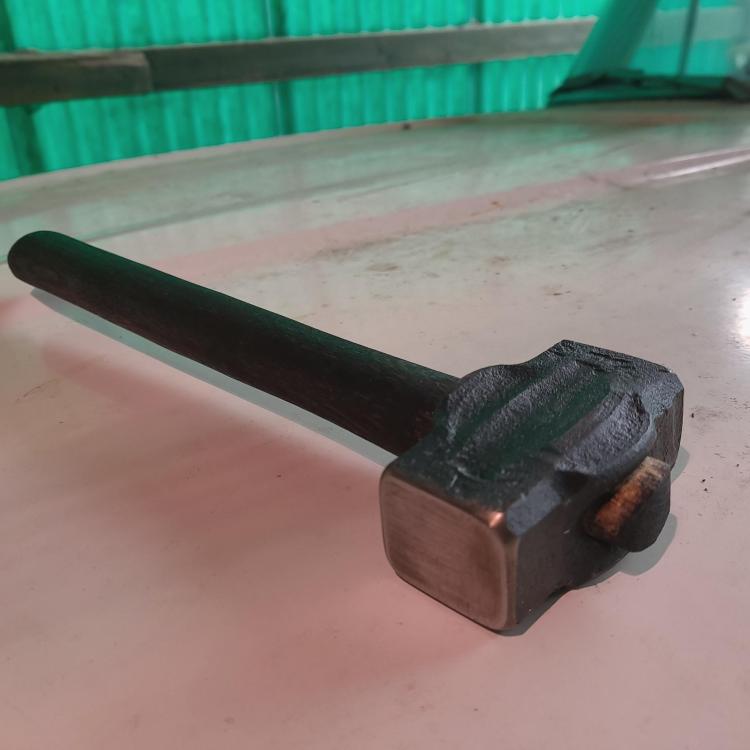
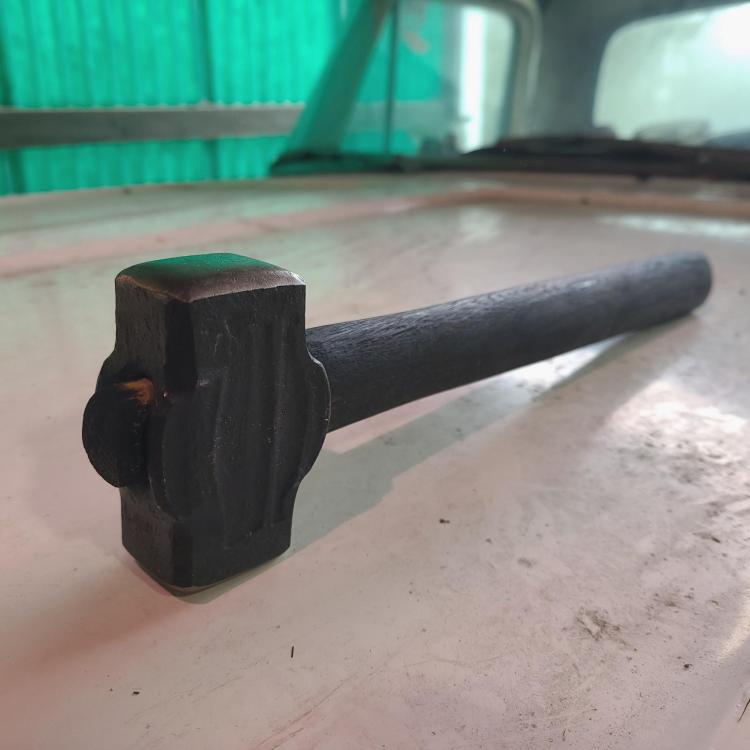
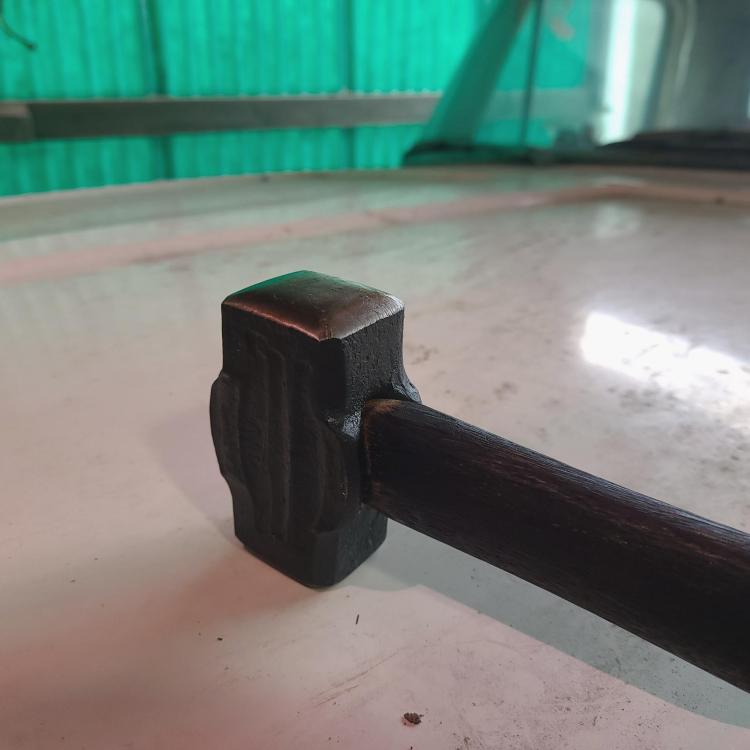
Thanks guys. IronDragon, just to be clarify, the only tool I made from start to finish was the set hammer. Although I did get to work in on a few of the processes on the other tooling as well. The amount of experience was worth it alone, the tools are the bonus as i see it. Ps. Having all those nice machines sure helps speed up the process of tooling up. Now I really want a power hammer. Bad.
-
Hey guys, hope your holidays were great! Sorry for going dark for a while there. The Wife and I bought a new house last summer, so most of my time has been consumed with projects outside of blacksmithing. So I won't bother you with the details. I have yet to set up the smithy on the new property, but don't think I have not been working towards it. Yesterday I ventured up to Portland to visit Andrew of Portland Ironworks at his shop for a private lesson on tool making. Where he shared some insights to his process and techniques on some of the machines. We set out to make the hand tools necessary for making hand tools for use at the anvil independently and with a striker. We decided to start with the tools for making handled top tools and hammers. After running through the processes a handful of times on the machines, and after a quick BBQ lunch break Andrew handed me a piece of 40140 4140 and with a little bit of guidance and a watchful eye cut me loose on the Coal Ironwors 25ton forging press and the air driven 55lb powerhammer. Time to make a top tool. I decided to keep it simple and make a set hammer. Used the press to punch the eye, and fuller the cheeks. The powerhammer to form the striking and struck ends. And the drifting of the eye was done at the anvil. At the end of the day we had filled out my tool collection with a set of top fullers with opposing orientation, a bottom fuller to match all from 4140. A handled hotpunch made from H13. A hammer eye drift. And a set hammer. It was a super awesome experience, and really nice to be back in a workshop making things.

-
Sure thing. Thomas. I figure it's like taking two friends on a really long and expensive beer run.
-
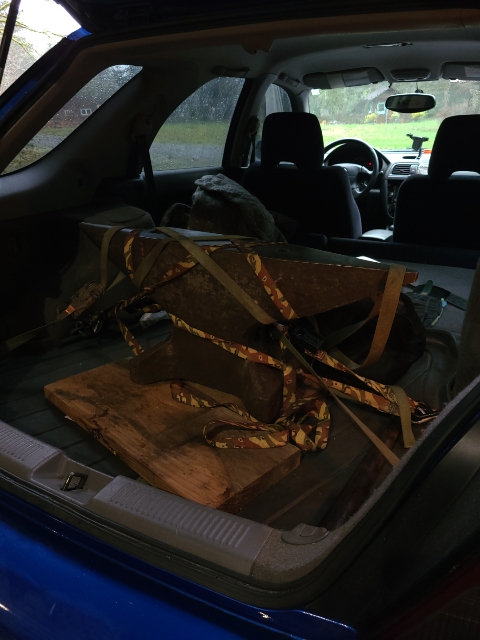
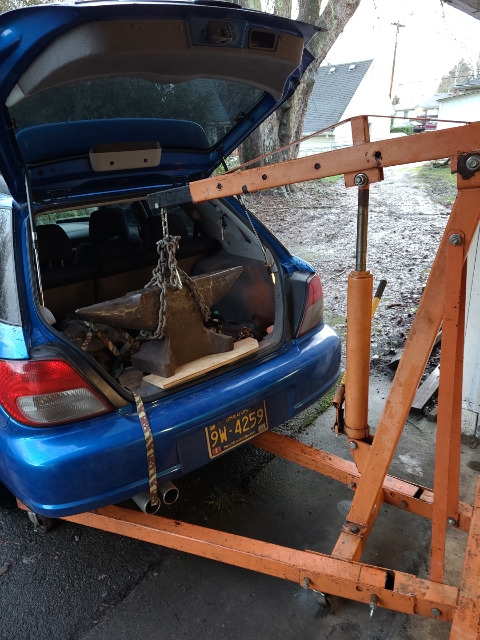
Tangledriver, Hahaha, the car took it well for as tiered as the rear struts are. Didn't complain one bit.
-
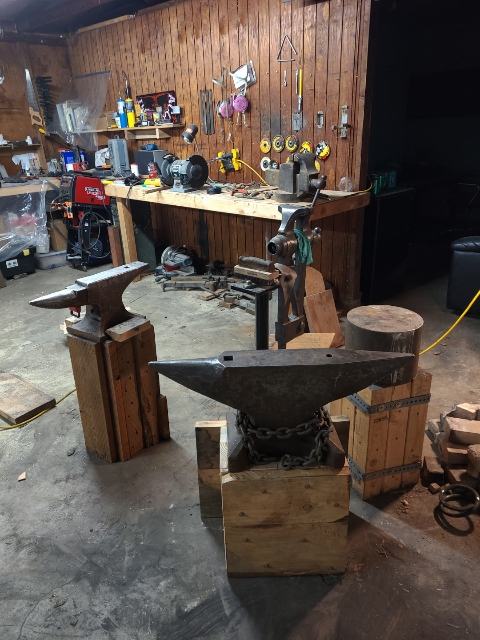
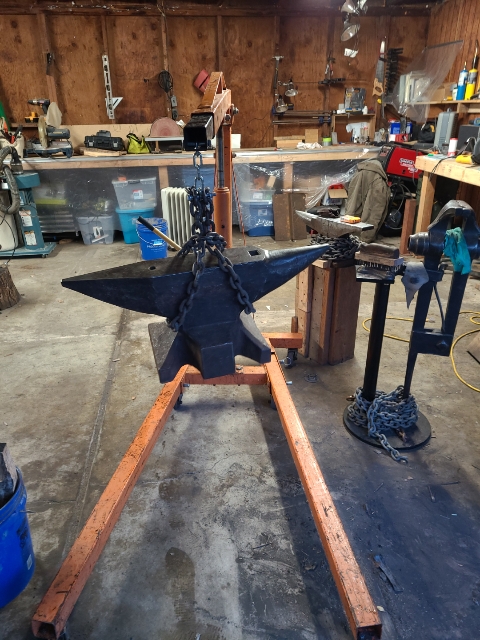
Deimos, sorry for the typo, last response, auto correct you know. I bet there was a bit of hassle getting an anvil out of a trunk. Well I got a temporary stand put together and she is all settled in to her new spot for now. At some point down the road will fabricate a steel stand for it. But I want to dial in a proper working height and get a feel for what will work best. So now it's back to the day job for the week. Hopefully I'll get to fire up the forge next week.
-

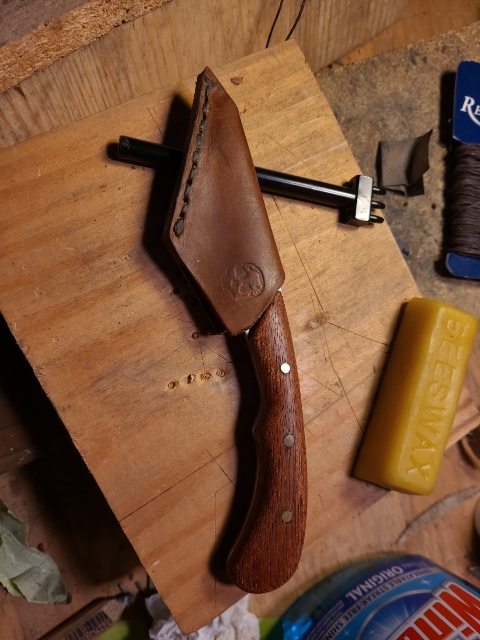
What's your latest blade look like? Post em and let us see.
M.G. replied to HondoWalker's topic in Knife Making
Great looking blades guys. Here is my most recent forging.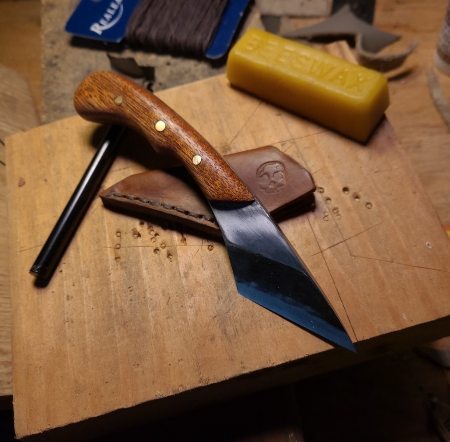
-
Demos, I couldn't seem to bribe any of my friends with beers to come lift heavy things that day, so I hit the local Listings and found the roughest cheapest hoist I could find. Made it a breeze. And I am thankful to my friends for declining my offer, now I have a hoist and a six pack of frosty ones. Hahahah
-
Thanks for the tip Frosty. Don't be fooled, the hoist is about as rough as they come. But it will do the trick for anything I have in my shop, for the time being ...
-
Thanks guys, it's kind-of hard to beleave that just a year ago I didn't even have a space to hang a hammer, let alone a full workshop set up for blacksmithing. Thanks for all the encouragement and inspiration!
-
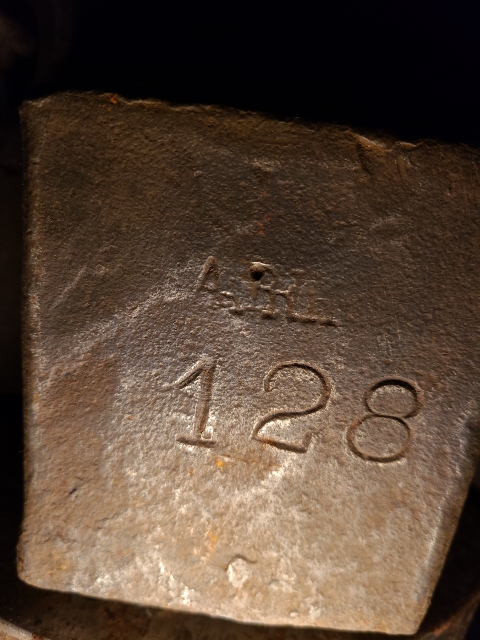
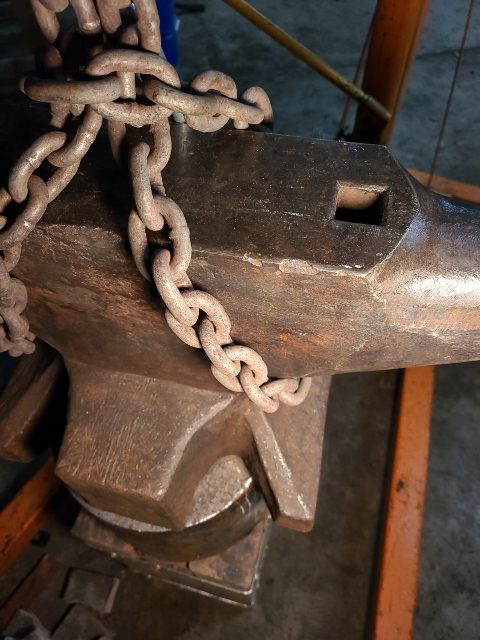
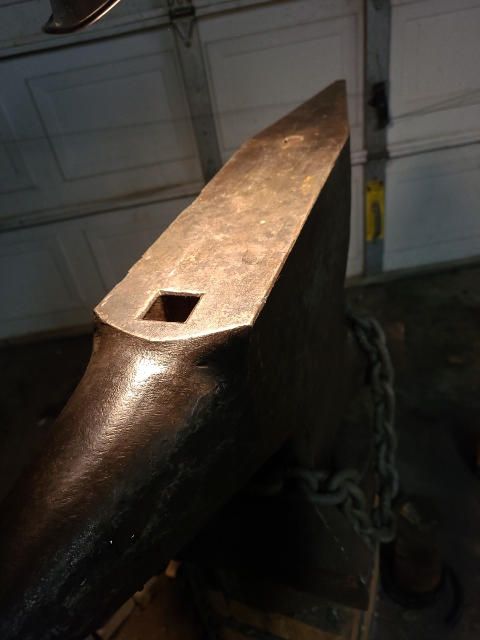
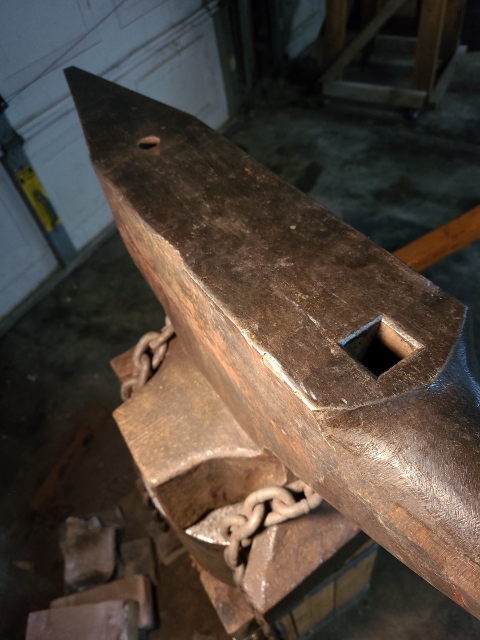
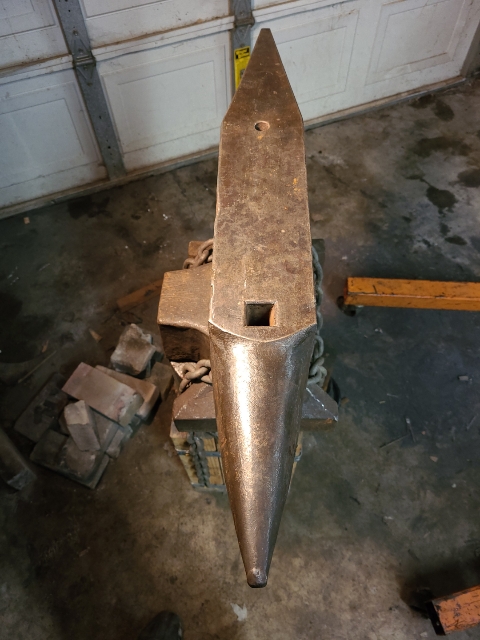
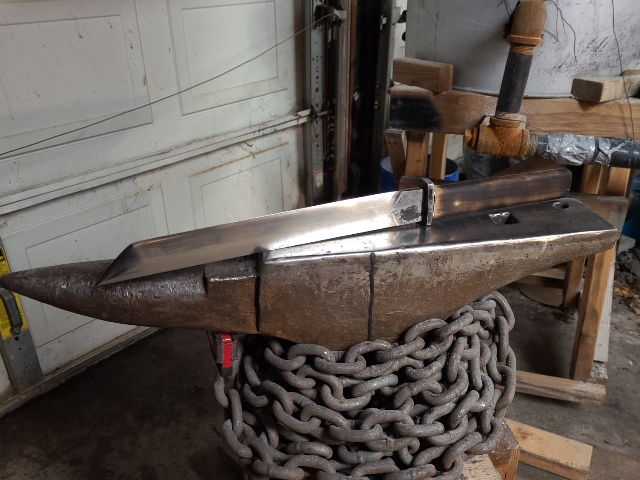
I got tired of chasing my 100lbs Trenton around the shop, and picked up something a little bigger. Hopefully with a decent stand this one will not want to run away as easily under the hammer. I found this on the List locally. And have had a few interactions in the past year with the gentleman that imported it. When I saw it posted I knew that my 2x72 purchase would have to be put off and I would end up spending countless hours hunched over various work pieces with files in hand. But I would never "NEED" to buy another anvil. This forged double horned south german pattern with upsetting block weighs about 282lbs. She is perfectly flat with what look to be factory edges (minus the couple of minor chips on one side) She shows no signs of welded repairs on any part of the face, or edges. Has excelent rebound, looks like roughly 80 to 90% return on a steel ball bearing if not better. The only stamps are the 128, kilo note. And what looks to be a double stamping of "ARH" above the kilo weight stamp. If any one is familiar with this stamp I would love to hear about it. But as I understand it may forever be a mystery, as I was told this is to be a War time anvil where the makers marks were negelected..?? I am looking forward to doing some heavier work on it in the near future. Next is to set up a temporary wooden stand, while I source the material to fab up a steel tripod throne. Here are some shots of the move and some of the finer details of the new anvil. Then in the last shot is the stack of all my anvils minus a couple of extra cake sized drops of 4140 that get used occasionally for beating on. 100lbs. Trenton 282lbs german double horn 240lbs non hardened tool steel drop

-
Thanks Frosty, I agree about larger leafs. This being my first run making leafs, there is a lot of room for improvement, and I'm looking forward to refining my process and vision at my next opportunity to do more ornamental work. But in the meantime I need to make some tooling for my next project.
-
Good thinking Glenn. Cheers
-
Thanks, Daswulf. That's what I'm afraid of, hahahah.
-
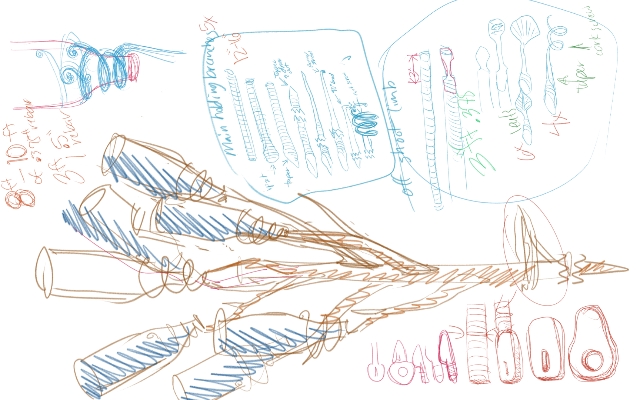
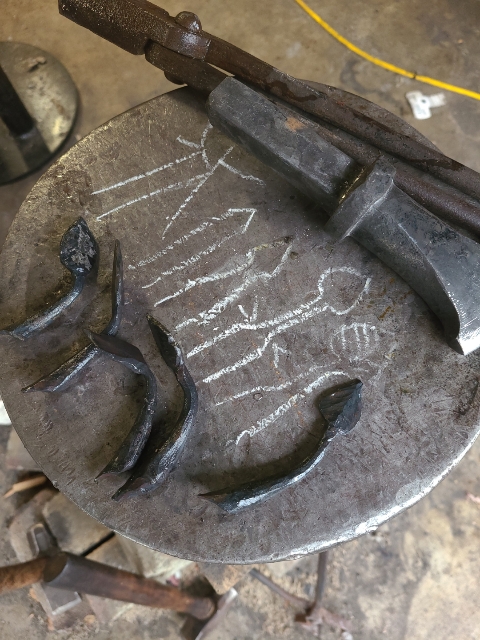
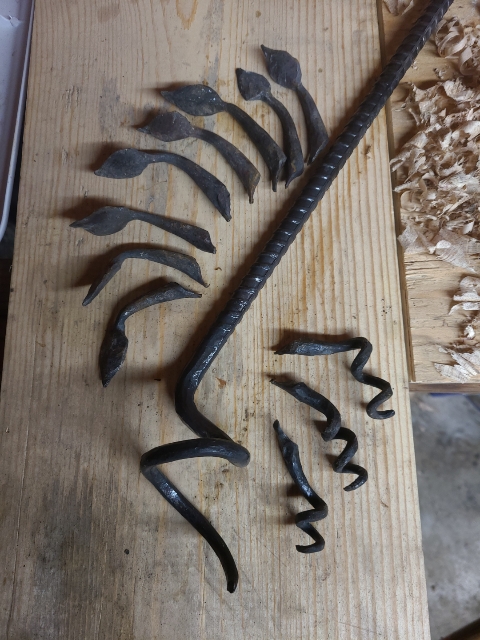
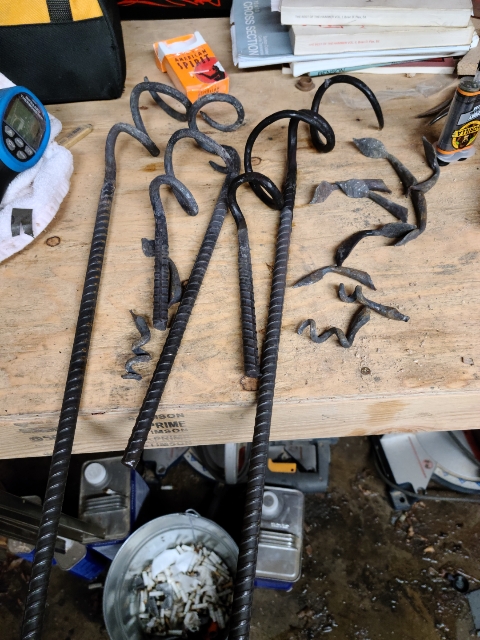
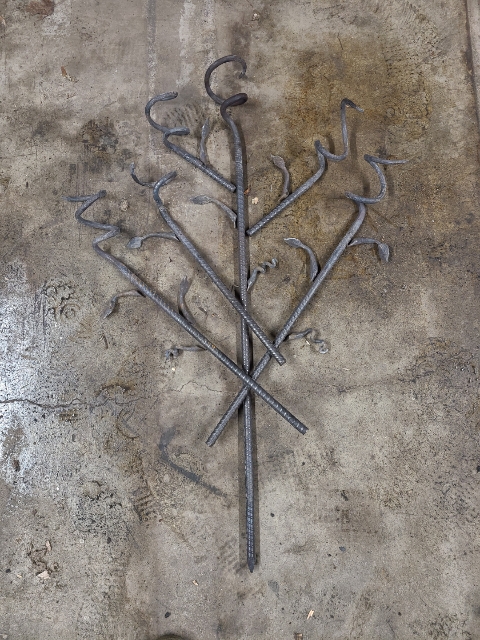
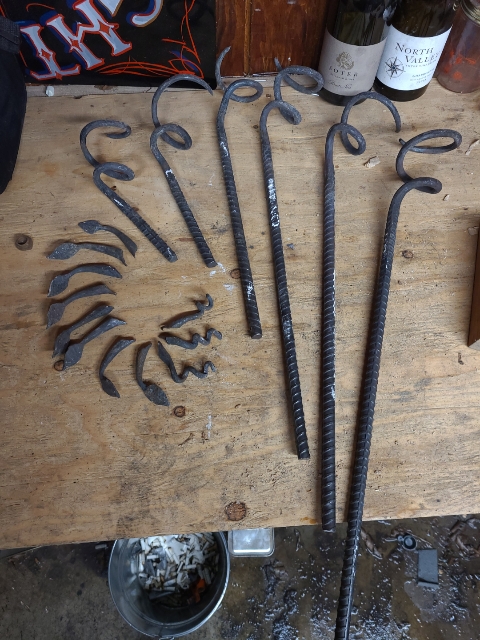
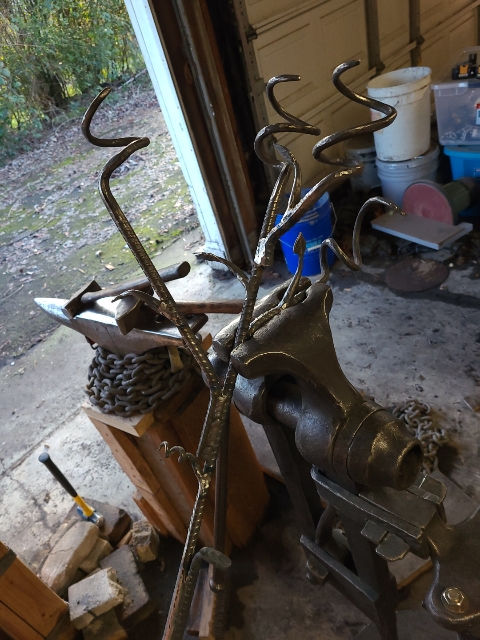
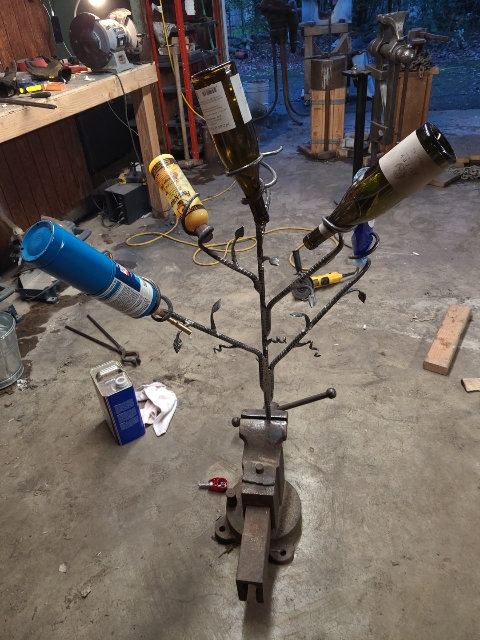
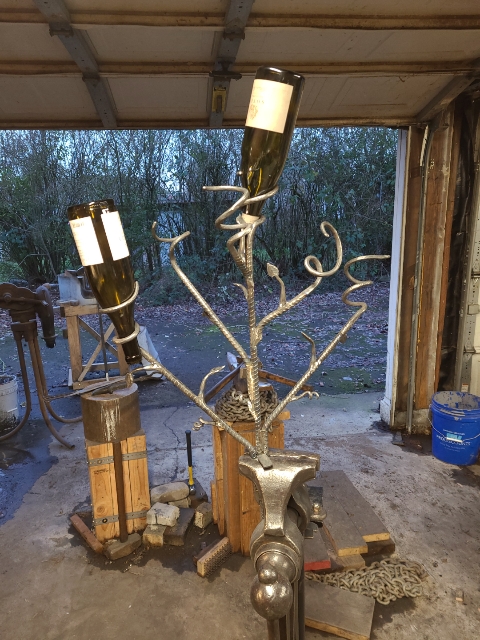
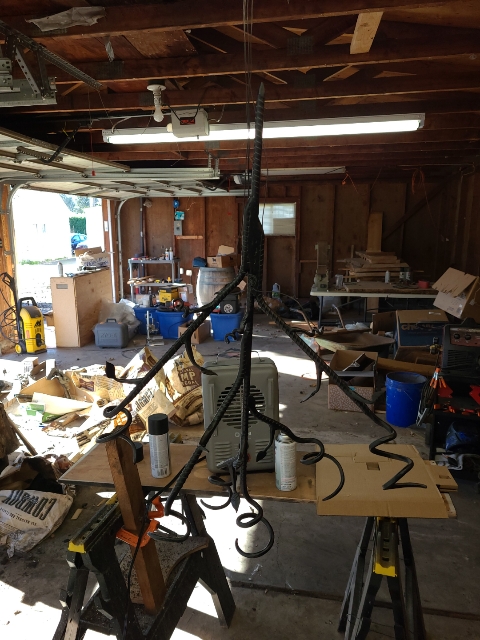
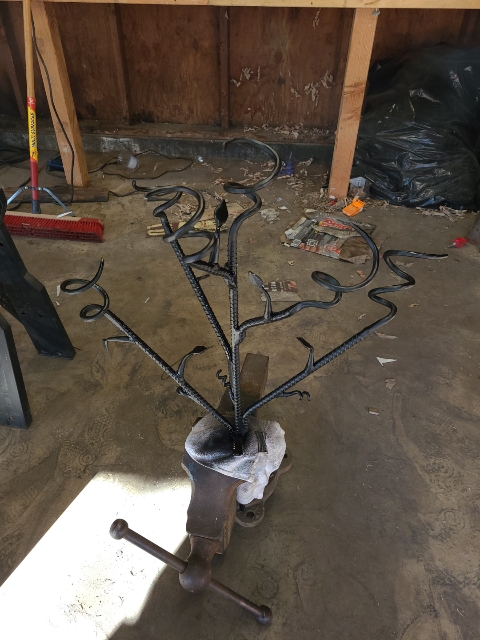
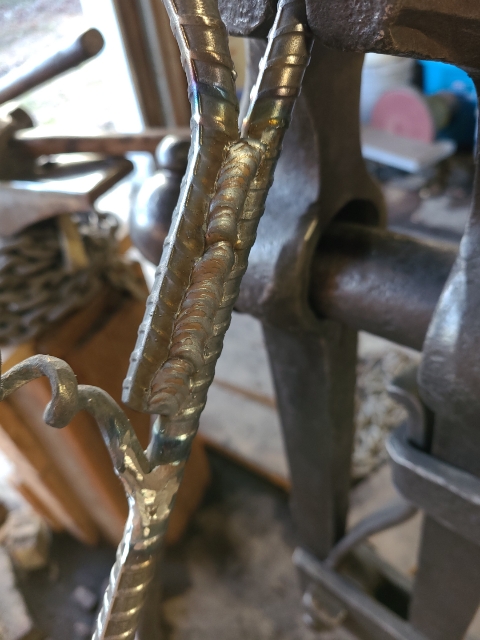
This last week I decided to make my mom a piece of yard art, that she has been dropping hints about for her birthday. I figured it would be a great way to practice forging tapers corkscrews and leafs. Also got to do some mig welding for the first time in about 18 years. All set and done I'm pretty pleased with the outcome. I will be sure to post a photo in its final installation once it has been gifted. Here was the original idea laid out in sketches, things changed a bit as I worked through the project, but here it is.... enjoy.
-
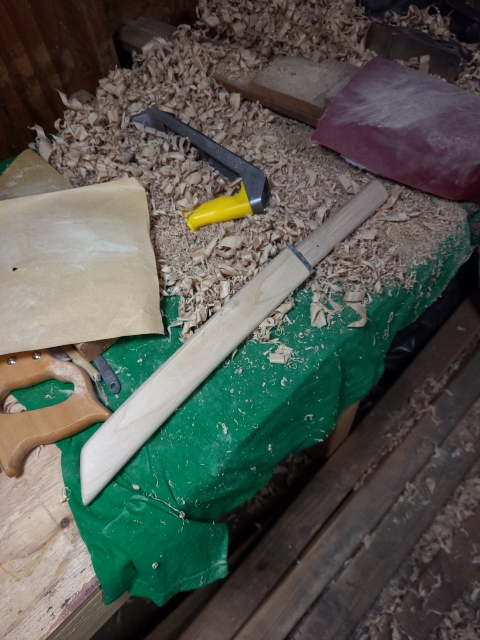
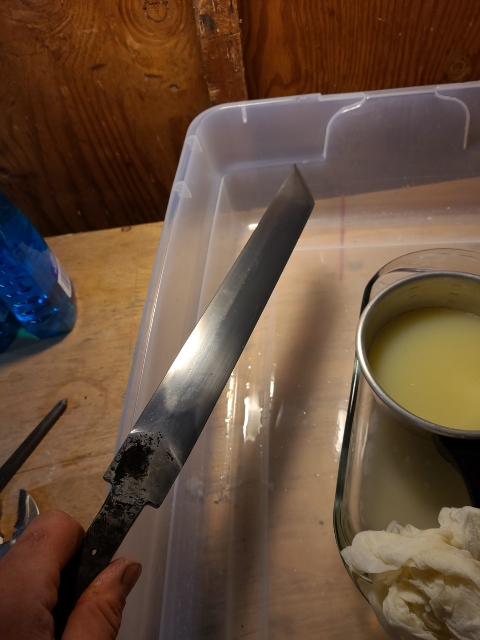
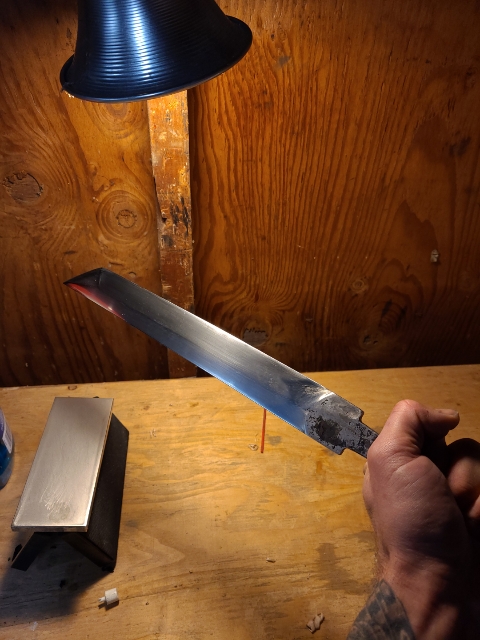
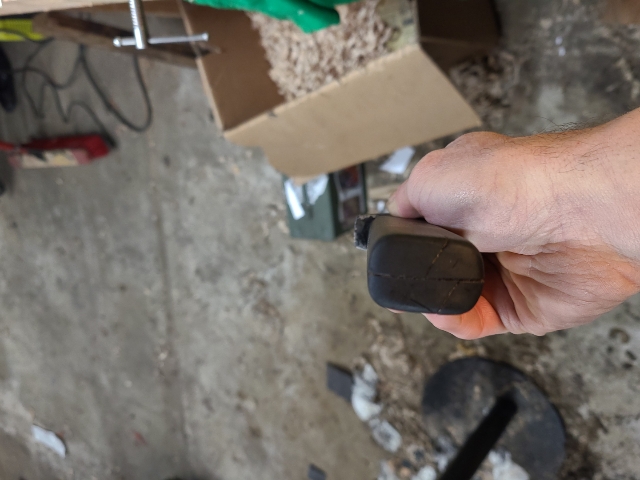
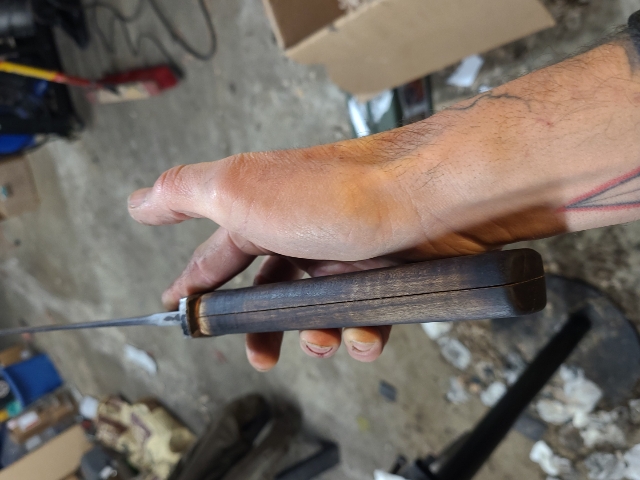
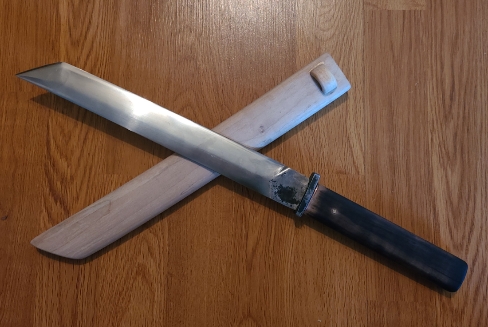
Got the tanto finished and assembled. Lots of flaws lots of learning. I failed at creating a proper hamon, it shows up at the base of the blade at before the tang but not in a horizontal pattern with the blade, but perpendicular to the blade... The handle cracked after the epoxy set up. And the blade nolonger locks into the scabbard tightly, I would love to make new furniture for it but I will hold off for a while and move on to the next project ad apply what I've learned here.
-
Ok sorry, im not familiar with the process, or the terminology. But im all ears. I understand that mokume is different kinds of metal "welded?"together in a forge. But not sure what the process is called. Or if it's called the same or some thing completely different if it is just copper to copper...??