M.G.
-
Posts
229 -
Joined
-
Last visited
Content Type
Profiles
Forums
Articles
Gallery
Downloads
Events
Everything posted by M.G.
-
Thanks, Excelent advice. I was thinking about that same shape, very similar to the hot chisels I made. Which tracked very nicely. The fleur de lis, came out really close to my sketch, it was right in there, dang near spot on a couple of times. Curves in all directions, but after more tweeking and re "straightening" and adjustments to the hard bends, I realized I had stressed the tightest and thinnest spots in the hard 90°. And was ritteled with stress cracks laterally. Might have even burned it a bit in those spots... So in to the scrap pile it goes, and next week I'll make a better one. Or two. I've got a couple of preforms ready to go.
-
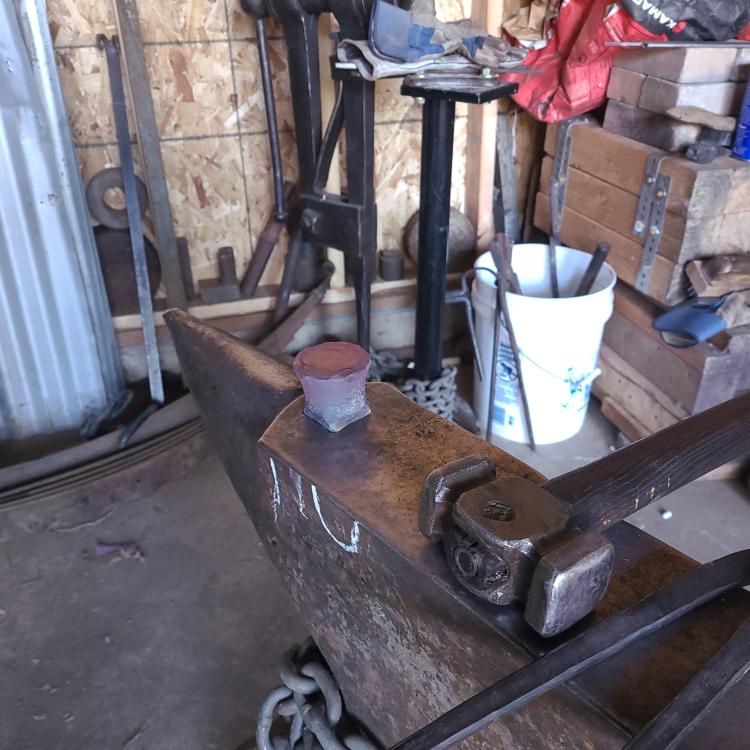
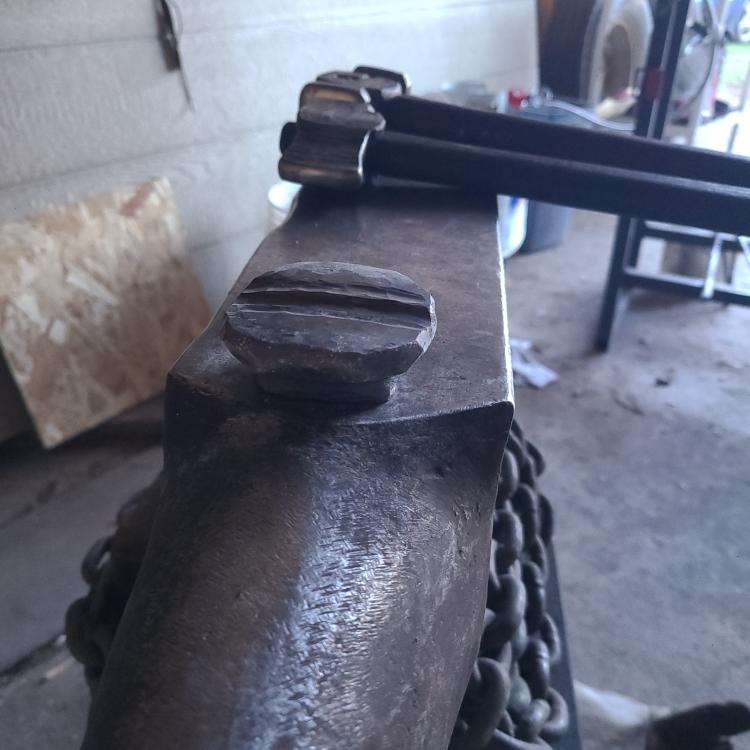
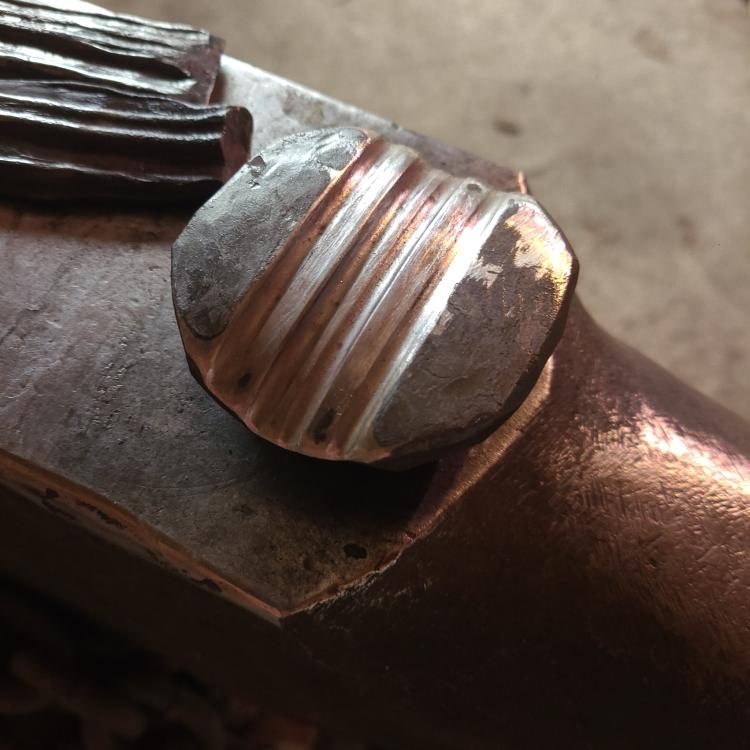
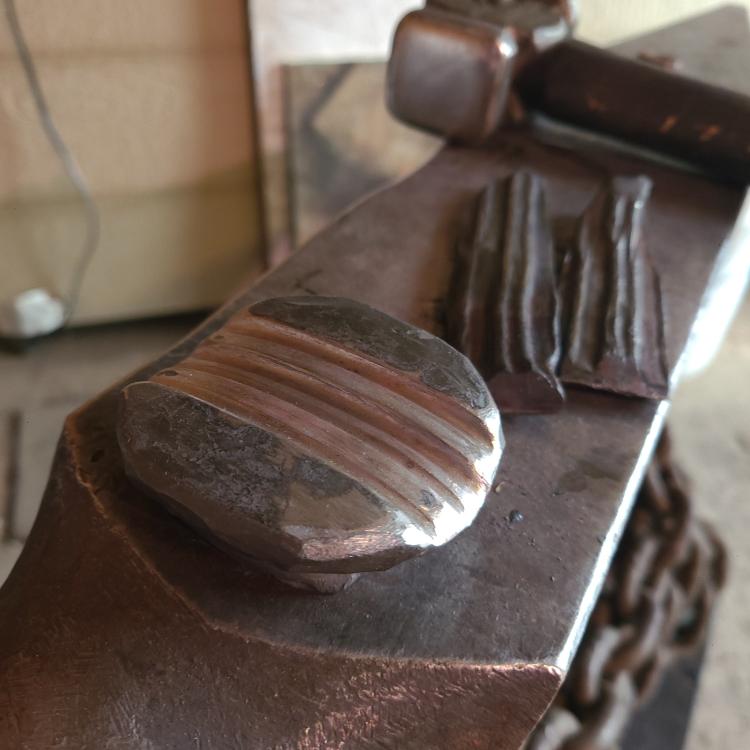
On today's episode of Tooling Up. Woke up and got in the shop to heat treat a hot chisels and itisy bitsy hand fuller, that I forged out yesterday, got all the way through normalizing lastnight before the wife called me in for dinner. But I got back at it this morning. After quench and temper, I put them to work with this decorative test piece. I think im going to make another hand fuller same width but a little longer, might make it easier to clean up the lines, and keep in its tracks for the longer runs. The chisels works pretty well, but I may make another one with a bit with a bit finer taper to the bevel.
-
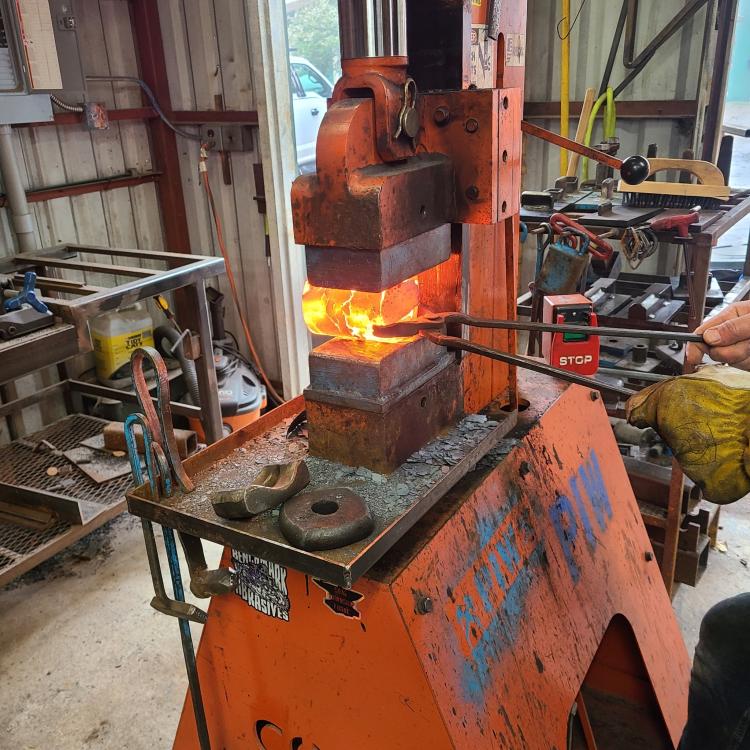
The forging press is pretty amazing. After running the 18 ton press, a few days I am seriously considering selling my car for one of the bench top 12 ton forging presses. My shop is not much bigger than a large shipping container, so floor space is limited. But what an arm saver.
-
Frosty. It's a great tool for sure, I have used the Coal Iron Works press a few times now, for Making hammers and some hand fuller, and this sledge. The press is a little intimidating for sure, I feel more comfortable on his powerhammer than using the press. But that thing moves some material with ease. It's amazing.
-
Yeah, it is a pretty good feeling for sure. I am looking forward to working out a too tool to match, I think I like the form enough to use it again in the future, so having all the tooling for it will be an advantage. Also I still been to form this strap into a ring so some sort of top tool that won't mar my shapes will be integral to getting the ring to shape. I wish I had a treadle hammer, but I don't really have much room in my shop for big equipment. So ill just have to get bigger arms. Or bigger friends to do some striking for me.
-
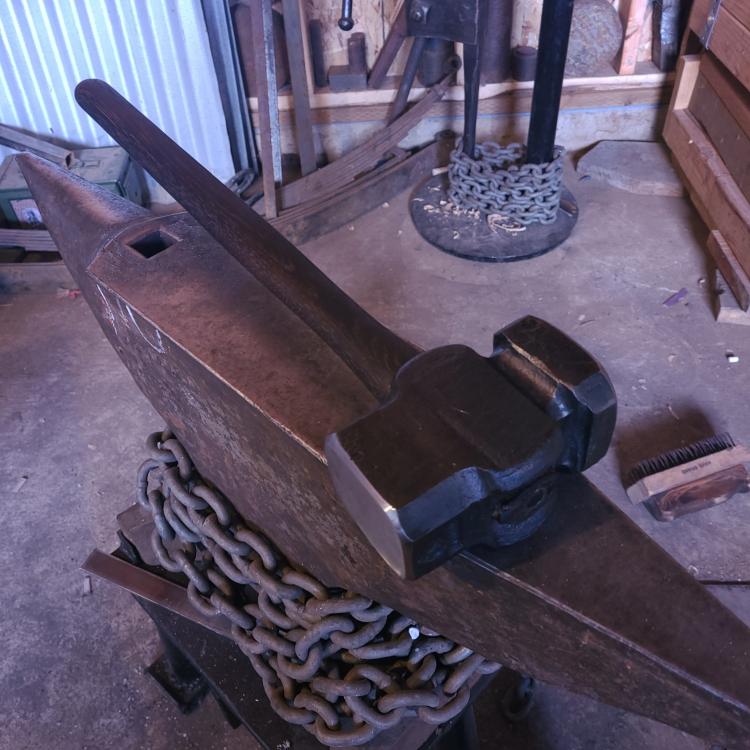
It was about 7" of 5.5"round 4140. Thanks Frosty. I can't wait to make some hammers with thus beast.

-
Just made this 13lbs. sledge over at a buddies shop. He has a coal Iron Works forging press, and all the proper tooling to work this much steel. Made short work of it. also, Firdinand please share a photo of the 42lbs hammer!

-
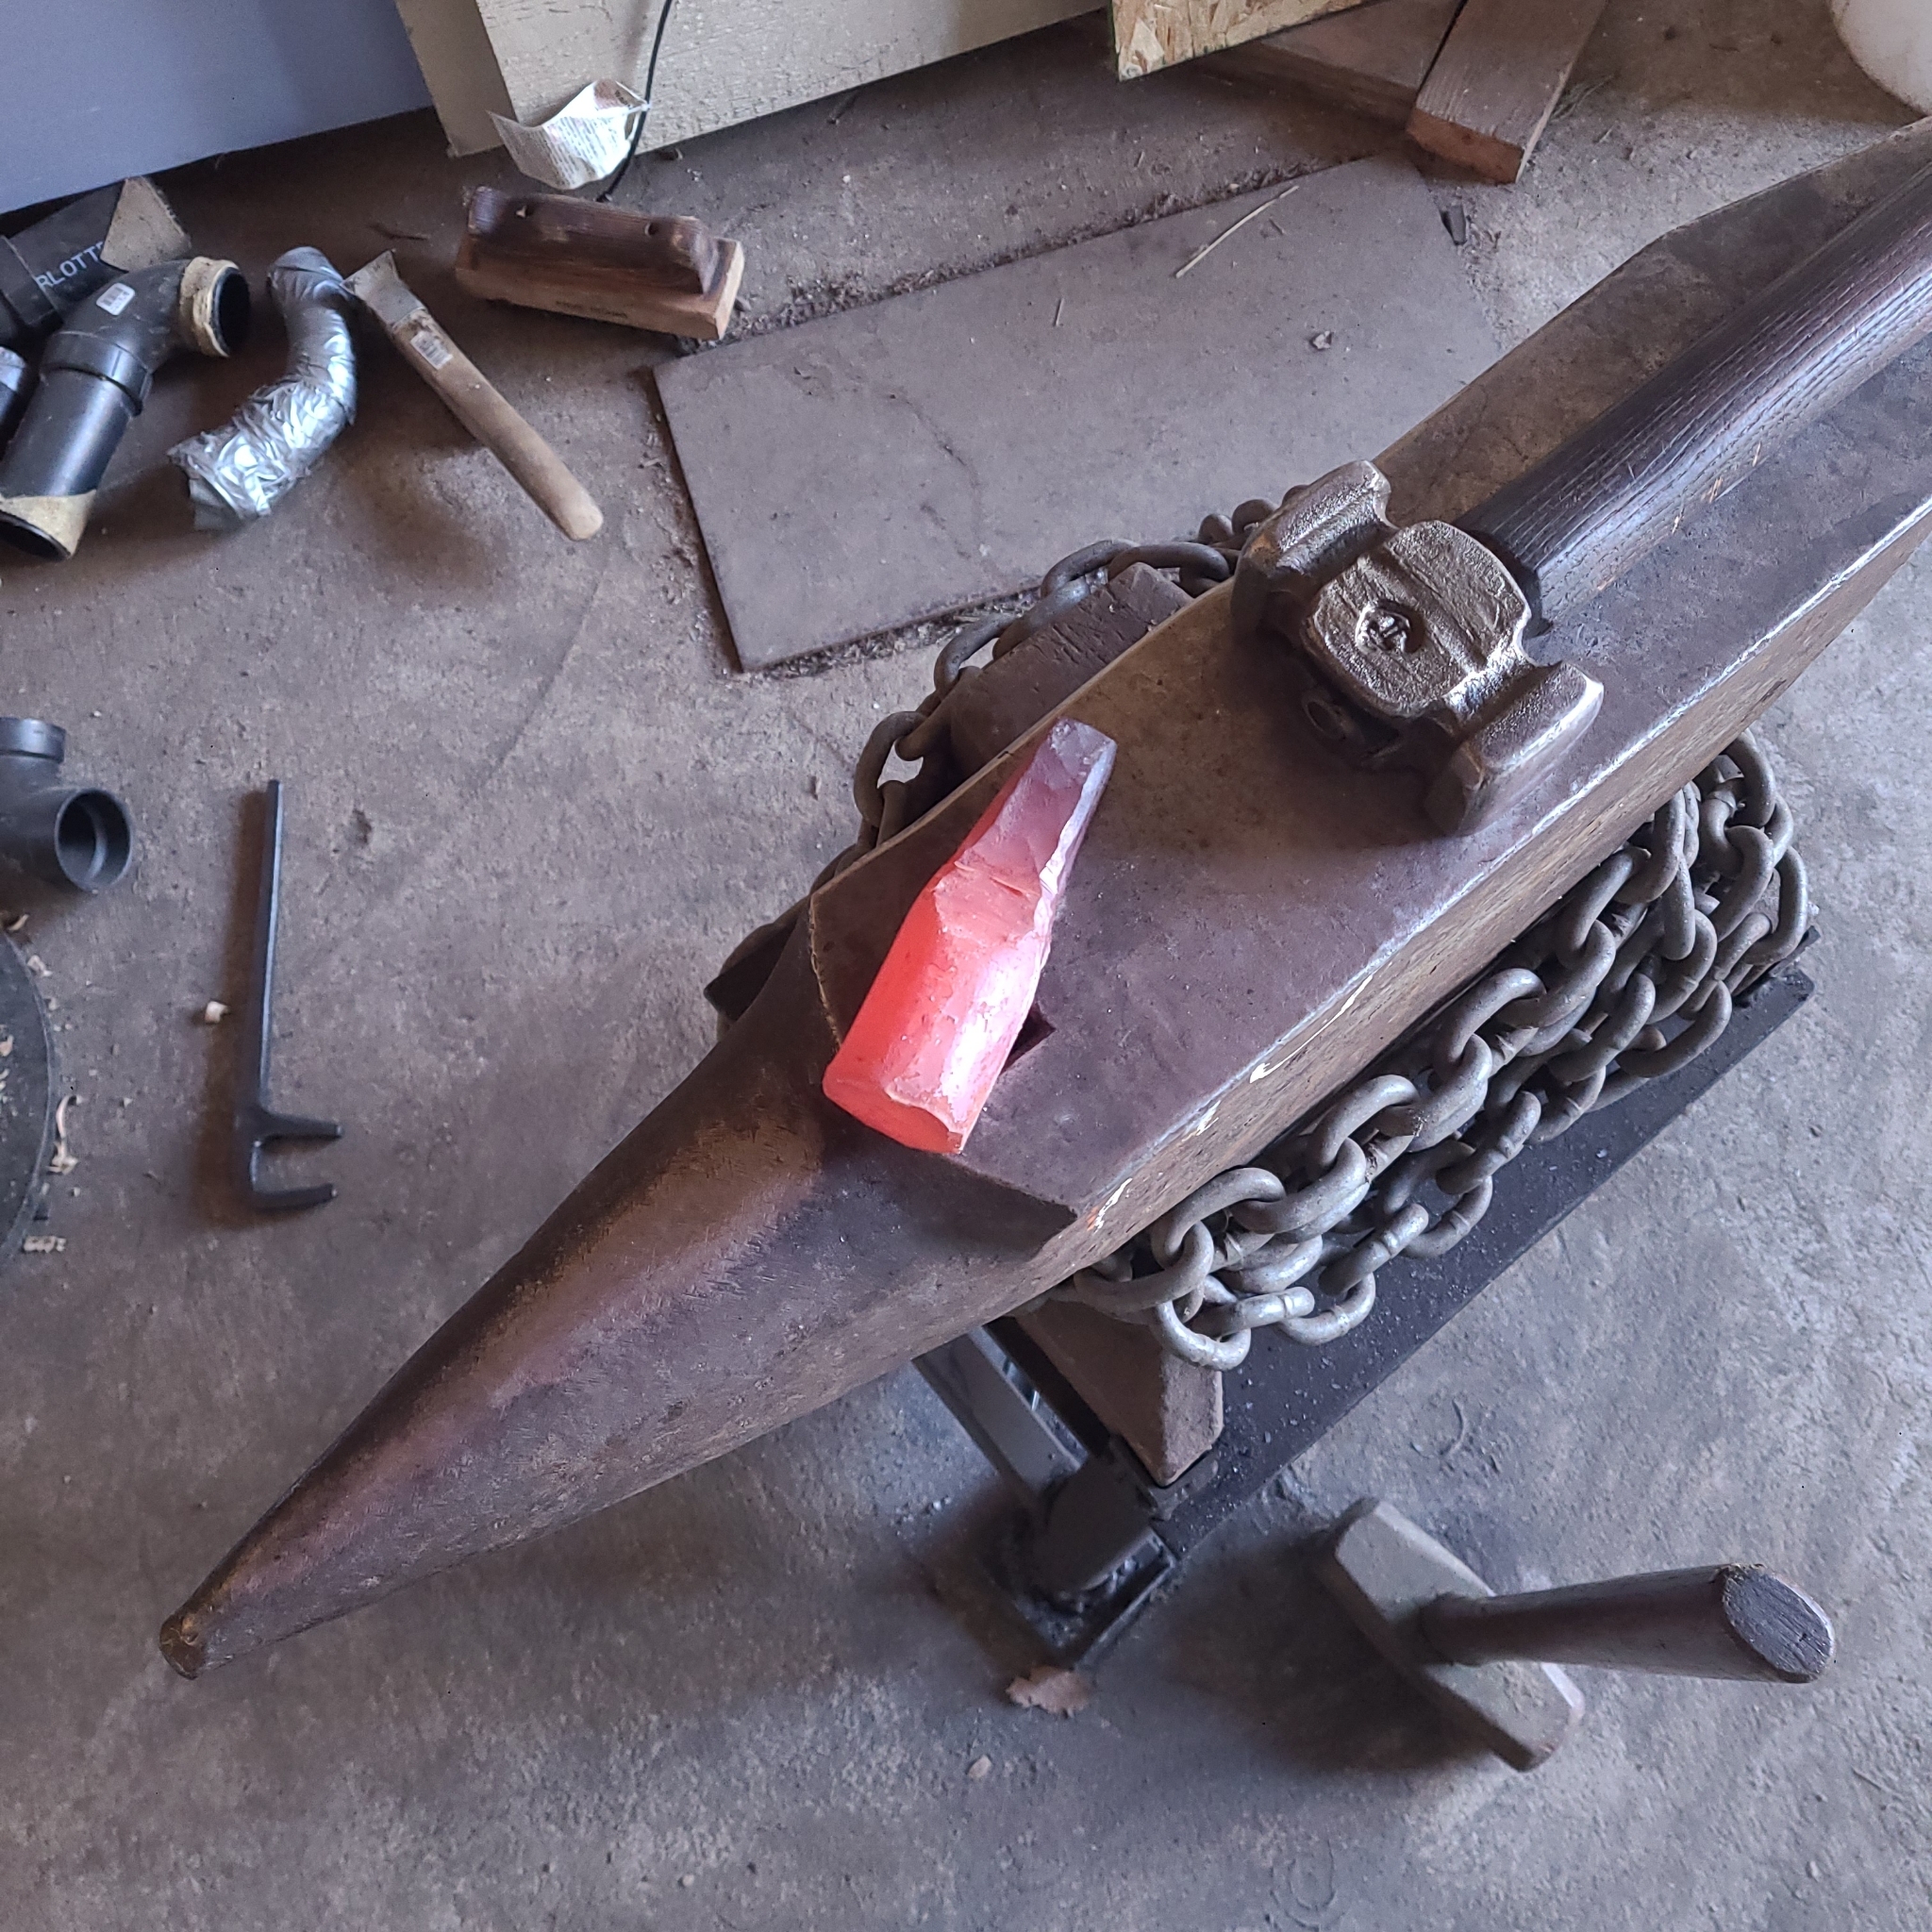
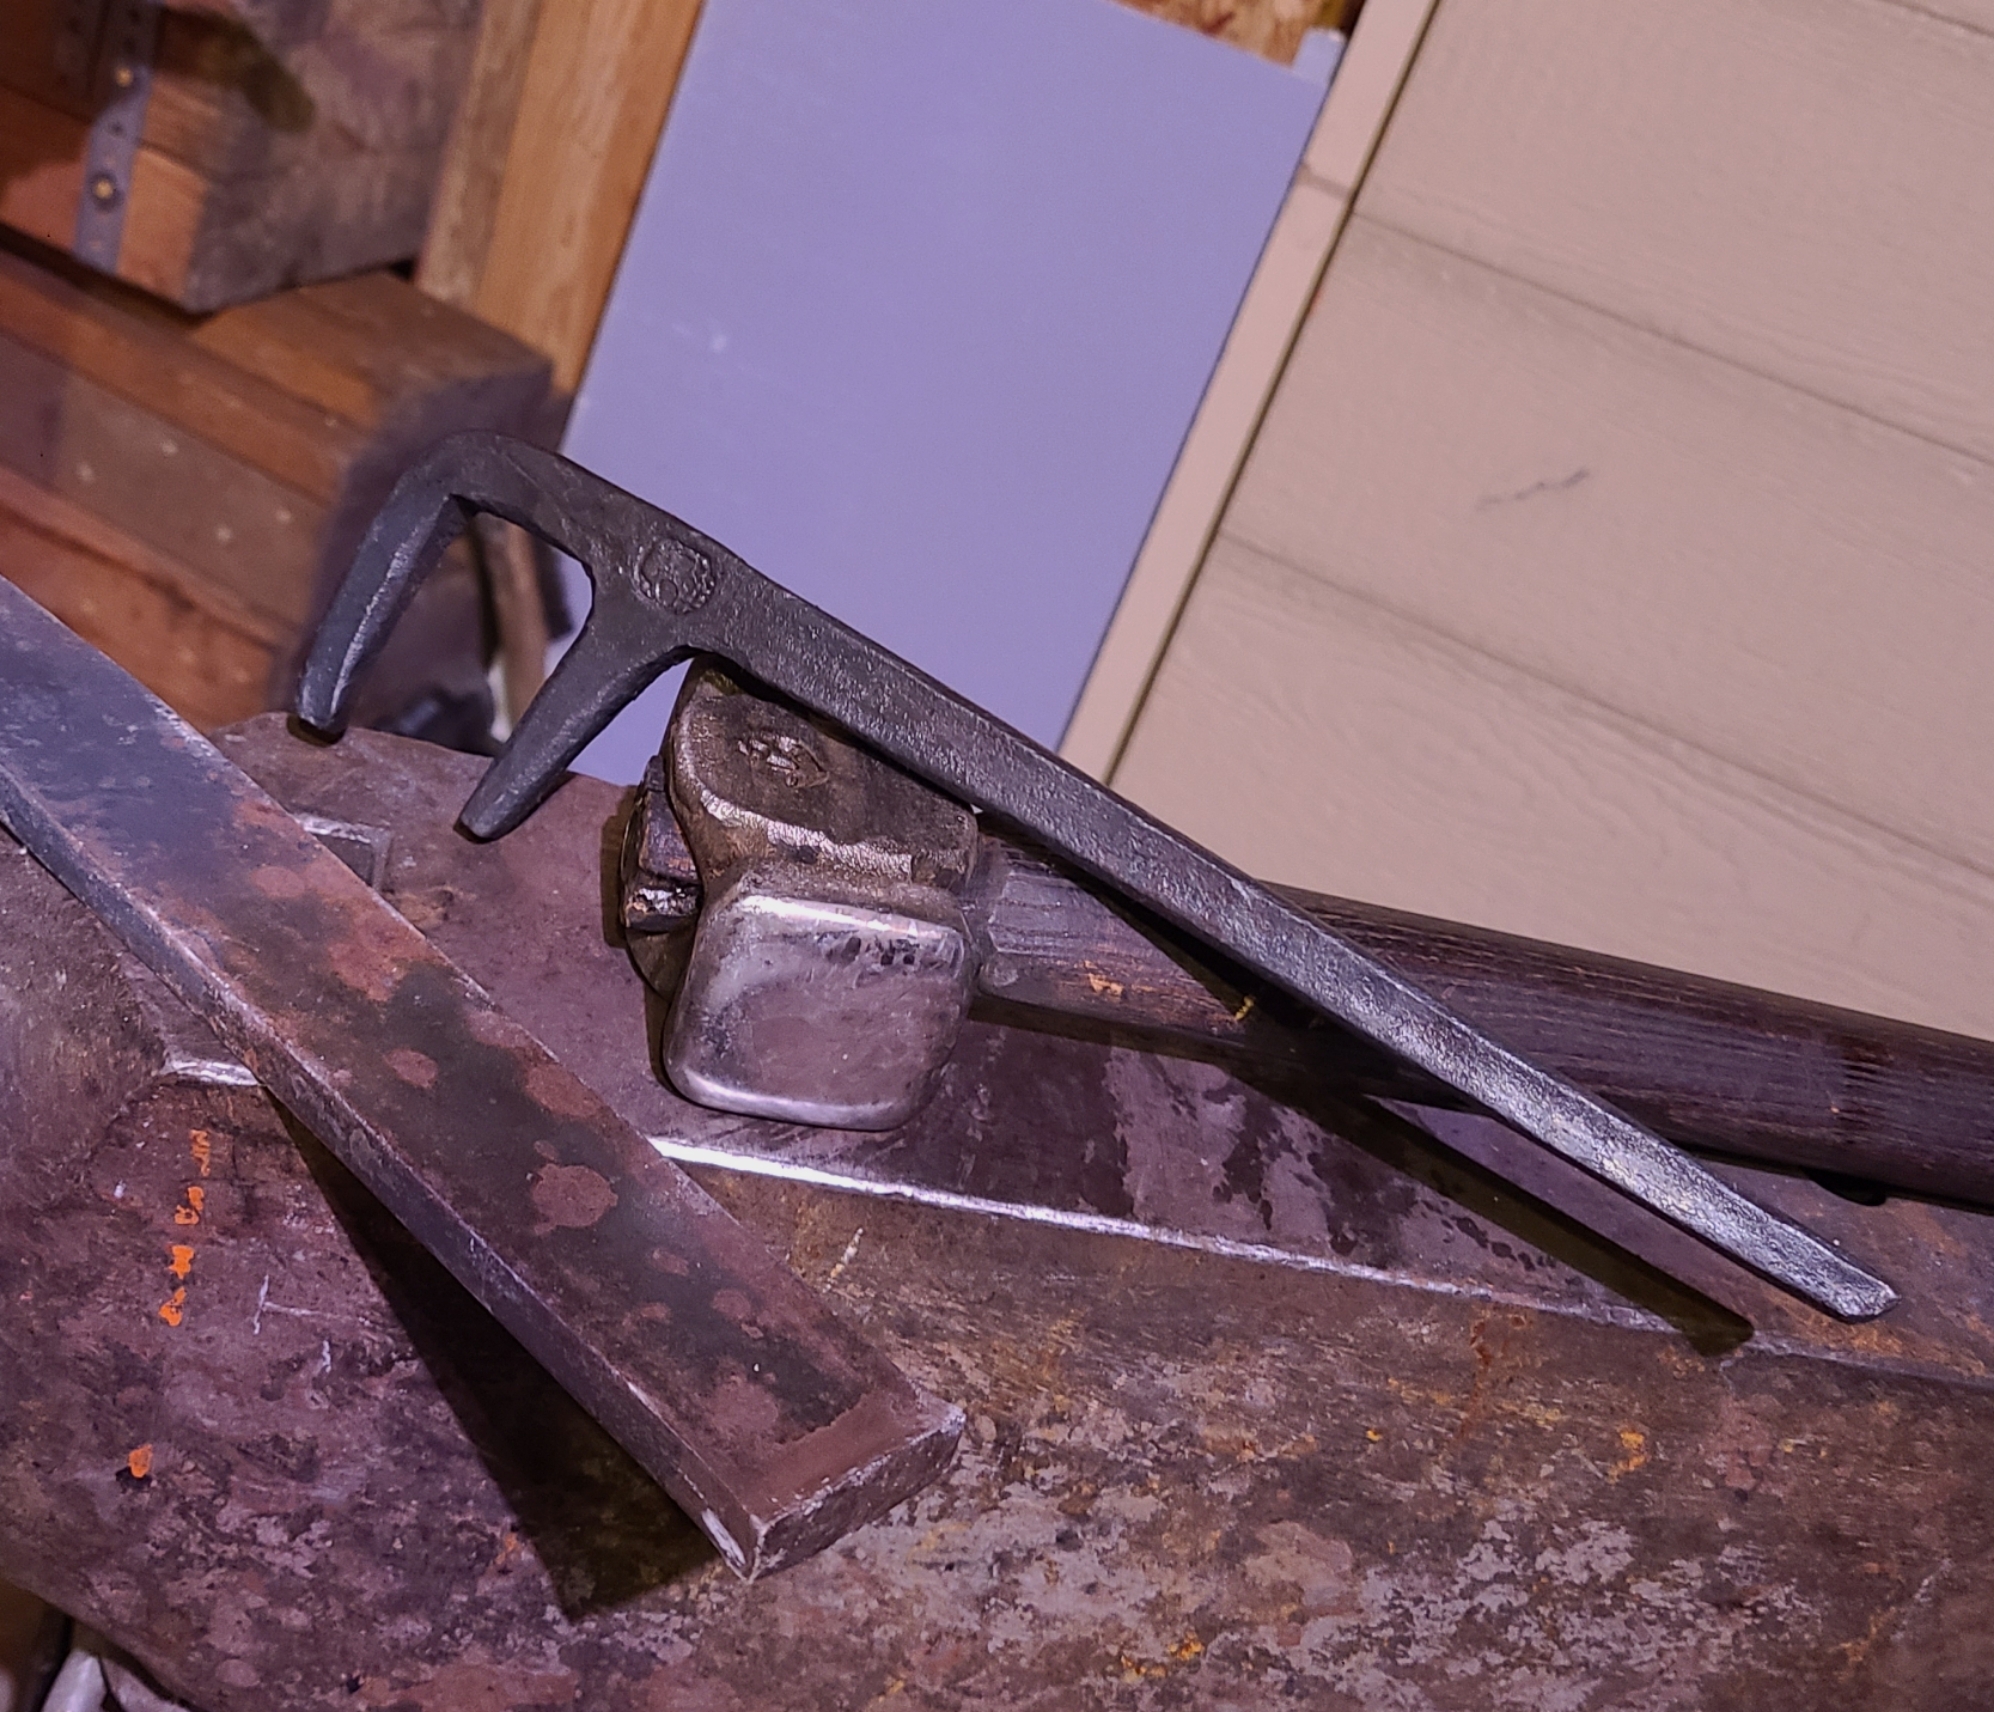
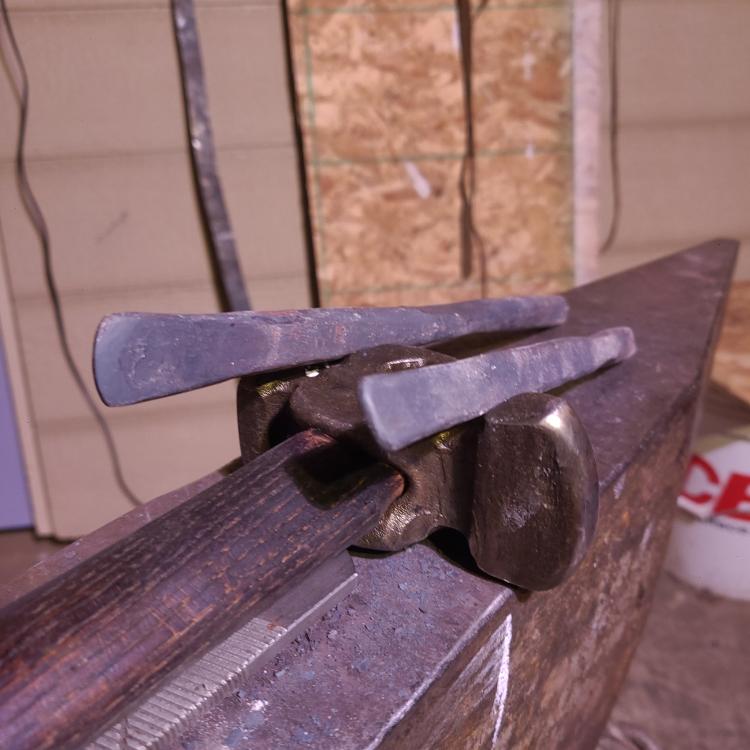
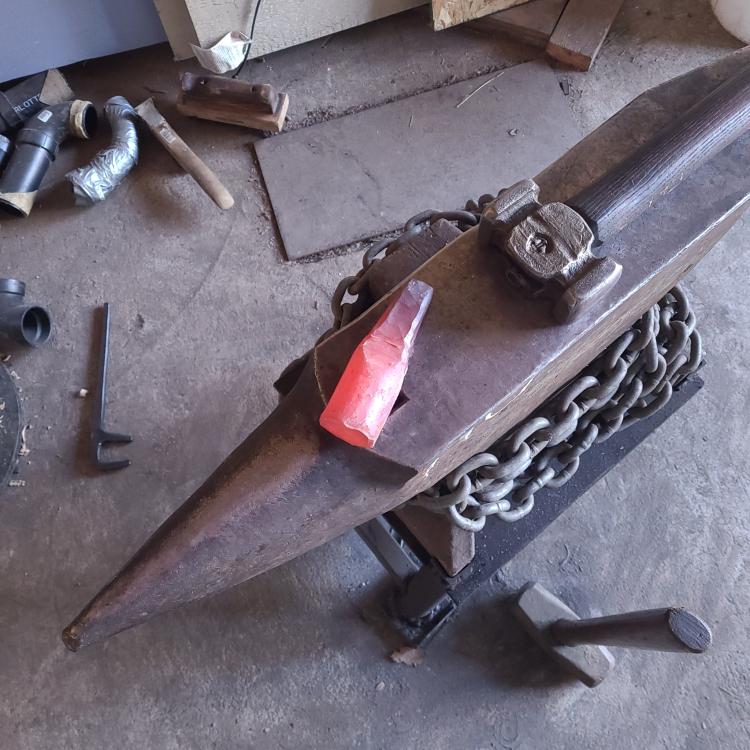
Thanks, I think I will be making a top tool to match this strap. I messed with the die some more today, I had some flat bar stock laying around that was just about the perfect size to fit the die. (much easier to keep the workpiece going straight). I also used a 4lb hammer instead of my2.5kbs turning hammer. I was able to get a pretty decent forging of about 34 inches of length. With just a few nicks from the die, due to some unseated strikes. Oops. Oh well l, I think I only need 2 lengths at about 12.25 inches, so I should be able to pick some clean sections. Still gotta get the flashing cleaned up. But im pretty happy with the outcome so far.


-
Quick addendum, the reigns and clip ring will need to be adjusted for comfort. But they will hold the stock I need em to.
-
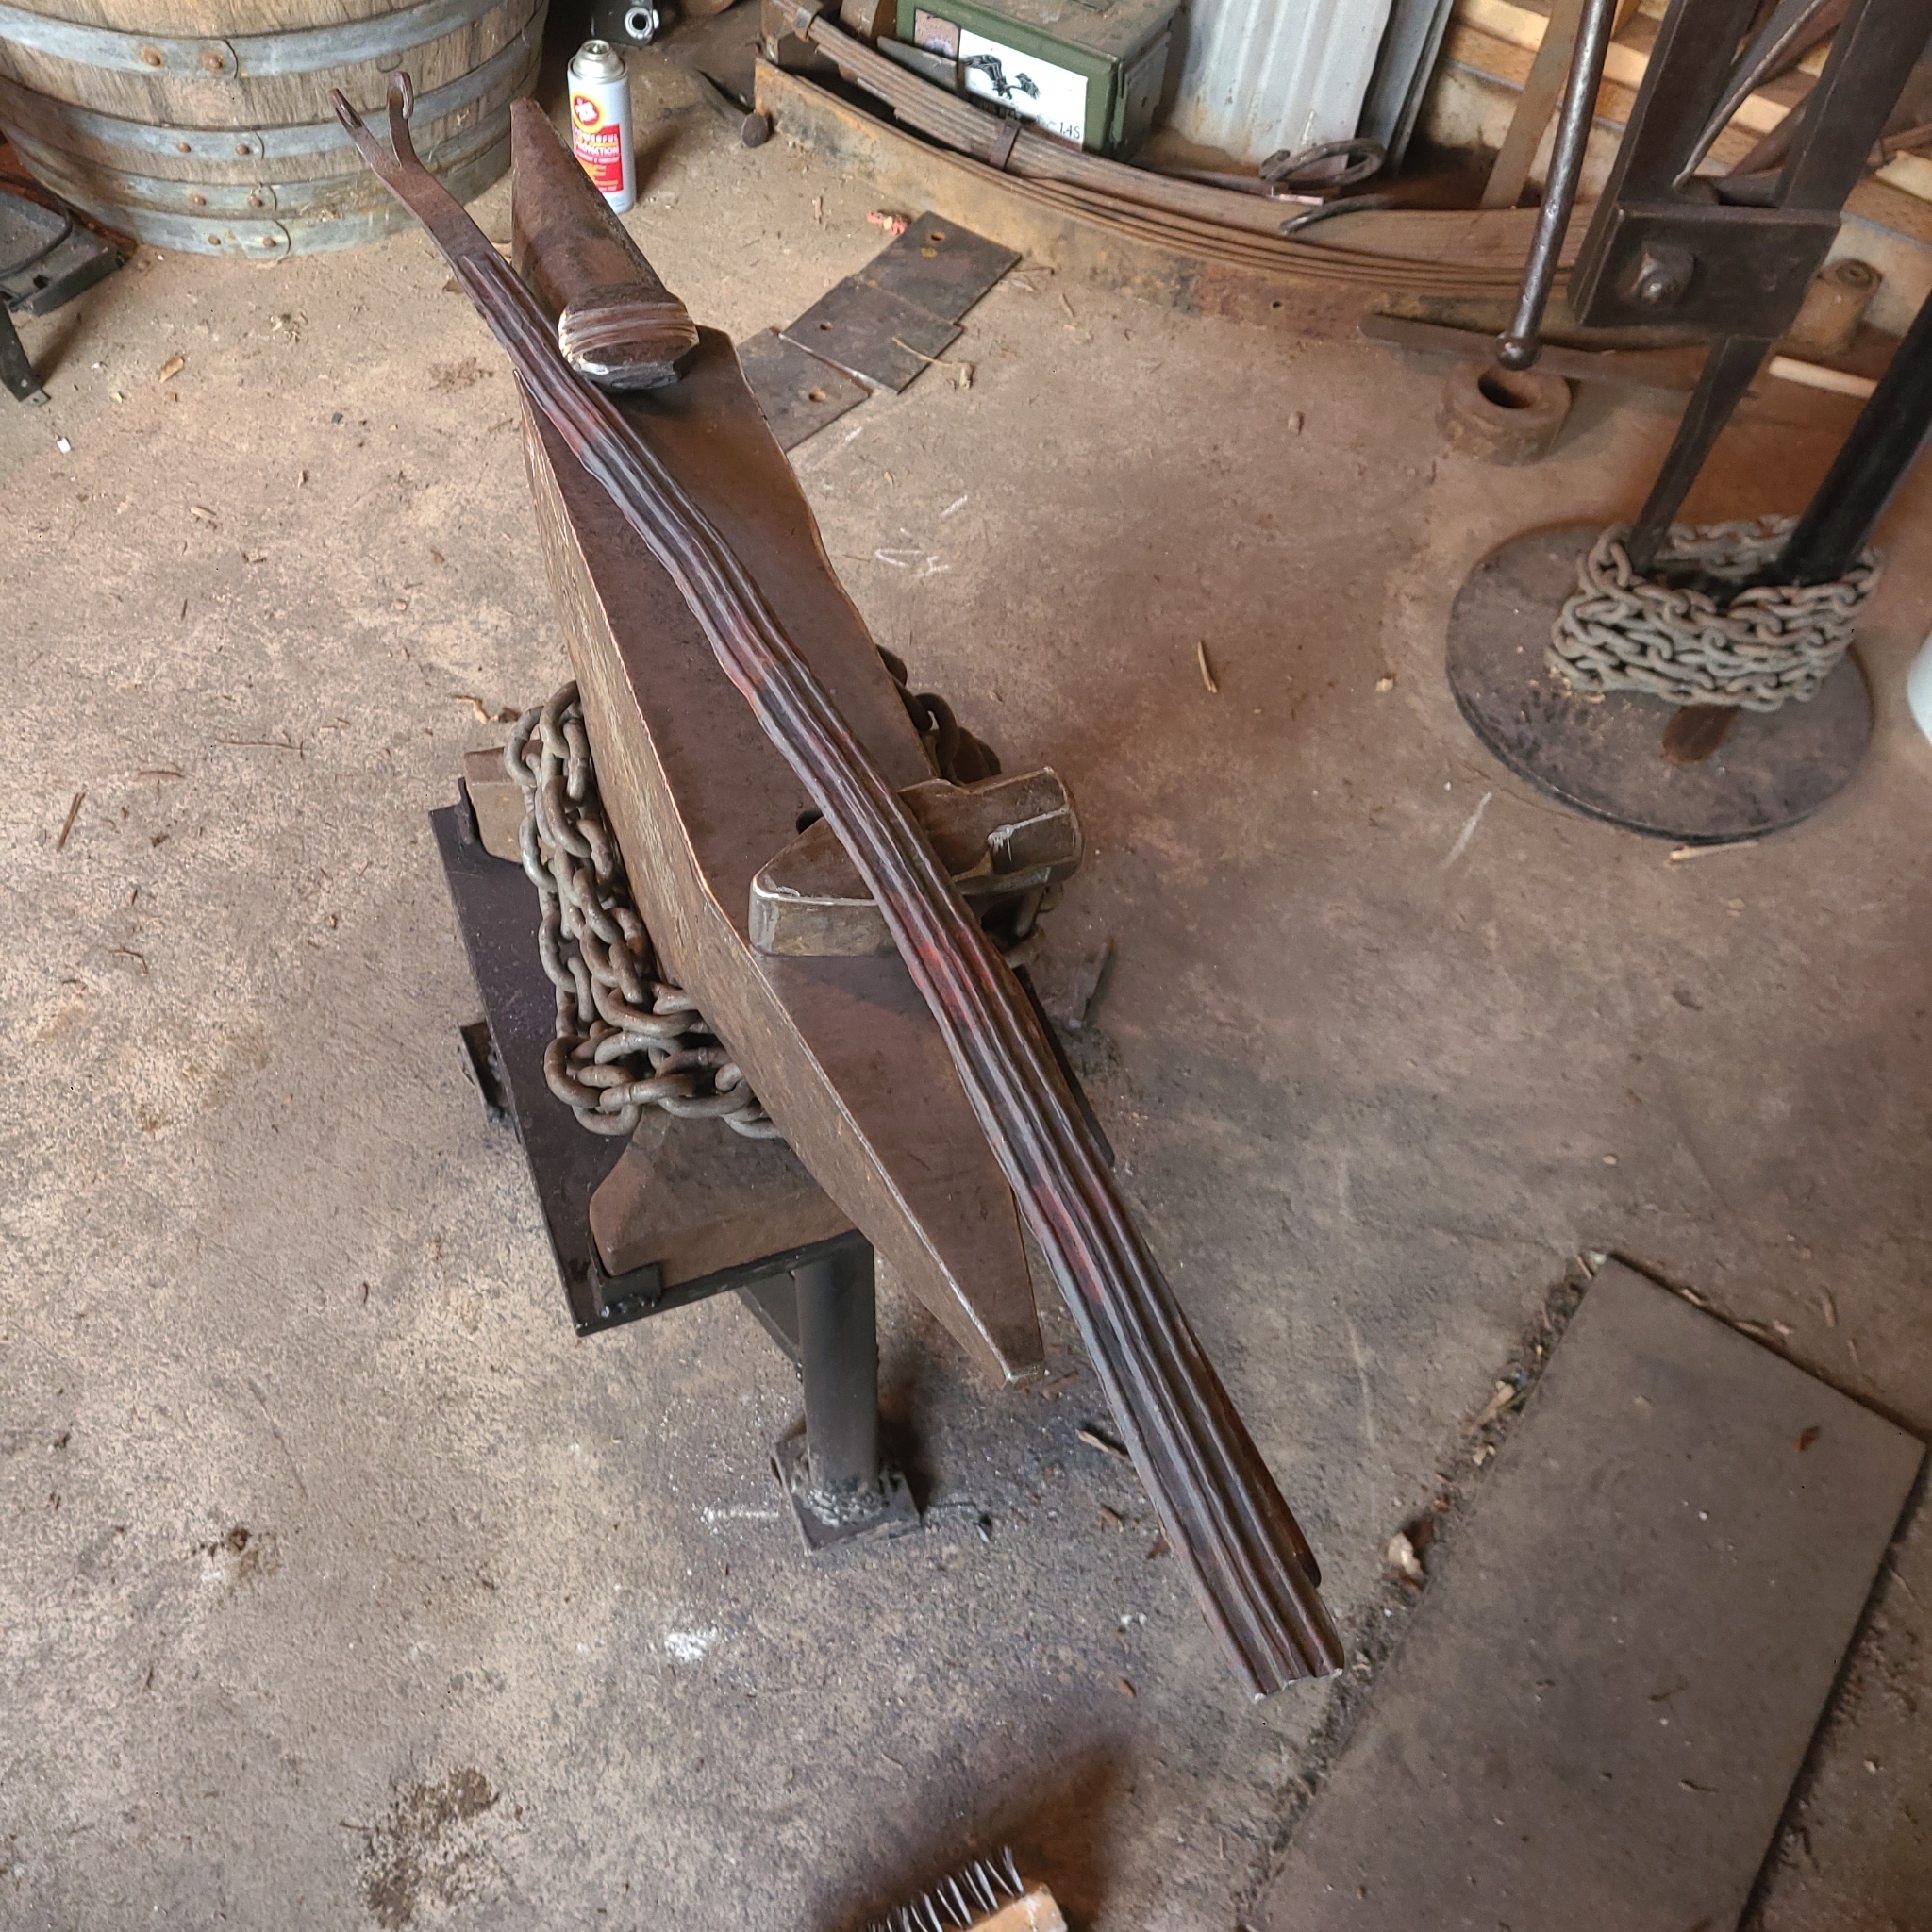
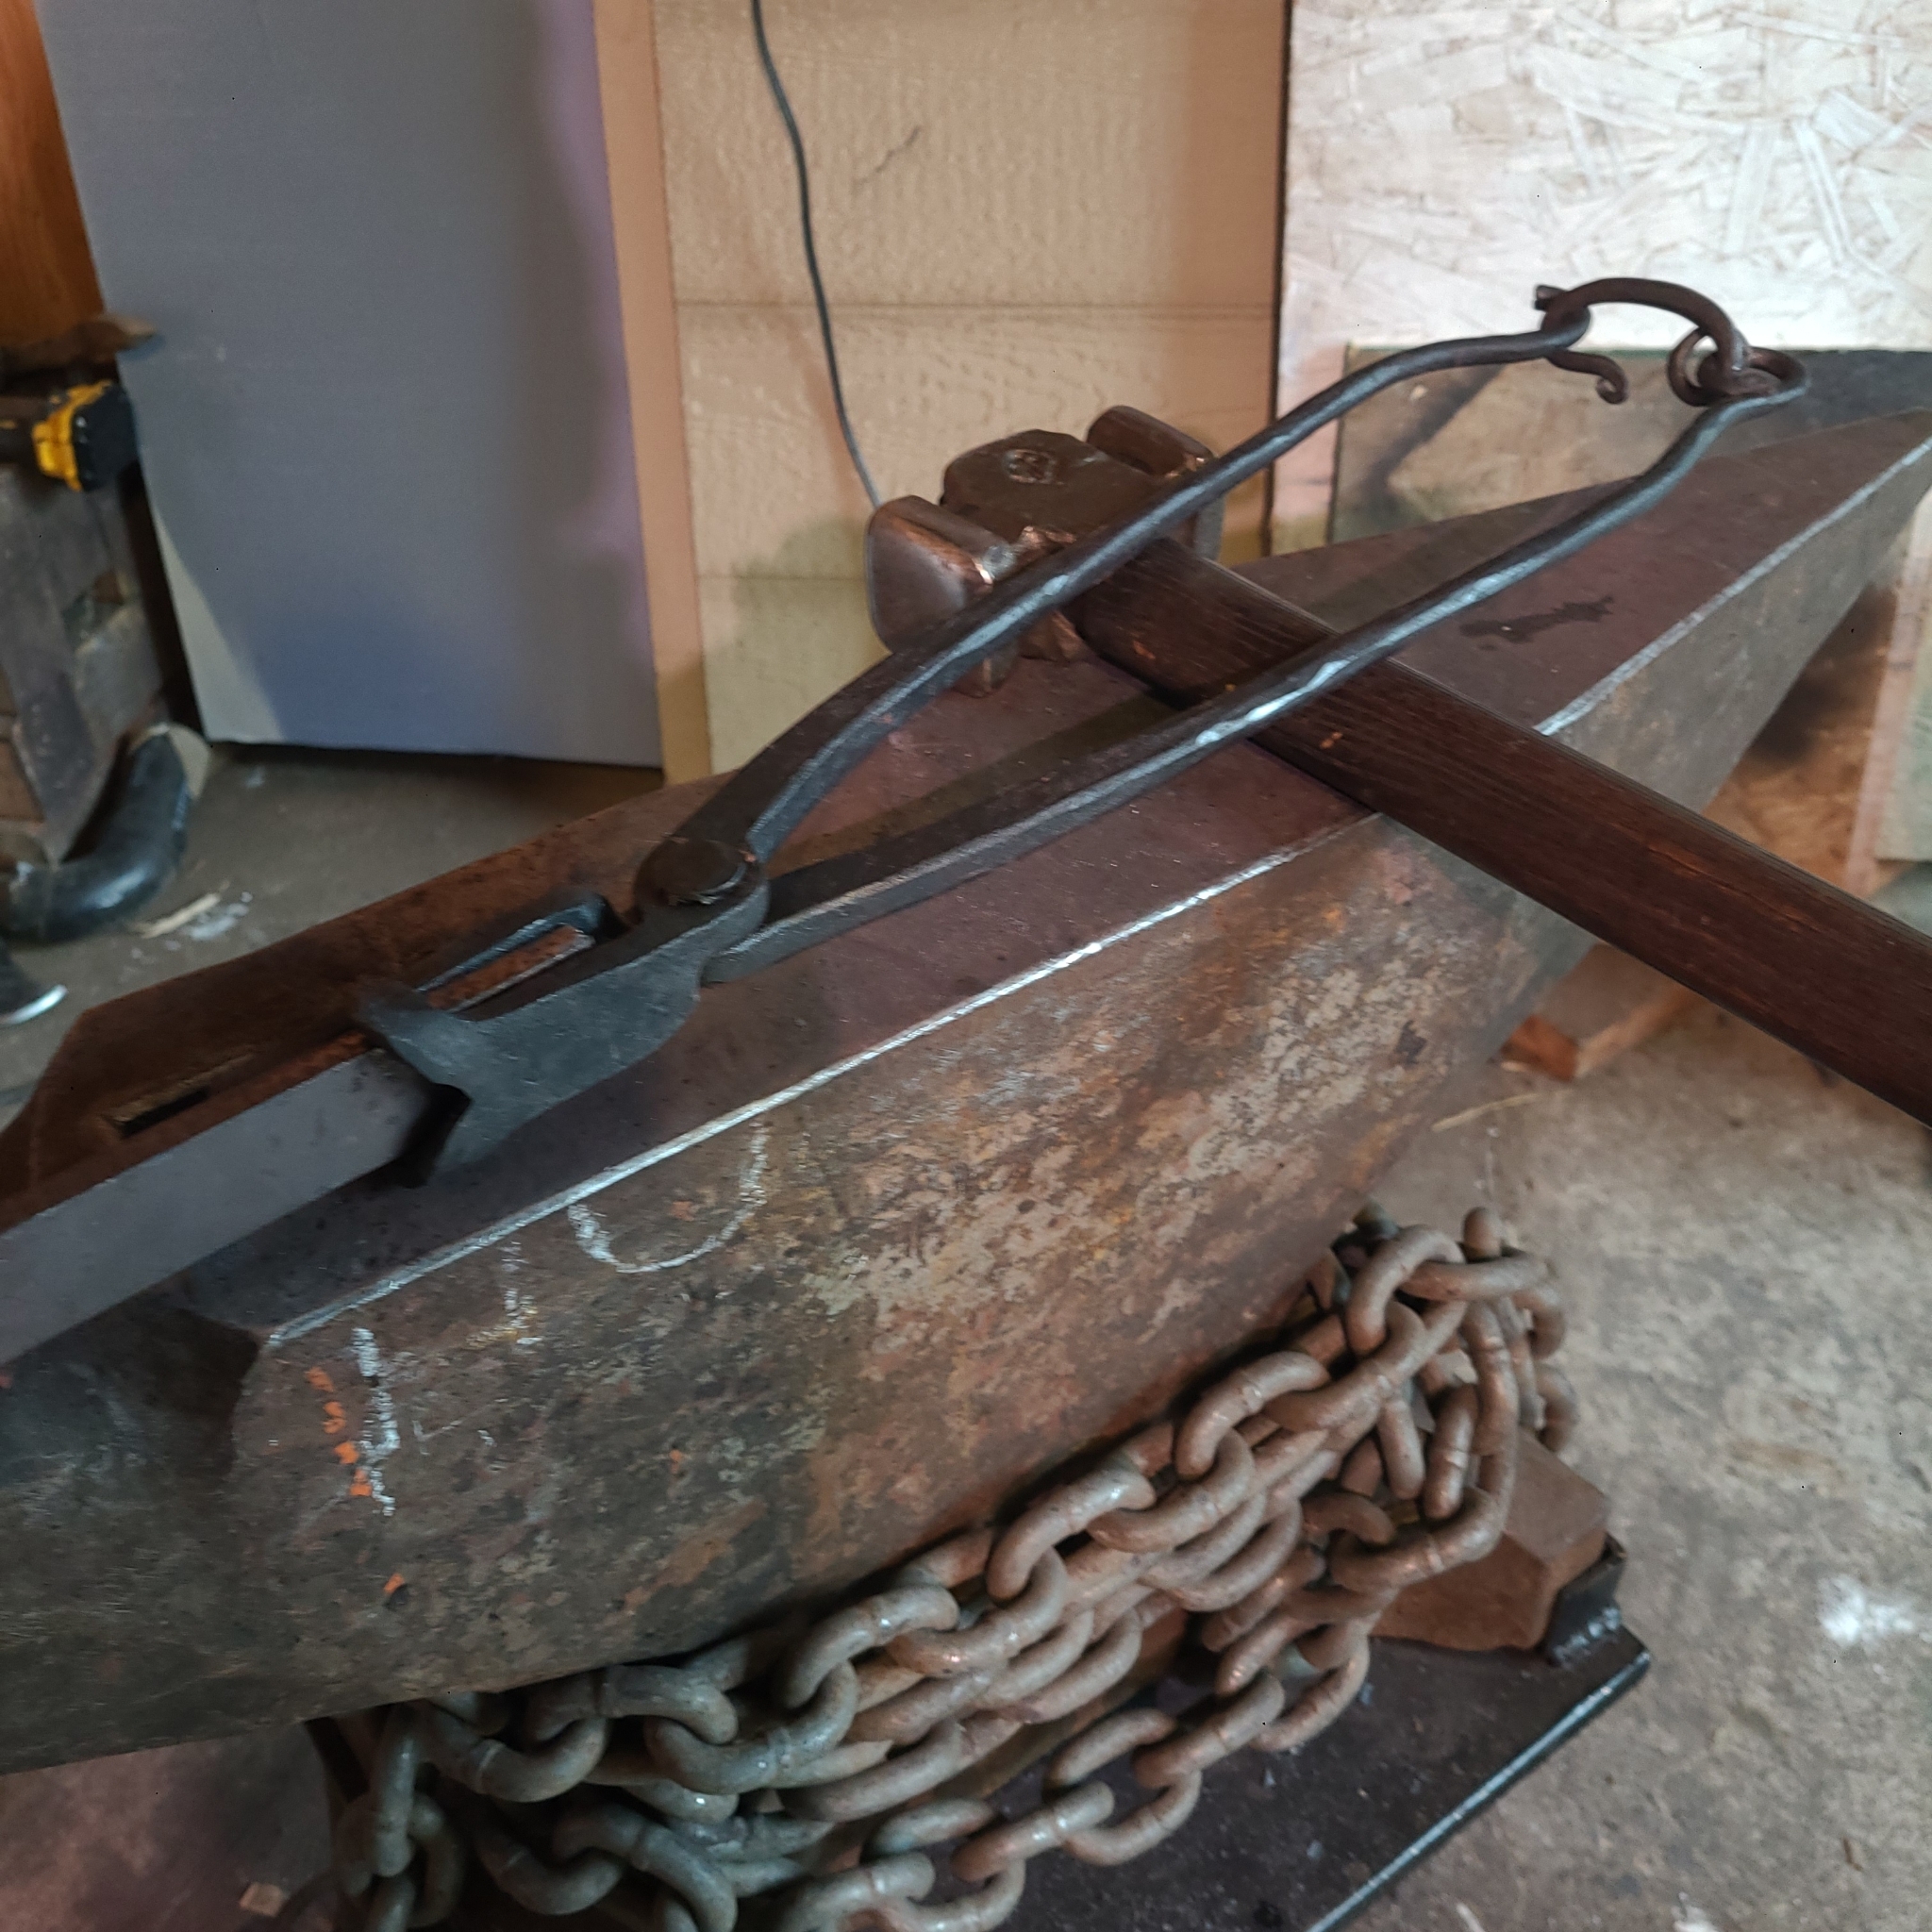
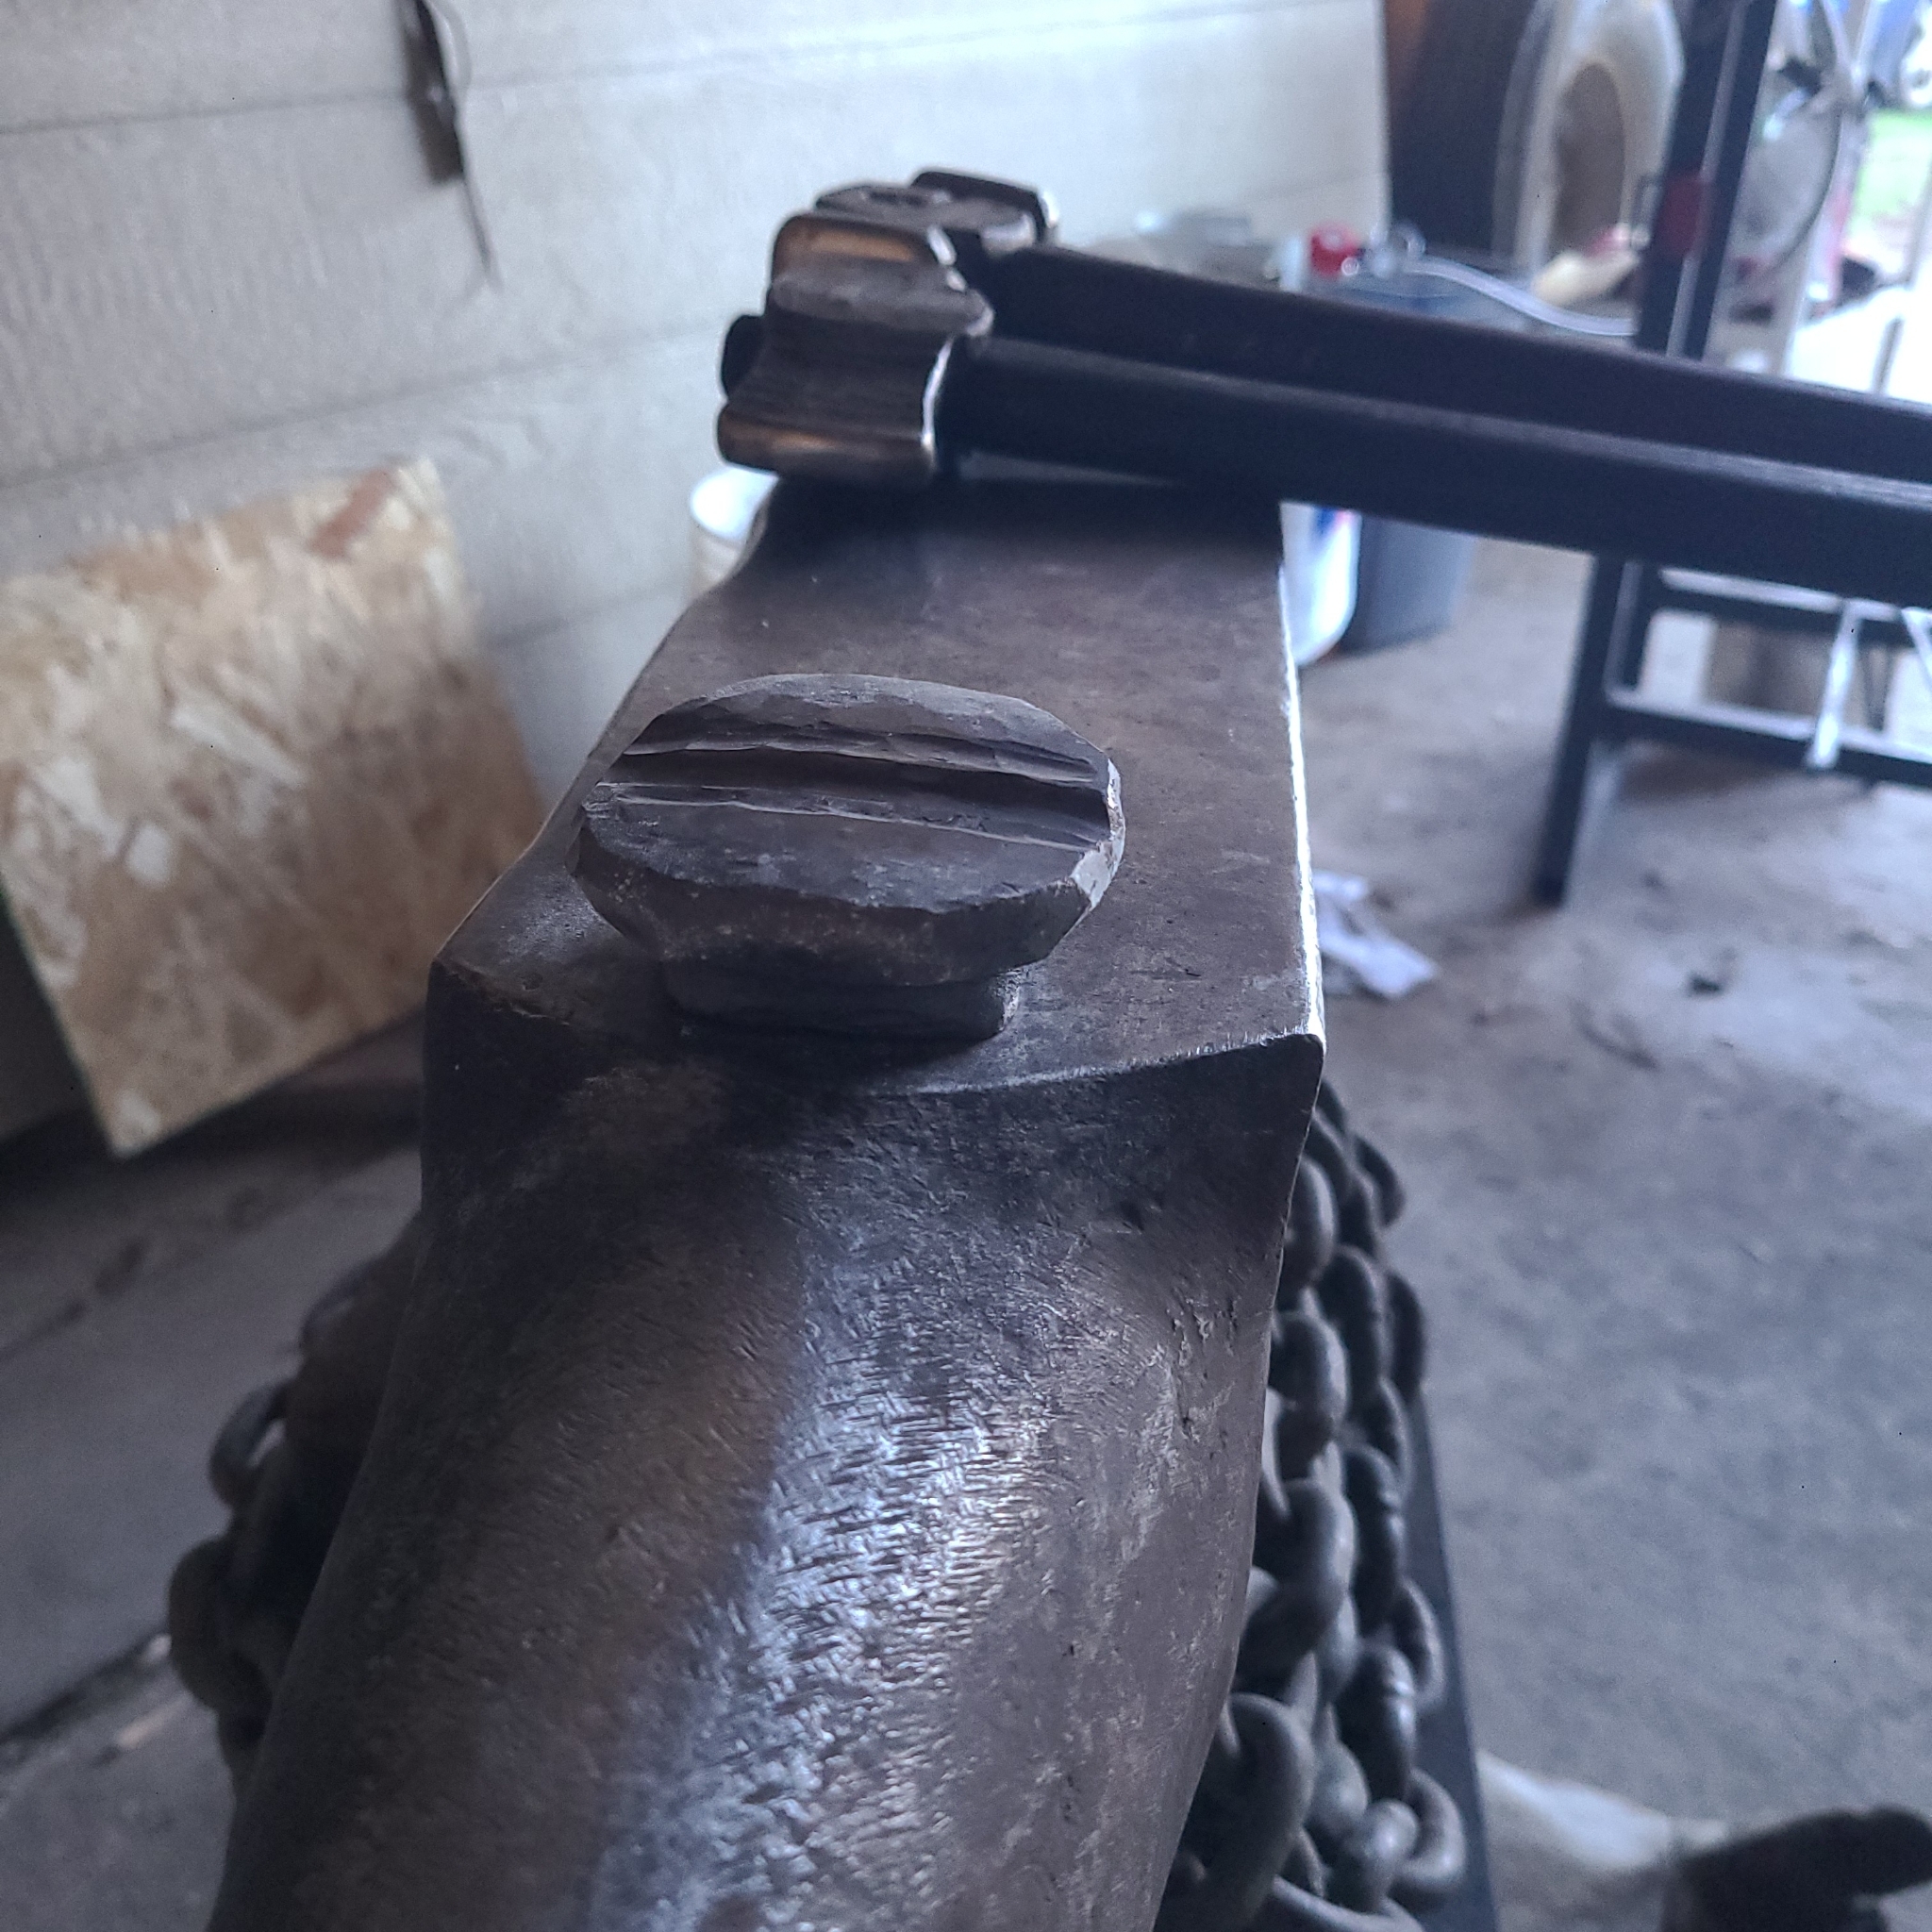
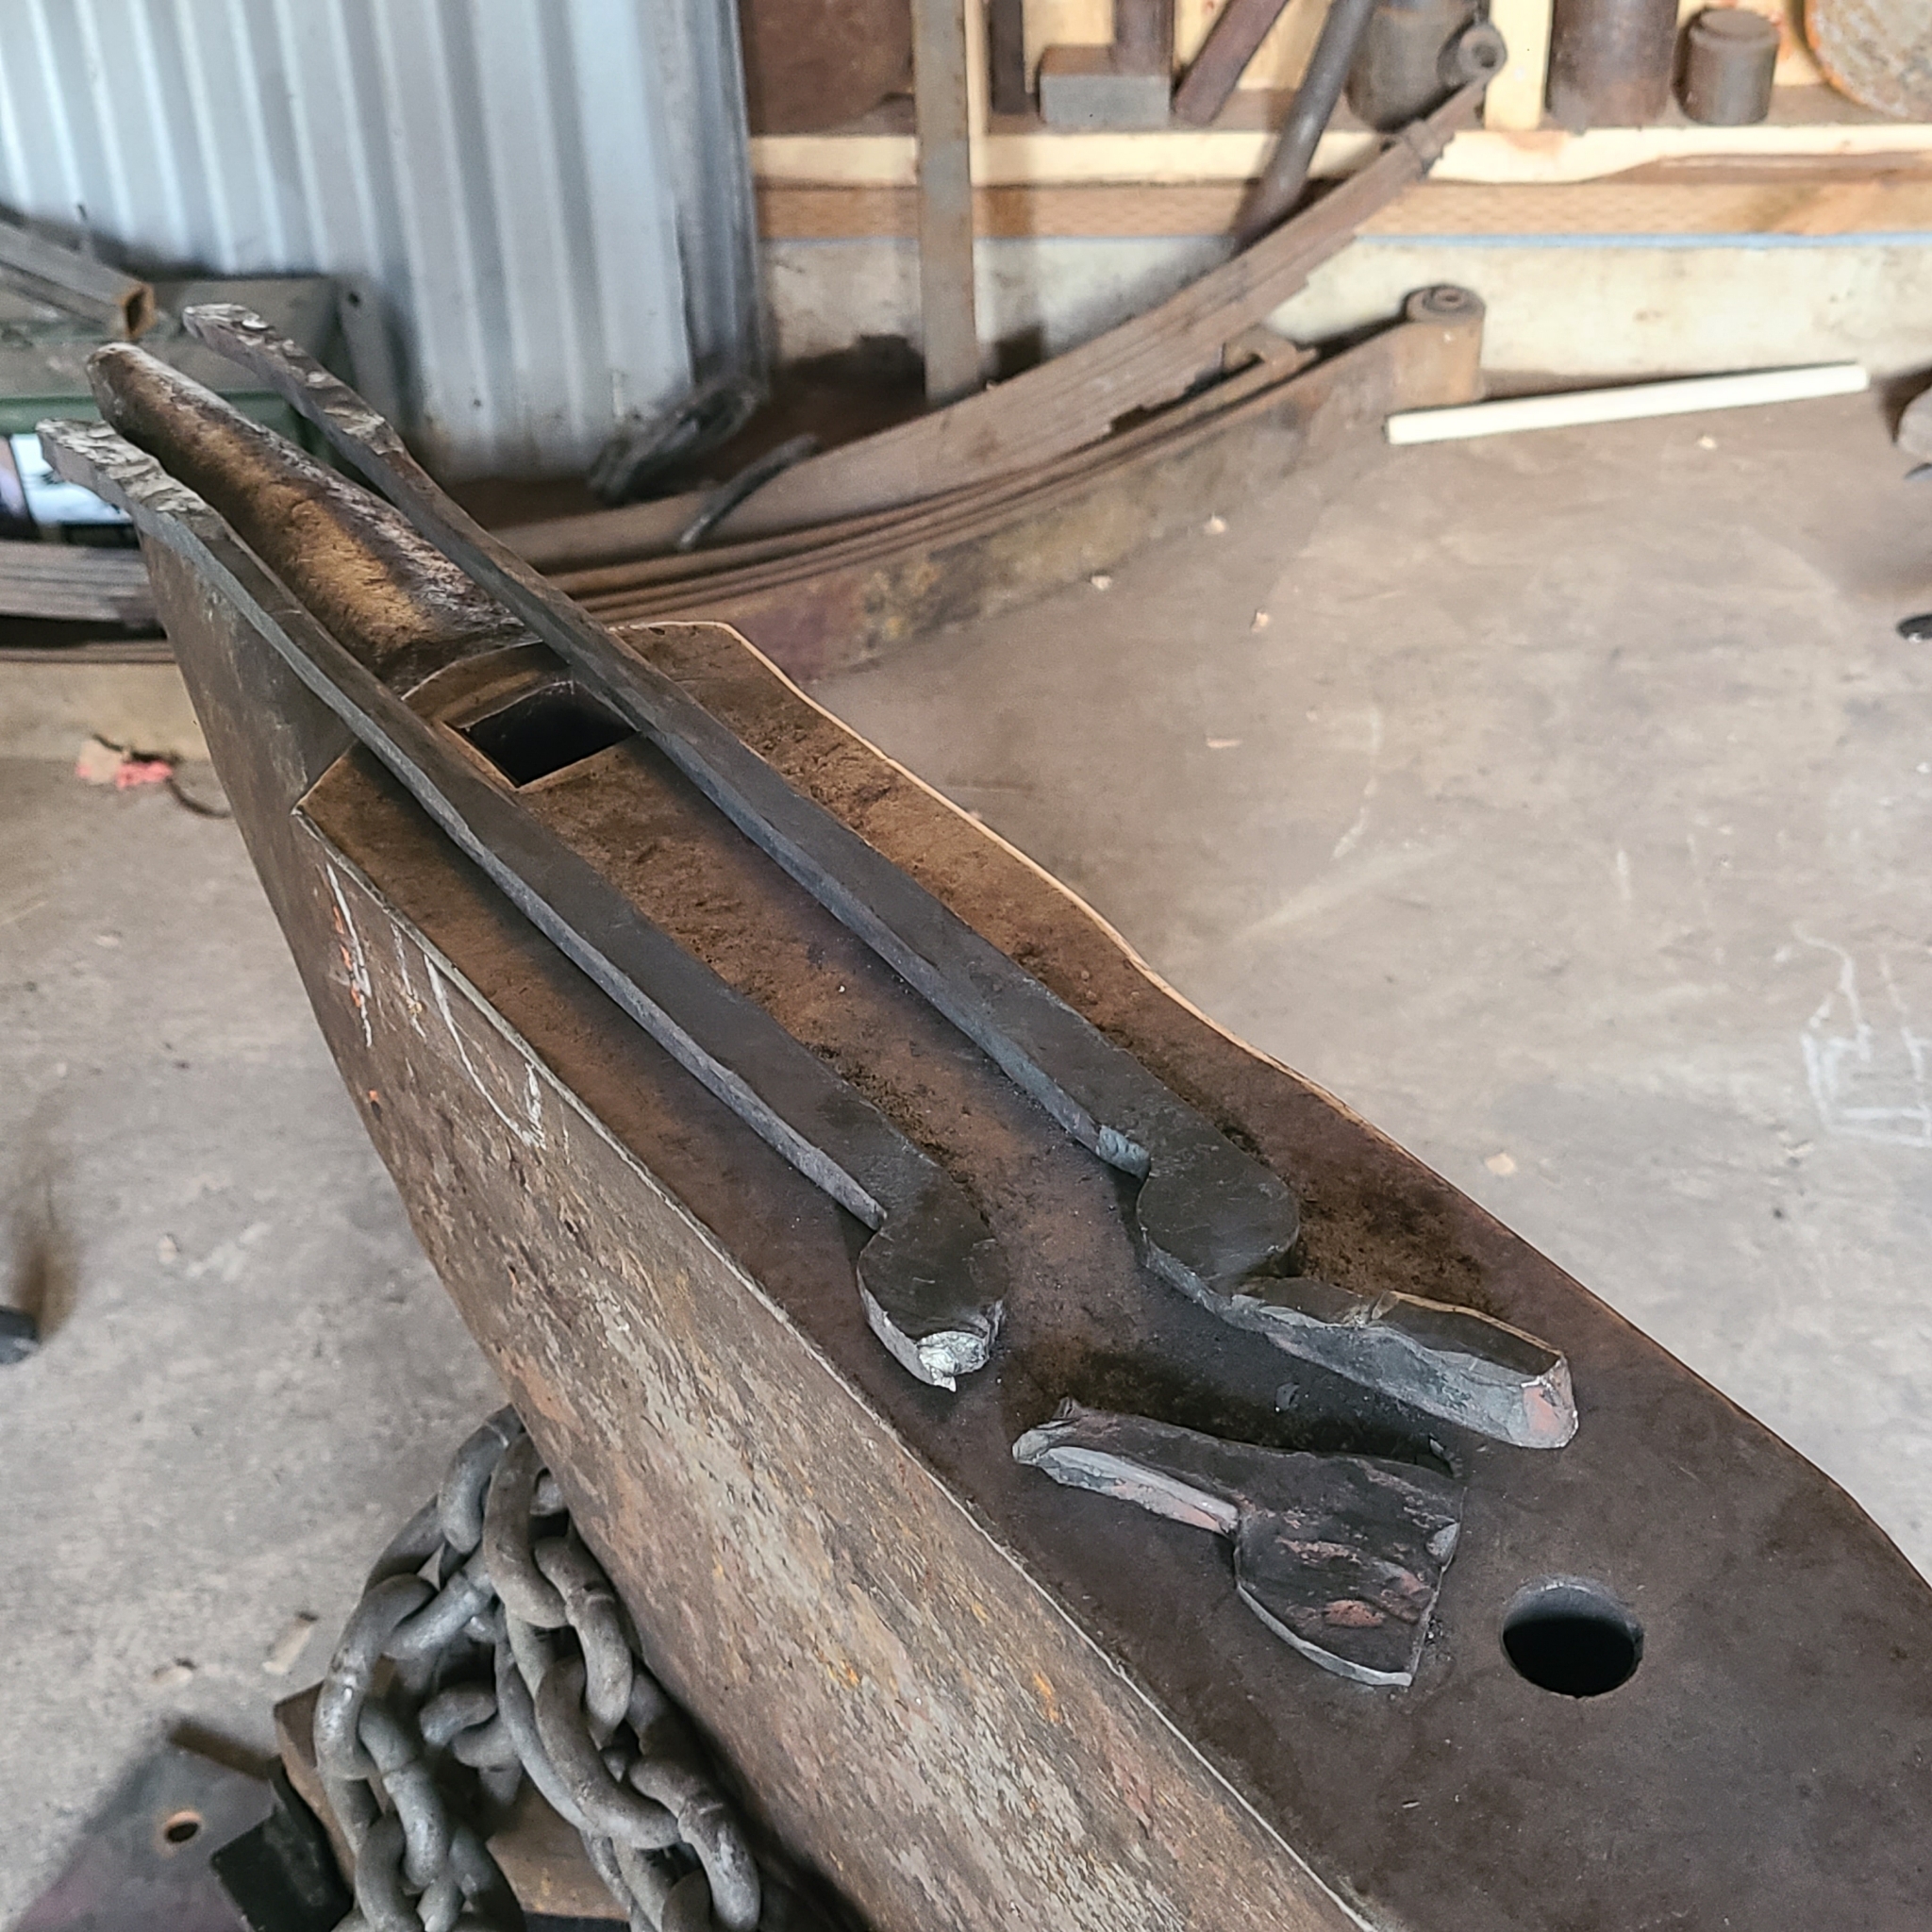
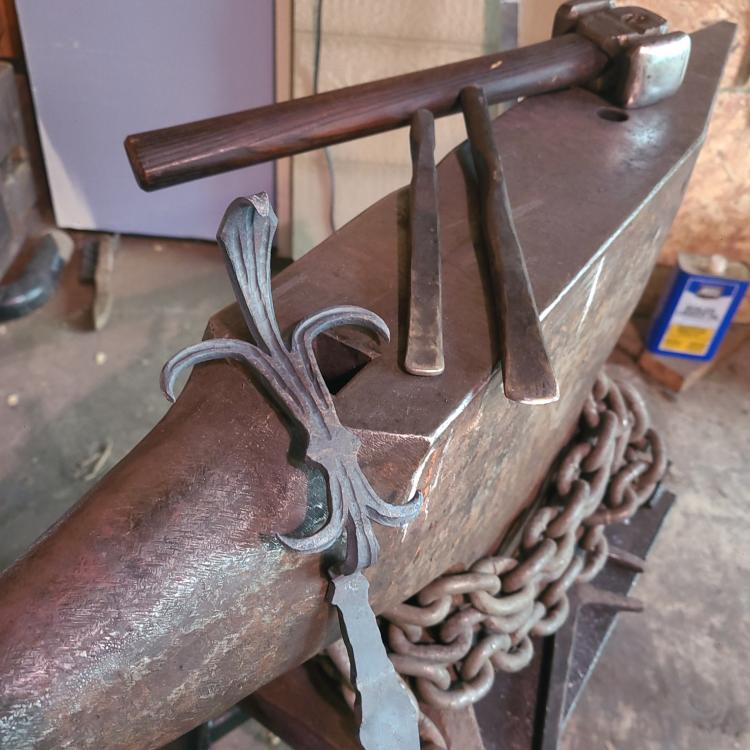
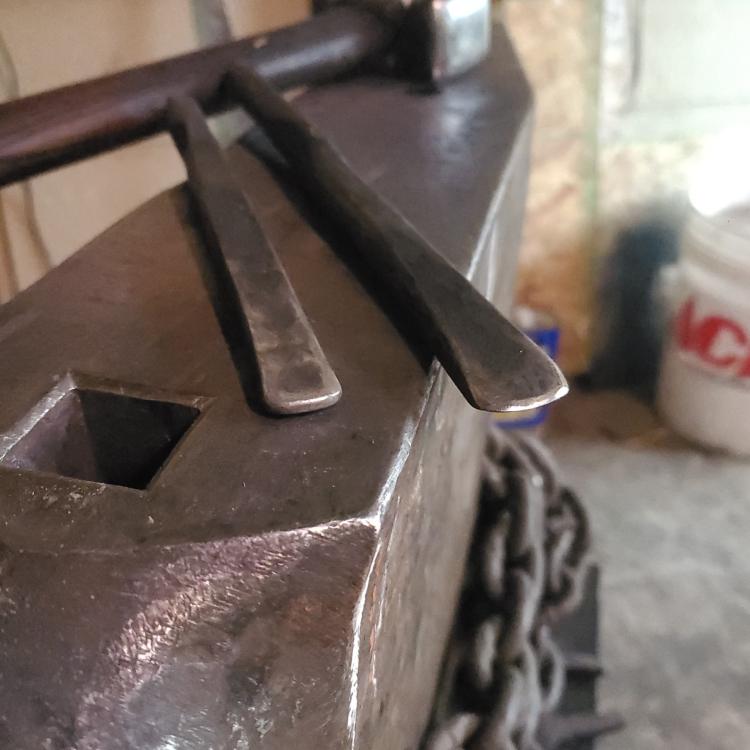
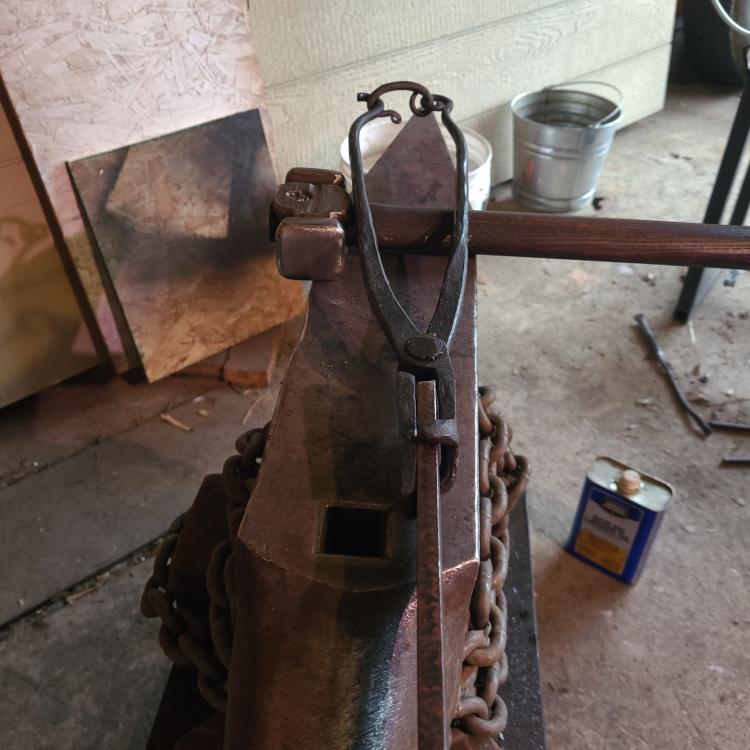
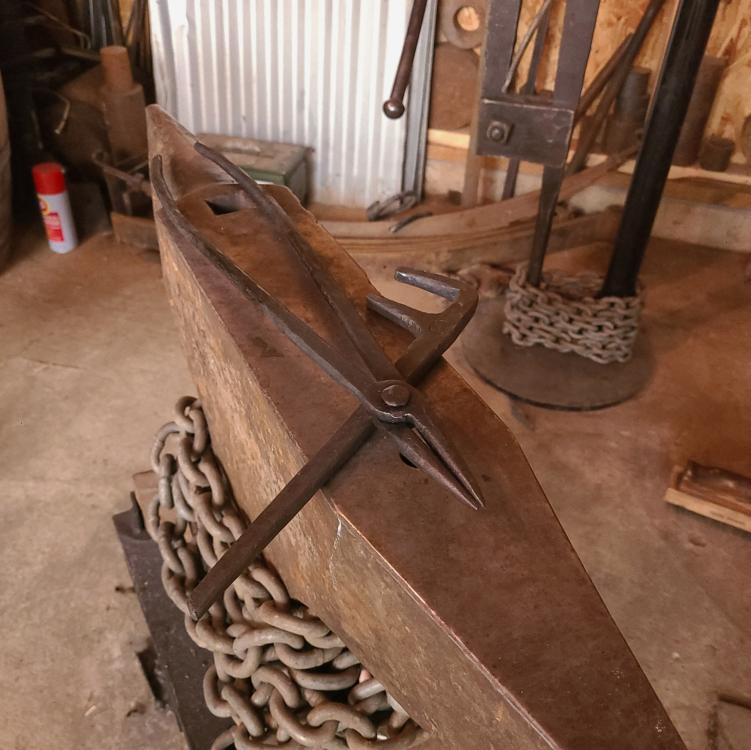
Frosty, I will keep this one hidden until after I have somebody roped into the job, I've got a little 8lbs sledge to lure em in with. Then, If they can swing with consistency, then I will pull out the big guns, 13lbs. Hahahah I was thinking about trying a couple more shapes, like a wide flat pudgy triangle, or I guess a rectangle with the corners knocked off, to move some of the material to the deeper portions of the die. I didn't get a chance to try any different stock or pre forms on the collar die but there will be more experiments to come from this next week. Anvil. The input is appreciated. I understand what you are getting at, I do realize that even if I do get this open die to work for forming the pieces I need. I will likely still want a top handled top tool to match this "collar" shape, and I am realizing just how much work that is going to be with how detailed the shapes are. This piece is not specificly going to be used for a collar, but for a decorative strap or ring, im not sure how to call the specific piece of the project I am building. I may try and use it for a collar at some point though. It's not out of the question. Unless I can't get a clean forging off of this tool. And I am using a workable length of bar stock that I have been holding by hand while forging. No tongs needed, I then lopped off these test segments with a hot cut, just to get em off the bar. Any way that will all be work for another day. But after lunch today, I got back out to the forge and knocked out a variation of box jaw tongs. With a fun little clip ring thing on the end.


-
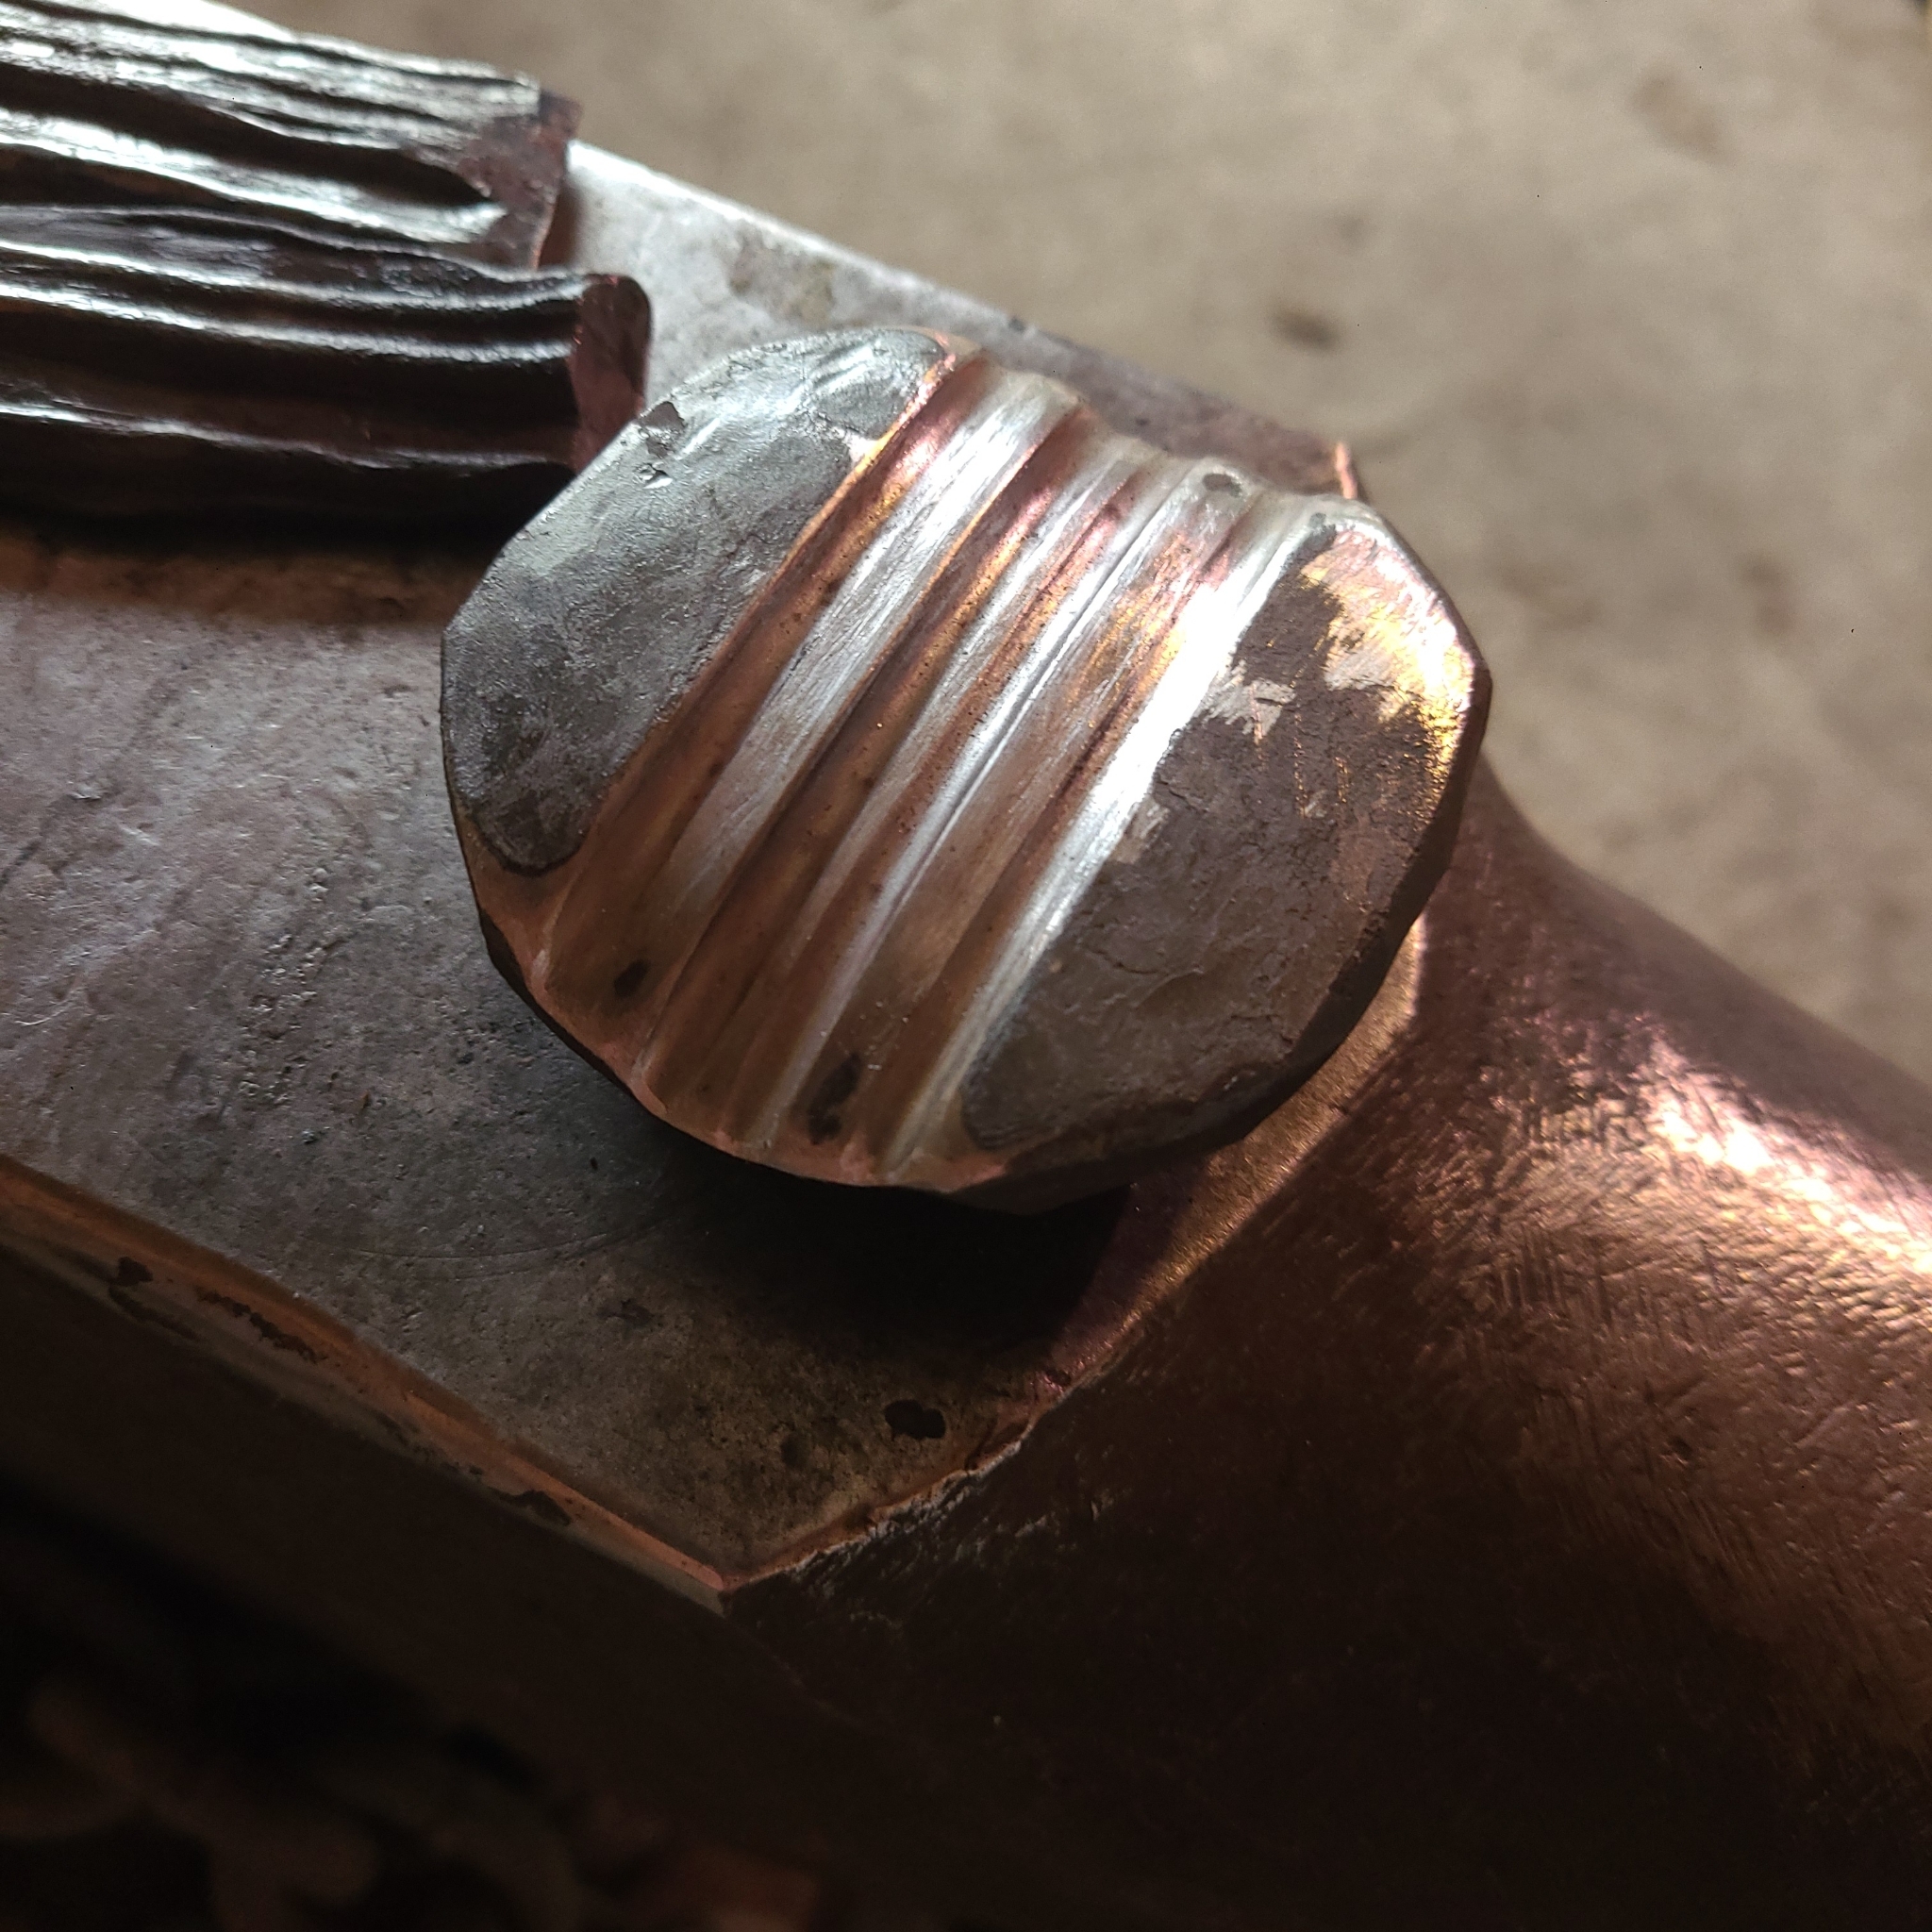
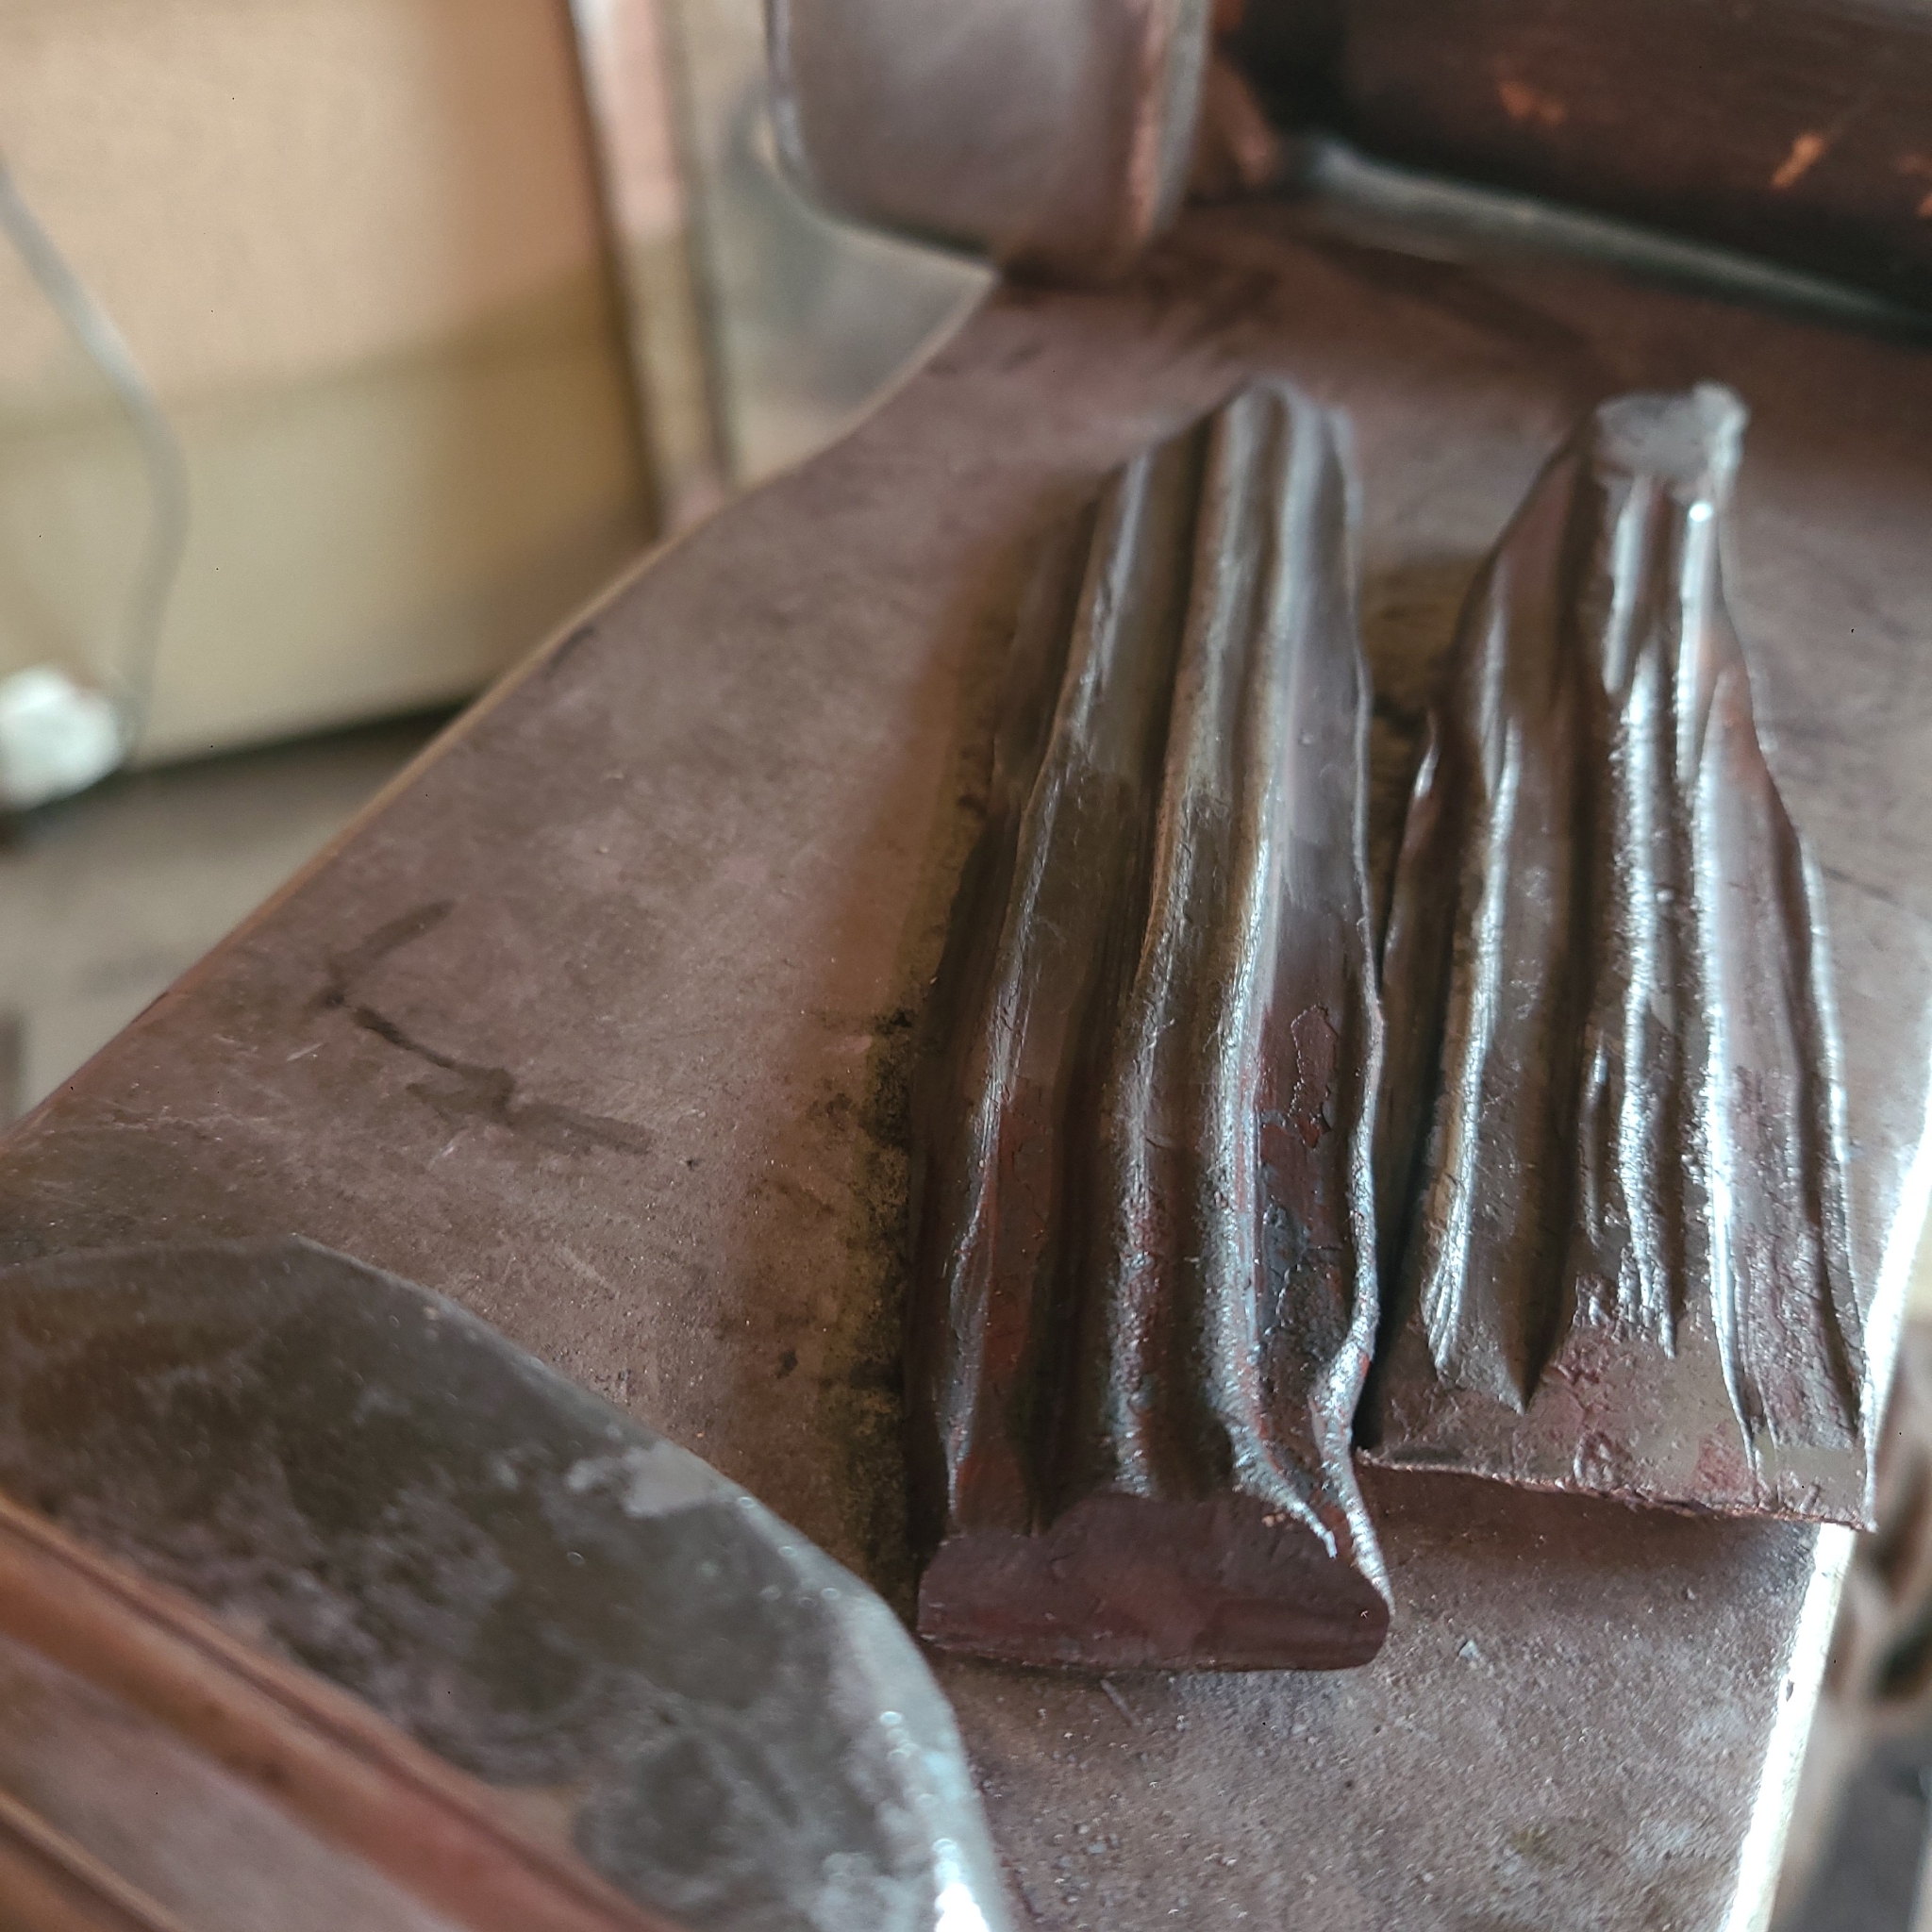
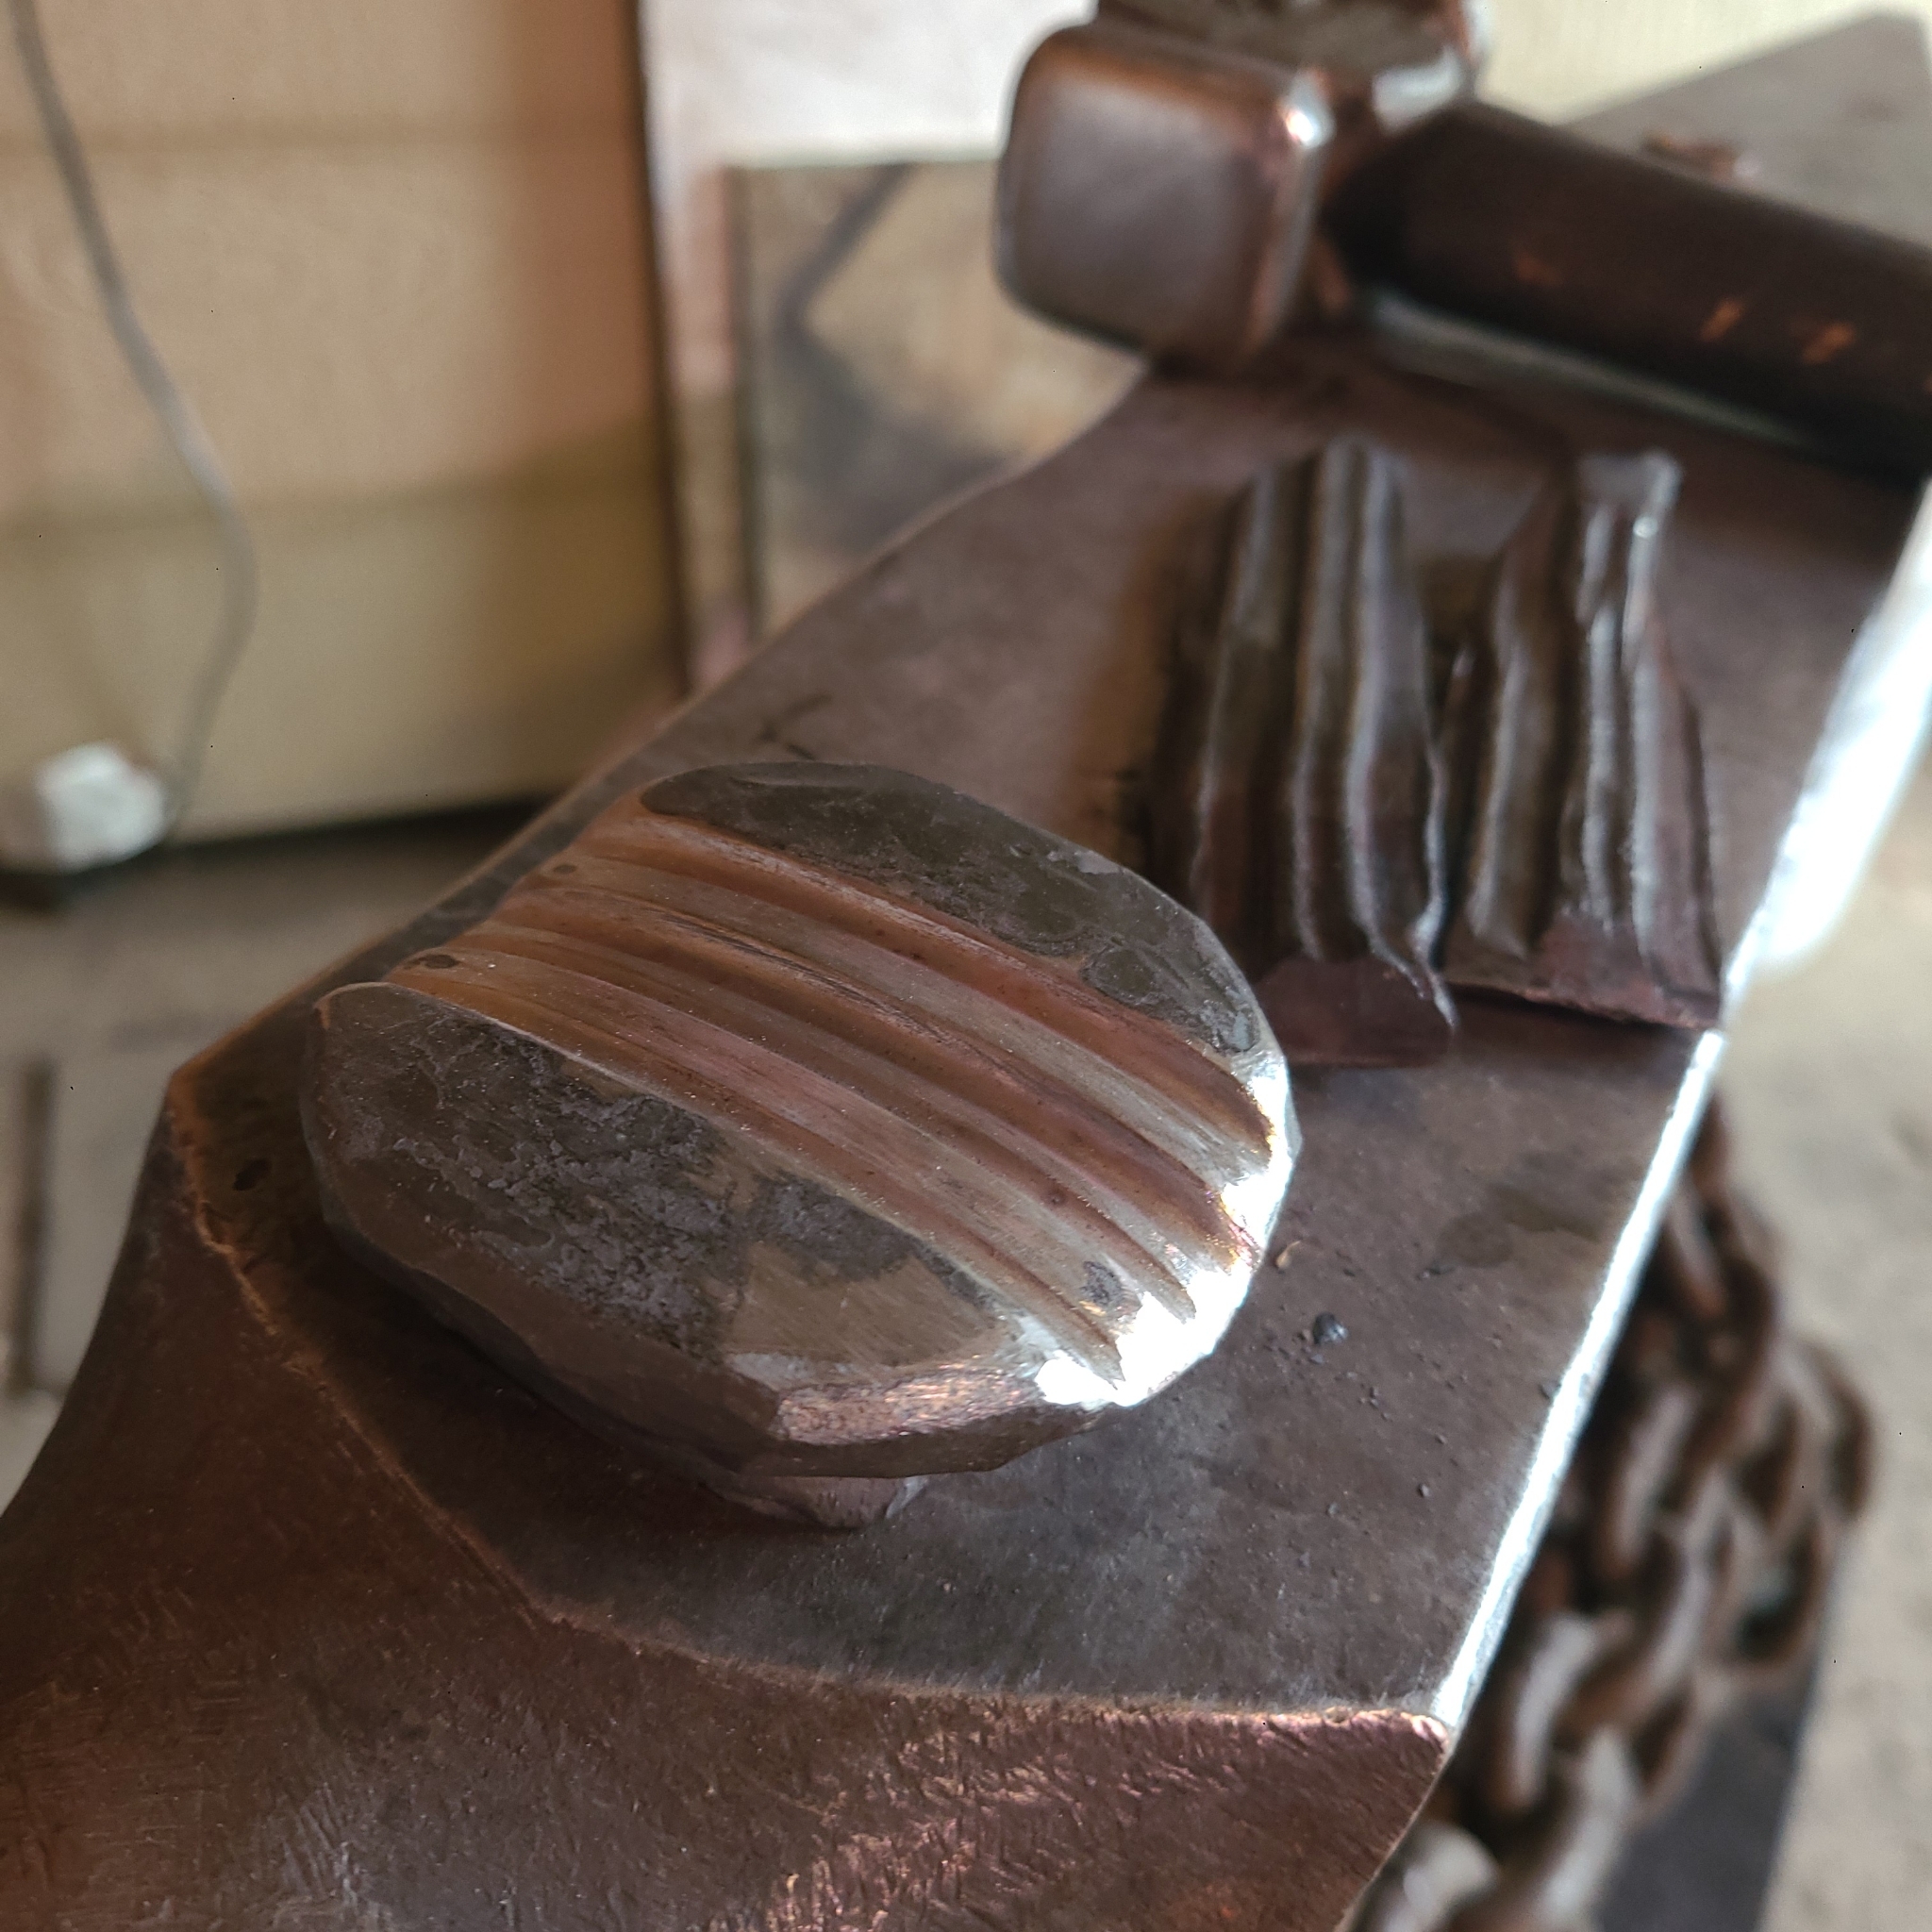
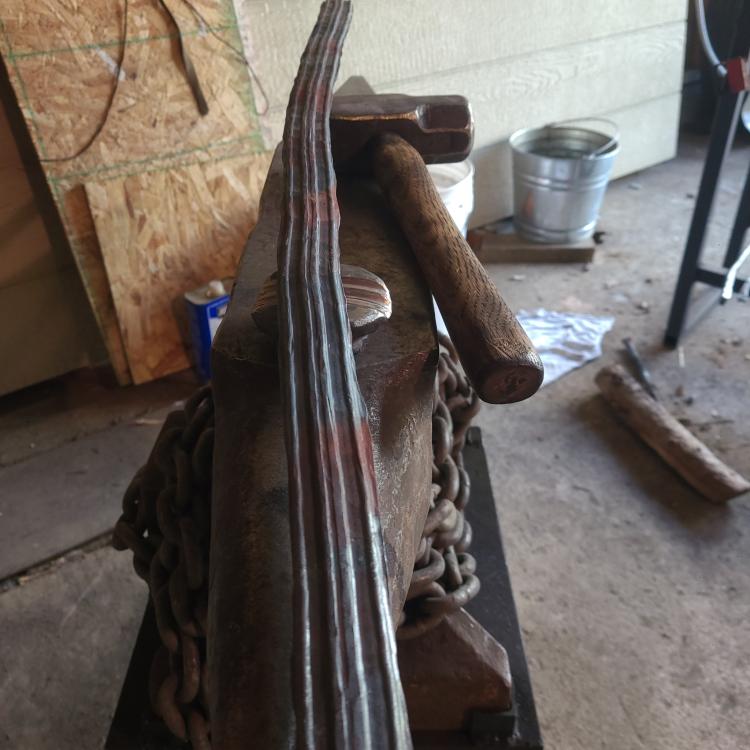
Over the last few weeks I've been in and out of the workshop trying to tool up for some specific projects, as well as for general use tools in the smithy. First up was making a hardy tool blank to form into a sort of complex collar swage. The blank was made from a 1 7/8th" piece of round unknown steel. (Although it came with a bit of known 4140 that I picked up from a machinist as scrap drops. This particular piece I used for this tool was unmarked. But sparked similarly to the known 4140.) I am not planning on heat treating this tool so I won't worry too much about what the steel is. After I had the blank tapered and upset into my hardy hole, I used a hand top fuller to rough in the shape of the swage. Then I normalized and fully annealed in vermiculite over night and into the next day. After that I cleaned up the flats with some files and used a small chainsaw file to cut in 4 bands of piping. Today I finally ran some mild round stock through this swage for some test pieces. First one was giving me some trouble. And it got a little bit chewed up from miss alignments and miss hits. I felt like I was having trouble feeding it straight, and keeping it from wanting to banana curve due to uneven forging, although I was able to get all four pieces of piping to read in the final. On the second test I attempted to sort out my alignment issues bu pre forging the round bar into octagon, which seems to have helped with getting it straight and clean, but on this test piece I must have pushed toomuch material off center and only was able to get piping fully on the center and one side rail. Perhaps a different preform shape and a little more material to start with. But ill keep working at it. B9th came out with some uneven flashing to one side as well. I feel like I'm gonna have to play with this a bit before I get the two pieces I need out of it. Ha. Over the course of the collar swage project I took some time to knock out a set of tongs box jaw tongs. That I had gotten the reigns nearly drawn fully out, when I felt the jaw go loose in my hand. I had attempted a twisted jaw from flat bat, must have had a tiny coldshut at the twist. So I tossed em on the floor under the forge and moved on. After that me and my buddy Andrew from Portland Ironworks, got together and did some hammer making, using his forging press. We grabbed the two biggest hunks of 4140 and 1045 that he had in the shop and smashed out a couple of sledge hammers for doing heavier striker work. The 4140 hammer came back to my shop with me. It weighs in at 13lbs. Hung on a torch roasted hickory handle. Big thanks to Andrew from PIW for sharing his knowledge, experience and workshop. With out him it would have probably taken me and a striker months to get right, but we knocked out 2 sledges and roughed in about 6 or 7 axe heads in 8 hours that day, I didn't expect to get an axe making lesson that day but, man I shure can't shake a stick at it. Andrew hosts tool making workshops at the PIW, look him up if you are in the Portland OR. area and want some hands on learning.


-
Anvil. Oh even better clarification. Thanks for sharing the pictoral as well.
-
Correction, I think I may have seen the stake swage tool on Blackbear forge s channel.
-
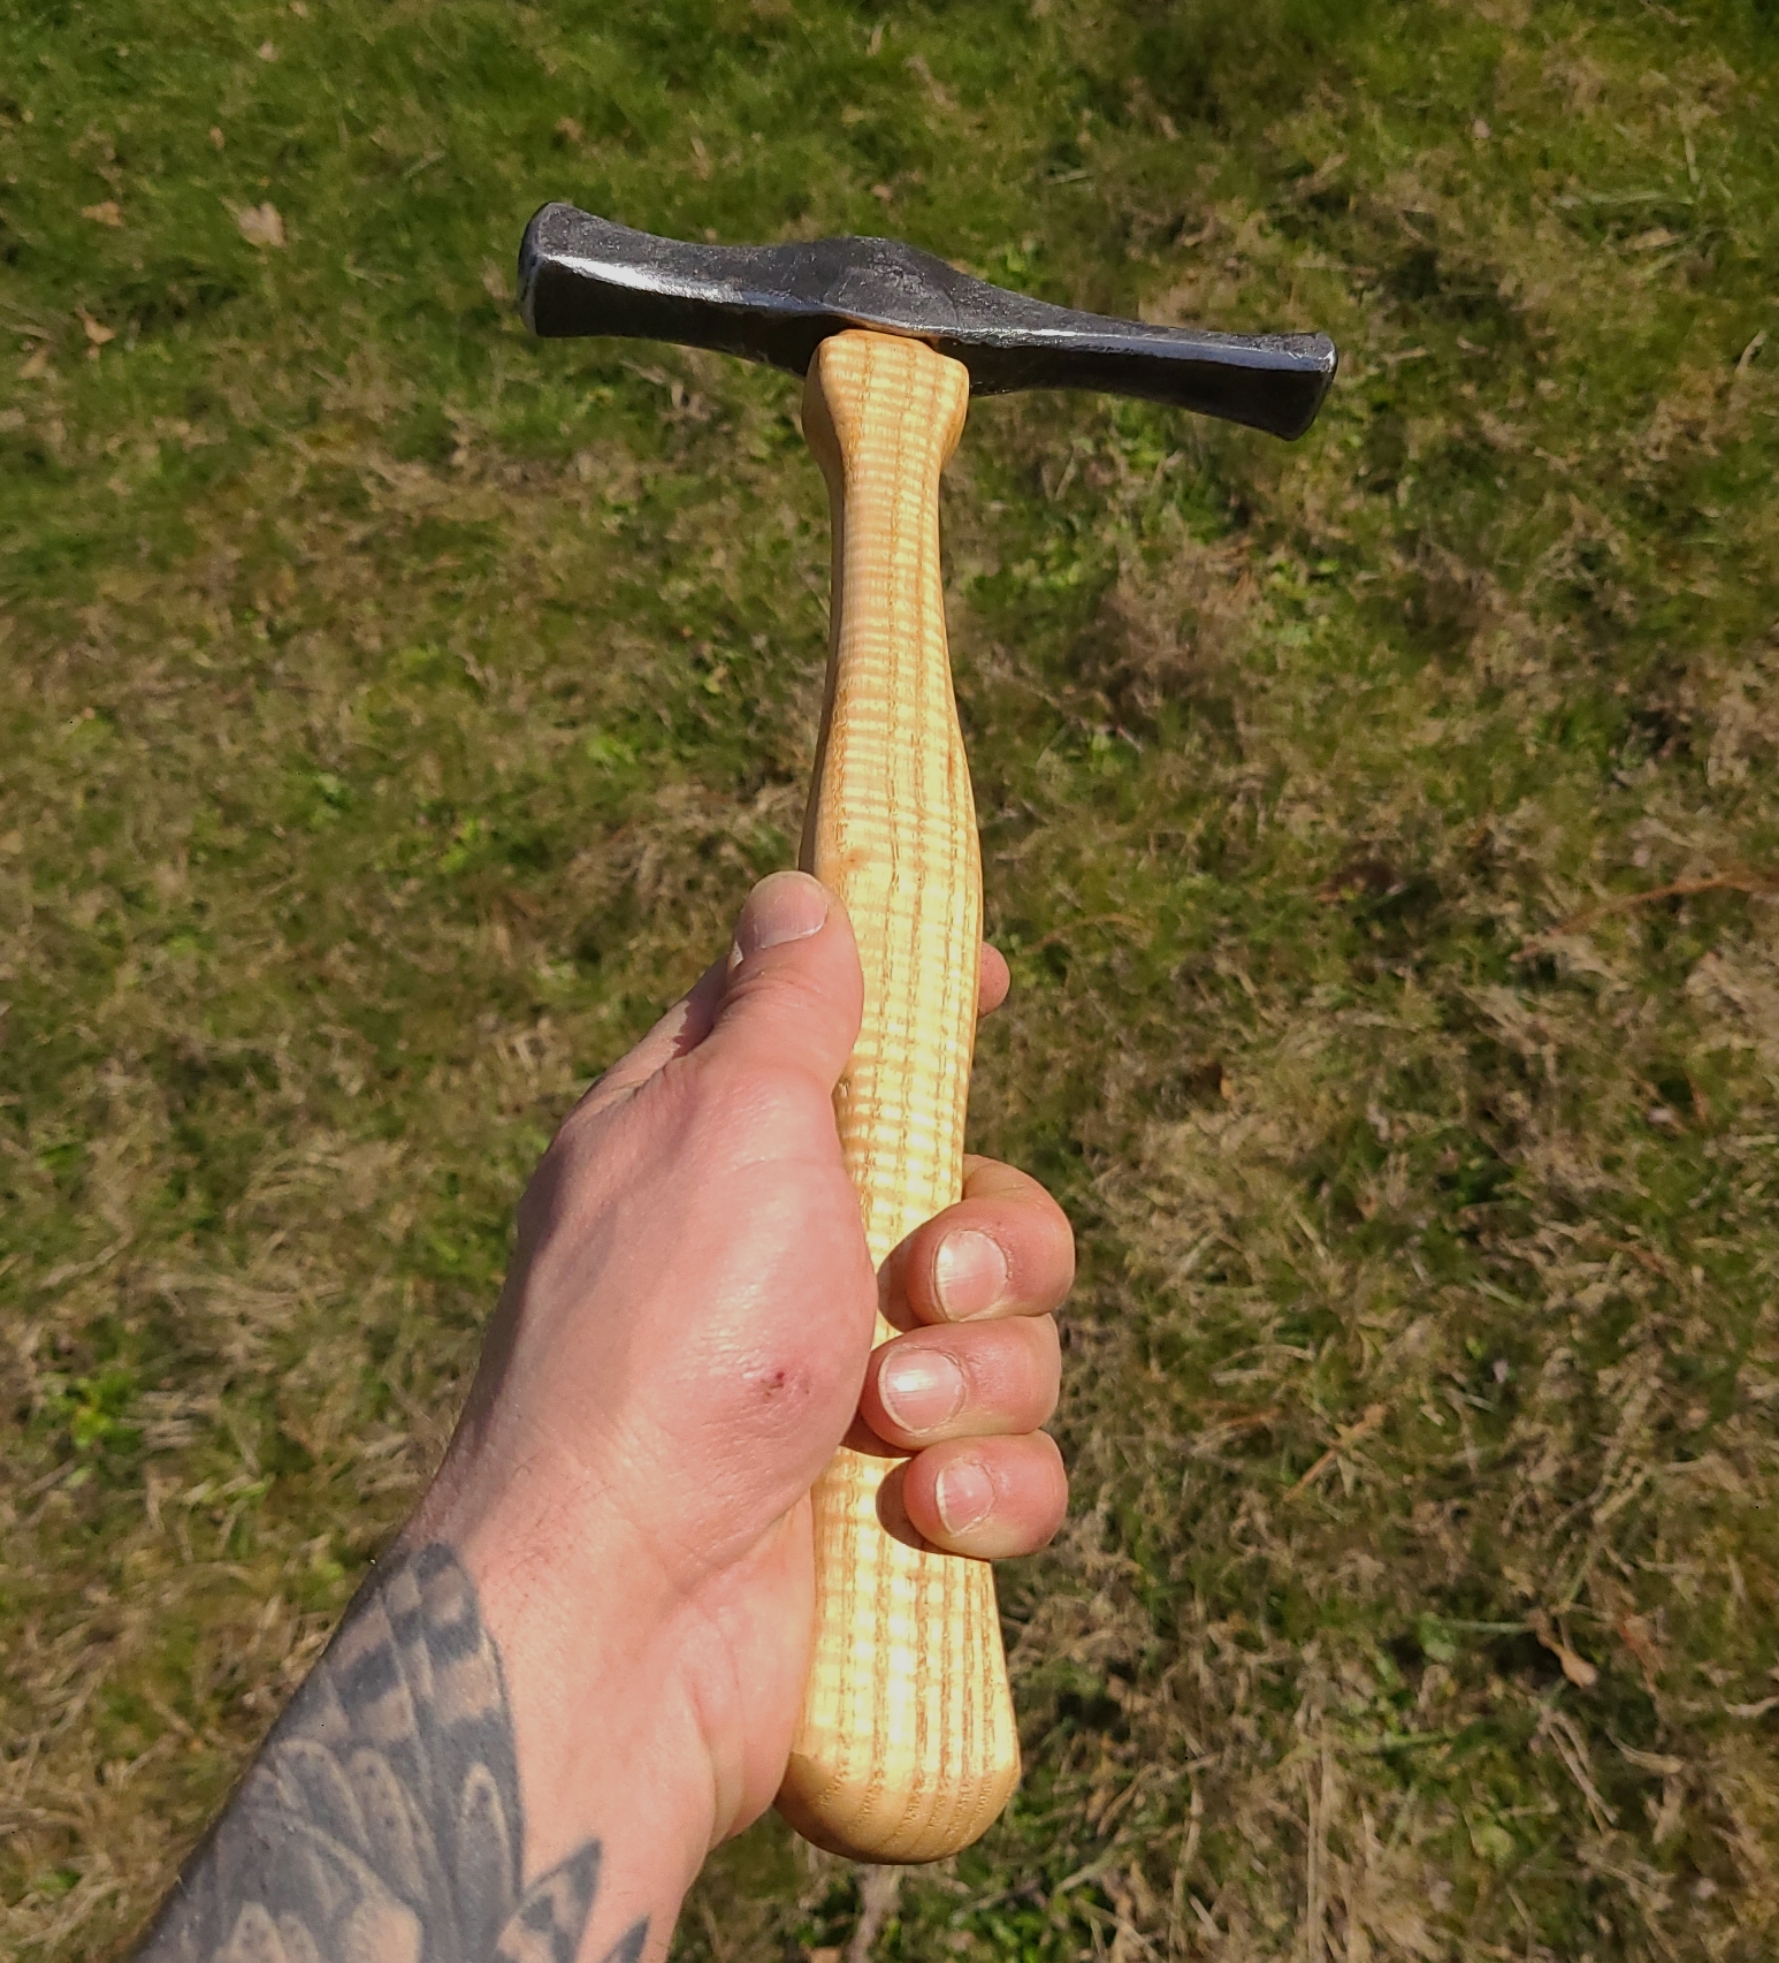
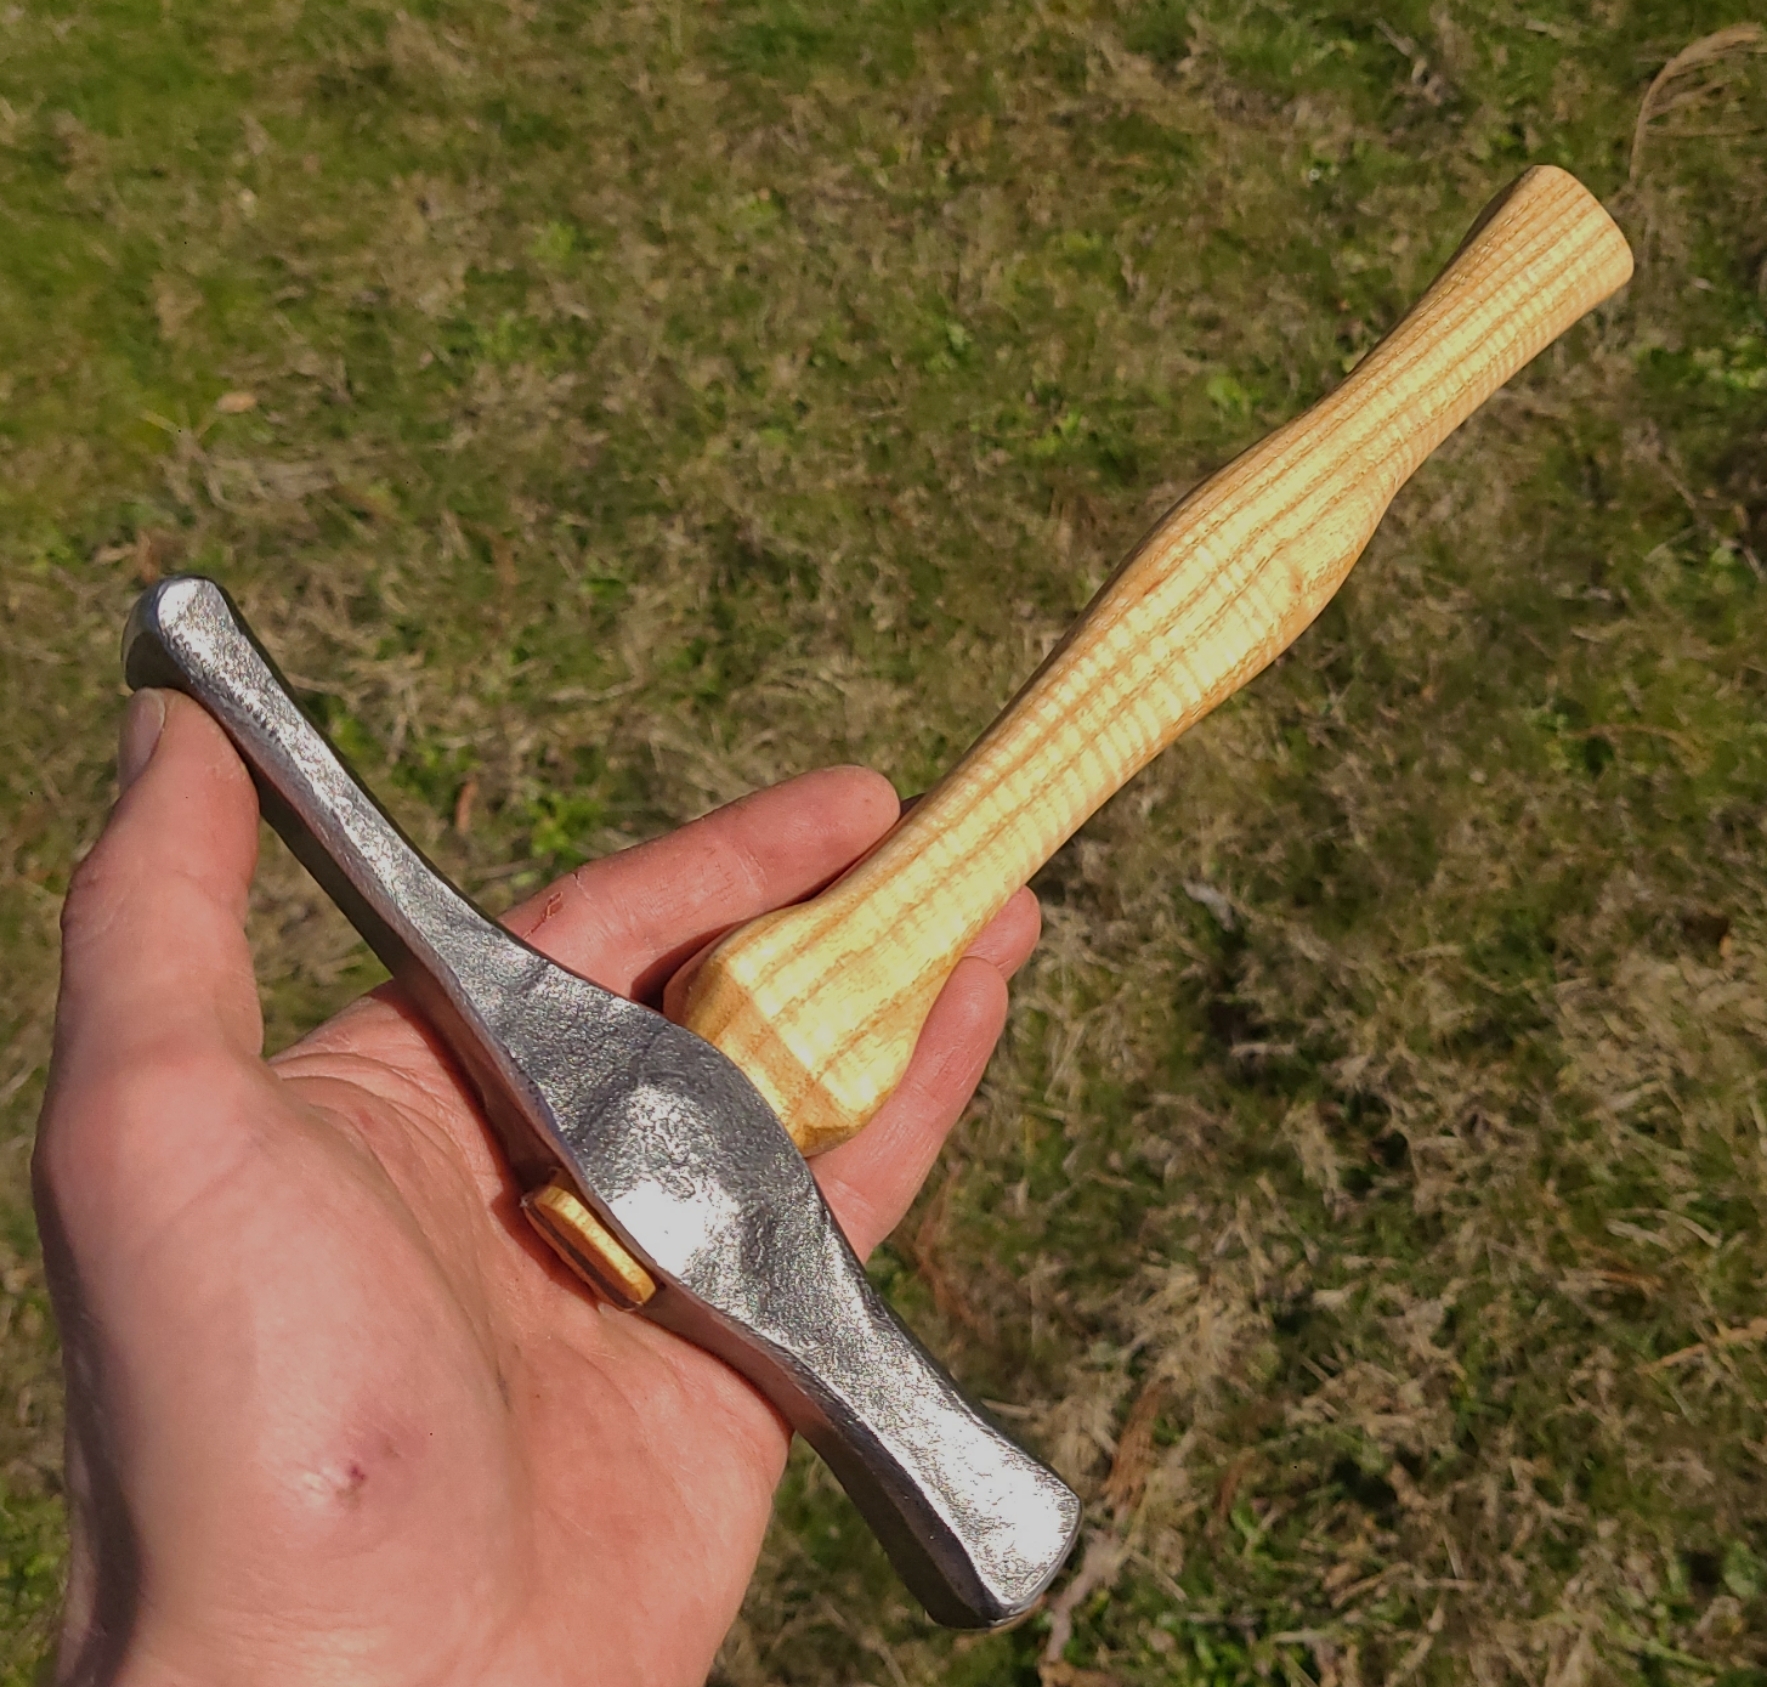
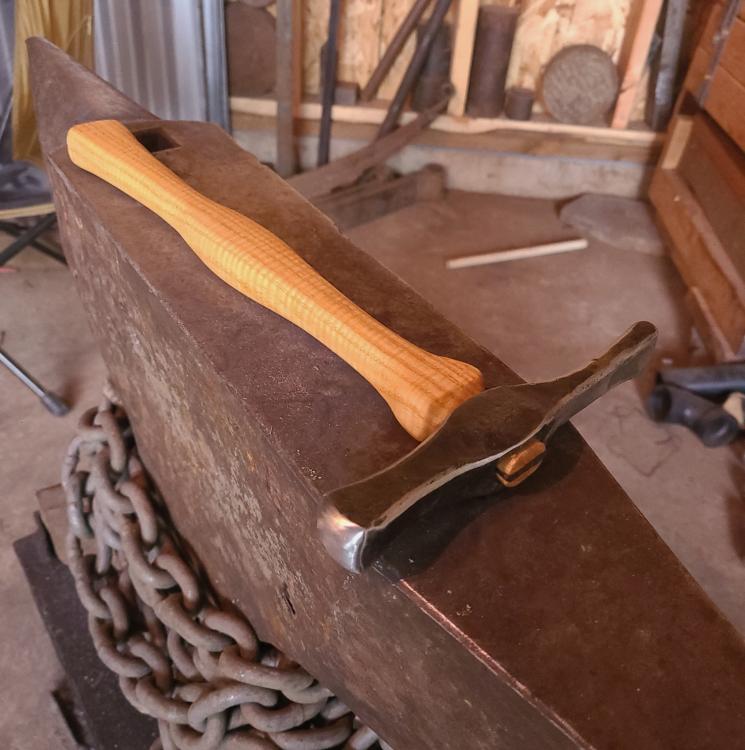
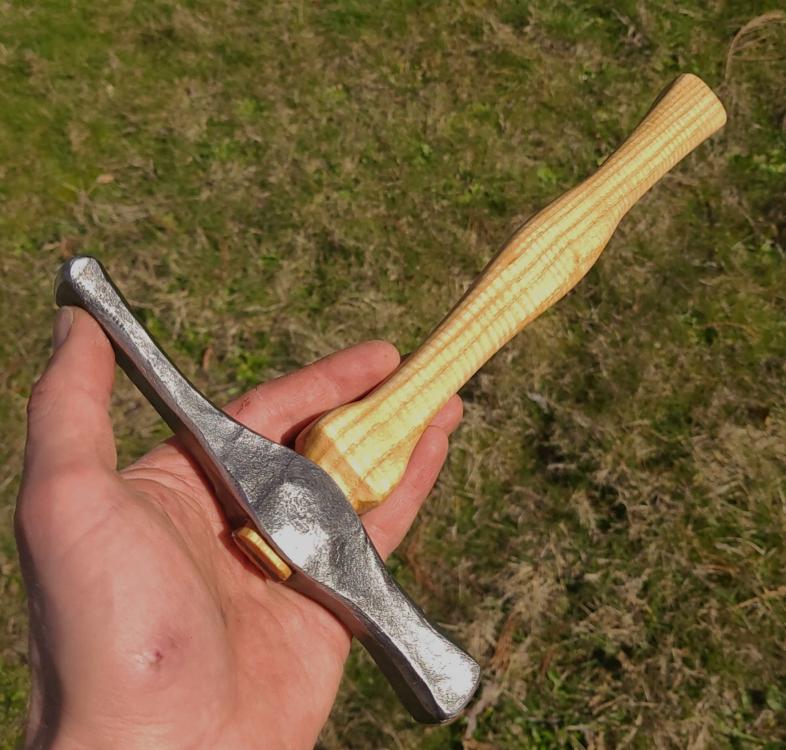
George N.M. The nemae "leafing hammer" comes from the instruction put forth by Mark Aspry and the CBA, viewed through utube. I will be trying to use this for decorative organic elements like leafs and other floral type work. And will be used in conjunction with a swage stake type tool with a depression that is similar to the cross pien of this hammer. (Also described in videos by the aforementioned smith. But, being that I have no experience in this type of work with these types of tools yet, plans may change and tools may change throughout the process. I do not intend on holding the hammer as pictured, these photos are to show off the work, and the wood. I am a little unsure as to the comfort of the palmswell at this time as well, for I have not had the opportunity to put the hammer to use yet. And as stated previously there are likely modifications coming down the pipe as I put these tools to work. Thanks! M3F, thanks I am looking forward to sharing more of my journey in the future.
-
Anvil, thanks for the clarification. I've heard these tools be called by probably 5 or 6 different names, infact the leafing hammer could even be called something like an armorers hammer. But I guess it depends on the work piece in that case. But really names aren't my strong suite, so I will probably mess it up a few more times. So please forgive me. Thanks Davor, I'll hopefully have some time to make some more tooling early next week.
-
Hopefully these reminders are not fleeting, get out there and tool up!
-
Thanks, George N.M. great considerations to keep in mind for sure. I saw Torbjorns video on that a while back. Definitely not gonna make anything quite that industrious yet. These are ment to be decorative pieces, but I will make them function as they should. Likely fule will be wood. Frosty thanks a bunch. Credit to you and the great info you supply all of us with here. The burner runs great, the forge holds heat well. And it will definitely do the job for my humble operation.
-
Thanks Goods! Will do. Excelent work on that axe you made recently! Love the simplicity.
-
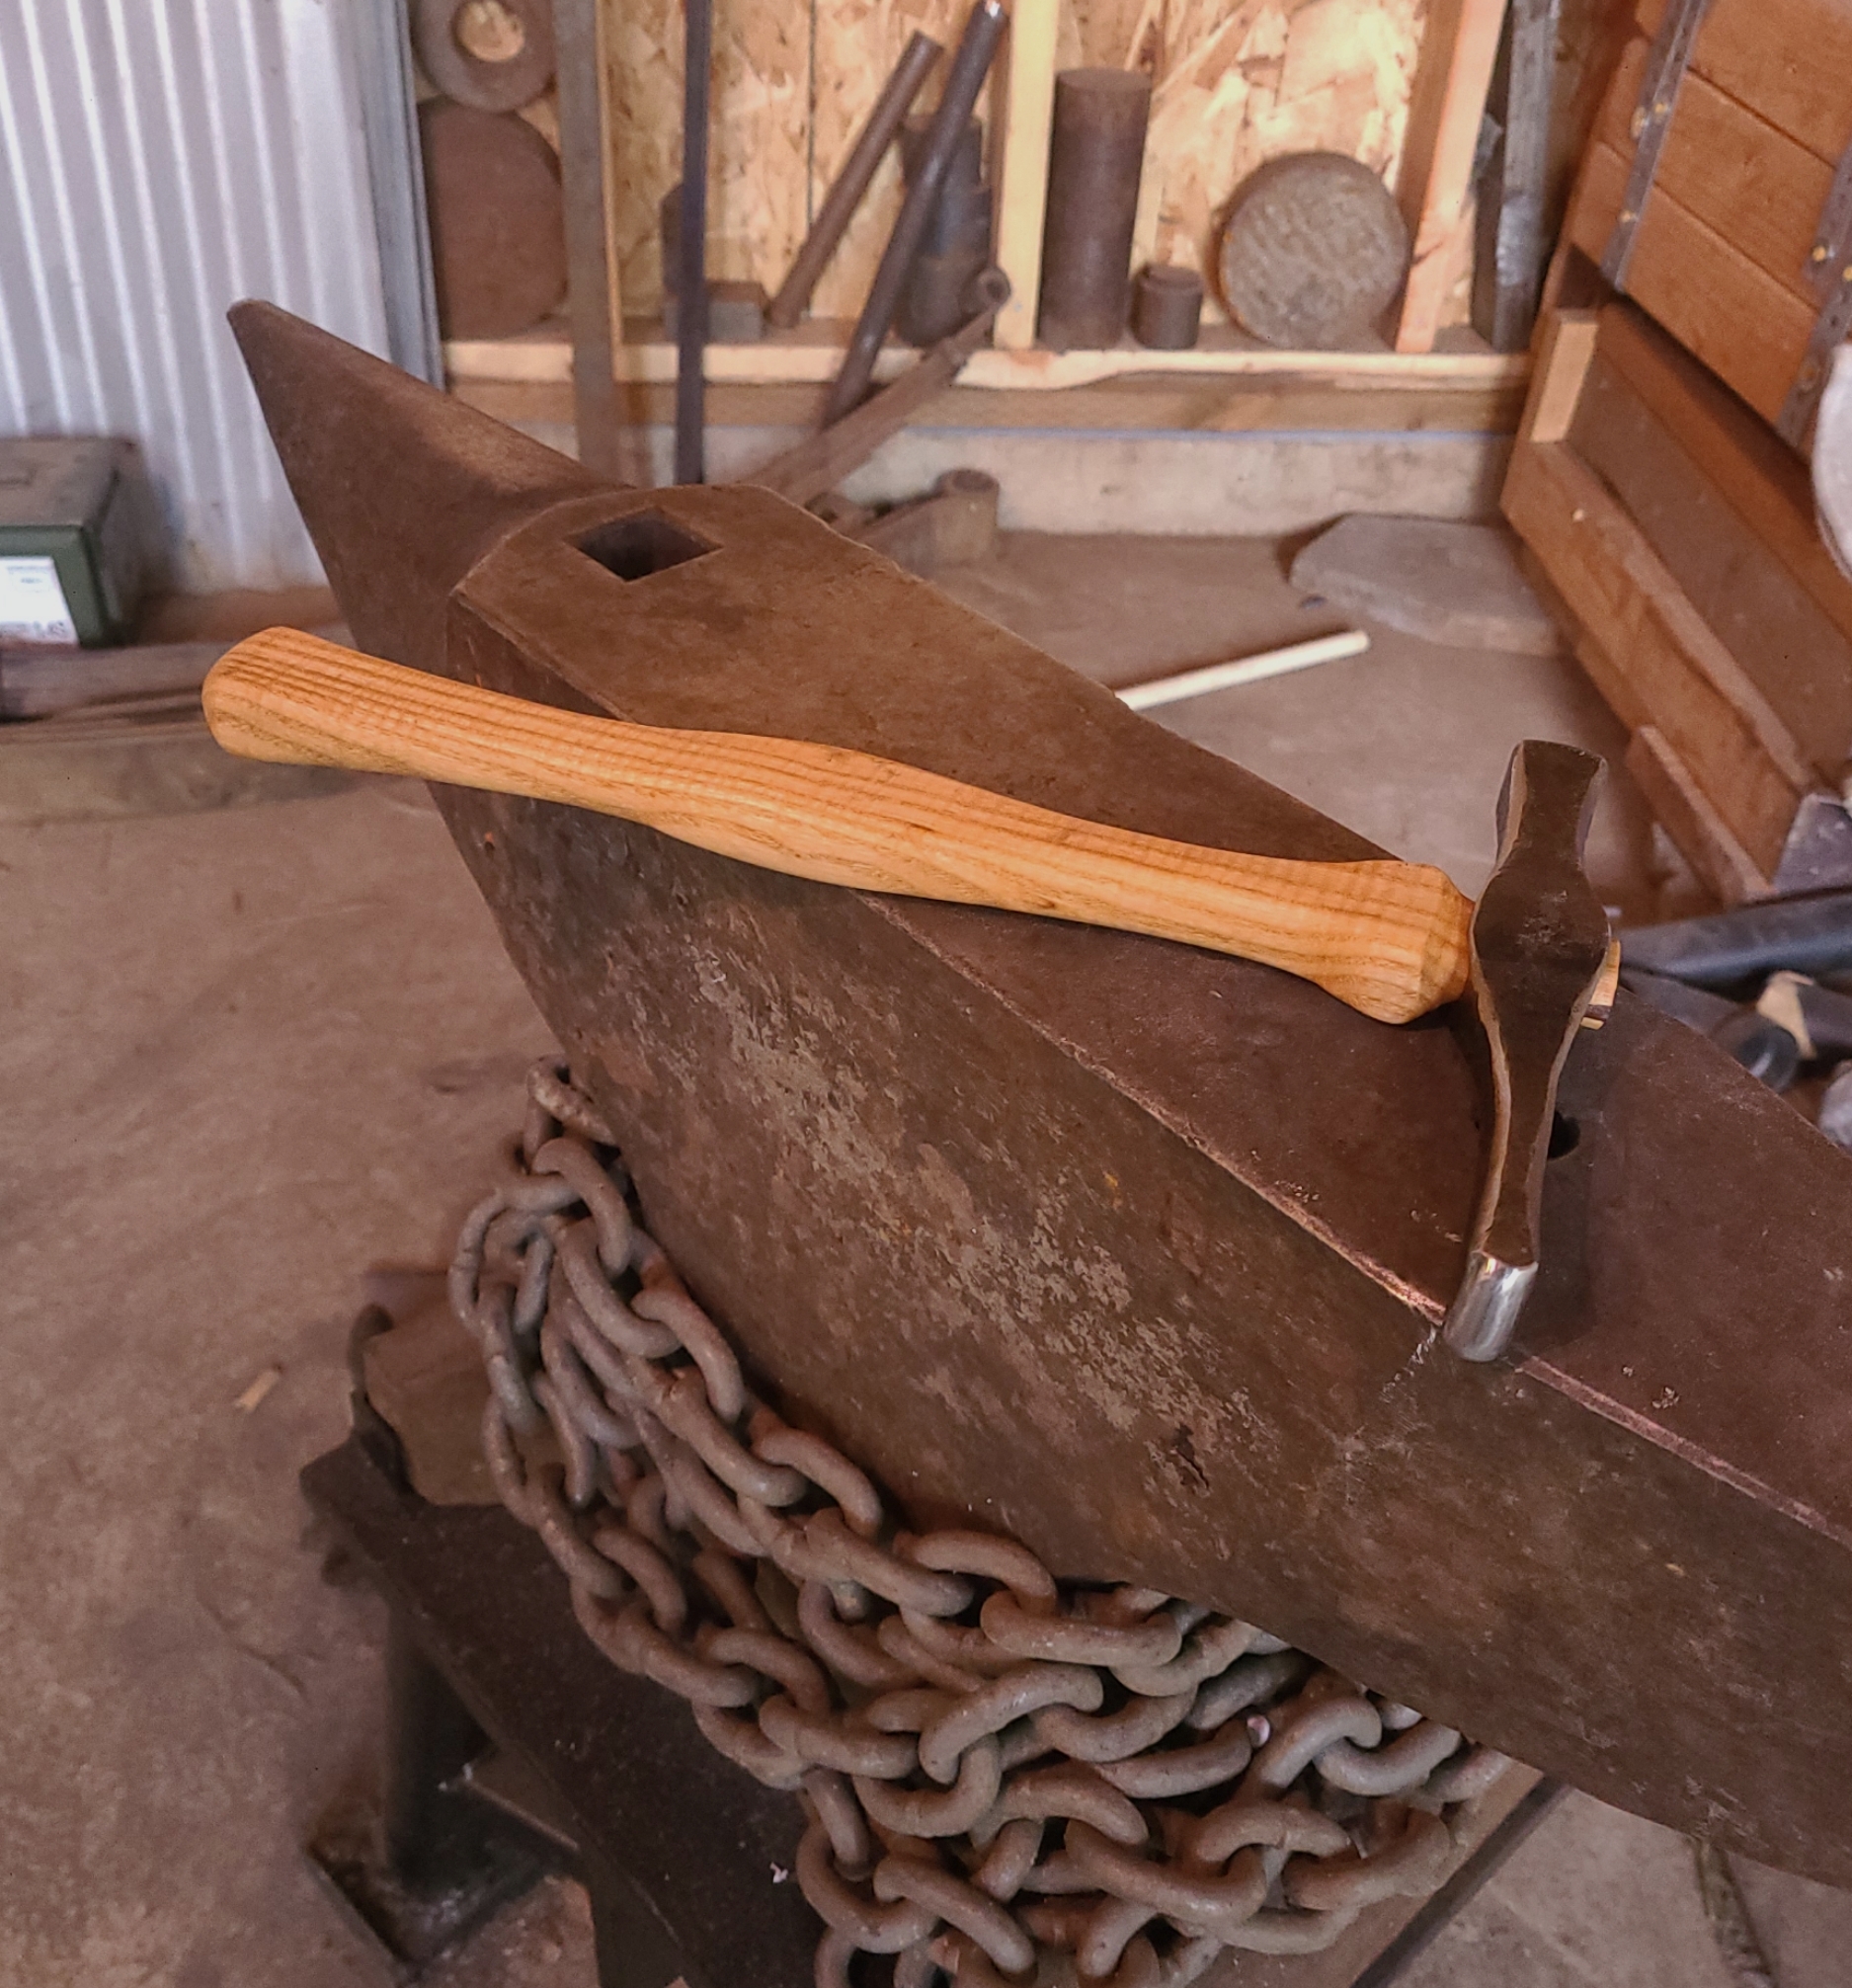
Hopefully this fhread will become a comprehensive account of all the tooling that I am making for an upcoming decorative ironwork project. Just to give you a quick insight into what the tooling will be working towards.... I am planning on making an ornate set of medieval basket torches and a wall mounting. I'm still working on the concept and design, but im planning on a design that lays a little less in line with the sensibility of form follows function, and to add a more modern organic and decorative touch to the project (think rococo meets nouveau) I may add some sketches or photos of some test pieces to the thread as they come together. But before i dive too far into the immigrations of a mad man, we might as well get started with the tooling. I couldn't just wait to let the new gas forge do its job, so I started in with some seemingly simple pieces of tooling. (Most of these for the time being, are loosely modeled after the processes laid out by Mark Aspery, with liberties taken by yours truely[likely to be re interpreted down the road after some use])... First up was a scrolling wrench, forged from 1 1/2"x3/8" bar mild steel. This was my first attempt at this type of forging. And will not be my last, I can foresee needing a couple of these in various sizes in the future. So I will likely have more chances to make nicer ones. Next I made a set of scrolling tongs these were forged from 1"x3/8" bar of mild. I will likely trim down the reigns on these after a couple uses. And will likely make a smaller set for finer work down the road. Here is the leafing hammer for the project. Forged by hand, with a little help from my very accommodating wife, who I was able to convince to strike for me to punch the eye. Forged from scrap steel of a truck axel, which I broke down to a 1 1/8"x1 1/8"×4 1/2" billet. Then hung on a highly figured piece of curley ash, and secured with a wallnut wedge. And oiled up with some BLO. All in weighing 3.5lbs on the dot. That's all I I was able to do in my last couple weekends, and other chores are calling. I hope to be back with more tools over the next few weeks, so please check back and let me know what you think. Enjoy!


-
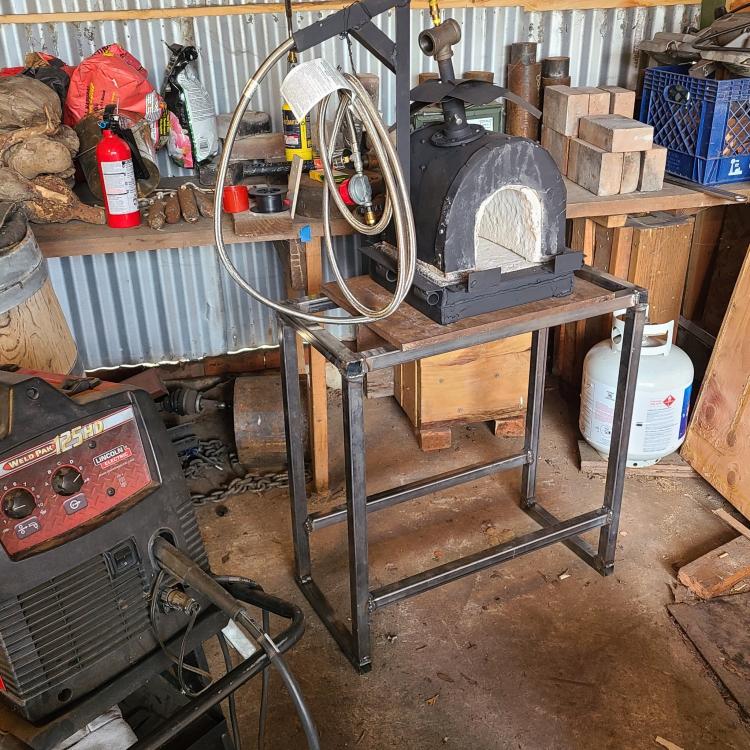
Alright. Well this brings this build to a close. Ran over to the scrap yard and picked up some square tube to stick together to make a stand for the forge. I'll pick up a piece of plate to top the entire bench next time I make it to the yard. For now I've got a piece that supports the forge just fine. Hope to see you in the next thread , likely under Shop layout, or smithy plans, or there abouts. And again thanks for the help guys.

-
My burner flare in this forge was cast in with the kast-o 30 over top of the hole cut in the kayo wool layers, and formed with a couple of pieces of pvc that were shaped to a smooth transitional flare with files. Once the kast-o was set and cured and ran through a days worth of heat cycles. I went ahead and coated everything with a couple layers of ITC 100 ht kiln wash, for good measure. So far so good. I will get a proper forge cart built in the next couple weeks while I slowly get the remaining work done on the smithy space. Hopefully I will be fully moved in and operational in about a month, and I'll get to put the forge through its paces, and report back on how it's holding up.
-
According to my IR thermometer I was hitting about 2240ish at that point in the test, and slowly starting to decline, which I think was due to my tank freezing up. I can't really vouch for how accurate my laser thermometer is, so it could be running hotter as stated. And if that's the case, hot dang. I'll take it.
-
Thanks Mikey, That was kindof my line of thinking. Good to hear some confirmation.
-
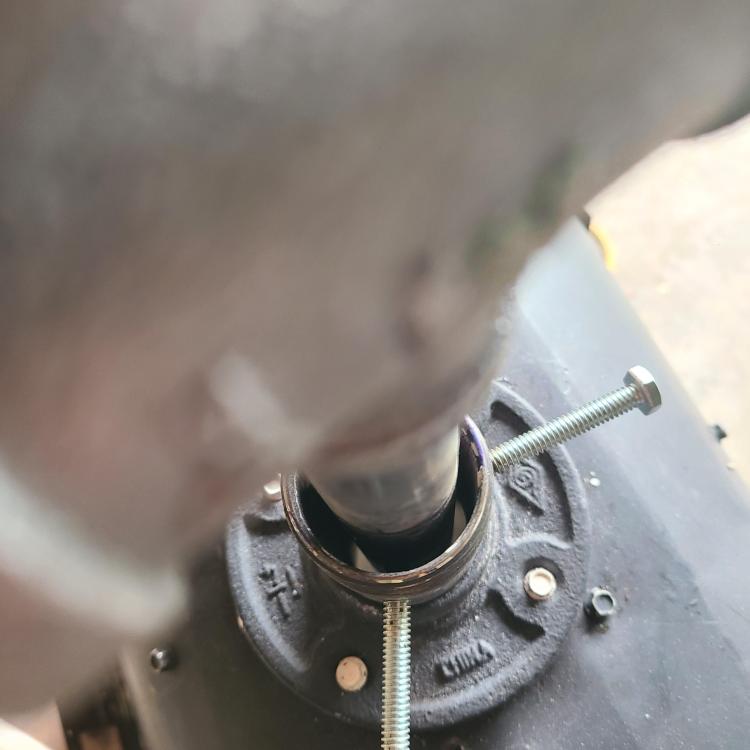
Hey guys, I've got a quick question. How much should I worry about the gap around my burner and mounting bracket at the entry point on my forge? Wondering if heat loss and or excess O2 intake will have any negative effects on general operations or when trying to reach forge welding heat.. Any thought or input would be appreciated.
-
Thanks Mikey! And thanks Frosty! You two have been a great helping hand and voice of reason. I am pretty happy with the results so far. I can't wait to put it to work. Hopefully I'll be posting updates soon.