M.G.
-
Posts
229 -
Joined
-
Last visited
Content Type
Profiles
Forums
Articles
Gallery
Downloads
Events
Everything posted by M.G.
-
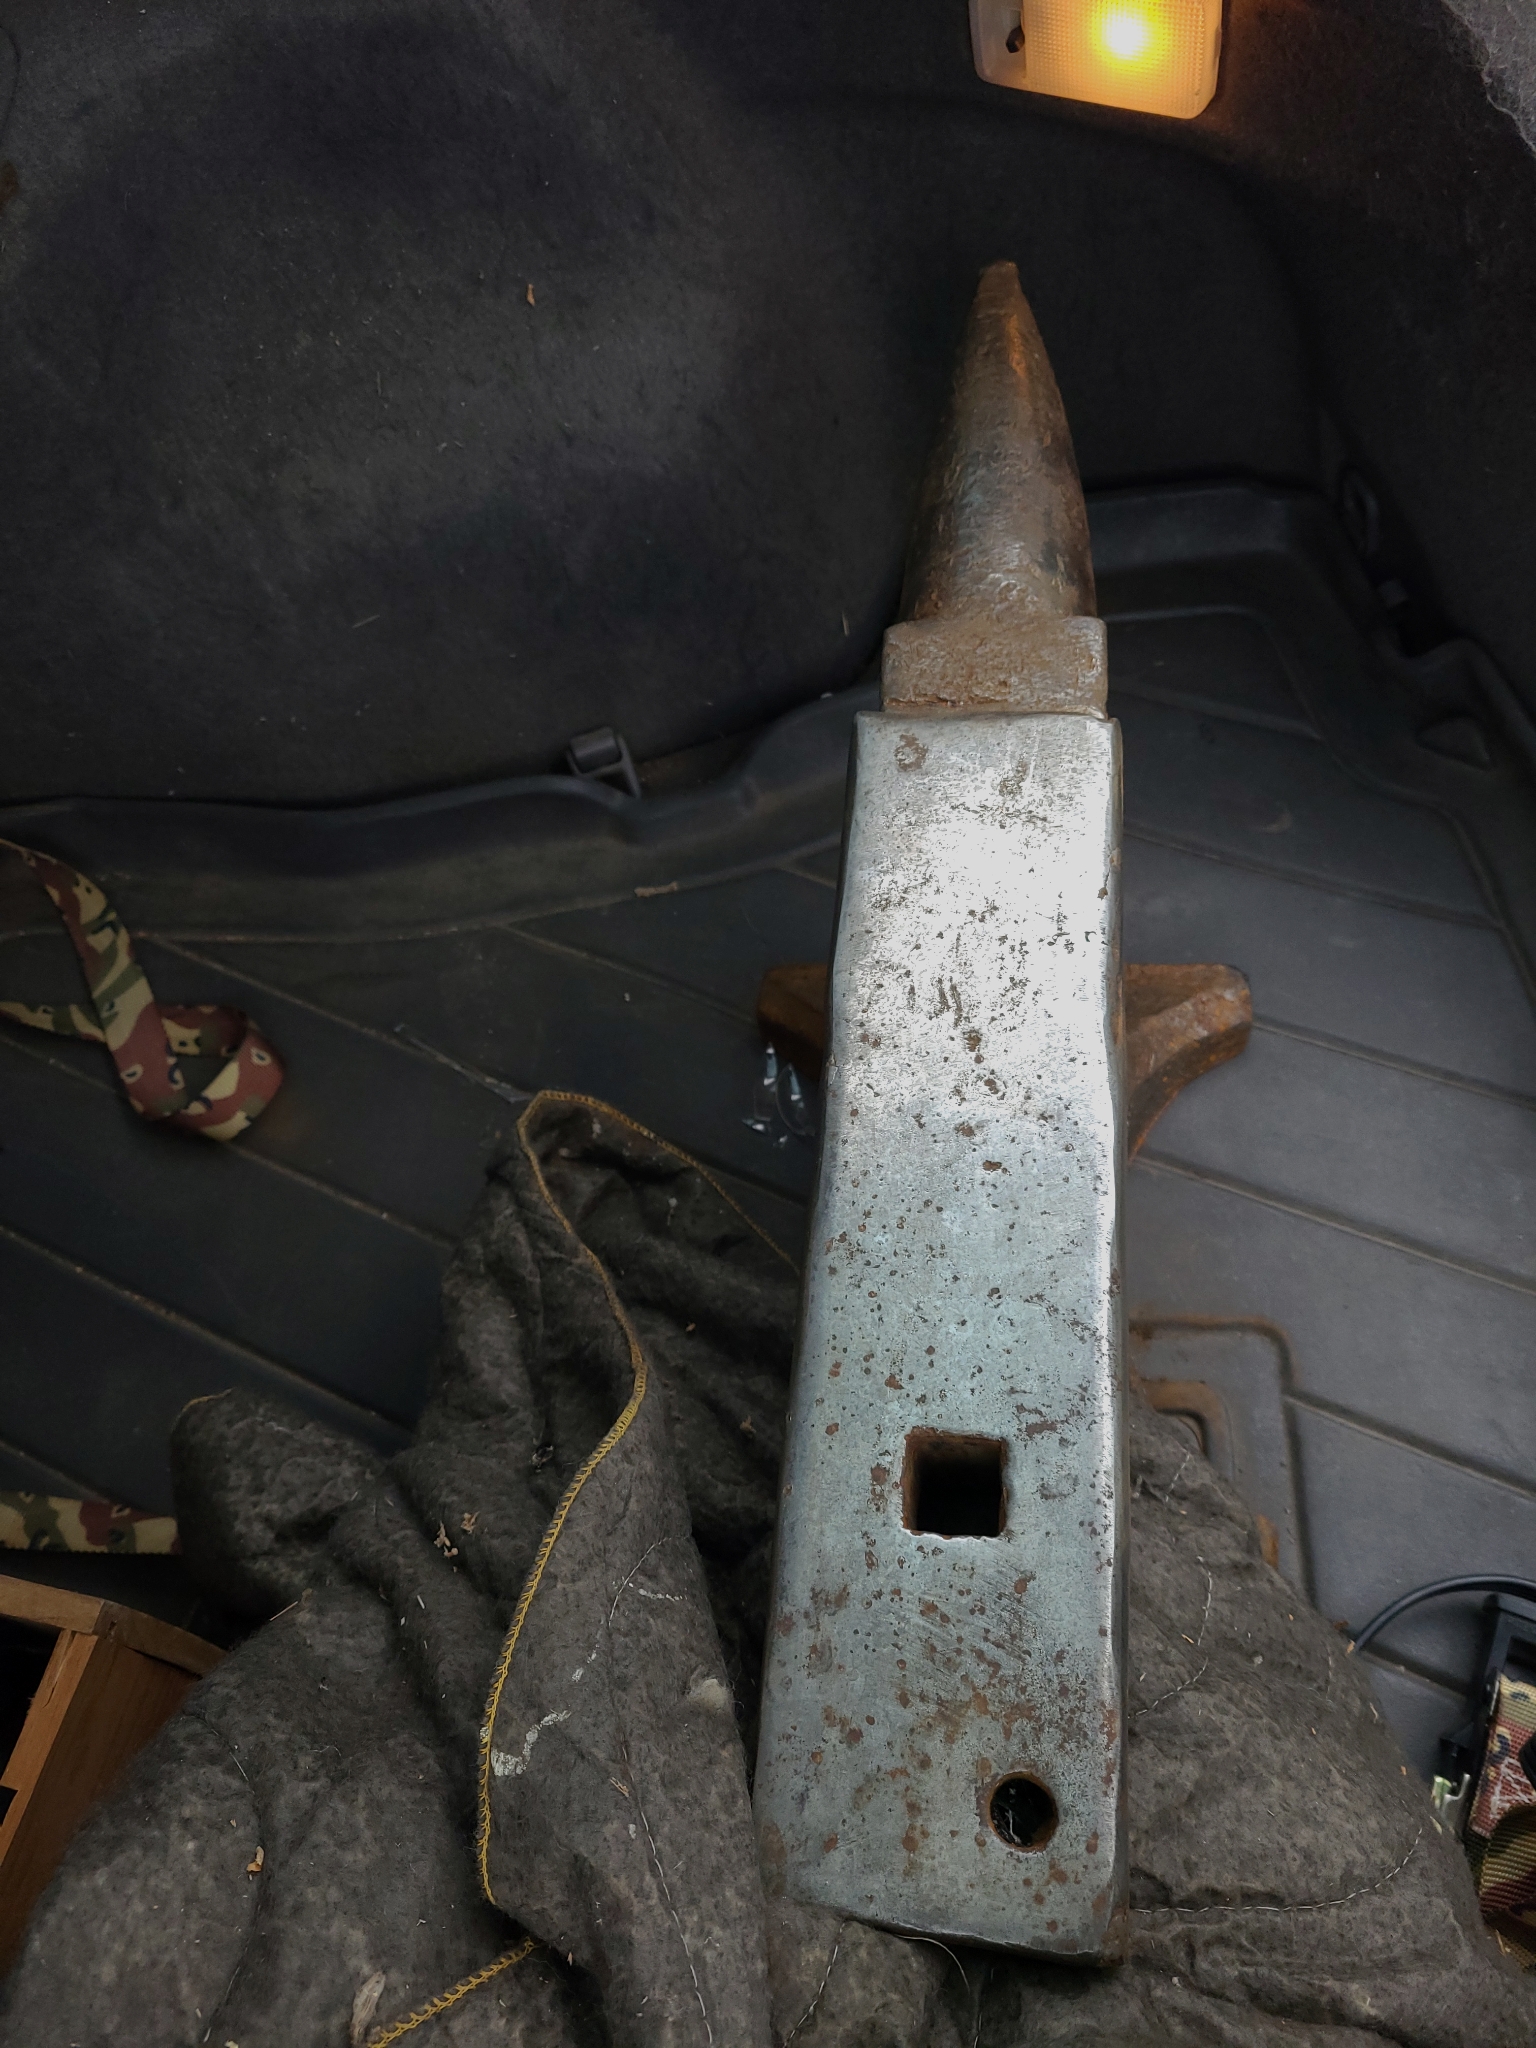
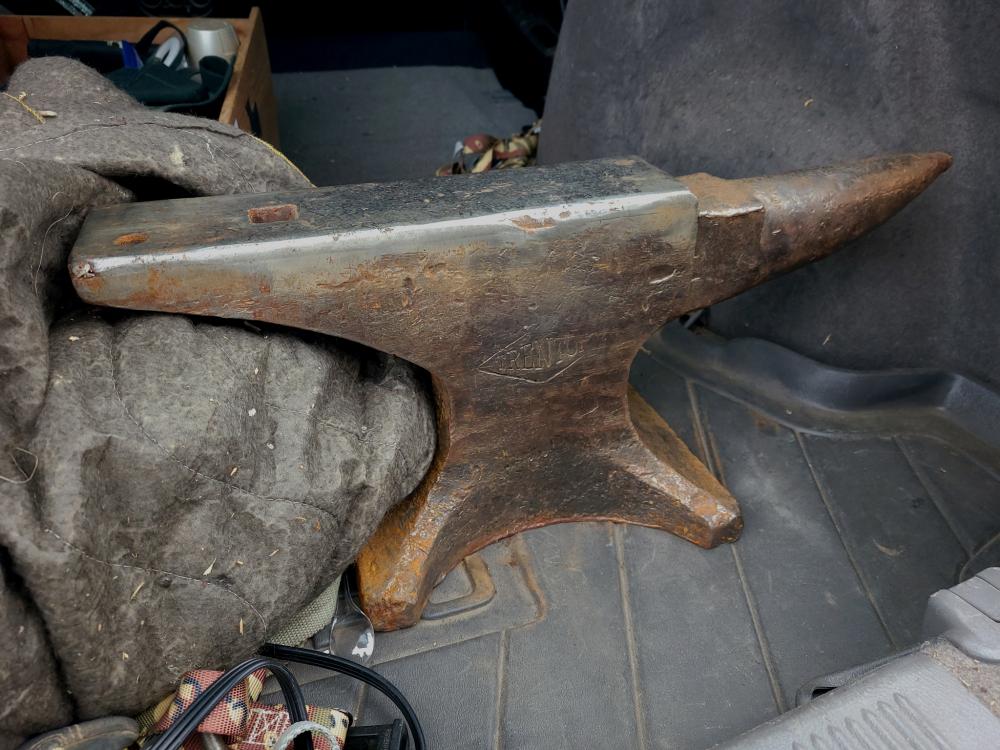
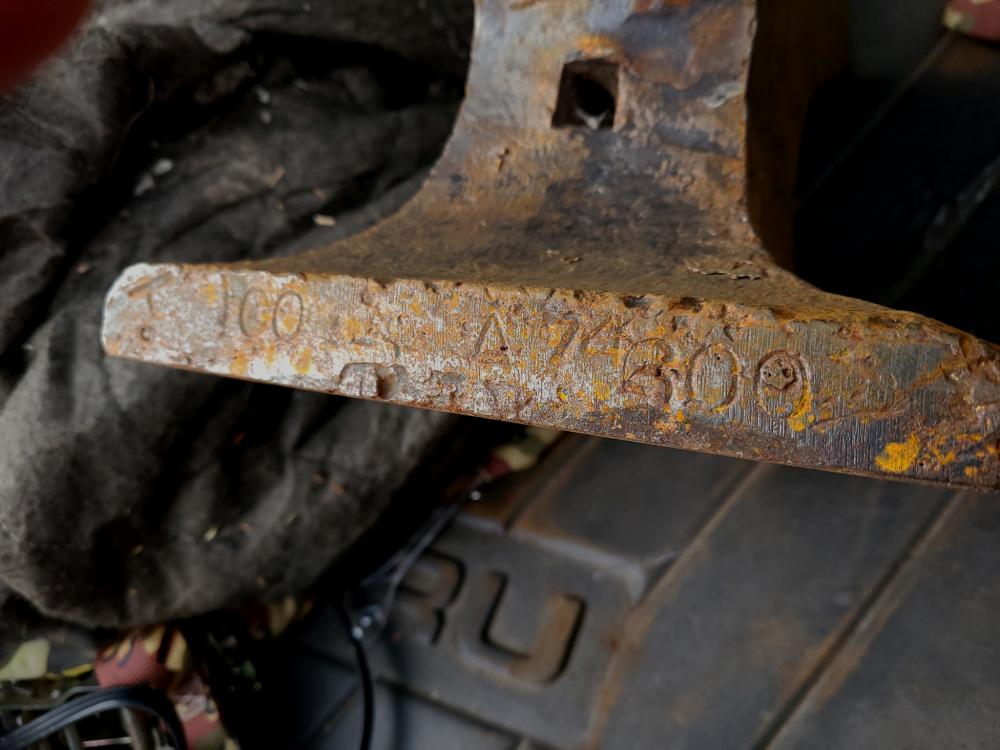
Today I picked up my first London pattern anvil. Not a big one by any means, but usable enough to hold me over until I can justify spending the bucks on a big boy. This little devil ia a Trenton 100lbs with a maker's mark of "T" before the weight. Im told that the serial number corresponds with the manufacture date of 1908. I can't confirm this yet, but I will drop a photo in the Trenton ID thread to get some knowing eyes on it. I may have paid a little too much for it but its got great rebound and rings like a bell, even with a couple minor cracks and repairs. There is maybe a 1/16" or less saddle on the face. But I figure its still got a lifetime or so of being on the receiving end of a 2lb hammer.

-
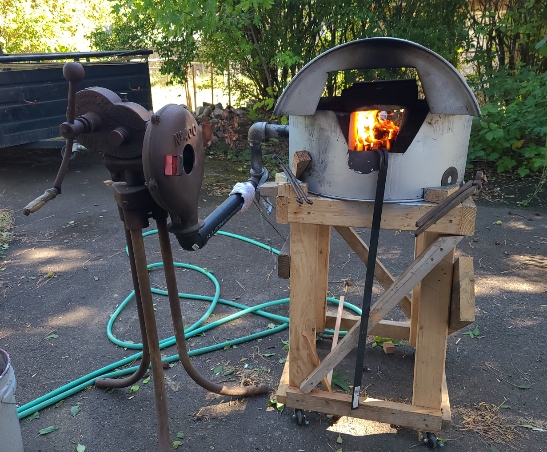
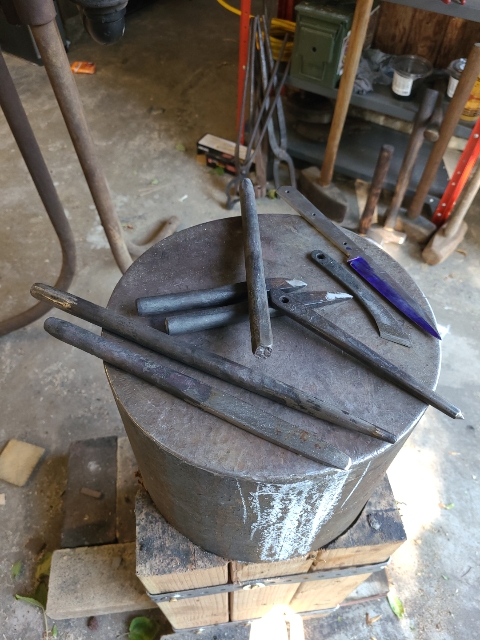
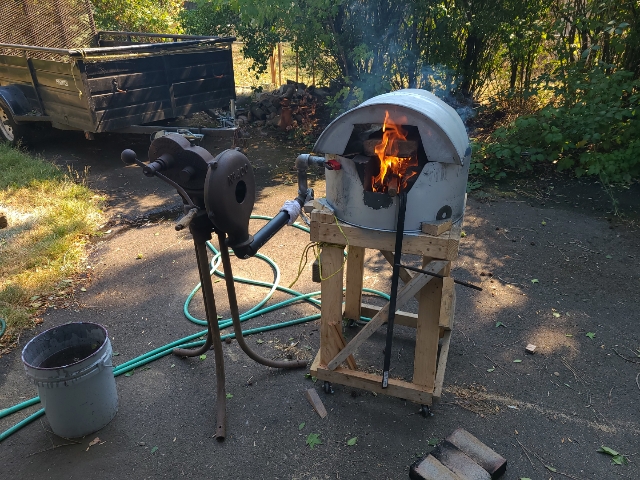
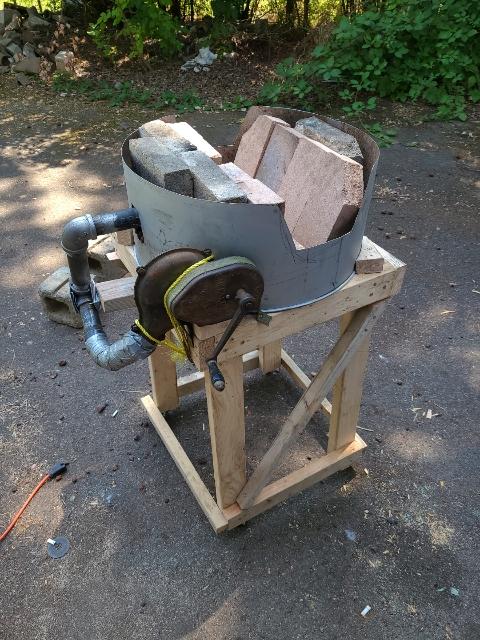
Today the forge got a huge upgrade! I came across a Champion Forge no. 400 hand crank blower. Which is a major upgrade from the tiny Buffalo Forge blower I was running. Now its even less work to keep the fire nice and hot. This thing spins for days when you let go of the handle. Also, here is a shot of what I've been heating and beating over the last few weeks. A couple hand gravers. A round punch a slot punch. A kiridashi. A touch mark punch. A scribe. And a very poor attempt at a knife.

-
Yeah, im lookinf forward to the ease of use of the hand crank. But im still happy to use the box bellows as needed. Its just a bit too warm for it these days.
-
Sorry for the inappropriate language, I won't let it happen again, thanks for the edit Mods.
-
I'm looking for one already.
-
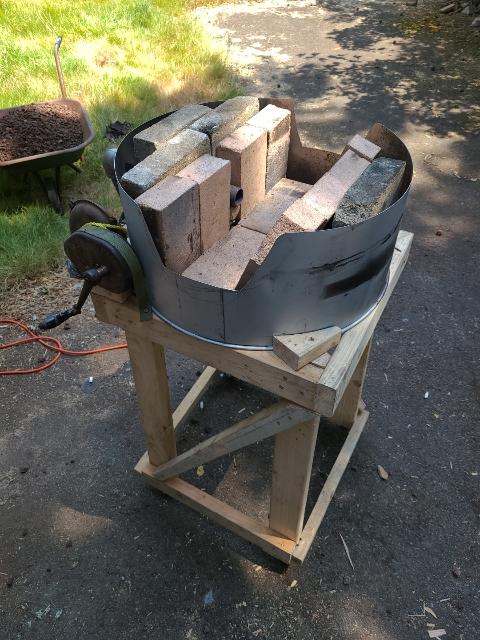
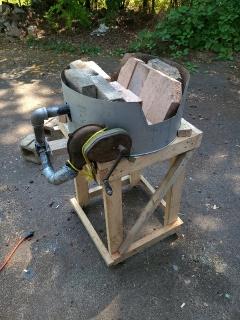
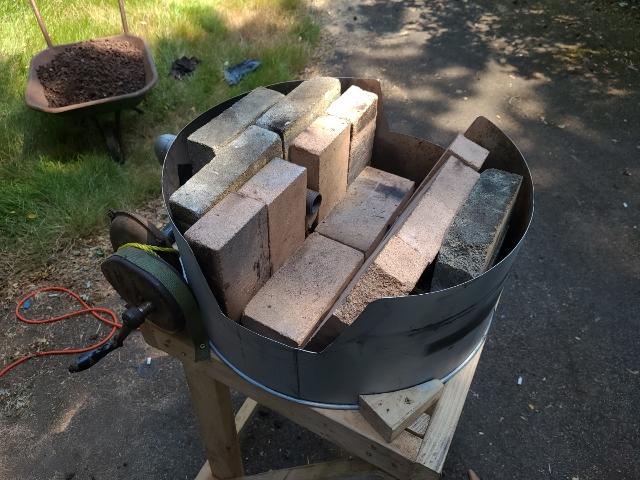
Update! Lava rock: try and keep it out of the fire, works fine for back fill around the bricks, but i was finding tons of black glassy hard rock like material left over when picking out leftover charcoal. As many of you have suggested my forge body was way too big. Pain in the xxx to move in and out of the garage space by myself. So I figured i would pick up some locking casters so I could roll it in and out. the bellows: way more air power than needed for most projects. While I was hunting for my post vise I found a small Buffalo Forge blower that I talked the guy out of for next to nothing. I figure if I am working on projects that require that much air and fire I will likely be using a striker, in which case turns can be had pumping the box bellows. Which I came to the conclusion are way more work than is necessary especially in weather as warm as we have been having. So after some consideration and another stack of fire brick I found for free on CL. I made the call to rebuild my forge. I now have a more normal looking sideblast 55, fuled by scrap dimentional lumber(which is typically free if you know where to look) powered by the Buffalo Forge hand crank blower, which all sits atop a temporary stand(on forementioned casters). This stand will be one of the first projects I do when I get my welder.
-
As much as we all like playing with homemade explosives, I think I will pass on that one. Welding seems way simpler. But really, I think i will leave the jaws as they are for now. Use it as it is until it becomes unbearable. But if you find a cool man hole cover, just go ahead and stand it on end and roll it down the 5 ill grab it as it passes through Portland. Haha.
-
Yeah that was my thought.
-
Nice Irondragon, looks great.. also looks real similar to what I drafted for my concept. Shoot, I might follow your lead and use something similar as a base, if i can find one for next to nothing. I was considering a larger table with some rungs off the table or post to use as handles for moving and hanging tools on when in use.
-
Thanks for the ideas guys. Working on tracking down some material for the base plate might take some time. But I may get some workbenches put up in the shop next week then I should have place to put my vises until I can find good scrap materials to build steel work stands.
-
We are here near the mouth of the Columbia river so there are a few ship yards, not nearly as many as the Bremerton area about 4.5 hrs north of me but there should be a source for what I'm looking for. Thoughts on the base size.... 24"dia or bigger? I would assume wood would work if it was mounted to a bench anchored to a wall. Or if the wood post was sunken into the ground. But I am in a non permanent location, so I don't have the ability to drive any posts in to the yard.
-
Yeah Frosty, that was my hesitation on the tripod idea. Maybe a single post with a round plate base would be best. But finding the material is gonna take some time and effort. But it sounds like I should start the hunt.
-
Ah.hahahhaha.. too true Goods. I haven't decided how to mount it yet. We have yet to build workbenches in the shop. And I'm not the lead on that project, so i try and make due on my own. The forg is in a collective space, so i was considering the possibilities of a free standing tripod similar to some steel anvil stands you see, but with a wider base and taller obviously. Maybe with room for sandbags... kinda portable around the workspace but kinda stable..??.. not really sure. Open to suggestions though.
-
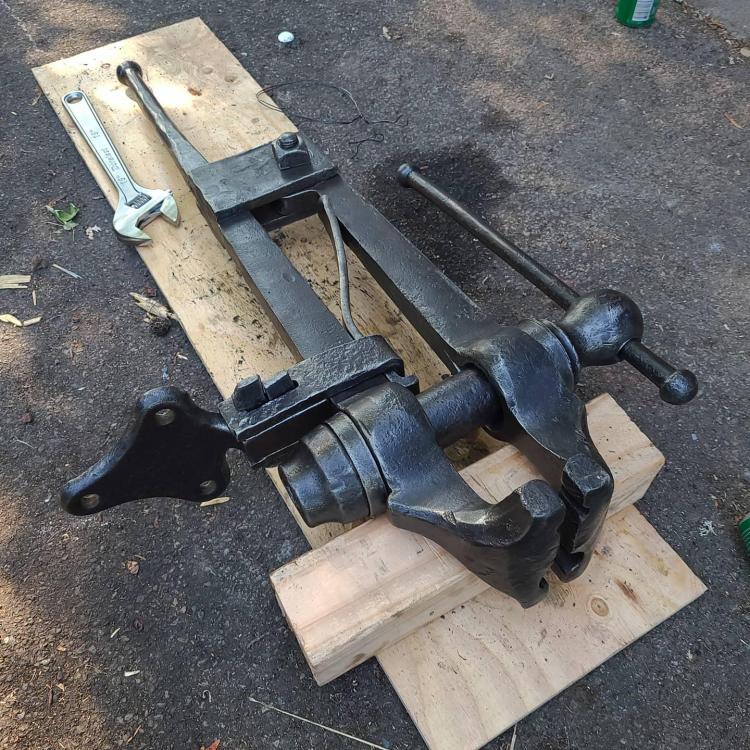
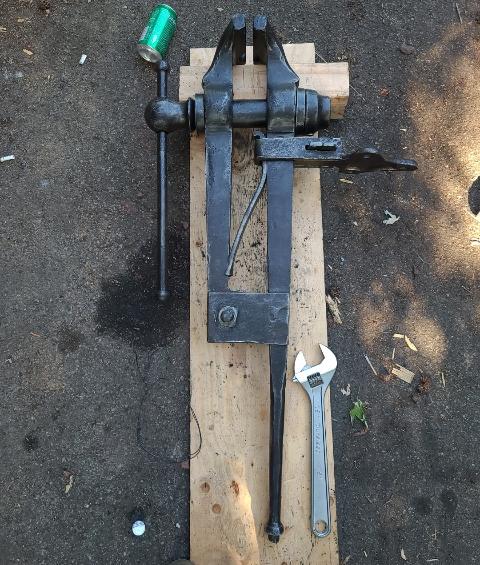
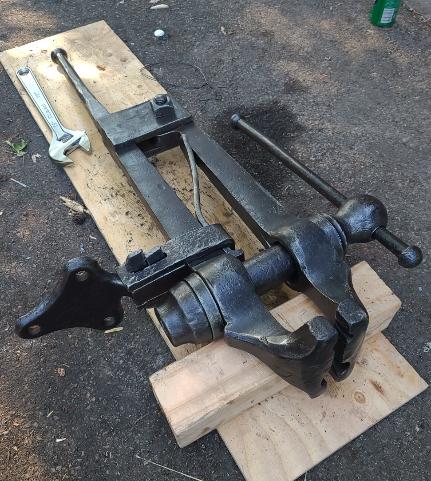
Just to wrap up the story in this thread, incase any one missed the resto thread I made, or this is getting viewed in the future..... here is the vise i picked up after about 5 hours of stripping and refinishing. Thanks again everyone, for the great advice!
-
Super sweet haul. Its a dirty and satisfying project!
-
Thanks Frosty! Means a lot. Definitely somewhat of a wild goose chase, but worth the runaround. I feel like i found a pretty good one. But sense I picked this one up ive seen a couple more locally that I almost jumped on. And hesitated. And now my wife is saying things like, you could probably make a few bucks repairing and flipping those.... ugh, always a day late hahahhah. Jealdi, thanks! That looks like a good starting point. The jaws look a lot nicer than the ones I'm stuck with. You could probably keep your eyes on the CL and score another small leg vise to use as a doner for a new screw and box. If that one is giving you a hard time. There are guys out here on the west coast letting small ones go for next to nothing missing various pieces, ie. Springs, mounting plates, exact.
-
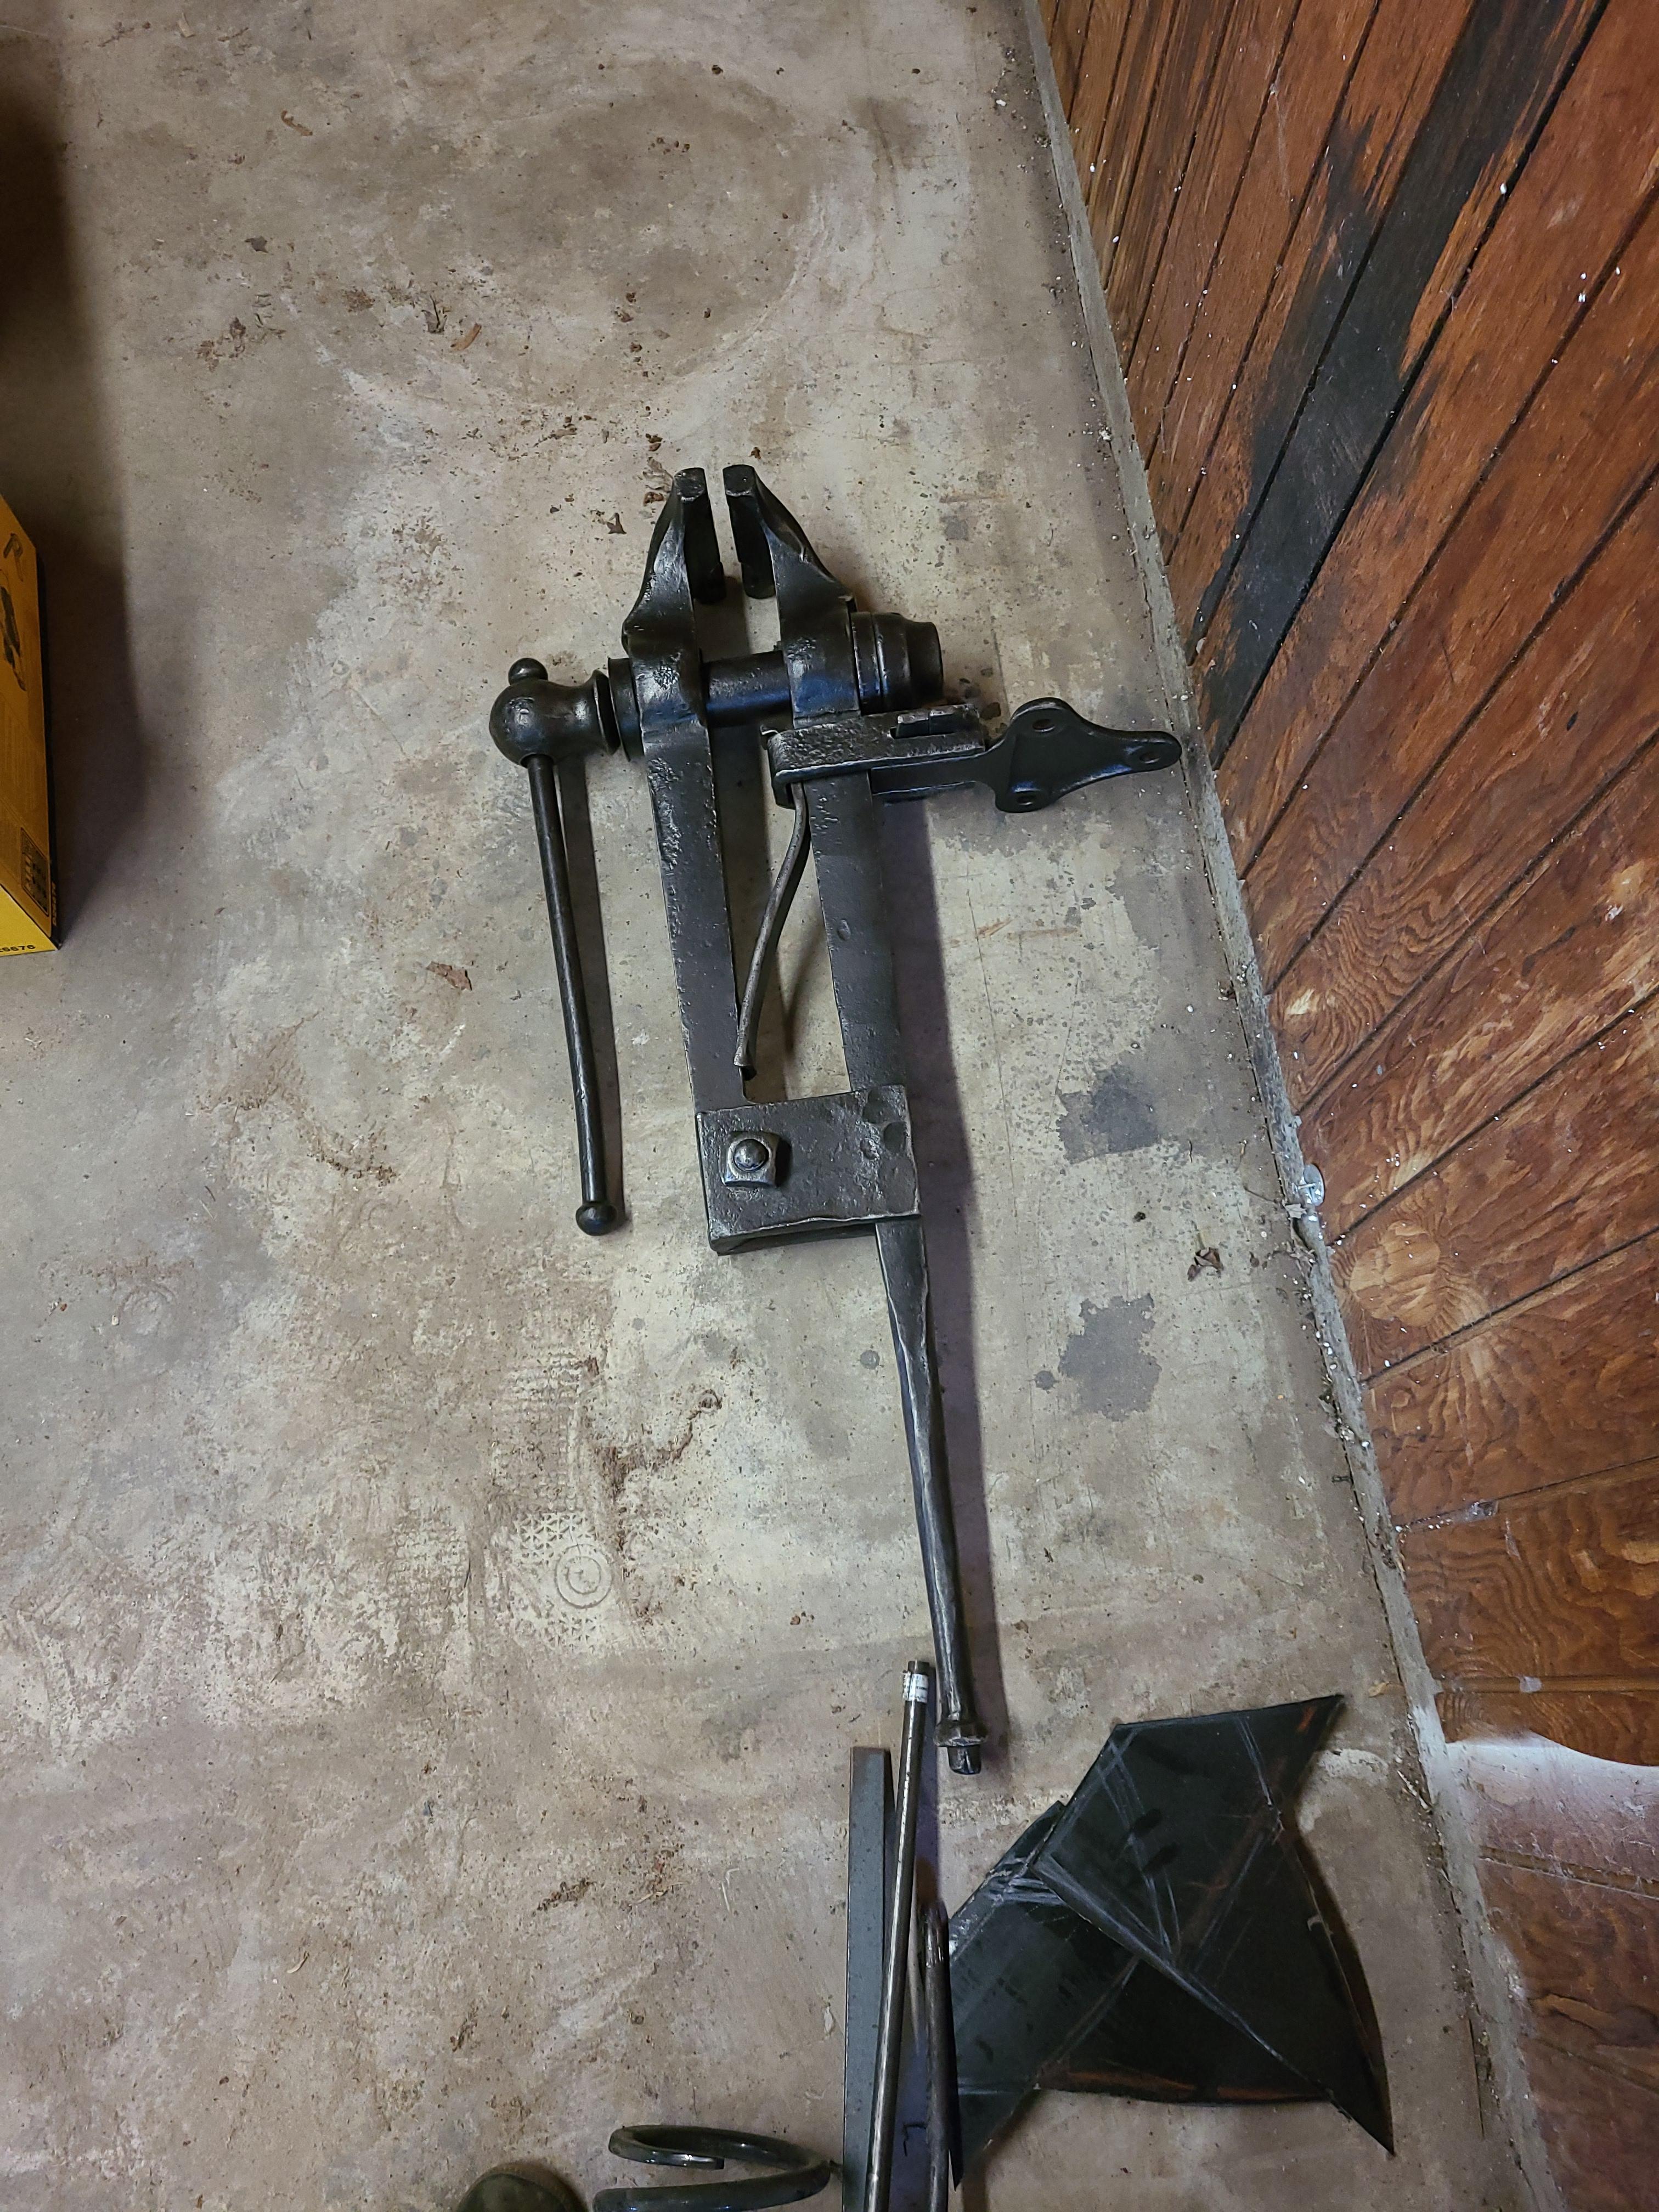
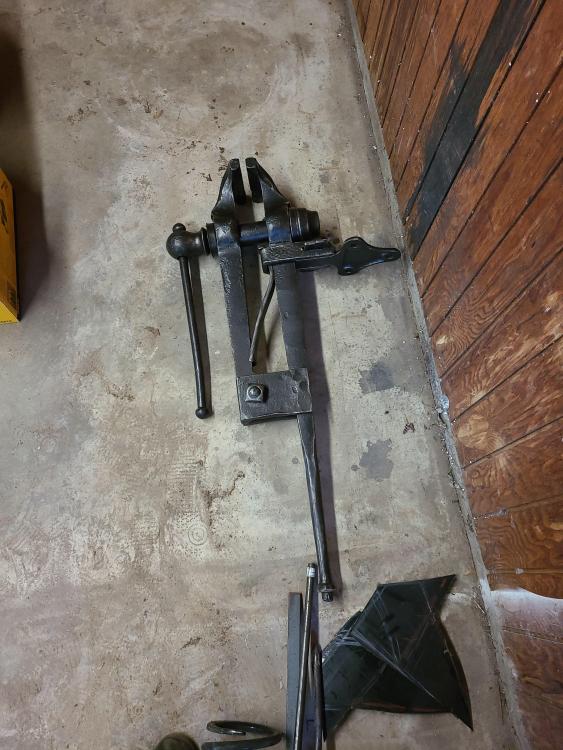
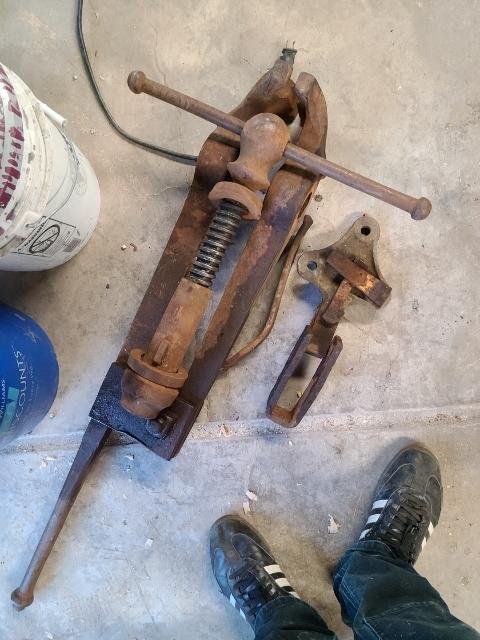
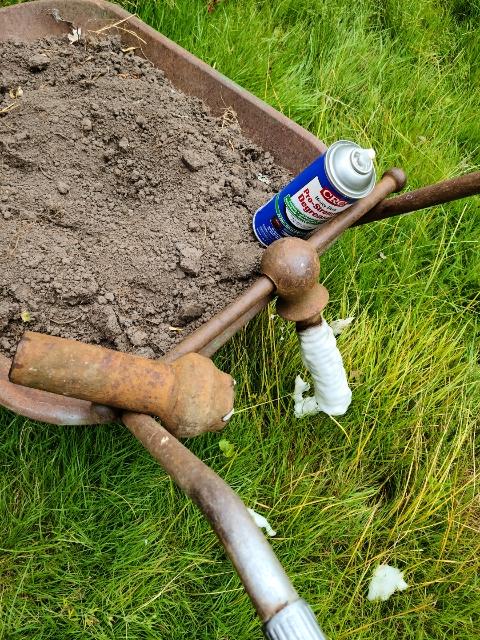
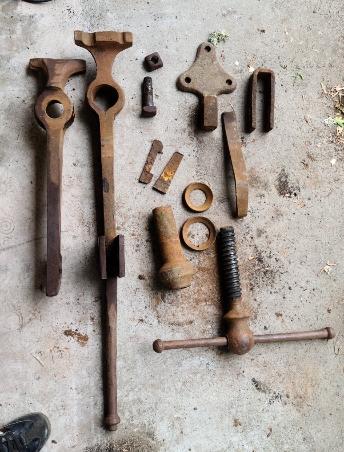
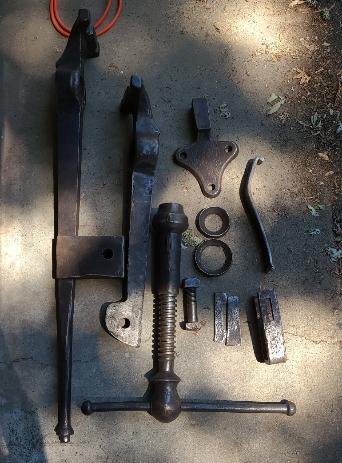
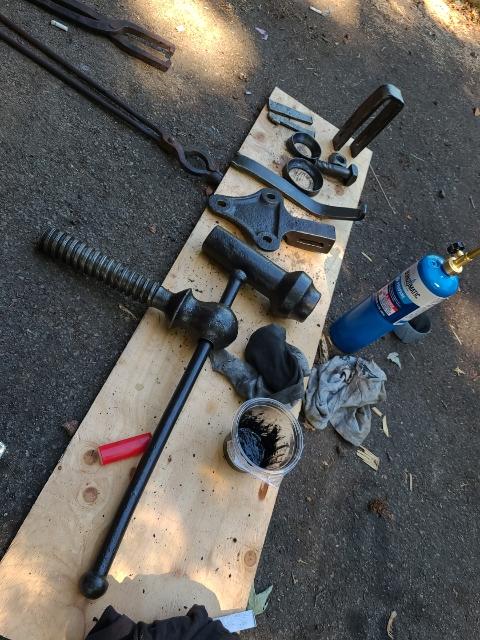
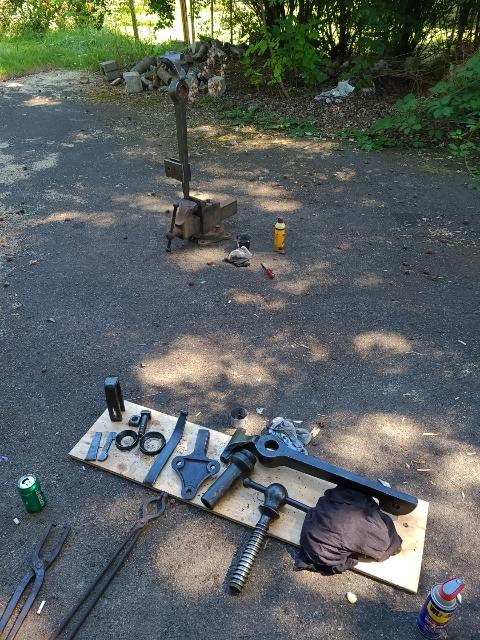
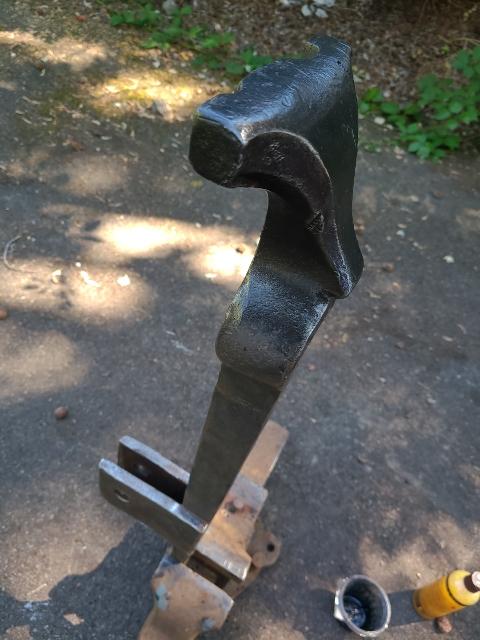
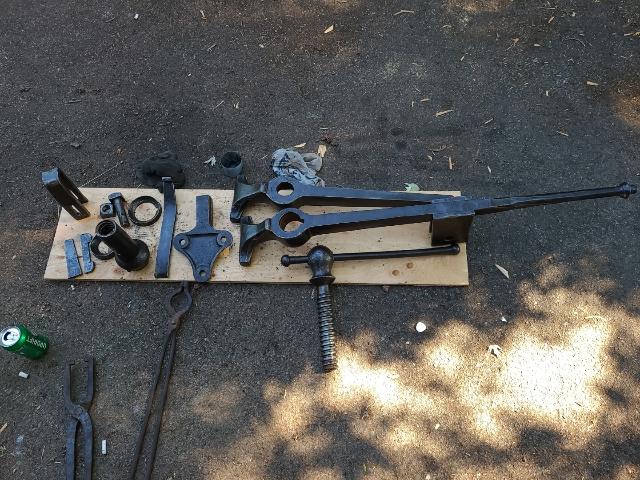
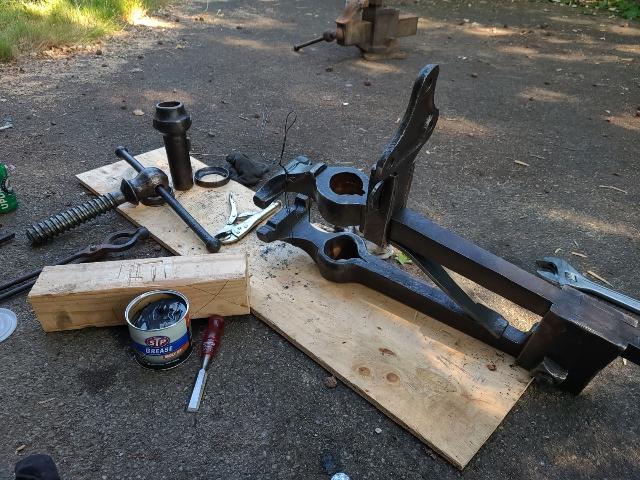
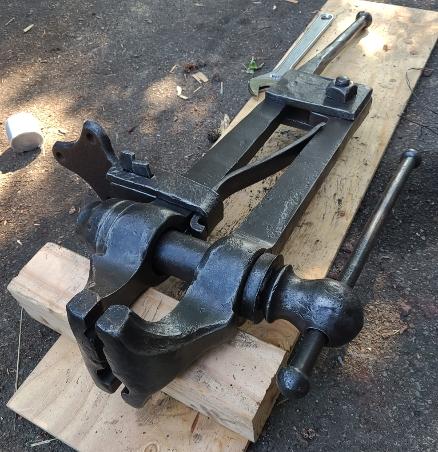
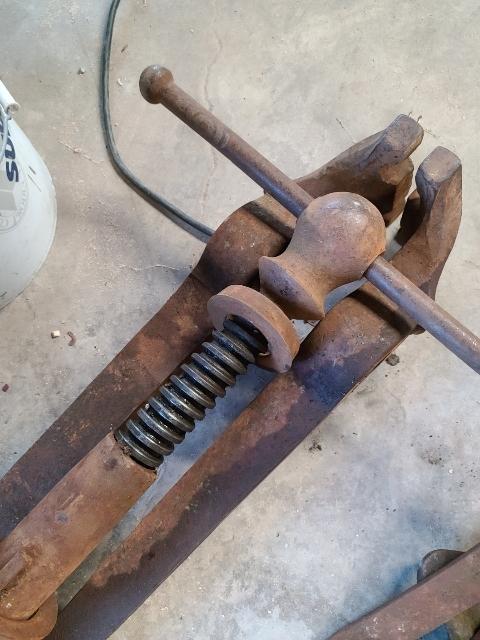
About 2 weeks ago I went down a rabbit hole on a hunt for my first post vise. After a little searching and a little heartbreak I went to look at an old incomplete PW 6 inch, but unfortunately the screw was shot and he was asking way too much for it. So more heartbreak... But while on the gentleman's property I had spotted a slightly smaller vise laying in the dirt. Long story short.... i ended up taking it home. It needed some love, so I decided to give it the good old once over with a wire wheel to see what I could do for the old girl. Used some engin degreaser to break down the old muck on the screw and box. Then went after it with a scraper tool. Once the screw and box were clear of gunk, and the rust had been wired off, all parts got a good hot rub down of a mix of beeswax, carnuba wax, some drier agent, and charcoal powder. Wiped on to the surfaces, heated by propane torch. Then I stuffed some fresh grease into the screwbox and on the screw and put it back together. With the spring back in the right place everything works and fits great. Here is the story of her rebirth in pictoral form. In stripping away the last century's worth of rust. The only marking that were found on the entirety of the vise are a year, 1919, and what I would assume is a weight, 100, stamped into the back of the rear jaw. It looks a lot like some of the mid sized Columbia vises I have seen online but there is no C, or columbia stamp anywhere.
-
Yeah, the screw on this one has to have 80 to 90% life left on it not a knick anywhere. The box looks good from what i can see through the grease. The completeness and the condition of this vise are what allowed me to overlook the drilled out jaws. I figure it will work just fine until I find a doner 5.25" vise with clean jaws and a roaches screw, at that point ill marry them and have a super clean tool.
-
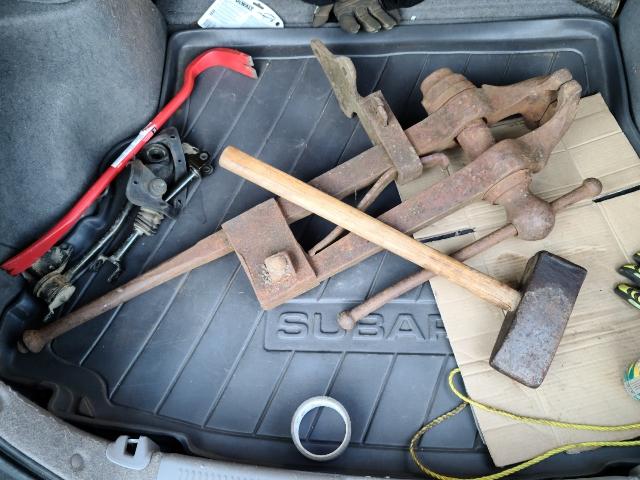
Well I started the teardown tonight after work. Just enough to get a picture of the screw for you guys. Here is the vise I chose to take home the other day.

-
Thanks Frosty, I was wondering when you would pop in. It will be a really good starting point to get me working. I'm at the day job for most of the day, but if I can cut out early ill dip over to the shop and start soaking the bolt and start on the teardown. I havnt shown youguys the best part yet. I'll get a couple pictures of the screw and maybe start a new thread as a refurbish thread here in this section, if the mods will allow it. Thanks again everyone. As always a great help to hear from you.
-
Ah right sorry, forgot about that trick. Just finishing my coffee now.
-
Like automotive style wax paste? Rub on with a rag...? Or do i need to use a block of it?
-
Ah, ill keep my eyes out for markings and stamps as I clean it up. Maybe next week or so. Anyone have a good method for wax sealing this beast? Paraffin, beeswax, home brew.....
-
Ah, Thomas. Yet another good idea. And this one dosnt require adding any more stress to the jaws. I haven't taken a measurement yet,, but im guseeing this is a 5.25" jaw weighing in around 120lbs... I didn't see any markings on it anywhere. But its pretty grungy. Something may show its self when I start working it over with a wire wheel. And apparently I'm still new to this game, I may have pId a little more than yourself for this vise. Also what is the ski jump?
-
Thats a good idea Irondragon. I am gonna clean it up a bit with a wire wheel and wax and re grease it. Then use it as is until it becomes unbearable. But im gonna keep that one in the memory bank for when it comes time.