picker77
-
Posts
212 -
Joined
-
Last visited
Content Type
Profiles
Forums
Articles
Gallery
Downloads
Events
Everything posted by picker77
-

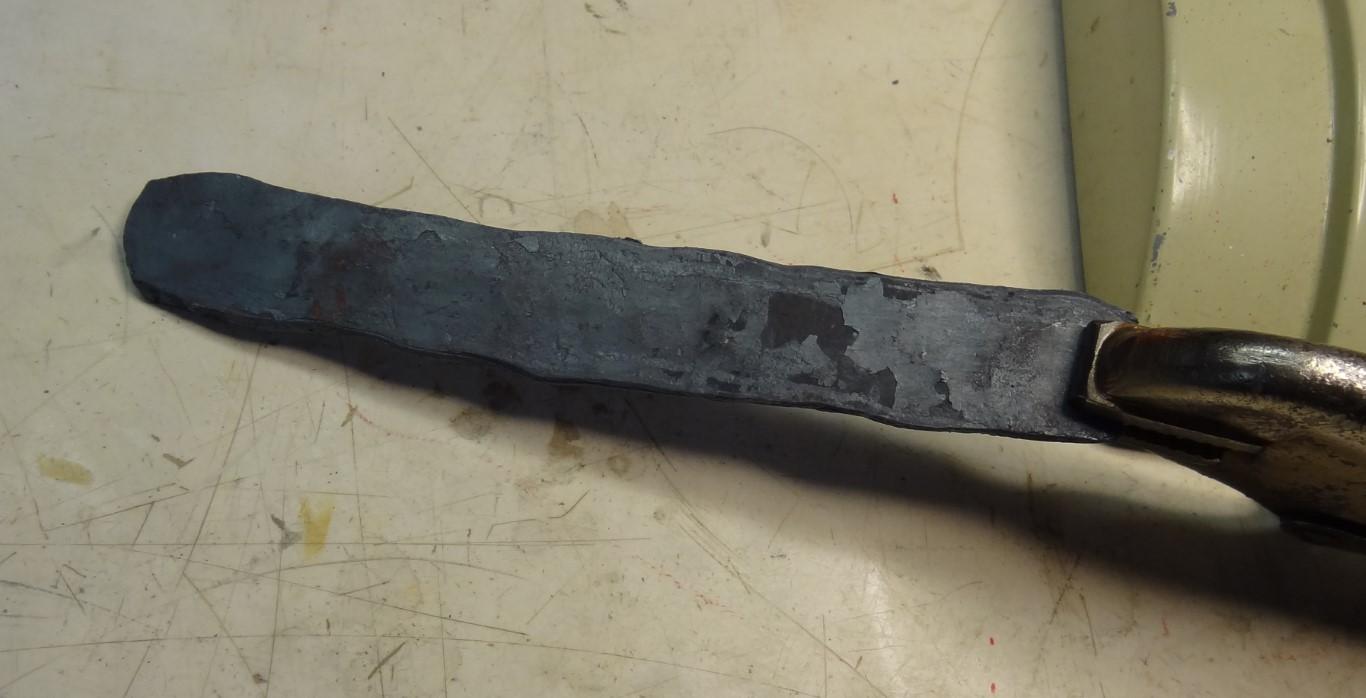
Dry-welded, hand hammered pattern blade (8 photos)
picker77 replied to picker77's topic in Knife Making
1. Metal stack was clamped, MIG welded across each end, and also once across each long side. All welds were then ground down to flat clean steel before welding on the tong stub, which was a short piece of 1/2" square HR. 2. Don't remember on the soak time. I turned it over just once, I think. I probably slapped it down on the anvil shortly after it was yellow-white and I was sure there were no shadows. 3. I would not recommend trying this with mystery or pitted/dirty steel involved. This stuff was all new and shiny, and I cleaned every layer very carefully. 4. Do not make the mistake of assuming I knew what I was doing. This was my first time, and it just happened to come out well. 5. You made a nice looking knife there! -
Excellent. For hidden tangs, it should beat heck out of the flame/smoke/fire/stink/char & burn method, which I never liked, and the broach will still allow carving a "slotted" tang hole. I have never trusted epoxy to properly bond to charred wood, although haven't had any failures (yet).
-
Echo that, IFC! I'm making a couple of these tomorrow! Thanks for lighting the spark!
-
Dry-welded, hand hammered pattern blade (8 photos)
picker77 replied to picker77's topic in Knife Making
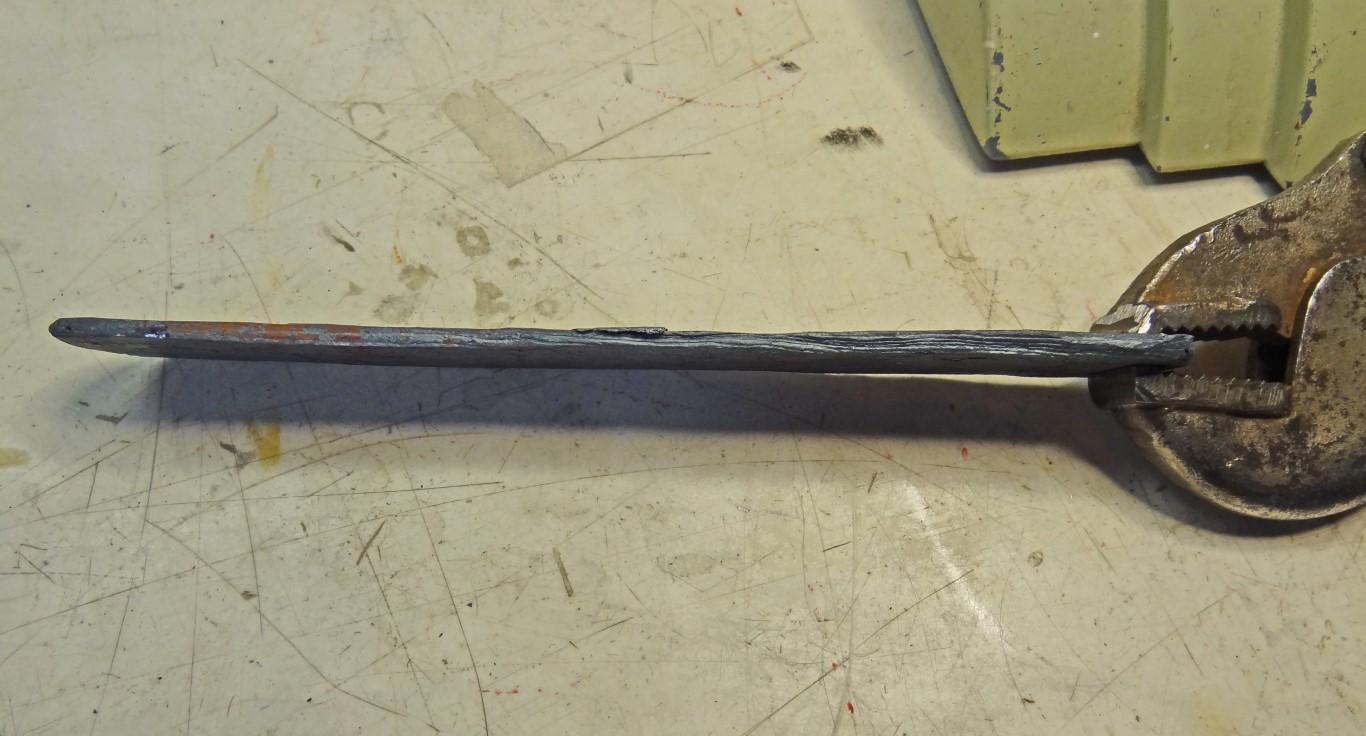
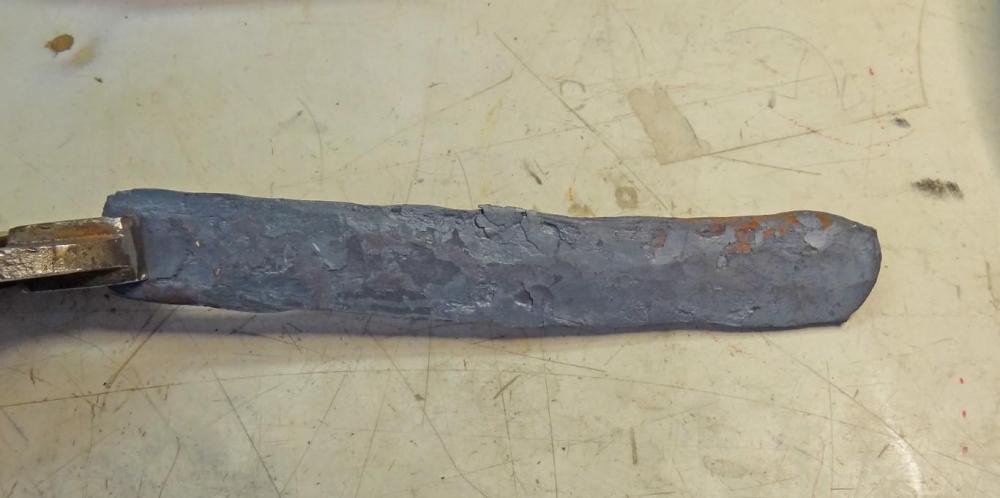
The billet was nothing special, I just was pretty careful in prepping it. The stack was made up of all new metal, alternating 1/2" x 4" wide strips of 0.035" 1095 shim stock and 0.049" 15N20, with a 1/16" strip of 1095 as the core. The first photo in the sequence above shows the billet (19 layers) after each strip was cleaned with acetone, stacked, tacked with a MIG welder, a stub added for the tongs, and after it was cleaned up on the belt grinder. I was really careful to keep the metal clean as I assembled the stack, and I ground the billet down to fresh metal on all sides after it was tacked together. After all that careful prep, the actual dry weld itself was kind of anti-climatic and was surprisingly easy to do. I had fooled around with borax on a couple of experimental billets and did not like using flux, mainly because it was messy as heck and cratered my forge's kiln shelf floor pretty badly. So I decided to go dry. I plan to try some more dry billets but have several knives for friends and family to finish up before I get back to experimenting. Also getting ready to add a VFD & 3-phase motor setup to my home built 2 x 72 grinder to replace the 1.5 hp single speed motor,which will give me some much needed speed control. Right now it's pedal to the metal at 3450 RPM or nothing. Thanks again for the hammer control advice, I'll work on it. -
Dry-welded, hand hammered pattern blade (8 photos)
picker77 replied to picker77's topic in Knife Making
Thanks to both of you for the advice. The wrist pain only lasted a couple of days, and faded out. This was the first layered billet I'd ever attempted to draw out, and after reading and studying lots of IFI member comments on hammer technique, I may have mentally abandoned all I thought I'd learned, and was concentrating so hard on not screwing up the billet, that looking back after it was all over I'm not sure what my hand/wrist was doing, ha. I was mainly trying to take my time and be accurate. I used an 800g hammer for most of it, but used a short-handled 3 lb little sledge for the initial series of gentle welding "taps". Learning hammer technique kind of reminds me of taking golf lessons, where there are maybe 8 or 10 things that all have to go just right simultaneously in order to consistently hit a clean, straight drive. It all comes easier with time, I'm sure, but I'm trying not to learn too many bad habits up front. Like golf and many other things, unlearning a bad habit is a lot harder than learning a good habit! -
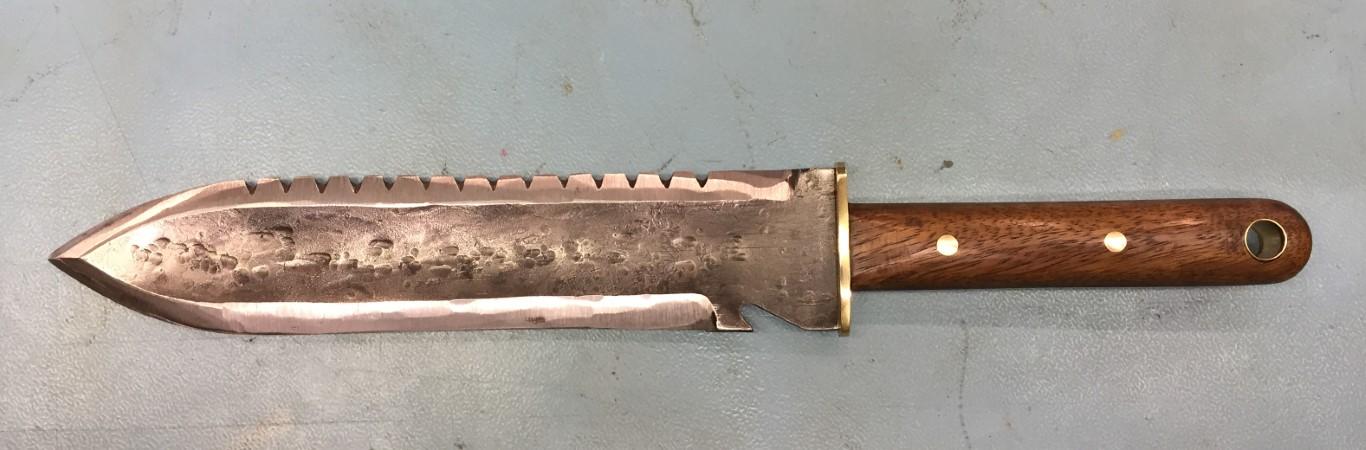
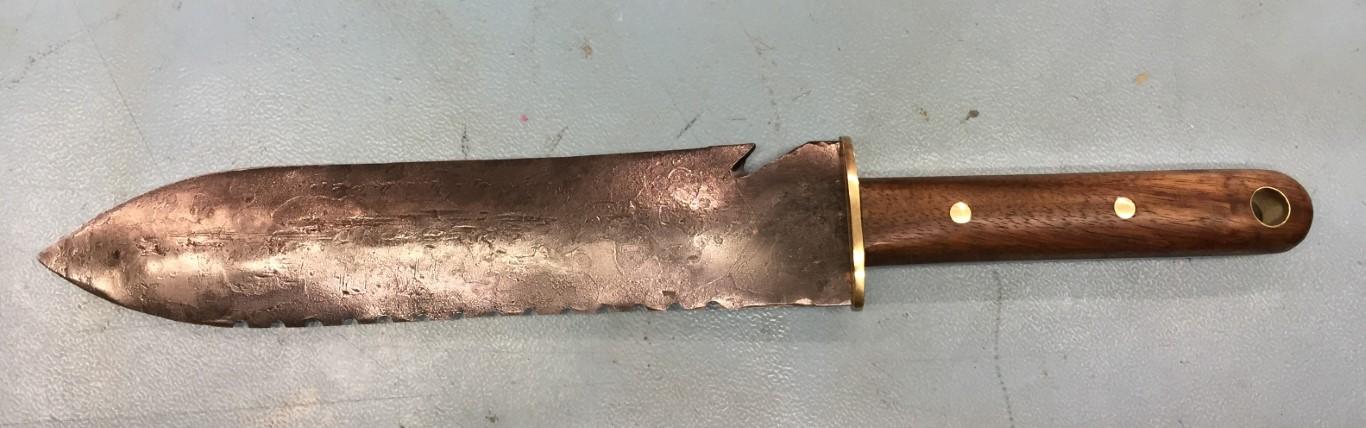
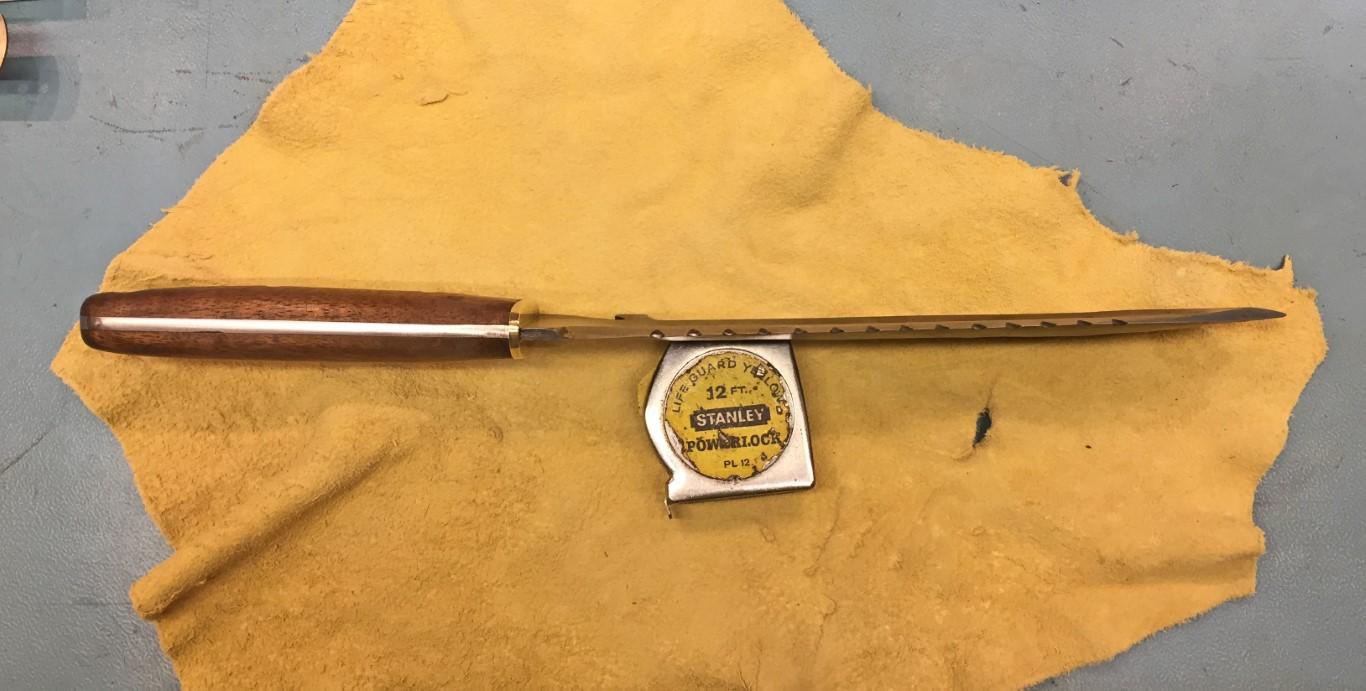
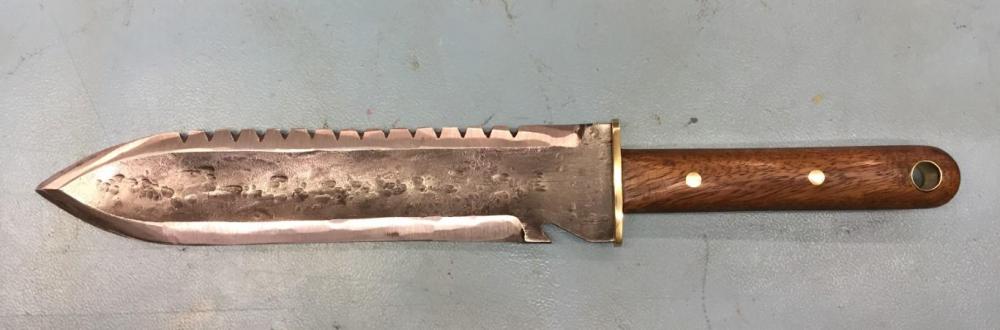
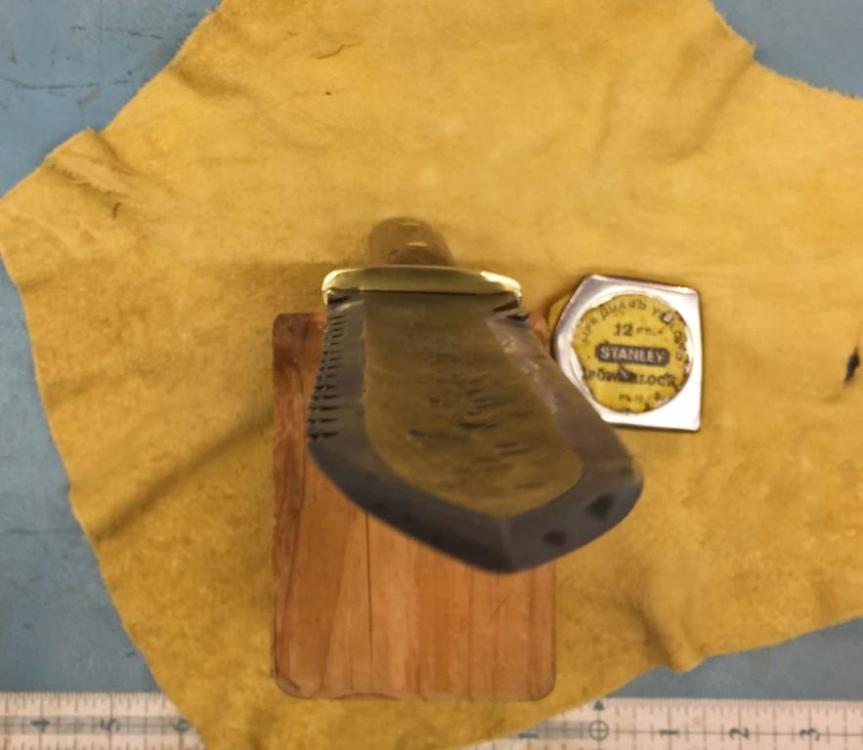
Thanks for the nice comments. It is a beast of an implement, and should not be carelessly wielded, so I really should probably make a sheath. Never tried a wooden one, so what the heck, maybe I'll do that. Actually, the 1/2" brass tube lined hole in the handle is intended for hanging it on a nail in the potting shed or wherever, but it is pretty heavy and extremely sharp so should probably have something for a sheath. I'll also have to warn her that it's carbon steel, and like a horse should not be put up wet. Till now I'd never heard of one of these things, but they make a lot of sense, and apparently are very popular among the gardening set. However, some online research reveals a lot of QA problems with broken & bent blades, loose handle rivets, etc with the mass produced units. I already have my first order, the XYL (wife for non-ham radio folks) wants one!
-
Don't see a garden tool category, so I'll throw this in here, although maybe it should be in "What did you do in the shop today" instead. Mr. Moderator please move it if need be. Thanks. One of my sisters is a University-certified Master Gardener, who also teaches others. Her favorite all-around garden tool is the Japanese Hori Hori, but she uses her tools daily and hard, and has suffered a rash of broken/bent blades (from prying roots & stones) and poorly attached partial-tang handles that loosen up in use in the commercially available tools. Most popular variations appear to be rather cheaply made with blades stamped from stainless sheet metal, and they are infamous for having cheap and poorly attached partial tang handles. She asked me to make her a heavy use forged hori hori and forget making it pretty, just make it a bit oversized and make it tough. Making things that don't break and aren't pretty is right in my wheel house, so I finished this today. It's a full through-tang digging and prying tool, 15-3/4" long with a 10" blade, forged from 5/32" 1084 with scale left intact. It is about 2" longer and quite a lot thicker than the common versions. It's heavily front-weighted for chopping and digging, very sharp on both edges, and the serrations cut wood and roots quite well. The string/line cutter is also very sharp. Scales are riveted Koa. In keeping with the hori hori's evolution from a garden trowel, the blade curves slightly lengthwise, and is also forged concave in cross section for strength. I do not think she will break this one, and I hope she likes it.


-
I remember it being called the icebox. The ice company provided each house with a four-way sign to put in the front room window. Depending on how it was placed, the upright number either read 25, 50, 75, or 100, referring to how many pounds of ice you wanted from the ice man who cruised the streets in his truck every few days. If you ran short, you drove down to the ice plant and brought home a chunk to hold you over. But that was when our phone number was "803-J", so it was a while ago.
-
Dry-welded, hand hammered pattern blade (8 photos)
picker77 replied to picker77's topic in Knife Making
Thanks, Les. And you're right, Frosty, if I was doing it again I'd make it into more of a Wharncliffe and put the edge on the other side. My wife and chief QA inspector already gave me one of those "why did you make an upside down knife?" looks about the handle when she picked it up. But, as I lamely explained, it was less intended as a real working knife as it was a dry-welding attempt. I tried welding a billet with borax and not only had delaminating problems, the danged flux ate a crater into my kiln shelf forge floor, which really torqued me off. So I'm going to try to stick with dry welds from now on. This one seemed easier to hammer out, I had no delams to speak of, and it left the forge floor in pristine condition. Heck, now that the idea has been planted, maybe I'll re-grind the profile and call it a semi-Wharncliffe. -
Dry-welded, hand hammered pattern blade (8 photos)
picker77 replied to picker77's topic in Knife Making
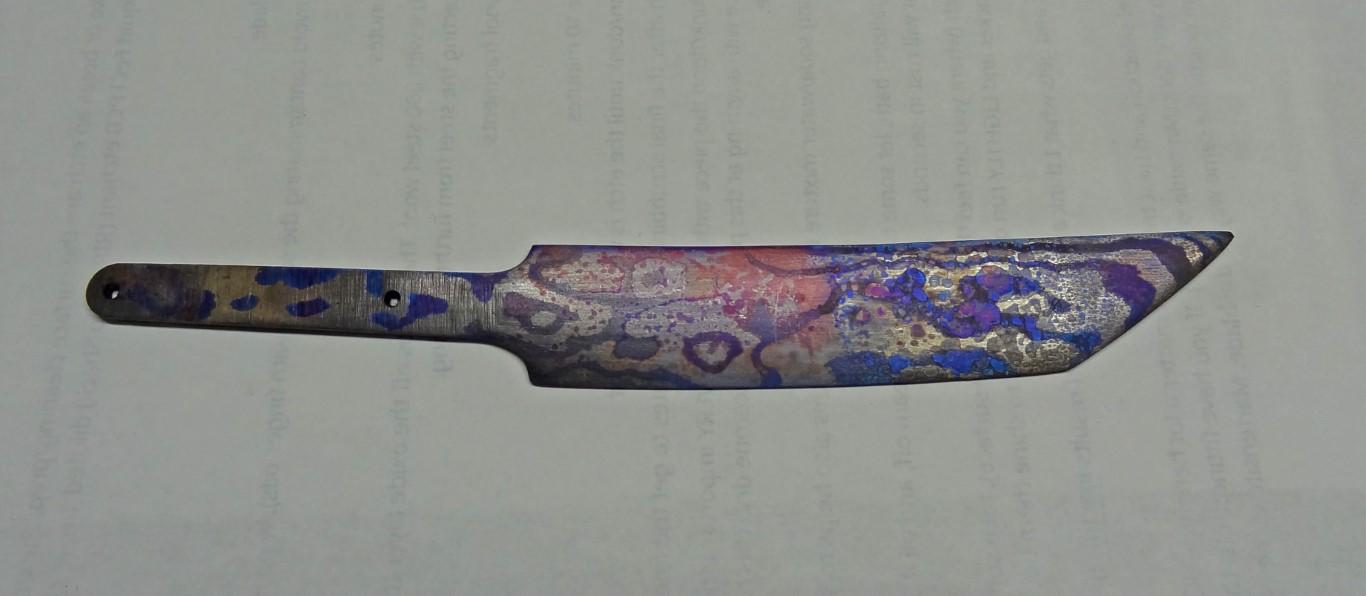
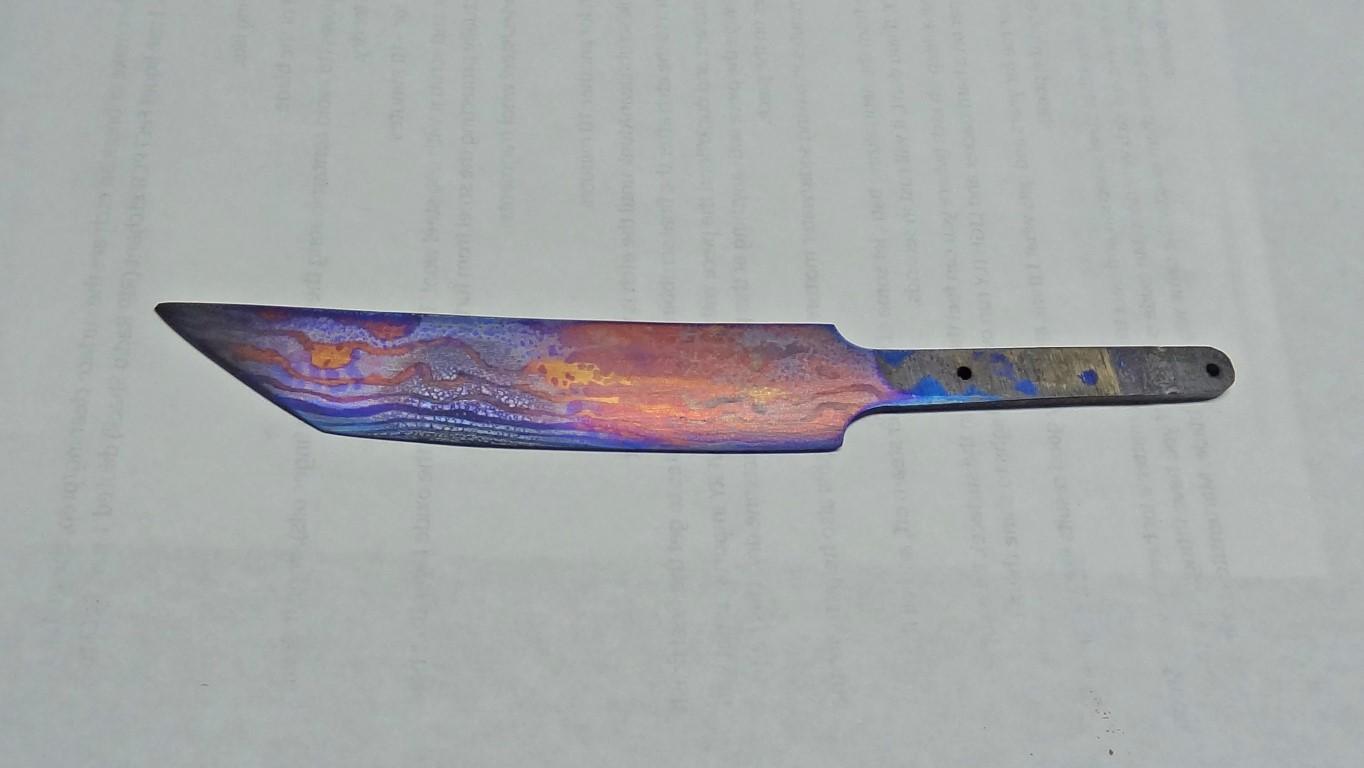
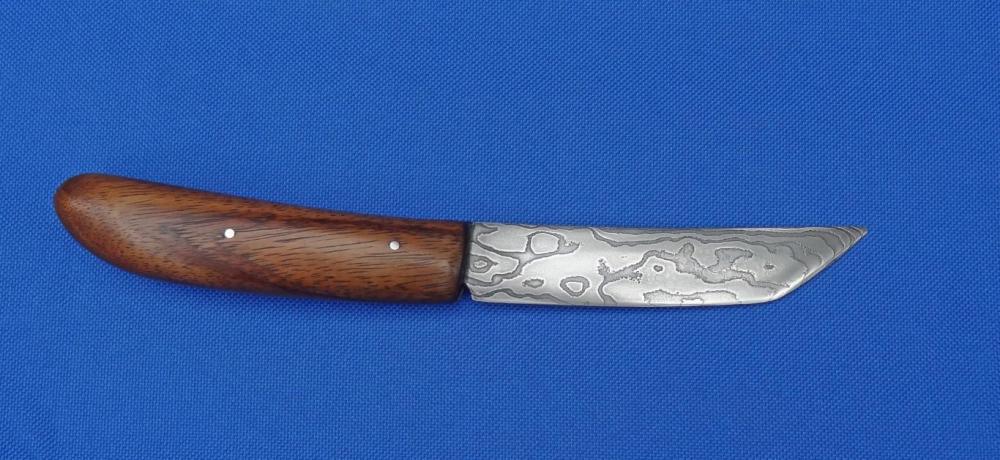
Thanks, Goat Lady! I had to work hard to get the image of the Hawaiian Islands into the pattern on the left side, but felt it was appropriate considering the Hawaiian Koa handle. -
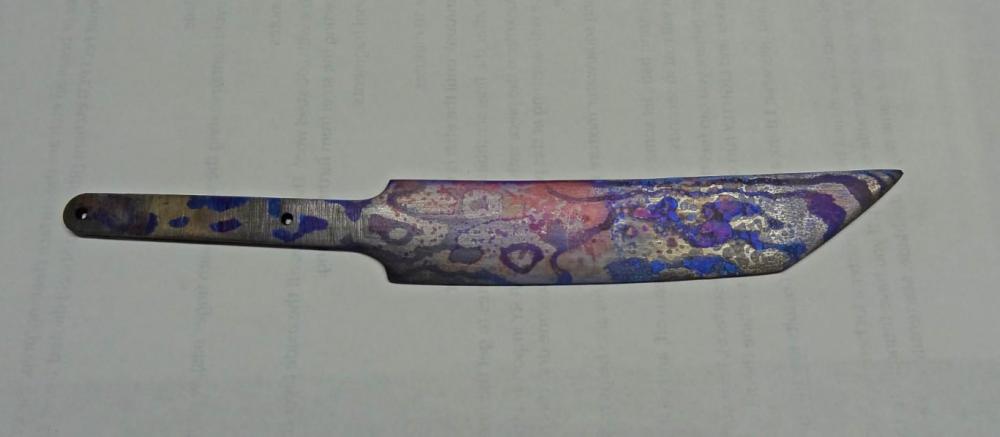
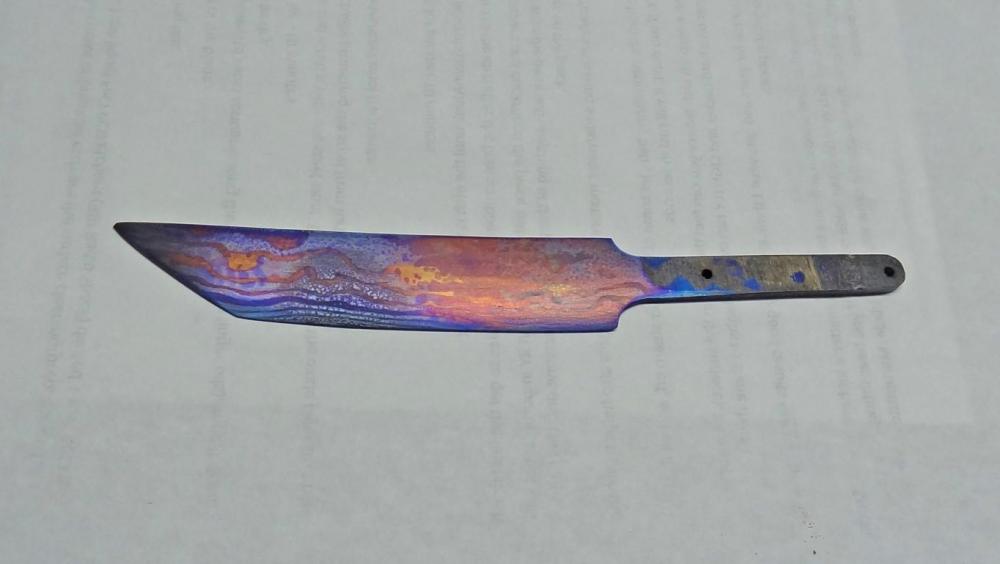
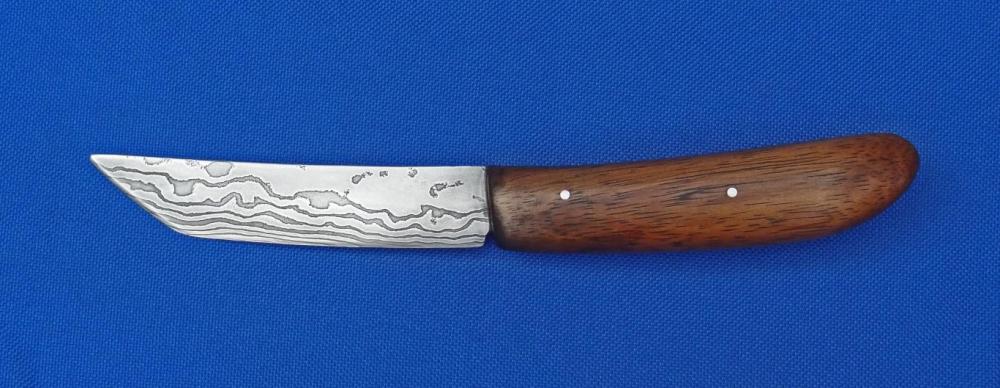
Wow, nothing like following an artist like Templehound with a beginner project like this. Some of you may need to avert your eyes, lol. Anyway, this utility sort-of-tanto-shaped blade was not only my first try at pattern welding, to make it even more fun it was dry welded and hand hammered. 8-3/4" OA, 4-1/4" blade. 18 layers of thin gauge 1095 and 15N20, sandwiched around a 1/16" layer of 1095, for a 1" tall, 1/2" wide, 4" long stack. It was dry welded and not folded during welding. The handle is simple polished Koa from a small supply I brought with me when I moved here from Hawaii, and is pinned to a hidden tang with stainless pins. Several valuable lessons were learned in the process, such as don't heat directly in the flame path if possible - I think doing that created some scale/stains especially on the left side I could simply not get totally polished out (especially visible in the post-tempering photos). Tempering was 450F for an hour, and hardness seems fine, which leads me to believe the blue after-tempering color was probably caused by residual quench oil (another of many lessons learned). The biggest lesson, though, taught to me in no uncertain terms by my right wrist, is to start saving up for a small power hammer. 8 photos below, I resized them but hope I smashed them down enough.


-
Thanks, Timgunn. Well, I must be somewhere in the ball park, because what I'm doing appears to work. I just didn't have any real idea what too much closure might do to the burner mix, or back pressure, or CO output, all some of the things that are still a bit of a mystery to me. I do keep a CO monitor on the wall about 8 feet away and I watch it closely, so I suppose I'm ok.
-
New here, no experience blacksmithing yet.
picker77 replied to maple smith's topic in Introduce Yourself
Welcome, Maple Smith! Right off the bat, you might as well go to your profile and add a location now, because it's the first thing folks will want to know for lots of reasons, lol. And you might want to un-click the bolding from future posts to make things easier for old eyes like mine to read. Don't let the health/age thing hold you back. I'm a forge newbie too, I'll be 78 in a couple of months, and have the usual litany of back/joint/arthritis/hip replacement/knee surgery, etc and things that go along with that. I found right away that pacing is important. 2 or 3 hard hours at the anvil in my case calls for a day for my wrist and arm to recover, which works out fine because it gives me time to concentrate on other small projects and knife finishing, etc. in the shop. So I just plan on actually swinging a hammer every other day. It's a lot of enjoyment and I know right away if I overdo it, ha. Sounds like you have a great place, a solid plan in mind, and plenty of resources to develop a nice forge. Keep us posted with lots of photos as the project progresses! Latticino as usual gives great advice. I'm with him on the labor saving devices, especially after the first time I drew out a billet with a hand hammer the other day. I'm almost back to where I can hold a cup of coffee now, ha. However, the price of power hammers and presses opened my eyes REALLY big, so that's probably not gonna happen. Have fun! -
I have the usual sliding half-firebrick door setup front and back on my little single-burner, but I've been sort of winging it on how much and when/if to close the back doors. How much is too much? The front doors of course need to be open wide enough to get stock in and out, but is there a general rule of thumb for the back doors (assuming a stock length that doesn't require them to be open)? Seems I read somewhere the color of dragon's breath out the front is a visual key, but I can't find that comment again. I have tried closing the back all the way, and the forge runs ok like that and it doesn't seem to restrict the burner, but of course that results in a rather nasty blast out the front, which can sometimes make stock handling a little more uncomfortable.
-
Please pass my congratulations to the Chief. I know exactly how she feels, and she deserves to be proud. I was a two-hashmark CPO myself, and loved being at that level. But the powers that be shortly thereafter made me an officer. I climbed up through W-1, CWO-2, and CWO-3 before they made me an LDO (Limited Duty Officer). For my civilian friends, an LDO (or "mustang", as we are colloquially referred to) is restricted to serving in his/her enlisted field of expertise (electronics in my case), as opposed to general ship driving duties. Many Chiefs will jokingly claim that LDO actually means "Loud, Dumb, and Obnoxious", but in reality LDO's, being ex-enlisted and usually ex-CPO's themselves, usually have an especially good working relationship with senior enlisted personnel. Incidentally, for a hundred years or more shipboard CPO quarters have been commonly referred to as the "Goat Locker", but in the modern Navy, not sure what they call the female CPO quarters. Sorry for the impromptu Navy Slang 101 class, but many civilians might hear some of these terms and not have a clue what they mean. Again, sincere congratulations and a big Bravo Zulu to the new Chief! My Navy is in good hands.
-
I suppose others have done this, but if like me you need readers for close work, try this. I wear 1.5 safety glasses in my shop, and got really tired of messing with trying to use them inside my MIG helmet. Had some spare 1.5 lenses for my OptiVisors, so I masking-taped one inside over the MIG helmet lens. Works like Bob's your uncle. You can get spare OptiVisor lenses in about any power desired pretty cheap on the auction place, and they fit nicely with a little tape around the edges. Being inside, they don't get all scratched up, either. Mine are two years old and no scratches.
-
What did you do in the shop today?
picker77 replied to Mark Ling's topic in Blacksmithing, General Discussion
Alexandr, you are both a wonder and a curse. I showed images of some of your work to my wife, and she said "Why don't you do things like that out in your shop, honey?". Sheesh. I have no words to describe how amazing your work is. A treat for the eyes. -
Discovered those wiggly little critters in my 10 gallon slack/slake tub a couple of days ago, like some I don't like oily water in the tub since I rinse my hands in it sometimes and I just don't like oily coatings on stuff. Half a cup of Clorox bleach in the 10-gal tub cured the problem more or less instantly. Easy peasy, and probably killed any other nasty things that might be in there to boot.
-
Great, I'll stand by for the link. The artistic side of my brain is routinely humbled by the ideas Ausfire constantly comes up with. He, and a few others on IFI, can look at common everyday things like old wrenches and see them as something else, something entertaining, clever, whimsical, visually arresting. As if that weren't enough, they also have sufficient craft skills to actually make the transformation happen with fire and hammer. I remain constantly in awe of the artistic talents of IFI members who produce work at that level. It's a lot of fun to watch, and maybe the best reason to regularly read these forums.
-
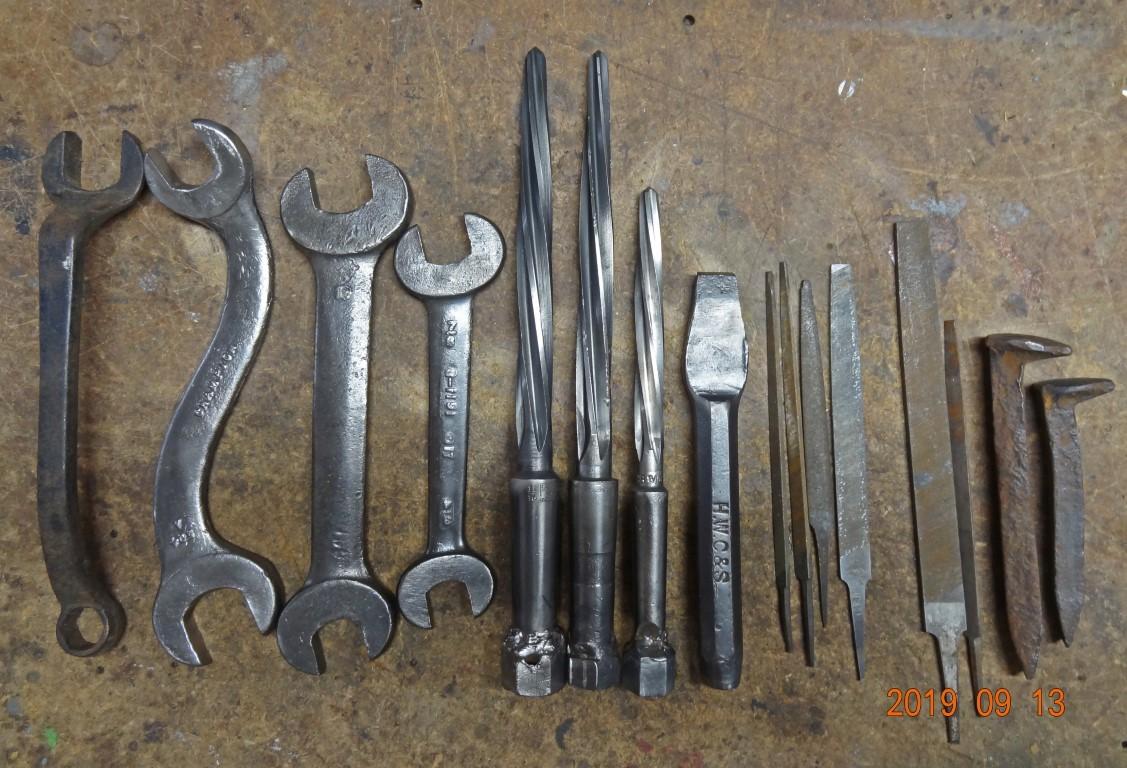
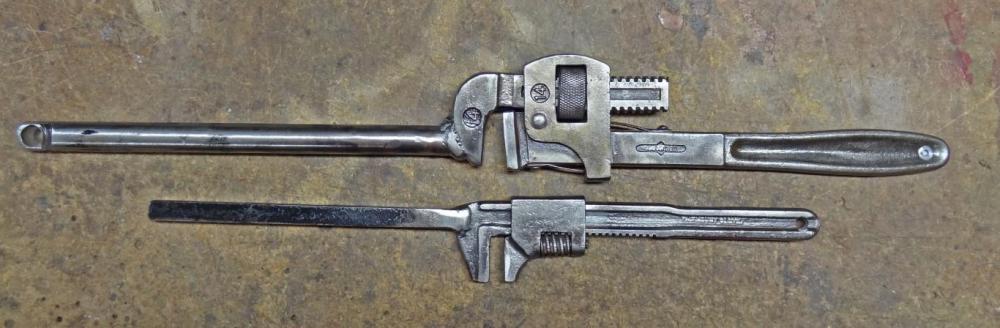
Nothing very exciting for Show & Tell, but I did hit Goodwill for a bag of old tools. Left to right is a "special" combination wrench (sickle bar blade wrench?), 1-1/8 & 1" weird curved open end, 1" - 7/8" open end, 3/4" - 7/8" open end, a pair of 11/16" bridge reamers (one nice, the second one made in Brazil and pretty chipped up), a decent 9/16" bridge reamer, a masonry chisel from "H.W. C&S", four old Nicholson files, a pair of Japanese files, couple of RR spikes. There was also a rusty & frozen up 14" Stillson, and a small flat-jaw adjustable wrench (that one might be from a Model A took kit). I really wanted the lot just to get the bridge reamers and the two adjustable wrenches. The reamers have been crudely "converted" from taper chuck to hex drive, and whoever did it is one of those rare folks who is a worse welder than me, lol. I converted the Stillson and the monkey wrench into twist wrenches for my shop. Do old open end wrenches have any forging value, or is that stretching the "mystery steel" idea a bit too far?

-
Shorts and steel-toe flip flops. Take that, OSHA! Man, I'd love to read that paper. Bet it's interesting.
-
Troy-Bilt Tiller knife project finally underway
picker77 replied to picker77's topic in Knife Making
Thanks IFC, already tracked it down, lots of good info. Storm Crow does some absolutely jaw-dropping work. His knives are a sight to see. -
Troy-Bilt Tiller knife project finally underway
picker77 replied to picker77's topic in Knife Making
Wow. Thanks Frosty, That does make sense. A second and much closer look with a 10x glass DID show some differences I had not noticed at first glance. I think I was incorrectly expecting a dramatically different, easy to see look to "bad" grain in steel, so comparing these two didn't ring any alarms. Another tidbit learned. Lots to think about, I'll take it a step at a time. I think I'll print this out and chew on it while I consider my next series of moves. This will be the third post I've hung on my shop wall, the first two being your PDF on burners, and the second being Steve Sells' clear and simple article on heat treating. Hope things in the Great North are good. -
Troy-Bilt Tiller knife project finally underway
picker77 replied to picker77's topic in Knife Making
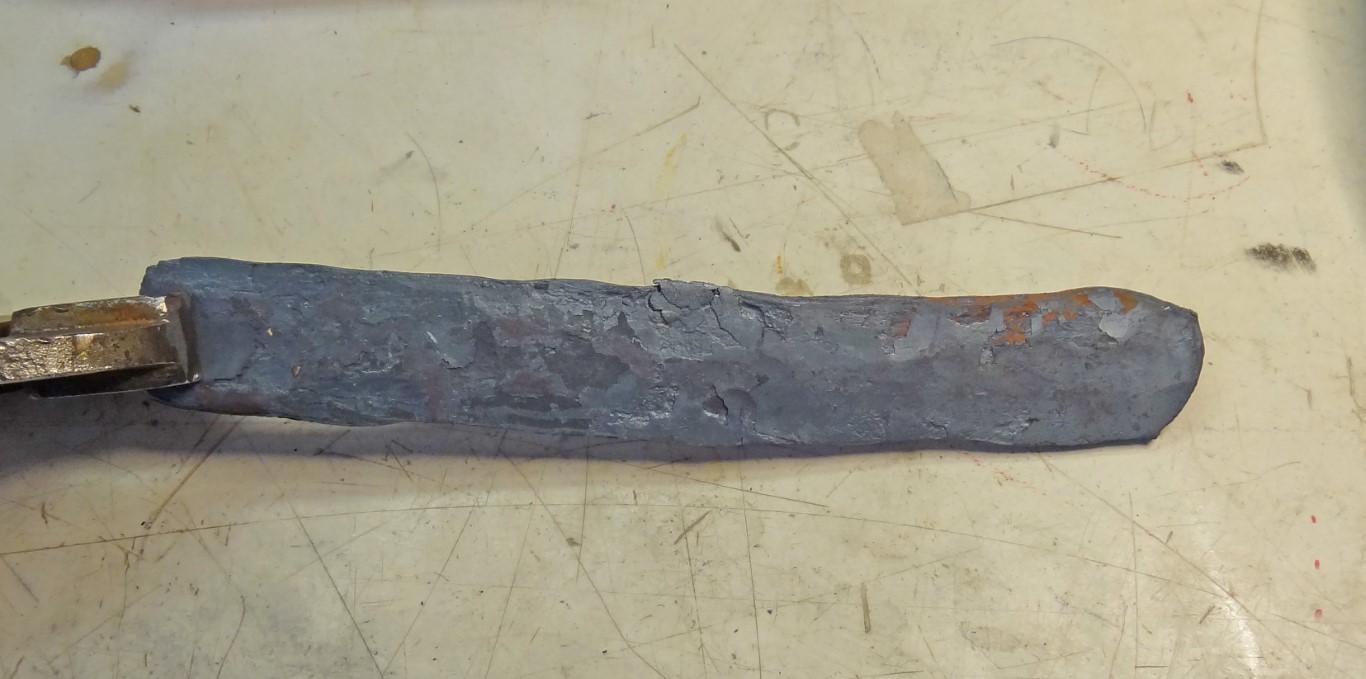
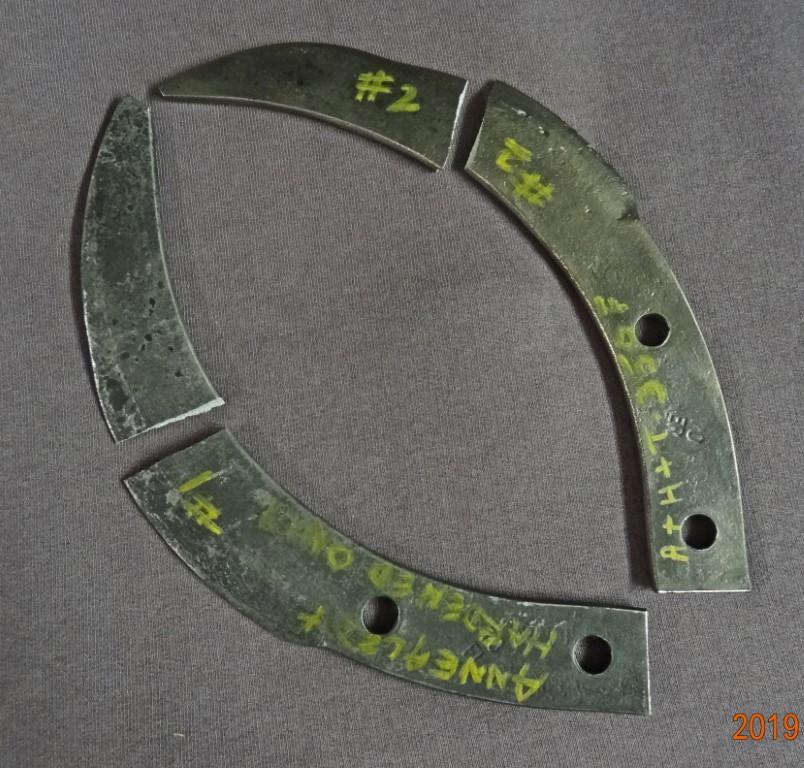
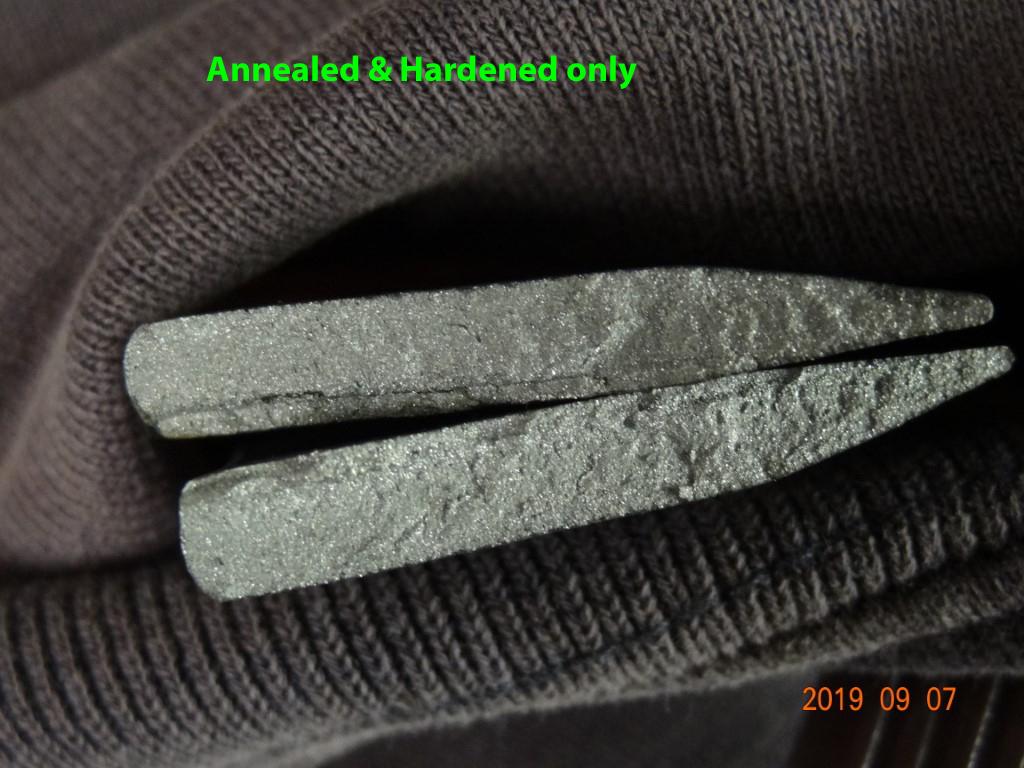
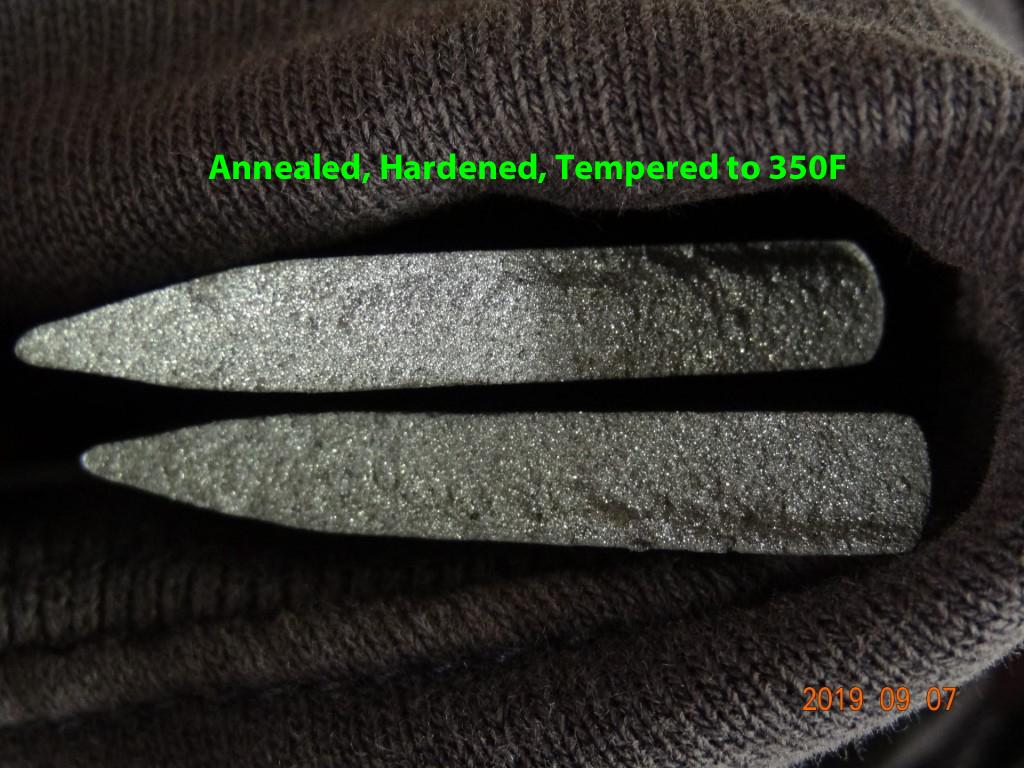
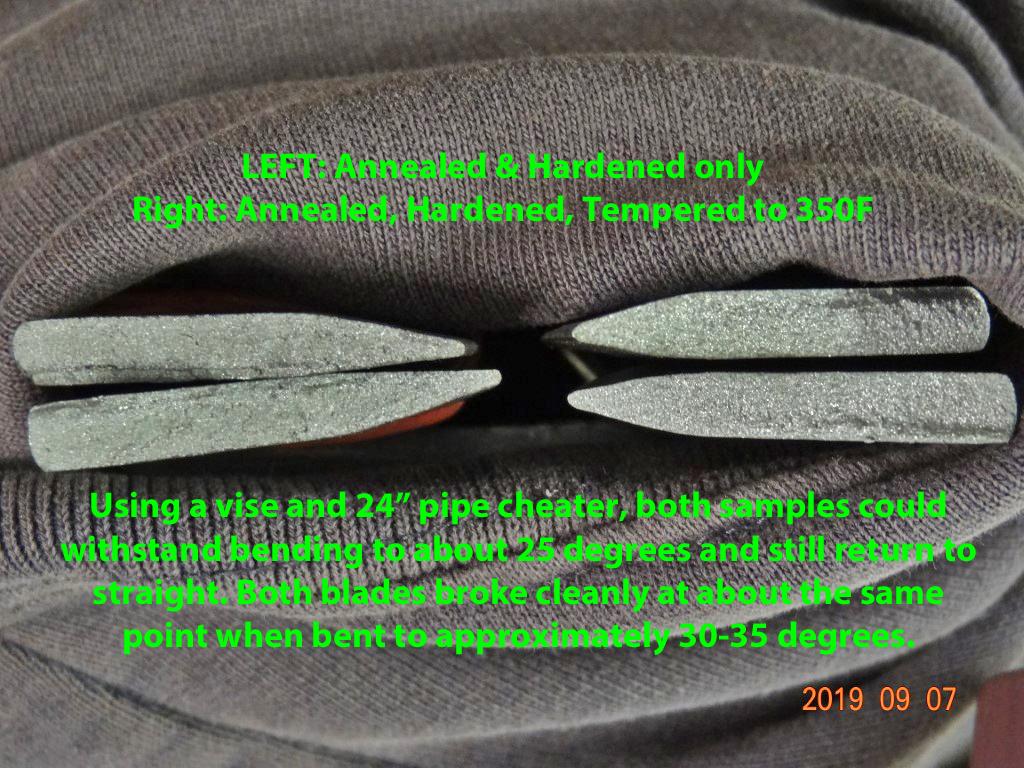
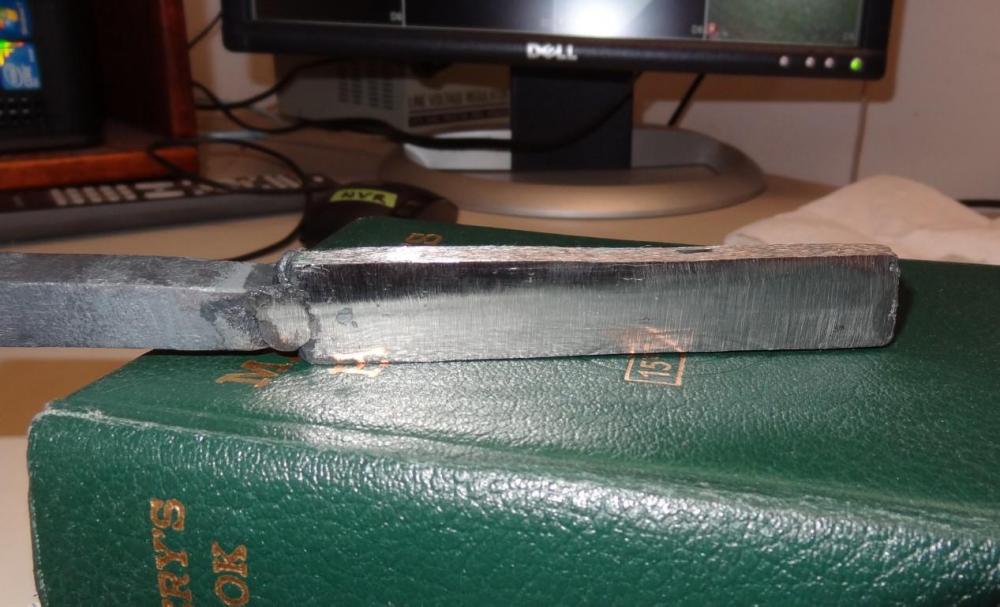
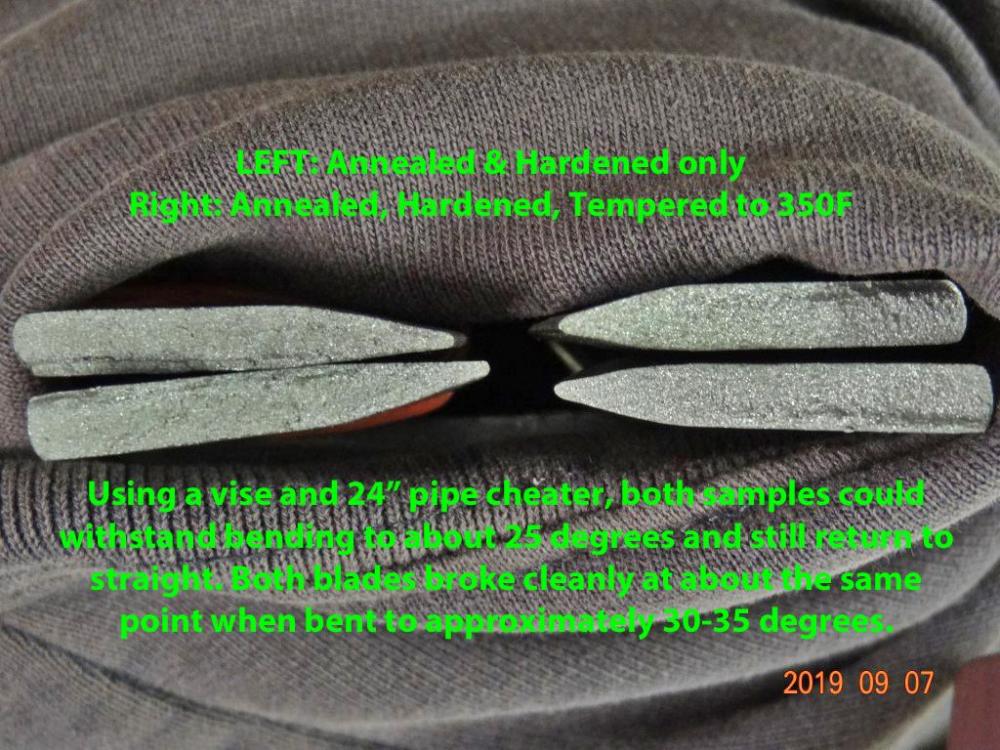
This morning I heated and quenched the second test tiller tine (the one that was annealed only). I then put both test tines in a heavy bench vise side by side, and using a 2-ft pipe cheater, did some bending of both of them. They were very strong, I weigh 240 and I was leaning hard on that pipe. Photos of the results are below. I tried to get some good closeups of the grain, and to my newbie eyes it actually looks pretty tight, but I'd appreciate learned opinions on that. I was surprised at how springy feeling and resilient both were (up to a point, that is), especially since I was cranking down on only the tips (about 1/3 of their length). It was odd that both bent & returned to perfectly straight a couple of times at about 25 degrees of bend, and both ultimately broke cleanly at the same pressure point (about 30-35 degrees of bend), even though only one was tempered. Could it be that the 350F temper was simply too low, and should have been 450-500? I still have the bottom 2/3 of both tines, so I could try tempering each to 500F (which would max out my little toaster oven), and see what happens. Thanks for letting me waste all of your time with this exercise, but I truly appreciate the opinions and I'm learning a lot.

-
Troy-Bilt Tiller knife project finally underway
picker77 replied to picker77's topic in Knife Making
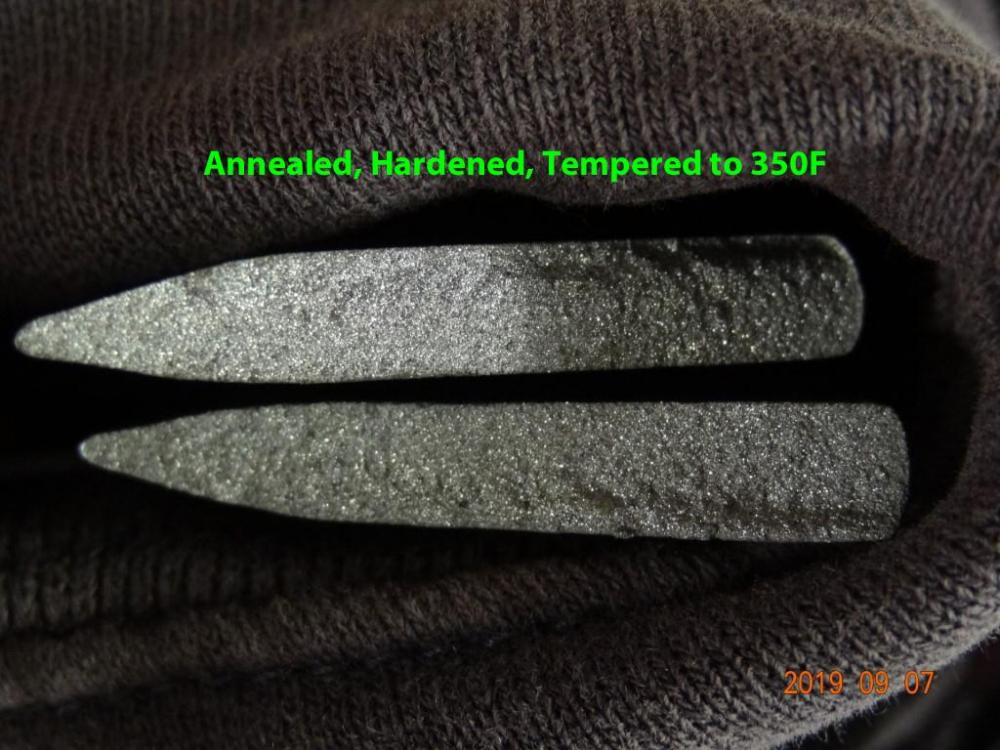
Thanks, IFC, I'll look up that Storm Crow post. I'm pretty sure these are likely 5160, also. I have a couple of test cases ready to go, one has been annealed, hardened, and tempered using Steve's 350/24hr/350 method, the other has been annealed only, and I plan to harden it in oil today but NOT temper it, and do a bend test on both of them to see what the grain looks like, and also to see the effects of not tempering after hardening. The one knife I just finished without tempering is a great performer but of course I haven't tried bending it. If the un-tempered test tine today breaks like a piece of glass as I sort of expect it will, then I'll probably torch-temper this finished knife using Buzzkill's methodology. I kind of wish I had a big stack of these tines, but at least I still have about a dozen to play with.