Goods
-
Posts
1,148 -
Joined
-
Last visited
Content Type
Profiles
Forums
Articles
Gallery
Downloads
Events
Everything posted by Goods
-

What did you do in the shop today?
Goods replied to Mark Ling's topic in Blacksmithing, General Discussion
Shops only 20’x20’ and I try to make the best of it. For these we move the vehicles to the neighbor’s and setup for food and relaxation there. I guess the picture does give it a stage like feel though . Feels pretty spacious right now, but it probably won’t tomorrow… Keep it fun, David -
What did you do in the shop today?
Goods replied to Mark Ling's topic in Blacksmithing, General Discussion
Shop is a clean as it’s going to get and tables/chair setup: Ready for the hammer-in in the morning! If any of you are local to south central Indiana, drop on by. Fun starts at 9am. Keep it fun, David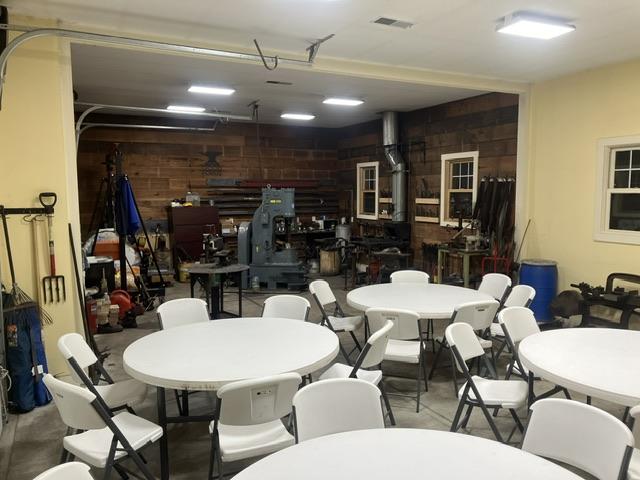
-
When I built my shop I put in dimmable high bay LED lights. I like working in a bright shop, but for forging bronze or heat treating I can dim the lights to get a better judgement of heat color. I cost a little more, but the convenience is wonderful! Keep it fun, David
-
Anvil ID -- beat up Vulcan?
Goods replied to Omars Forge's topic in Anvils, Swage Blocks, and Mandrels
Beat up Vulcan? When I read the title of the post I was expecting much worse. Most of the Vulcans I’ve seen are in much worse condition. It still has a lot of life left in it. That being said, it is not a top tear anvil. I would probably put it at $500 in current condition. Of course, you never know what you could get on Facebook marketplace place from a newbie that doesn’t know any better, but I couldn’t bring myself to do that. Keep it fun, David -
I would heat it to non magnetic hold it to get the temperature even through out, then slow cool in vermiculite overnight as prep for grinding. (Belt can get costly, but I guess fuel it too.) 4340 can air harden a little, but I’m not sure with a large block. Honestly, I would go with air hardening and leave it at that. Too soft for a hammer die is way safer than too hard! Just my two cents… Keep it fun, David
-
wood block when welding? and other weird ideas
Goods replied to northmanlogging's topic in Blacksmithing, General Discussion
Frosty, I wasn’t planning on using a swage, but I’m not opposed. I’m probably going to figure it as I go. The 3rd small roller is a visual effect. The chain is folded back on itself and you’re seeing one of the rollers from the bottom layer. It mess with me too, and I had to take a me a close look at the other pictures he sent. Irondragon, I’m glad you checked them out. Beautiful results with all the details of the steps. I was really surprised/impressed by his hand sanding aid. Keep it fun, David -
wood block when welding? and other weird ideas
Goods replied to northmanlogging's topic in Blacksmithing, General Discussion
northmanlogging, sorry for taking over your post… George, here’s a pic of the chain that was just sent to me: He’s clean up 3 chains to play with, each over 2lbs. I plan on starting the weld by hand hammering, but will use the power hammer to get good consolidation. I’m looking to make the final billet up with 1/4” of consolidated chain on each side with 1/4” core of 52100 for a total billet at 3/4”x2”x6”. That should give me plenty of material. (It’s more than I’ve used for my large hatchets!) I’m expecting this to be a fun, challenging project and don’t really expect the first try to be quite right…(I’m generally not that interested in making knives, but this intrigues me.) Just a note on the YouTube channel for “shurap”. He’s a knife maker from Summy, Ukraine and his videos are well done with interesting forge welding pattern development and shop built equipment, without crazy music or even commentary. I really enjoy his videos and was very concerned after the situation started there and he videos stopped coming. I was very relieved when he started posting videos again last spring! The world can be a very dangerous place… If you have any interest, check his videos out, it may help the circumstances for him, maybe… Keep it fun, David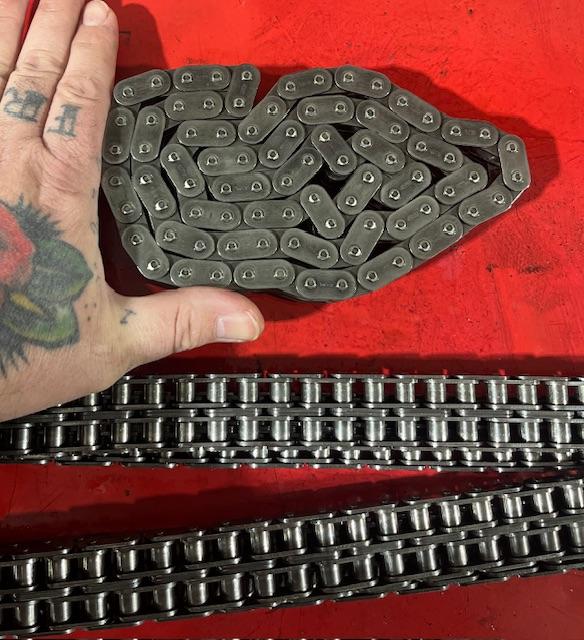
-
wood block when welding? and other weird ideas
Goods replied to northmanlogging's topic in Blacksmithing, General Discussion
I’m not sure exactly what the chain is made from and I don’t have it yet. This is basically a commission project. The person it a big Harley fan and he wants a clever made from it. He’s going to provide plenty of extra chain and I plan on using 52100 that I have as the core of a Sanmai billet to make sure the edge is actually good material. (Lots of challenges on this one!) If it doesn’t work out he’ll be okay with that, but personally, I won’t give up till I get good results. It’s not a money making venture. It’s a hobby for me and with my personal requirements I don’t think I could ever make it profitable, but it’s nice to get a little coal/propane money. For reference I benchmarked “sharup” (YouTube) for technique on this one. I will be welding up the links some, but a minimum amount to avoid messing up any pattern. Keep it fun, David -
wood block when welding? and other weird ideas
Goods replied to northmanlogging's topic in Blacksmithing, General Discussion
One thing I’ve always tried to keep in mind when forge welding is that I need to apply force to get a good weld, but need to (at least initially) avoid too much forging that can result in shear across the welding surfaces. The place I see wood under the work as being useful is when you’re forge welding oddly shaped things. I have a project coming up where I plan on welding up roller chain into flat bar. I’m probably going to try the initial welding with a board on the anvil. I’ve not used wood yet, but I’ve never welded up something with so many air gaps and moving parts. Keep it fun, David -
Any thoughts on changing the angle of the splice for the thicker belts? The angle look a little shallow to me, but I’m not at the shop right now to compare. Keep it fun, David
-
Thanks, that’s were then connection in my mind came from. Keep it fun, David
-
Beaudry champion 300 lb BS model
Goods replied to Anthony condon's topic in Power Hammers, Treadle Hammers, Olivers
There a power hammer group on facebook that Mark frequently post on… If you’re on Facebook you might check there. -
Somehow I connected that story to a blacksmith guild in England. Could be my imagination though… Keep it fun, David
-
Help with Refractory Cement
Goods replied to Huali_the_Kitsune_'s topic in Insulation and Refractories
I’m not sure if we have met or not. Honestly, I’m not that good a “peopling” and don’t attend too many events outside those of the Vernon Chapter. Those other events that I do attend, I often keep to myself. (However, once I know you, you’re stuck with me .) (I am planning on going to the conference in June and have committed to helping Bill with the kids classes/session. That should help me get to know a few more smiths outside of my normal group.) Keep it fun, David -
Help with Refractory Cement
Goods replied to Huali_the_Kitsune_'s topic in Insulation and Refractories
If you’re just getting started, try to catch up with the IBA. The satellite group in Indy meets on the 4th Saturday of the month… The is no better way to get started than working with experienced smiths hands on. If you’re interested, just google “Indiana Blacksmith Association,” that should bring you the their website and the latest newsletter will have contact information for the hammer-ins. I’m hosting a hammer-in next Saturday down here in Seymour and you more that welcome to stop in, but there is another hammer-in in Waverly on the same day that’s closer to you. Keep it fun, David -
You can temper it now. Typically, you want to temper immediately after the quench. Many times the internal stress from the quench process will result in the part cracking while it’s just sitting there. I’ve not had that problem yet, but I’m pretty quick with getting to the tempering process. Keep it fun, David
-
What did you do in the shop today?
Goods replied to Mark Ling's topic in Blacksmithing, General Discussion
Honestly, I’d go with the “worry too much” over the possibility of excessive corrosion from a strong acid. (I would also do what I can to avoid my wife’s wrath!) Sounds like you’ve been doing exactly what I would. Keep it fun, David -
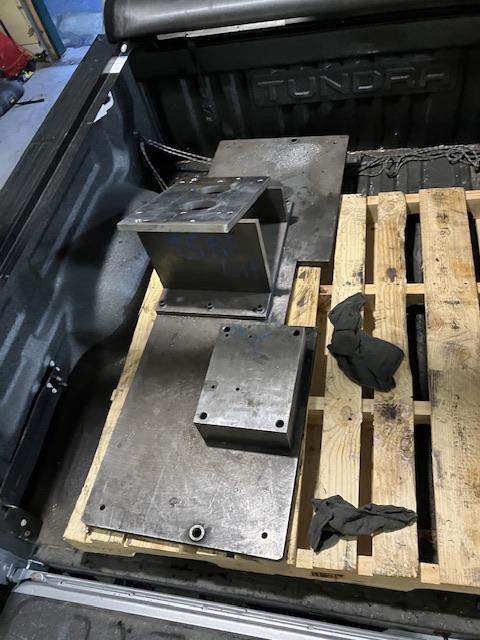
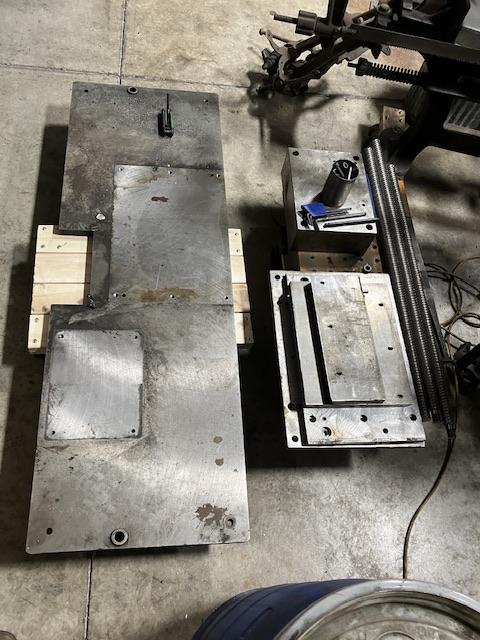
I grabbed two fixture bases from work. The other 38 went to scrap, I just couldn’t see them all go. Here’s the second one before I lifted it out of the truck: and here’s the first taken apart and stacked for future use as (your guess is a good as mine): Also in the second picture is another section up 10’ ball screw the guys saved for me. The ball screw seems insignificant in size compared to the plate steel… (main plates are 30mm thick) And I’m supposed to be cleaning the shop. Where am I going to keep this stuff? I can’t lift the main plates without the crane and even the smaller plates are not easy to move. I’m going to have to come up with some robust storage or get really generous at my hammer-in… Keep it fun, David
-
What did you do in the shop today?
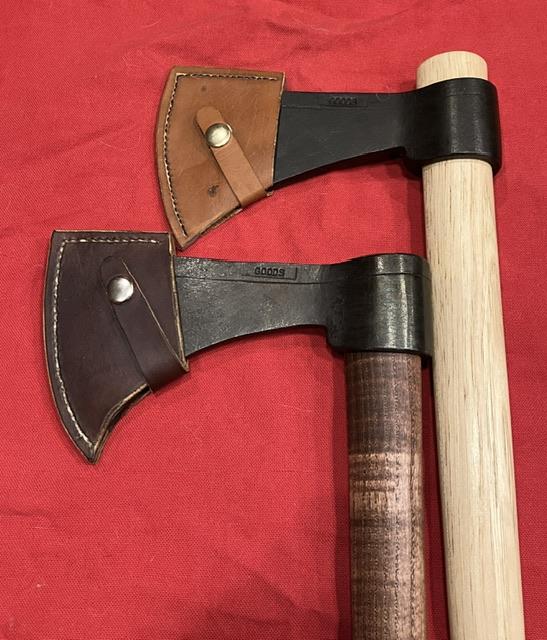
Goods replied to Mark Ling's topic in Blacksmithing, General Discussion
I wasn’t sure if I could pull it off, but I got the stitching finished up on the hawk sheathes tonight and they’re ready to go to the new owner tomorrow morning: I sharpened them and finished the handles Monday night. Then Tuesday, I managed injuring myself, getting a bad gash and nicking the bone on my left index finger. All stitched up last night, I didn’t have any trouble making the sheaths, but I was really worried about pulling the stitching tight tonight, but it went ok. No forging for a a while, but I have to clean the shop anyway. I’ll just put on some latex gloves to keep it my hand clean. Next time you’re doing something and the thought “this is not a good idea” crosses your mind, stop what you’re doing, and think how to proceed more carefully! Most of us have been there, but it doesn’t always doesn’t always end good. In honesty, I got off easy, 1/2” in any other direction and I could have had major complications. Keep it SAFE, David
-
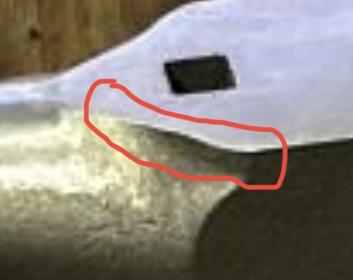
Flatliner, I think you miss understood to shape I’m not sure about. I think I’d rather have this area radiused. That would give different radiuses to work with. Of course, the shape it is now may offer interesting opportunities I haven’t thought of. I guess I’m a little biased, chasing after the Refflinghaus South German pattern for a couple years now. Itsnick, all in all, put the beauty to work and let up know what you think! Keep it fun, David
-
Itsnick, is the round horn level with/on the same plane as the face of the anvil? I’d really like to get my hands on a south German pattern like that… but I’m not sure I like the transition from the round horn to the edges. Keep it fun, David
-
What did you do in the shop today?
Goods replied to Mark Ling's topic in Blacksmithing, General Discussion
Direwolf, thanks for the input. I do have the guide that came with my torch set. I used it as I initially setup my torch, but didn’t even think about reviewing it for welding. I just put the middle size tip on, adjusted the flame to what looked right (based on the discussions here on tuning gas forge flames) and gave it a try. (It helped that the first welding I learned was Tig welding on tool steel for stamping die repair.) The knowledge shared openly here is a wonderful resource for the community! Keep it fun, David -
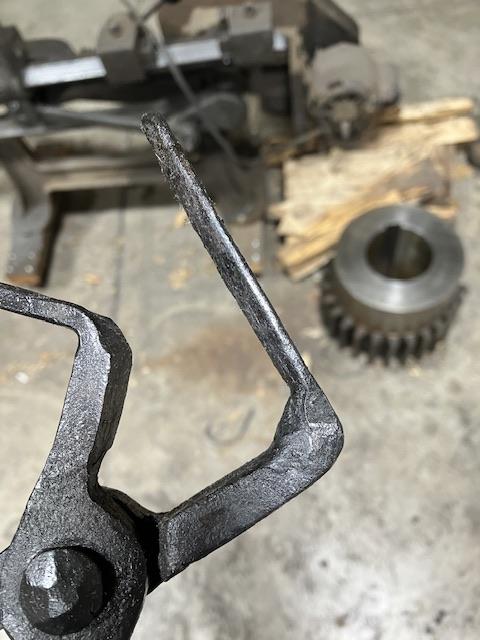
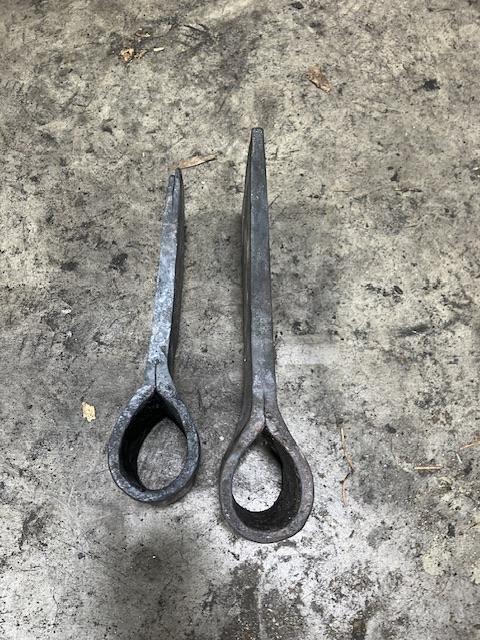
What did you do in the shop today?
Goods replied to Mark Ling's topic in Blacksmithing, General Discussion
Cleaning the shop, that’s what I was supposed to be working on before I got this commission. I am hosting a hammer-in here and have a lot of cleaning to do before I can have people in, let alone food for people! Today, I got the forging on the second hawk done and both cleaned up, thermocycled, and hardened: They are both temping currently. I’ll get better pictures after that. I also learned to torch weld! I broke the bit on my bent jaw tongs, which was bound to happen. So I fired up the torch with a welding tip on it and used some 1/8” CRS as filler rod and welded in a big fillet: I’ll probably have to do the same thing to the inside jaw before too long… I was surprised how easy it was to weld with the torch! Similar to Tig welding, but at least for me, not as graceful. Not sure that graceful is the right term, but it kind fits(?). keep it fun, David
-
What did you do in the shop today?
Goods replied to Mark Ling's topic in Blacksmithing, General Discussion
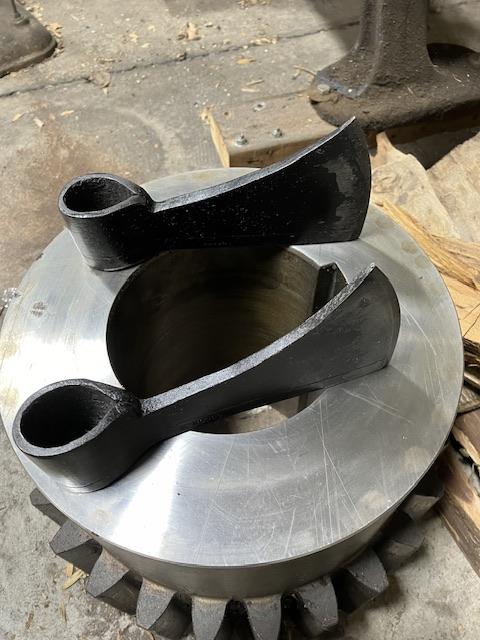
Well, at least I seem to be good at making clinkers: Honestly, a much better day in the forge! I got the next two hawks reworked, one forged out, and normalized. The other is ready for the bit: Both welds opened a little, but not too bad. The 1st one may get reworked, but I’m honestly not going to be happy with it, so I may put it in our next Iron-in-hat. The last time I did that it end up as a prized item… It probably won’t make me happy, hopefully it will make someone else happy! A for how much material I needed, it was about 3/8”. Keep it fun, David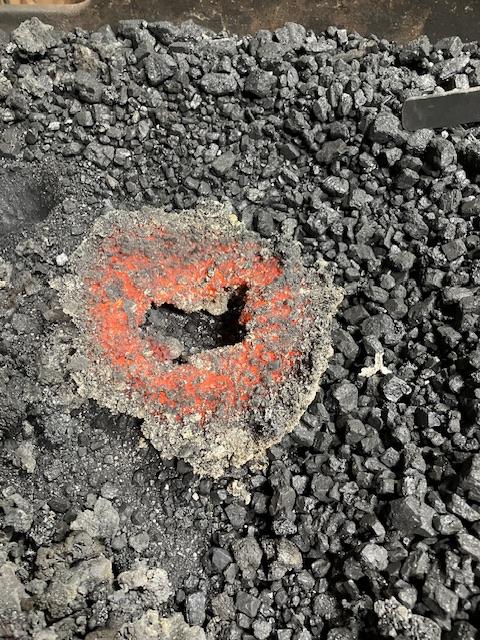
-
What did you do in the shop today?
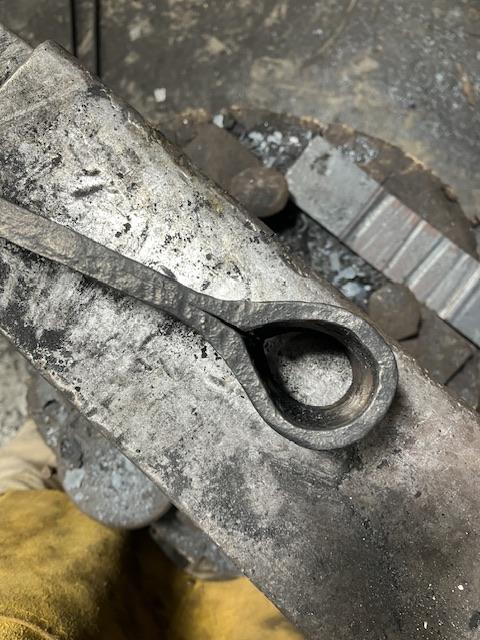
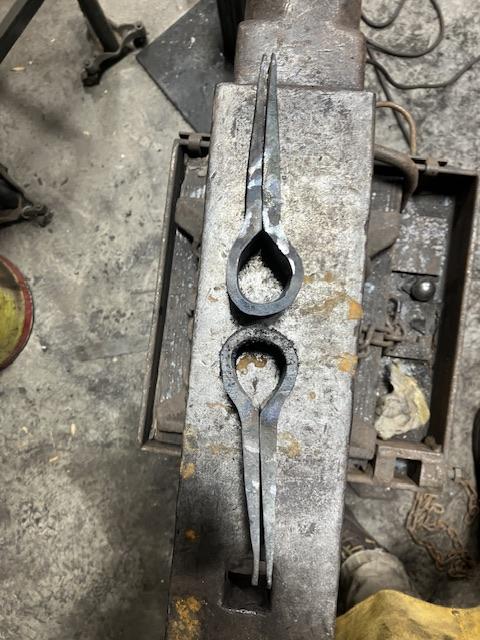
Goods replied to Mark Ling's topic in Blacksmithing, General Discussion
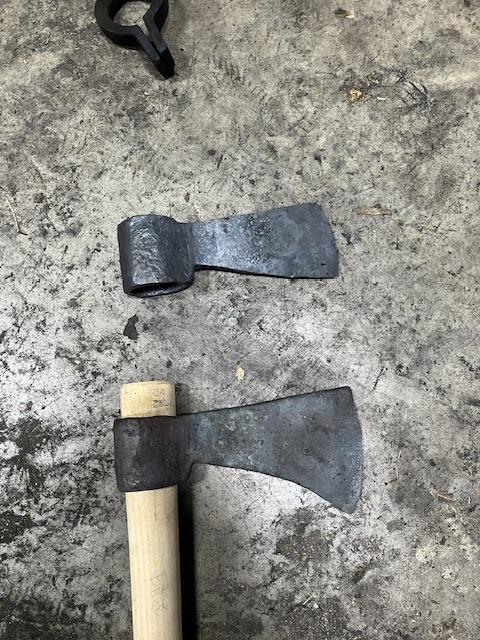
Well, it looks like I messed up. I forgot one key piece of information. Add your material thickness measurement to that of the handle when doing a wrapped eye like this! The eye is way too small! Broke the weld trying to size it, and lost some of the transition shape I was going for trying to re-weld it. At least I think you can see the general shape I was going for in the transition. Now, I’m going the have to rework the next two to get the right length for the eye: I’m going the have to open them back up and I’ll probably grind the set down back 1/8” on both sides. (I may even start another blank in case I mess something else up.) I really did not need this set back with the time constraints! Another hard lesson learned… Keep it fun, David