.JPG.2f3624accaac3d3b9eda127ac2e5aecc.JPG)
Chelonian
Members
-
Joined
-
Last visited
Everything posted by Chelonian
-
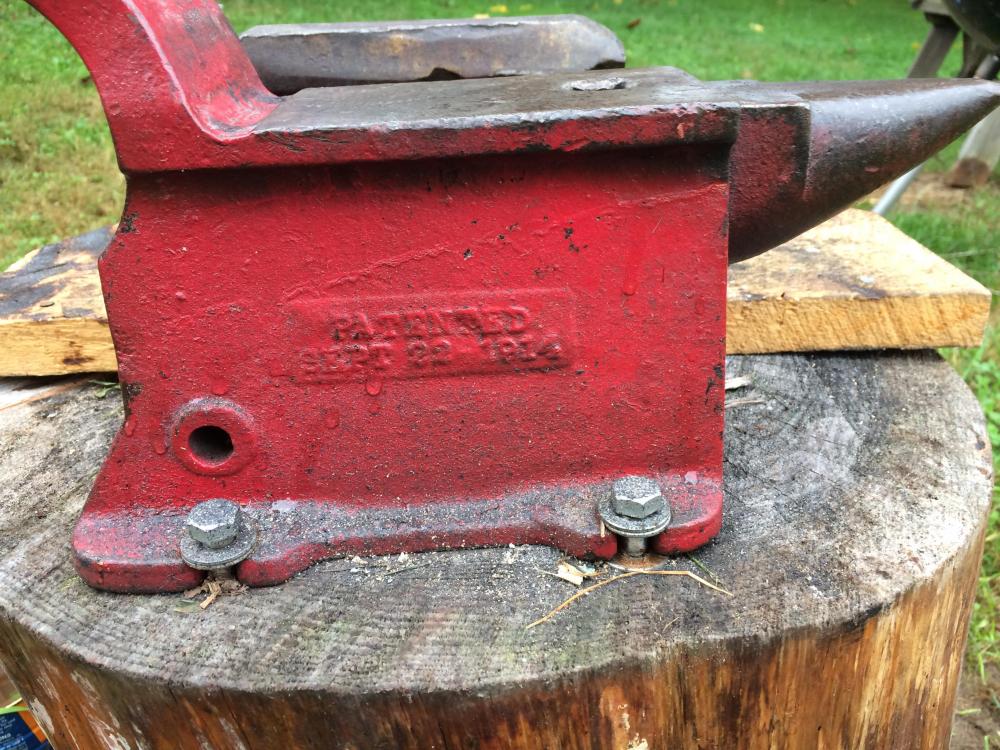
He said he wants someone to "make an offer" so I think he wants me to say the first price. It would be pretty easy to tell if the hardened face was completely missing, right? It looks like it's there in the photos, but I'm just a little paranoid.
-
Thomas, bringing a scale is a great idea, thanks! I'll definitely bring one along. Kozzy, I'm not really in too much of a rush (I've been casually looking around for about 6 months), so the only thing that will be pressuring me is the drive, which is about an hour. If it's not in decent shape, or if he's expecting a really high price, I'll either haggle it way down or just leave.
-
So maybe bring a hammer and make sure the ring and rebound are fairly consistent? I don't have a large ball bearing to use, but will a hammer sort of work as a substitute? Assuming it is around 200lb and I don't find any major issues, approximately what do you mean "weasel them down like crazy"? I know it's really hard to tell just from the photos, but I just don't know where to start. Thank you!
-
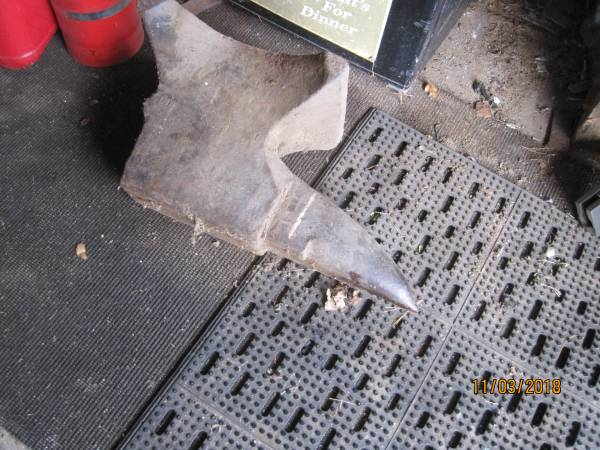
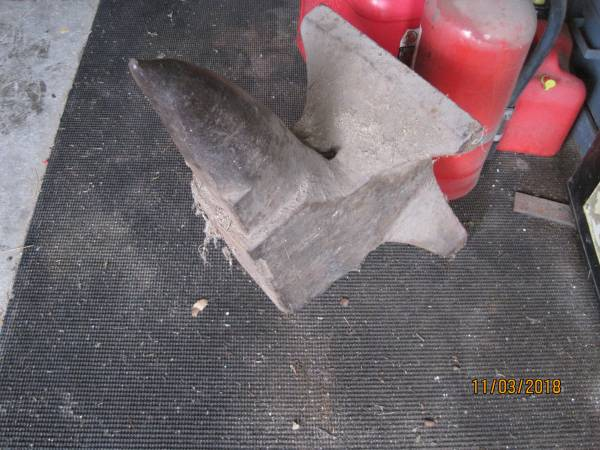
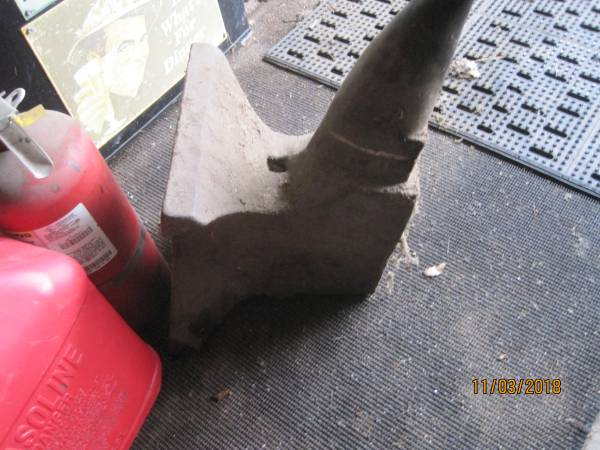
Hi, Someone at an estate sale is selling this anvil, what would be a reasonable price for me to offer? Since this would be my first real anvil, I'm not too worried about it missing the heel. He says it weighs about 200Lbs. Also, would it be tippy without the heel to counterbalance the weight of the horn? I haven't seen it in person yet, but here are some photos of it: If you can help it would be extremely appreciated, thanks!
-
Great, thanks for all the advice! I guess I'll just go there sometime and see what happens.
-
Hi, I'm currently using an old, light, cast iron ASO, and I really need to find a large chunk of steel to use as an anvil. I've seen people using bulldozer parts, forklift tines, and large (often cylindrical) chunks of steel from machine shops. I emailed a forklift repair shop about a week ago asking if they had a broken or damaged tine they would be willing to sell, but they just never responded. There is a machine shop fairly close to where I live, maybe they would have something? Should I email them, or would I be better off just going there and asking? Also, if they do have one, what would be a reasonable price/LB for me to pay? Any ideas/opinions are appreciated, thanks!
-
Unfortunately, it appears my possible source for a replacement gear won't work. He simply never responded to my email.
-
I've seen that series, but he never actually removes the bronze gear.
-
Yes, I have watched that whole video series, but he never actually took the bronze gear out. The bronze gear is also pretty much the only part I haven't taken out for cleaning on the blower. I'll try that penetrating fluid idea. Does it evaporate really fast, or does the trans fluid slow that down? Thanks!
-
Judging by how there have been zero responses, I'm thinking not very many people have tried removing the gear. If anyone reading this has, please just let me know what you did to get it out. Is the only way to tap the shaft with a hammer? Would it be helpful to use a penetrating fluid? If so, what kind? Thanks!
-
Hi, In a previous thread I posted I mentioned that the phosphor bronze gear on my recently acquired Champion 400 is very worn out. I have since found a possible way to get a replacement gear, and I'm wondering what would be the best way to remove the old gear and install the new one. (I'm obviously not going to try removing it before I have the replacement, but I'm just wondering at this point) I'd like to keep the old gear intact and not break anything, so I'm looking for the gentlest approach possible. I also don't mind spending a lot of time on it either, it that's what it requires. In all the disassembly/restoration videos I've seen, they just leave the gear in, so I'm wondering if anyone here has done it. Thanks!
-
Well, It's what I have at the moment. I am kind of worried that it's just going to crumble under the hammer one day, since it's hollow and not that thick. Only weighs about 20LBS. I've heard people talking about getting a drop from a machine shop, but I don't know of any close to where I live. There is a forklift repair company pretty close though. Would a piece of a fork tine make a decent anvil? And is there a fairly good chance they'll have an old one to sell?
-
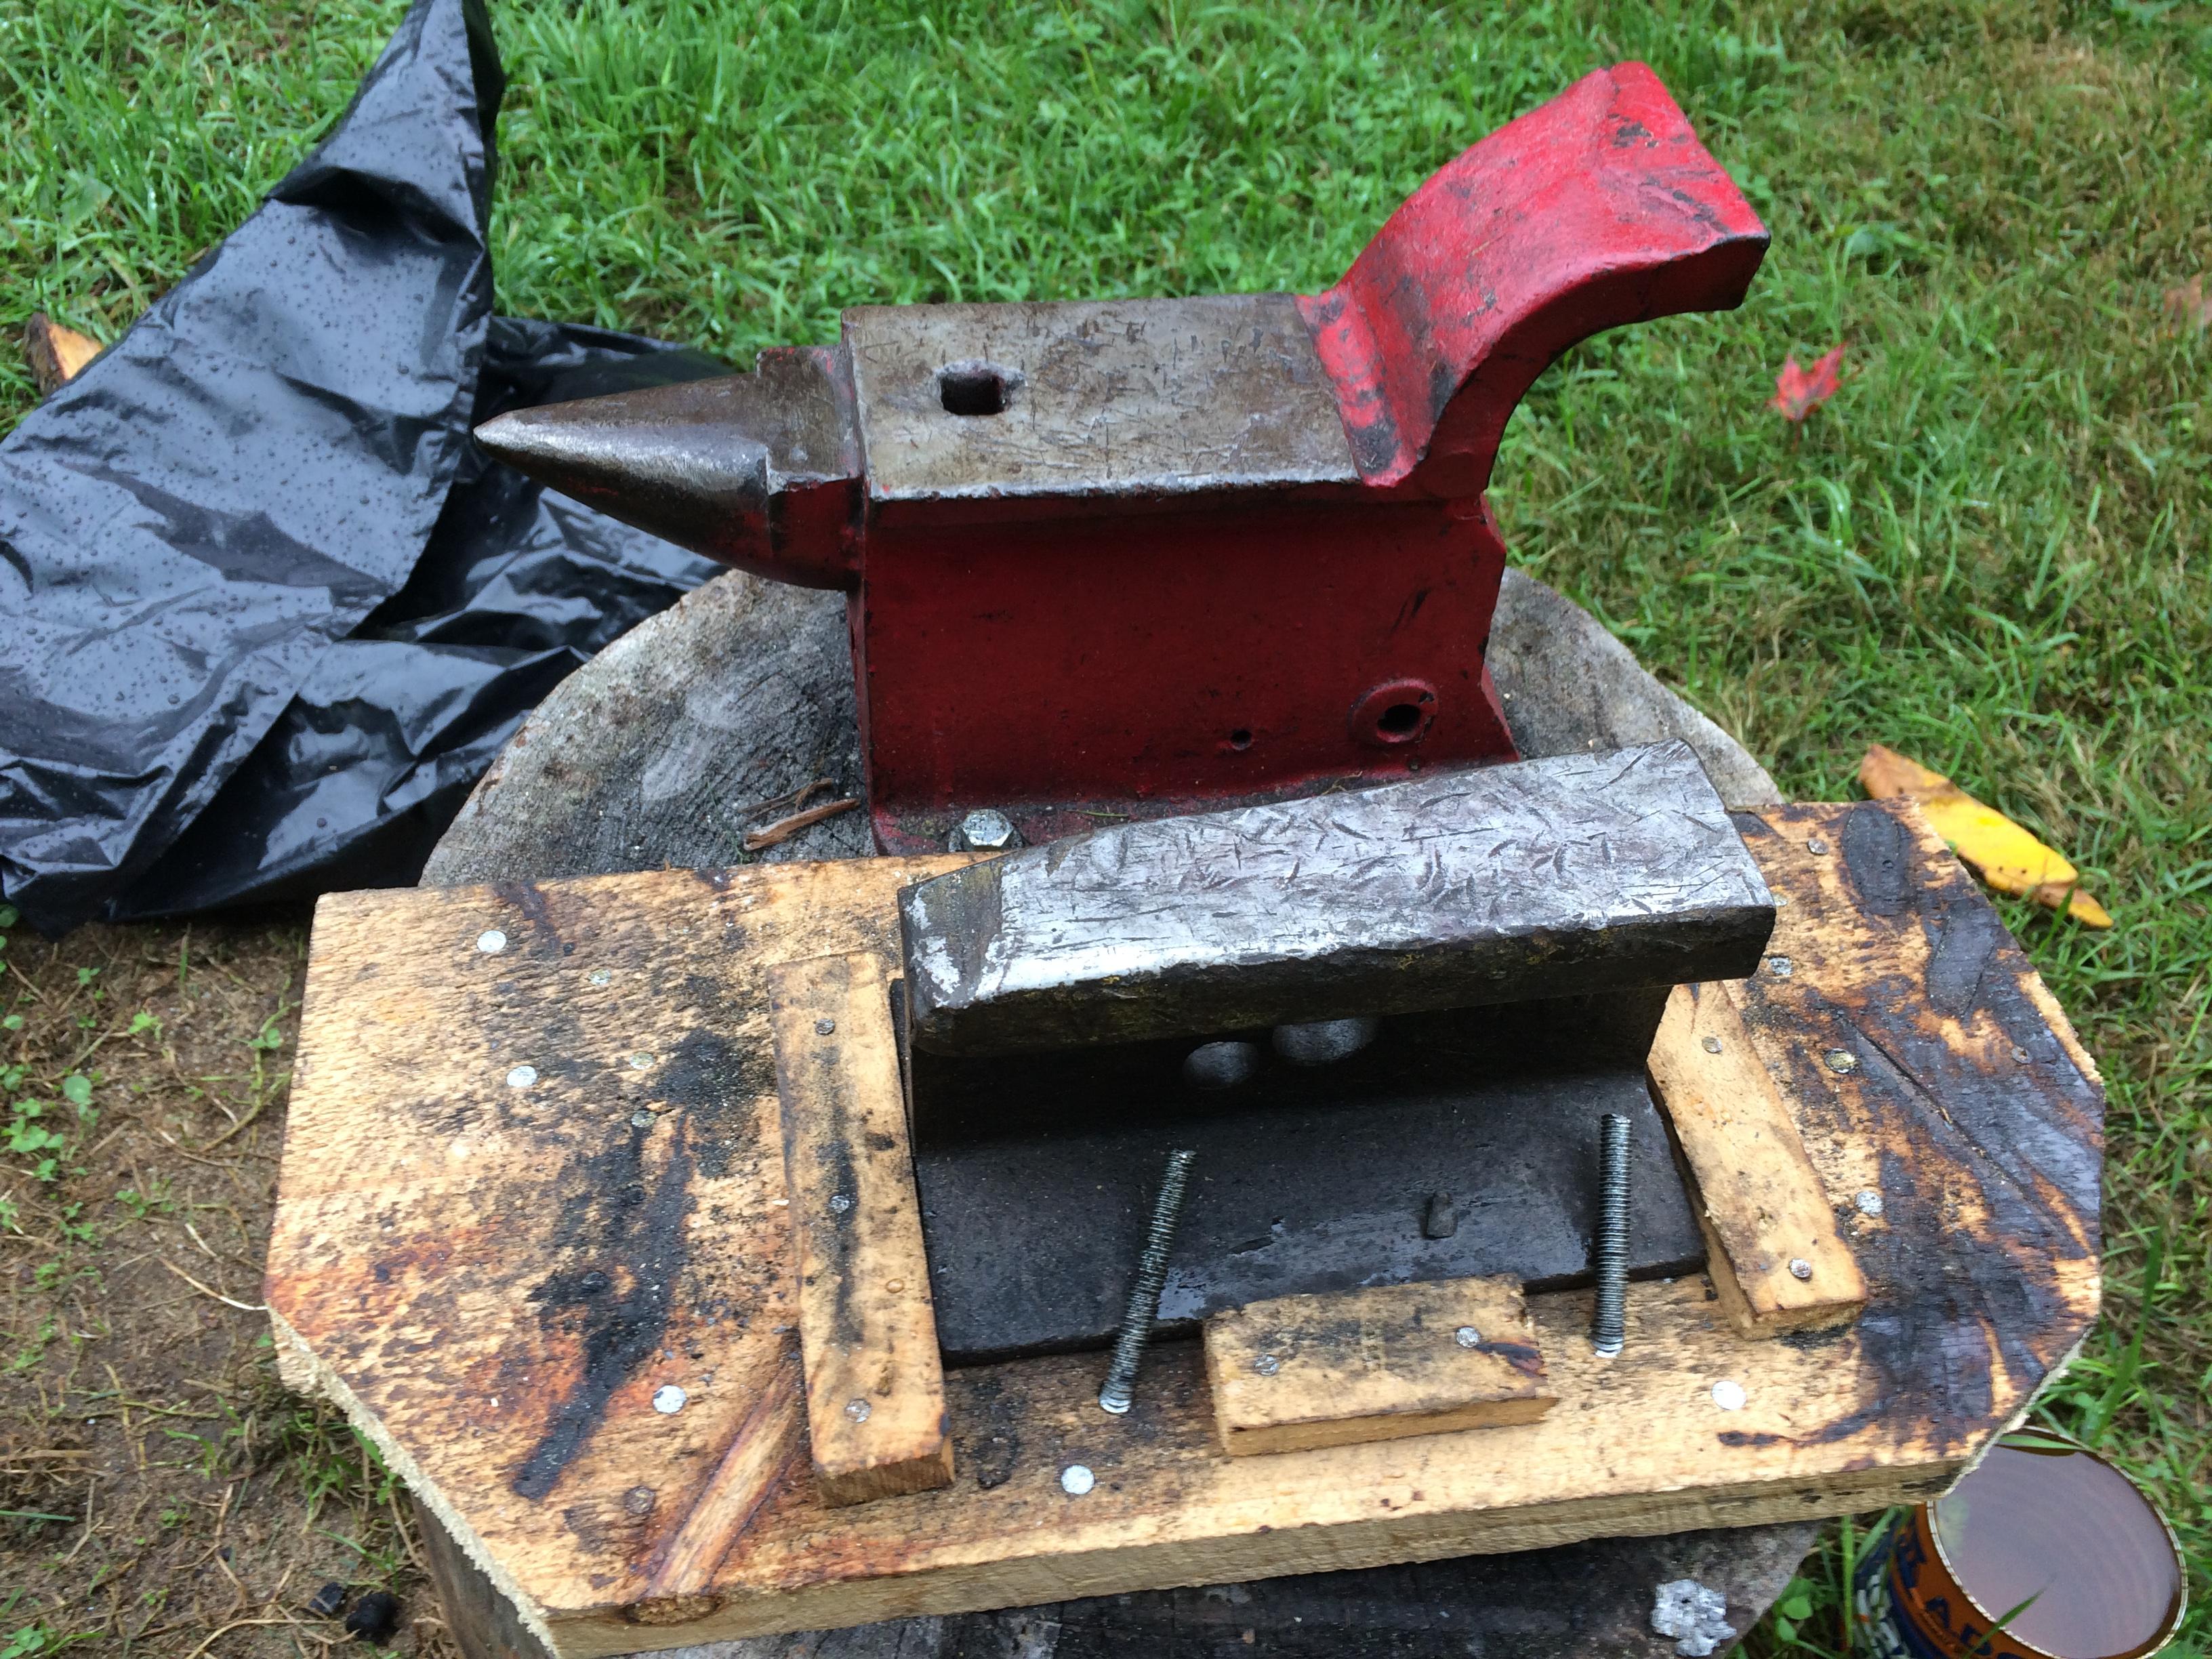
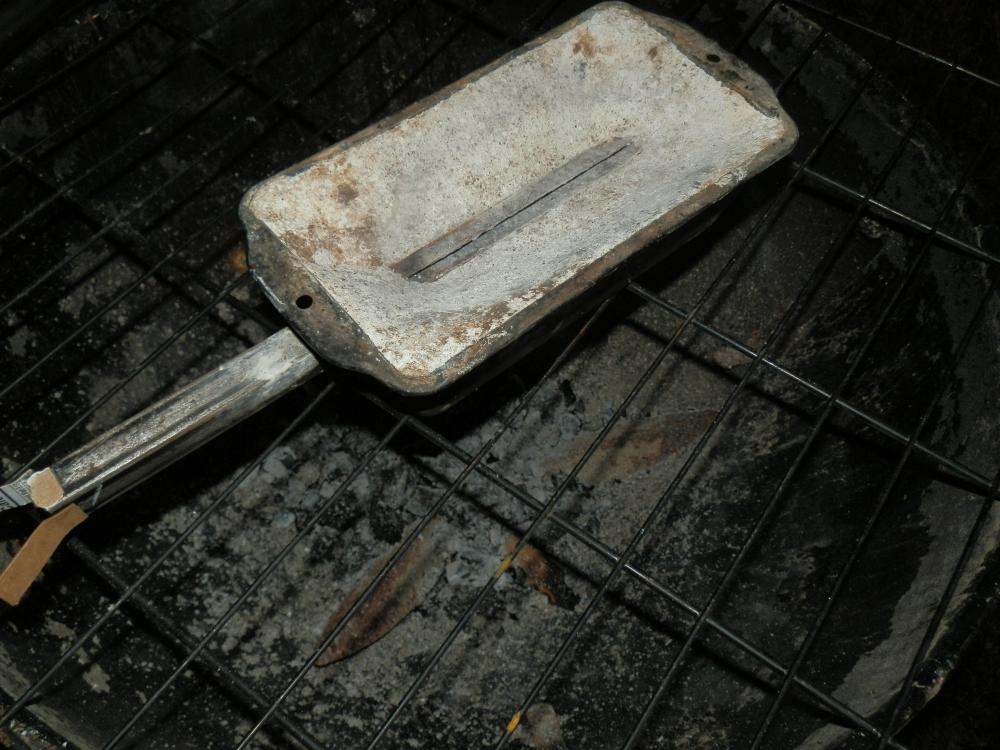
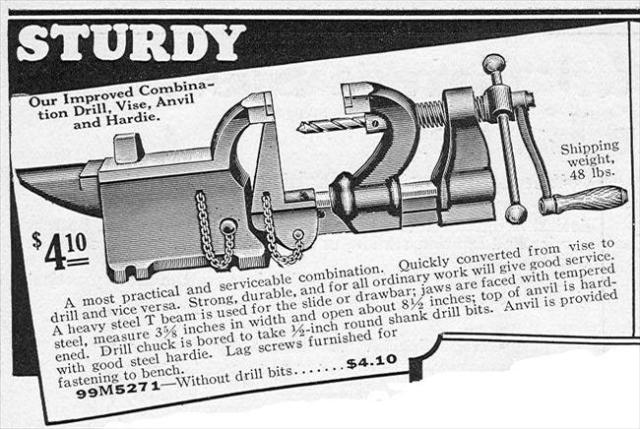
I've been using these things: it's a piece of rail (I don't think it's from a normal train, it seems too small) and the back of a weird vise/anvil/drill. I'm liking the vise back thing, it's strangely quiet when I'm hammering on it. On the side, it says "PATENTED SEPT 22, 1914". Here's an ad for what it looked like when it was new: *not my image, just found it on google* I don't think I would risk damaging such a cool old thing if I had the front jaw assembly, but I'm thinking it's pretty unlikely that I will ever find one. From what I can tell from researching it a bit, they were not very popular and were not made for very long.


-
Currently de-galvanizing a pipe in vinegar and trying different layouts of bricks in the barbeque to see what seems best. The bricks do seem rather wet, so I think I'll just keep the top of the barbeque on loosely for the first time I use it. Thanks!
-
Thanks everyone! Laynne, I had not seen that, and I think that might be what I try first actually! I have a ton of those red bricks from when we got our old chimney rebuilt. Also, I'm assuming I should avoid using a galvanized pipe as the air pipe? or does it not get hot enough to be a problem?
-
Hopefully it's okay that I'm reviving this thread. Having been advised by some that my current forge may not be ideal, I have started looking into the side-blast variety. In this thread, it has been mentioned that clay or sand can be used as the filler stuff for the box. I don't really have access to natural clay, so I would have to buy it as cat litter. I do have quite a bit of sand left over from a previous project though, so I would like to give that a try. My question about that is, how does the sand not just collapse in on the hole? Also, I have an old unused charcoal grill (the old round kind) that is still pretty structurally sound. Would that make a decent substitute for the box? Thanks!
-
-
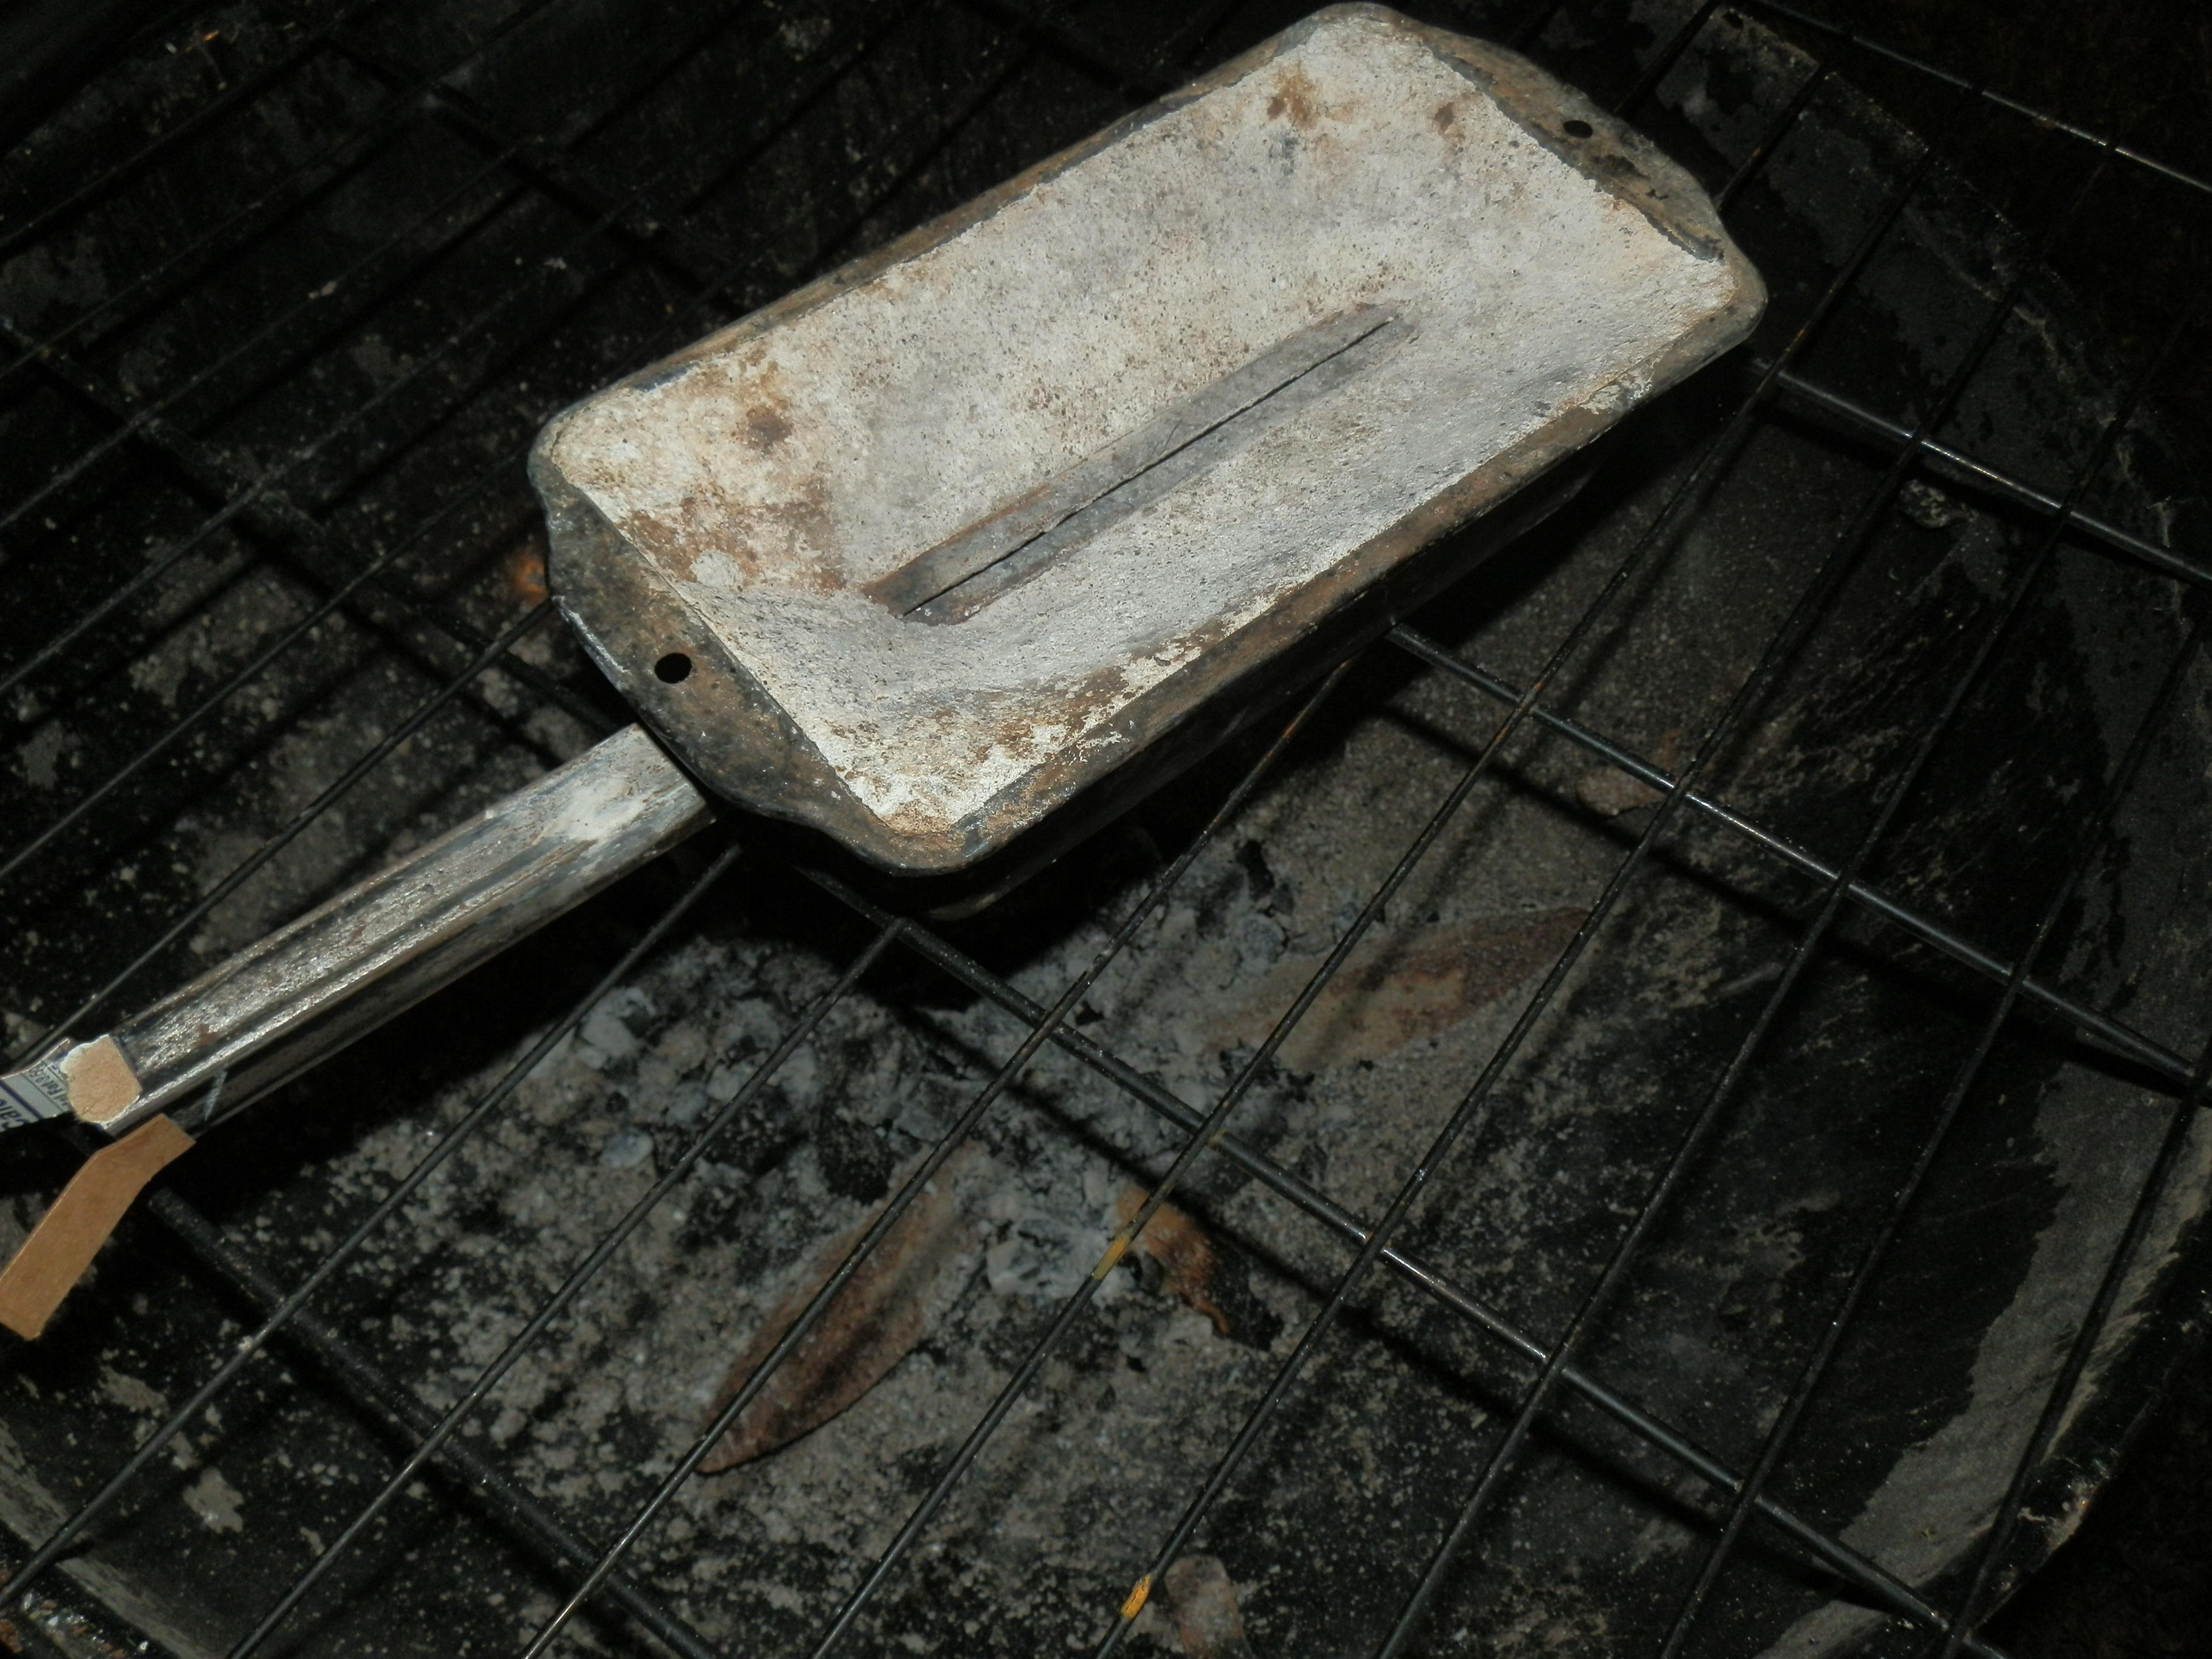
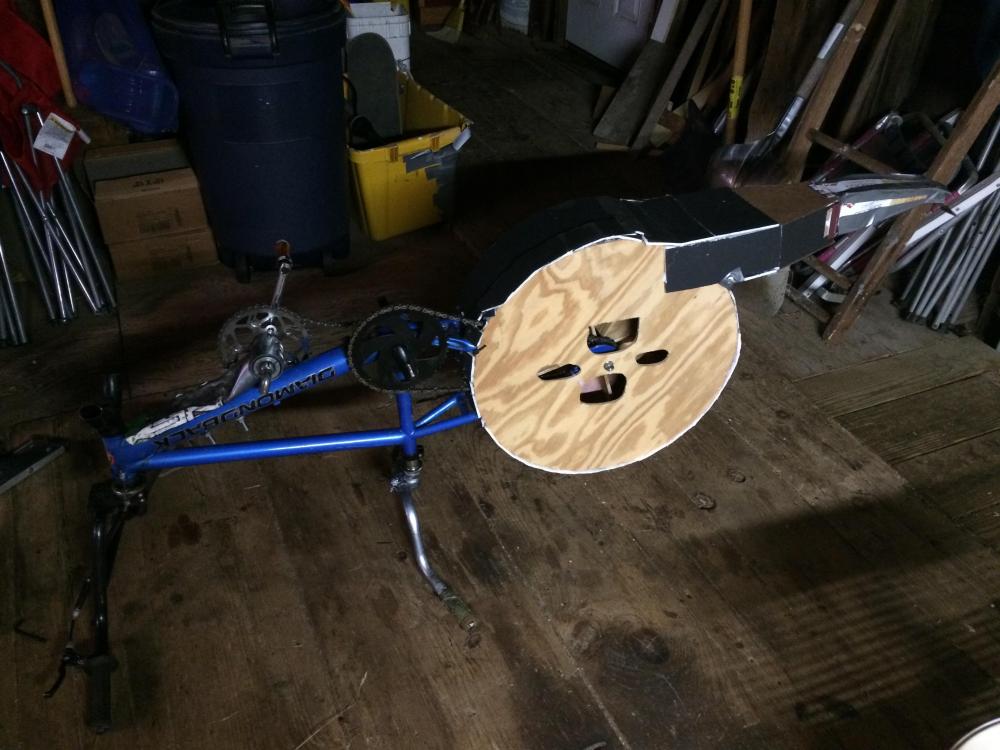
As a fellow beginner, I'd recommend this. It's worked great for me so far for making small hooks, house numbers, and pantry handles: It's a bread pan with a square tube going through it, and a 50/50 mix of Plaster of Paris and play sand as a refractory. I did not come up with this design myself, and if you want more details on (link does not work) I then used this blower that I made as an air supply: https://www.iforgeiron.com/topic/60184-beginner-blower-idea/ Hope this helps!
-
-
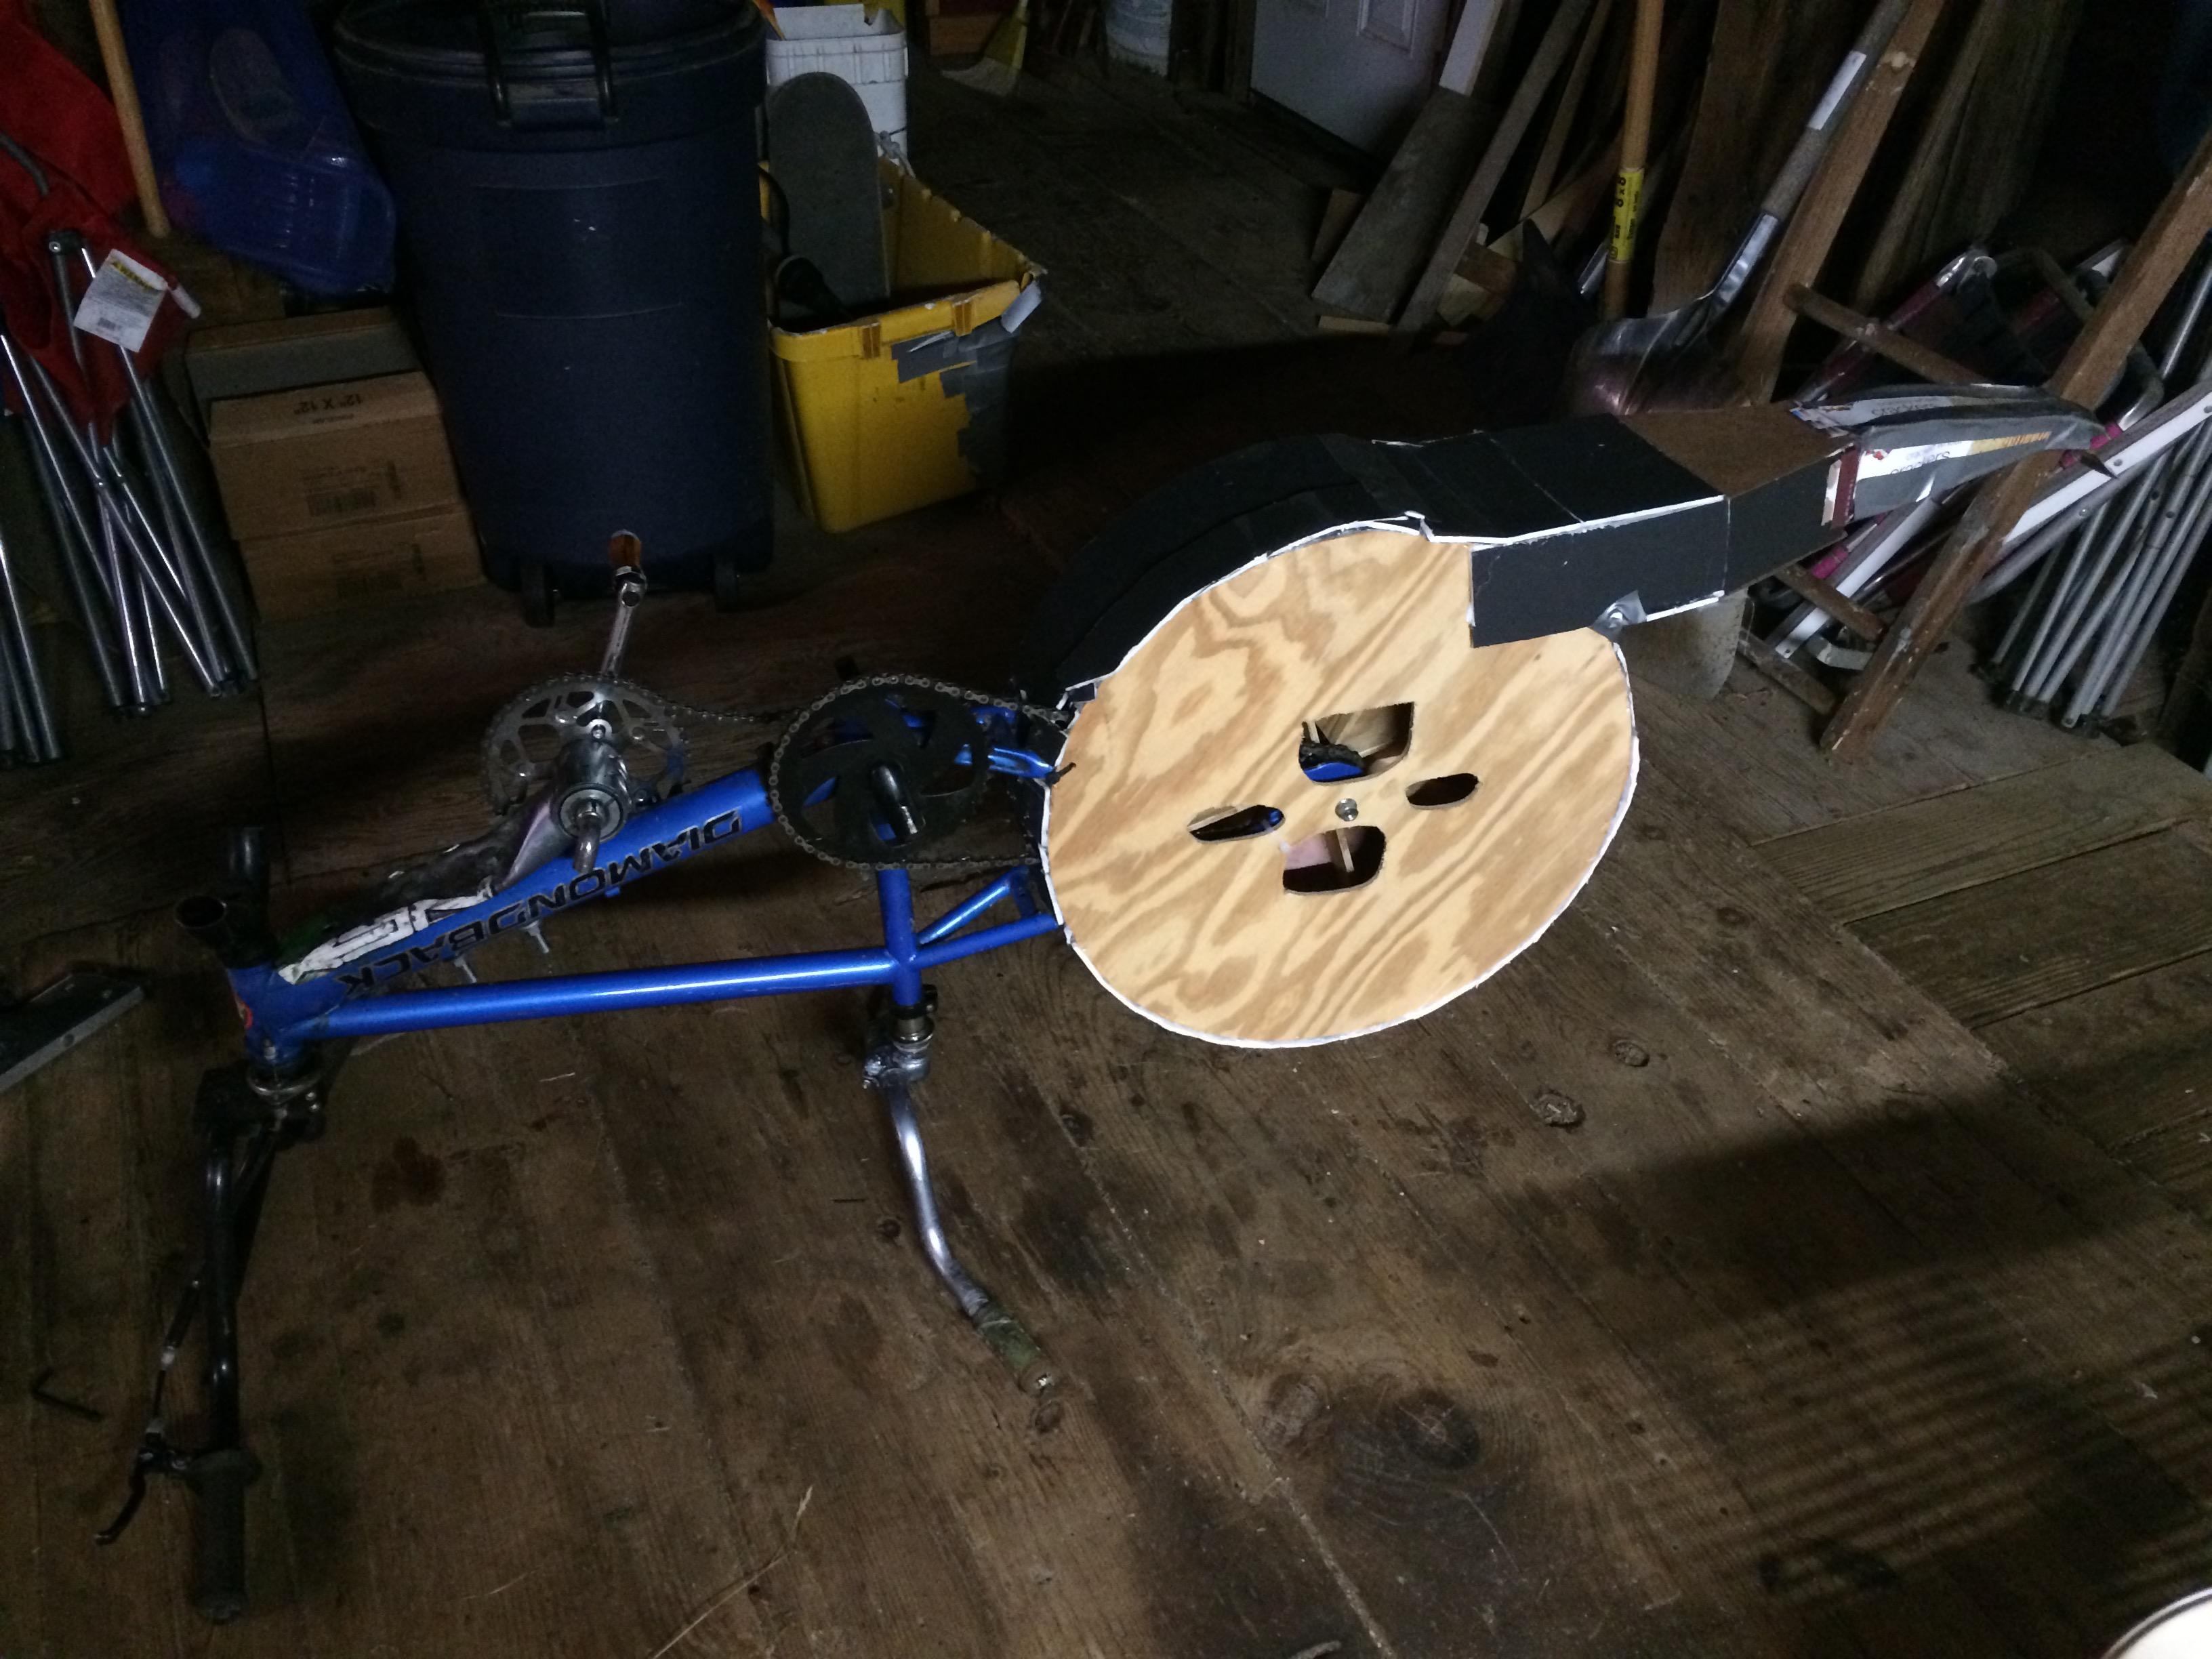
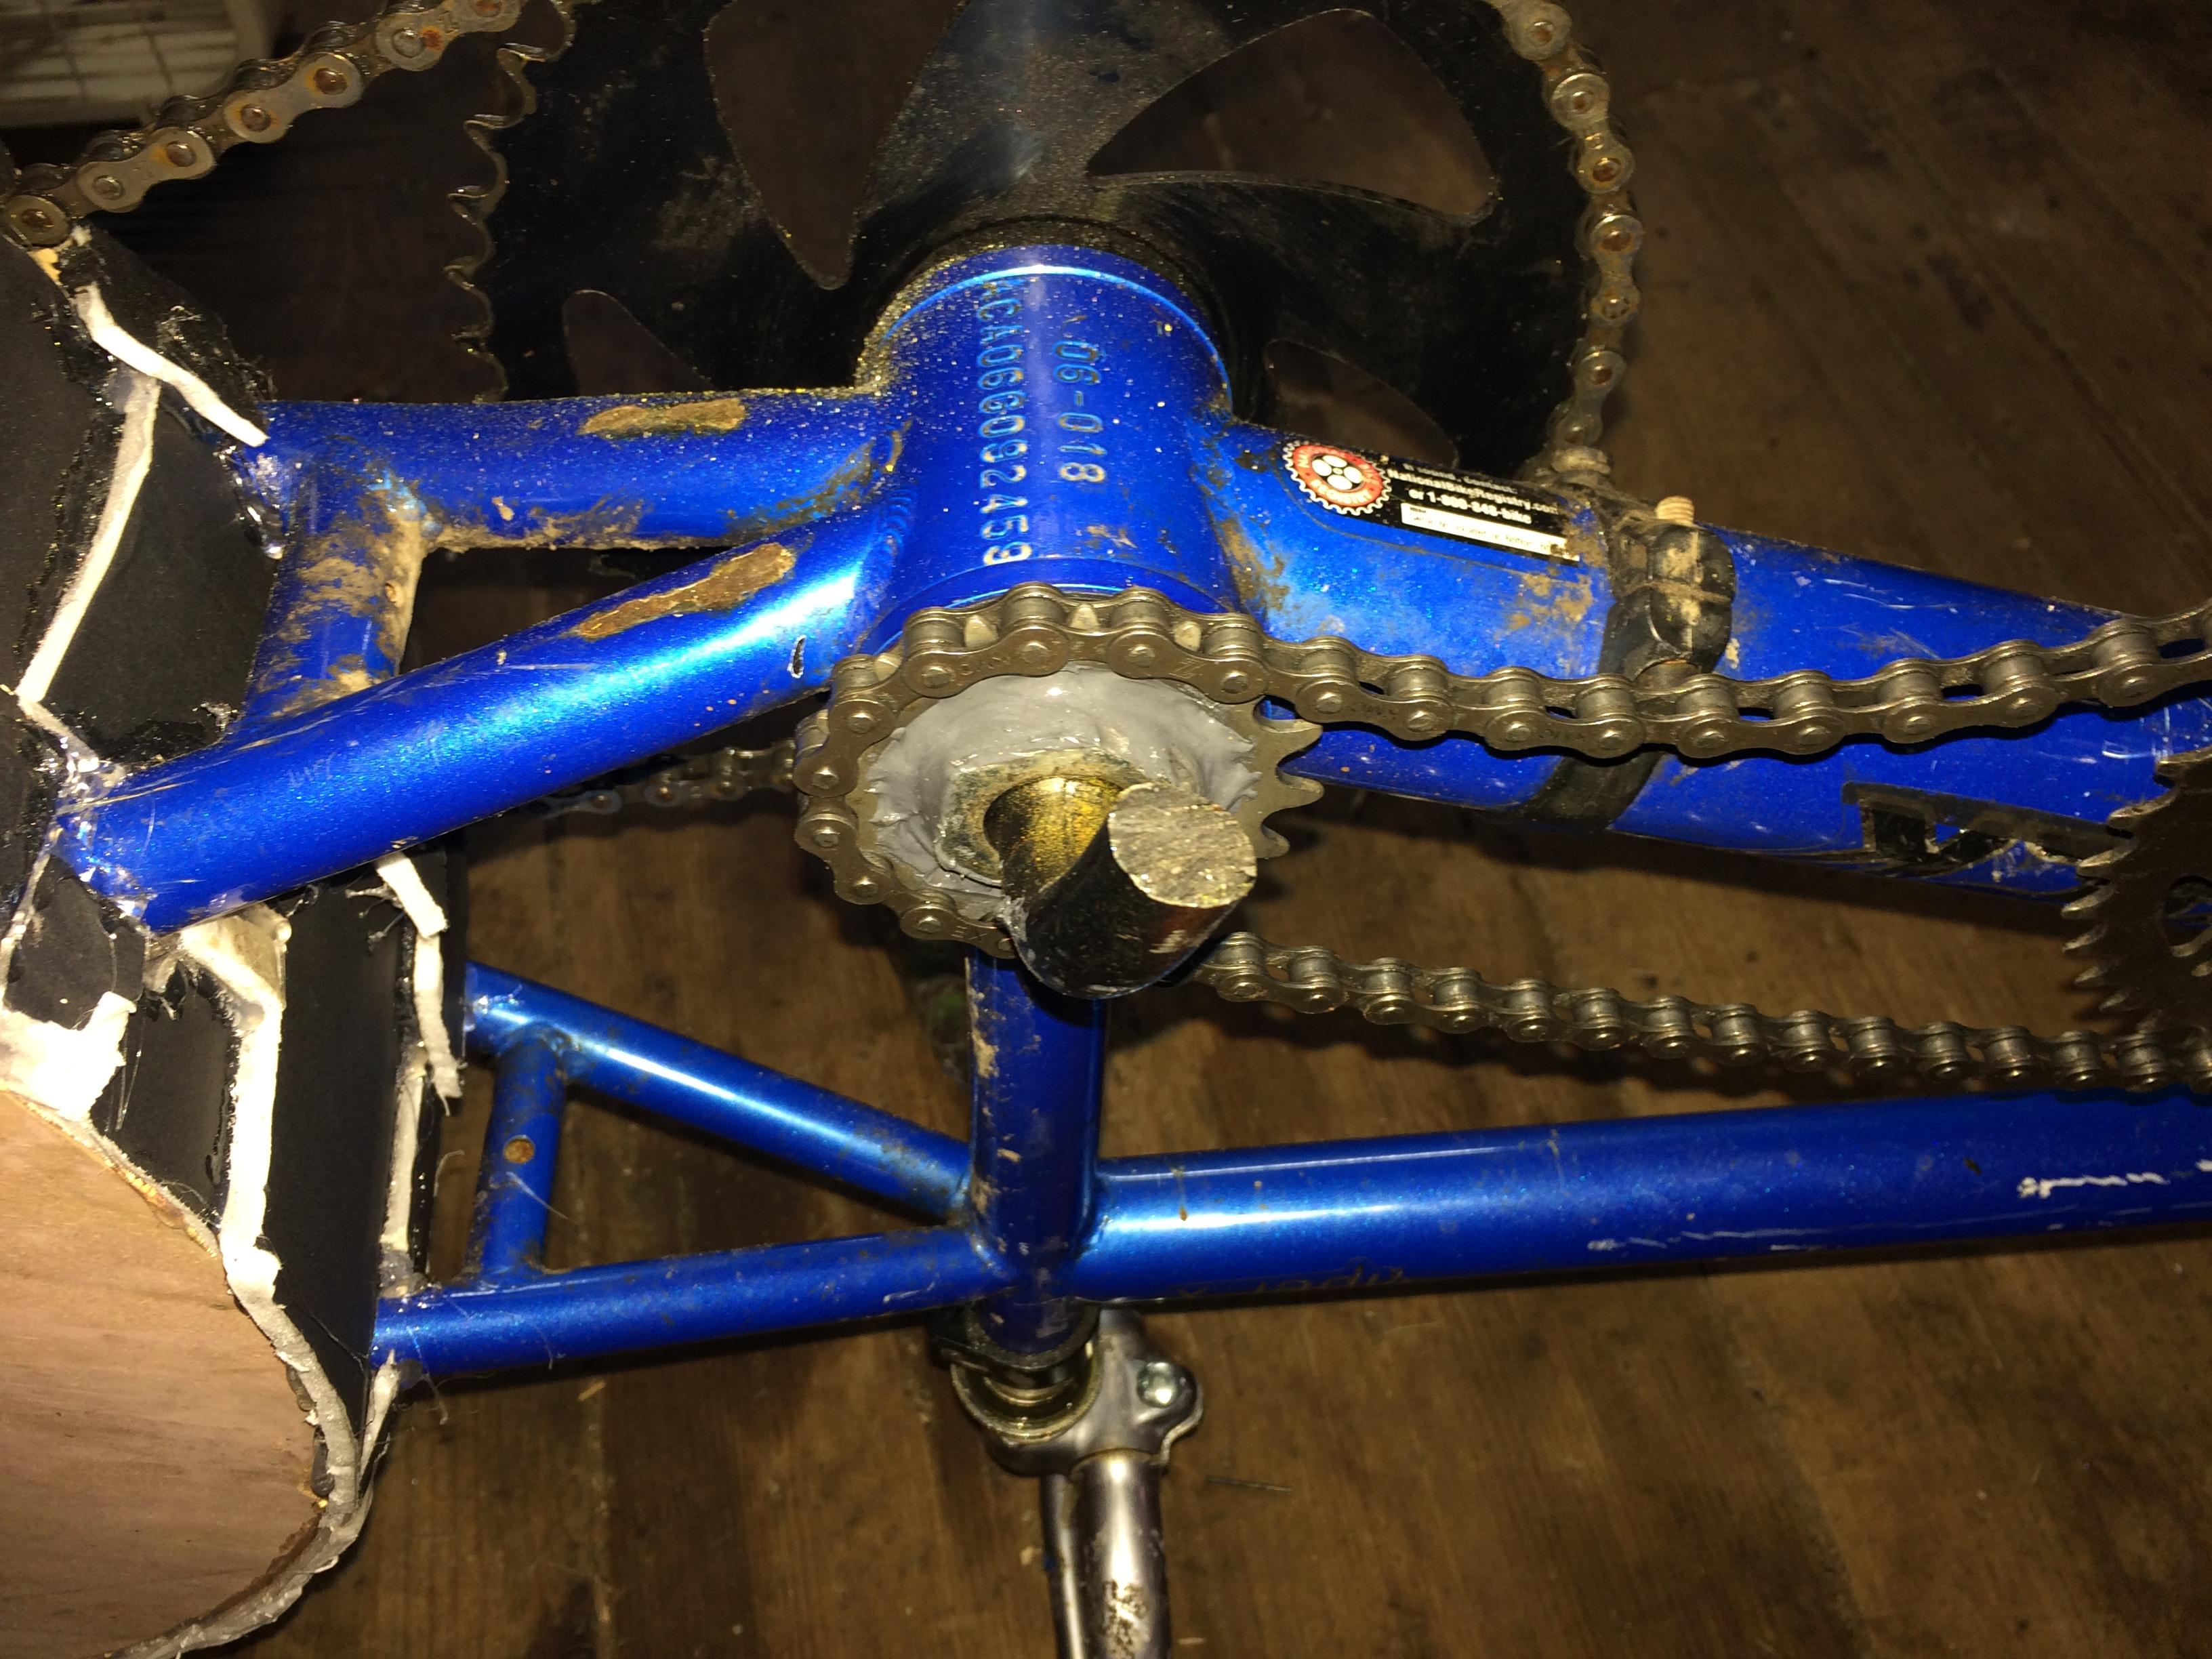
I'm still very much a beginner to blacksmithing, but when I first started, I, like many others, needed a forge blower. I came up with this thing: I know, it's pretty ridiculous, but it puts out almost (not quite, but surprisingly close) as much air as the Champion 400 blower I recently got. It's two junky kid bicycles that I got on the side of the road for free that I jumbled together. Since it is geared up twice, you really don't need to turn the crank very fast to produce air. It also coasts quite well because it uses the ratchet form the bike. Here's some kind of step-by-step instructions on how to build it: Make three plywood circles, one slightly smaller than the other two. Make sure the smaller one will fit in the bike frame as a replacement for the rear wheel. Make eight (I have no idea if eight is optimal, but it’s what I used) plywood rectangles and attach them to the smaller plywood circle as you would cut a pizza (this will be the fan blade). Remove the rear wheel of the first bike by cutting all of the spokes (keep the hub, that's needed). Drill a hole in the middle of the small plywood circle just large enough for the cone-shaped bit of the hub to fit through, but not the part with the holes (that were originally for the spokes). Drill small holes in the blade disk that line up with the spoke holes in the hub. Attach the fan to the hub using small bolts and nuts. (Put threadlocker them, mine kept loosening up until I did) Reinstall the hub/fan assembly back onto the bike and reattach the chain. (you should have the bike upside-down on its handlebars and seat from now on) Now disassemble the other bike, and retrieve the small gear that is attached to the rear wheel, as well as the pedal assembly with the bearings and large gear. You will also need the chain. Back to the main bike, cut off both pedal arms down fairly close to the base (I only have a hacksaw, so it took some time, but it is possible). Now take the small gear from the second bike, and attach it onto the jam nut holding the bearing cone in place. On my bike parts, the diameter of the hole on the inside was very close in size to the jam nut, and I was able to grind a hexagon shape into the inside on the gear with a Dremel. This made them fit together very well, and the way in rotates should tighten the jam nut, not loosen it. I then used some JB-Weld to attach it more permanently in place. (actually welding it would probably be better, but I don’t have a welder) If all goes well, the gear should look something like this: To attach the pedal bearing assembly to the bike frame, I just smashed the tube flat that I left on from the second bike’s frame, and bolted it onto the main bike's frame. Cut one of the pedals arms off the second pedal assembly, but leave the other, as it will be your handle. Take the chain from the second bike, and adjust it to size to get it to fit well onto the gears. Now take the two large plywood disks and drill holes in the middle large enough to fit onto the rear wheel hub axle, and with a nut that threads onto the shaft, bolt them in place. After making sure they fit well, take the one that is facing the blades off and cut air intake holes in it as close to the middle of the piece as possible. I built the shroud to direct the air out of foamboard and cracker boxes, but it would be quite a bit nicer if it was made out of thin sheet metal. Slowly funnel the outlet down until it is the size of the inlet on your forge. You can also hack off unnecessary parts from the bike to make it lighter and easier to carry around. I replaced the seat with the handlebars from the other bike to make the contraption more stable, but it isn't strictly necessary. And you're done! I wish I had taken photos while I was building it, but I wasn't very optimistic about it actually working. Obviously, not all bikes will be the same, so you may have to improvise a bit to get it to work. Have fun if you decide to build it!

-
I never hammer on it, I only use it for fairly light work like filing, sanding, or for bending rings for making chainmail. It's a joy to work with! The only thing I use the "anvil" section for is shaping thin copper sheets. Some owner before me must have hit the jaws a bit too hard and cracked off the casting supporting the rear jaw (you can see that it's missing in the photo). This is what I use as an anvil: It's a piece of rail (I don't think it's from a normal train, it seems too small), and, ironically, the back of a vise. I got it for 20 dollars because it's missing the whole front jaw. The vise says on the side "Patented Sept 22, 1914". Here's what it originally looked like: I use the rail piece for most stuff, and then the vise for bending things (because it has a horn).

-
Here's mine. It's a 3.5in Wilton. Anyone know approximately when it was made?

-
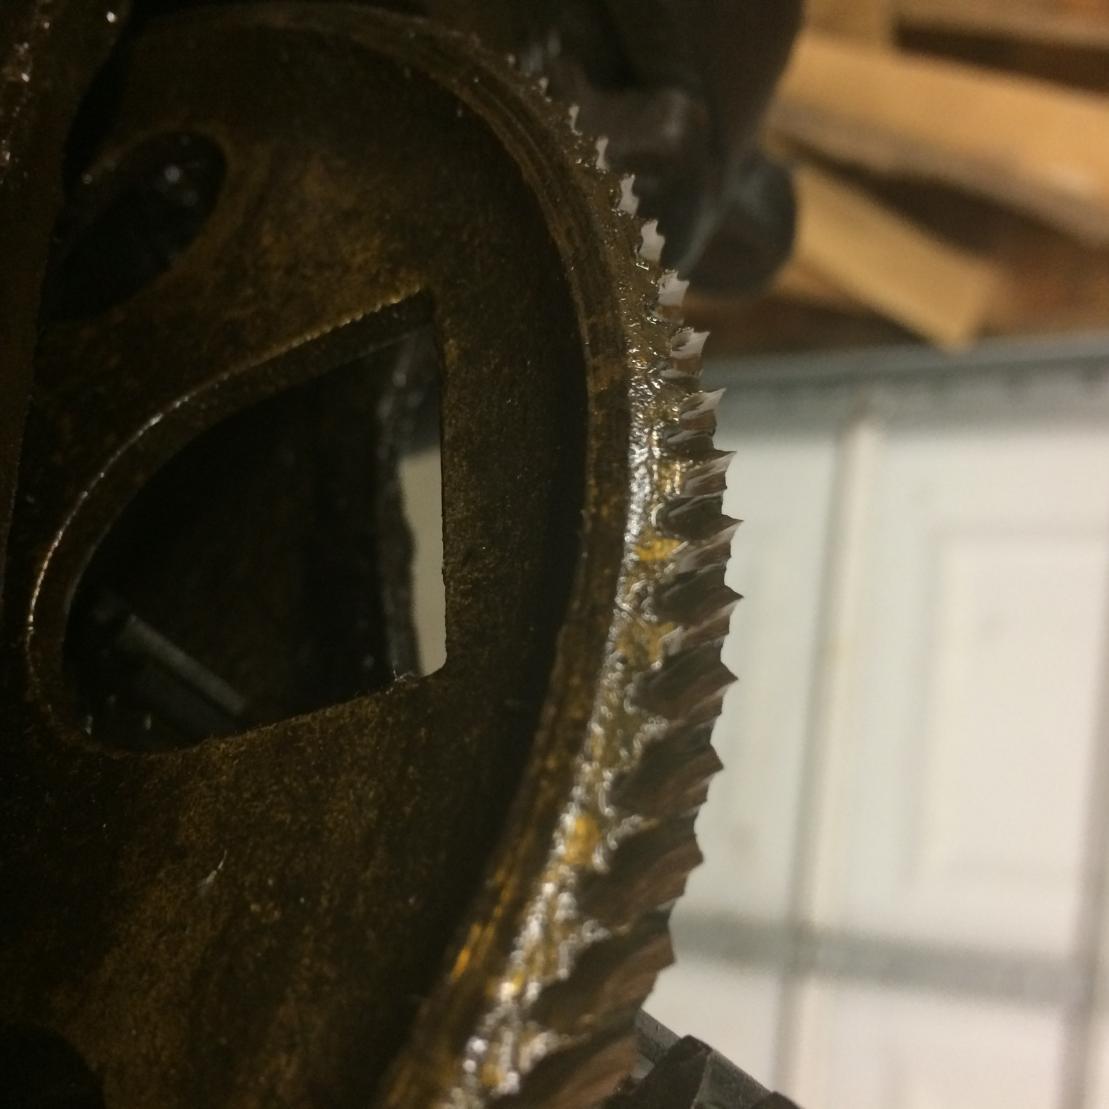
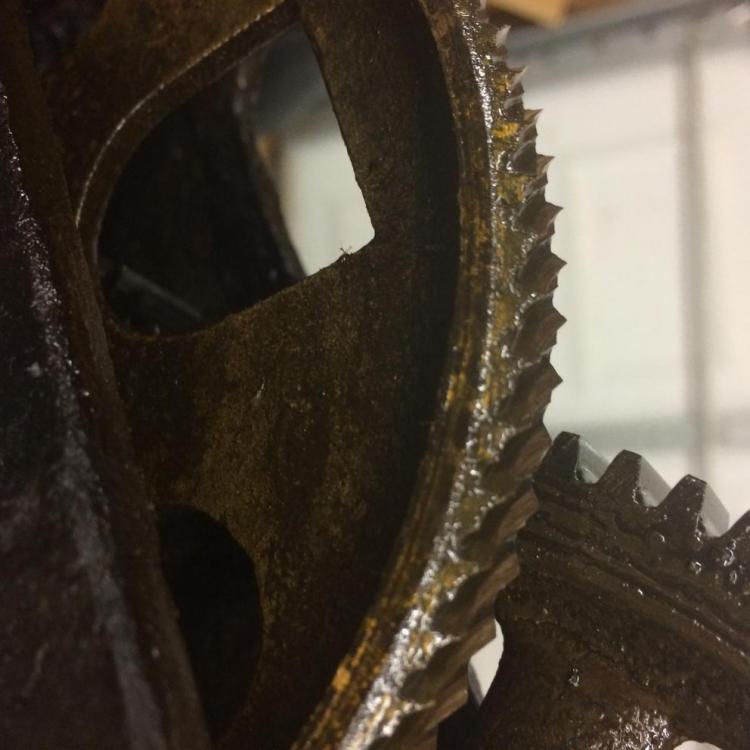
Thanks, that's pretty sad to hear. Shame someone just didn't bother giving it a few drops of oil now and then. Would there be some way to braze on a new layer of bronze and cut new teeth into it?
-
Oh, I guess I learned something today. Pretty sad actually. I guess it turns out the 10+ squirrels our cat killed this past month weren't the grey squirrels that are eating everything that grows in our garden. They were flying squirrels. On a more positive note, here's my blacksmith pet! He's a 14 year old Russian Tortoise: (I also have a cat, as mentioned above....)

-
Hi, first post here. I recently purchased a Champion 400 forge blower for a very good price (60$!). It is in fairly good condition, except for the phosphor bronze helical cut gear. The teeth have worn extremely thin, and I worry that it will not last much longer. My guess is that it was run without oil for a long time since it was completely dry when I got it. All the other gears look fine, it's just the phosphor bronze one that's worn. My questions are: How long might it last if I keep it well cleaned and oiled? Is there a way to adjust the mesh between the gears to make it wear less? If it does wear through and stop working, is there any way to get a replacement? Any and all help appreciated! Thanks!

.thumb.JPG.709dad07e8fea36ff1bade44acc98e95.JPG)