.JPG.2f3624accaac3d3b9eda127ac2e5aecc.JPG)
Chelonian
-
Posts
406 -
Joined
-
Last visited
Content Type
Profiles
Forums
Articles
Gallery
Downloads
Events
Everything posted by Chelonian
-
Do I need a water cooled tuyere? I don't have a welder, so my fabricating skills are pretty limited. Are bottom-blast forges simpler to make, or harder? Thanks!
-
Oh. What are the differences? Would I be able to make the required modifications to my current one, or would it be better to start over from scratch?
-
I'm having some issues with my JAPOB forge. I built it about as closely as I could to the one Charles R. Stevens made. The "firepot" is the size of one red brick, the air inlet pipe has a 1 1/4" inner diameter, and I'm using bituminous coal. The problem I'm having is that if I make the fire even just above the top of the "firepot", the airflow becomes extremely restricted, and either I have to make the fire shallow again, or the whole forge goes out pretty fast. The blower I'm using is a Champion 400, so I doubt the problem is insufficient airflow. The coal I use is mostly fines, but I was told that that isn't a problem. I have had some success heating up metal, but I feel like if the fire was deeper it would work a lot better.(?) If there are any details that I didn't mention, let me know. Thanks!
-
Looks like a great table. How well supported is the vise? Beautiful Wilton Bullet BTW.
-
I would pass considering how damaged the face is. There will always be a better deal, and usually sooner than you think.
-
.thumb.JPG.709dad07e8fea36ff1bade44acc98e95.JPG)
Is this coal a usable size?
Chelonian replied to Chelonian's topic in Solid Fuels: Coal, Coke, Charcoal, Wood, etc
Sure was fun! Glad I came here before trying it though - otherwise I probably wouldn't have had much success. -
Is this coal a usable size?
Chelonian replied to Chelonian's topic in Solid Fuels: Coal, Coke, Charcoal, Wood, etc
I just finished trying the coal, and it seems quite good! It coked up into large puffy clumps, which I assume is a good thing. It consistently got the metal nice and hot, so I'm happy. Thanks for all the help! -
What can I do with this piece of metal?
Chelonian replied to Chelonian's topic in Blacksmithing, General Discussion
I got the forge going today, so I cut a piece off the end of the rod (not exactly fun with a hacksaw ), and tried hardening it. I tried breaking it, but even when I was hitting it quite hard, it didn't break. So I cut a groove into it, and then tried hitting it again. This time it did break: (don't worry I didn't break it in the vise) I then tested the hardness with a file, and it pretty much just skates it. I did manage to eventually round off a corner after about a minute of filing, but I don't think it was biting much.
-
I vote for mailbox post. That is a really cool find.
-
Is this coal a usable size?
Chelonian replied to Chelonian's topic in Solid Fuels: Coal, Coke, Charcoal, Wood, etc
Thanks for the answers! I think at this point I just need to try it and see what happens. I'm hoping I'll be able to try it later today. -
Is this coal a usable size?
Chelonian replied to Chelonian's topic in Solid Fuels: Coal, Coke, Charcoal, Wood, etc
Great information, thanks! I did just think of another question though: since my forge is made of plain old red bricks, and I was told to make sure they were completely dry before use (So that they didn't crack when I heated them), will putting damp coal on them and then heating them be a problem? -
Is this coal a usable size?
Chelonian replied to Chelonian's topic in Solid Fuels: Coal, Coke, Charcoal, Wood, etc
Okay, great! I'm glad that it's usable. Is the purpose of wetting the fine coal just so that it doesn't get blown away by the air, or does it help the burning process in other ways too? I'm using a JAPOB side-blast forge, if that makes a difference. Thanks! -
Is this coal a usable size?
Chelonian posted a topic in Solid Fuels: Coal, Coke, Charcoal, Wood, etc
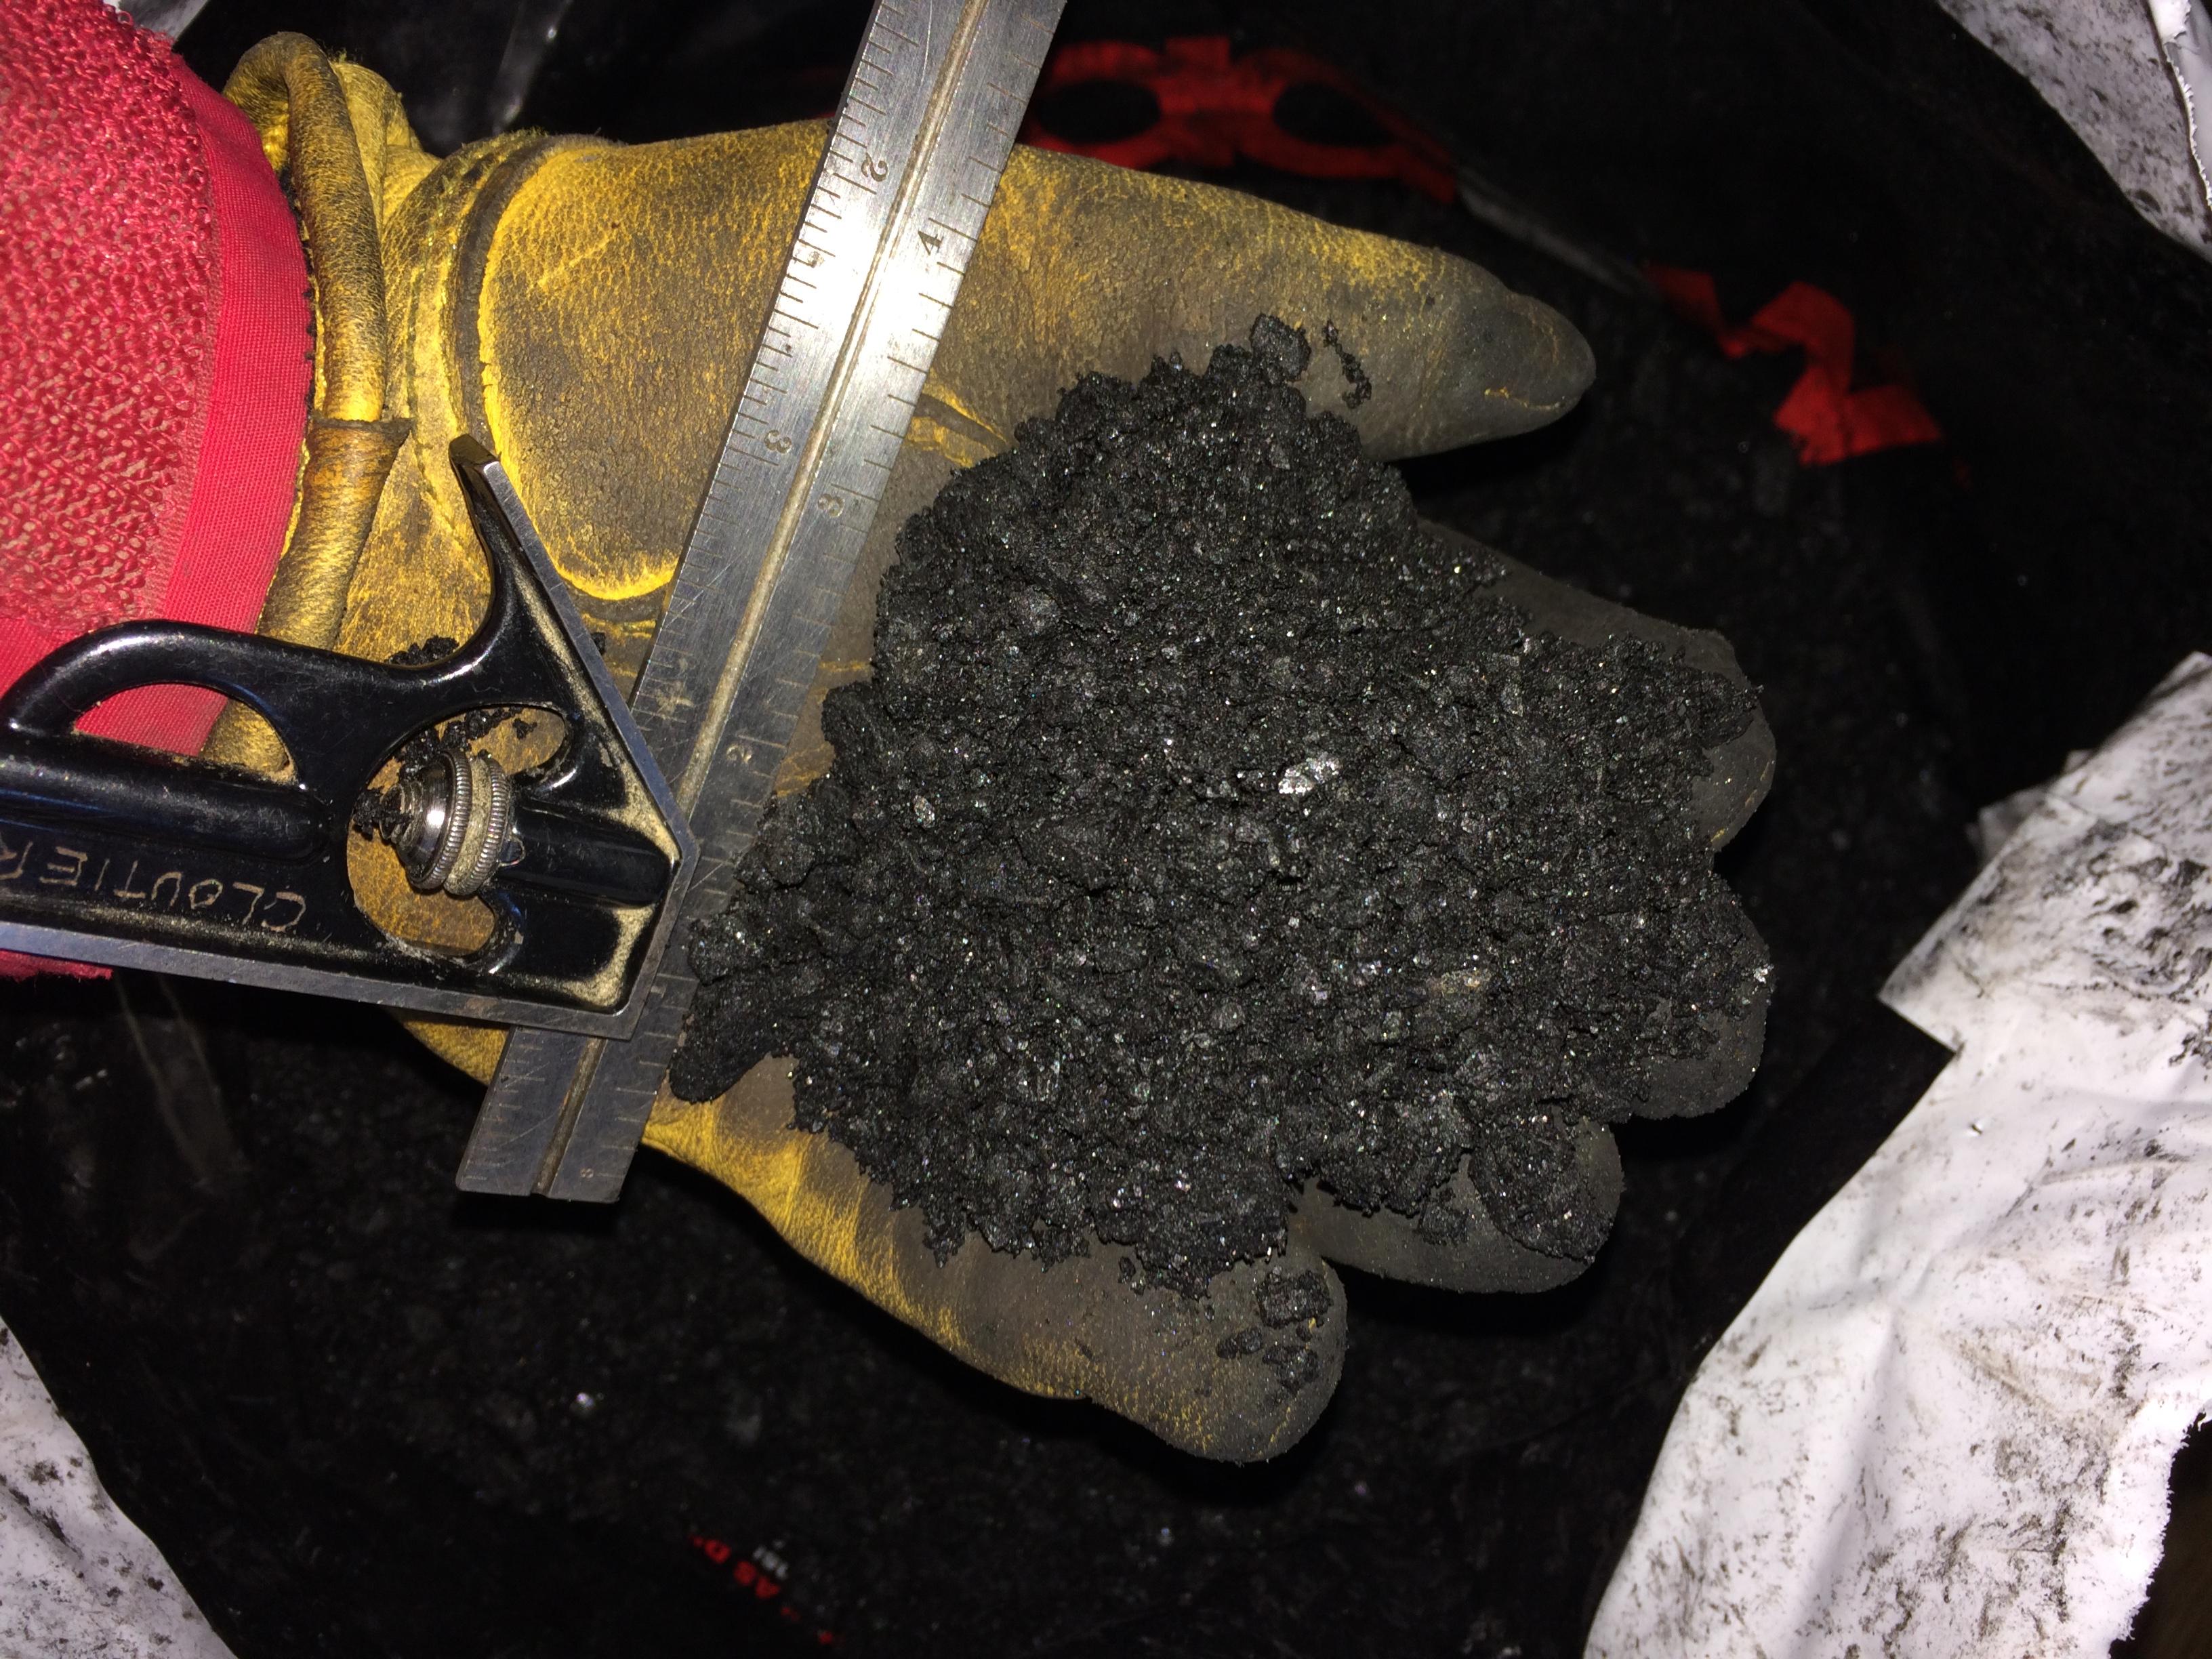
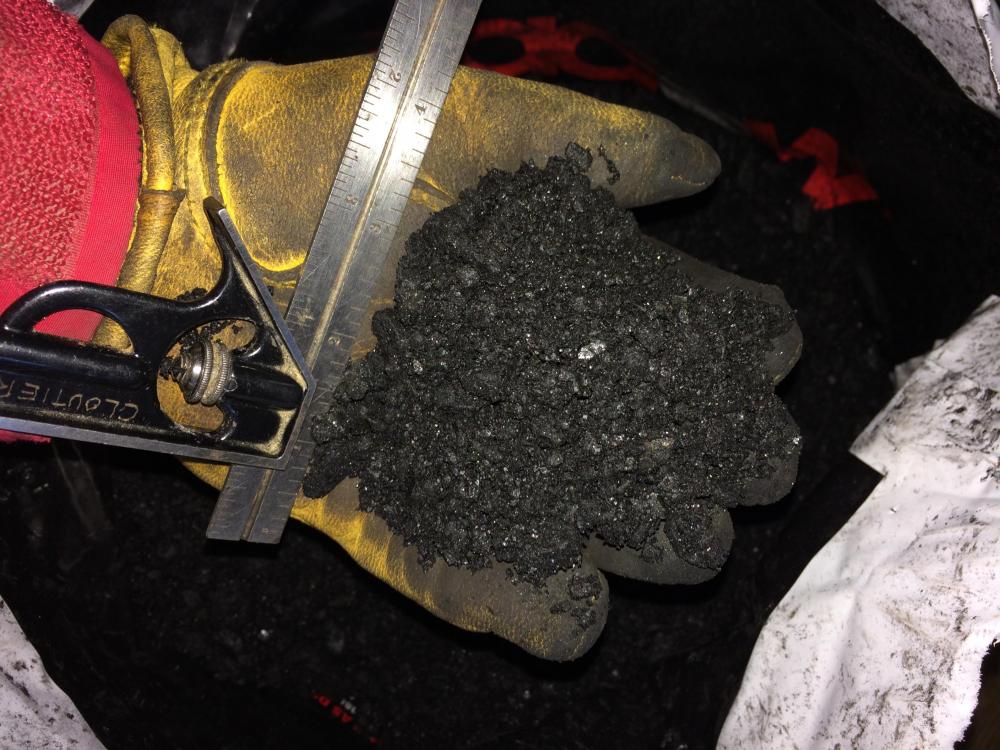
Hi, I just found a place to get bituminous coal in my area, so I bought a 50Lb bag to try it out. When I cut the top off the bag to take a look at it, I saw this: (6-inch ruler for scale) I know basically nothing about what it should look like, but this looks REALLY fine to me. It's almost like dirt. WIll it still burn okay? Is this the normal size for bituminous coal? I tried digging around in the bag to see if it was just this spot, but it all seems about the same size. Thanks!
-
What can I do with this piece of metal?
Chelonian replied to Chelonian's topic in Blacksmithing, General Discussion
That's a good idea. I'll try that next time I get the forge going. (might not be for a while because the weather looks awful for the next few days here) And then I'll post the results. Aren't most general forging hammers hardened and tempered? Thanks! -
What can I do with this piece of metal?
Chelonian replied to Chelonian's topic in Blacksmithing, General Discussion
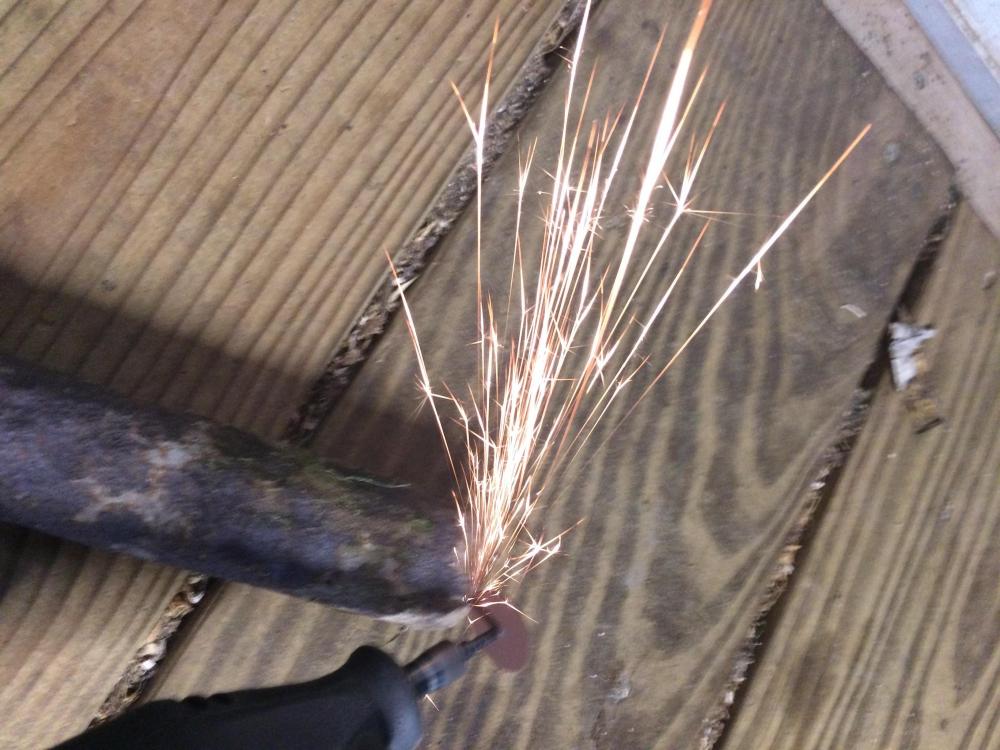
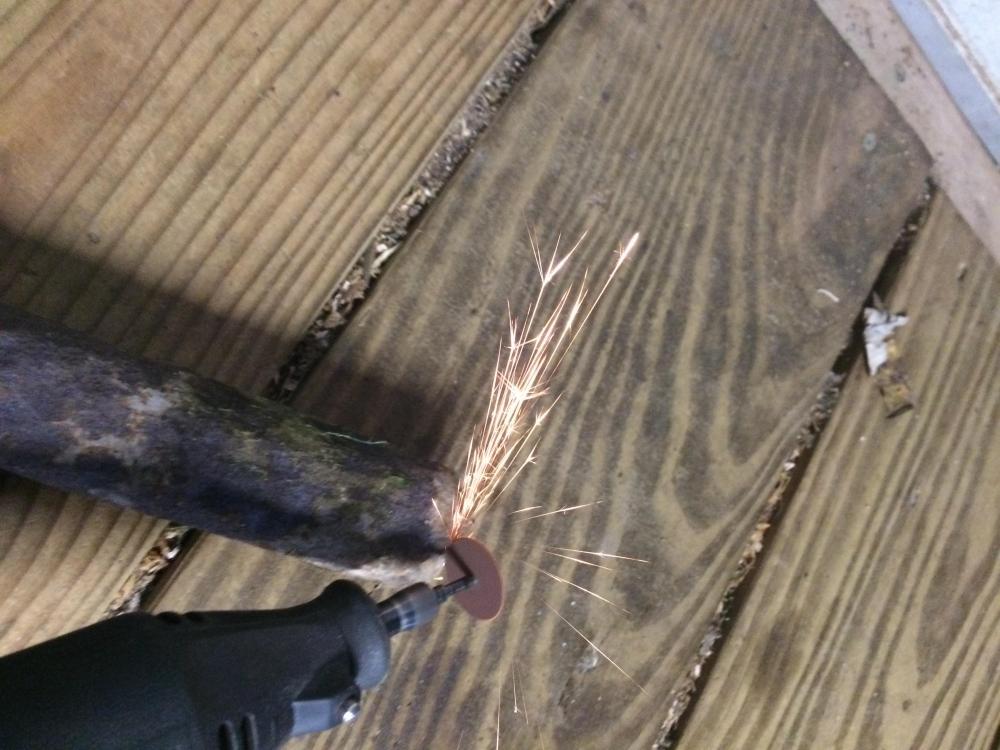
I'm mostly wondering if it would work to make hammer heads. Unfortunately, the only vise I have is a small Wilton machinist vise, and I'm unsure if it would handle being pounded on too much. I guess I might be able to try it in the vise if the piece was really thin. Is there any other way to test the brittleness? My spark testing method was a 3/4in cut-off wheel in a Dremel at 30K RPM. Thanks! -
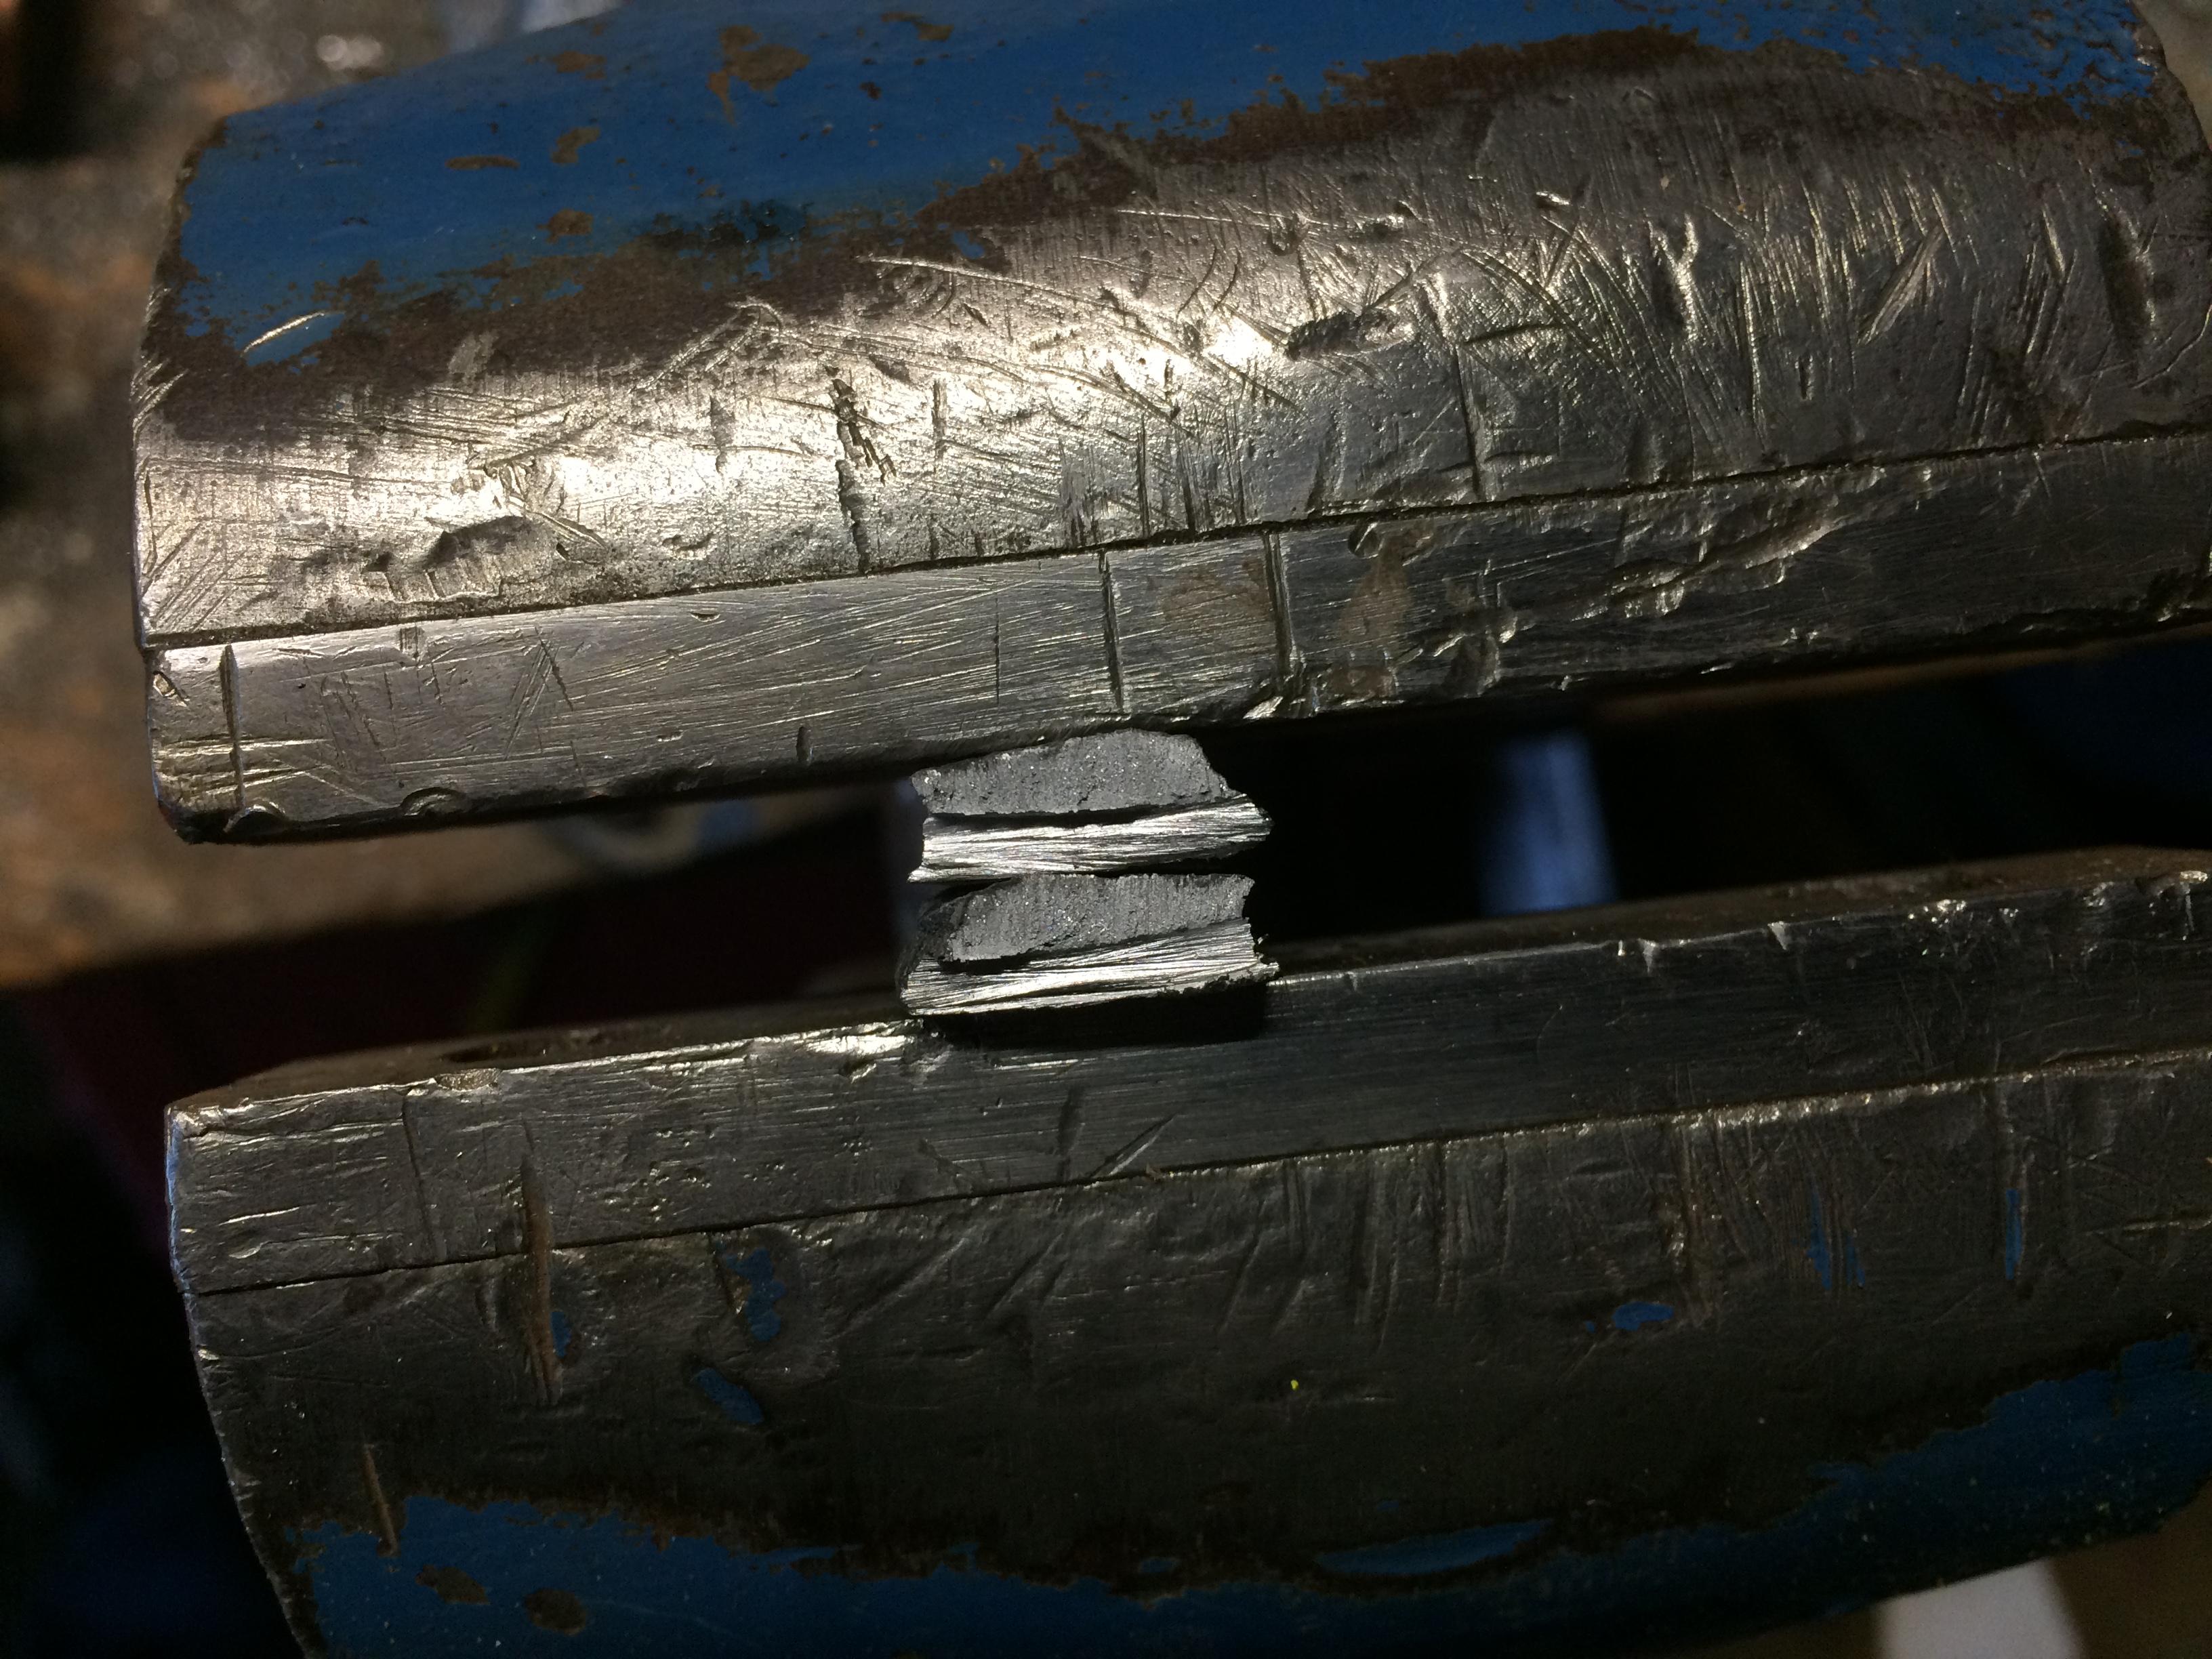
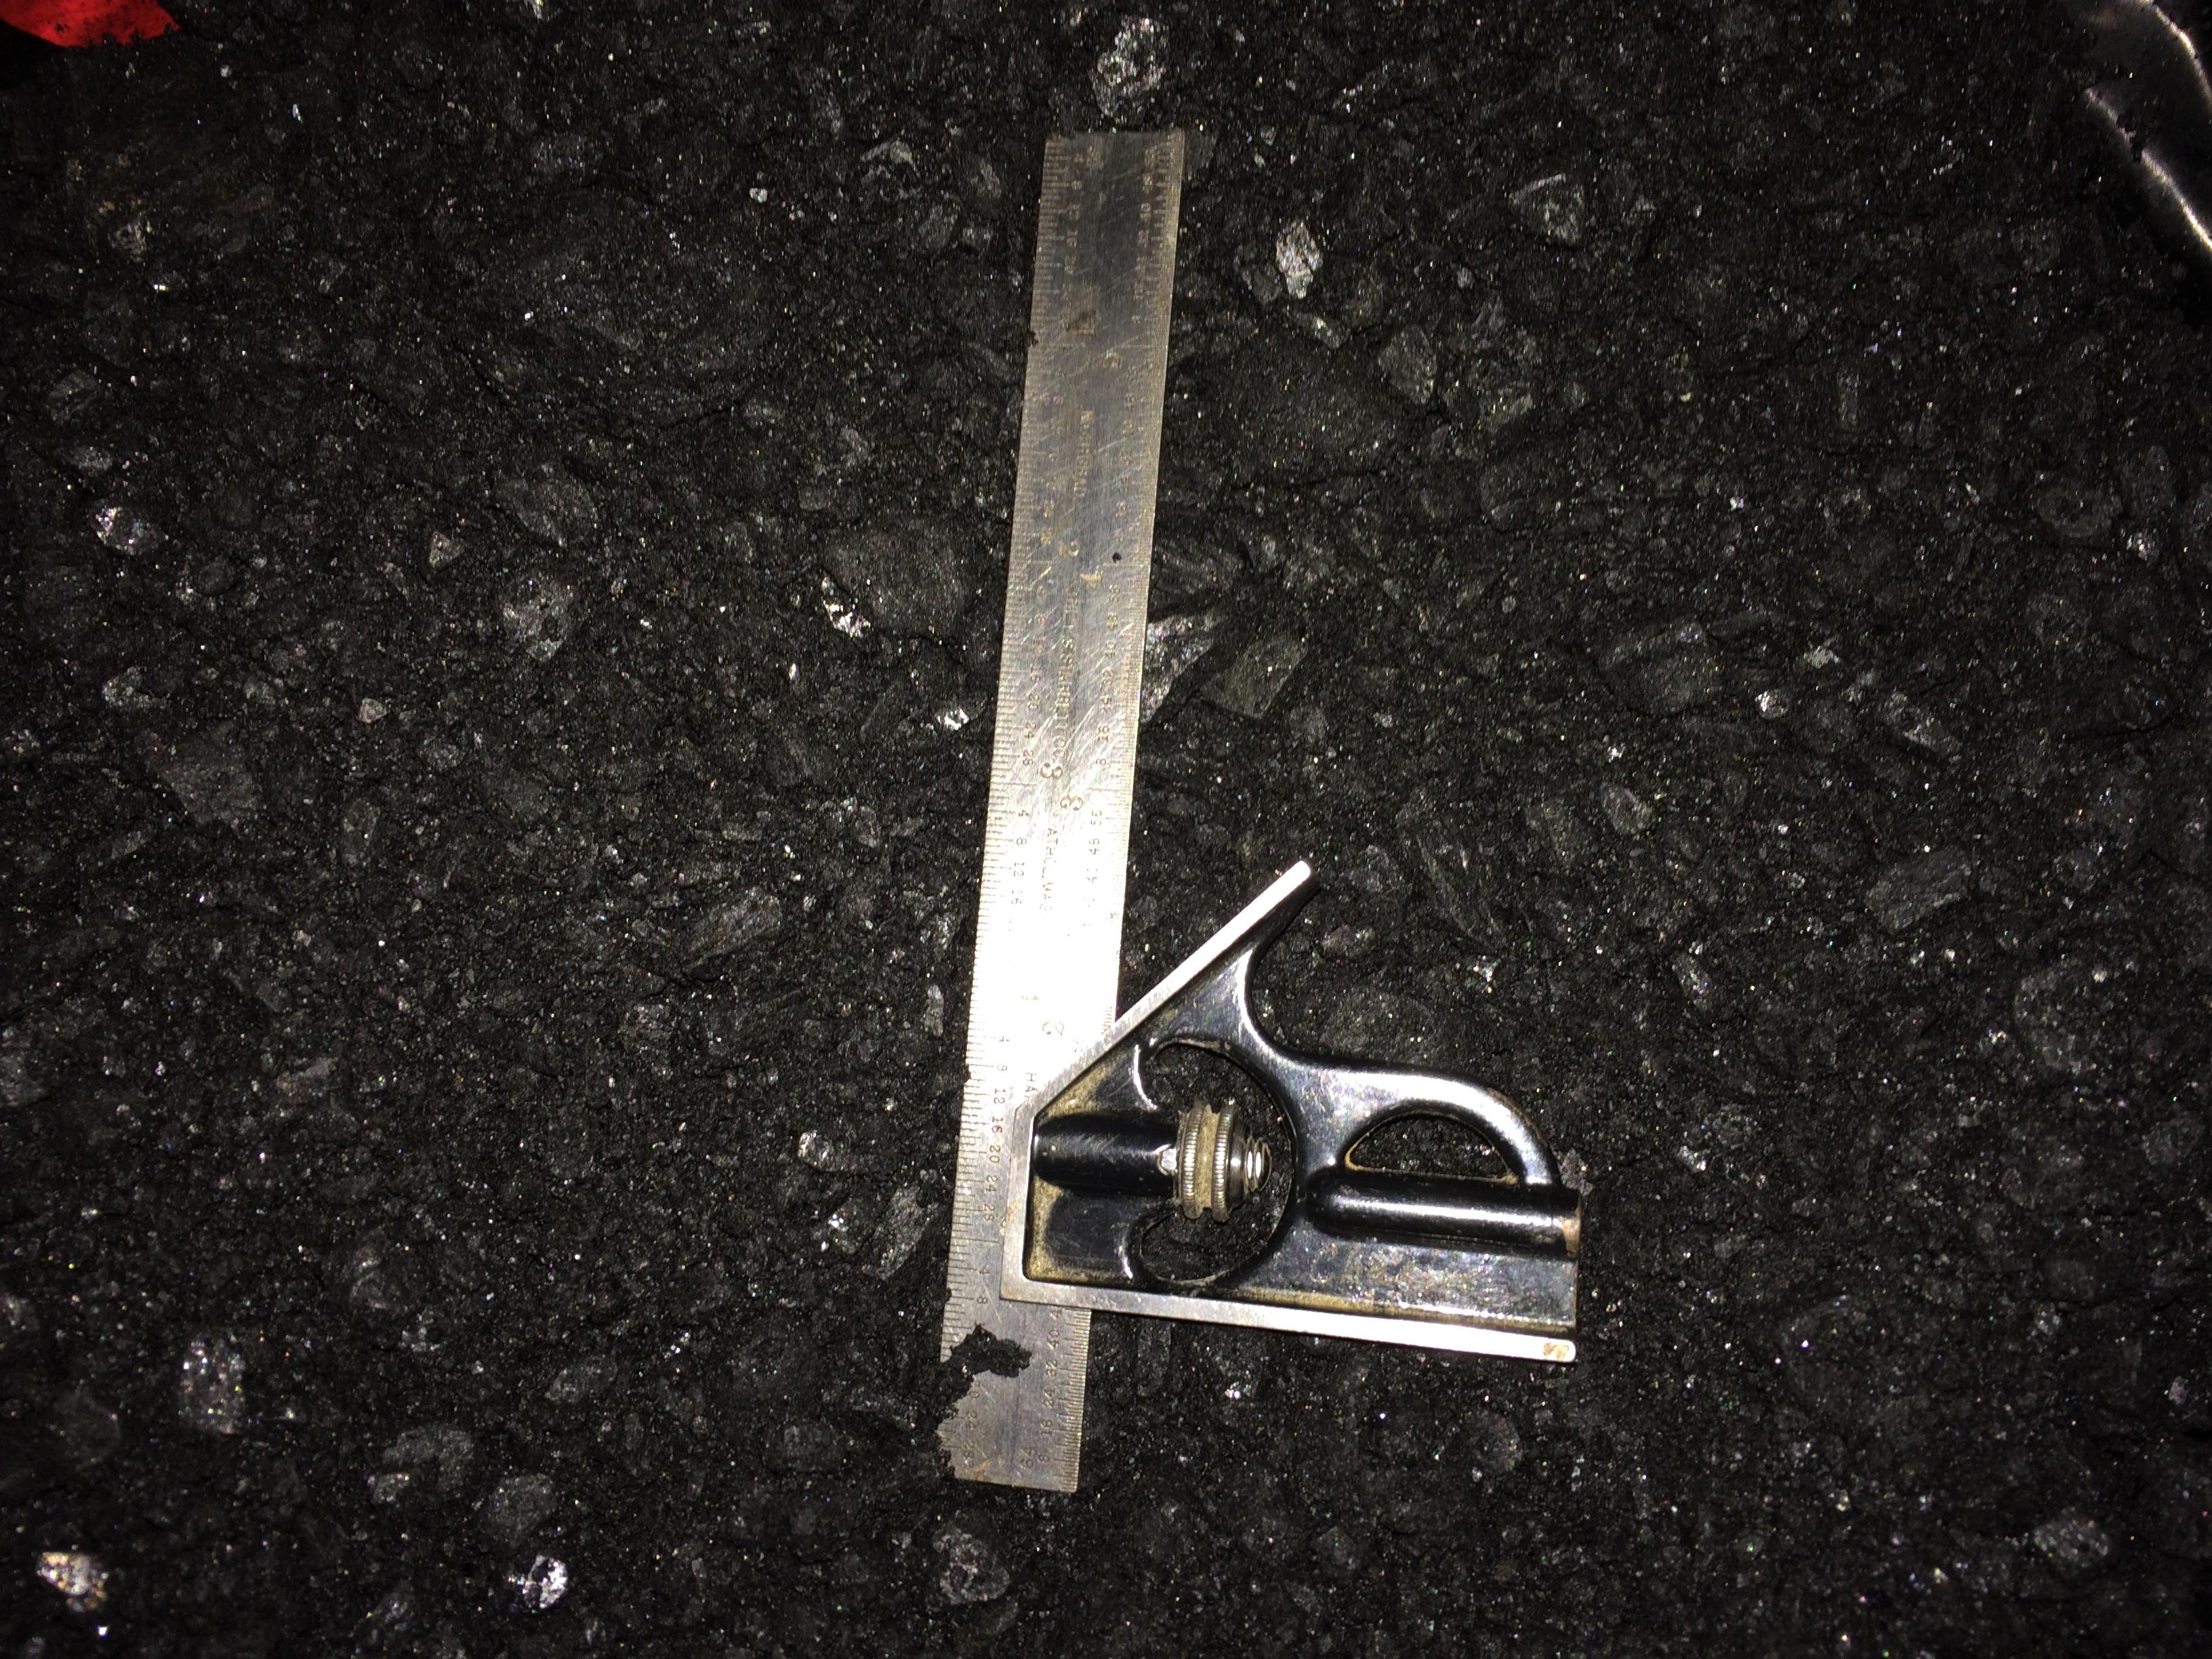
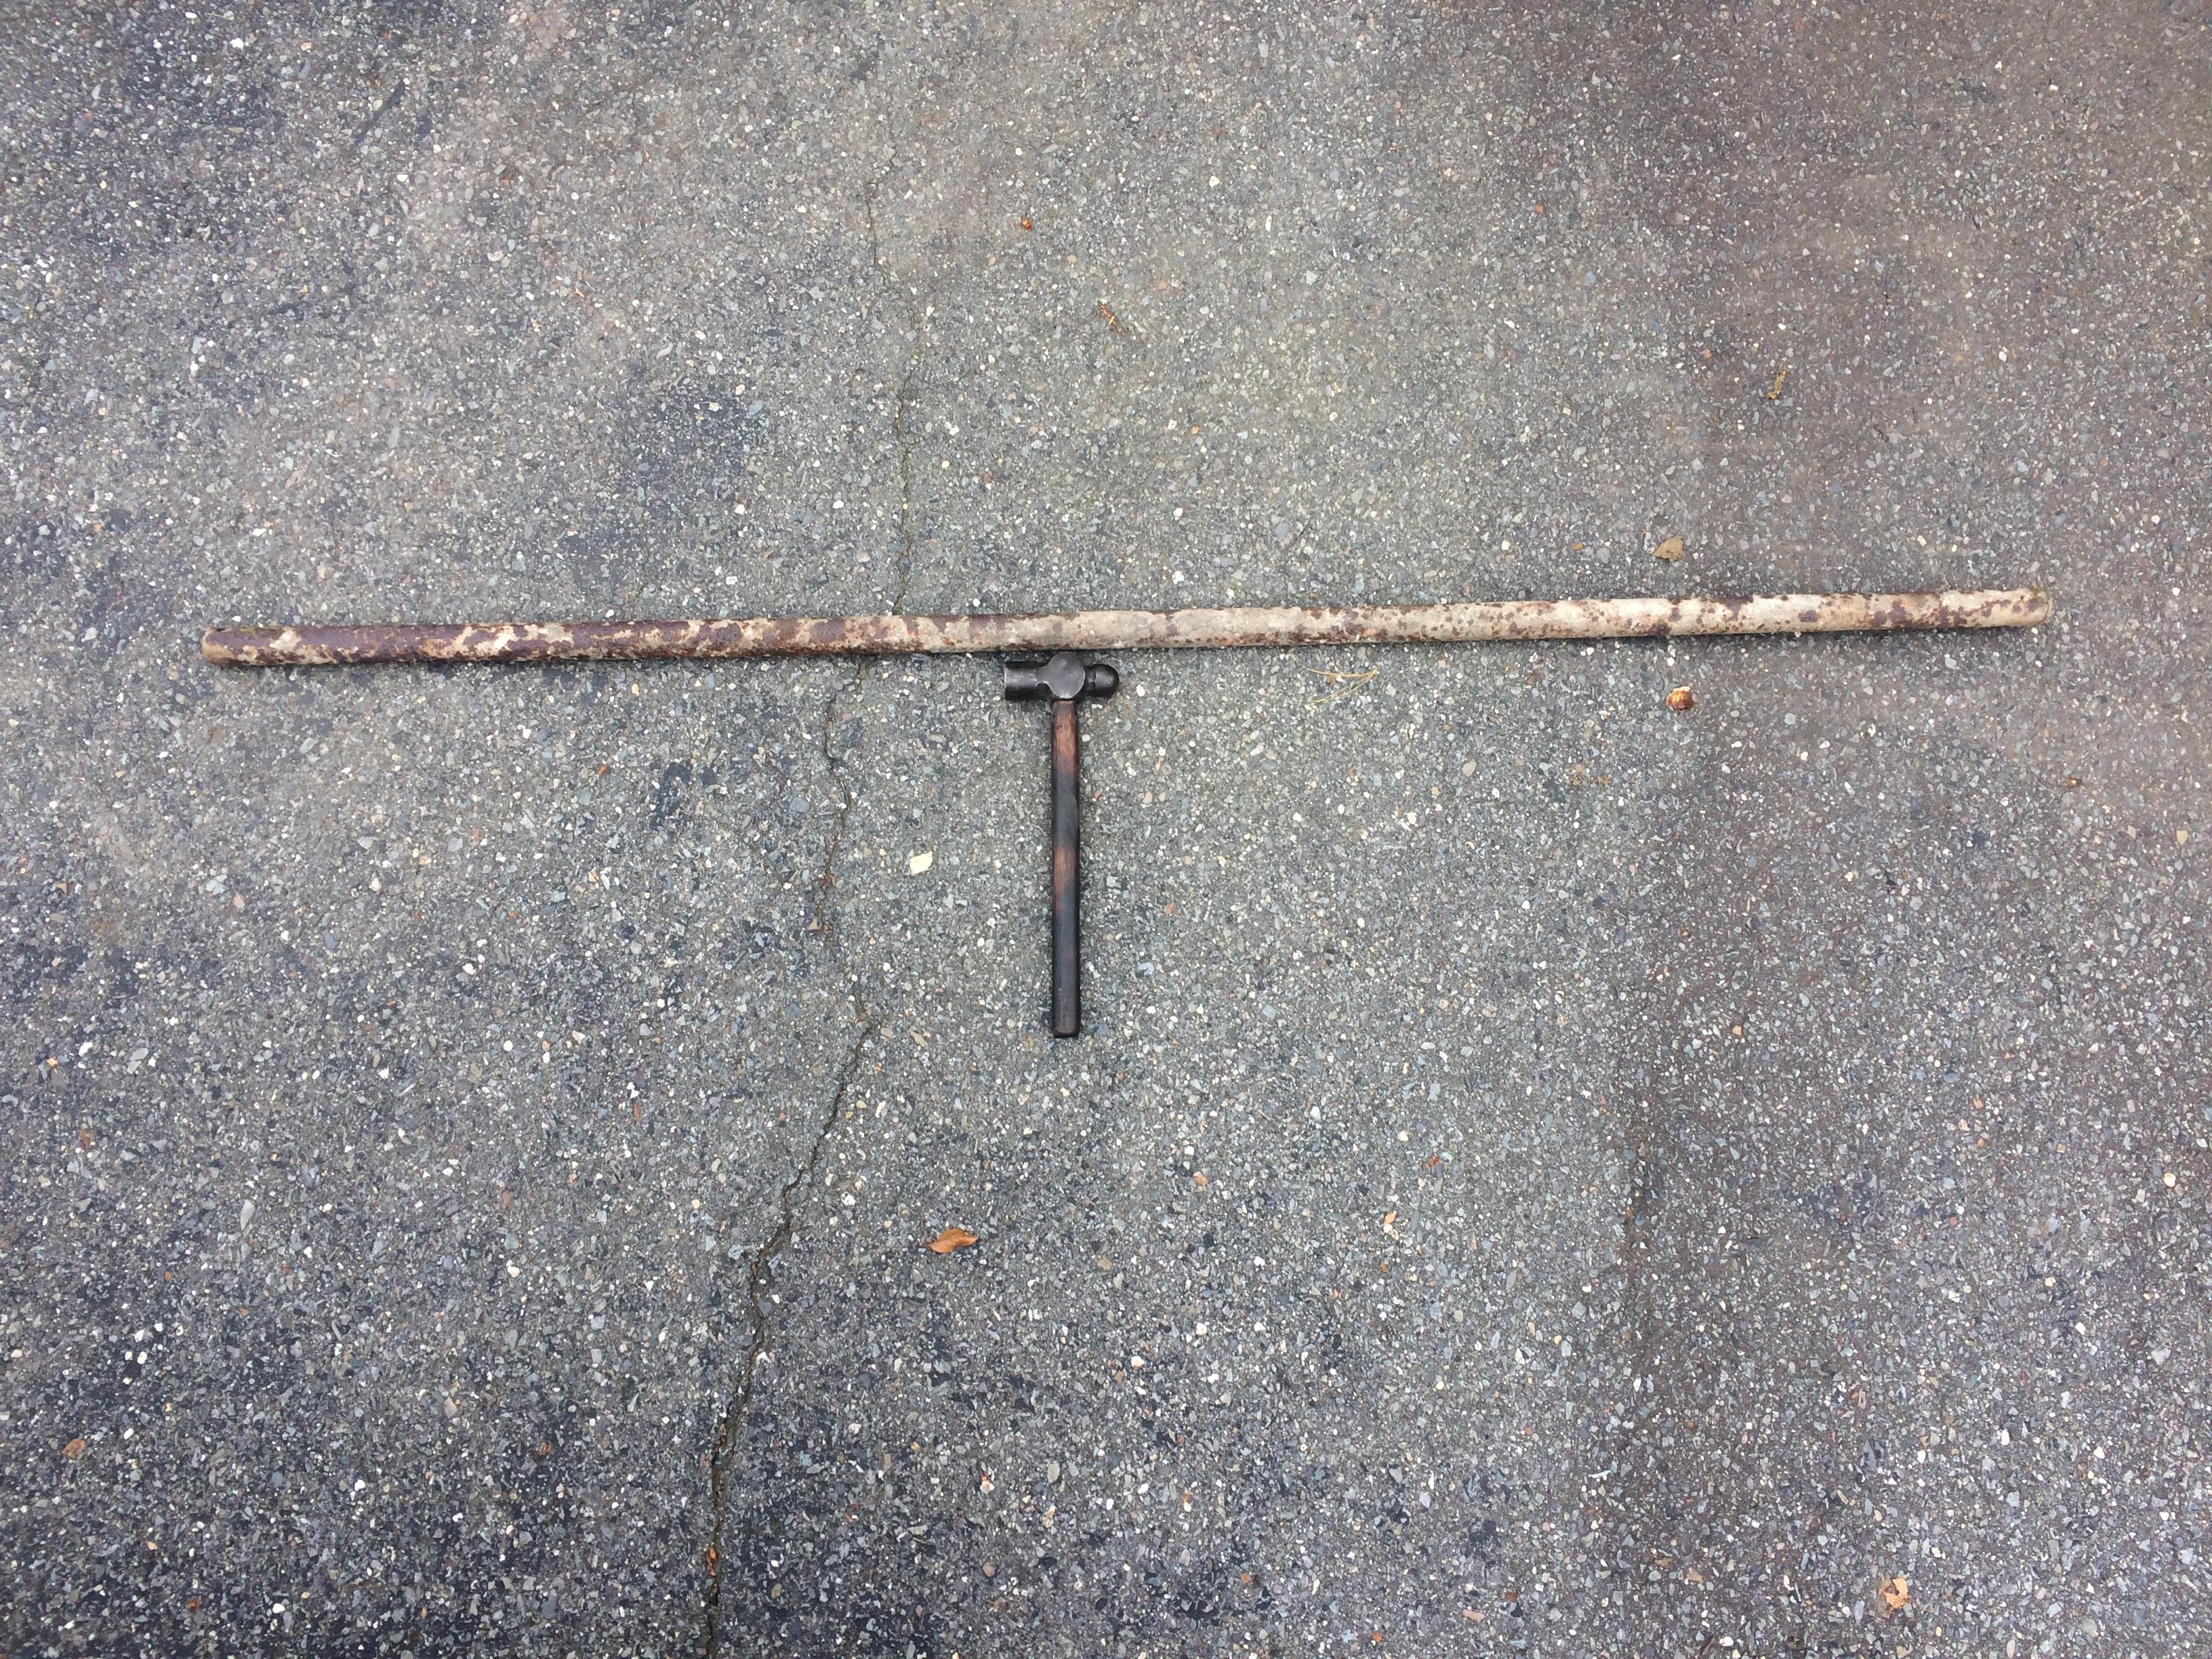
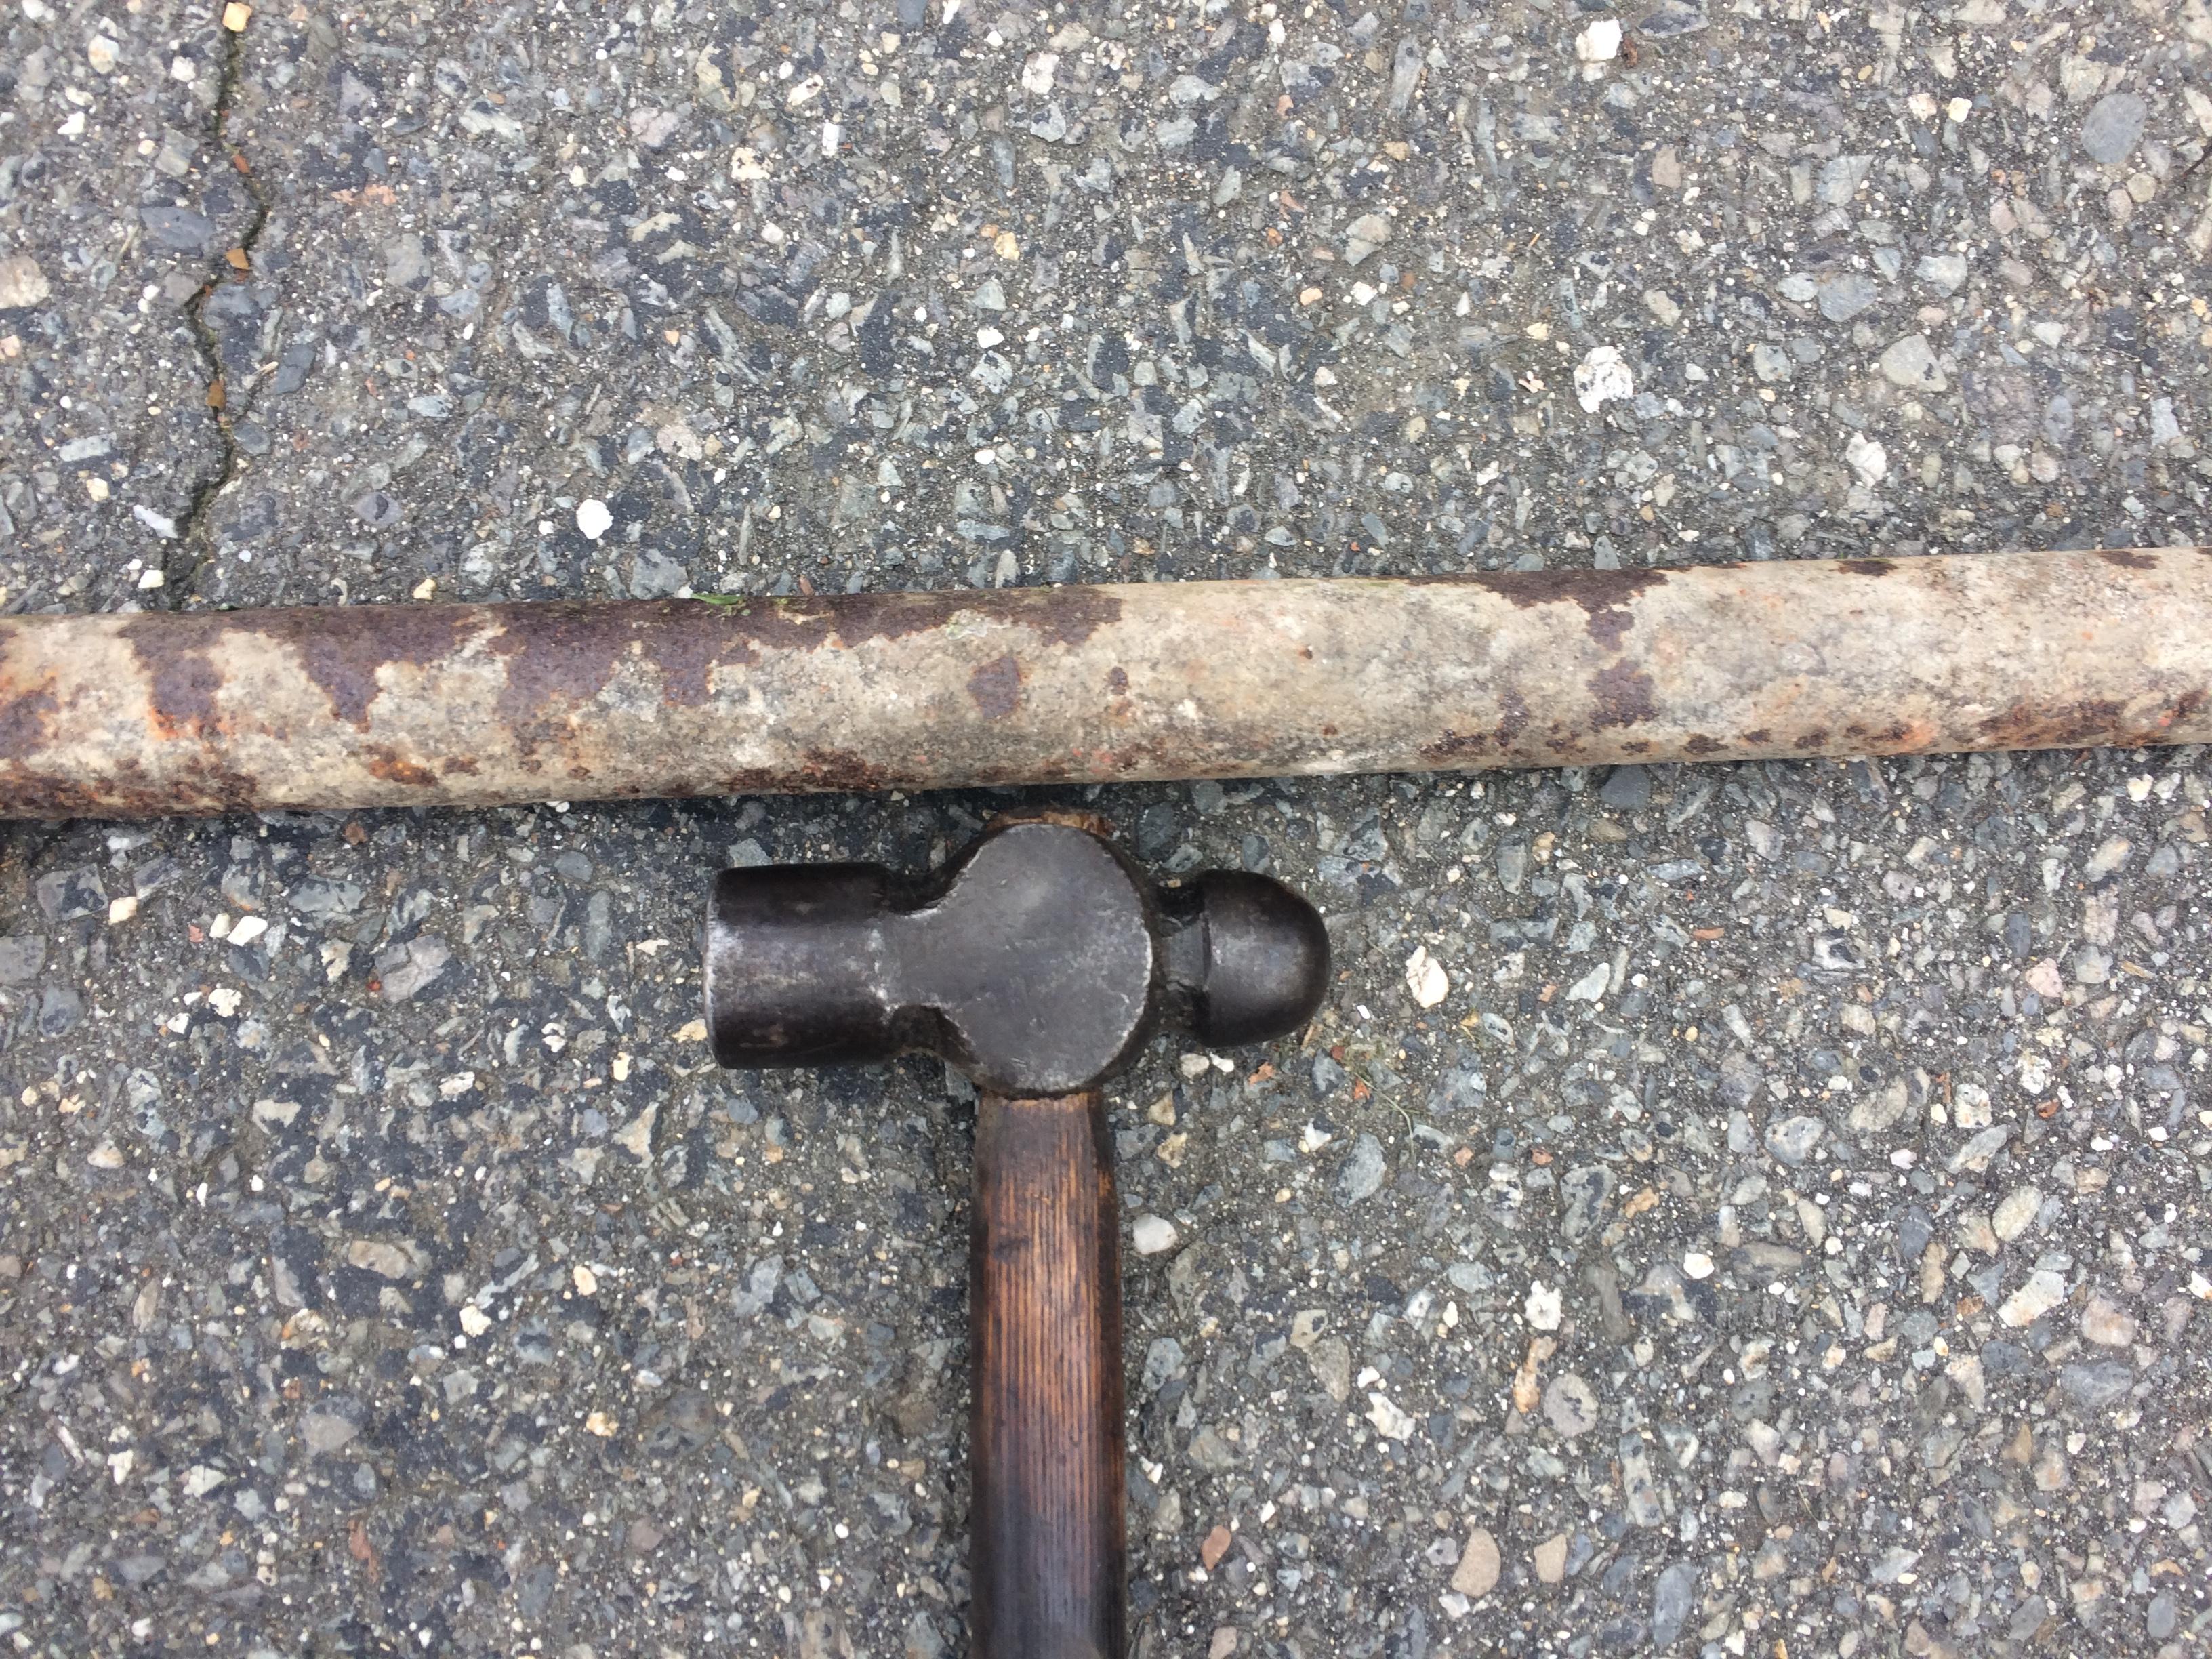
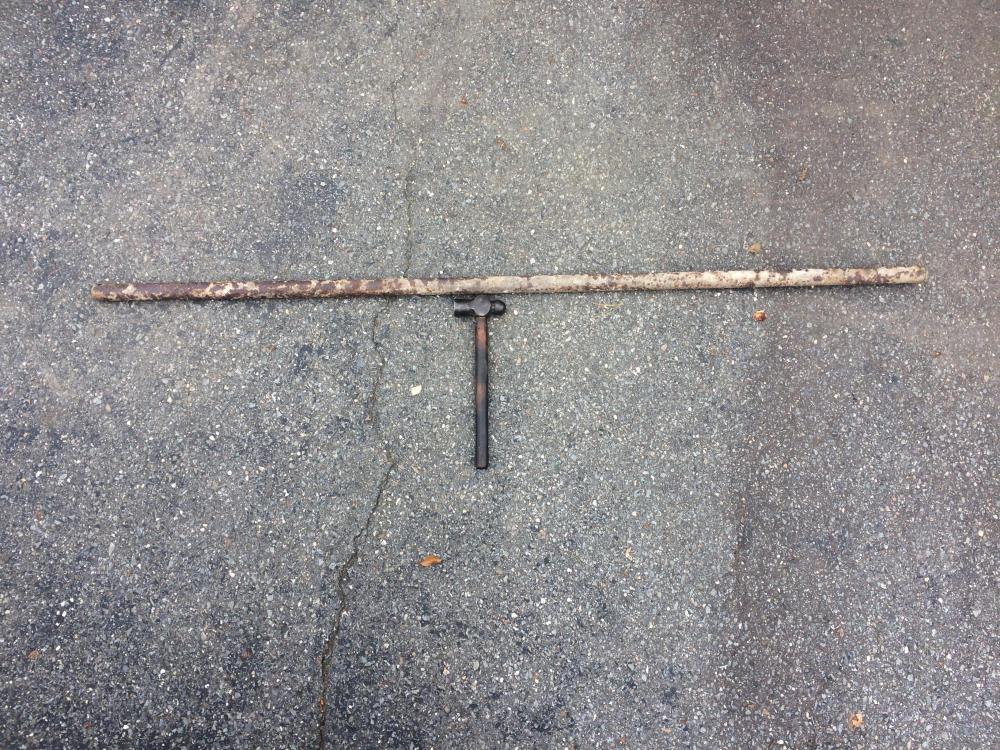
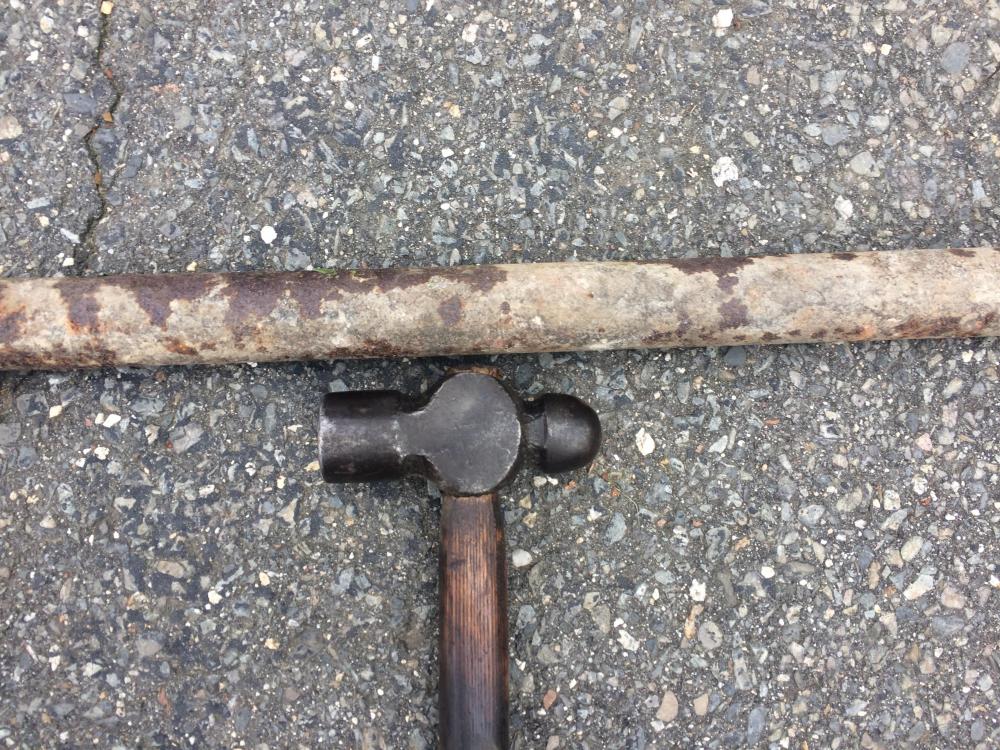
Hi, I recently found a large piece of metal in the basement of our house. It is 6 feet long, 1.5 inches in diameter, and weighs 35 pounds. I'm wondering if anyone has any ideas for what to do with it. Here are some photos: (next to a 2lb ball-pein hammer for scale ) I wasn't sure what type of metal it was, so I tried spark testing it. Does it look like it would be hardenable? Here's a photo of the sparks: If you have any ideas, please let me know! Thanks.
-
What did you do in the shop today?
Chelonian replied to Mark Ling's topic in Blacksmithing, General Discussion
After finding a suitably-sized stump for my recently acquired truncated anvil, I made my first pair of tongs today! Well, technically it's my second pair, but my first didn't come out nearly as well. They may not look the nicest, but they do hold stuff quite well. Now I don't have to use pliers to hold everything! It was also my first attempt at riveting something. It's definitely much nicer using a real anvil than the piece of rail I was using previously. Here's a photo: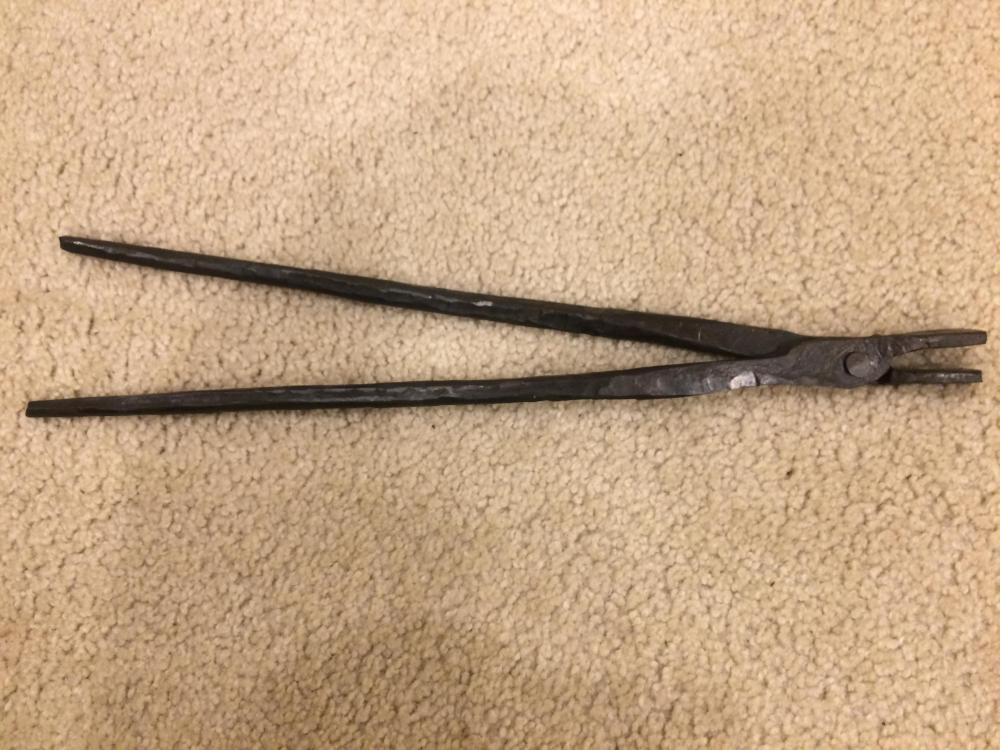
-
I think that diamond shape on the side means it's a Trenton, but I'm no expert.
-
What Should I Offer for This Anvil?
Chelonian replied to Chelonian's topic in Anvils, Swage Blocks, and Mandrels
Thomas, Thanks for figuring out the weight! I never understood the whole weighting system, so the 230 was just a guess. steve miller, I think I'll wait and use it for a little while before making modifications, but I may do that at some point. Thanks! -
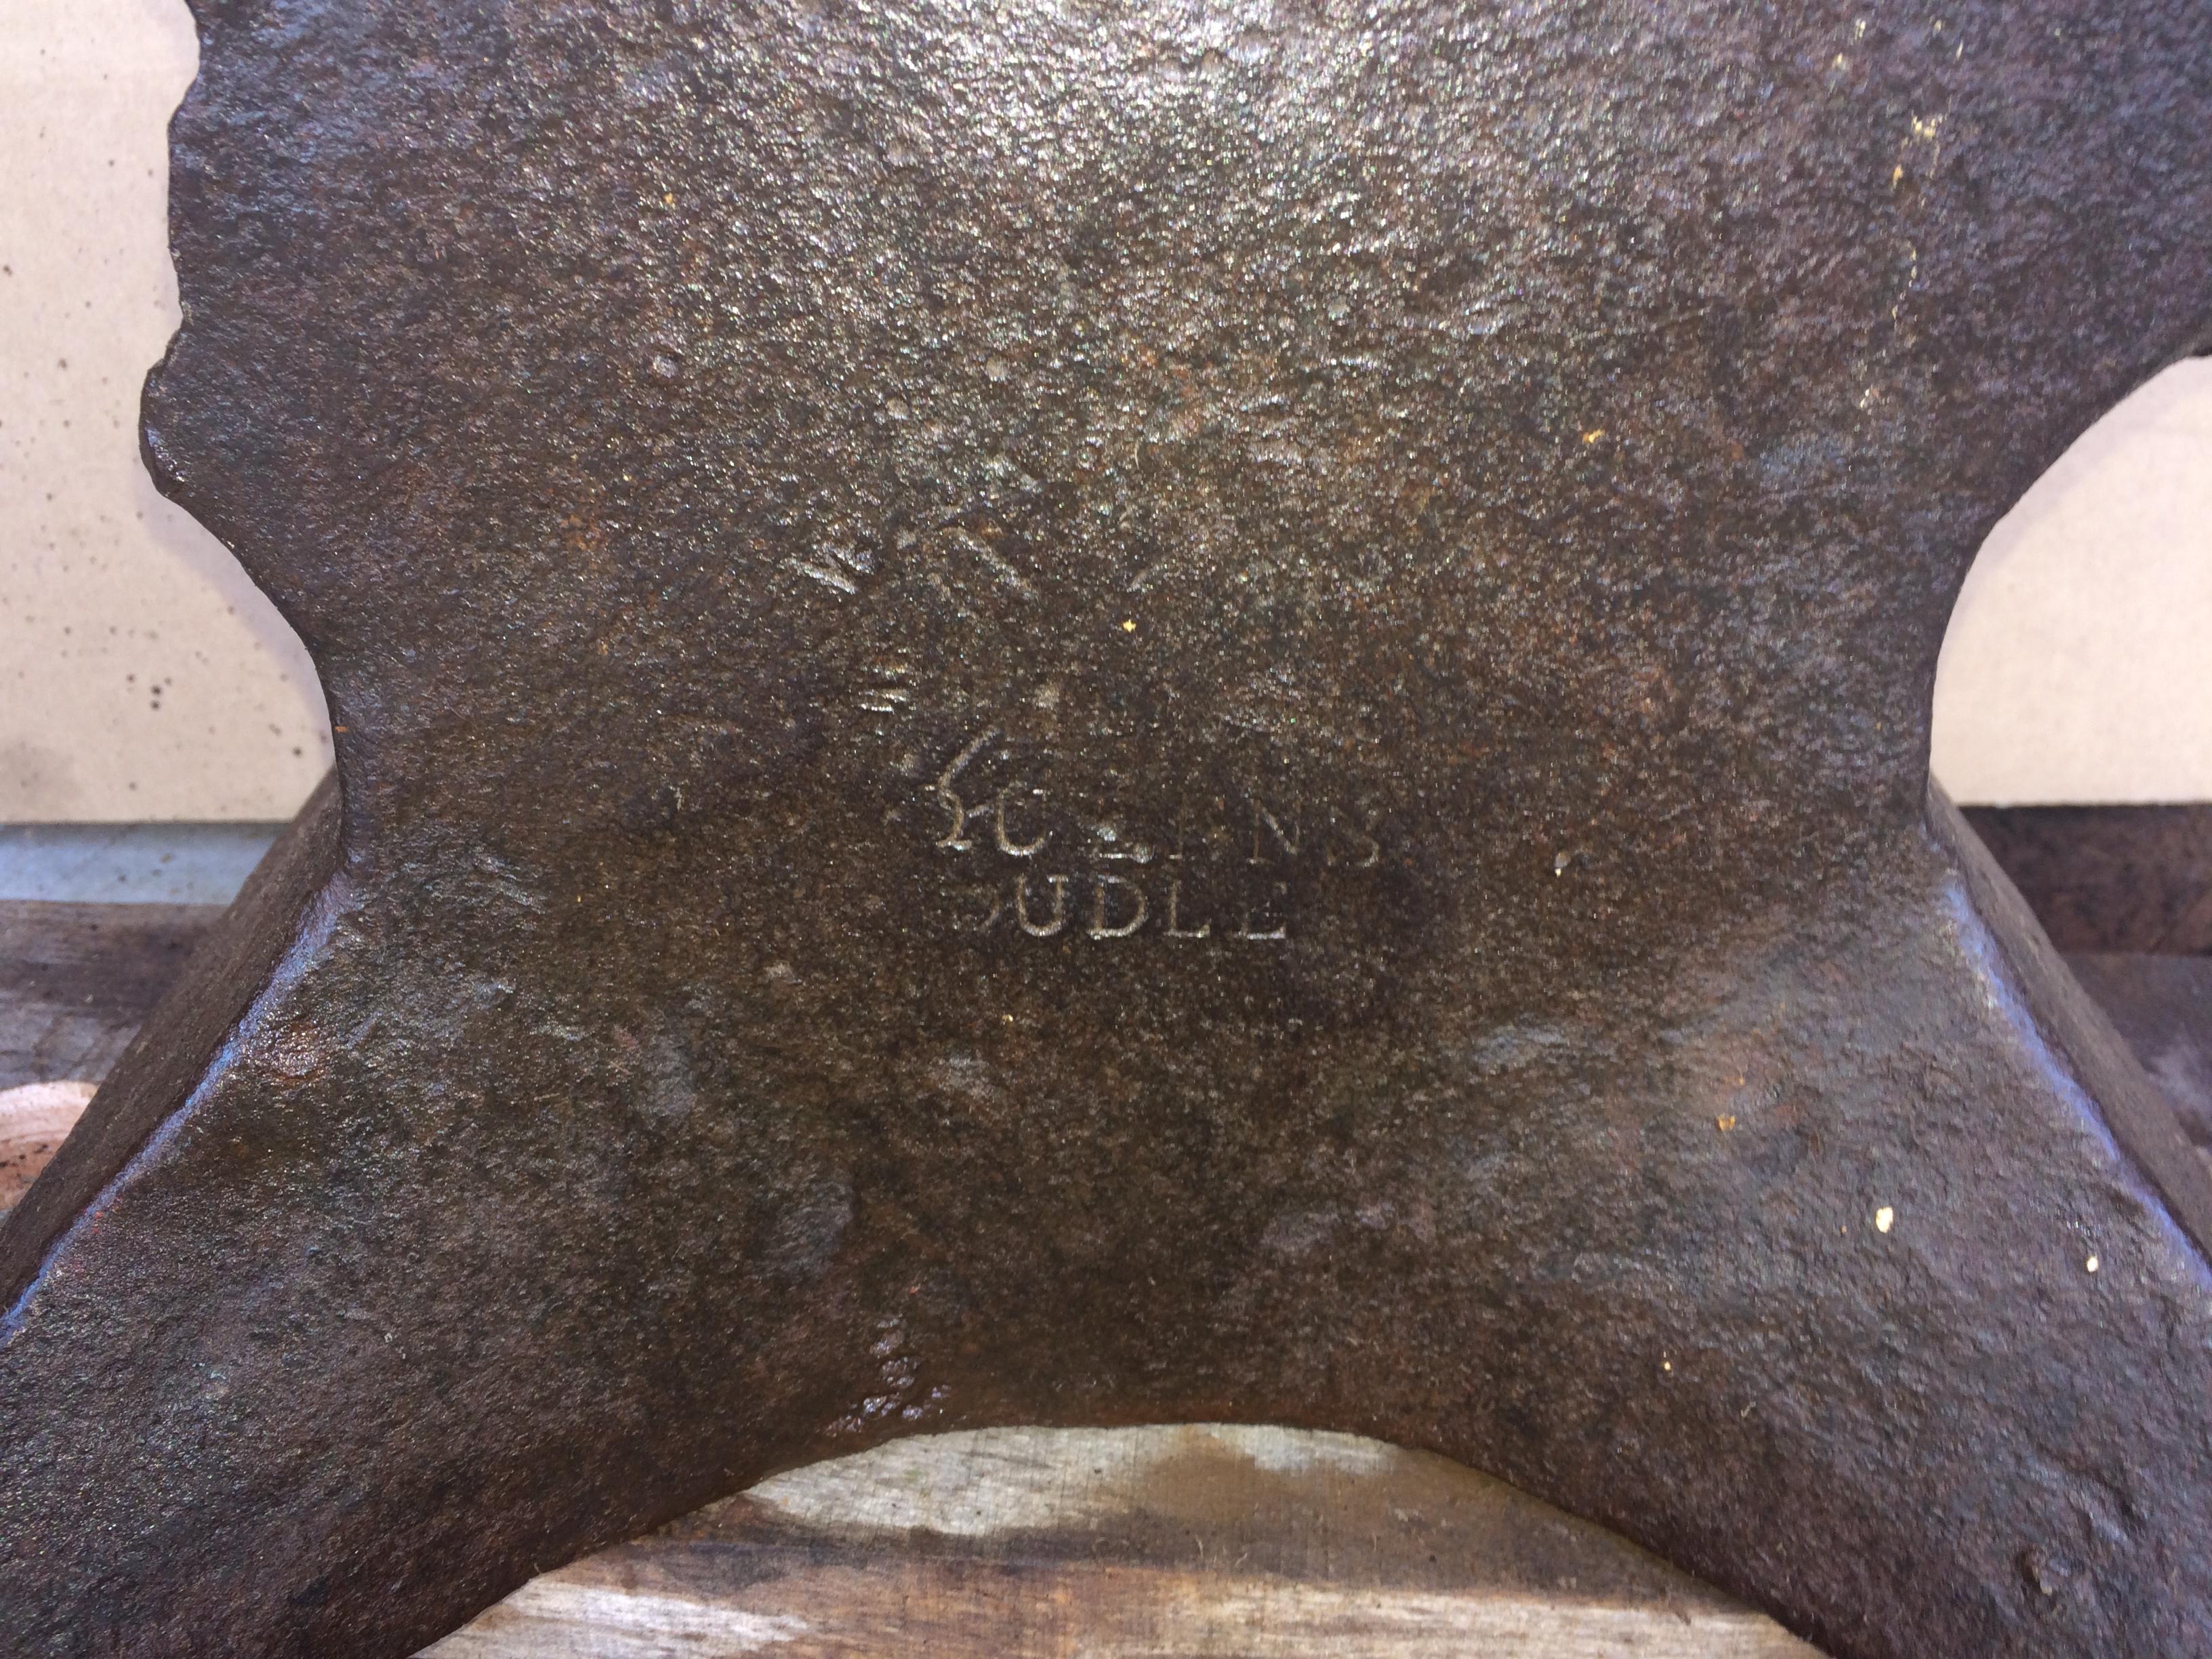
Brought home this anvil earlier today. It's a 185# Wilkonson Queens Dudely anvil that is missing its heel (185# now, so must have been a bit more before it lost its heel). Are they considered fairly decent anvils? I got it for 125$, so I think I got a pretty good deal regardless. Also, if anyone knows approximately when it was made, I'd love to know. Here are a few photos: I'm looking forward to cleaning up the face with some hot steel and a hammer.

-
What Should I Offer for This Anvil?
Chelonian replied to Chelonian's topic in Anvils, Swage Blocks, and Mandrels
Correction to what I said in my last post, the weight numbers on the side go like this: [1, I can't find the middle one, 17] Maybe it was 230 pounds? That seems about right since it's 185 with the missing heel. -
What Should I Offer for This Anvil?
Chelonian replied to Chelonian's topic in Anvils, Swage Blocks, and Mandrels
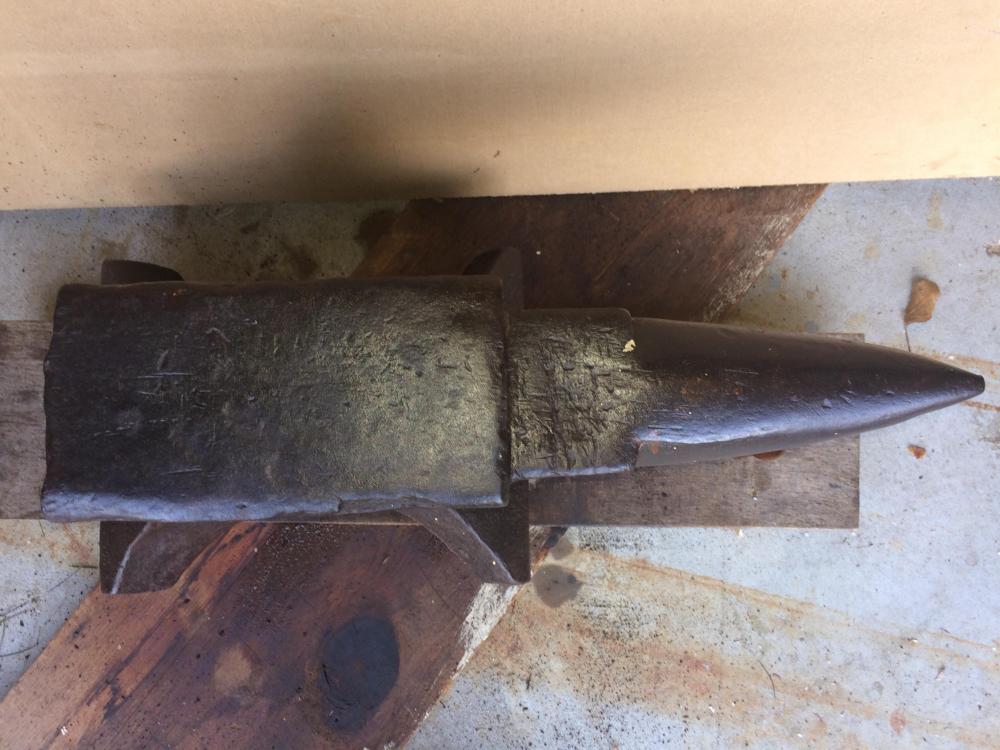
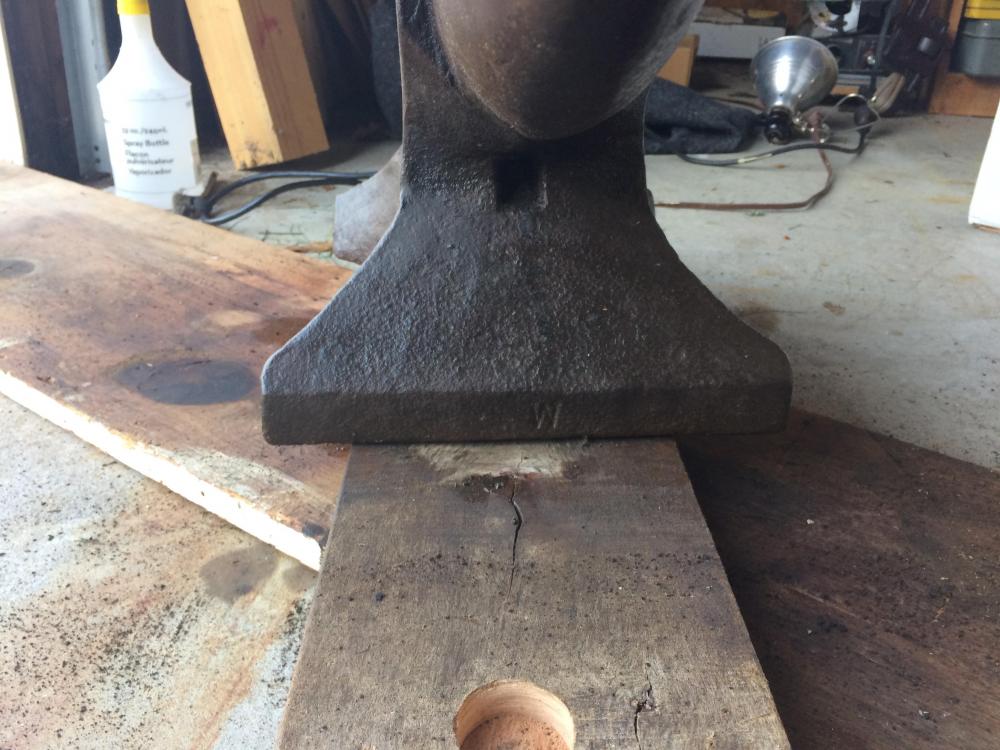
After a quick scrubbing with a wire brush, it became apparent that it was a Wilkonson Queens Dudley anvil. I did a forum search, and found somewhat limited information about them. If anyone knows approximately when it was made, I'd love to hear it. Also, are Wilconson Queens Dudley anvils considered to be decent? The "17" I saw earlier ended up being the third number in the weight code. I can only make out the "1" on the right of the side of the anvil, and "17" on the left of the side. I cannot read, or even find, the middle number. Here are some photos of it: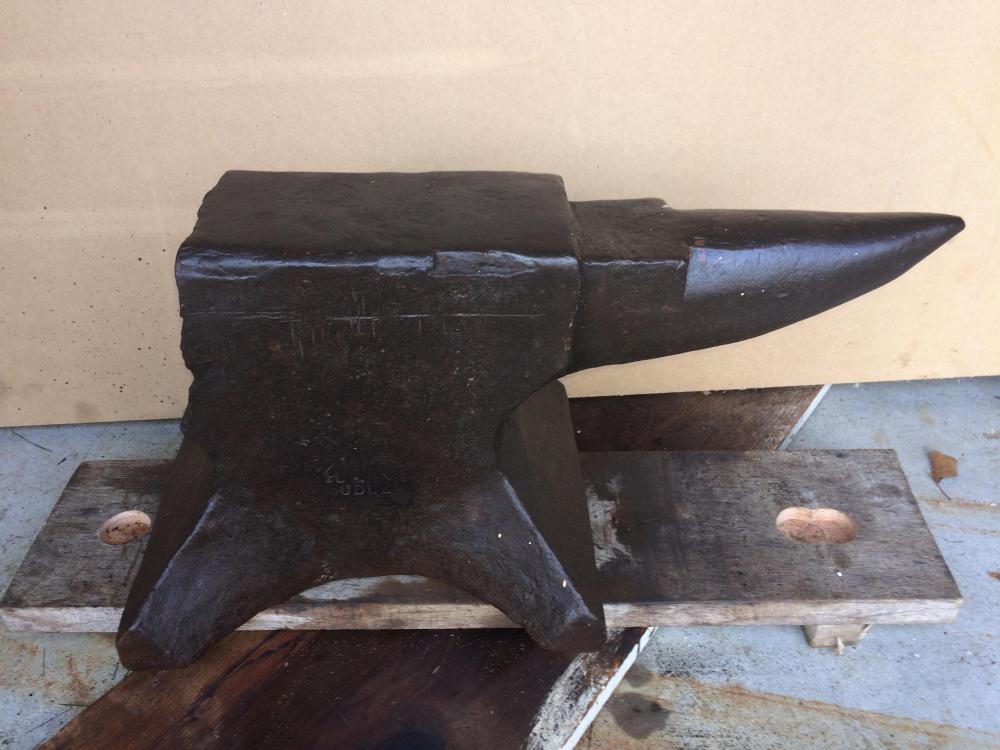


-
What Should I Offer for This Anvil?
Chelonian replied to Chelonian's topic in Anvils, Swage Blocks, and Mandrels
Well, I went and got it! It weighed 185#, so the guy wasn't far off. I paid 125$, which means it was 67.6 cents per pound. I'll post some photos of it soon. The face seems in very good condition, there is really only one major chip out of the edge, and it's not too pitted with rust either. The ring is very consistent, and rebound seems quite good. I haven't looked at it too much, but the only marking I see on it is a "17" on the side near where the heel was. I'm quite happy with the deal. Thanks everyone for the help! I think this will be a big step up from the tiny chunk of railroad I was using. -
What Should I Offer for This Anvil?
Chelonian replied to Chelonian's topic in Anvils, Swage Blocks, and Mandrels
I just don't want to offer a price before I see it in person and inspect it. Seems like there are too many ways for that to go badly. -
What Should I Offer for This Anvil?
Chelonian replied to Chelonian's topic in Anvils, Swage Blocks, and Mandrels
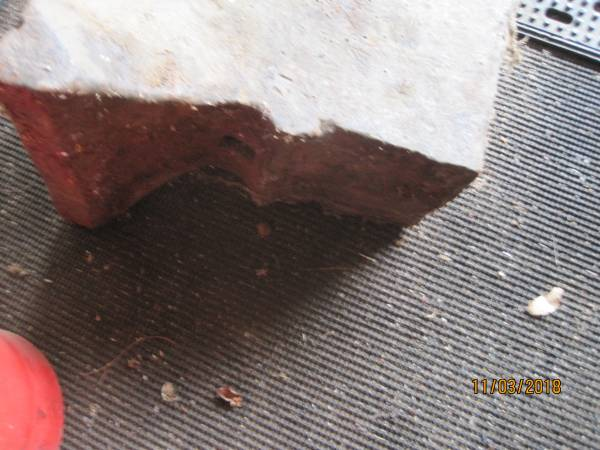
This is the only one I didn't post, simply because I didn't want to post too many. The thing in this photo that worries me is that I don't see much of a clear demarcation between the face and the body. Maybe that just means it's still well attached? I did get to hammer on a real anvil when I took a took a blacksmithing class, so I think I know what it should feel and sound like. The one I used at the class was a Peter Wright I think. Thanks!