Beavers
Members
-
Joined
-
Last visited
Everything posted by Beavers
-
Arthur, I'm brand new to learning blacksmithing. I've spent at least 150 hours reading this forum and books trying to learn and I've not even scratched the surface of what a lot of these guys know. If you want to make a sword then you need a forge. I built my JAPOB forge for less than $20. Next thing you have to do is get metal hot and start working it. It's not as easy as it looks watching the pros doing it on YouTube. My first project was a simple J hook, next I made a S hook. I've been trying for the last week to learn forge welding and still can't get it right. I don't even feel I'm to the point where I'm comfortable attempting to make a pair of tongs. If you really want to make a sword, build yourself a forge this weekend and start working hot metal. Like I said it's a lot tougher than it looks. It sounds like you are probably pretty knowledgeable about bikes. What would you tell someone with no experience that wanted to build a race bike? Would you tell them to slow down, back up and learn the basics first?
-
I'm just a little jealous Would love to be able to mill my own lumber...not a lot of forrest's out here in Nebraska though. It will be cool to see how your board and batten turns out. Much nicer looking that steel siding I'm sure.
-
Sawing your own lumber from trees on your property is very cool. Are you making beams out of the ash or just boards?
-
Thanks for all the info guys. I'm going to step back from welding for a little while and concentrate on getting the fire management figured out. I'm going to a hammer in next month so hopefully I can get some in person learning.
-
Thanks Stevomiller After a few phone calls I was able to find a place that sells small quantities of 1018. I got 1/2" round since it was half the price of square. I will square it up before welding. I have zero confidence in my fire management skills at this point. I've exclusively used 1/4" and I've been able to get it to yellow, but based on the amount of scale I've been getting I think I've been using too much air. I've never been able to get sparks. I'll definately follow your suggestion and cut a chunk off my 1018 and experiment with fuel/air amounts until I can get it sparking. That would at least give me a baseline that I could then back off from a little for welding. Side note: Thanks to Joey Van Der Steeg's video I have learned that I'm using the wrong kind of brush to remove scale. I've been using a wimpy little one from the hardware store. I just ordered one of the heavy duty flat bristled ones tonight. Hopefully between the better brush and better fire management I can reduce the scale problem I've been having.
-
Daswulf your explanation does make sense..thanks. I'm going to stop at the local welding shop and see if I can get some 1018 1/2" square bar. There's a local hammer in a few weeks from now. I'm guessing this is one of those things that is much better to learn in person. If I can't get it figured out before then hopefully someone there will be able to help me. Wow Thomas...you were forge welding back when I was in diapers.
-
Thanks for the feedback guys. You've given me a lot things to try. Any thoughts on how much air I'm using in the video? Too much...too little? Steve this is the Borax I used. It only listed one ingredient...some scientific name I don't remember.
-
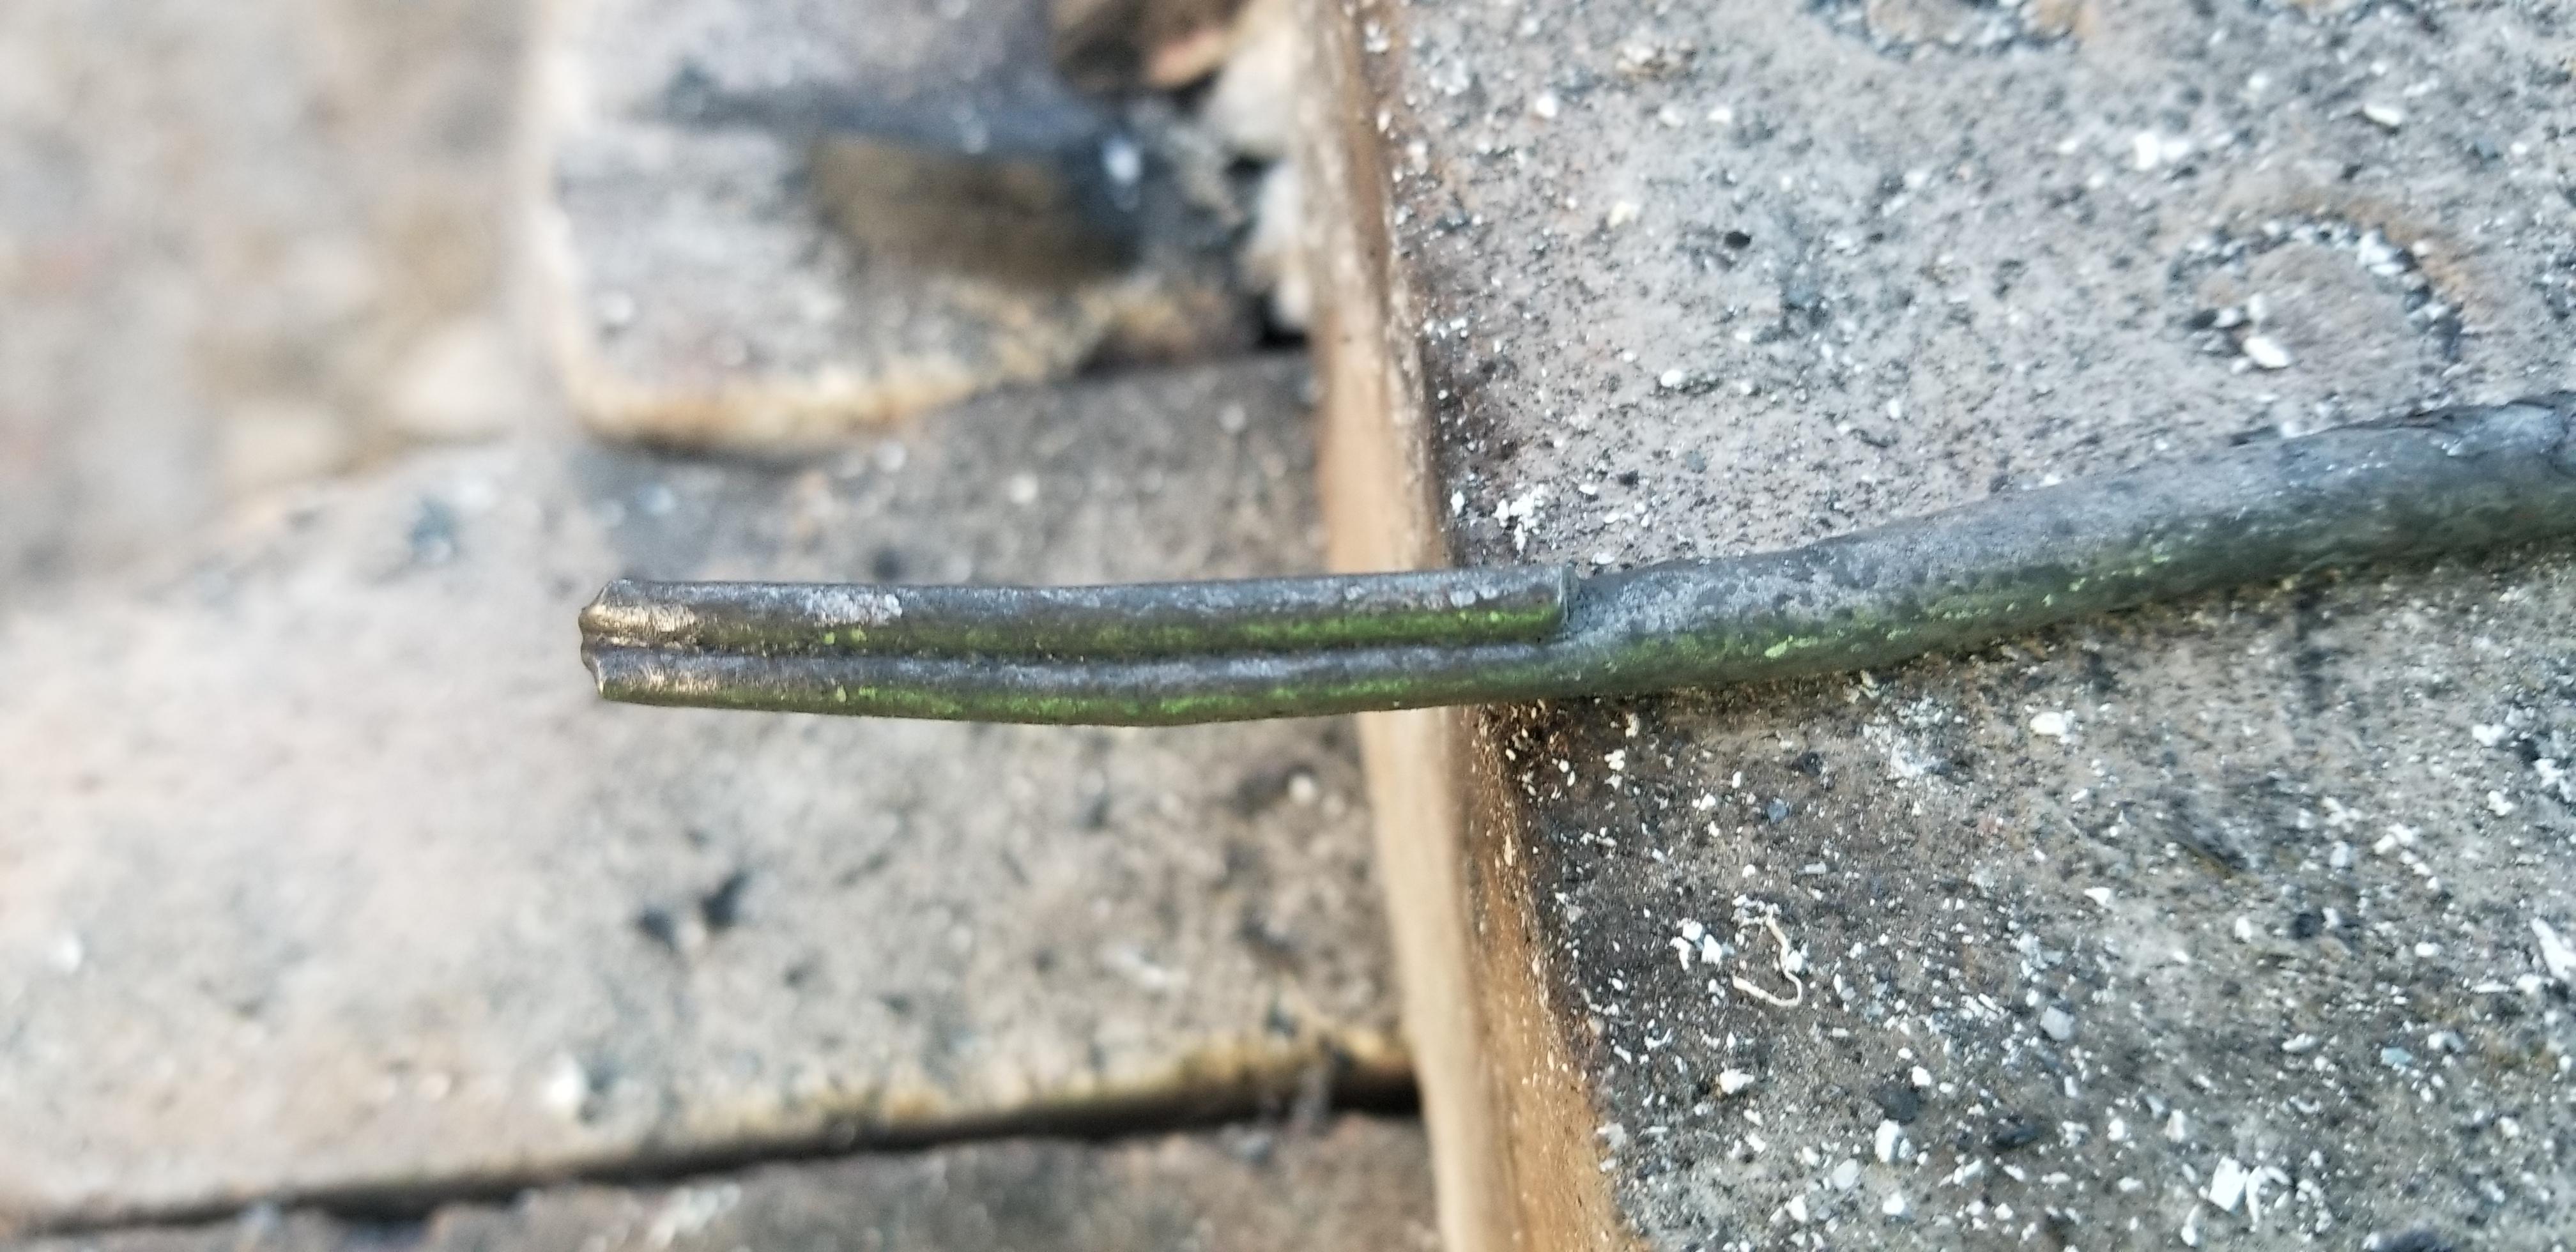
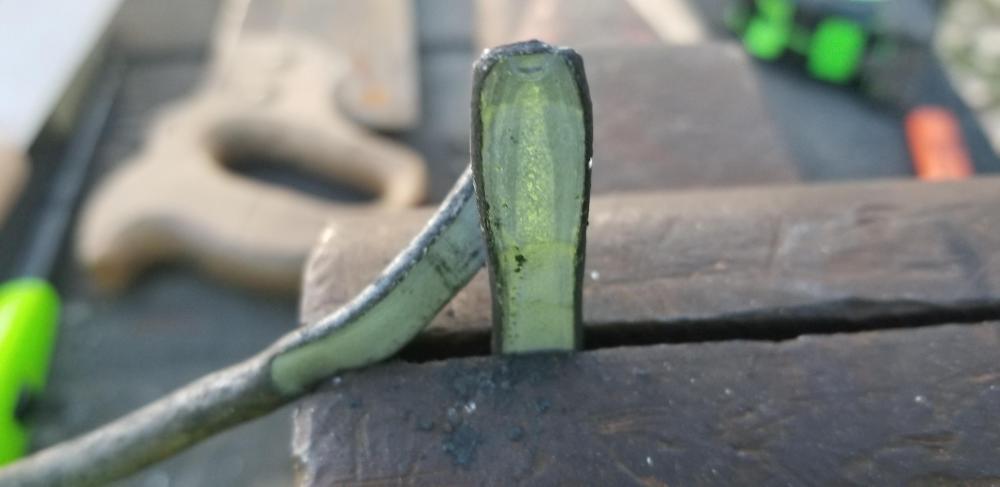
I've tried to do my homework. I've watched the forge welding videos from Black Bear Forge, Dennis Frechette and Joey Van Der Steeg. I read the sections on forge welding in the books I have and have searched back through the forum reading everything I could find on the subject. From probably a hundred different blacksmiths I have read or watched 150 different ways to forge weld. It's slightly confusing. I'm hoping that I can describe the steps I'm using good enough that possibly somebody can help me trouble shoot where I'm going wrong. I'll try to provide all the details, please let me know if I missed something. Forge: JPOB. My first attempt the fire pot was 3 1/2" x 8" and 2 1/2" deep Second attempt I made the pot deeper to 3 1/2" Air: Manual mattress pump with a 3/4" tuyere . The tuyere is angled down into the pot slightly and the bottom rests on the floor of the pot. Fuel: Charcoal, a mix of Royal Oak and homemade hardwood charcoal. I have been mounding the charcoal about 2" deep over the top of the stock Steel: 1/4" round hot rolled from Home Depot My first attempt: I scored the bar and bent it back cold to do a faggot weld. I bent it cold in the hopes of avoiding creating scale between the pieces. I though I had some borax but it turned out that I was out, so no flux with this attempt. I started by heating the steel slowly, when it got to orange I started pumping as hard as I could. Once the steel looked "shiny and melty" I pulled it and gave it a couple of hits. On a scale of 1 to 10 with 10 being the hardest I could possibly hit I used about a 4. I brushed and then reheated the steel. Second hits were harder, about a 6. Brushed and reheated a third time with a couple of more hits. This one wasn't even close to being welded. I was easily able to pull it apart with pliers. After some further reading I think my problems were no flux and too much air. My second attempt. I bent the bar cold for a faggot weld. I read multiple times that slow is faster so I backed way off on the air this time. Hopefully the short video shows how much air I was using. I heated to orange heat, brushed and then applied 1/2 tsp. of Borax to each side of the joint. The Borax I used was the laundry soap kind. I continued with a nice slow steady pumping until the steel matched the color of the coals and looked wet and melty. I pulled from the forge and held it an 1/8" above the anvil as to not suck the heat. I hit it a couple of times as fast as I could at a 4 out of 10. I didn't see any sparking from the steel, but there was a lot of molten material that flew when I hit. I'm not sure if that was just the melted flux. I brushed and applied another 1/2 tsp. of Borax to each side before reheating. I heated a total of 3 times, cleaning and fluxing before each one. On the second two heats I hit harder at about a 6 out of 10. I think I got at least a partial weld with this attempt. I was unable to pull it apart using vise grips, but when I put it in the vise and cranked on it, it pulled apart easily. I'm including pics of my forge, the joint after attempted welding and what it looked like after I pulled it apart. Any tips of where I'm going wrong would be greatly appreciated!


-
He says in the video how to remove the gear.
-
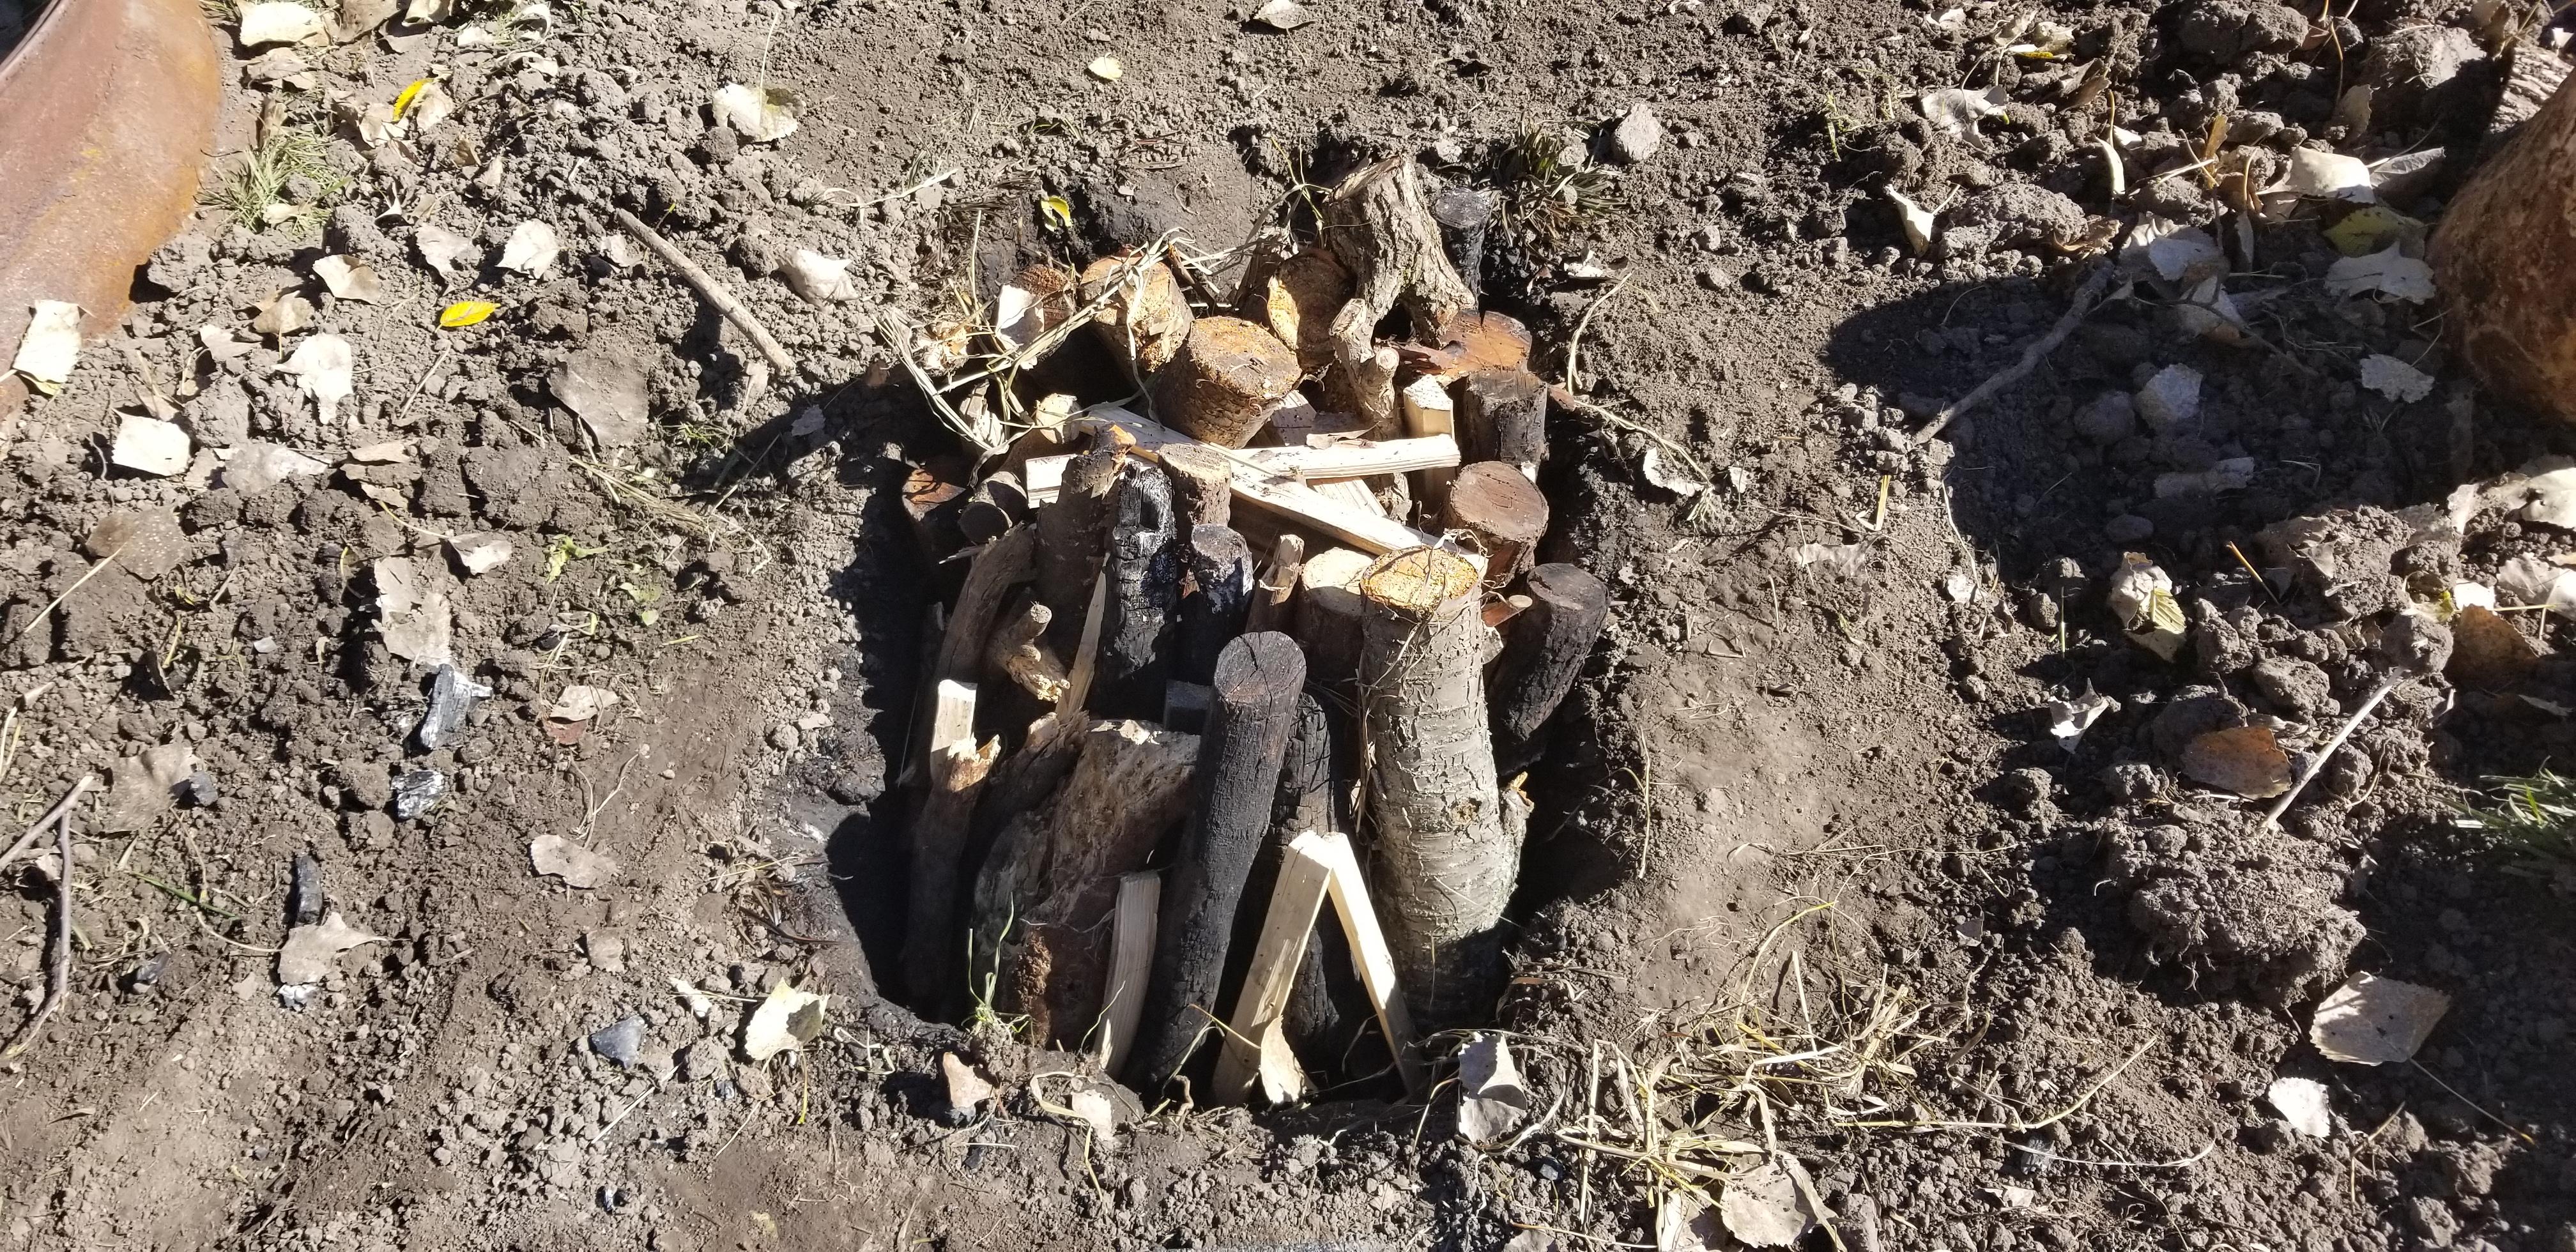
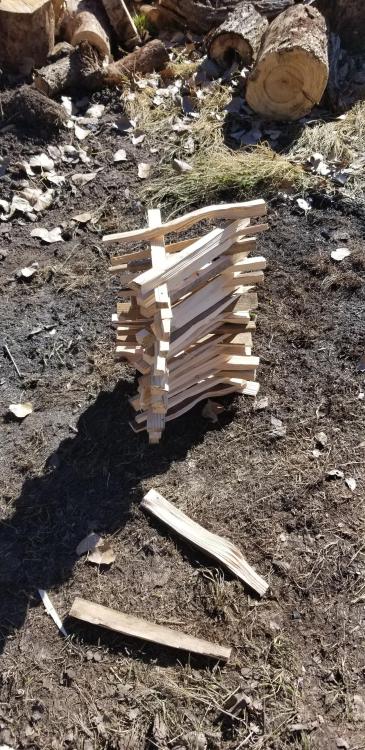
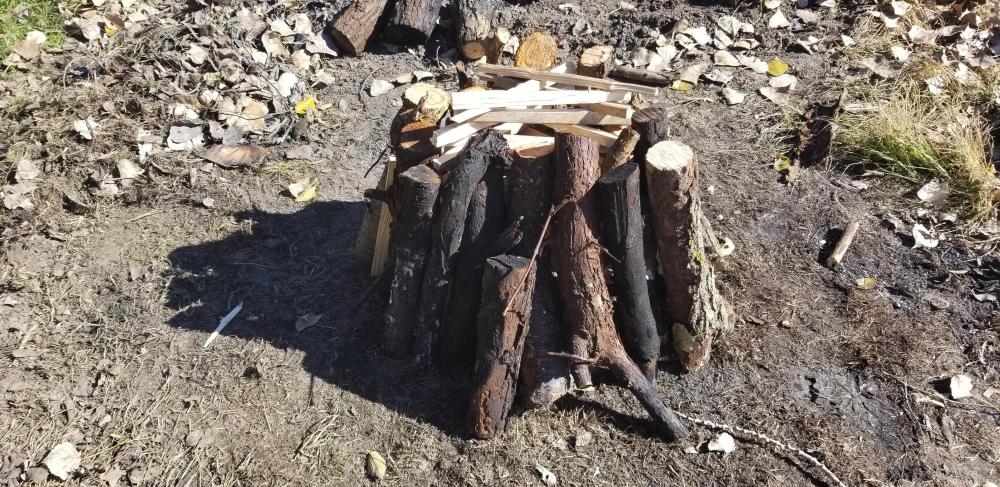
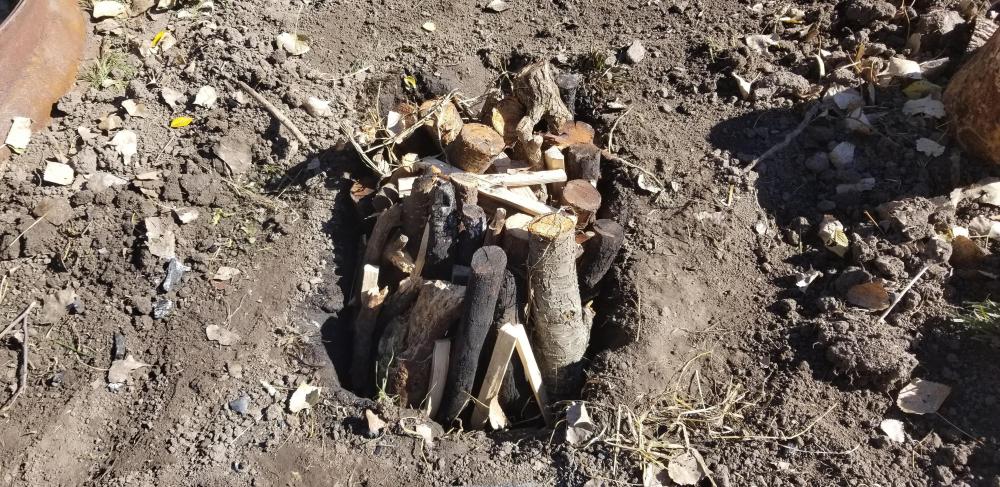
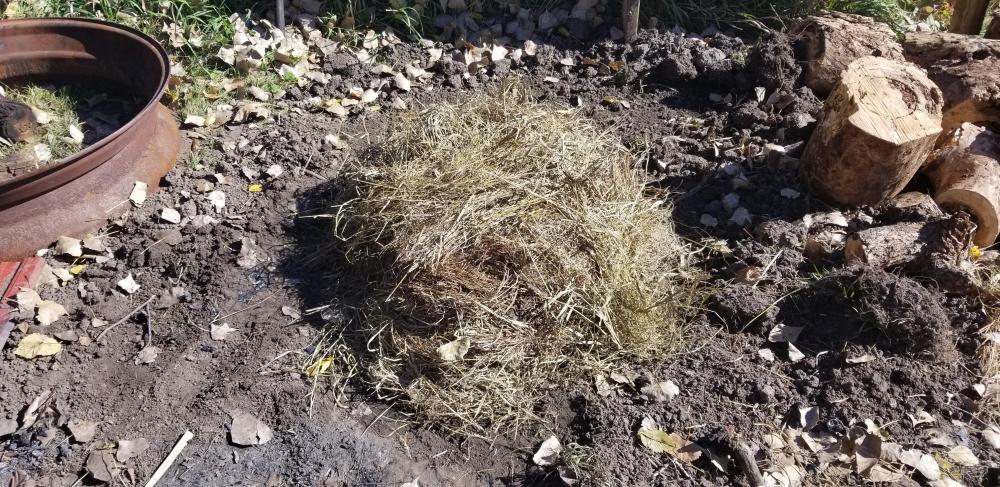
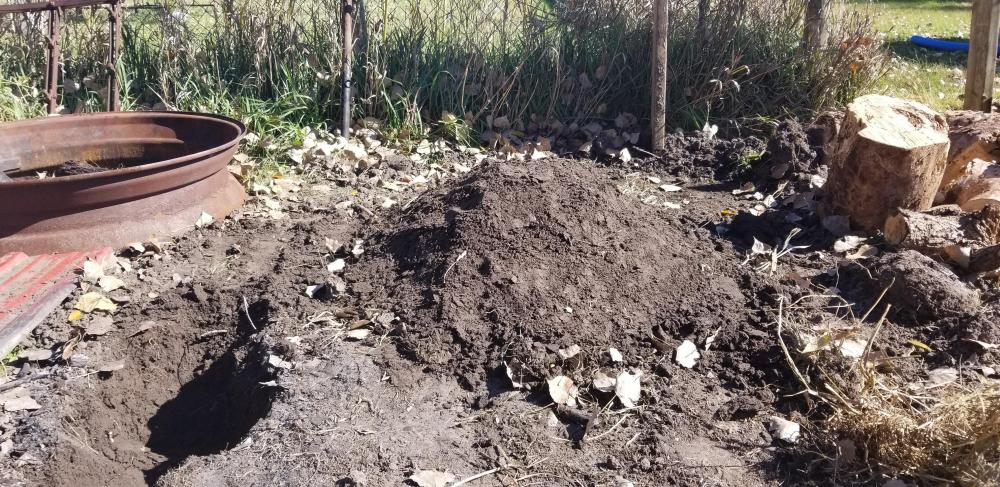
I took Friday off of work so I had a long weekend to make charcoal. I started off by building the traditional three sided chimney. The chimney was filled with kindling and the logs were stacked tightly around it. With my small scaled down version of a charcoal pit the sides were too vertical for the leaves or dirt to stick. To build a pit with the correct shape and less sloped sides would of taken a ton more firewood and I didn't want to build that big of pit yet. So I rebuilt the pit inside the hole that I had been using for my previous charcoal making experiments. I packed the wood as tight as I could. The chimney opening was covered with a piece of 1x10 prior to covering the mound. It was quite windy and the leaves were blowing off the pile as fast as I could add them. I've read that Colliers also used grass to cover their pits if it was available, so I used hay. I then covered the pit with a couple of inches of dirt. I removed the "brigen" chimney cap and dropped a shovel full of hot coals down the chimney to "fire the pit". The pit was fired about noon on Friday. Covering the pit was traditionally called "leafing and dusting". The dirt that I used was dug from the ground and had some moisture in it. After packing it down I think it sealed too tightly and didn't allow the pit to breathe as much as dust would of. I ended up having vent holes opened in the pit during the entire burn. The pit never put out a ton of smoke, it was just slow lazy wisps of smoke from the vent holes. The pit burned overnight with no holes opening up in the cover. After burning for about 24 hours I "jumped the pit" and walked over it tamping it down with my feet. One section sank about six inches suddenly when I stepped on it. I can't imagine how dangerous and nerve racking that must of been for the Colliers jumping their 15 foot tall pits. One wrong step and they would of fallen into the fire. The pit continued doing it's thing smoking all weekend. Unfortunately I have a job and had to work on Monday, and I didn't want to leave it burning unattended while I was gone at work. So Sunday afternoon I sealed up the vents and let it cool down a few hours before I opened it up. I was hoping for buckets full of wonderful charcoal. Turned out that only about 40% of the wood had converted to charcoal. I'm guessing this pit would of needed to burn for about a week. While I didn't get a ton of charcoal out of the deal I still think it was successful. I learned a lot about the history of charcoal making and had the kids involved in the process too. Probably not many other 8 and 6 year old kids that know what a collier is, much less can say that they helped with a traditional style charcoal pit. I want to continue making my own charcoal but until I can retire and have the time to watch my pit for a couple of weeks I think I'll be using some steel drums.
-
-
I feel the same way! Blacksmithing has opened up a whole new world of possibilities for me. Sorry, I'm of no help with your book
-
That turned out very nice! I'm pretty sure even weak concrete is rated for 3000psi. How many square inches is the steel base under the anvil? If that base is seated good I would be surprised if the average human could put out enough force by hitting an anvil on top of that plate to do any damage to the concrete. I'm not an engineer but I would think it would be fairly easy to calculate how much force would actually be hitting the concrete. Has anyone ever mushroomed the top of their stump by hitting on their anvil? The load is spread out. If you took a jackhammer to a stump it wouldn't last long either. Has anyone ever cracked their concrete shop floor under their steel anvil stand? I really hope it holds up...I might want to copy your idea I've seen some really awesome heavy duty steel stands posted here. I'm not sure where I could get that heavy of steel at a reasonable price and even if I could I don't have the tools to cut and weld that big of stuff together. Pretty much all your materials are available off the shelf at a hardware store or easy to get second hand and are much easier to work with than the big stuff. If it holds up it would be a nice alternative to a wood or massive steel stand.
-
Swing and a miss again. I still only got about 50% of the wood to charcoal. I do have a 5 gallon bucket of charcoal that I was able to make for no cost. So it's not a loss. I'm going to keep experimenting and try to get it dialed in.
-
Thanks Al, that was interesting reading. I really want to build one of those style pits now. I'm thinking 3-4 feet tall instead of the 15 foot tall like they did. I know there's easier and more efficient ways to make charcoal but I have fun trying to do things the old ways. A little bit of living history in my own backyard. At least there's some benefit to the brush fires ausfire. I'd be out picking it up and stockpiling too.
-
Well I came up short again. Most of the wood didn't char again. Although I did get a couple more gallons of charcoal. I'm not giving up...fired it again and going to let it go overnight this time. If it doesn't work this time I'm going to try a scaled down version of the Hopewell pit (mound) style. Found a pretty cool video showing them doing it at Hopewell. Another cool video from Hopewell. I'm kinda a history geek so I find this very interesting.
-
Thanks C-1 Would you light the wood in your main chamber or just rely on the heat from the small fire to char it? It's funny you mention smoker...as I was standing there watching it burn I was thinking I could probably wrap a pork butt in foil and toss it in there. Make dinner and charcoal at the same time. I use a lot of charcoal in my grill too, so this experiment, if it works will fuel both the forge and the grill.
-
Das, it got cold in hurry this weekend. I'm not ready for the snow yet! My forge is outdoors, so a nice open fire would be nice. JHCC I saw that while researching. Wish that was closer to home...would be cool to see in person. EXPERIMENTAL CHARCOAL MAKING This is the article that I kind of based my design on.
-
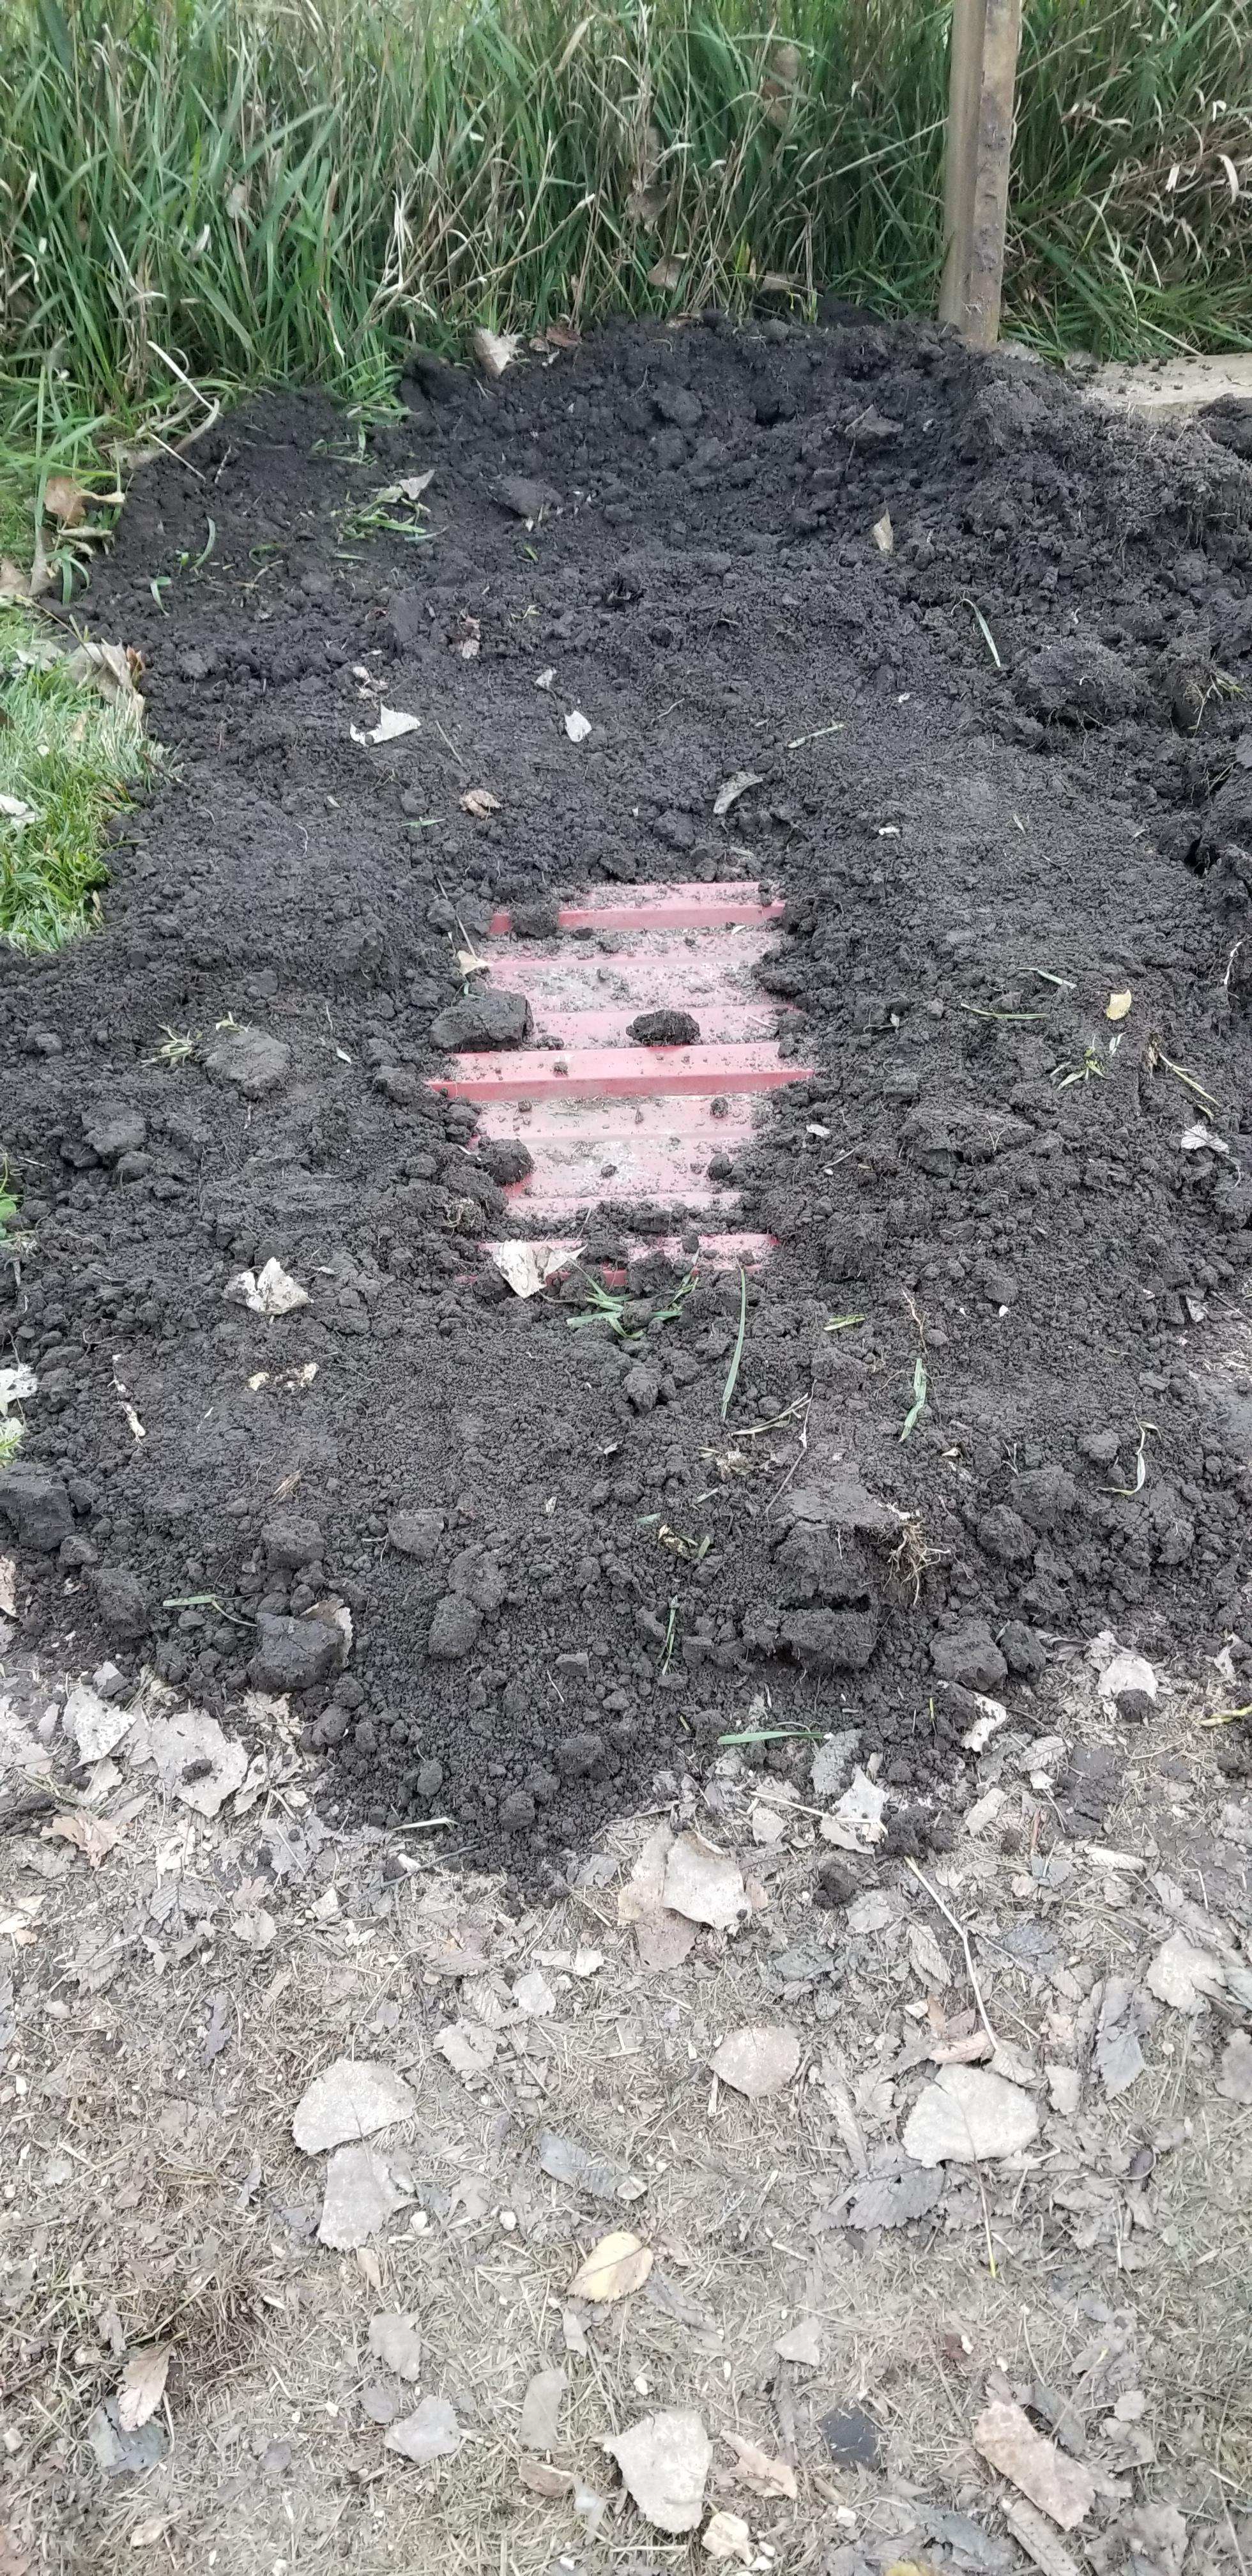
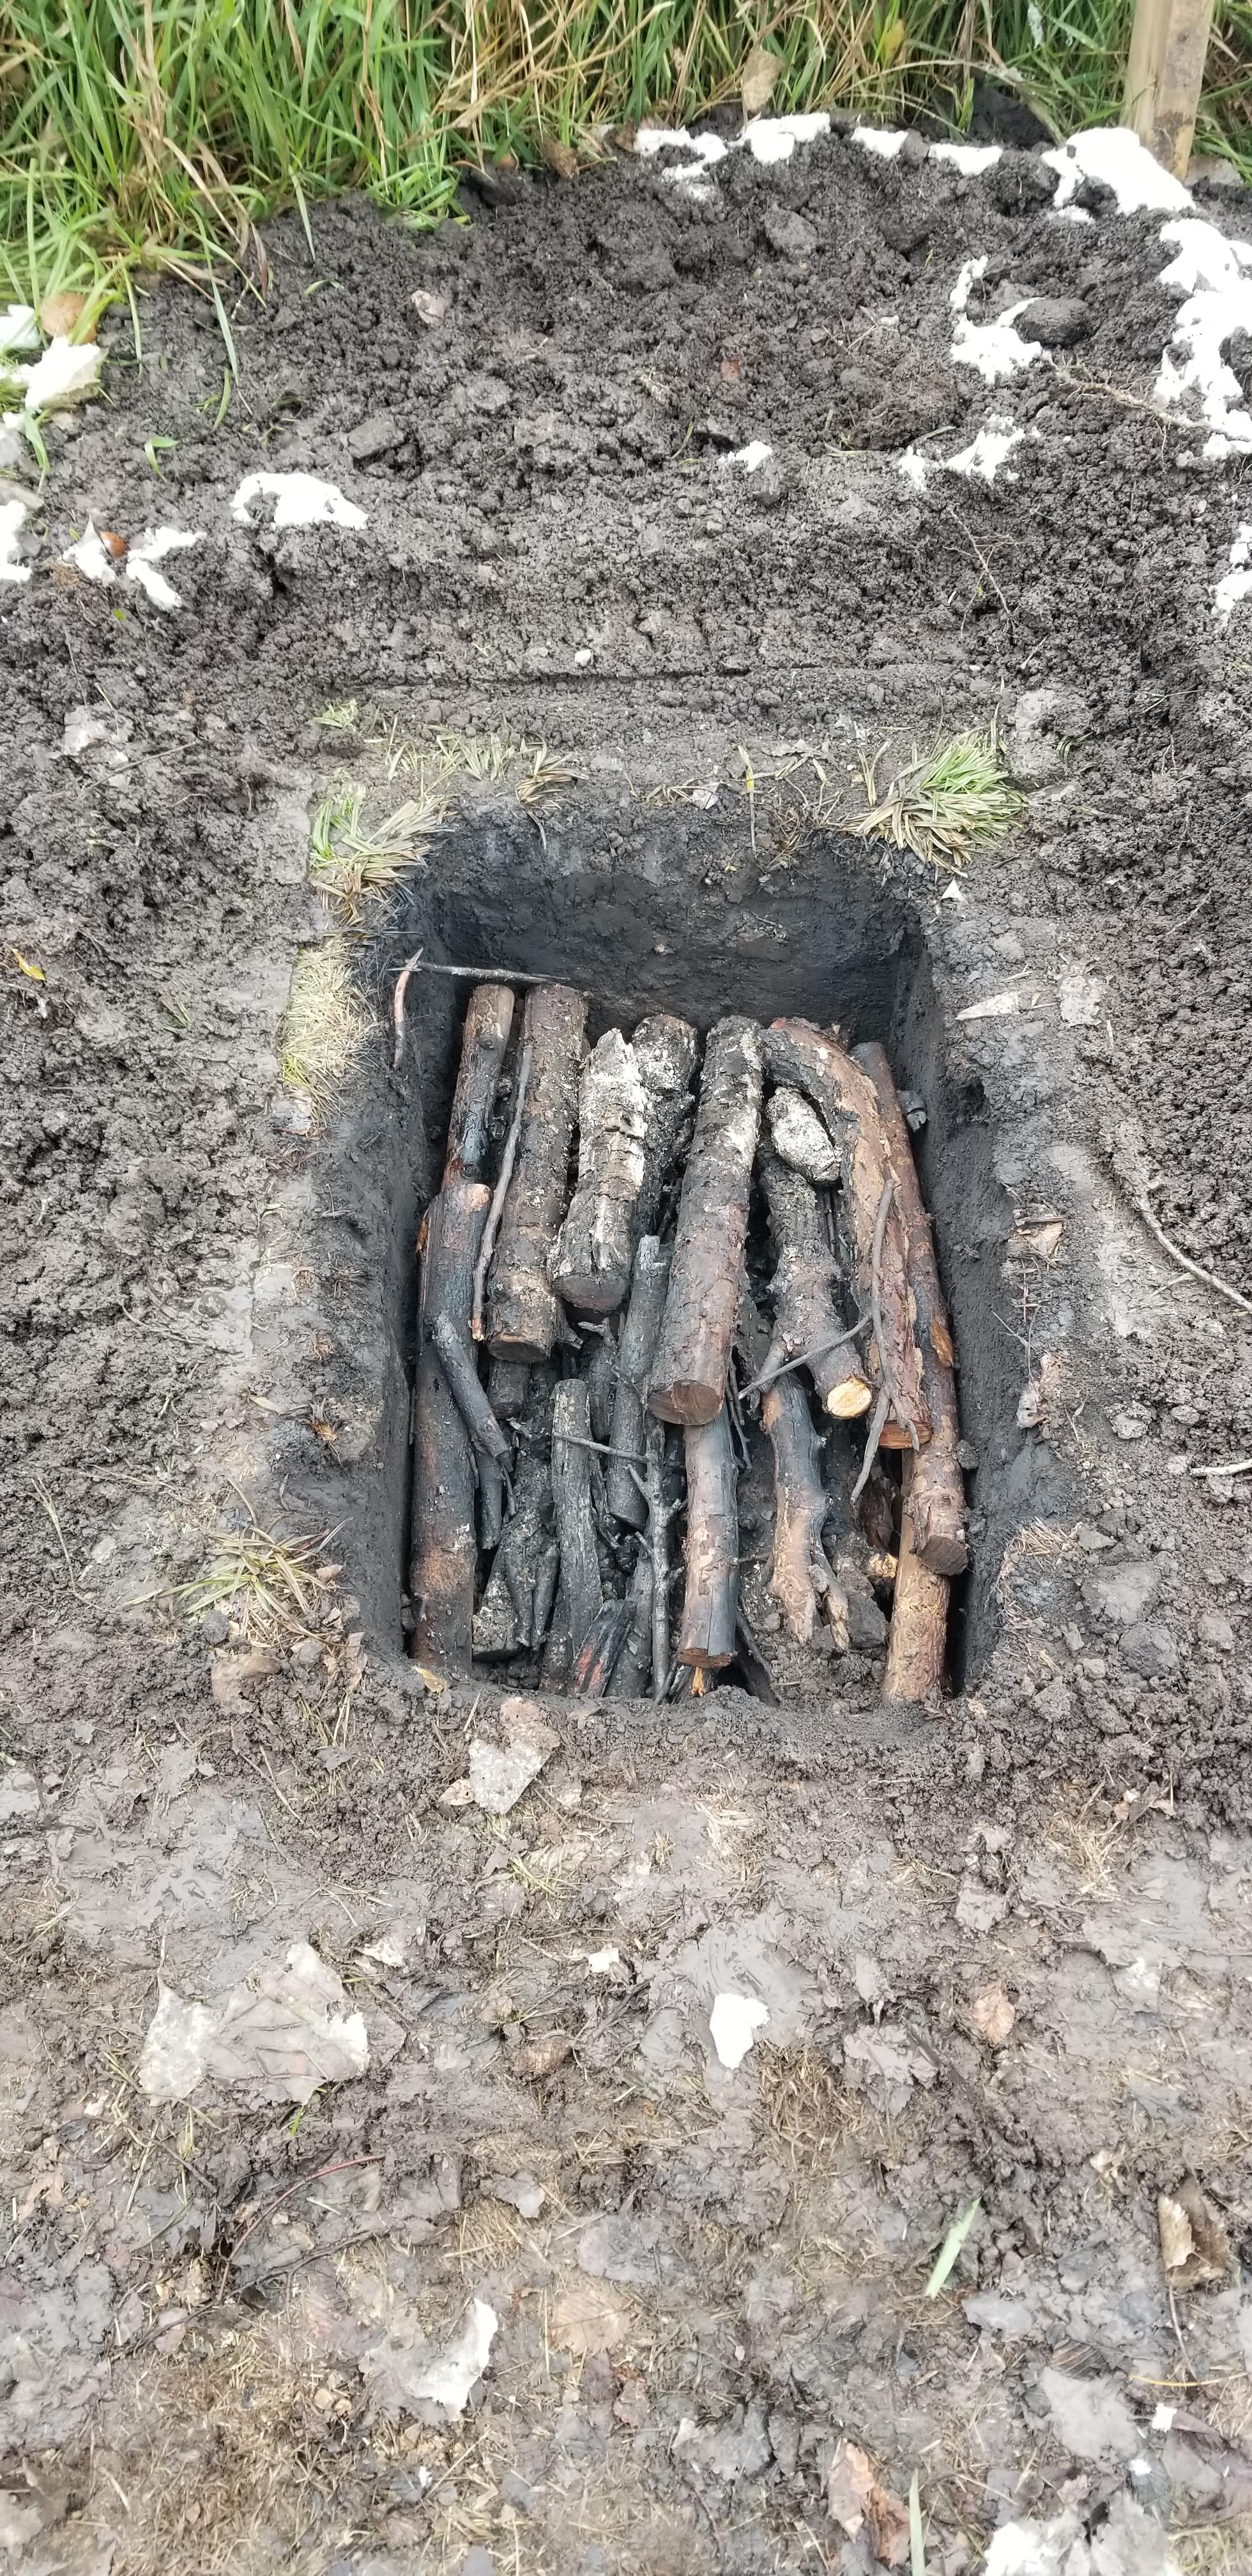
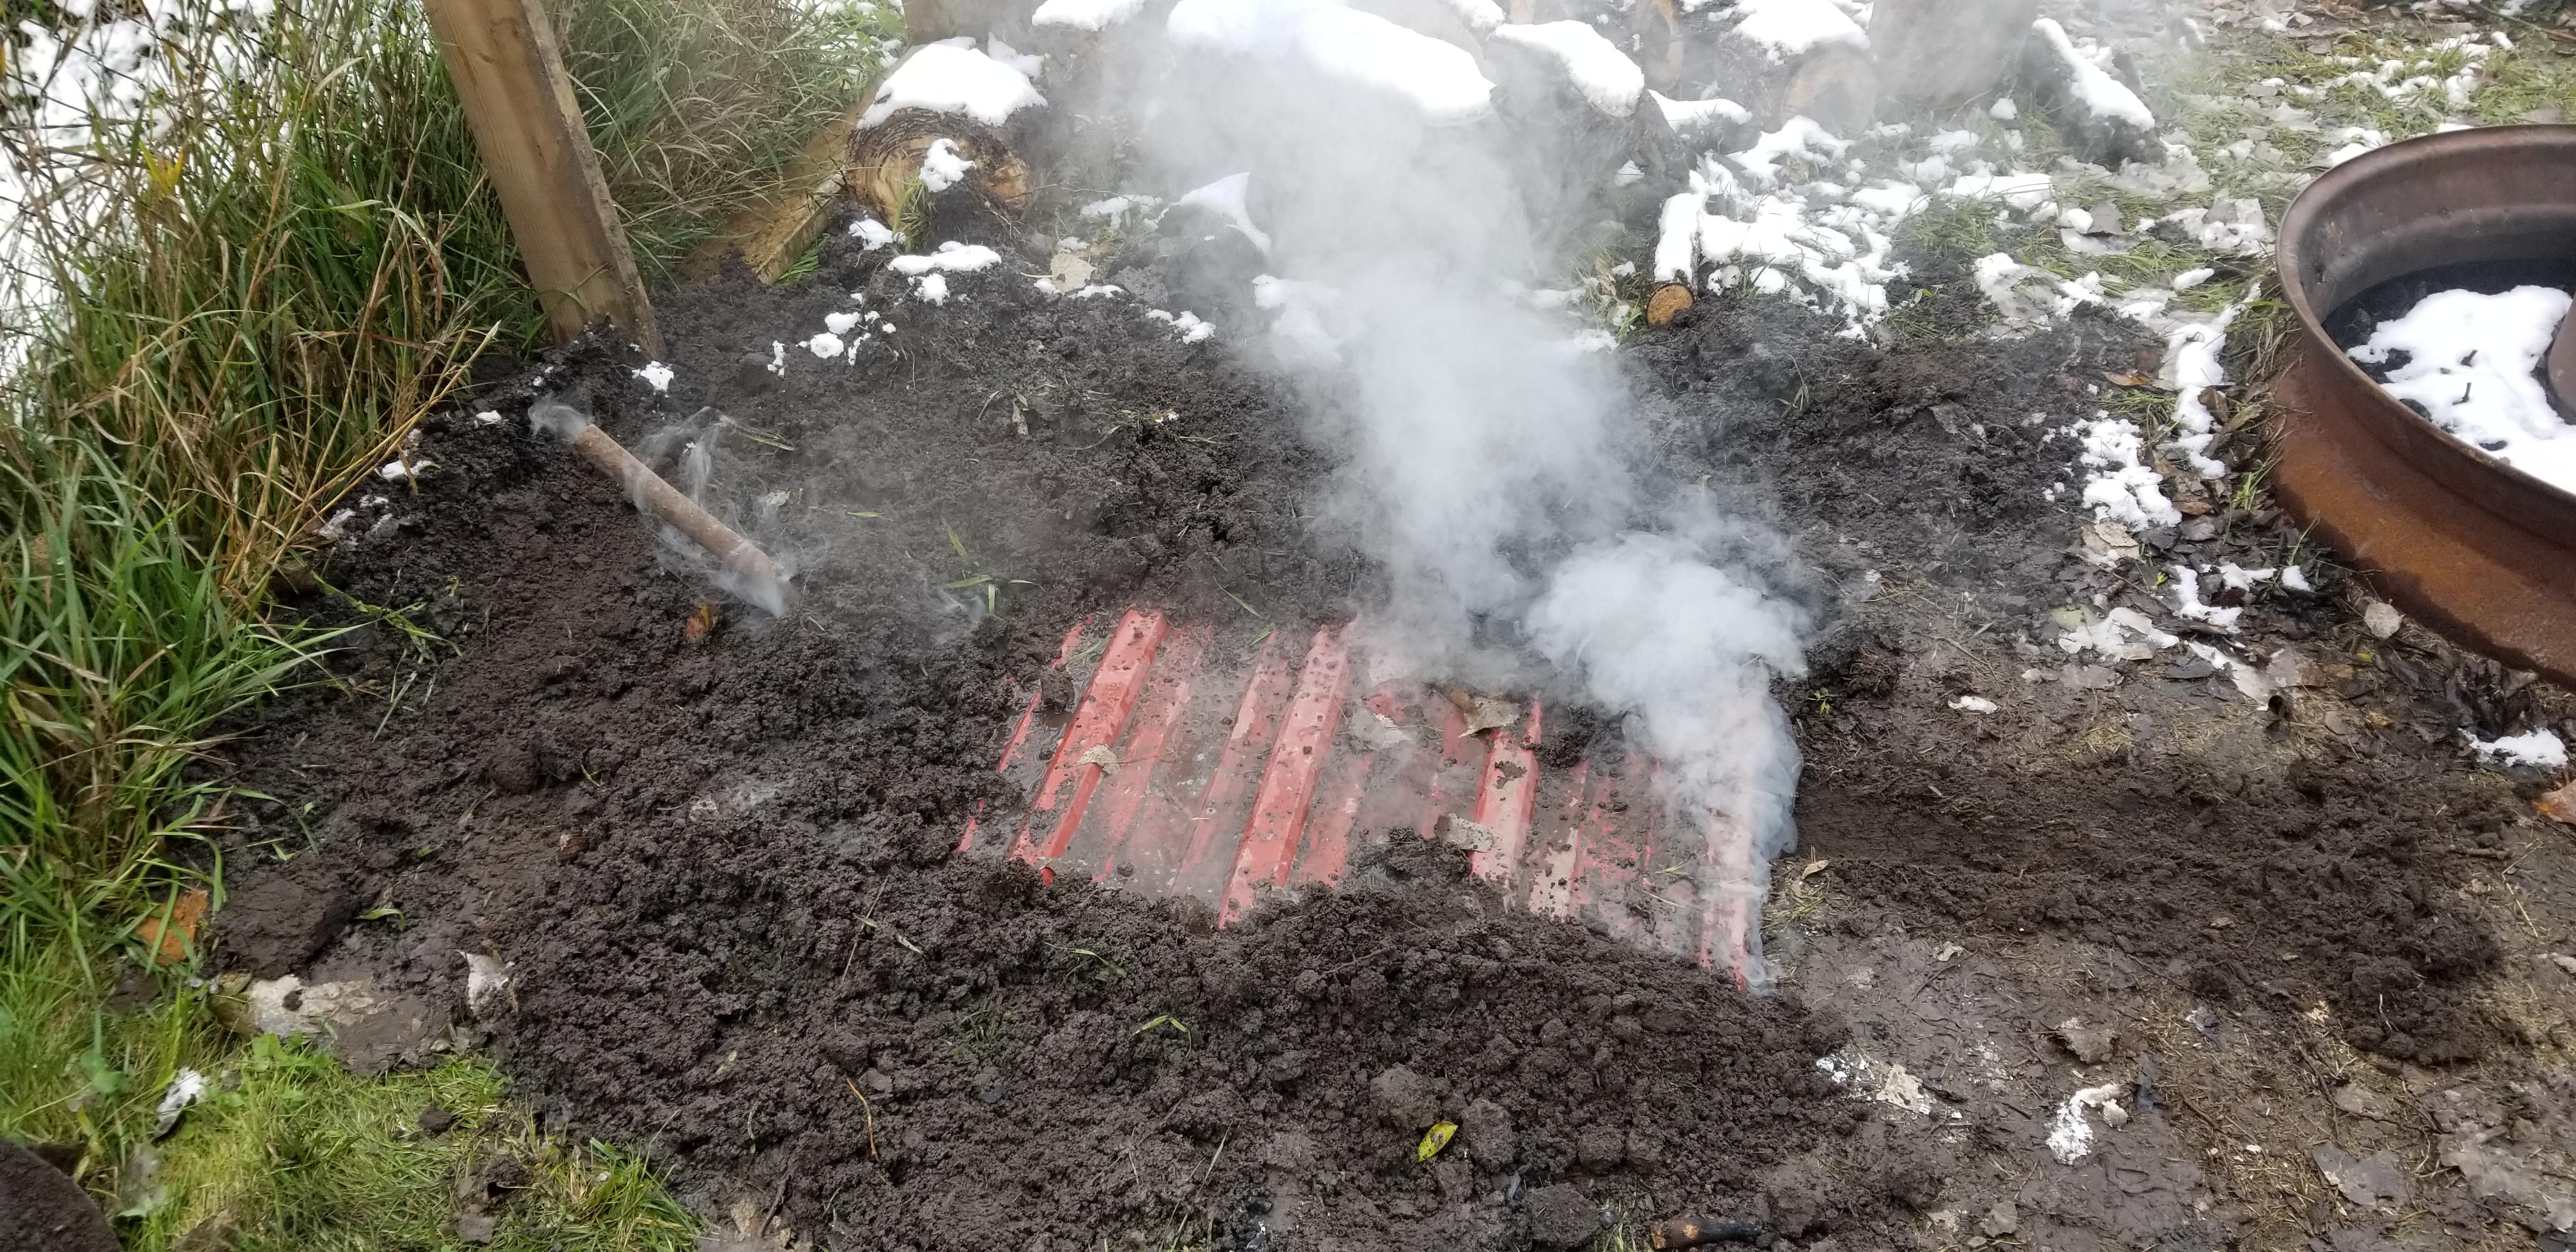
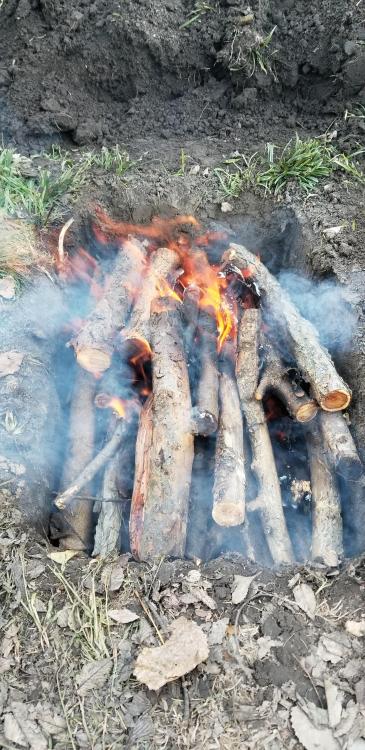
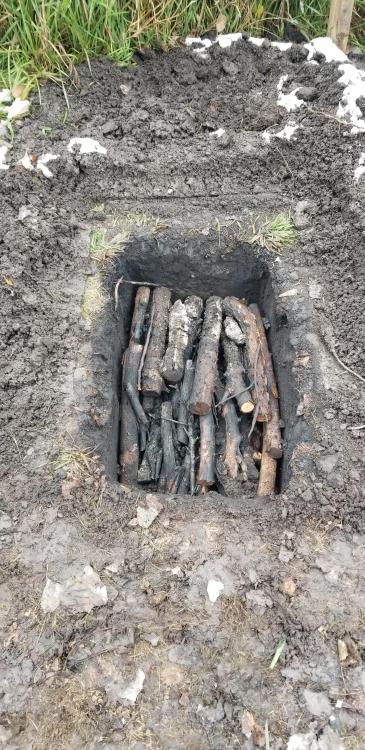
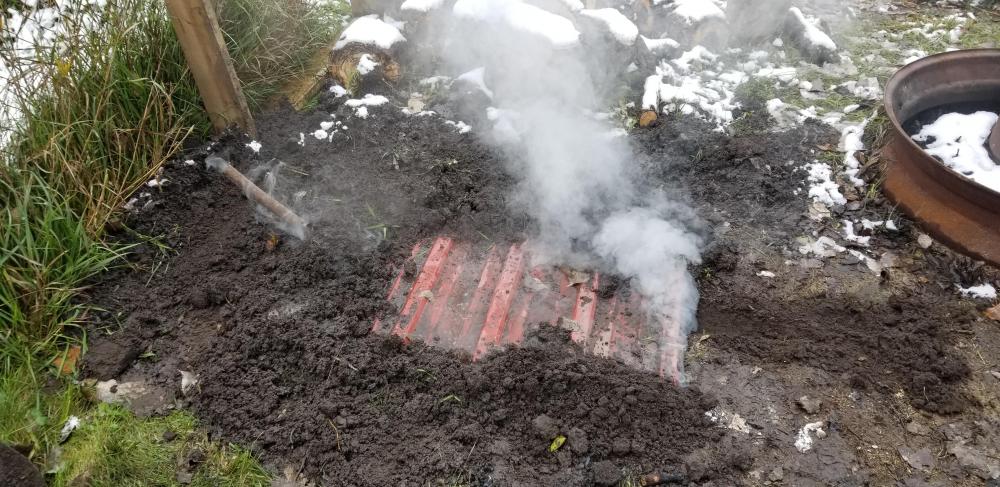
Most of the charcoal making I've seen on IFI is with retorts. I'm sure they are much more efficient and probably easier to use. I don't have the correct steel drums handy though. I figured could spend the next few weeks finding drums and building a retort or I could dig a hole in the ground and try making charcoal right now. I decided to give the hole in the ground a shot. I found a paper from the United Nations that described charcoal making methods for developing countries. One method they described was digging a hole, filling it with wood, let it burn for a while and then cover. I dug a hole about 16" x 30" and about a foot deep. I then went over to the big burn pile of tree limbs and cut enough wood to fill the hole. Most of it was 1-2" diameter. I got a fire started and then placed all the wood in. I didn't pack it super tight. After everything was burning pretty good I put a piece of steel roofing over the hole and sealed the edges with dirt. I let it sit overnight and opened it the next day. It didn't work very well. Most of the wood had not burned and converted to charcoal. I was able to get about 3 gallons of charcoal out of it. Mostly from the lower area of the fire. So...back to Google and more reading. I found some articles on medieval charcoal making showing the pit method using vented pits. I put a pipe in on one end of the pit for an air intake and dug a small trench on the other end. Reloaded the pit with wood and got it fired up. After it was blazing pretty good I covered it again and sealed it up, leaving the vents open. It put out some heavy white smoke for a while. After three hours the smoke volume was a lot less and was a lot lighter in color. I pulled the pipe and sealed it up completely with dirt. I figured it would be better to err on the side of under cooking. If it's not completely done I can always fire it again. I'm going to open it up after work tonight and see how successful I was. If this works I have a big pile of tree limbs that will work great for charcoal making and if it doesn't work I'm not out any money.

-
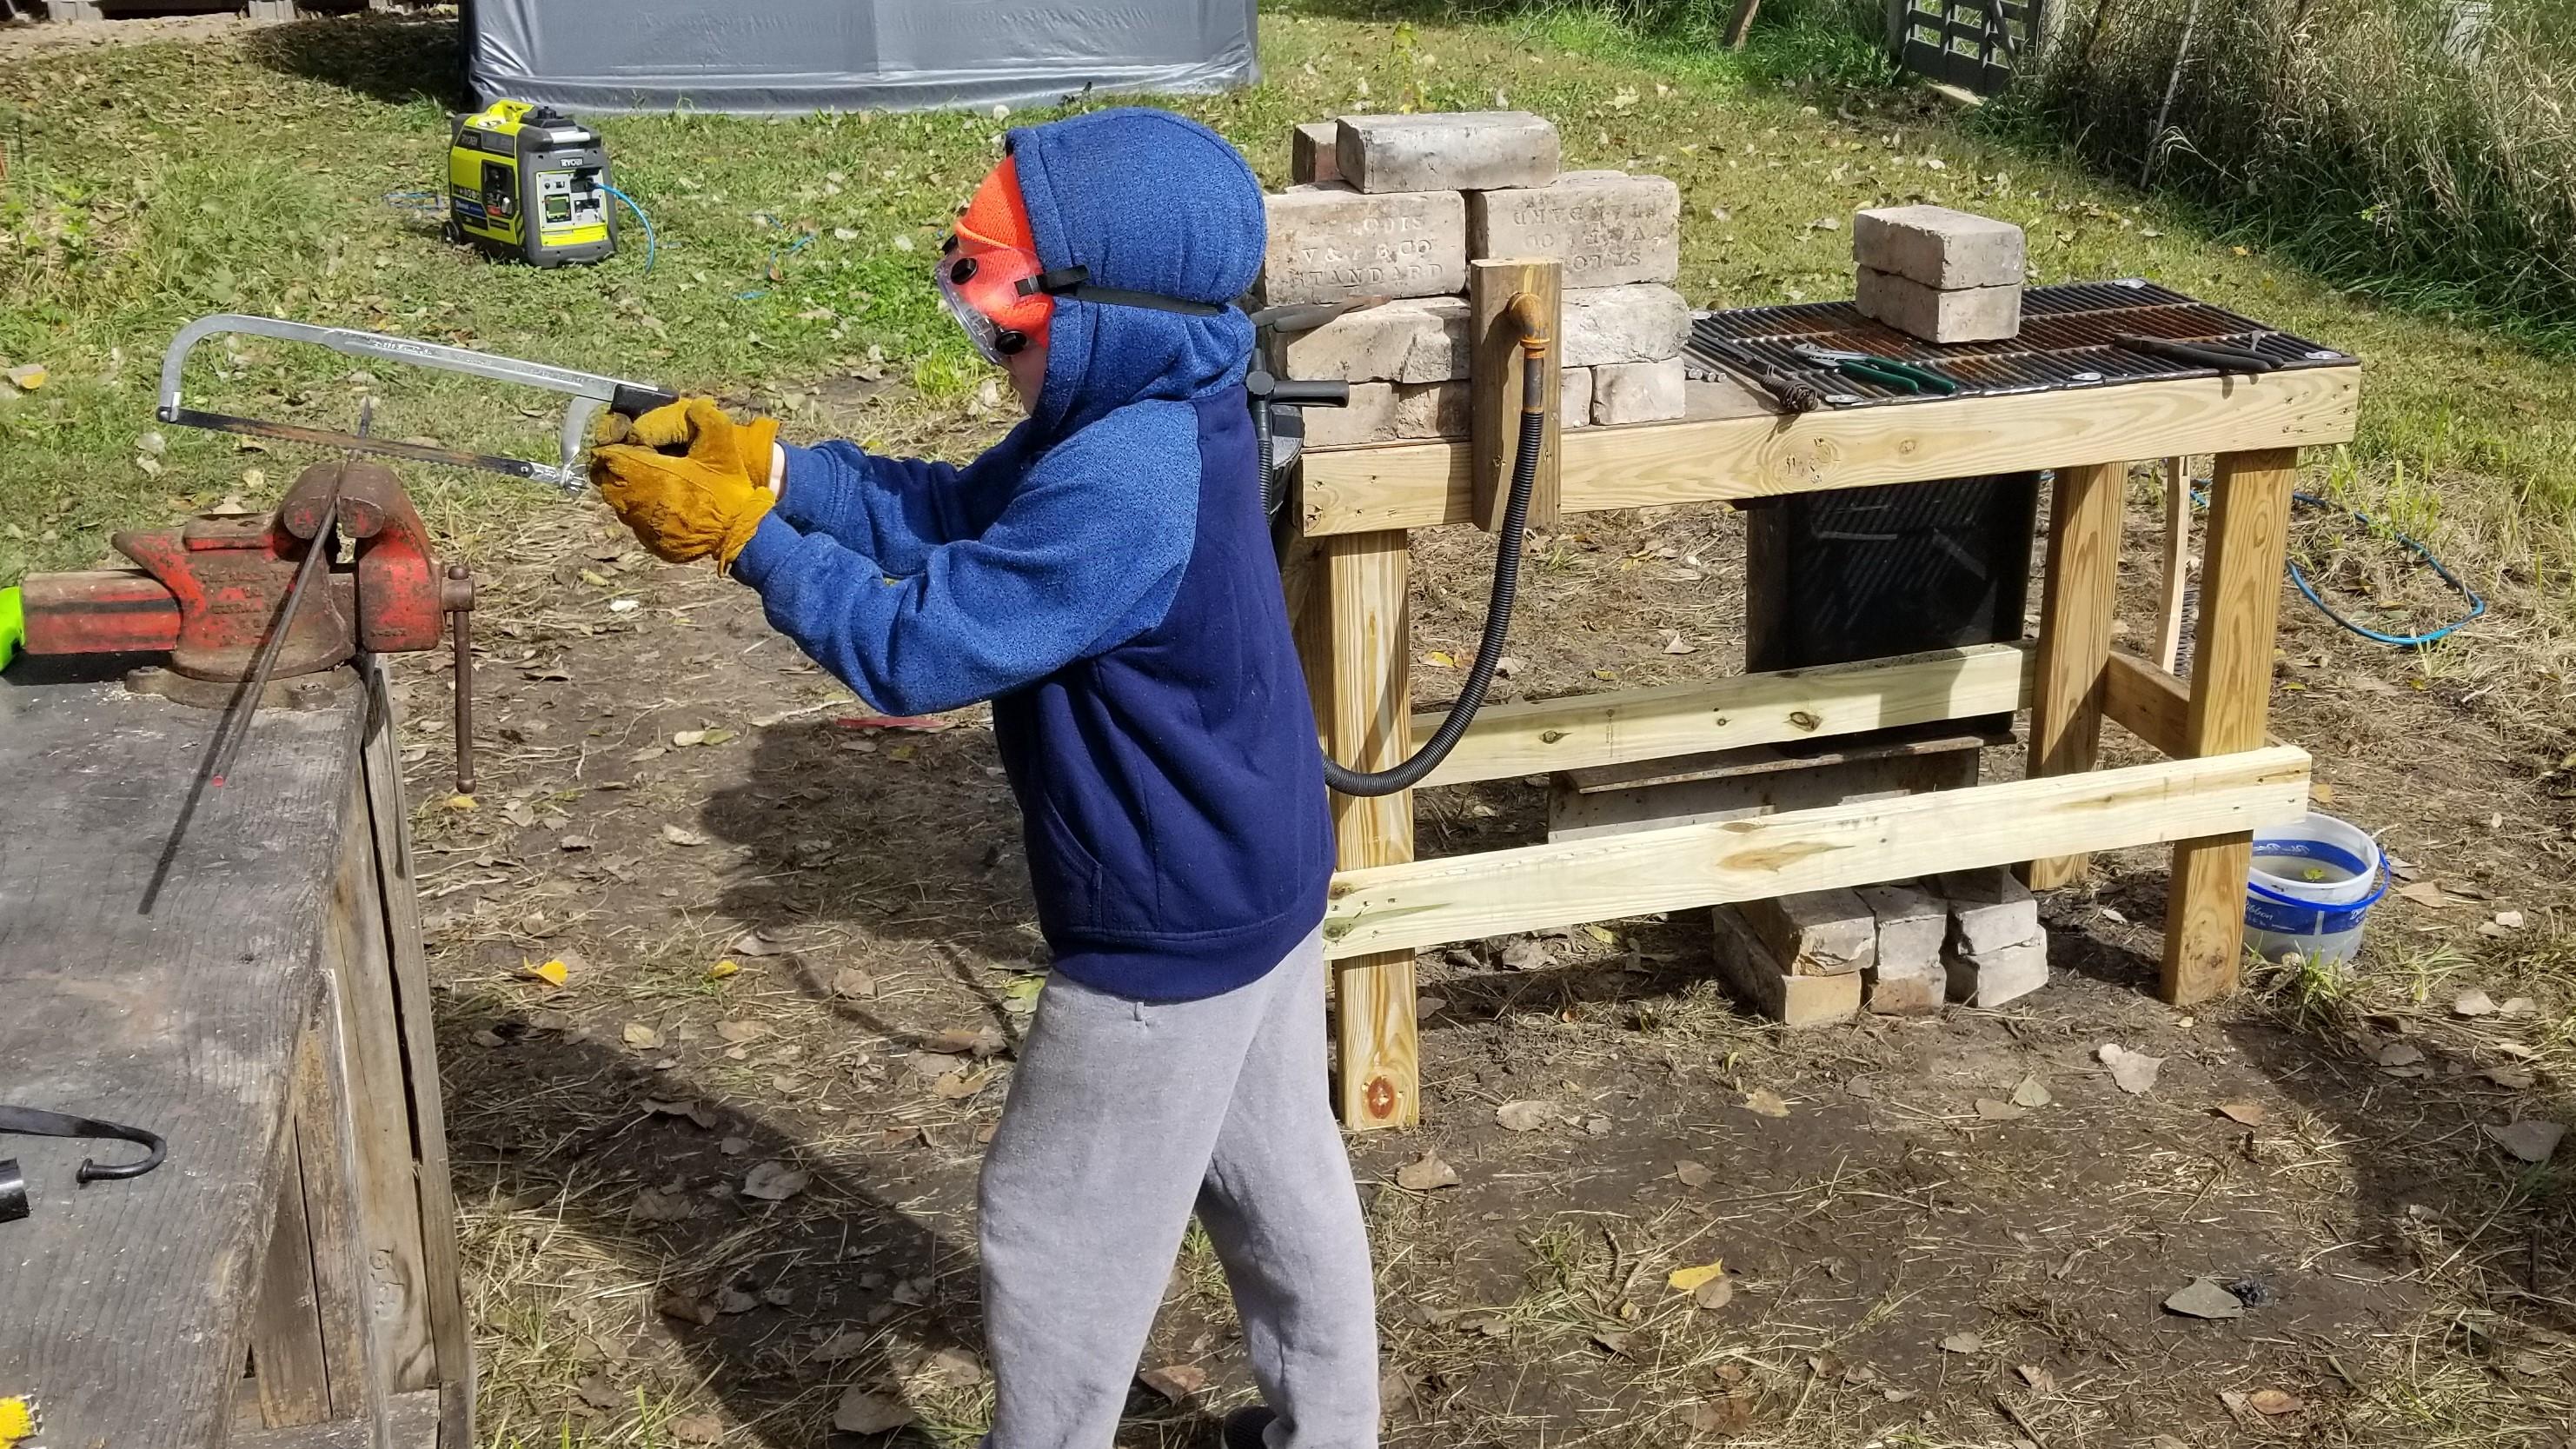
Peppie, I'm also a wood worker trying to learn how to smash hot metal The workstation looks nice. Very heavy duty and organized...I like it!
-
I made the modifications to the forge today. Its using way less fuel and is heating up my stock a lot faster. I think I might finally have it set up correctly. Thanks for taking the time to post all this info and answer questions Charles! I actually felt like I was blacksmithing today
-
If you add some chamfer strips to the inside corners of your form and along the top it will eliminate the sharp corners and give it a nicer finished look. The strips on the top also make a nice guide for finishing the top. Looks very solid...but I'm no anvil expert
-
Thanks Charles. That makes sense. I was trying to follow along with all of your improved versions of the JABOD and was getting a little mixed up. That's the nice thing about this design...it's easy to change!
-
I'm getting confused on fire depth for a side blast charcoal. Right now my fire pot is 4" wide and 8" long. I have the tuyere about 2" off the floor and about 4" of sides above that. Would I be better having the tuyere sitting on the bottom of the floor and making the pot shallower? Here's a couple of pics of my set up now.


-
The weather looks nice this weekend. I have a bunch of charcoal and a whole bag of nails that need bent into hooks. With only a few hours of forge time under my belt it's probably time to stop reading and start forging.