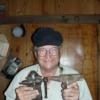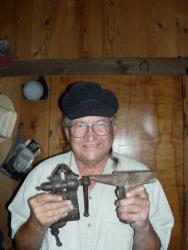
Frank Turley
Members
-
Joined
-
Last visited
Everything posted by Frank Turley
-
In a blacksmith forge situation, any file steel or high carbon steel needs to be welded at a "sweating heat," no sparks. Otherwiae, it can crack and/or crumble. Turley Forge and Blacksmithing School : The Granddaddy of Blacksmithing Schools
-
I doubt if they are related. There is a great 55 minute video "The Gunsmith of Williamsburg" featuring Wallace Gusler making a flintlock as it might have been done during the colonial period. The barrel is of wrought iron, a formed tube forge welded over a tapered mandrel. It took over 200 heats to get the job done. This was labor intensive. At a later time, the solid barrel was drilled and bored at water powered boring mills, no heat needed. In both instances, the barrels were of wrought iron of extremely low carbon content, so hardening and tempering was not an option. I understand that some contemporary barrels are made of medium carbon steel that is hardened and tempered, but I venture all that is done high tech and with pyrometer control...having nothing to do with blue oxidation. I think that bluing and browning of barrels resists further rust to a small degree if the gun is cared for and kept indoors. However, "Rust never sleeps." Turley Forge and Blacksmithing School
-
I'm in New Mexico, USA, and some of the homes and shop buildings had clay and beef blood floors in the Spanish Colonial days. http://www.turleyforge.com
-
In Otto Schmirler's book, "Werk und Werkzeug des Kunstschmieds," he talked about their shop anvils sitting in a steel box of sand. I have done this with two of my anvils. I arc welded 3/16" plate together for the boxes. The anvil is held fast by threaded rods and nuts to keep it from shifting. Two flat bars with holes either end sit on the slanted base, horn and heel sides. The rods are welded to the side of the box and go through the holes where they receive the washers and nuts. I can "walk" it around the shop. http://www.turleyforge.com
-
Years ago, I fixed an anvil with McKay Tool Alloy HW stick electrodes. Currently, I could not find it on the internet, but I believe it was designed to be "martensitic." The HW supposedly stood for water hardening. I let my work air cool, and it has stood up well over the years. Where the rod was used, I got a brighter color than the original face, so you run the risk of your anvil looking like a pinto pony. McKay/Hobart is still very much in business making specialty electrodes. Turley Forge and Blacksmithing School : The Granddaddy of Blacksmithing Schools
-
There have been some good looking rasp-spurs shown on this forum not too long ago. As for the snake, a lotta' guys make the scales run backwards by using the tang as a ready made tail. It should be reversed. Cut off the tang and forge a snake's head at that end. Turley Forge and Blacksmithing School : The Granddaddy of Blacksmithing Schools
-
In the U.S., Warren made most of the track tools, first in Warren, Ohio, with the stamped trade name "Quikwerk." I think they may have moved to Hiram, Ohio, at a later time. In their Hiram catalog, they outline the dimensions and grinding specs for their "Track Chisel." It's overall length, new, was 10
-
That is a nice bouquet. Here, we have "shoeing displays in rectangular cases. The British patron saints of blacksmithing are St. Clement and St. Dunstan.
-
A 1964 book, "Metals for Engineering Craftsmen," states for following regarding tempering colors. "The temperature is estimated by the surface colours of the steel, formed by oxidation, but these will only show it the steel is free from scale. It should, therefore, be cleaned with emery cloth or on the grindstone, but must not be polished, glazed, or burnished as this results in different colour changes" I wonder about this. Comments? http://www.turleyforge.com
-
Goatman has it right. The head and peen are done separately. If the entire head is at a hardening heat, the eye's cheeks will harden quicker than the head or peen, having to do with mass and the quenchant acting inside and outside of the eye. The difference in hardening speed and the different rate of contraction often causes those cracks. I use the "wet rag method" in my coal forge. I heat the head at the edge of a hot fire not allowing the red heat to enter the eye cheeks. I quench vertically in water while agitating. With the scale removed from the face, I temper with a 7/8" square M.S. turned eye heated to welding and dropped onto and surrounding the face, while the head is in the vise, face up. The turned eye has a handle and tempers by heat conduction. I take the face to a dark straw temper color. Quench to hold the temper. I wrap a wet rag around the hammer head and eye and use large bolt tongs in order to heat the peen. The wet rag protects the head temper. Quench the peen in water continuing to hold with the wet rag and tongs being vertical. Into the vise, peen upwards with the rag still surrounding the head. I normally use a torch tip directed slightly downward and going around the base of the peen until I see a purple tempering color. Quench. The old timers say that when hardening medium or high carbon, plain carbon steel, to "bring it out when it quits quivering." Never mind the sexual connotation. The intent is to withdraw it from the quenchant when you can no longer hear or feel the sizzling, the "cush" sound. That helps prevent cracks. In 1976, some old timers in the heat treatment department of Bethlehem Steel told me to figure-eight the piece while it was in the quenchant. This style of agitation allows fresh, cooler liquid to hit the tool from all angles and quickly. Turley Forge and Blacksmithing School : The Granddaddy of Blacksmithing Schools
-
Sometimes, you'll get clinker sticking to your work or a very thick scale adhering to the steel, and it won't wire brush off. Borax helps. Apply some and take an orange or lemon heat; brush it off easily. Turley Forge and Blacksmithing School : The Granddaddy of Blacksmithing Schools
-
As a long retired horseshoer, I found that hot countersinking and punching increases the length of each branch of a horseshoe. I therefore, agree with HWooldridge about possible distortion. Turley Forge and Blacksmithing School : The Granddaddy of Blacksmithing Schools
-
We're beginning to reach out without defining our terms. In the first place, a peen (various spellings) is smaller than a face. The hammer face is normally squarish or round. The French face is rectangular. I think Hofi would agree that he uses the face edge at an angle for drawing, 'drawing' meaning reducing section while increasing length. On a farriers' rounding hammer, there is a ball face which is the same diameter as the slightly "rockered" face. Therefore, it is not a ball peen; it is properly, a ball face. A peen, cross, straight, or diagonal, tends to move more metal at right angles to the peen length than lengthwise of the peen length. Some peens are half round or fairly sharp edged, and maybe 1/8" to 3/16" thick when the hammer is purchased new. It is advisable to disc or belt sand the peen, removing metal in order to thicken it a little. At the same time, crown the peen length, and if it is flattened a bit on top, you must radius the corners. Peter Ross, formerly of the Williamsburg Smithy, does flatten the peen slightly. He says that you still get the job done, and there is "less clean up." By the latter, he means there are fewer peen marks to get rid of on the workpiece. A beginner must learn to use the center of the peen for most work. For example, when forging the fishtail (flared) end on a flat bar, some beginners use a kind of edge to edge blow; not good. The center of the peen should be at the very end of the bar, not behind it. Start in the middle of the hot bar and work either way of the middle. http://www.turleyforge.com
-
The old catalogs would show a straight peen for use by coopers, maybe for driving the hoops on?? I've never used a straight peen or diagonal peen for anything. Presently, my most used hammer is a 2� pound cross peen made by Channellock. I mostly use the peen for getting more spread than draw, as on a fishtail end scroll. What's awkward? Hold the stock at an angle. Turley Forge and Blacksmithing School
-
I'm blown away by the collection, and I'm thankful that some of it has been shown to the public. I have a special interest in Hispanic iron, being the co-author of "Southwestern Colonial Ironwork" recently re-printed by Sunstone Press. So far, I've glimmed about three quarters of the photos, but if one is taken by the work, they require repeated looks and further study. I notice that if you click on a photo, you get an exploded view. Fortunately, architectural hardware is more collectible than 3,000 pound gates and grilles. Some of my suspicions have been confirmed. Thumb latches are of the "Norfolk" style, not the "Suffolk." The reverse internal views of the chest locks are not too unlike the Mexican ones that I've seen. The same may be said for strap hinge finials. For serious students of this style, Byne & Stapley wrote a book, "Spanish Ironwork" in 1915. In 1993, the Museum at Teruel, Spain, published "De lo
-
I purchased an old, wrought iron L hinge at a New Orleans antique shop in 1973. It is of scant 1/8" thick sheet with a right-angle weld at the "L" of the main hinge portion. The "tail strap" is a vertical strip, the same length as the hinge height. The three knuckle barrel is centered on the two verticals, and the full barrel length was forge welded on both pieces before hack sawing, chiseling, and filing. The shuts faintly show on the back of the hinge. Both barrels were laid out by cutting to allow a projecting rectangle of sheet, enough for rolling and welding. I have done this using pi x average diameter formula, and then adding a little more for the overlap and weld. The peened up pin ends of the barrel are flat and not visible. There is a rust patina, but it looks as though the hinge pin was annealed and only an small amount left protruding (1/16"?) either end for the heads. I'm fairly certain the upsets were done at room temperature, and hammer-burnished. This is an old fashioned way, but I love trying to duplicate what the old smiths did. Turley Forge and Blacksmithing School : The Granddaddy of Blacksmithing Schools
-
I have made a number of light duty slip hooks out of mild steel according to Schwarzkopf's* directions. I let them normalize. Nowadays, however, I understand that hooks are manufactured of medium carbon steel or alloy steel and are hardened and tempered at the factory. I think that when used for repeated hoisting and the hooks begin to open (stretch), that is a sign of failure, and they are discarded. P.S. It is best to have them open slowly rather than suddenly shearing in two. In some industrial applications, they have a discard schedule, and all hooks are thrown out and replaced at certain times of the year. The idea has to do with safety, and not all plants have heat treatment departments. I agree with Newman's above post re not knowing the type of iron or steel. I don't think that one should guess about how to reforge and heat treat. A friend from Toronto was researching old records at the library. He ran across an obsolete law stating that all wood hooks were to be brought to the blacksmith on an annual basis to be annealed. We assumed that the wood hooks were of wrought iron and were used in logging. The annealing would somewhat refine the grain structure of the wrought iron. *Ernst Schwarzkopf, "Plain and Ornamental Forging," Astragal Press reprint 2000AD. Turley Forge and Blacksmithing School
-
Without high tech testing methods, it would be a difficult to ascertain the quality of the weld. As a smith, one way might be to hacksaw the piece in two, and inspect the kerf for signs of shuts. Another way would be to continue forging the piece down to a haywire size. As you forge, any imperfections may appear. In the 1930's, the British published a little book titled, "The Value of Science in the Smithy and Forge." The authors showed some photomicrographs of forge welds, and along the line of the welds, there appeared "slag inclusions" and grain growth. Slag inclusions indicate that fly ash and dirt are present, especially in a coal forge situation. Grain growth is a result of heating the metal to the incipient burning range. I would guess that a majority of coal forge welds are like this, and they are therefore not as strong as a gas or electric weld. The pattern-welders have devised a couple of ways to keep oxygen and dirt from the weld area, thus obtaining cleaner, stronger welds. In thinking about forge welding in 2009AD, if it's not so strong as gas and electric, why do it? We forge weld because a forge weld is forgable, whereas some modern welds will crack or break when heated and hammered. We also forge weld for aesthetic reasons, as when joining a branch to a stem. After welding, you gain a disappearing point at the base of the join, and it looks "organic" without further filing or touch-up. Seldom will a forge weld be so weak as to affect the structural integrity of ornamental ironwork. In New Mexico, we have a cowboy saying, "I don't care how weak it is as long as it's strong enough." http://www.turleyforge.com
-
If you do use 5160 spring steel, it doesn't need any heat treatment beyond normalizing. It will have enough springback without hardening and tempering. Many of the old vise springs were fishtailed at the bottom. I've done it with my cross peen. Then, the tail is folded back on itself to provide extra thickness. After that the extra material either side, the "tabs," are bent at right angles. The shut from the fold is outside the bends. Turley Forge and Blacksmithing School : The Granddaddy of Blacksmithing Schools
-
I'm curious about the end use, hot work or cold work? If used on hot work, you need not do any machining. Just hold the straight shank firmly with the "link tongs." If you forge the blade and tapered portions, it is advisable to anneal before hardening, 1400-1450
-
I have a couple of anvils sitting in welded up boxes of sand. I used 3/16" and 1/4" plate for the boxes. To keep the anvils from shifting around, I fabbed threaded prongs going through two flat bars, each bar fore and aft on the anvil base. When the nuts are tightened, it helps to keep the anvil face horizontal. I got the sand box idea from Schmirler's excellent how-to book, "Werk und Werkzeug des Kunstschmieds." I'm in New Mexico, so it's easy to drive to the nearest arroyo (dry wash) and shovel up some sand. Turley Forge and Blacksmithing School : The Granddaddy of Blacksmithing Schools
-
My old mentor, Victor Vera, was brought up in a blacksmith shop in San Luis Potosi, Mexico. He said that his dad and uncle both wore deerskin aprons that came to the tops of their shoes. Lots of farriers' aprons used to be made of muleskin which was thick and protective. Nowadays, their aprons are made of different materials or combinations of materials: "bull hide", cordura, "duratuff", latigo, etc. Turley Forge and Blacksmithing School : The Granddaddy of Blacksmithing Schools
-
I use an undersized, hafted "slot punch" which is pretty much the elongated shape of the finished eye. I don't continuously rotate to get rid of the burr. I attempt to have one forepunch side and one back punch side. I drift from both sides. While the drift is in, I turn the piece on it's side and use a flatter to get rid of the side swelling. In Spain and parts of France, the side swelling (bulge) is often left on the hammer and is considered part of its aesthetic. Many hand forged hammer eyes and top tool eyes in the U.S. have straight sides and half round ends. I think the reason for this is that it is easier to forge the punch and drift cross-section in this way as opposed to forging and shaping an oval cross-section. There is nothing wrong with the oval; it is just more time consuming for a hand forger to get it right. Lots of manufactured hammers have oval eyes. As a rule of thumb, the length of an eye can be twice its width. Turley Forge and Blacksmithing School : The Granddaddy of Blacksmithing Schools
-
I see that noted gunsmith, Bruce LePage, is still at work, probably either in Wisconsin or Minnesota. Bruce demonstrated the spiral welding of a gun barrel at the 1982 LaCrosse, Wisconsin, ABANA conference. I wasn't present, but I heard about it. I would suggest that he knows more about that kind of work than anyone on two hind legs. Turley Forge and Blacksmithing School : The Granddaddy of Blacksmithing Schools
-
I'll be demonstrating some forge welding among other things in St. Louis, MO, November 21-22. If you can get away, come on down. There is no charge; the Blacksmiths Association of Missouri is only asking for a donation. Click on the Calendar on the above header for details. http://www.turleyforge.com