CreekSideForge
Members
-
Joined
-
Last visited
Everything posted by CreekSideForge
-
Hey y’all, Over the weekend, I took a chef knife making class over in Detroit with Niko Nicolaides. He showed us some of his examples and did some demoing then let us go at it. On Saturday, we forged, profiled and heat treated the knives. Because I have experience already doing this, I knew most of what to do but he still had some useful tips and tricks on how to move the metal to specific places. Sunday was spent grinding and finishing the handle. This is the Detroit Smith Shop where the class was hosted. Profiled I learned the most in the handle construction. He did the method of drilling a .5” hole into a block and splitting a dowel to hold the tang. I’ve never done that and while I’ve read about, I didn’t really understand before. Get a drill either the same size as the widest part of the tang or a little bit smaller. Drill down as far as you need to go and if needed, file little slots to fit the tang all the way in. Take a dowel the same size as your hole and split it in two. From there, sand the flats and size the dowels till the tang fits; you can leave a small gap for glue if you want. This method is SO much easier than drill 2 or 3 small holes and tediously needle file. I did that with the lower part of the handle and for the “bolster” piece, I split in half and filed away notches for the tang to fit in. Again bc it’s easier IMO. If you want, you can put hidden pins through the tang to help locate, I just glued them together. Also, make sure that the shoulder of the tang is seated on the handle! Check and double check to make sure. I didn’t so now there’s an ugly gap in a otherwise pretty good knife. Putting it through it’s paces. It’s a little thick but still works like a charm! I’m really glad I took this class, it allows me get a better idea how a kitchen knife should be made without doing trial and error. Taking a class is definitely one of the best things that someone can do to learn.
-
It helps to live in southwest MI where it rains 6 days in a week during spring time.
-
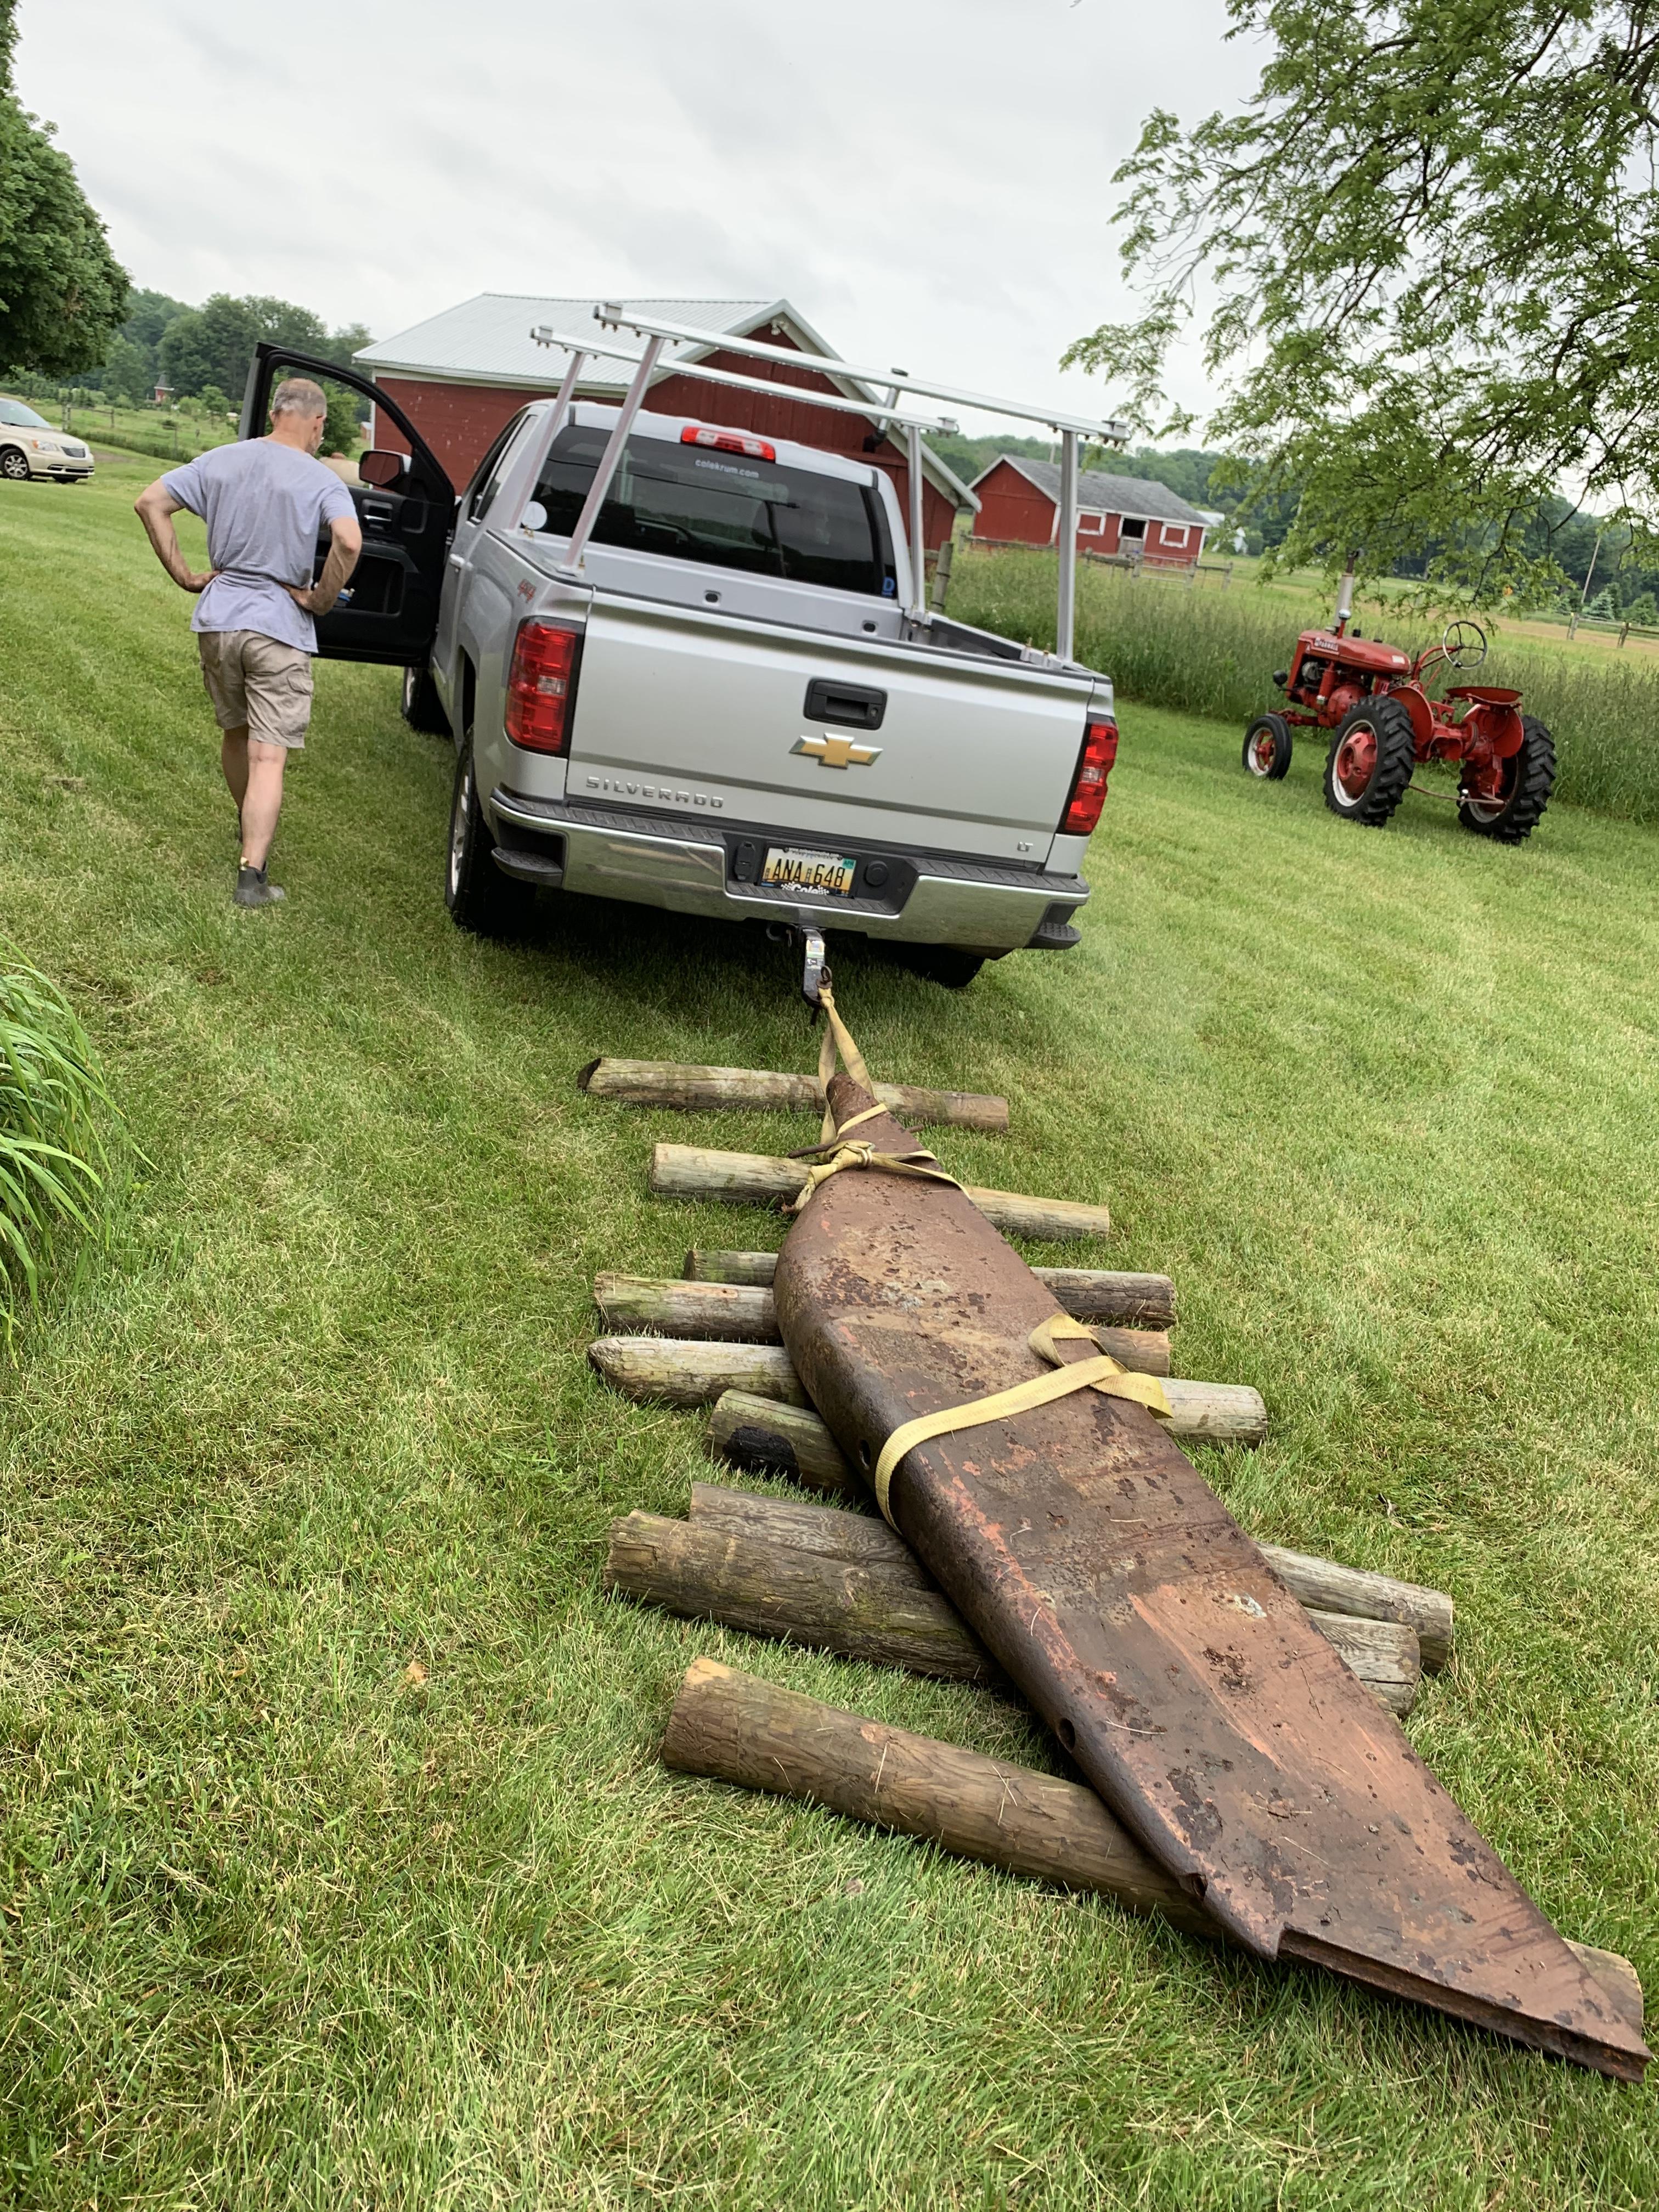
I have been working on this knife for a couple of weekends and I found out after all the finish grinding was done that only about .25” up the bevel was hardened. So I said whatever screw it, normalized it twice and then quenched it waited the appropriate amount of time to get past the quench curve nose, clamped it between two boards. And it worked!!! Just a bit of decarb and the smallest of a wiggle in one spot that easily ground out. I’m putting this success down to luck . And I banged out the other one this morning also. And my dad, his friend and I moved his 2200 lb cast iron sailboat keel got the other barn.

-
Thanks Lew L. Try staring at the big makers stuff for years and reading as much as you can in as many reputable places. Oh and lots and lots of work.
-
Bottom two are ready for heat treat. The top I got the wrought iron guard fitted up and then ground it to shape. It’s ready for hand sanding and finish work.

-
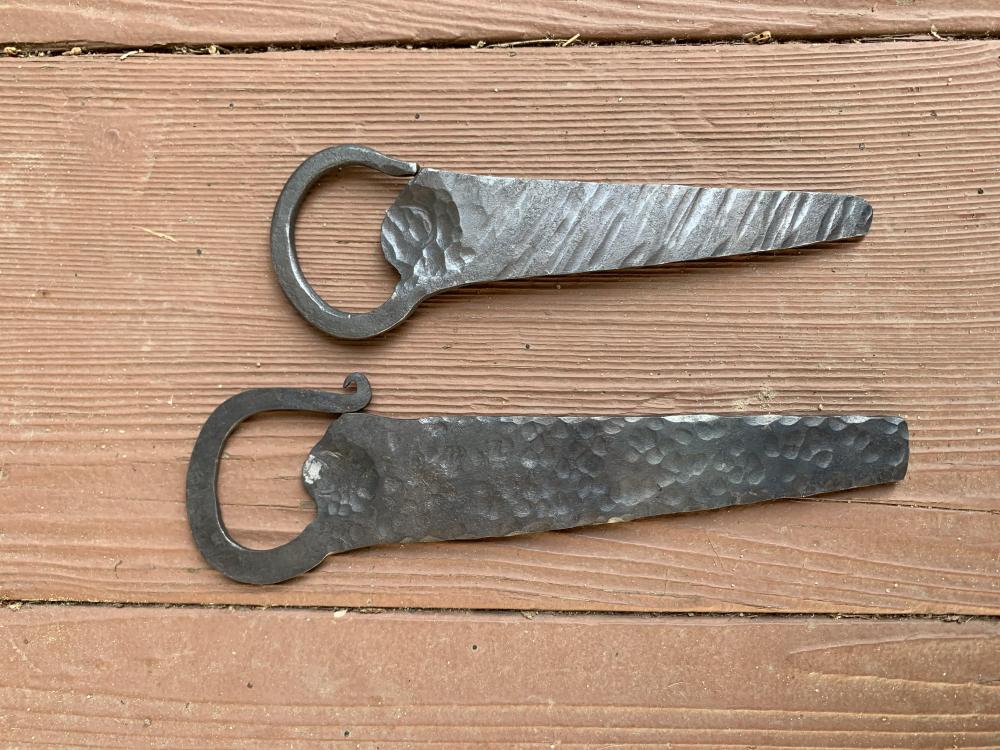
I think I’m going to make one of these as warm up for each session.
-
For 1084 and 80crv2, peanut, canola, mineral, frying, and veggie oil all work fine. Probably can find them at a big store like Costco or maybe Walmart or Meijer. Plus those steels are very forgiving and easy to work with. Probably can get away with the 1095 if that’s all you have available.
-
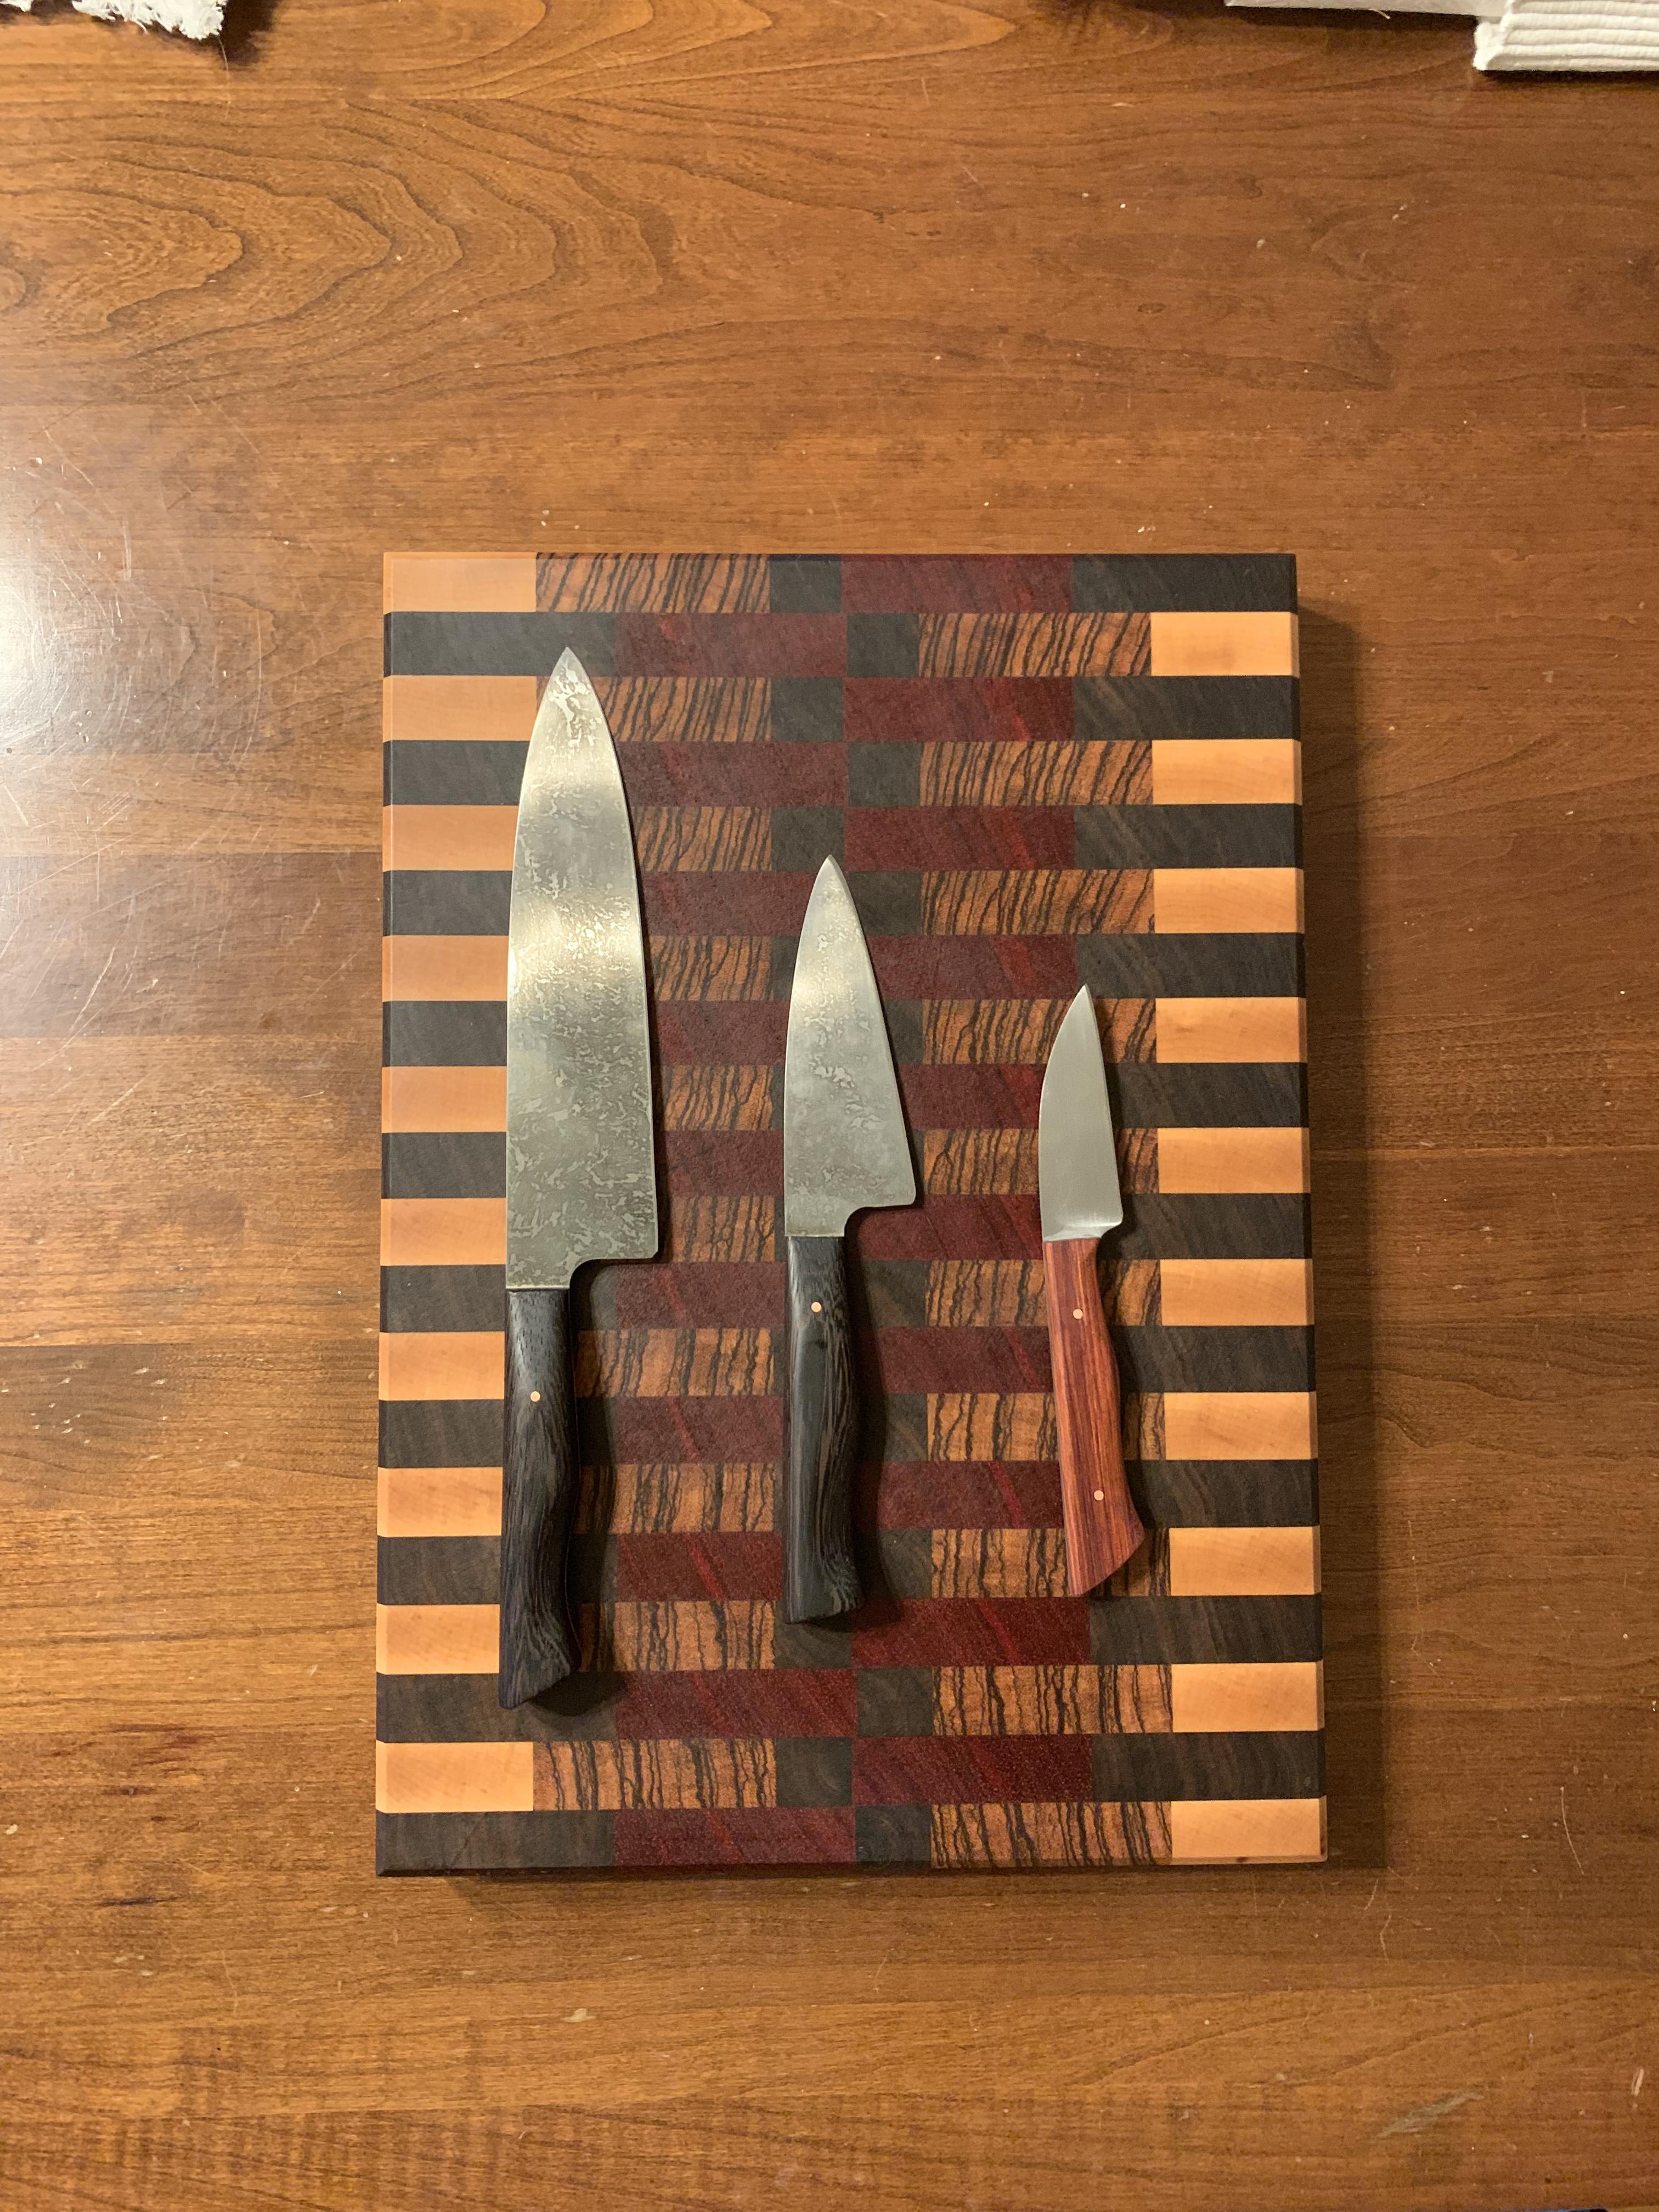
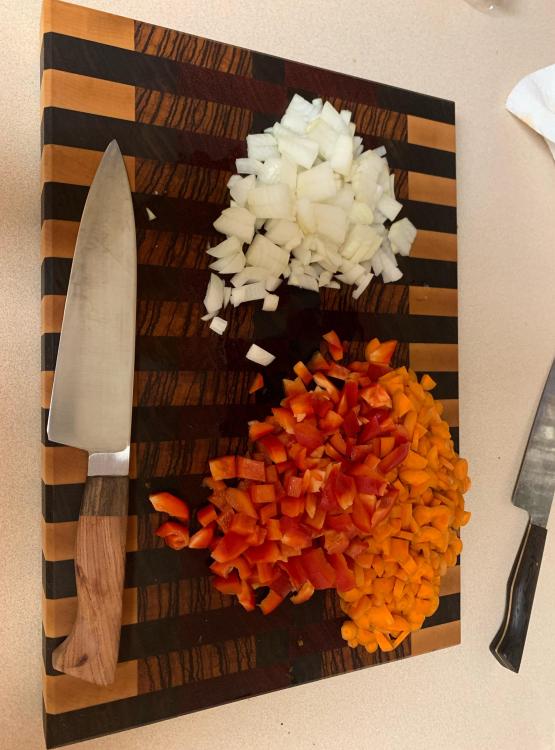
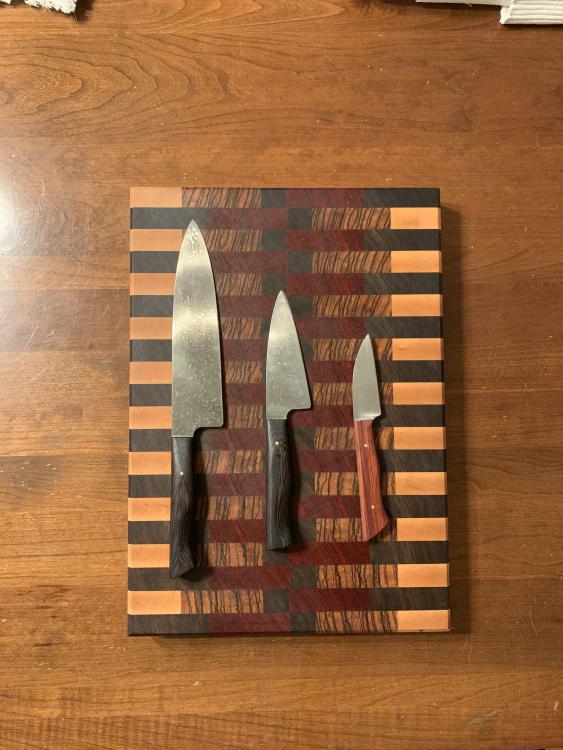
Finished up my kitchen tools and a smaller board for my brother.
-
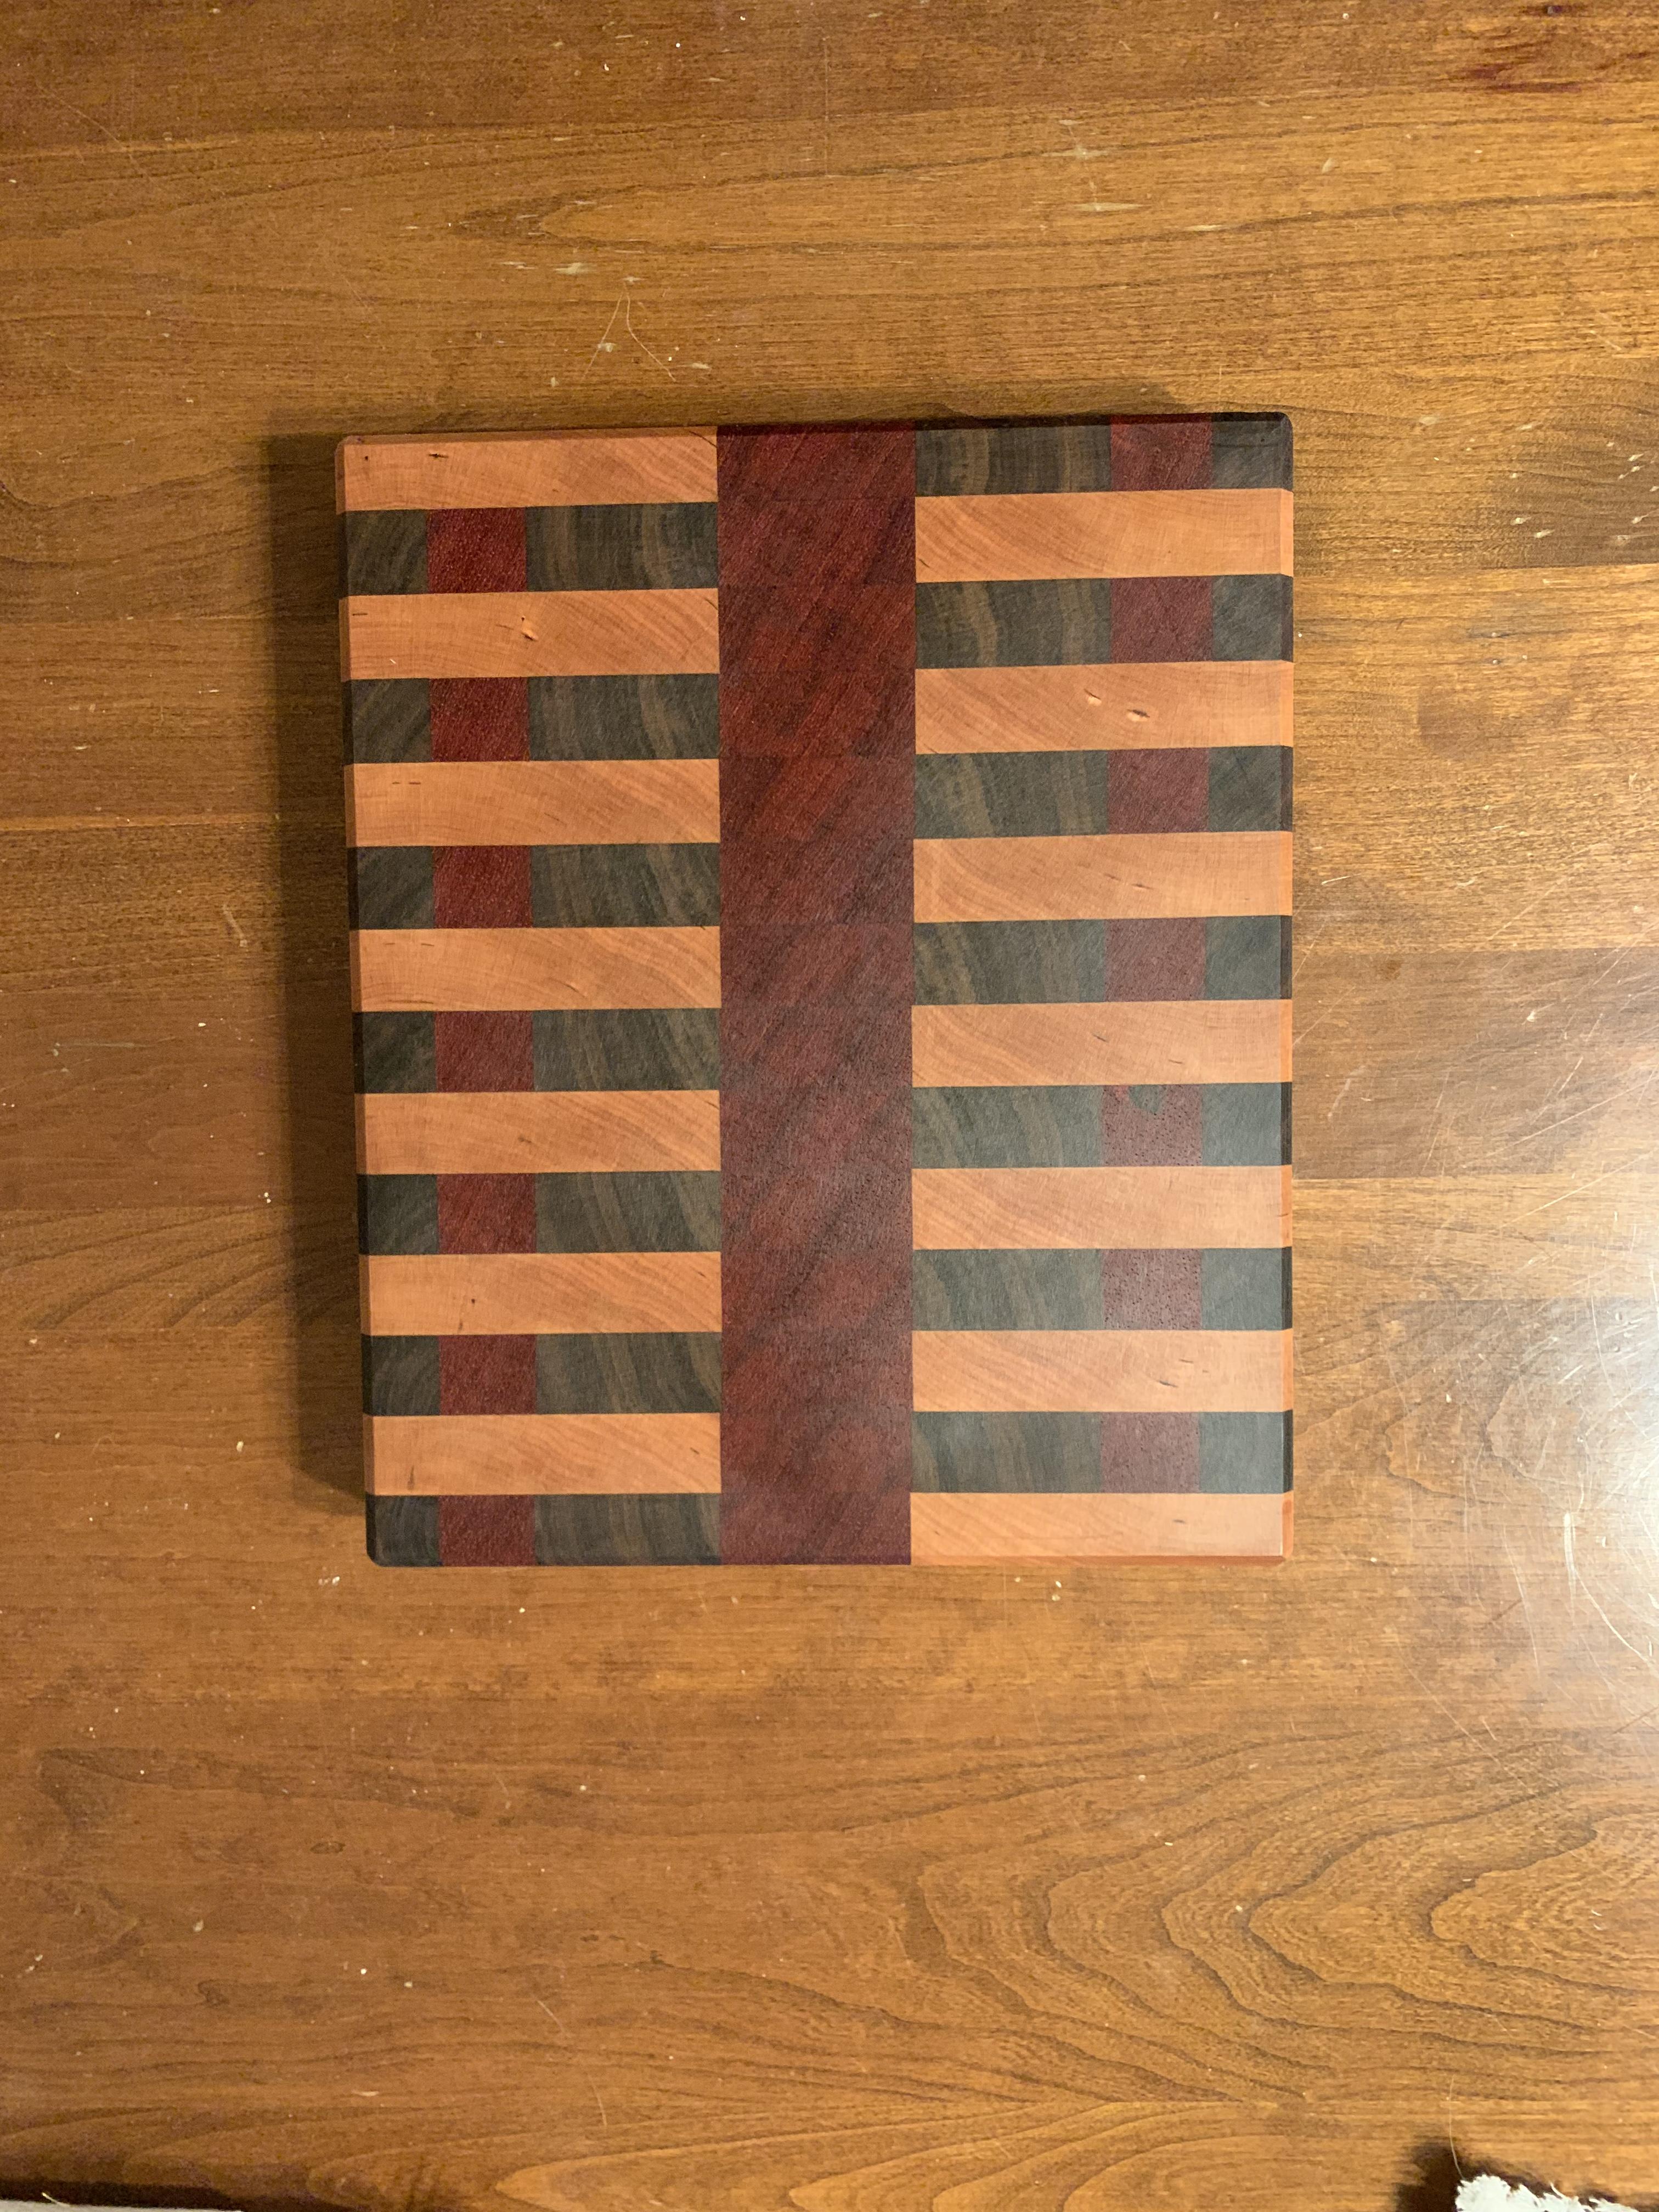
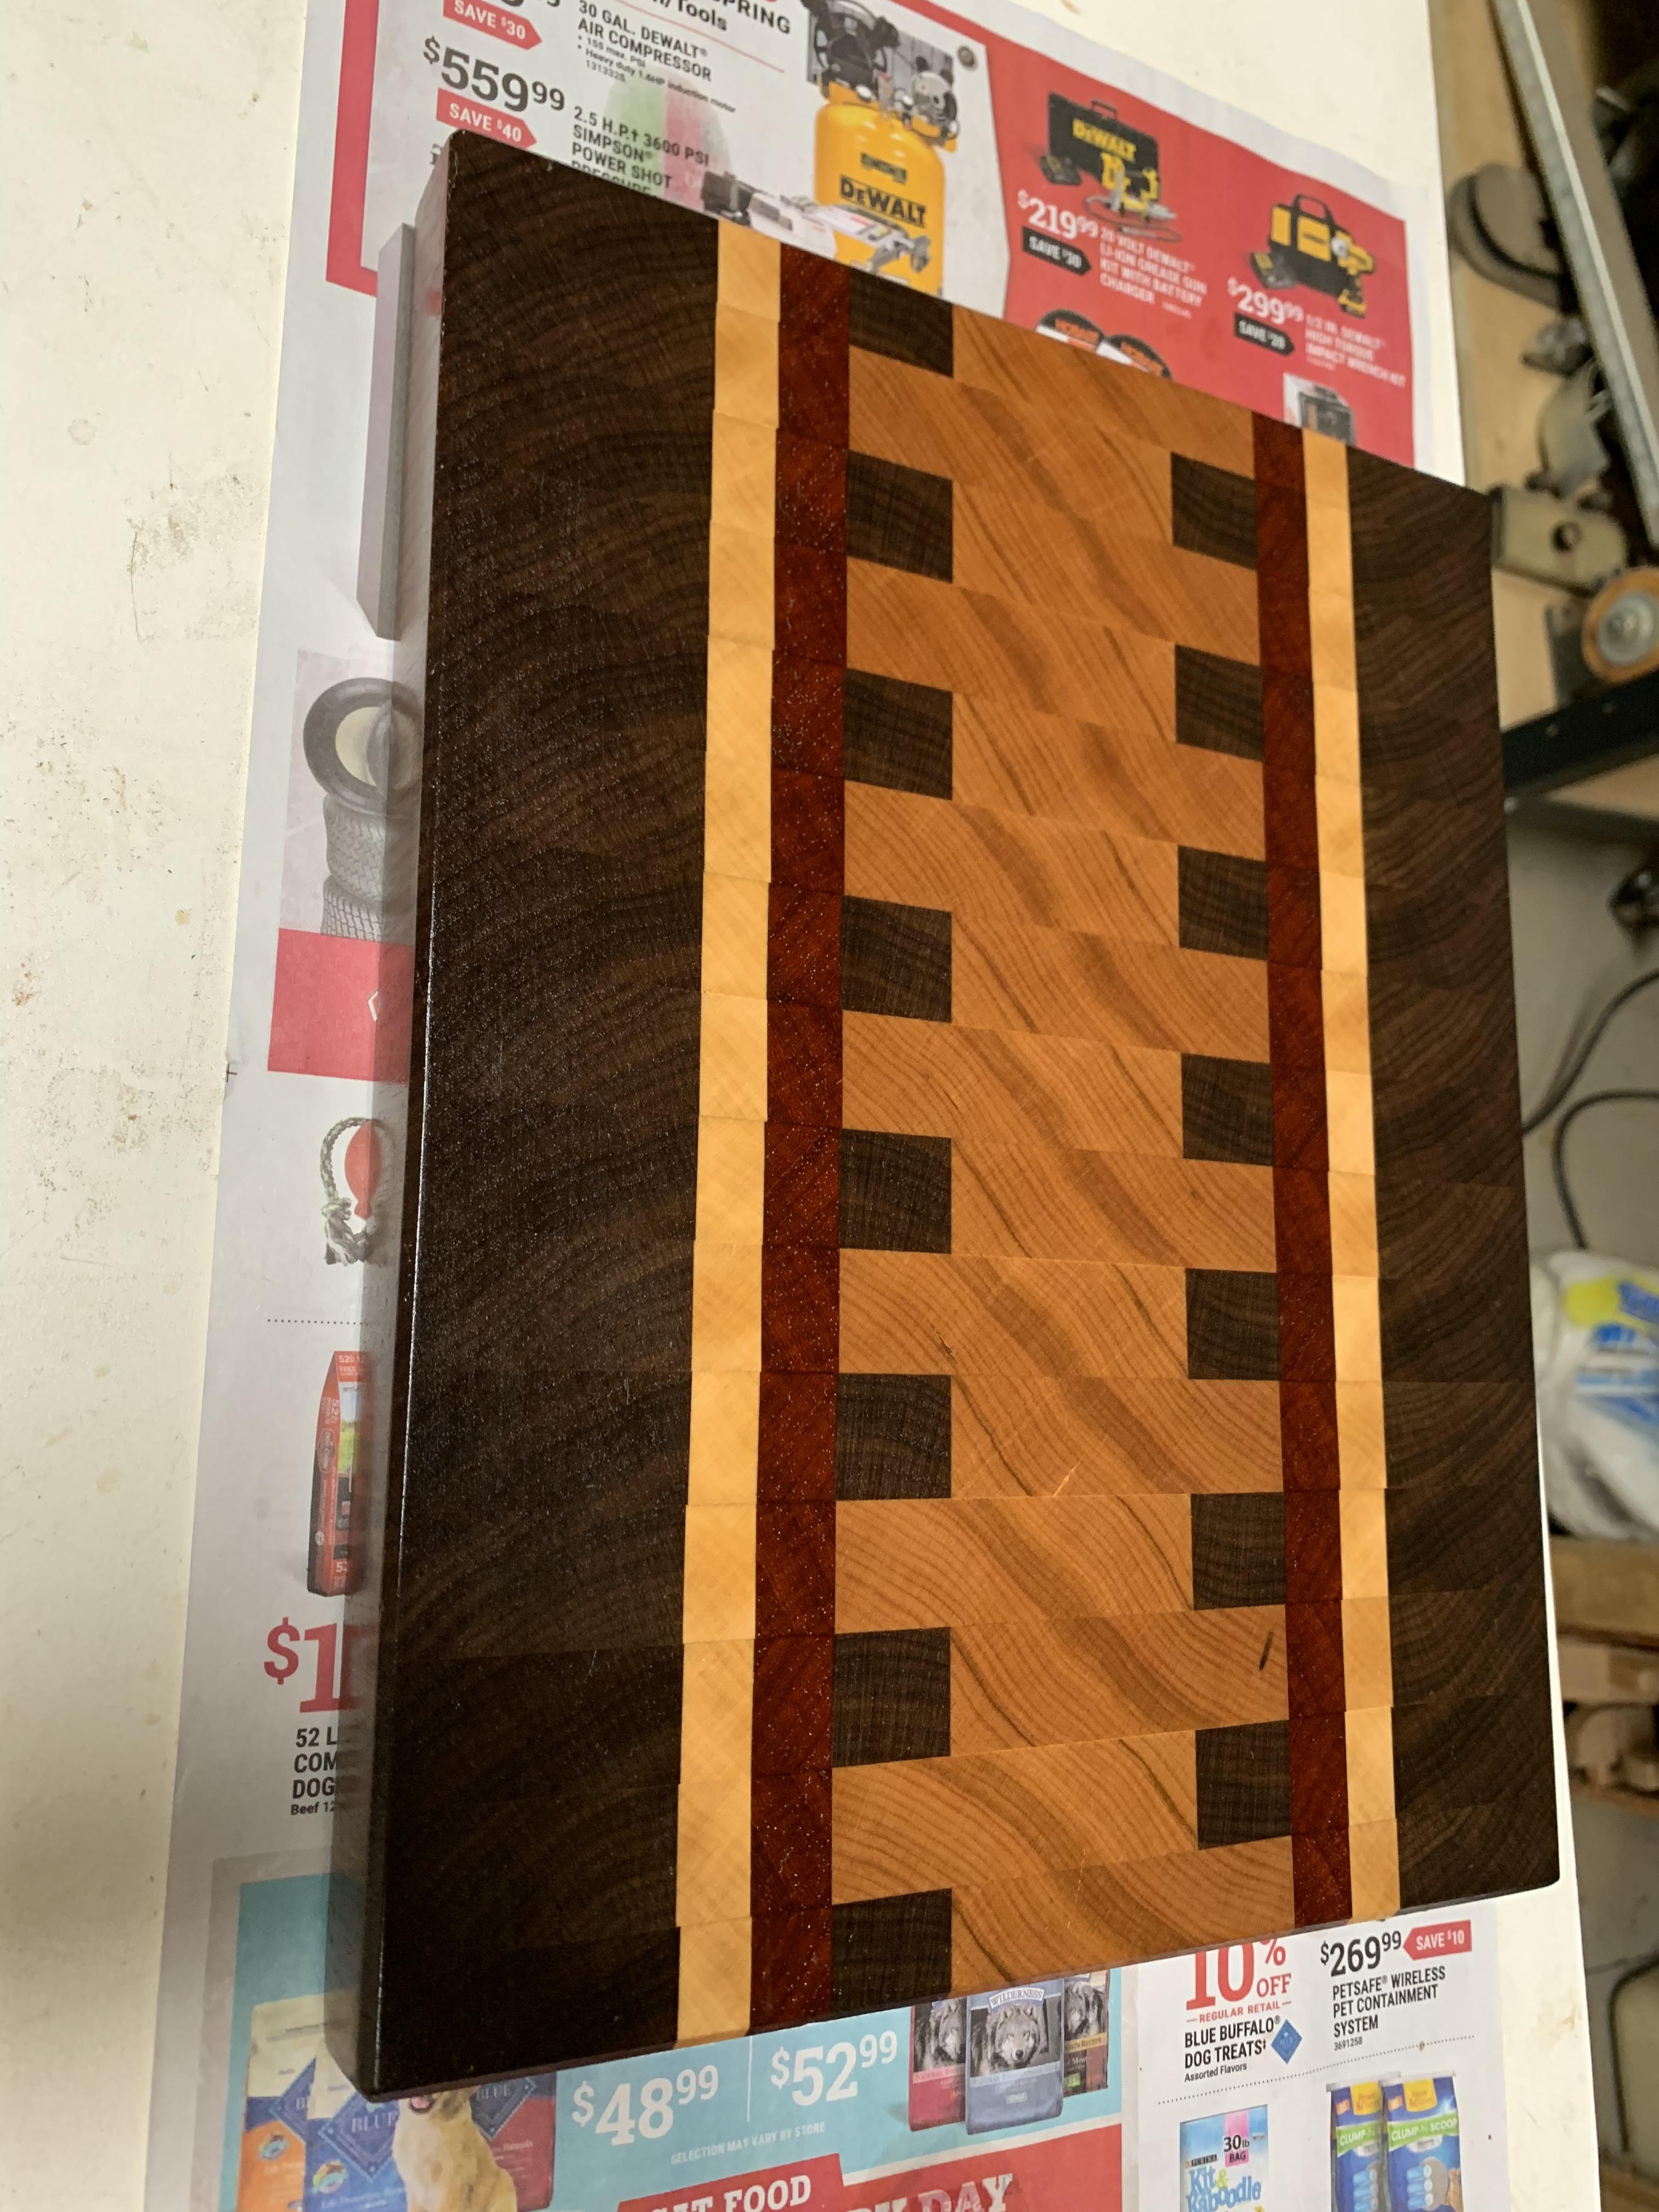
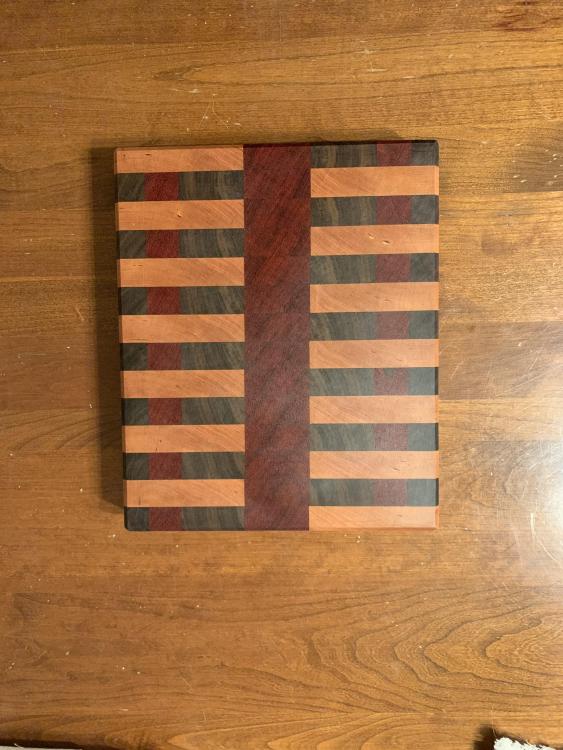
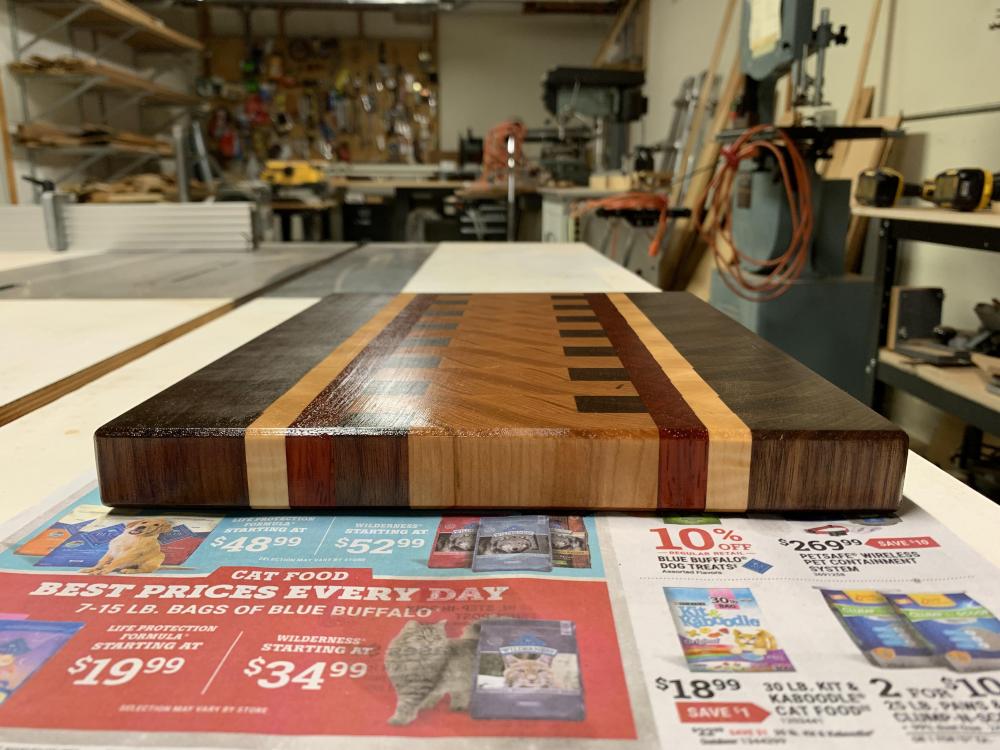
Finished the last one; walnut, maple, Padauk, and cherry.
-
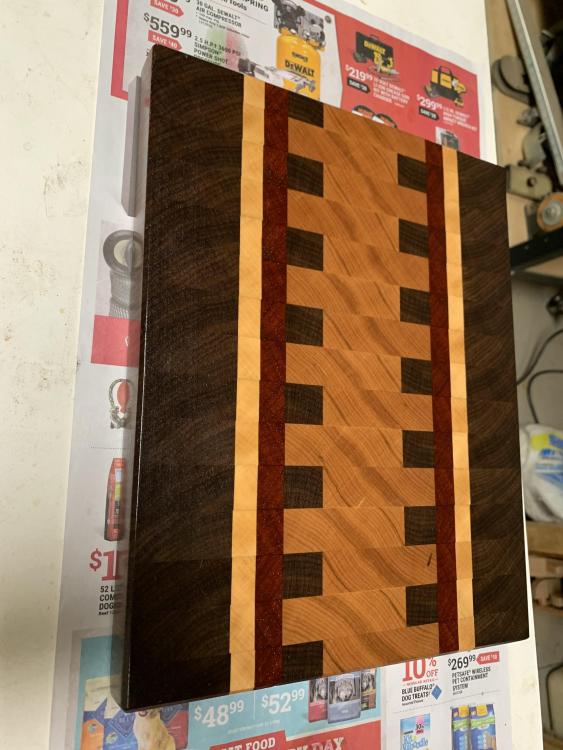
Thank you! I finished up those knives and started a new board for my dad for his birthday.


-
I believe it’s the vinegar in the mustard that reacts with the iron and creates oxides that help prevent extreme rusting. I could be wrong about the vinegar being entirely responsible for the process. It can be dabbed on with a finger or with a cotton ball in a thin layer to create different patterns. Leave it on there for about 30-45 minutes or until the mustard turns dark brown then wash it off.
-
Thank you, just 80crv2 with a mustard patina applied, no patternwelding.
-
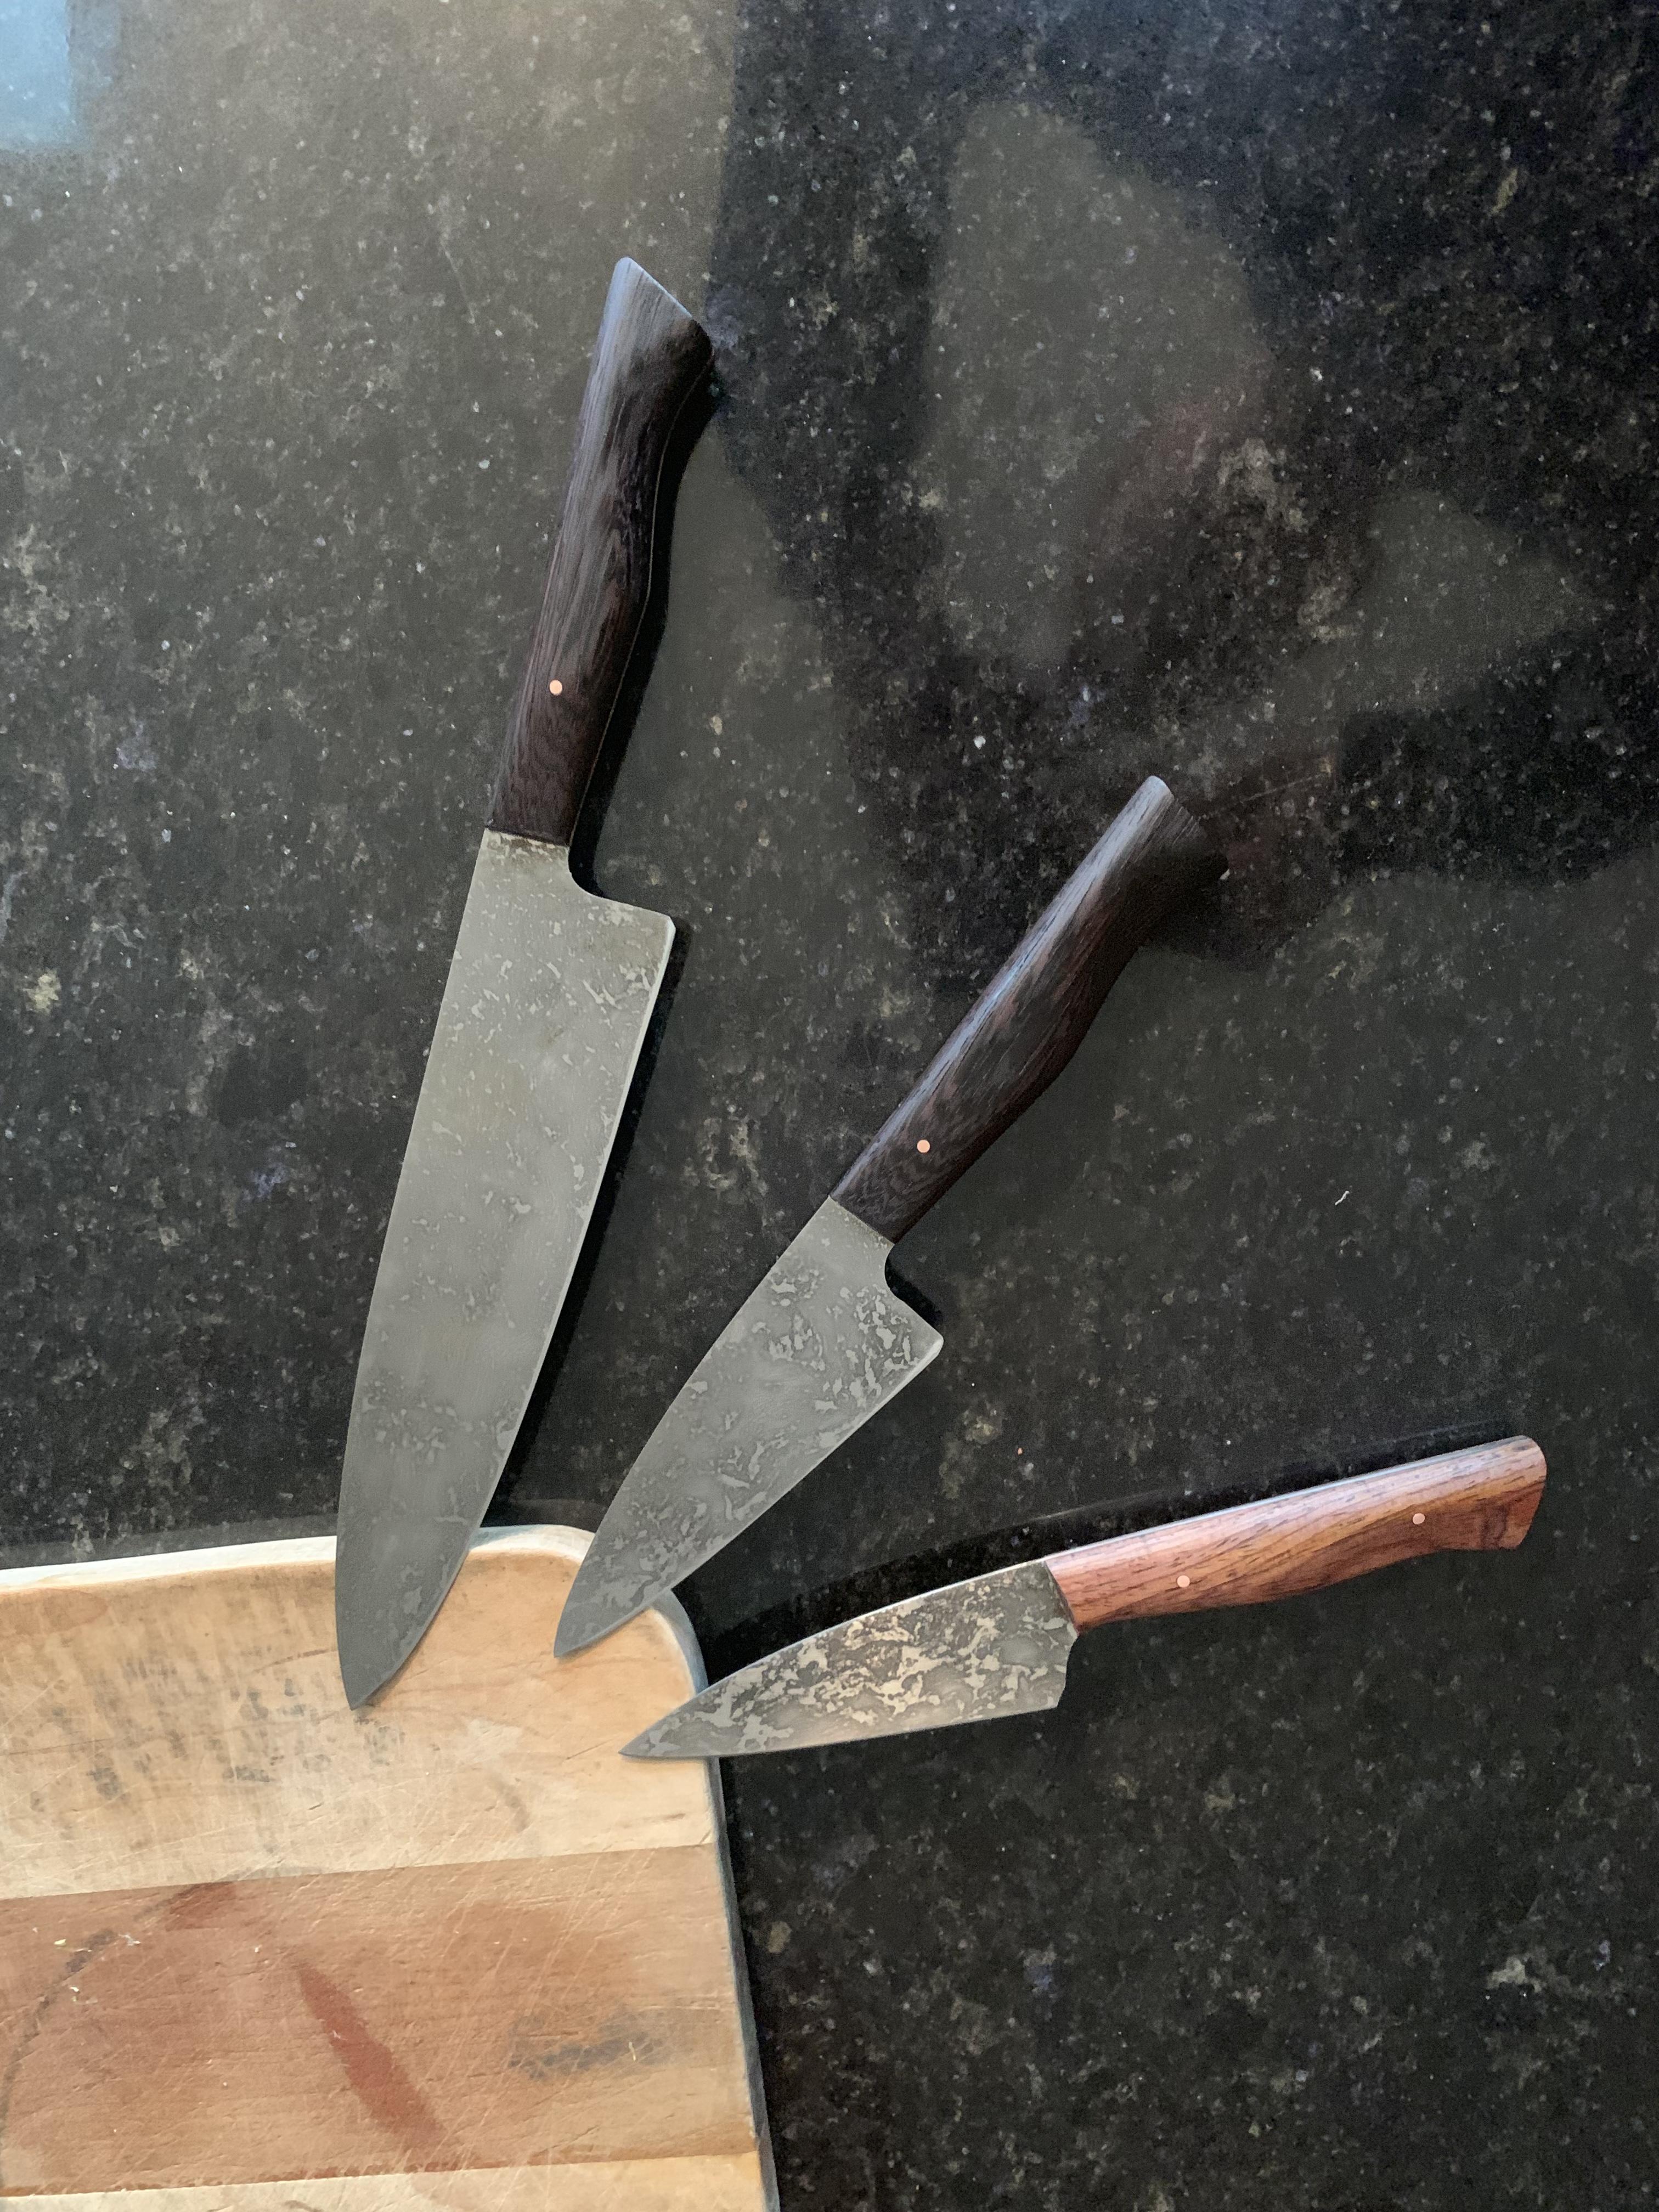
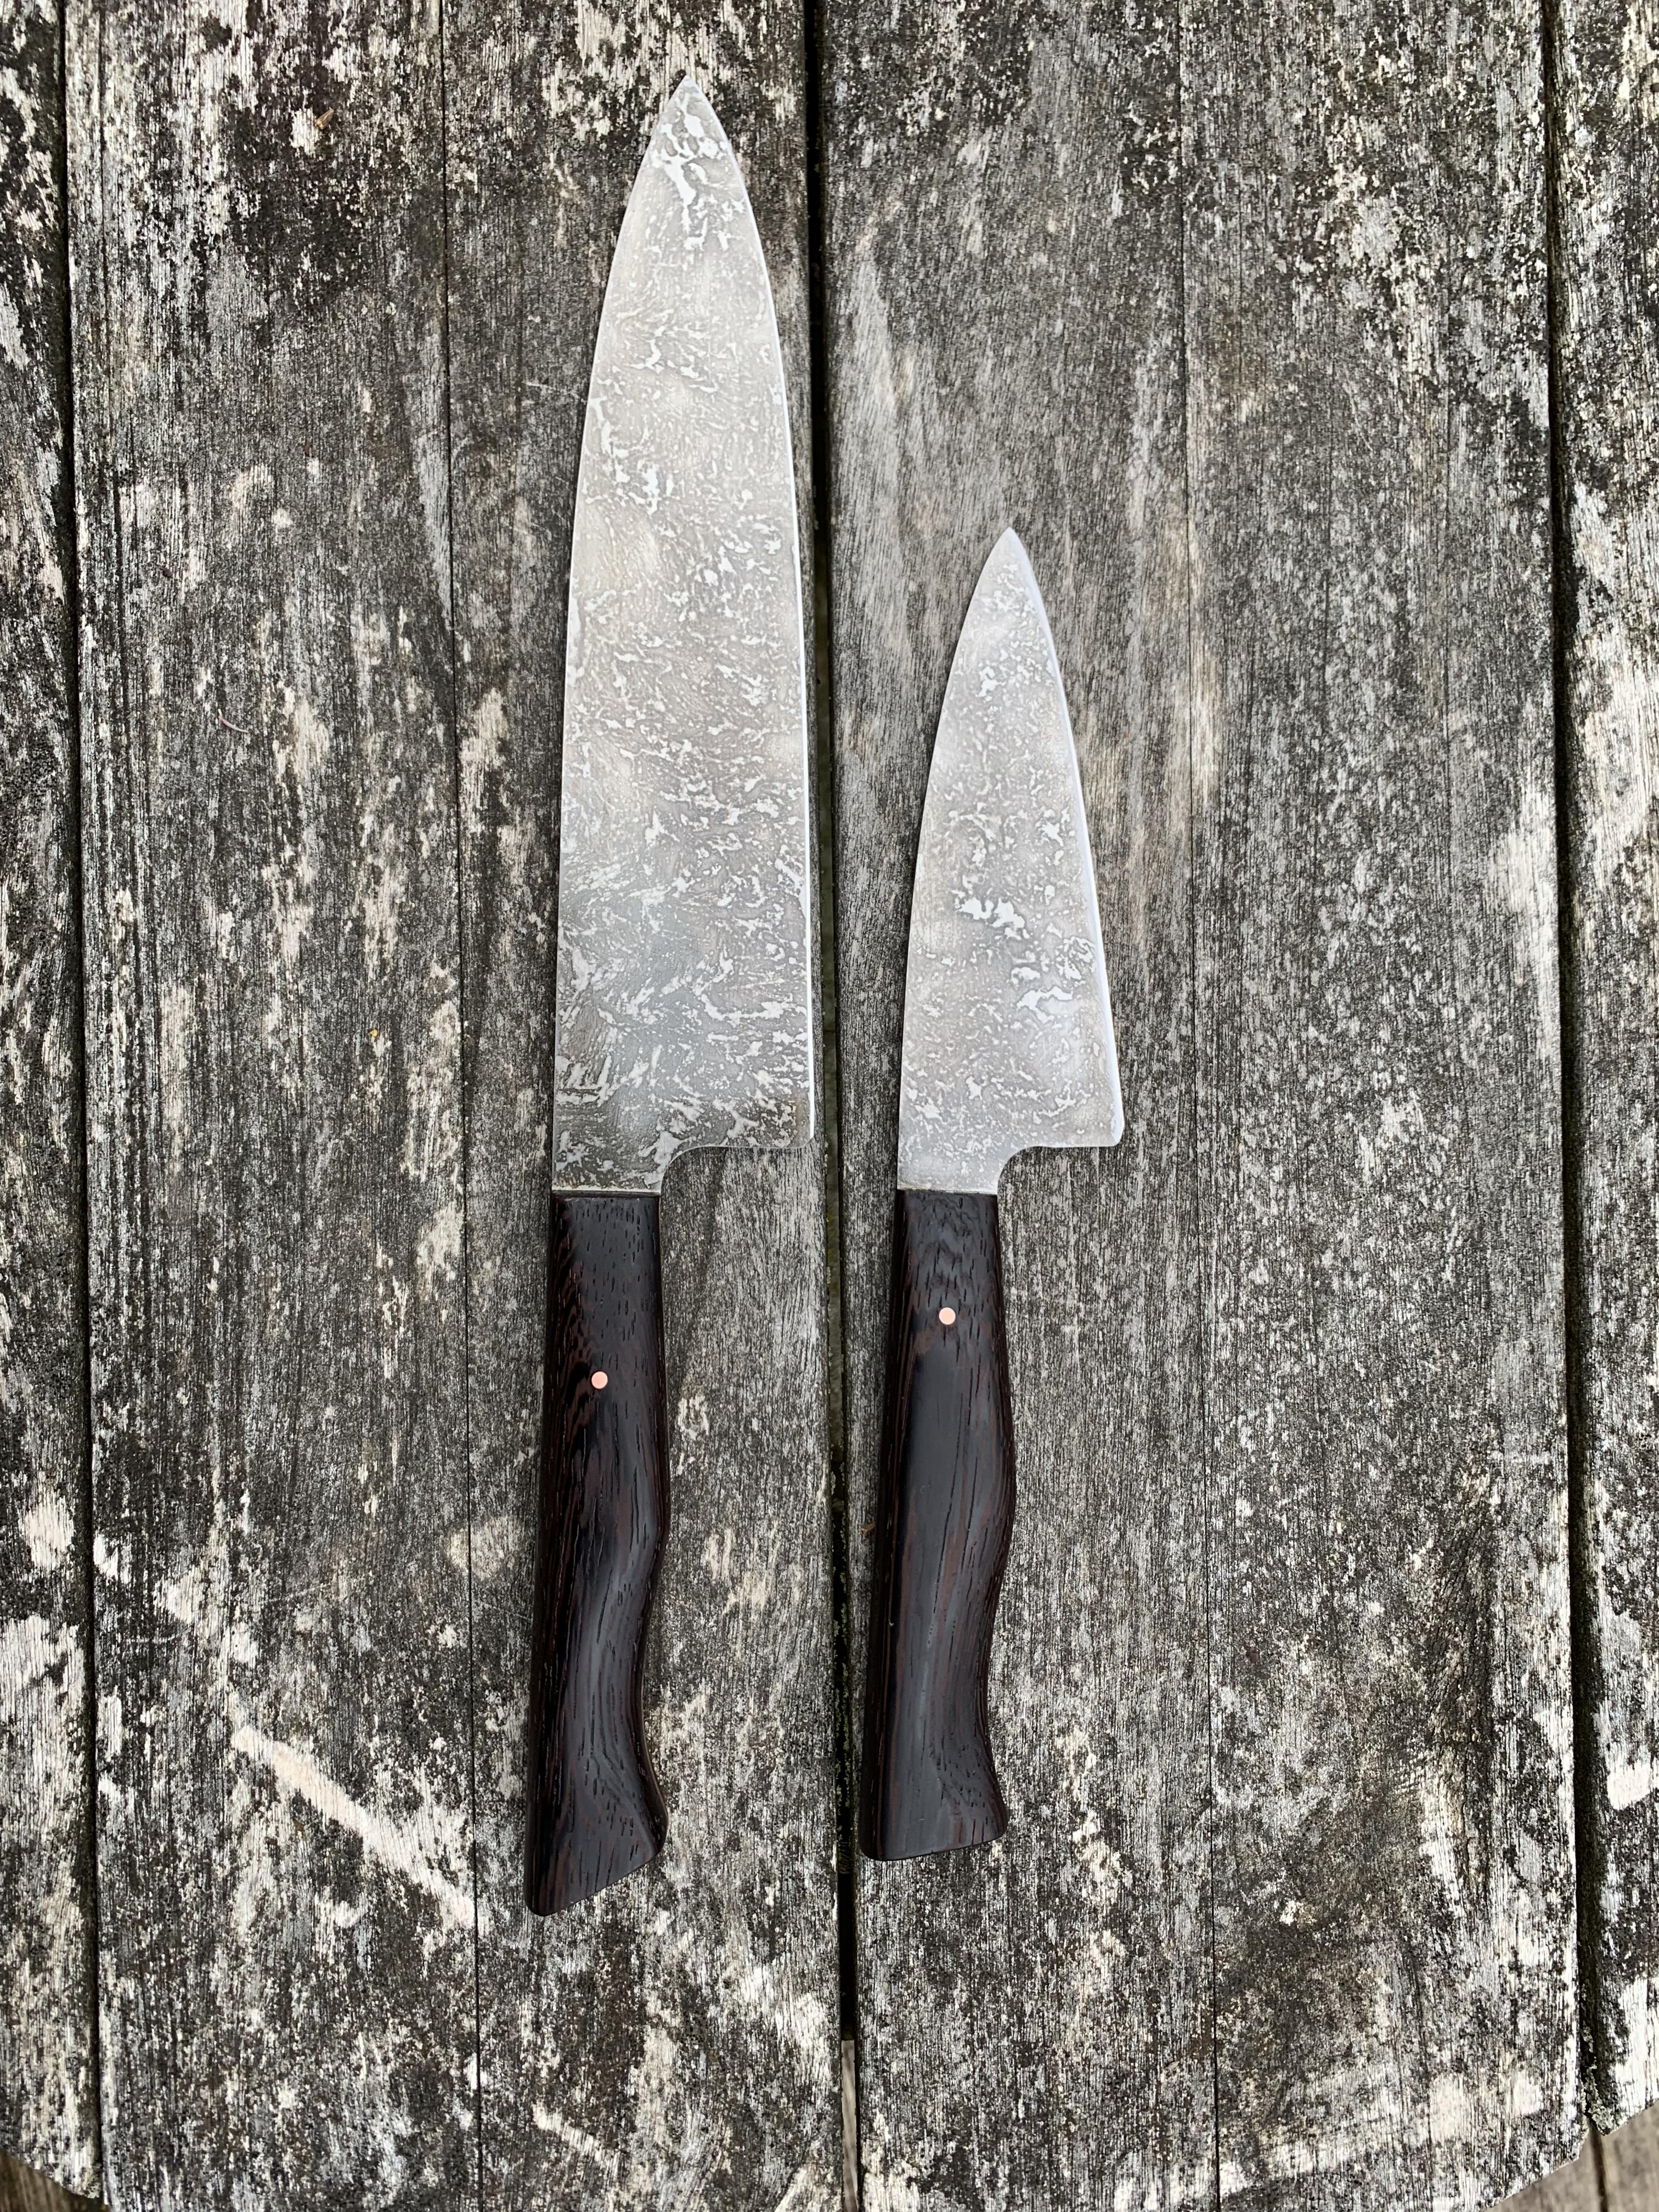
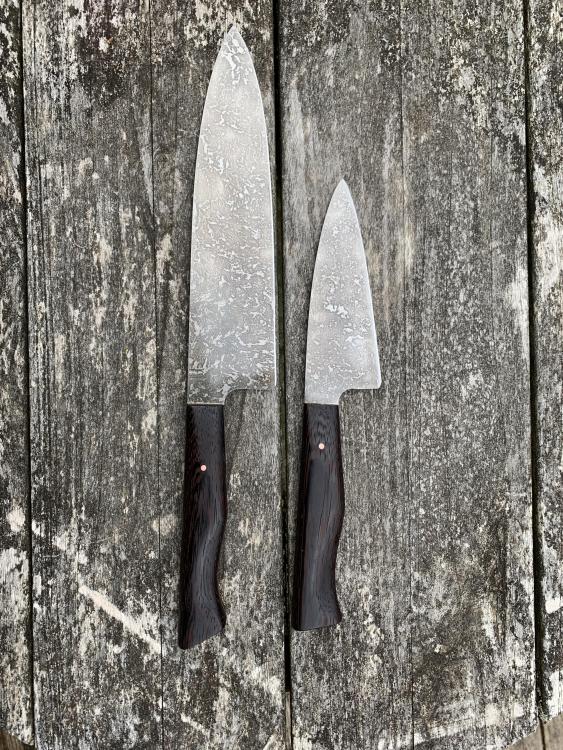
Finished these up, a 8” chef and a 4” utililty for my self and a paring knife for my dad. The steel is 80crv2 and the woods are wenge and cocobolo. I added a mustard patina for looks and some protection.

-
Thank you Frosty! Cutting boards are really fun to make and when that first coat of oil is poured on, it’s just wow.
-
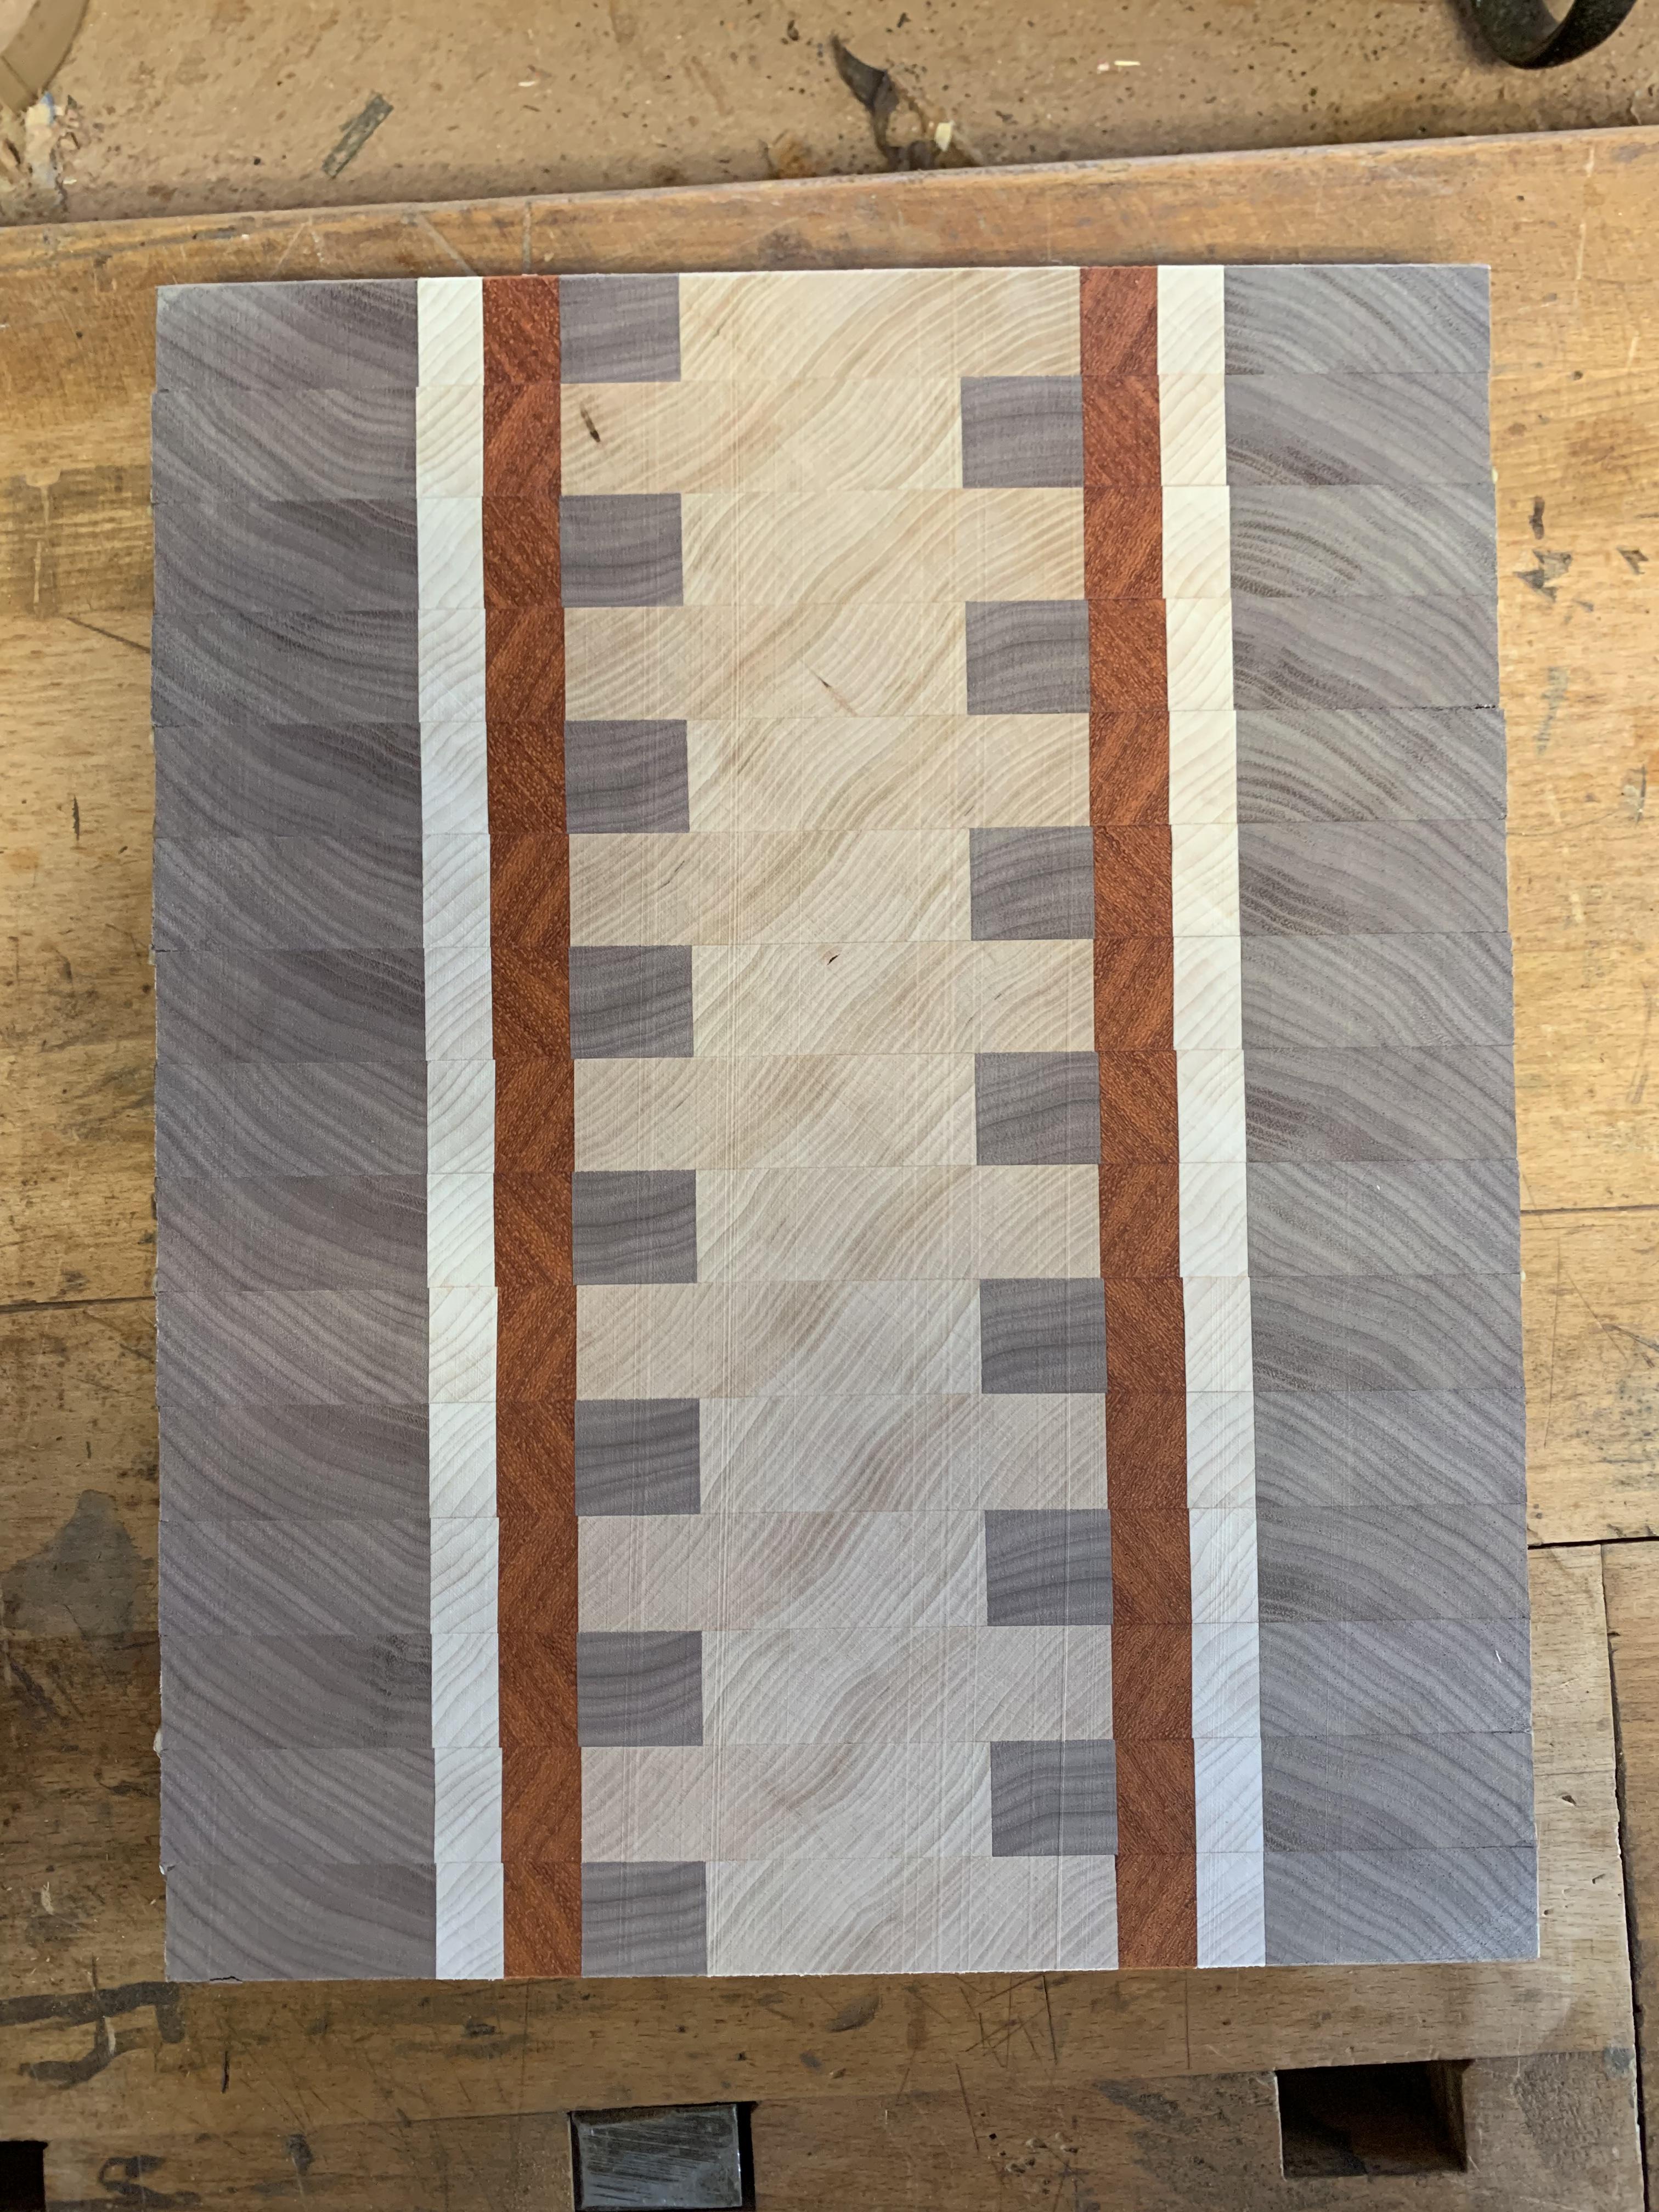
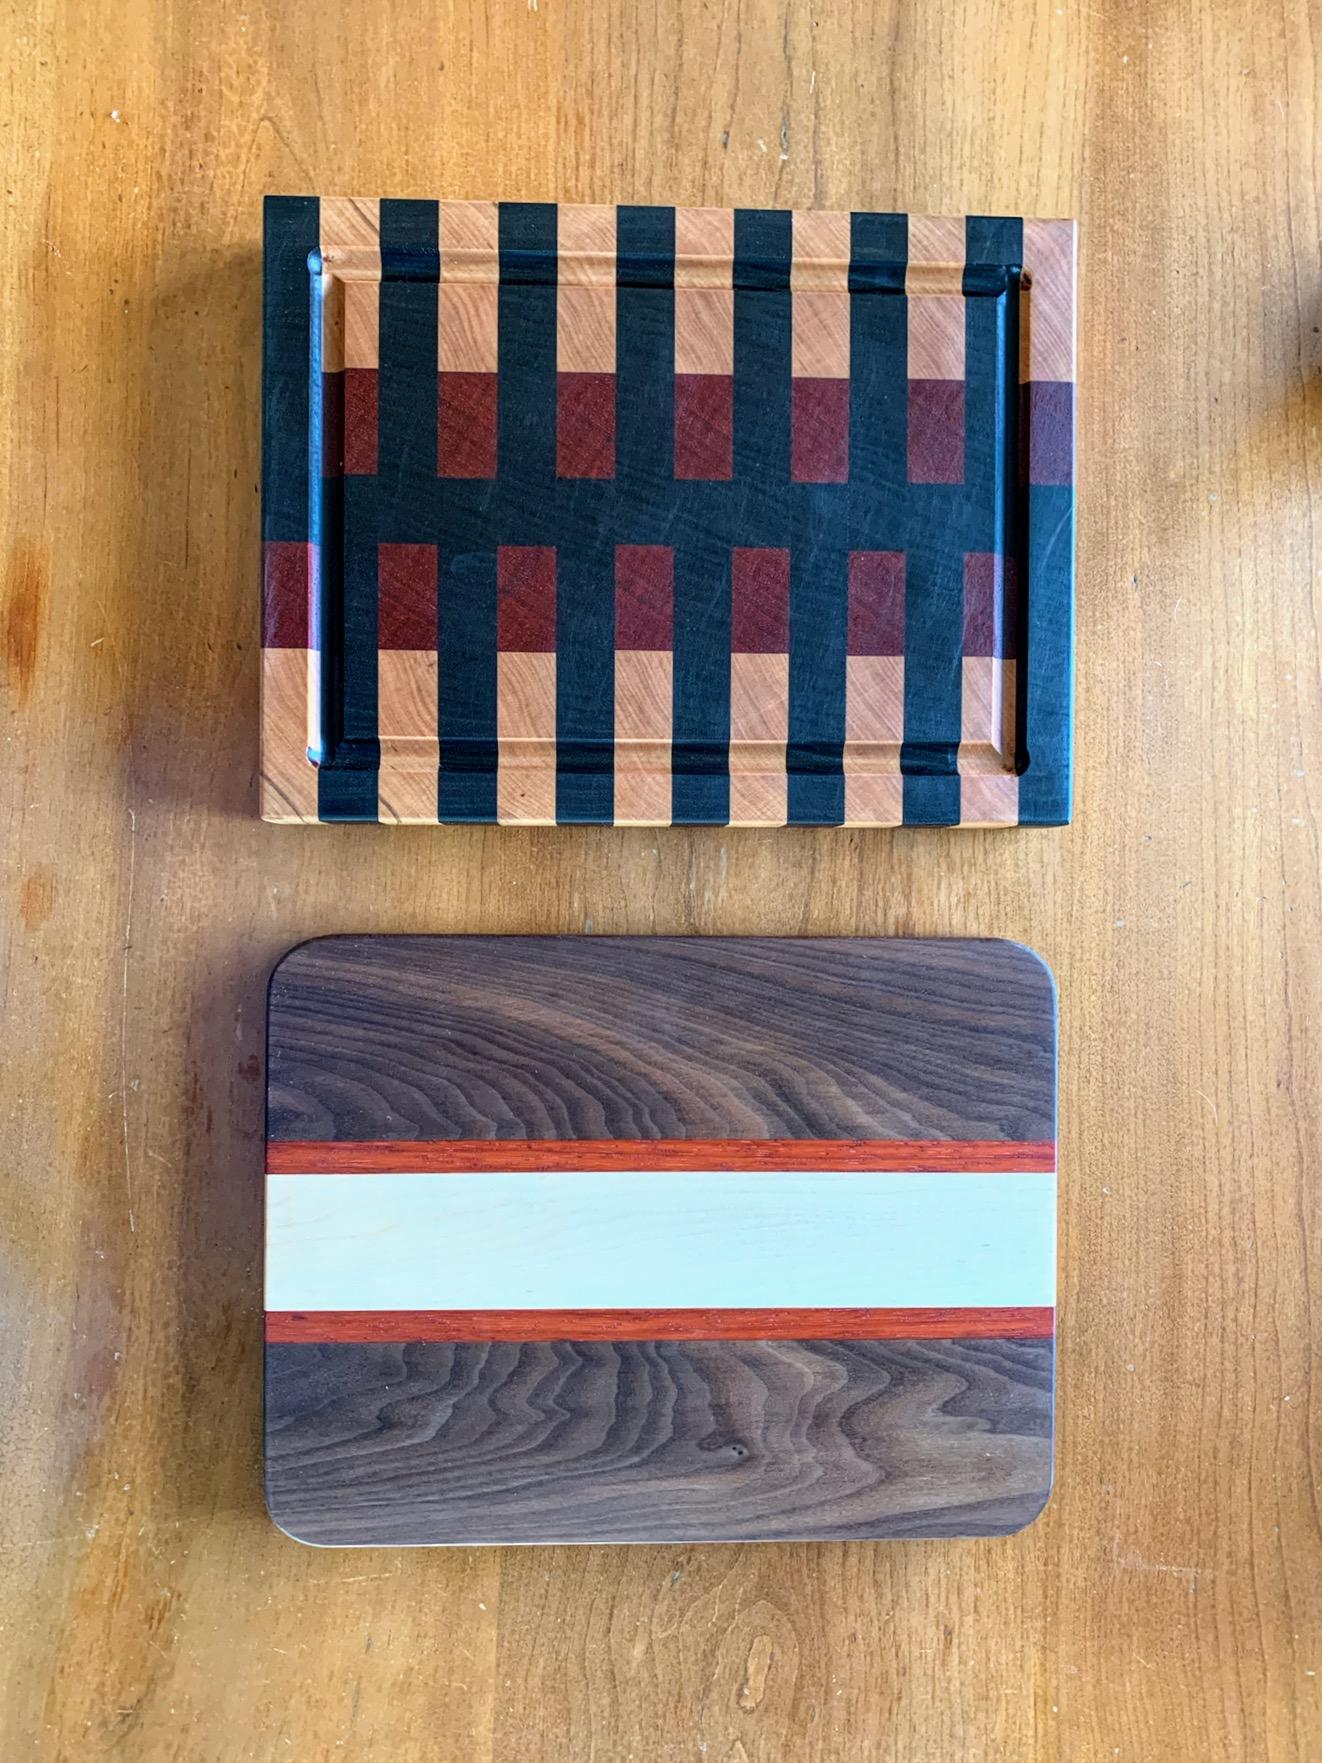
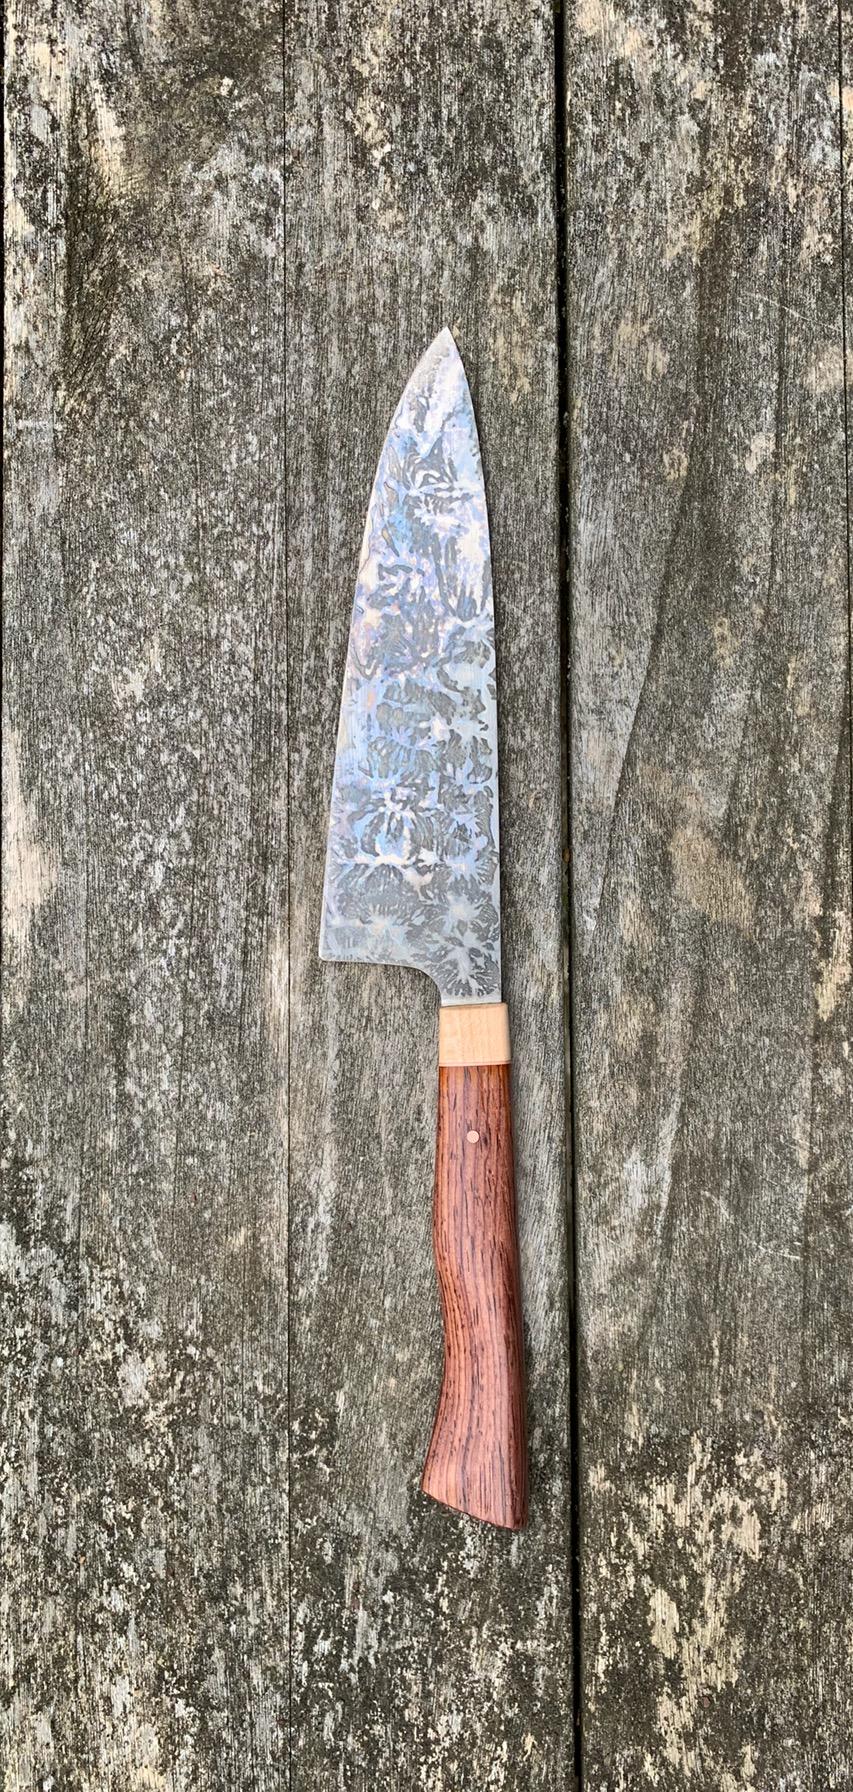
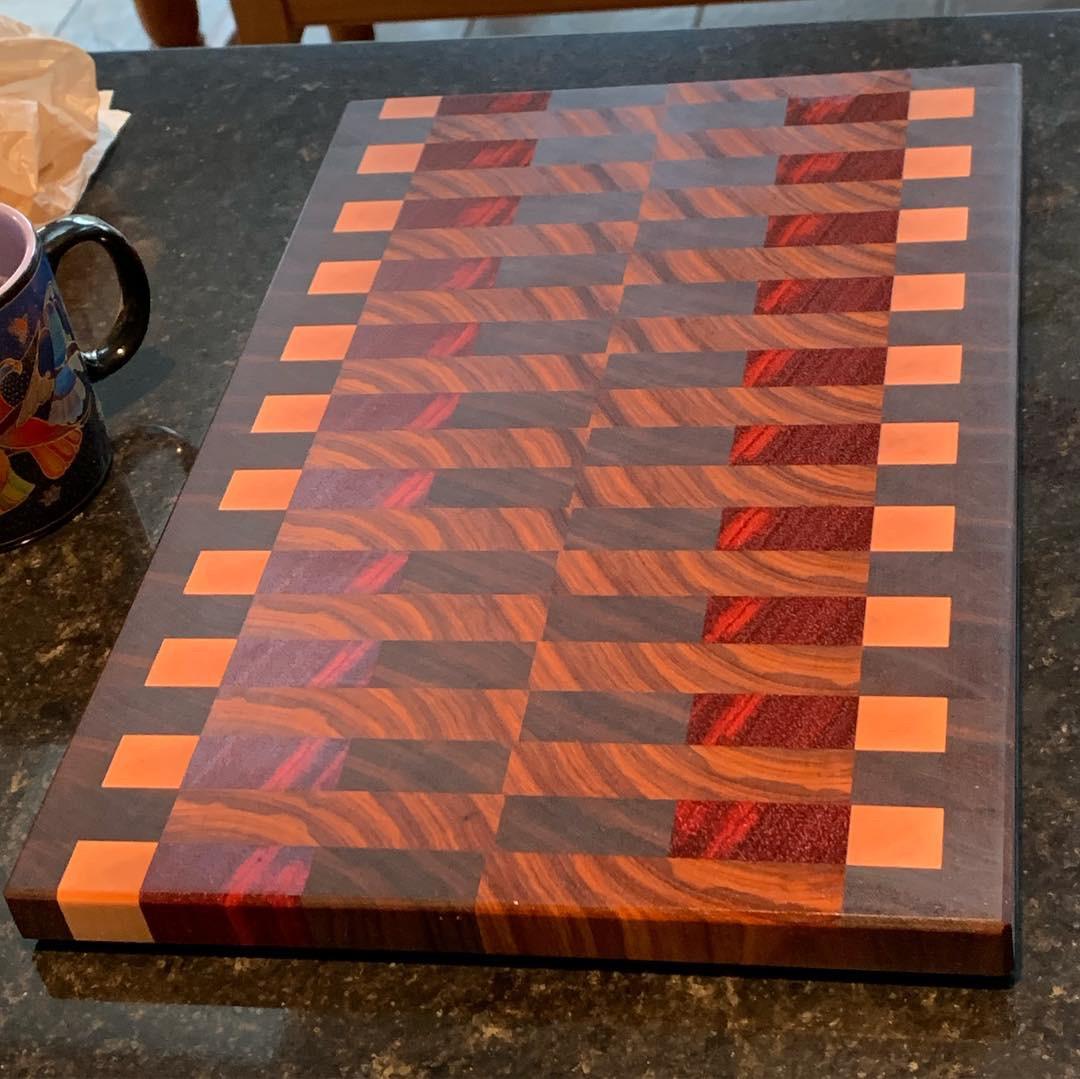
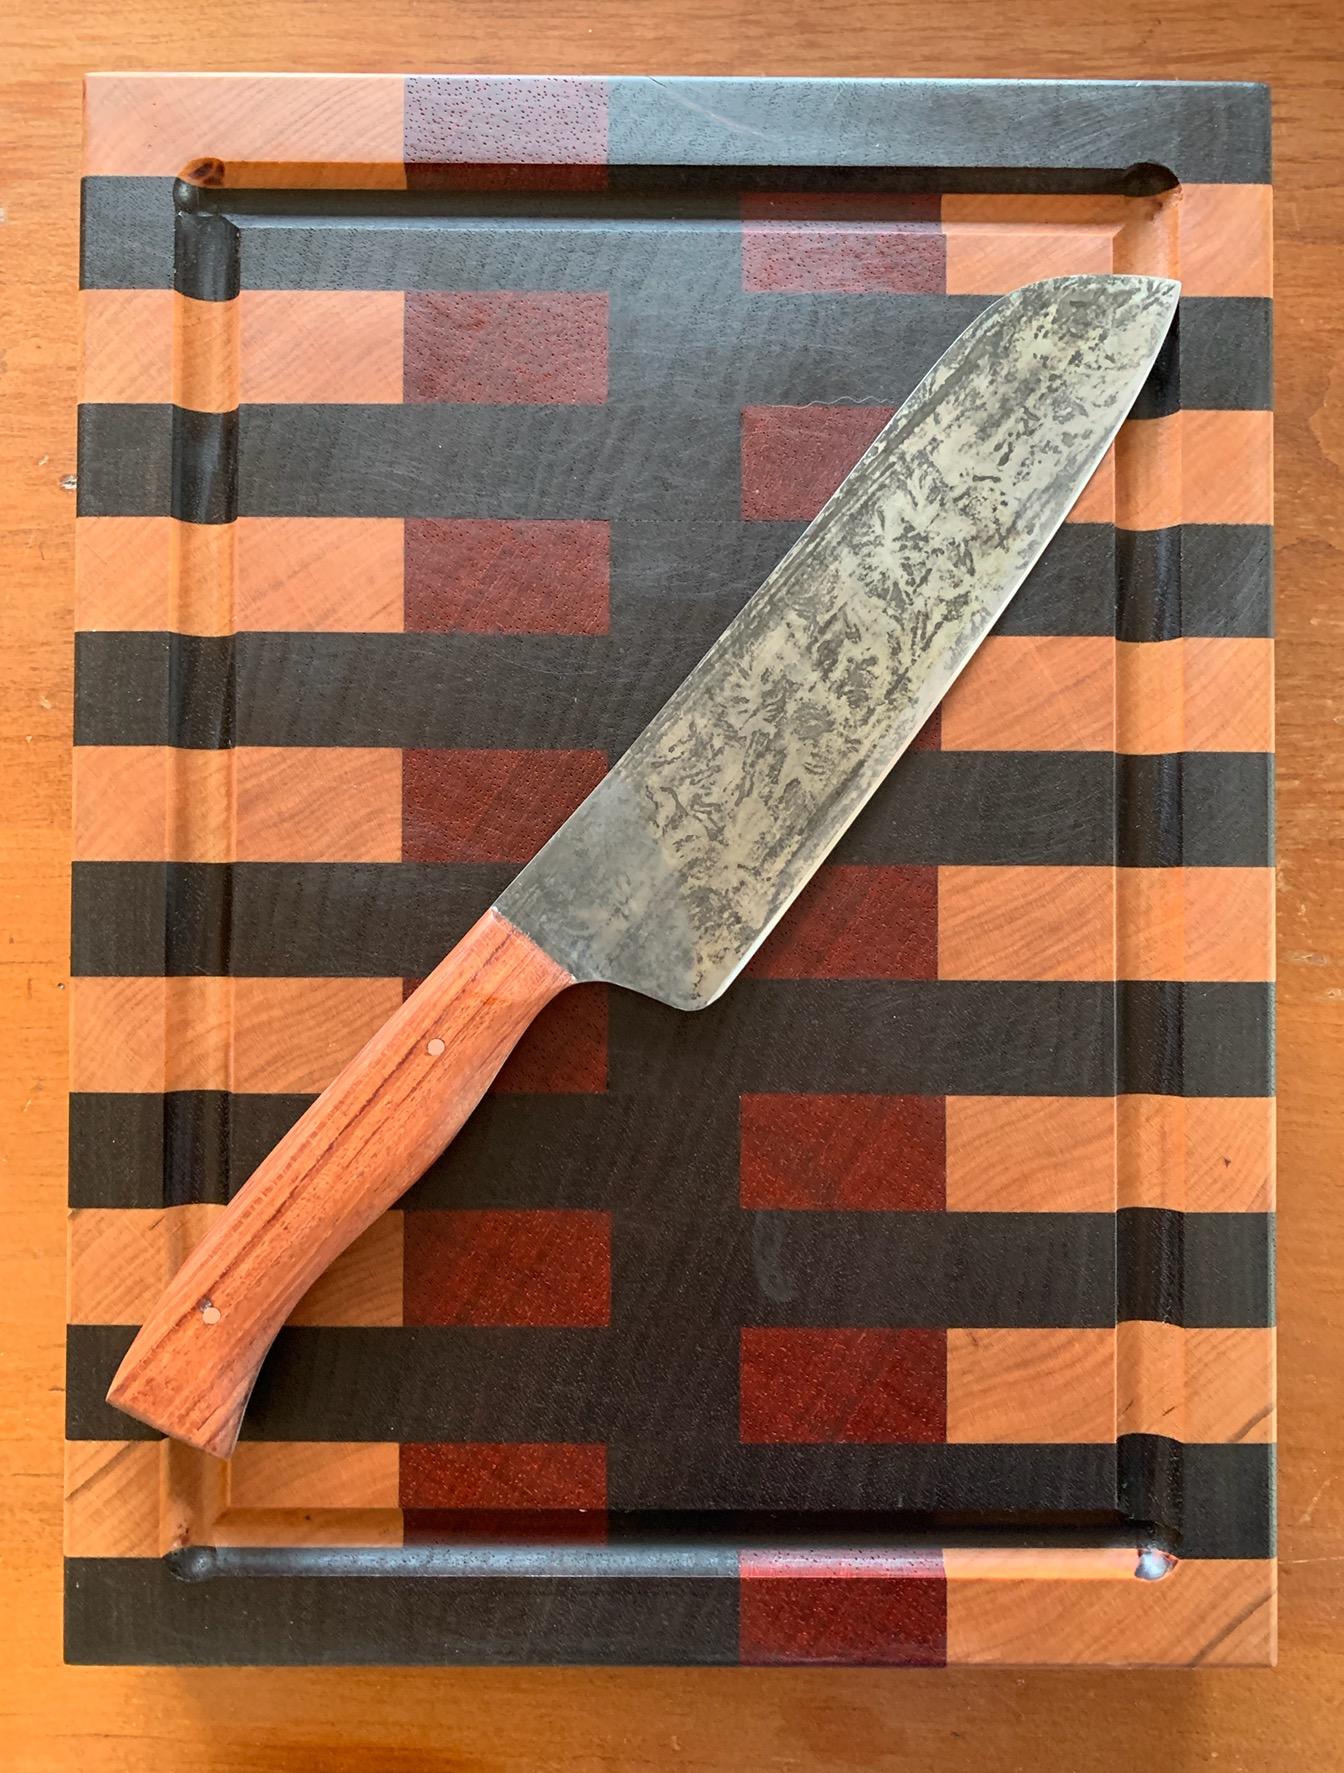
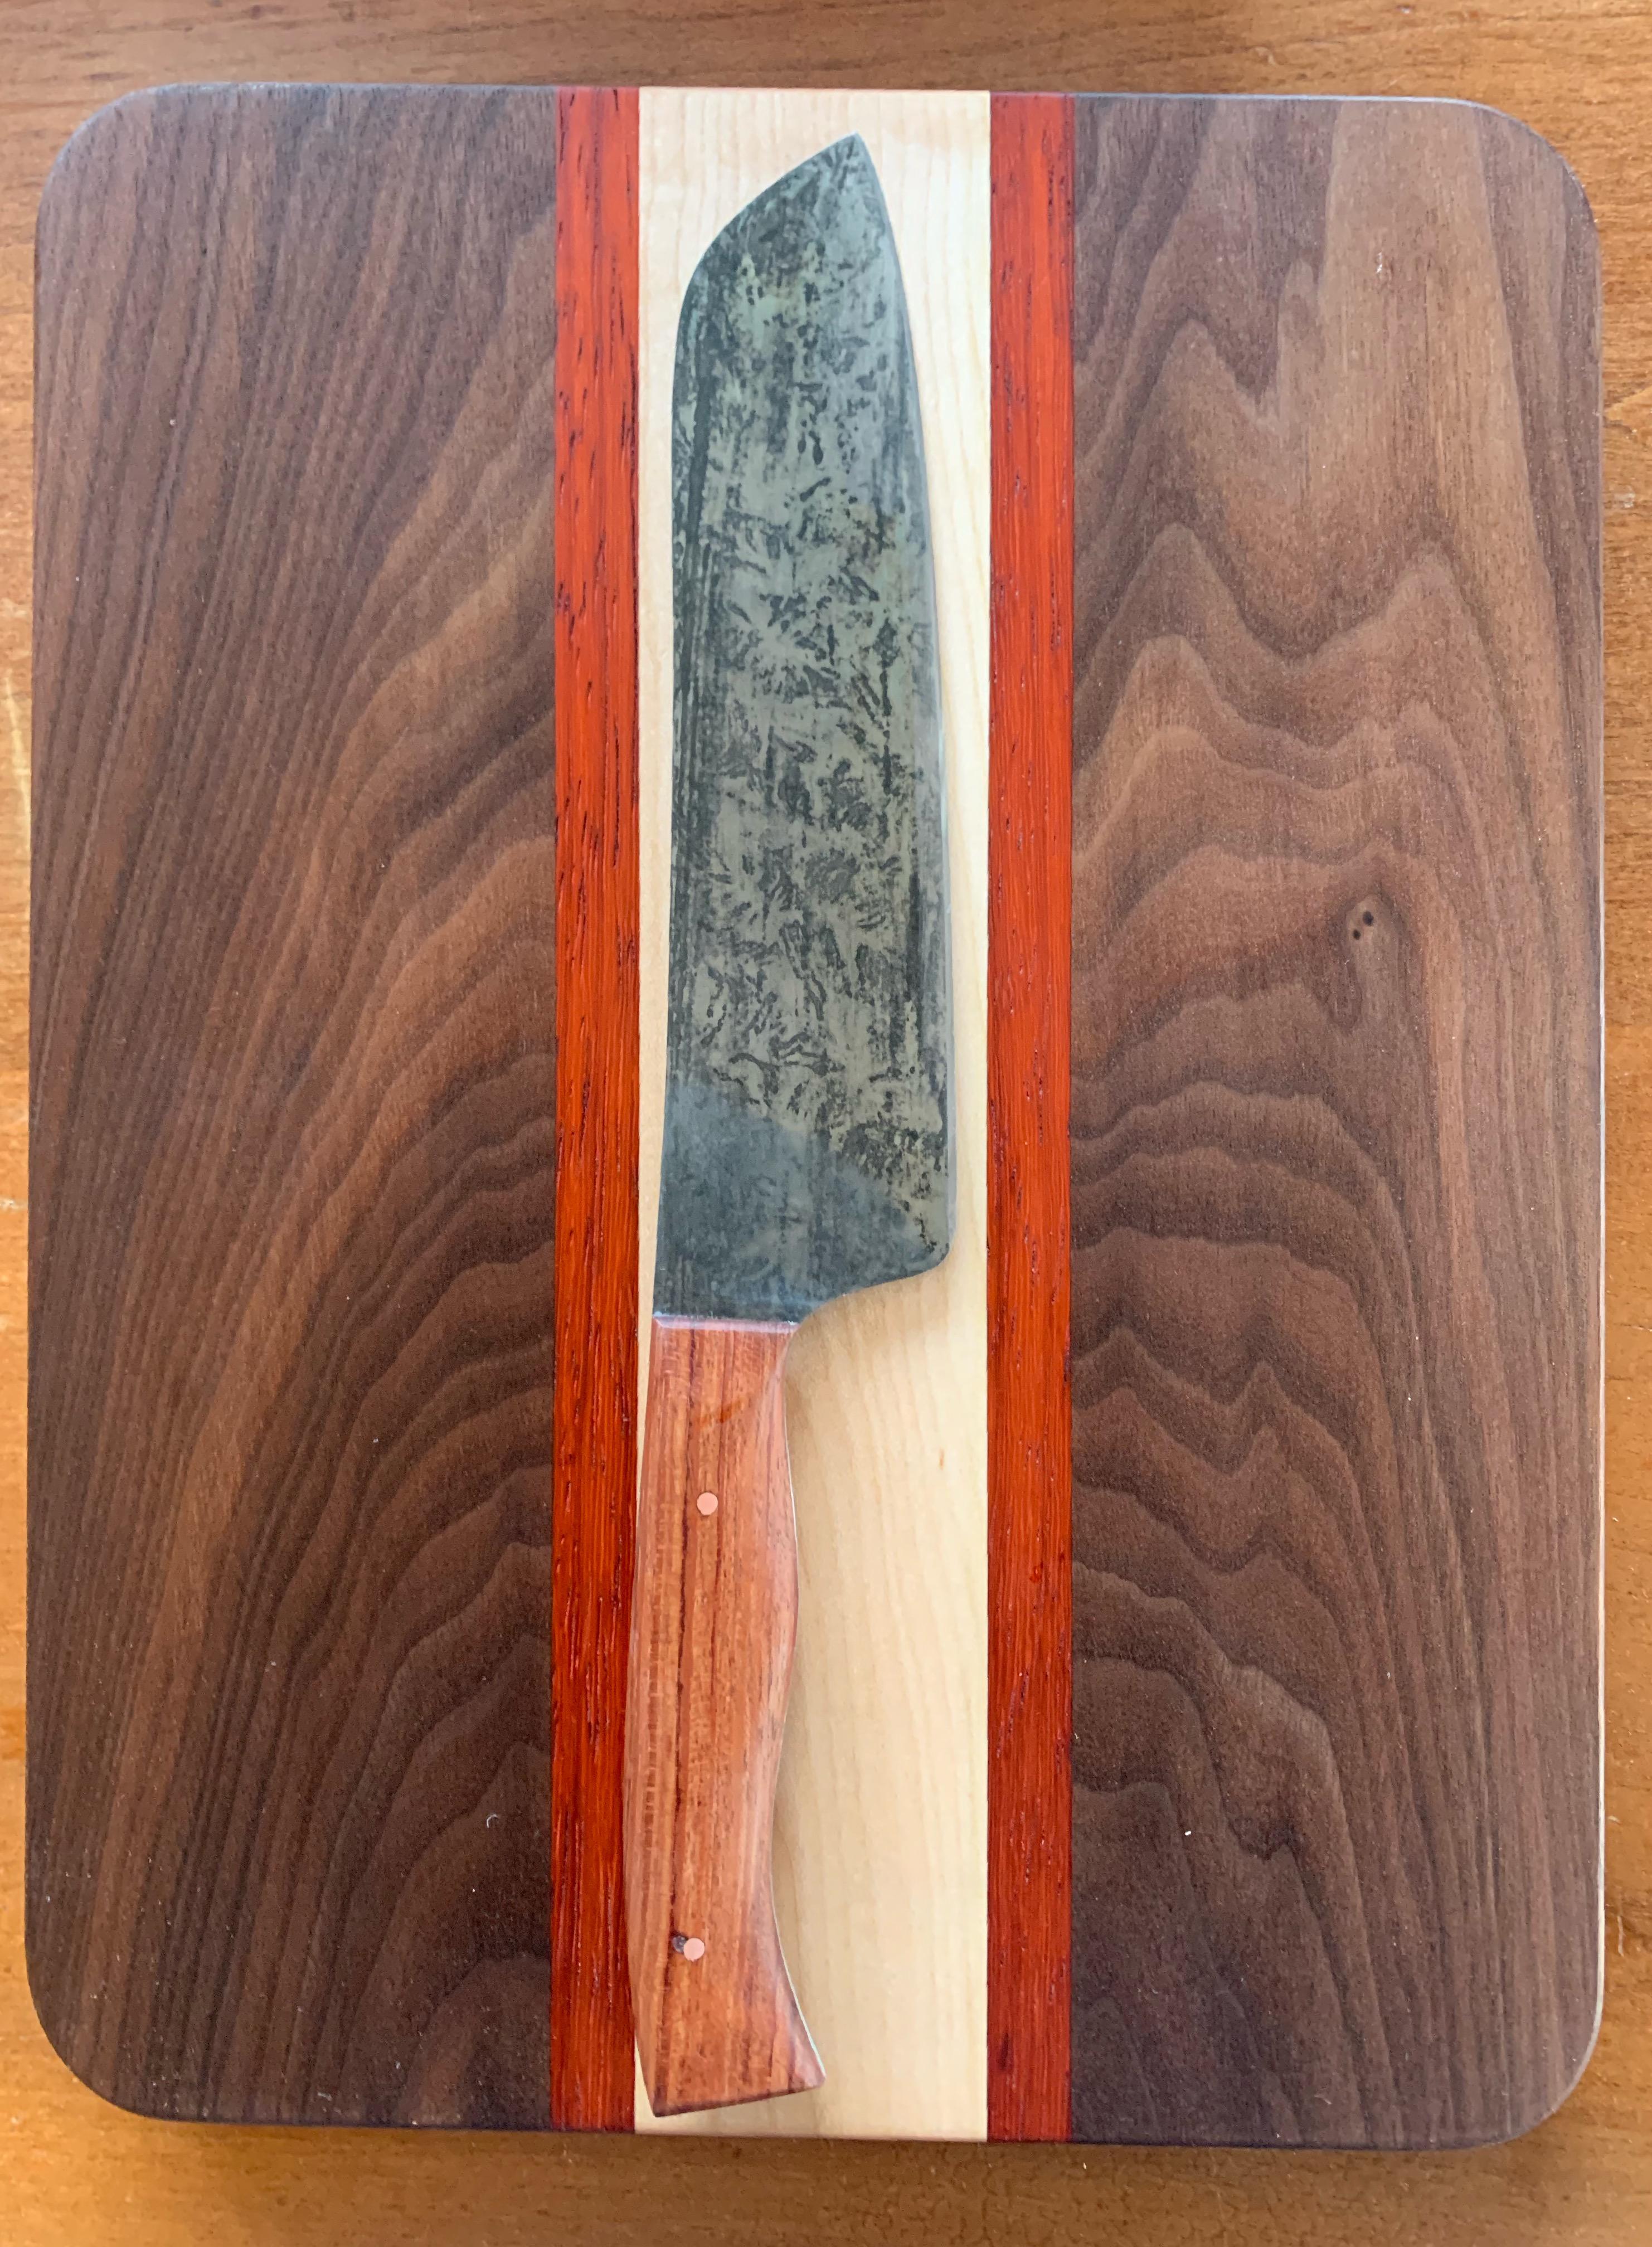
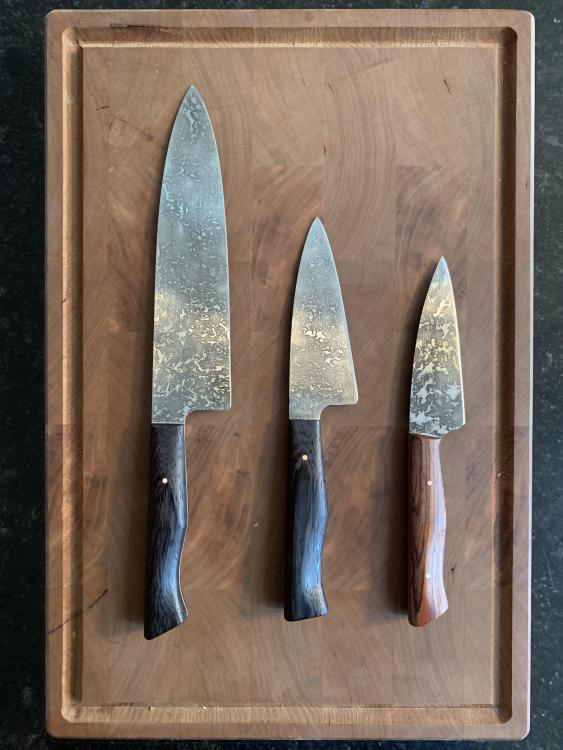
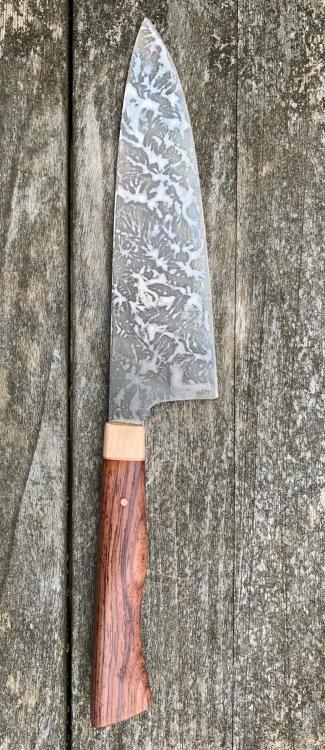
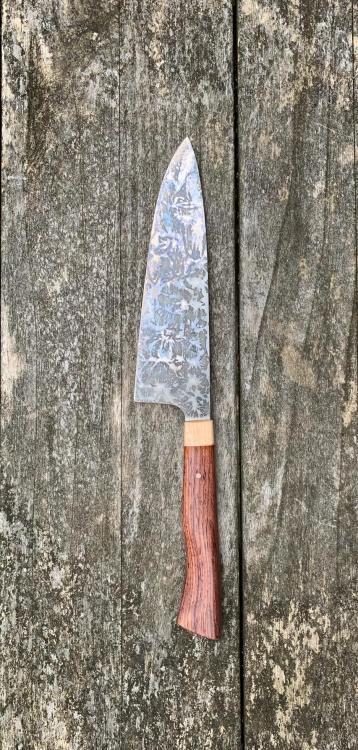
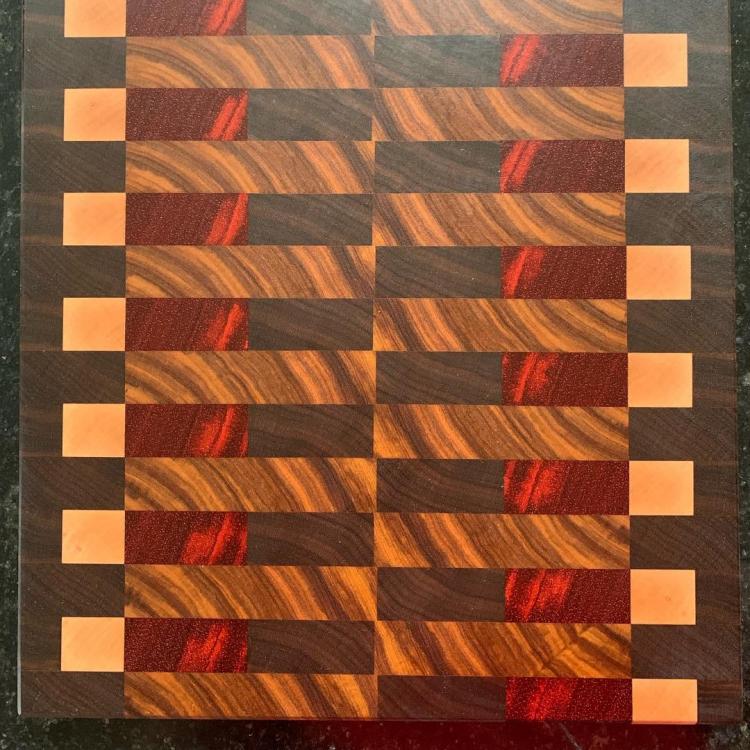
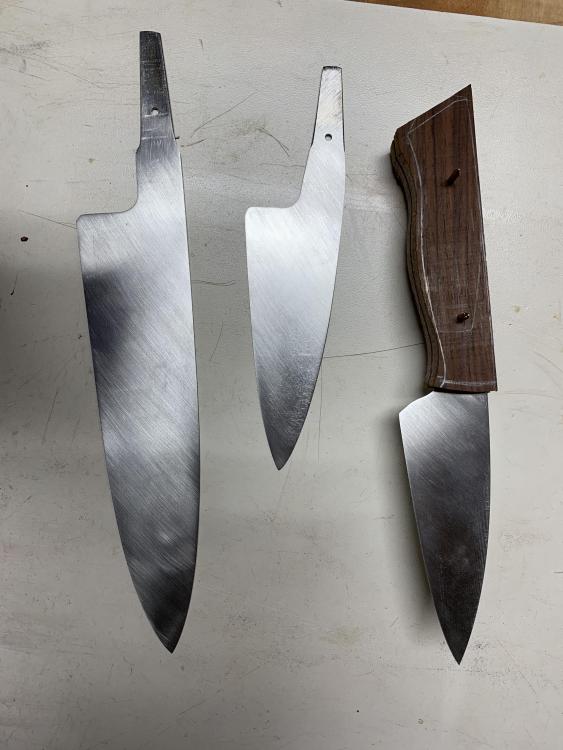
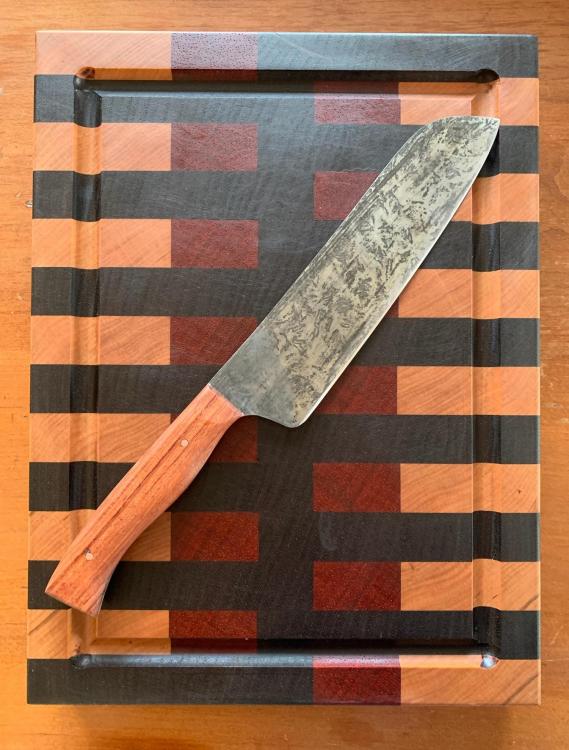
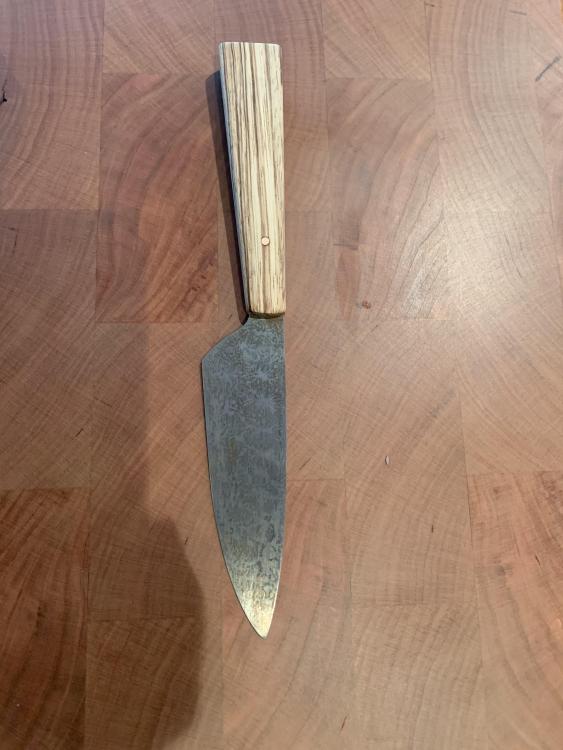
I got a few items made in the past few months. All of them gifts for family. The boards the 2nd, 3rd, and 4th ones and I’m very happy how they turned out. For my mom, I made her two cutting boards and a santoku influenced kitchen knife. The end grain board is made out of cherry, Padauk, and Peruvian walnut. The other one is black walnut, Padauk and maple. They both are finished with food grade mineral oil and Howard’s Butcher Block Conditioner. The knife is 6.5” with Bubinga scales and is made out of 80crv2 with a mustard patina. For my sister, I made a nice big ~12x18x1 endgrain cutting board out of walnut, maple, Padauk, and Canary wood. It was finished like the others. The knife is 80crv2 with maple, copper and cocobolo with a mustard patina applied. It has a 6” blade and 10.5” overall. It’s light but she says she really likes it that way and the balance is perfect at the heel so I’m cool with it. The block/saya is hard curly maple with a walnut spacer. The left and right ones I’m making for myself so I have something to cook with this summer. And the middle is for my dad so he has an actually decent knife .


-
Thanks, I’ll keep that in mind.
-
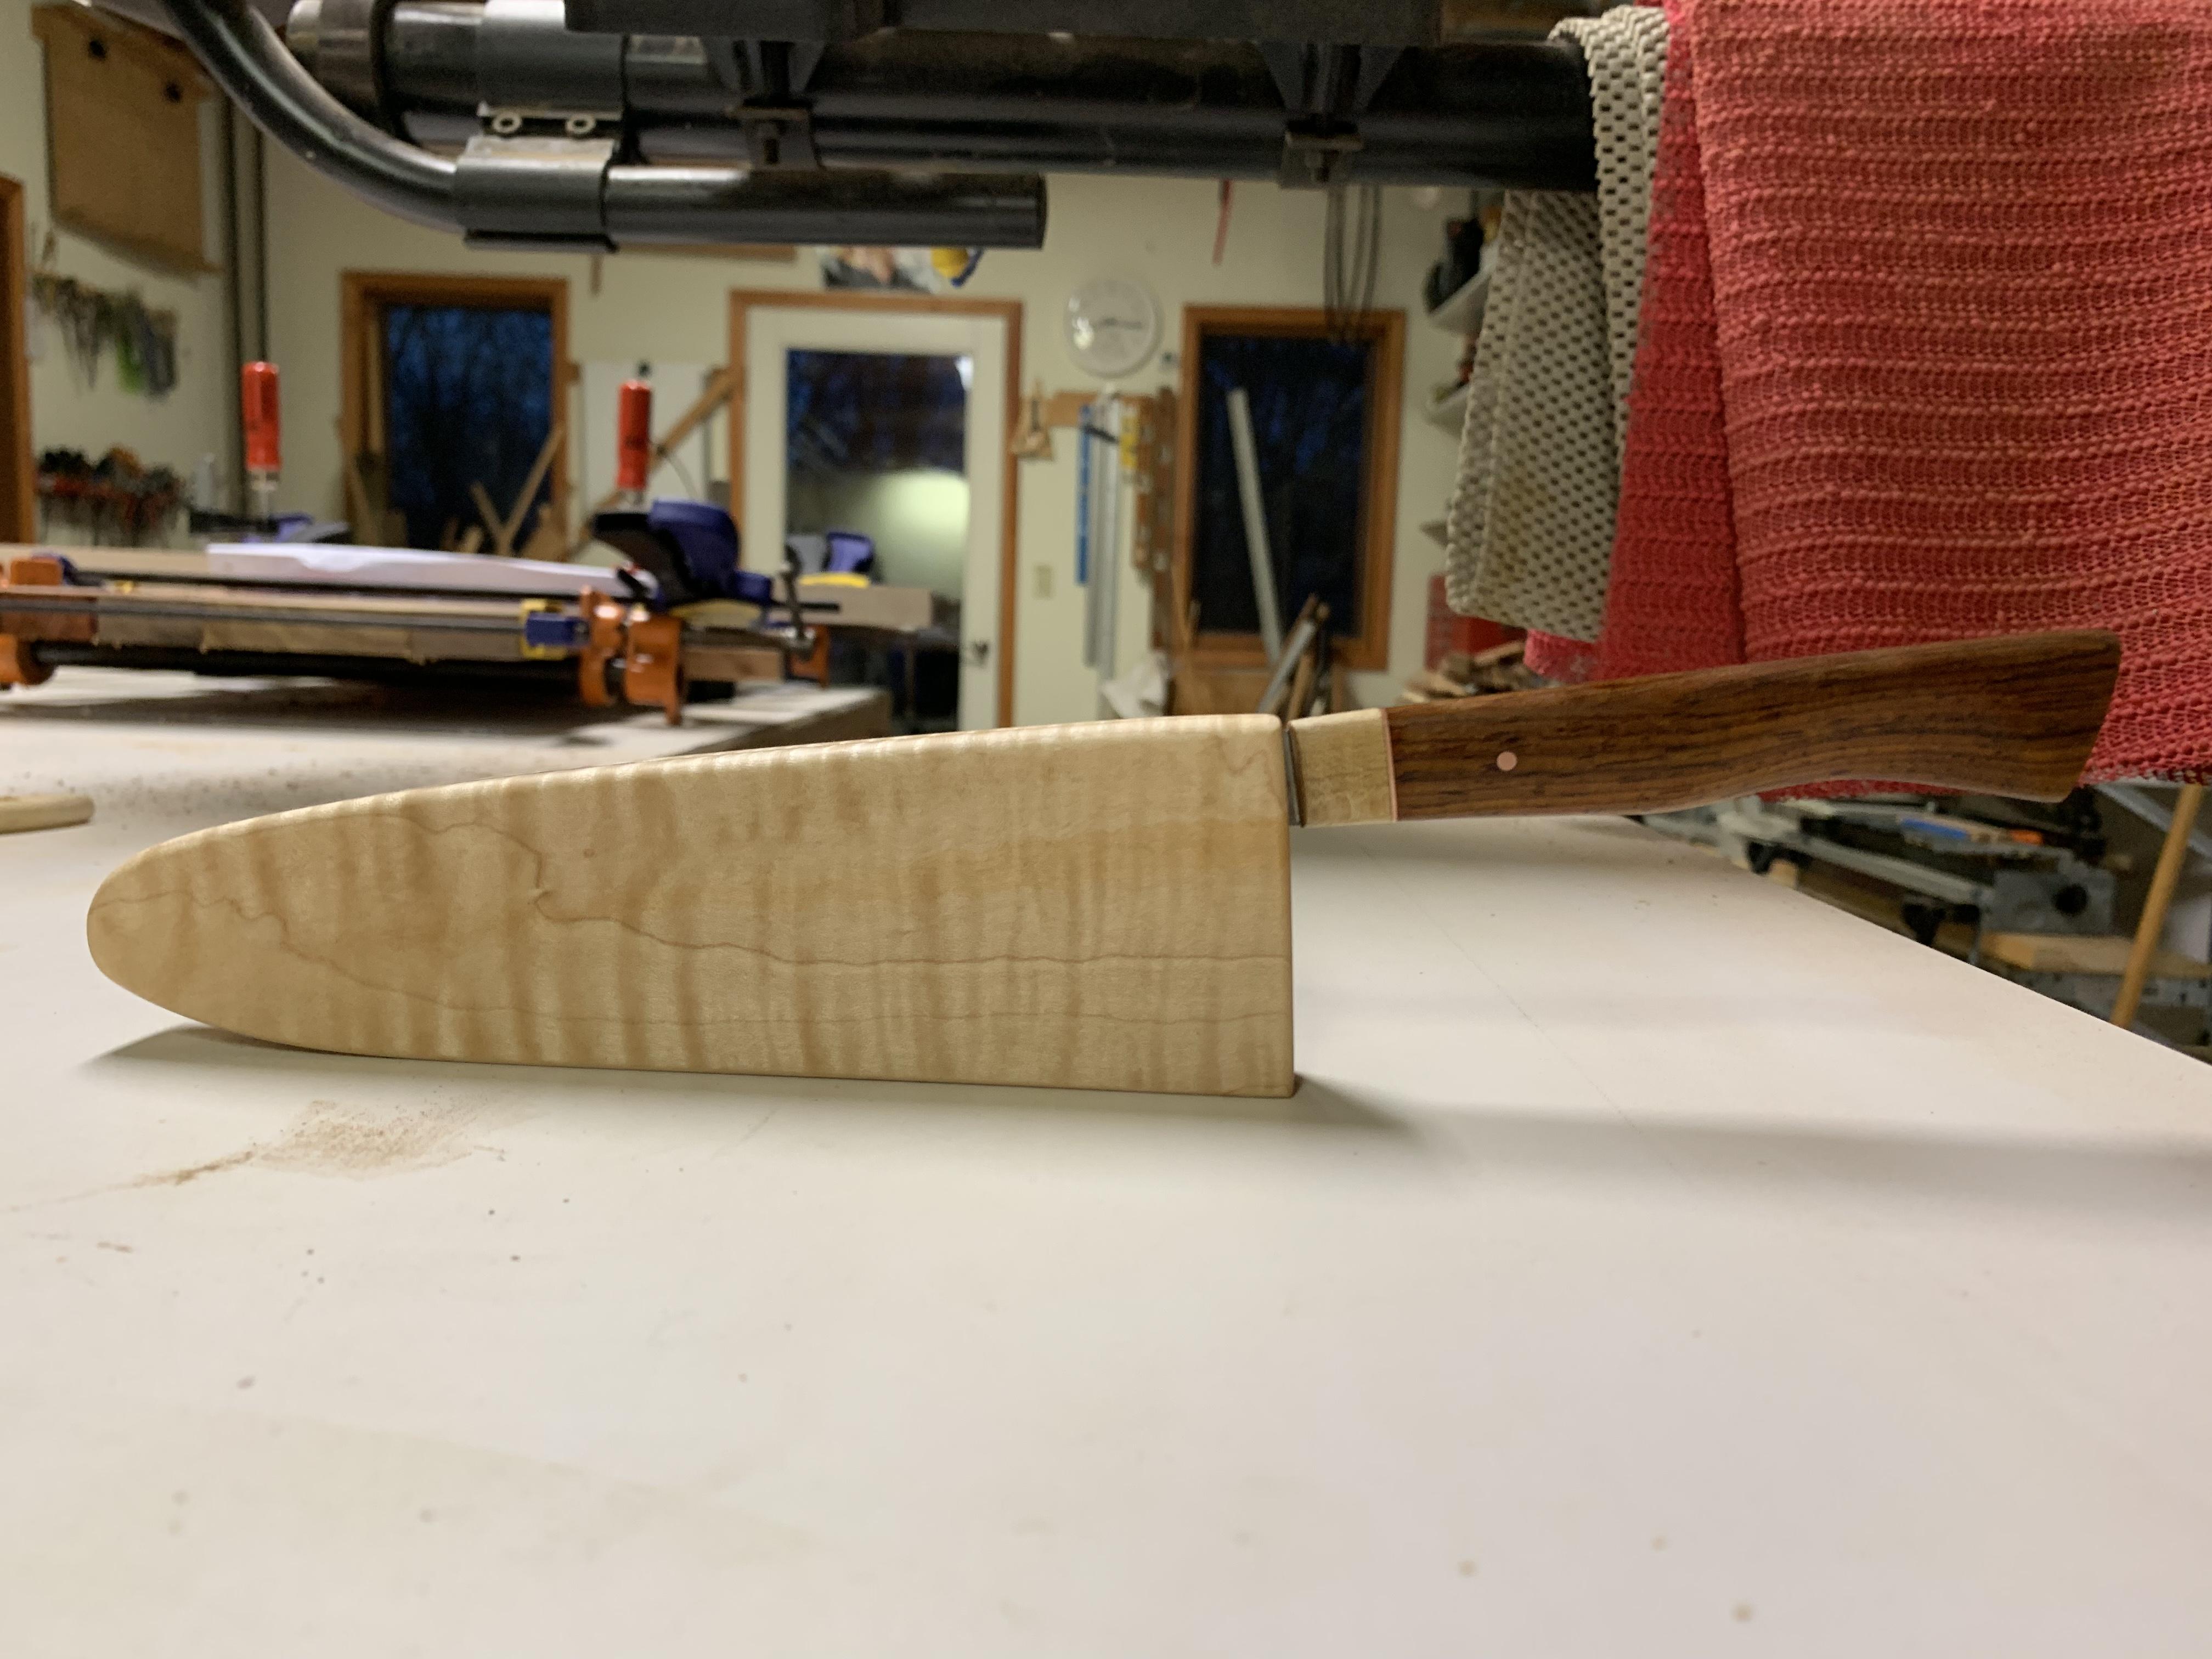
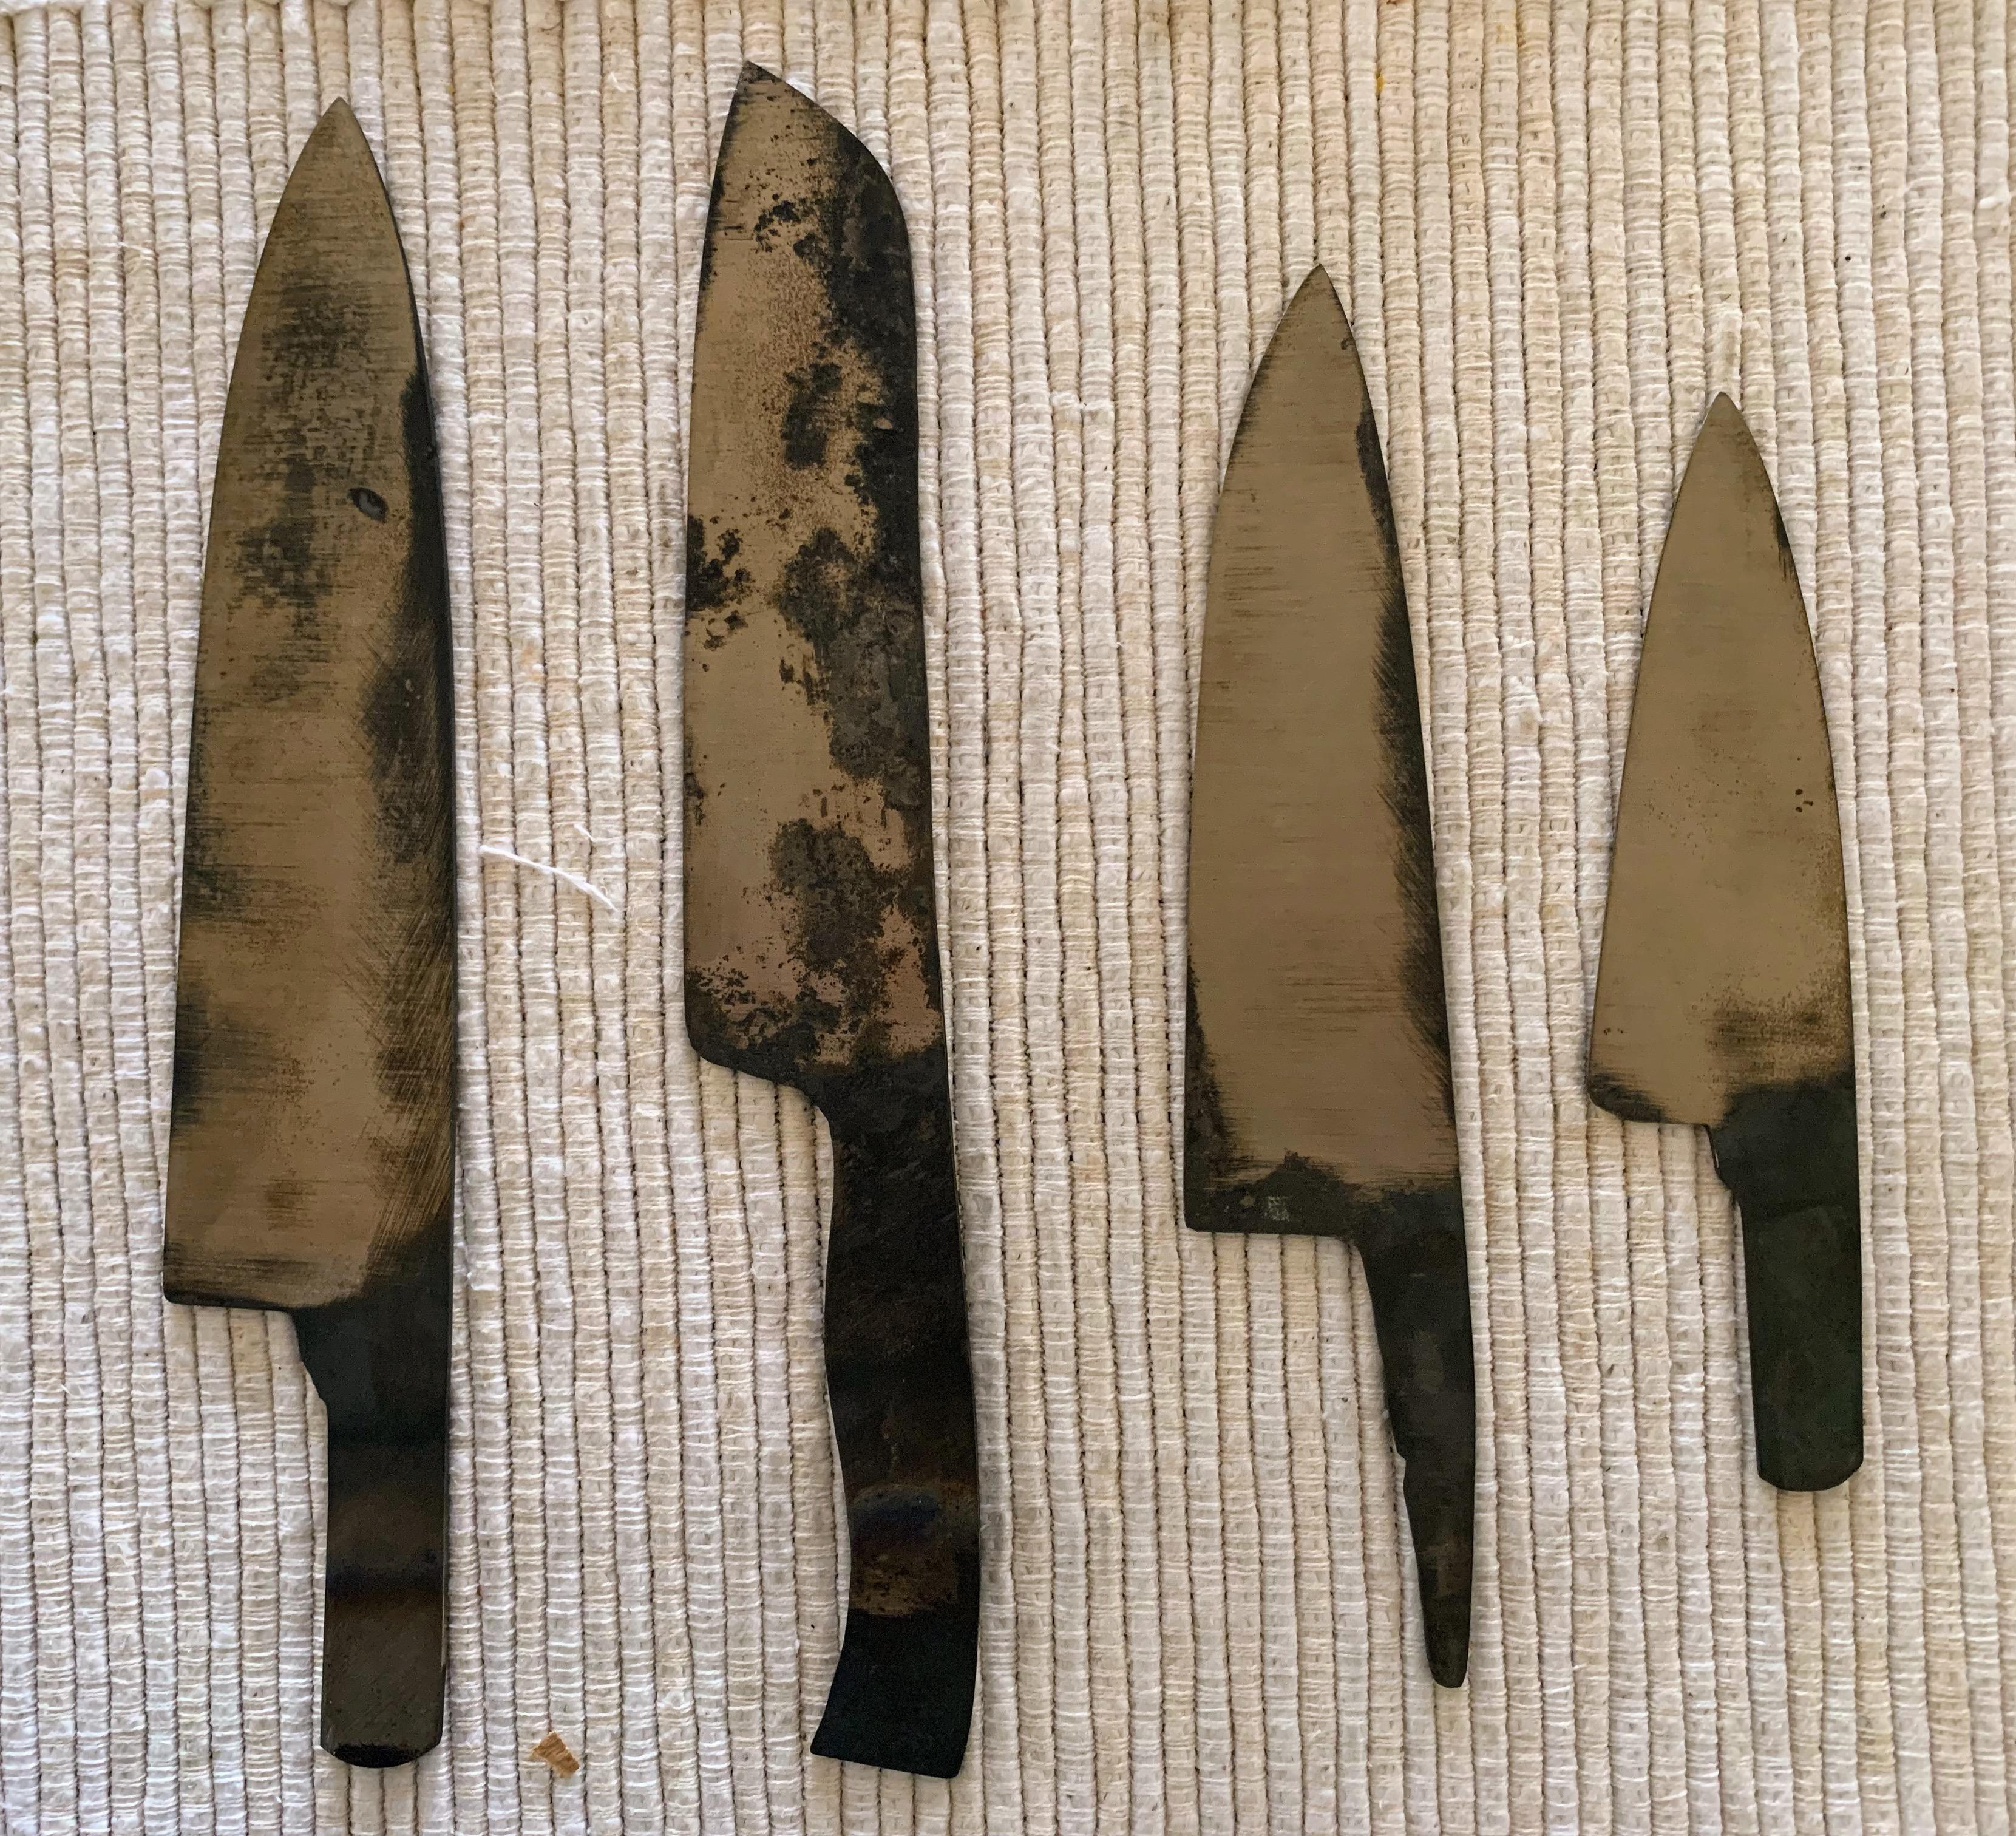
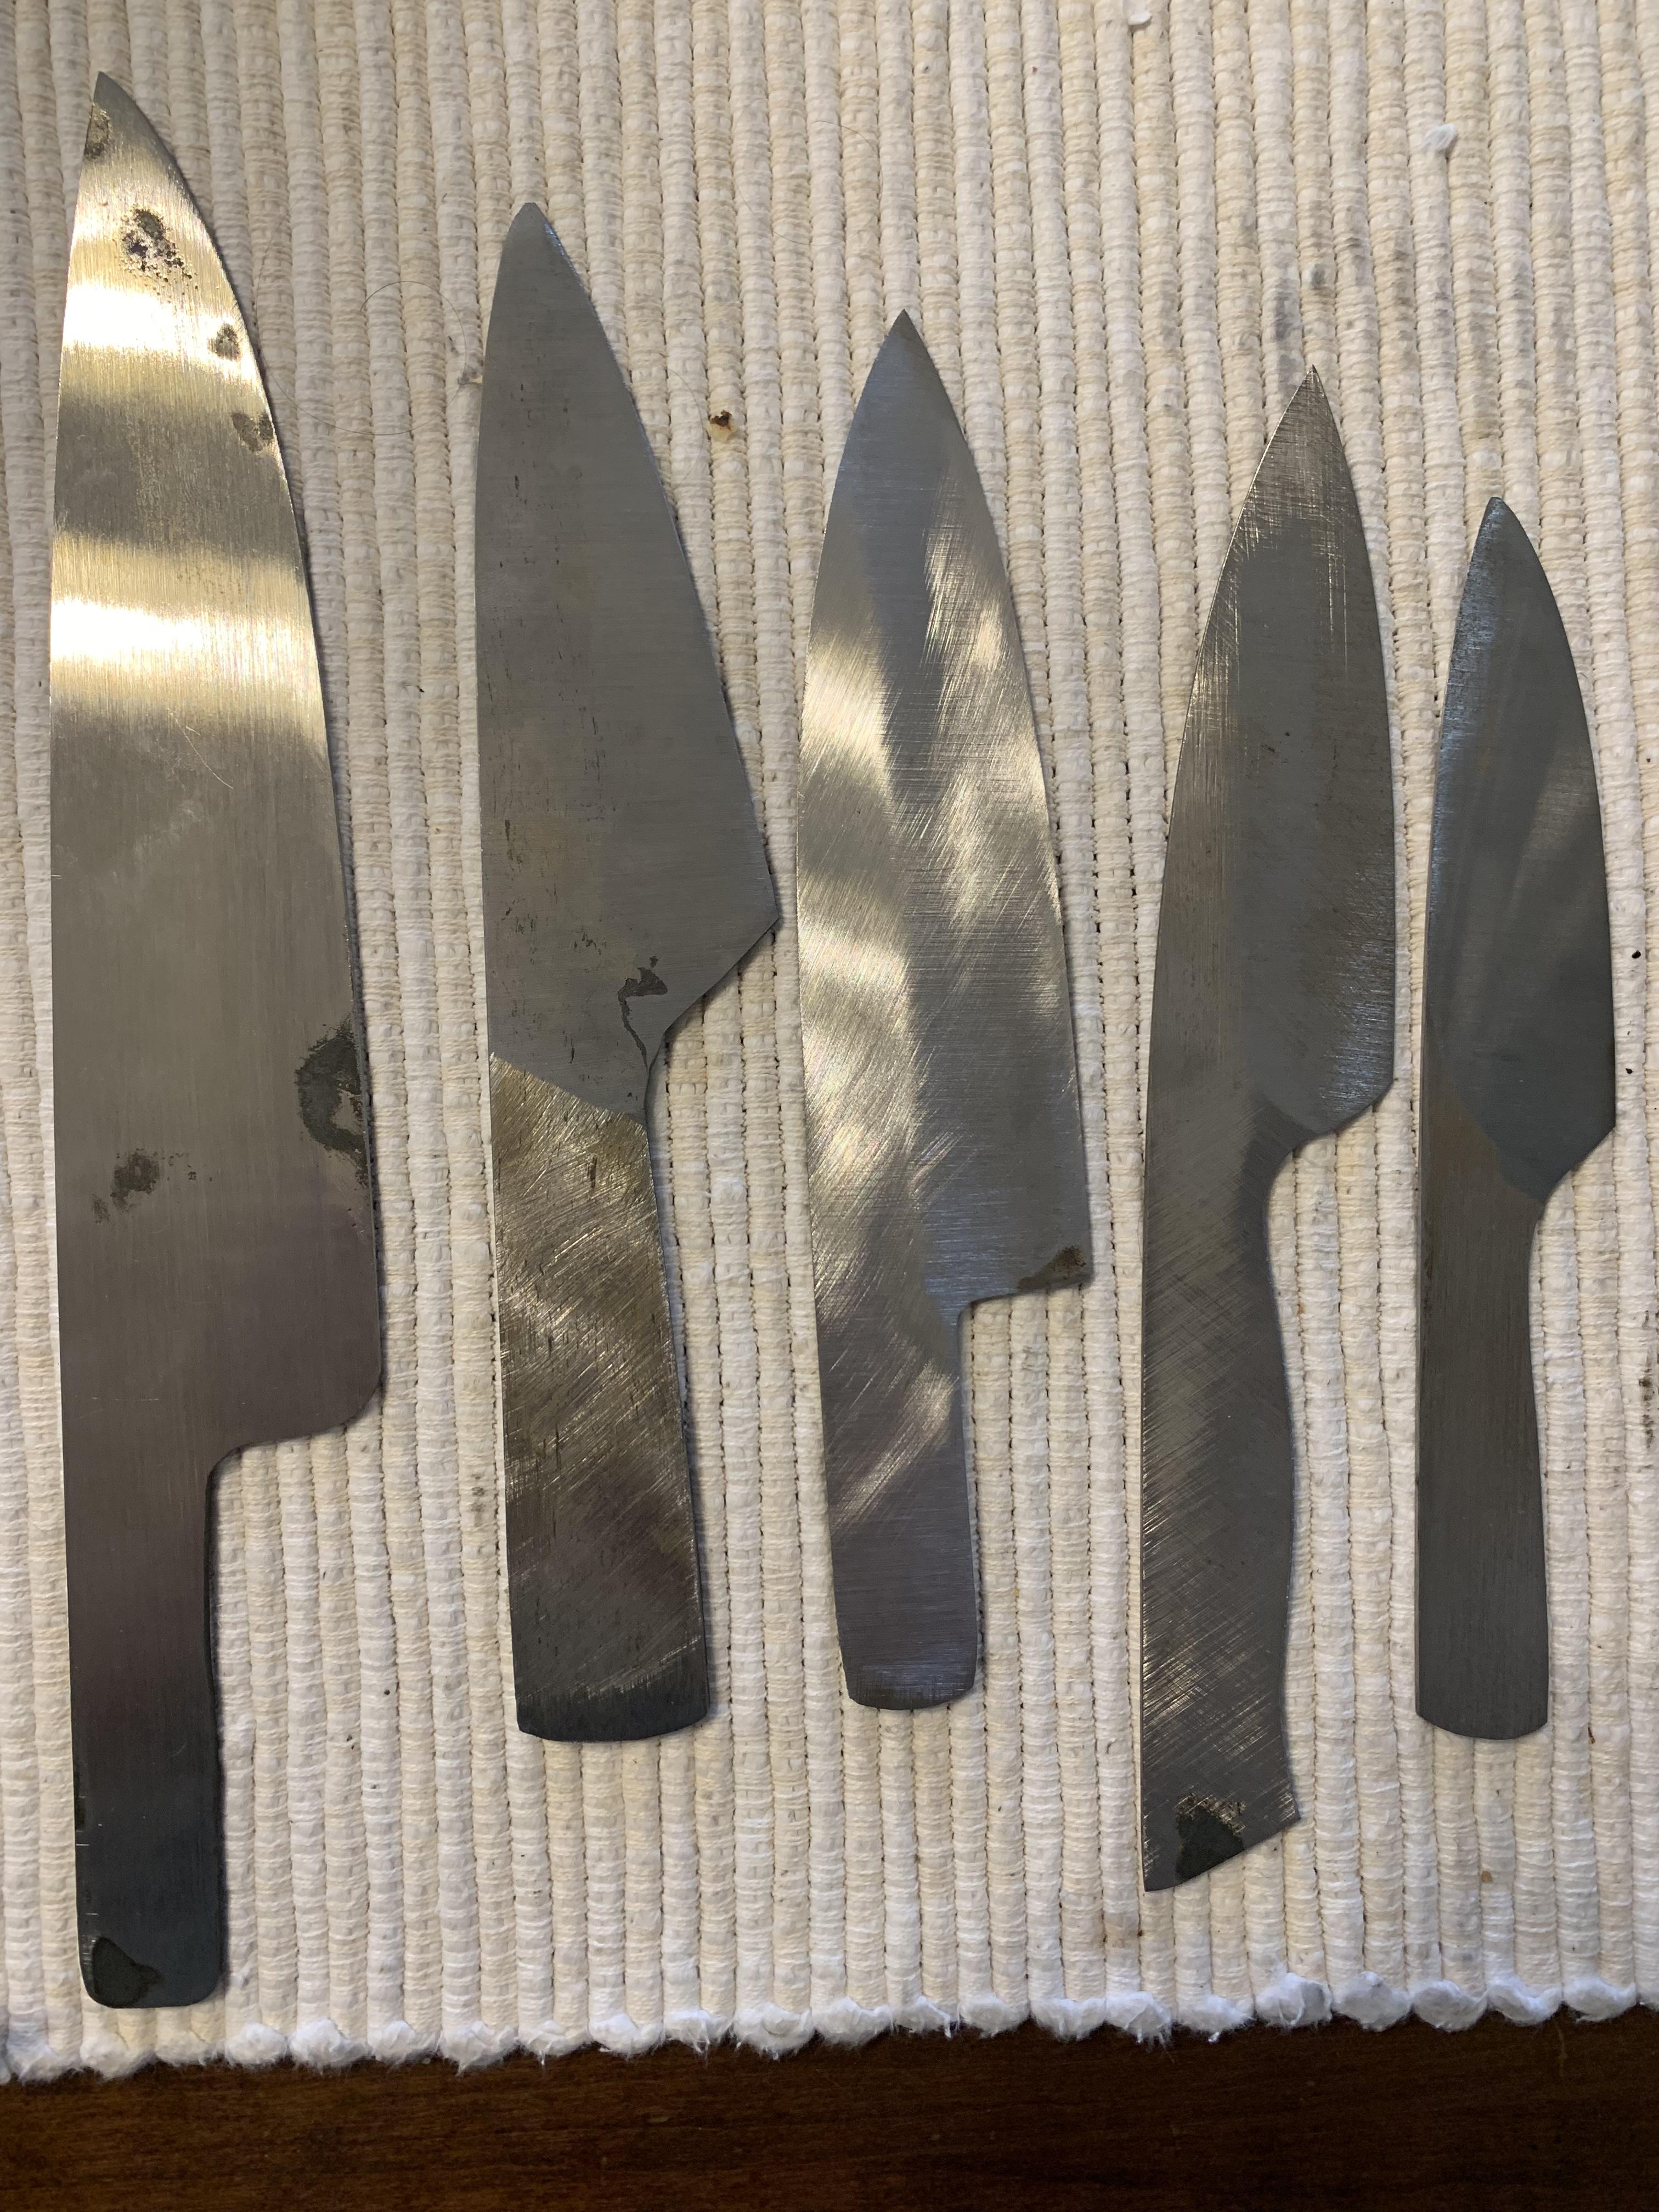
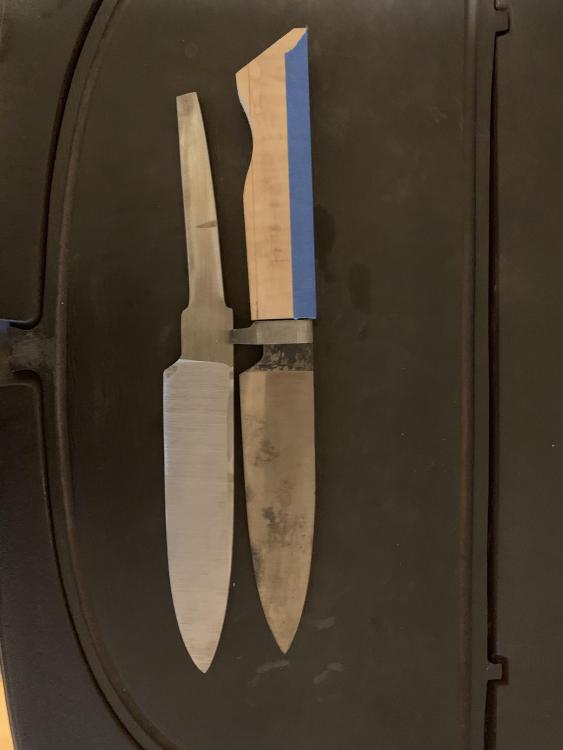
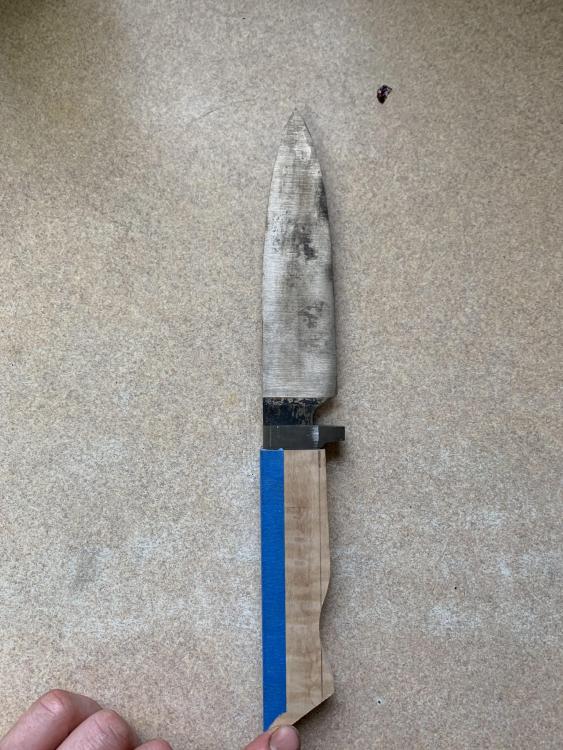
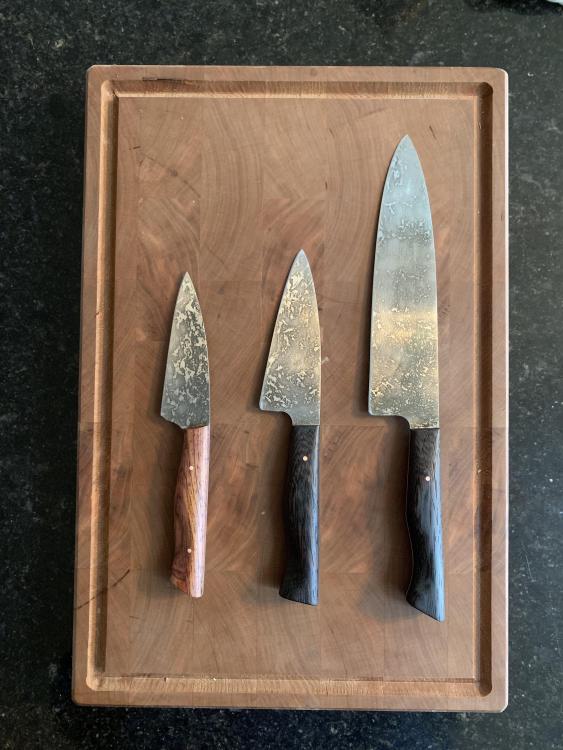
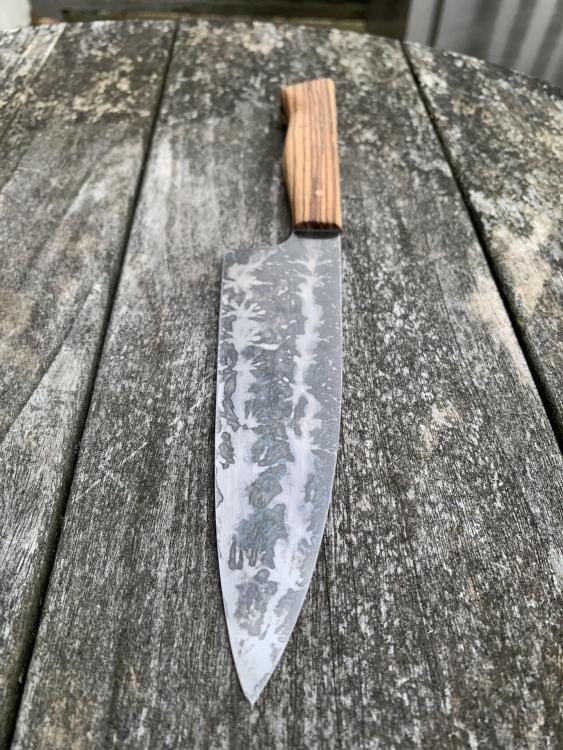
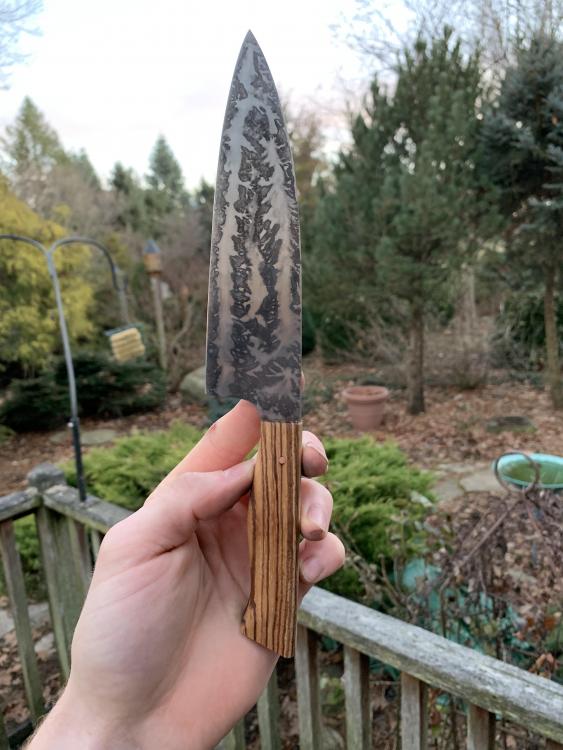
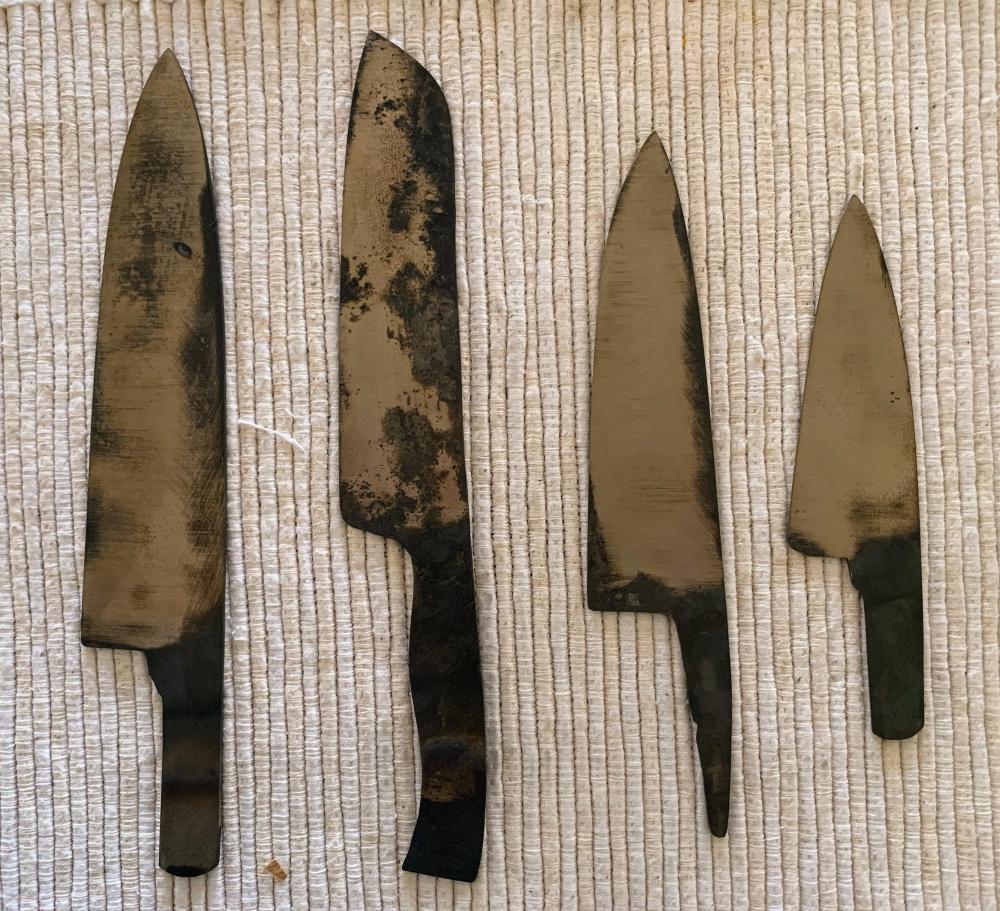
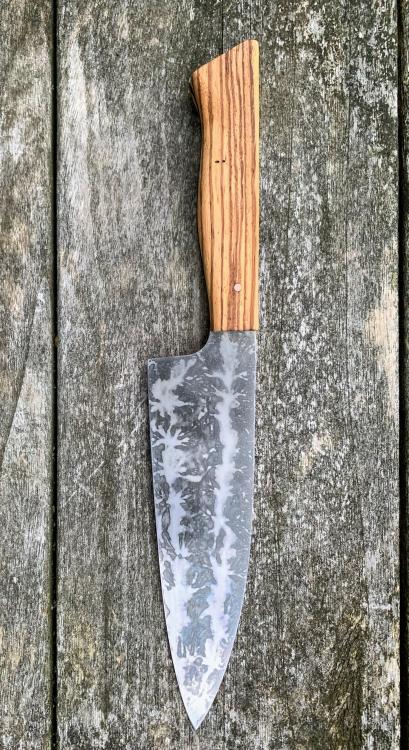
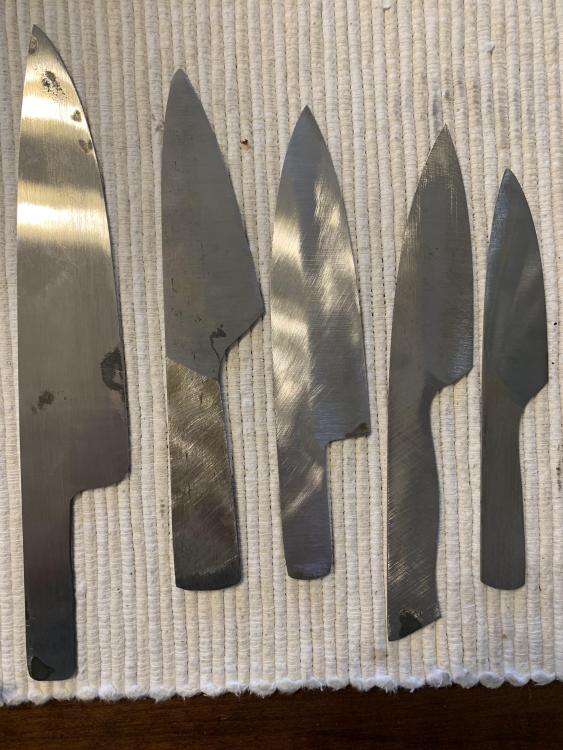
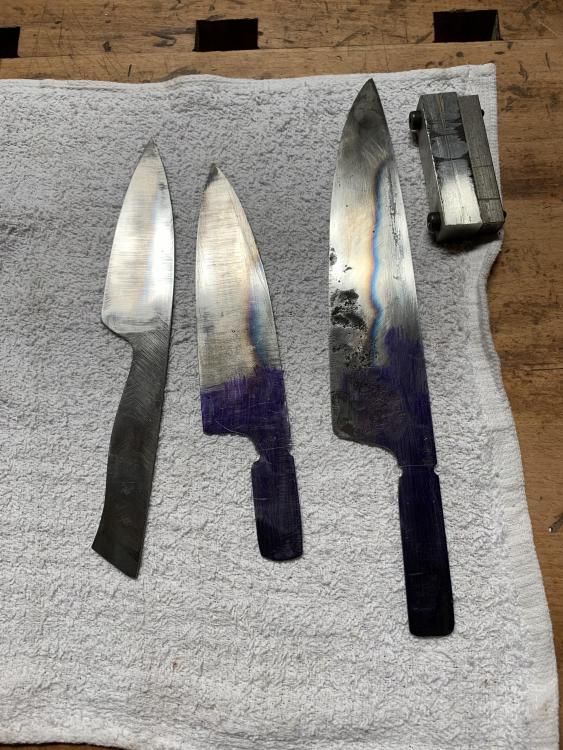
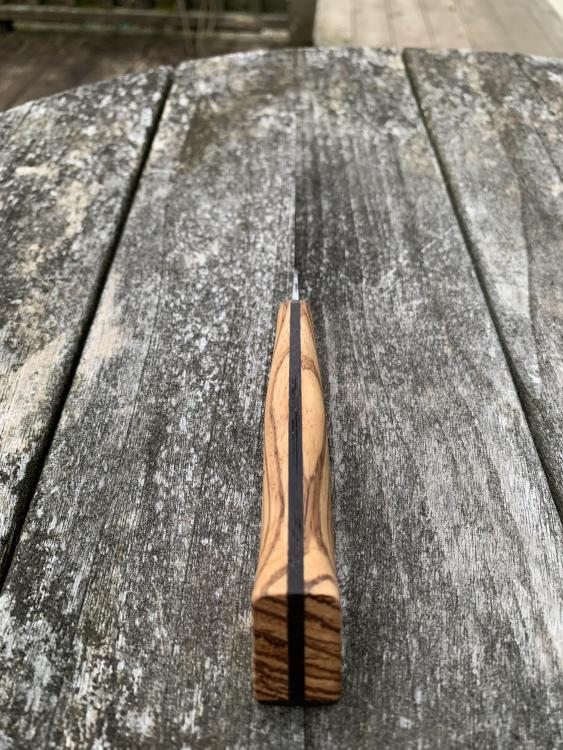
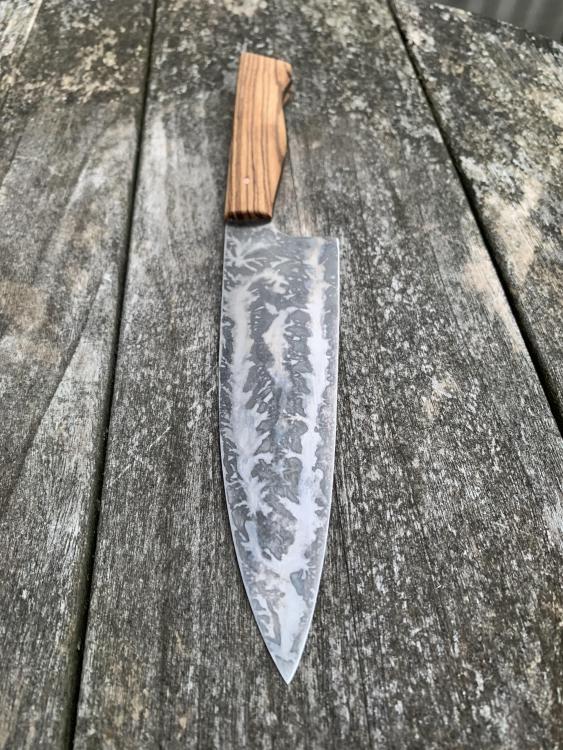
I got a lot of practice making knives over break. Everyone wanting kitchen knives for Christmas which gave me a lot of opportunity to experiment. Learned a lot and no two knives are the same. With the first picture, I made a 8” chef knife out of 80crv2, a ~5” utility kitchen out of San mai wrought and 80crv2, 6” chef out of 80crv2, another ~4.5” utility, and a 3” paring. I learned that wrought is like literal butter when it’s nice and hot. I had to fight the urge to just grab and mold it like playdoh. I finished the paring and 6” chef in later photos. But the 8” one was a PITA to heat treat because it is bigger than my fire pot. I later ruined it grinding by putting pressure on the spine and getting it too thin. The second pic is just a little wip pic after I had drawn back the spines and tangs. That’s when I also set the shoulders for the hidden tang. The next few pics are of the 6” chef knife. The woods are zebra wood and wenge. I initially tried to chisel out the tang in the zebra wood, but didn’t like it very much so I just did a three piece construction which IMO looks better. Finished with a coat of Tung oil and then a coat of beeswax. The hard part was the grinding, I went to close to a finished edge thickness and didn’t take in account that hand sanding removes a bit of material. Therefore, the middle of the blade kept going past zero and would bring the width down in the middle. Plus, having an uneven graphite platen on my grizzly sucks, so I ordered a ceramic one. Mustard finish on the blade. Honestly, I think this is my best blade yet. This is the paring knife that is out of 80crv2 and zebra wood. Made it as a pair for the 6” one and gave both to my cousin. These last ones are how far I was able to get before I had to get back to school. All out of 80crv2, the first is another 8” chef, the next is a ~6.5” santoku style, next a ~6” chef and a 4.5” utilityish blade for the kitchen. Heat treat went fantastic, no warps or bends. One hour at 355 and one hour at 375 temper. Overall, I’m quite pleased on how much I got done. The santoku I forged and ground in about hour and a half, probably less, which is record time for me. Any and all criticisms/opinions are welcome. I want to get better!
-
I'm pretty sure it works fine, gave to my brother as a gift. He's the more of the beer lover than I am and I haven't heard any complaints. I like the music cleft idea! That would be cool to do.
-
Made this one awhile ago from coil spring.
-
Thank you. Lou, the spine at the base is .135" and has a distal taper down to something. Can't remember off the top of my head, but I left the edge at the tip thicker to help a little. Its more of a slicer than a chopper.
-
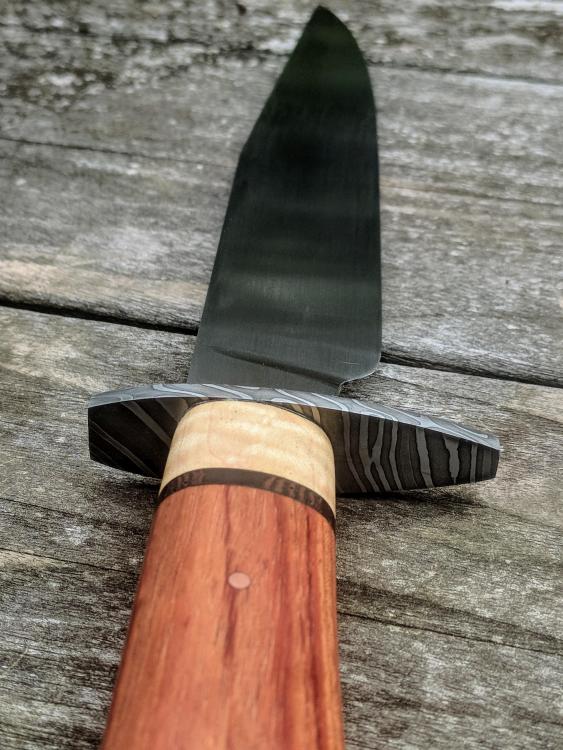
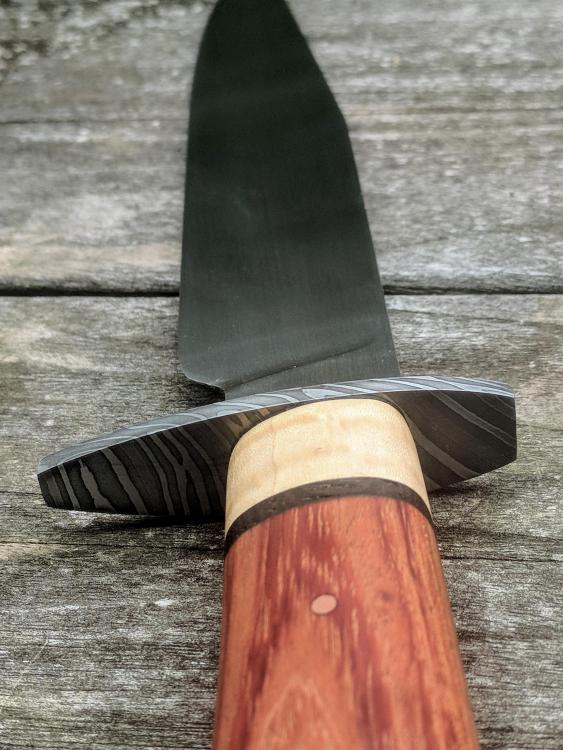
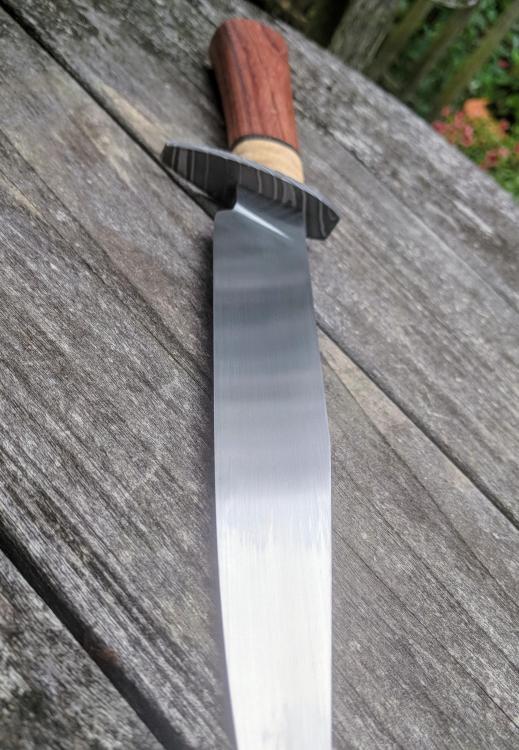
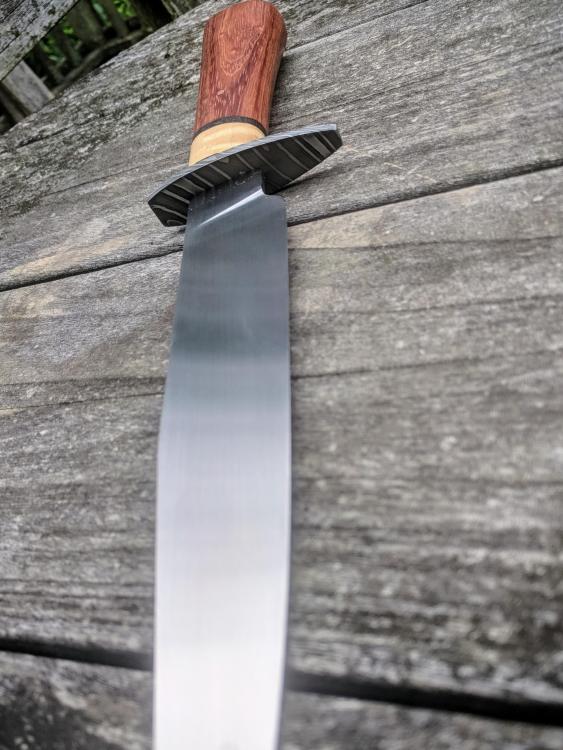
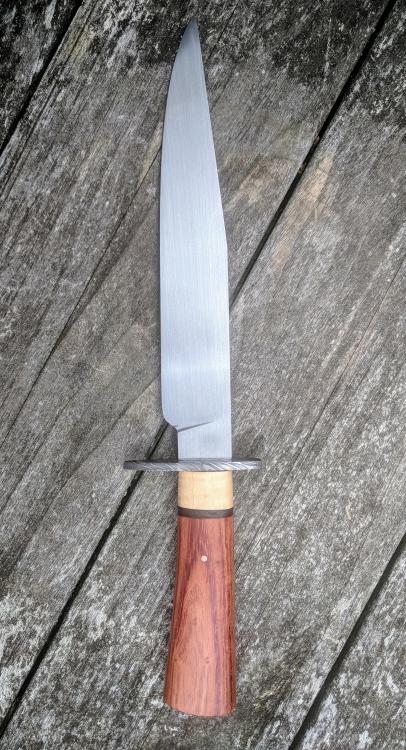
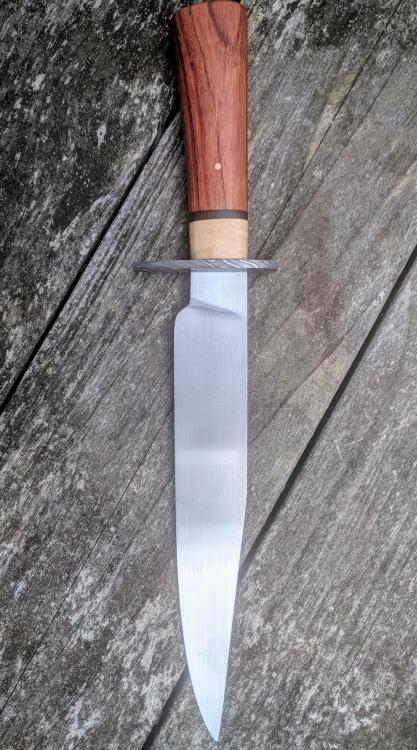
After a stupid amount of time and a restart, this is done. Started with a blade of 1084 that worked just fine up until the point where I decided to do the heat treat again because I wasn't satisfied with the first one. Bad idea because it was too thin by that point and the edge looked like it was Lake Michigan on a windy day. Restarted the blade using 80crv2, which worked just fine. Forging, heat treat and grinding went well. Anyway, the guard is 1084/15n20 with 12 layers twisted. The handle goes tiger striped maple, wenge and bubinga with a length of 4.5". It is finished with several coats of Tung oil and I will be putting wax on there also. The blade is 8 3/16" long by 1 3/8" wide and 1/8" thick. My friend loves it so I think it's a job well done.
-
CreekSideForge replied to Bayshore Forge's topic in Hot Cuts, Anvil devils, metal cutting on the anvil.So I managed to grab some 2x1x3" H-13 blocks from work with the intention of making a hot cut and other tools, what would y'all say to that? I dont have anyway to do the proper heat or anything close to it. I've read that once it's done being forged, let it cool slowly (poor man's anneal), do the grinding , then take it up to a dullish red and put it somewhere safe to cool down for the heat treatment. That sound ok? I know most of you use jackhammer bits or torsion bars or axles but I don't have any of those available. Plus, I have 3 pieces so there's room for error and mess up.
-
Hey Frosty, I have a quick question. Currently, I have a coal forge and a JABOD charcoal forge that I use to mainly make knives and other things. They work wonderfully for regular work and forge welding, but they're more difficult to use for heat treatment mainly due to having inconsistent heat and/or heat control. Therefore, I would like to build a gas forge to help with that problem. It would be out of a 20 lb propane tank out of the style of Wayne Coe, 2 layers of kaowool, kastolite,etc. The heat treatment would involve a baffle tube also. My question is: would you recommend a ribbon burner or a regular single port burner ? (I plan to use your T-burner or the NA ribbon burner)
-
Ok thanks! I'll try be more patient in the future. Seems to be the key to almost everything.
-
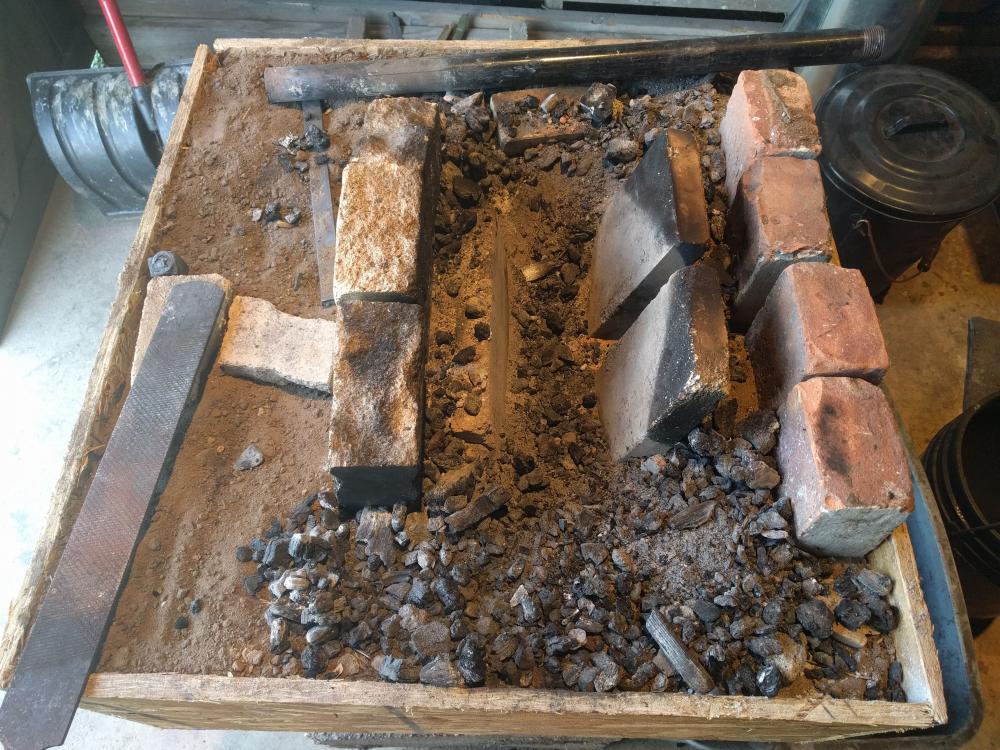
I had it running yesterday for about 5 hours and it worked fabulously. I moved the trench wall closer to the tuyere to about 4 inches away like Mr. Stevens has suggested and it worked much better. I also pretty sure I had it near welding temperature which is very nice to know. The box never got hot on the sides and the pipe was only warm about 4 inches out. There's a heat shield in front of the trench to keep my tongs from getting uncomfortably hot. About half way though I kinda converted to coal and it worked just as well as the charcoal. I didn't really find that much clinker in the bottom afterwards. I think I learned that I like coal more than charcoal, but that might just be because I have more experience with it. A question on charcoal: what size chunks do you guys put in the fire?