Melw45
-
Posts
173 -
Joined
-
Last visited
Content Type
Profiles
Forums
Articles
Gallery
Downloads
Events
Everything posted by Melw45
-
Frosty I can see the Wisdom of putting guards on the drive mechanism. You would run in to that safety issue trying to use any line shaft driven equipment. Drive it with an electric motor and put a guard over it. As for the hammer and pinch points, if someone can't keep there fingers or other body parts out of them then maybe blacksmithing is not the hobby for them. I have worked with machine tools for years as a hobby. A lathe is a most unforgiving machine. It seems to me all power hammers have a lot of pinch points. I am not trying to be a jerk just don't see anything that can't be managed. I am willing to learn if I am mistaken. Thanks Mel
-
Jim Sorry to drag up this old post. Just want to know what you find dangerous about them. Thanks! Mel
-
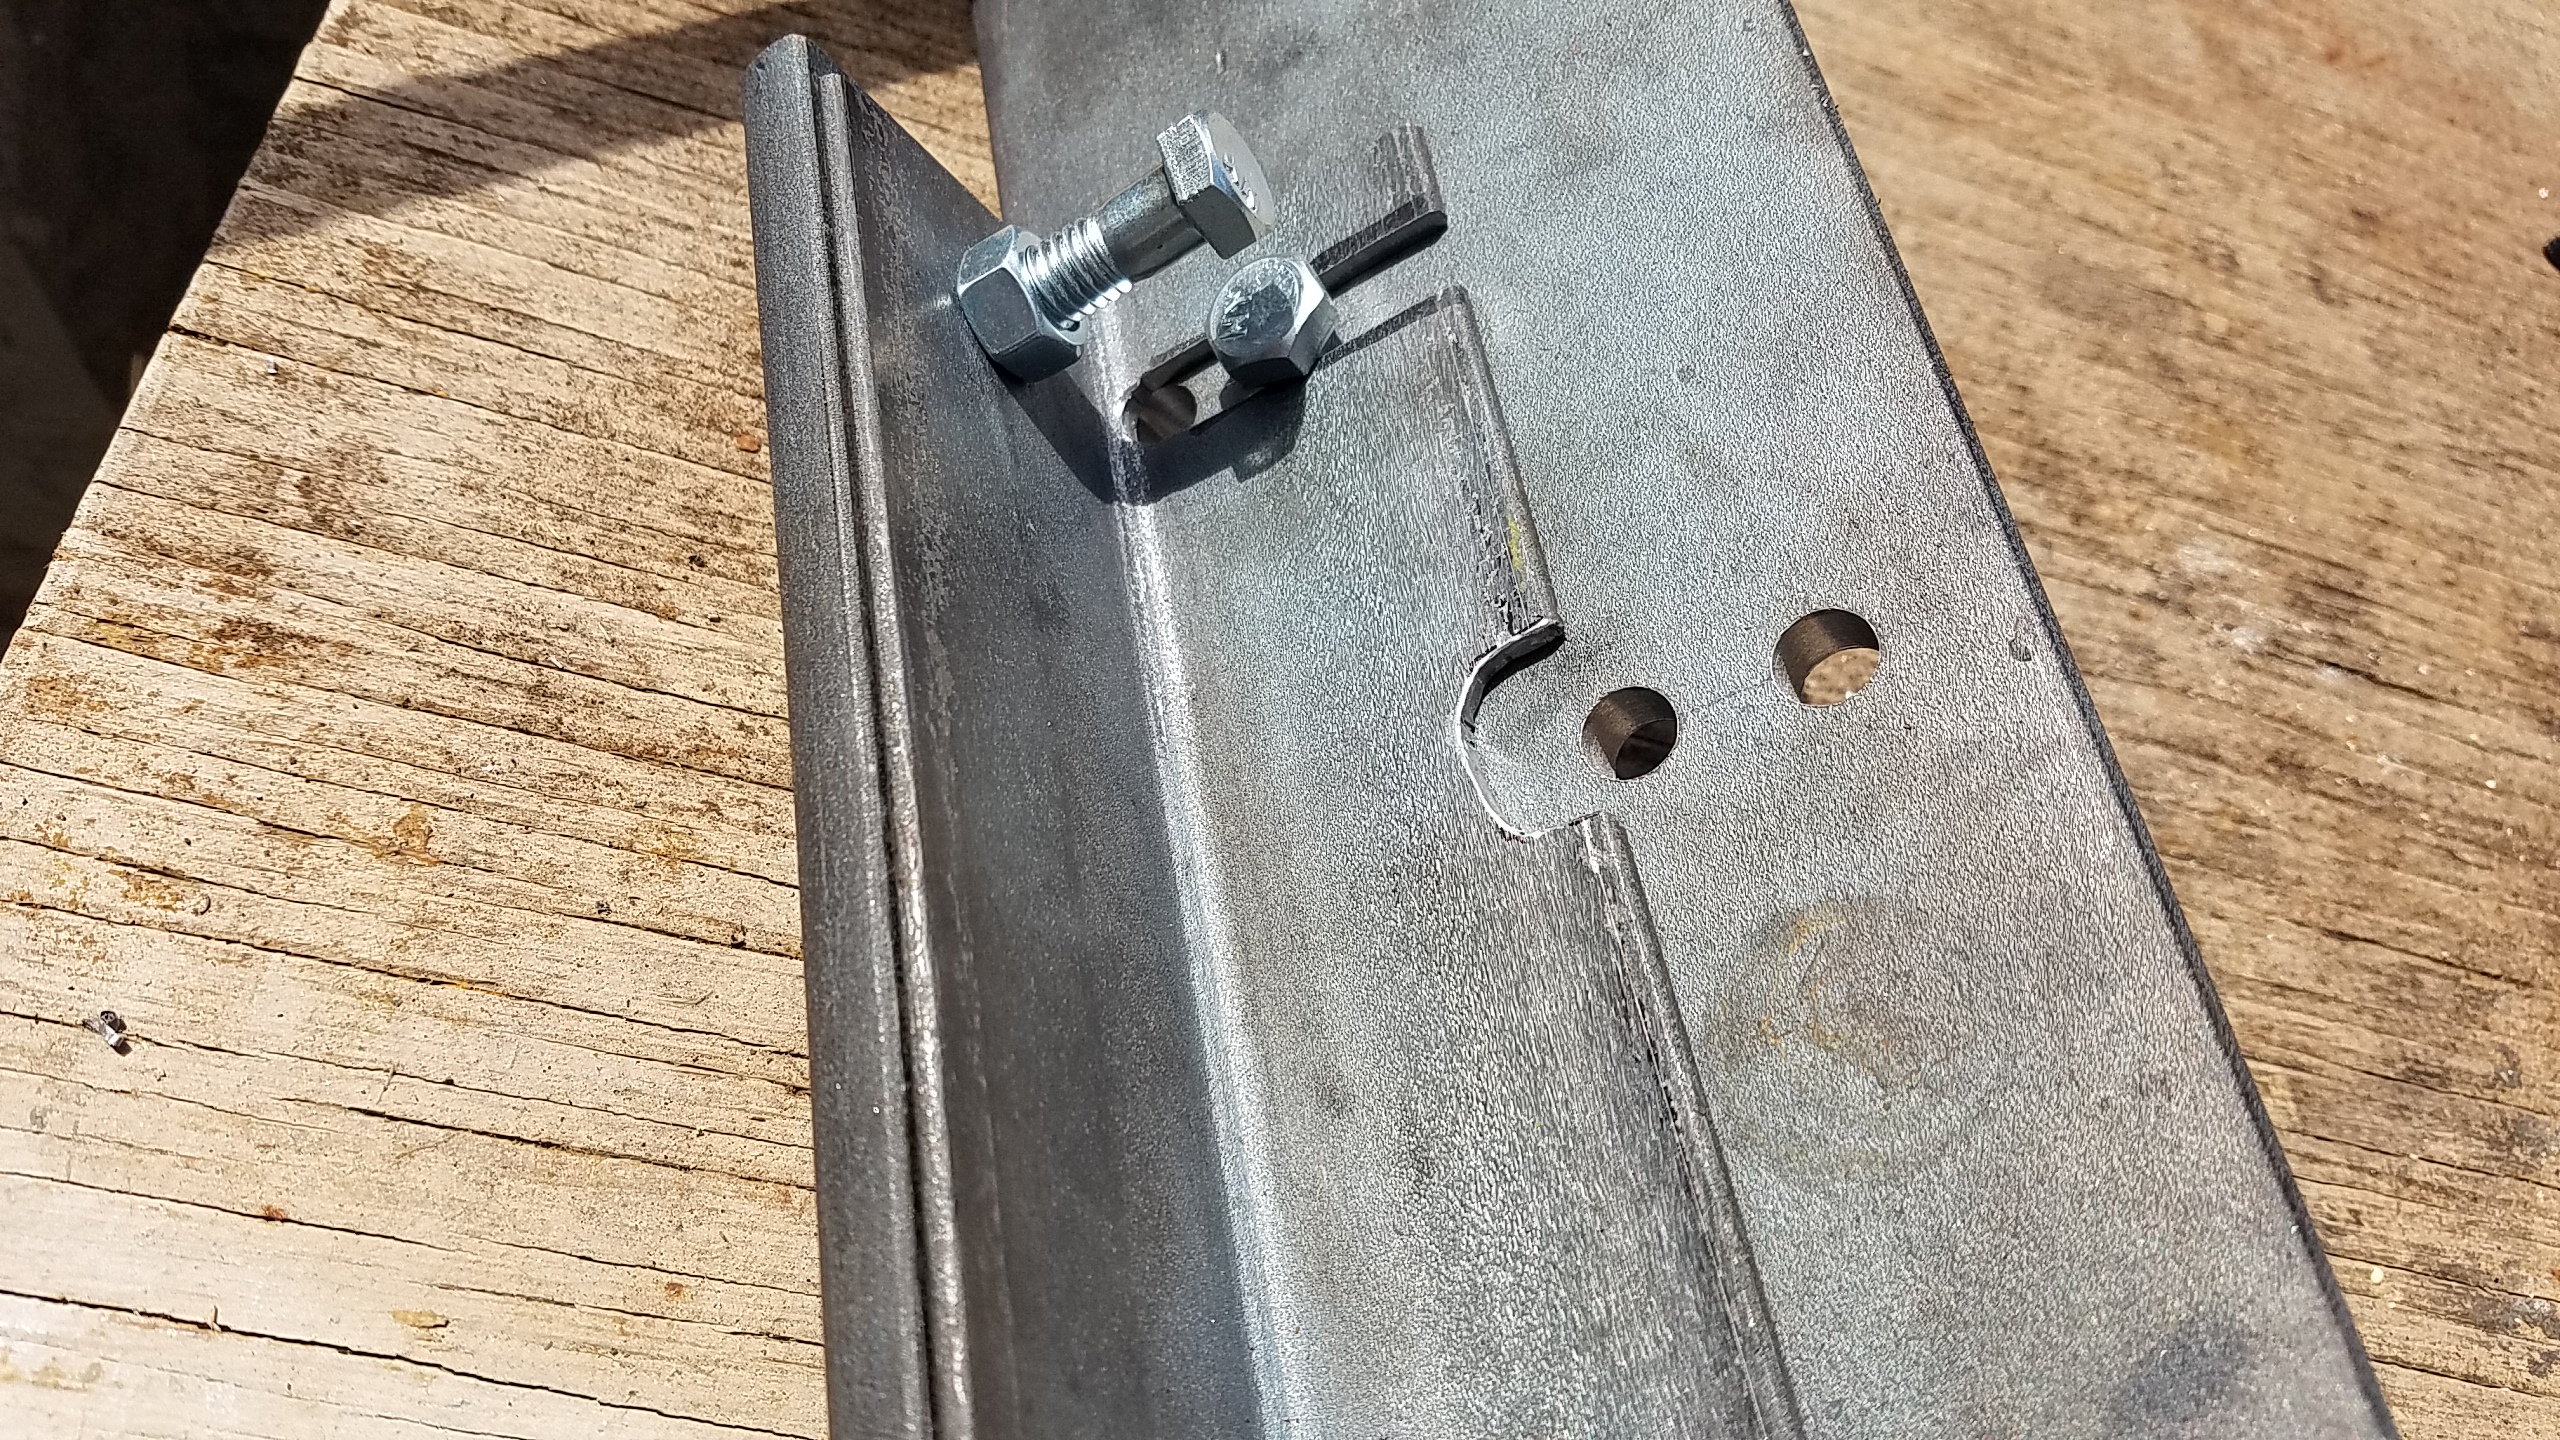
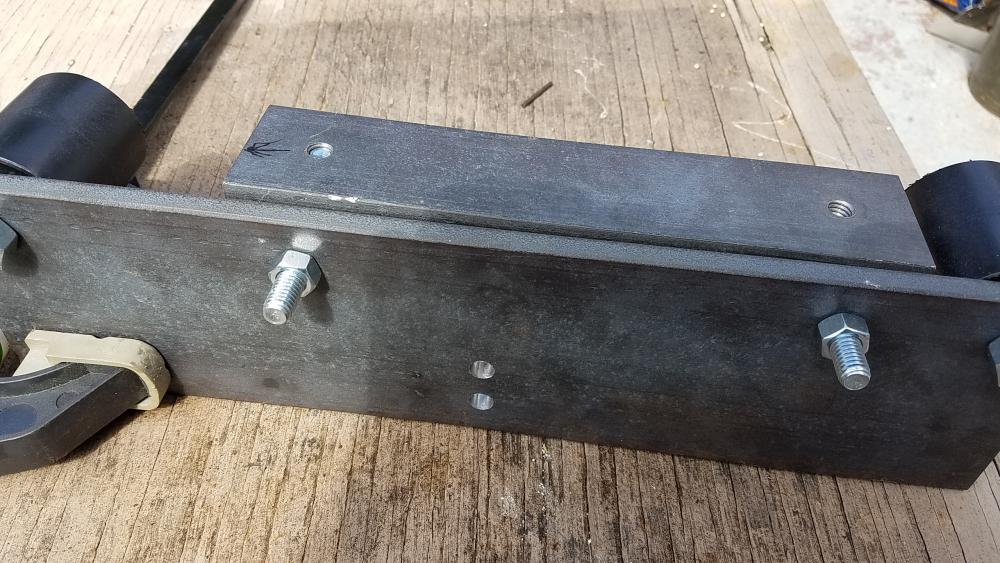
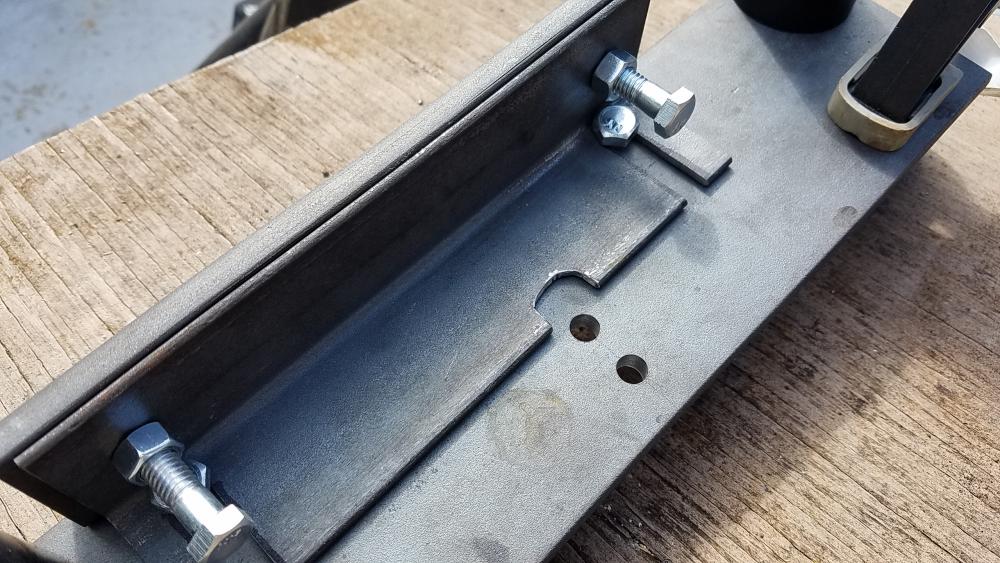
Today I pulled the grinder apart and addressed some issues I found in the test assambly. The first was the fit of the platen. As you can see in this photo it is proud of the large plate. The bolt heads are pressed on the angle iron. I drilled two new holes to fix the problem. in this photo you can see the screw adjuster for the tracking wheel. Near as I can tell I let the tap cut the threads at a angle. After some drilling and file work it now passes through. As you can see in the other photos some of my tubing came from some rusty stock. I would welcome any advise on removing it before painting. I was thinking wire wheel might do the trick. Thanks Mel


-
Very nice! I like how it looks. I had to show it to my wife and she liked it too. Mel
-
What did you do in the shop today?
Melw45 replied to Mark Ling's topic in Blacksmithing, General Discussion
I like the photo with its mouth all aglow. He looks like he is ready to fry some knights. Mel -
I picked up a Harbor Freight farm duty 1 hp motor. This is the dust proof one. Saves me the work of building a filter system for the motor. I had a 25% off coupon that sweetened the deal. Progress continues. Mel
-
Will do. I have identified some areas that need adjusting. the angle iron i used was larger then called for and needs some relief cut in. Next is to take it apart and paint it then do the final assambley with the lock nuts and washers. Still need to find the step pulleys. I am thinking about the pillow blocks. I might add some angle iron to the back to spread them out. Thanks for looking. Mel
-
Not really fallowing but brought by the magic brown truck. Two butcher block brushes. The HF welding brush kind of melted when it hit hot steel. So i now have two and will most likley only ever be able to find one. Mel
-
What did you do in the shop today?
Melw45 replied to Mark Ling's topic in Blacksmithing, General Discussion
Did a bunch more on my 2x72. I put some photos in my NWGS thread. Find it here. https://www.iforgeiron.com/topic/51520-nwgs/ Mel -
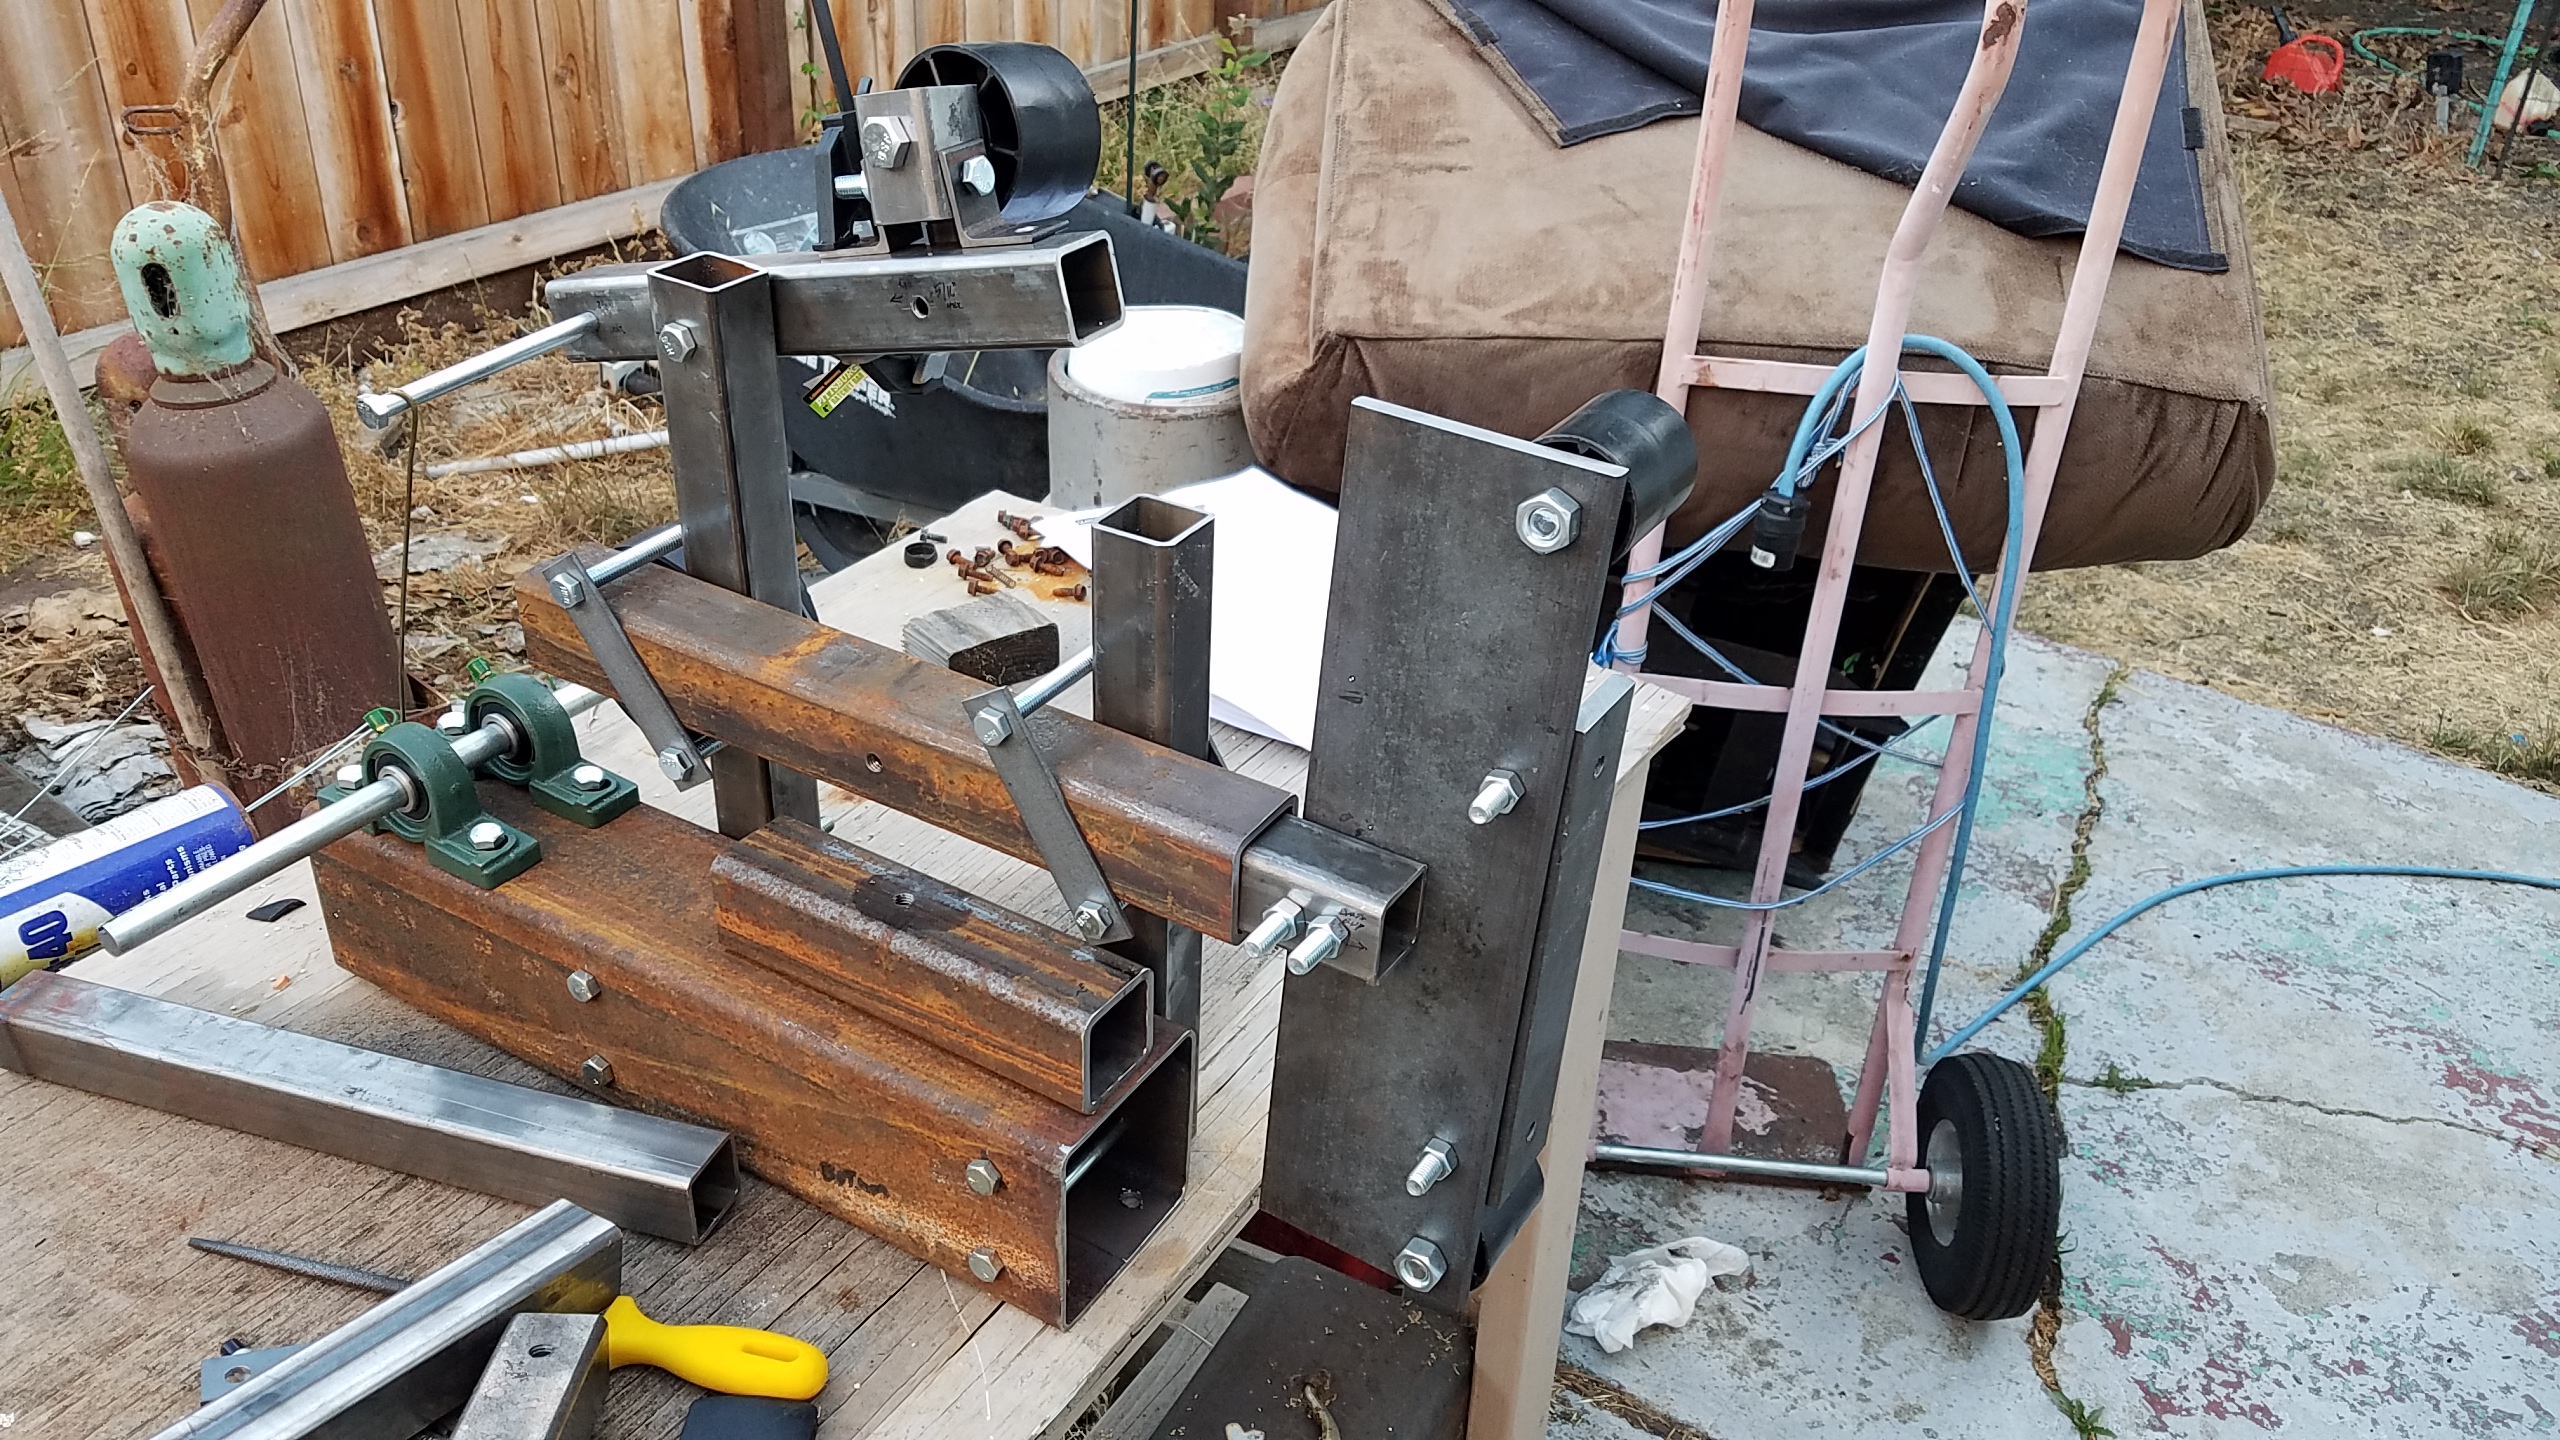
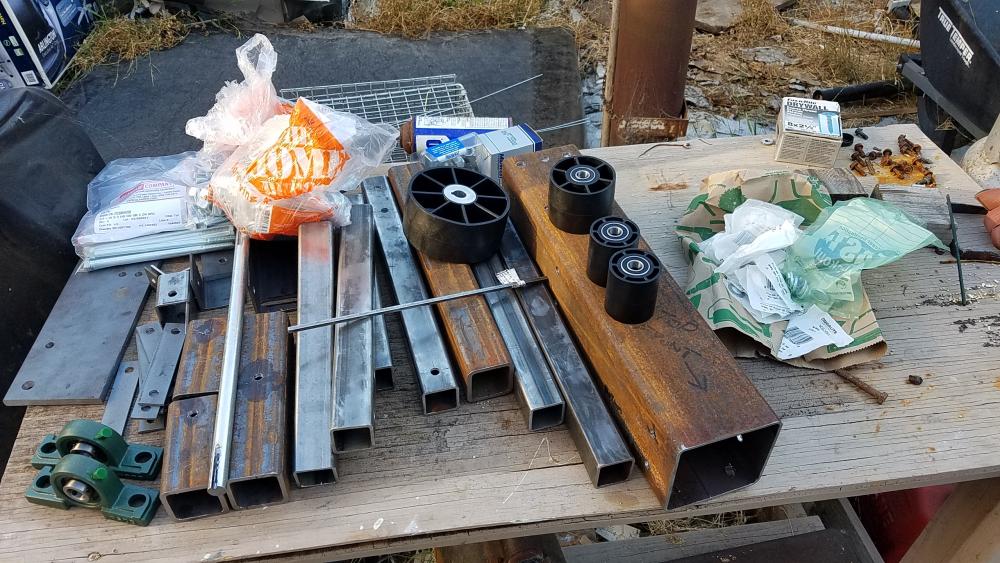
Made a bunch of progress over the last couple of days. Made the parts for the table and cut some ugly keyways in the drive shaft. I now have a large pile of parts. Next I did a test assembly. Staaarting to look like a grinder. Thanks for looking. Mel

-
DC Nice hual. Do you think the anvil can be saved? Mel
-
No photos today. Just cut the tubing for the tool rest. Still need to drill some holes and tap some threads. Mel
-
What did you do in the shop today?
Melw45 replied to Mark Ling's topic in Blacksmithing, General Discussion
Nice! Will have to start warching out for files now. Mel -
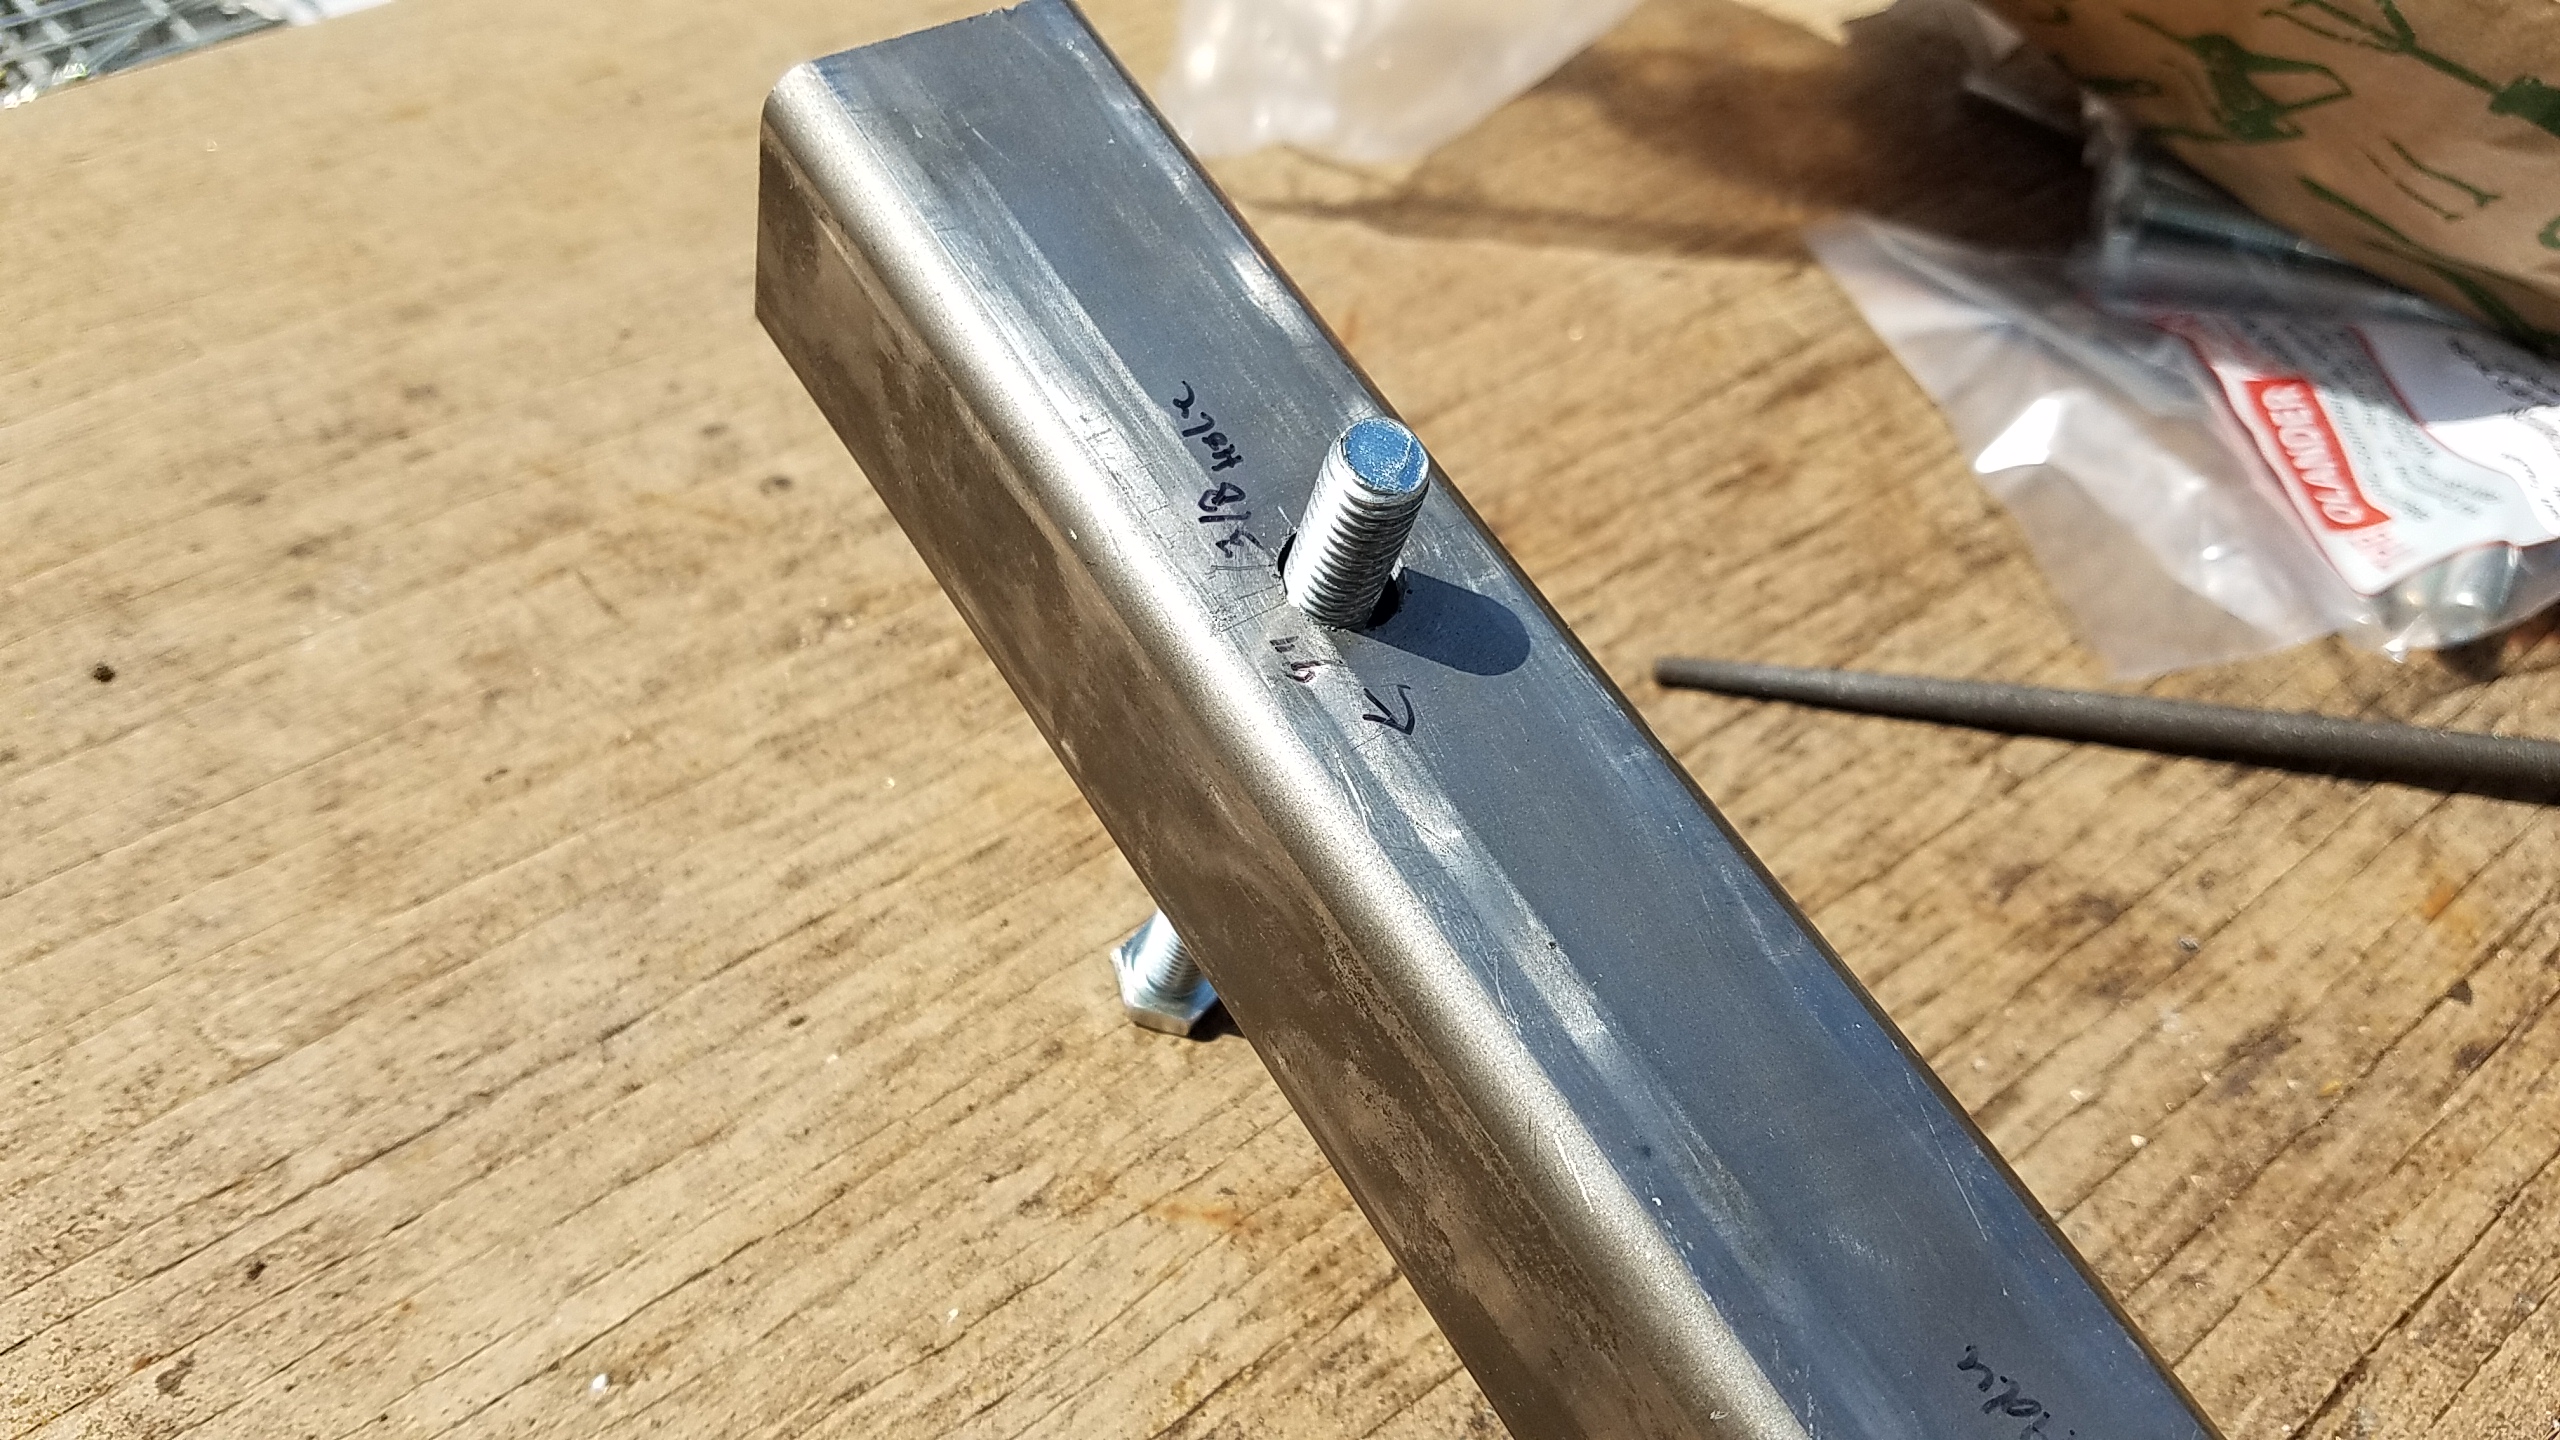
A pic of the latest parts. Allmost time to put it togather. Still need to cut the keyway in the drive shaft and deside about the step pullys. Mel
-
What did you do in the shop today?
Melw45 replied to Mark Ling's topic in Blacksmithing, General Discussion
I did get some time to work on my 2 x 72 grinder. Mote drilling and sawing. All most time to try putting it together for a test assembly. Mel -
Wow last time I bought steel the yard here charged me .65 cents a pound! That was for the rusty cut offs. Like the 4"x4" tube I am using for my 2x72 grinder base. Mel
-
I think the pillow blocks might be to close together as well. I have a bunch of 2" angle iron so I can move them if I need. I was given a 1HP motor brand new in the box from sears craftsman. He said his dad had bought it in the 60s and never used it. It is a open frame so I am planing to put it in a fan cooled filter box. Thanks! Mel
-
Thanks for the pointers. I will keep my eyes open. Mel
-
Power hammer ( Home Built )
Melw45 replied to ROCKEN MIKE's topic in Power Hammers, Treadle Hammers, Olivers
I like it. I have been thinking of something similar. Mel -
Frosty Glad you found the problem. I finshed drilling the 1x 1/8 bars for the clamps. No photos today. I also started the tool arm. Then had to run some errands so i will drill more tomarrow. Mel
-
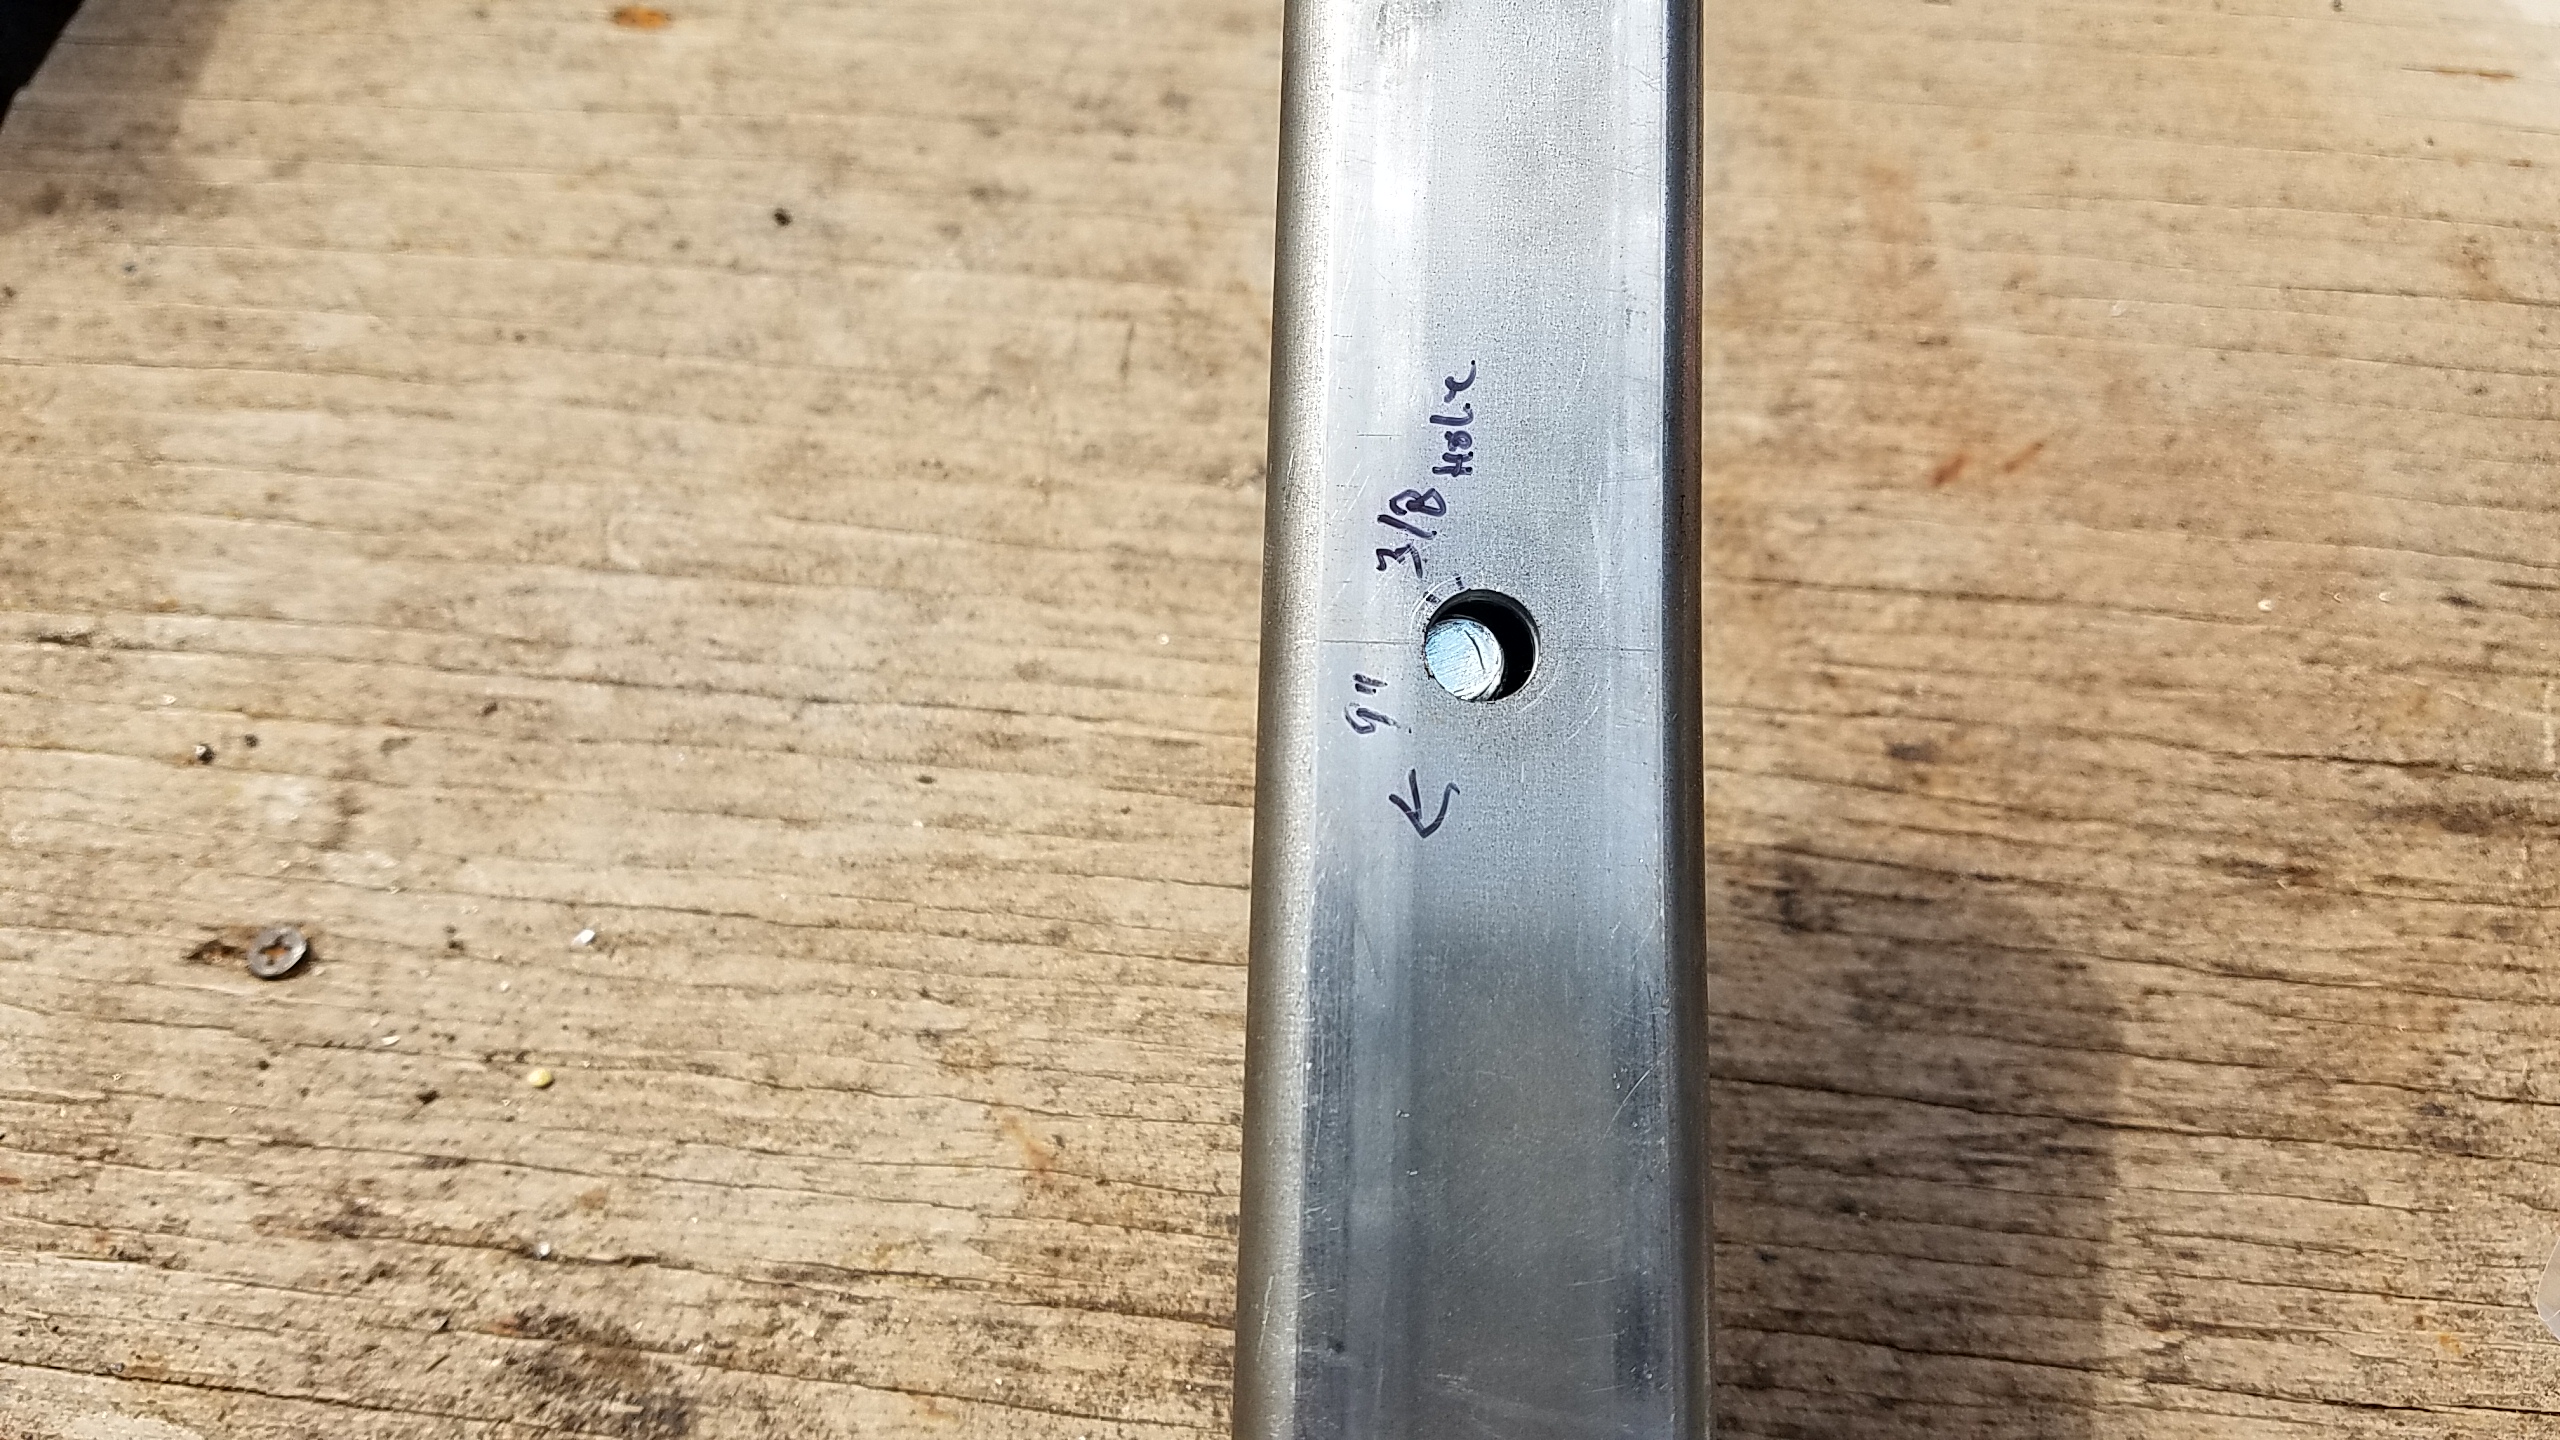
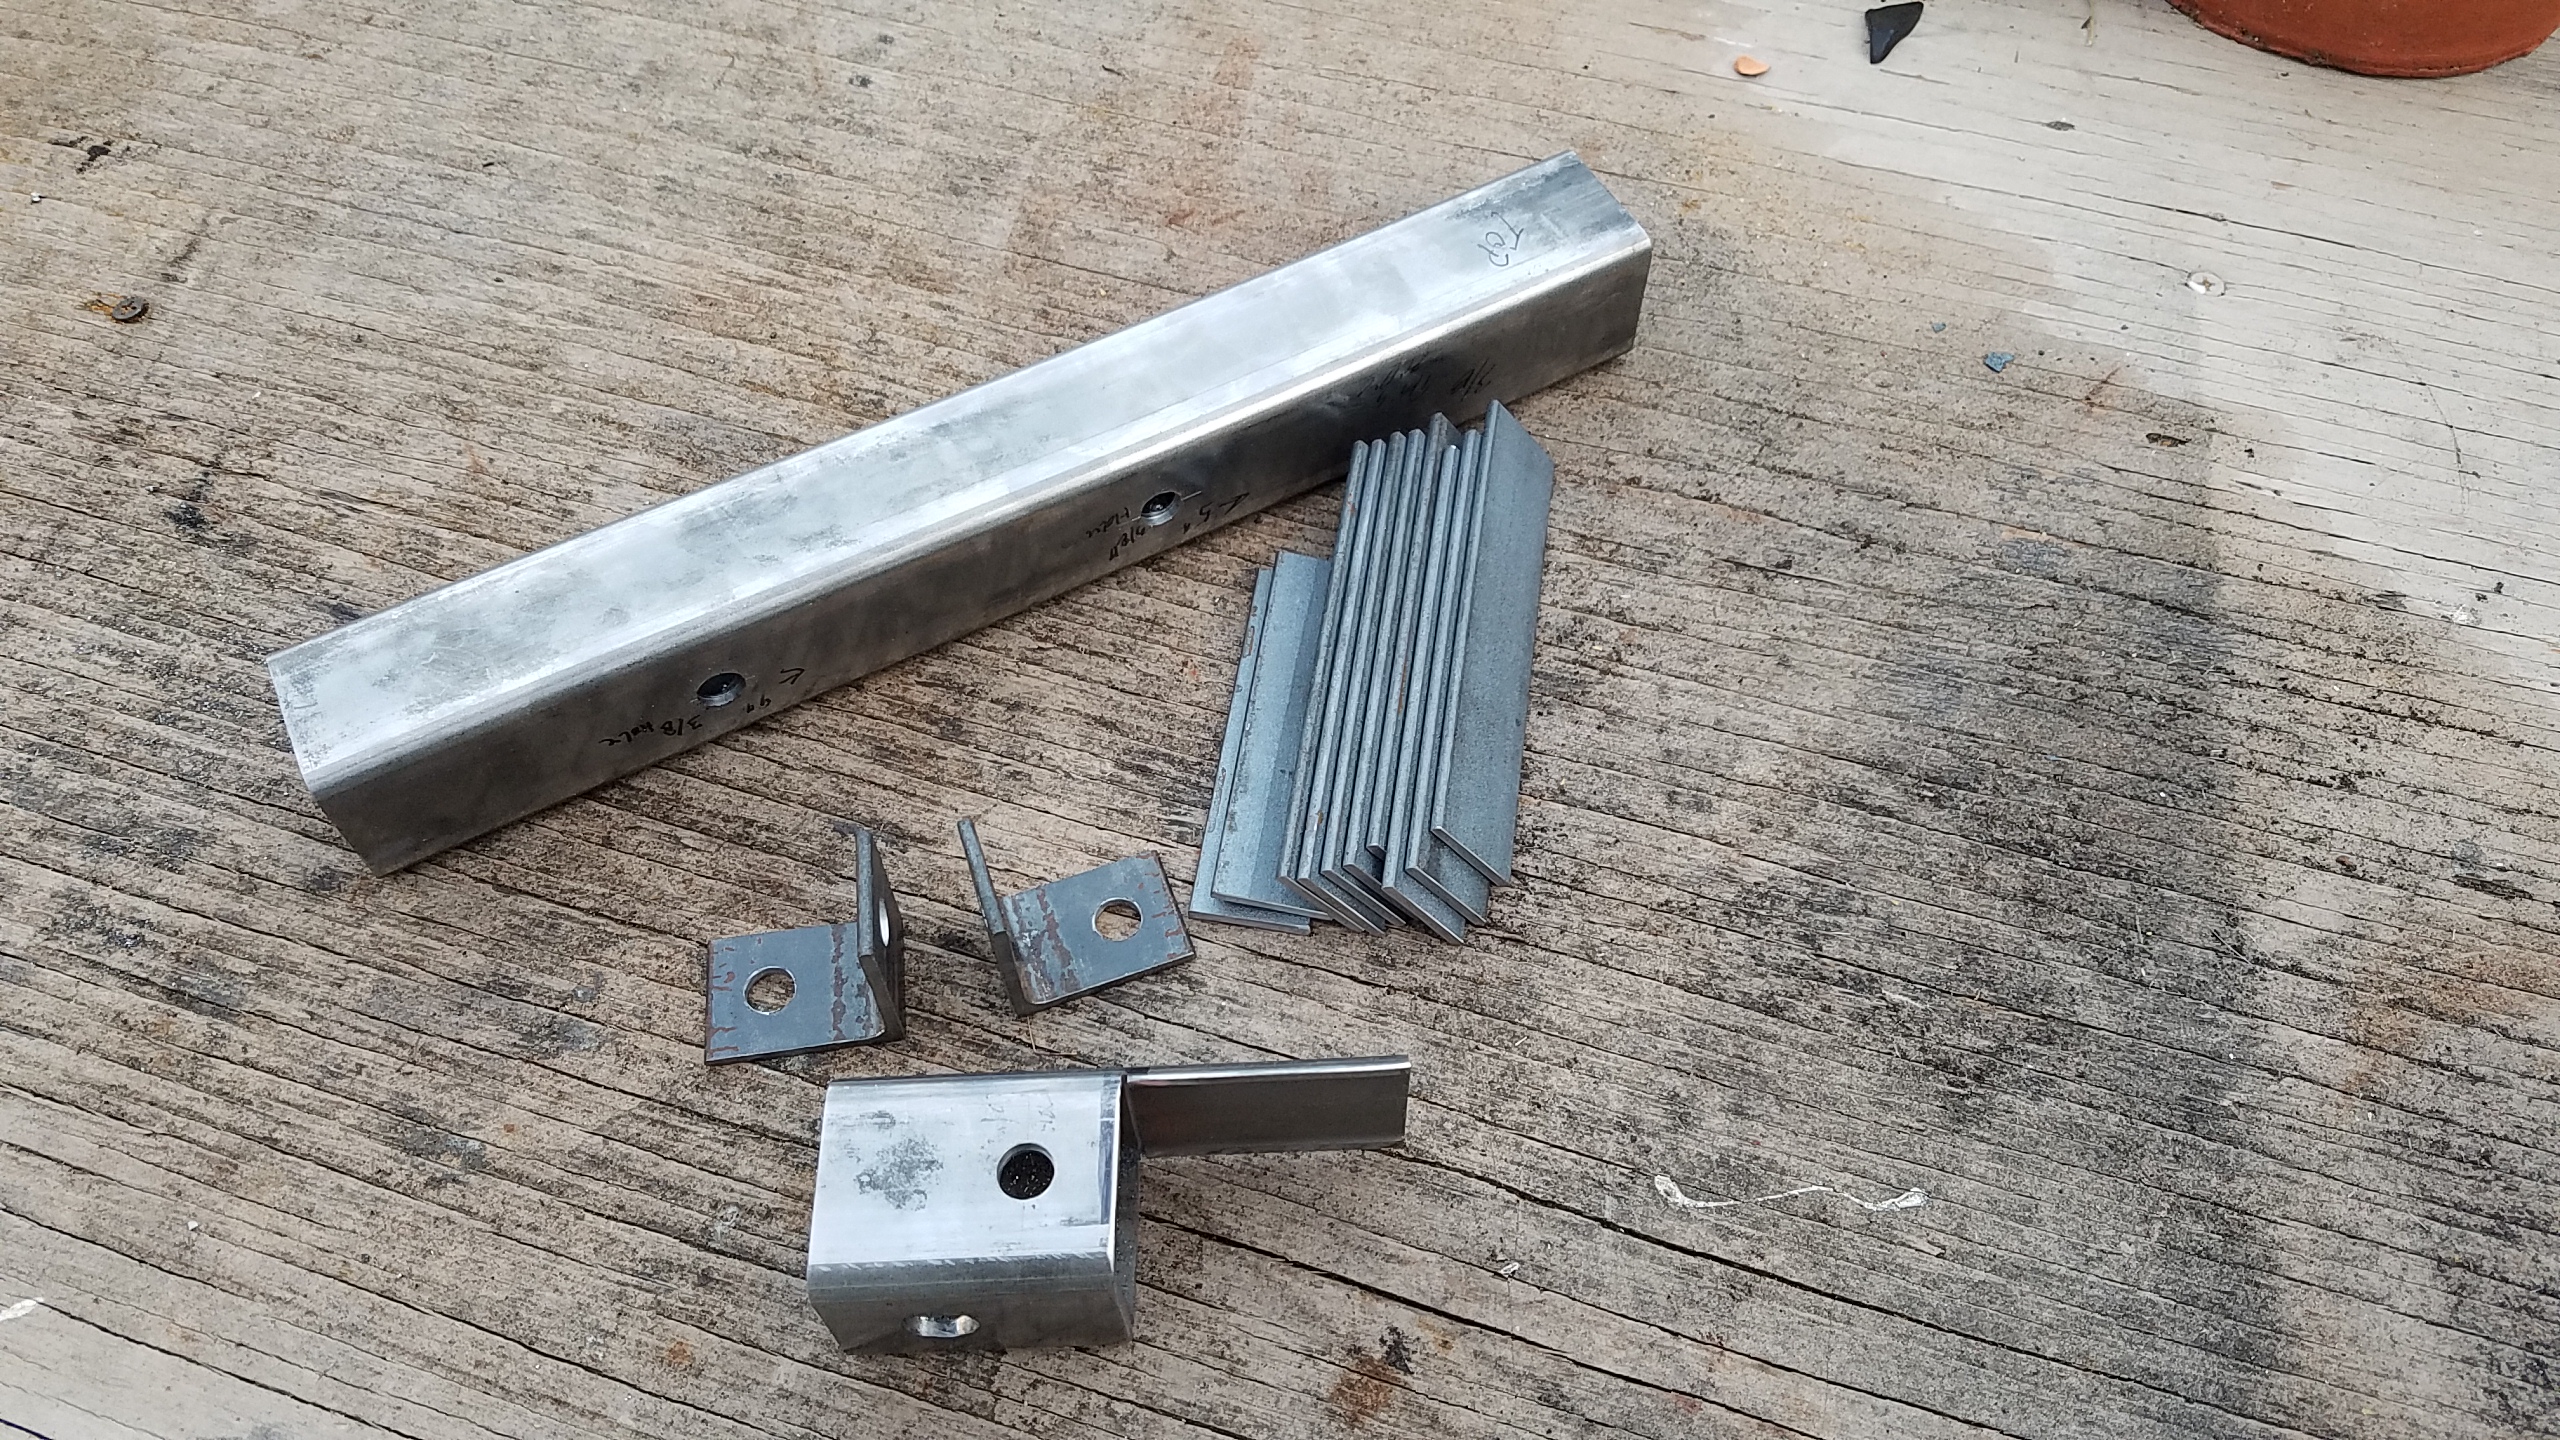
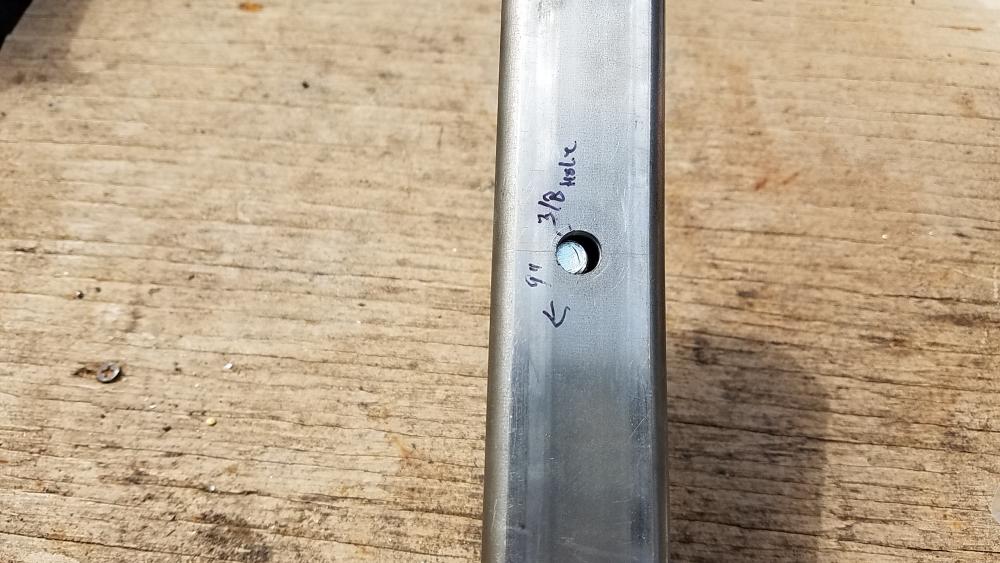
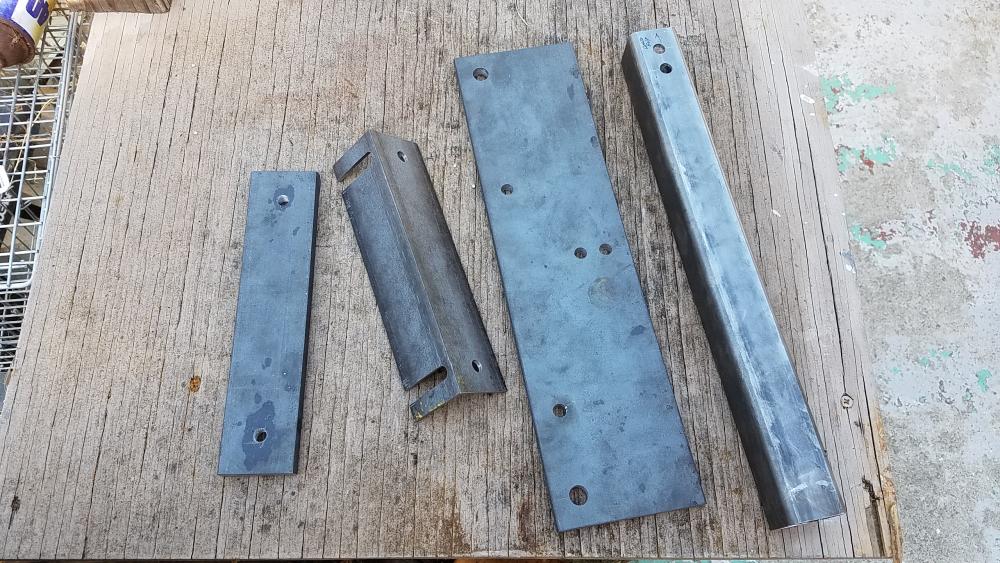
Yesterday I made the tension arm and the tracking wheel parts. Today drilled the mounting brackets for the tracking assembly. I also cut the clamps. Still need the 3/8" holes in them. Here is a photo. Mel
-
What did you do in the shop today?
Melw45 replied to Mark Ling's topic in Blacksmithing, General Discussion
Worked some more on my 2x72 no weld grinder. I am getting quite the pile of steel tubing with holes drilled in it. Mel -
As part of my No weld grinder build i need some step pulleys. I am shocked at the prices of them. The 3 step pulley called for in the plans range from $20.00 all the way up to almost $80.00! I want to ask the forum what do you guys use? Has any one found a inexpensive source? Thanks for any help! Mel
-
What did you do in the shop today?
Melw45 replied to Mark Ling's topic in Blacksmithing, General Discussion
Got some more done on my 2x72 grinder. Pics in the grinder forum in the NWGS post. Mel -
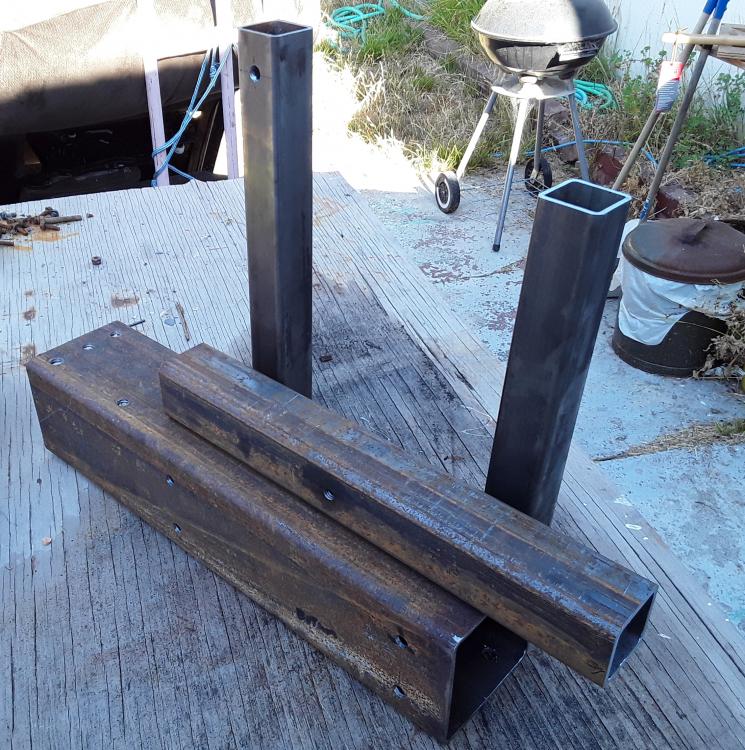
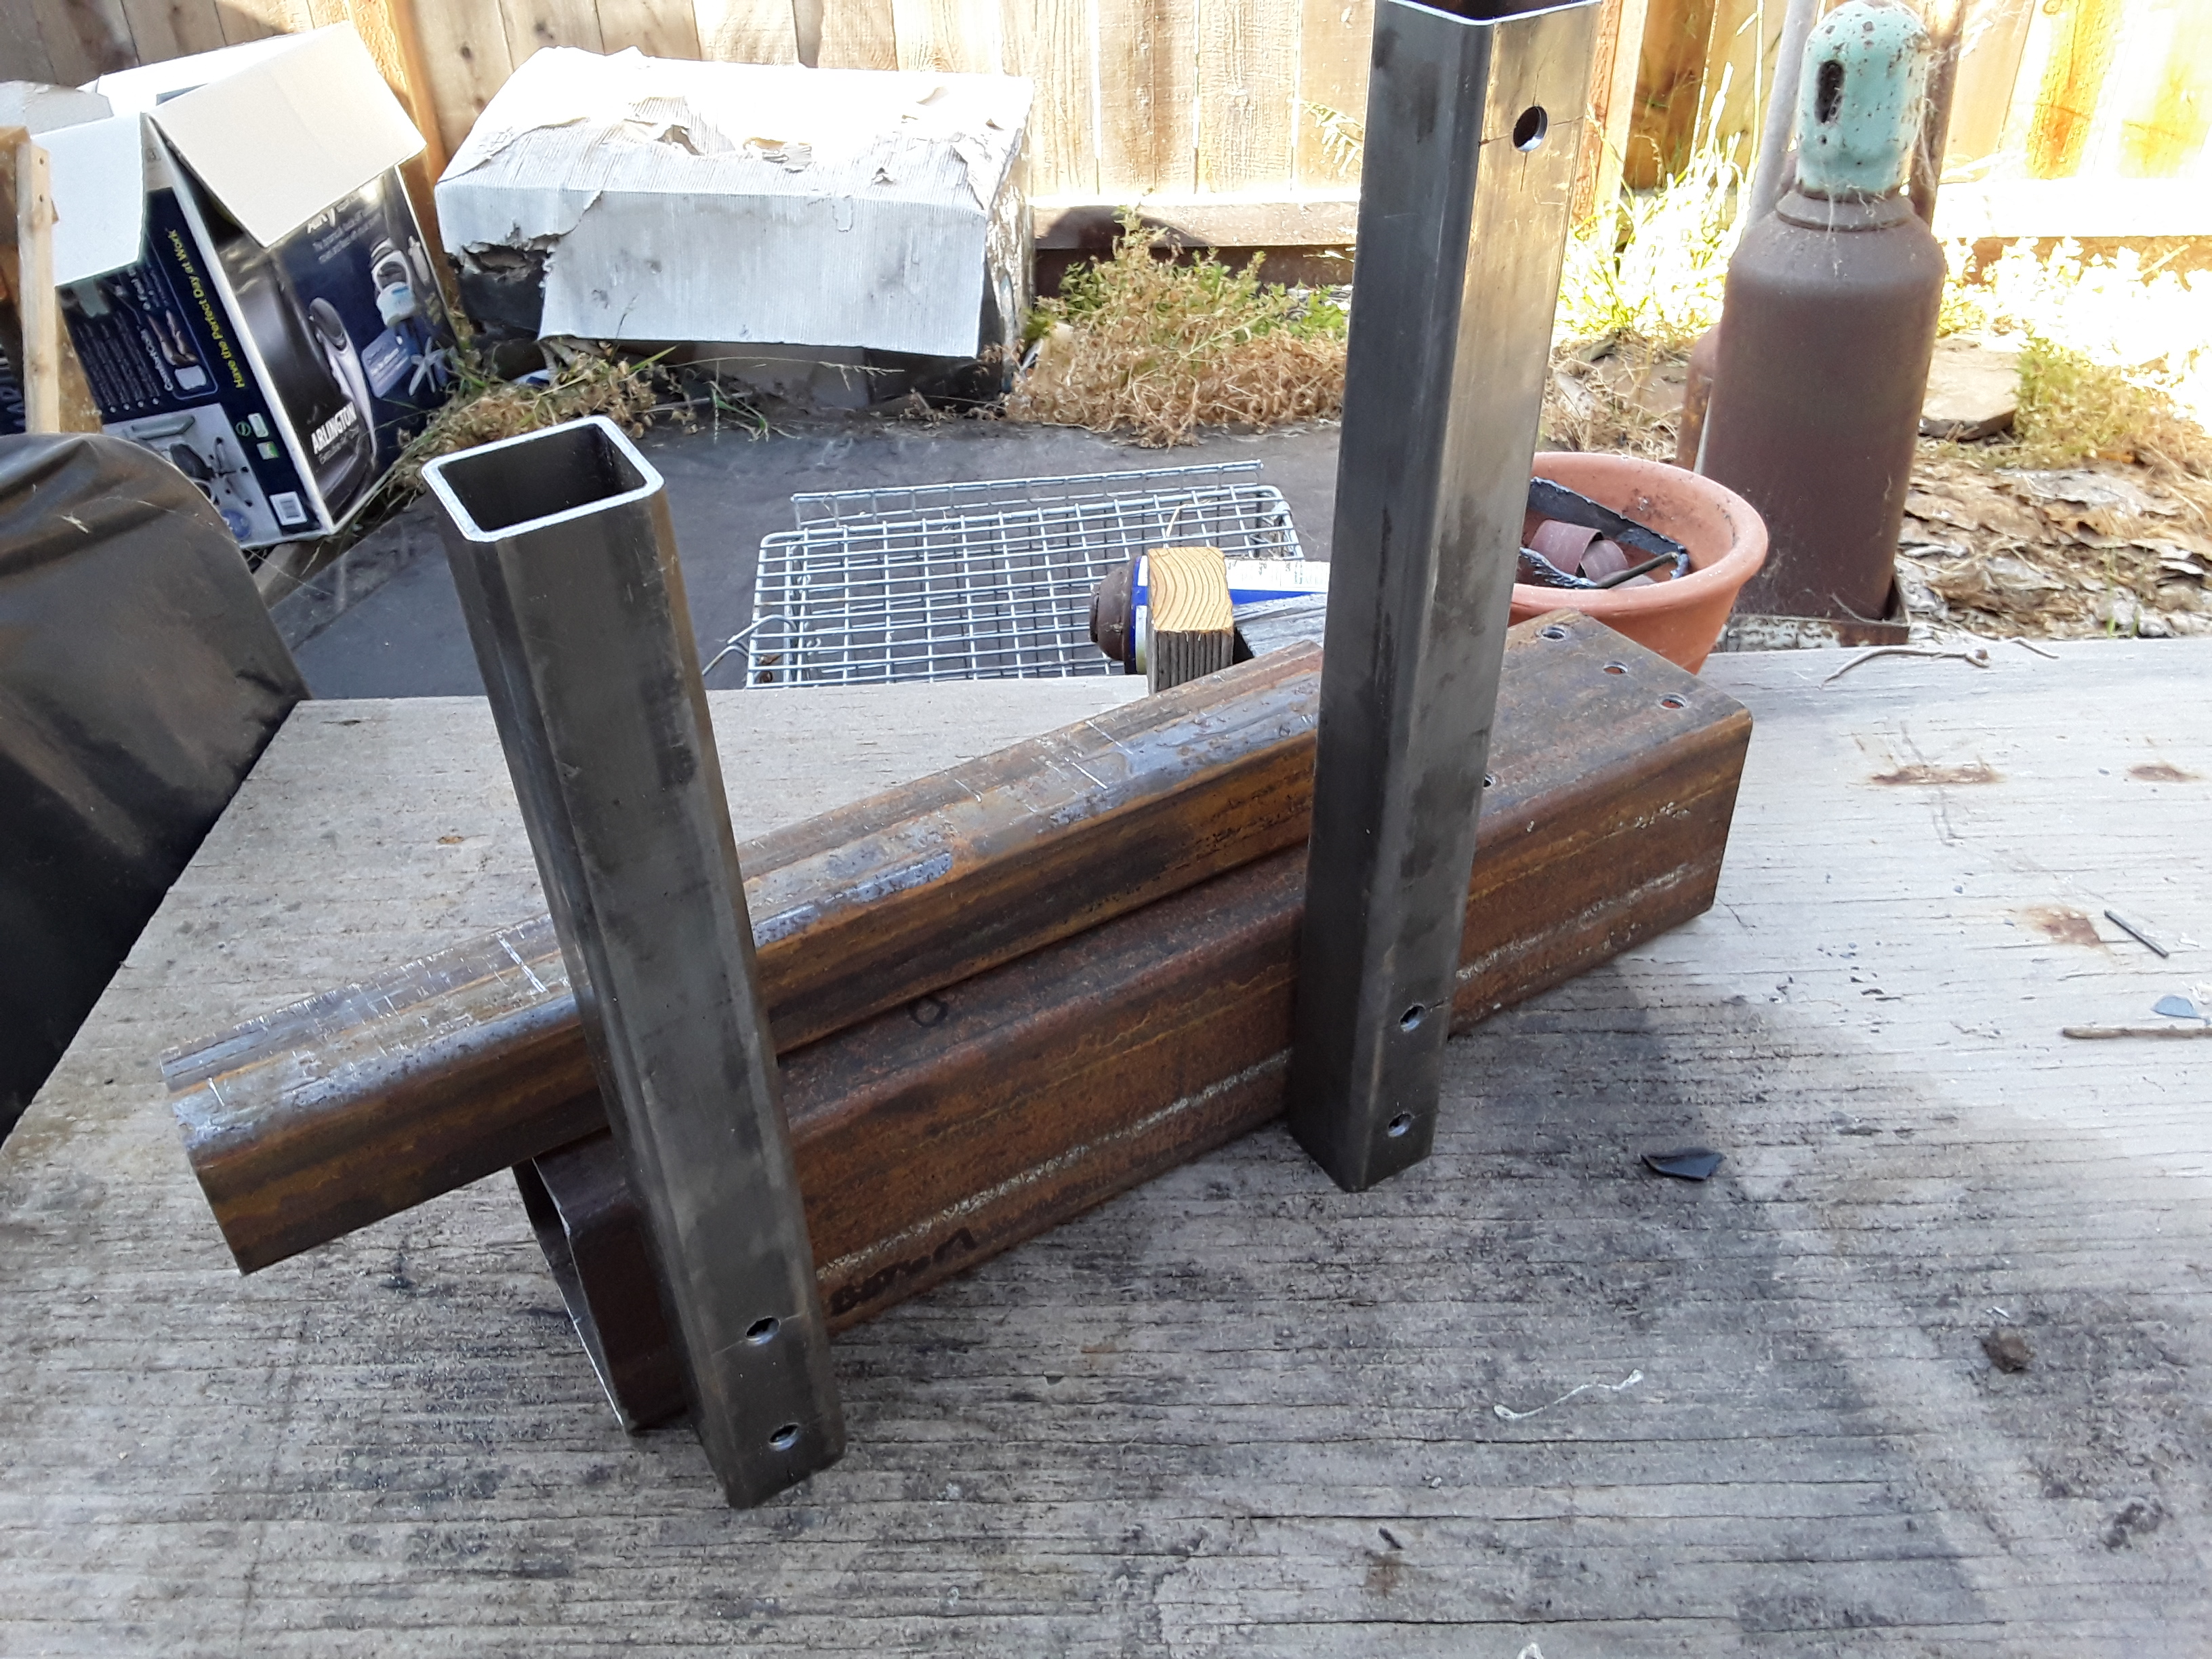
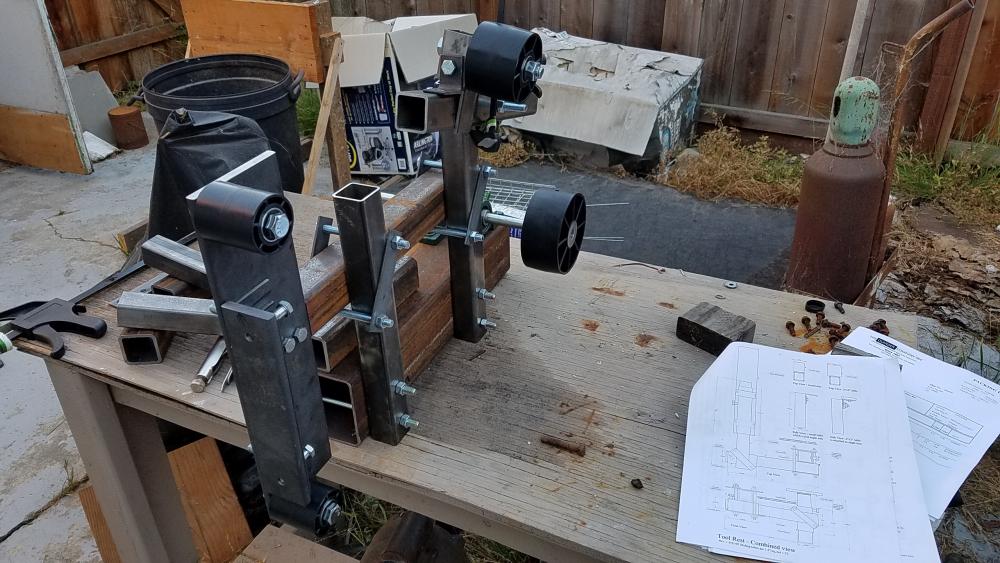
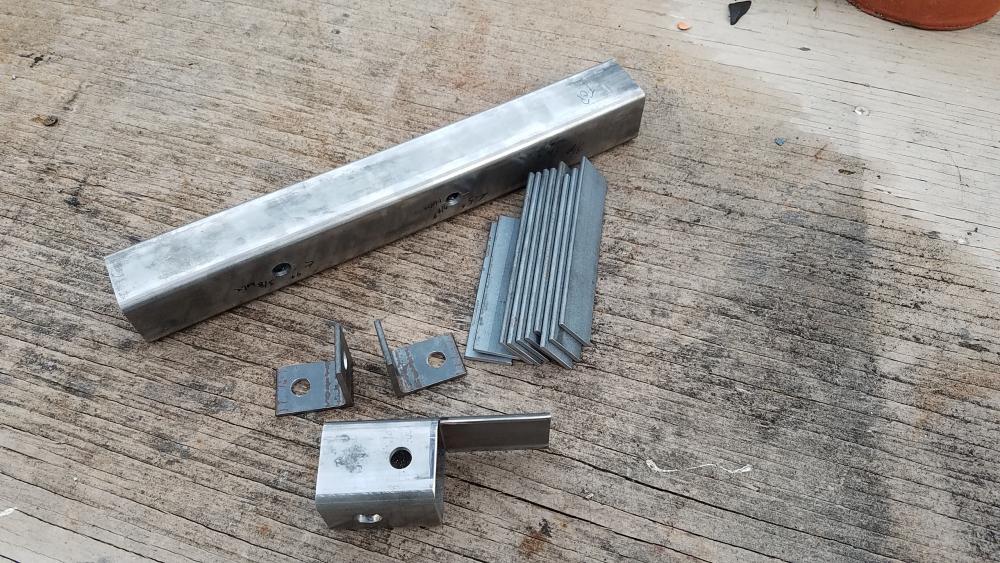
I have made some progress yesterday. Both uprights and the tool bar holder. Here are some photos. Mel