Jclonts82
Members
-
Joined
-
Last visited
Everything posted by Jclonts82
-
I don't remember who, but someone regular on here (TP?) has stated he likes to get the coal or lump charcoal smoking hot, then turn off the air all together before putting the billet in the fire. This is to make it as reducing (no oxygen present) of an environment as possible. Excess oxygen can form scale on the surface of each layer, that will inhibit welds. I decided I was not patient enough, nor attentive enough to use coal, its what I started out on, but then I built propane and likely will not go back. Also, FYI the higher carbon steel cannot take as high of a temp as less carbon steels. the more stuff (carbon, etc...) in the steel, the lower the melting point
-
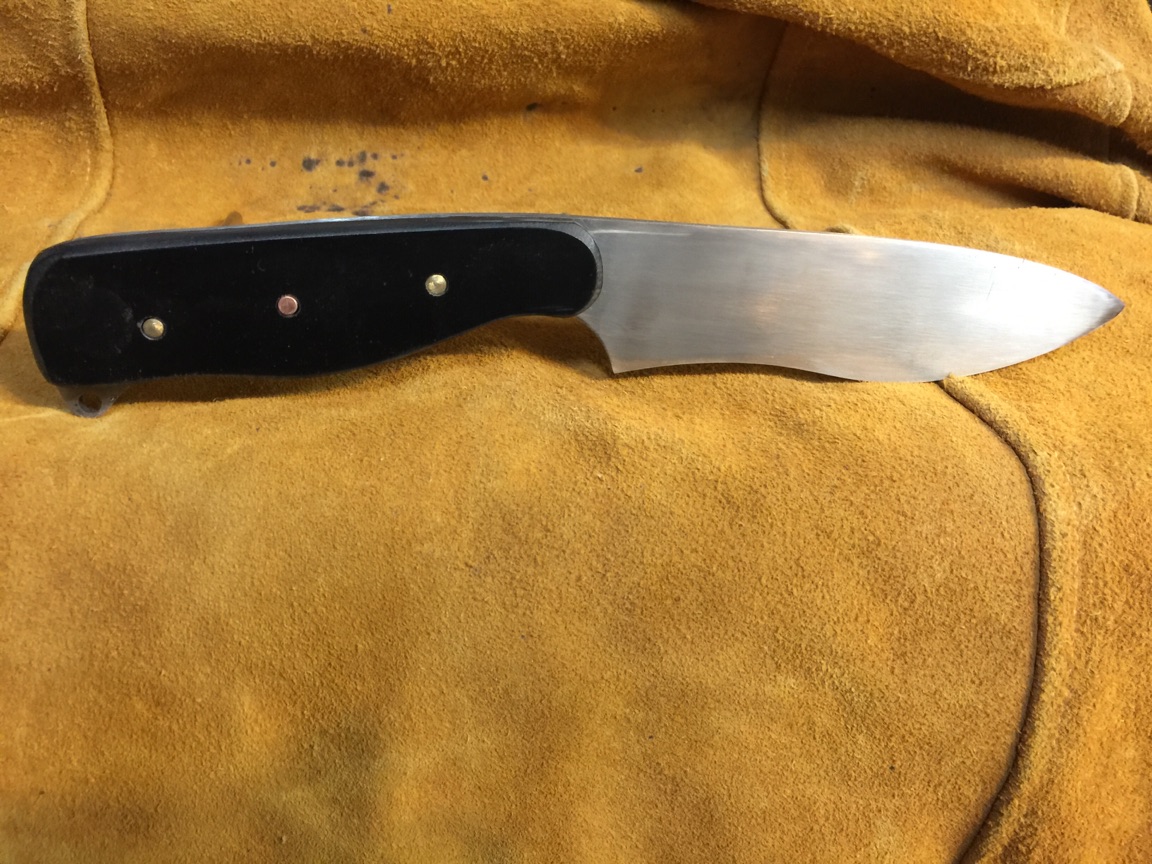
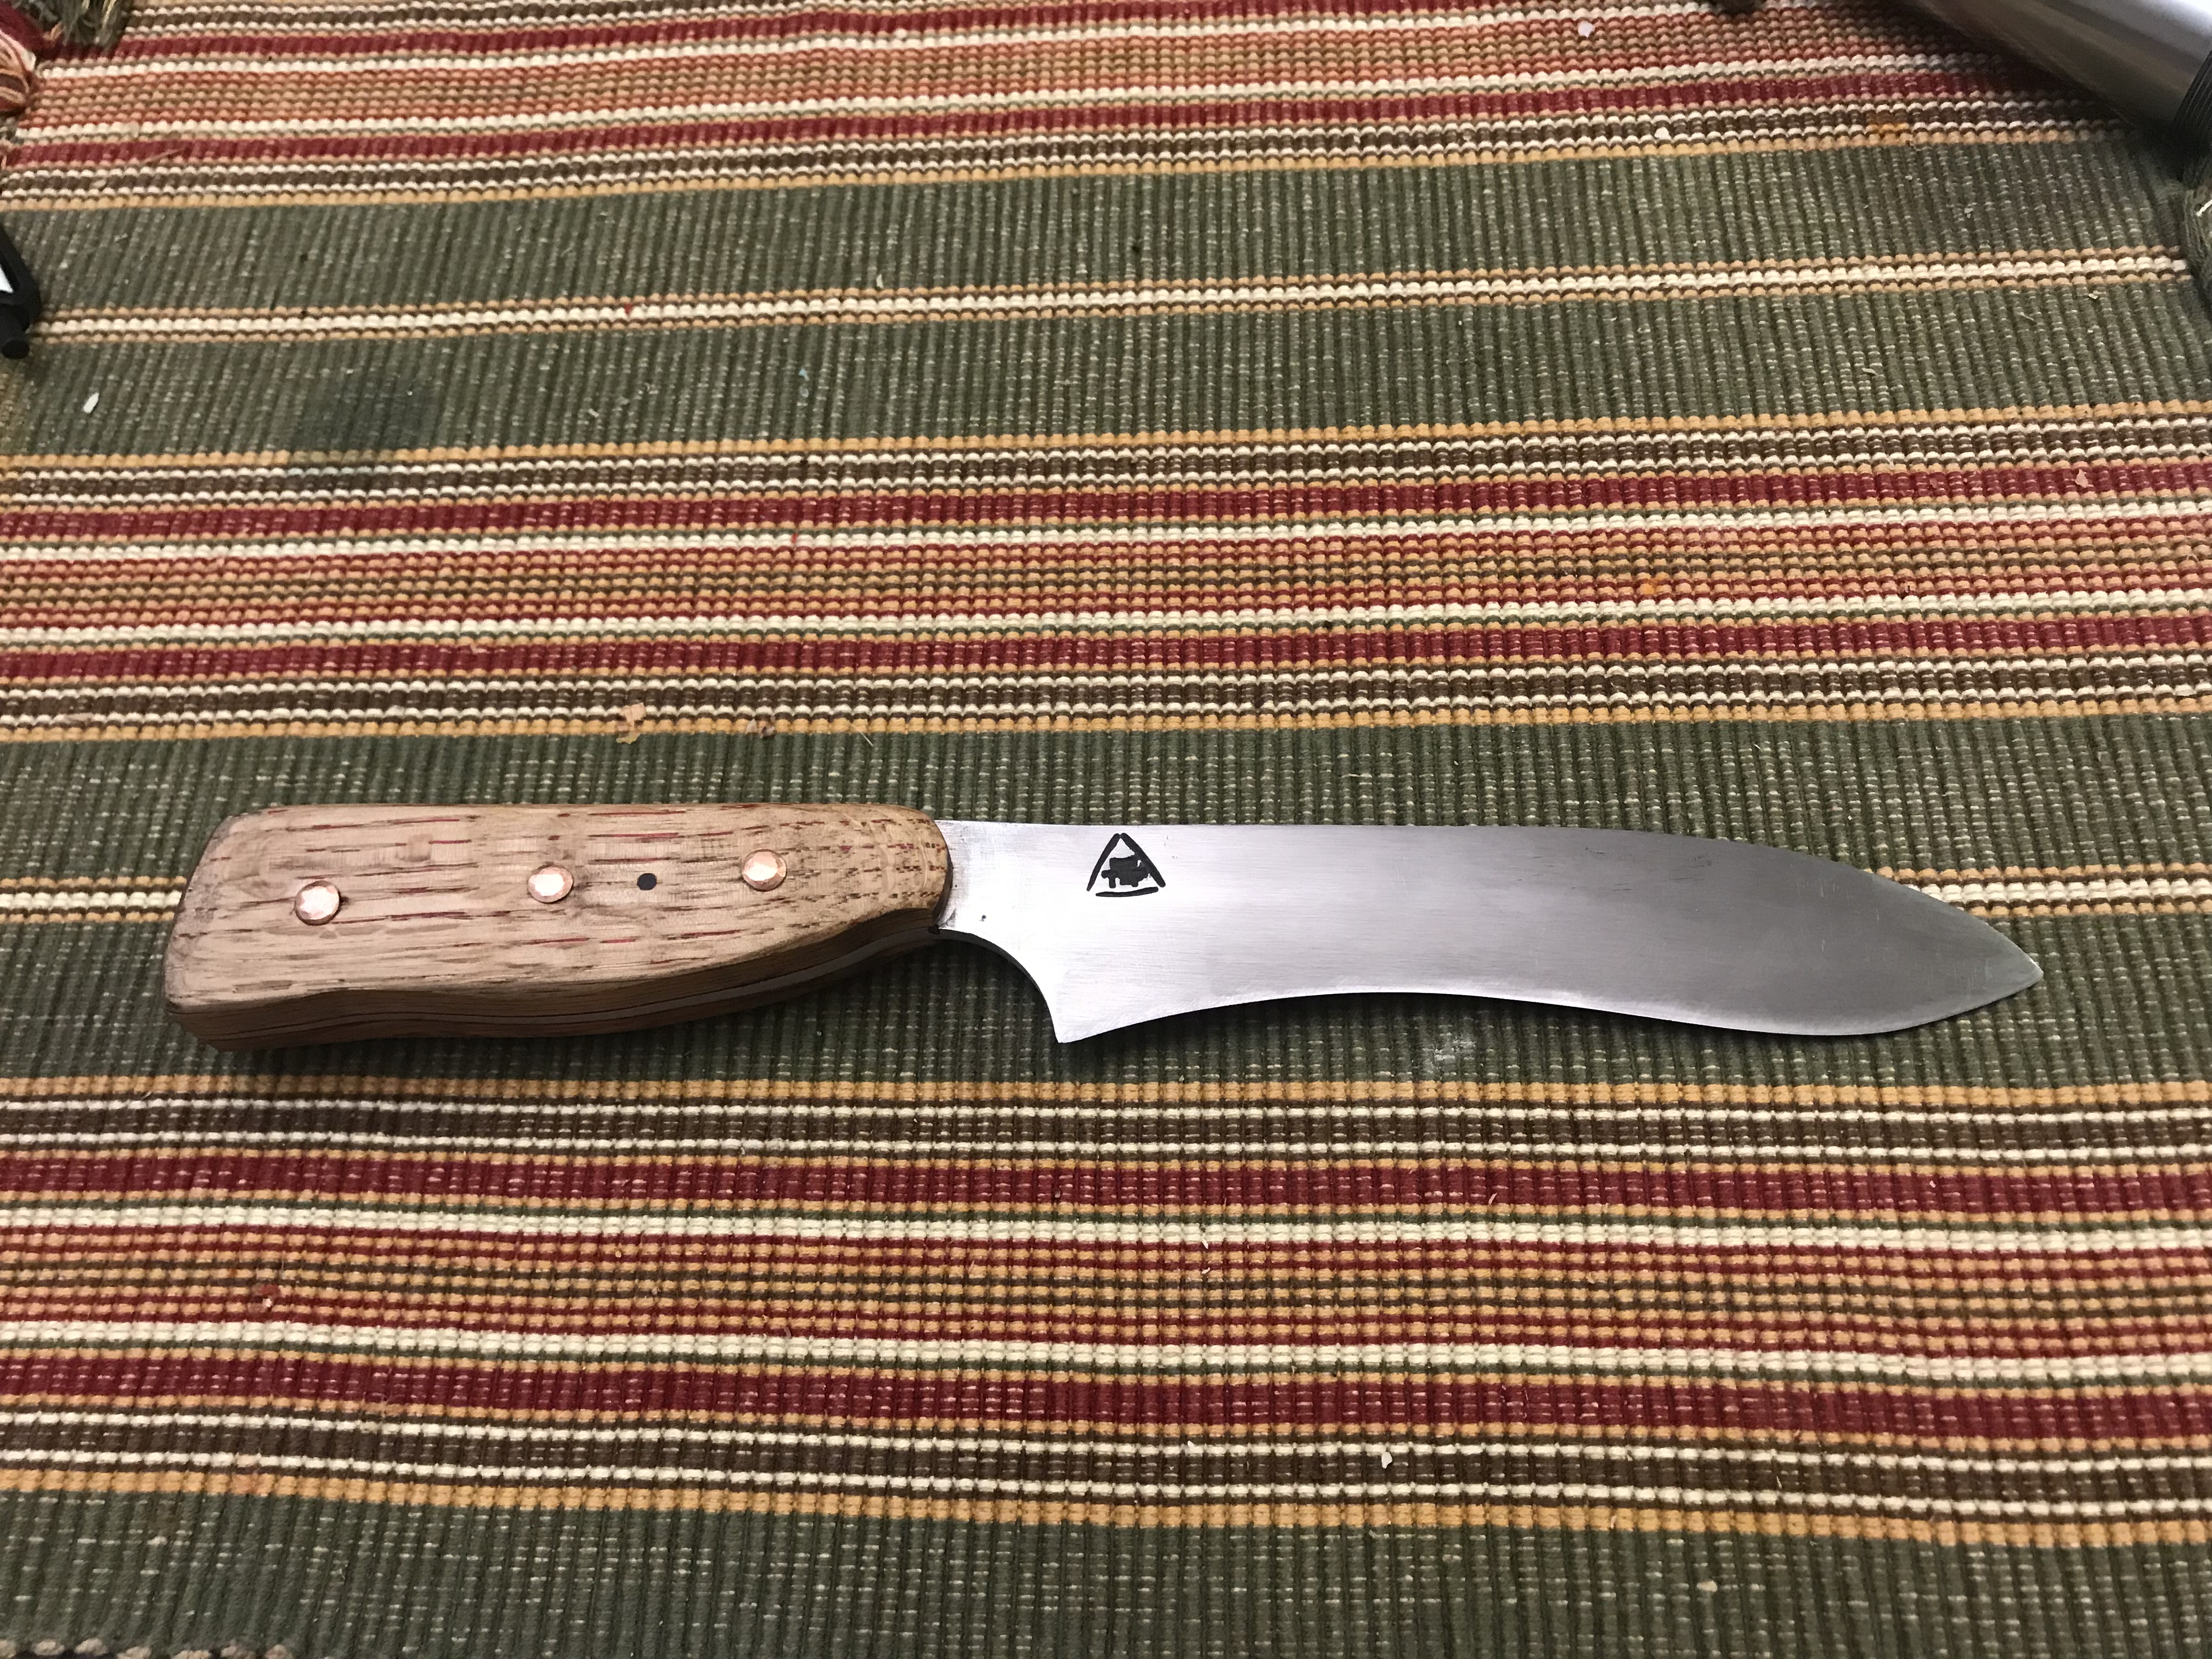
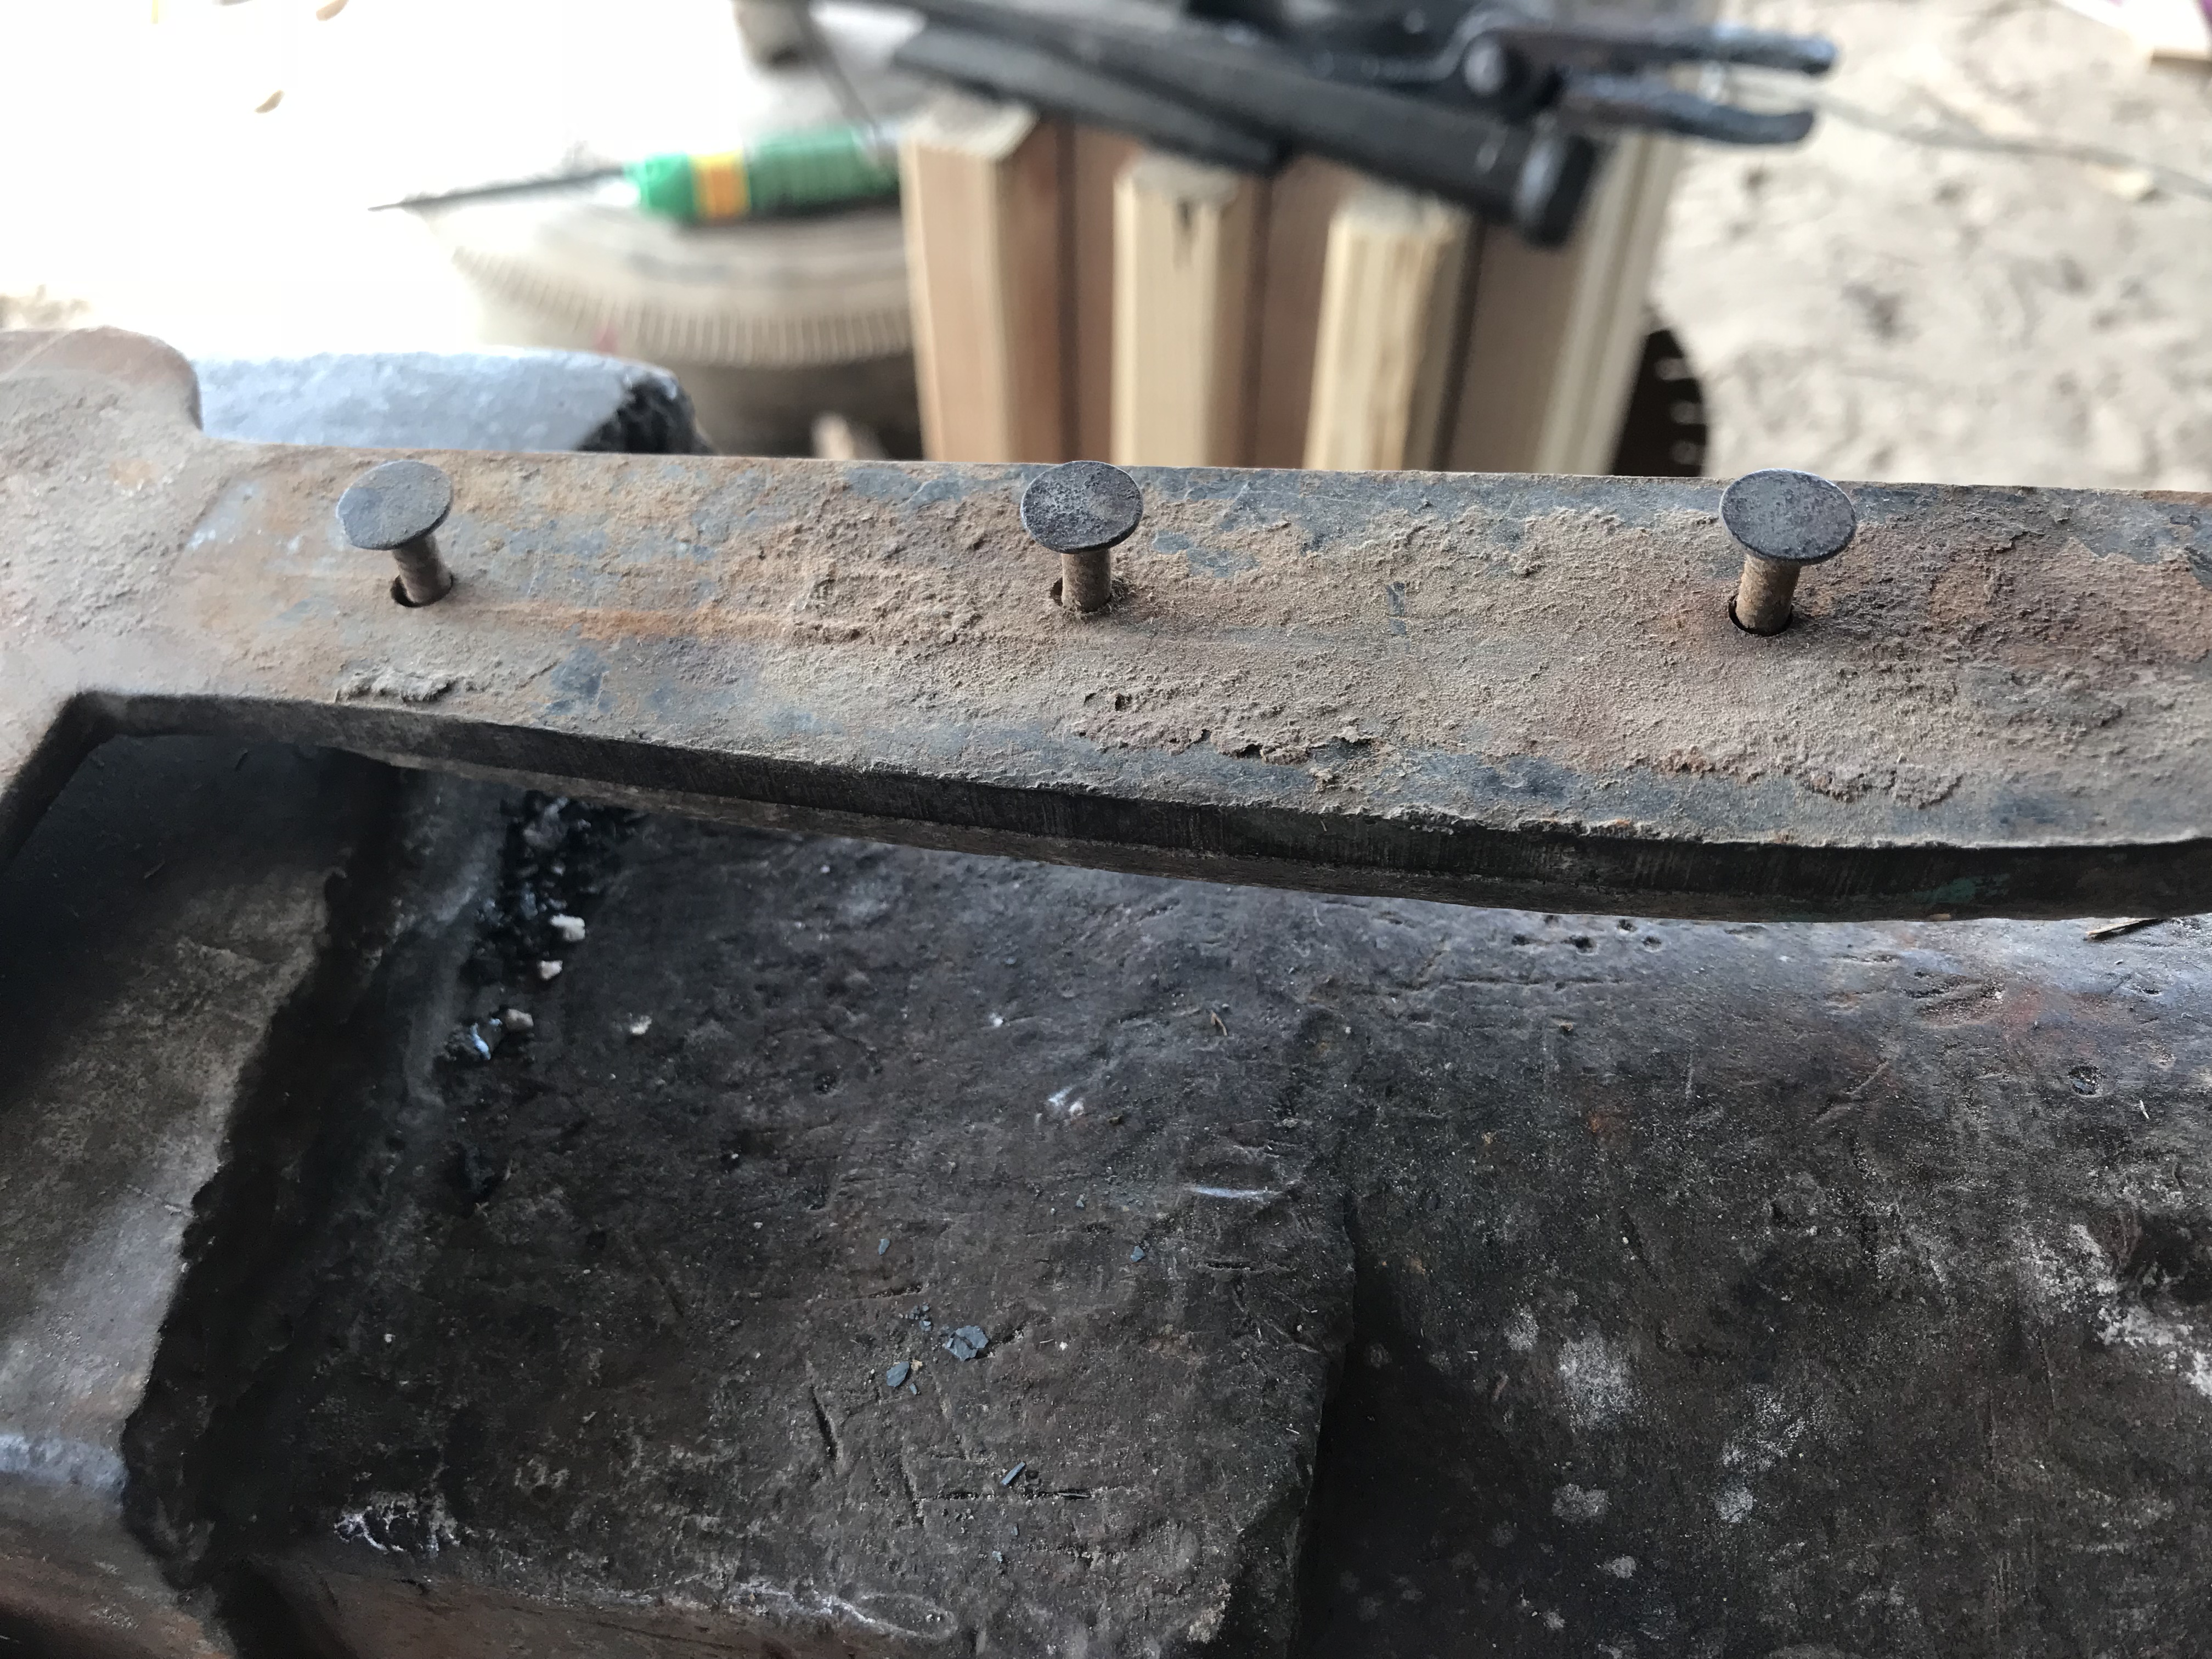
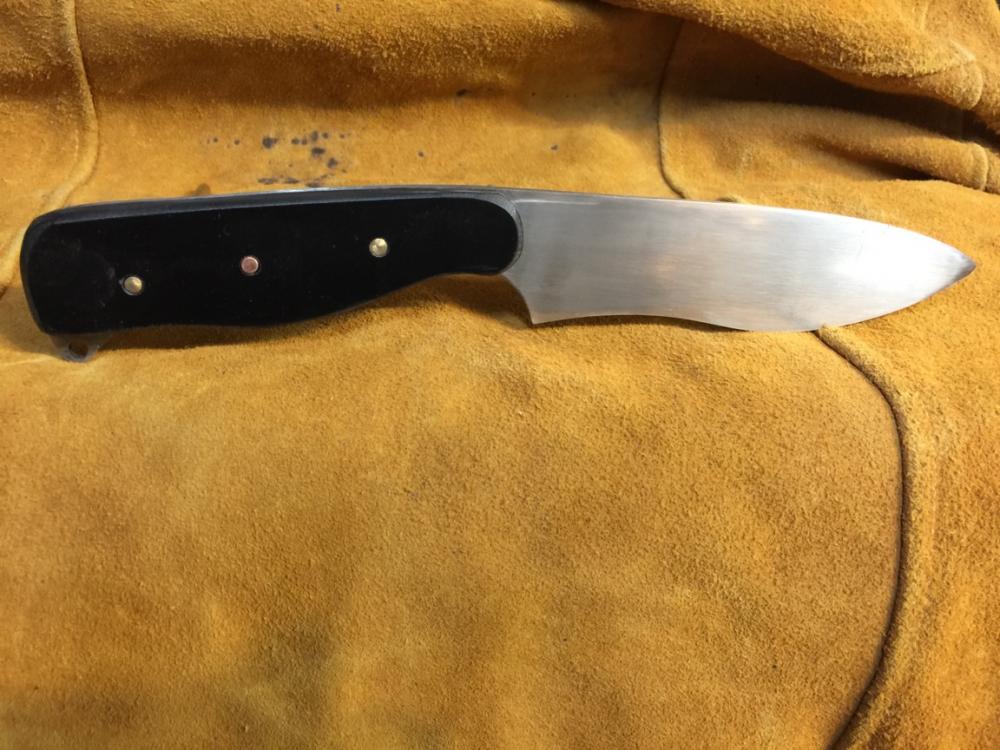
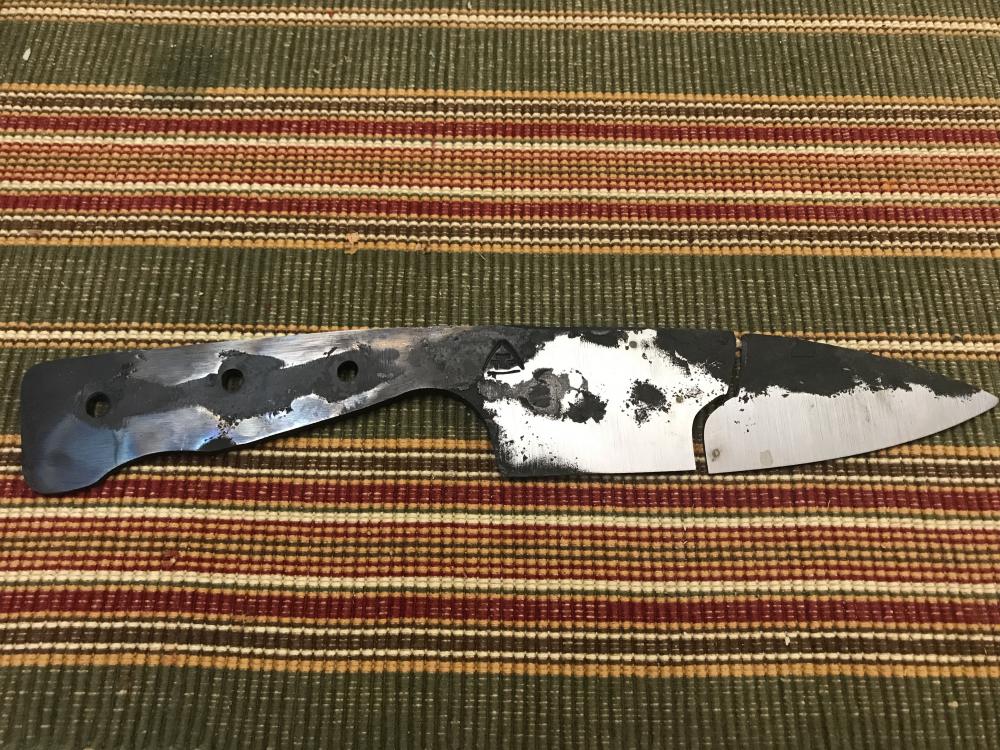
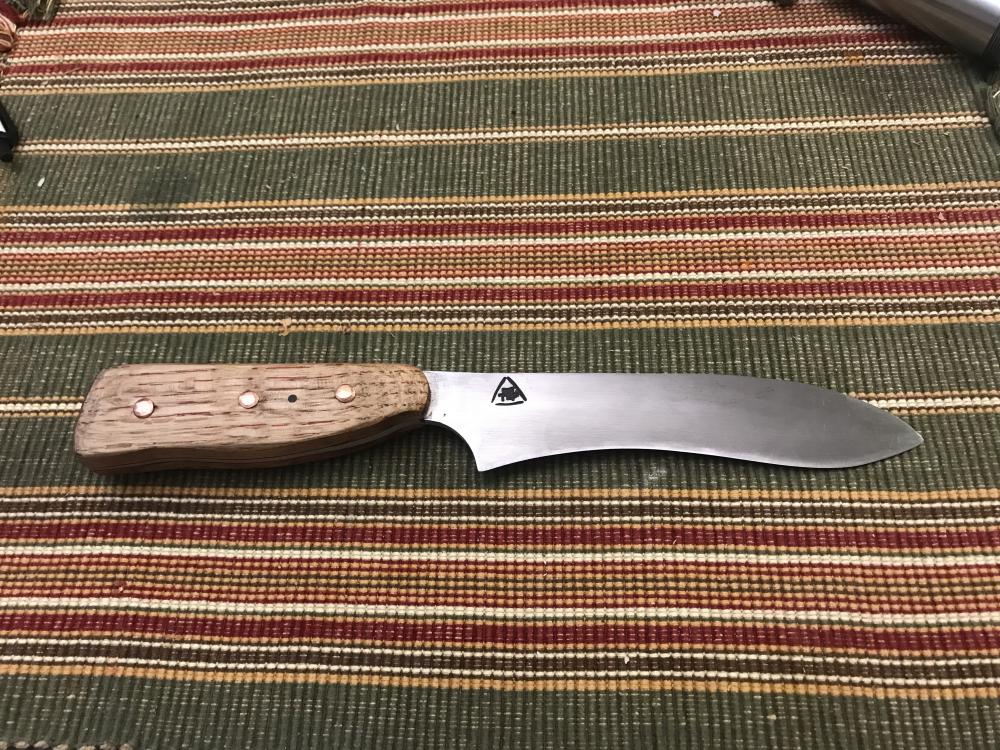
Pics of completed (mostly) knives from the class. Mine is the thinner one. Thinner because I decided to to salvage it by grinding out the crack. The handle is 100+ year old oak basketball court flooring. I have a memory of pulling nails out of the wood as my grandfather wanted to keep the wood. I think i was about 5? at the time. Floor was installed in 1915 We wanted to make matching-ish blades. His handle is canvavas micarta. Also my broken first blade.
-
What has been seen, can never be un-seen. +1 to your statement...
-
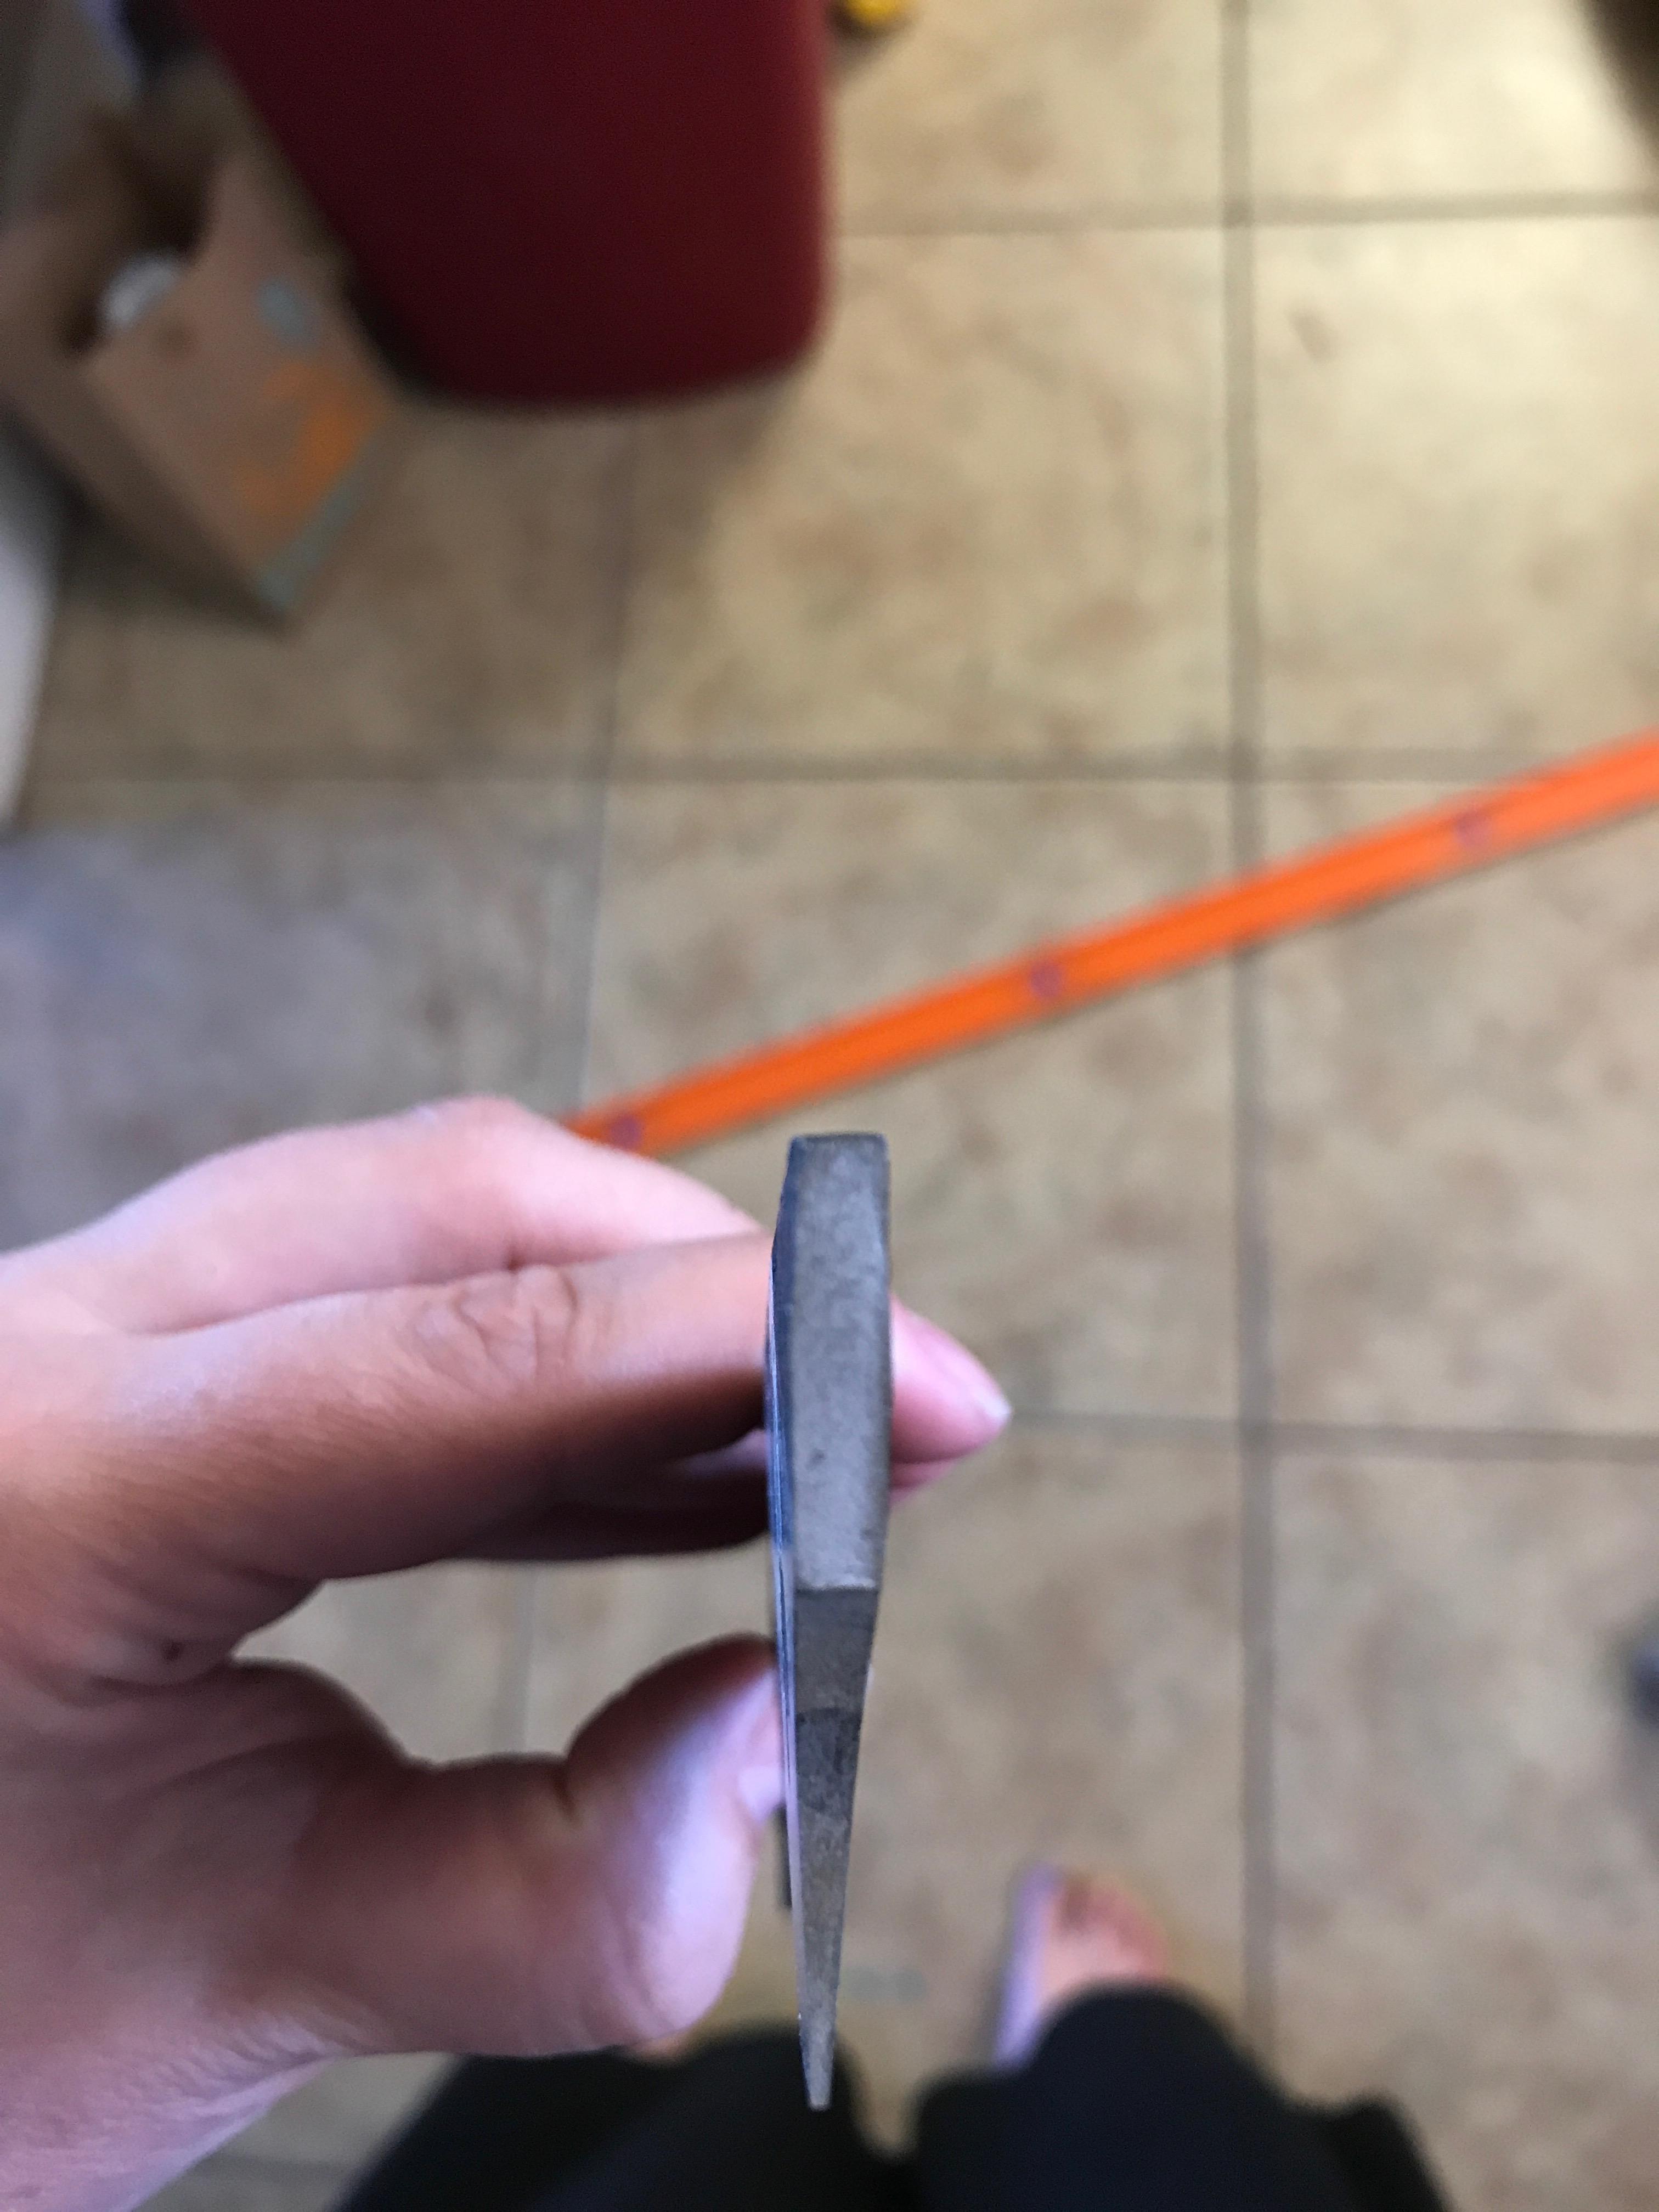
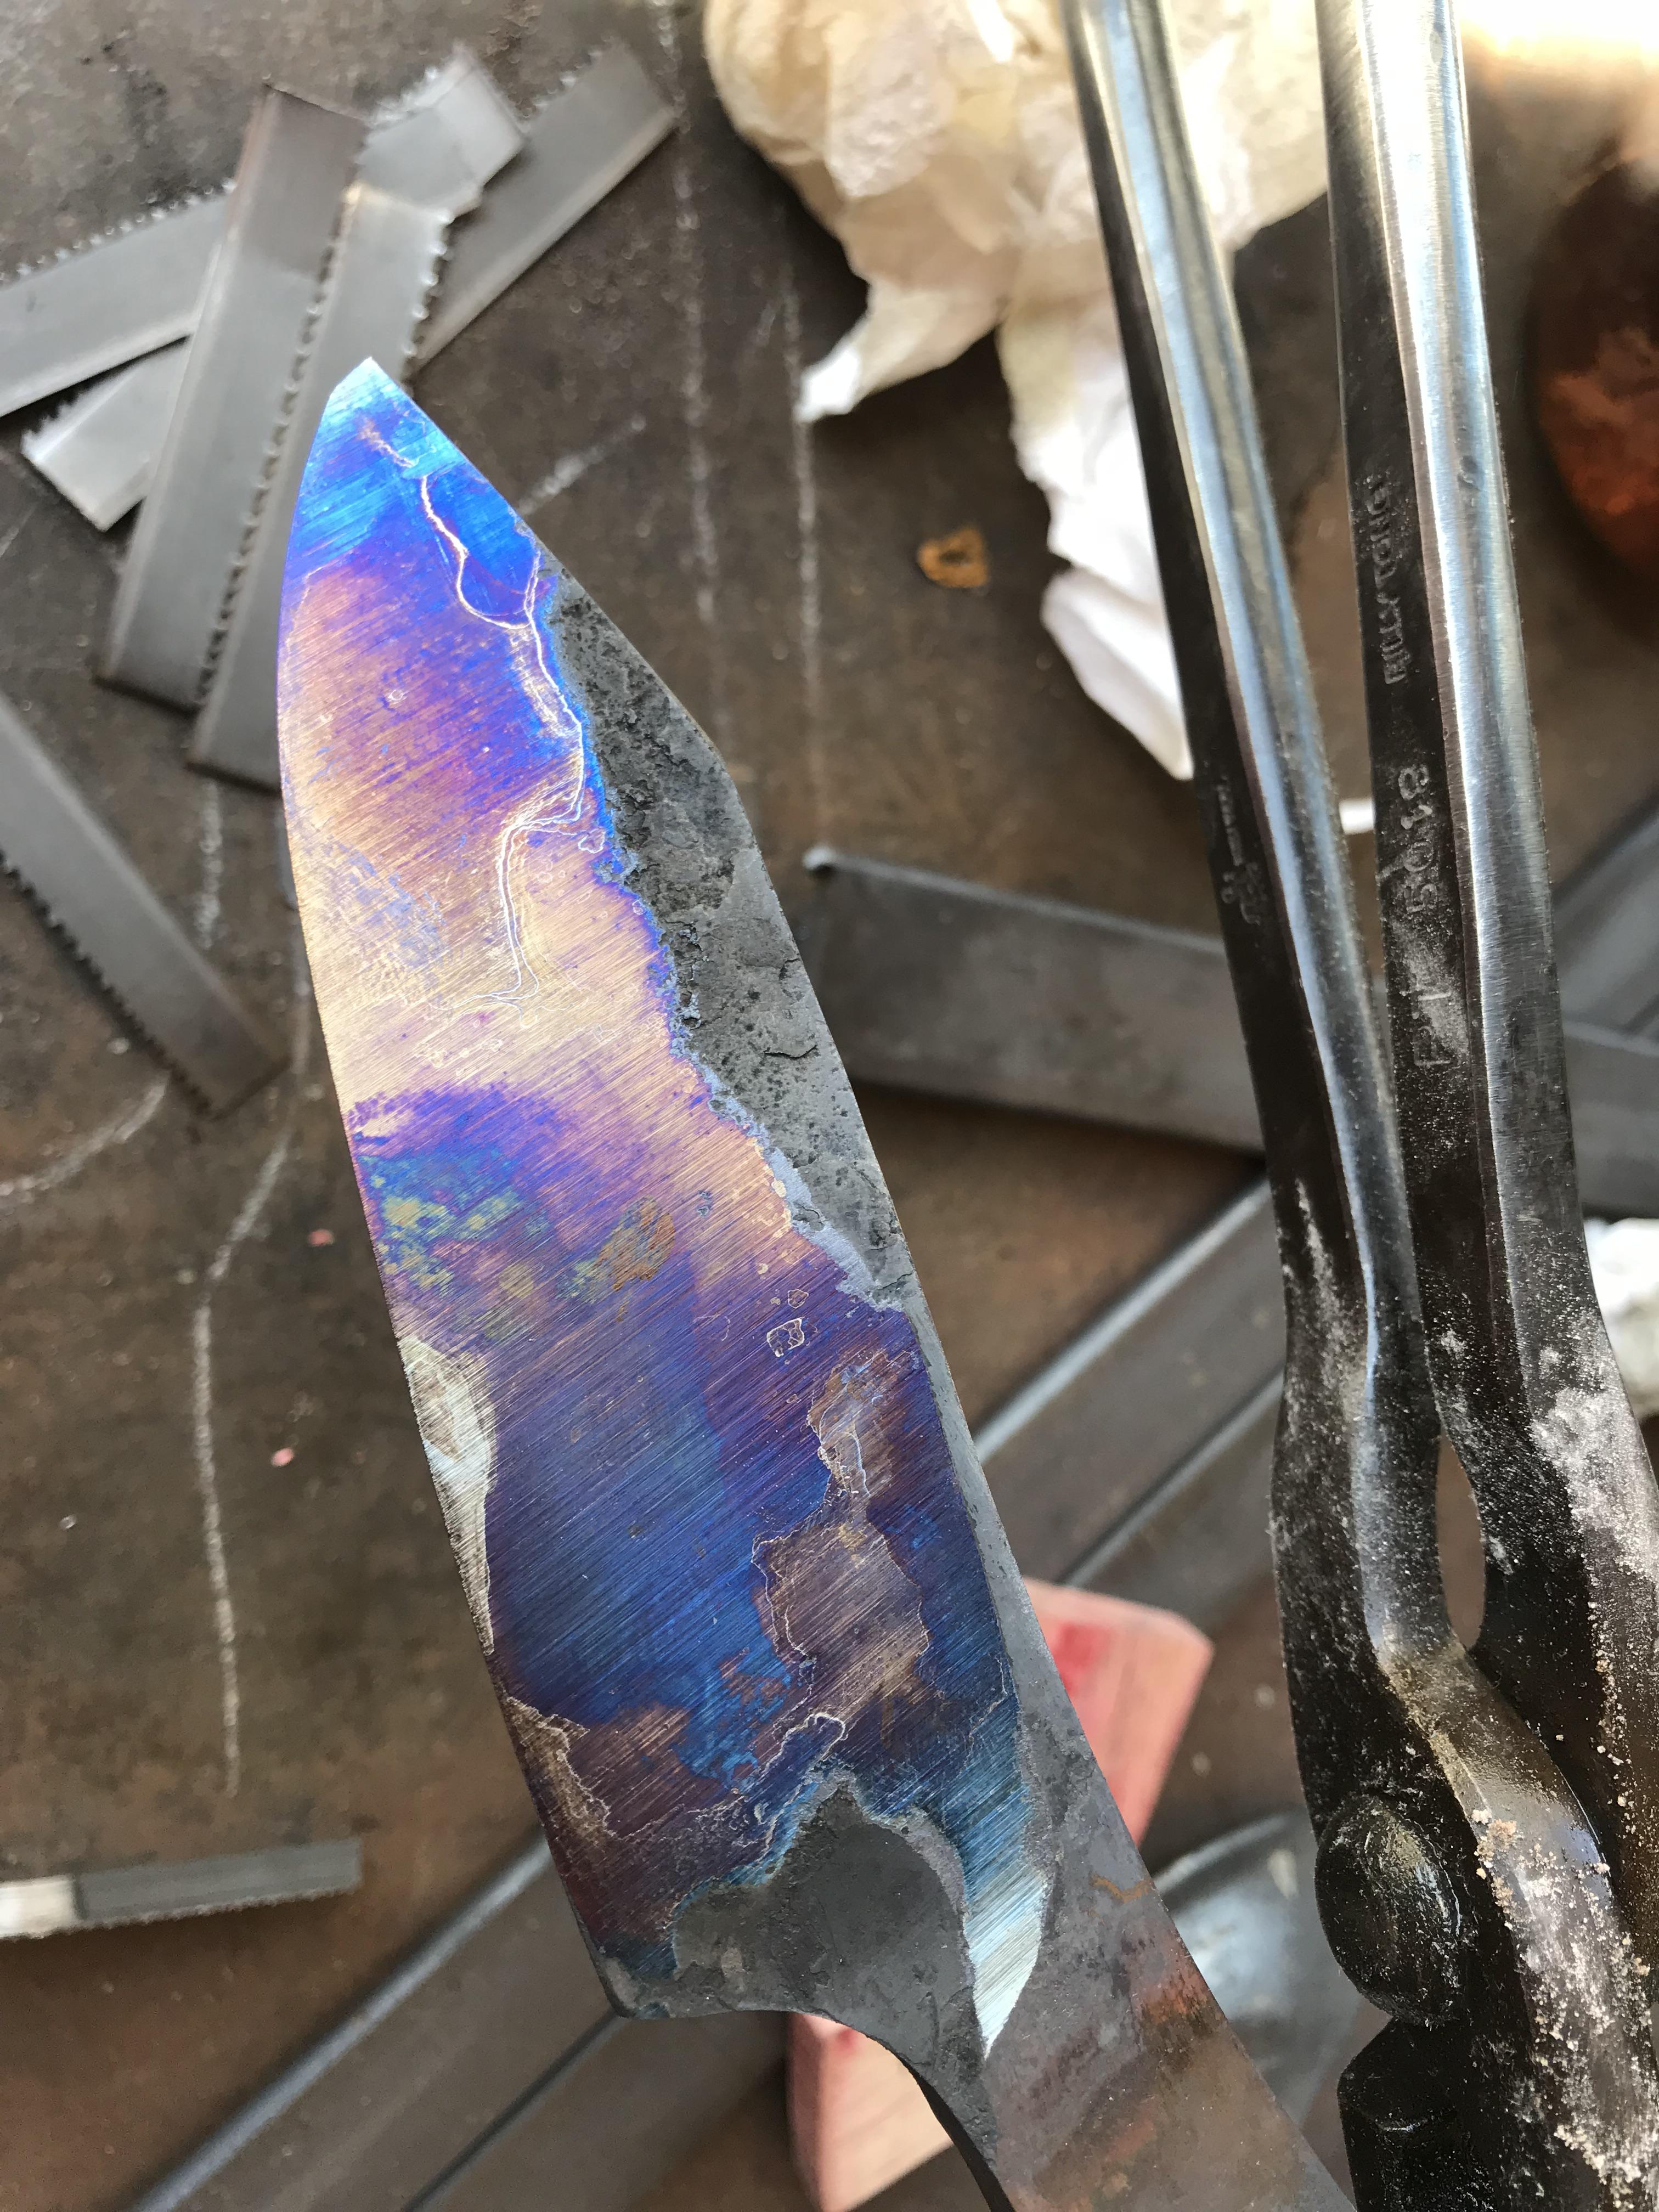
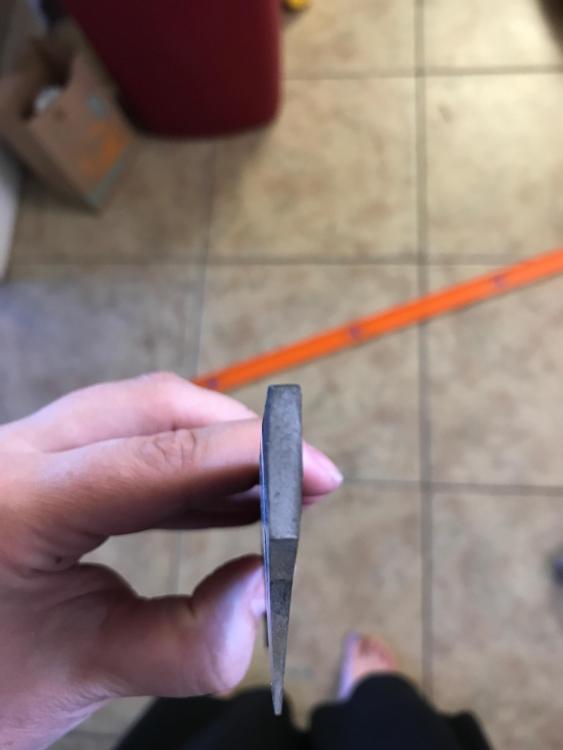
I tried, but he said you will never find him on a forum, and he also said if he hears one of ‘them cell phones’ go off he will pull a hillary on it. Lol An honary crumudgen at heart? pic of the broken blade. Interesting how the middle transition layer is blue/purple-ish The wife just corrected me, its ‘lavender’.
-
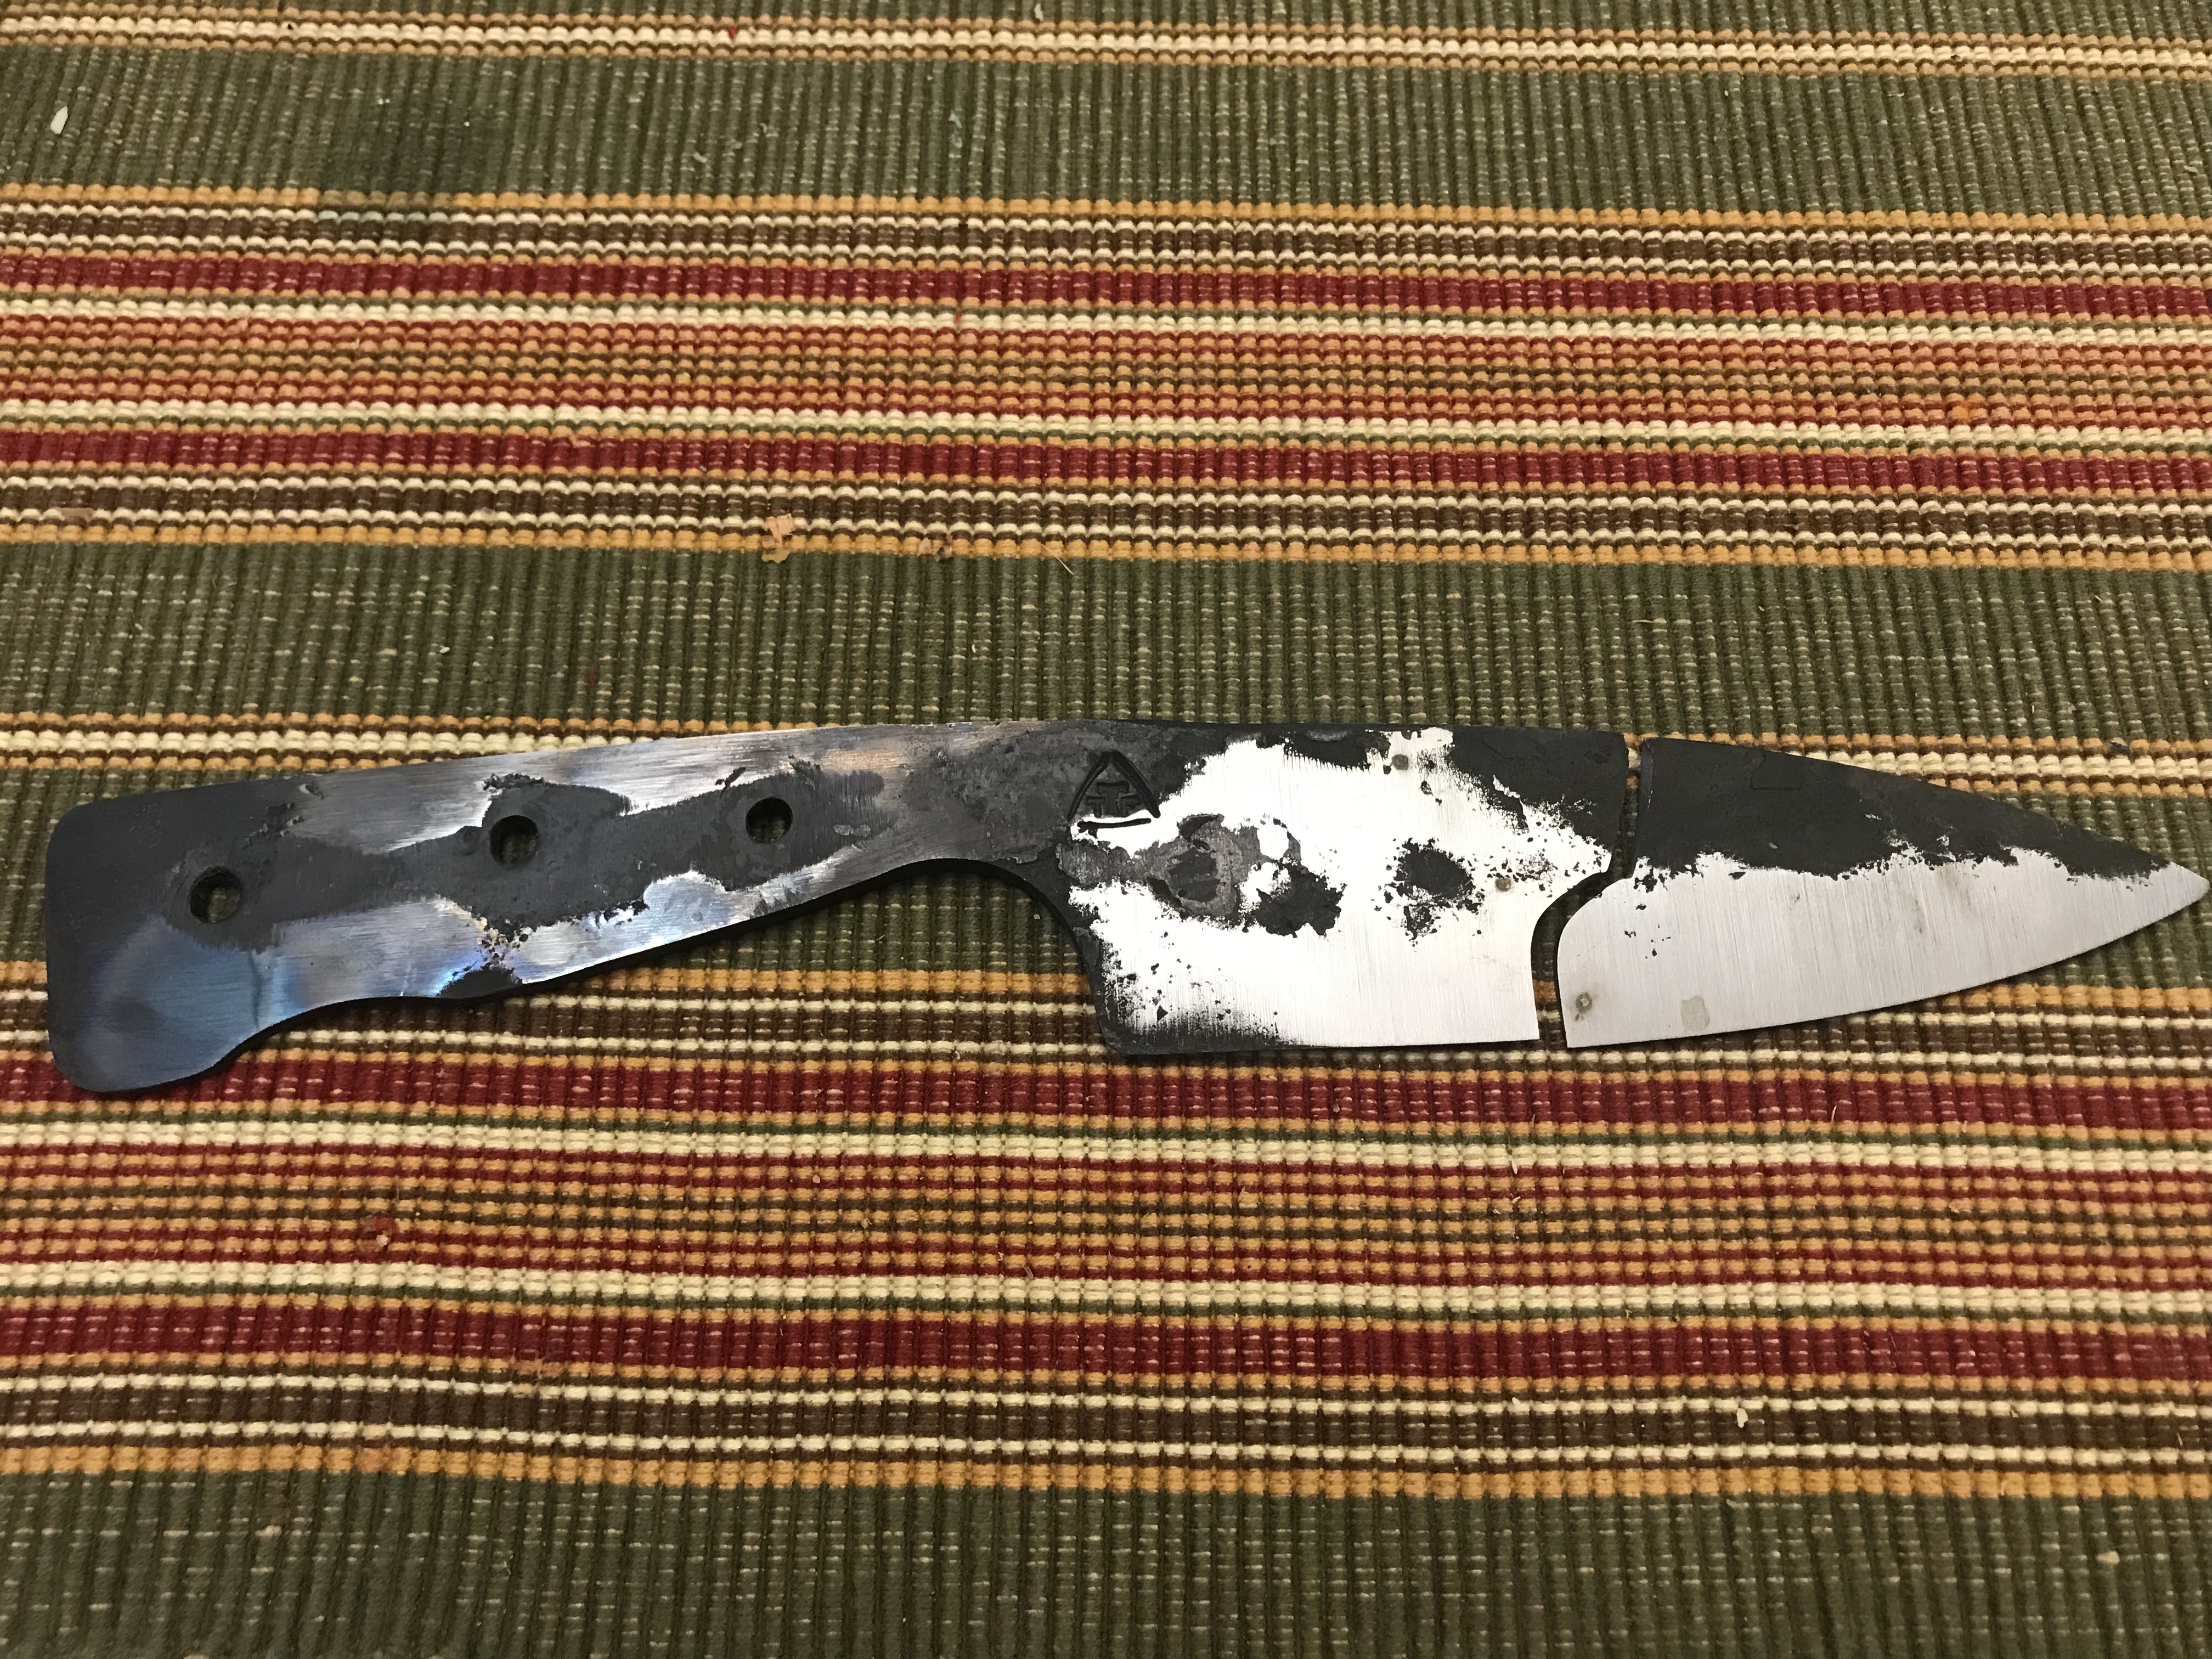
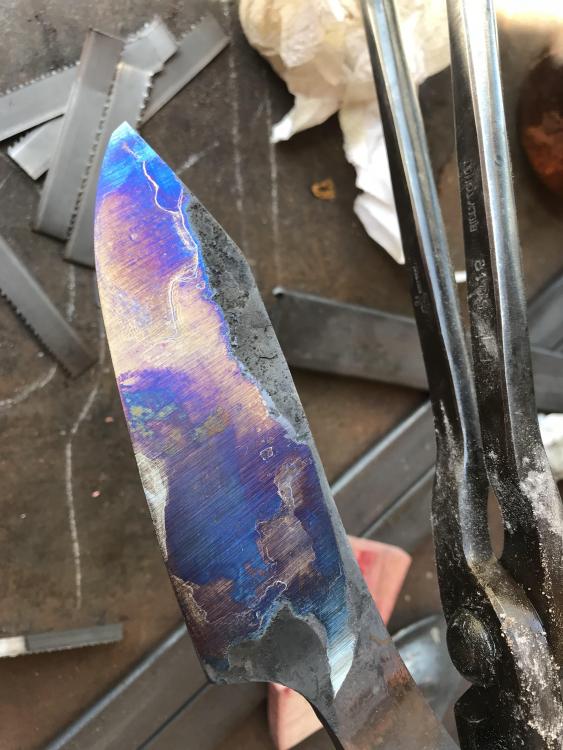
I will have him send me a pic, and I can add one of mine when I get home to take a pic of it. one of Ray's main talking points was about the quality (or lack thereof) of steel nowadays. He grew up in Pittsburgh and started smiting as a farrier assistant at 10 years old. He remembers the glory days of US steel, where the stated specs of the steel were exactly what came in the steel, not so much anymore with the majority of US steel mills gone the way of the dodo and being imported. We had a perfect example in this class. He ordered 5160 bar stock because he was out of the stuff he makes himself... yes, he collects ore, and reduces it down and makes his own steel adding in other trace elements, then has a buddy of his spectral analyse it, because he cant trust what others sell anymore. I had started making my second knife, cut from a new bar, since I was a little more adept than most in the class and got ahead. However while grinding the first knife I discovered a crack. He was puzzled and said he watched me do most all of my work and was surprised to see a crack since I never overheated it, nor hit it too cold. Then a second crack, in a second blade, we were able to grind through it, but it made it a little thin.We broke the first blade all the way to check the grain structure. I will add a pic later that shows a perfect transition from Martensite on the edge, to an Austenite transition zone, with Pearlite towards the spine (we did an edge quench method in this class). Then another student cooked his blade into cottage cheese and had to start over. He cut another piece from the same bar I was using to make my knives and forged away (pictured below). Upon heating it up to temper it, Ray wanted to look at it on a hunch. The chrome in the steel was not evenly distributed, and there were chrome carbides all throughout the blade that had pooled in streaks/lines. Some of these lines even inhibited heat transfer (read: essentially a crack). The tempering colors being halted in their run can be seen by the spine close to the tang, and right in the belly of the blade too. So Ray said with confidence that I did nothing wrong to cause it to crack, and it was probably a carbide line that was brittle and the slightest bump once hardened caused a split.
-
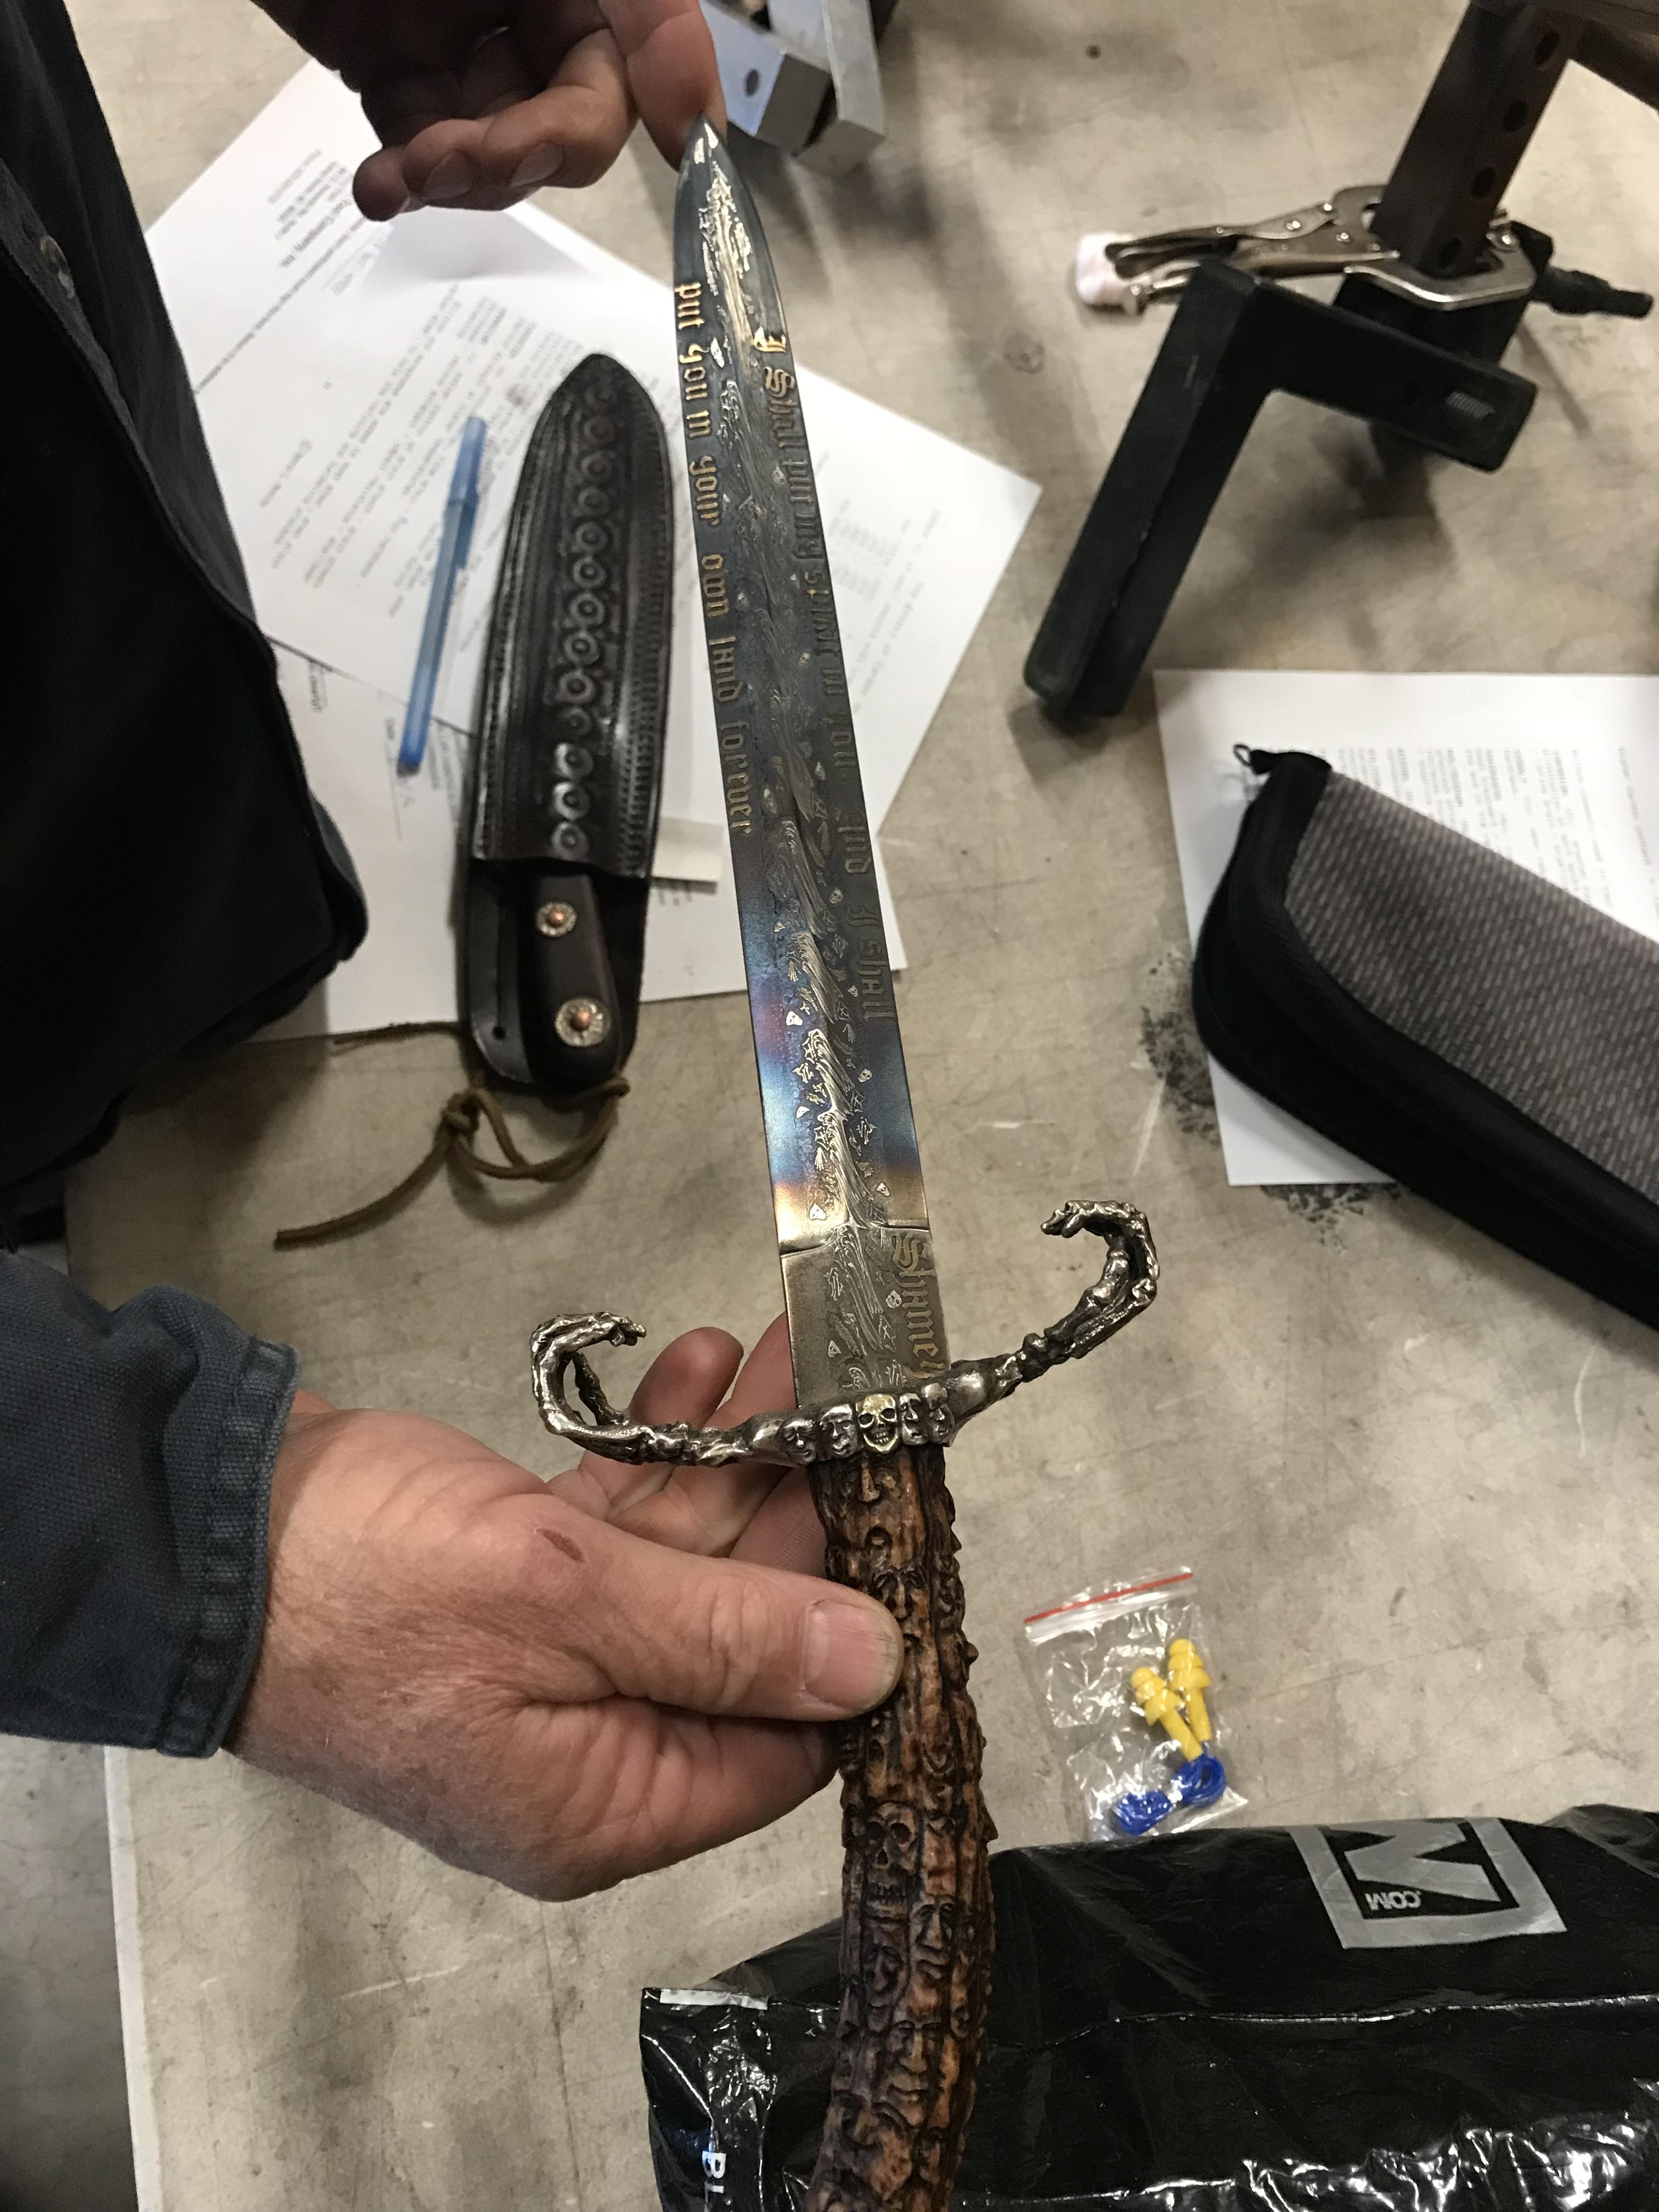
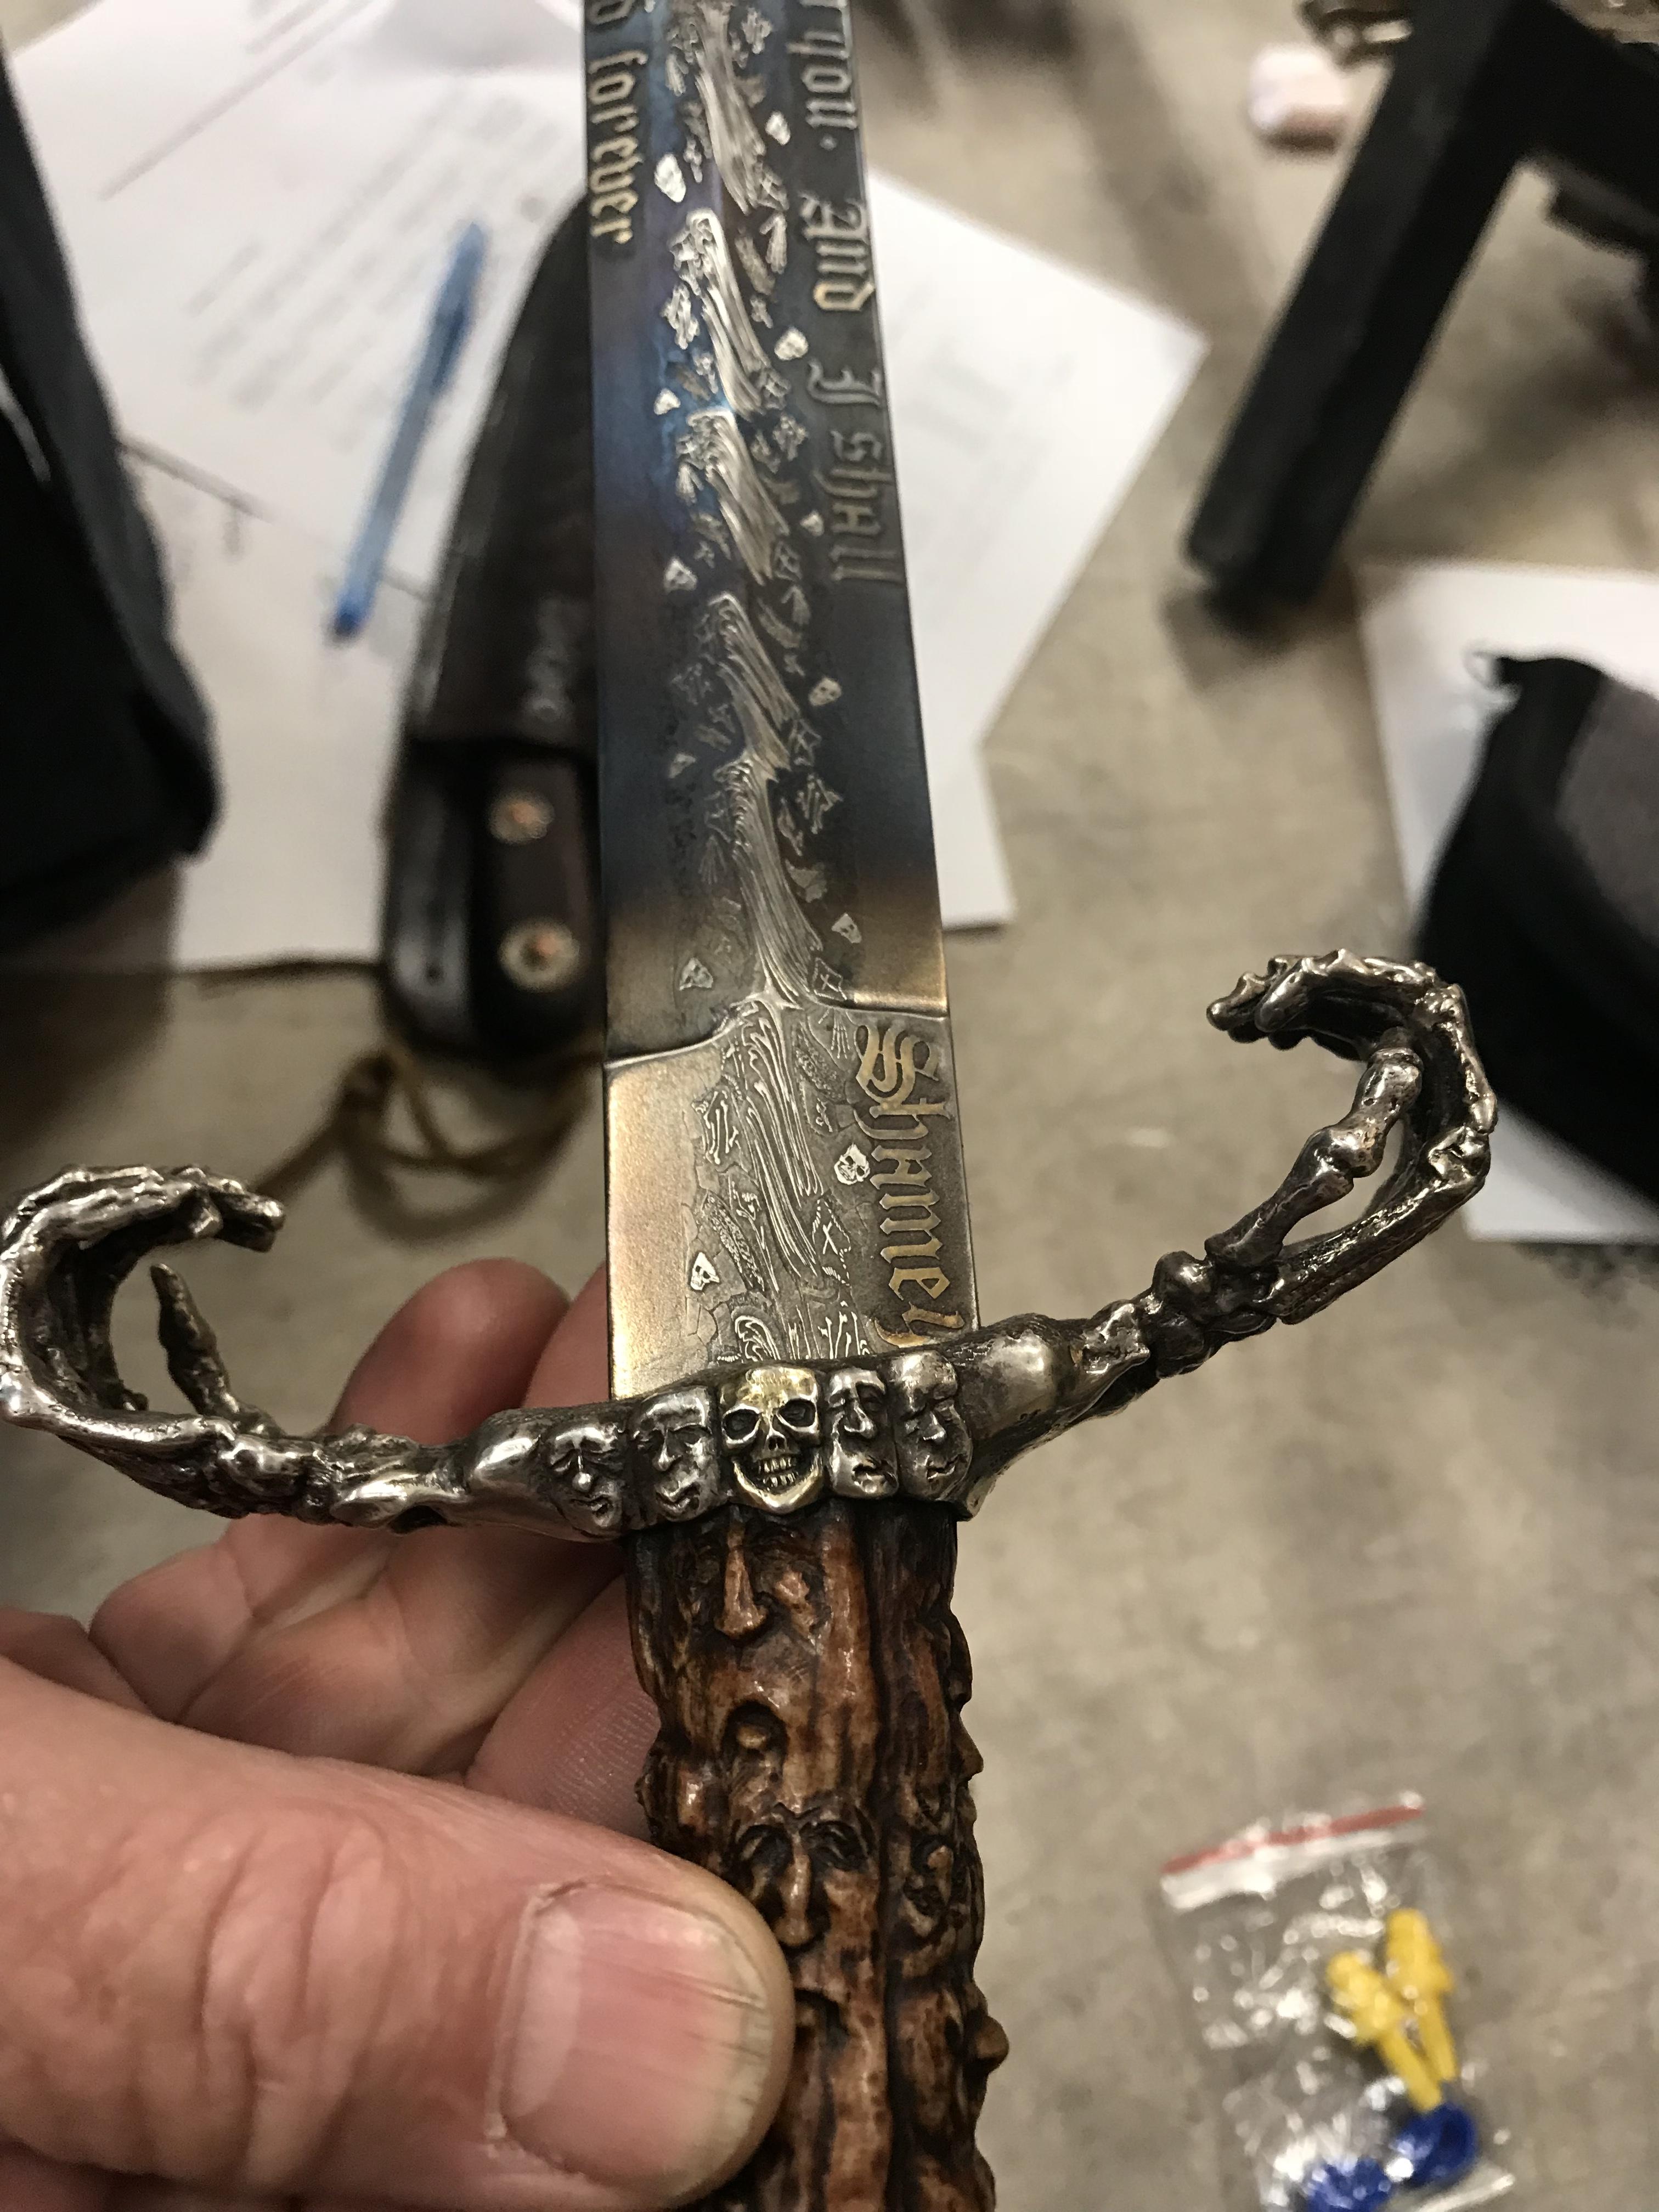
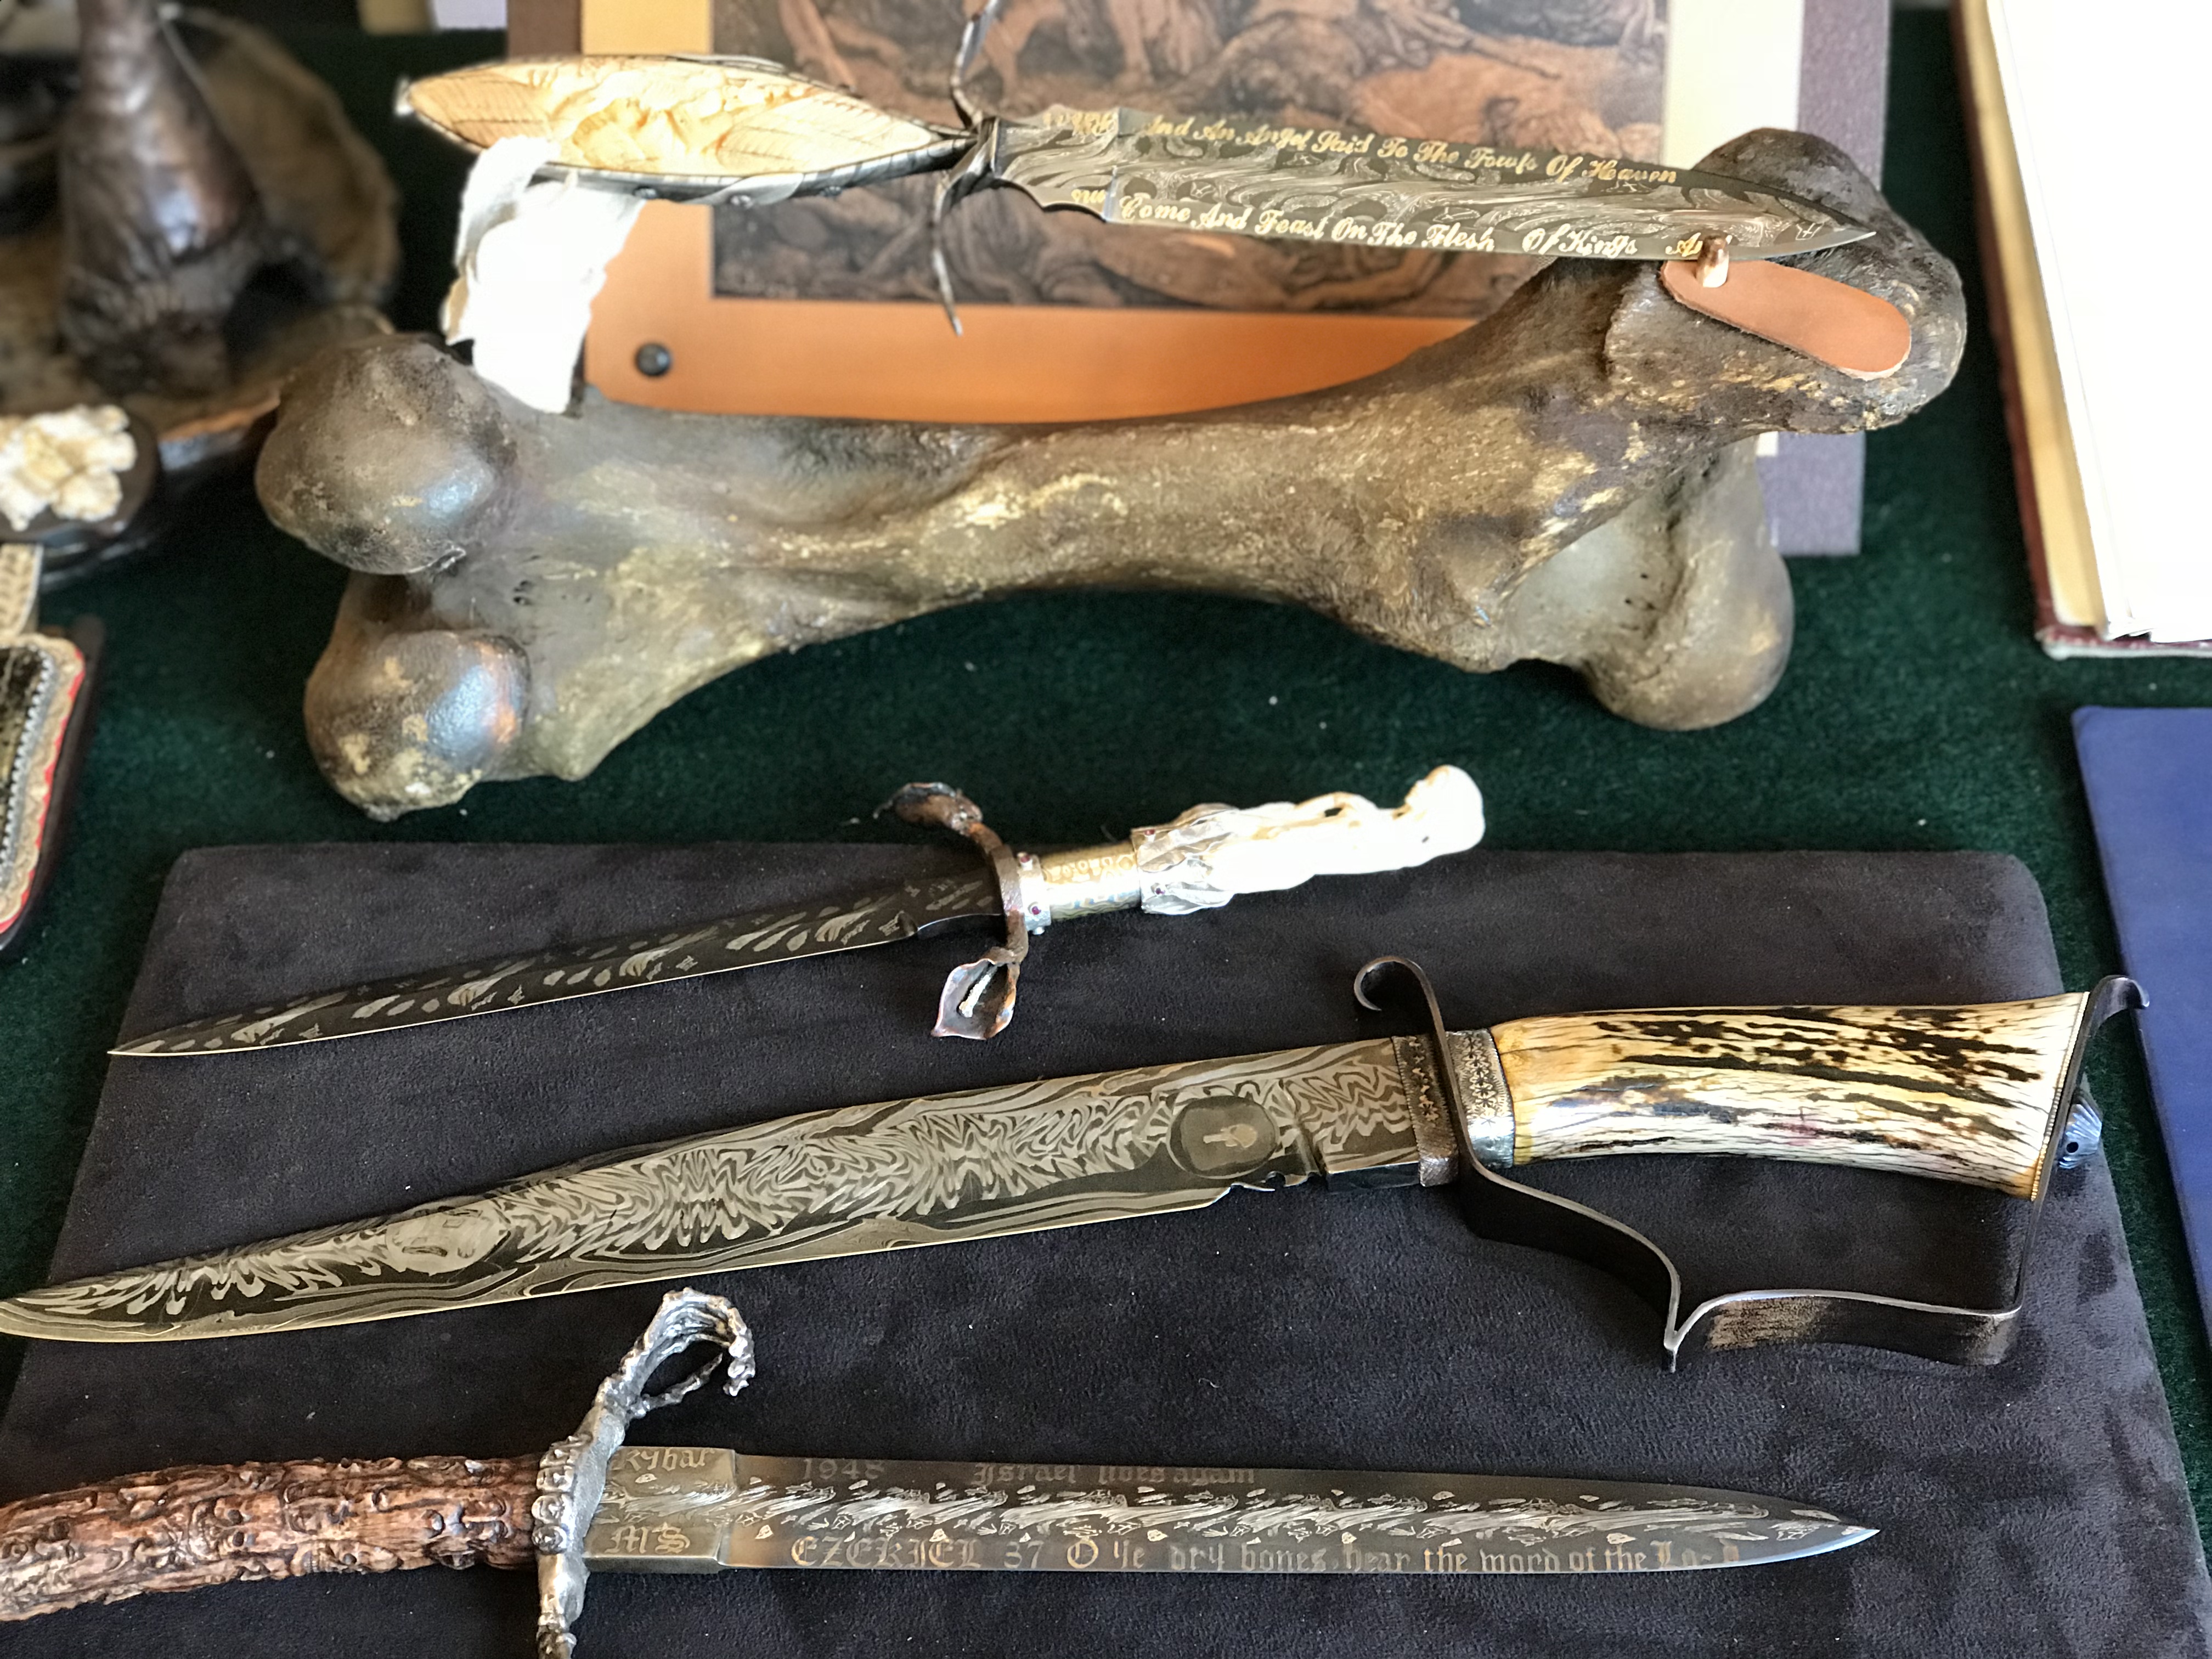
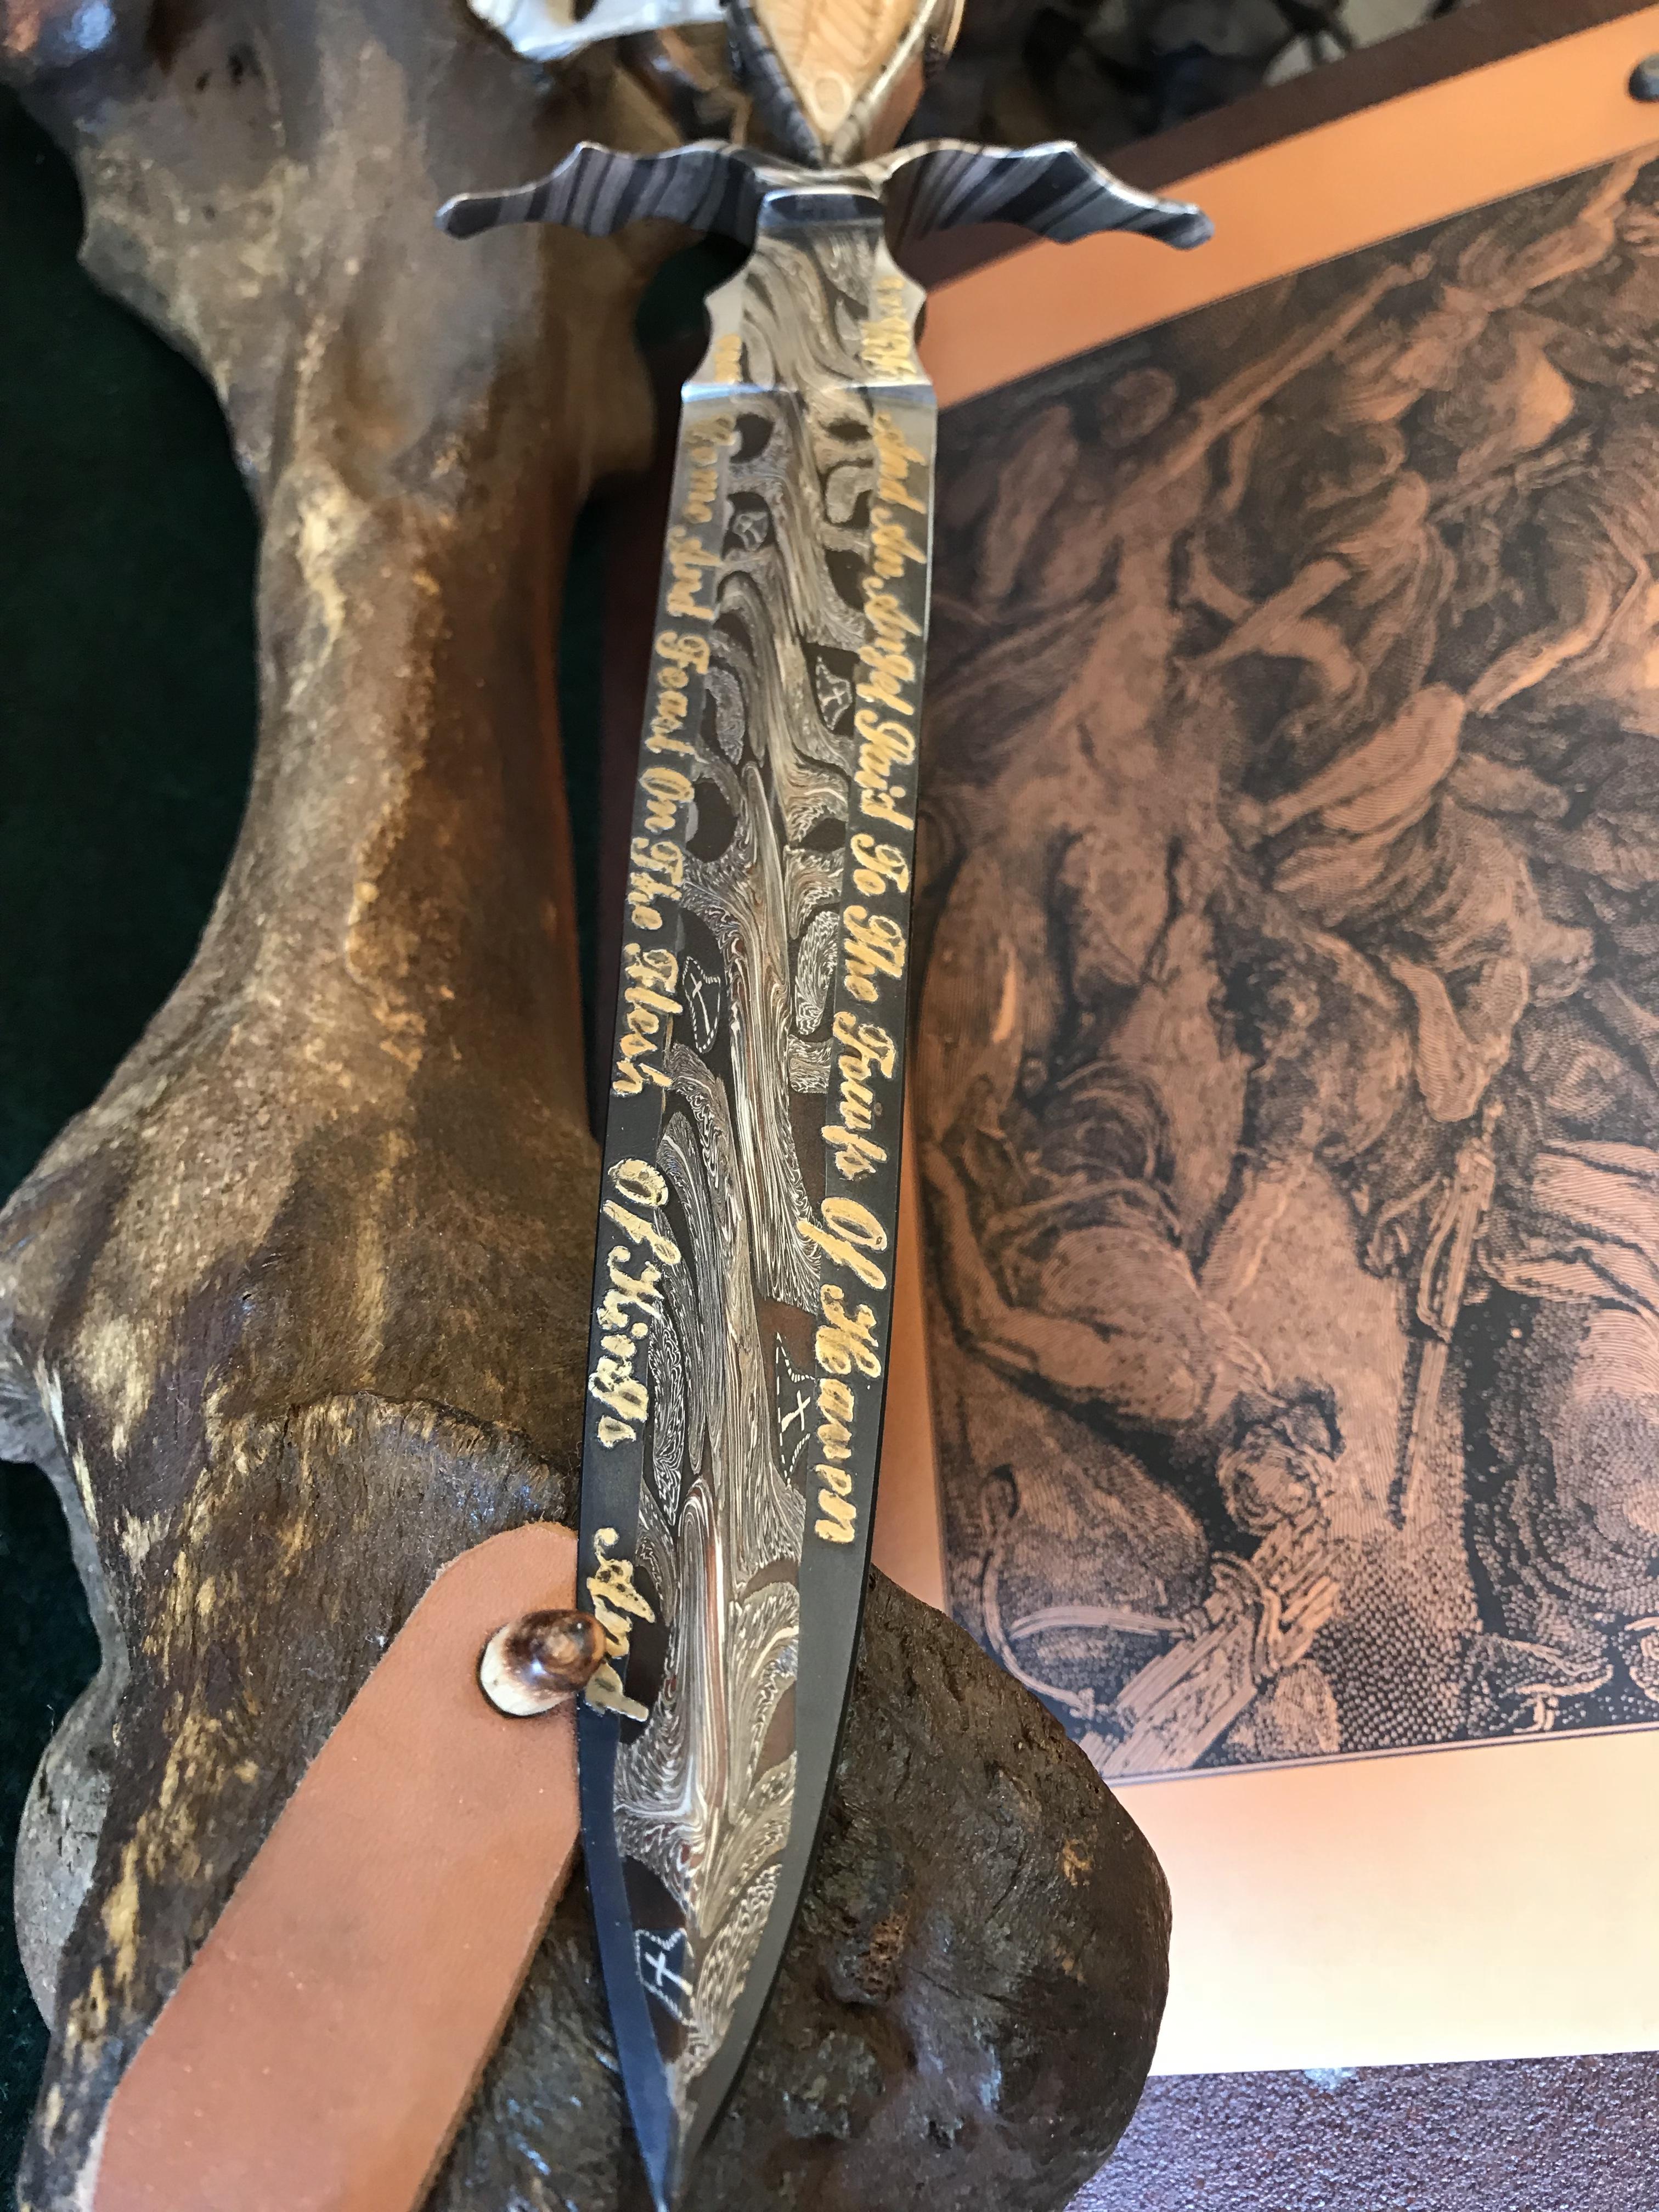
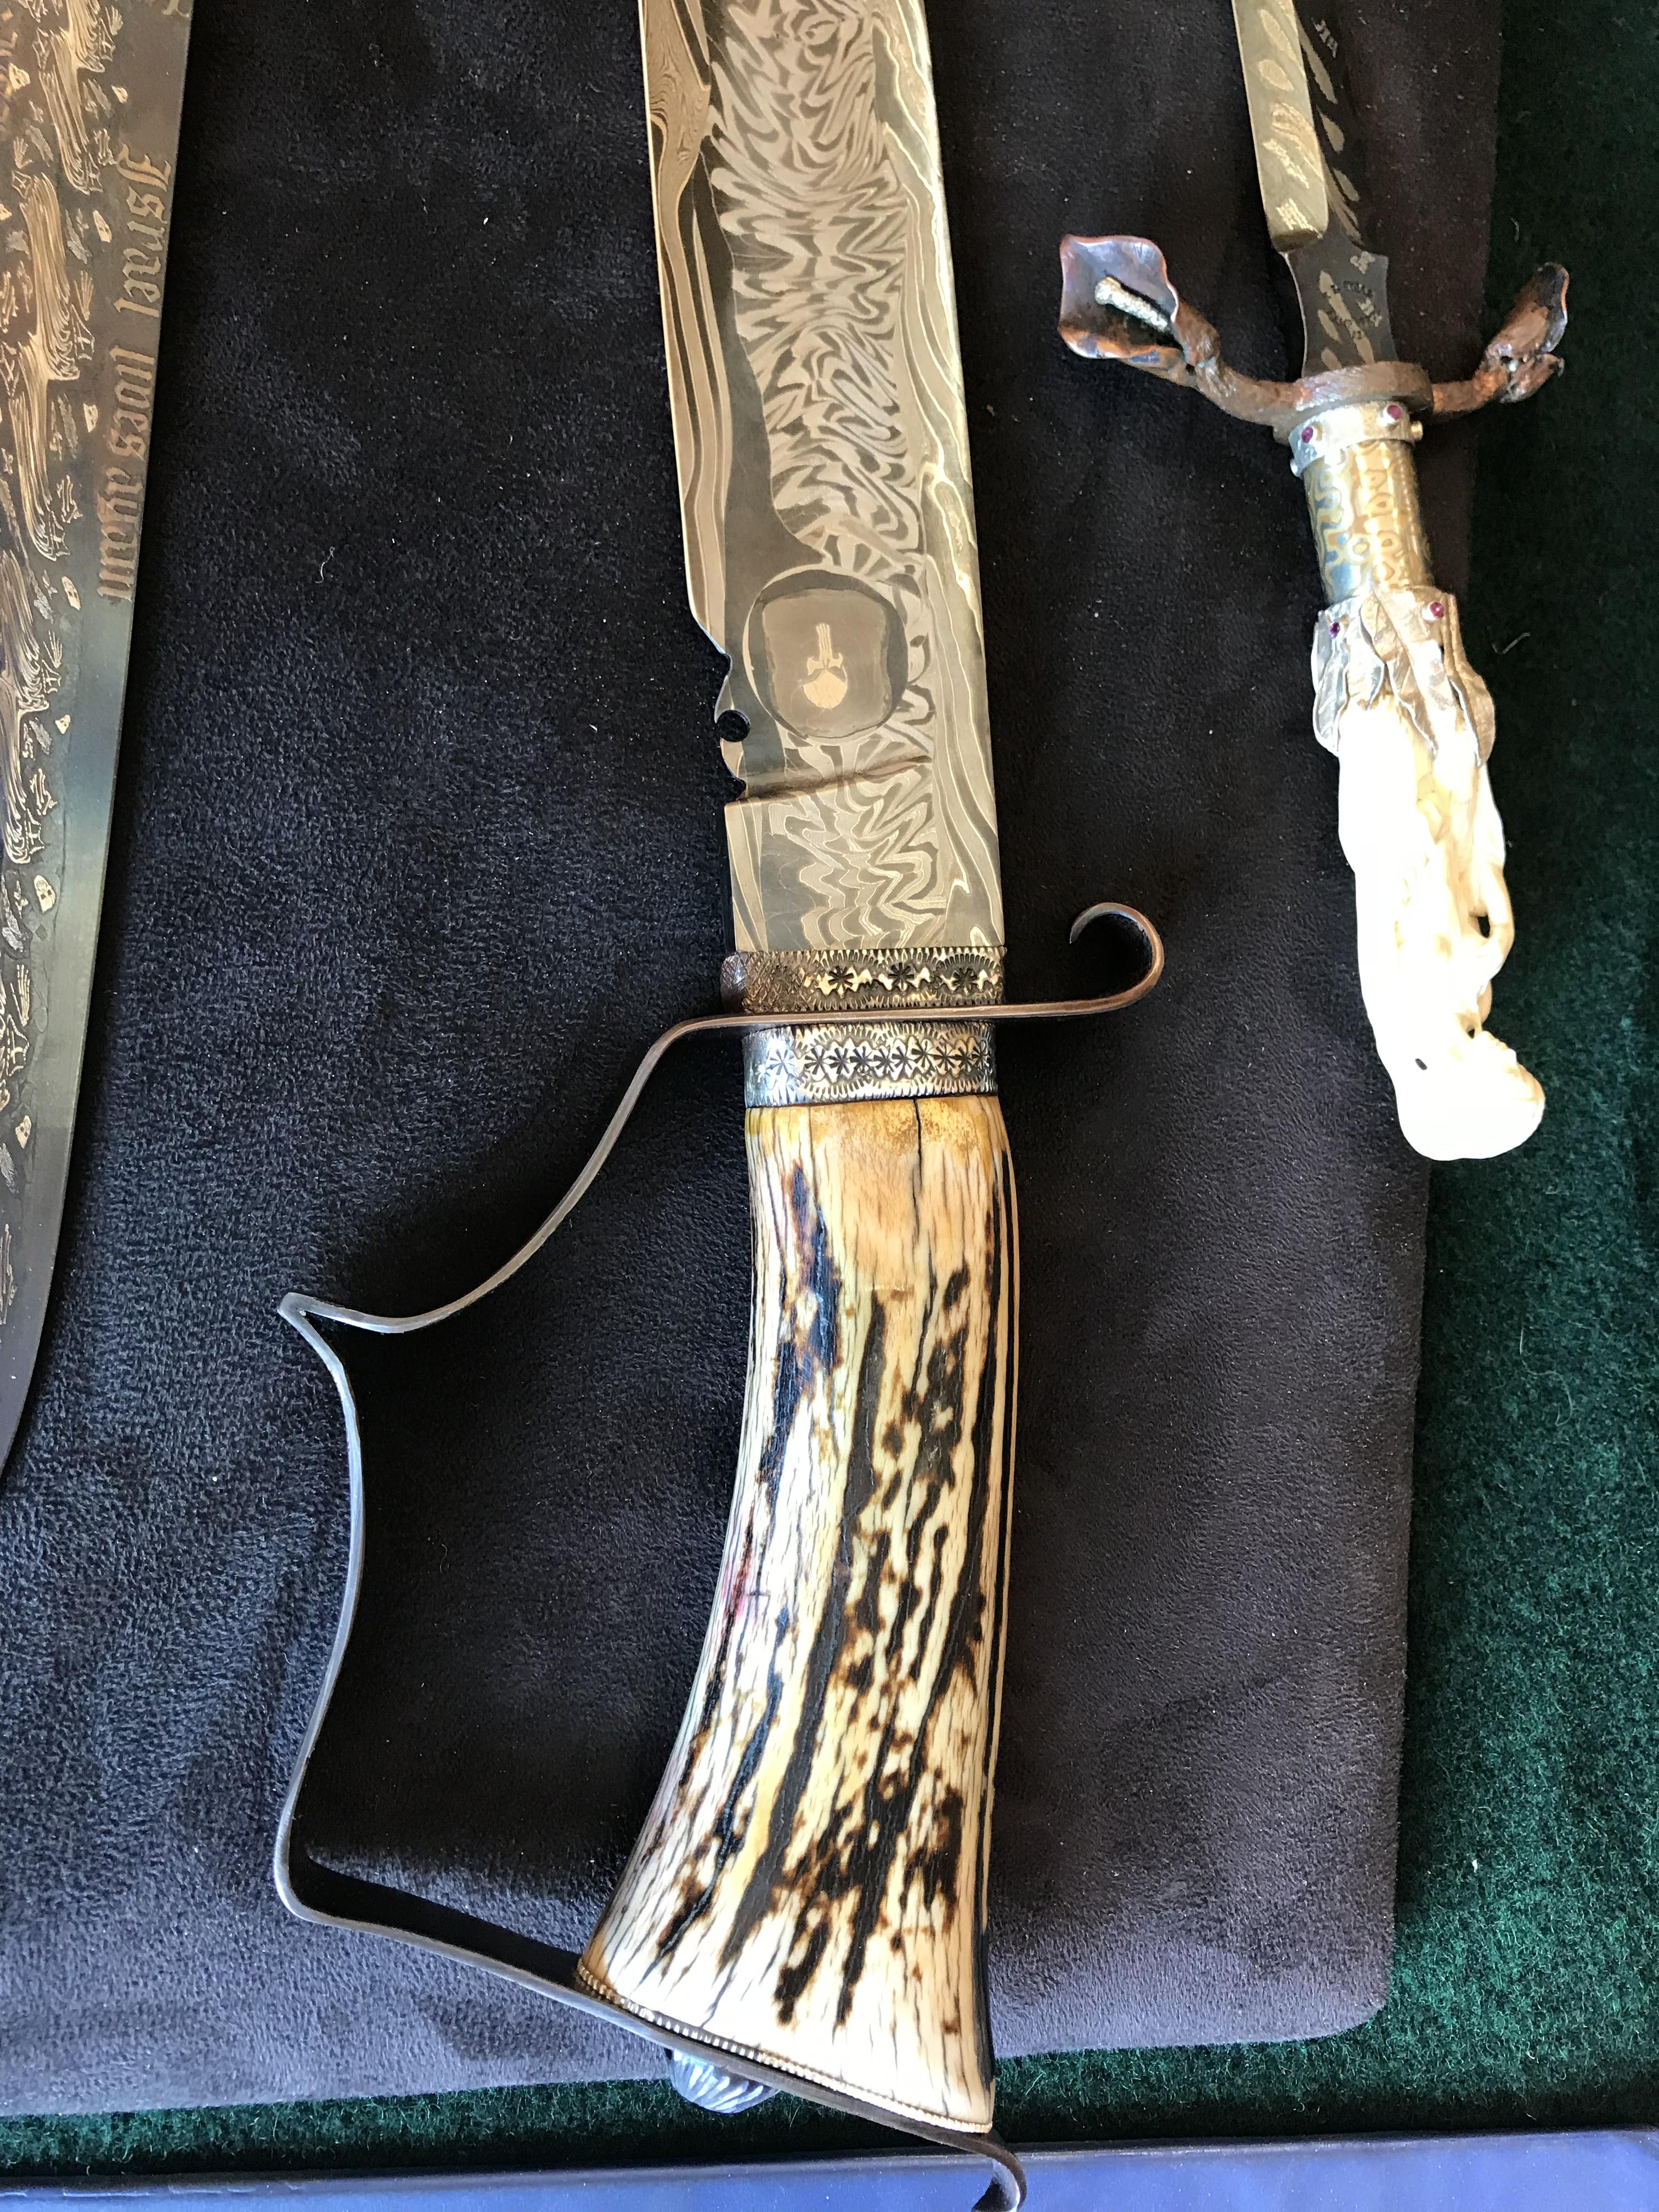
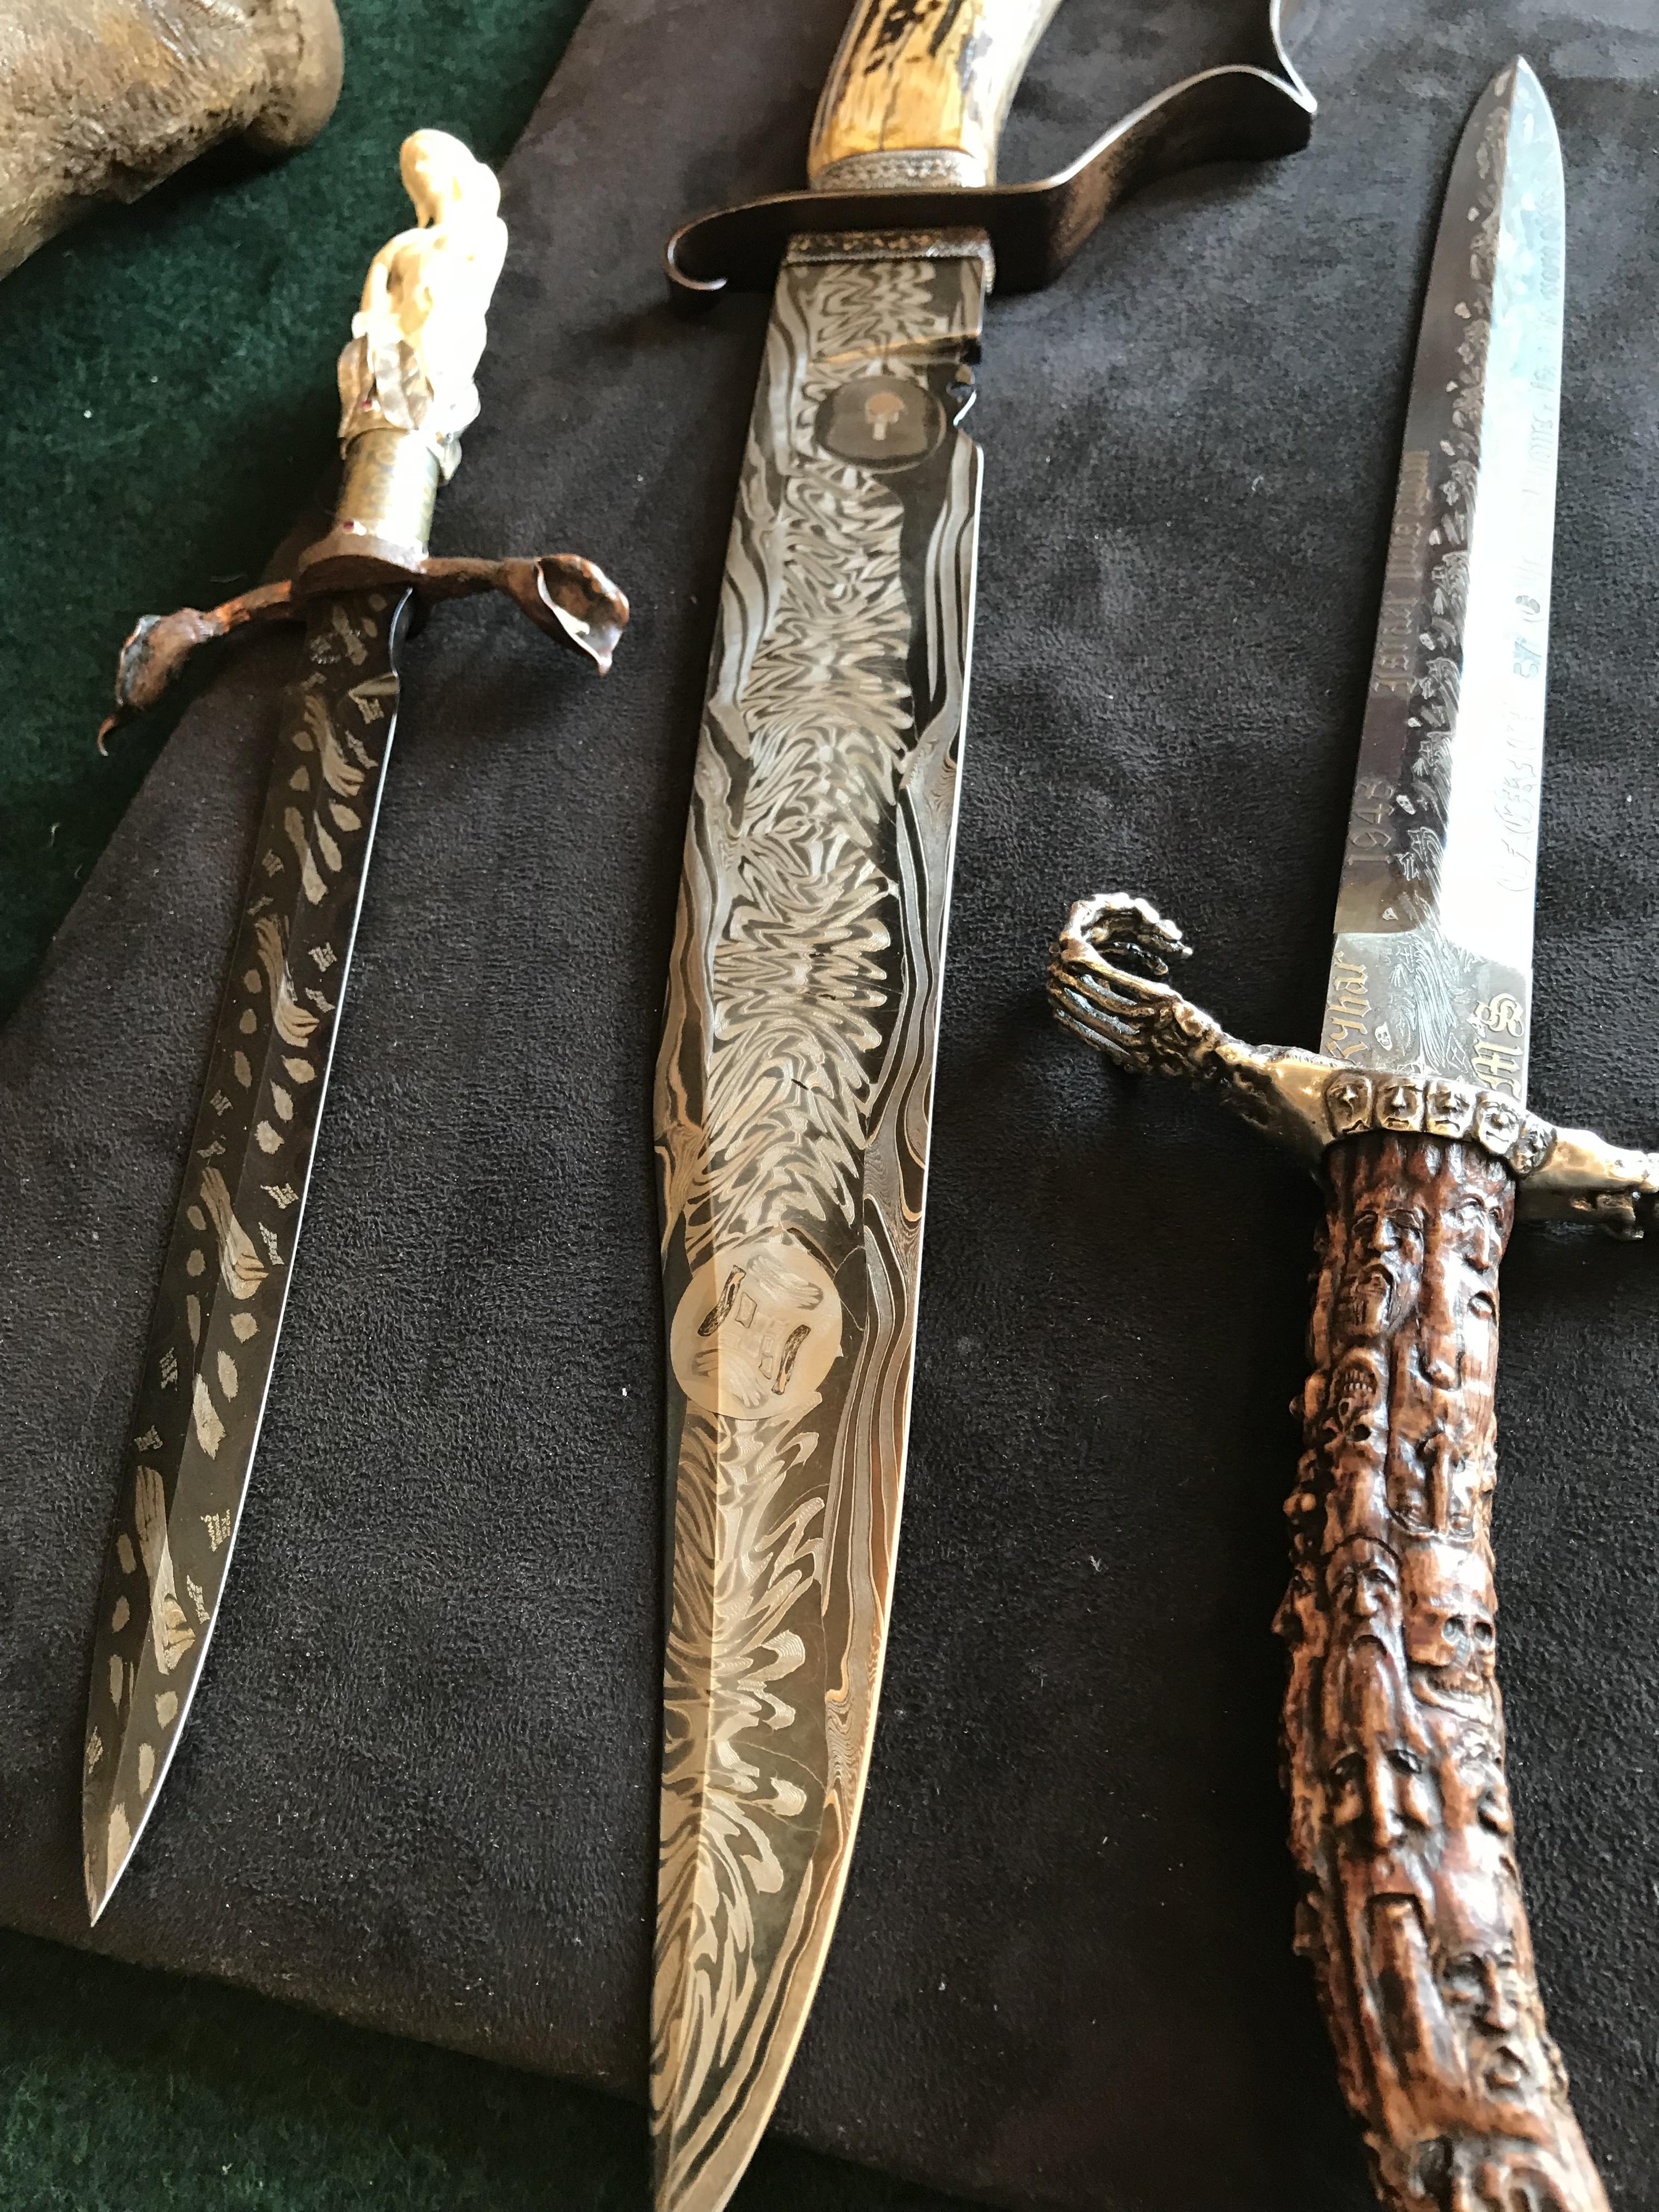
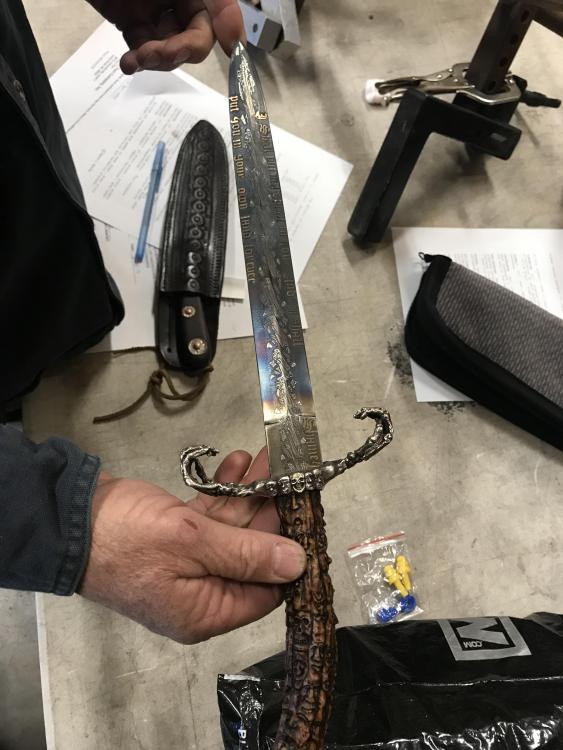
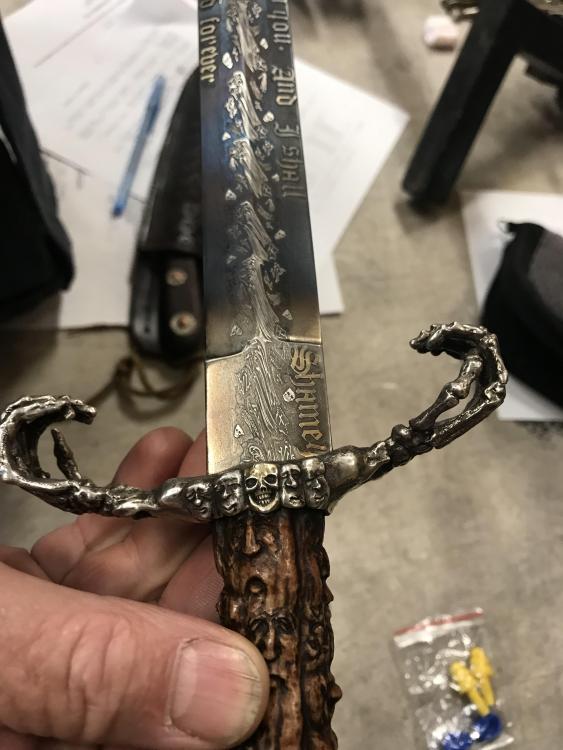
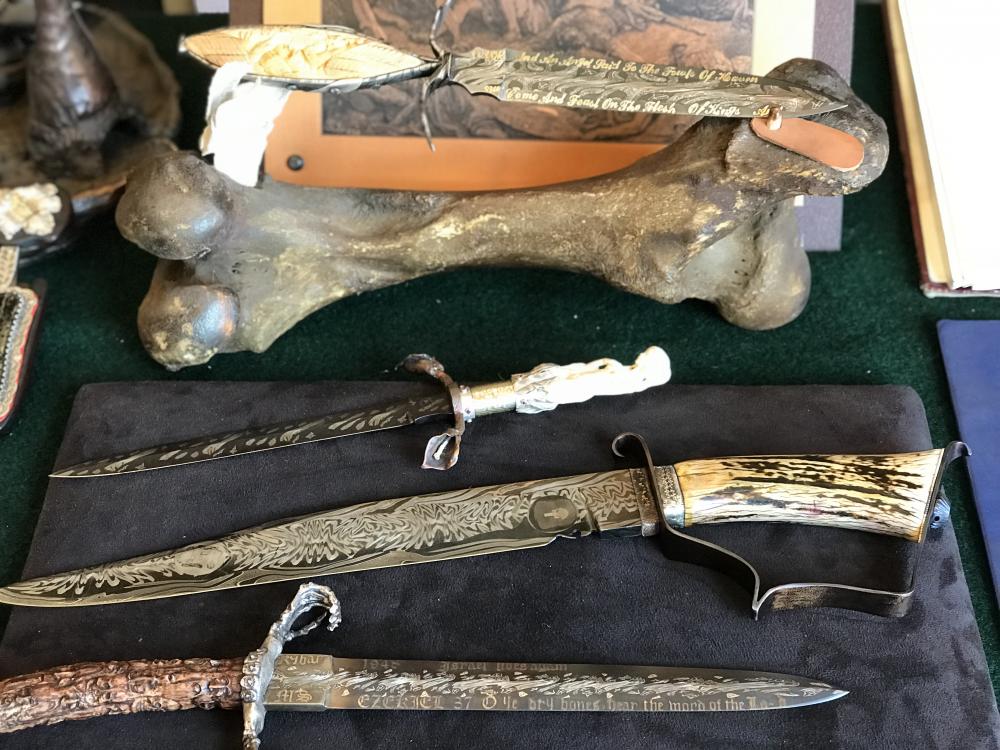
This is Not an advertisement for the tool company, but a report on a good experience. Ive been dabbling in smithing and making knives for about a year now, and my father became interested when I gave him my first piece of Damascus i mangled into a knife. Since then He has been tooling up to get started, and found a class put on by Pieh (pronounced like pie) tool for knife making. The class runs a few times a year, Fri-Sun. He signed us both up and I just got back. The best part was the Master Smith Ray Rybar who taught the class. Luckily I have a studious approach to any endeavor i get into, and much of my self-taught and researched process was exactly as Ray taught the course. But I learned an INCREDIBLE amount of new information, techniques, and approaches to knife making and steel work in general. If anyone lives near northern Arizona, or wants to make a nice little road trip I highly recommend it. I took some pictures of a few of his pieces. Look him up. Its simply amazing. I learned that there is so much more that I didn’t even know I didn’t know. This man forges entire biblical scriptures (fully legible), skulls, crosses, etc... in damascus and puts it in a knife, thats already damascus to begin with. If you flip the knife over, the letters & pictures are backwards. Its so cool. And its not a simple mosaic technique in a can either.
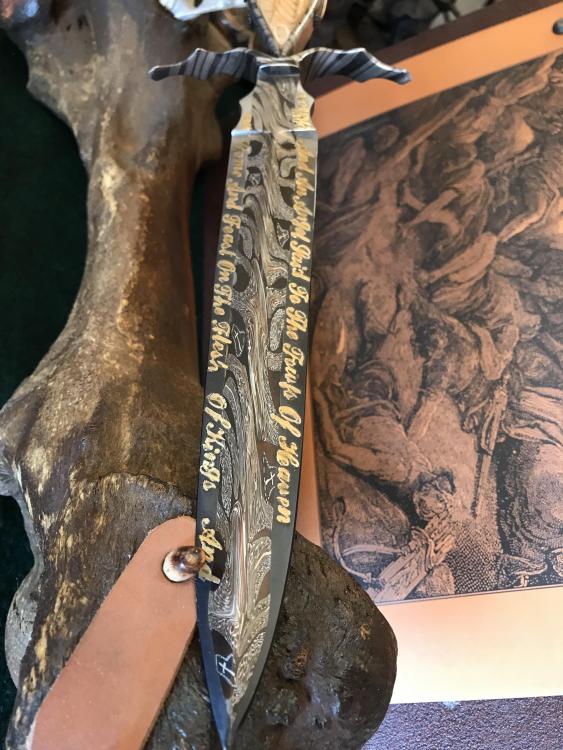
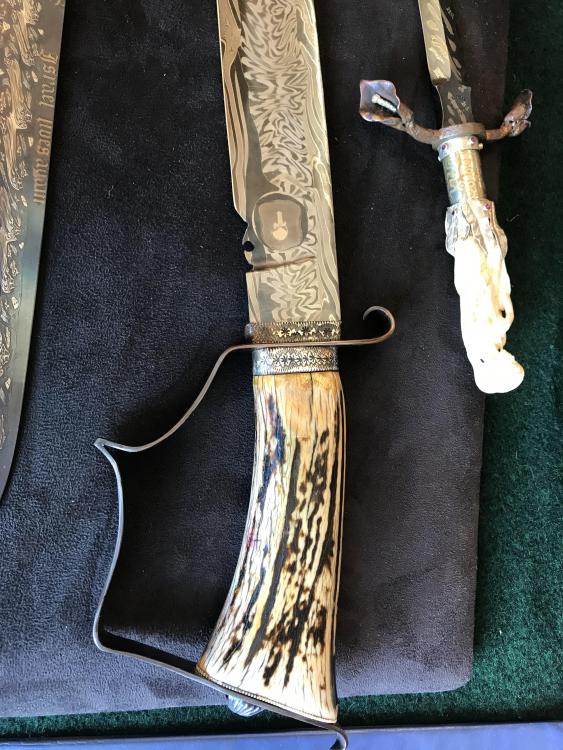
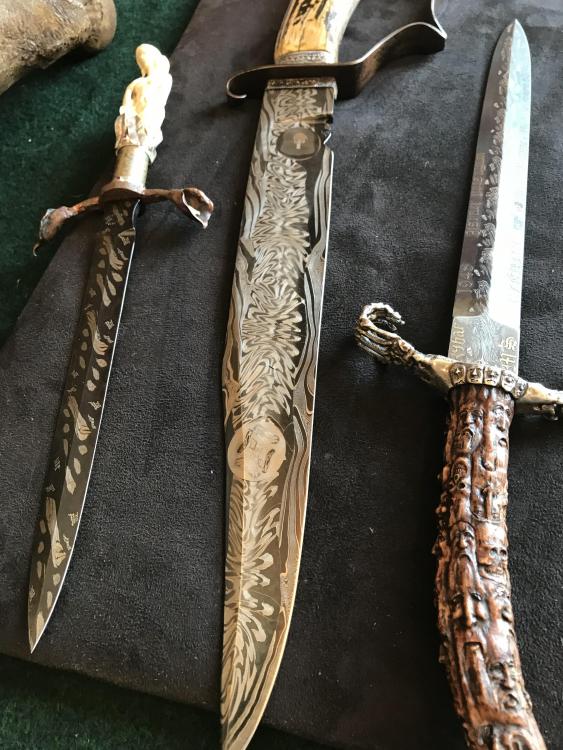
-
preheating with a torch or whatever you have can increase, at least a little, weld penetration. I'm NOT a certified welder, but have probably burned 1000 lb of 7018 growing up on a farm in AZ and fixing/fabricating equipment. Often all we had was 3/32 and I would weld 1/2" with it, as hot as the little welder would go, preheating with a propane/oxy torch would yield less of a sharp heat affected zone, and most often better penetration (my only evidence was I noticed drastically less weld failure when I started pre-heating) My 2 cents, I know there are much more experienced welders on here though, they may have better advice.
-
like Frosty said, burner topic, has lots of pictures and examples... grab a comfy chair, LOTS of valuable info in there. I read it, ALL OF IT, and the corresponding forges 101... twice... before I built my current setup
-
it LOOKS overheated, but that pitted/bubbly texture may be from too oxidizing of a flame and just excess scale being formed, are you hammering it too cold/when there is no color left in the steel?
-
What steel are you using? And what are you defining as sharp? Also, that belt grinder in inches is a 4 X 36, pretty common, and with patience can easily be used on metal. I have one, and use it with decent success. Like TP states sand paper on a block, I really like using wet/dry silicon carbide sand paper on a hard wooden block for final polish, alternate direction when polishing, start spine to edge with one grit, next grit go tang to tip until all previous scratch-marks are gone, then alternate again, and again, with higher grits.
-
nobody needs that many! I suppose those are a high capacity assault stick bundle too?
-
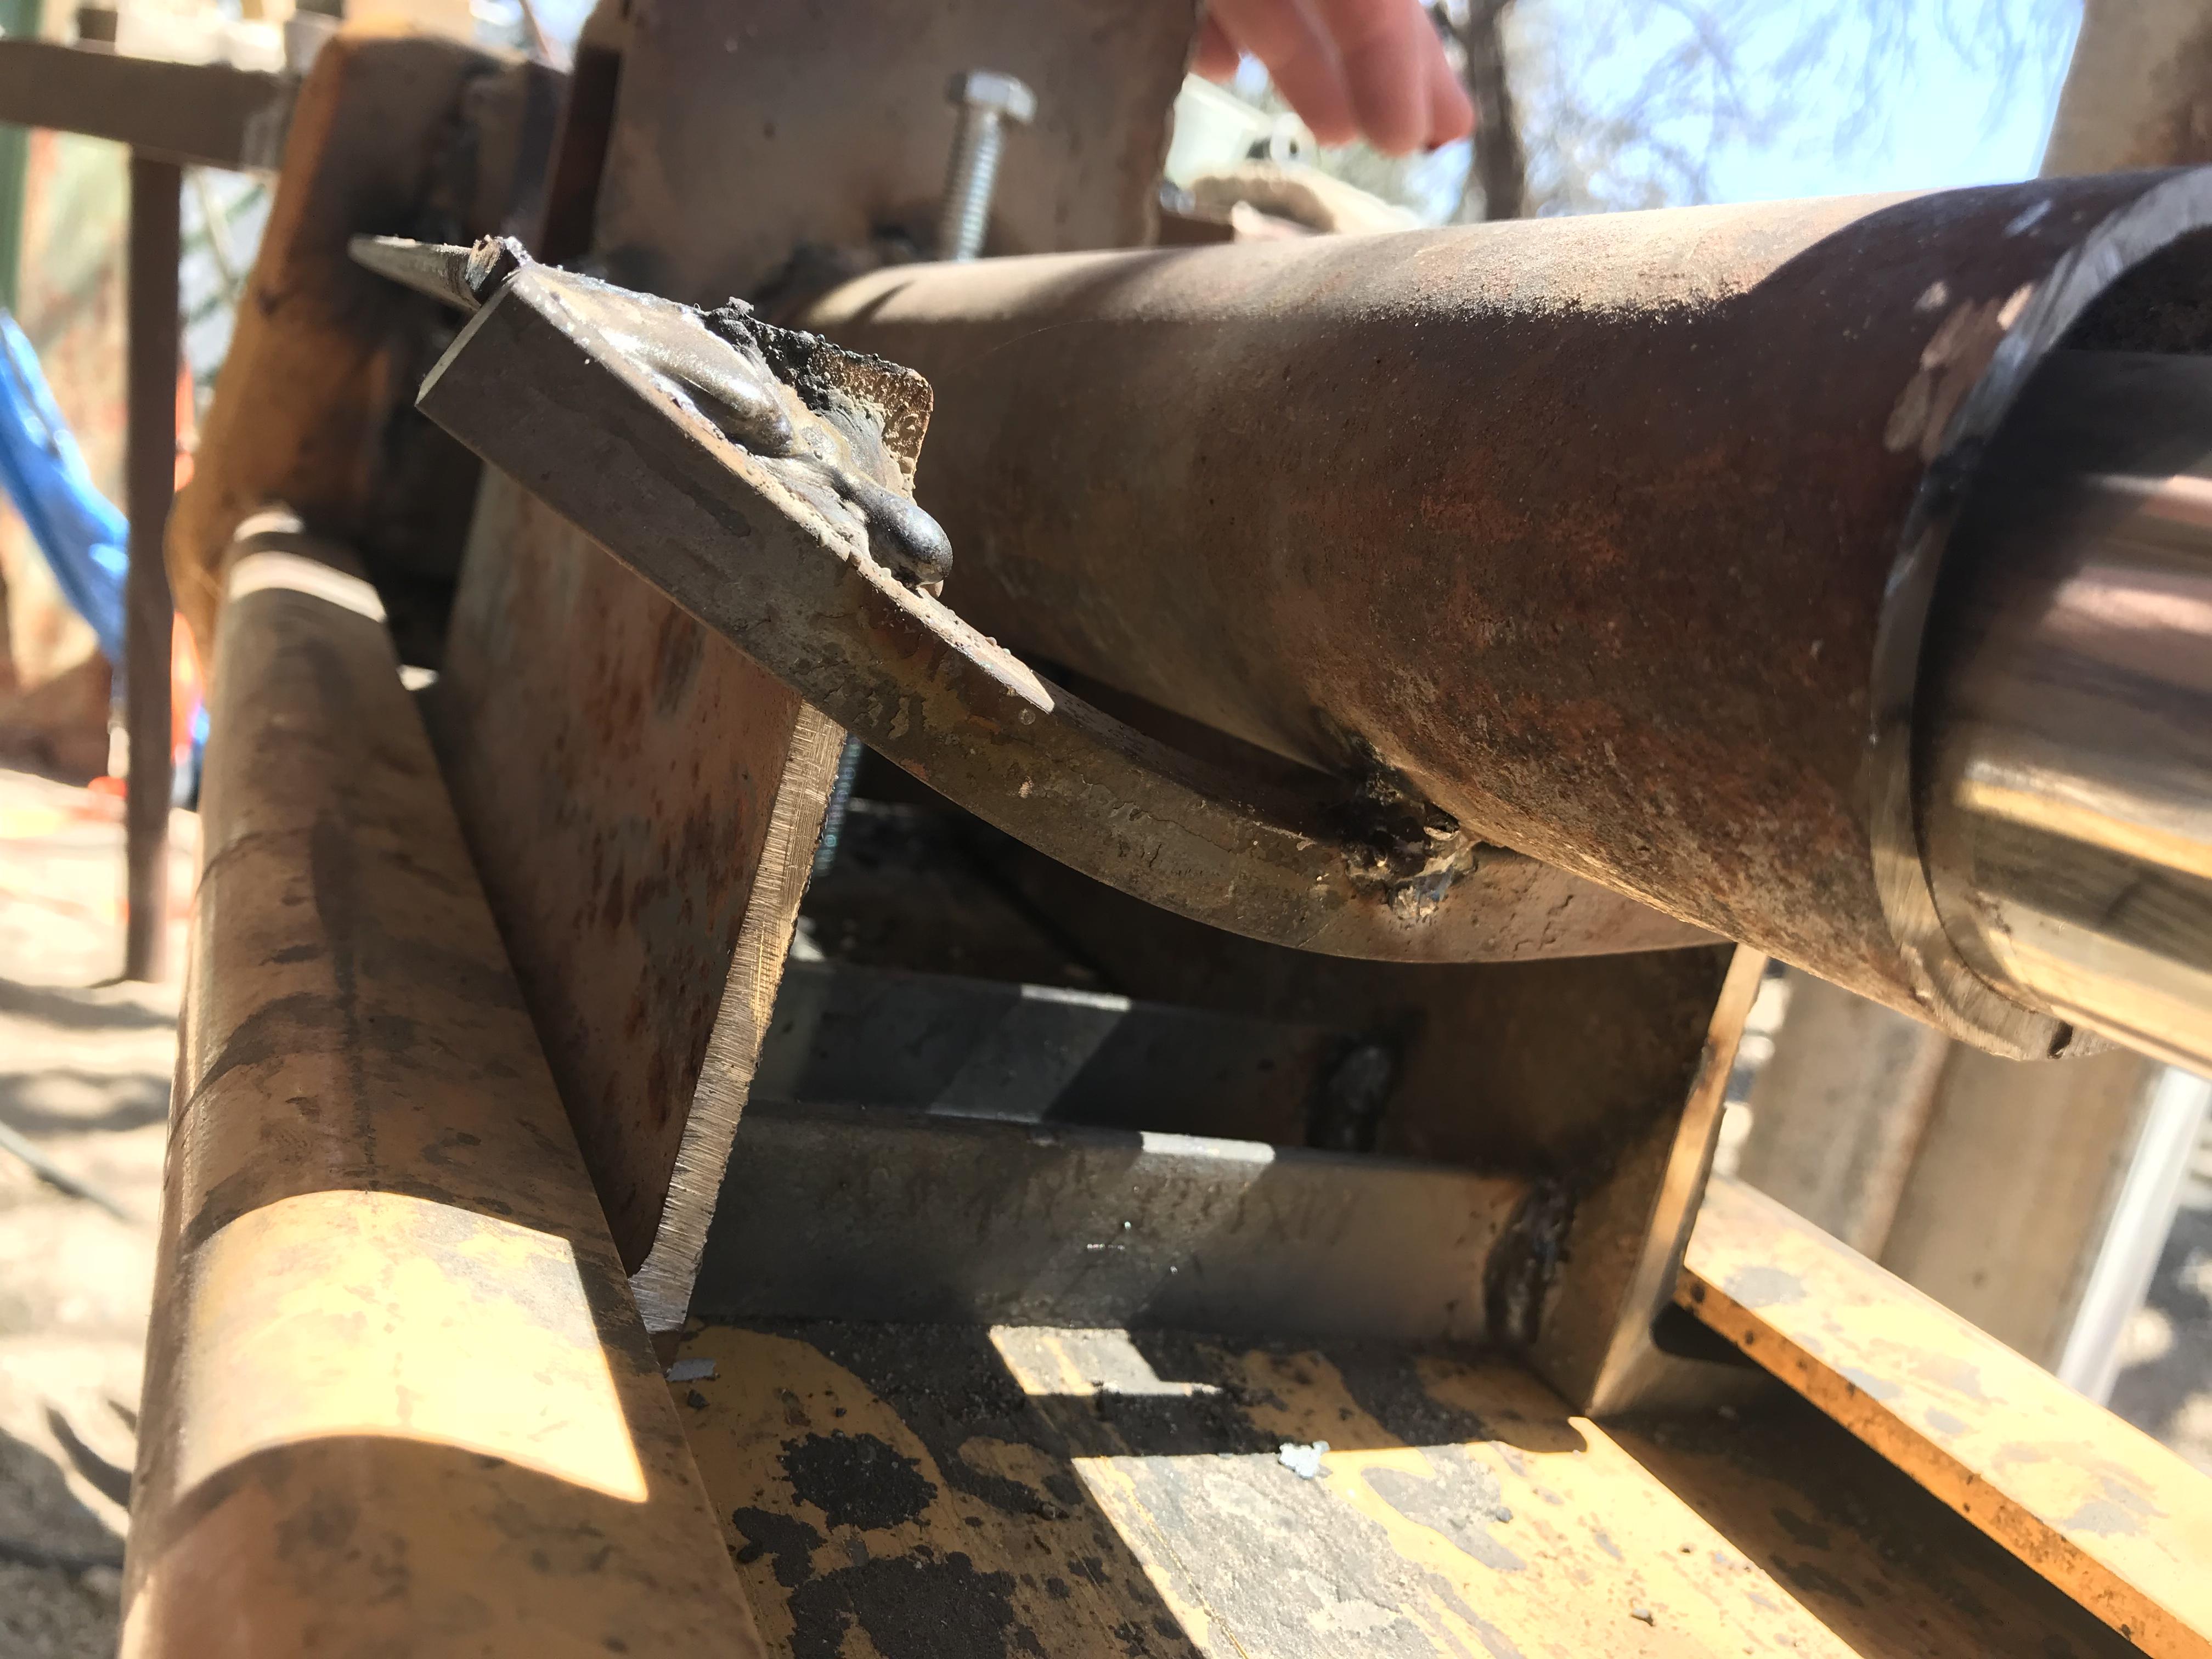
Good call! I offset the pipe on purpose so on the back the bottom of the pipe touches the ram, and on the front the top touches, that keeps it from moving during cycling. But I did not even consider that it might damage the ram. I have do some teflon that I can cut to fit on the back end to make a thin bushing of sorts to keep the back from marring the cylinder. it doesn't move on the ram at all, but the pressure alone might be enough to scar it. Thank you!
-
Exactly, therefor its not really a problem. Also the hot water helps convert any Fe2O3 to Fe3O4. (brown to black)
-
If the bluing chemical wasn't cleaned off and neutralized, the residual chemical could be an issue. However, properly cleaned up after use the steel will have an oxide layer (Fe3O4) on it not very different from standard brown (Fe2O3) rust. Should be fine. -trust me , I'm a pharmacist-
-
Now THAT is a hollow grind! what are the dimensions? looks to be about 7/8ths of an inch? I'm currently working on one, but do not have a contact wheel in the traditional sense. Just trying to use the top of a 4X36 belt grinder meant for wood, and free-handing it at that.. Its not easy. But i'm going for more of a near wedge.
-
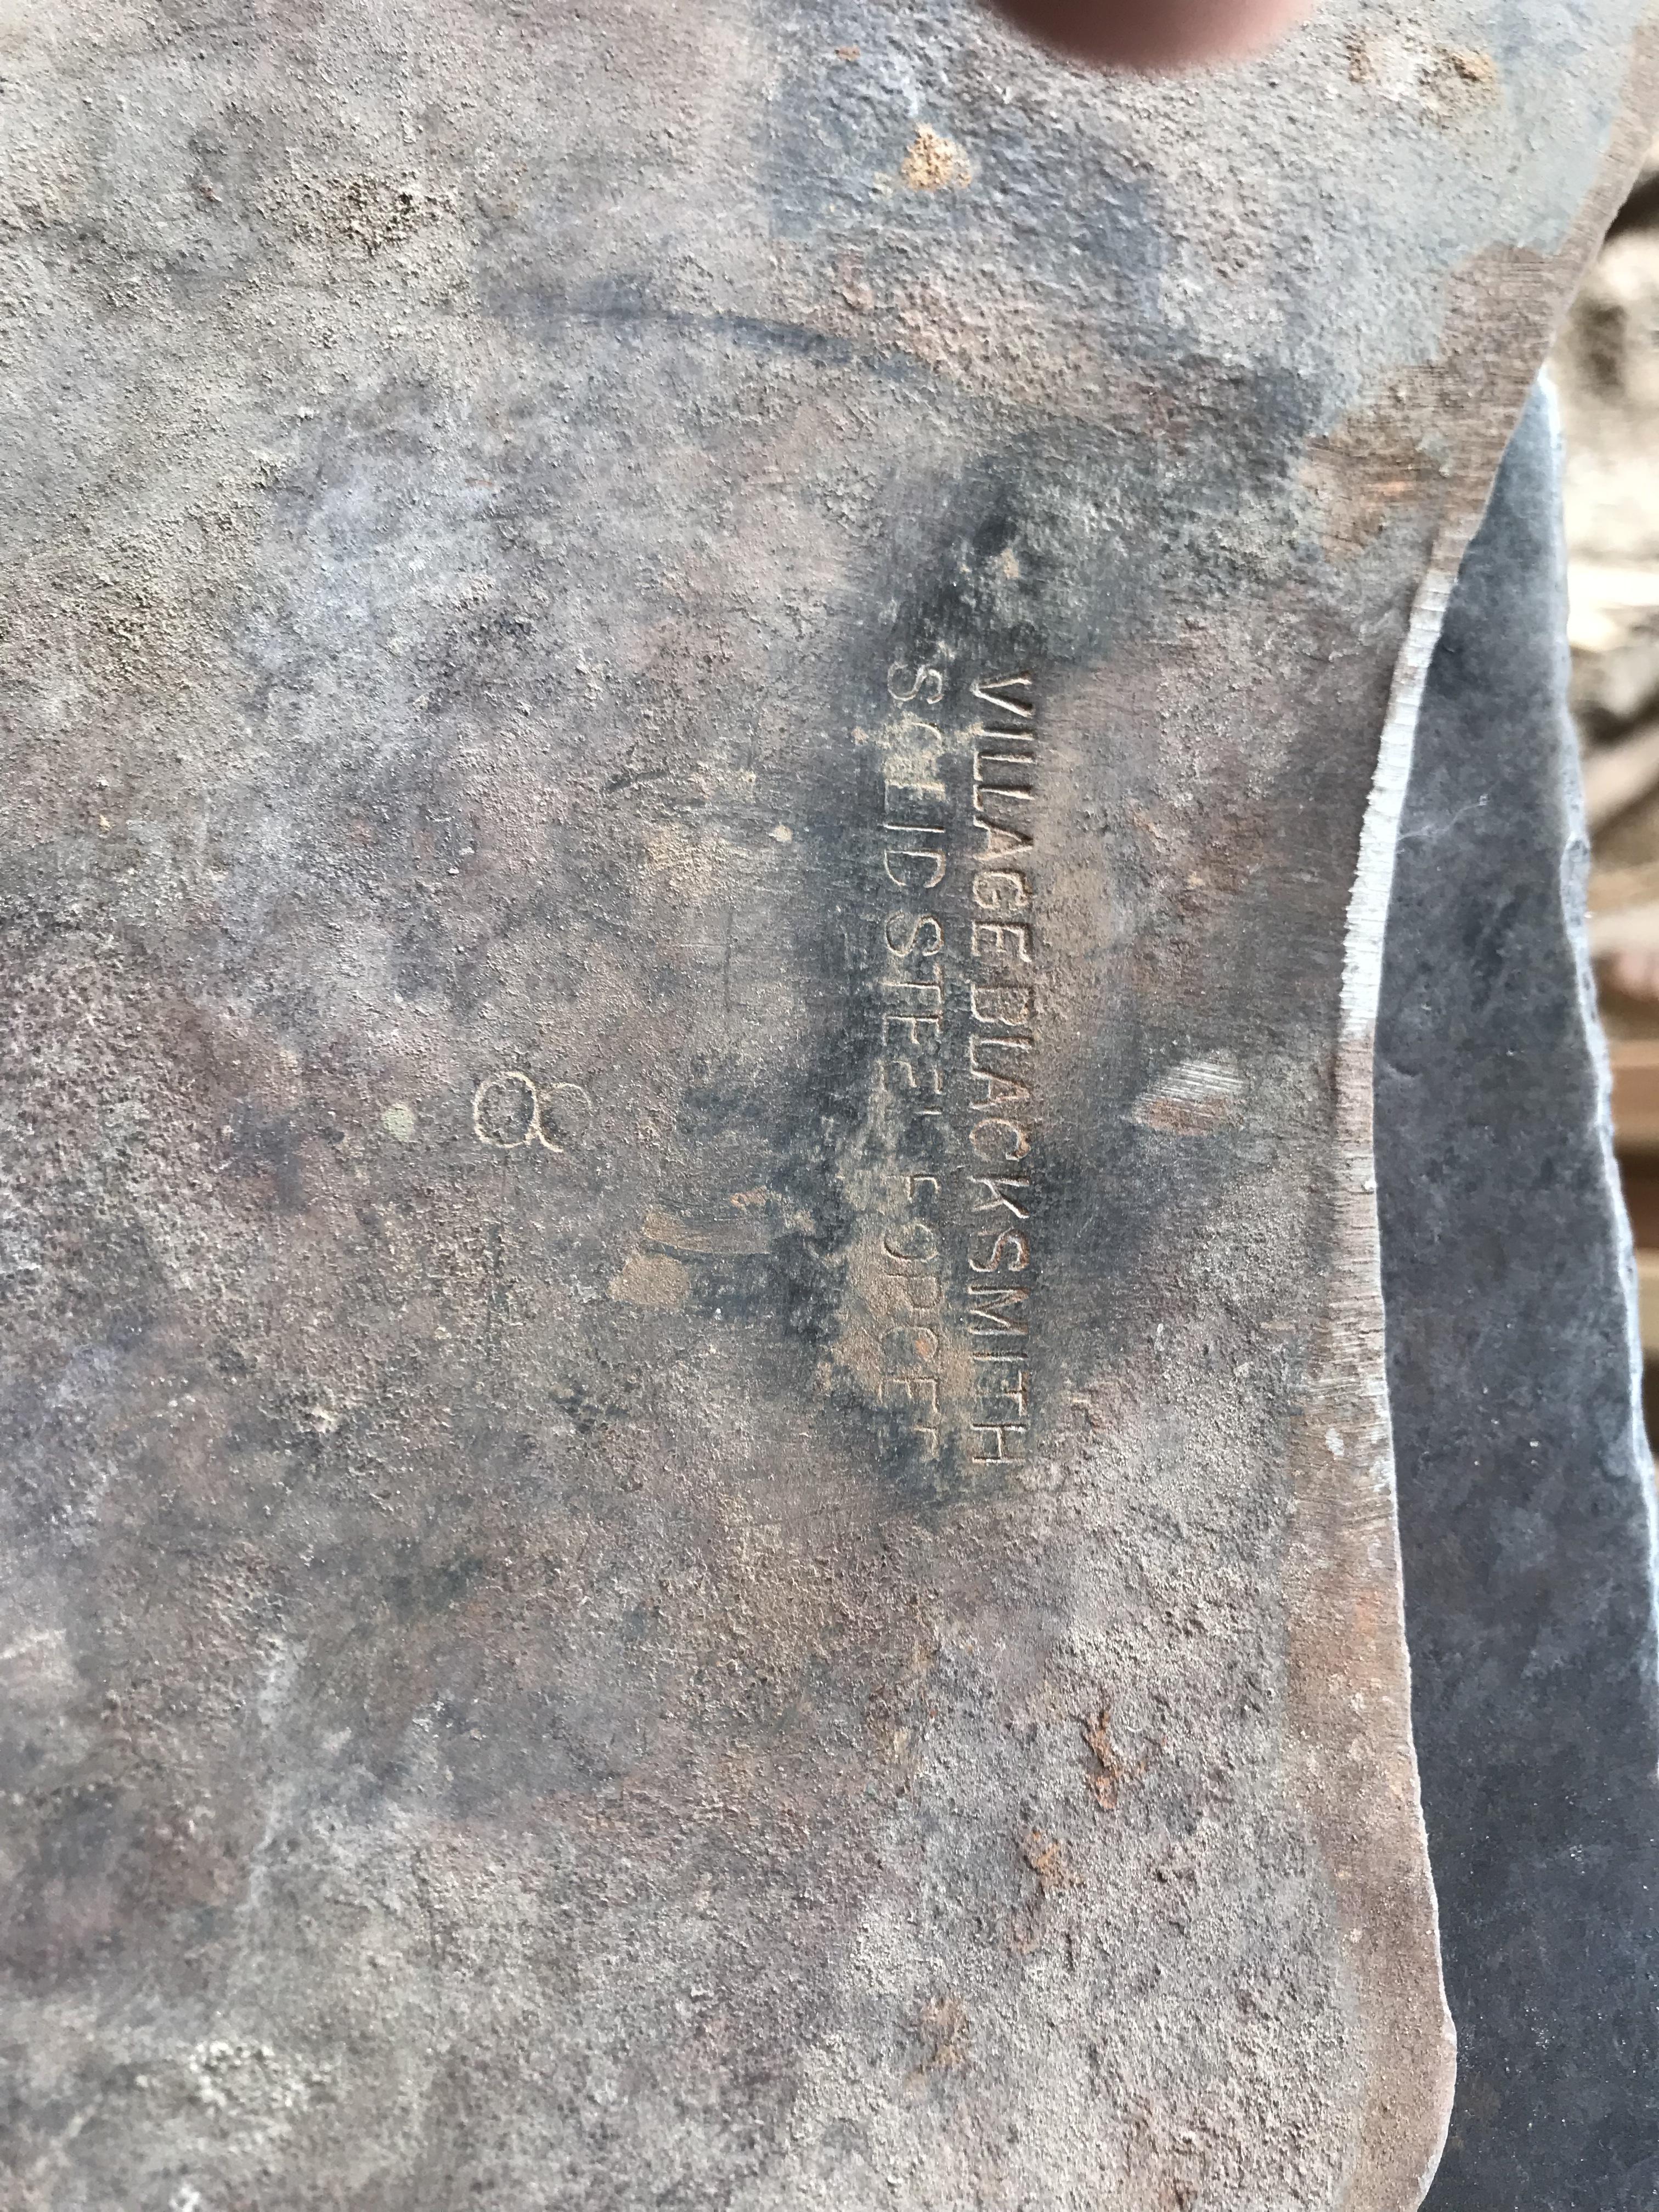
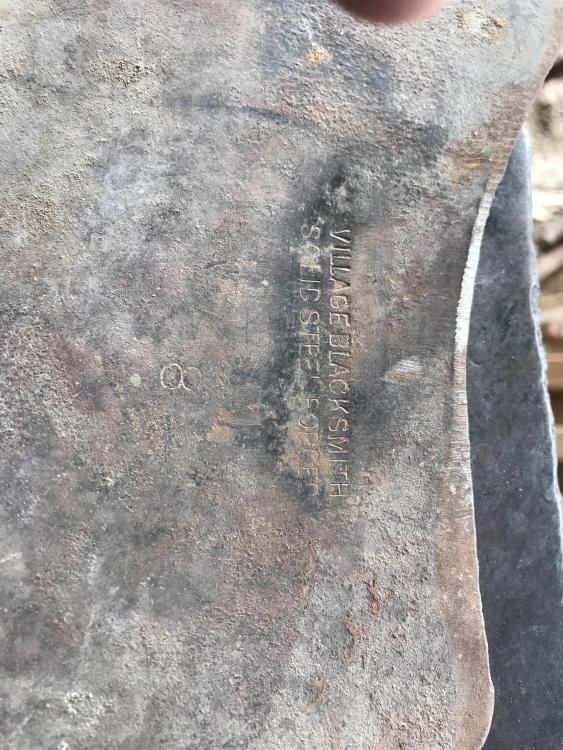
I'm pretty sure the 8 is the length of the blade based on pictures of other products from this maker I have found, length seems to correspond with the numbers but I could be wrong. For the cutting edge and the spine I have some brownells cold blueing liquid. I will try some on the tang where it will be hidden and see if it matches close enough to the blade's color. If so I will clean everything up, including the spine where it is rolled over, blue it and handle it. I'm going to test some of the cutoffs of the wood by vacuum impregnating with boiled linseed oil, then lightly baking it to have it set/harden some. See if that works well for the wood.
-
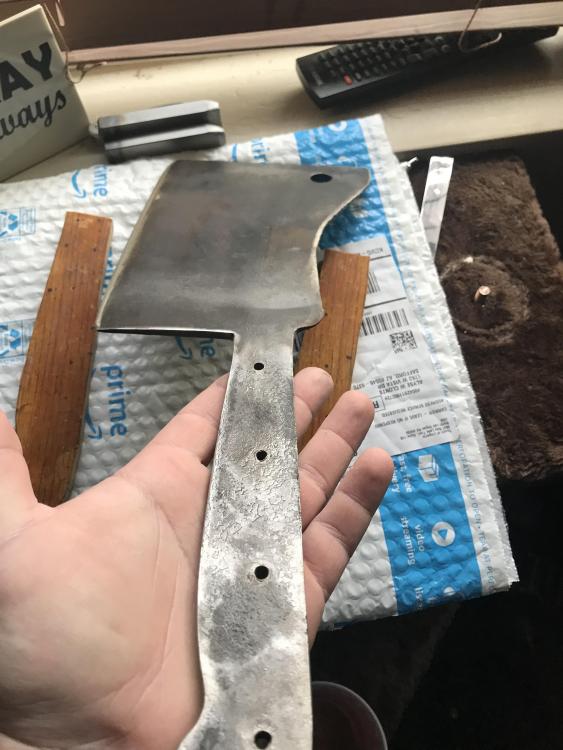
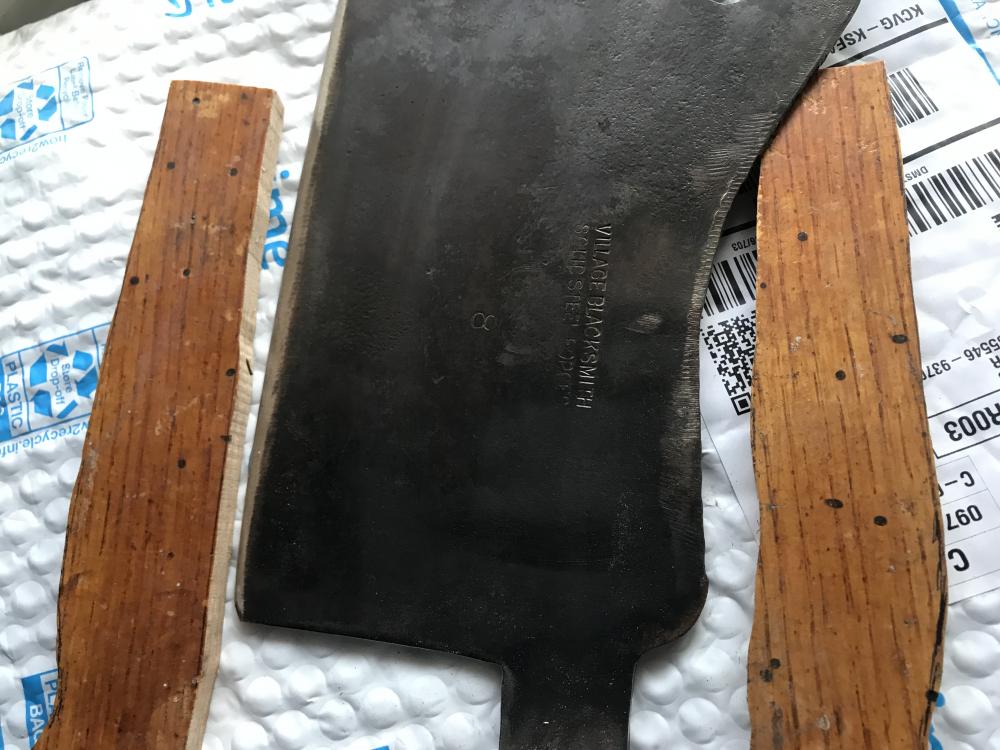
Couple more pics, showing the black patina I guess youd call it. And rough cuts from the century old basketball court floor.
-
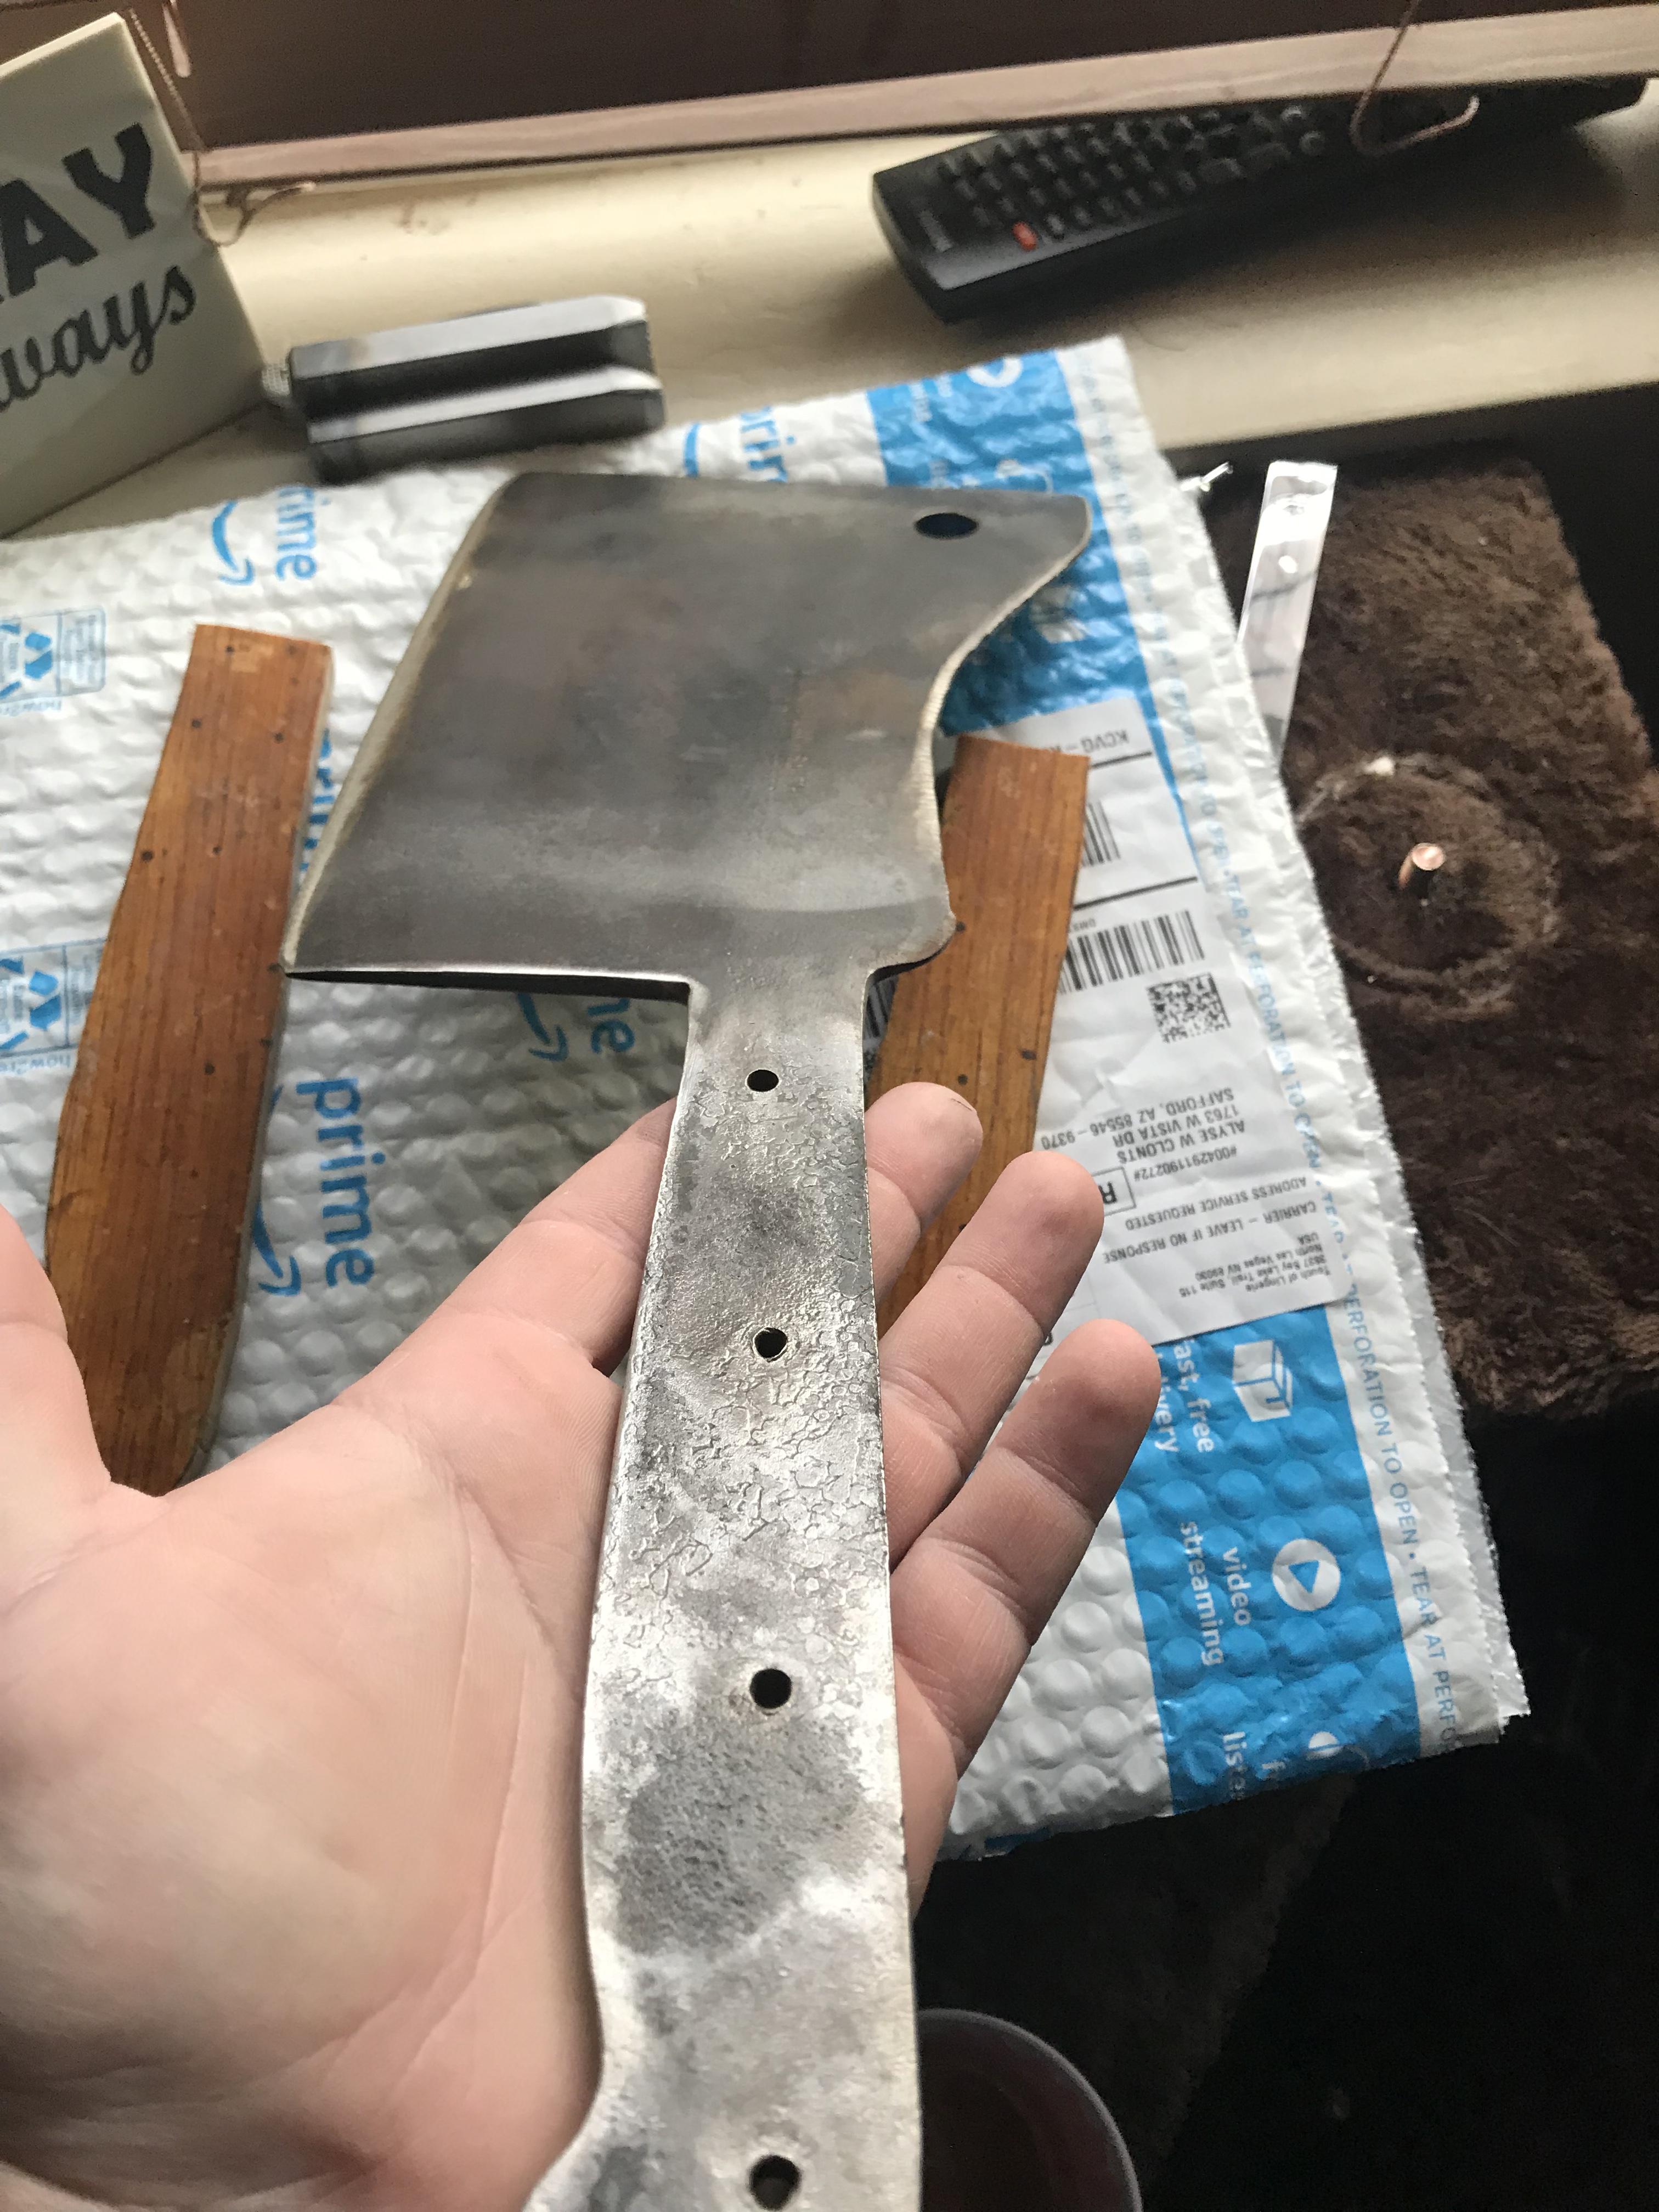
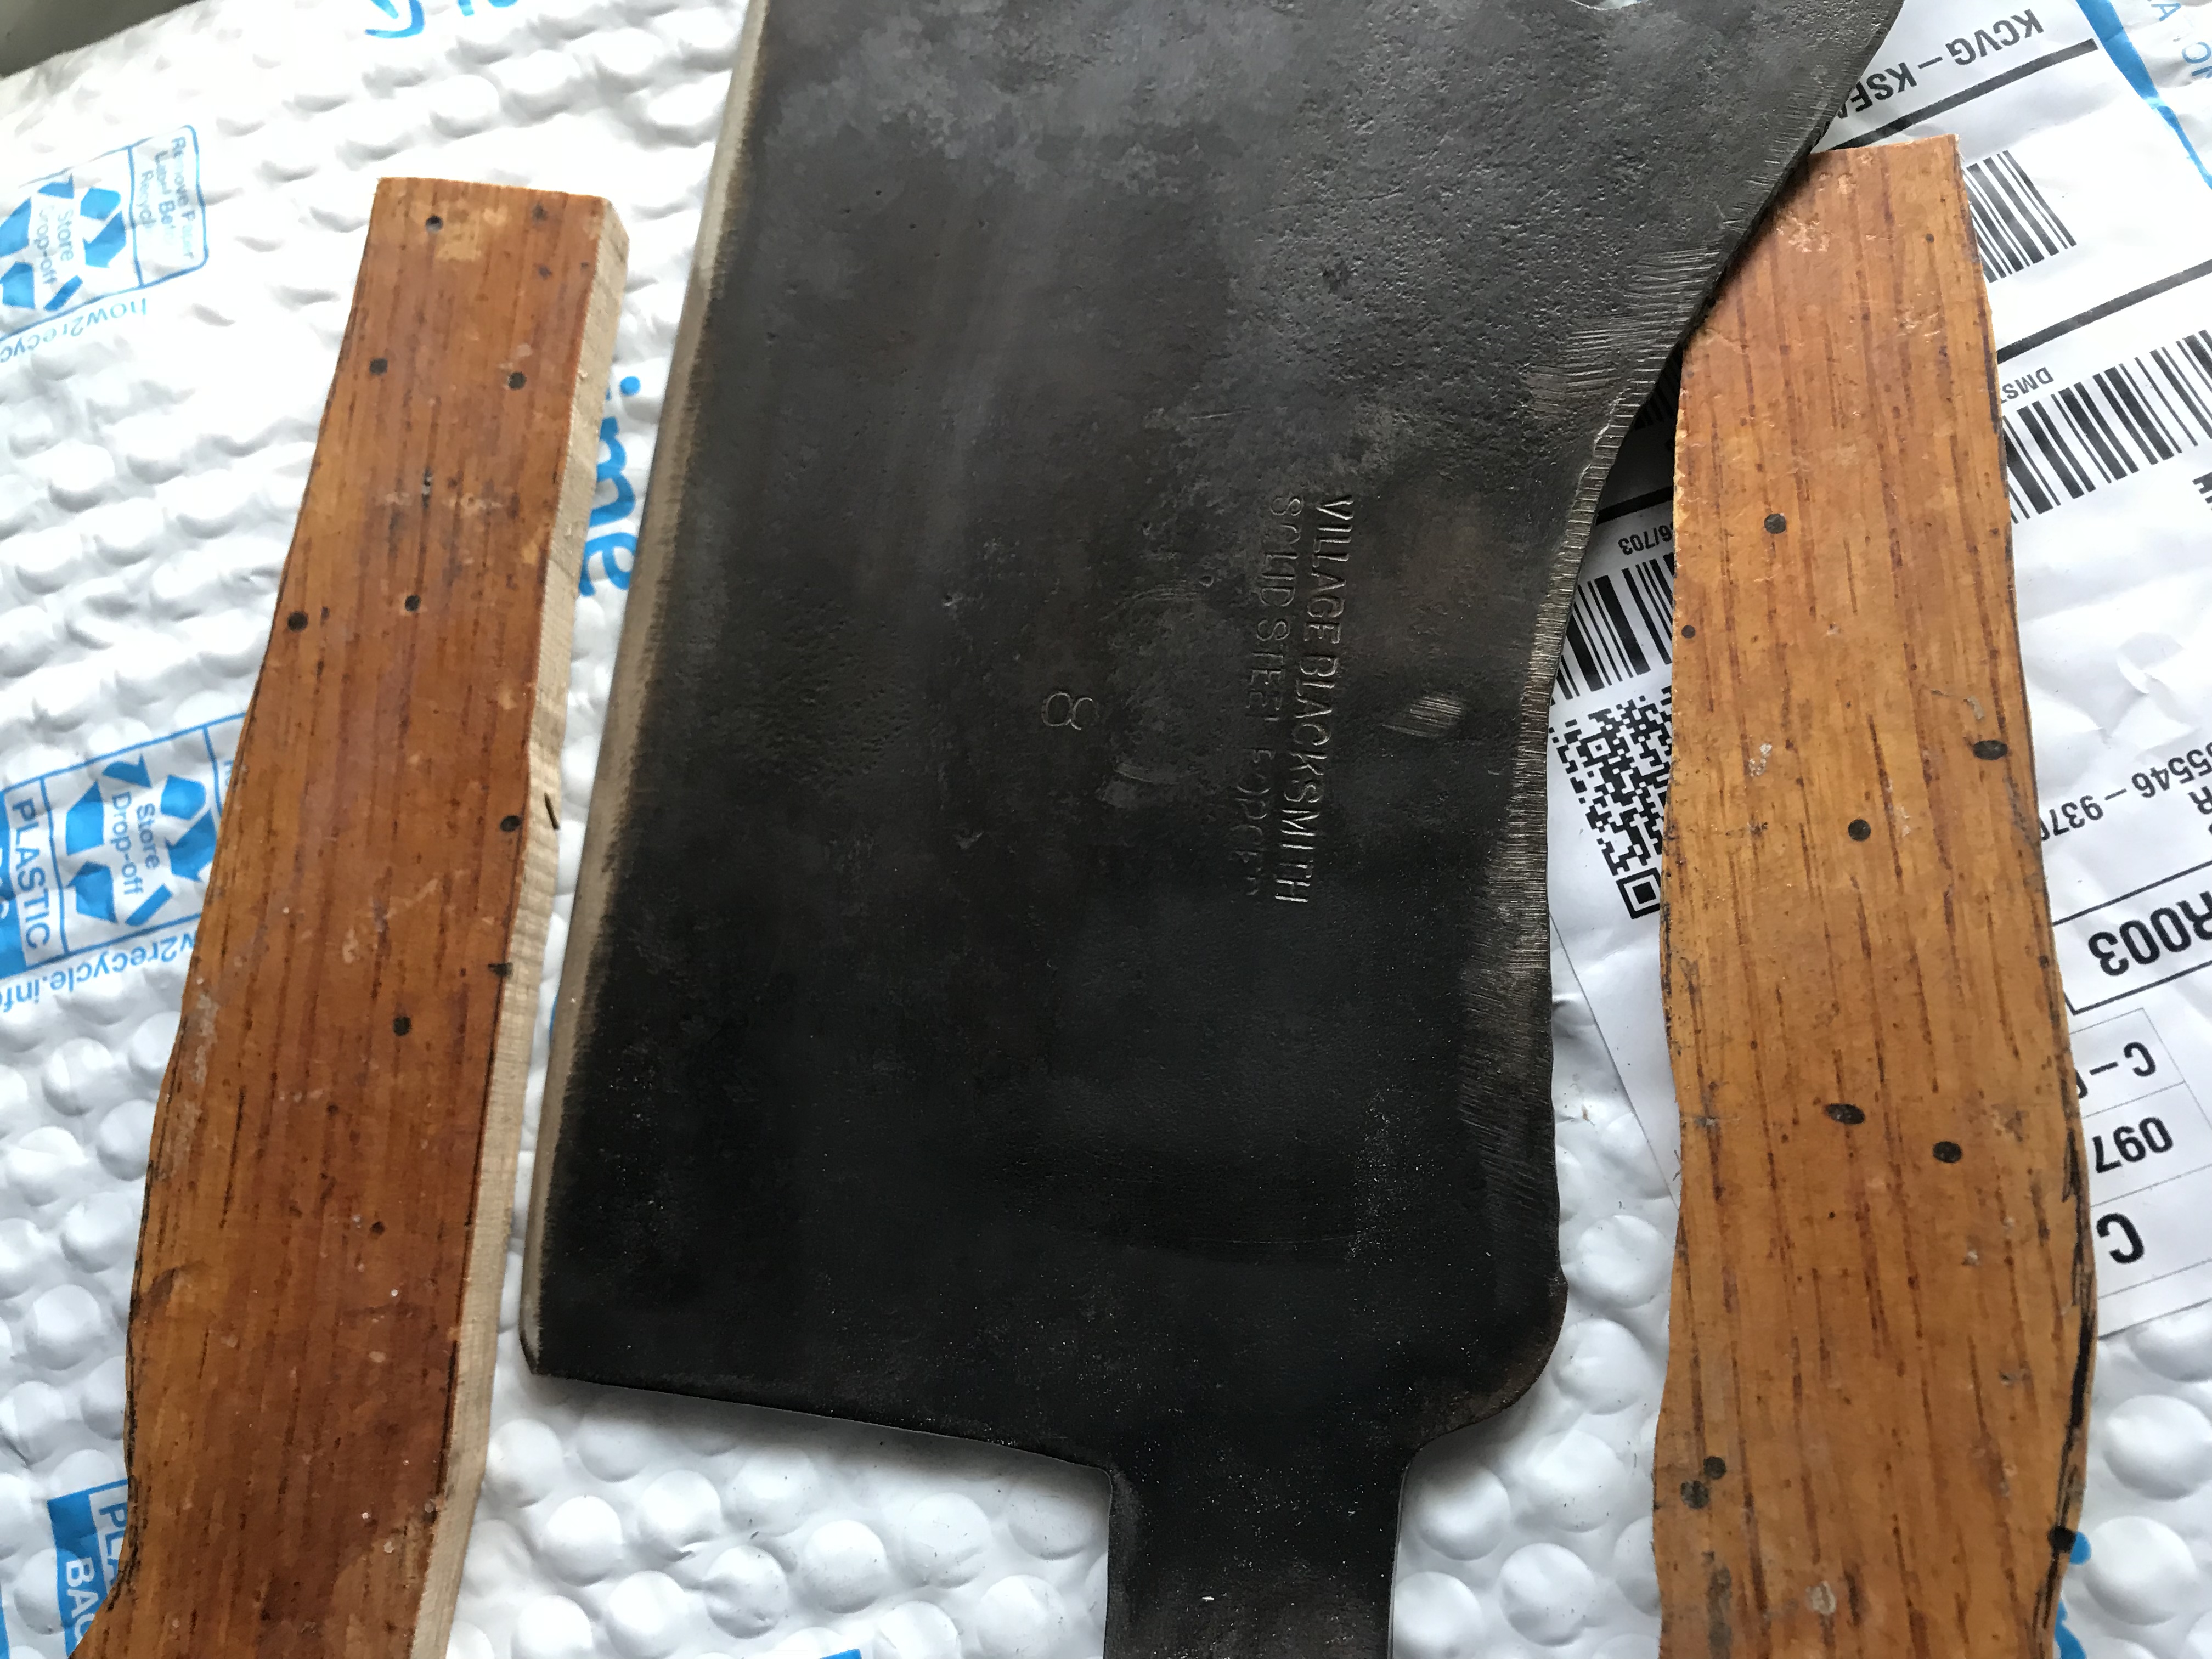
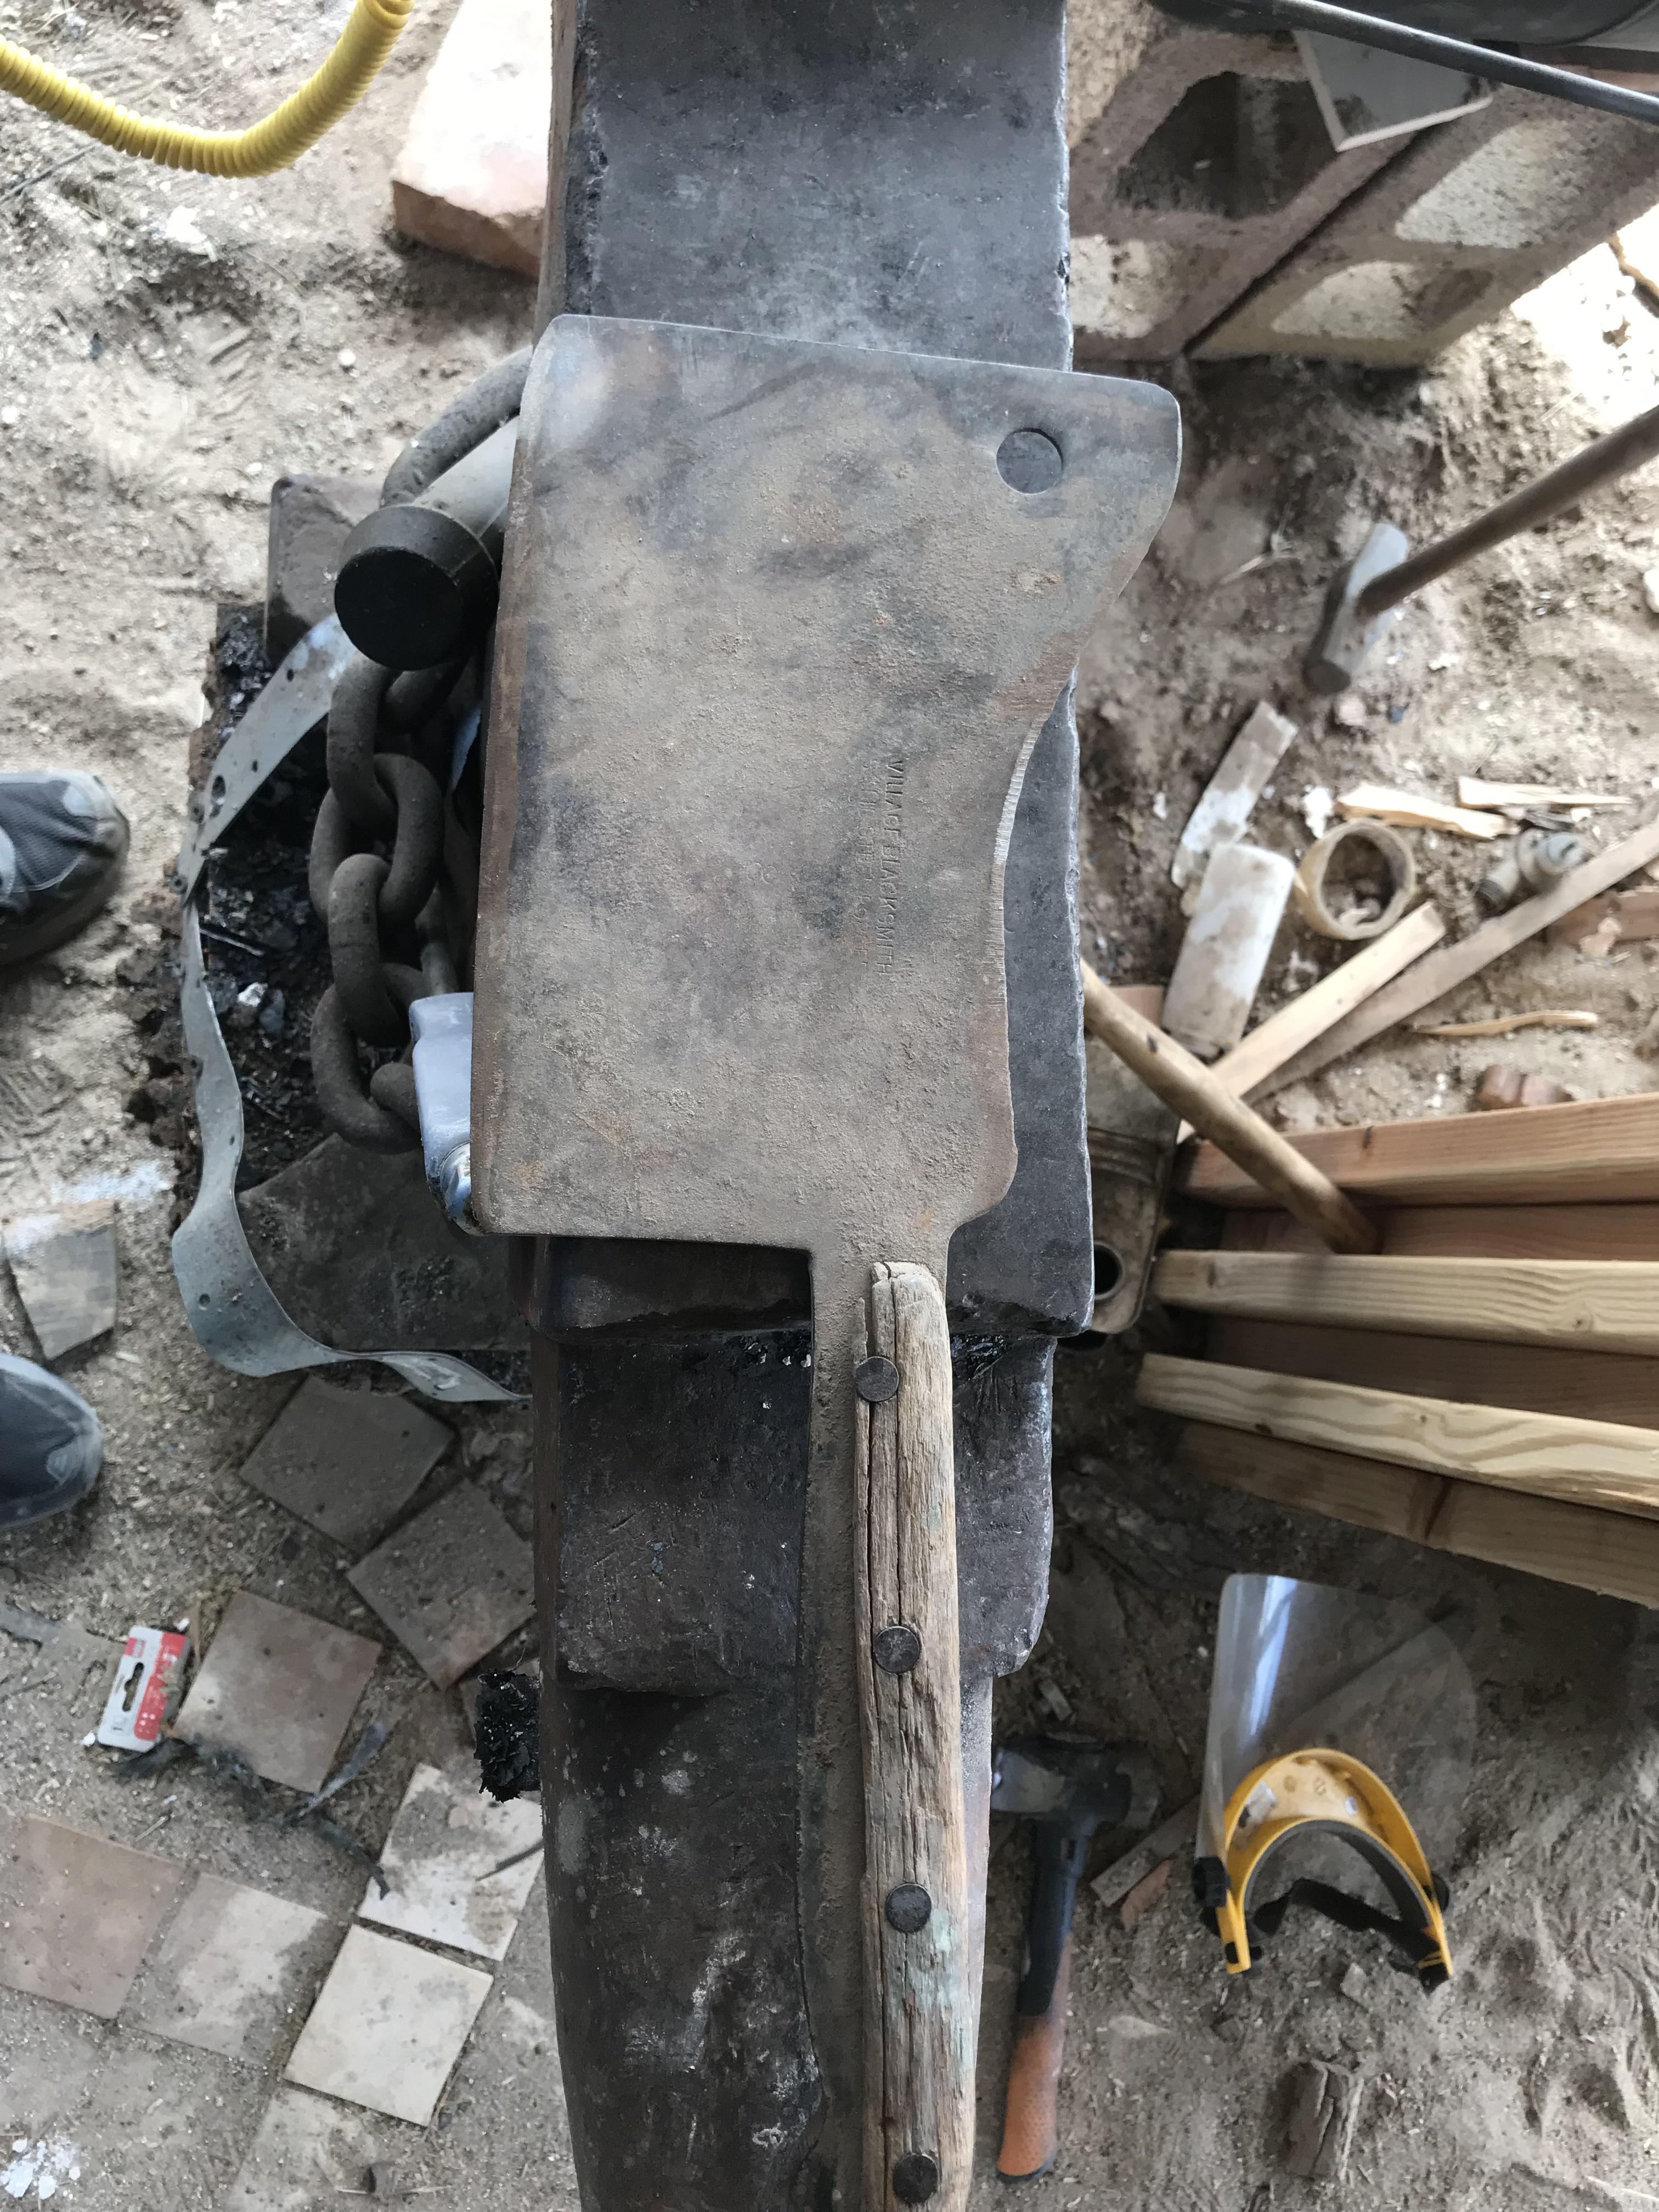
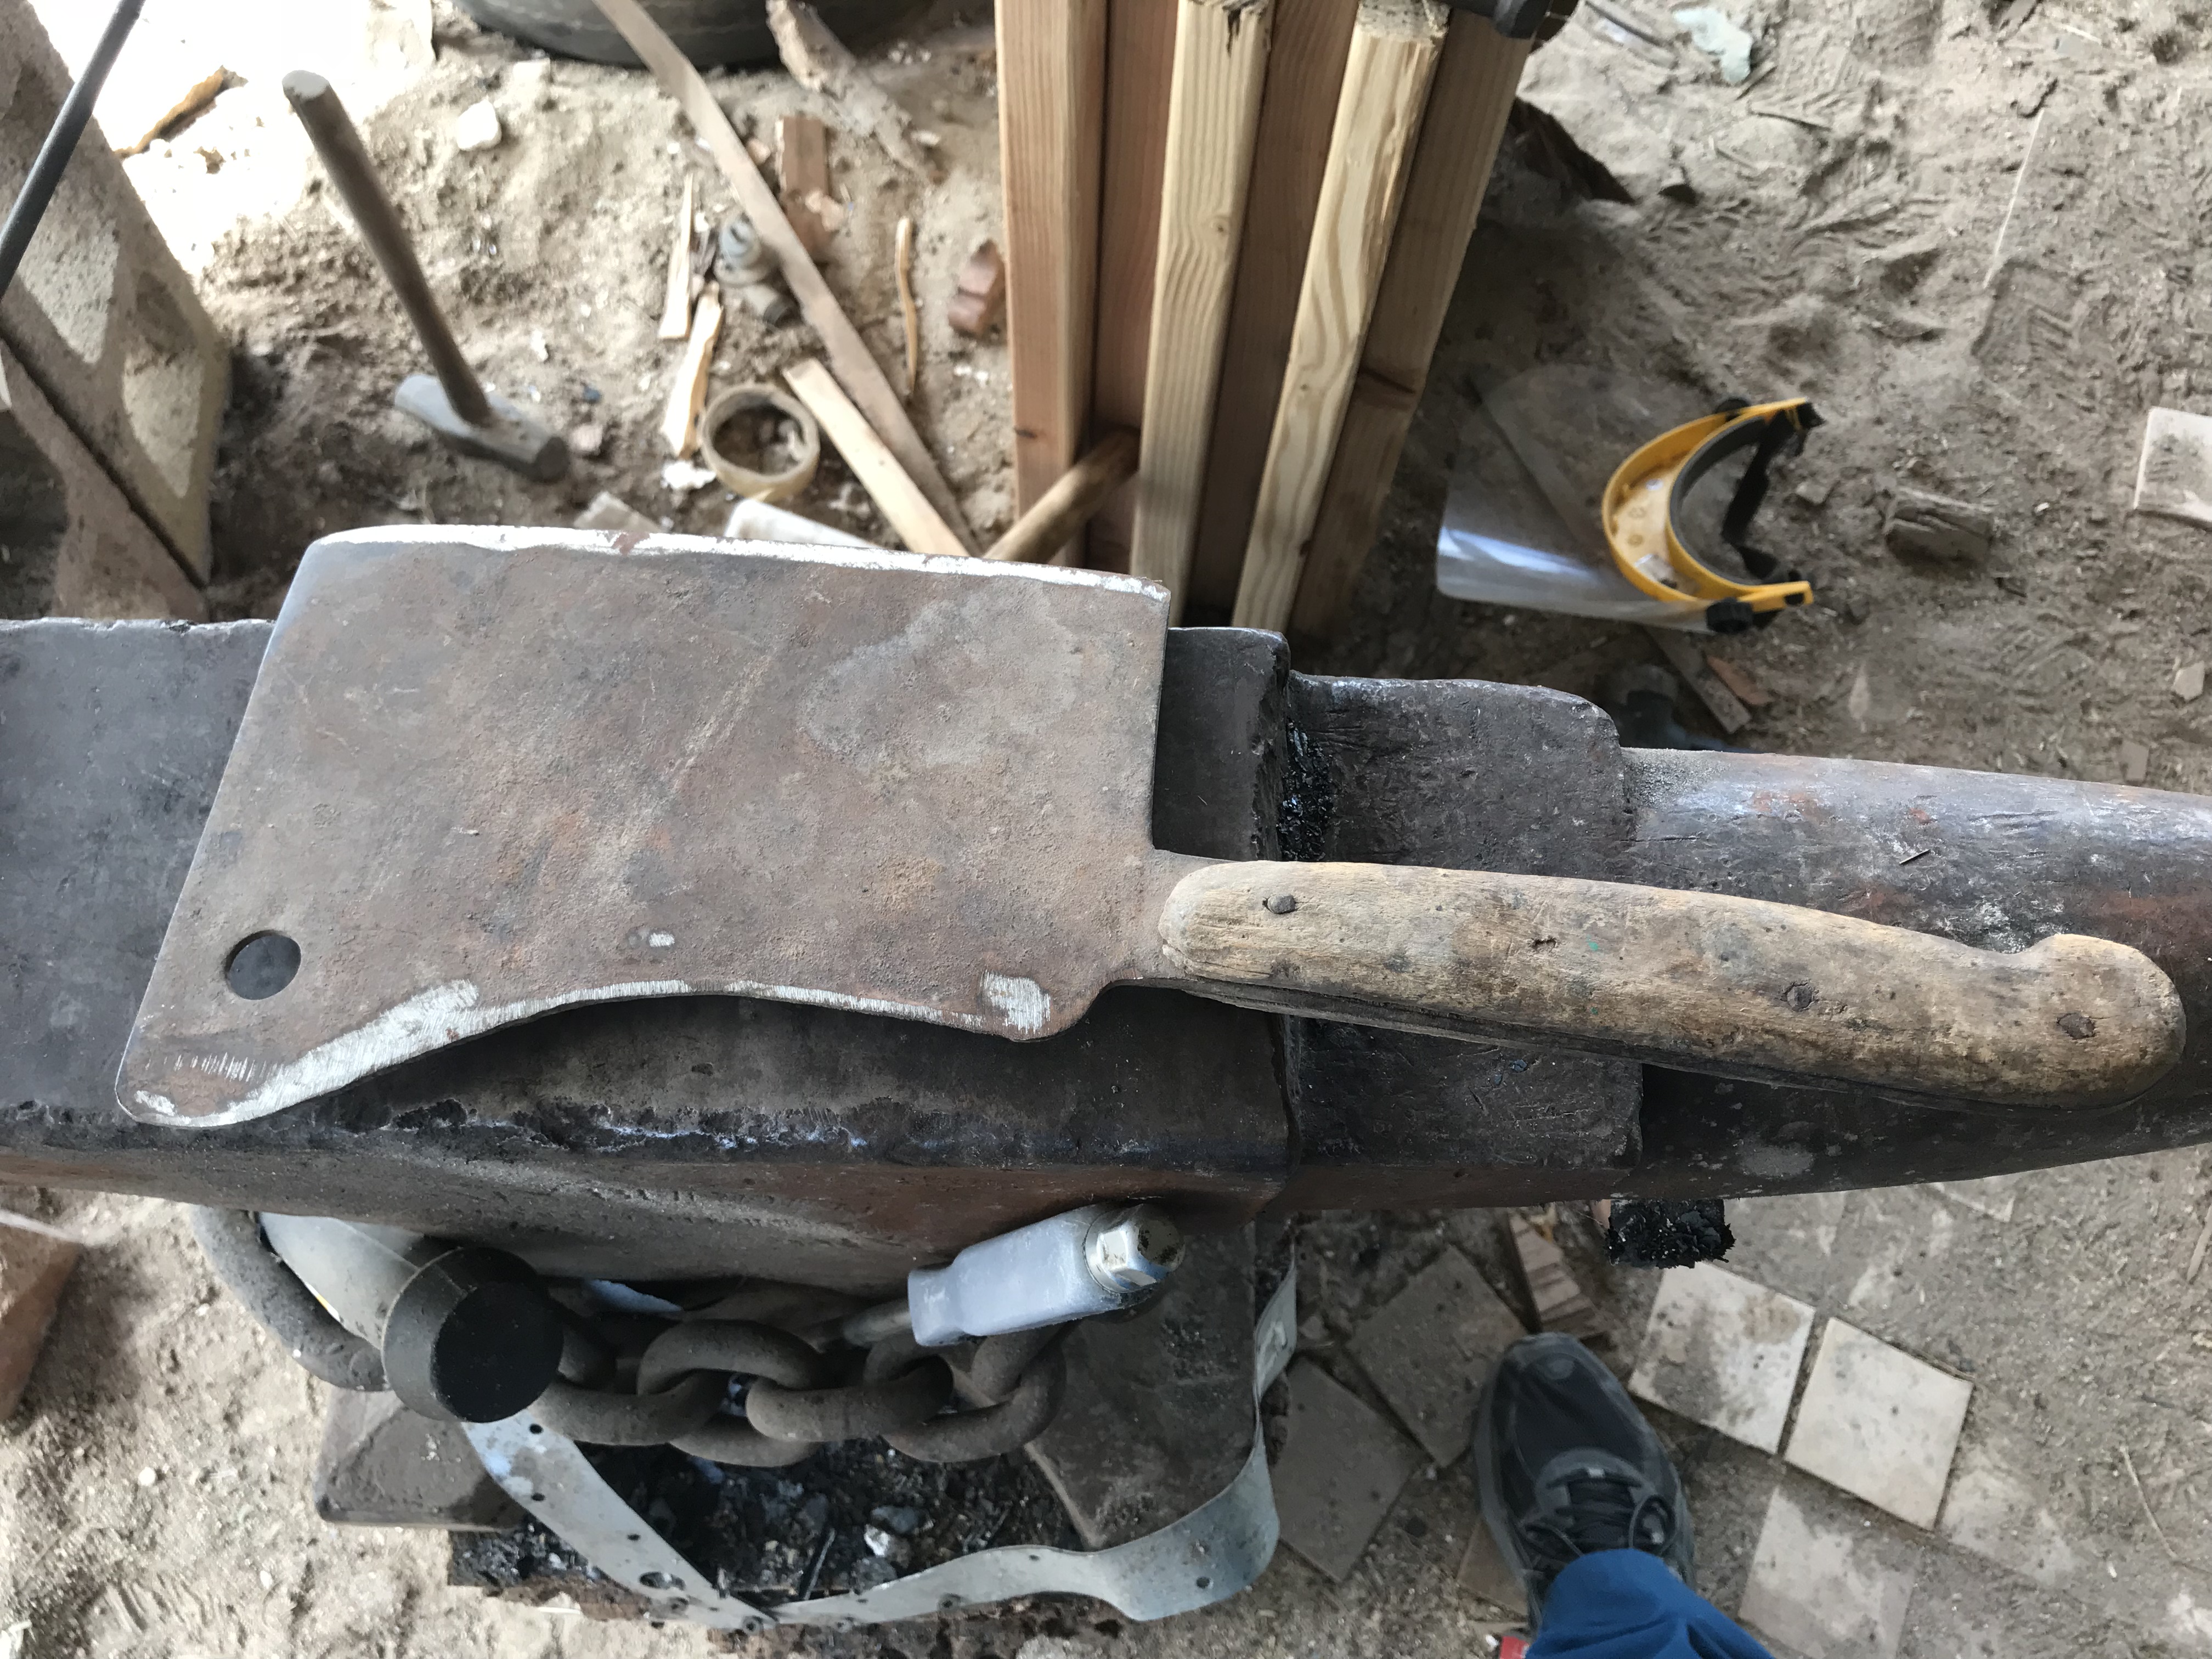
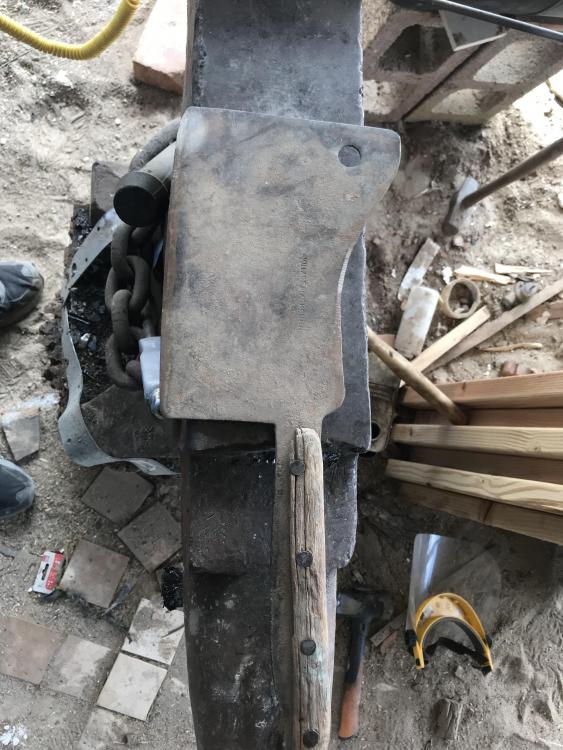
The first thing I did was take a wire brush to it. It had a 'finish' I will call it under the dirt and surface rust. Its black, like flat black. I took a wire wheel on a 4" angle grinder and covered the whole surface with it. the handle came out a dull silver, but the cleaver stayed black... minus the cutting edge and parts of the spine where someone took a file or angle grinder to it. I like that black look, More pics when I get home. I think I will just clean up the bevels so they dont look like a teenager tried to sharpen it on a rock, and put a new handle on it. With the cleaver was a stack of floor boards from the Safford High School gym. To keep it o'ld' I will use that wood for the handle. It was built circa 1915, and I have an early memory of pulling nails out of the boards when I was 4, in 1988. My grandfather kept all the wood in this warehouse. I know it might have some gnarly kind of treatments in it, so as always, PPE while working THAT wood. Display piece, not for use I think.
-
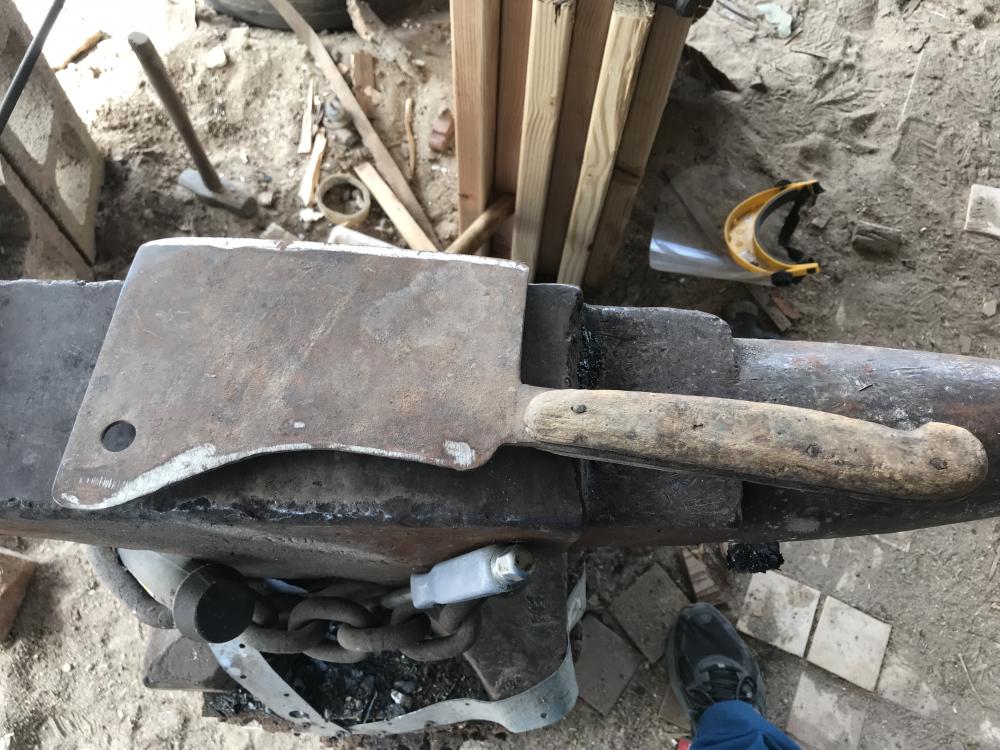
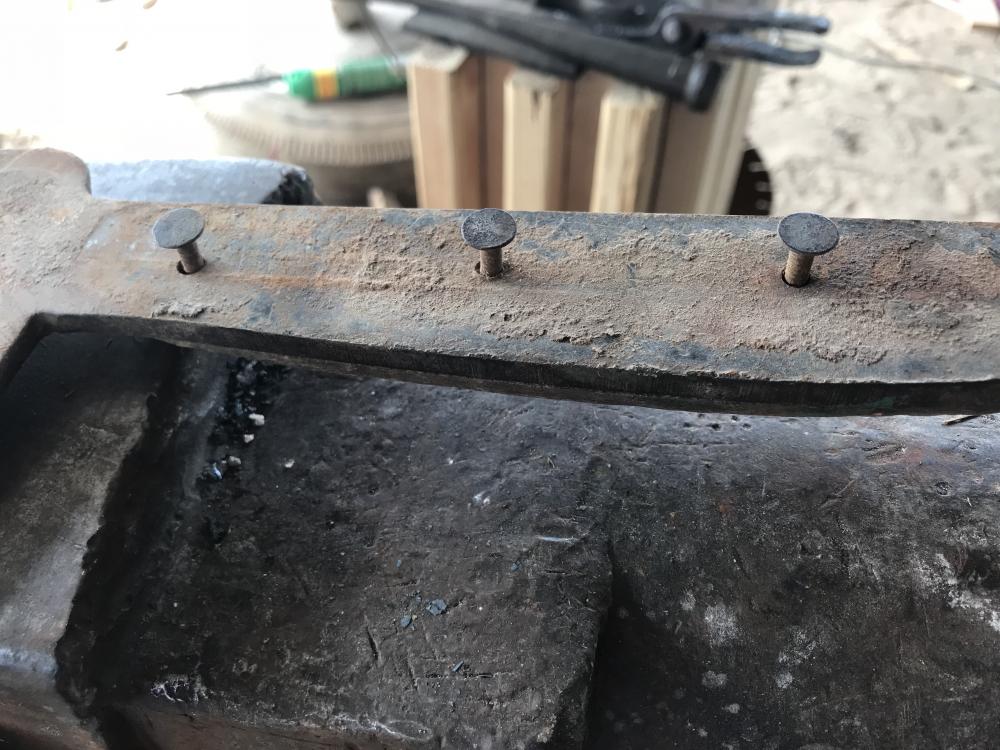
I was going through my grandfathers ‘warehouse’ (read enormous bulk junk storage) and found this old feller burried in 1/2” of dust. I think I will restore it. I would like to get the pitting rust off and make it shine, but that would likely entail grinding through the maker’s mark. Speaking of the maker, anyone know much about the “Village blacksmith” company? From what i could find on Google, it looks like it used to be “Washington Cutlery Co” that made knives, cleavers, and farm tools from 1900-1960’s.
-
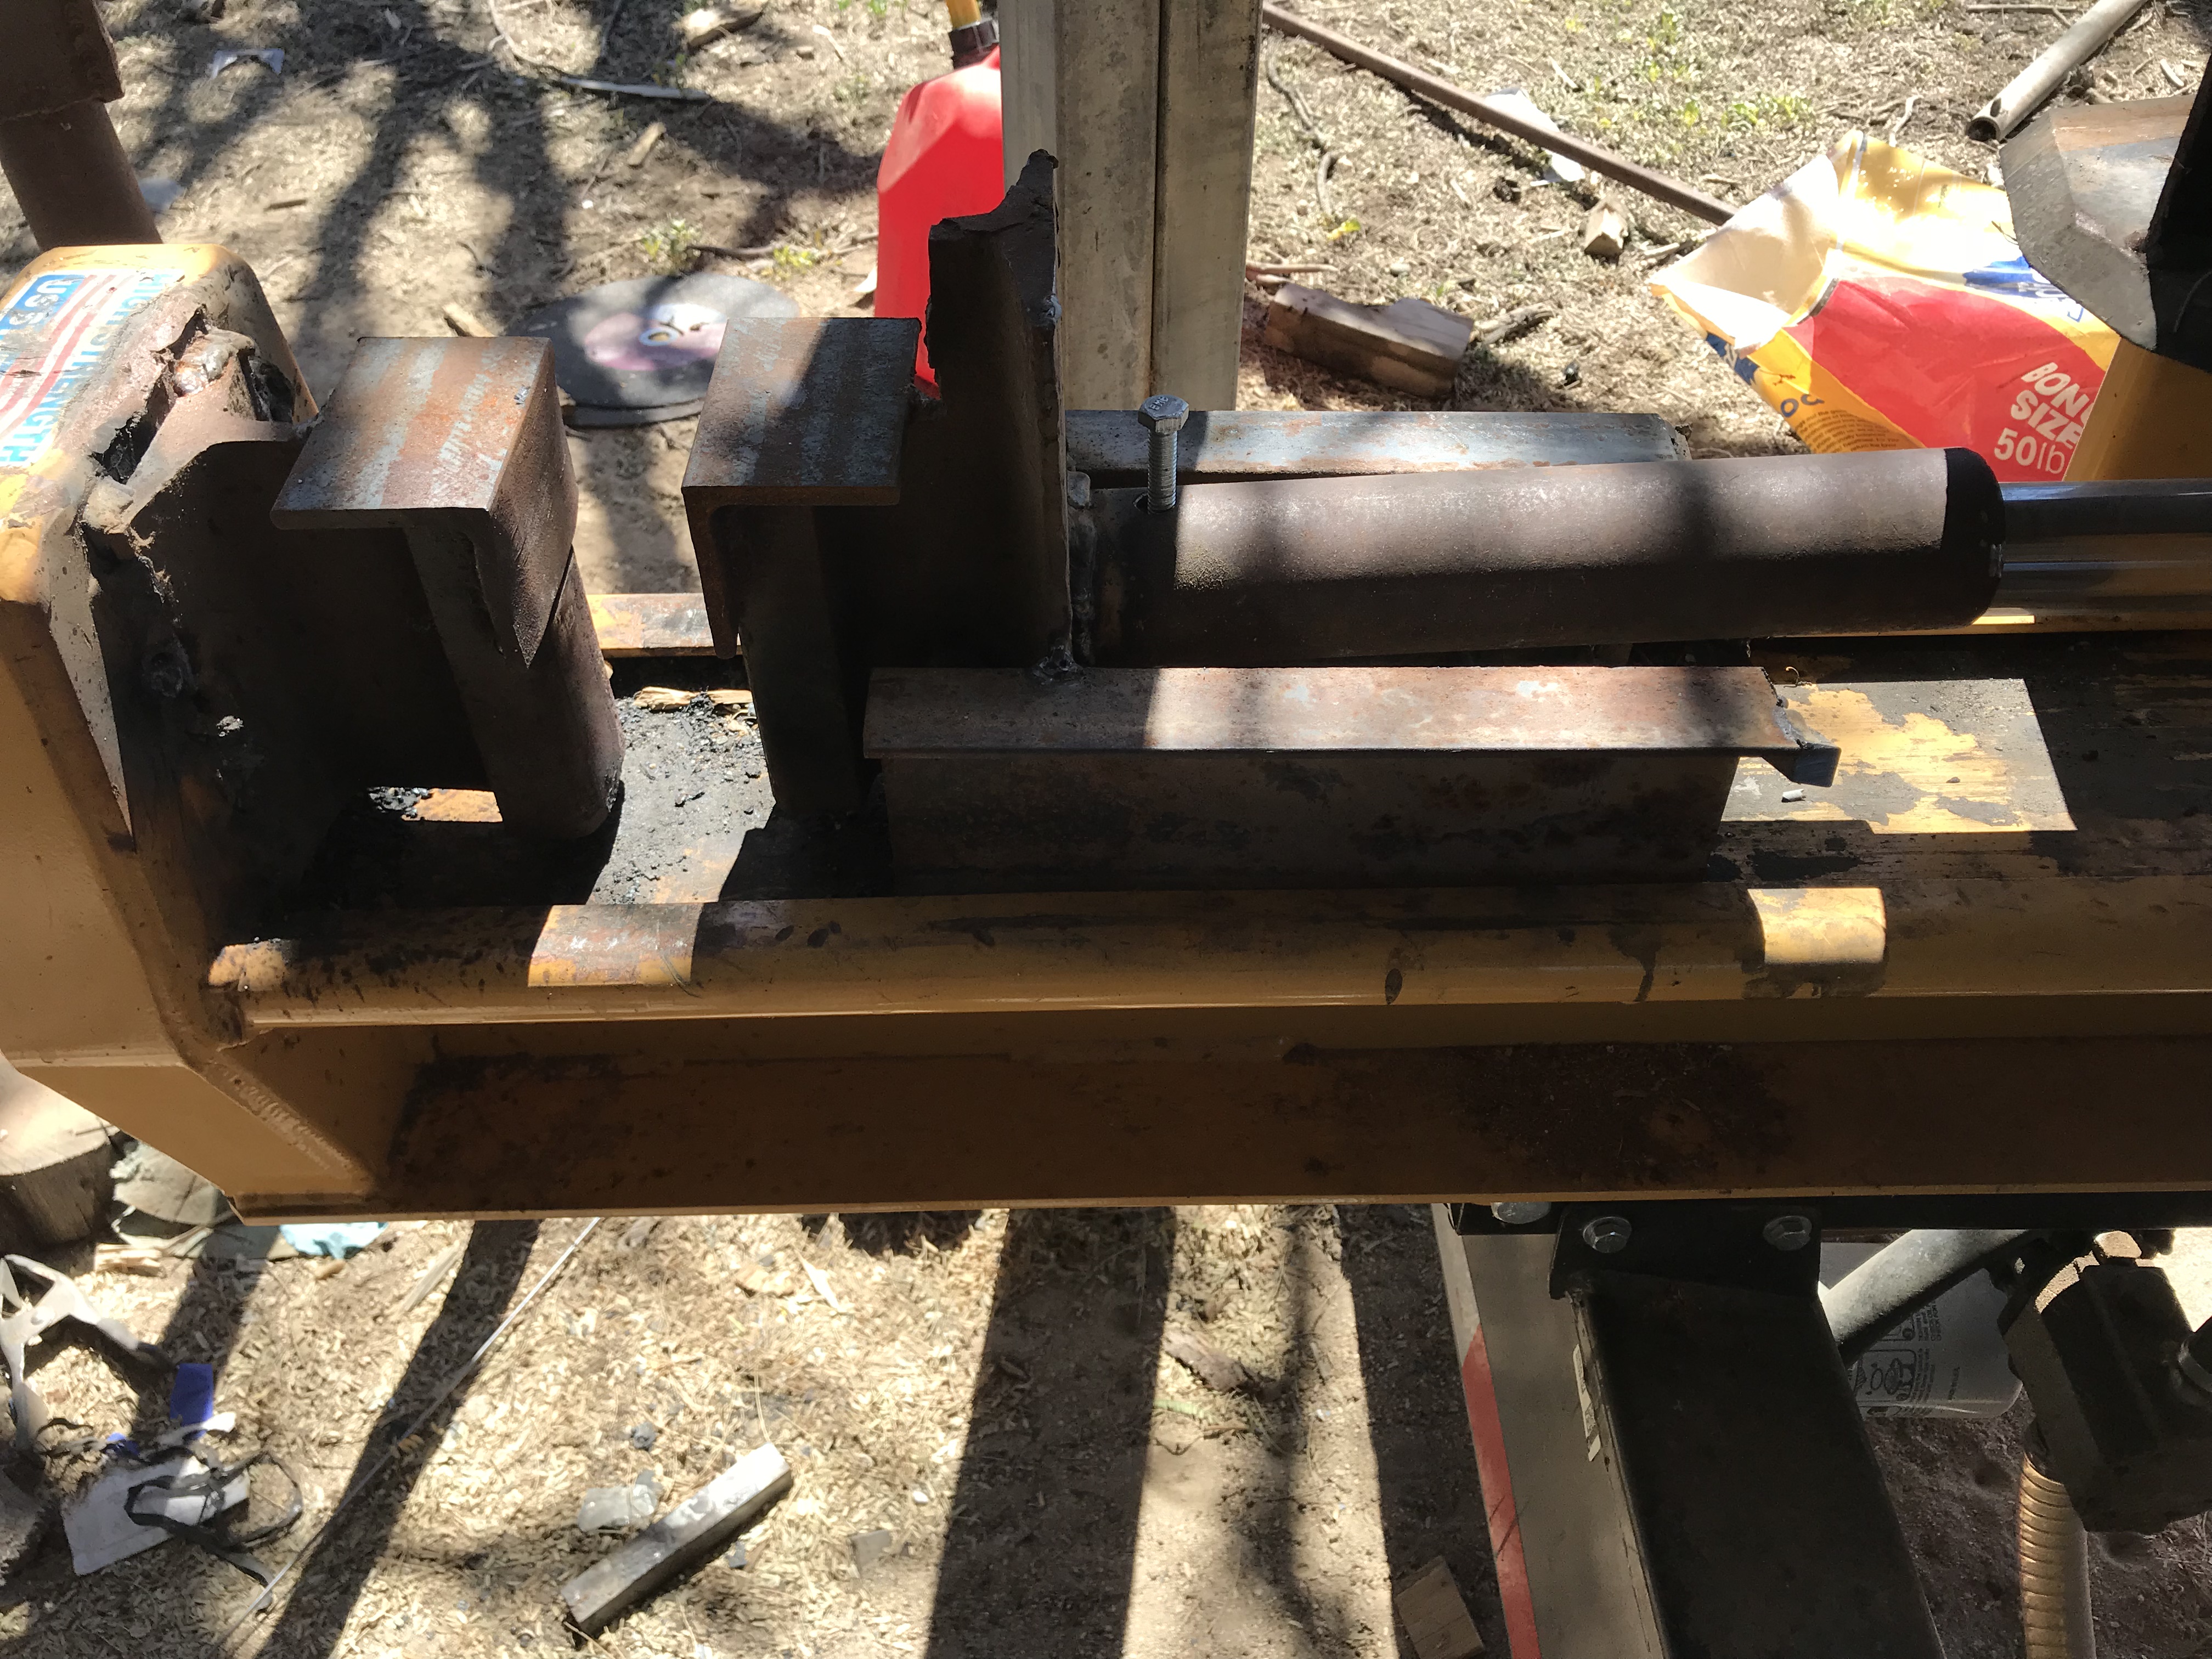
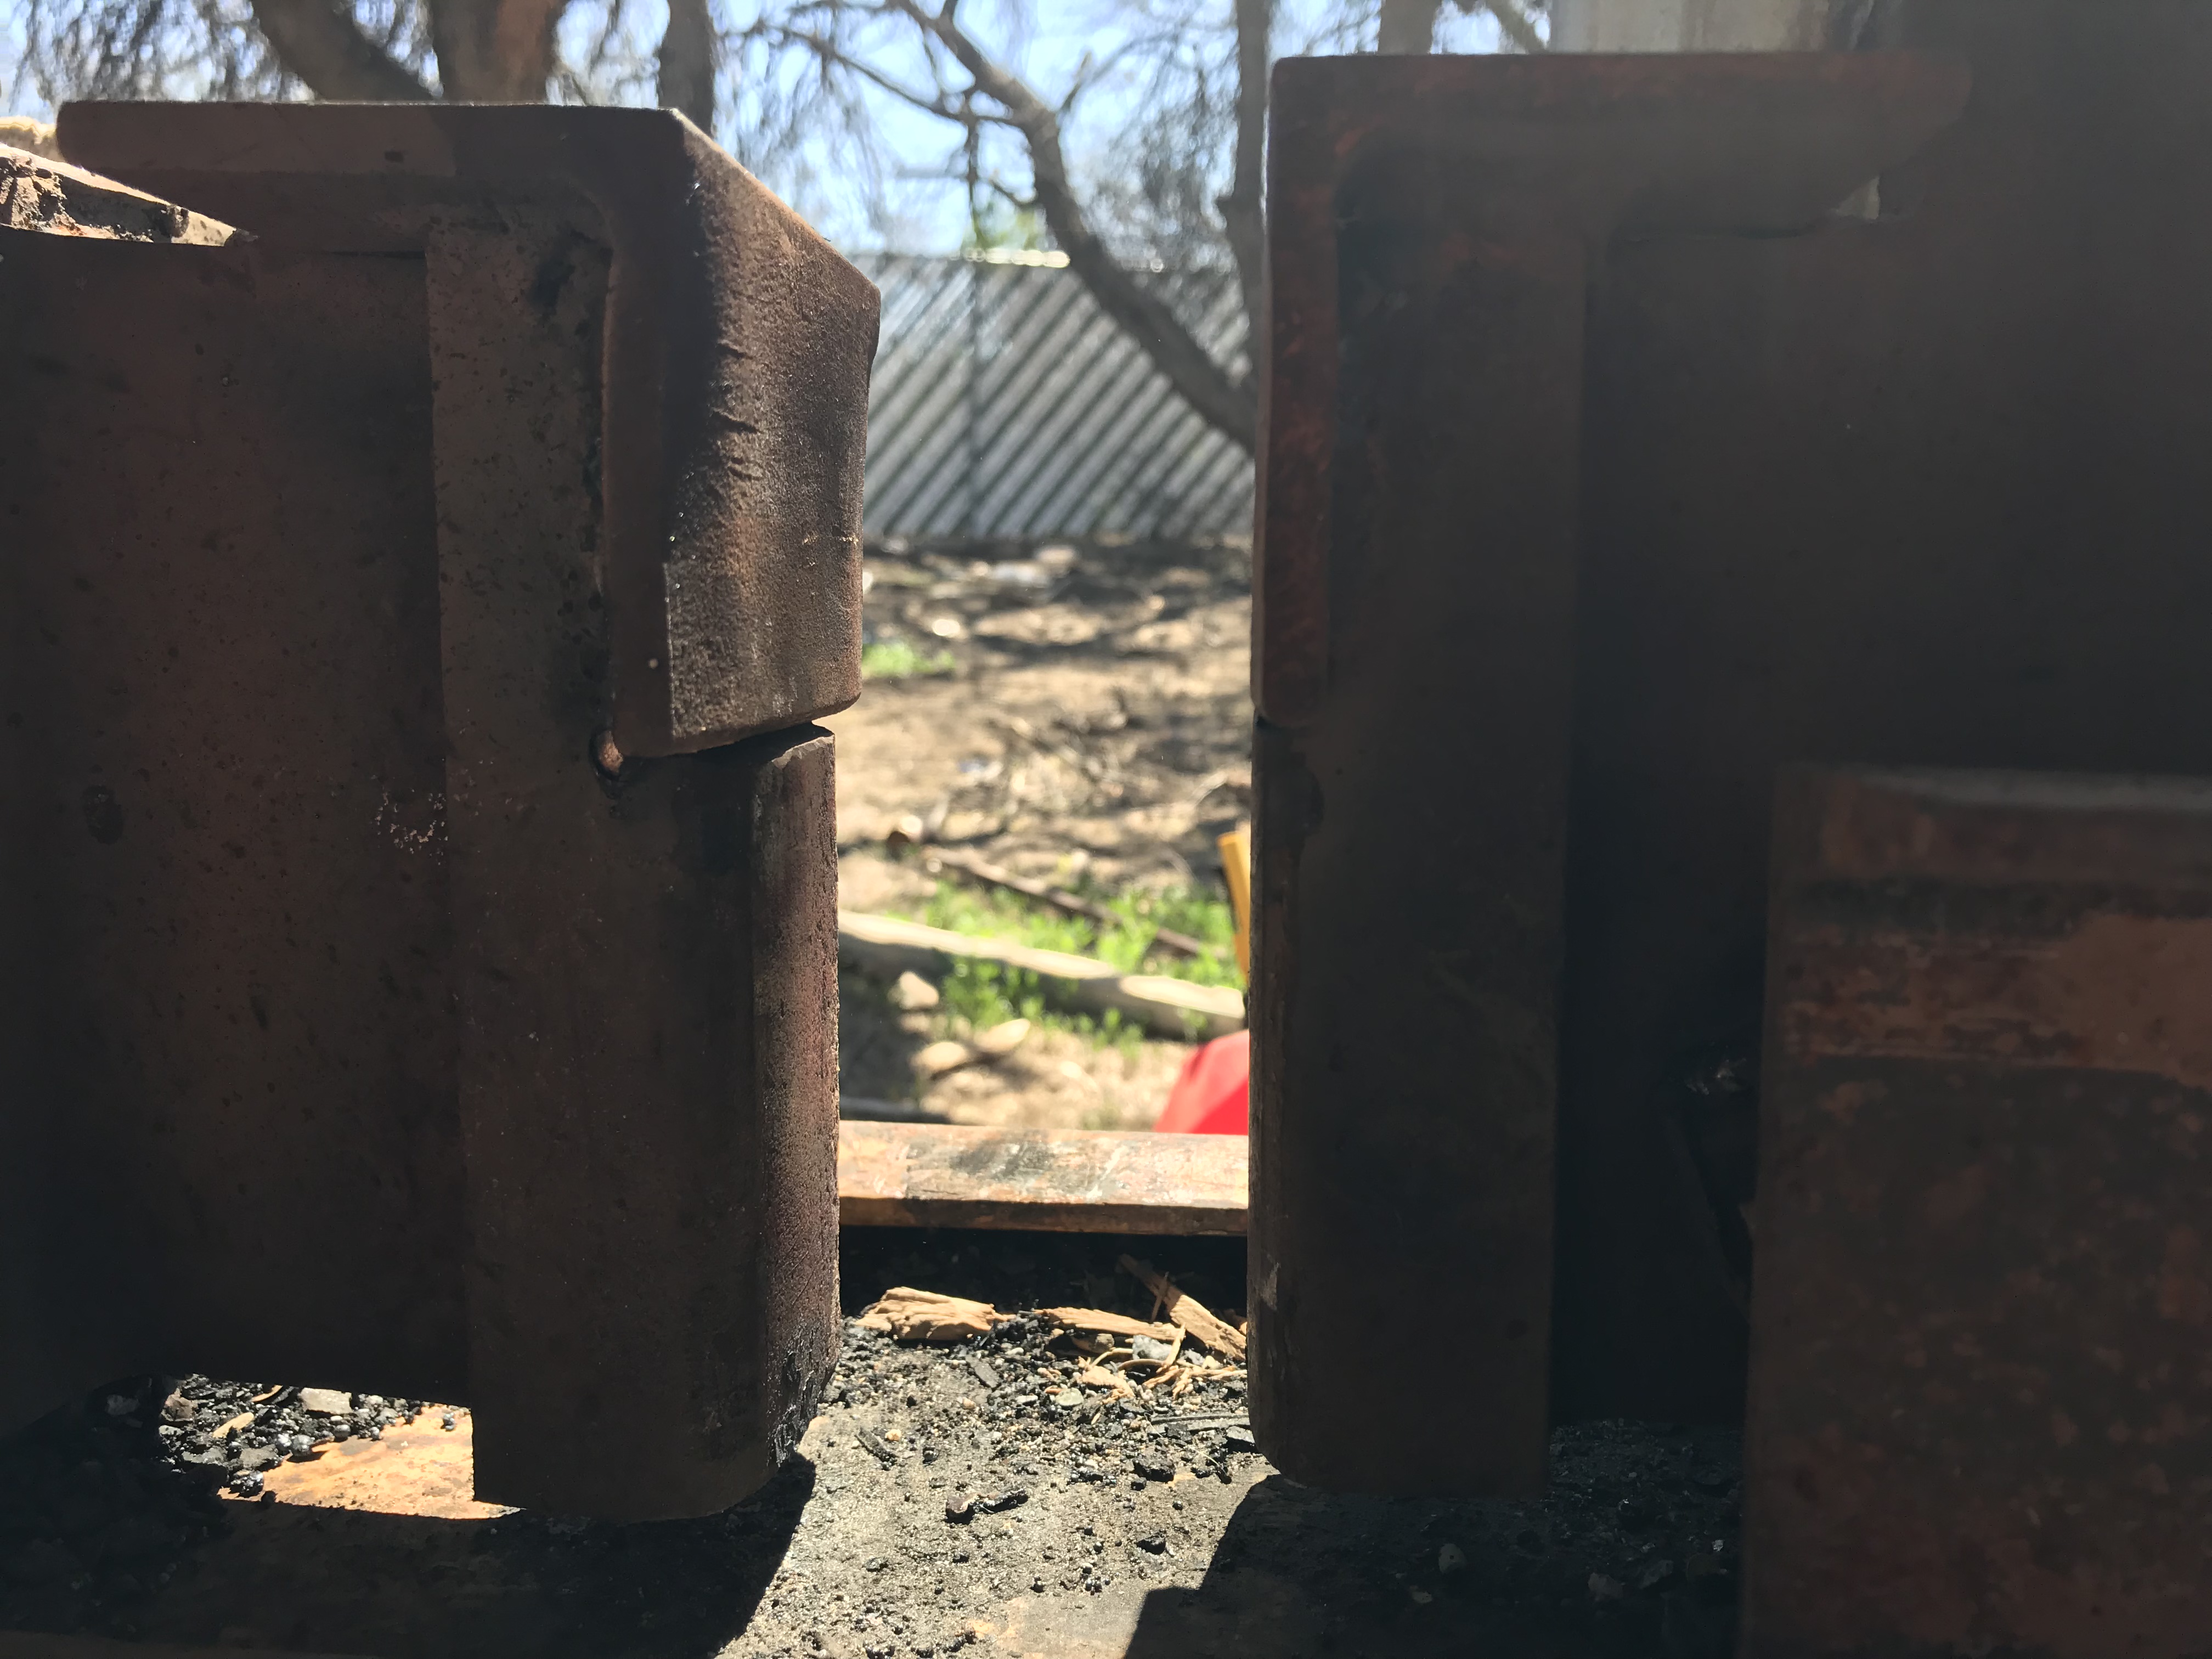
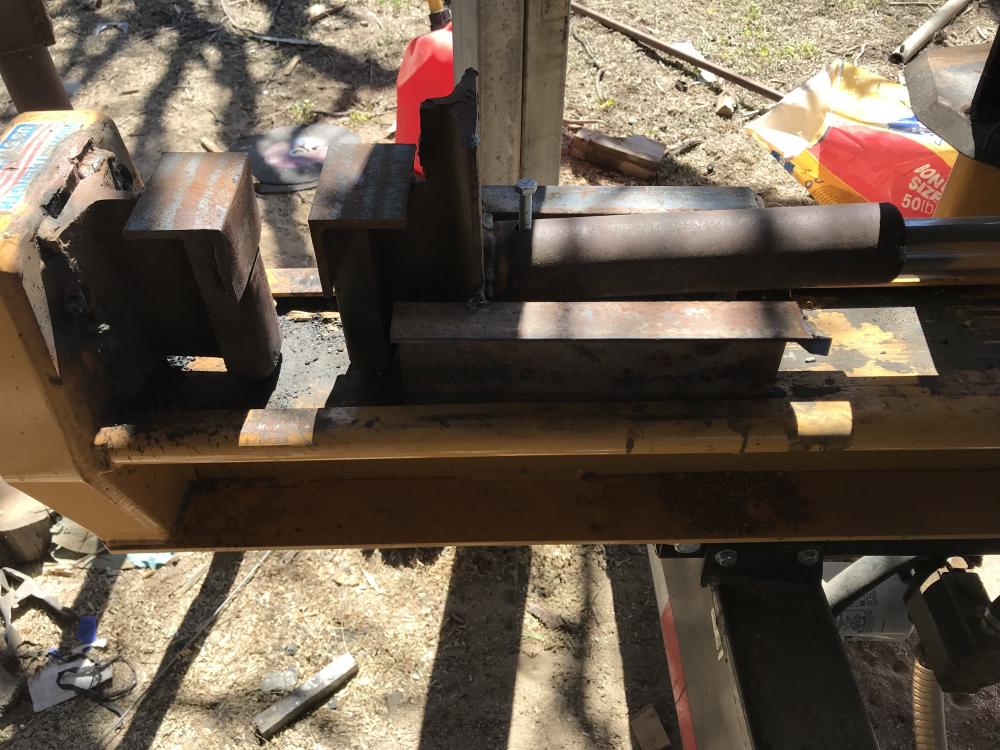
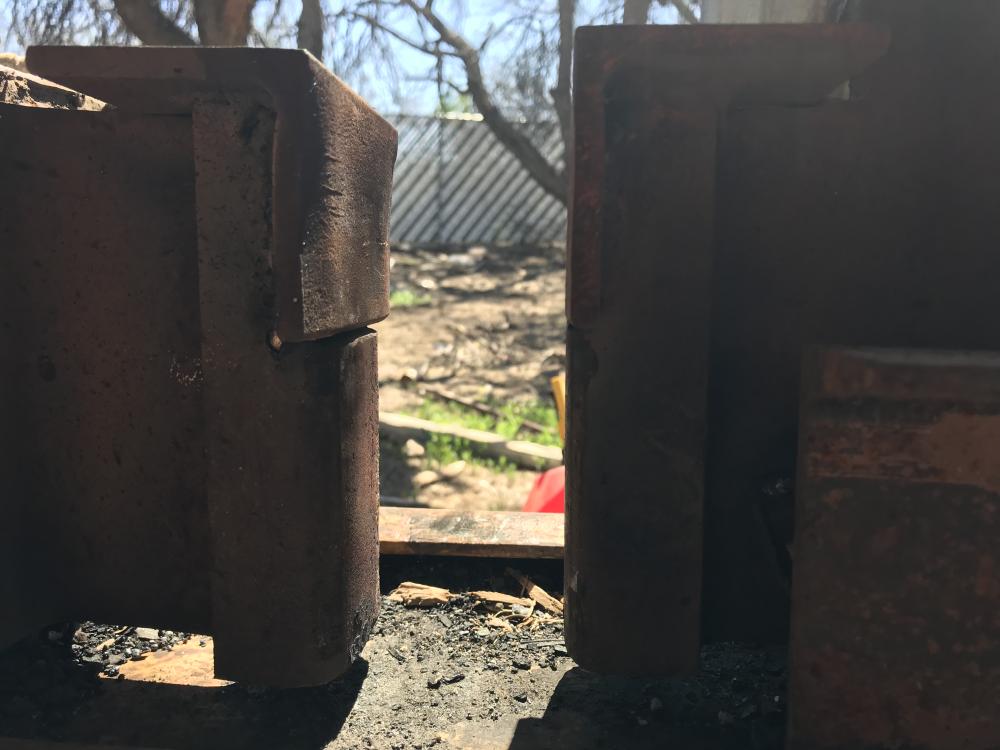
Close fitting pipe around the hydraulic cylinder. Heavy Channel iron that fits inside the guides, made it long so it cant flex too much. And rails with heavy angle for the flats. Simply pull the bolt up and slide the wedge back in for conversion.

-
I kept gas on it, elctric would be stronger, but I like the portability for the dual purpose. Plus that is more work and time for a conversion than I had available. I purpose re-built it because I did a billet by hand with 52100 in it, and thought to myself, never again...
-
i respectfully disagree... lol
-
this is what I ordered from NJ steel baron... 1095 Thickness: .070" Width: 1.5" Length: 48" 3 $36.99 15N20 Thickness: .065" Width: 1.5" Length: 48" 3 $35.76 I then took it to the community college and used their press brake sheer to cut it into equal 4" lengths. I have 2 little bins one full of 1095 pieces, the other 15n20. I made a stack that is about 1.5" tall. Ended up being 11-12 layers I think. That is an easier to hammer billet for what I'm comfortable doing it by hand. I have done up to 2.5", but I will never do that by hand again, too many heats and too long to draw it out thinner... to much naproxen... plus it was 52100 & W2... once more, not ever doing that combo again.
-
I'm pretty similar to Buzzkill. I hit both sides with a rough belt grinder. I prefer rougher, lower grit, because in my mind (a scary place to be sure) it leaves more surface area on both sides of the welding surface, and those little ridges and valleys have a greater chance to intermingle at high temperature. I have no data or sources to back this up, but I picture the roughed up sides acting almost like Velcro that then gets melted together if that makes any sense. I dont have any sources or data for this reasoning, just my own extensive chemistry and physics background. I do differ in that I don't like using rebar, I prefer 1/2-5/8 square stock. I find it hit or miss that the arc weld from rebar to the billet will stay throughout the stresses of hammering. Since rebar steel composition is a random bag of who knows what, sometimes you can get some alloys in there that don't like to arc weld to HC steels. my 2 Cents anyways Econaway abrasives. custom belts that they make to fit virtually any sized belt you need, just choose the abrasive, Aluminum oxide, silicon carbide, zirconia alumina, ceramic. and input the sizes. its the only place that has reasonable prices for my oddball 4 X 10⁶ belt grinder. the shipping is not the greatest, but ordering many belts at a time usually mitigates that cost a little bit.
-
apparently looking for 90MnCrv8 is a better way to get results. It looks like this steel is not used much in the states, more of a European-Scandinavian commonality. But I have some coming in from Finland, so I have that going on for me, which is nice.