Mberghorn
Members
-
Joined
-
Last visited
Everything posted by Mberghorn
-
I do have a drill press. The only reason that I hadn't used it as a vertical wood lathe is because I didn't know how to clamp the wood in the chuck but after reading this I think I can take a pretty good whack at it now. Also, good idea on the angle gauge.
-
Sounds to me like you already have a basic design in mind. Might better just build one of your own. That can benefit you in multiple ways. One you know what kind of craftsmanship went into is making, two if you want to tweak something you can before it gets too far along, and three when it comes time to reline it (and you WILL have to reline it) you'll know exactly what do to and what materials you need without having to do tons of research before you buy a kit that is gonna end up causing you more headaches. Also, I agree with Thomas. There's no such thing as "general blacksmithing." That would be like saying you're a "general pilot." There are just too many focuses to narrow it down by that one phrase. Wayne's page is awesome! The best part is that once you figure out what you wanna do you can order all the materials you need in the quantity you'll need from his site. Save the basics that you can find at the local hardware store.
-
Awesome, thanks for all the great input guys! I've already rigidized my blanket and fired it to set the rigidizer (pictures in Burners 101) so now I just need to pour my cast-o-lite. I saw before someone mentioned using cardboard with the corrugations pulled out as an inner mold so I have that sitting inside the forge now just waiting on whatever I put in the burner ports to keep them clear. That's what I was thinking of doing too, I'm just at a loss for what to use as materials. I don't have a wood lathe so forming the cone out of wood is out (my whittling skills are less than exemplary). I do like Frosty's idea of the fire extinguisher nozzle, though. I can definitely make that work! That's what I was curious about. Is 'close enough' going to be "good enough" to work without having to fool with it too much.
-
I think I'm going to give your step nozzle thing a try on the burners I make for my next forge. I'm in the process of getting everything ready to line it now so they'll be coming along shortly.
-
I bought mine from him and all three are almost identical and they come tapped with two set screws each all for $7 a piece. Well worth it in my opinion!
-
The structures mechanic in me is twitching like a son-of-a-gun right now
-
Unfortunately that's the way of the world, my friend.
-
The obvious ones are that your mixing tube is WAY too short and your gas jet orifice is too far in to draw in the air required for a good burn. Read up on the Burners 101 thread and the Frosty "T" burner thread before you keep going. Those two threads will answer any and all questions you could possibly dream up! (I suggest you take notes if you find something that is pertinent to your build because once you pass it it's a PITA to find the post again for reference!)
-
I did the same thing when I built these burners. I bought a package of mig tips that were supposed to be 1/4-28. That's what they were advertised as and that's what it said on the package. When I double checked them with my thread gauge they were 1/4-27. I thought maybe my thread gauge was messed up so I checked them with four other thread gauges; three SAE and one metric. Once my suspicions were confirmed I ended up buying a new tap so I could use the 25 mig tips that I just bought, lol. (Hey, if it's good enough to buy one, then it's good enough to buy a bunch, right?!) Glad I could help. Someone has to keep you guys occupied, lol!
-
When I rebuilt the burners for my way-too-big forge I used a fuel gas rated thread sealer. It's yellow and gritty and seals the threads quite well and all the parts are still easily removable. I'll take a picture of the bottle when I get home and up load it to the thread tape post.
-
So I have a question for all of you who have experience using castable refractory. Do you put some sort of a mold in the burner holes in the blanket to keep the refractory out of there or do you just cast the whole thing and then cut the burner holes in the refractory layer after it's all set up? I'm up to that part on the two forges I'm working on and I want to know what works best for you guys before I commit to mixing. Thanks for the help!
-
One of the pictures at 2psi is less than a minute after lighting them all off. If I had to venture a guess it would be somewhere close to 20-30 seconds or so. There is one of those pictures that shows all three burners running in the forge but the flames are white in the picture. I'll try and take some out in the open air when I get home but they don't seem to perform as well outside the forge even with the flame nozzle, which has about a one inch overhang past the end of the mixing tube by the way.
-
Sure thing! I couldn't find black iron pipe that would allow me to thread a mig tip the first time for my jet tube so I used what I had which ended up being 1/4" copper pipe. (I didn't know that the pipe had to be schedule 80 in order for it to work.) That's way too big to thread a mig tip into so I tapered the ends down small enough that I could thread them to accept the .035 mig tip. They weren't very straight but they were close, or so I thought. That was also my first attempt at soldering copper pipe so learning experience there. The first time I went to forge in it I ran it all day, probably about 10 hours or so, and didn't even get half a set of tongs made before I shut down. Fast forward a few months of reading threads on IFI and I tore them apart, found the schedule 80 black iron pipe that I needed, down sized the mig tip orifice to a .030 and re did all the plumbing to use threaded brass adapters. I also changed the angle they were entering my forge from a straight 90 to an off set towards the top of the chamber to give that nice swirling effect that I read so much about. S/F
-
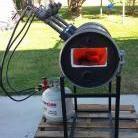
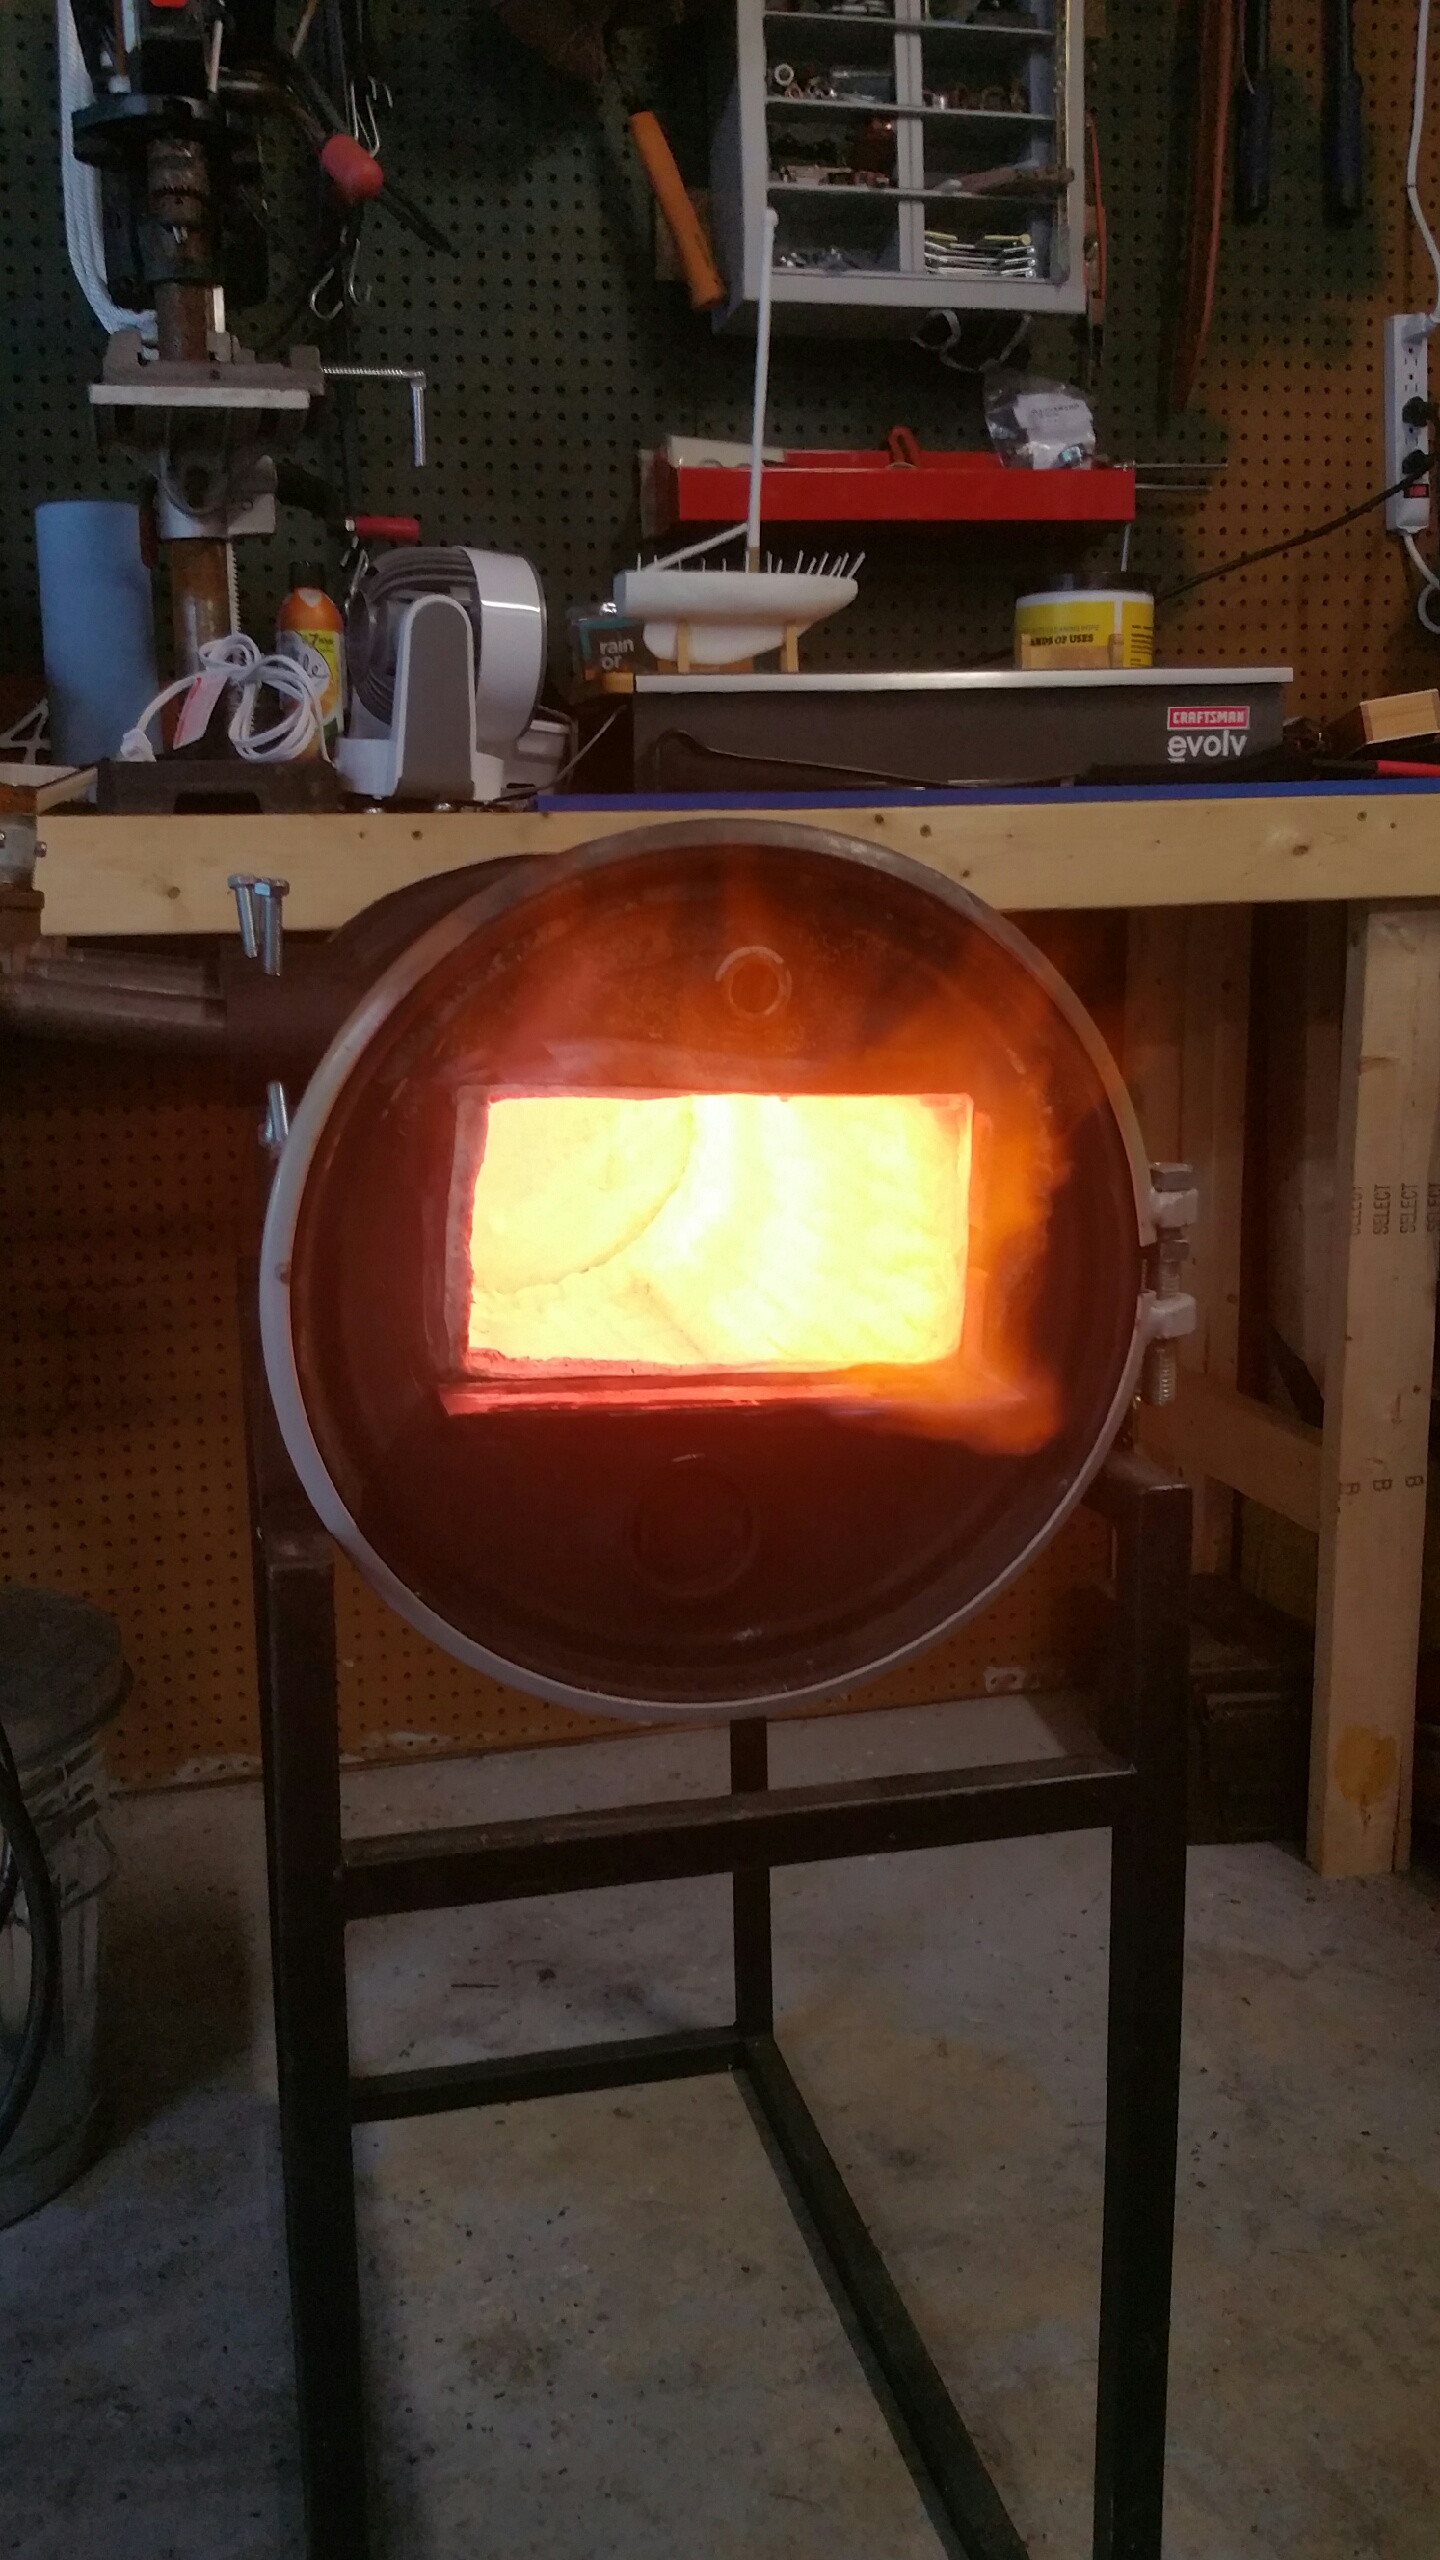
Yeah, that's my way-too-big forge that I told you about.....Once it get the castable layer in (which I'm going to make an inch thick) it will have a volume of 1,050 in^3. I have a buddy of mine that wants to get into smithing too so I'm going to tell him to bring his anvil over and we can both use the same forge. Lord knows it has the space for it, lol.
-
That's a really good idea! I have a couple brake drums off a 95 F-150 that I want to use as fire pots and now I have a good idea of what to use for a grate. Thanks, arkie! S/F
-
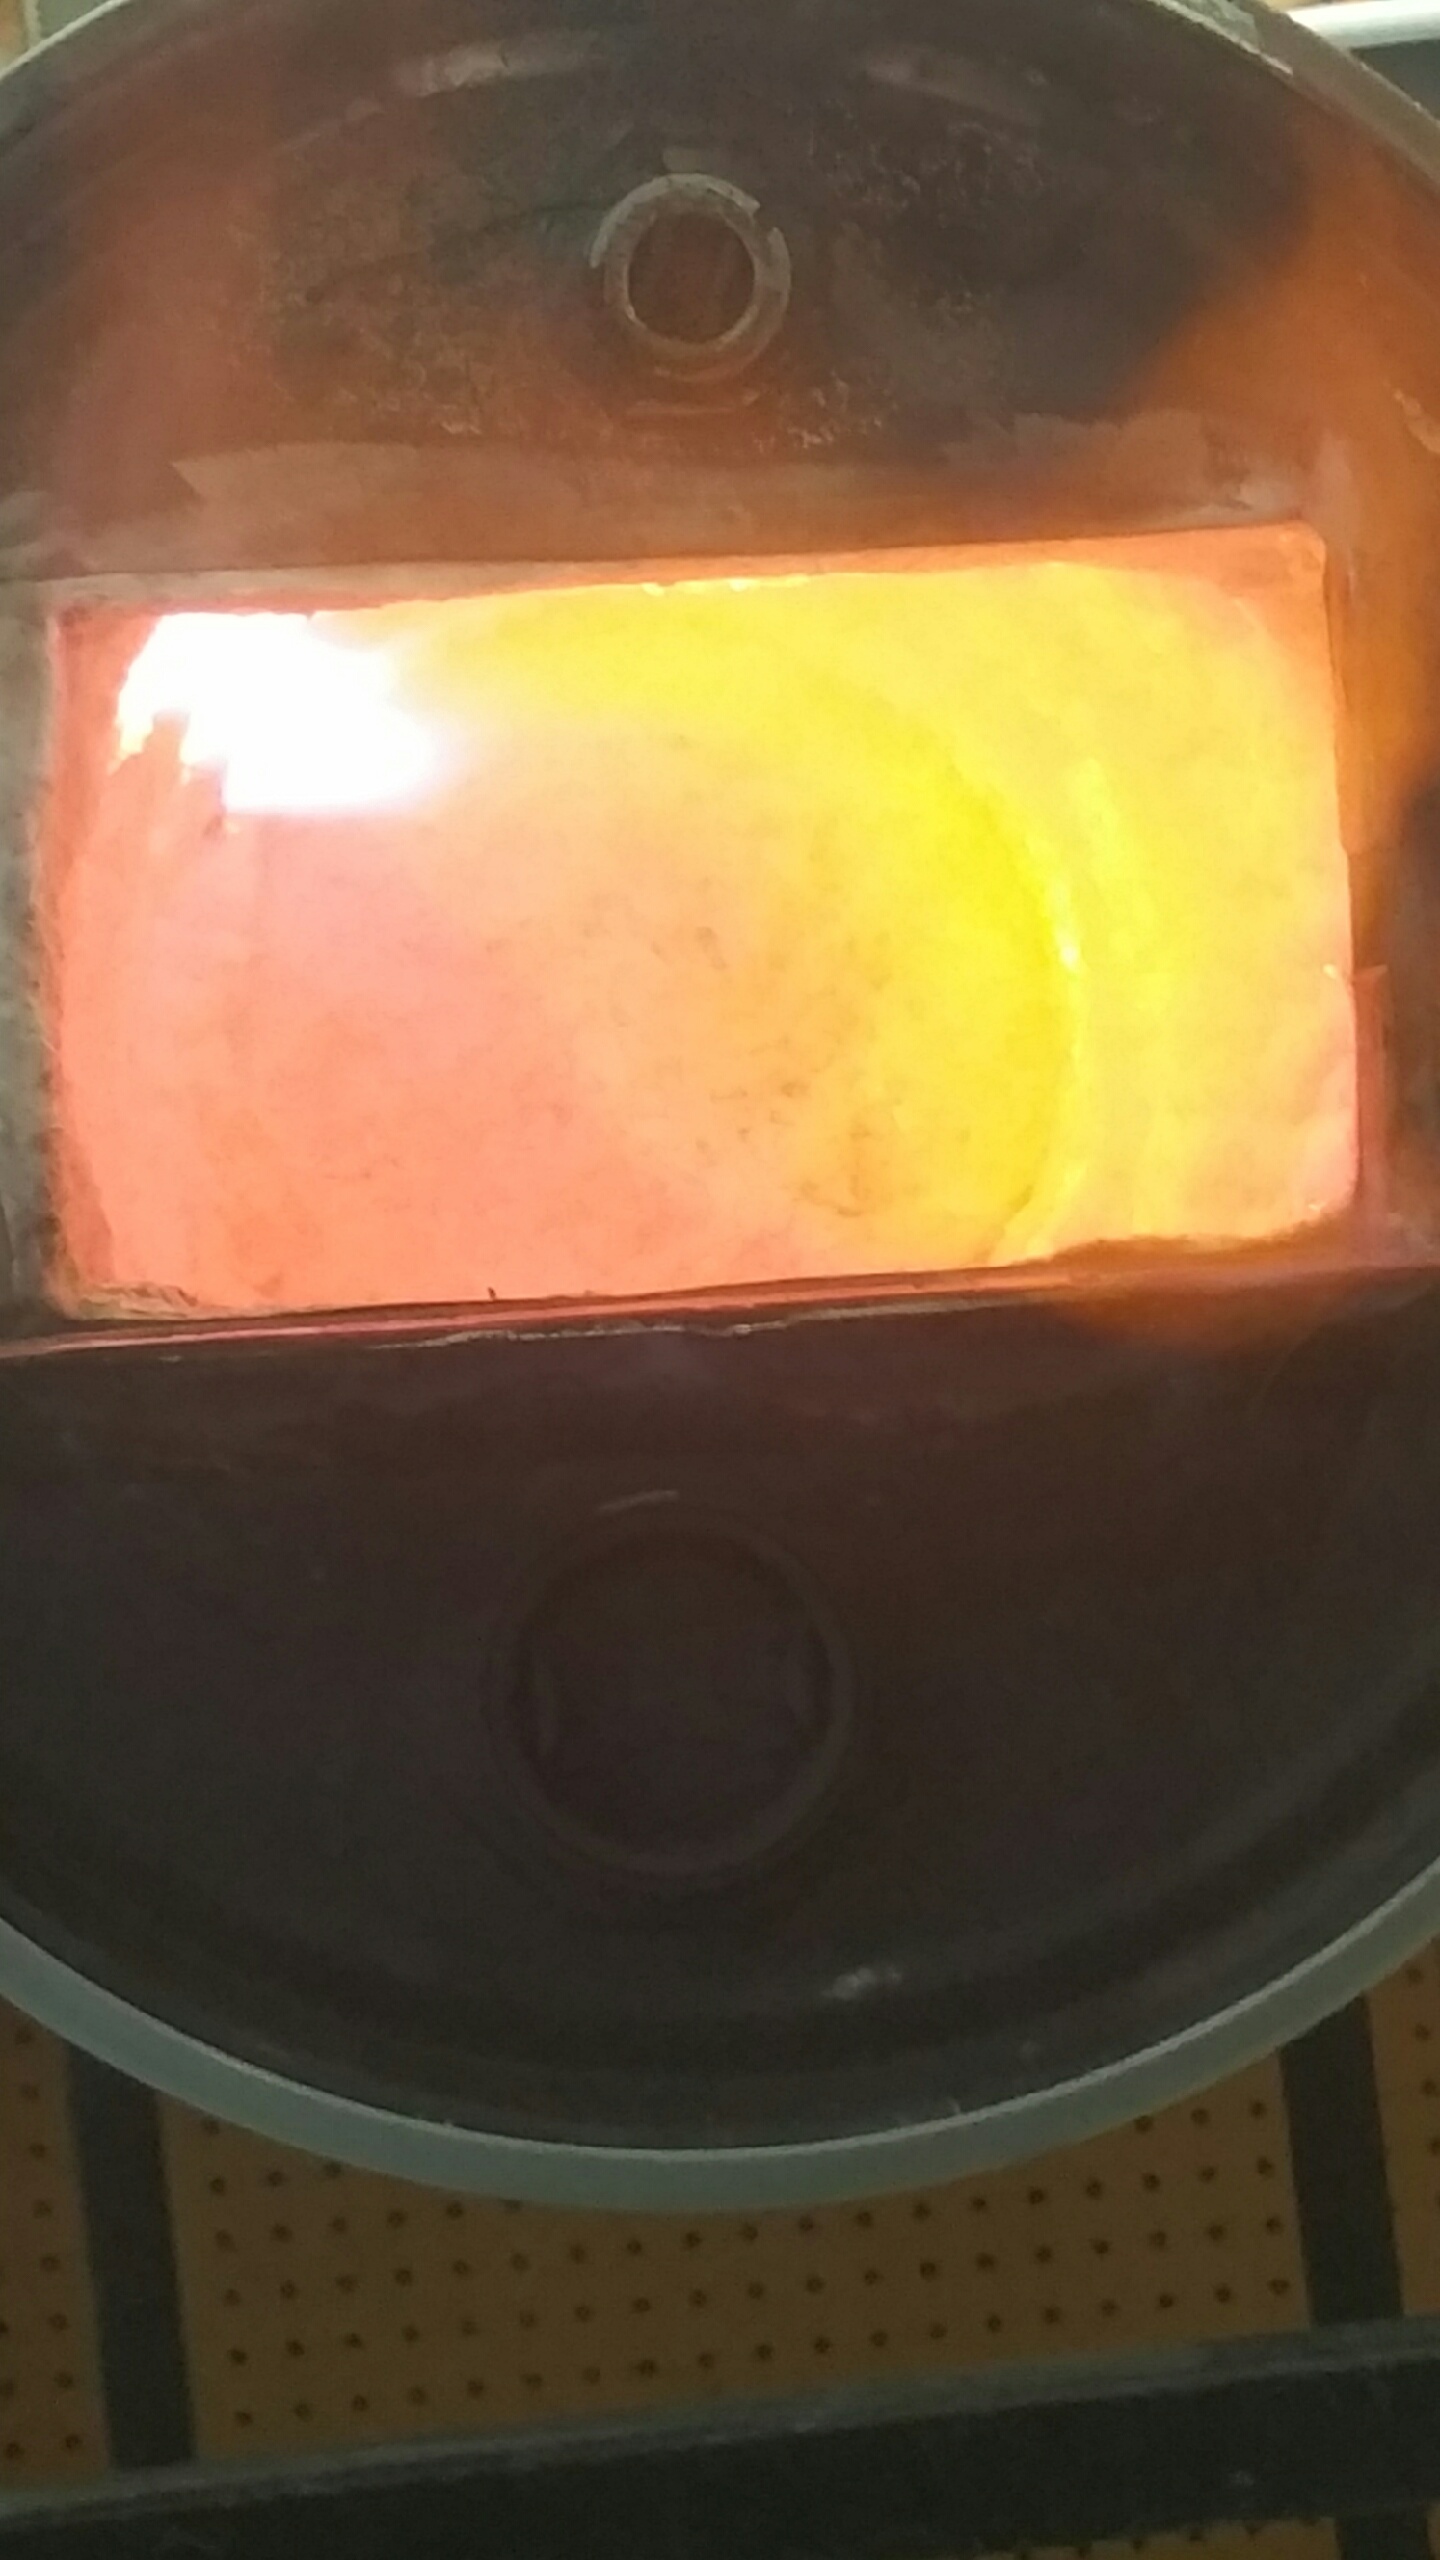
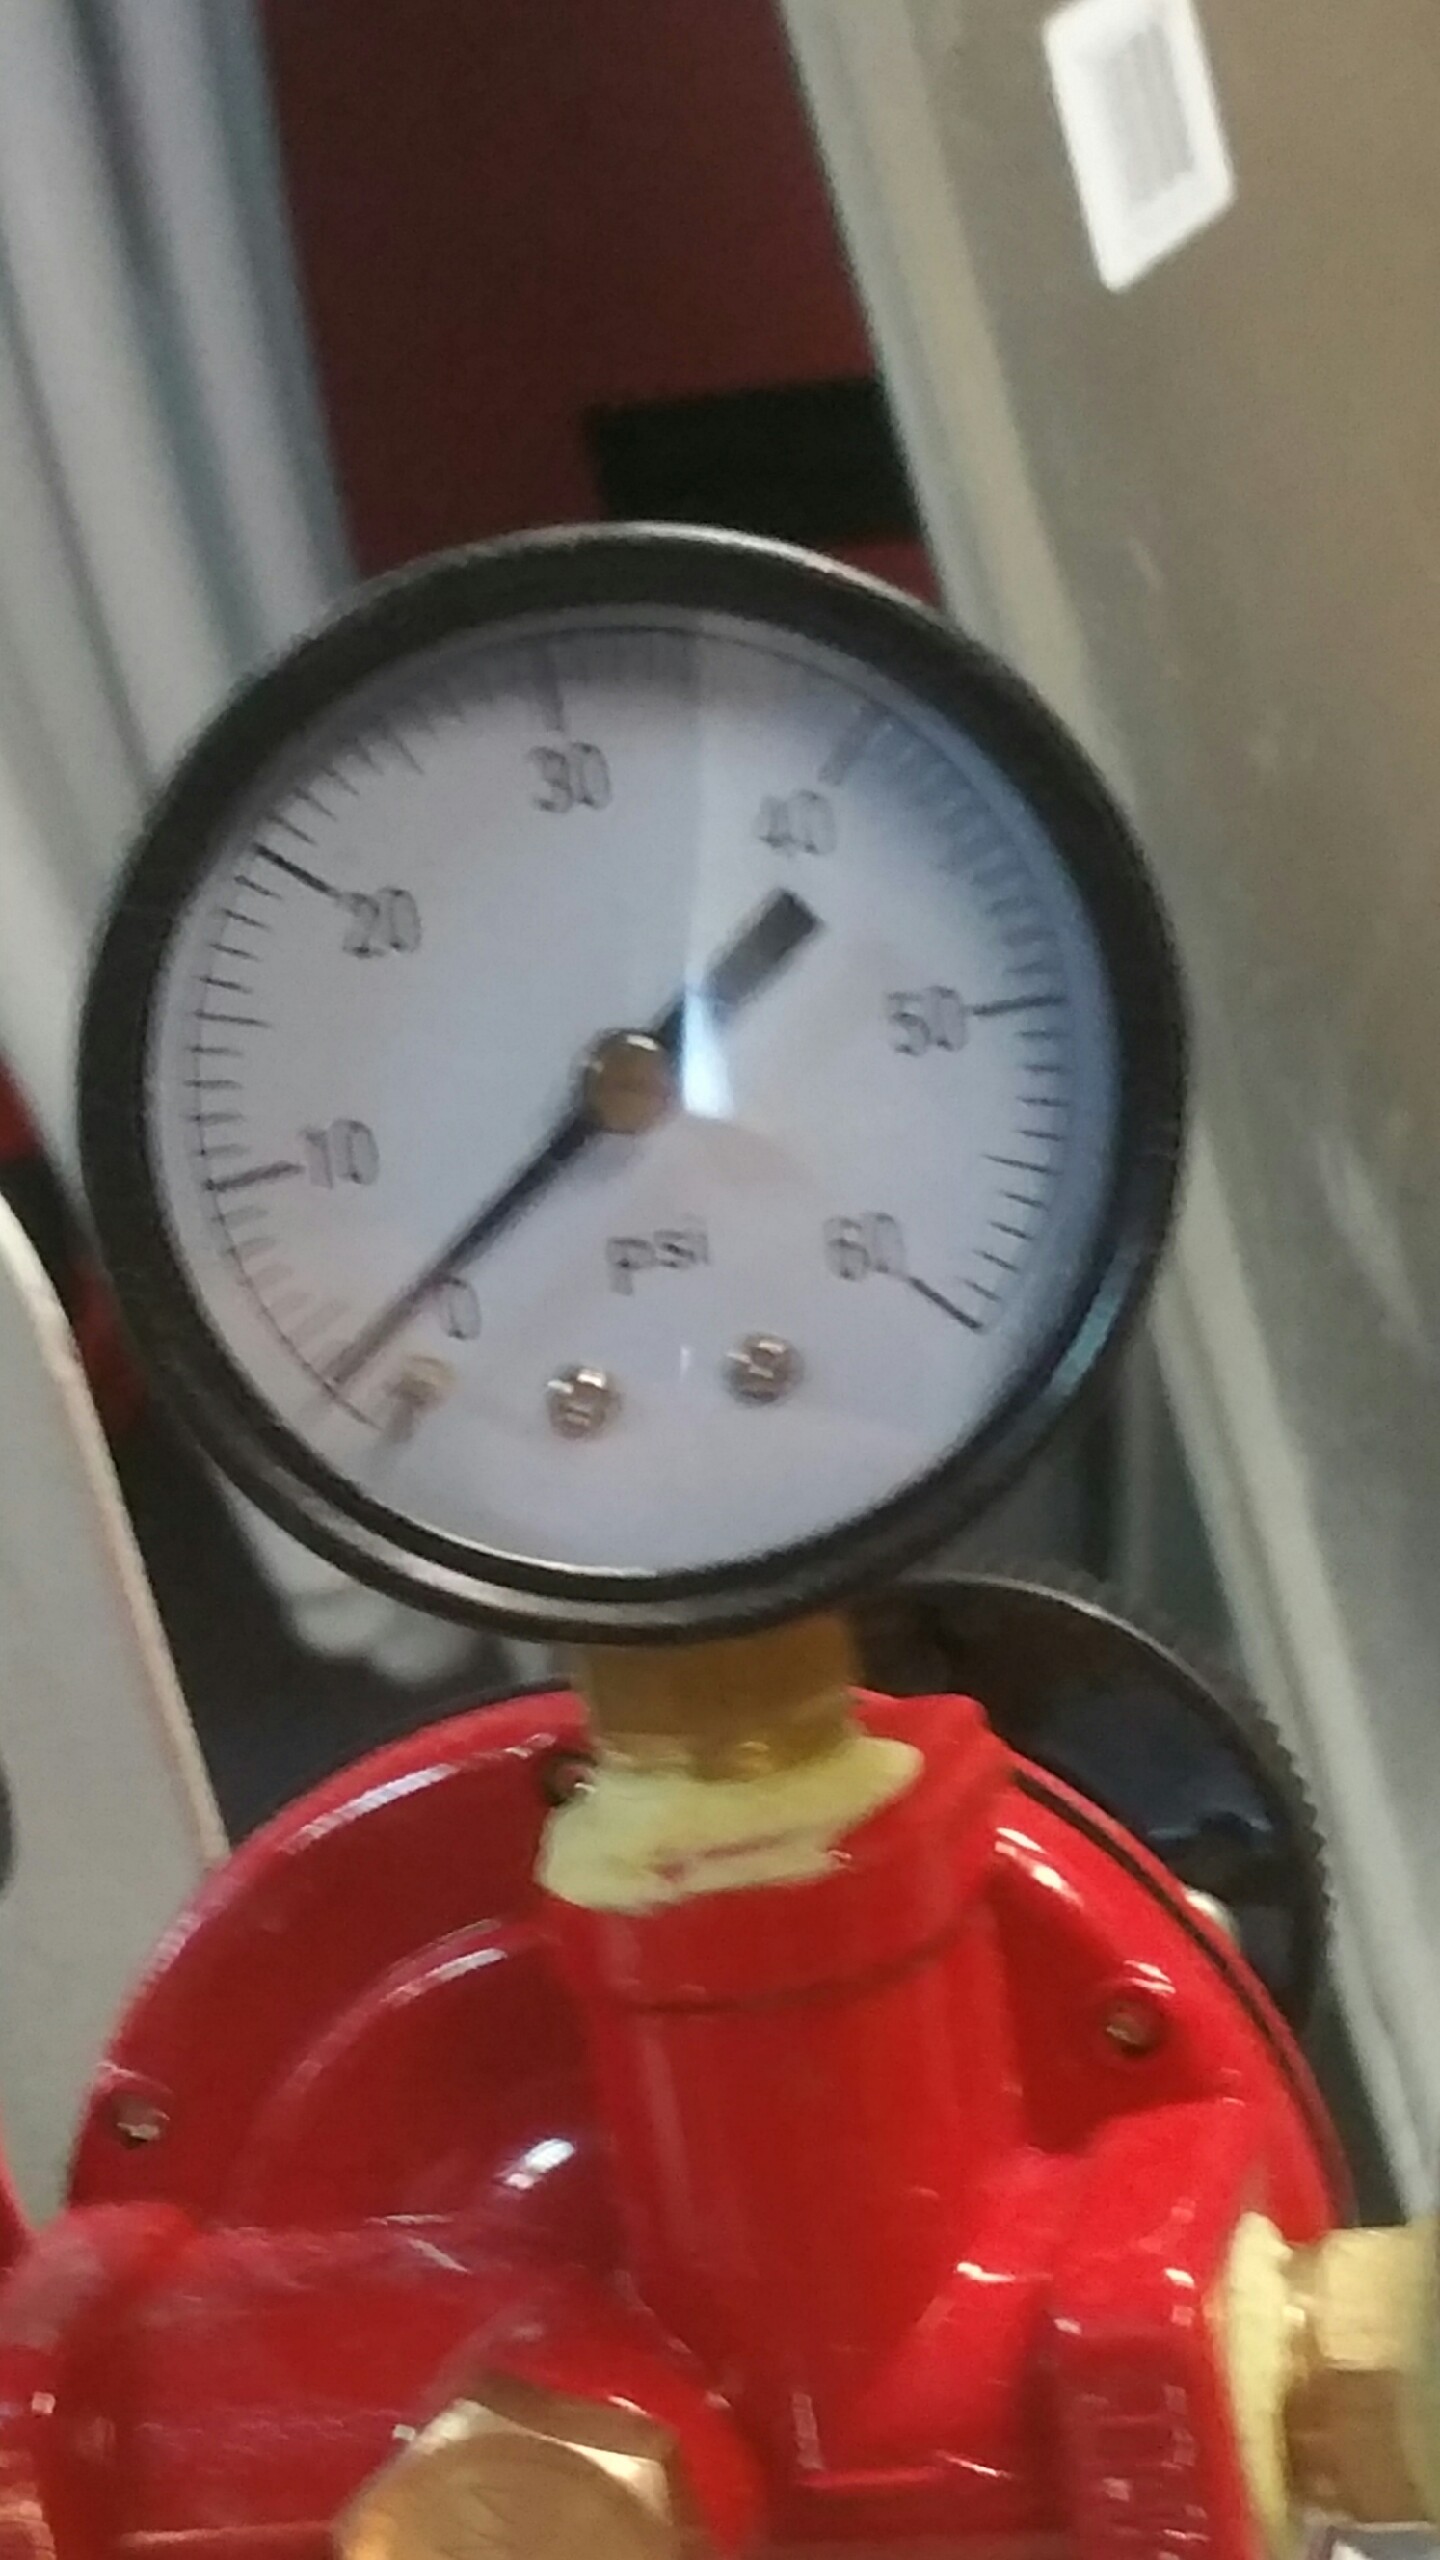
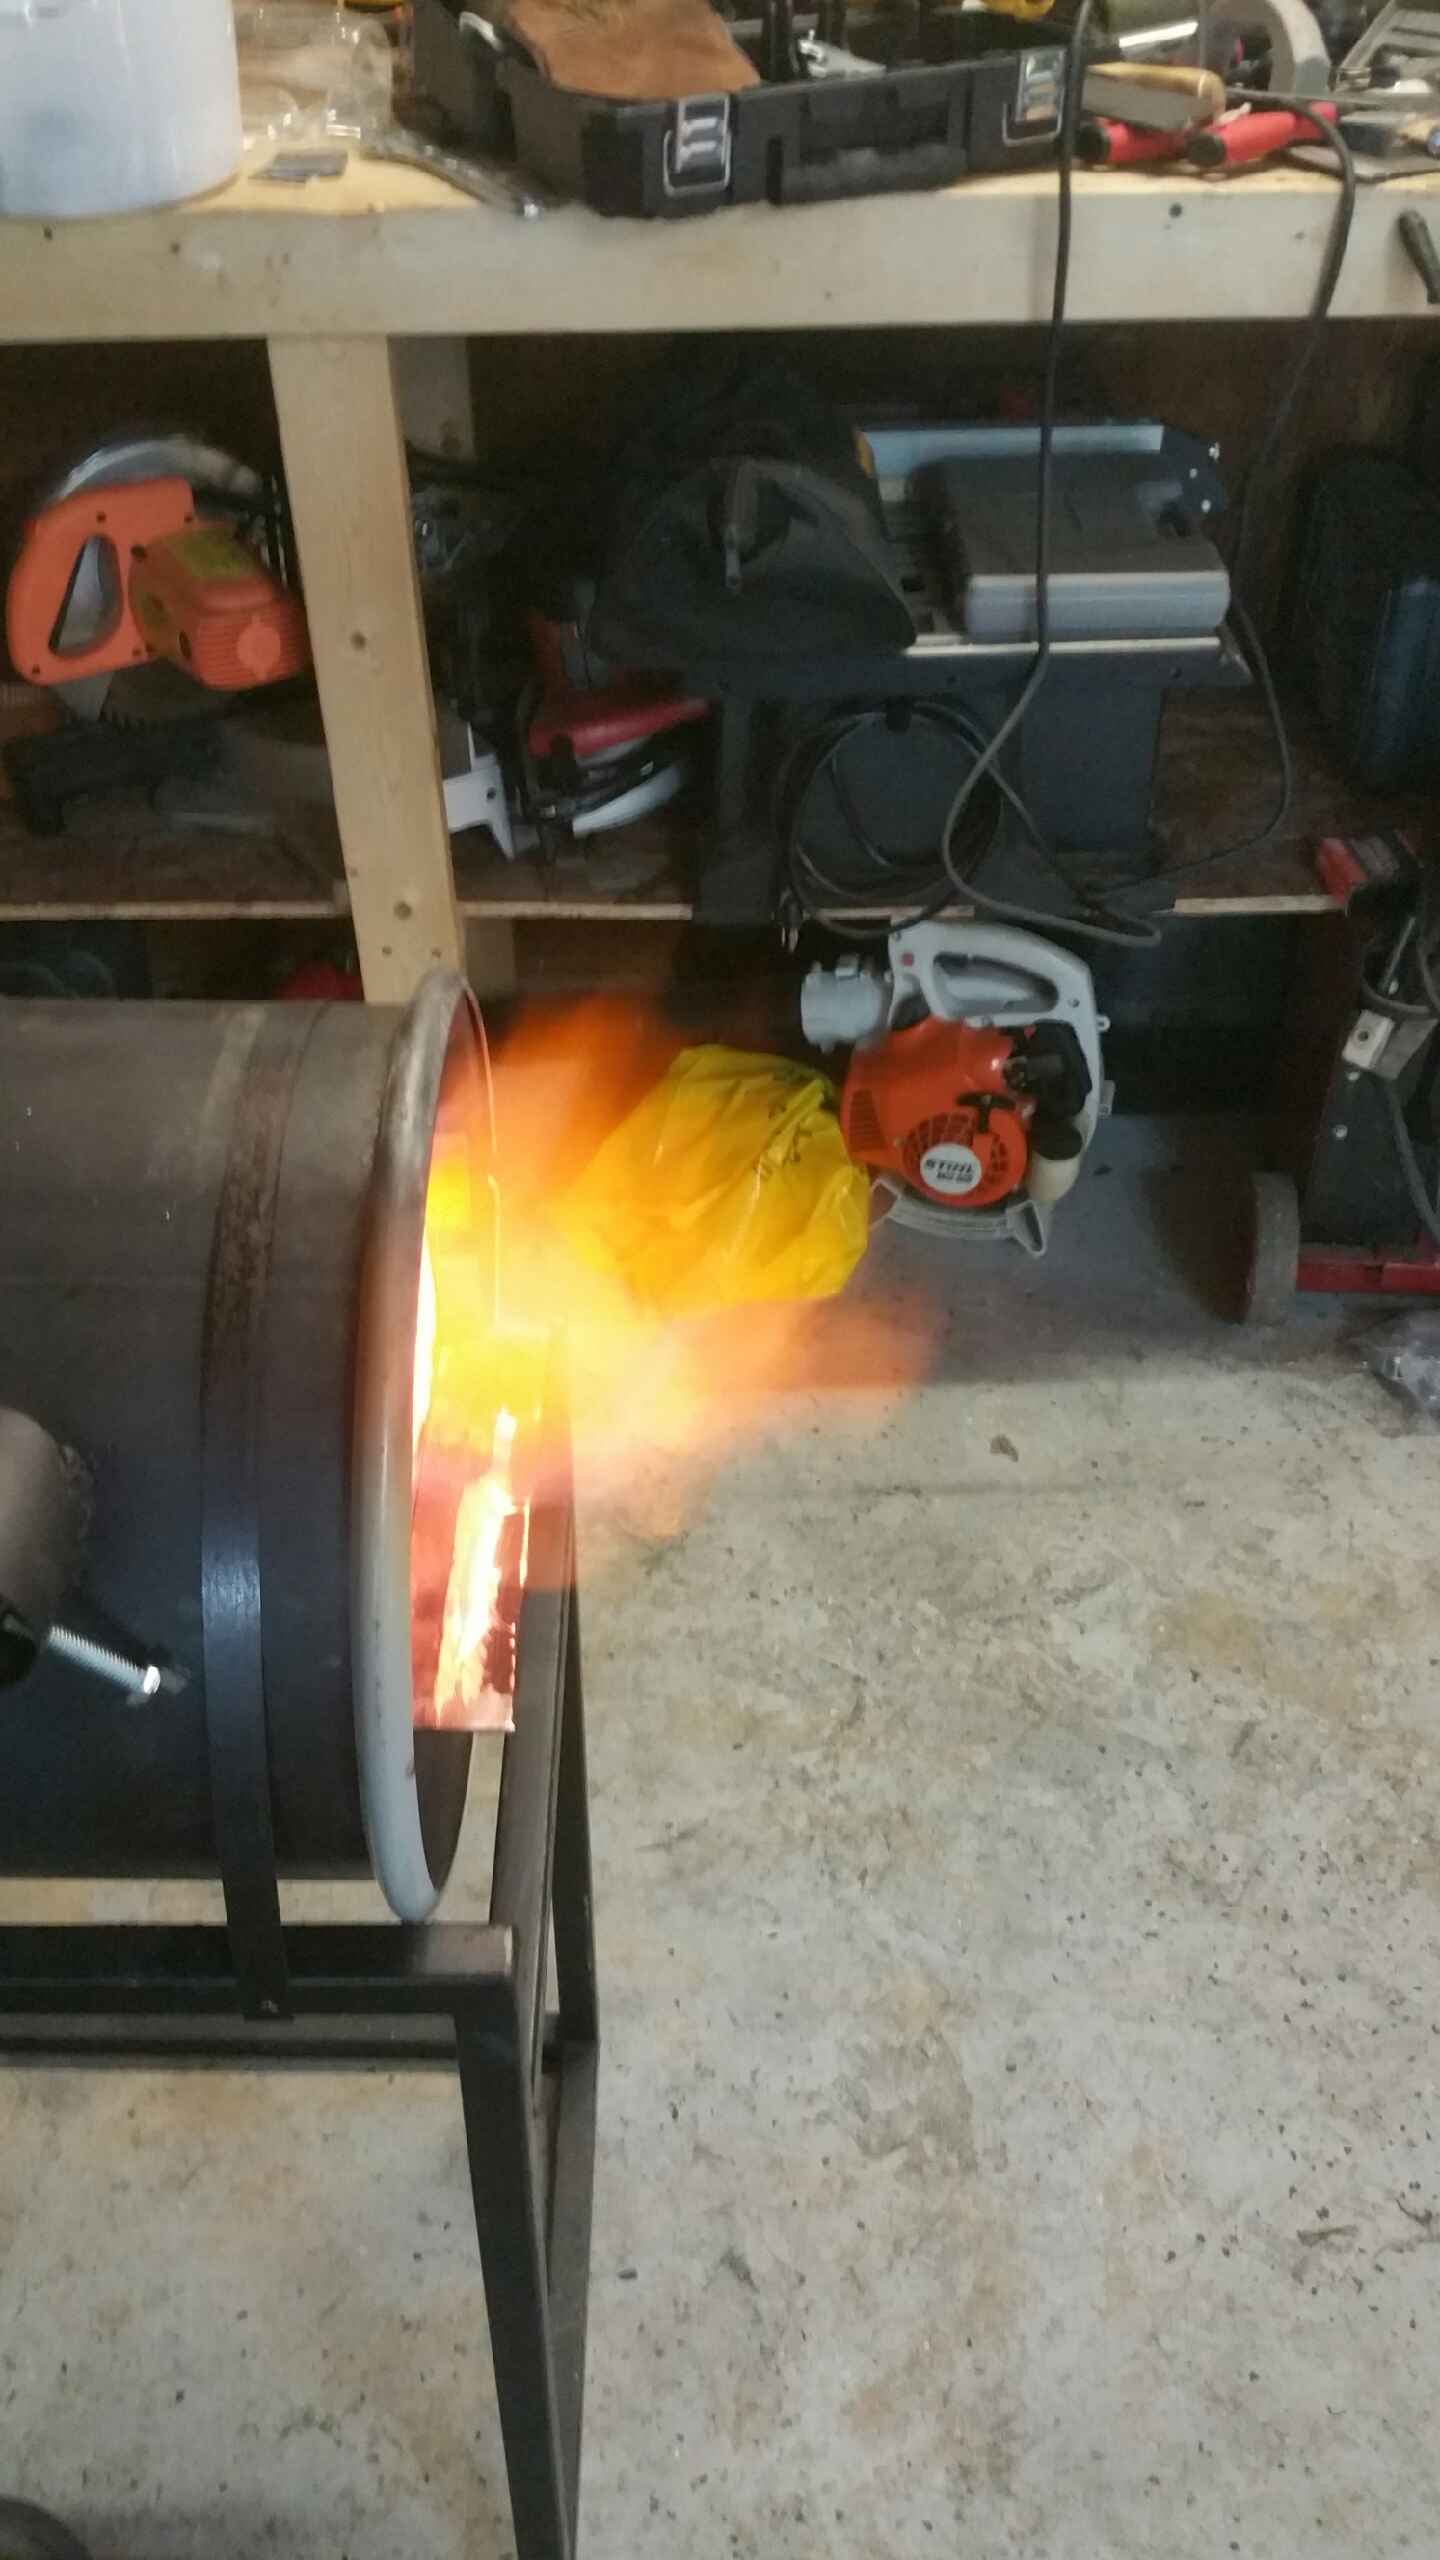
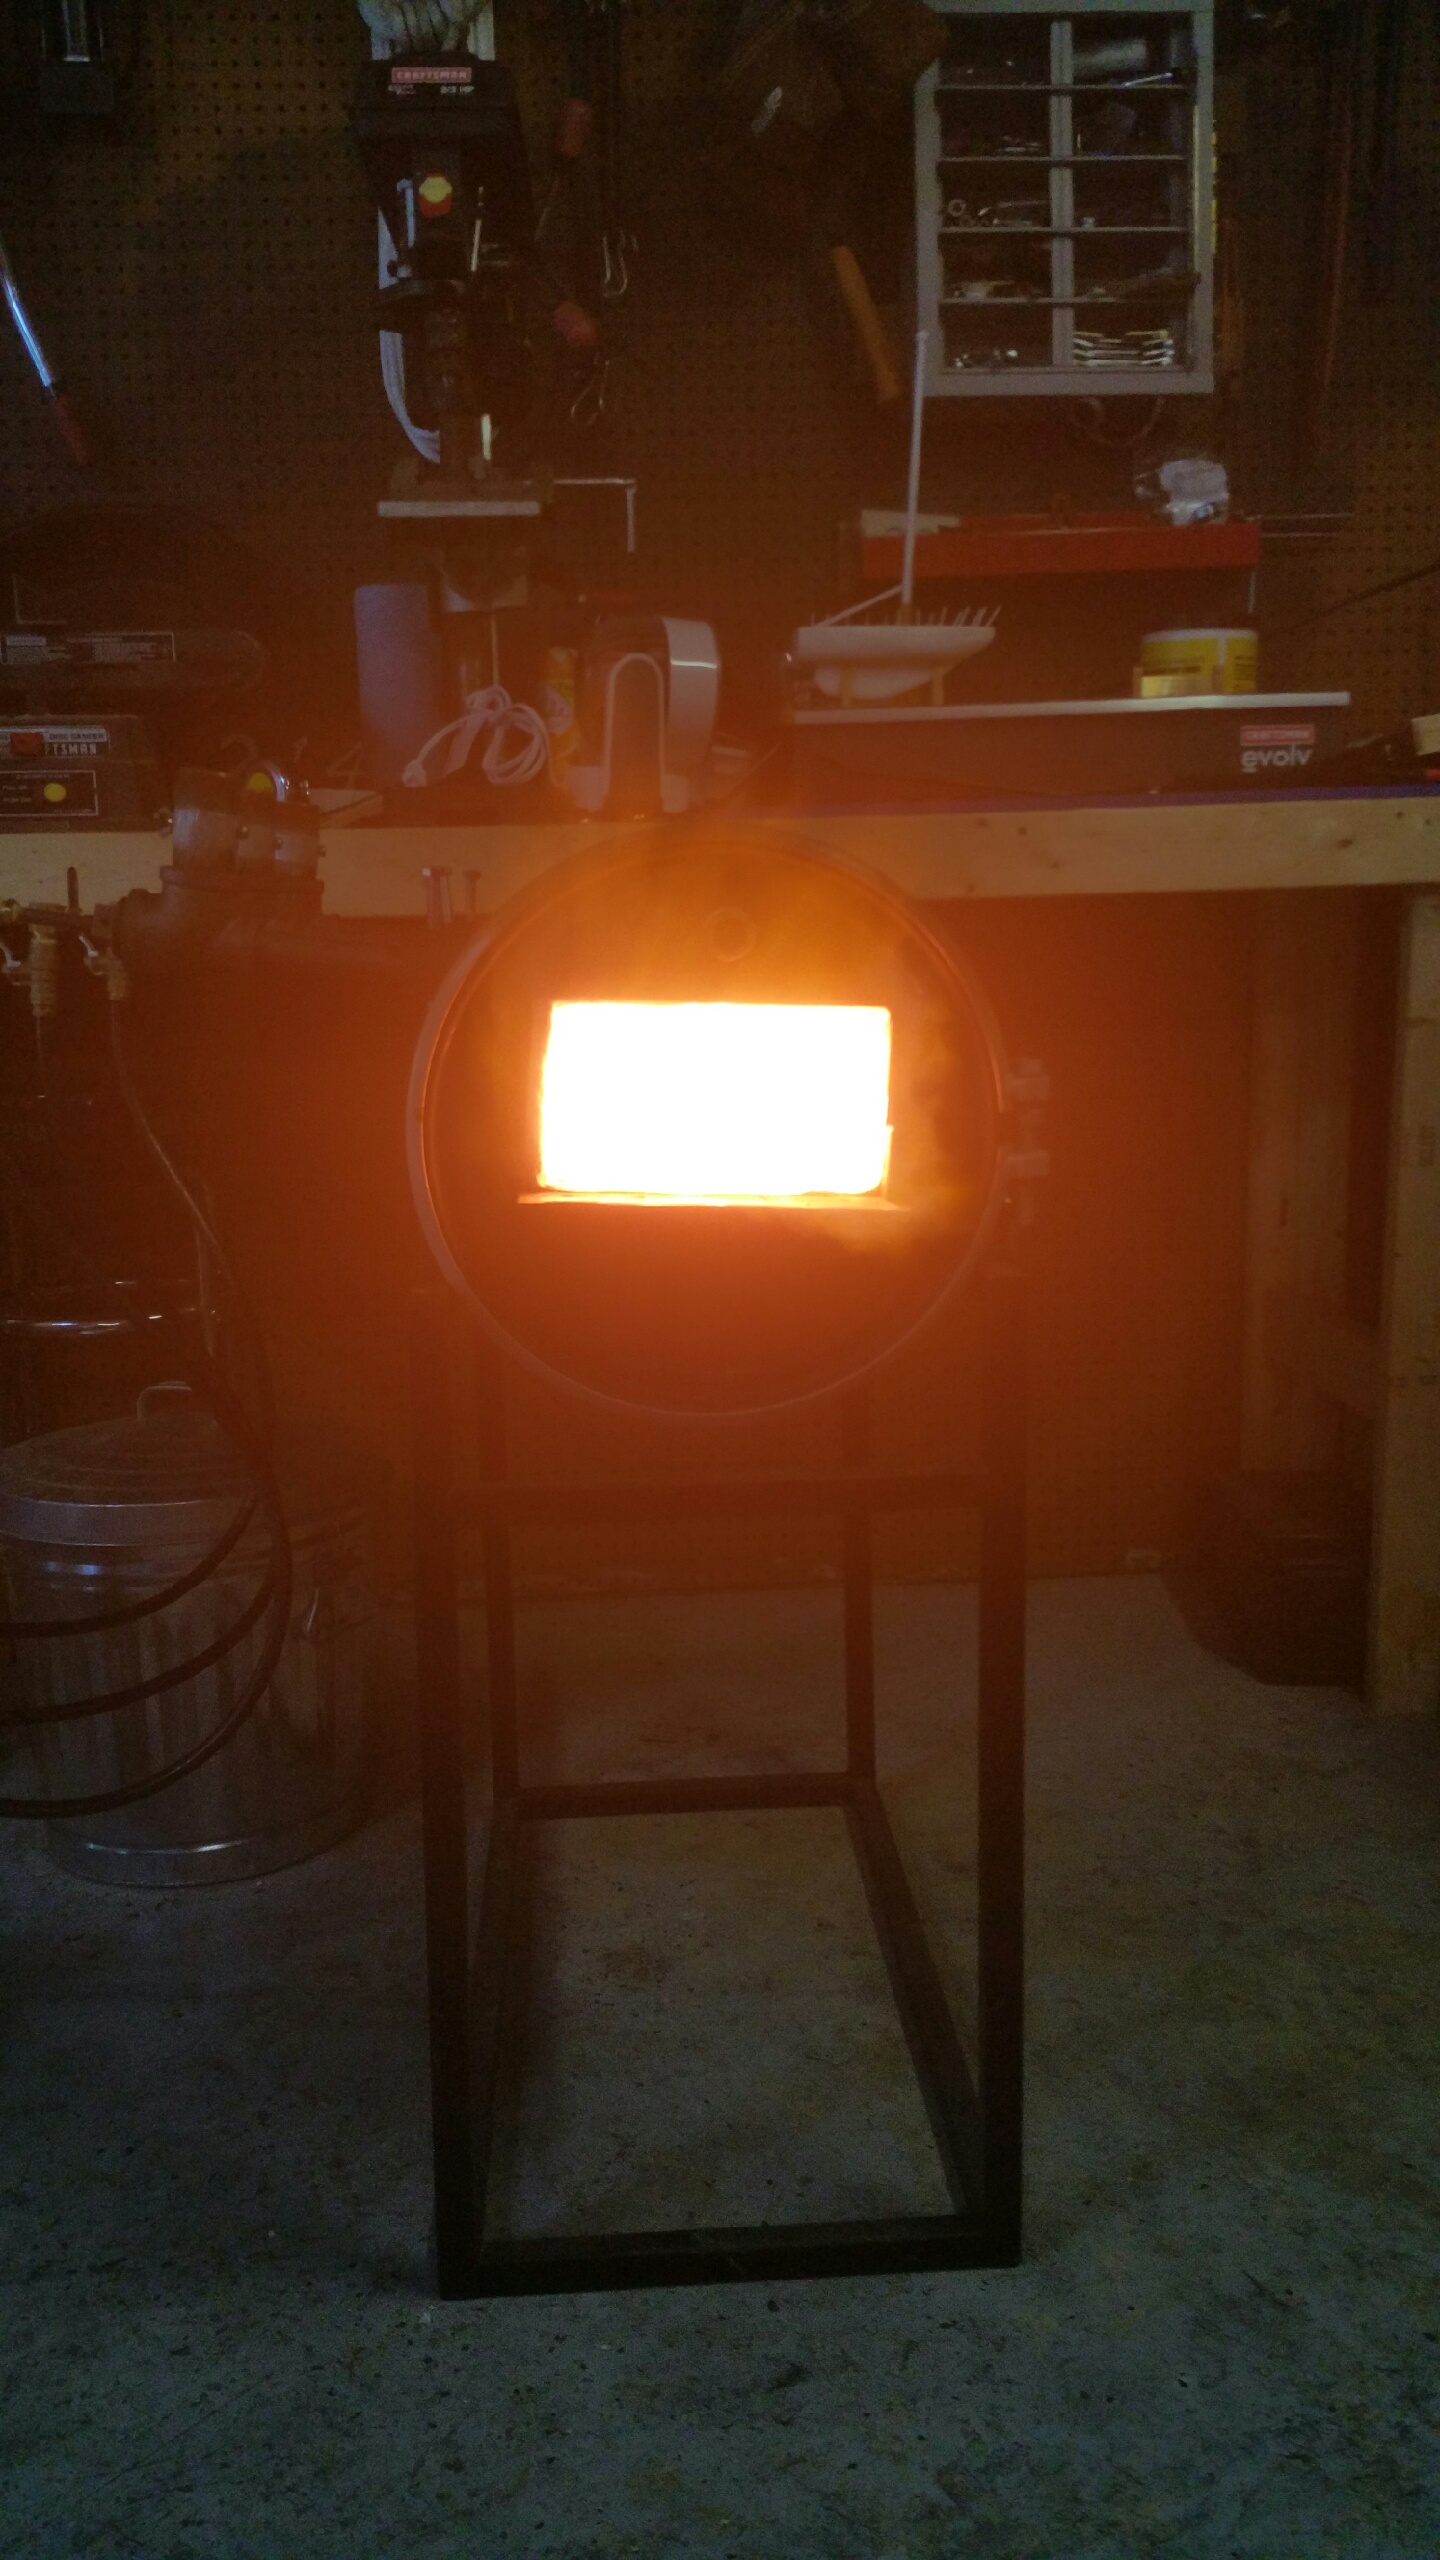
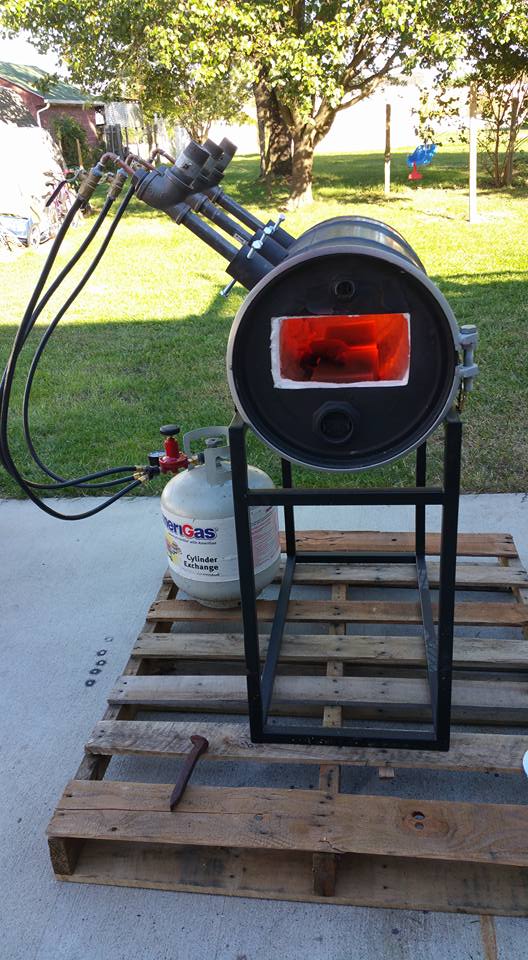
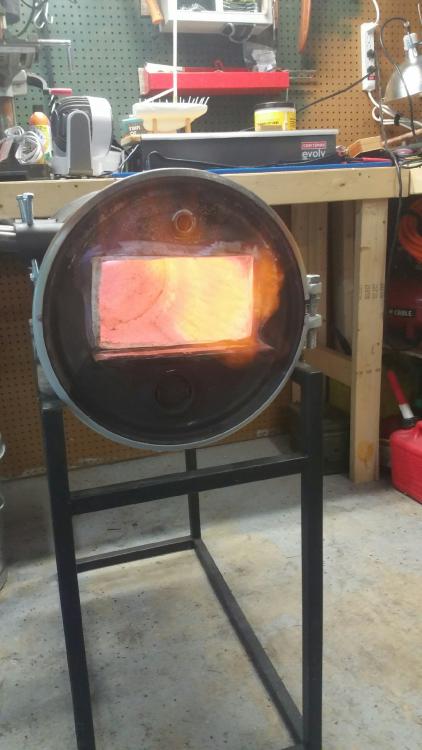
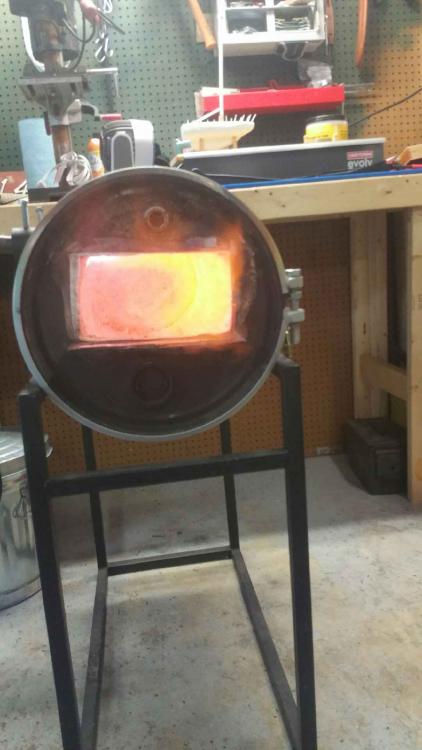
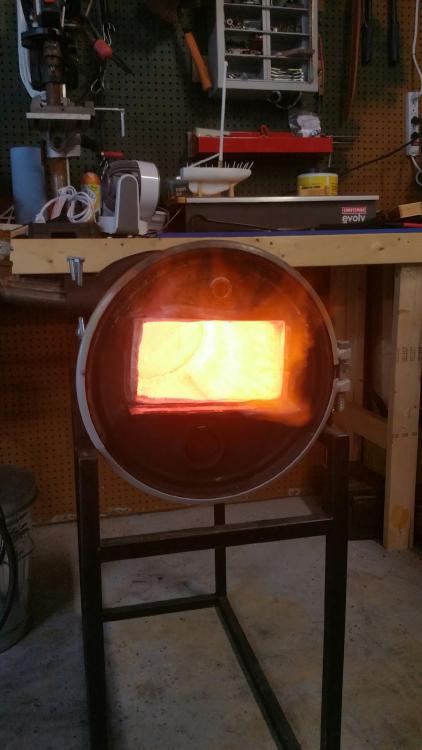
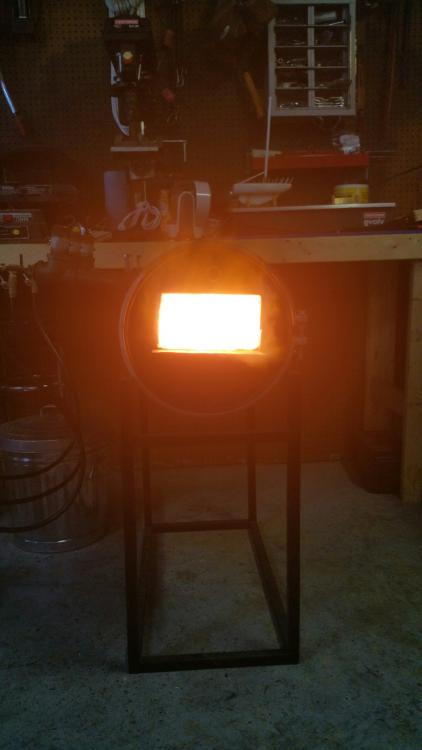
So I finally had the chance to put my rebuilt side-arm burners back in my forge this weekend. I fired them for the first time to set the rigidizer I applied to the fiber blanket. I must say I'm pleased with the results! This is less than a minute after lighting them off I started off at about 2 psi and was not displeased with the results! This was after turning it up to 10. Just for a comparison, this is the same forge, minus the rigidizer, running at around 8 psi before I found IFI and rebuilt my burners. I had my chokes wide open for the whole pressure range so I'm debating on whether or not to remove the choke tube completely. Also, I forgot to remove my nozzles before inserting them into the forge. I'm not sure how much of a difference it makes but I just thought I'd put that out there. Let me know what you guys think!! S/F


-
Word of advice, do it outside, down wind of your neighbors.....I thought my tank was empty, for several reasons, but I thought "maybe I'd better drill a hole in it just to make sure before I go cutting it open." Placed said tank on the floor of my garage and drilled a 3/8" hole in the top and got a face full of LP gas. Took me a week for the smell to dissipate from inside the garage. I did the dish soap and water thing too just to be sure before I started cutting. I was a bit nervous still though because it still had that smell from the oil additive. I survived though so that's a plus.
-
Your words are not falling on deaf ears, trust me! I can't speak for everyone else but as for me, I'm trying to pace myself. I have already built the modified side arm burners and I'm tuning those, and I'm going to build a ribbon burner for my new smaller/realistically sized forge. I will be swapping out my modified side arms for "T" burners eventually but I have to concentrate on getting the old forge relined and finished before I can tinker with a new-to-me burner design. There are so many burner designs out there that for new guys like me trying to decide what works for my needs is enough to give you a head ache! Plus when you have the proverbial too many irons in the fire it's just inviting disaster.
-
That's probably one of the best analogies I've heard in a long time!
-
Just a thought but you could also weld an eyelet on to the front to one side of the opening and have a latch that catches when you raise it up. That way you don't have to worry about slipping off the tab with your tongs or losing the removable handle. Just my two cents.
-
It's in the Burners 101 thread on page 17 a little more than half way down the page. It is a large file though. My work email won't let me attach it to an email because it's too big.
-
Per his request, I posted a clean link in that forum that I found to download it for free. His book is no longer in print and has no estimated re-print date so unless you want to spend more than $150 for it on amazon or ebay the download is the only way you're going to get it. If you can't find it, shoot me a personal message and I can email it to you. (I saved it to my desktop before printing it out.)
-
I'm glad to see I'm not the only farm boy on here, lol.
-
Thanks confederatemule!! Even without the pictures it's a huge help!
-
Oh man, I'm crying over here!!!