Mberghorn
-
Posts
89 -
Joined
-
Last visited
Content Type
Profiles
Forums
Articles
Gallery
Downloads
Events
Everything posted by Mberghorn
-
‘NO one provokes me with impunity’ or ‘Nemo me impune lacessit’ is the national motto of the Kingdom of Scotland. Often translated into the Scots ‘Wha duar meddle wi me’ (in Scottish Gaelic ‘Cha togar m’ fhearg gun dìoladh’), it is loosely translated as ‘No one can harm me unpunished’. Read more at: http://www.scotsman.com/heritage/people-places/scottish-fact-of-the-day-nemo-me-impune-lacessit-1-3655817
-
I misspoke earlier, the burners that I built initially were the modified side-arm burners. He added a note to the side-arm section saying that the original design was there for informational purposes only and he advised either doing the modified side-arm plans or ordering a "Z" burner from Larry. I did all this before discovering IFI and since then I have figured out just how ill-equipped and ill-informed I actually was!! Next I'm going to replace the modified side-arm burners I have with "T" burners and when I build my smaller forge I'm toying with the idea of making a ribbon burner. I have most of the materials that I need now I'm just waiting on my zircopax plus from The Ceramic Shop. After reading all the wonderful information on these discussions, thanks for all your input by the way, I figured out that the problem with my forge is two fold; underperforming burners and inadequately lined forge body. Right now I only have two inches of Cerachem blanket as my insulation and a few half bricks as my floor. I'll be sure to photo document the rebuild of my "way-too-big" forge, as Frosty would call it, and the initial build of my smaller forge. Oh and the burners of course
-
Awesome! That'll give you some extras for when you mess one up which, if you're like me, you'll need a few....
-
I got mine off Ebay. Don't get too wrapped up in the name brand though. Your local welding supply should have tips for .035 wire in different threads, you just might have to specify what you want is all.
-
I looked at the stuff I have when I got home and you're right it is a refractory cement. I went and bought some zircopax and kaolin from www.theceramicshop.com and some kast-o-lite 30 from www.hightemptools.com last night so I'll just have to wait until they get here to continue on. Is it okay to cast my floor with the kast-o-lite or is it still adviseable to use a high alumina kiln shelf cut to size? Thanks again!
-
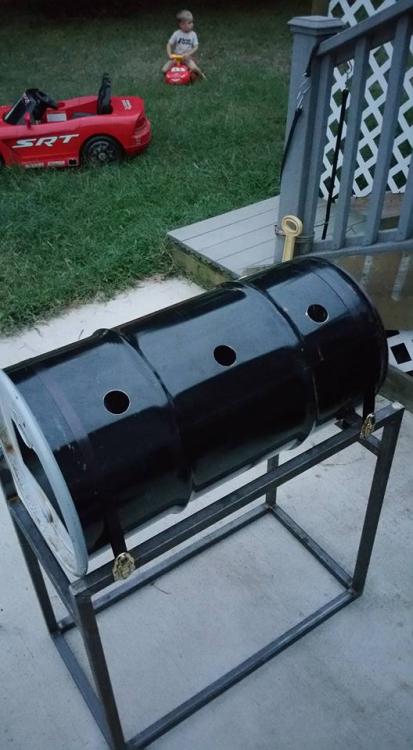
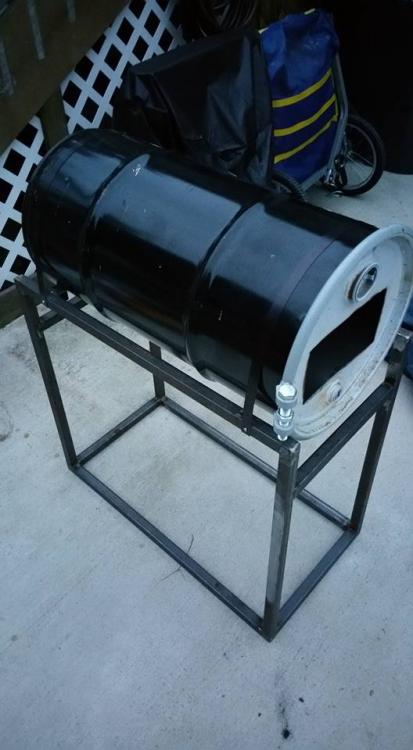
Okay fellas, I need a bit more guidance but this one is opinion based. So the forge that is in my profile picture is a three burner forge that I made out of a 20 gal (I think) barrel that I got for free. I did some research online before building it but I hadn't yet discovered these pages when I built it. It gets hot enough to forge but not nearly enough to weld. Part of that is due to my poor burner construction (my fault for trying to change something in the design plans for a side arm burner from Ron Reil's site) and the other part is due to how my forge is lined. I took the burners out so I could rebuild them and during that I found these pages. Now after moving everything over to my new house and pouring over these pages I've come to see the error in my ways as far as my build. That being said, before I get up and running at the new place I have to re line my forge. Here is the opinion based part. I hear lots of people talk about Mizzou and Kast-O-Lite 30. I've never worked with either one and the refractory I have now is the Red Devil 3000* F stuff but I've come to the consensus that I can't (or at the very least shouldn't) use that as the sealer coat over my blanket. Which one works better in you guys' opinions for a sealer coat between the IR coat and the blanket? Also could I use one of these for my floor or is it still better to get a high alumina kiln shelf? On a side note I just picked up a 30 lb propane tank that failed it's hydrostatic test so I'll be building a new forge soon. Now I just have to figure out if I wanna put a ribbon burner in my old big forge and use the NA burners for my smaller one. I'll be sure to post pics when I start. Thanks again for all the help, guys!!
-
I learned that one the hard way too.....The first time I went to light my first home built forge (long before discovering IFI) I noticed that the gas was running but my torch sparker wasn't igniting anything. Stupid me put my face down there to make sure I was holding the striker in front of the burner nozzle and struck it again. Lost all the hair on my face, gave myself a nice receding hair line and took the hair off my arm that wasn't covered by my welding glove. Not my proudest moment, for sure!
-
I did the same thing you did for the same reasons, and after three days Centaur Forge refunded my purchase because they didn't know when or if it will be back in stock. ede, I printed it out and put all the pages in sheet protectors. I need to have a physical book too. People rely way too much on technology now a days and we're losing touch with all of the old world skills!
-
This is the link that I found. I was able to access it at my work terminal so it made it past all our firewalls which means it's not encoded with malicious content. Happy learning!! http://scribd-download.com/gas-burners-for-forges-furnaces-and-kilns-michael-porter_5850bd1c6454a7ca41e58856_pdf.html
-
It took me some time, but I found a reliable link to your book online! I can't believe the price some people are selling your book for....used! That being said, if anyone wants the link just PM me and I'll give it to you.
-
As Paula Dean would say, "you can never have too much butter!" Thanks again, you two, for clearing up my confusion.
-
You guys crack me up! This has to be the best natured and most helpful forum site I've ever been on. I too am building my first coal forge soon (once I "finish" tweaking my gas forge) and I'm going to use an old rear brake drum from a 95 F-150 as my fire pot. Not quite as robust as a nearly 1" thick one but hopefully it will last me a while. On the topic of blowers, does anyone have any advice on where to find them other than eBay? I feel like the ones on there are way over priced.
-
I have one last question about rigidizer. How much needs to be applied? Obviously it depends on the inside surface area of my blanket but is it possible to oversaturate the blanket? I'll be spraying it on so I don't want to go spritzing a whole quart when only a pint will do. Frosty, is your finish coat recipe by weight or by volume? I might have missed it in the earlier comments but seeing Irondragon's post the other day reminded me.
-
I haven't gotten my silica in the mail yet so I can't read the instructions. Now I at least have a good idea of what I need to do while I'm waiting on the rest of my materials. Masonry is about the only thing that I haven't tried my hand at so far so I'm glad you gave that example too. It really helps to understand the "whys" behind the methods as opposed to just the "hows". That statement also goes for how the blanket insulates; I didn't know that it was more or less the air in the blanket that does the bulk of the insulating. Ya learn something new every day right?
-
Thanks for the process, Frosty! I wouldn't have thought to pre-dampen the blanket with water before applying the rigidizer. Would it do any good to apply more than one coat with firing in between? Particularly because I have 2" blanket in my forge. WoodnMetalGuy, thanks for the research! You saved me a bunch of time and headache.
-
Awesome, thanks! I just need to mix enough silica with the water so that it all stays in solution right? i.e. no amount is too much as long as it's not settling out?
-
Back to the rigidizing with colloidal silica.....if I buy fumed silica in a 1 lb bag, can I mix it with regular water or does it have to be demineralized or deionized water? Also what is the mixing ratio?
-
I'm starting to see that first hand, lol!
-
It's funny you posted this because I just downloaded and printed this chart for my shop after reading your post about bit sizes the other day!
-
I inherited a bunch of my grandfathers tools when he passed and he had a big old school tap and die set, which is way better than the cheapo one that I had, and his set had all the even numbers from 14 all the way up to 28!! Now it has a 27 as well though, lol. Thanks for the heads up on bit sizes, Mikey! I usually just go down two sizes from the width of the fastener thread.
-
I've come to the same conclusion after reading the info in these pages. I personally don't have any one goal as far as what I want to make. I just like making stuff and learning how to make new things. My fix is the crafting, not the purpose for the end product. I take pride in my work but it's all about the "build" for me!!! I'll tune this forge to get the best production out of it but I think instead of making another smaller gas forge I might just stick with a new coal forge. I'll go through the redesign of the gas forge when it needs to be recoated, and I'll be sure to post updates of the build, but for now I think instead of making all that backwards progress I'll just get what I can out of what I have and make a coal forge for the smaller, more common items. I feel like you are speaking from experience here.....
-
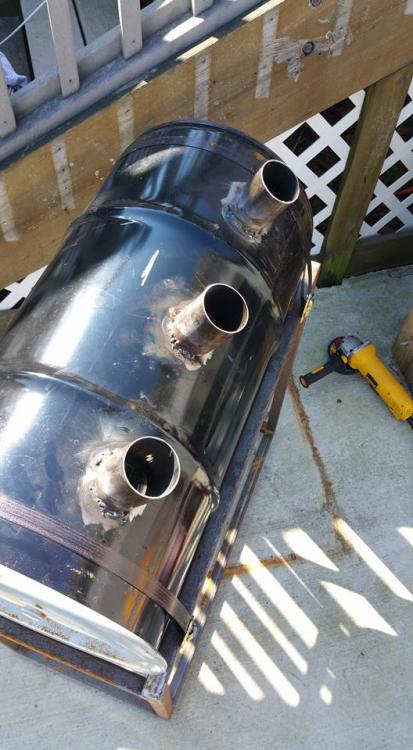
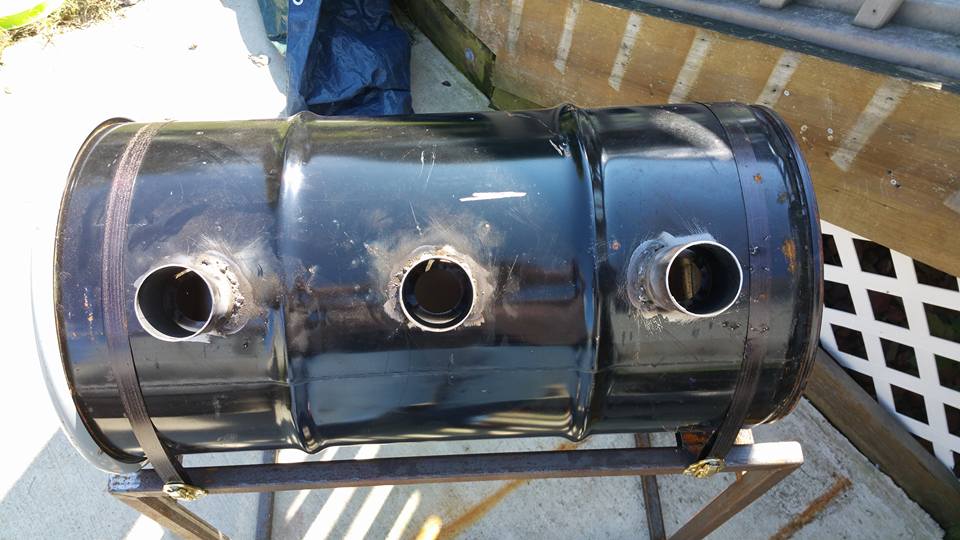
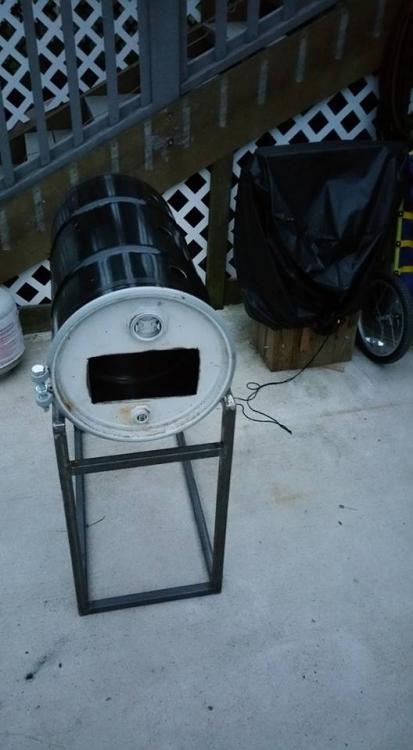
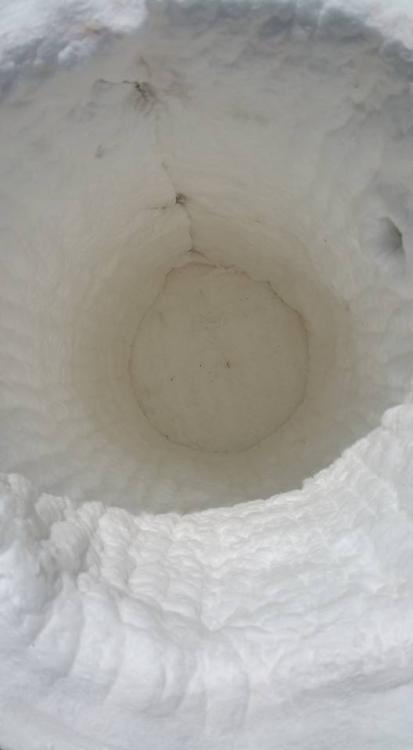
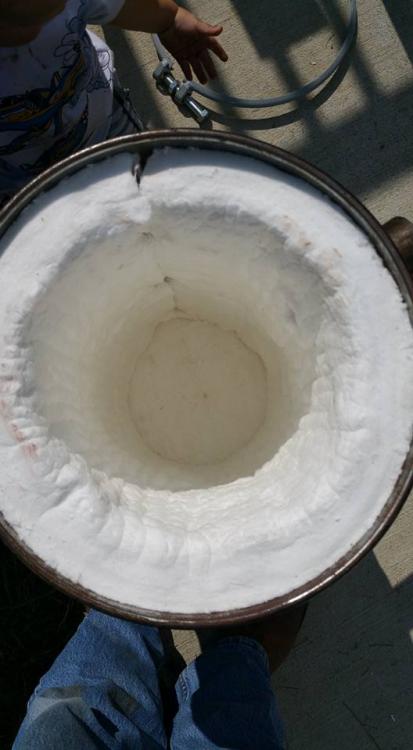
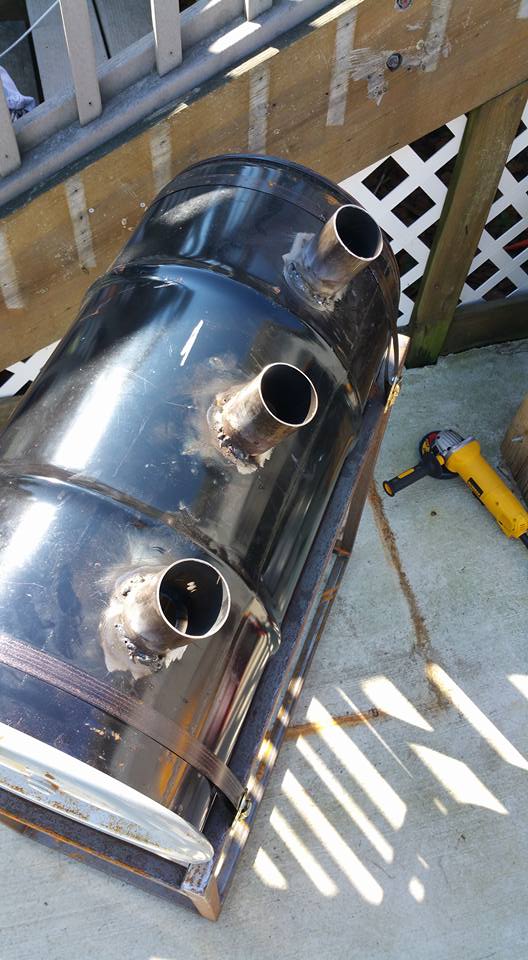
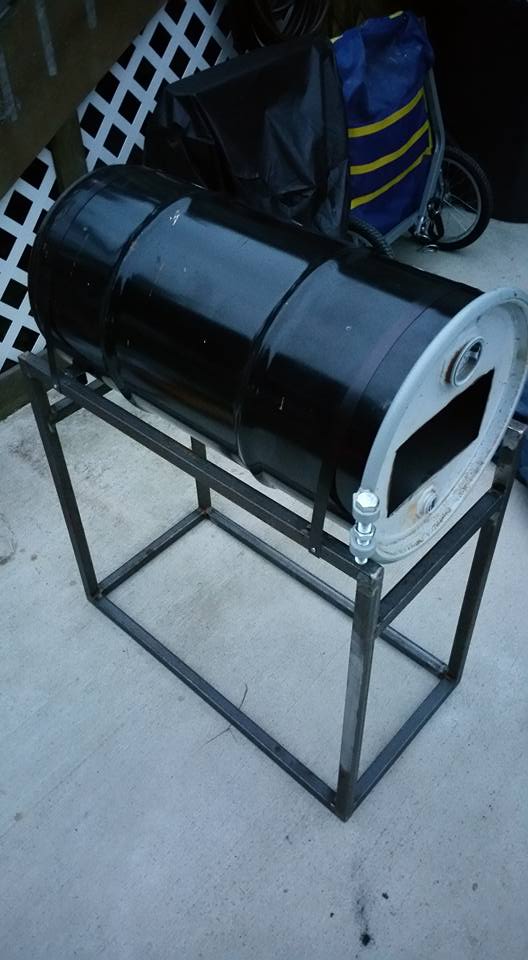
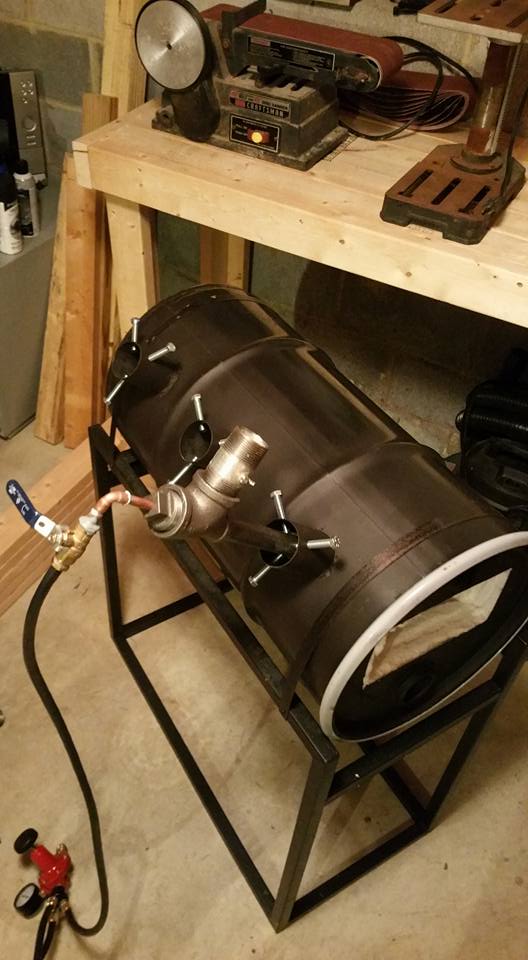
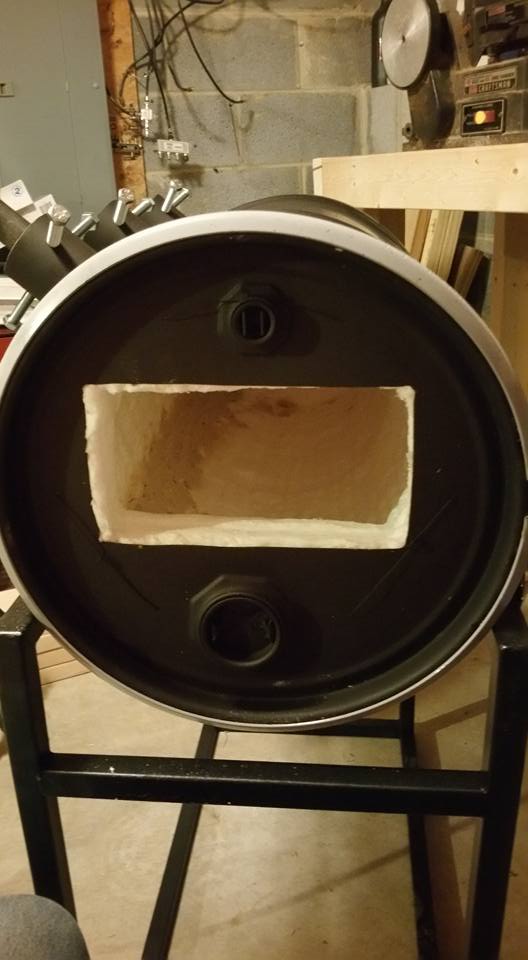
Neither one of us knew anything about smithing before we started other than you get metal hot and hit it with a hammer, lol. I did some basic research before discovering this wealth of knowledge and now I am a bit more informed for the next build. As I said in my last post, I'll be using another barrel of this size for the next one but only because one I already have another one, and two because I have ten feet of 2" thick blanket to use so I don't want to make my work area too small by having 3-4" of insulation around the inside of the forge body. I'm about to come into possession of two brake drums so I'll be building a coal forge next (once I go through the pages on coal forge construction). Also the difficulty in getting battle axes and such to fit into a standard opening for a propane forge is why the opening on this one is so big. It measures about 4"x10" give or take
-
The inside diameter is only about 10" but I agree that it's much too big for what I really need. I share this one with another guy that's trying to get into smithing too and he wants to make things like battle axes and short swords. I plan on building another one out of another 30 gallon barrel but I'm going to cut out the center section of it and weld it back together then most likely use 3" of fiber blanket, one layer of 2" (I have about 10 feet of 2" blanket left) rigidized, and then one layer of 1" rigidized, with a half inch of refractory and then a quarter inch of ITC-100 or similar. (Not quite sure on that last part yet) That should give me a more efficient forge and significantly cut down on fuel use. Mostly what I want to be making is tongs and practice pieces for now but eventually pieces to sell at shows and the occasional commission. It's a good release for me (and believe me I need that) and it would be nice to make enough selling things to cover fuel costs and such.
-
I'm not quite sure why it says that because the one that I got is a normal tapered tap. Maybe I fall into that last category of not getting the tap that was ordered, thank goodness there!
-
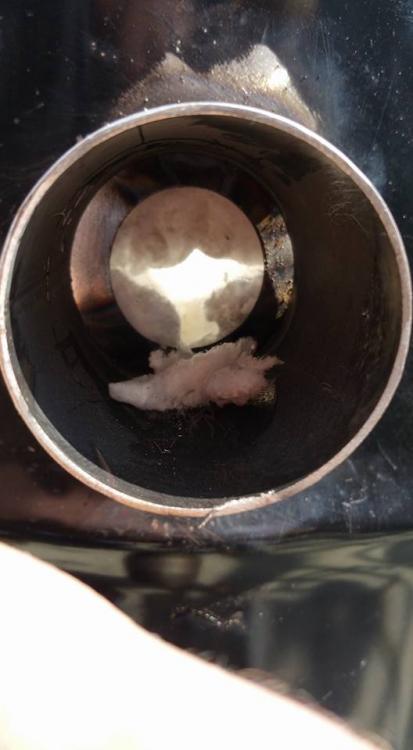
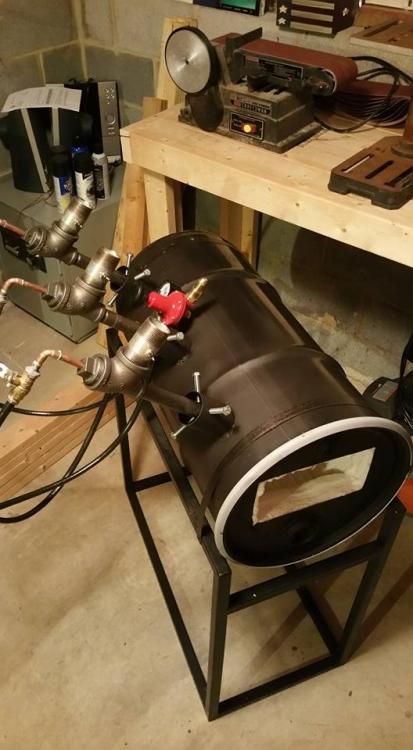
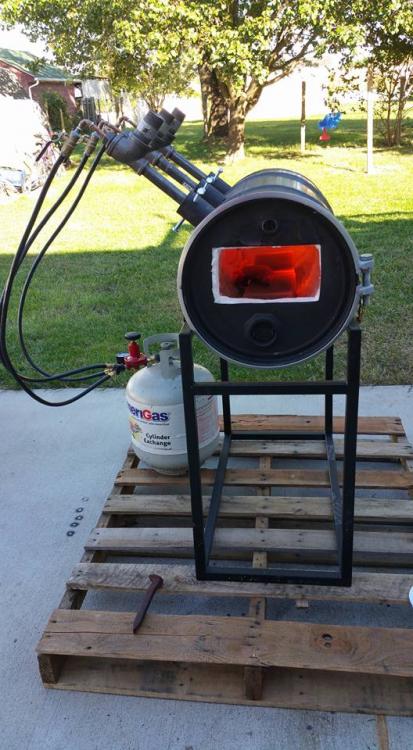
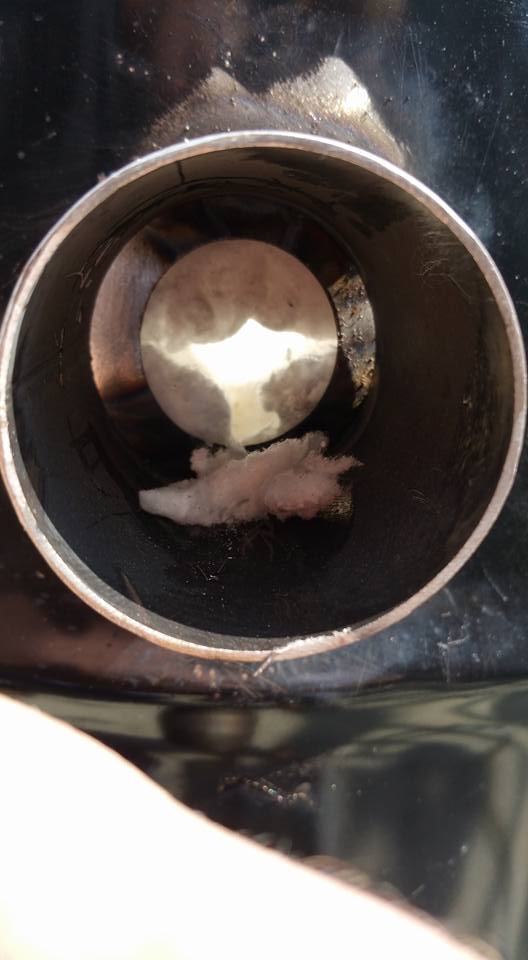
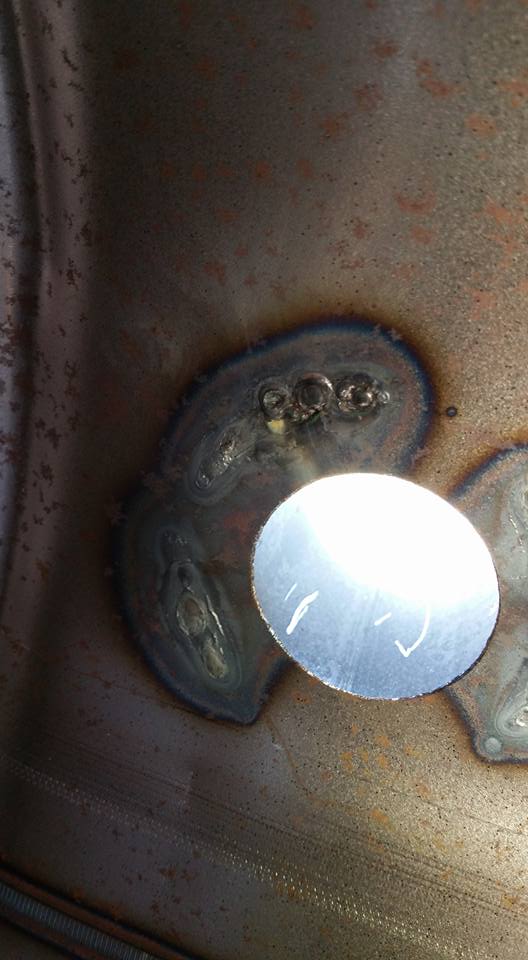
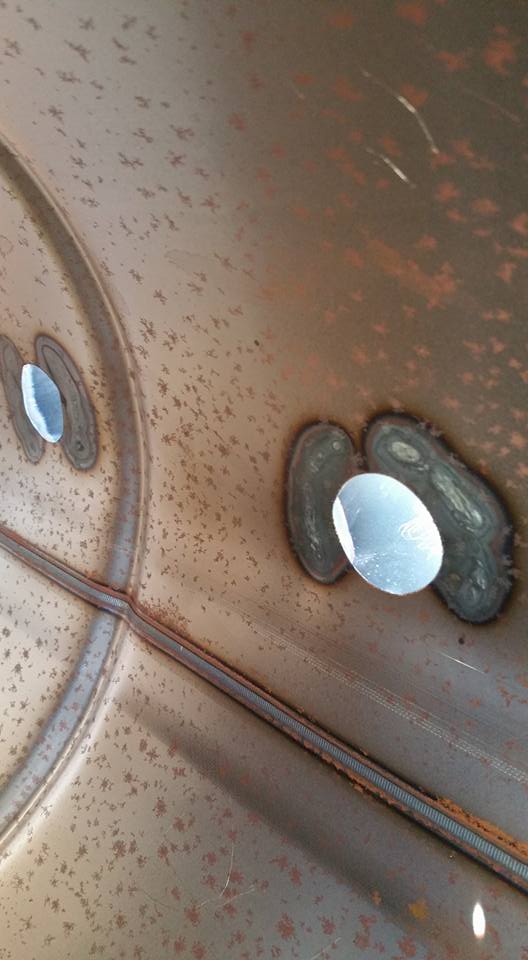
The only part that I coated was the seam because I didn't want to inadvertently melt through the forge body. I plan on ordering some colloidal silica and rigidizing once it comes in. In the mean time I'm rebuilding my burners based on the info I got from the burners 101 page (thanks in HUGE part to you and Mike). These are the firebricks I'm using as my floor. Currently just laid in there with one on the bottom and one on each side creating a sort of U shape. https://www.amazon.com/gp/product/B000UEYZ4S/ref=oh_aui_detailpage_o03_s01?ie=UTF8&psc=1 And this is the refractory that I have. https://www.amazon.com/MEECOS-RED-DEVIL-610-Refractory/dp/B00ACIWN9Q/ref=pd_bxgy_201_2?_encoding=UTF8&psc=1&refRID=8KBNVHBDX3R958P8F2G4 Here are the pictures I have from the initial build. I'll take some pictures of the rebuild once I get a chance. LET THE CRITIQUEING BEGIN!!!!