John in Oly, WA
-
Posts
932 -
Joined
-
Last visited
Content Type
Profiles
Forums
Articles
Gallery
Downloads
Events
Everything posted by John in Oly, WA
-
Thanks Alan! The frame is 8" x 8" H-beam with an 8" x 16" I-beam as the top cross member. I tend to overbuild, because I'm not an engineer, and that happened to be the smallest stuff the scrap metal yard had, that was big enough. My dad's an engineer though, and after measuring it and some mental calculations, said, "it's skookum enough"
-
Vertical weld at floor level
John in Oly, WA replied to John in Oly, WA's topic in Welding/Fab General Discussion
Thanks BIGGUN and yahoo. I'll look into the local classes. I can see that the vertical up weld is really hard. Is it harder than overhead? I think I'd have metal dripping on me if I tried overhead. And I thought I was getting the hang of it when my flat and horizontal welds started looking good. LOL If it were as easy as backing a trailer, I'd be in business. I can back trailers all day long. But I've been doing that most of my life. -
"On The Beach" blacksmith survival game.
John in Oly, WA replied to Frosty's topic in Everything Else
I guess, after Google mapping Evans Island, I'd wander over to the ATM at the Wells Fargo Bank in Chenega Bay, withdraw some cash and head to the Northern Delights café for breakfast. LOL But, that would probably be cheating. -
Vertical weld at floor level
John in Oly, WA replied to John in Oly, WA's topic in Welding/Fab General Discussion
Thanks everyone for all the helpful info. I put it to practice, and, well, I can see that I'll need to continue with a LOT more practice. It's getting better, but still not good enough. My first attempt armed with this new info, I had the molten metal dripping down the seam and my first thought was that I was holding on the edges too long. I adjusted that until I got the puddle to stay in place. but need to keep working at it. Can't expect to learn welding in a day...a week...a year... -
To "repair" an anvil?
John in Oly, WA replied to Slyfox's topic in Anvils, Swage Blocks, and Mandrels
I'm just a noob, but could you make a hardie with a rectangle of appropriate tool steel that had the sharp squared edge you want? -
Vertical weld at floor level
John in Oly, WA replied to John in Oly, WA's topic in Welding/Fab General Discussion
So, hold on the edges even longer, vertical up and maybe try 6011 rod? How much difference between 6010 and 6011? Rod straight out to start. As I go up, should I keep the rod angle at 90, or hold the stinger on the floor and angle the rod up as I go? And up the amps a bit. -
I need to run a bead in a 90 degree vertical joint that starts right above the floor and is about 4 inches long. I tacked it with a downward run with 7018. It made a very concave bead with what looked like very little filler metal being applied. I tried to come back and do vertical up with 7018, but couldn't get a good angle, and though I thought I was pausing on the sides long enough and quick across the middle of the weave and thought my puddle was looking good (relatively flat), it ended up very convex with a lot of filler metal in the middle and not much at the edges. How would you approach this weld? I have 7018 and 6010 rod available.
-
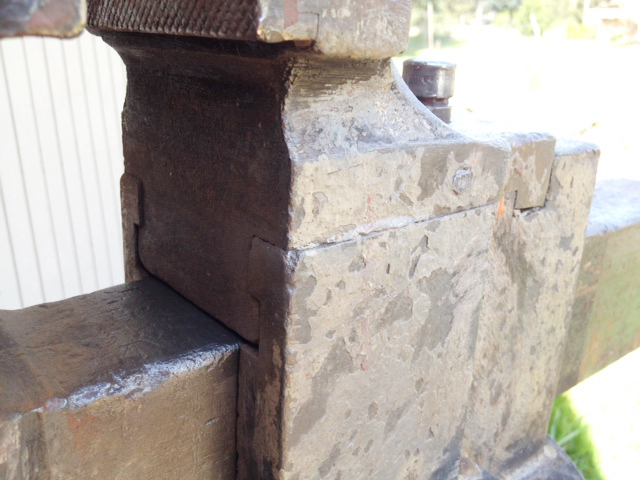
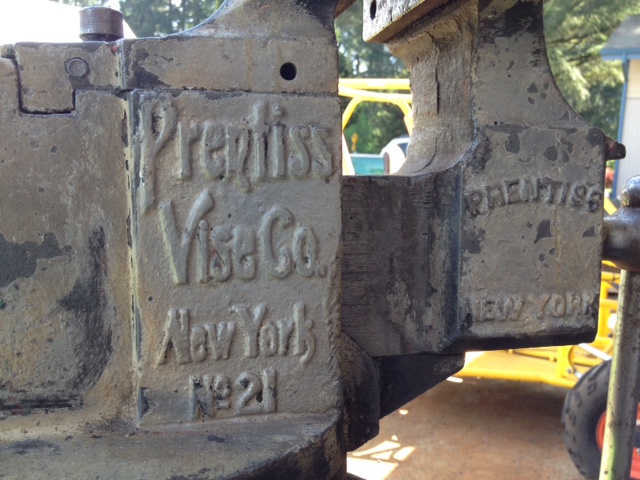
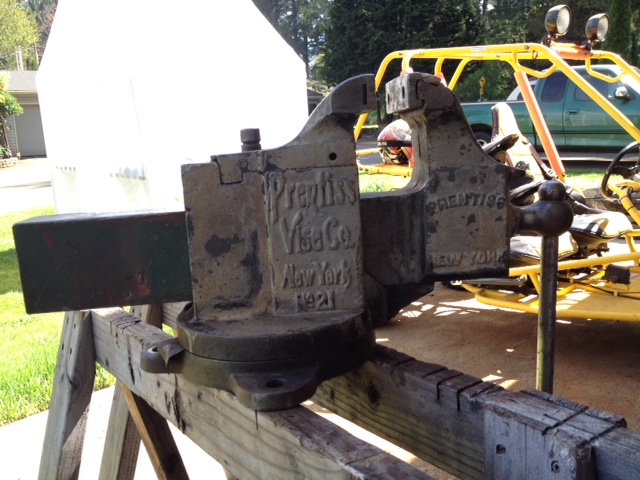
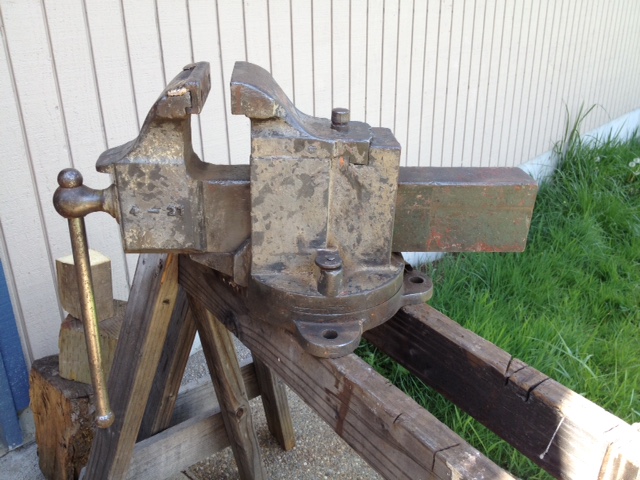
So that's how the back jaw works. Thanks! I'll get to brushing and oiling and maybe a little painting. Does anyone know what the original color might have been on a vise like this? I'm seeing green spots and red bits under the gray.
-
Thanks Jim. So the cylindrical post on the top behind the back jaw pulls up and out? What other parts generally wear out that I'd be looking to fix up in restoring it?
-
I inherited my Grampa's vise. Don't know anything about it, but one thing just puzzles me. If you look at the one picture, it shows the back jaw that looks removable, except for the fact that it has grooves, rabbets, channels running longitudinally, but also across the back has another channel running cross-wise. How the heck did they get that piece in there? Does anyone know anything about this type of vise? Thanks
-
Wow! Buy an anvil, get a tractor thrown in for free! Wish I was in Wisconsin now.
-
Warning! Warning! Warning!!! Thermite
John in Oly, WA replied to WayneCoeArtistBlacksmith's topic in Safety discussions
Dang! Glad I'm learning about this stuff from reading your posts, and not from experience. Thanks for the good info everyone. -
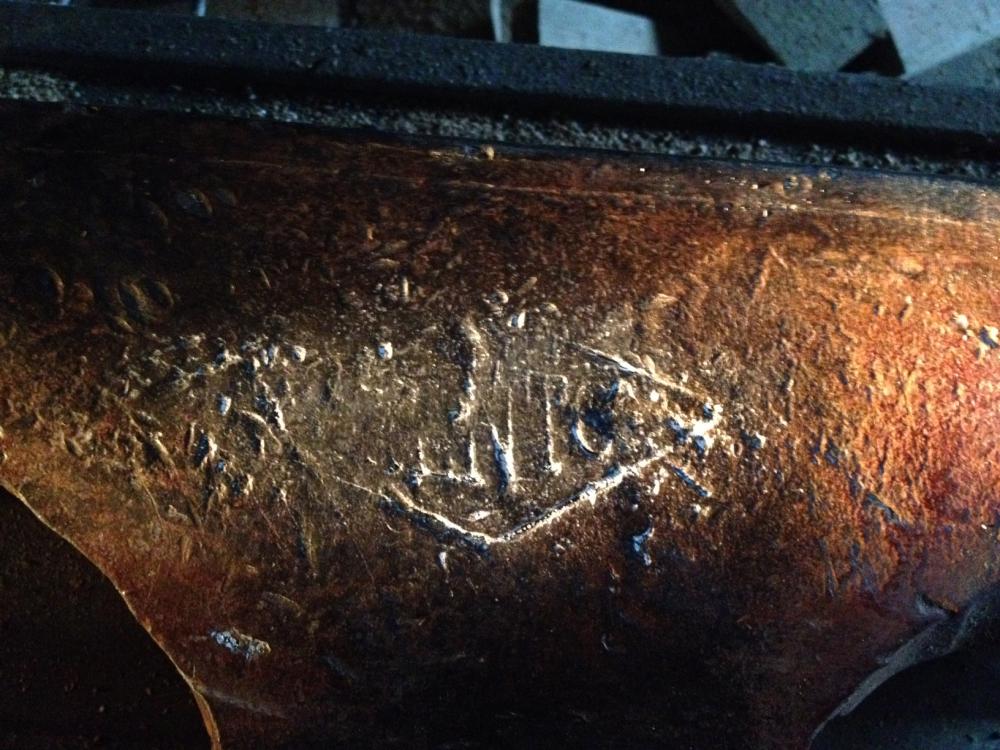
Sorry that took so long. Didn't have any chalk around the house. This is the best I could do on that logo. You can just almost see the top of the first E and maybe some of the leg of the R, if it's not just my imagination. Which it could be!
-
So that's why it's so hard to find good anvils these days, they've all been blown up - no disrespect to St. Clement or anything, but what a waste of an anvil (assuming the "firing" does damage, of course).
-
But blowing the anvil up into the air?! What's that about? Or maybe I should say "anvil shaped object", in which case, I guess it's alright. Just the knife, I guess. I never knew a hand compass was a standard blacksmith tool.
-
Thanks Frosty. I'll give that a try. Now why did that show up twice? I didn't think I hit Submit more than once.
-
Thanks Frosty. I'll give that a try.
-
Here's another attempt at getting more contrast on it.

-
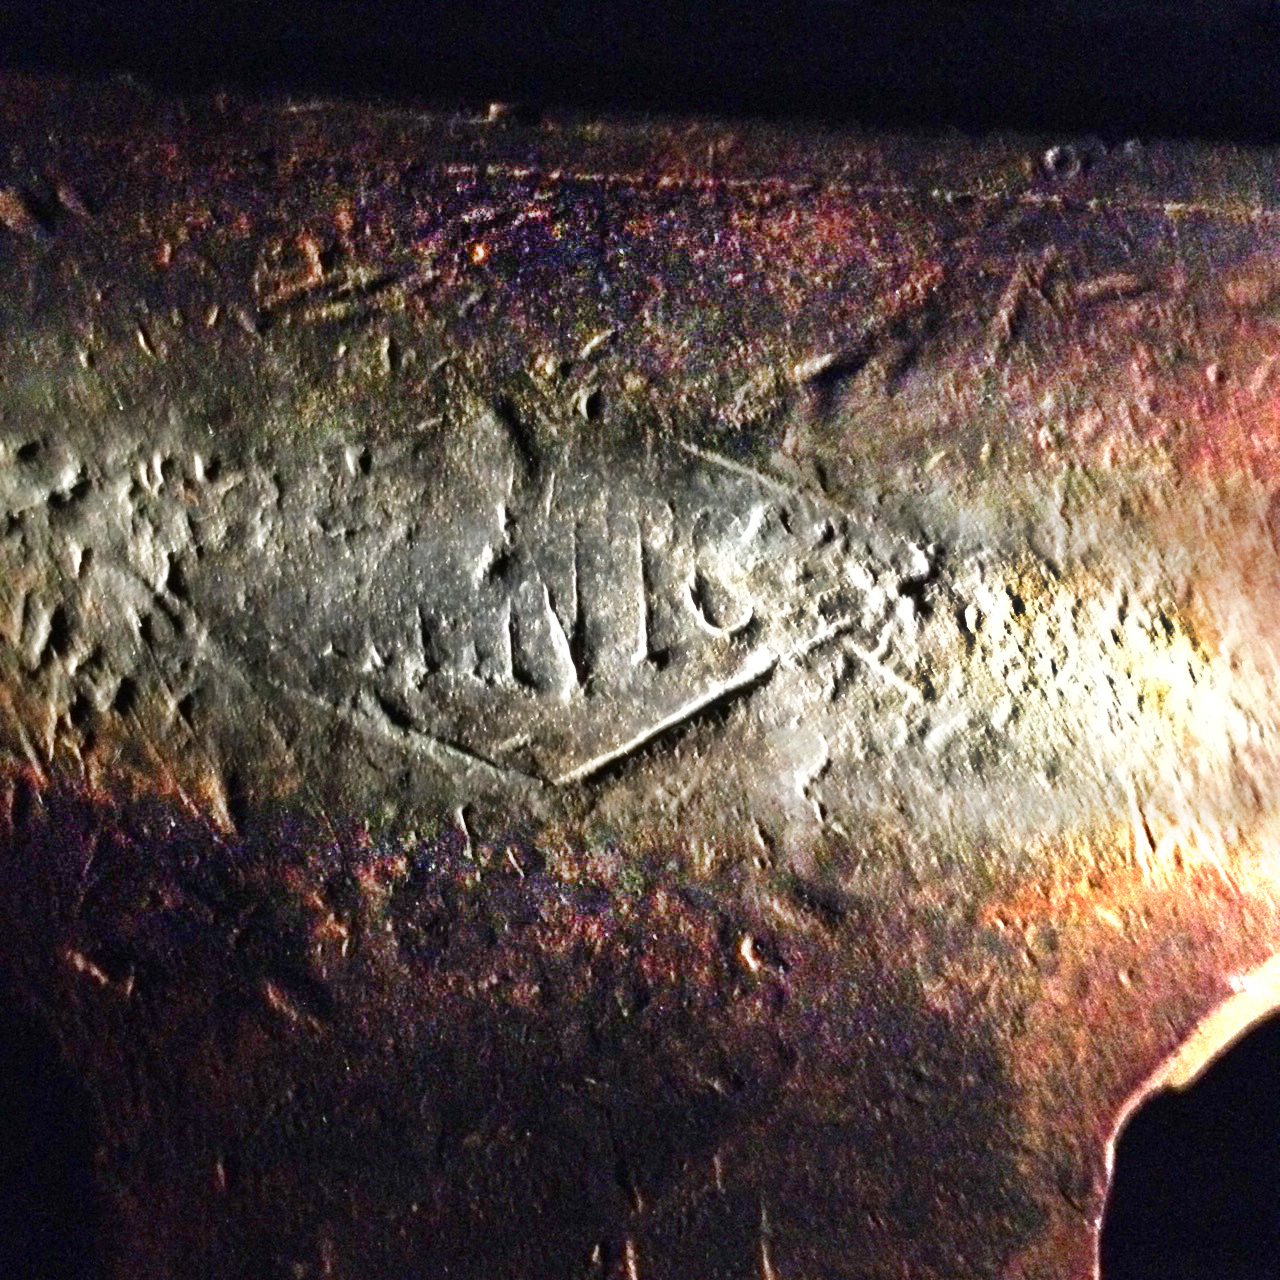
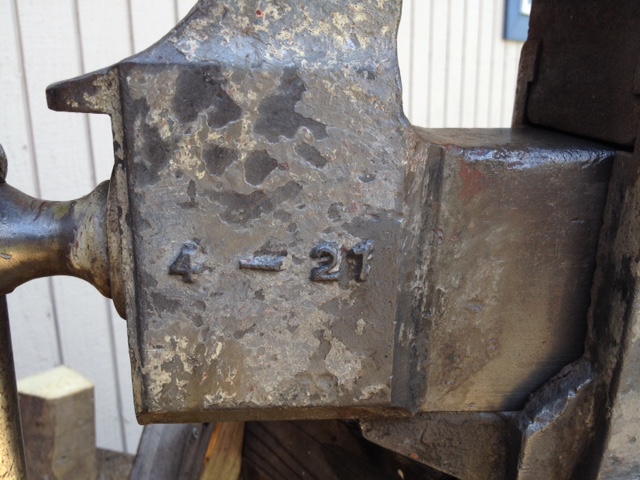
I acquired my Grampa's nice old Trenton anvil. The numbers across the front foot are Z80 A81974. What year would that have been made? I thought the number after the A was a 3 at first, so I thought it was a 1902, but a closer look, I can see the rest of the circles forming the 8.


-
Here it is. It's pretty banged up, but you can make out a few details and the characteristic diamond border. I'll see if I can take a better one with more contrast.
-
I just acquired my Grampa's old anvil from my Dad. Looks like it's a Trenton. The numbers across the front foot are - Z80 A81974. I thought the * after the A was a 3 at first, so I thought it was made in 1902, but when i looked real close, I could just see the imprint going around the circle. So it being an 8, I don't know when it was made. Maybe 1908 or 10?

-
Question about the effects of TV coverage
John in Oly, WA replied to Kozzy's topic in Blacksmithing, General Discussion
I'm a complete newbie to blacksmithing, so I can't speak to the effects of the TV coverage on the craft and business aspects But I have found "Forged in Fire" interesting, and it causes me to research more details on the subject. Another benefit I see is that as I am building and getting all the tools together, my boys have become more interested in what I'm doing from watching "Forged in Fire" and comparing it with what I'm doing and discussing it with me. So that's a bonus. Maybe they will want to get out there and shape some metal themselves. -
Thanks for the replies. Good things to think about. My cylinder is 5" bore and 8" stroke. I was just concerned that if the dies were set closer than the full travel of the hydraulic piston, there'd be the risk of pressing the press apart.
-
I hear you. But, unfortunately I am addicted to tools. Love tools and I've never found (haven't looked really) a rehabilitation program for this addiction! LOL Never met a tool I didn't like. And I really like making things, so combine the two - making TOOLS - and I'm gone 'round the bend!
-
I'm starting to build an H-frame forge press and haven't found this bit of info - Do I set the distance between the cylinder and the bottom die plate so when the cylinder is fully extended, the top and bottom dies just touch? Is there any reason it would be better to set the distance closer? I didn't see this info in Batson's book. Thanks