tdriack
Members
-
Joined
-
Last visited
Everything posted by tdriack
-
Looks good! Just be careful hammering near the cut mark in the top near the hardy hole.
-
When I built my grinder I had to play around with similar issues. My grinder has a crowned tracking wheel - all other wheels are flat. If you have more than one wheel that is crowned, they will fight each other if there is any miss-alignment. From your video I see several things going on - the belt seems to be tracking on the tracking wheel ok, but there is misalignment in the other wheels. Here's the real issue in my opinion - and you already said it --> your tracking wheel only allows for adjustment in one plane - not two planes. The easiest way to fix this is to move the pivot pin for your tracking arm hinge farther outward - like at least 1/4" minimum - so that the hinge can pivot downwards or upwards. If the hinge has the ability to swing downwards this will lower the tracking wheel, and thus pull the belt towards the grinder frame on the wheel's crown. Note though - if you move the pivot for the hinge - you will have to move all the wheels farther outward or use washer shims to get good alignment. Hope this helps. I also watched your video again and have one more suggestion. You only have one jacking/locking bolt on the frame tubes for the platten arm and the tracking wheel arm. I'd add another jack screw to each one on the frame to ensure the moving inner tubing is tightened down and secured on each end to prevent possible miss-alignment.
-
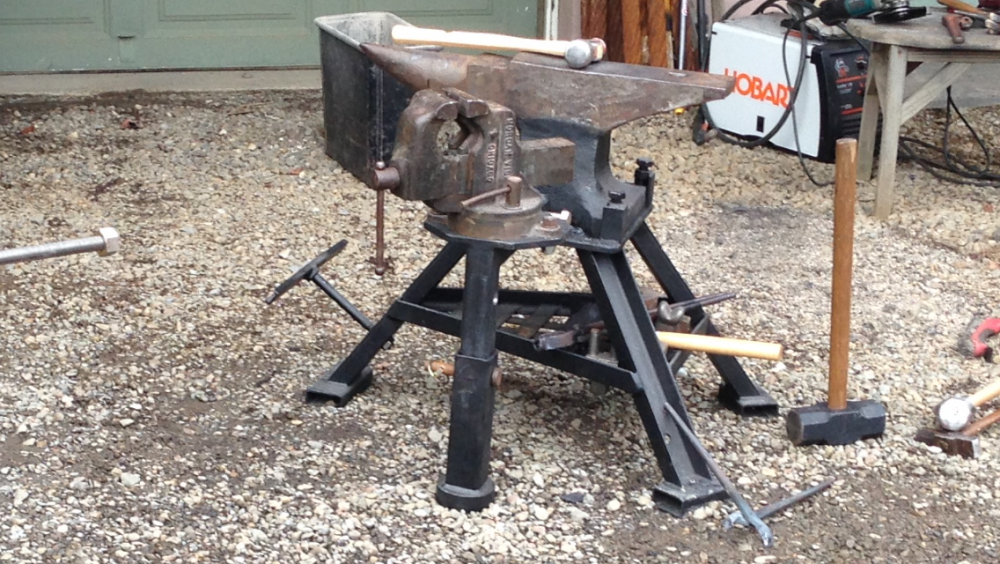
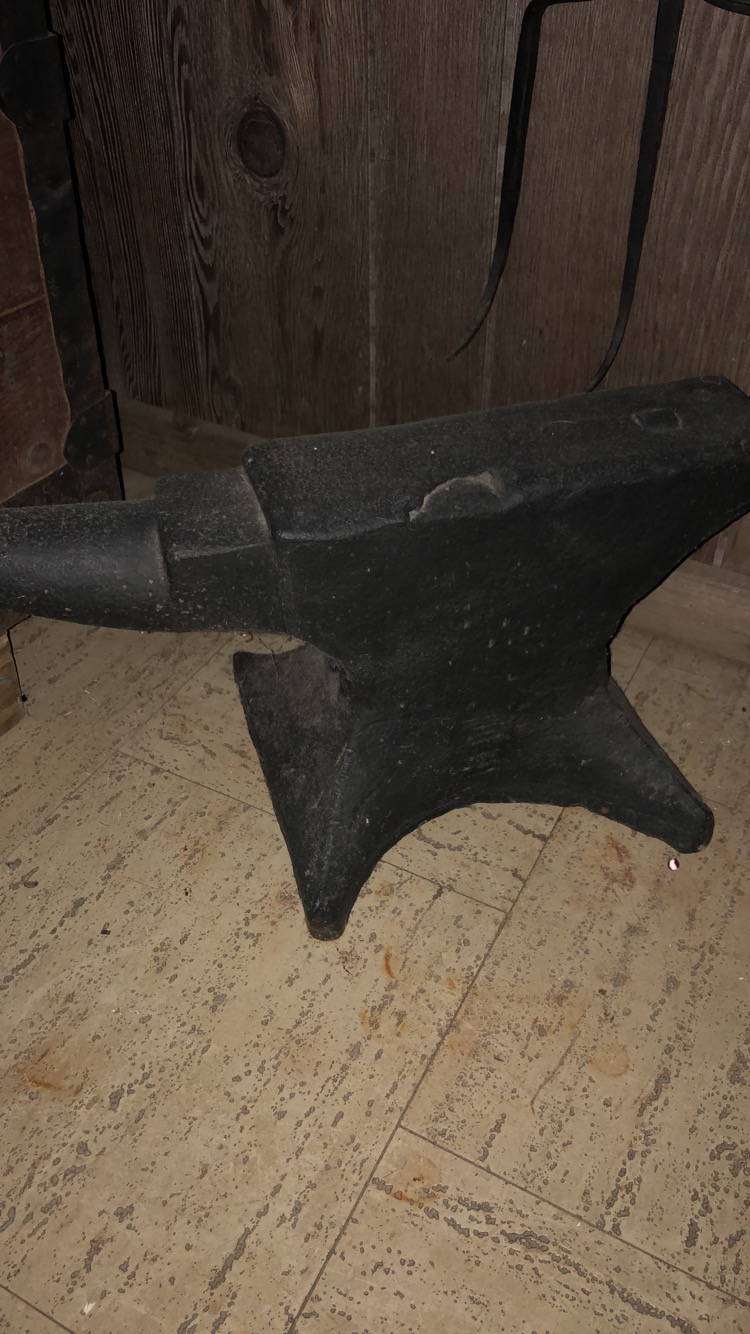
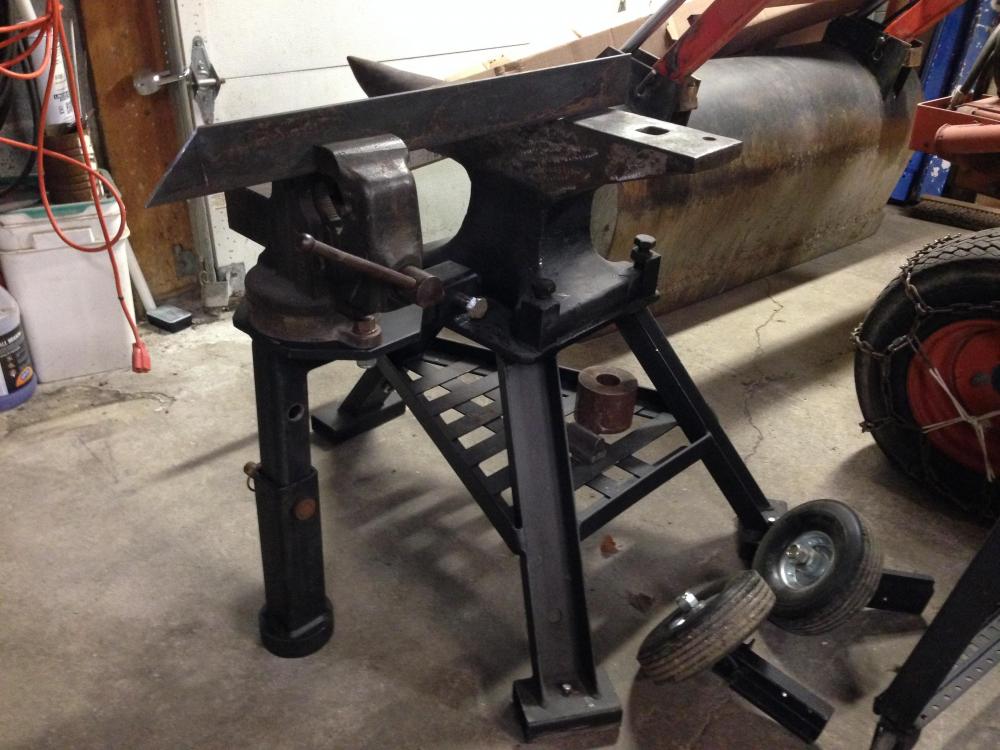
I've done a lot of modifications to my steel stand over time. I think either plate you have would work for you ( I think mine is only 1/2" thick and it works fine). The 3 leg tripod works really good on uneven surfaces - especially outside in the yard. My stand has 6" long 3"x 1 1/2" rectangular tubing welded on the bottom of the feet and digs in well in my yard - after a dozen hits or so it stops trying to move/walk. On my concrete shop floor it will move though but not dramatically from the friction of the area of the feet. My only recommendation would be not to skimp on the braces between legs - use at least 1/4" thick angle iron so the legs are stiff. I've posted pics before of my stand at some point - I added one I had handy so you don't have to search it.
-
50$ for the welder is a great deal if it is operational. - Nice! I'd probably pop the cover off and just make sure all the lugs are tight inside for good measure. Grab some 1/8" 7018AC rods and give it a go to see if it works well.
-
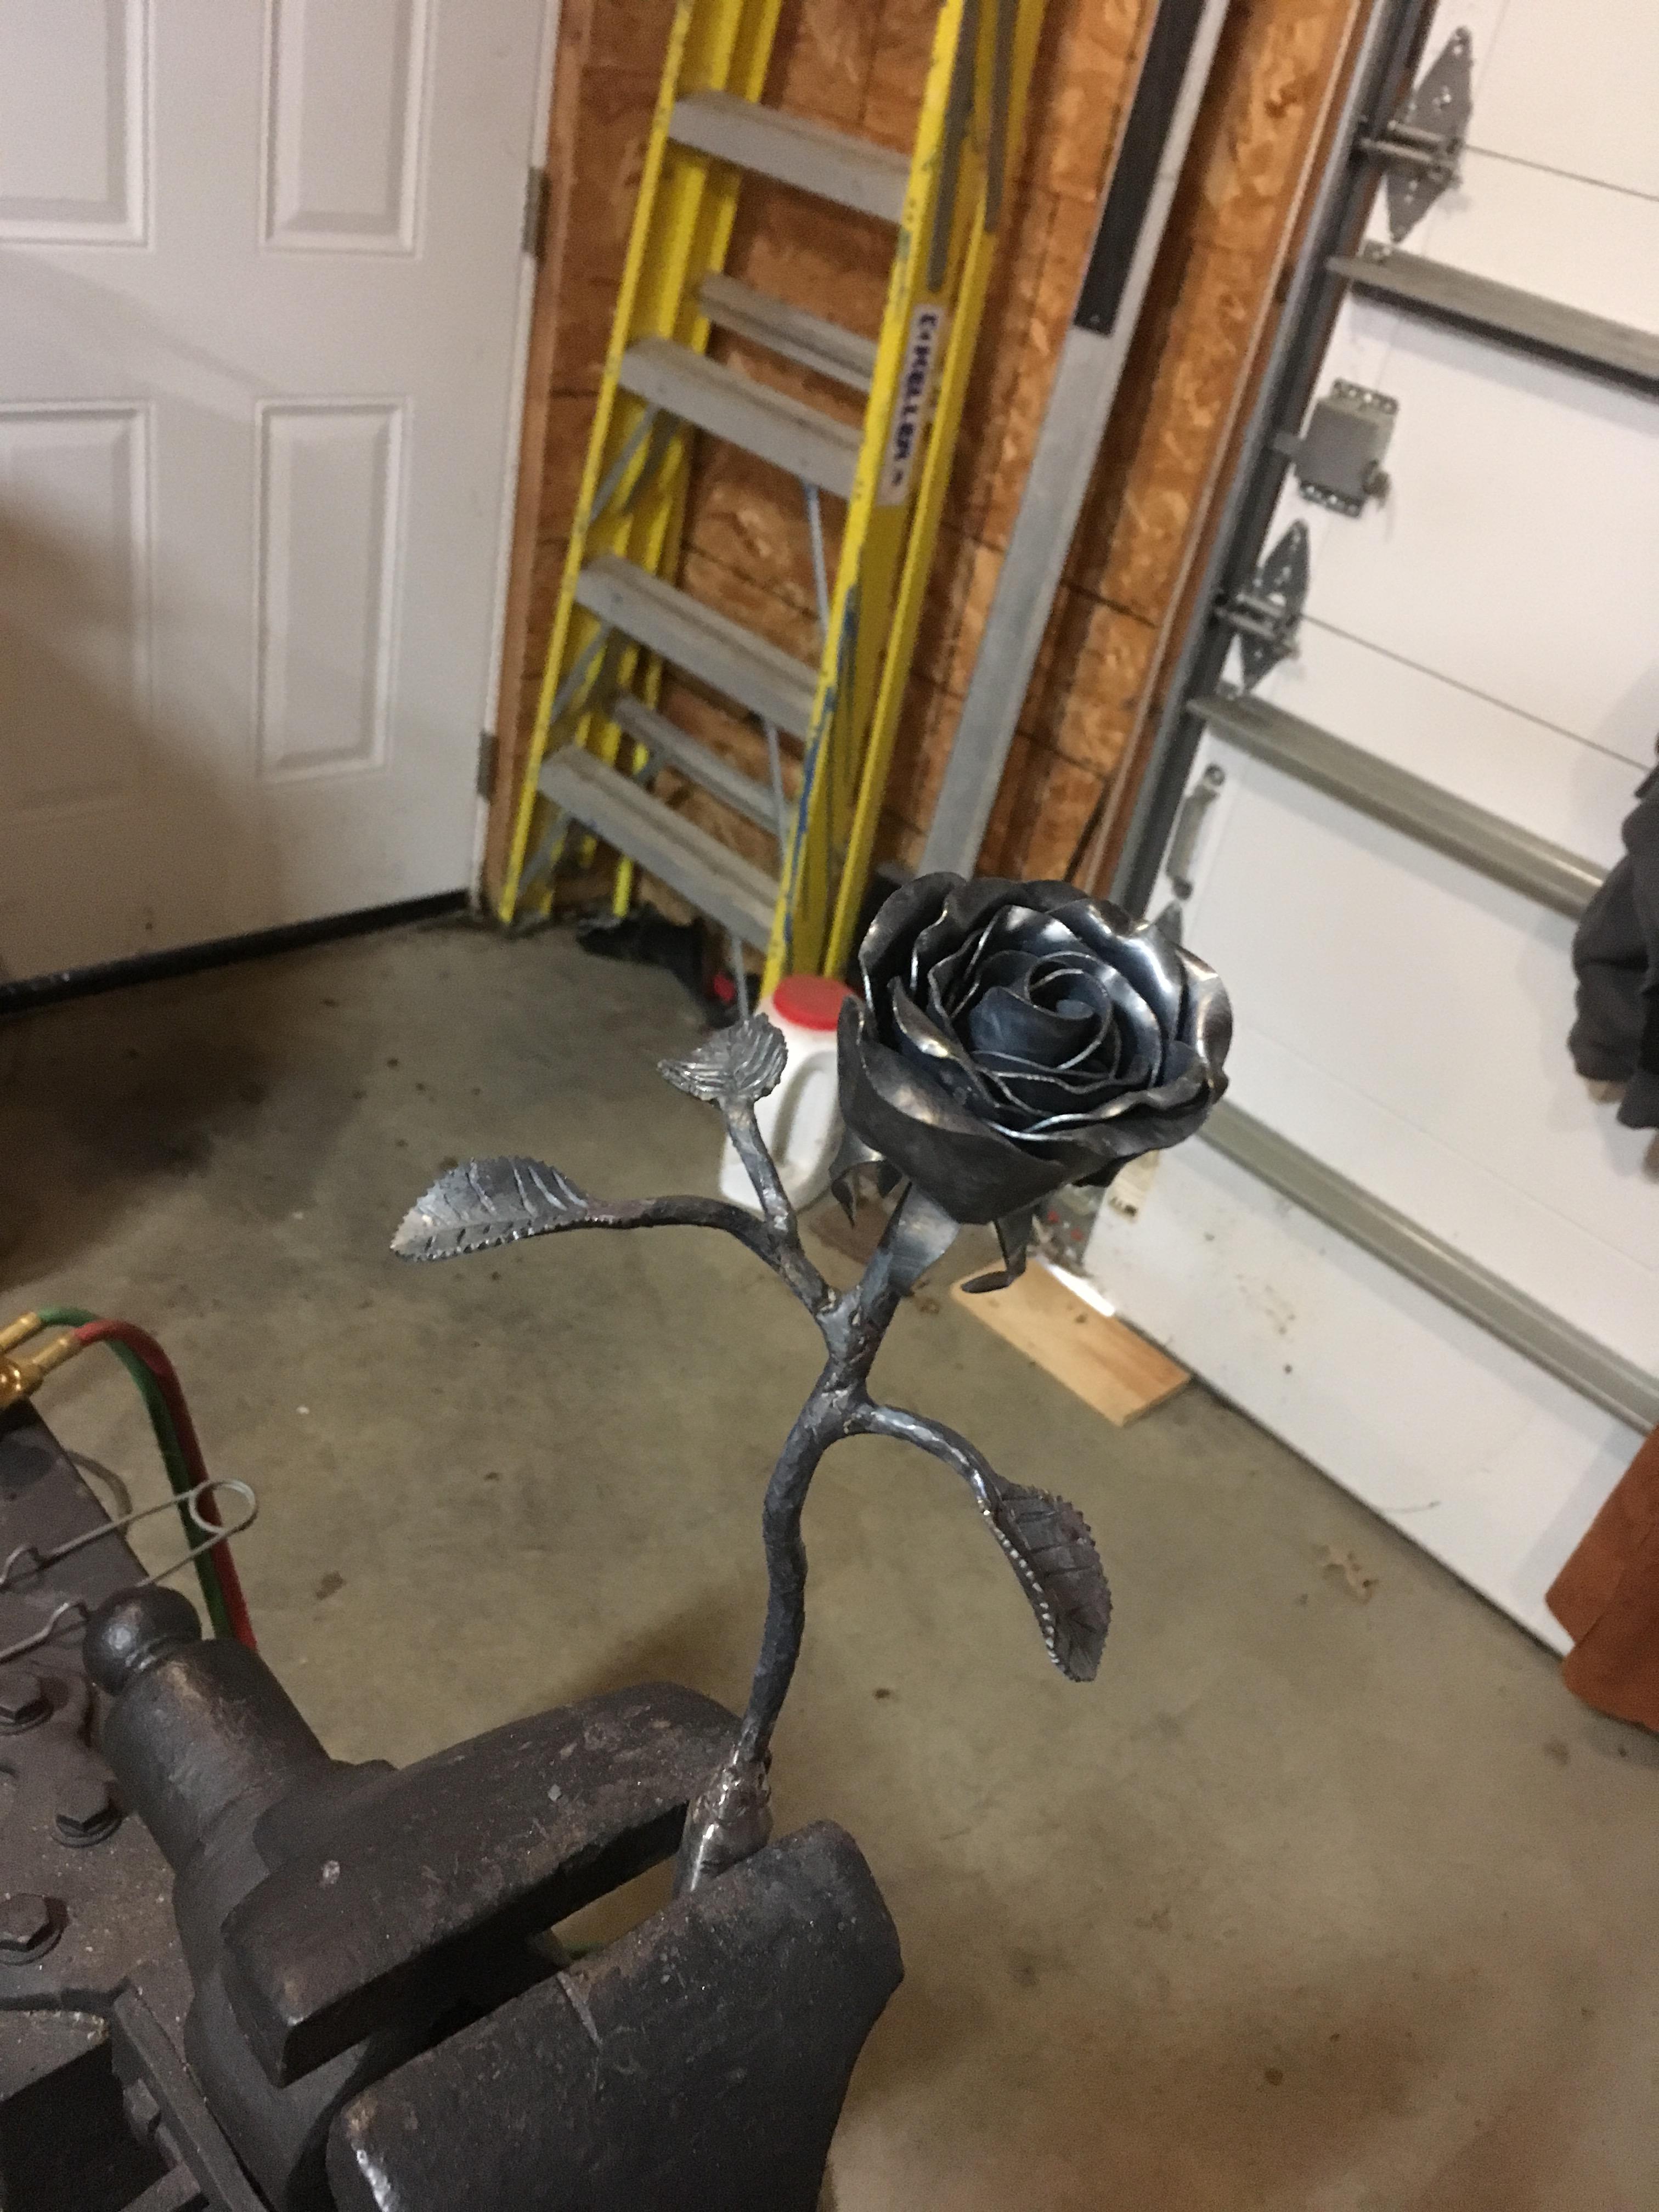
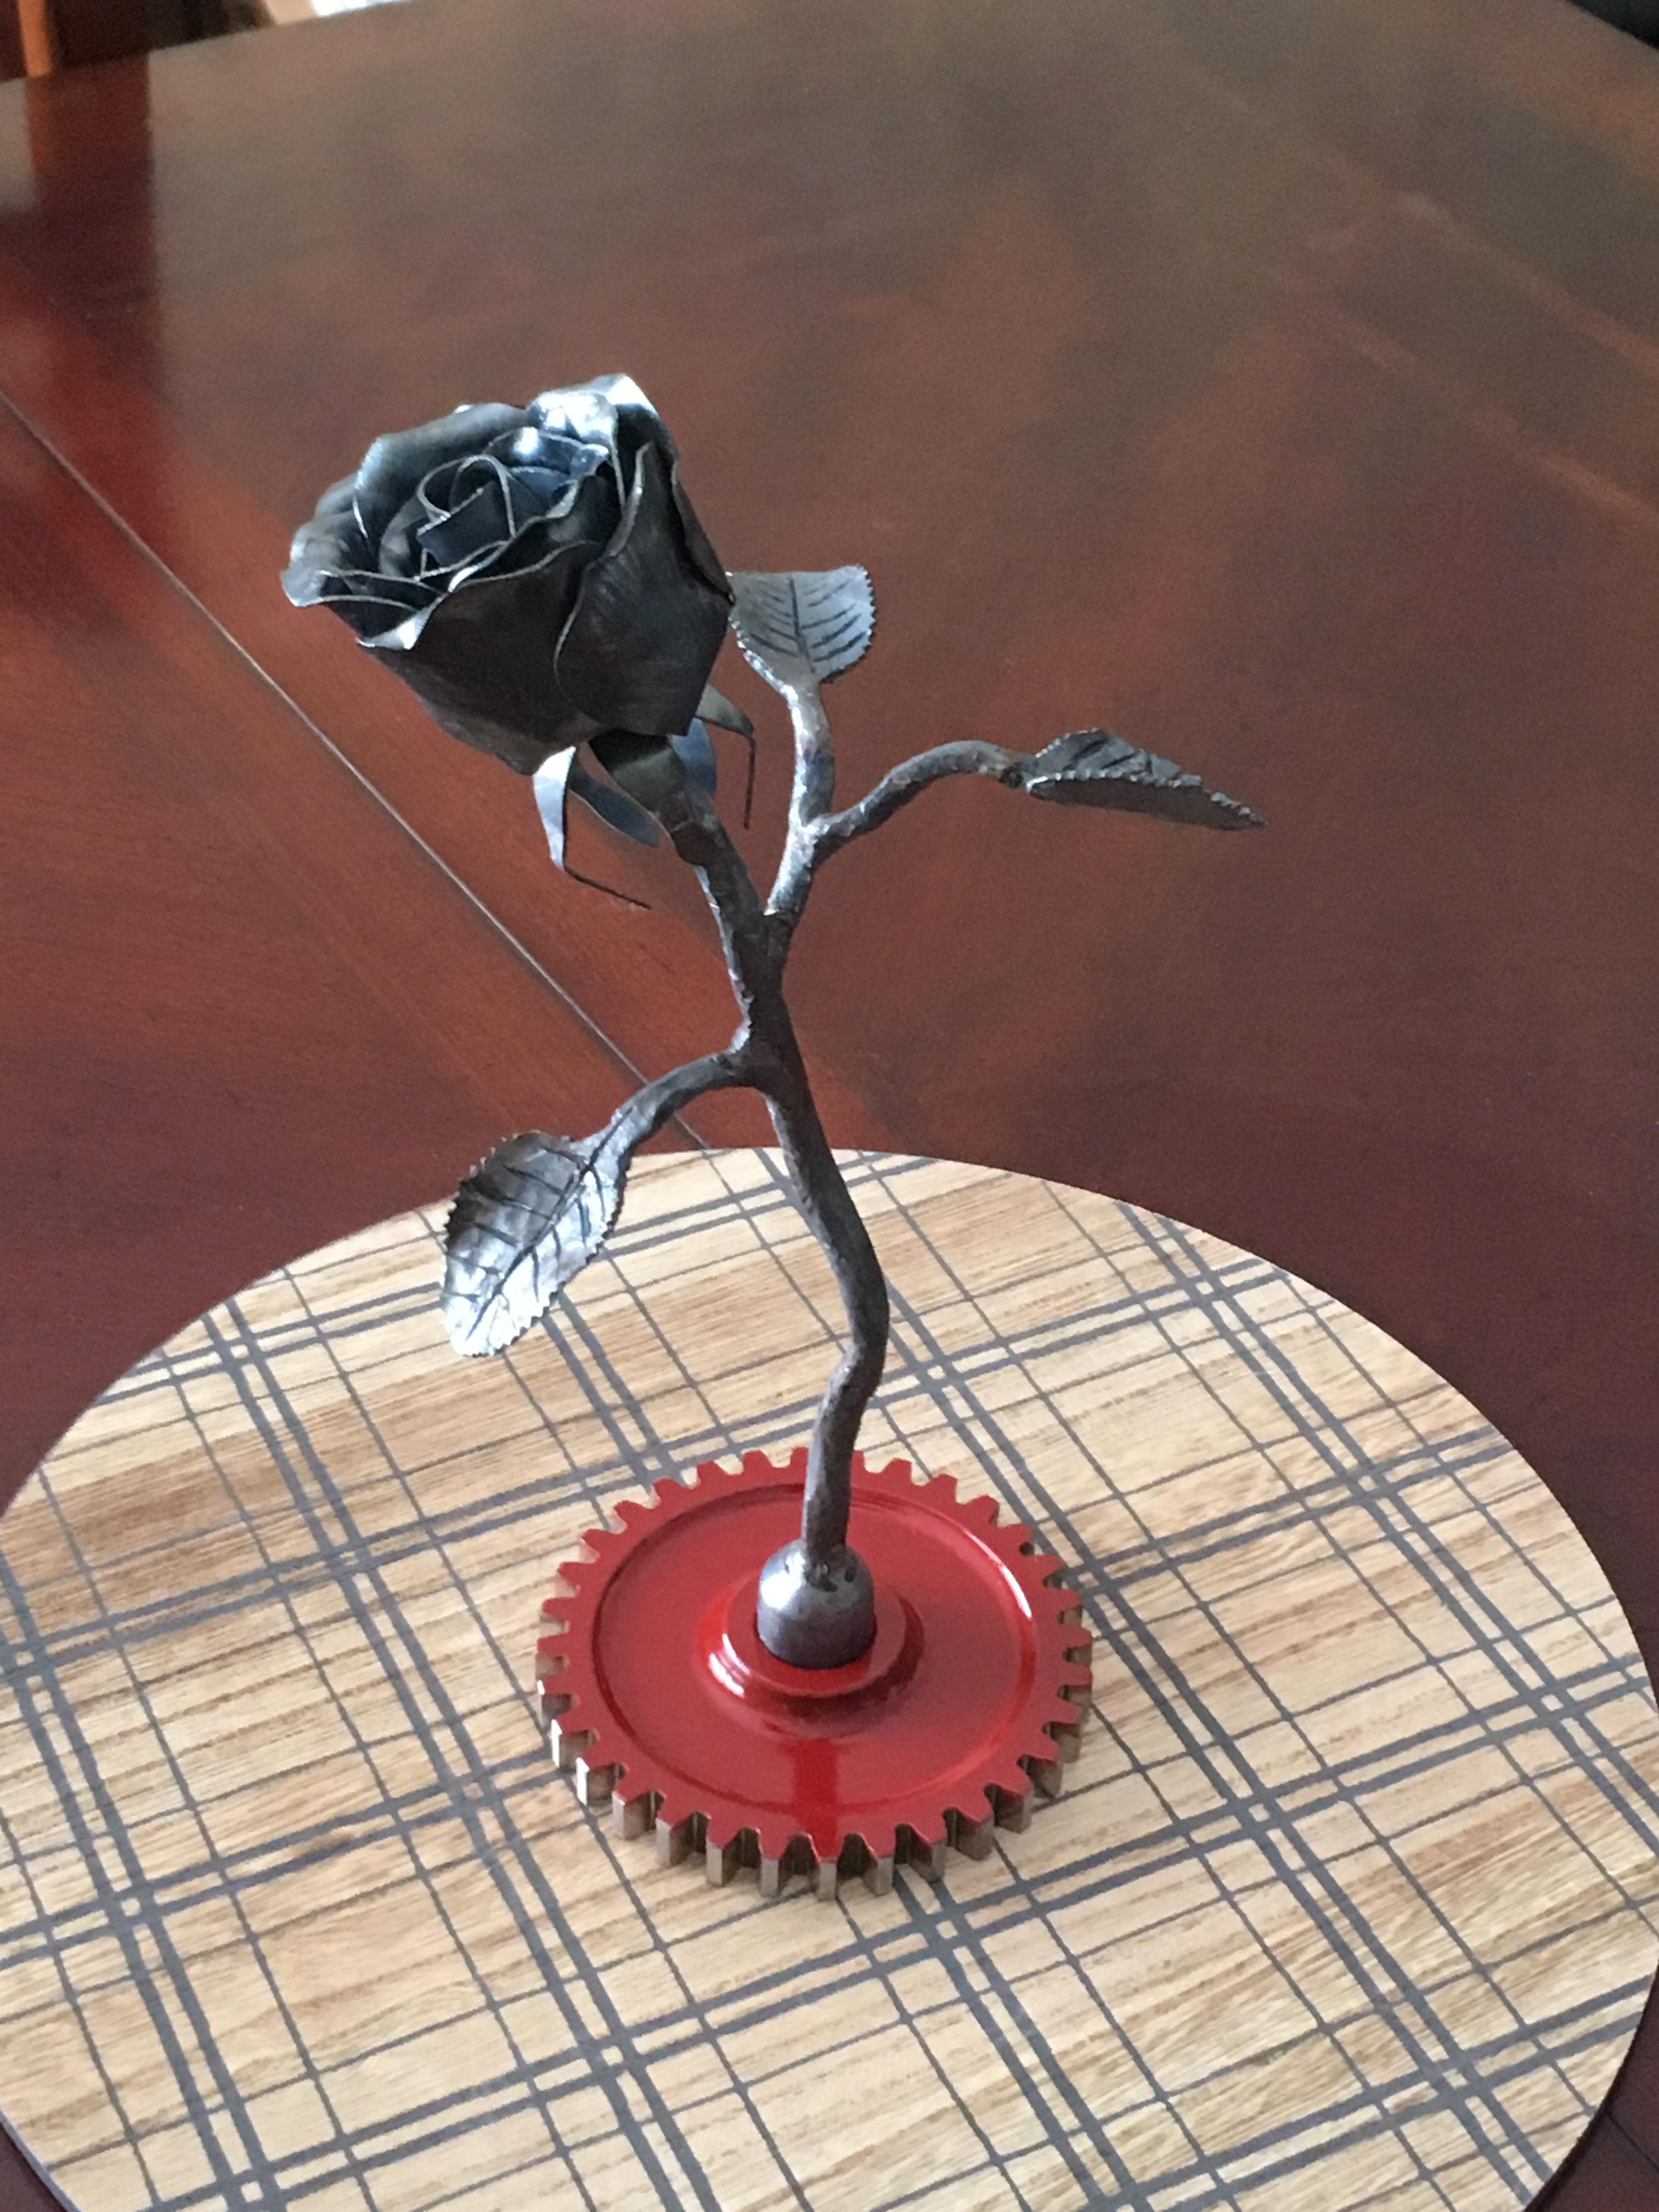
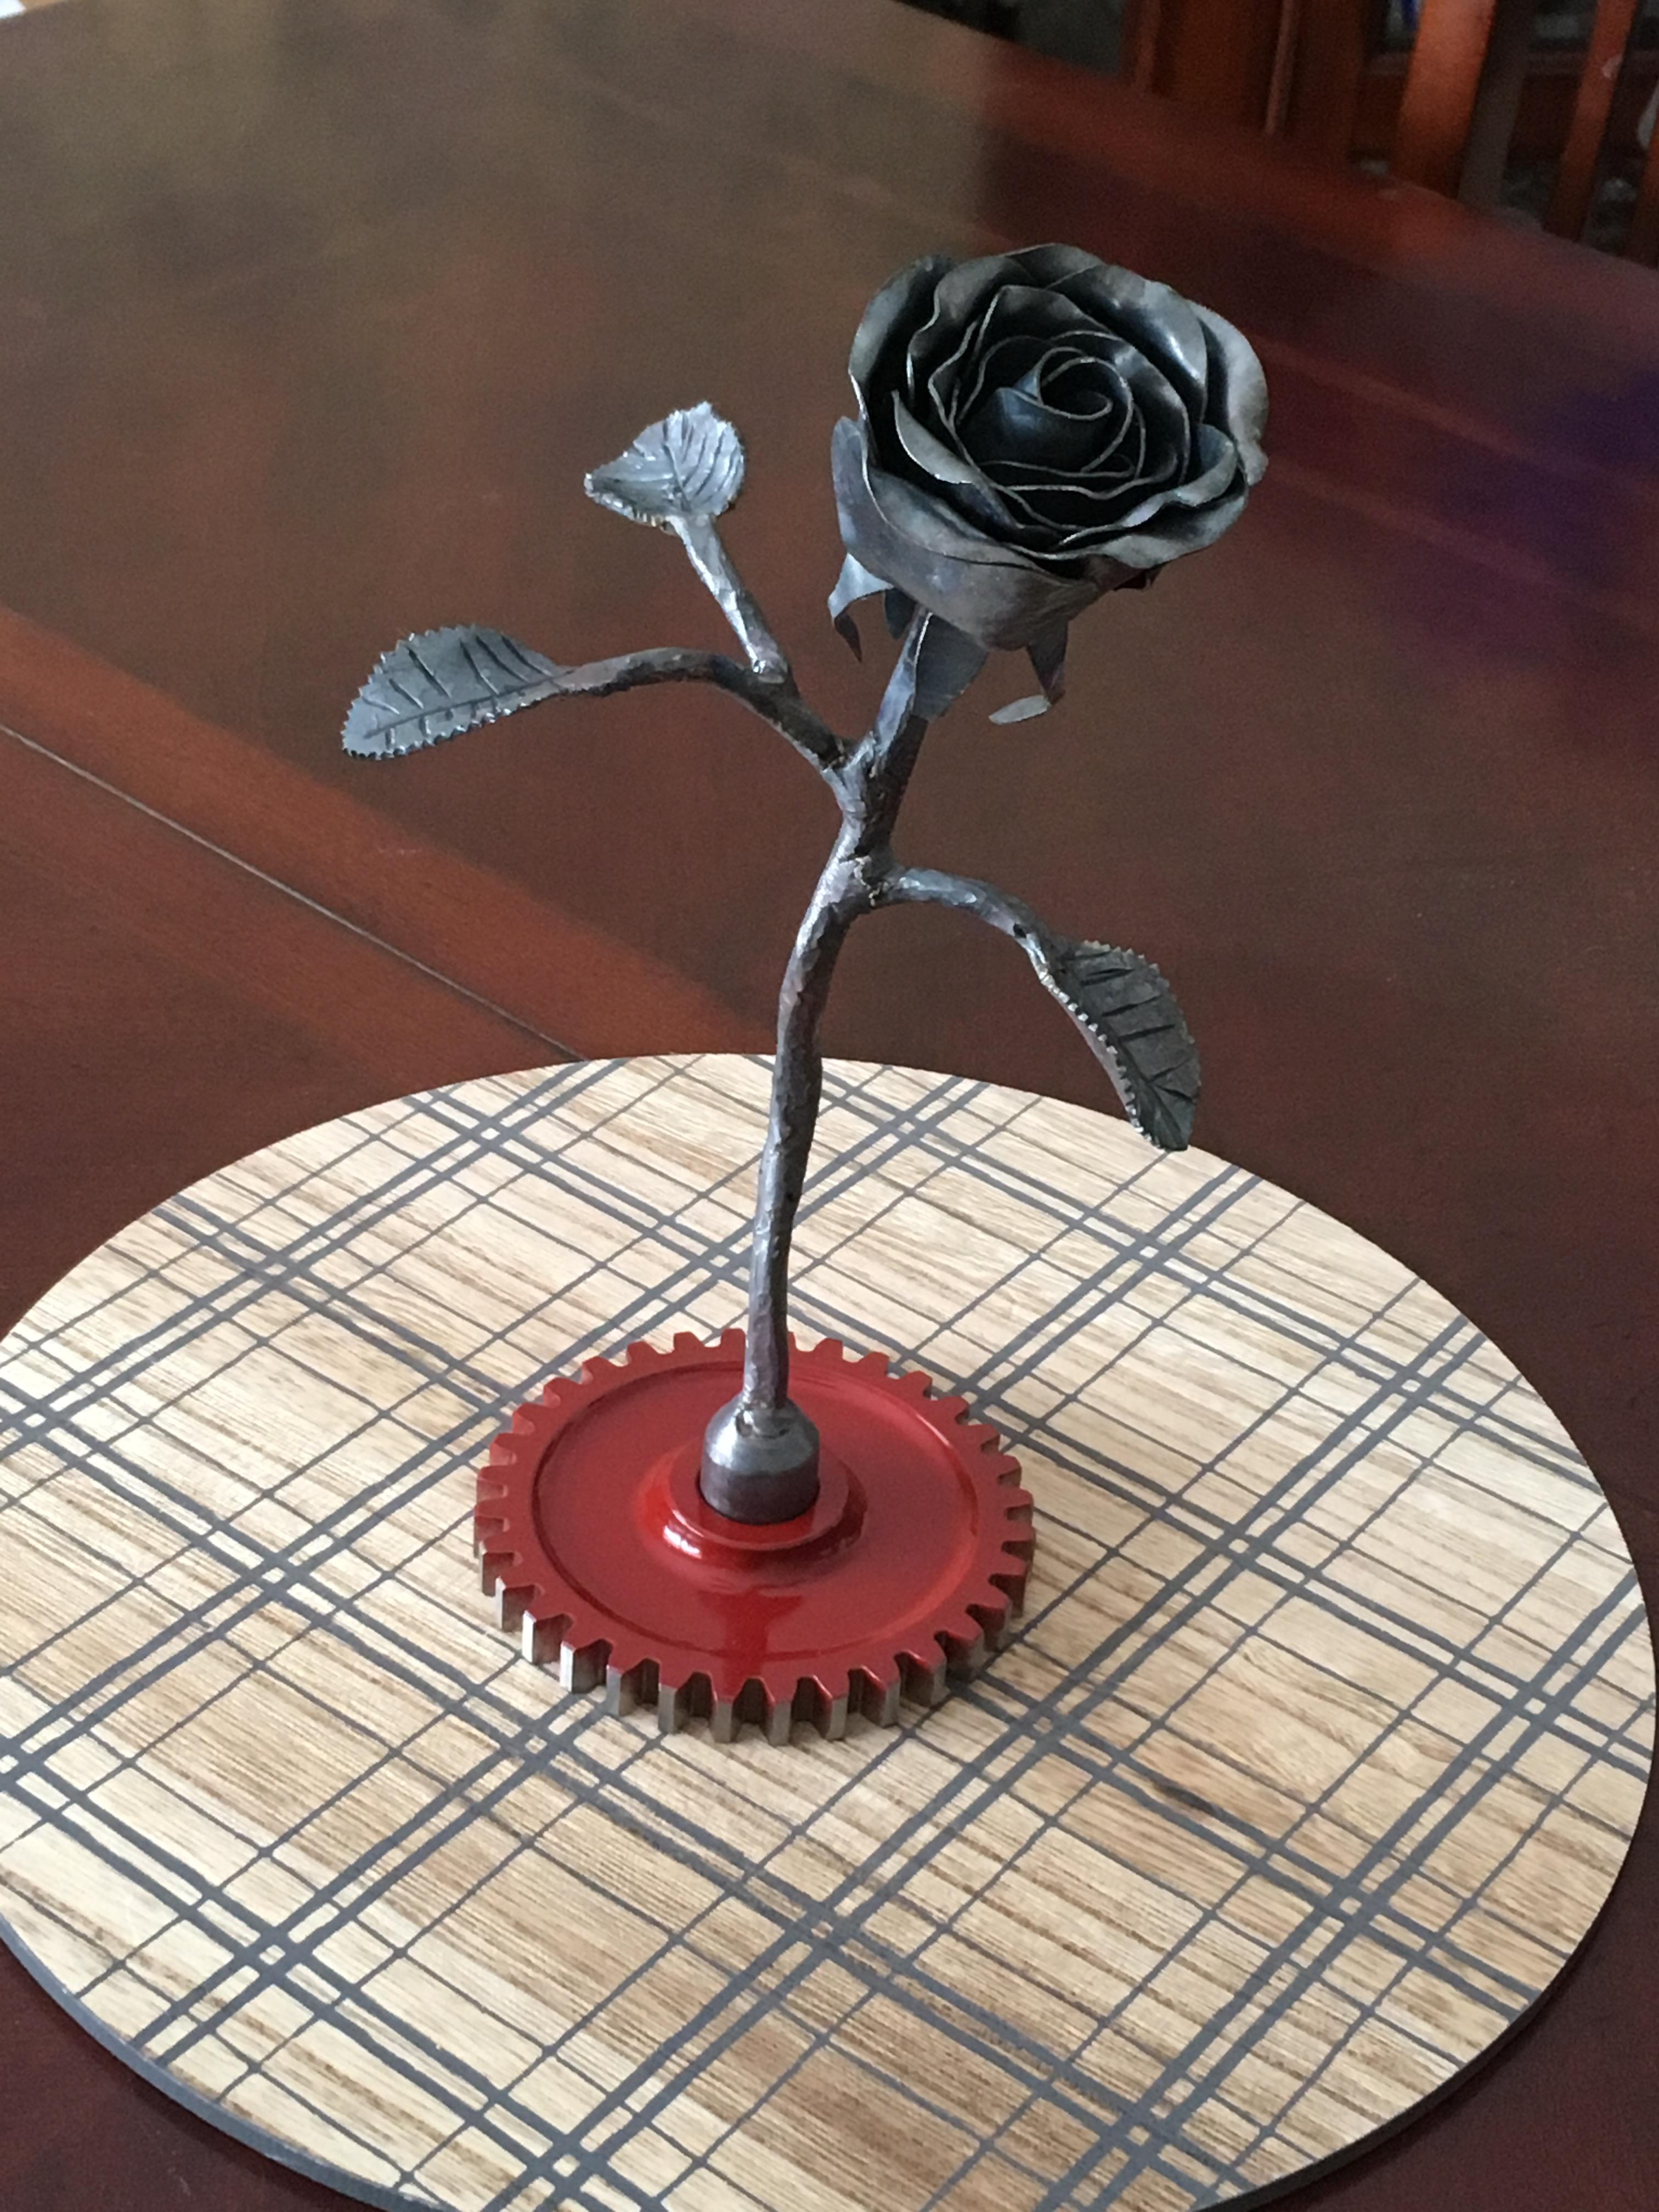
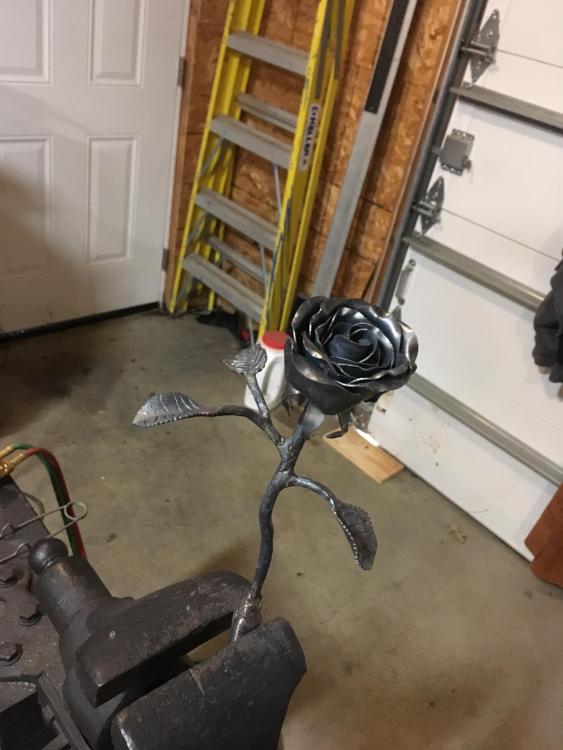
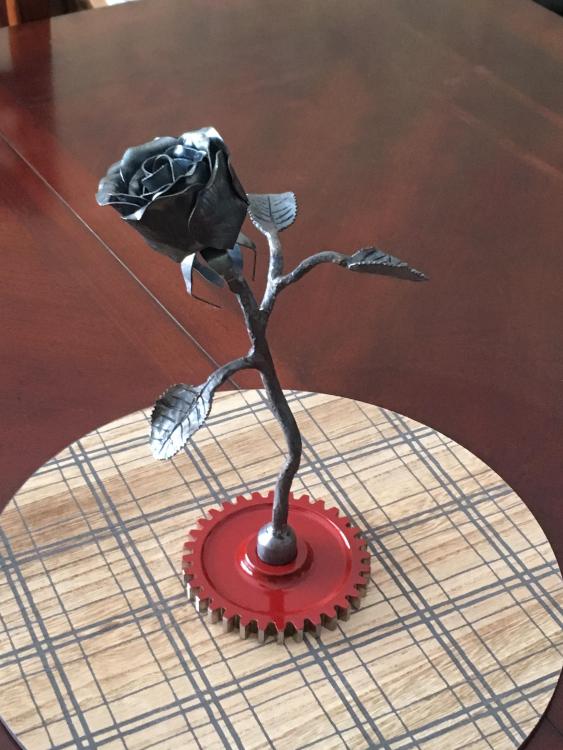
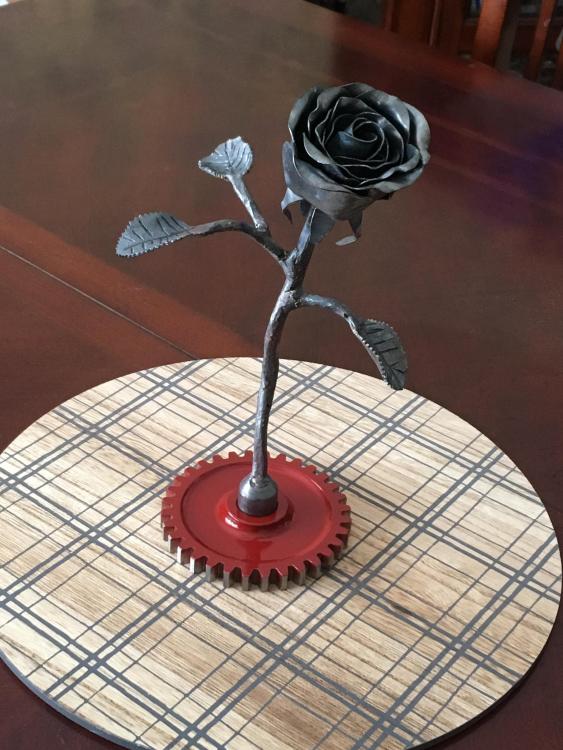
I just found this post and thought I'd add a few pics of my rose sculpture I made as a Valentine's Day gift. It was well received! I ended up just heating the rose and stem to red to uniformly scale it - but I was wondering if anyone has had rust issues over time and added a finish like wax or similar? I don't really like the idea of painting it. I'm thinking I'll leave it be - and if rust ever does become a problem - I'll run it out to the shop and heat and re-scale it. I have fallen into a routine of making a sculpture for the last 3 years.... I better start planning for a larger fireplace mantle to display them -lol.
-
Do a search on Ebay for an item called Caswell Black Oxide kit -- really easy to use. I saw others on here post about it I believe - works good.
-
Nice Find! I really love my Hay Budden. I could be totally wrong - but, above the side markings it looks like it might have had a welded repair and some grinding??? If the rebound is good - it really doesn't matter. It will serve you well for years to come!
-
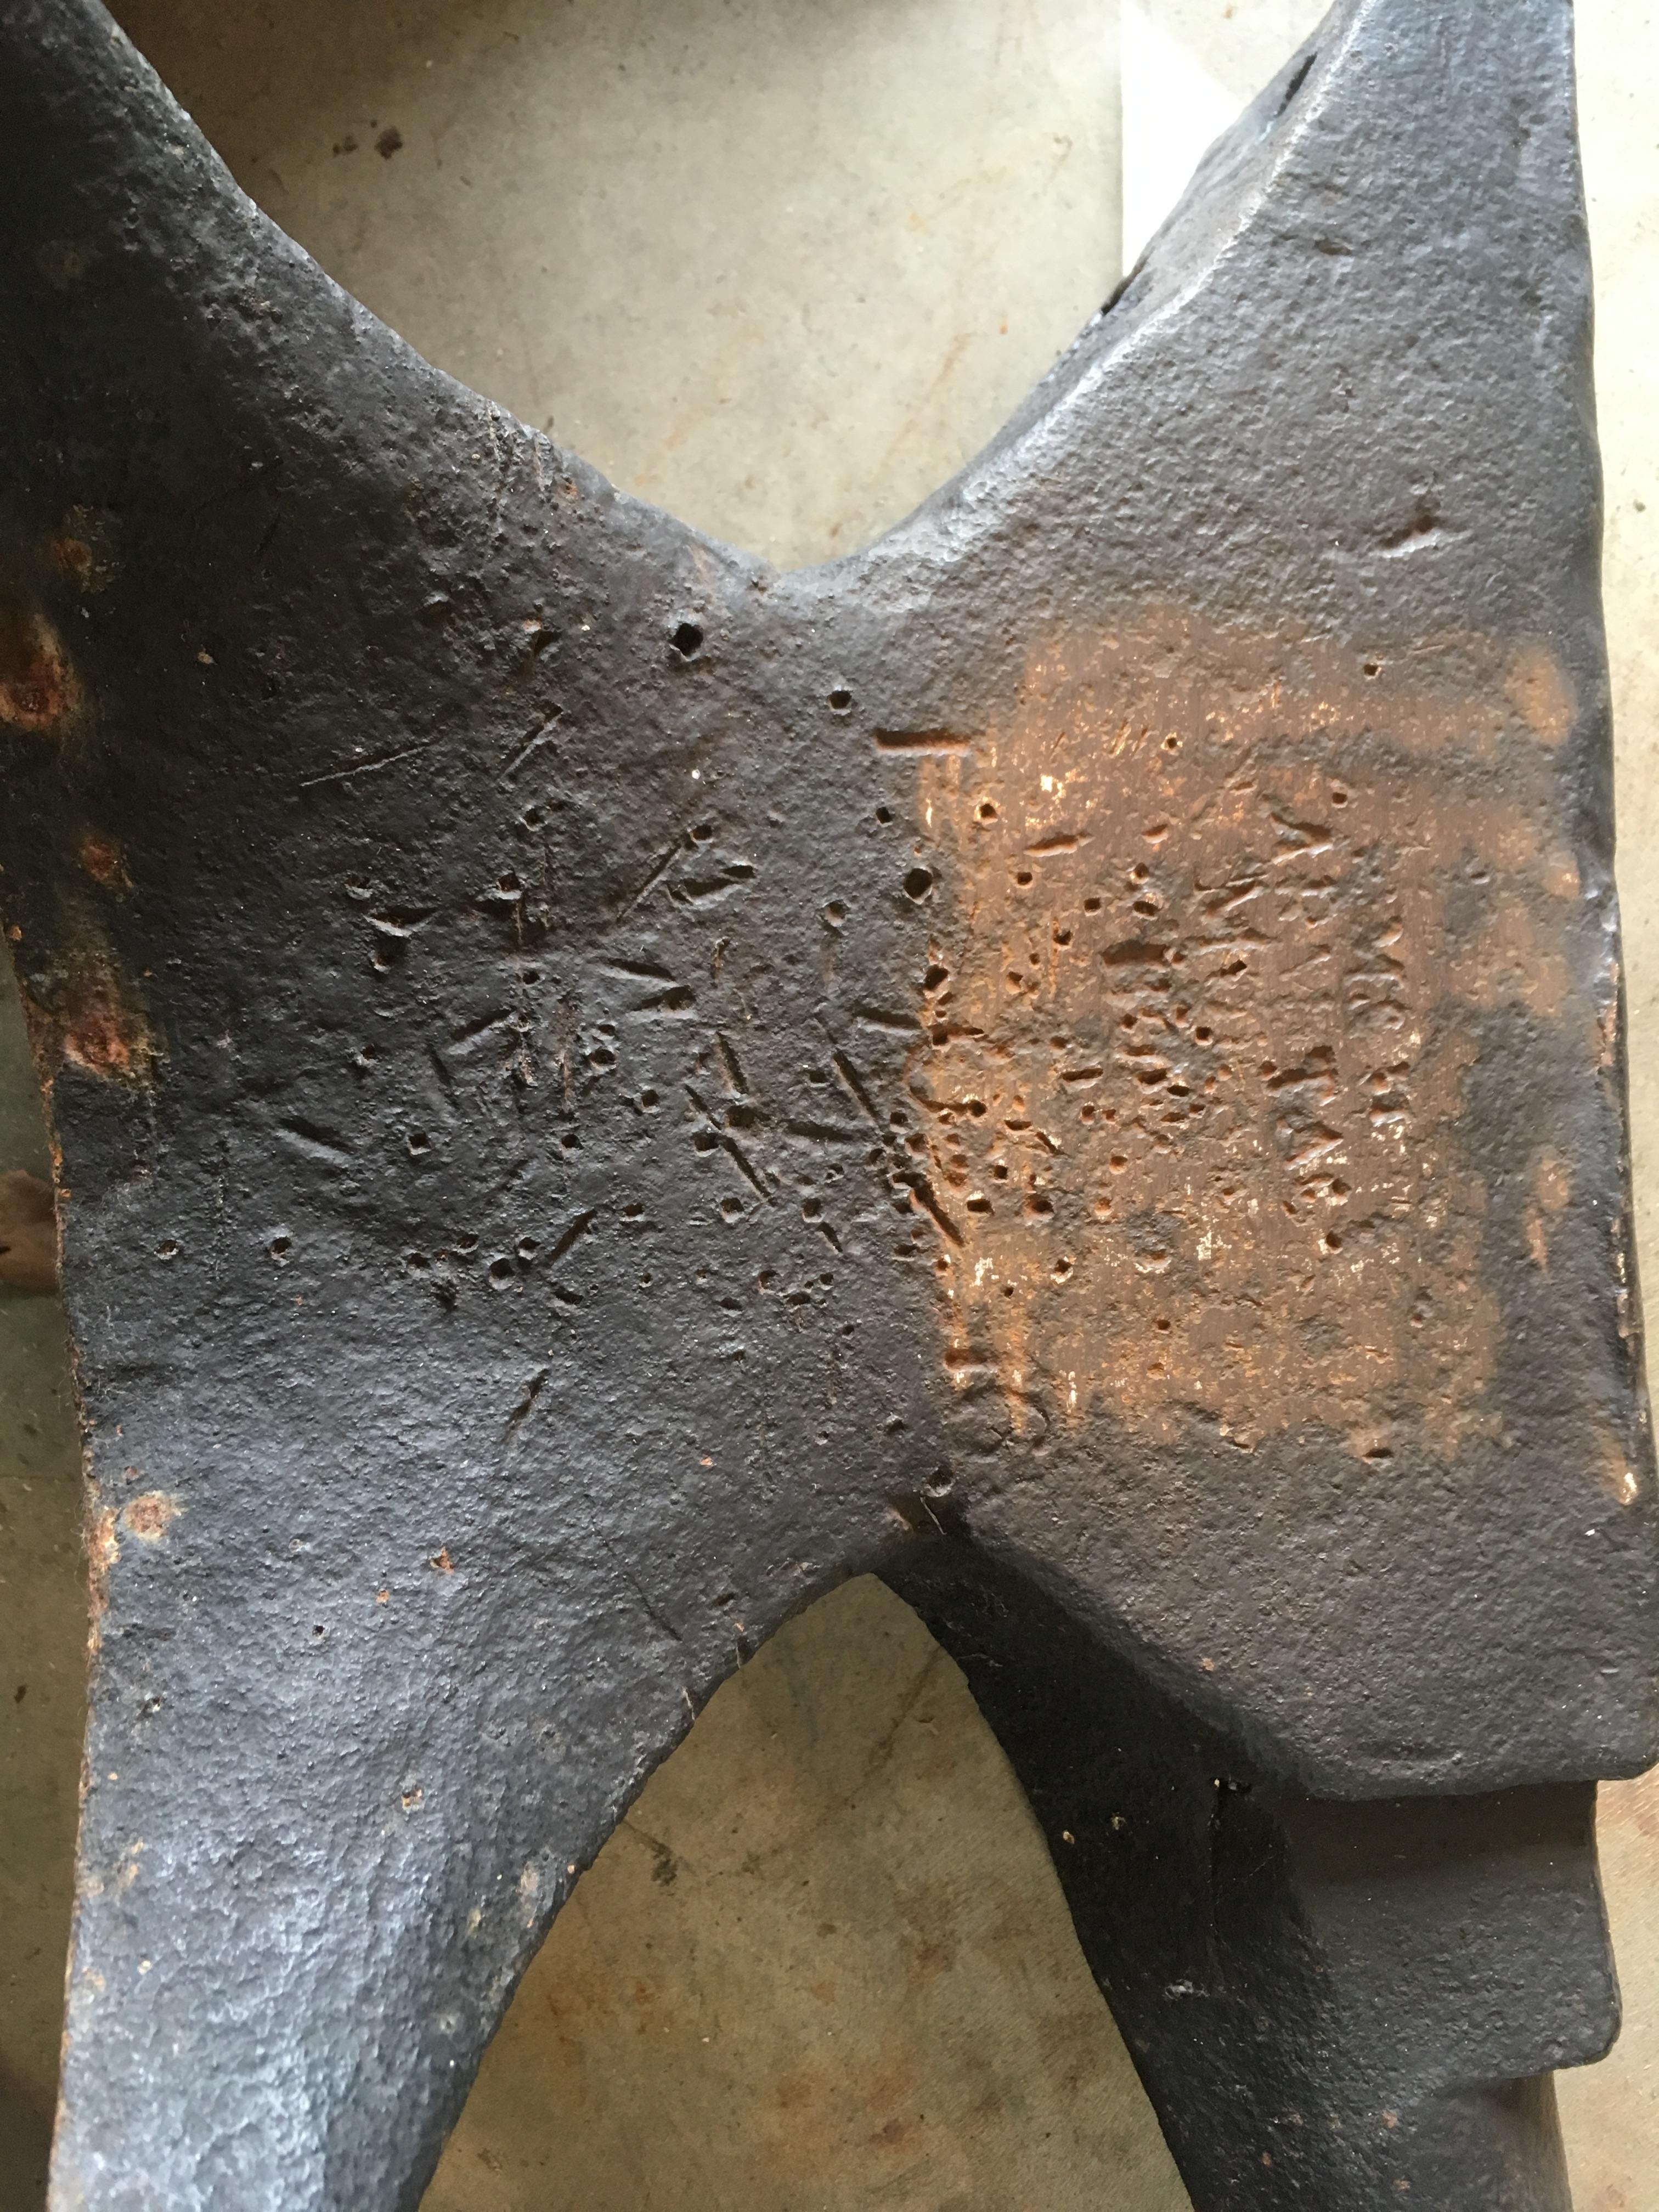
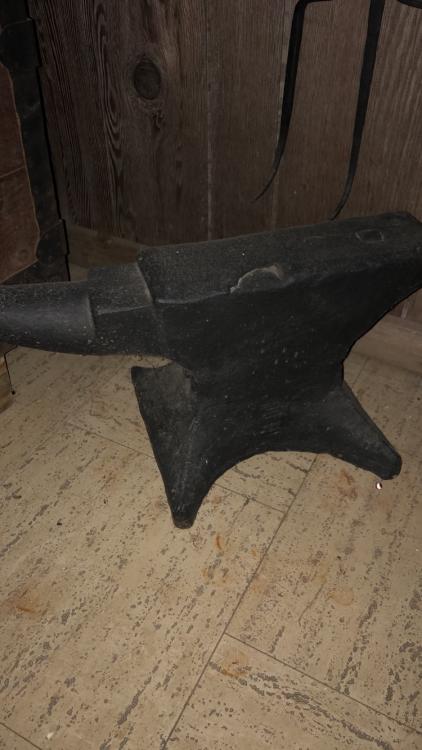
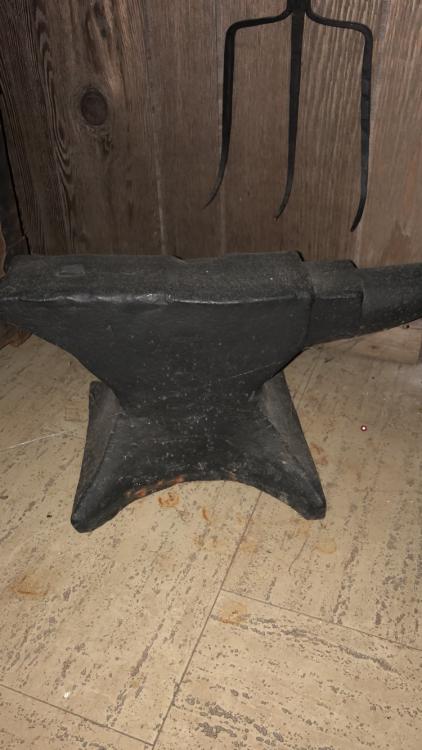
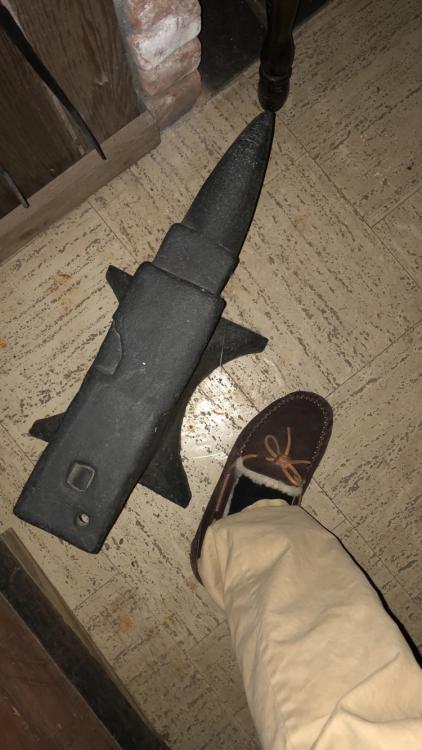
I was gifted this Armitage anvil last weekend. The top face is pretty beat up, but I'll try using it and see how it does. Also had a hardy tool shank stuck in it that I punched out after letting it sit overnight with penetrating oil. Markings appear to me to be M&H .... Armitage.... Mouse .....1-0-16 -- so 128 lbs? I don't have access to the Mousehole book - can anyone give me an approximate age guess? This is the third anvil I've seen lately that has numerous center punch like holes in the sides - what job/process was being completed to leave these marks on anvils???

-
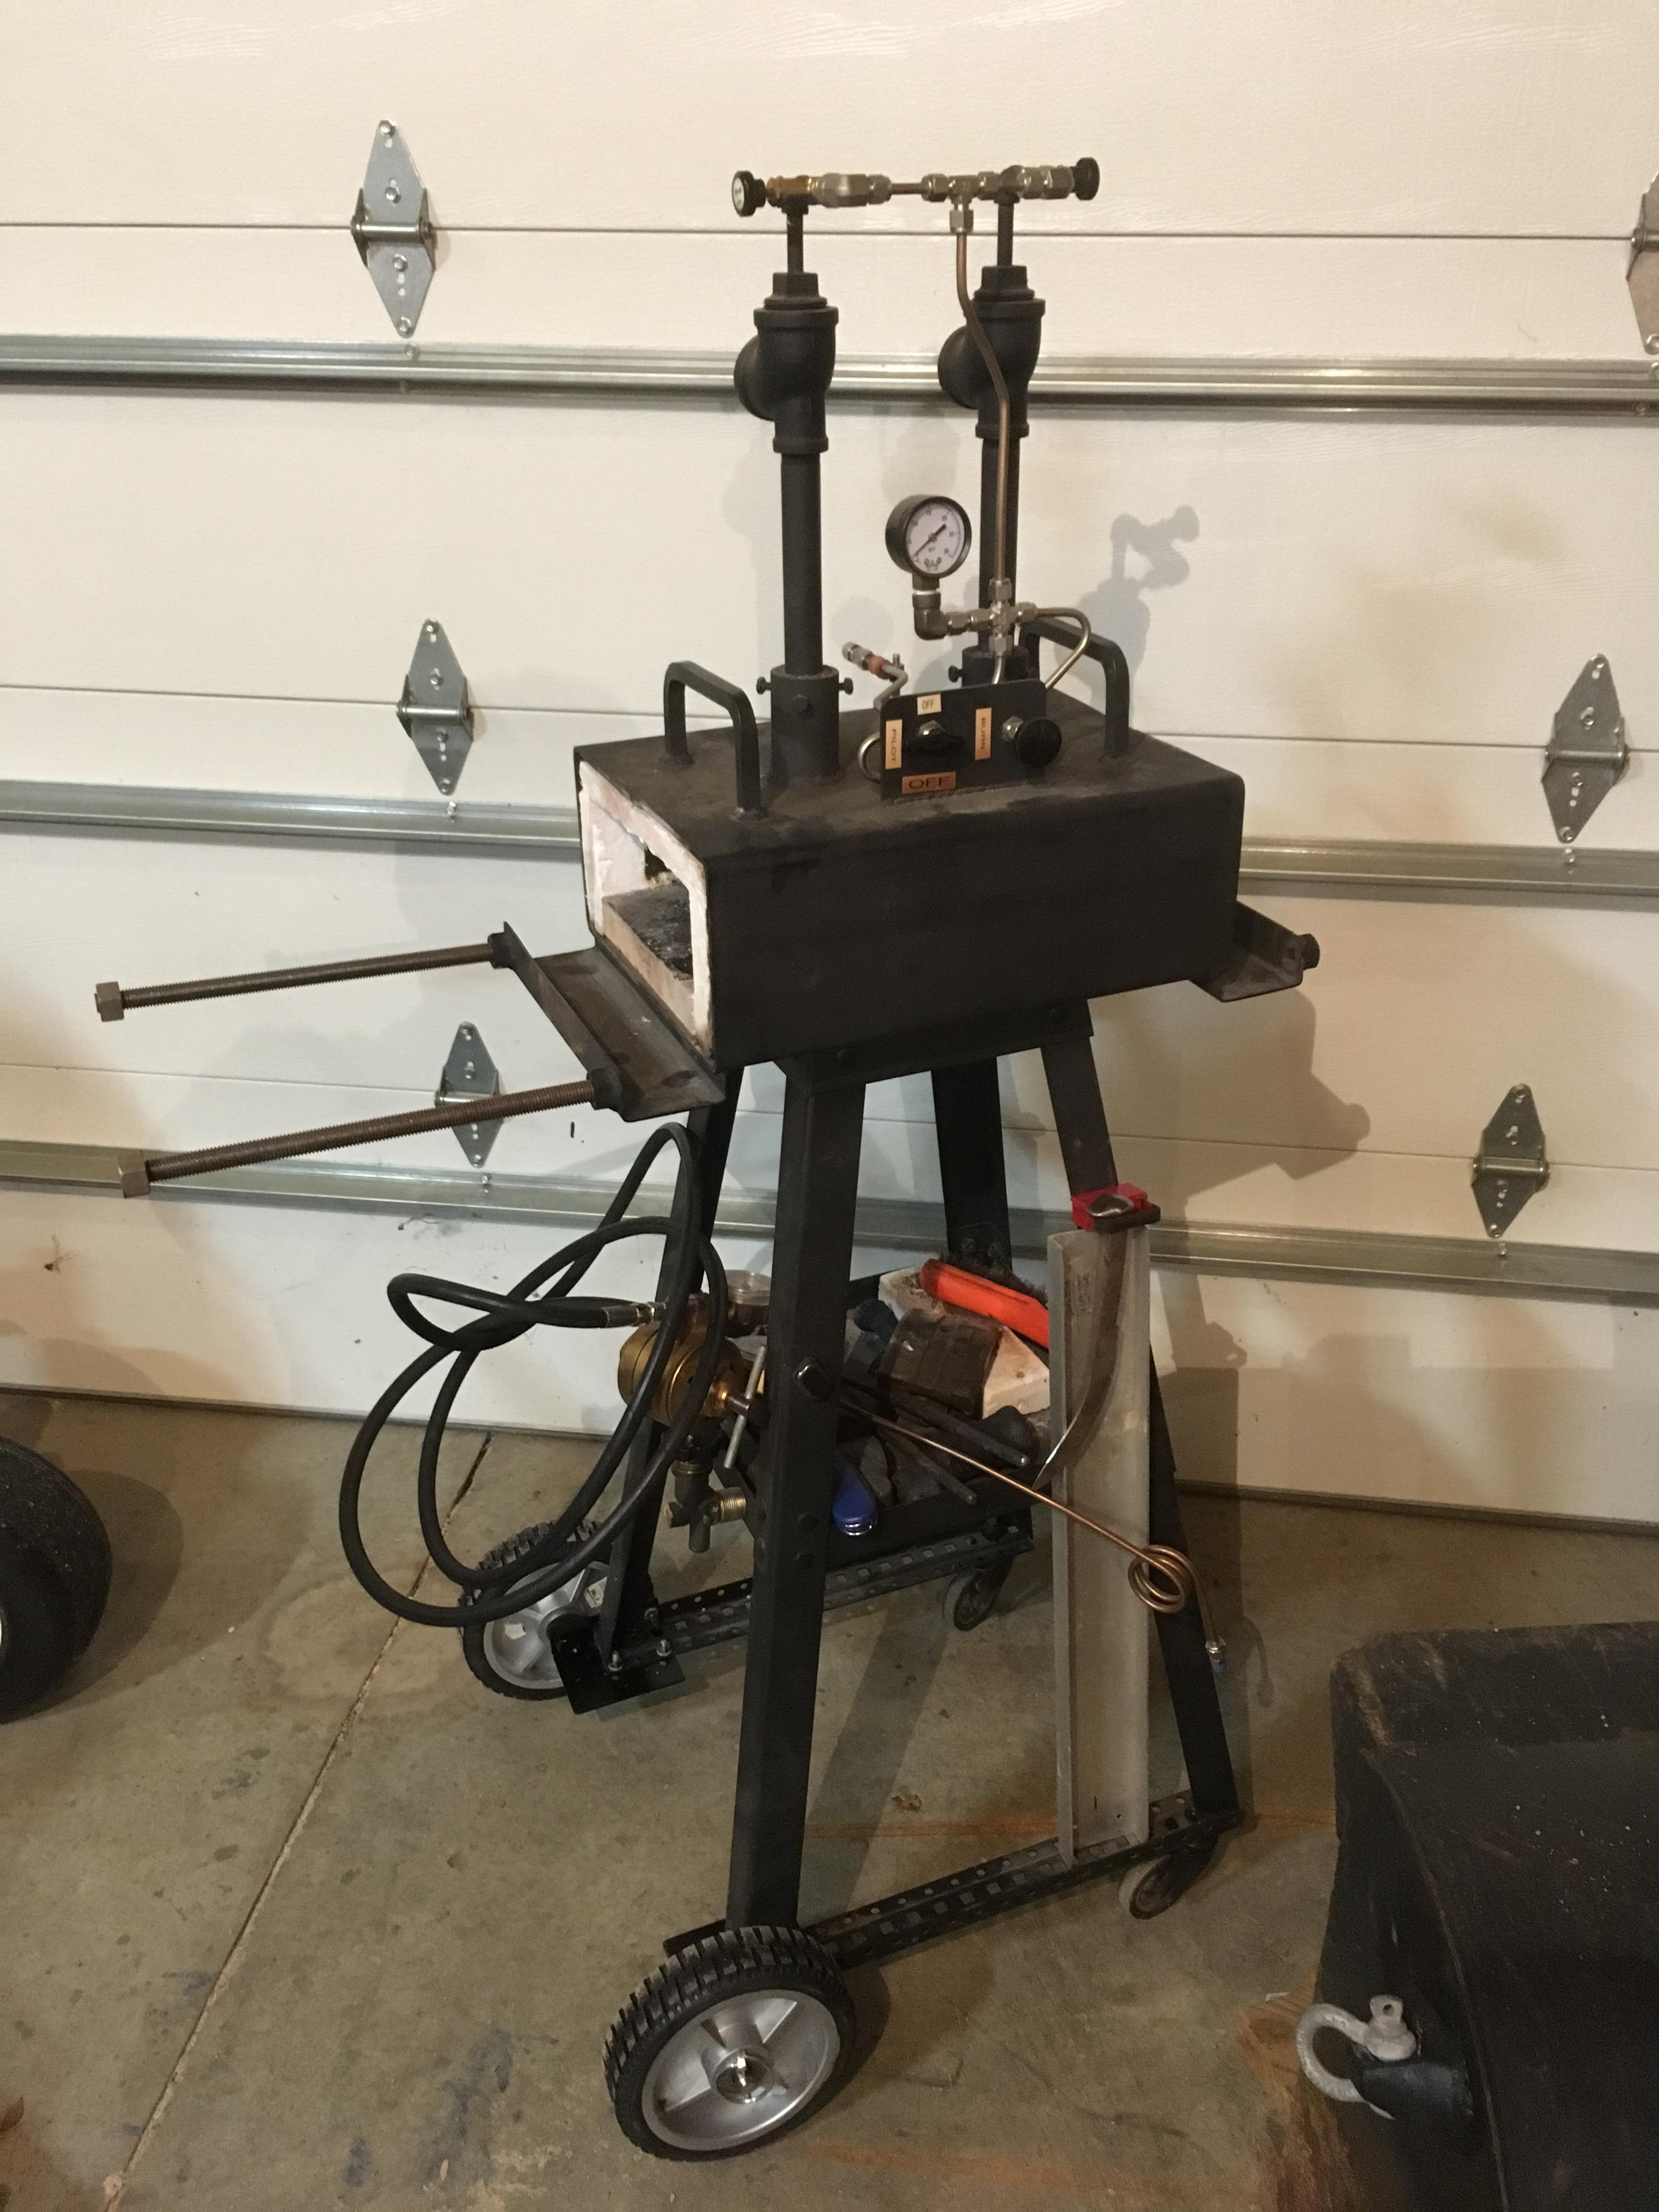
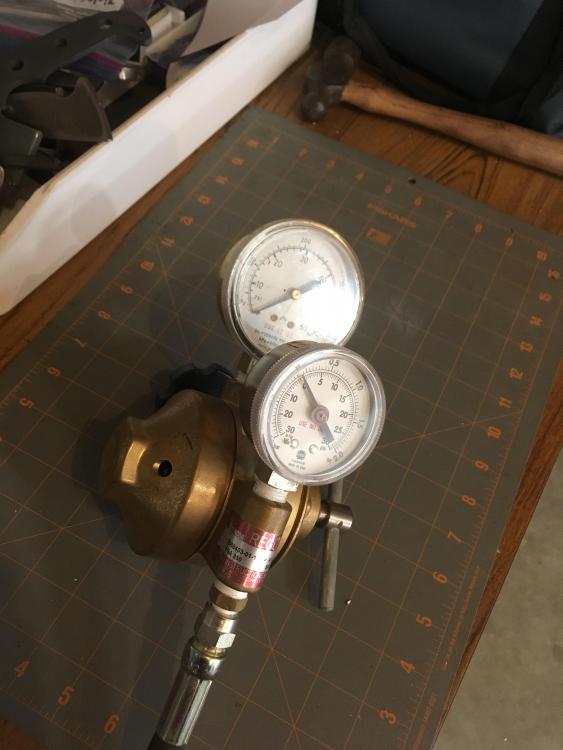
Sorry Frosty - Didn't see your post until now. It's a surplus Lab/industrial regulator I picked up somewhere? Swap or yard sale maybe. Its actually rated for hydrogen specifically - but works fine with propane. It also came with a huge spark arrestor on it - but I took it off for this set up. PS - lol I used gas rated teflon tape.........
-
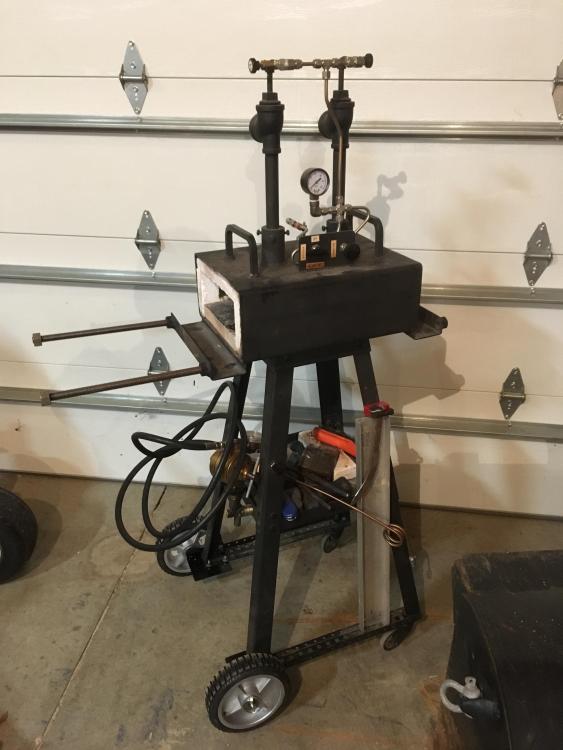
Just thought I'd share a quick picture of my new and improved cart. With spring here, and mud.... I decided it was time to upgrade my carts casters with real wheels so I don't have to fight with it in the gravel driveway. Also, my other biggest pain was protecting my regulator when it is disconnected from a propane tank. I ended up taking a valve body off an old 20lb tank and tapped it for a bolt and cut off the valve handle and then mounted it on the cart leg - so it has a safe storage spot now. The actual stand is from Harbor freight with angle welded onto the bottom for mounting the wheels.
-
I'm glad to hear you located the problem and have it repaired! The data sheet is interesting - thanks. The part that is more interesting to me is the use of a VFD on the press and how much load it takes before it trips. I'm "very" slowly building a new press, and after some price and load calculations, I decided on a single phase 230v 7.5 hp motor instead of a VFD. It was cheaper that way in my case - but I got a good deal from a friend.
-
I like to start small - and then work up to larger component failures. If the press was working normally before your revamp - and now isn't - I have to wonder if any of your modifications are causing it? Please don't think I'm being a jerk - but are you 100% sure you re-piped it with your modifications for the same circuit? Do you have any pictures from before you could compare the piping set up to? Did you bleed the system to make sure there is no air that could be affecting the pressure in the cylinder? (it's a small system - but ....) Are your new remote hoses (or is it tubing?) too small compared to the cylinder? Can you put a pressure gauge close to the discharge of the pump to observe working pressure of the pump? Are the cylinder speed and gauge pressures consistent in both directions of valve movement? Is the relief valve separate ? or built into a control valve? From what you stated, my first impression is that the pump is working ok if you can get the ram to move as fast as you say. I'd say you have either a relief valve leaking or a control valve leaking by to the return. It could even be leak-by in the piston of the ram too. You could very slowly and very cautiously dead head parts of the hydraulic circuit to test for pressure - but that could be very dangerous if you don't know how to do it - so I can't really advocate that for you. Need more specifics about your setup and pics to really say anything more.
-
This question has come up before I think? I remember doing some research one day and these are the two sources I bookmarked. I never got around to purchasing any so idk if the links are still active? 1084 powder is what I looked for when I was interested in this. www[dot]hightemptools[dot]com www[dot]knifeandgun[dot]com
-
For Christmas a family member got me a Fiskars 4lb straight peen hammer with a synthetic handle ( they also make a 3lb version). I was not really optimistic about it at all - but honestly - I really like it. It's really well balanced and doesn't feel like 4 lb, I find myself using it frequently. The head is well rounded and wide for a production hammer and the peen has a fairly large radius. I really didn't modify it much. Granted, I'm a hobbyist and don't spend extended hours every day hammering hot metal - but it feels good in the hand and is holding up well. For a 30- 35$ hammer some may like to give it a shot. When the Fiskars axes came out years ago with the synthetic handles - I laughed them off preferring traditional wood handles. But a friend has one of their splitting mauls and has tried very hard to kill it - and it's still going. Maybe I didn't give them enough credit......
-
Wow! I love cable knives. Great Job! - great details. I pinned that to my knives folder.
-
What's the wire size and amp draw in you're book for a 10hp on 120v ? It has to be huge -lol. Without looking it up I picture a 100a breaker and welding leads -lol. It's smaller than that I'm sure. In my experience in the marine industry (which has to carryover to all I bet) the larger the motor - the more the tendency for higher voltage and 3 phase. Mainly from an economic building choice for the ability to use smaller wiring - thus cheaper building cost. On a side note - one of the first tugboats I worked on was 120V DC and had a 35 hp fire pump motor - and it was HUGE...... it would brown out the boat at startup - even with a 120V battery bank of 8D starting batteries that was connected to the switchboard -- lol. Modern technology has replaced that stuff....
-
My 1.5 Hp motor will pop a 15A 110 circuit occasionally when you really lean on a piece grinding. I'm guessing a 2 hp would do it more. The motor's nameplate should also give a letter code for start up full amps if I remember correctly - some draw way more than you would expect .
-
I use a 1.5 hp continuous duty agricultural motor from Harbor Freight wired for 110V. As long as I use a 20a circuit I don't have any problems and it has plenty of power. It was a cheap motor but is still going strong with no problems after a few years of service.
-
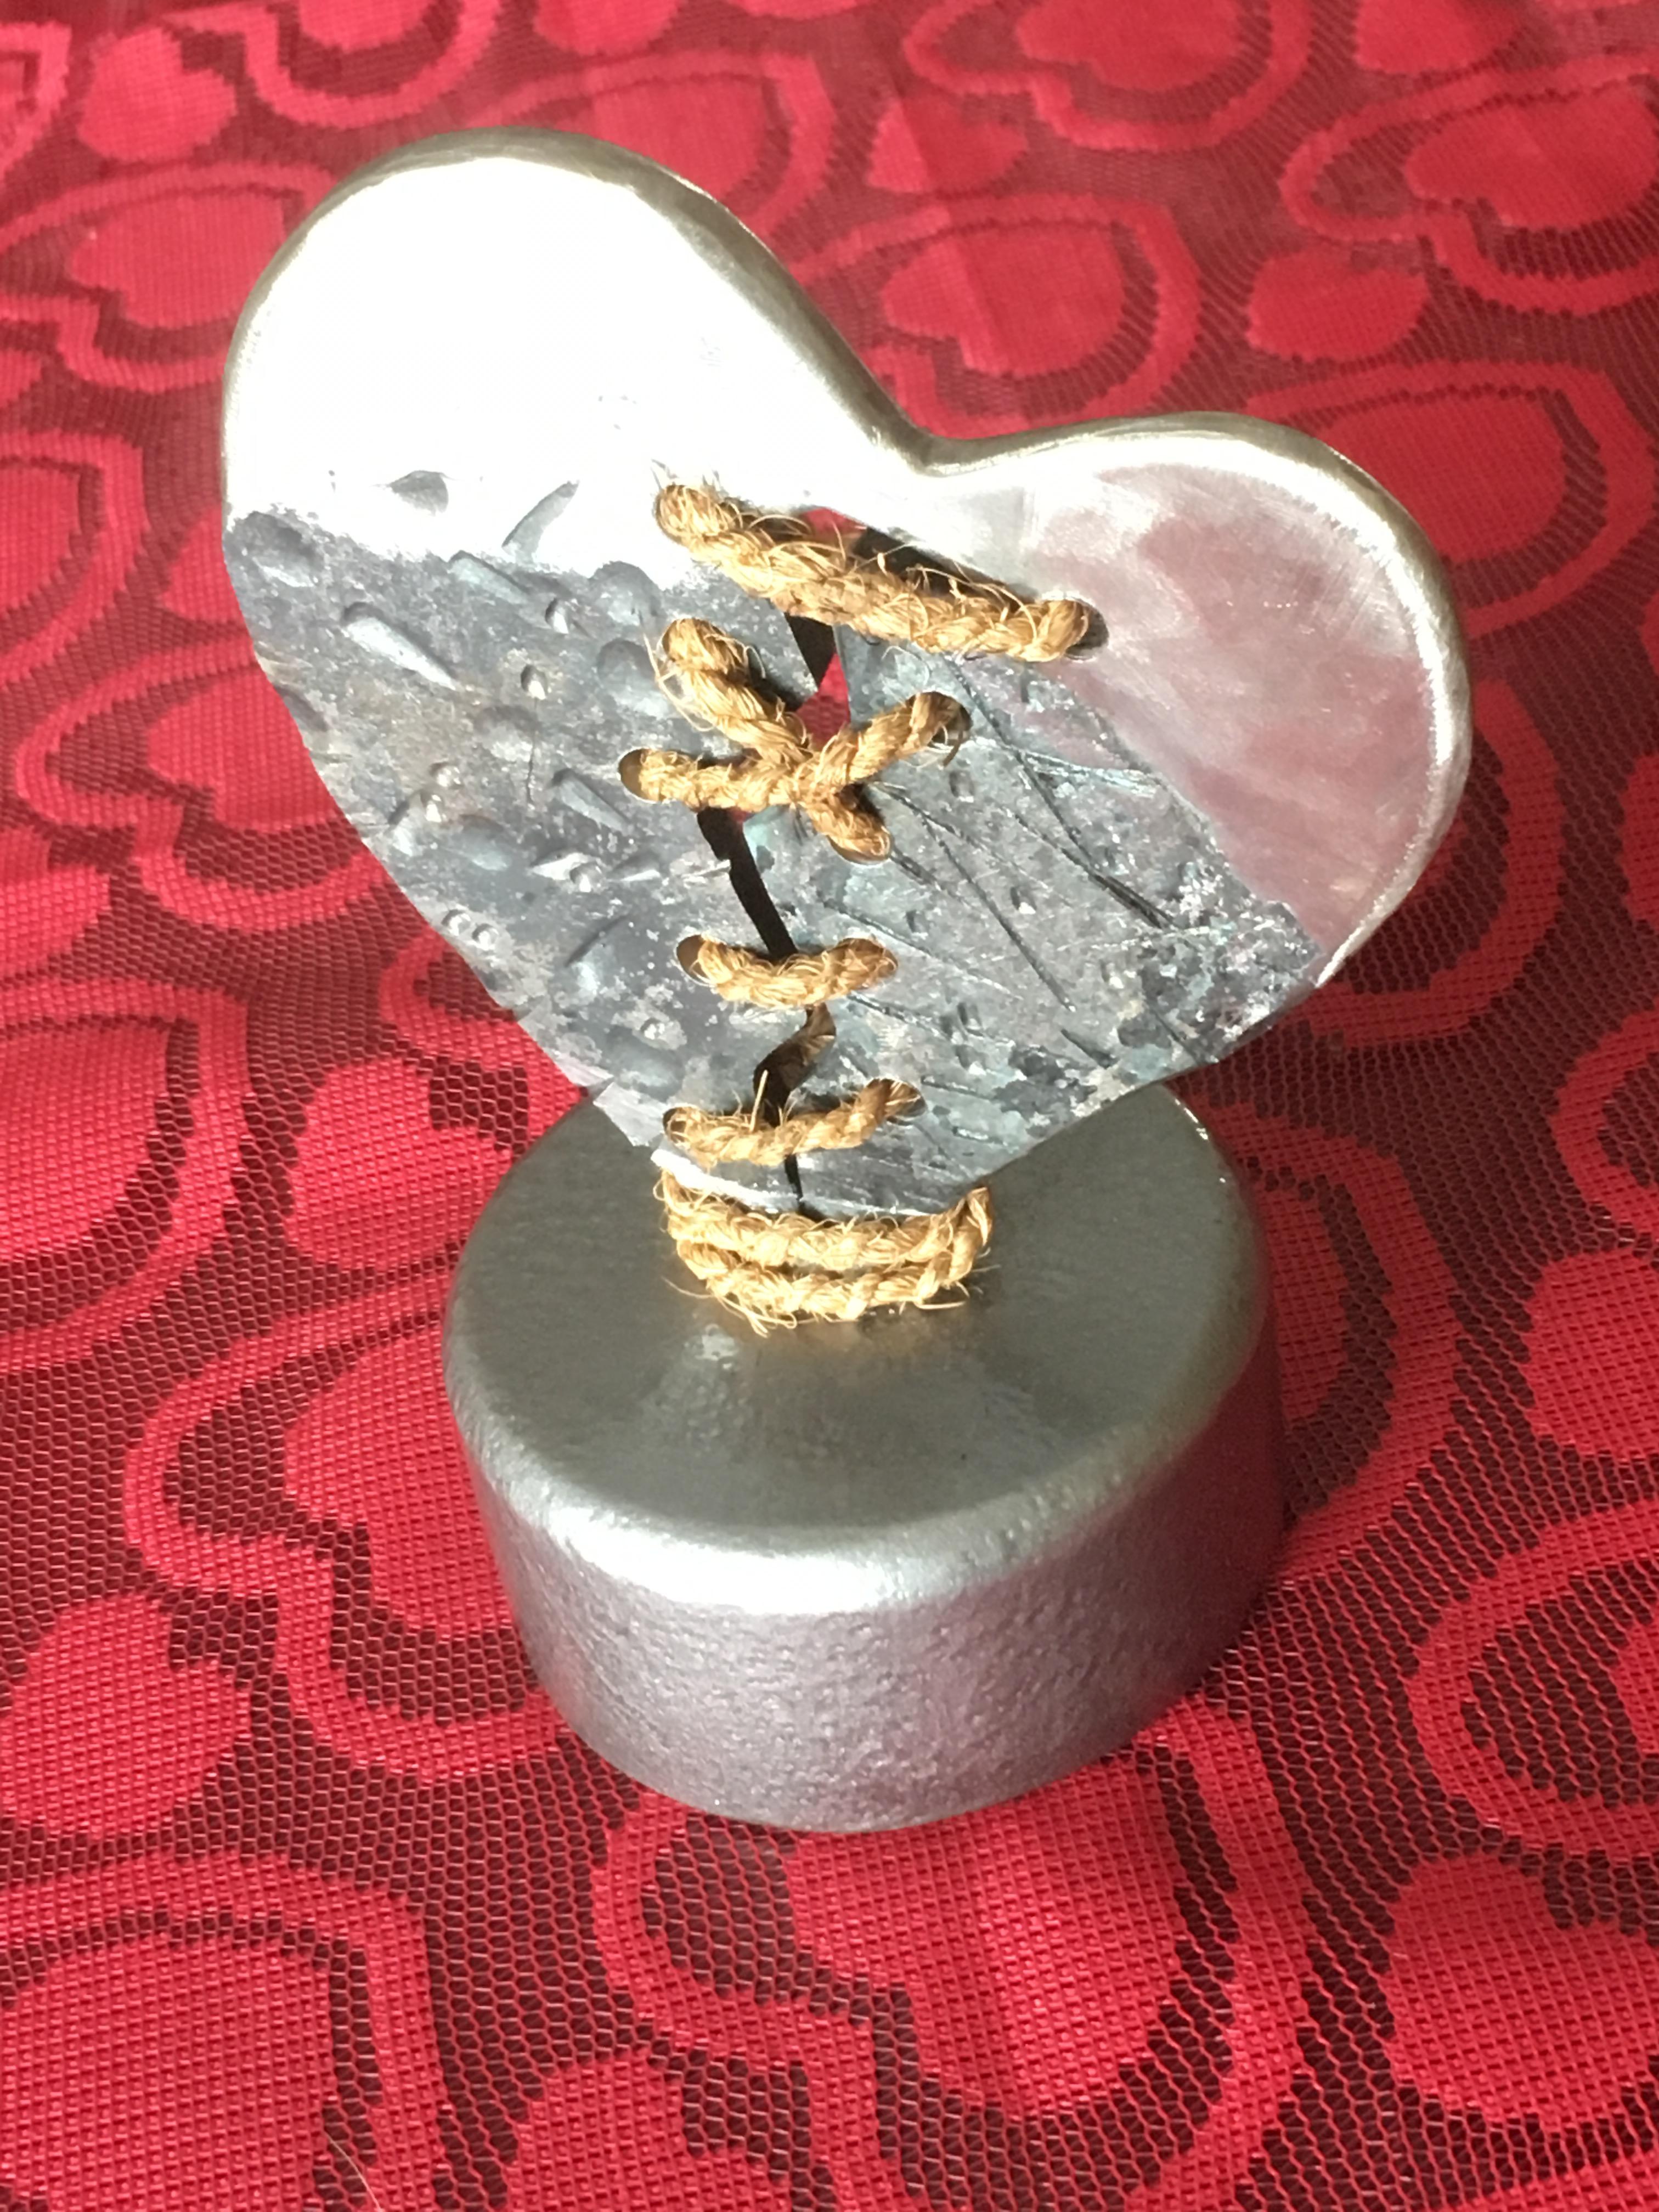
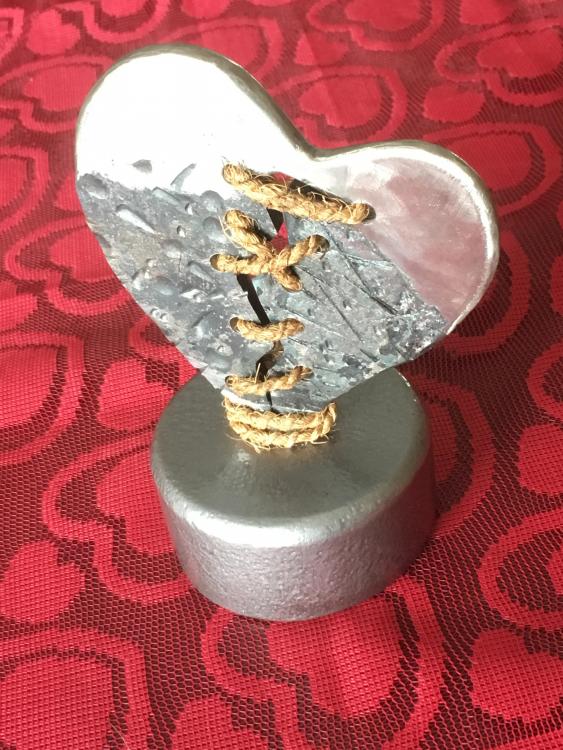
Just wanted to share my sculpture I just finished making for Valentine's Day. Was a fun project to make and pretty easy really. Only minor blacksmithing involved in the bottom mild steel heart pieces for texture and color, and welded to a piece of 316 stainless at the top. I think she'll love it.
-
Notownkid - I also mix 1 gal -50 degree RV non toxic antifreeze to 1.5 gal water for the water can and haven't ever had a problem with freezing in upstate NY - sorry I didn't mention that before......
-
I just purchased a new house with a detached garage for my new shop. I purchased on eBay three 2.5 galllon water can fire extinguishers very cheap - two for the shop and one for the house next to the wood stove. You can buy a small 1 oz additive for a water can extinguisher that will make it produce an aqueous film foam so it can fight type A and B fires (a lot of local fire departments use these and speak highly of the foam additive) - I recommend this to everyone. Fire is no joke - be prepared. the ABC dry chemical extinguishers are very effective - but will make a huge mess - I have them in my shop also in 15# bottles - but will go for the water can extinguishers first every time.
-
Hi 51: I had good luck building my own burners using info from Zoeller forge website. The side arm burners there were well documented and illustrated. Search my profile - I posted some pics of my forge when I built it. http://zoellerforge.com/sidearm.html The only problem I really had was that residential gas grill cylinders would pop their free flow safety device and shut down the gas flow when using more than one side burner. I eventually got a 100# bottle with no flow safety in the valve - and have had no problems since.
-
I don't think you can remove solenoid A - plus it's probably easier to just use it. You could always get a coil for it that matches the pump voltage and wire together through the on/off switch? If port E is a return port and open when solenoid A is energized - I'd just connect the return hose to that port directly (possibly also a good location for a return line filter). B definitely looks like a relief / pressure regulator - but I would still pipe in a new relief (you can never be too safe with hyd pressure) into your pump discharge line D either through a control valve with one internal or an inline one . Pipe the relief outlet back into your return line with a tee.
-
If I'm reading what you wrote correctly - there is only one hose out of the unit? No separate return line? I'm no expert on this setup, But I would say the 2 solenoids are controlling flow to and from the pump and its direction of flow - probably with a spool valve in the pump body. Here's my opinion on this - I'm sure others will give you other ideas too.... I would disconnect all the existing hoses and blocks on the unit piping - and start from scratch - the application isn't what you want. You need a discharge line out of the pump - which you have, but you will need to figure out which position the solenoid on the pump needs to be in (power on or off of coil) to generate pressure. You will need to install a return line connection into the tank so you have 2 hoses - supply and return. Otherwise, you won't be able to operate a double acting hydraulic cylinder through a double acting spool control valve. Obviously this is a simplification of an answer - you will also need to add a relief valve with a hose that feeds into you return line you created to protect yourself, a filter, Etc.... The unit is small, but you should be able to make a small cylinder work hopefully as long as it generates a high enough hydraulic pressure. Do some research online on simple press piping diagrams - and modify your setup for that.
-
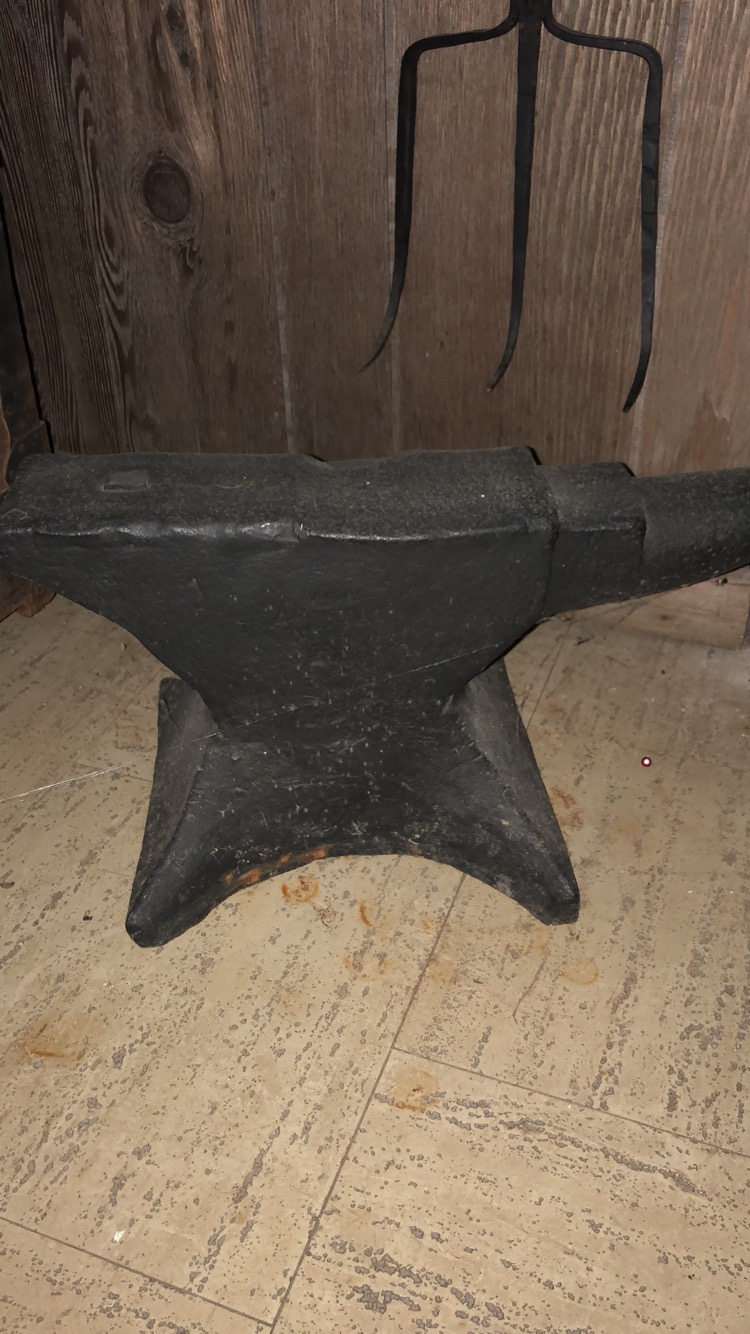
The steel stand I posted earlier doesn't show any noticeable flex when I use it - it's very solid built. (I posted another pic so no one has to scroll back). I understand the design theory and engineering being discussed, but I'm pretty sure steel flexing is the least of my problems in real world conditions. I think a steel stand that is portable has a much larger issue in its movement to the ground. I use my stand in a gravel driveway - and it takes a bit of hammering sometimes before the stand digs in and becomes really set - you can tell the difference in the anvil sound usually too. I can't really comment on using this stand on concrete or other hard surfaces since I don't do that currently - but if you lag bolt it to hard anchor it as most guys do, that problem is removed in my opinion. But, I still think a well built steel stand is only going to suffer negligible amounts due to flexing. I'd be more concerned with problems involving anvil weight compared to the work being conducted than flexing.