tdriack
Members
-
Joined
-
Last visited
Everything posted by tdriack
-
It looks like it was sandblasted clean.
-
I built the larger Zoeller burners a while back - and after experimenting with the burners for a bit - decided to purchase a stainless tip off ebay that was flared and tapped with 3 set screws. I'm not certain what your budget is - but the tip was around 15$ total and works great - I used it as a template for my second burner tip I made. Search - Propane Forge Burner Blacksmith Stainless Nozzle -
-
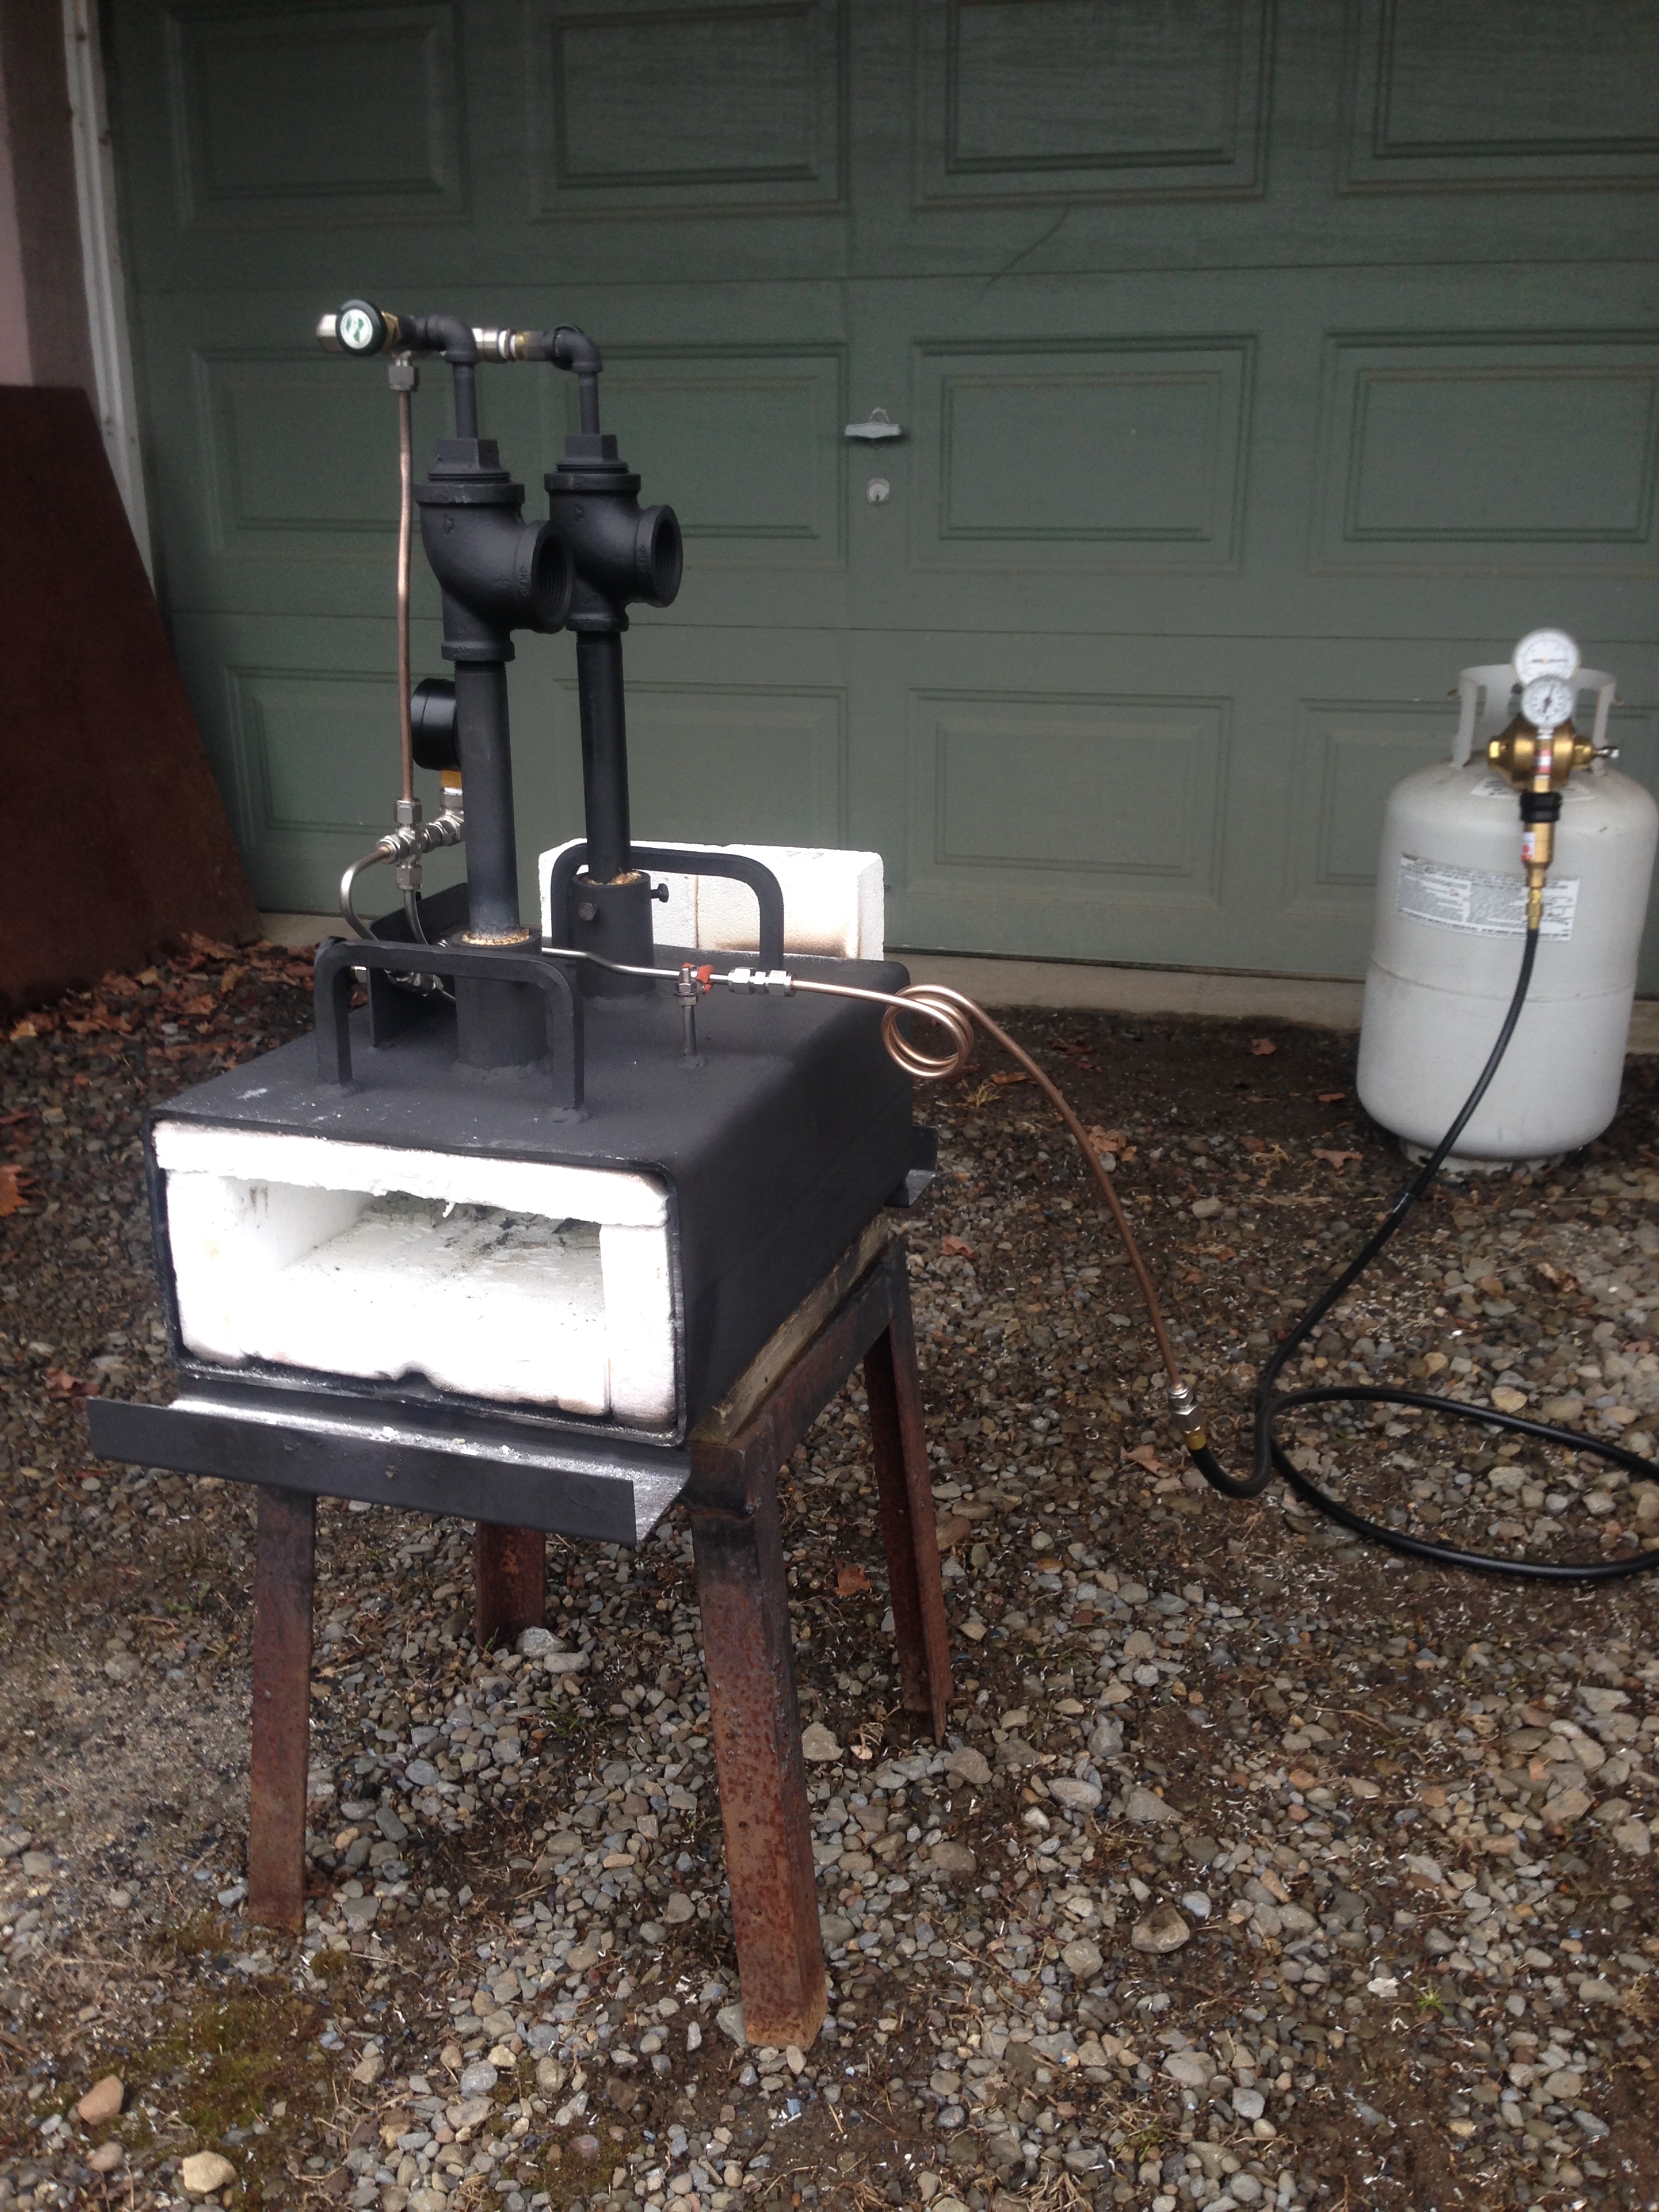
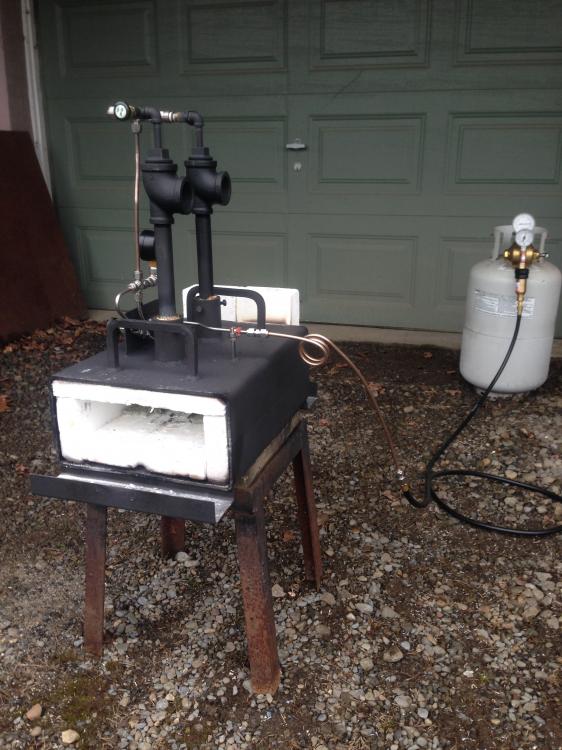
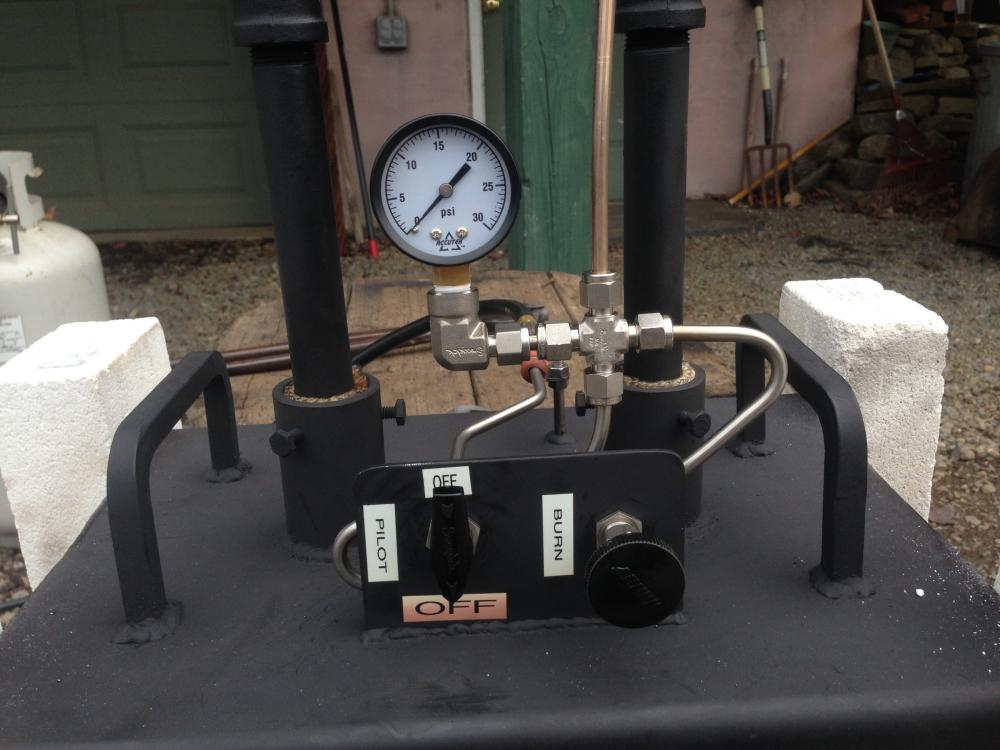
Here you go Frosty Best pic my phone could do with the glare. Also - I'm going to make a new stand to set the forge on - I'm already tired of bending over to look in -lol.......
-
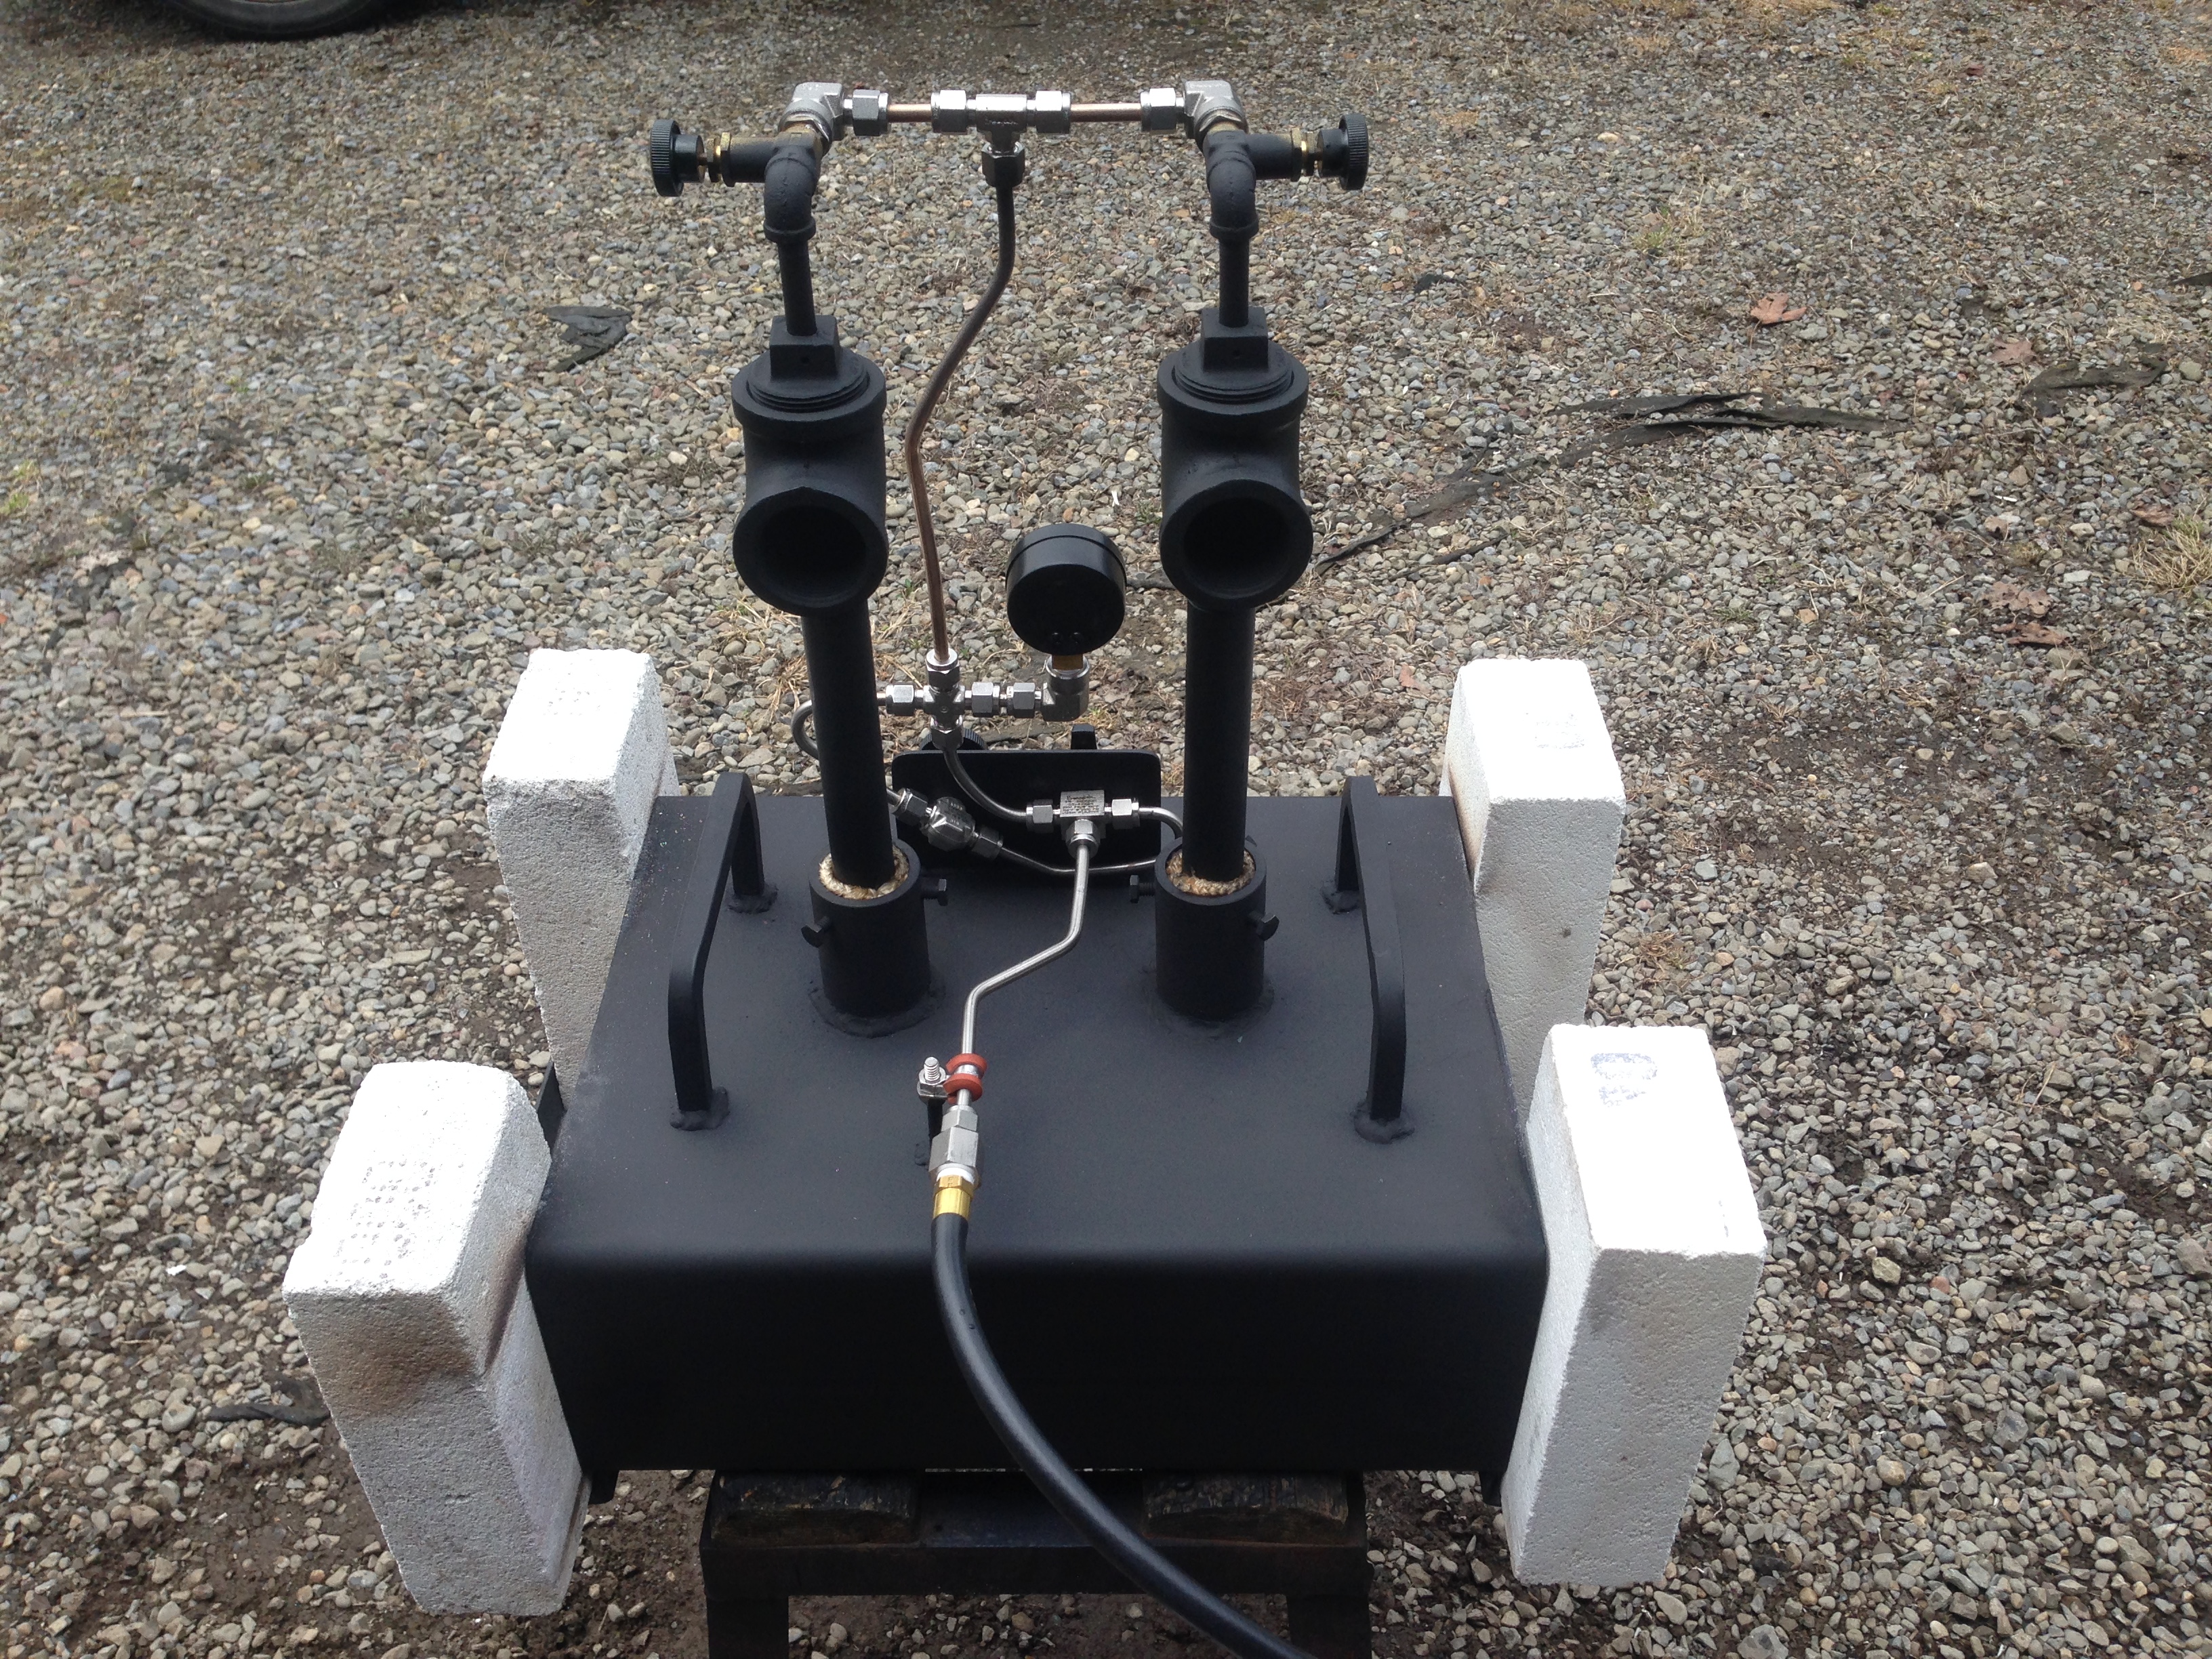
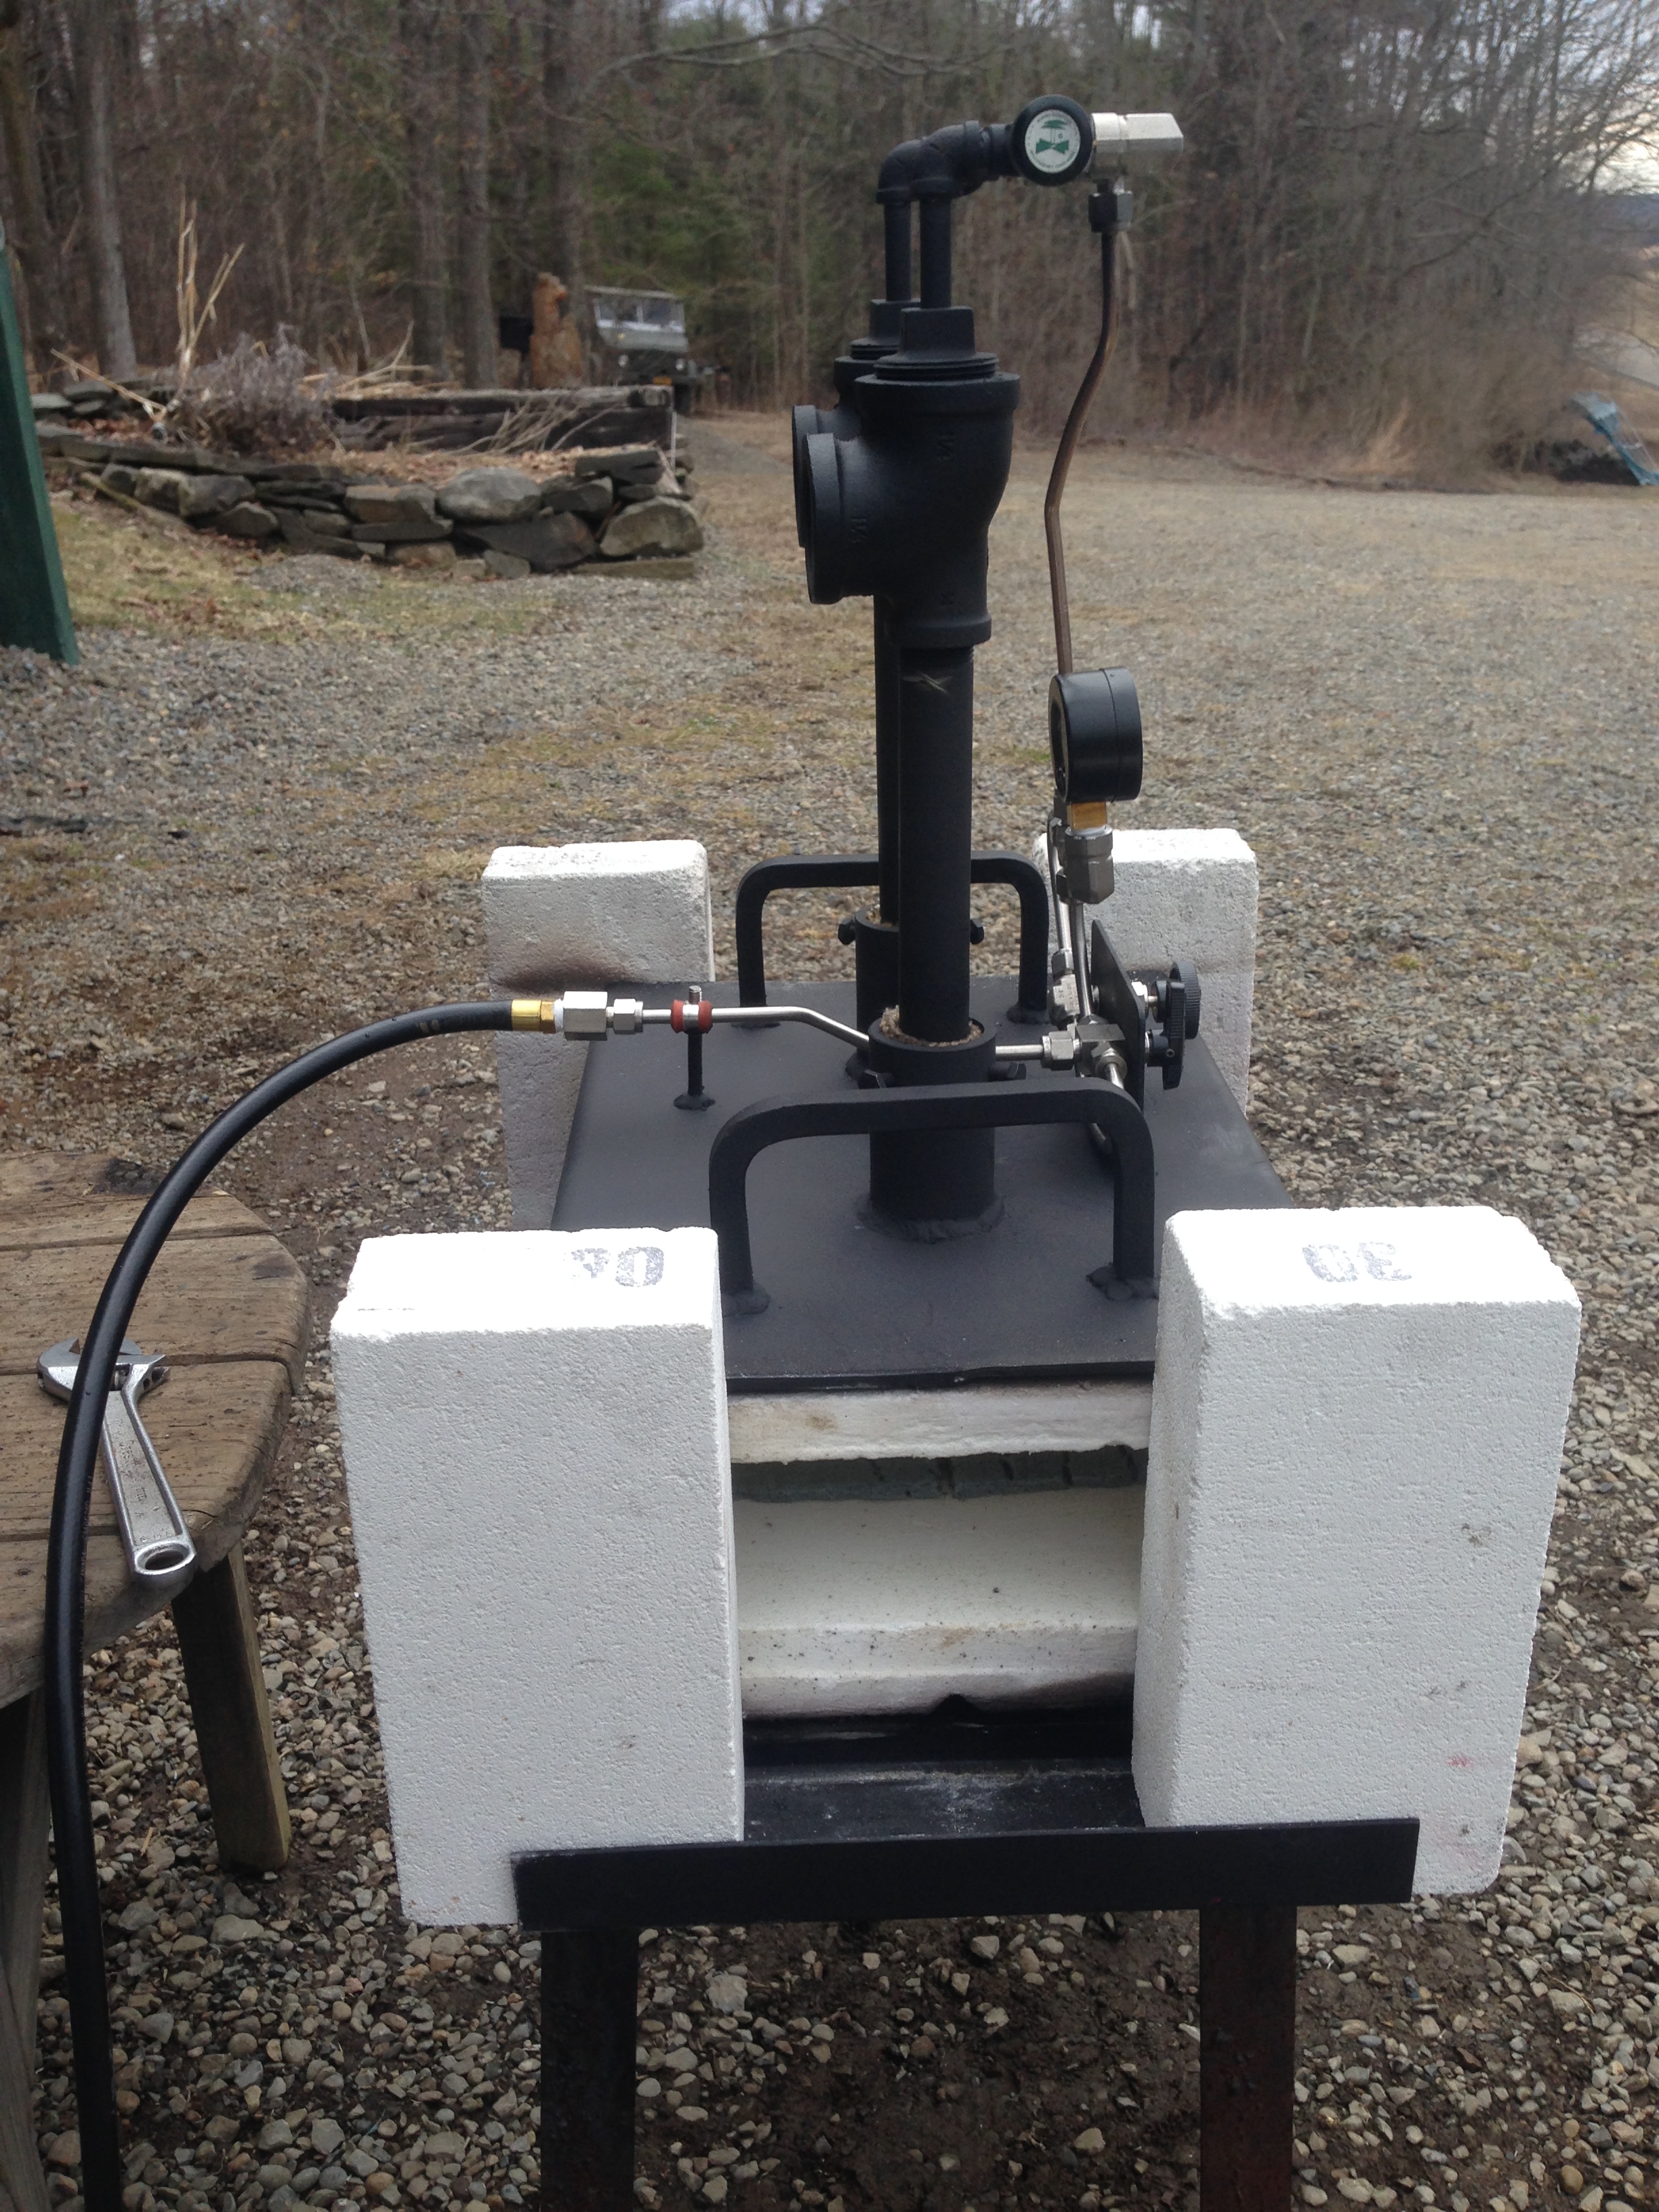
Here's the new hose connection - much safer! I'll try for a running pic when it gets a tad darker out. One of the burner tips was fouled with something and was sputtering - so I had to disassemble it and blow it out / inspect it. For now - I also installed a fitted piece of insulation inside to block the back door. I can pop it out if i need too.
-
Yes! I'm out of town for part of tomorrow - but I'll post as soon as i can - I want to get this squared away and start forging !
-
That's a fair criticism - Thank you! I went with steel to the edge since i'll be moving it around and have been disconnecting the hose when stored. I'll add a length of steel tubing to get the hose farther away - better safe than sorry..... Thanks!
-
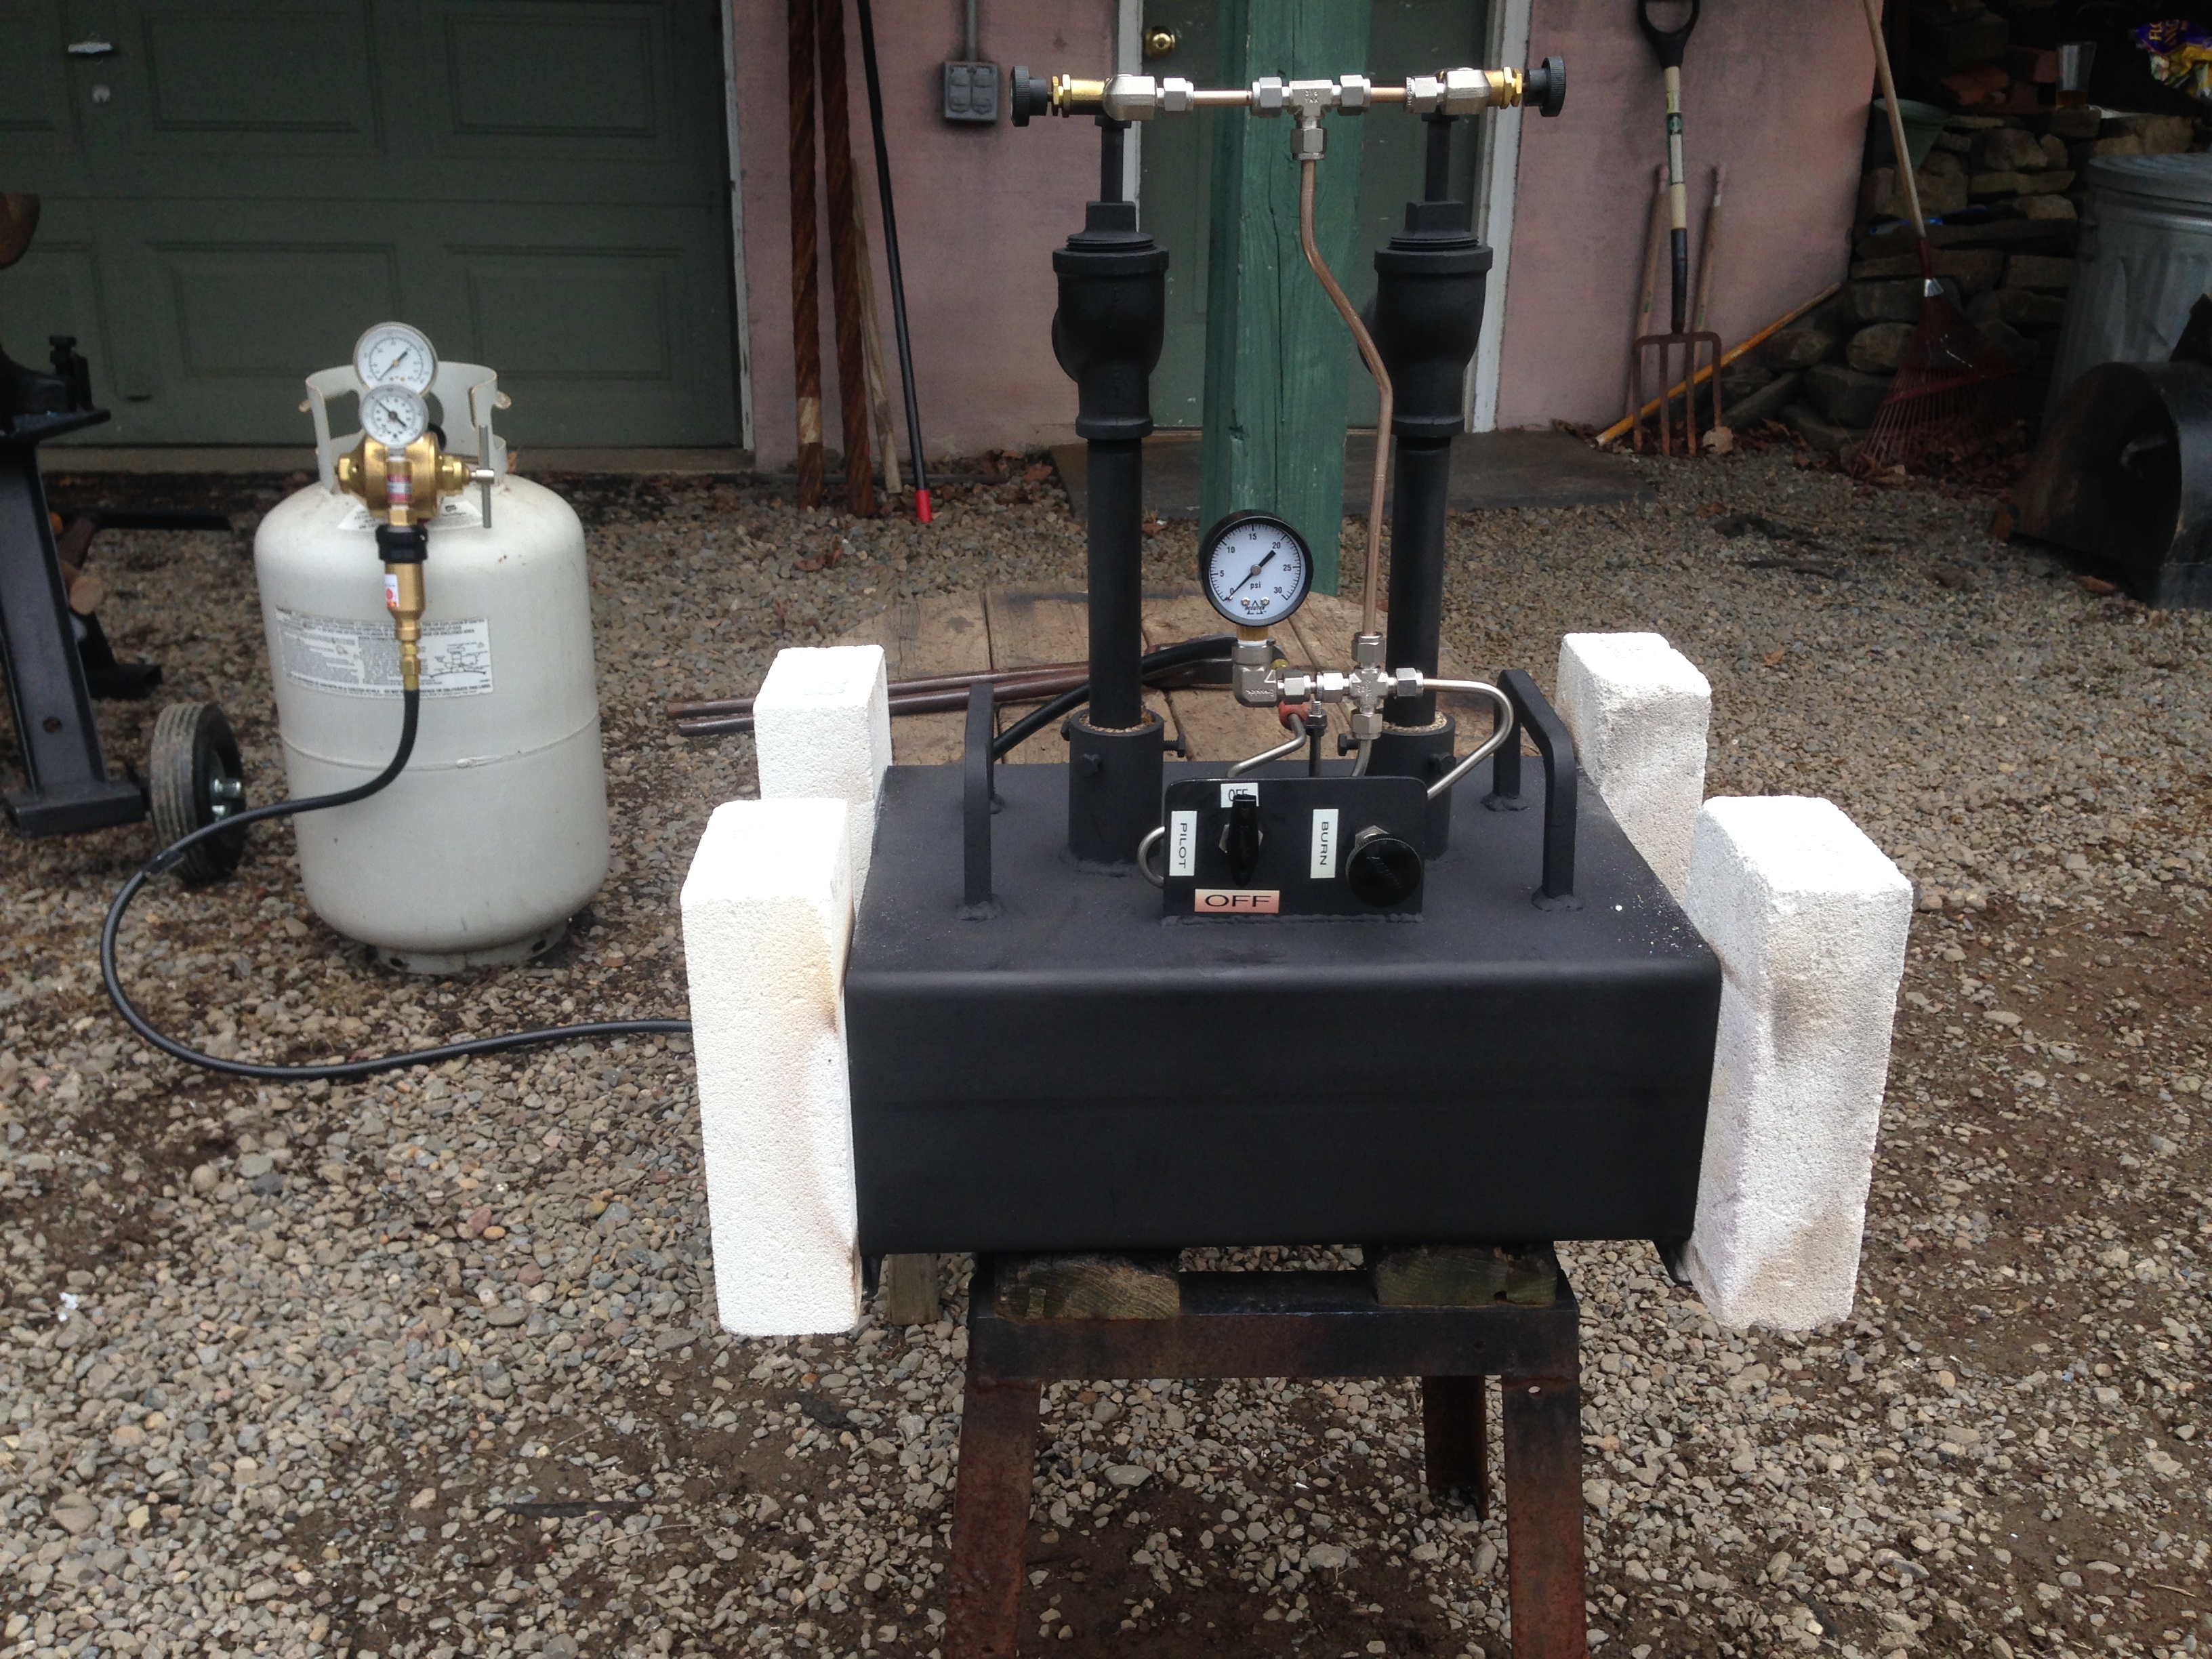
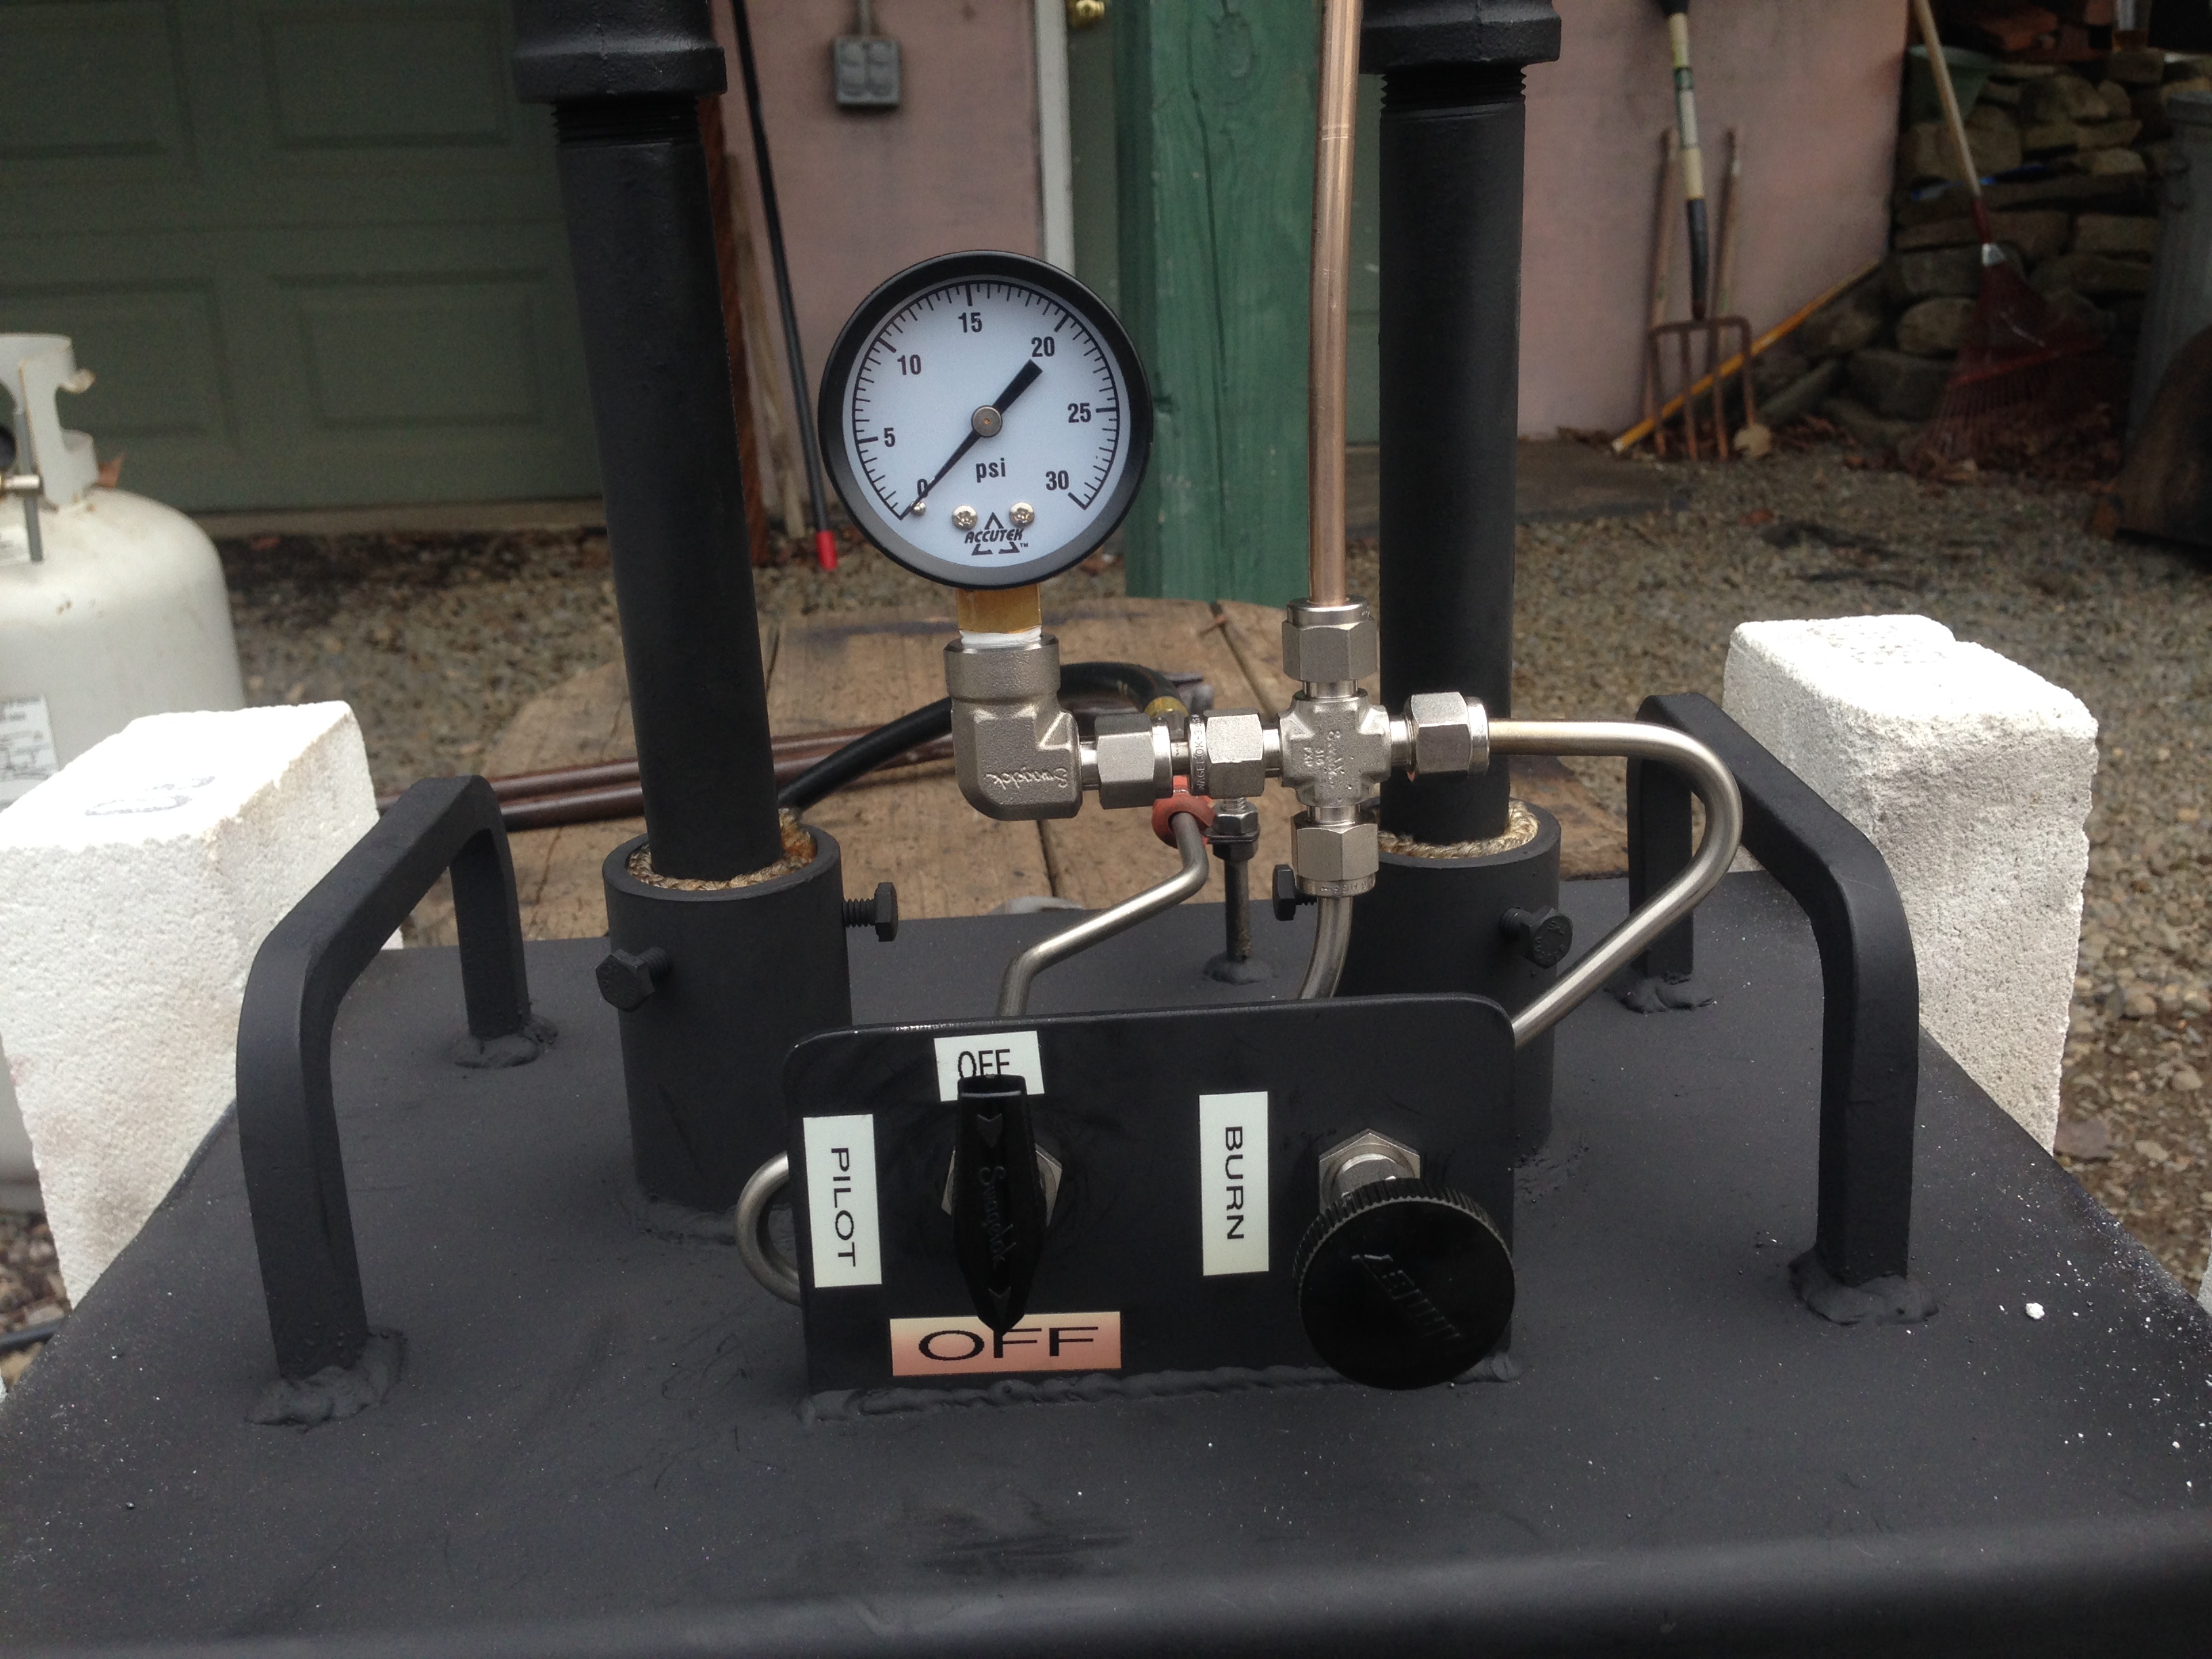
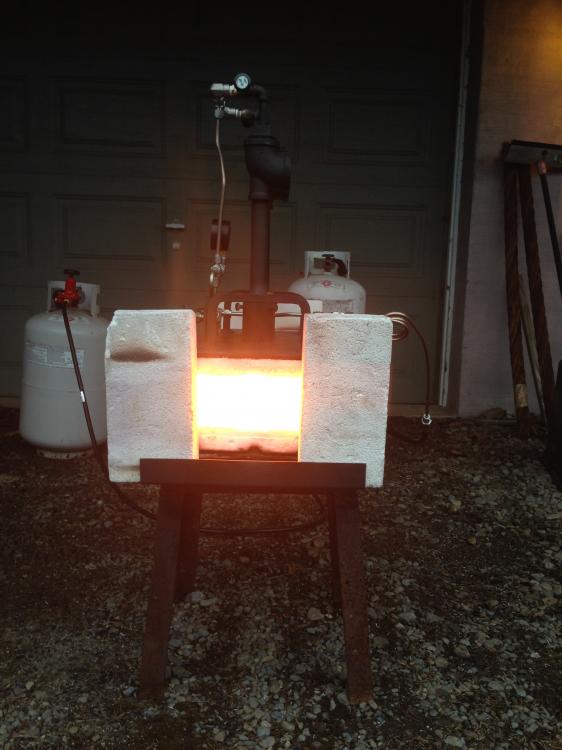
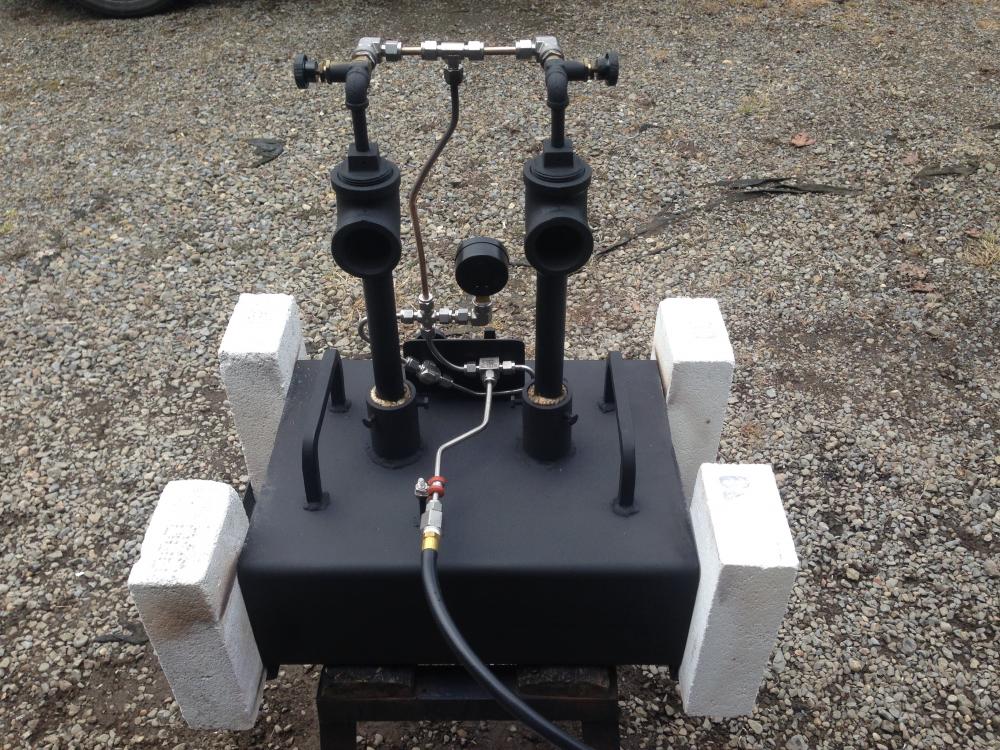
I finished fabricating my new gas forge today! I built it from two 6" lengths of square tubing, cutting off a side on each and then welding it together to make a rectangle OD- 16"x12"x6".The fire chamber is approximately 16"x8"x3" - 384 cubic inches. It's lined with 1 1/2" thick duraboard 2690 I believe (free scraps from a friend) and 4 fire bricks as doors. The two burners I fabricated similar to ones on Zoeller Forge's page. They use .35 mig tips and it will heat 1" square stock very fast. The gas piping has a 3 position valve (Off and two outlets) so I installed a second gas supply circuit with a needle valve that can be set as a lower output pilot for idling while I work. I haven't tried to reach welding temps yet - but i'm certain it will reach it no problem. I need to do some fine tuning on the burners - but at 8 -10 psi - the forge works great currently. I am going to add two air draft swinging covers on the tees on the burners so i can adjust air - one sputtered a little for a bit (covering the tee air inlet slightly with my hand cleared it up). I am very pleased with the forge - the size will be able to do anything I decide to work on at this point. The portability and weight is great and I can have it in my driveway and running in 5 mins. I do need to add a bracket support in the front so I can stabilize pieces of length - I'll tack weld two 3/8" nuts to the door support as a removable mounting very soon and post another picture. I was able to use a lot of free materials from friends and the gas plumbing was found at a yard sale - coffee can full of fittings for like 10$. My total cost for the forge was around 100$ out of pocket! I did a lot of research before building this project - But if i missed something - Please let me know!


-
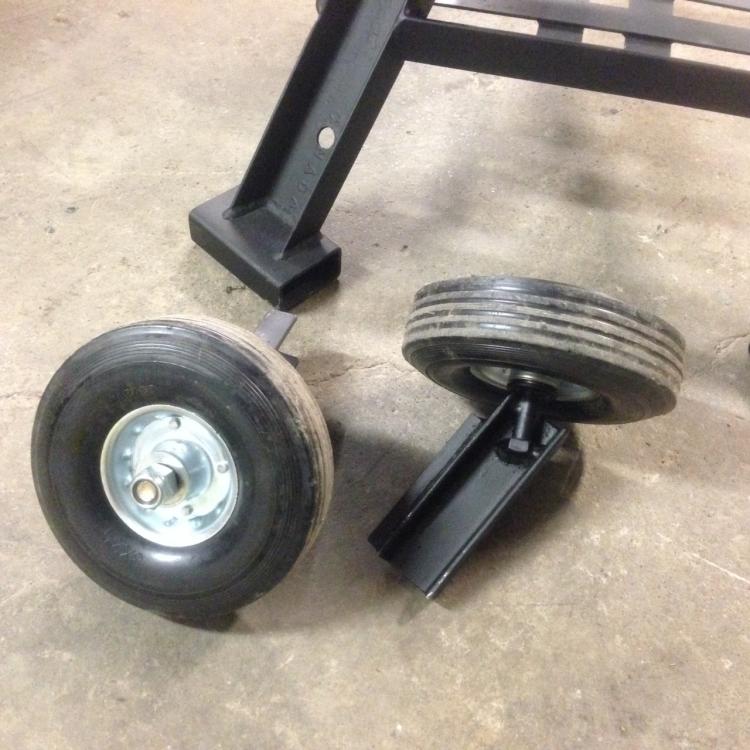
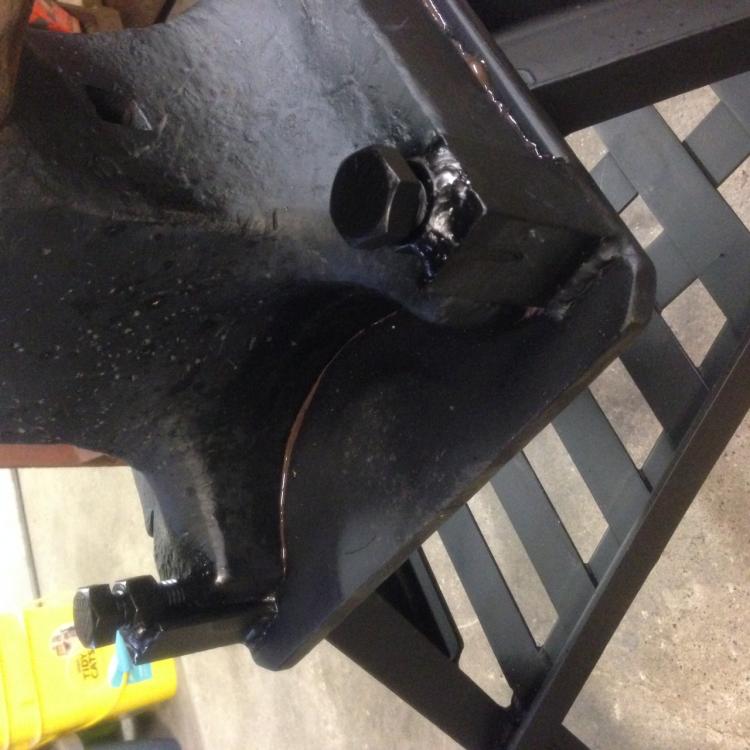
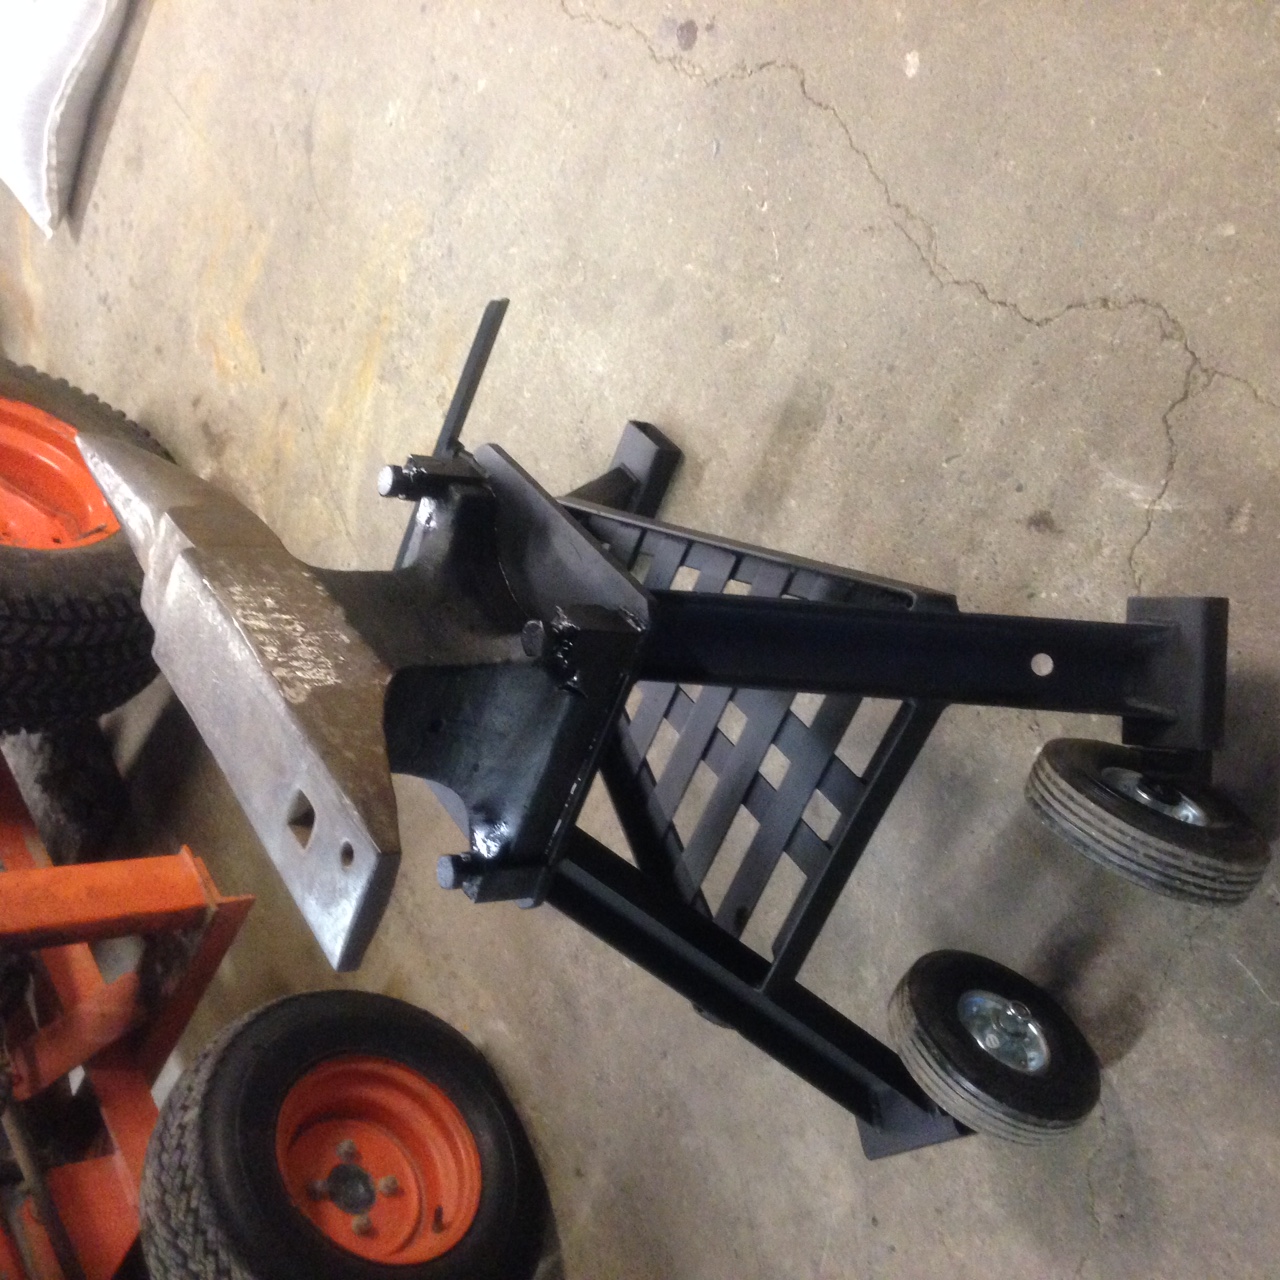
Thanks for all the feedback. The silicone bedding and the bolts tight definitely reduces ring - I had thought about putting a lock washer on the nut - but I'll wait and see how much it loosens over time. I will also be drilling a small hole through the wheel and tubing foot for a retaining pin - when the wheels are placed on the inside position - they tend to slowly walk out while moving. At this point - I'm working outside my garage - rolling in and out only a short distance - 20-30 ft so the short T handle is manageable - I went with its size based on a bolt I had on hand and also so it is short enough to be stored on the hardy shelf. If I ever need to remove the anvil... I'll have to sacrifice the welded nuts and remove them with a cut off wheel. The stand is very stable - I honestly think this will be the permanent stand for a long time - and it was a lot of fun to fabricate. I'm also working on a propane forge built out of two pieces of 10" square tubing and a home built belt grinder - so stay tuned for more pics in the near future!
-
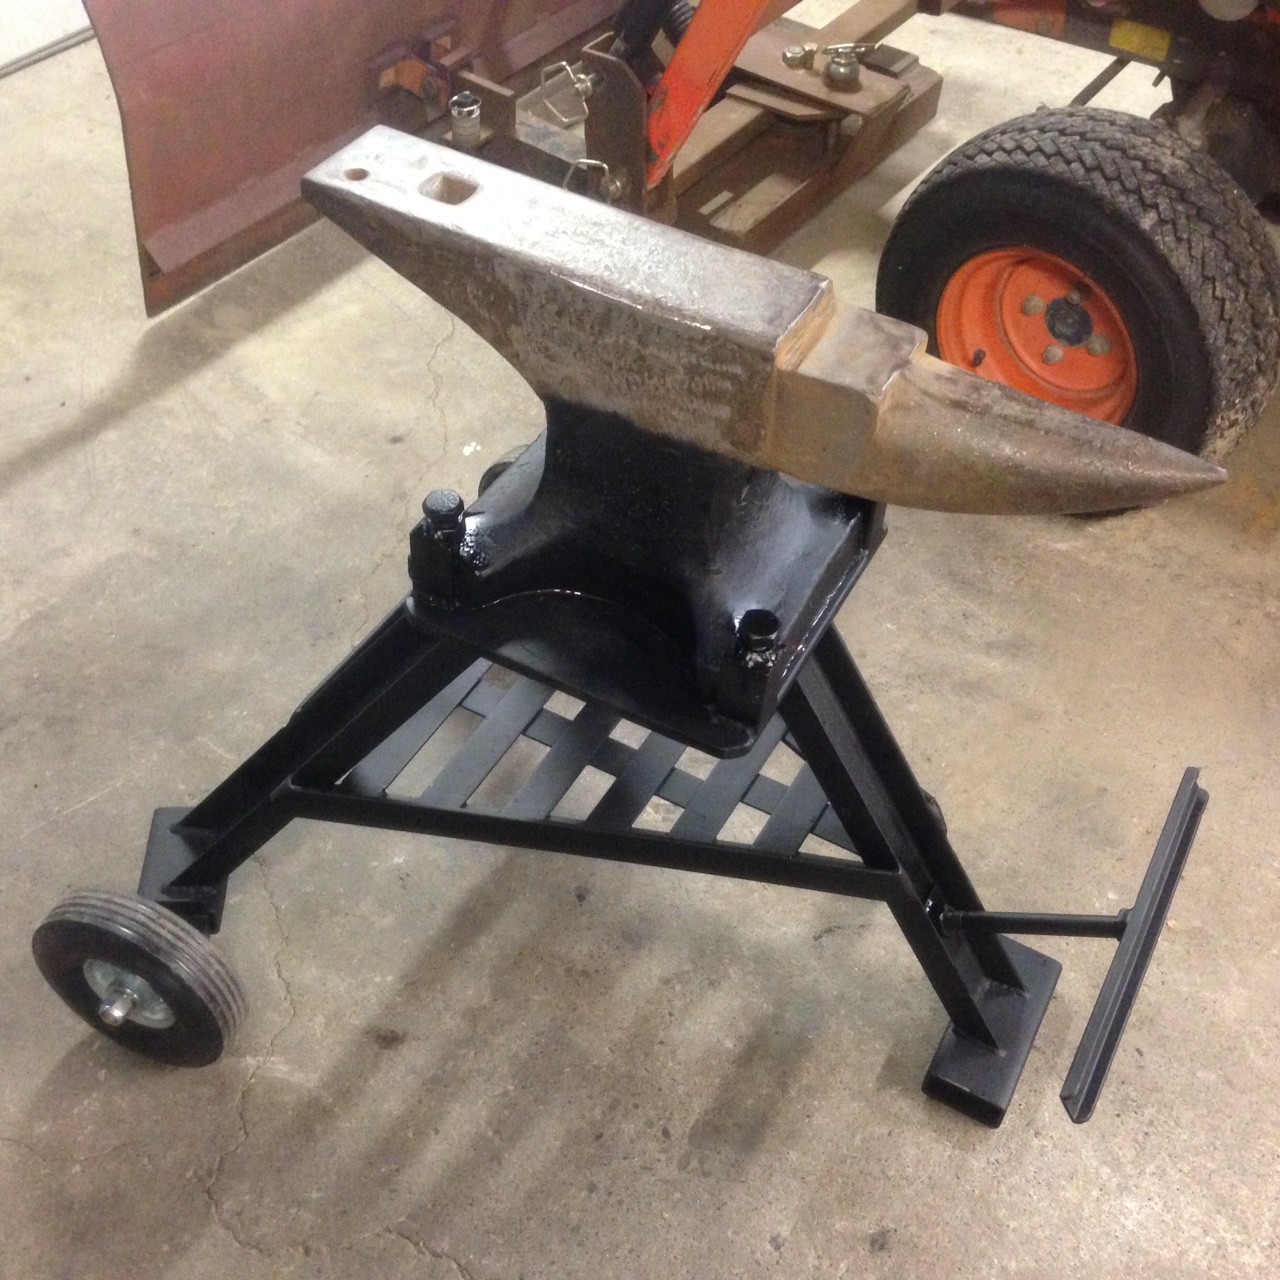
Wanted to share an anvil stand I built for a Hay Budden 162# I found recently (for 300$). I looked at a lot of pictures of others stands and incorporated various details. The wheels are solid rubber from Harbor Freight (6$ each) and they slide into the tubing feet. I showed in the pics how the wheels can be placed inside (so I can take the stand through my 36" basement door) or outside for more stable carting. The anvil is secured to the stand with corner angle iron with a nut tacked to it and a short bolt (excuse the paint on the anvil - I got a tad carried away spray painting). I also bedded it in a layer of silicone calk. The bottom shelf is spaced 1 1/4" square to hold my hardies and various hammers etc. The hardy hole has a clear hole through the stand so items can be stood straight to the ground. I added the removable T-Handle welded onto a bolt for better control carting. Just need to do some dressing on the anvil and I'll be ready to go!