Latticino
2023 Donor
-
Joined
-
Last visited
Everything posted by Latticino
-
What you have described sounds like fan noise from the interior of the unit. You have photographed the wrong side to evaluate equipment type, but from what I can see it appears to be a fairly standard fan coil unit with heating and cooling coils (though heat may be decoupled to a perimeter system). There are a couple of installation/design problems that I can see from the photo regarding noise control: No vibration isolation in the unit supports (should have neoprene vibration isolators on the threaded rod). No flexible duct connection on the supply and return duct connections (actually there is no return duct at all, see below) I usually like to see at least one acoustically lined return duct elbow at the return inlet to help attenuate fan noise running opposite to airflow (at least there is no compressor noise, which would be a lot worse) This type of unit typically is not hung exposed in a finished, occupied space. It should have been selected with all panels internally lined with acoustic material (the "skin" of the unit). I suspect this is a budget unit and does not have this option. Your selection of the "wood-wool" material should help. Other acoustic attenuation materials will also help as well, including fabric wall panels and/or hangings. Adding vibration isolation to the hanging rods is pretty easy and you should be able to do that yourself. Put your hand on the unit while it is cooling to see if you feel any vibration. Another non-intuitive option is to run the fan continuously. The change in background noise level is typically the most disconcerting, if the fan runs continuously it becomes background white noise and can more easily be ignored. Many of these units have variable or (3) speed fans. Provided the airflow is sufficient to prevent freezing of the evaporator cooling coil, you may be able to switch to running it at a lower fan speed. This can greatly affect the fan noise generated. There are other issues with the unit design/selection (including lack of connection to the exterior for code required mechanical ventilation), but I don't want to get too far into the weeds.
-
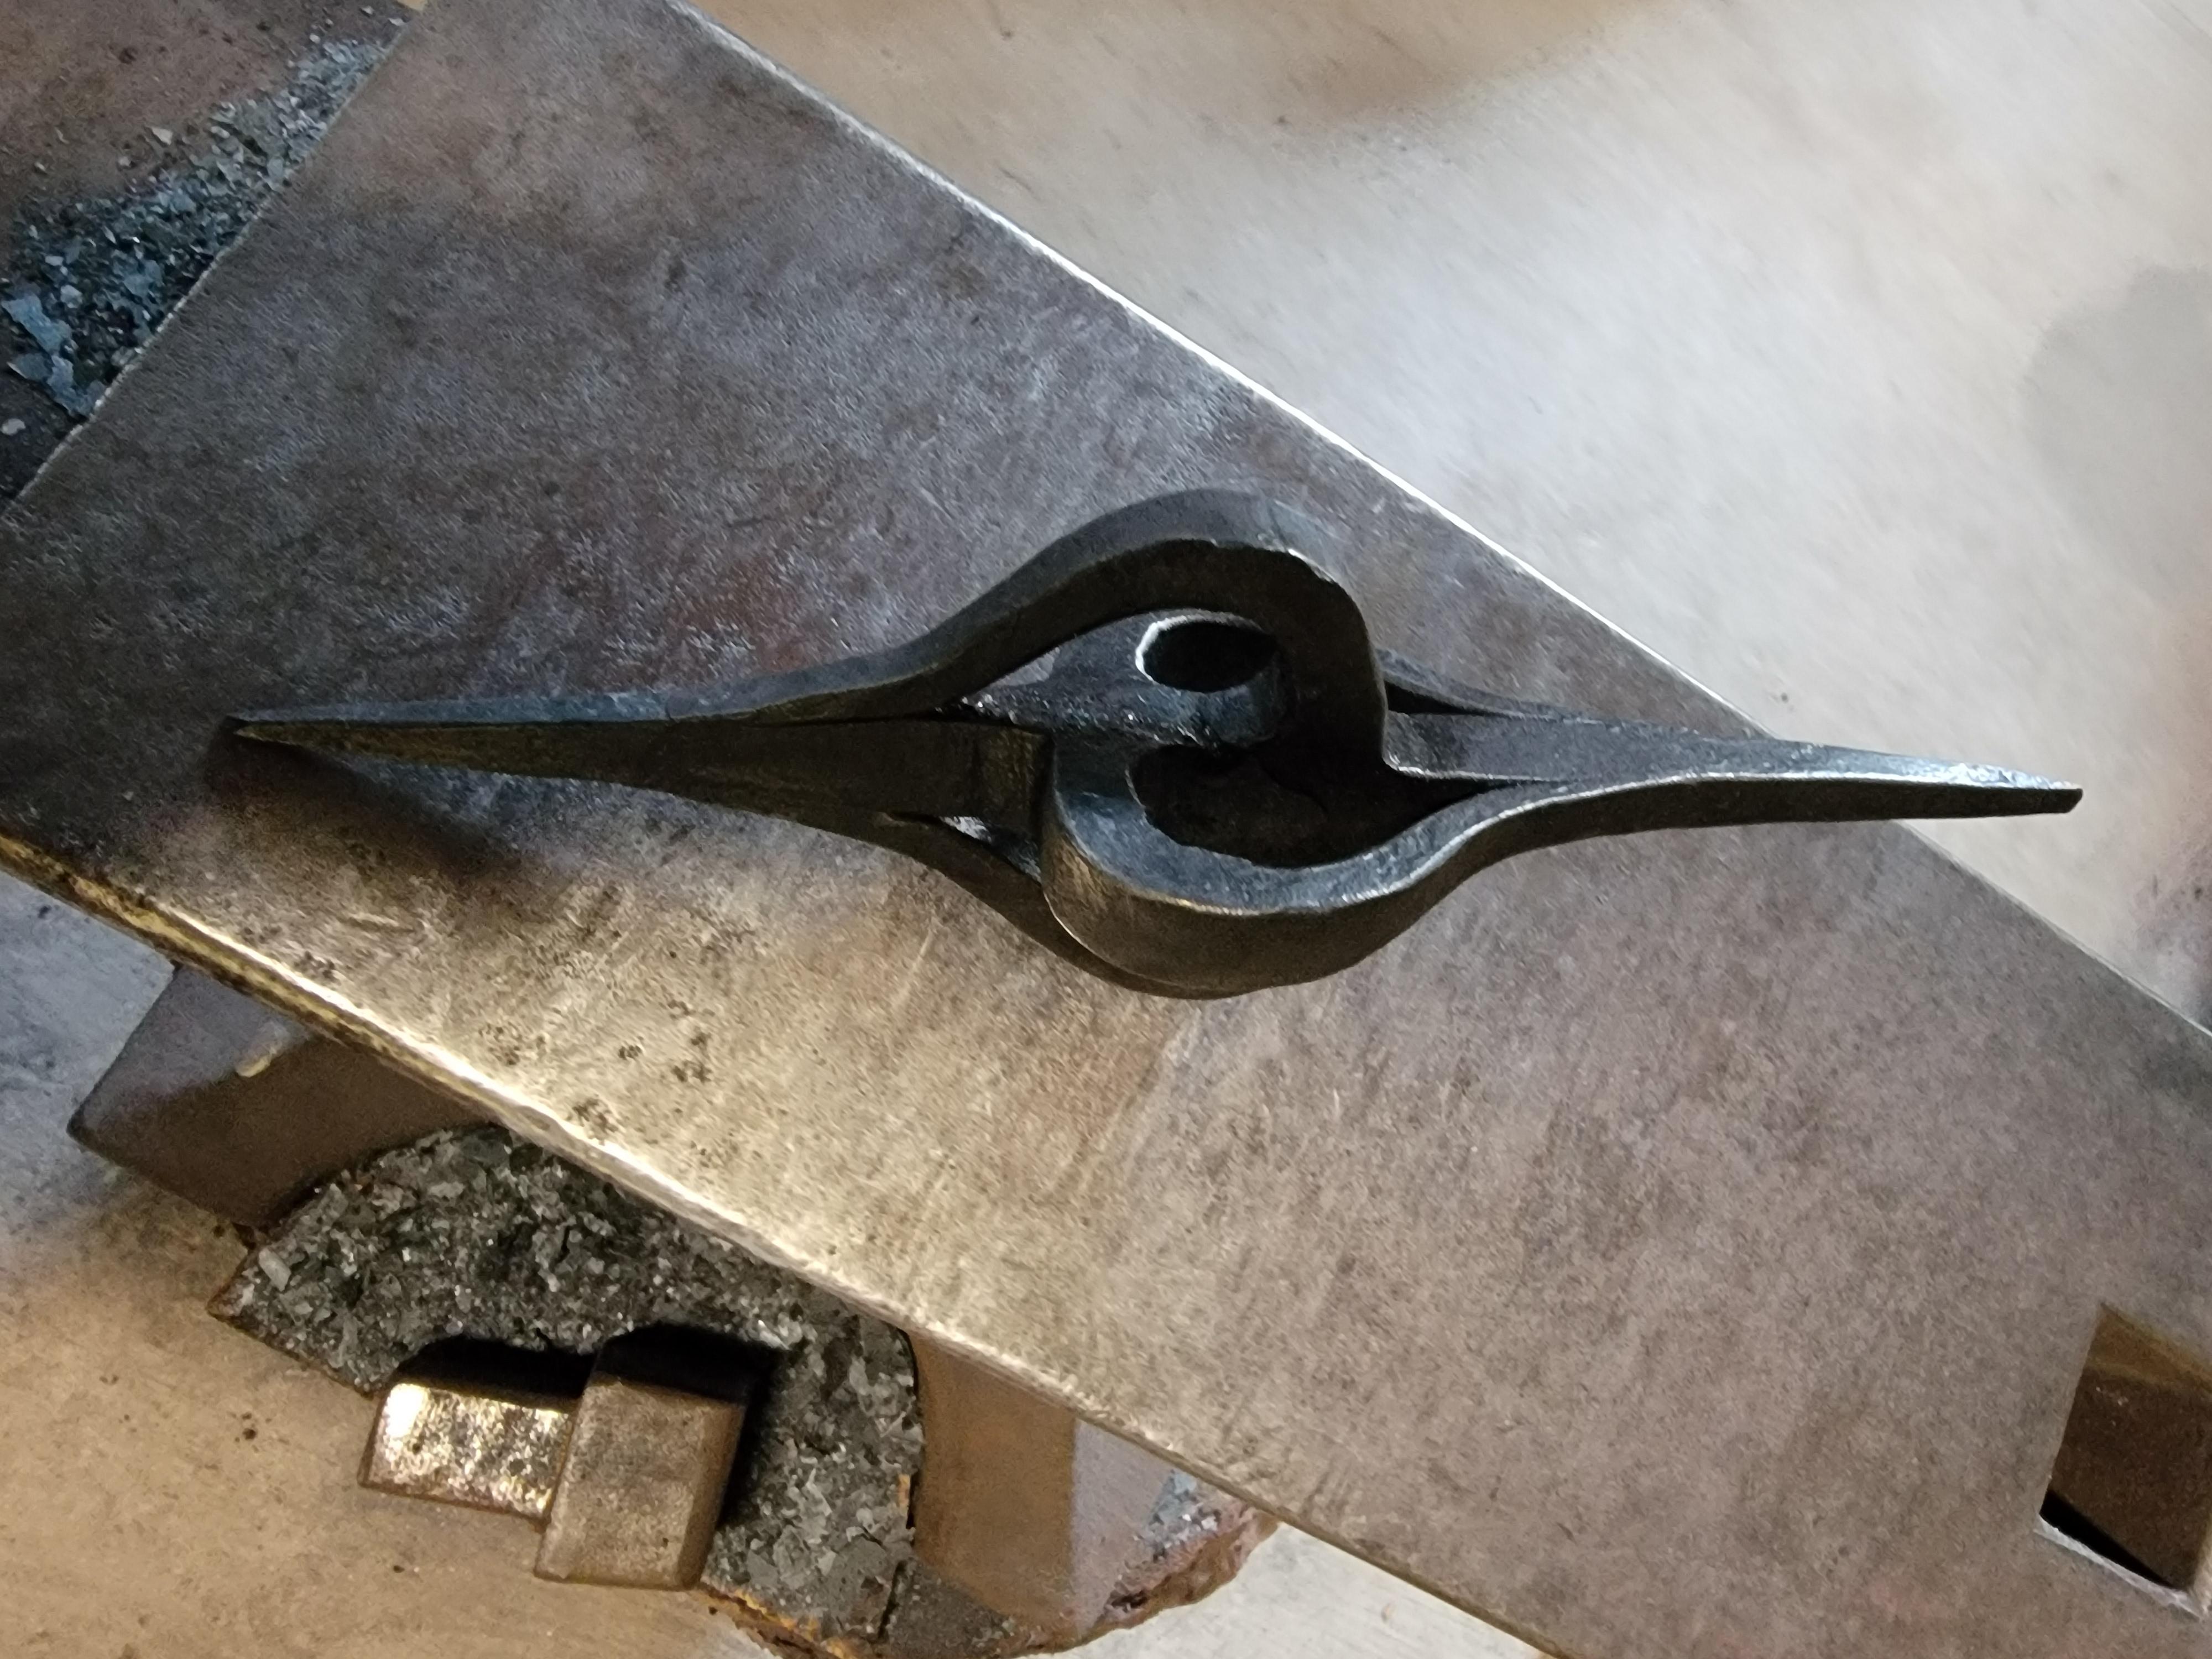
Frosty, I could (and probably should) have used "convenience" bends to allow me to put the different legs into the forge opening more easily, but there were certain conveniences involved in having the opposing arms in line to allow clean drawing out. I jiggered it around to heat sections, but it would have been so much easier with a solid fuel forge. I definitely did the enhanced caltrops style like Alric, but put a lot of effort into radiuses and transitions to keep things proportional and relatively symmetrical. Was very satisfying once I got it all bent up and could get it back into my forge further for the forge weld.
-
Yes, that is basically the way I did it. Of course part of the difficulty was getting it in and out of my 4" square forge opening once the "legs" were drawn out and keeping everything clean and symmetrical.
-
Hefty, That is almost exactly what I first proposed as a solution, and I still believe that it is one option, just not the easiest one. You are extremely close, just recall that the starting stock is 4" of 1" square (I didn't know that when I advanced the solution you listed)...
-
You are on the right track. Starting stock is 4" of 1" square bar. There are more than one solutions.
-
Two. Would have been better executed in a coal forge, but mine isn't setup yet.
-
Today's forging. From a challenge from Peter Braspennix. Tough to do in general, and harder in a gas forge
-
Very glad you got help at an opportune moment. I am hardly a medical professional, but the Cleveland clinic site appears to have some good info on cellulitis for the layman: https://my.clevelandclinic.org/health/diseases/15071-cellulitis . Sounds like something that I will have to look out for also. Appreciate the warning.
-
Well thank goodness for that. My memory sucks also, though I don't have a good excuse. Glad the antibiotics worked for you.
-
Frosty, No worries. You shouldn't feel obligated to respond to every post on the forum, even if your name is mentioned. I know you have a full life outside of this virtual one. I'm not really sure how accurate temperatures need to be during heat treatment either, particularly for the hobby bladesmithing I do. I guess if you are flirting with the edge of the austentitic range, trying to ensure full conversion without excessive grain growth before hardening, or wanting to temper back to a specific Rc level, actual temperature and stability of same could be important. Of course you could also just use decalescence for the former, but I still have trouble seeing that in my forge chamber. Probably tend to run it too hot... Hmmm, maybe I should use that IR gun a bit more.
-
I have one of these, and it does seem helpful, but remember that you are measuring surface temperature of the inside of the forge, not ambient. This will be close, but certainly not exact (might be an issue for very precise heat treatment). I have heard feedback that accuracy can be a little questionable based on what material and material color you are scoping. What little calibration I've done on mine seems to indicate that it is pretty accurate measuring surface temperature of blade stock being heat treated once the steel is outside the forge chamber. When I used to use a thermocouple inside my glass furnace that ran up to 2,400 deg. F during melting I used a 10 or 12 gauge unit inside a high alumina ceramic well. This worked pretty well, but degraded over time since type K isn't really rated for those extremes. Not sure how accurate it was. As Frosty mentioned earlier, it was good for a reference to match expectations on how the material behaves empirically (kind of like a pressure gauge on the gas line downstream of your regulator).
-
Well, you don't necessarily need to throw away the baby with the bathwater, as they say. A 4' forge is a specialty item, and I don't expect that you will easily be able to sell it on (even if unused) without losing significantly. If you can, great, and I would look for one with a chamber that isn't more than 8-12" long for a first forge. If you can't, there are options for blocking off a section of the 4' monster and just using one or two burners. Note that even with 2 burners you still may have difficulty supplying enough propane with a typical 20# propane bottle without it freezing. What kind of stuff are you planning on forging? If the "sword forge" label is what attracted you to this, I strongly recommend you start with making smaller blades to start with. Even with experience doing other metal working, making a good safe-to-use sword is a daunting task. The filing and hand sanding is a major effort, and heat treatment is as much an art as a science. Actually what I really recommend is that you take an in person bladesmithing class (plenty around these days) and get your instructor to give you direct guidance on setting up your own shop if you still want to. There are a lot of good resources in books, and online these days, but nothing beats in person mentoring. Good luck.
-
First question really is why do you need a 4' long forge chamber? Are you doing large scale architectural forgings? Do you have a massive power hammer, hydraulic press or twisting machine? If I recall correctly, even Albert Paley's large forge was only around 24" long. A 4' long forge with what appears to be only 1" of insulation is going to be an awful gas pig. While the ads indicate that the forge is suitable for sword forging, it isn't really optimal in my estimation. The only time you need to heat a long section of steel during forging, in my experience, is when you are drawing out a forge welded billet of pattern welded steel (and even then the 4' is too long). If you are planning on using the forge for heat treatment, the small crossection and spot heating burners won't allow you to easily heat the billet to an even temperature. A high temperature salt bath, muffle furnace or Don Fogg style drum heat treat forge are a much better choice. If I had to have a 4' long forge, I would likely keep the ceramic fiber, rigidize it lightly, then cast an inner liner into it using either Kastolite 30 or Mizzou depending on the planned use. If I was on a serious budget, I would put on a glove, disposable tyvek lab coat ,and just paint it with the presumed satinite coating supplied by the manufacturer in multiple layers. Note: I have used forges with cast, 2" thick monolithic insulation (Kastolite 30 or equal) that acts as an inner liner as well as insulation layer. They work and are durable, but the cast insulation thermal mass does take a long time and a lot of energy to heat up. I believe that the excellent Chili forges use this method of construction.
-
The main problem is that you have tried to use an insulating material for construction and support. Your "roof" wasn't even fully supported by a full width of block. Also, as you found out, these insulating bricks are quite fragile, particularly after firing up to temperature and repeated thermal cycling. It is possible to build a forge using light weight bricks, but the forge frame needs to be designed to keep the bricks under light compression and fully supported by a full width of brick. Note that direct flame impact will also melt the surface of an insulating firebrick and refractory mortar may not save that. Here is a sample, tested brick forge design from Giberson's site (note the compression on the lid): Personally I've had the best success lining my forge with 2" of 2,600 deg. ceramic fiber blanket and an inner 3/4" liner of Kastolite 30. Also, the ends of your burners are exposed to the heat and too far inside the forge. The flare needs to be protected from radiant heat or a ceramic burner head used.

-
You don't think he can find a clean approximately 150 lb anvil for around $1,000? I have an extra 125# Peter Wright in good condition (clean edges - but not sharp- and flat top) that I'd be happy to sell for $550. If he were any closer I'd hook him up with that. I've only been to SOFA once, but I saw folks there with loads of anvils to sell. You probably mean he will have trouble finding an anvil that is essentially N.O.S. for that price. I agree that those typically get snapped up by collectors and prices can be unusual...
-
Most blacksmiths who are concerned about getting an anvil with a perfect, "surface ground" flat face and sharp edges find out that neither is really optimal for typical hot work blacksmithing. A little sway allows for straightening stock with light blows over a dip, and a 1/8" - 1/4" edge radius prevents adding stress risers and cold shuts to your work. Of course there are certainly applications where these qualities are of paramount importance, but there are typically work-arounds. If I felt that those crisp corners and perfectly flat faces were required I would only be looking at a new anvil (and probably a H-13 Hoffman). If I got one of those pristine anvils, I certainly wouldn't use it to cold forge hardened steel items (as you list in your OP) or bending much of anything cold except over the horn. Note that the sharper and harder an anvil edge is, the more prone it will be to chipping. The scrap yard I go to is actually a steel discounter/liquidator: Alro Metals Outlet. They have over 80 locations, including (6) in Ohio. recommend you check them out.
-
If I were in Ohio and looking for an anvil I would certainly attend the SOFA event in September before laying out the money for a new anvil. The tailgating there runs for days and is easily one of the best in the country. In fact I have heard that some dedicated folks actually get there a couple of days before the official event starts and blacksmith equipment gets sold and resold several times during the week. Also, yes a scrapyard is your friend for getting mild steel stock for a Brazeal style anvil. I got a chunk of around 125# to use for a striking anvil for around $75 at my local. Good luck,
-
Magnet will tell if galvanized steel
-
Modern kitchen table tops will almost definitely be Stainless Steel (either 304 or 316). I'm afraid I'm not familiar with vintage/antique ones, but what you are describing could be galvanized steel (as currently used for sheet metal ductwork). I personally wouldn't use that for direct food contact.
-
May be totally wrong, but if I recall correctly these self contained hammers have two sets of pistons. Sounds to me like the pump piston section is making a knocking sound when under load. Could be slop in the crankshaft bearing, but hopefully not that. Alternately, it could be the top of the ram is colliding with the top cover. Might just have to replace the top gasket to get the buffer working again. I'd try bubble testing the joint to see if there are any air leaks. That would be a pretty easy fix.
-
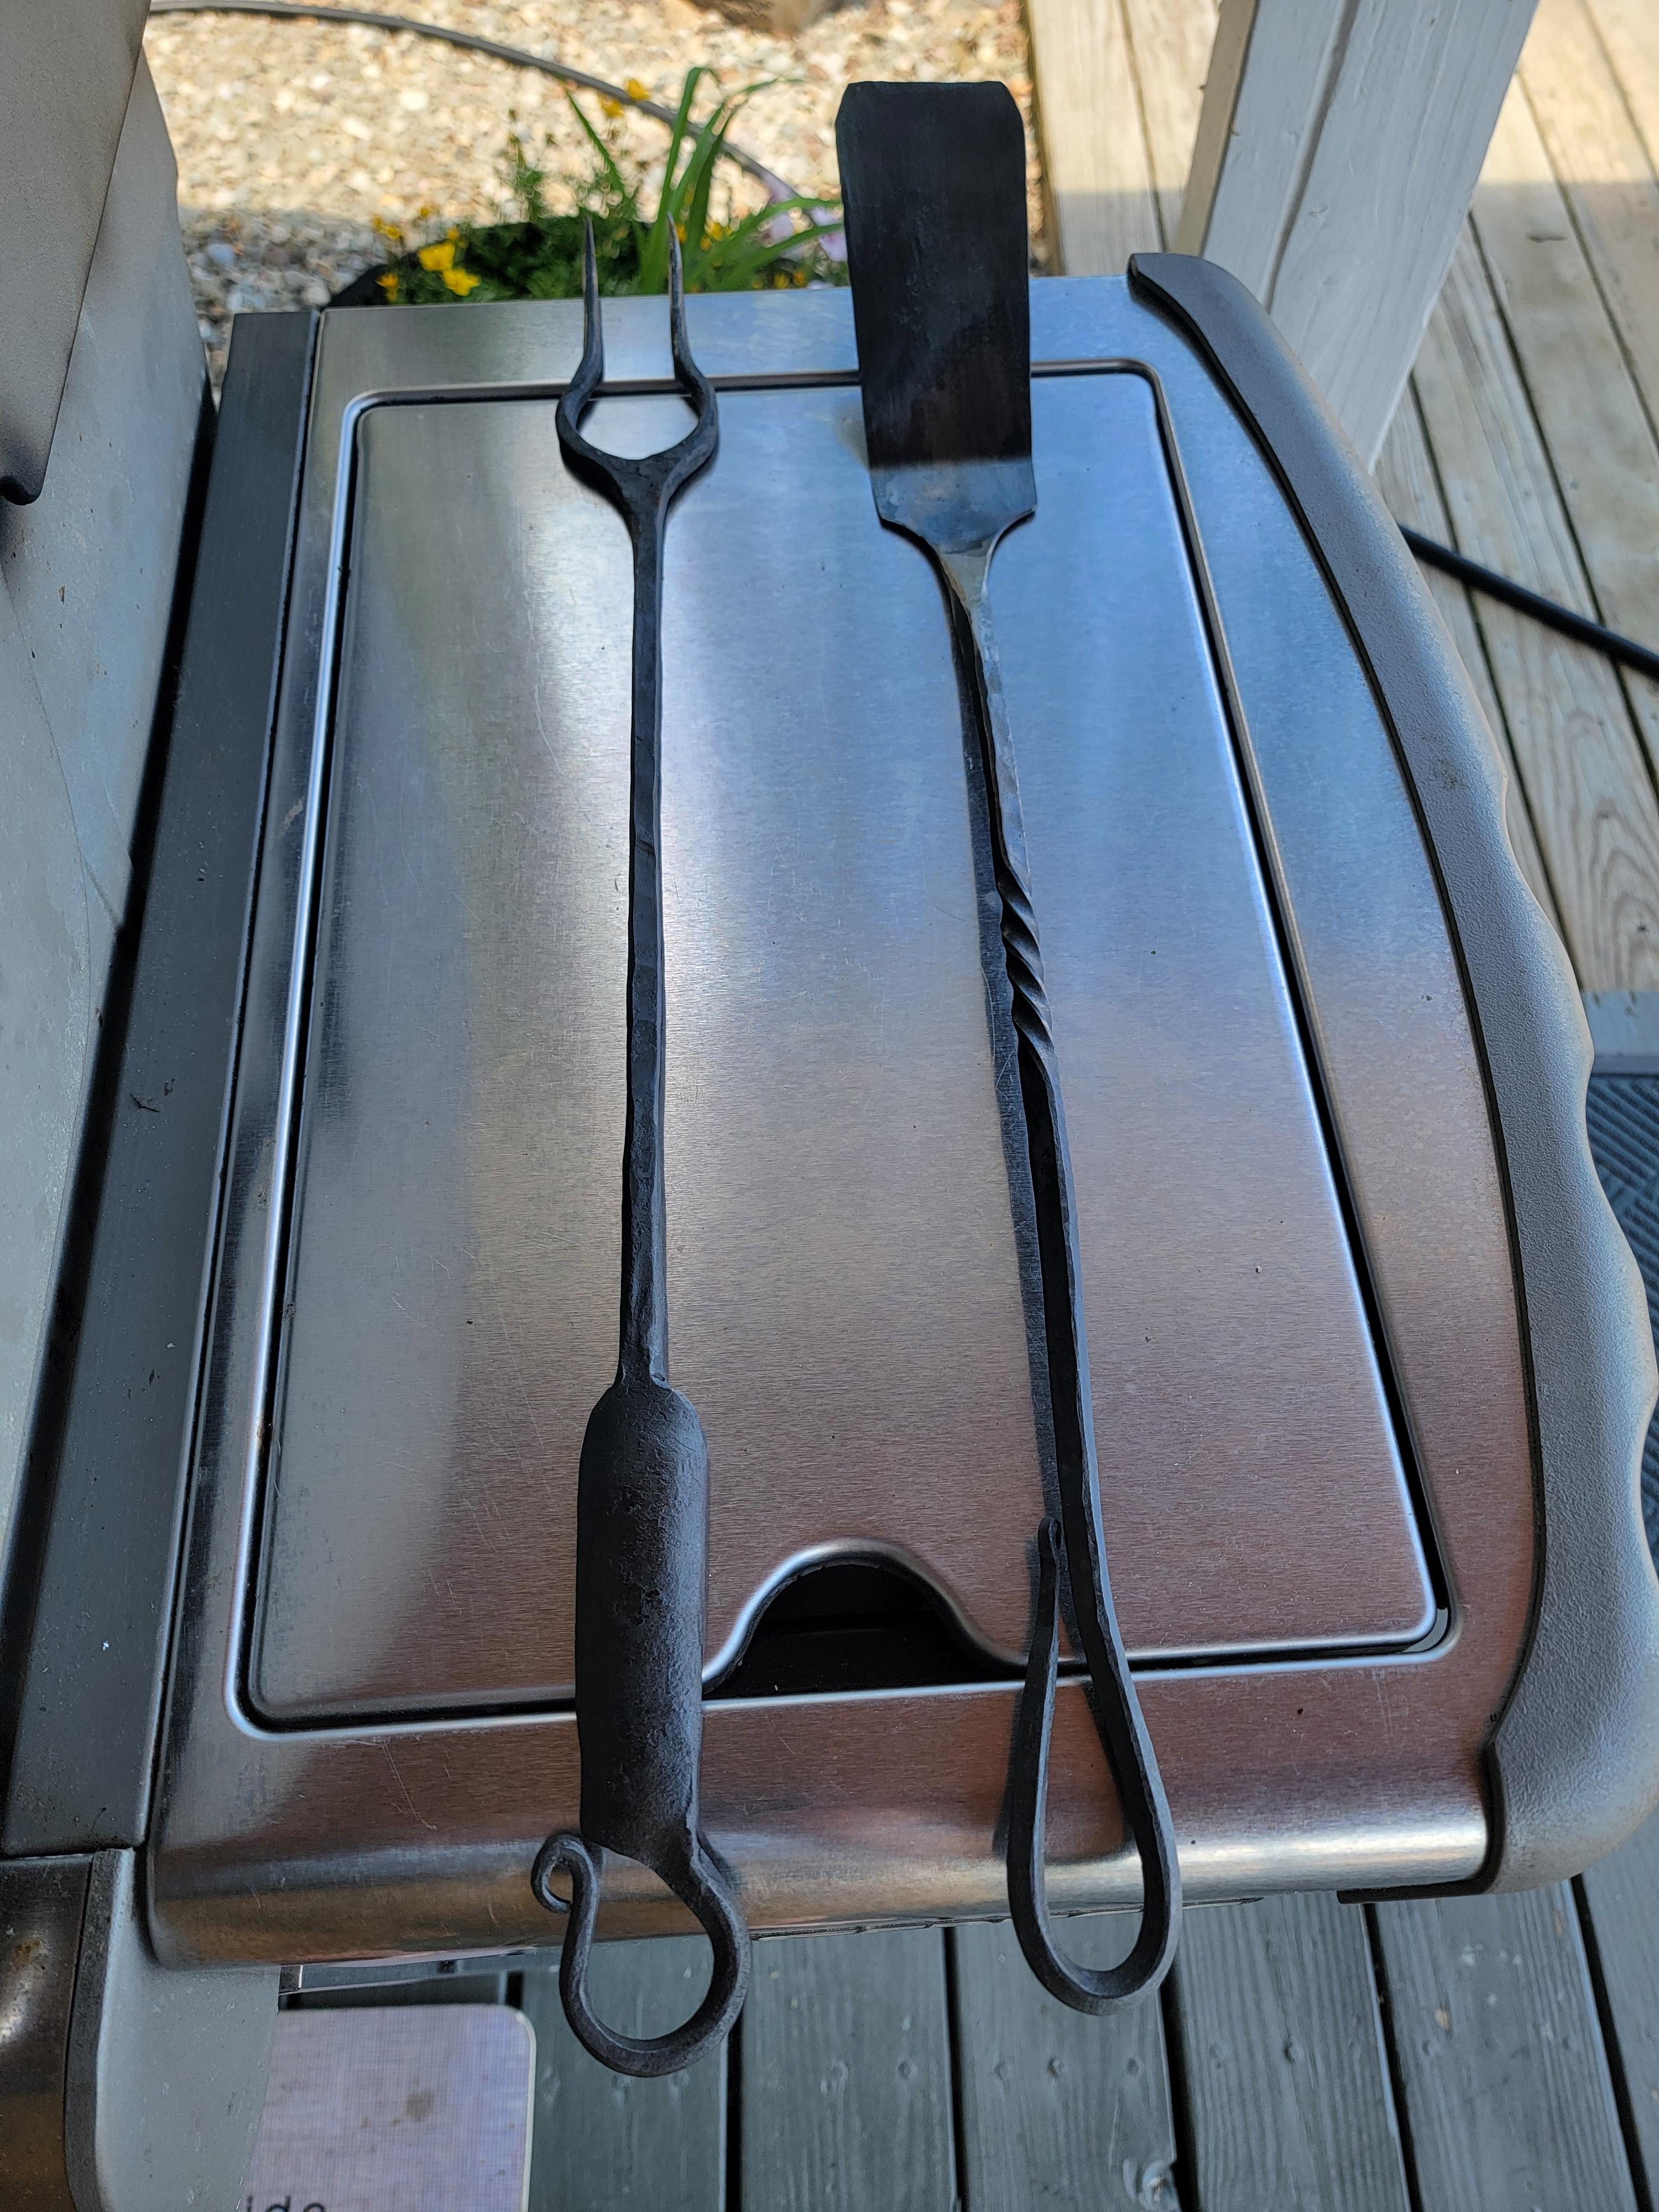
Set I forged for my in-laws that are letting us crash at their lake house while they are abroad.
-
Absolutely. I used to blow glass into graphite molds and even cast molten glass into a couple as well. Have to be careful regarding over chilling the glass to prevent cracking, but if it is not cracked and you get it up to around 1,200 deg. F for a moment before the annealing cycle you are good. Note that the graphite I got back in the day was from a local shop that produced graphite molds for epoxy potting I believe (was a long time ago). These were all cut-offs and scrap, so I got it for free. The binder holding the sheets together would break down over time if allowed to get too hot. I would preheat a little to avoid contact cracking, but typically kept down under 300 deg. F. I used some of the sheet stock for the custom molds I made when I developed these blown tumblers:

-
As you noted, molten glass will stick to red hot steel very nicely, but the difference in thermal expansion coefficients makes it likely that the glass will be under significant stress when the two cool down. I am most familiar with soda/lime/silica glass (hard glass typically used in "off-hand" glassblowing) rather than borosilicate glass (soft glass used for torchwork. These have different properties, including thermal expansion and resistance to thermal shock. All glass melts at different temperatures depending on whether you are melting from raw materials or remelting preformed glass frit (sort of like the difference between smelting and melting iron I guess). All glass should be carefully cooled in an annealing process to remove the cooling stress it is subject to by virtue of being an insulative material. You also have to be careful of keeping glass for a long period at elevated temperatures. I'm not sure what the parameters are for soft glass (though I suspect somewhat higher temperatures are involved), but hard glass will devitrify (lose some transparency) if kept for a long period of time between around 1,000 to 1,500 deg. F. Annealing is usually slow and controlled cooling from just over 900 deg. F down to around 200 deg. F. This is usually done overnight in a temperature controlled electric annealing oven. A couple of notes: As mentioned glass thermal expansion coefficients are more compatible with copper than steel for most glasses (I spoke to Al Paley a couple of years ago and he was working with Corning to develop a formula for a glass that would be more compatible with steel for some of his sculptures. I saw some of the results of this experimentation, but don't know if they ever developed anything that he was happy with). Retained stress in your embedded marbles would worry me. Glass under stress that gets scratched or thermal cycled can spall out pretty aggressively. Research "Prince Rupert Drops" for an interesting example. Molten glass will not stick to cold steel at all, though an interesting wrinkled chill mark pattern will form on the rapidly cooling glass. If the steel surface is thick enough not to get heated to the point where glass will stick, it should work fine to cast against. Other "resists" for casting glass to use if you want a clean release include graphite spray (make sure no molybdenum in the spray) or just a coating of soot from an acetylene torch. Float glass is another interesting process where the molten glass was cast onto molten metal (tin or lead) to produce sheets, but I wouldn't recommend that. Glass casting from frit is typically termed Pate-de-Verre, from the French. There are some beautiful examples of this work still being done today. Like casting metal Some glass colors have radically different thermal coefficients and are not compatible with others. The "hot" colors like opaque red, orange and yellow are often not compatible with the "cool" colors like blue or green. Glass colors are produced by the addition of metallic oxides to the raw materials during the initial melt. Some interesting reactions between glass colors can be added by use of silver nitrate or silver bromide powder during remelting, but beware of the fumes.
-
Frosty, I do the same as far as procedure. The air gas mixture keeps the burner head cool while firing and the airflow keeps it similarly cool during forge cooldown when the retained radiant heat of the walls affects the burner. My chambers had very little thermal mass (just a skim coat of Mizzou on the bottom and directly opposite the burner head), so the stored heat dissipated quickly. I theorize that one reason his burner heads worked so well in turndown is that with less thermal mass in the delivery tubes from the mixing tube, preignition happens in a relatively smaller zone inside the burner head, so is less likely. They did tend to get somewhat brittle over time for some reason (maybe caustic environment), but mine typically lasted me 5-10 years.
-
Mike, I used his high alumina ceramic multi-port burner heads in hot glass glory holes (no joke intended) for years without any problems. These warm up quickly from room temperature in the morning and ran typically for around 4-6 hours (until I ran out of steam) then were allowed to cool to room temperature. Of course with blown burners I always ran air through them both in the pre-fire cycle and afterwards, during shutdown, so they may not have experienced the same level of thermal shock.