Scratch
Members
-
Joined
-
Last visited
Everything posted by Scratch
-
Nice job on the stand. I like your bent bolt attachment idea. It seems like there's no easy method to attach an anvil... you always need to get creative.
-
So I have the plans to build a Ray Clontz tire hammer and have started collecting parts for it, but I'm concerned because I don't have a concrete floor in my shop yet... Should I wait until the concrete is done before I finish the build? My brother lives next door and has a JD240 skid steer so that would help with moving it, but I'm concerned that I won't be able to even use it without a concrete floor. Is that true? I'm not sure when I'm going to be able to pour my floor, but I've been working without one for a while now. Yes... I'm a caveman.
-
Interested in the build. I have the plans as well and am hoping to start my project soon!
-
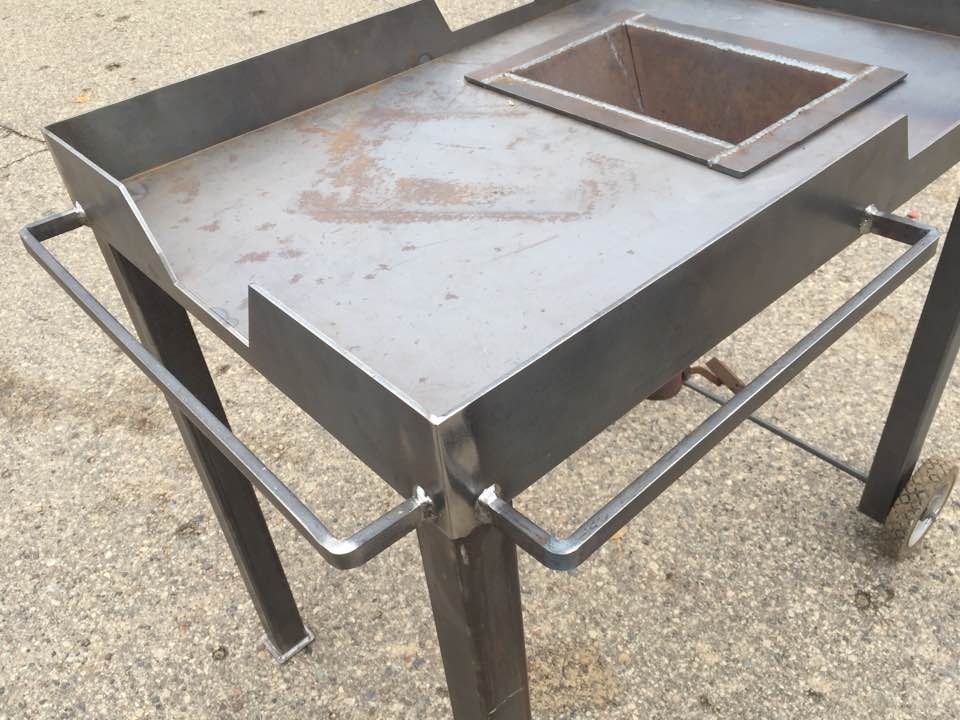
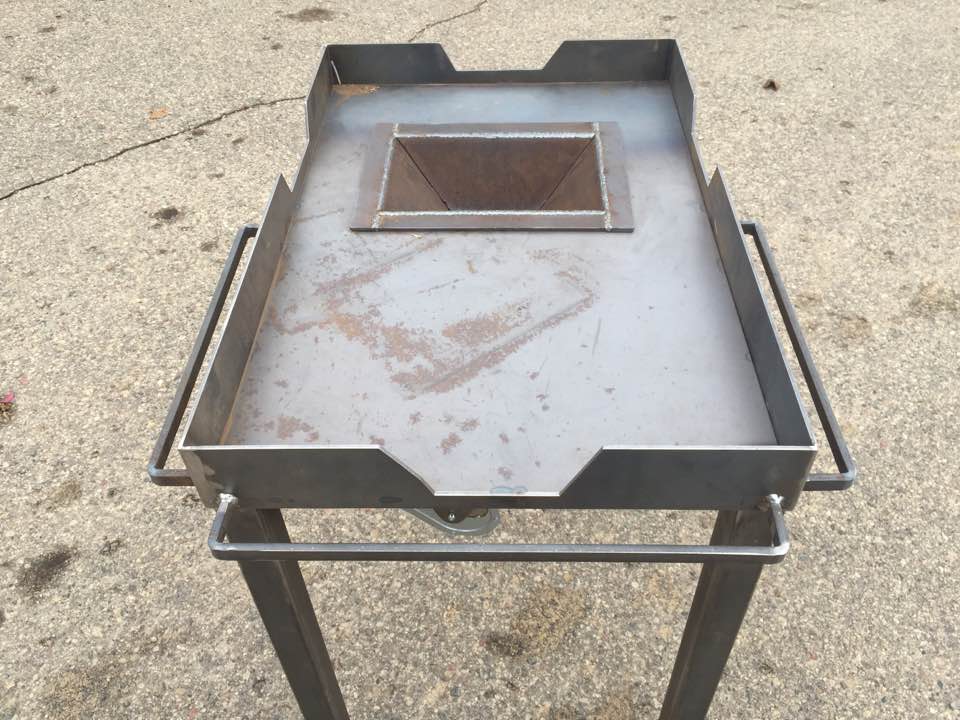
Looks very nice! Do you think the curved edge is better than a straight edge?
-
-
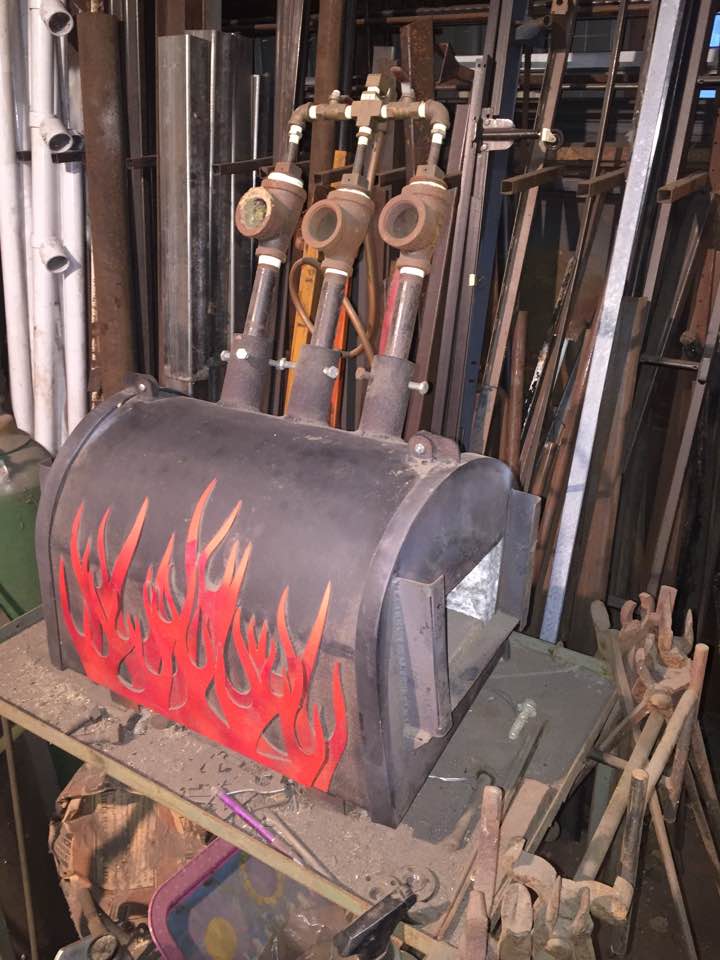
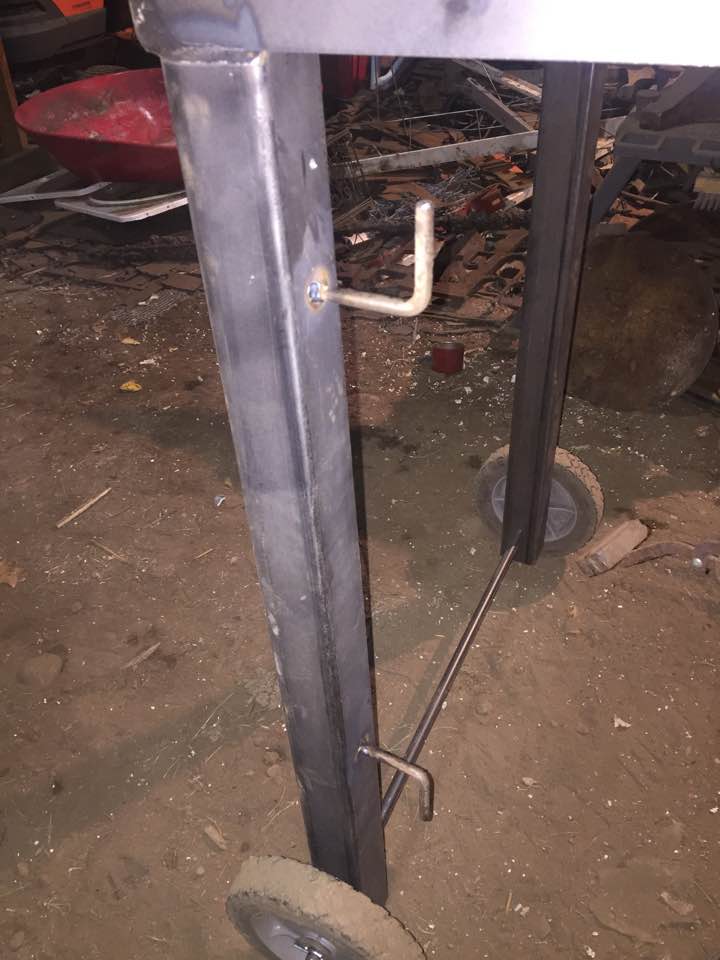
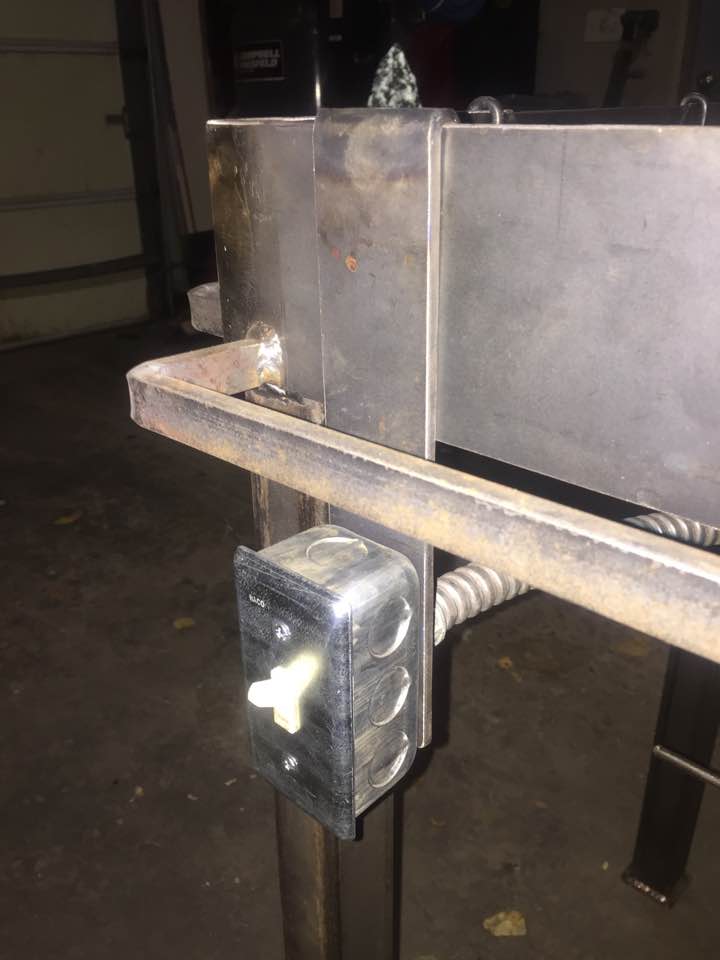
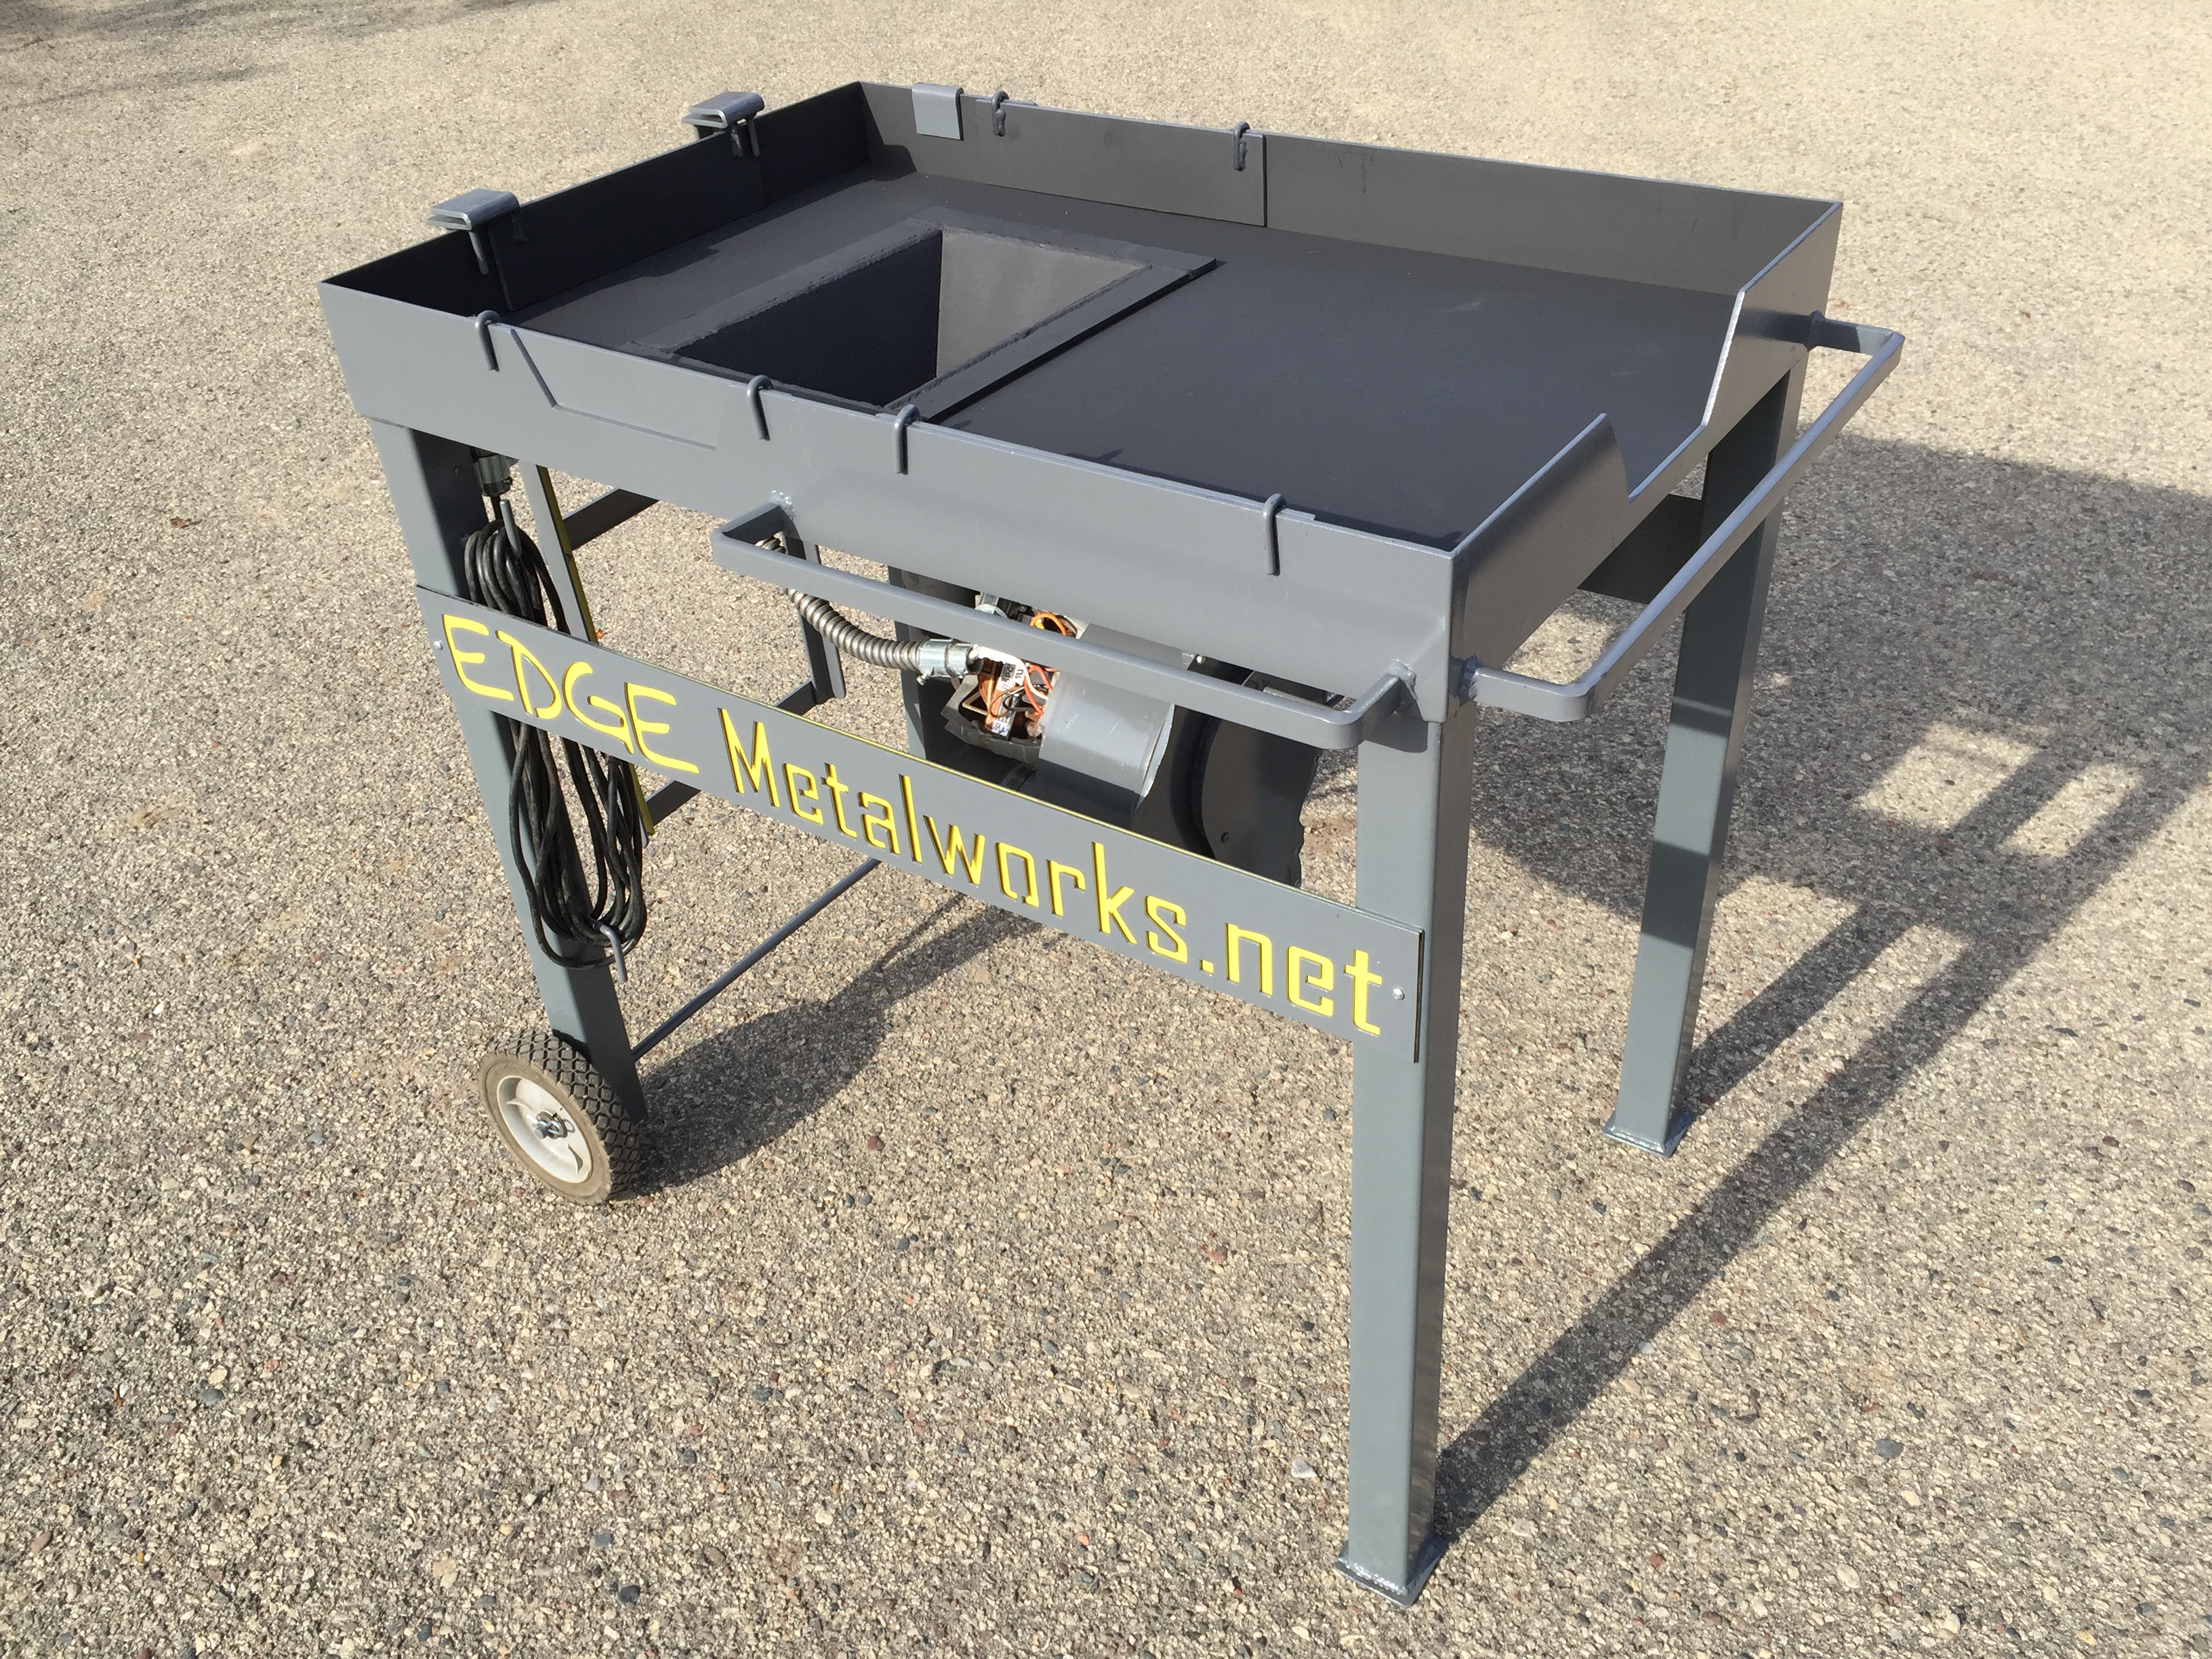
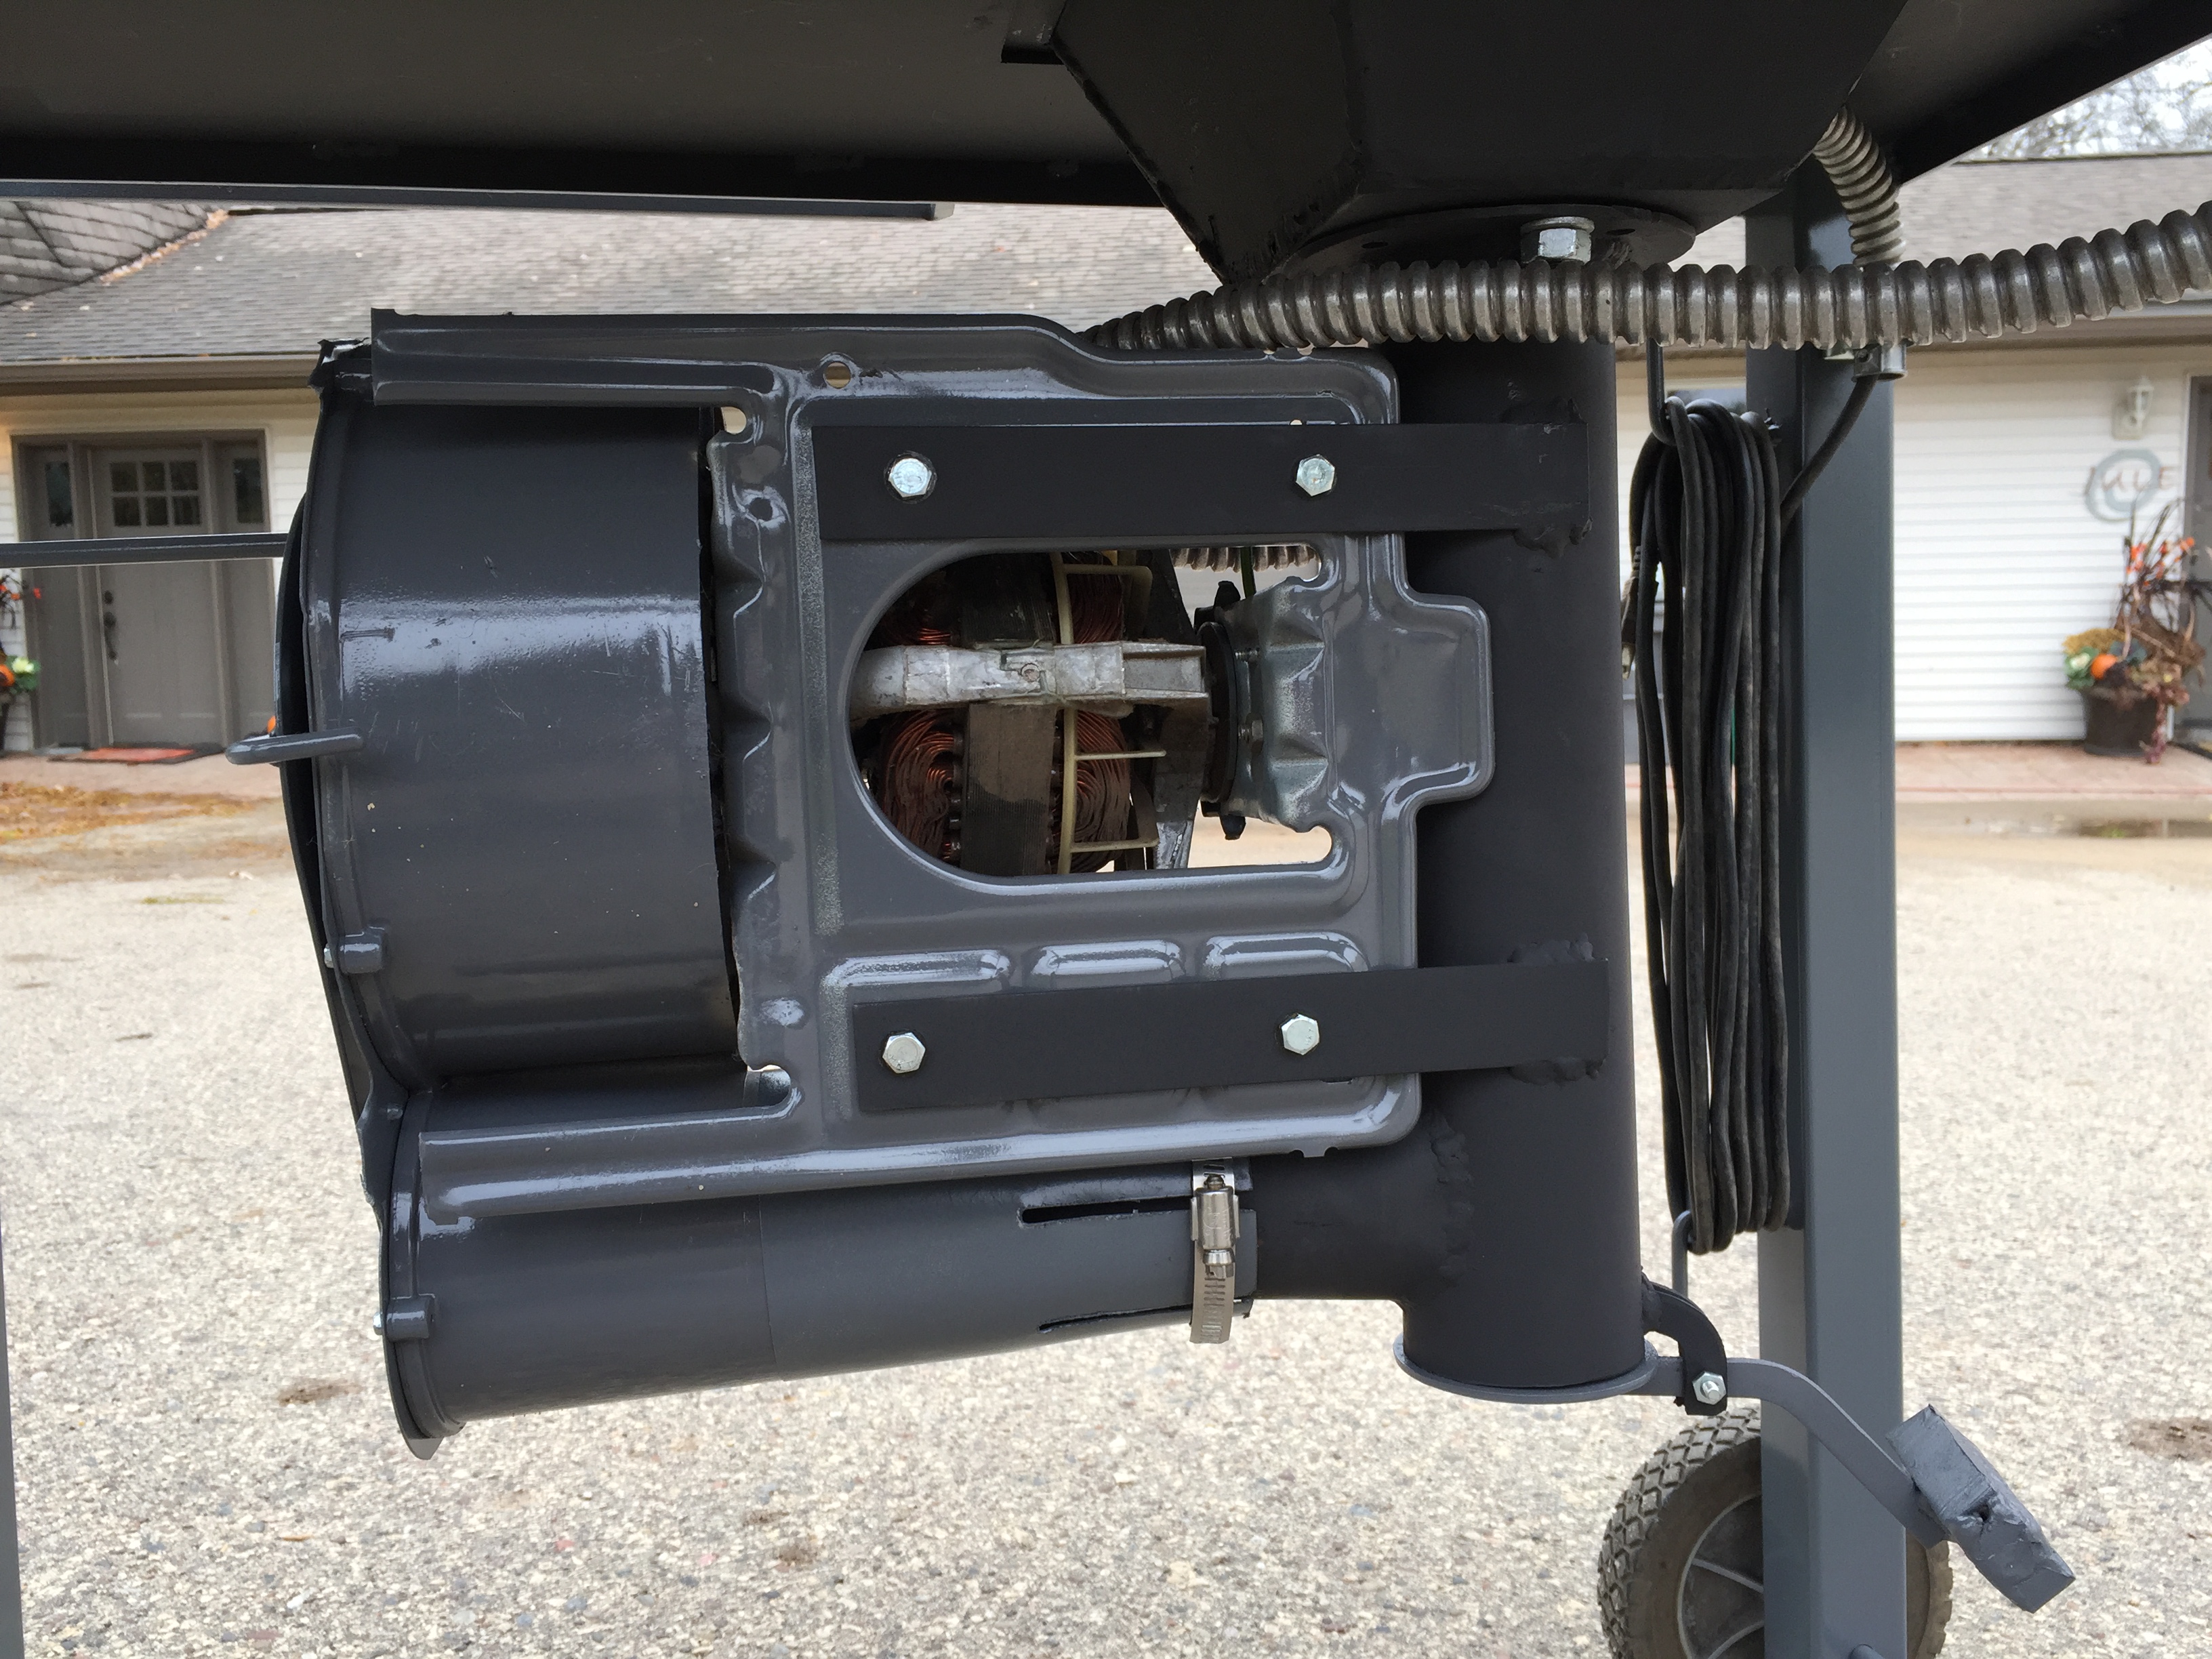
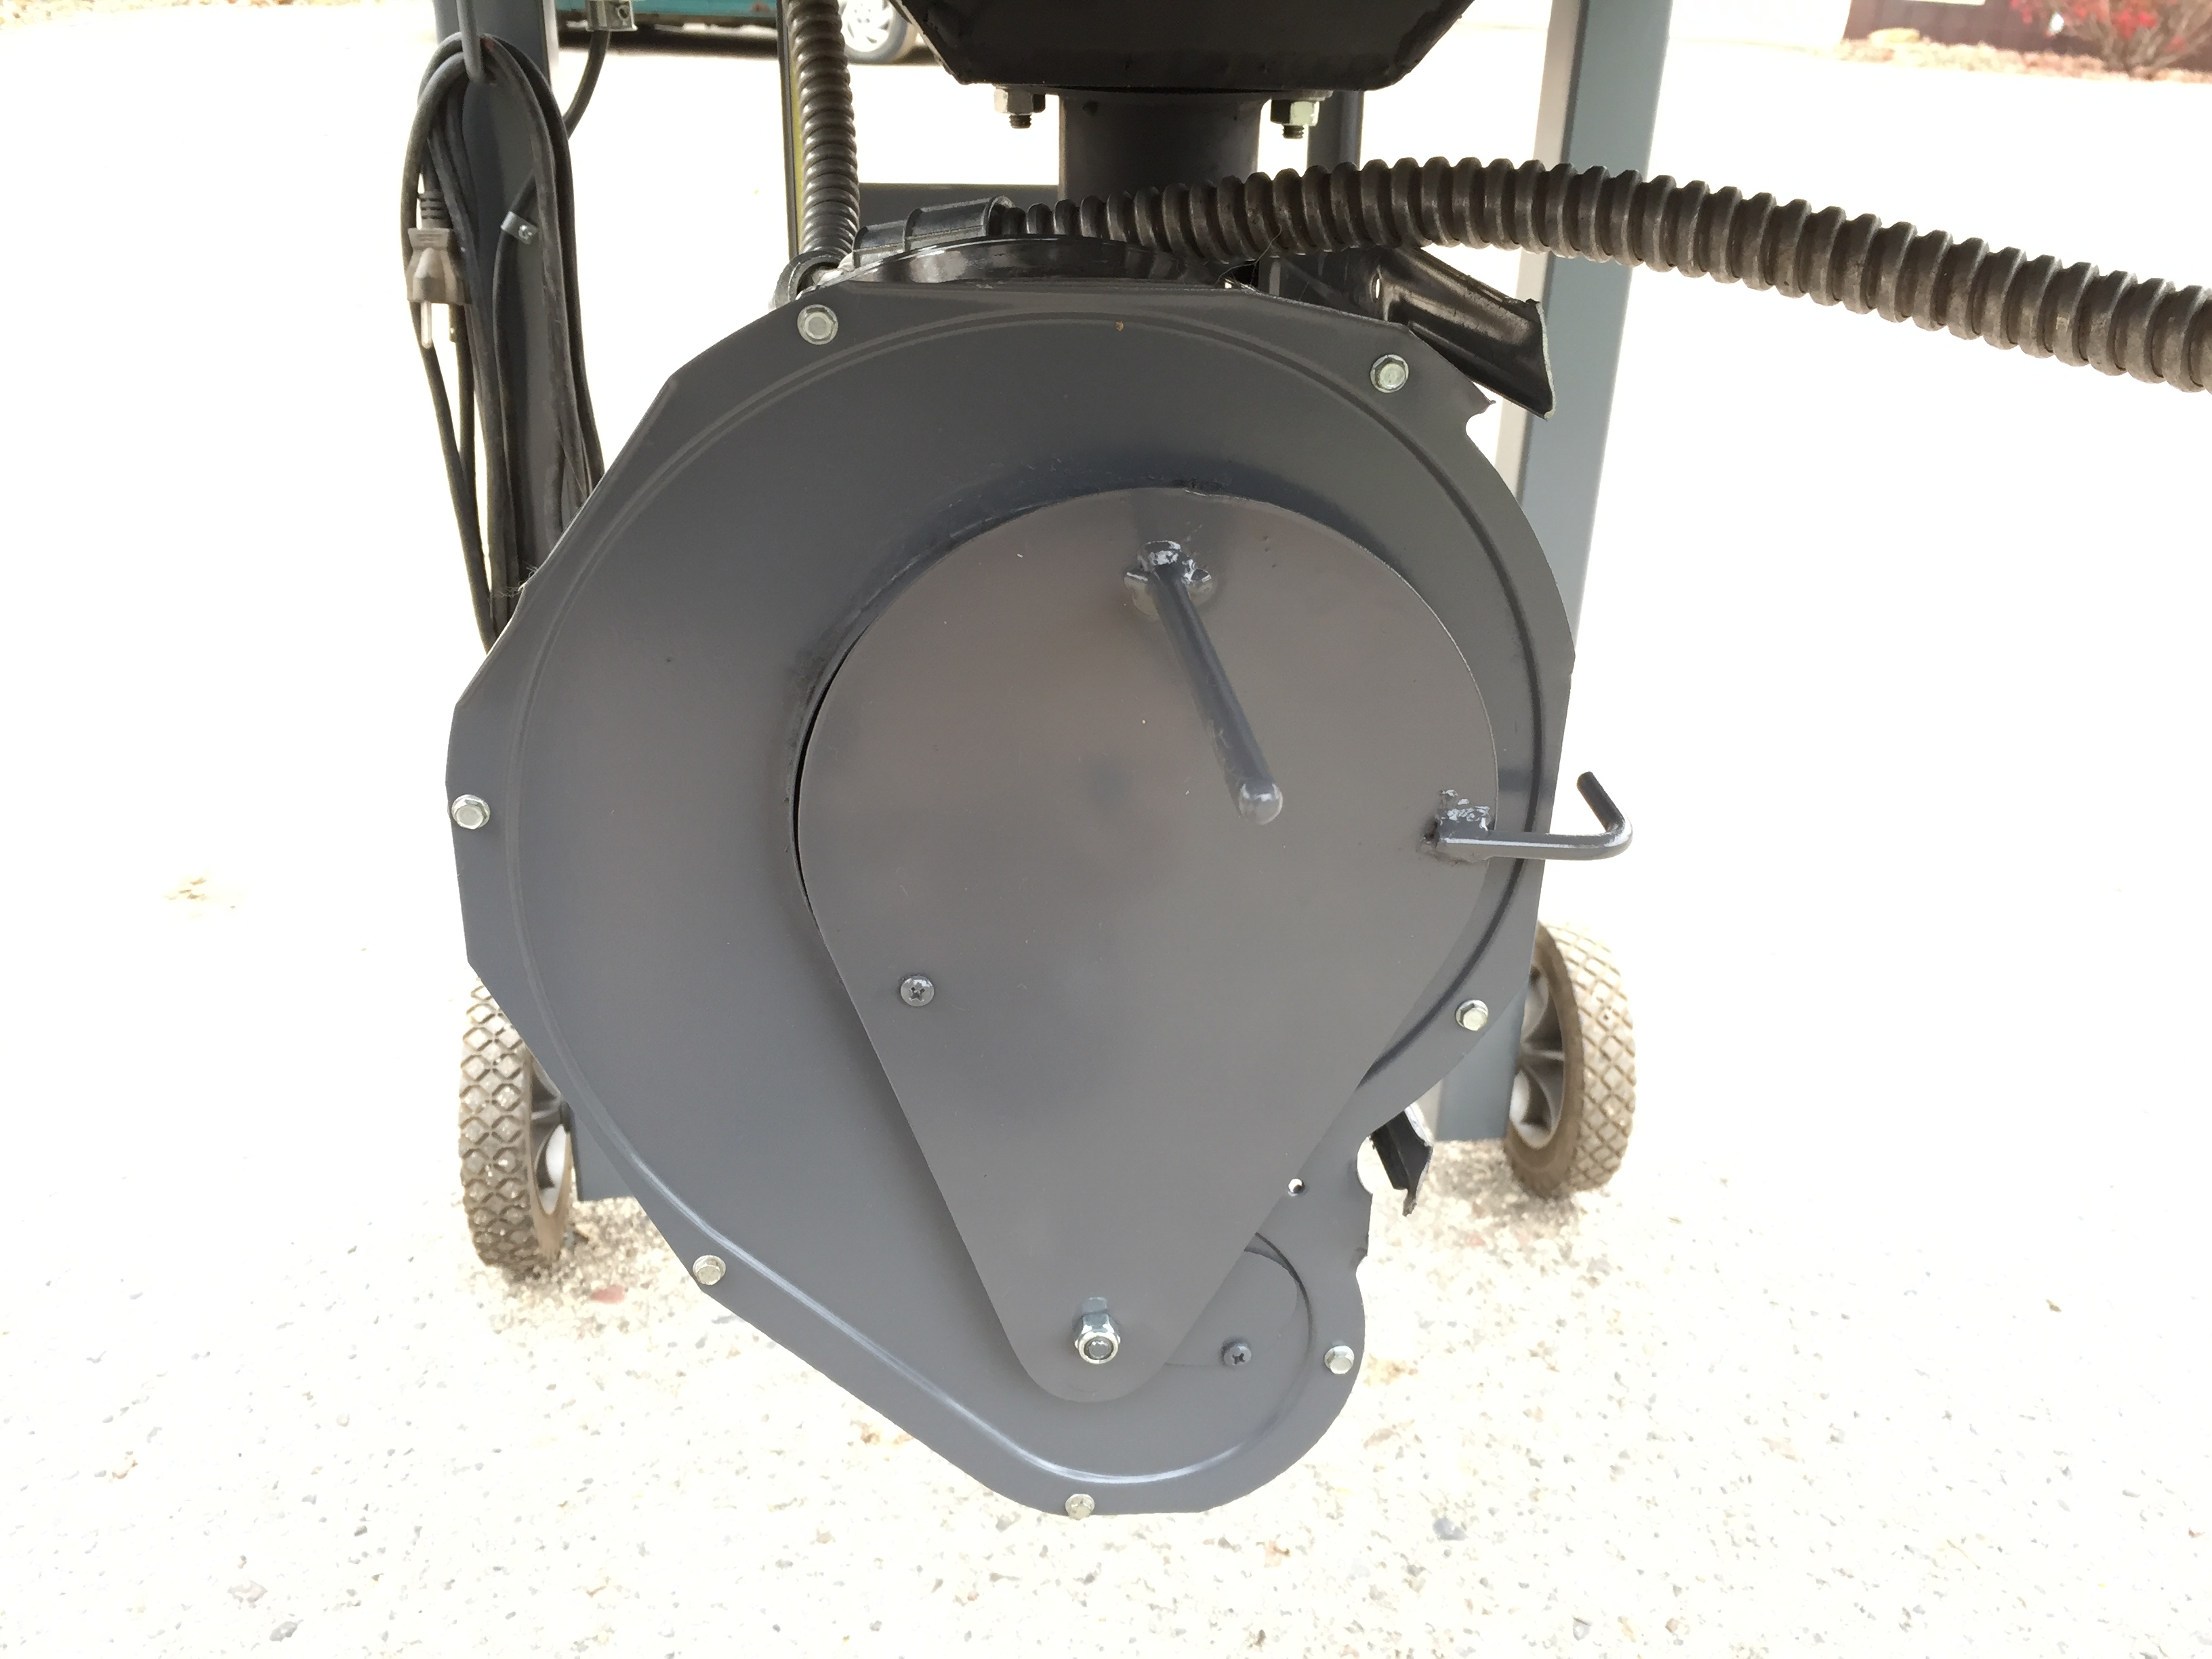
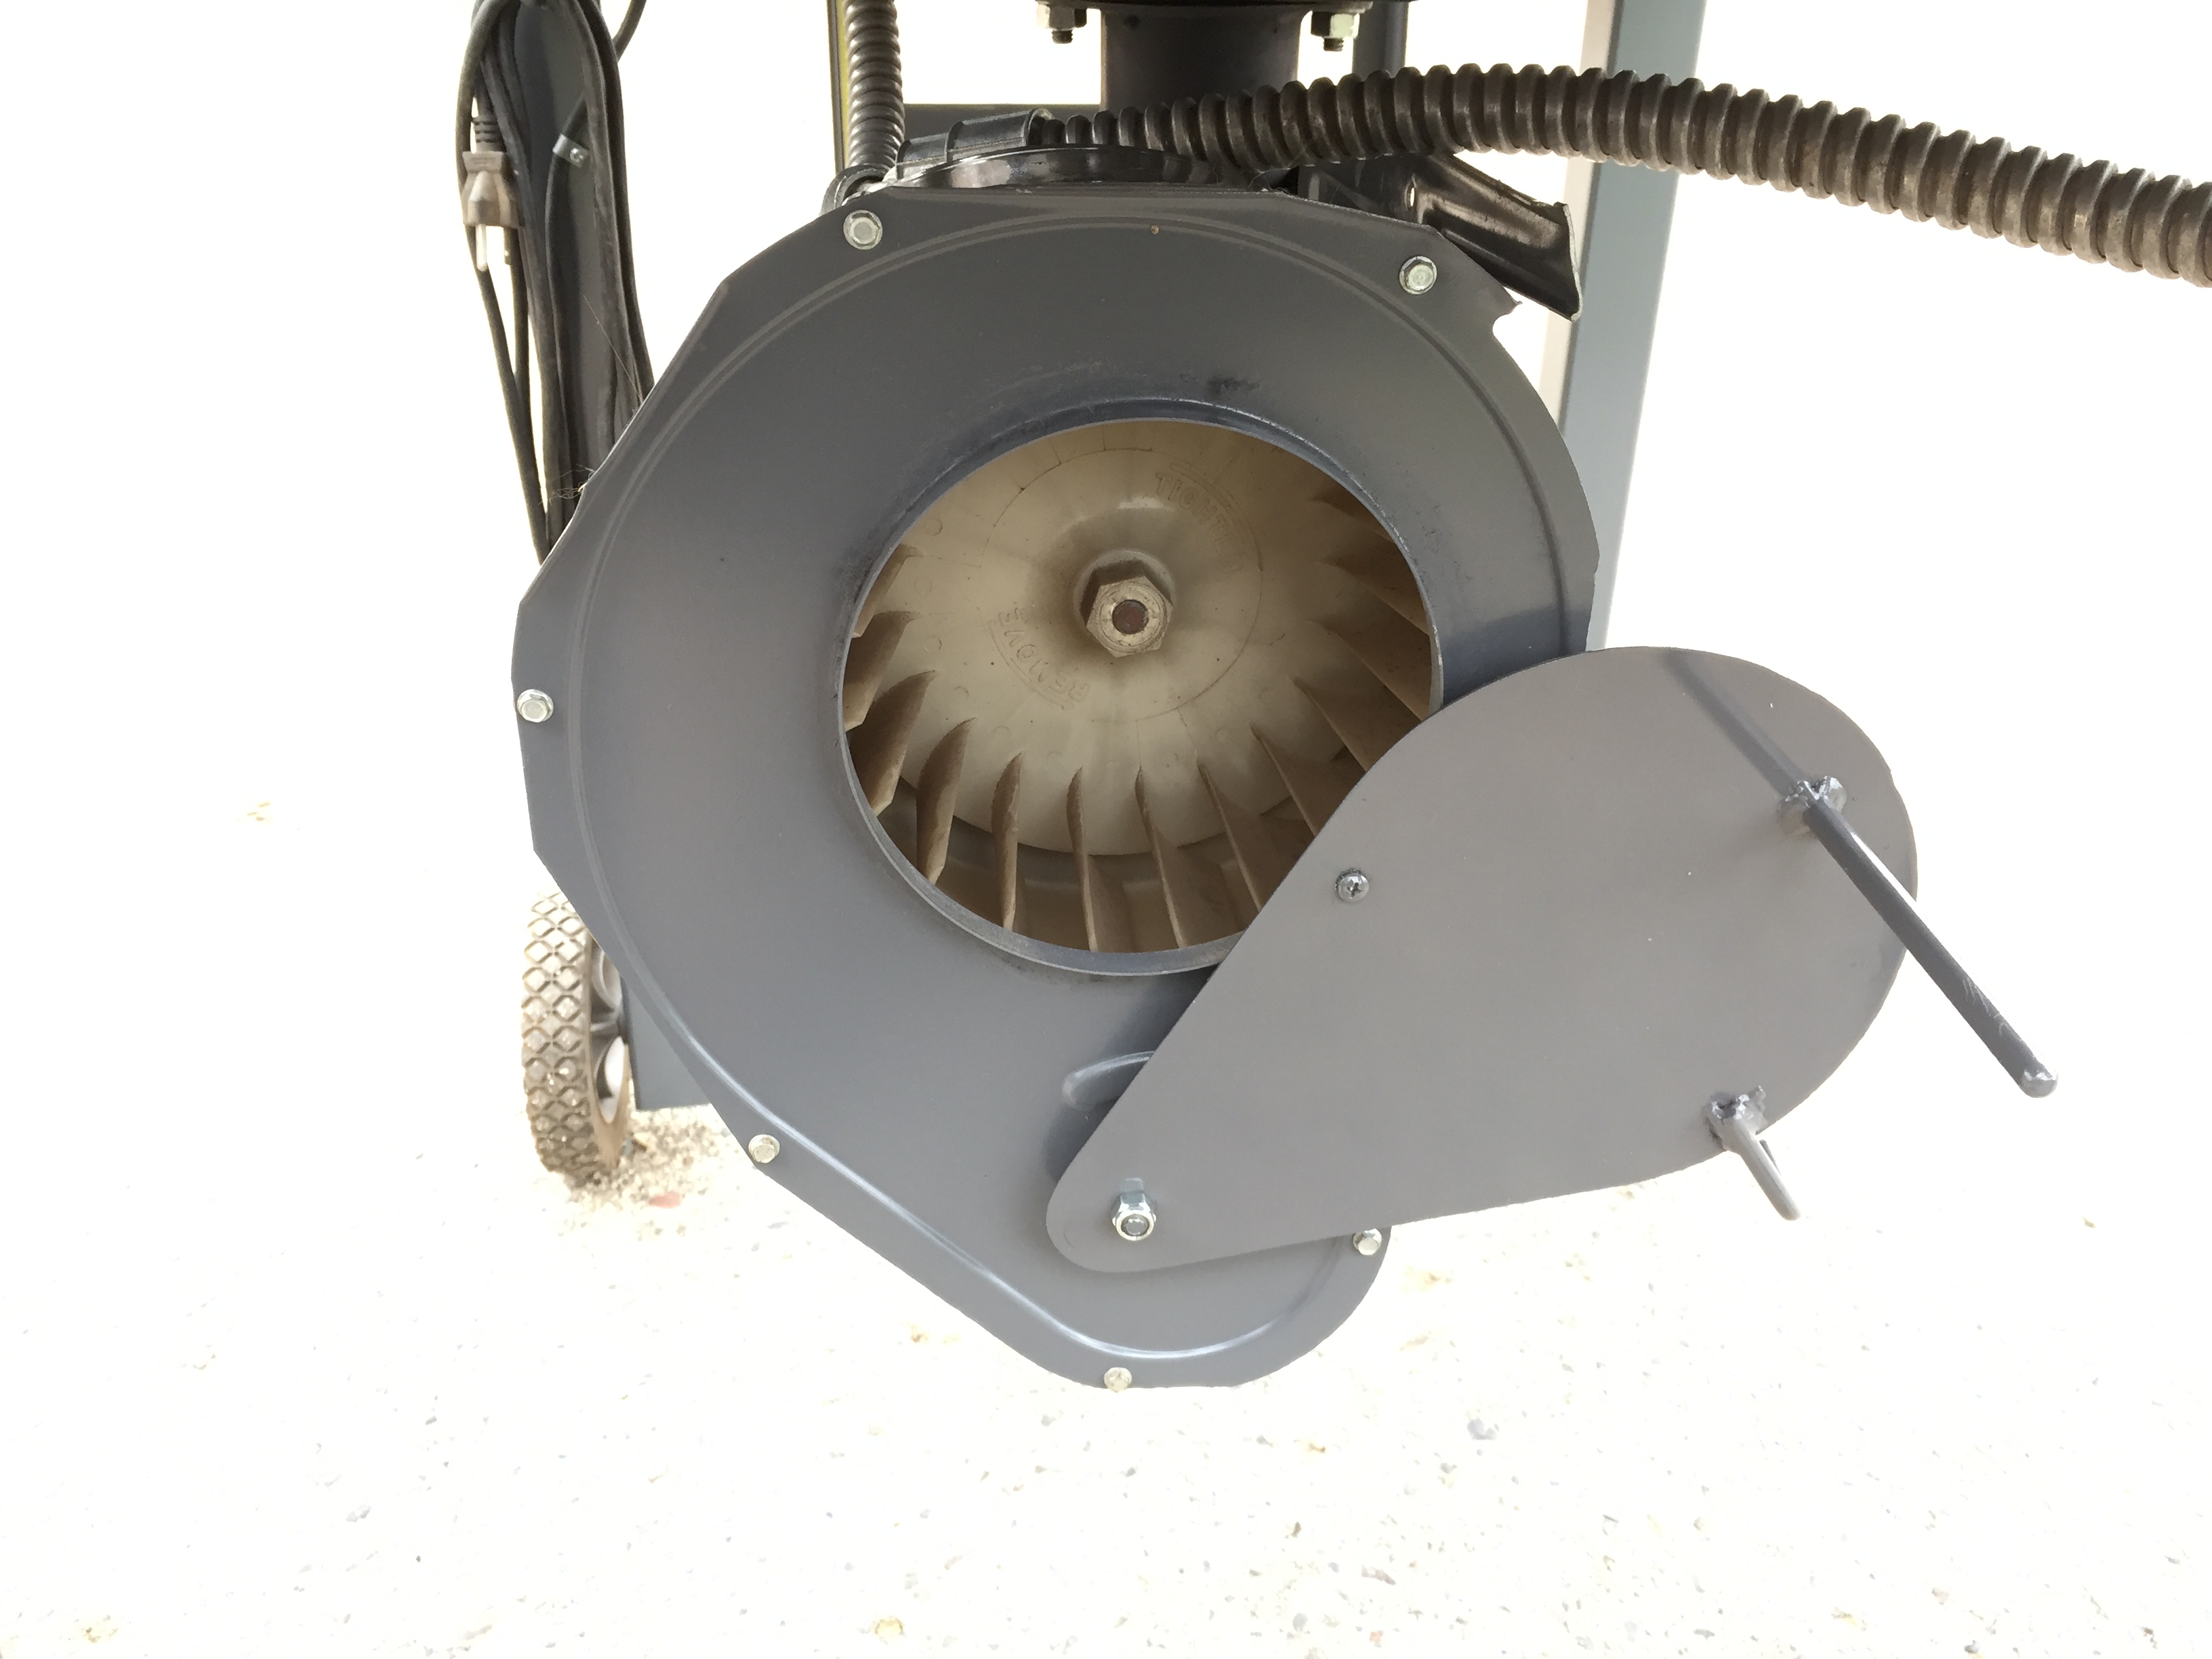
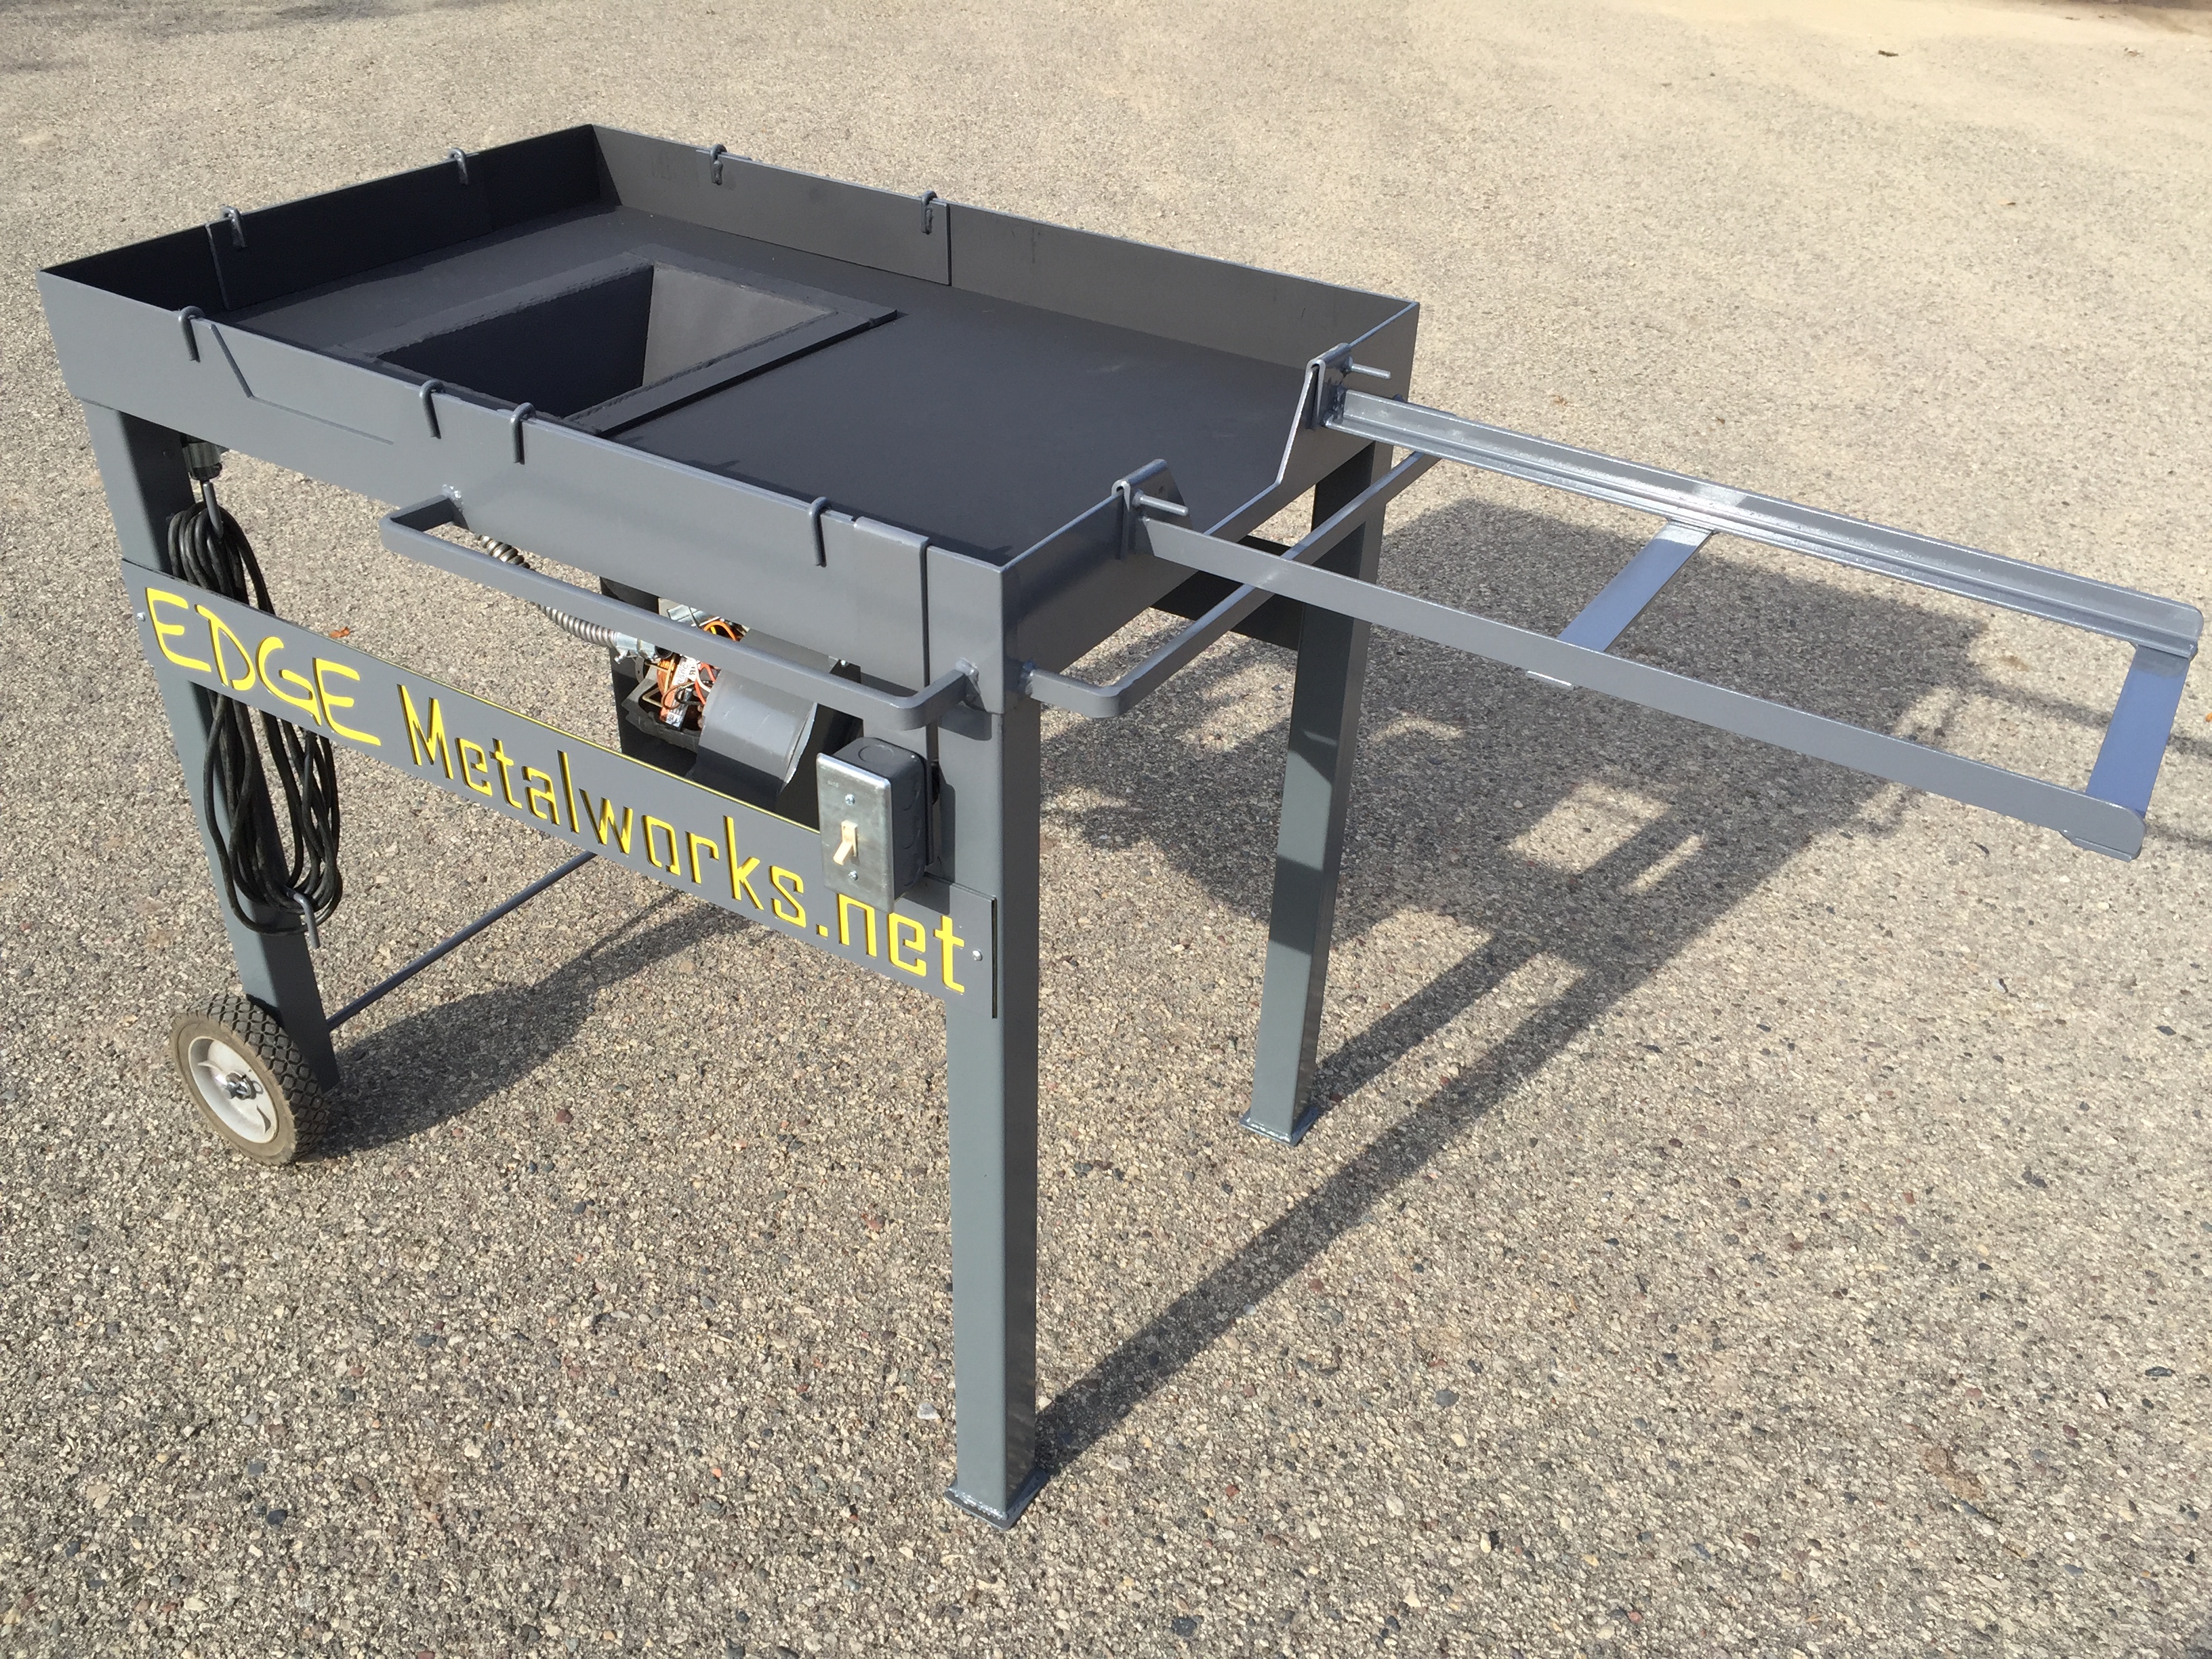
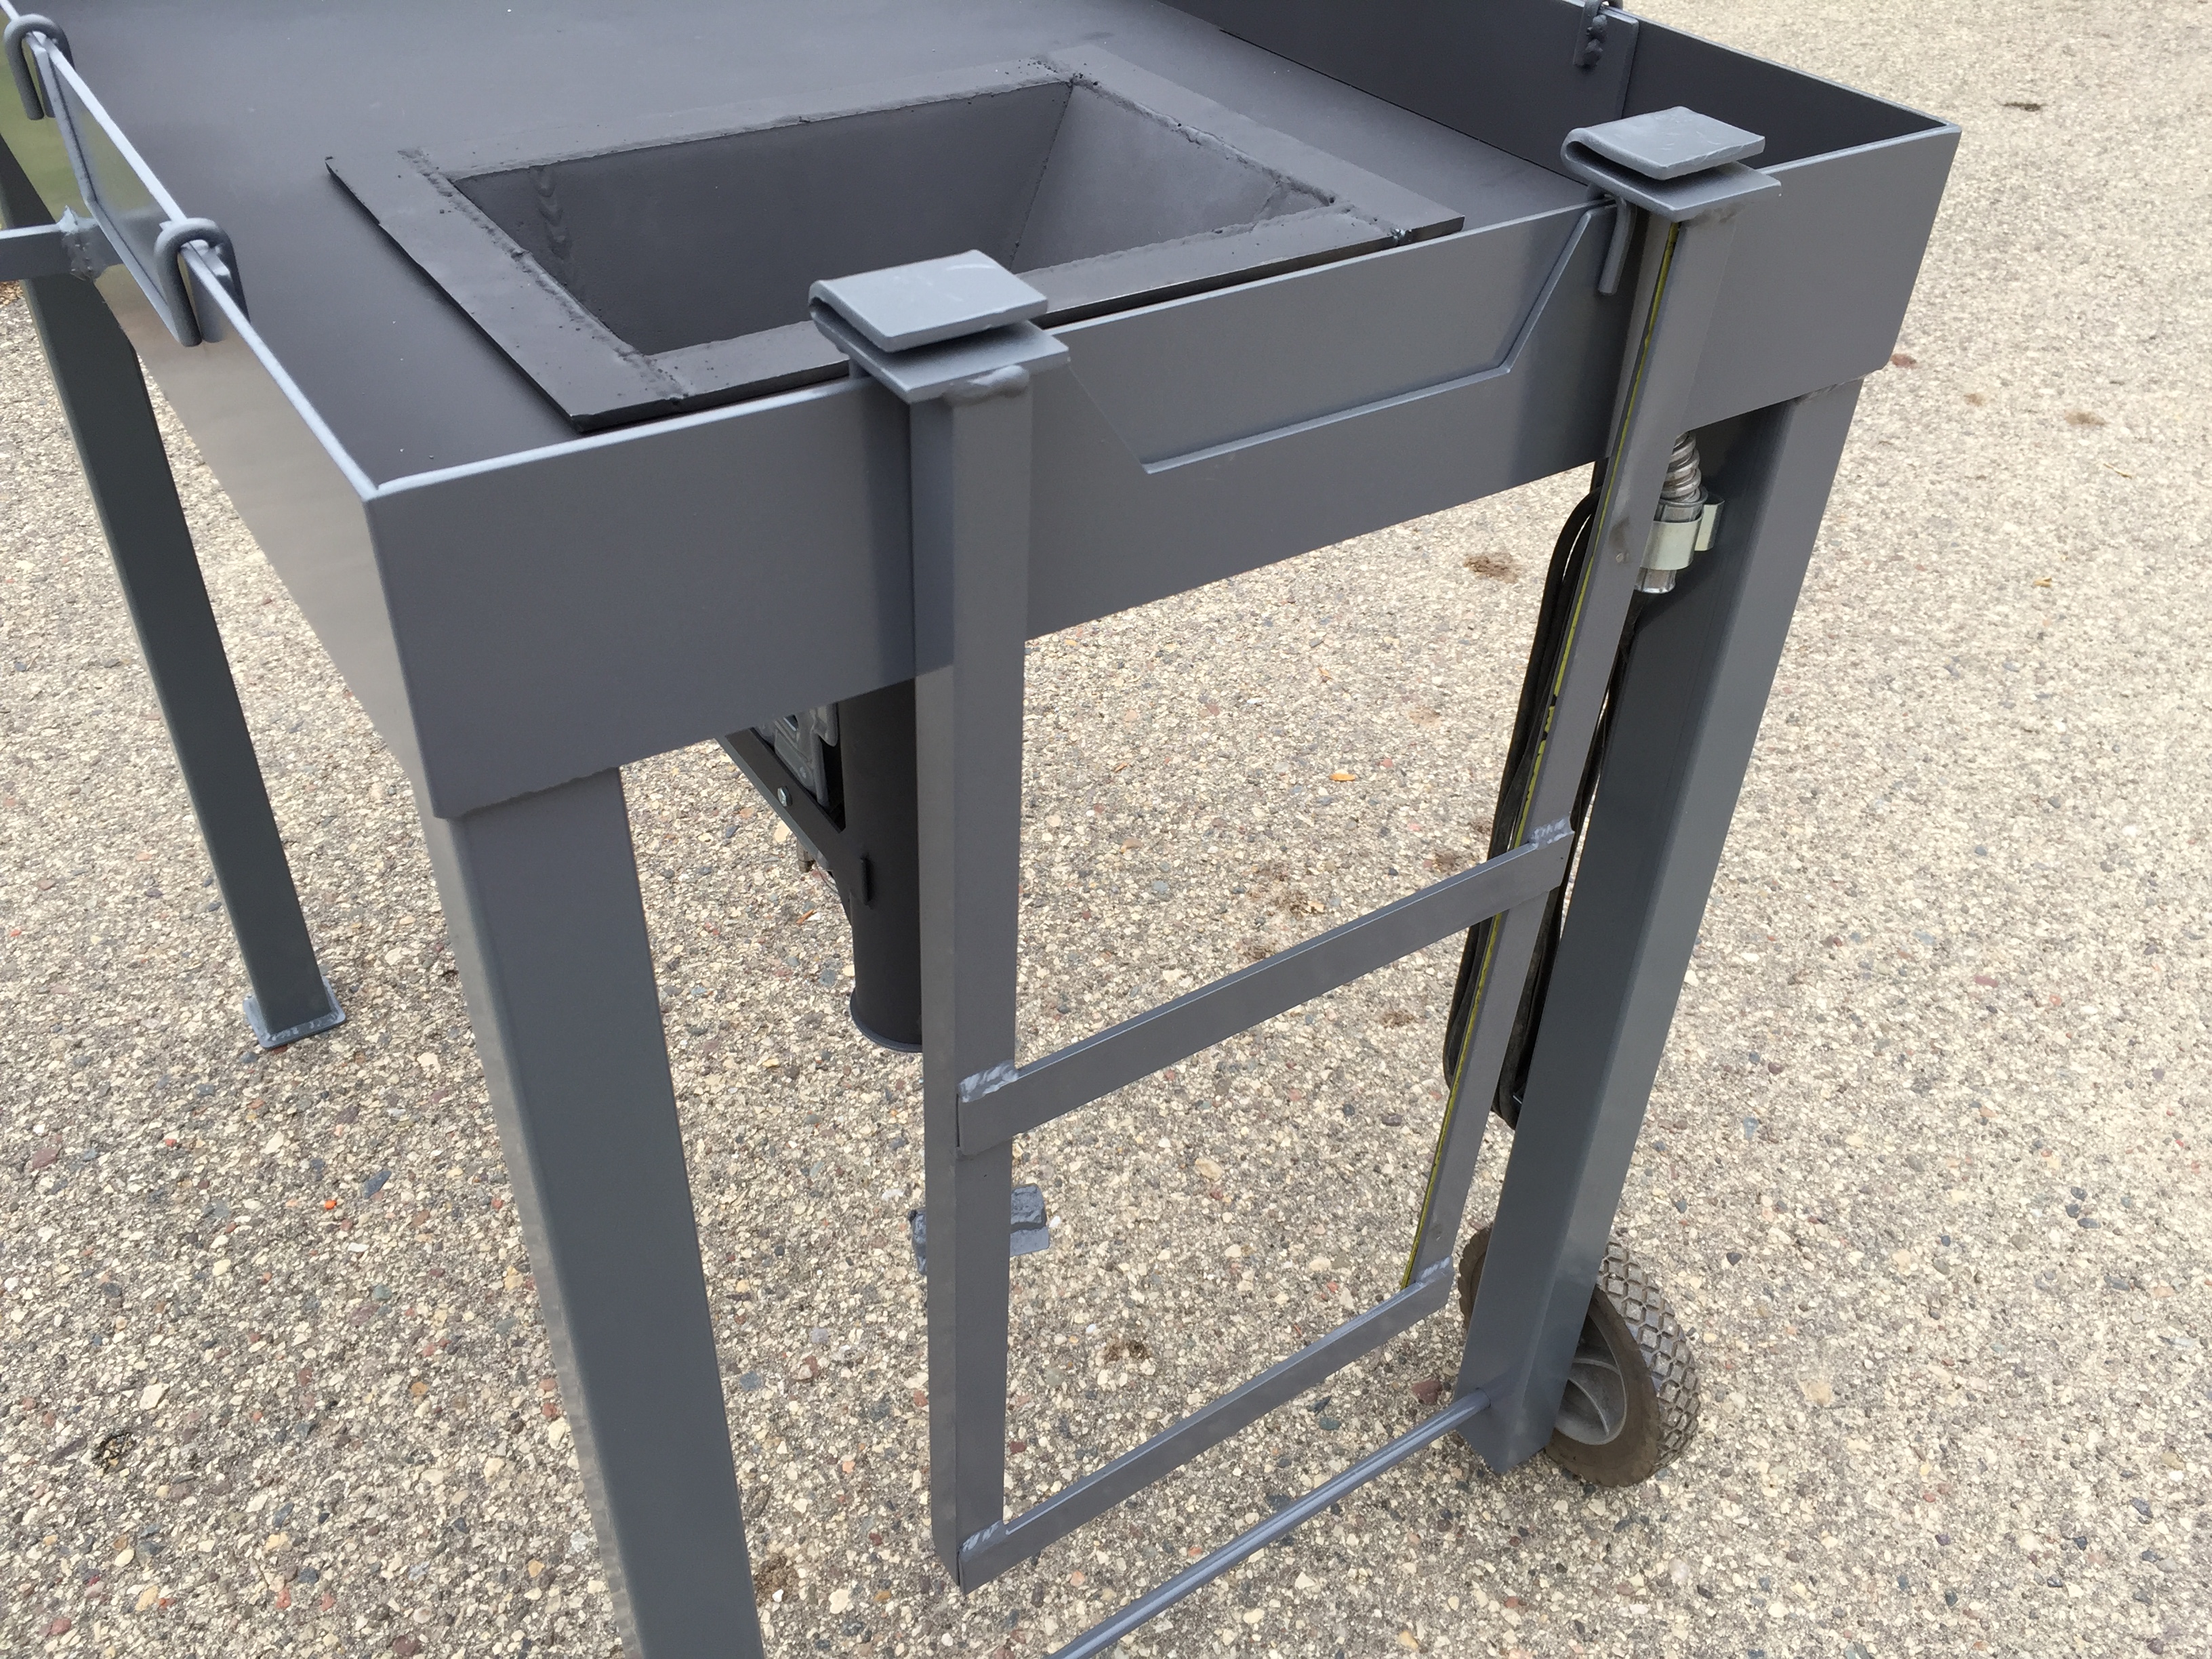
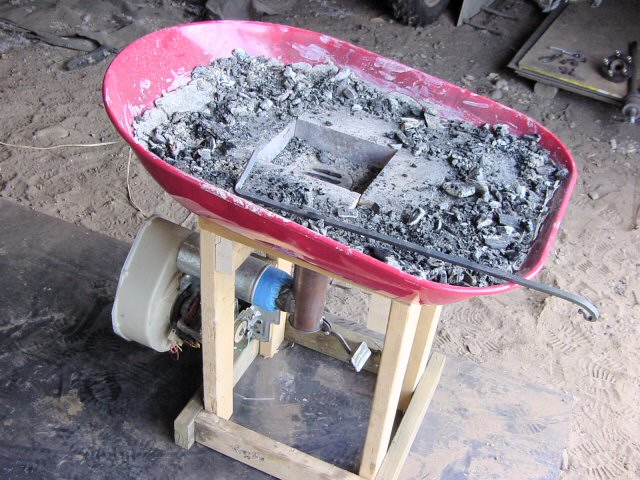
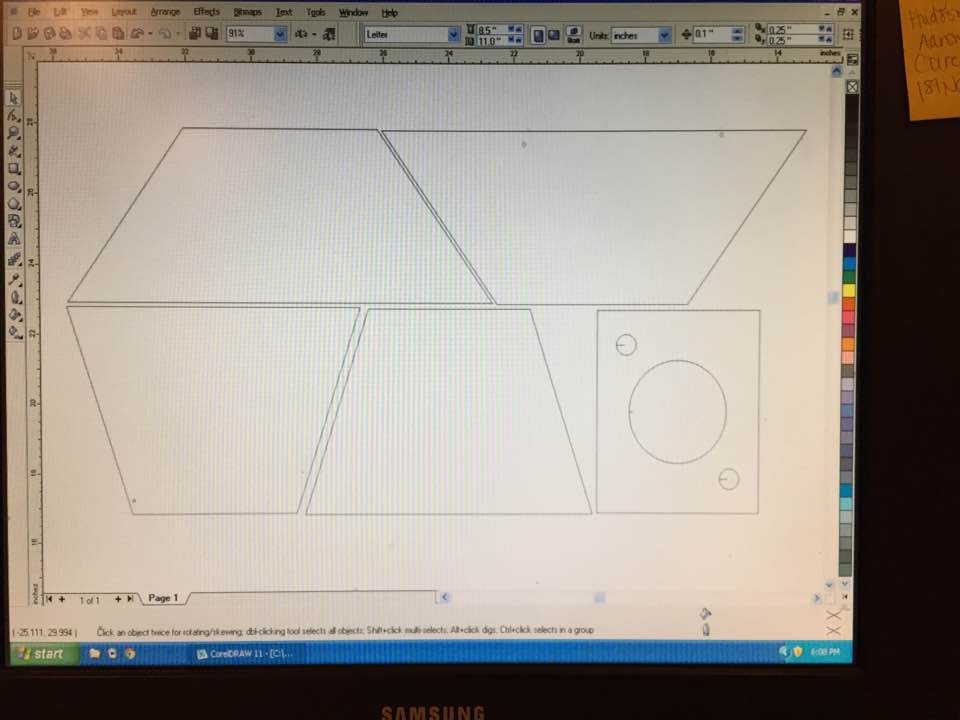
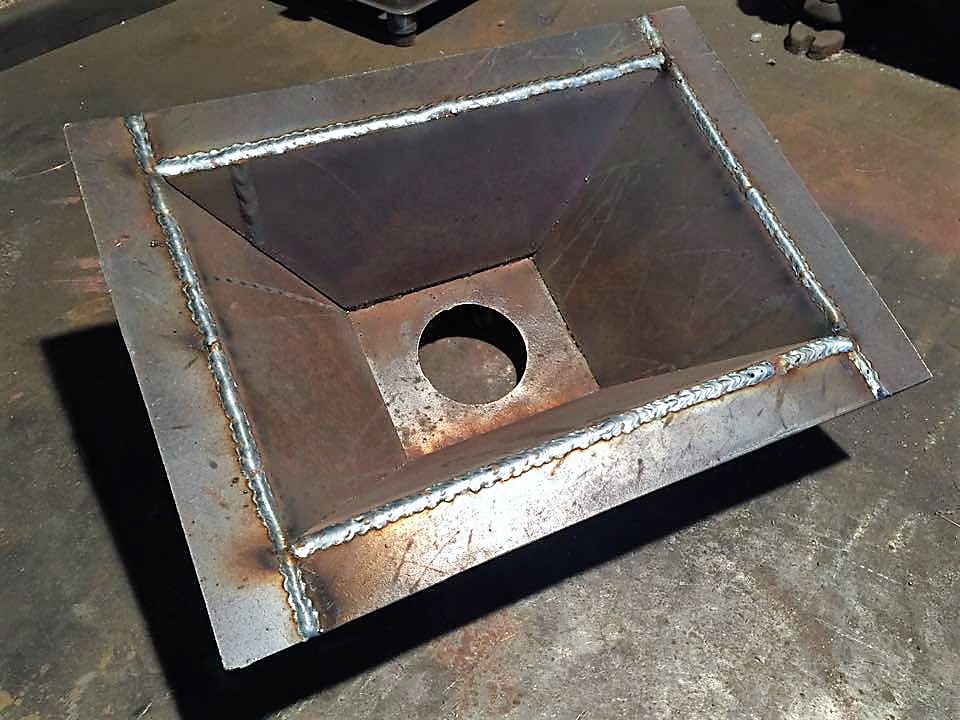
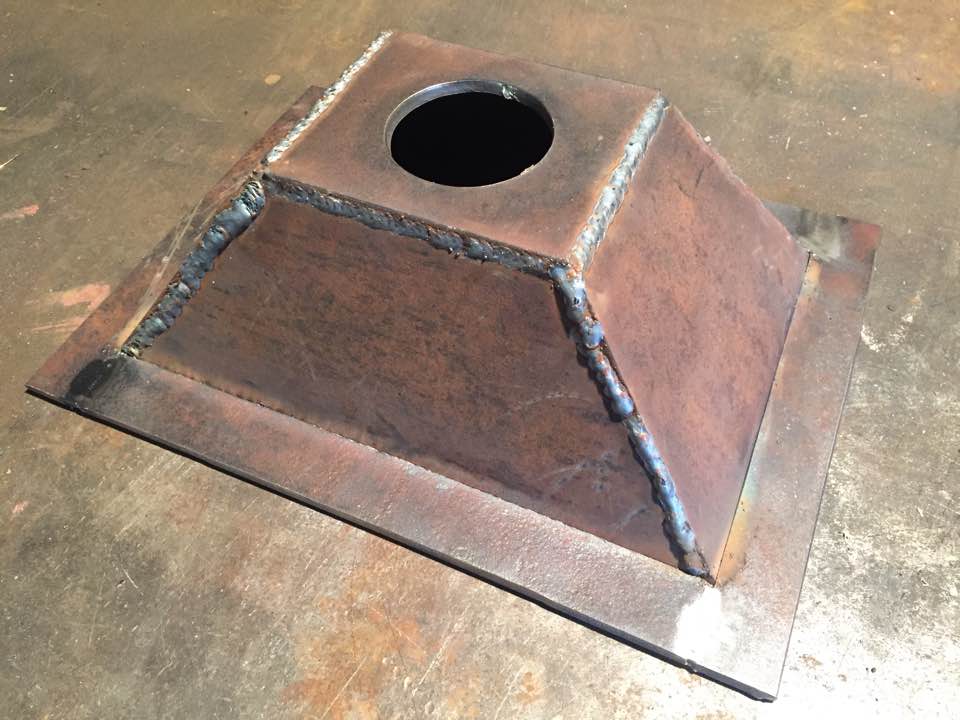
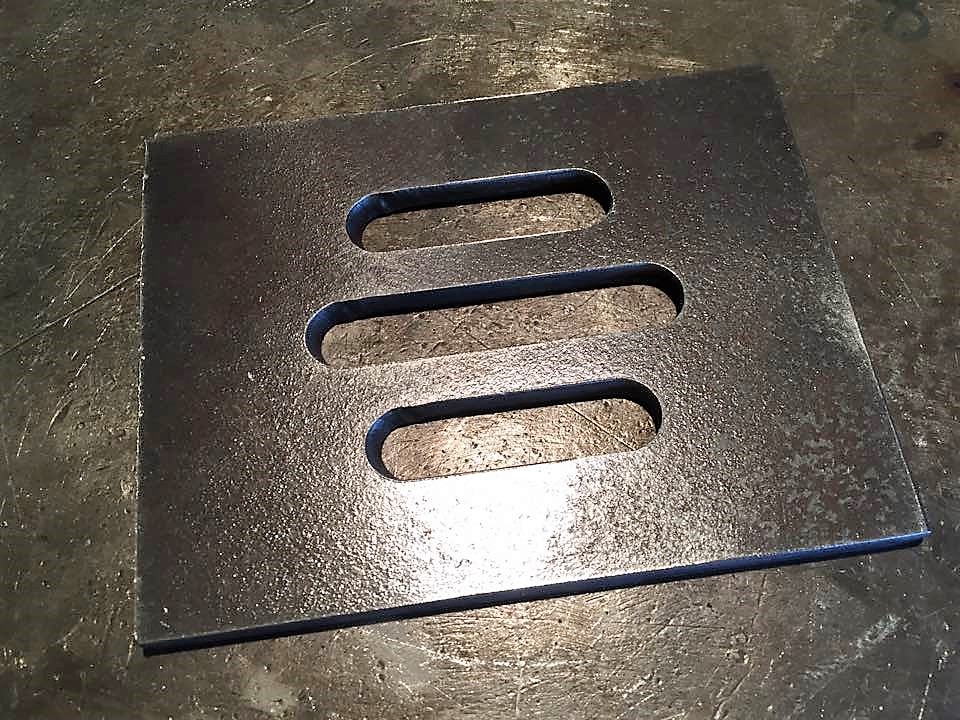
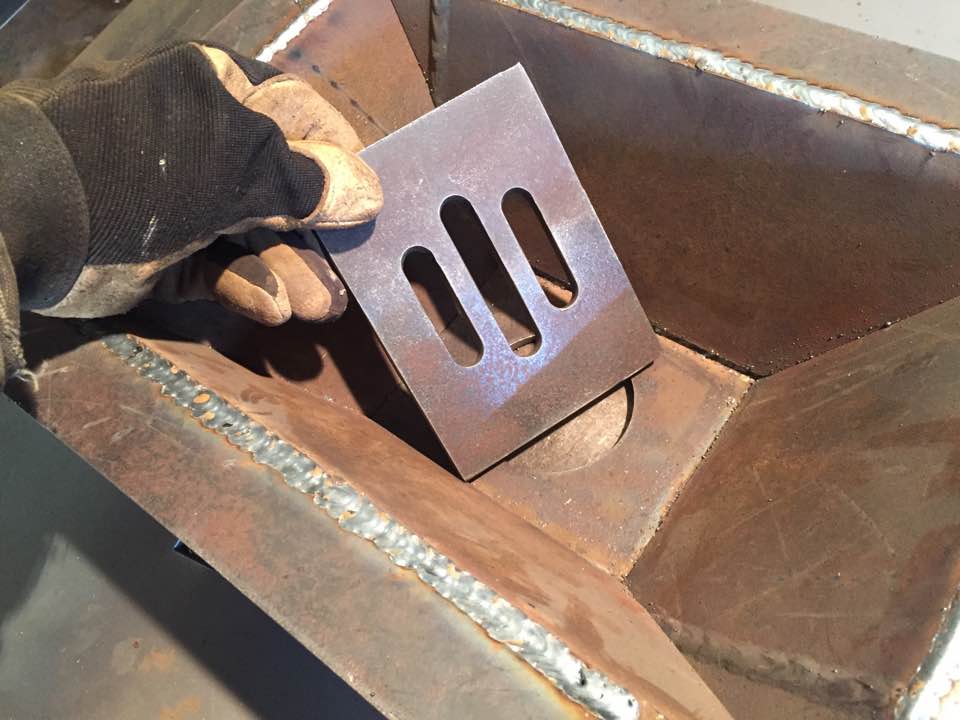
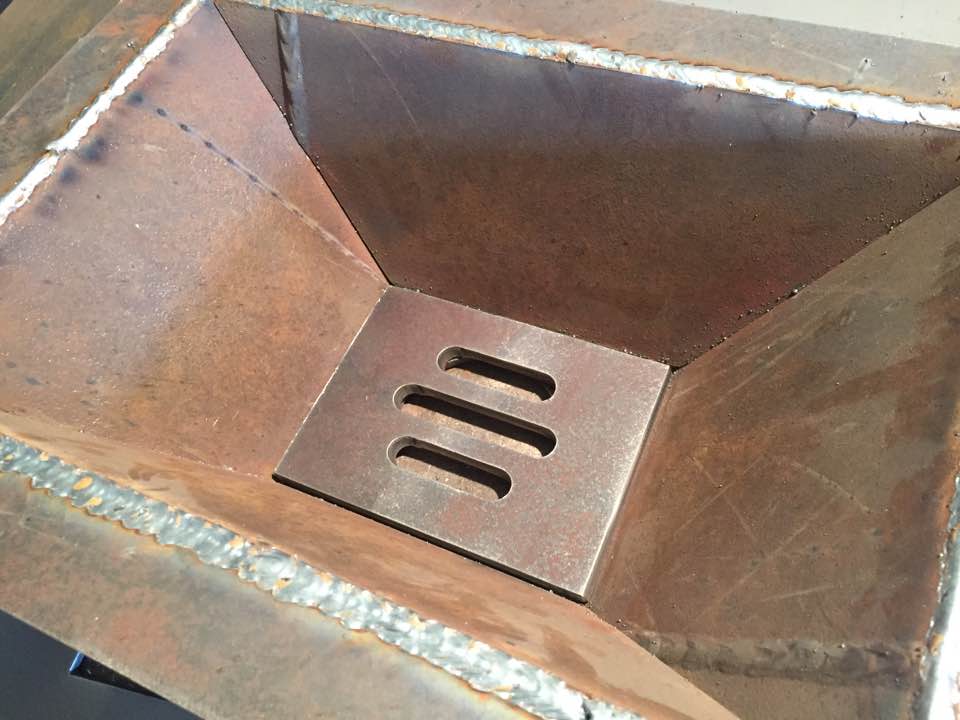
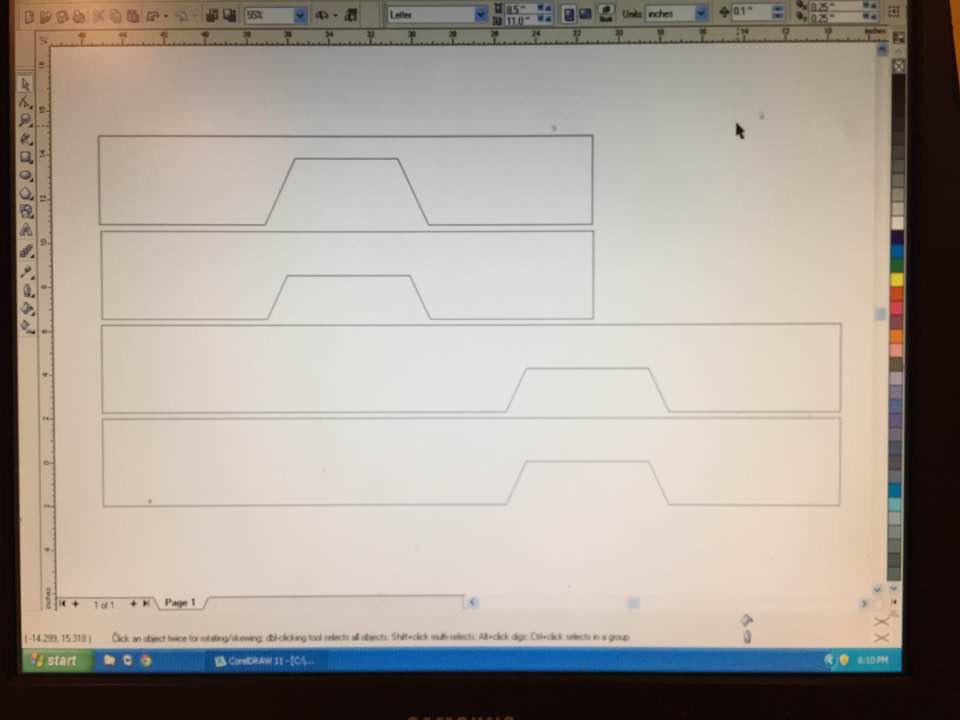
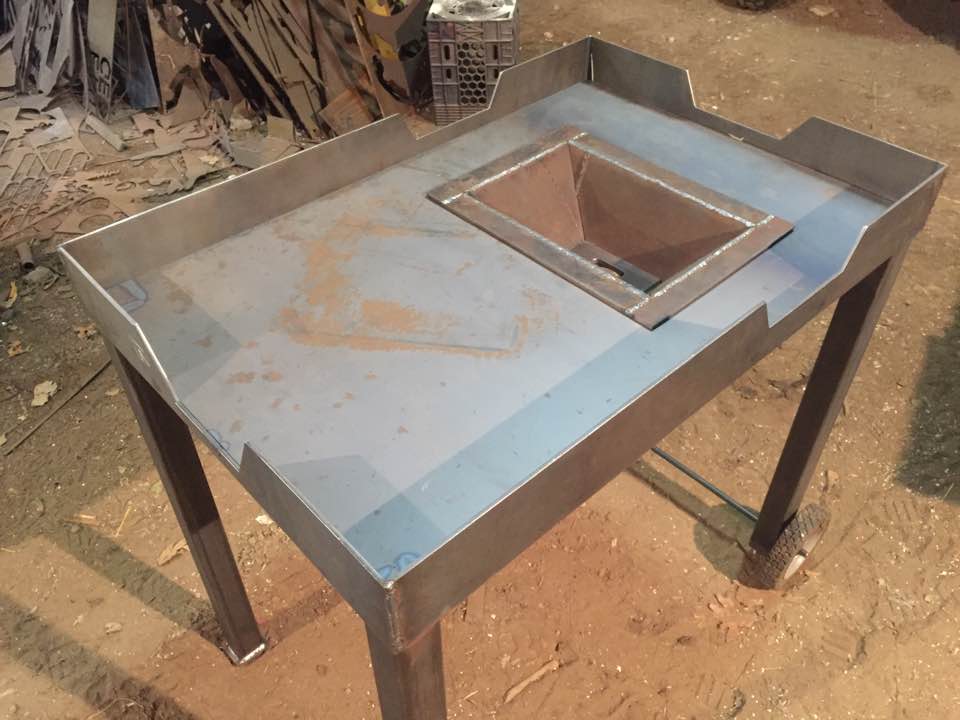
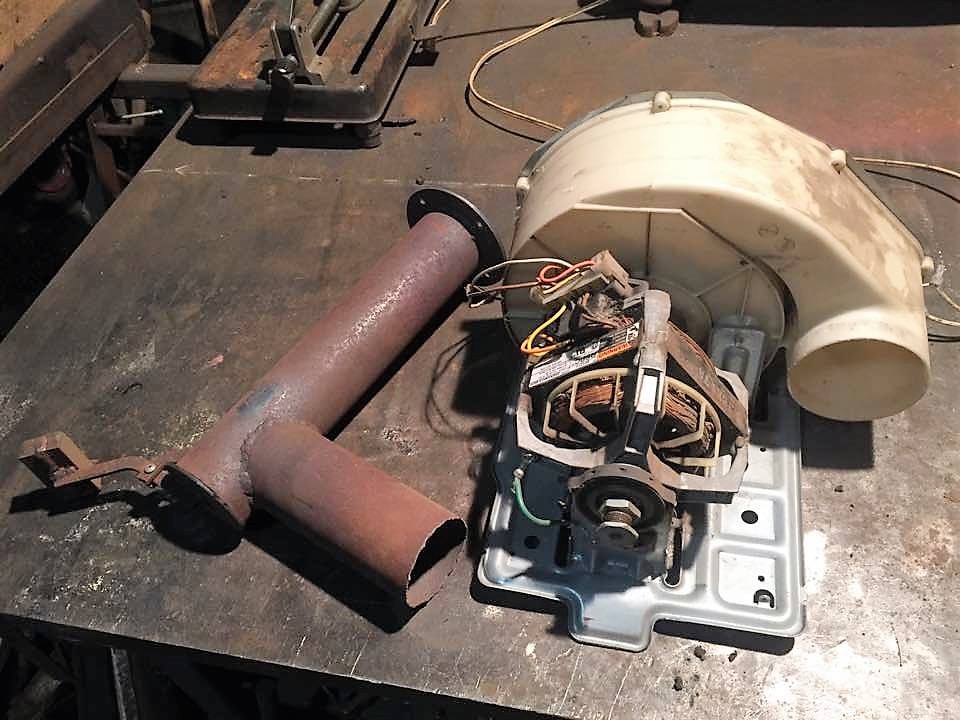
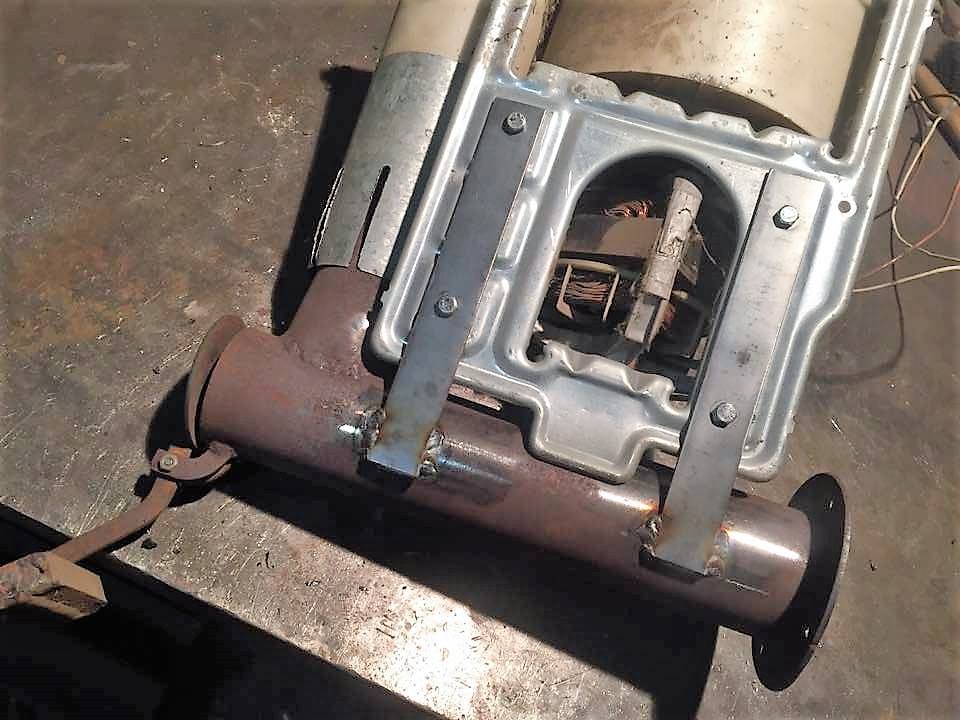
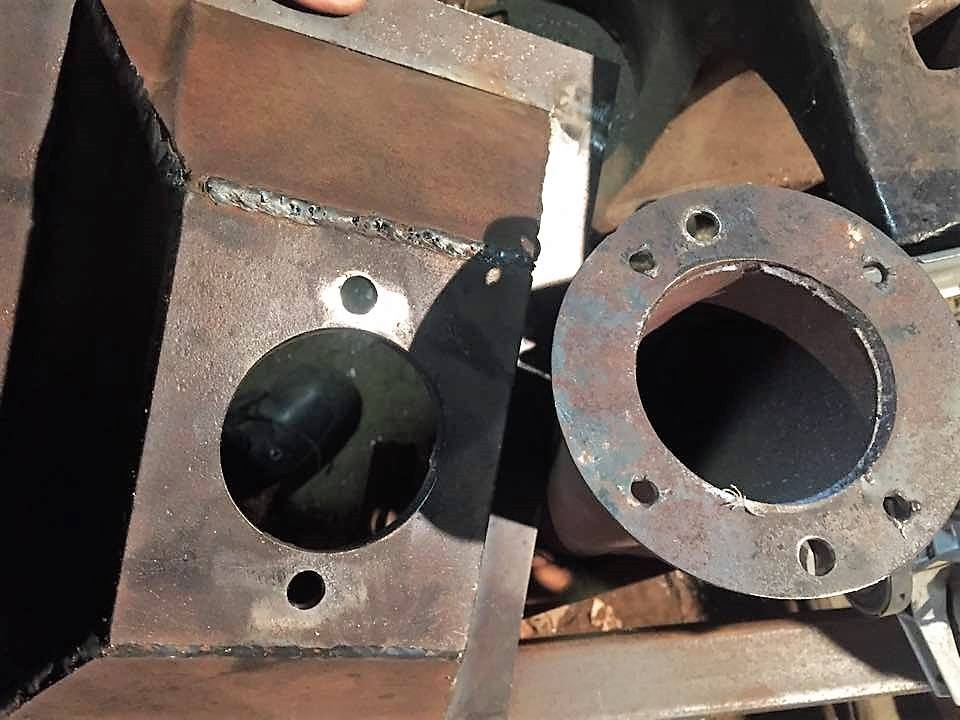
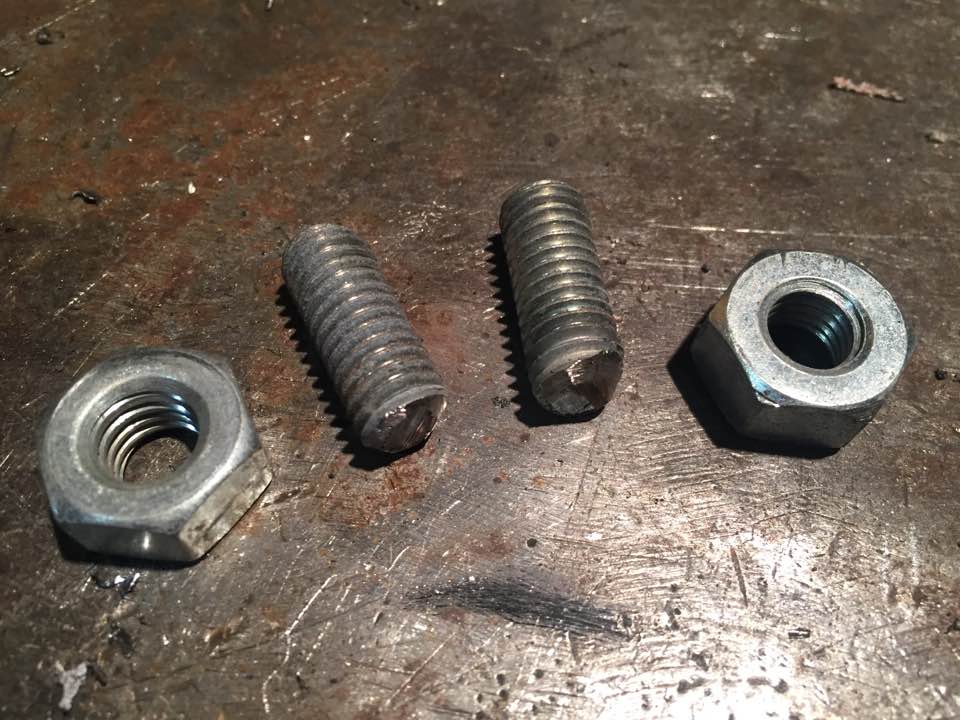
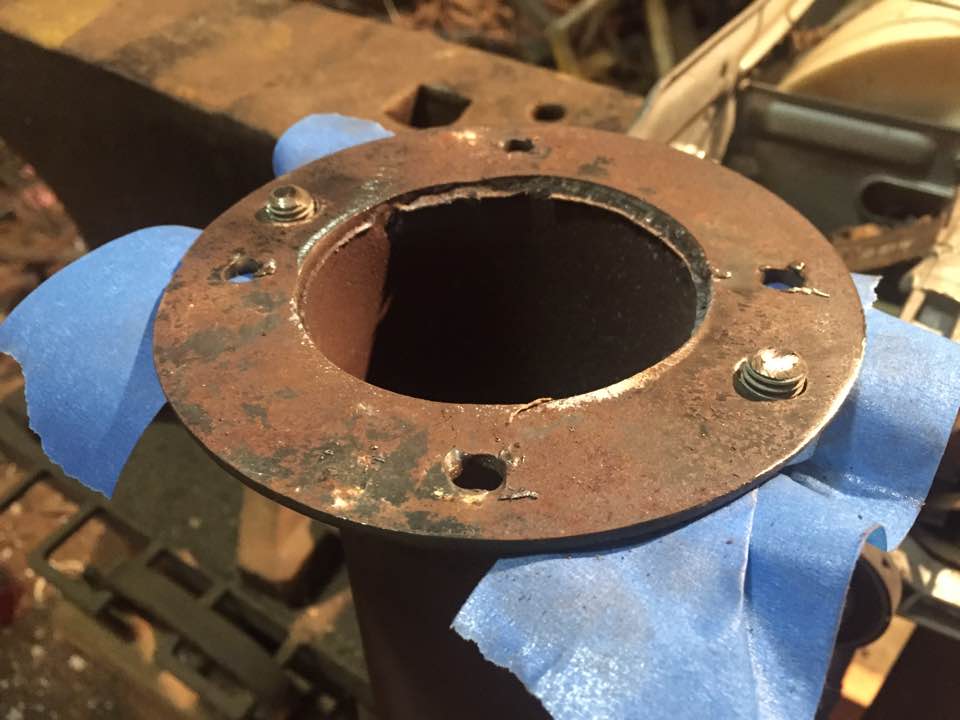
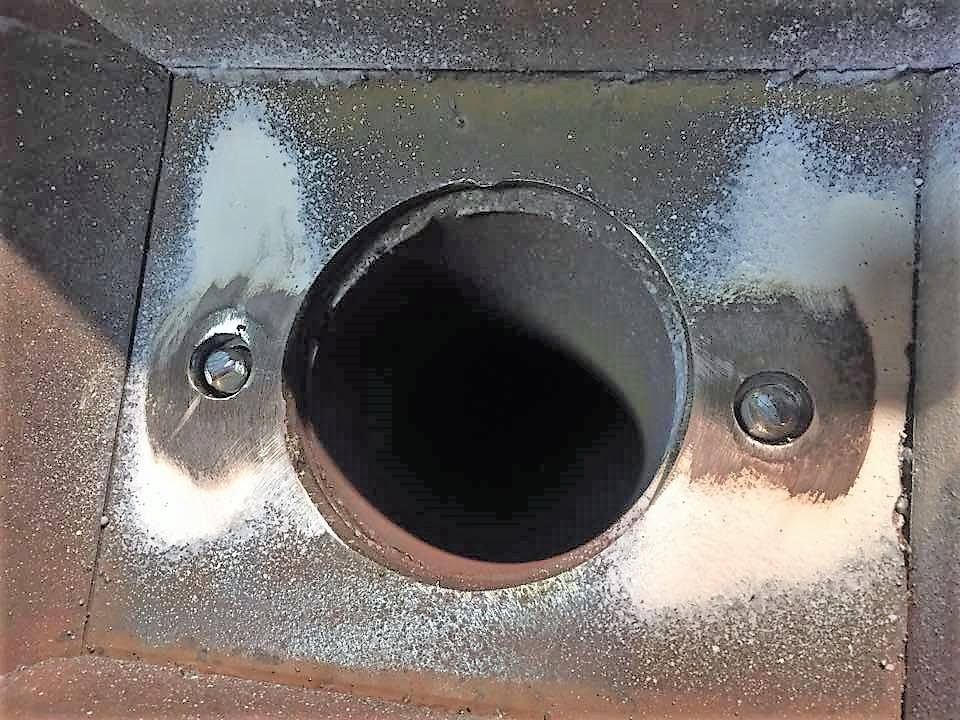
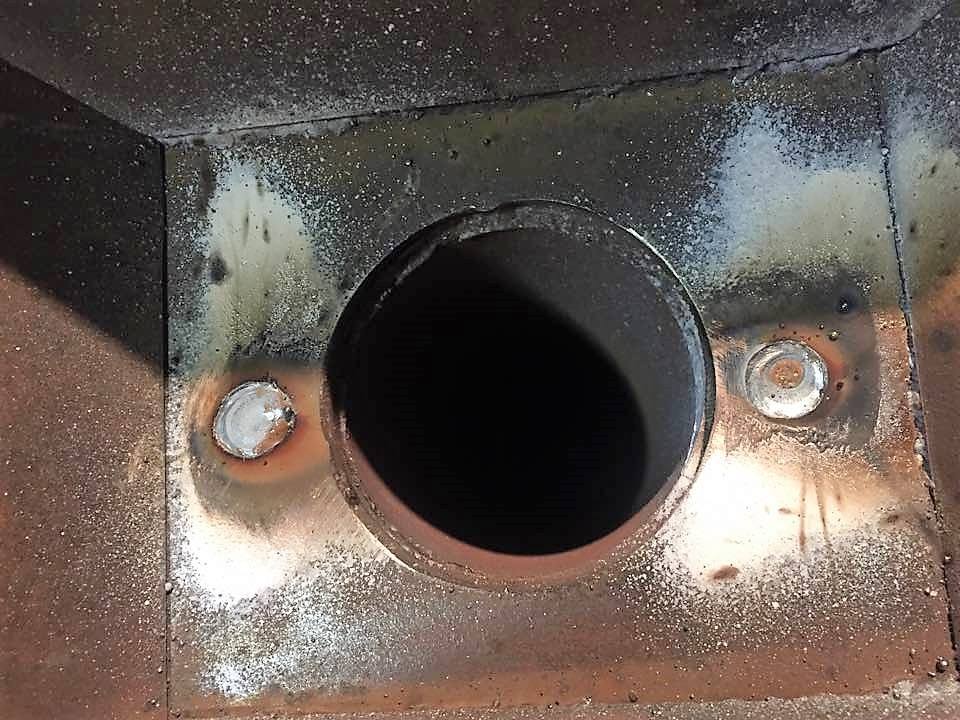
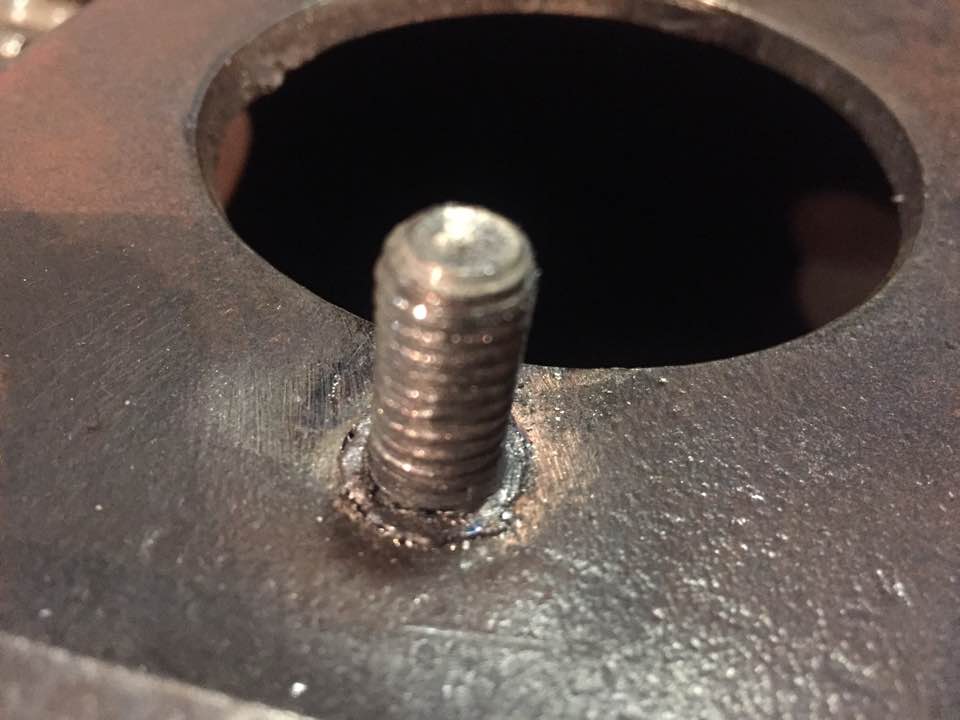
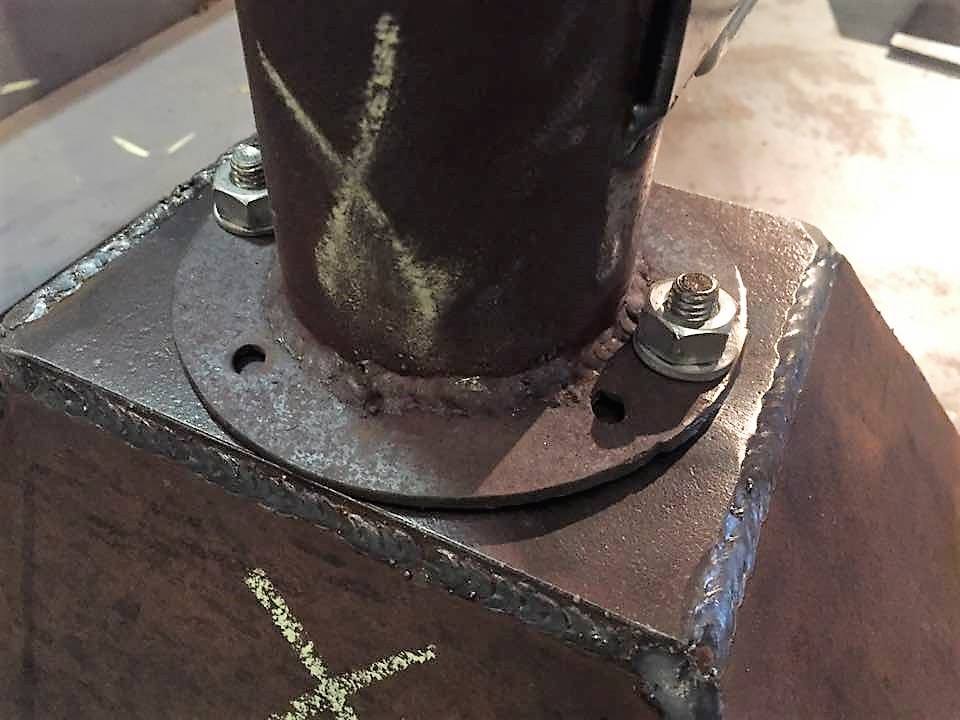
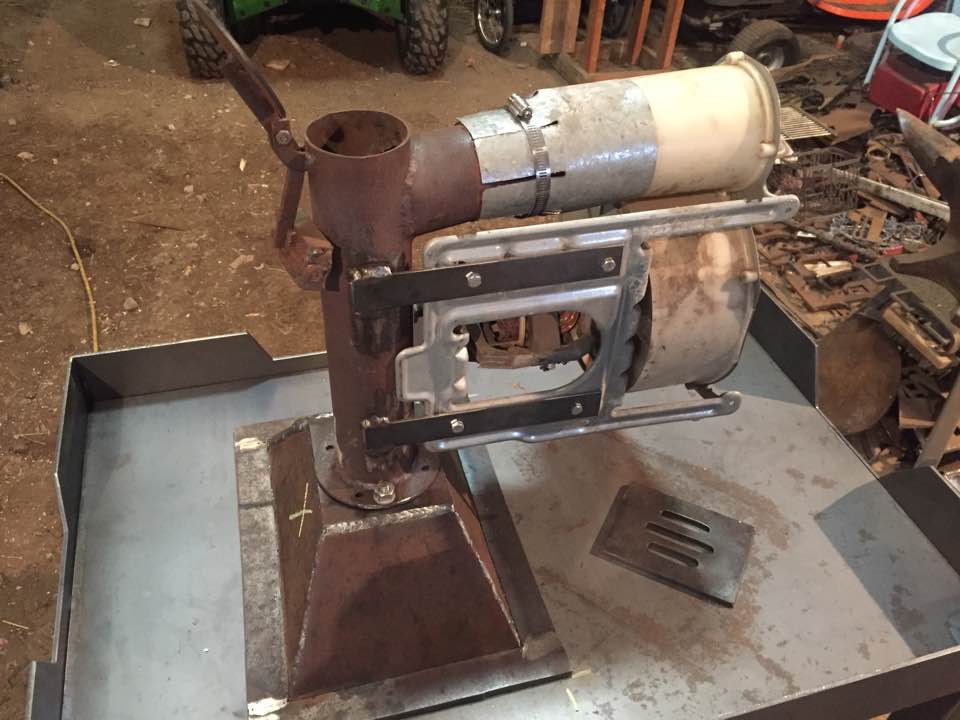
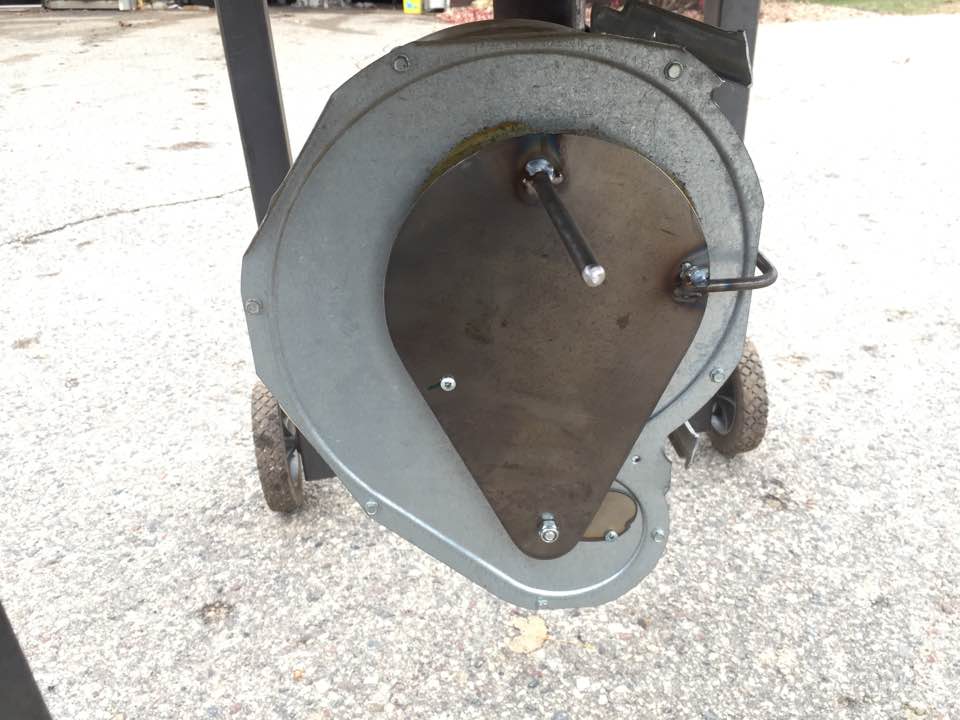
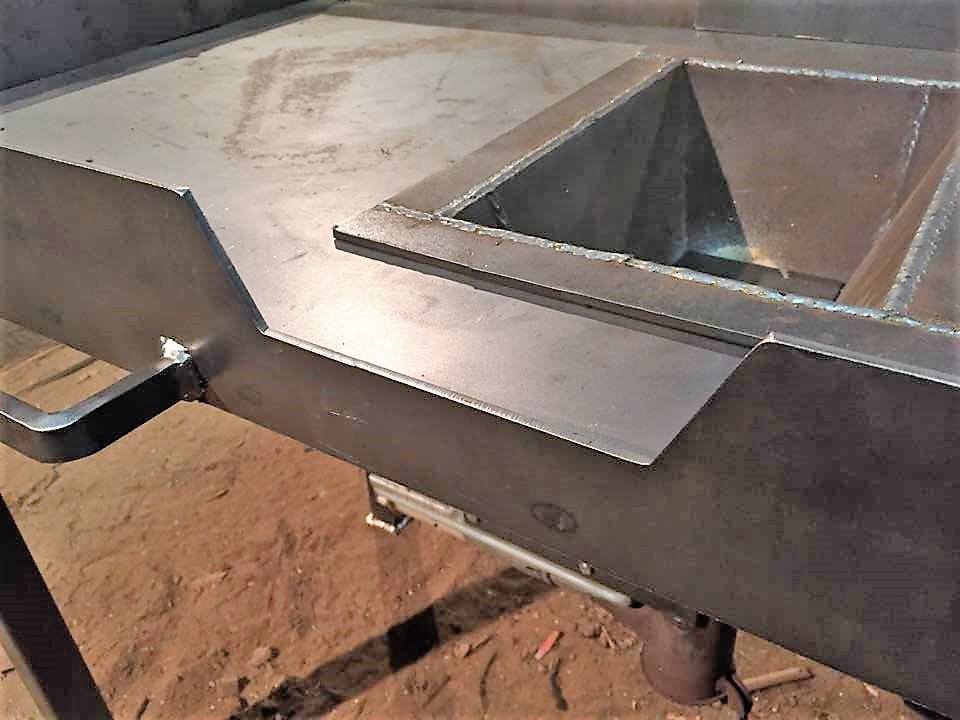
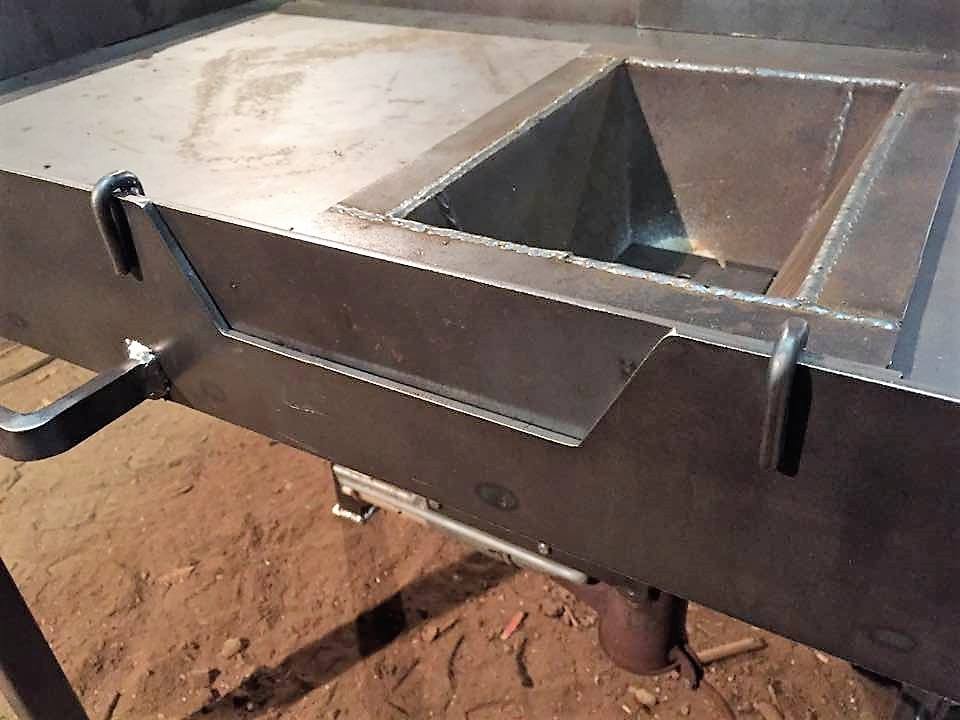
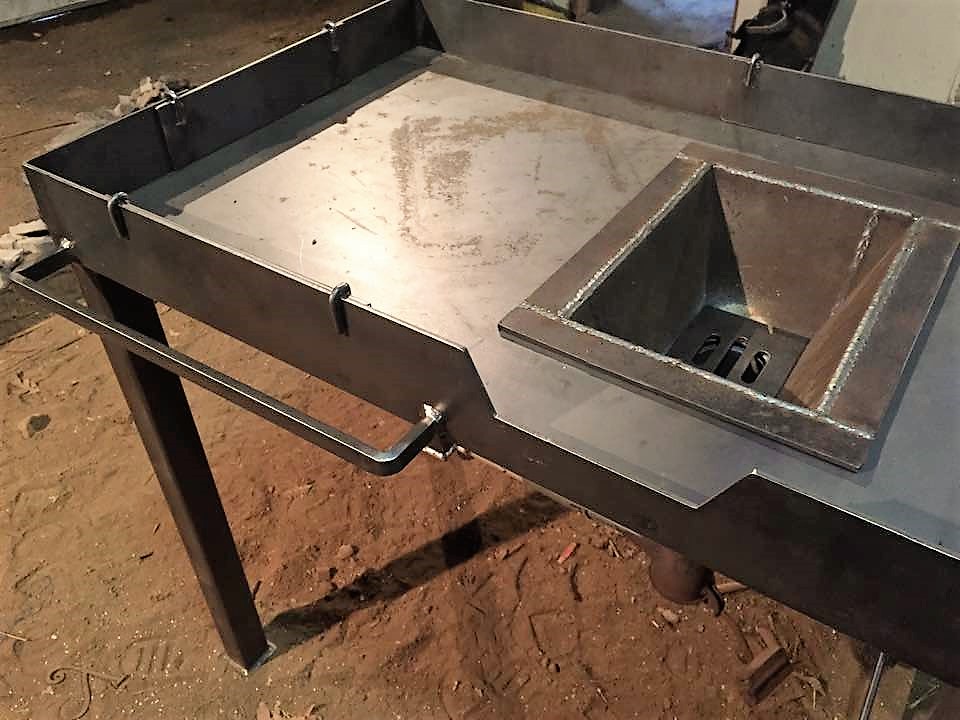
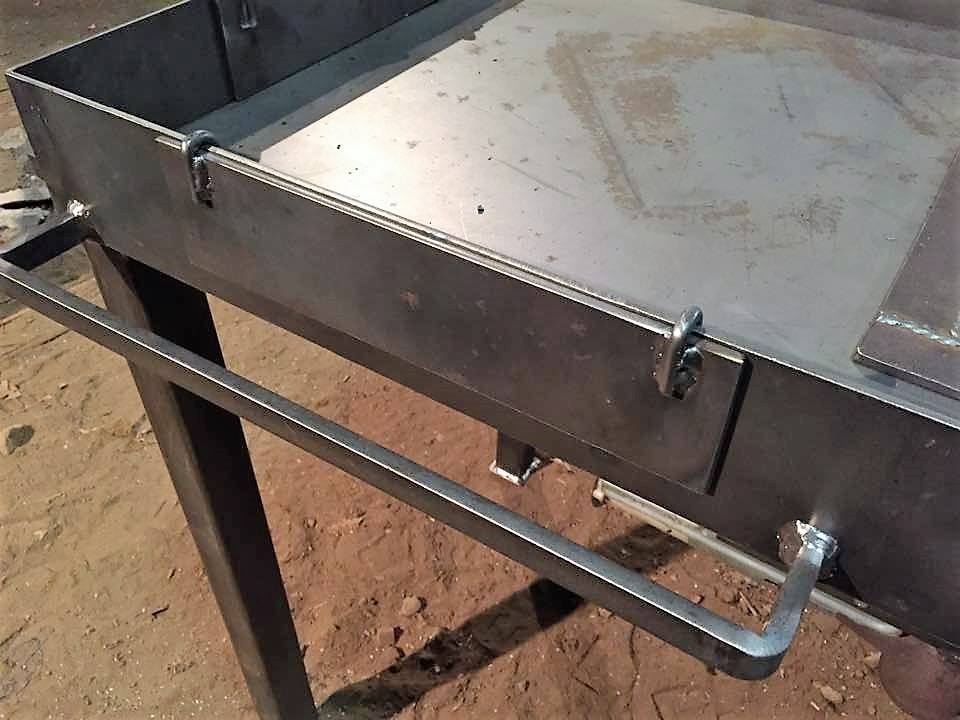
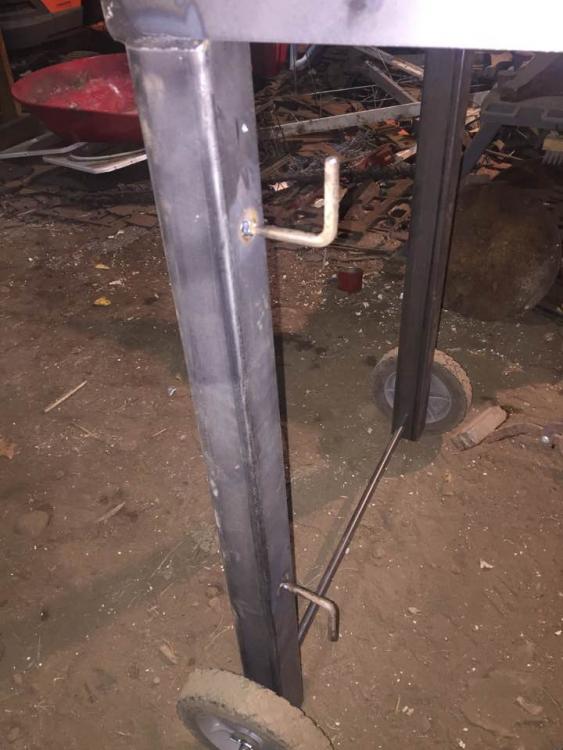
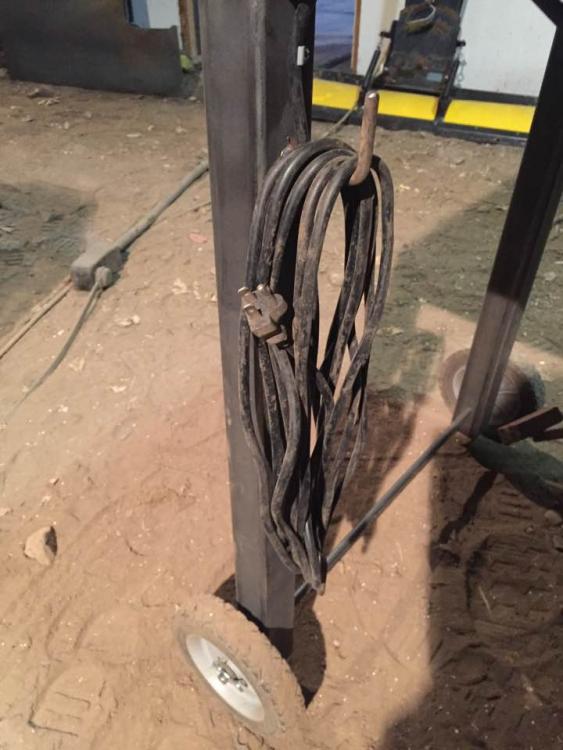
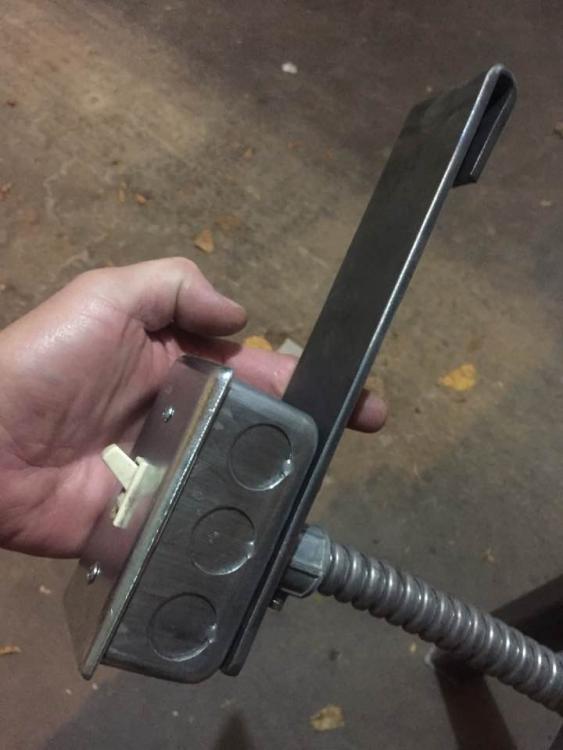
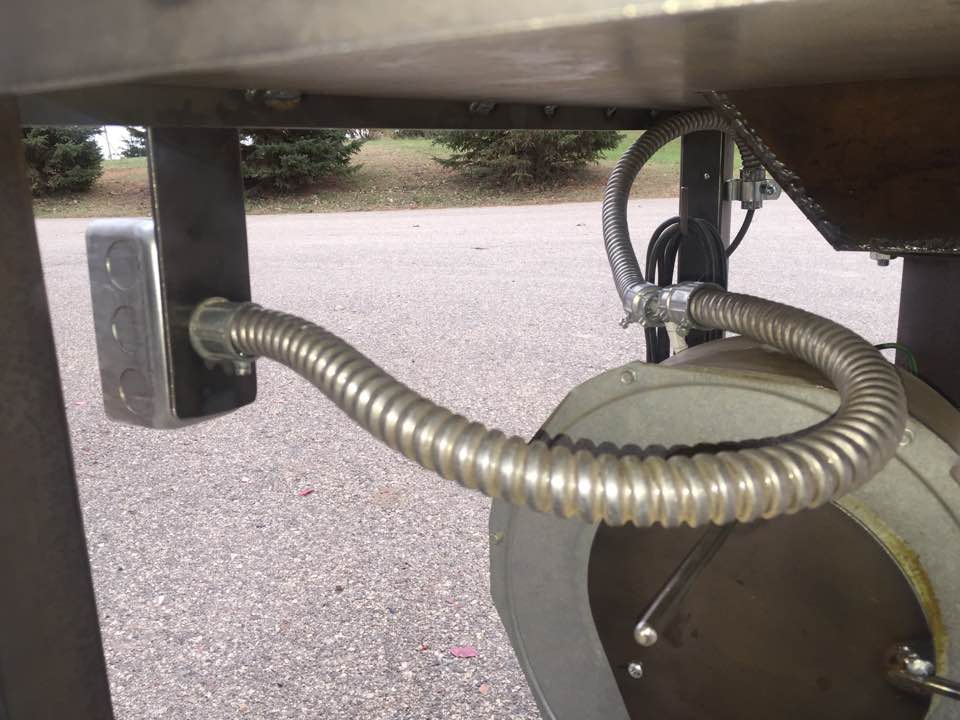
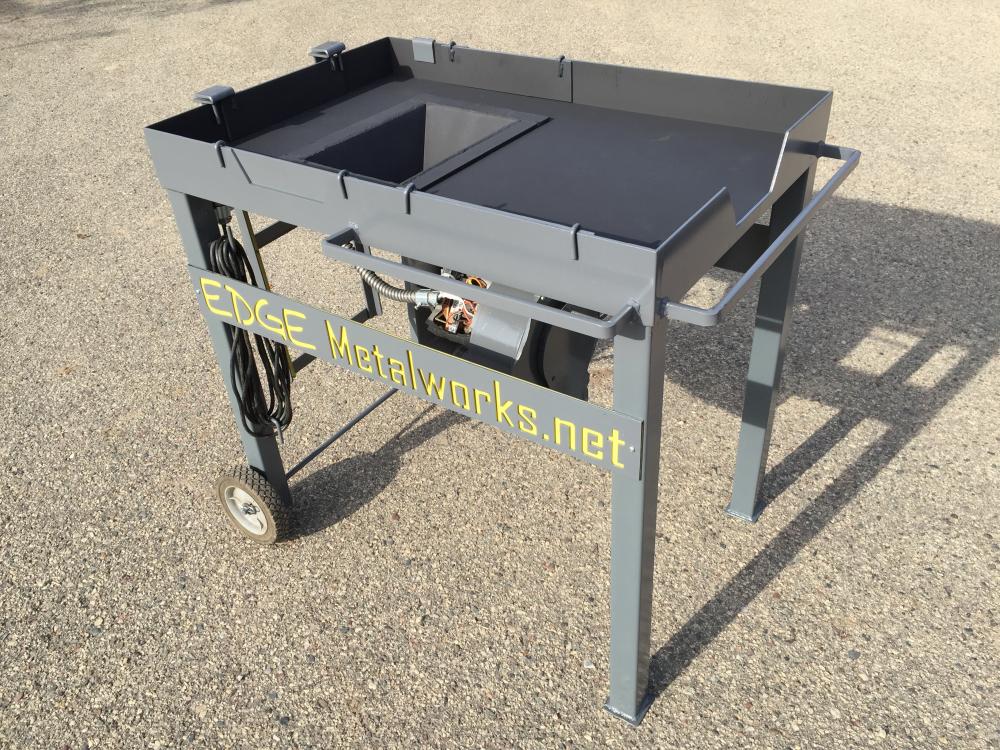
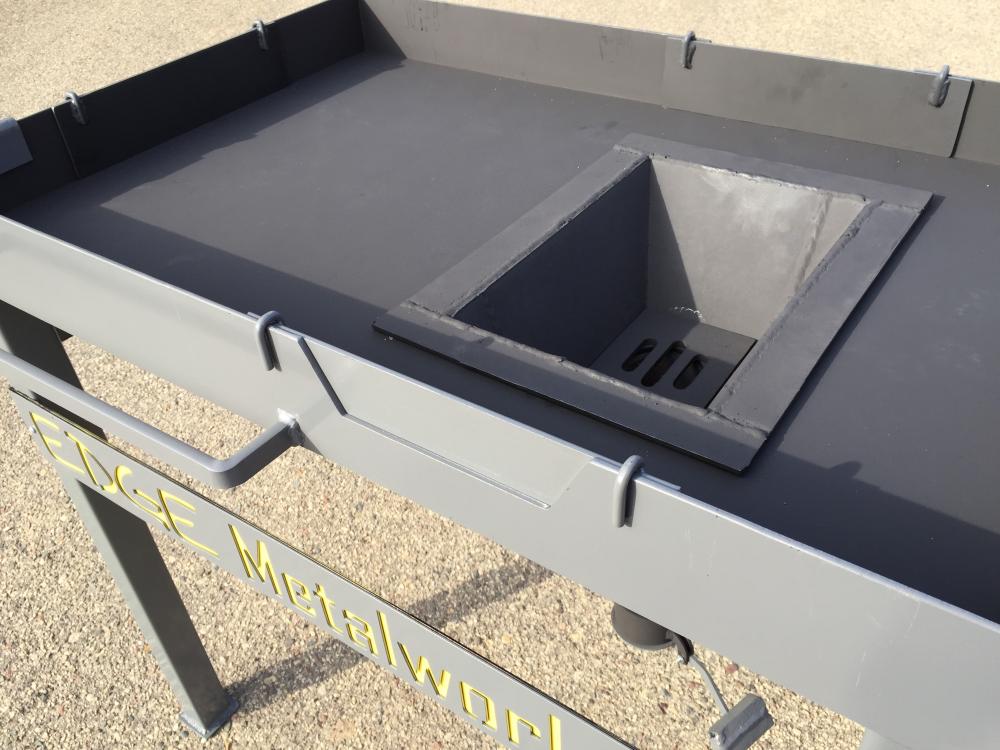
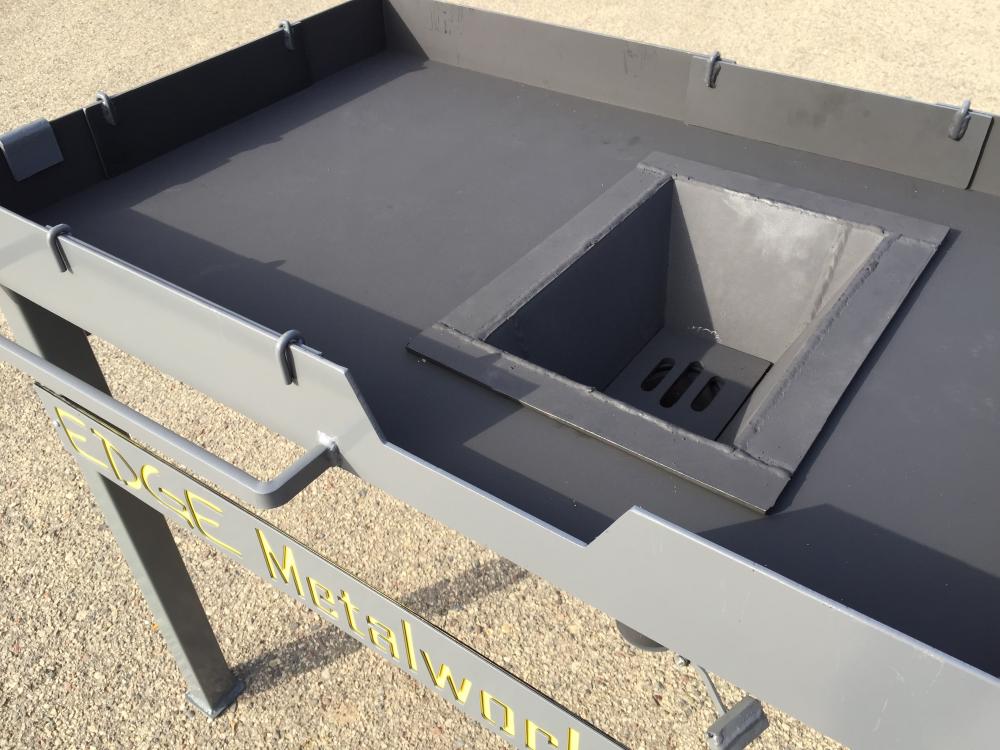
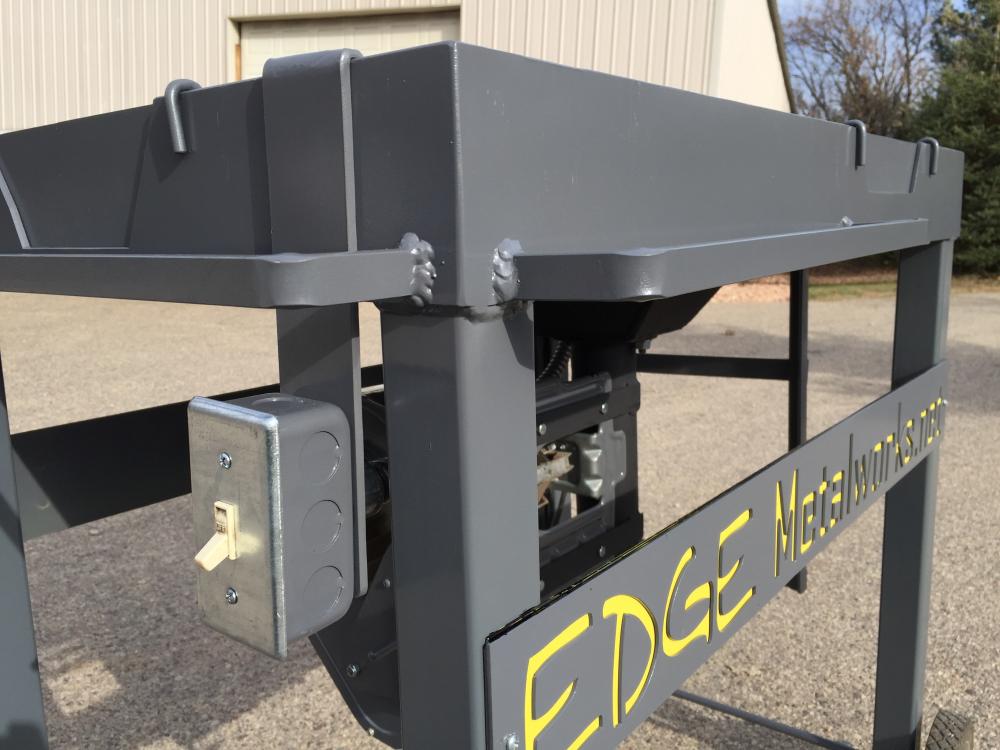
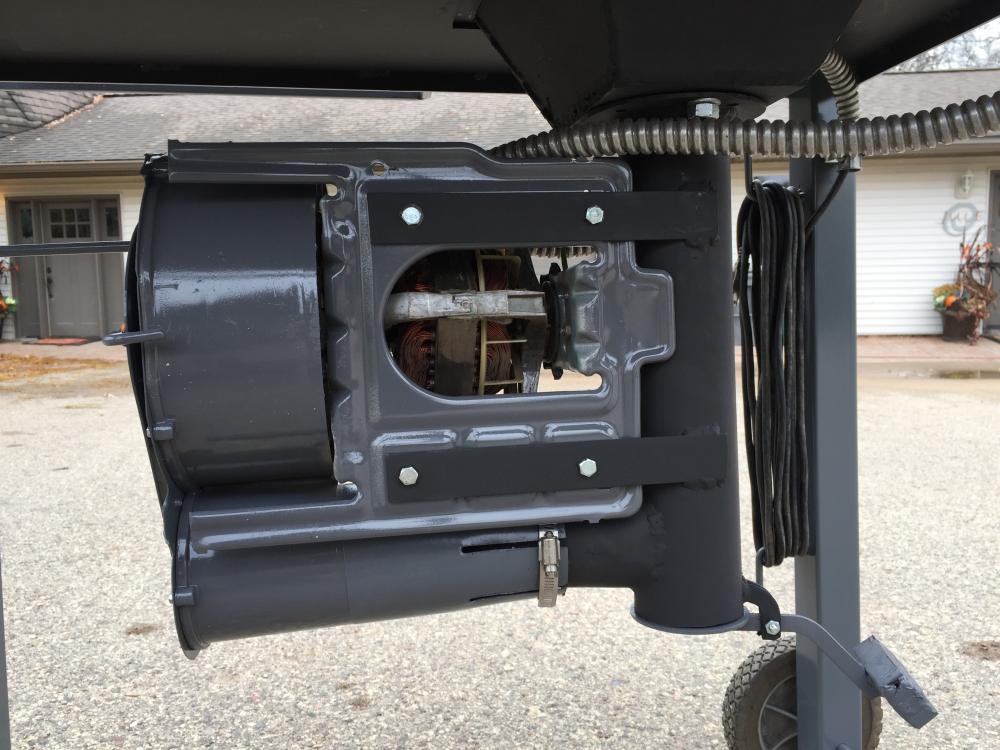
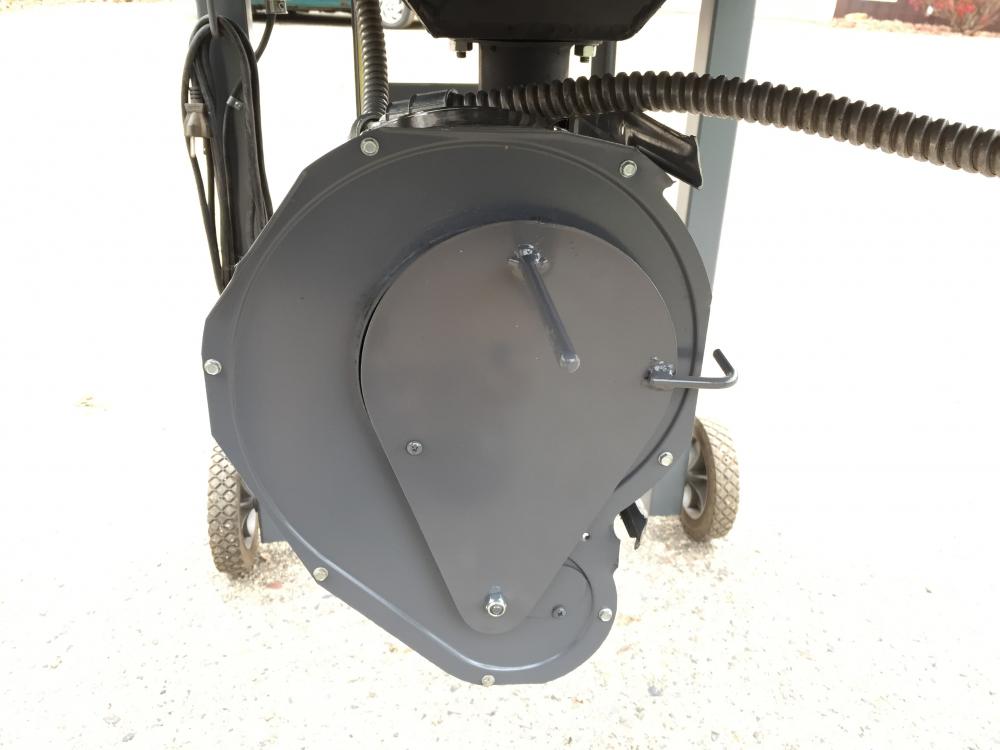
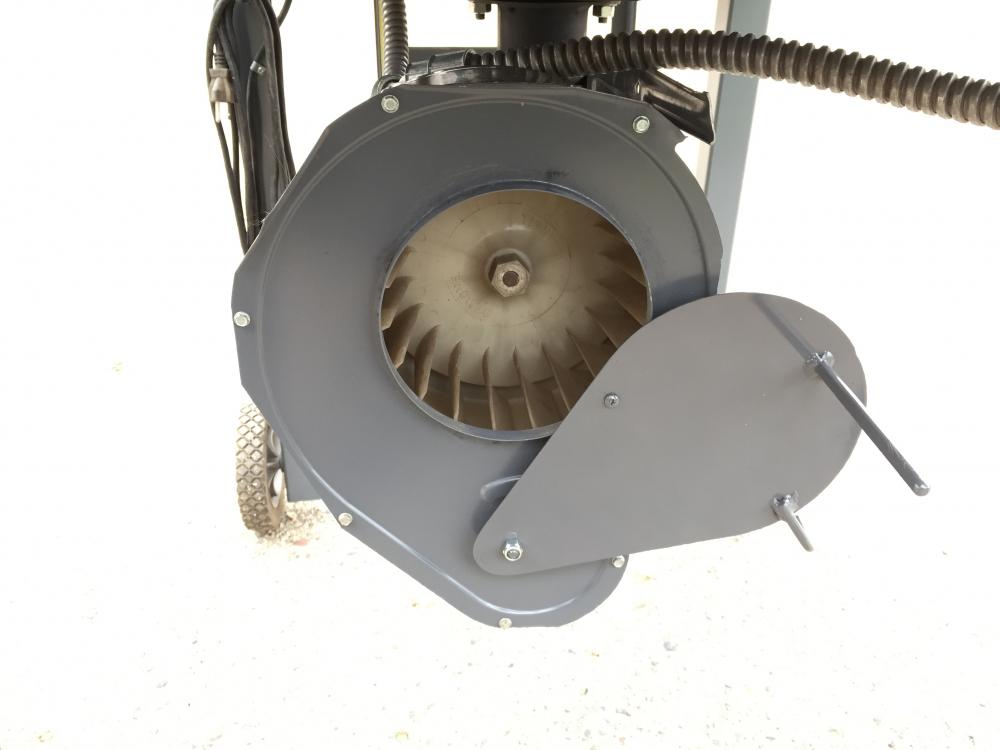
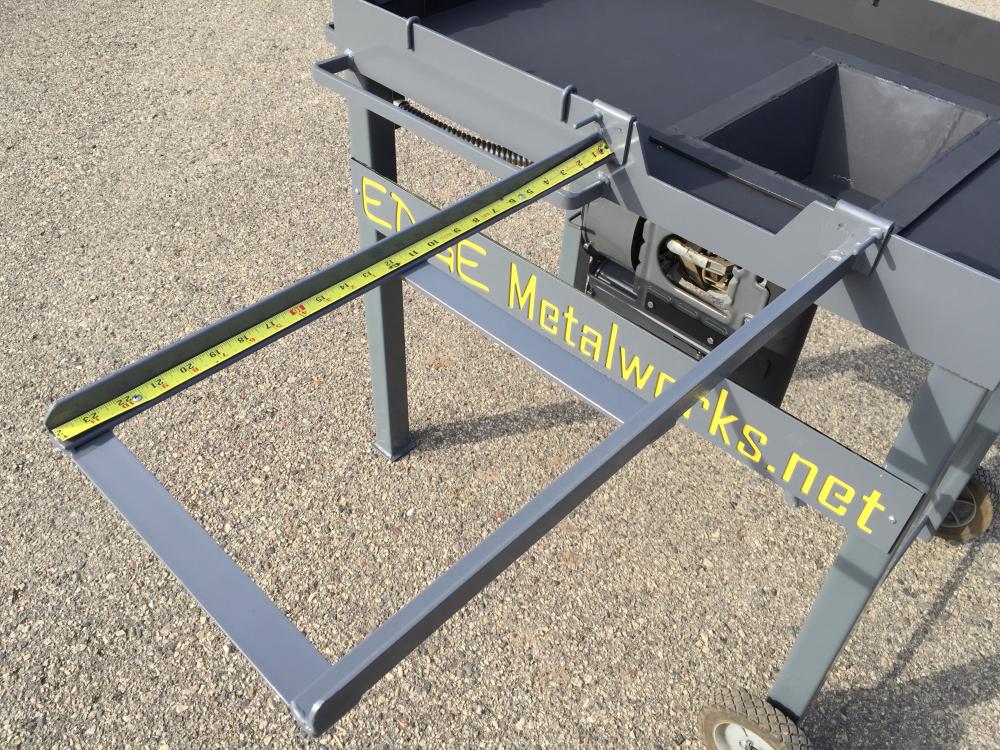
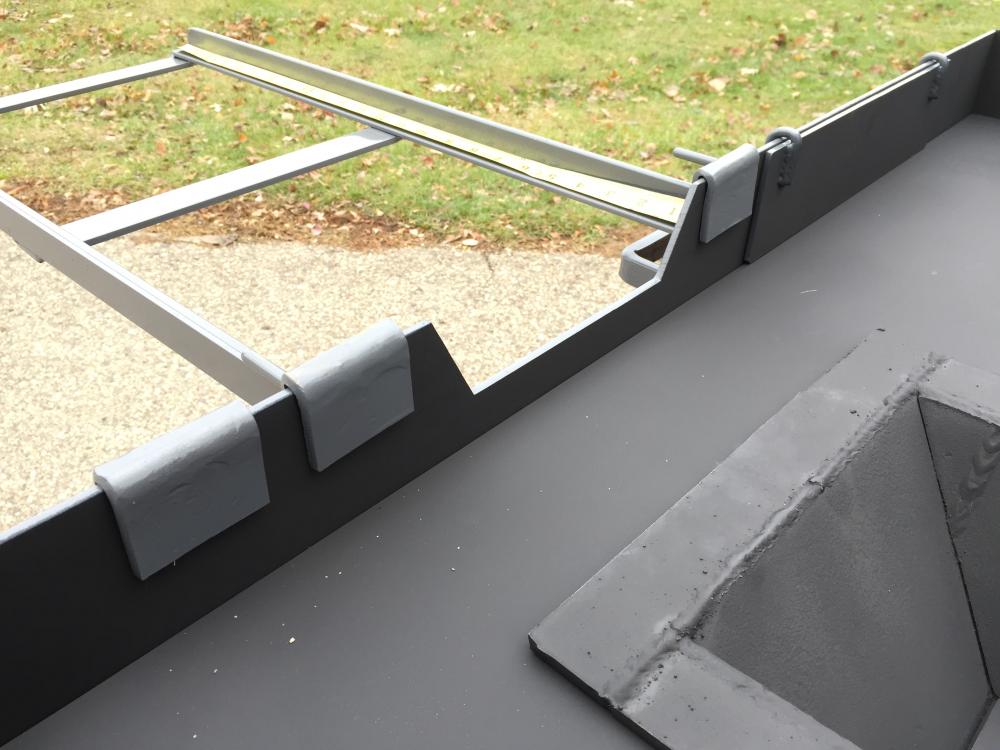
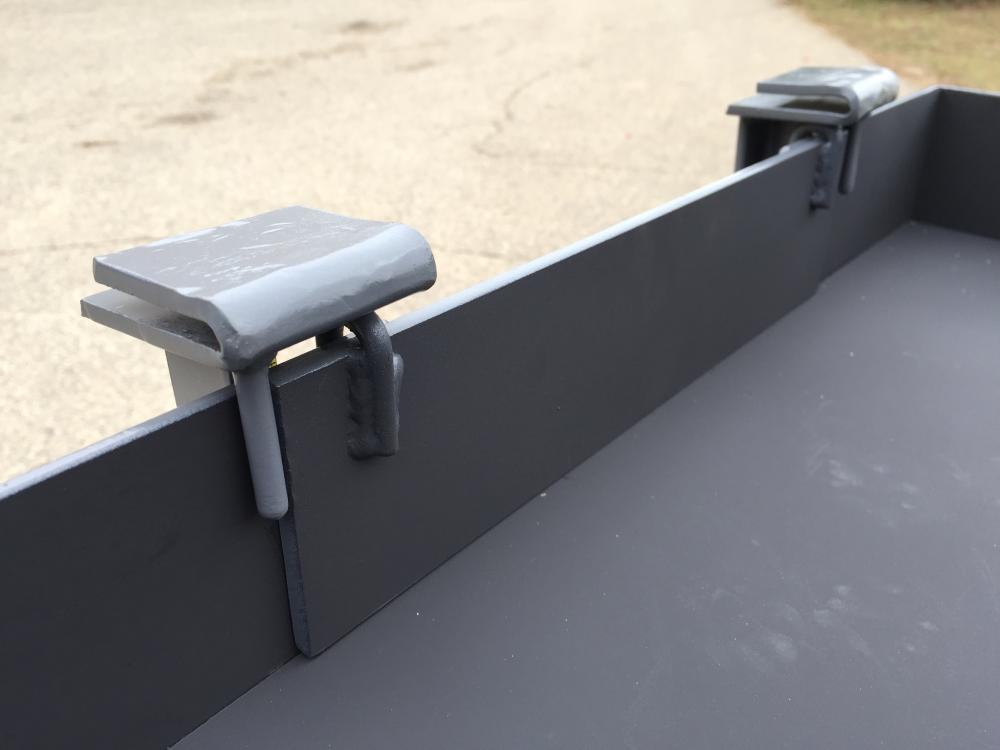
This one (and mine) is made from 1/4" steel and here's what he has to say about the thickness: "I made the fire pot. It is welded up out of quarter inch plate, thinner than what you see on some sites on the web, but I haven't had any issues with it. When forge welding all day, like at a forge welding class, it does get hot enough to glow dull red if the lights are low enough to see the glow."I know alot of people make them out of 1/2". This guy uses them and sells them on eBay and it looks like they're pretty popular: <Commercial link removed per TOS>Well I recently finished up my third forge and thought I'd share the build with you all as I think it turned out pretty well. Sorry about all the pics, but everybody like pics right!?!? Back in about 2007, I built a real nice propane gas forge for my very first forge, and while it worked well, I quickly realized that I needed something that could handle a wider piece. So about a year later, I ended up making a simple coal forge from a wheelbarrow tub and a clothes dryer blower. I figured I'd make something simple, quick and cheap... then when I get more experience and could figure out exactly what I wanted in a forge, I could build one specifically to suit my needs. Well I finally went and did it, and I took pictures too! ... Lots and lots of pictures... To reminisce... here is a picture of my first gas forge, and also my simple wheelbarrow forge. Now, let's get on with the build! I've always considered the the firepot to be the heart of the forge, so that's what I started with. I have a CNC plasma cutting table so I drew up the firepot in Corel Draw, then cut out the pieces from 1/4" A36 HR steel and welded it up. Then I drew up an easy to replace "grate plate" for the bottom of the firpot. I was going to just weld in some bars for the grate, but thought I could easily cut a new one when it gets burnt out, and just drop it in place like this. The extra thickness will help the firpot last longer as well. Next I drew up the floor pan and cut it out from 3/16" steel, then drew up the four sides, cut them out, and welded them to the floor pan. Then I welded on some legs from 2X2 square tubing, welded some feet on them, and added some wheels on the back legs. The finished floor pan height is 32". I tore apart my wheelbarrow forge and used the blower, tuyere, and ash dump from it since it would save time, and it already worked great. I do wish the ash dump was deeper, but I can live with emptying it more often. I also welded on some bracing straps to mount the blower directly to the tuyere. I was going to drill and tap some holes in the bottom of the firepot, but I couldn't find my tap and die set, so I figured out which position I wanted the tuyere, drilled some matching holes in the firepot and the flange, then cut the heads off some 3/8" bolts and welded them in place to use as studs instead. I used blue tape to hold the studs upward in place while I plug welded them from the bottom inside of the firepot. Worked great! Here you can see a close up of them bolted together, a complete shot of my firepot/tuyere/blower/ash dump assembly, and finally with it installed under the forge body. I drew and cut out a piece of 14 guage steel for an air gate, then welded a handle and a stop to it. CNC plasma tables sure are handy! I decided to weld on some bars to hold my tongs, shovel, rake, etc... from 3/8" X 1" bar stock. I put them on three sides since I wanted the versability to be able to use it in lots of orientations. I have these openings on all four sides so I can get longer stock, low into the sweet spot if I need to, but I still wanted to be able to close the openings if I'm not using them so coal won't spill out. (also... the opening on the one end farthest from the firepot is deeper and flush with the floor pan in case I ever want to clean out the forge by sweeping rather than tipping it over) So to close them, I made some sliding "coal gates" that can be partially or fully slid out of the way, or even flipped to the outside when I want to open them. All four of the coal gates are identical for ease of replacement. Then I welded in some cord hangers to hold the 20' power cable. I couldn't decide on where to mount the power switch since I wasn't sure which of the 3 sides I would be using as the front, so I decided to attach the switch to a movable mount that can attach to anywhere on the forge body. I also used flexible steel conduit to help protect the wires from heat. And here it is all finished up! I painted the firepot and floor pan hi temp black, but painted everything else industrial grey since that's what I paint all my home built tools in. I also made a removable support extension for long stock that can mount anywhere on the forge body, and also stores conveniently on any side when I'm not using it. It's exactly 24" long and 12" wide to double as a measuring tool if needed, plus I bolted on a piece of broken measuring tape to it, for smaller measurements. Can't wait to fire it up!


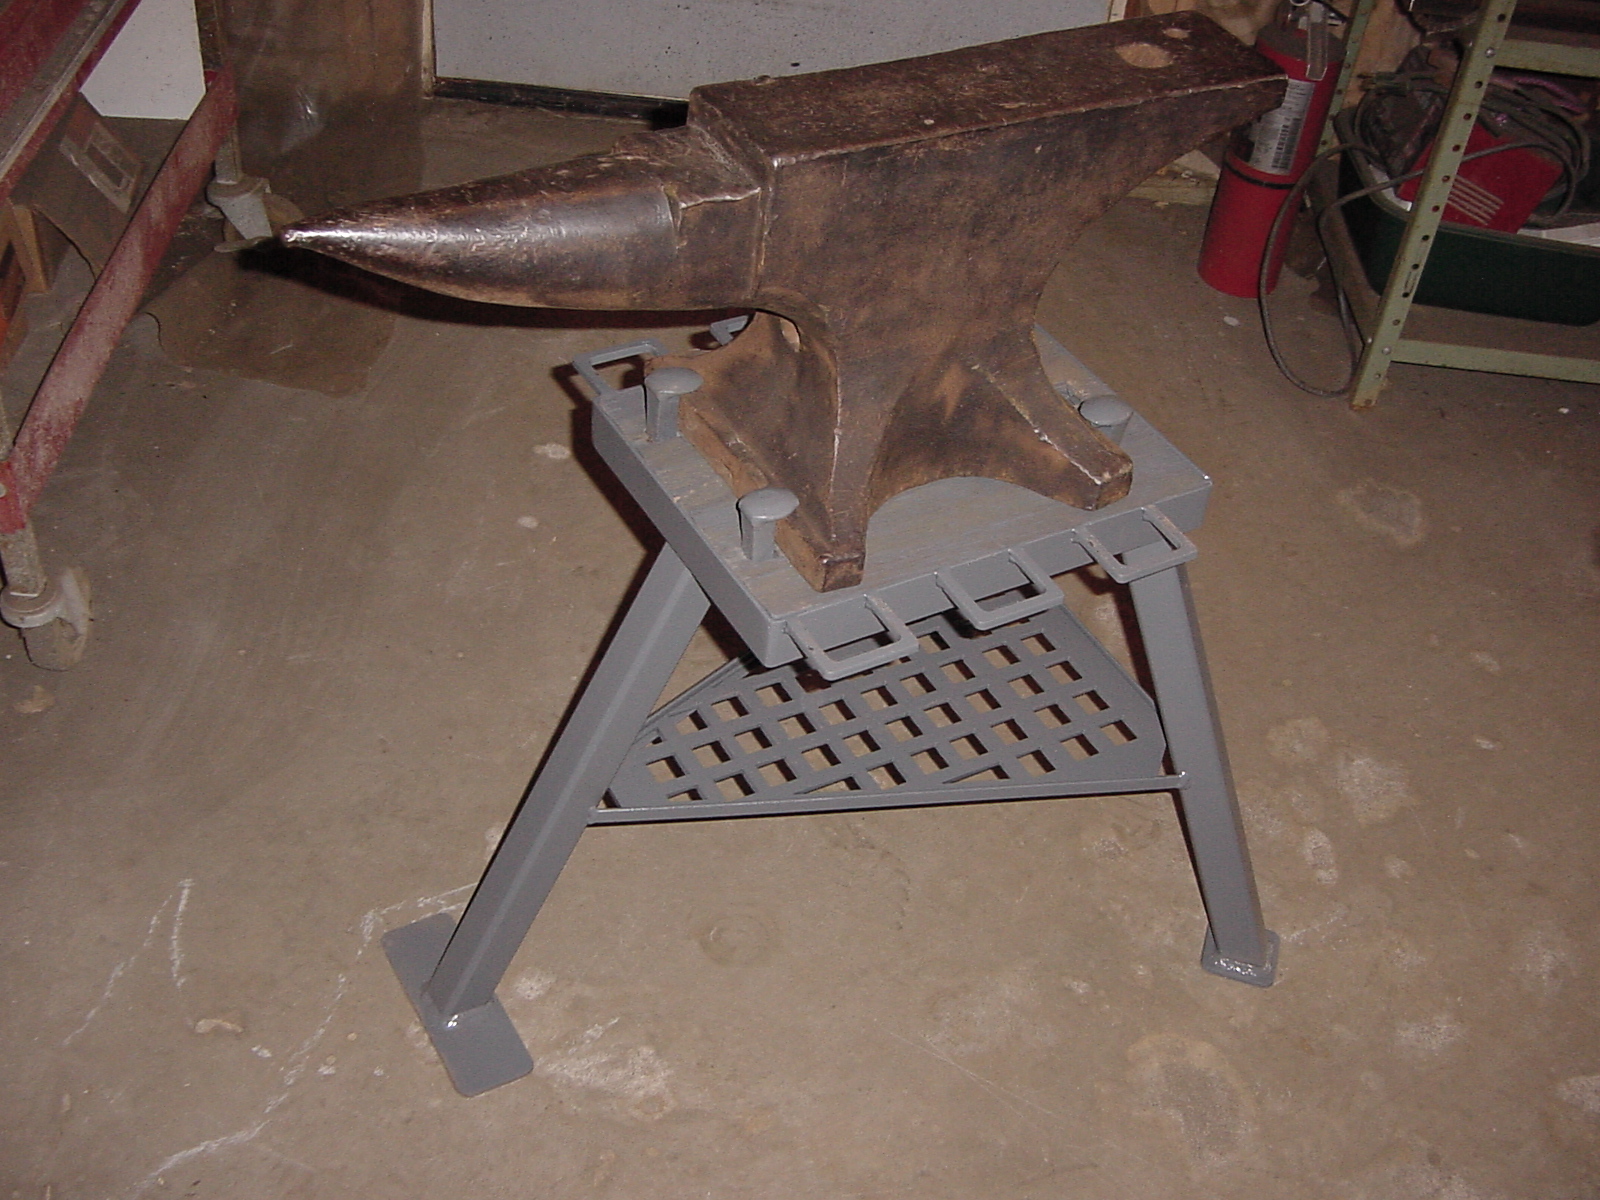
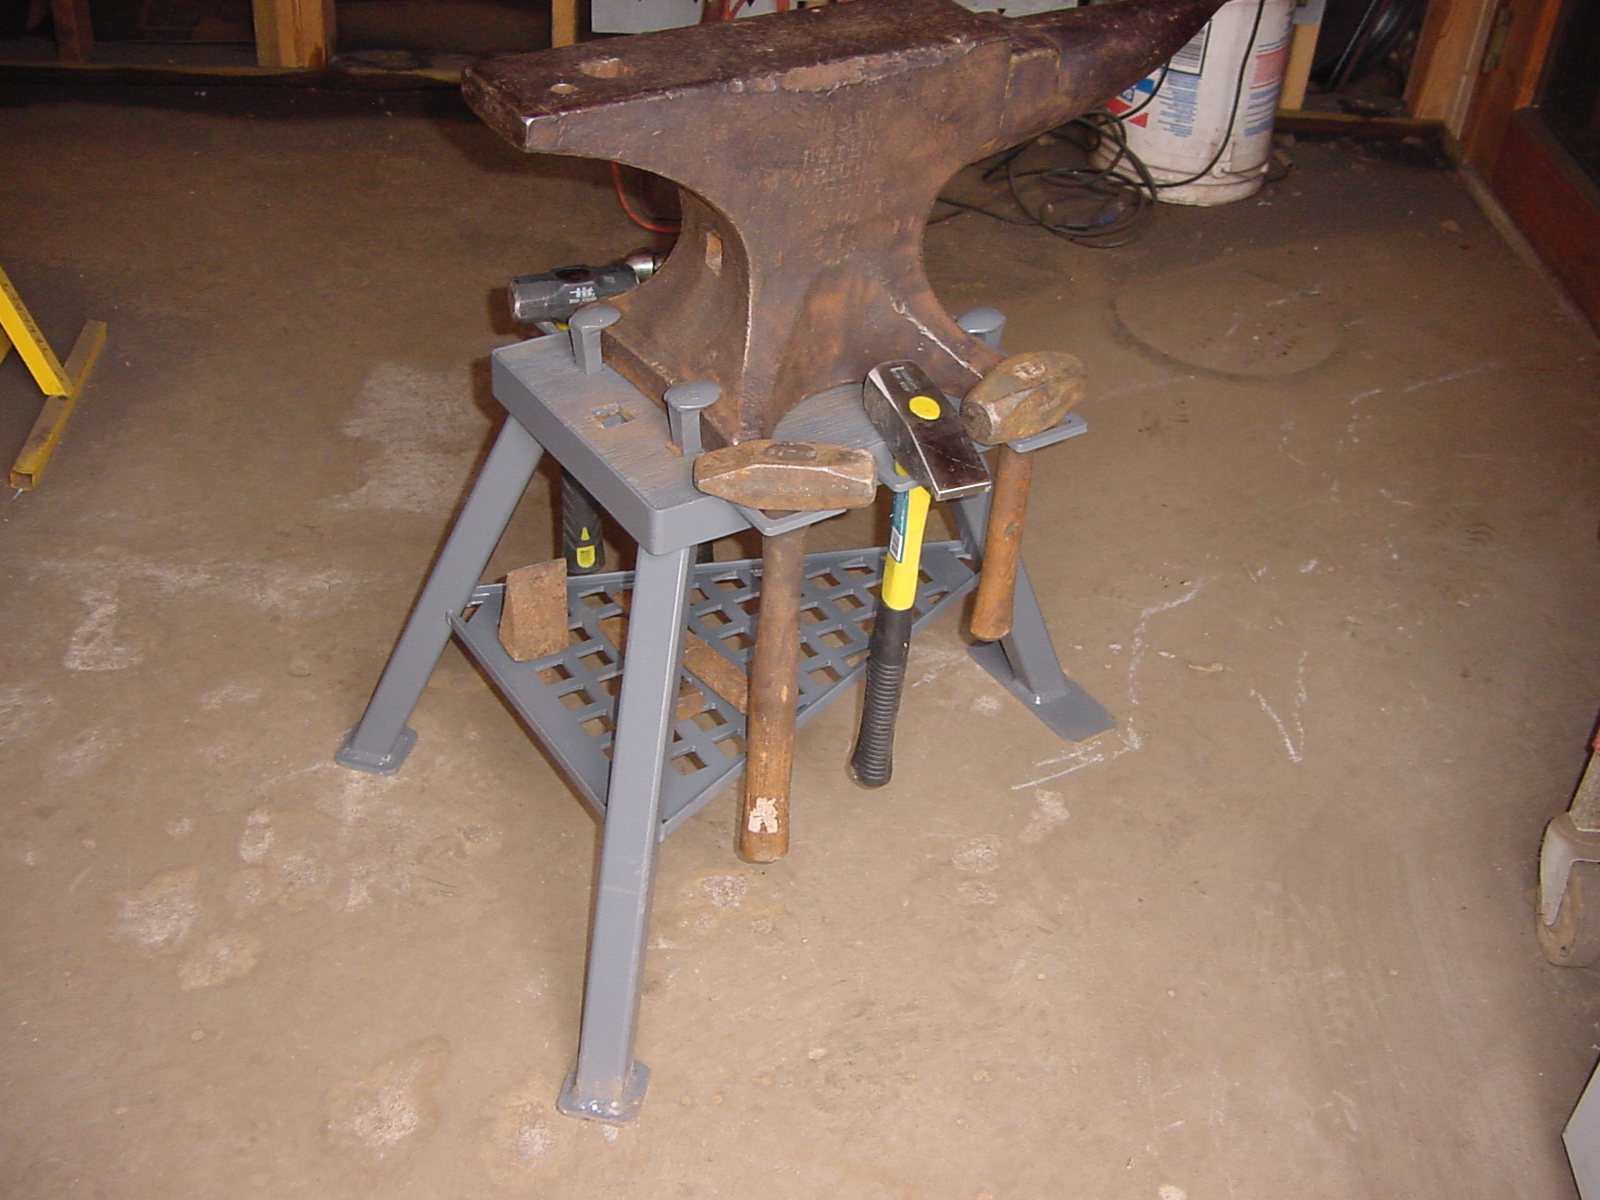
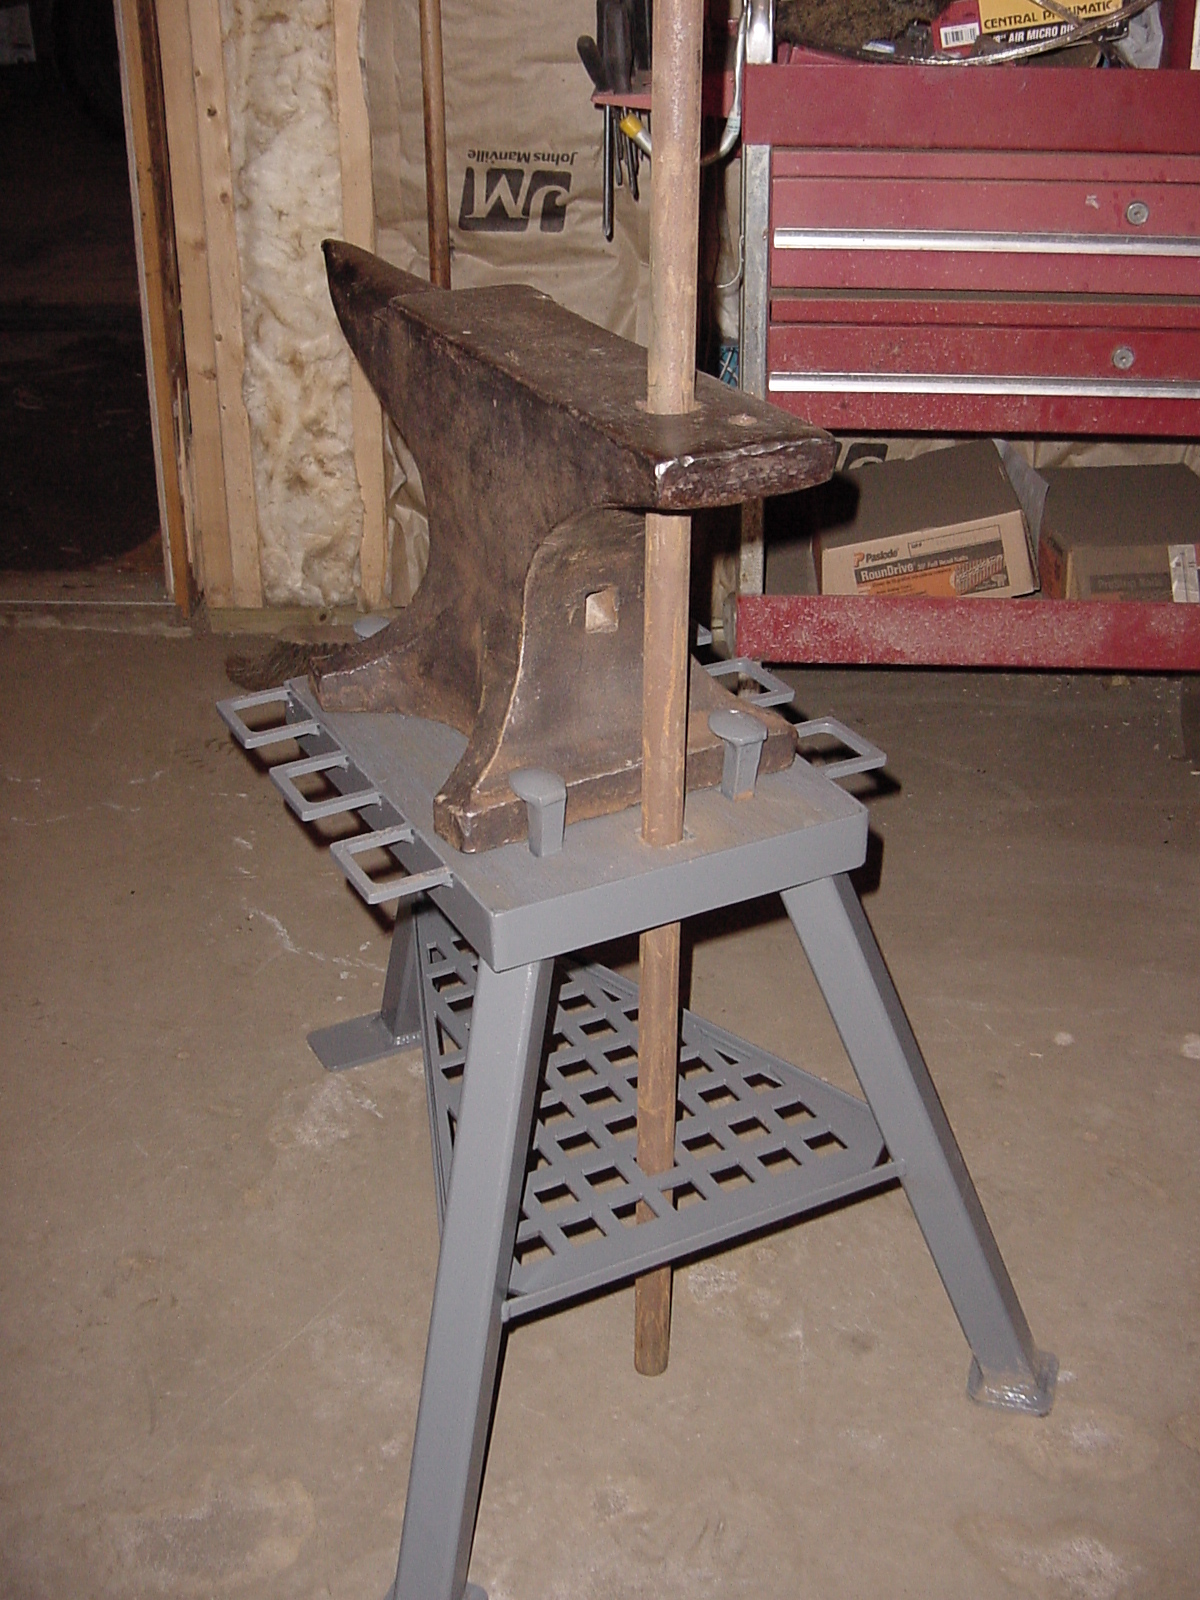
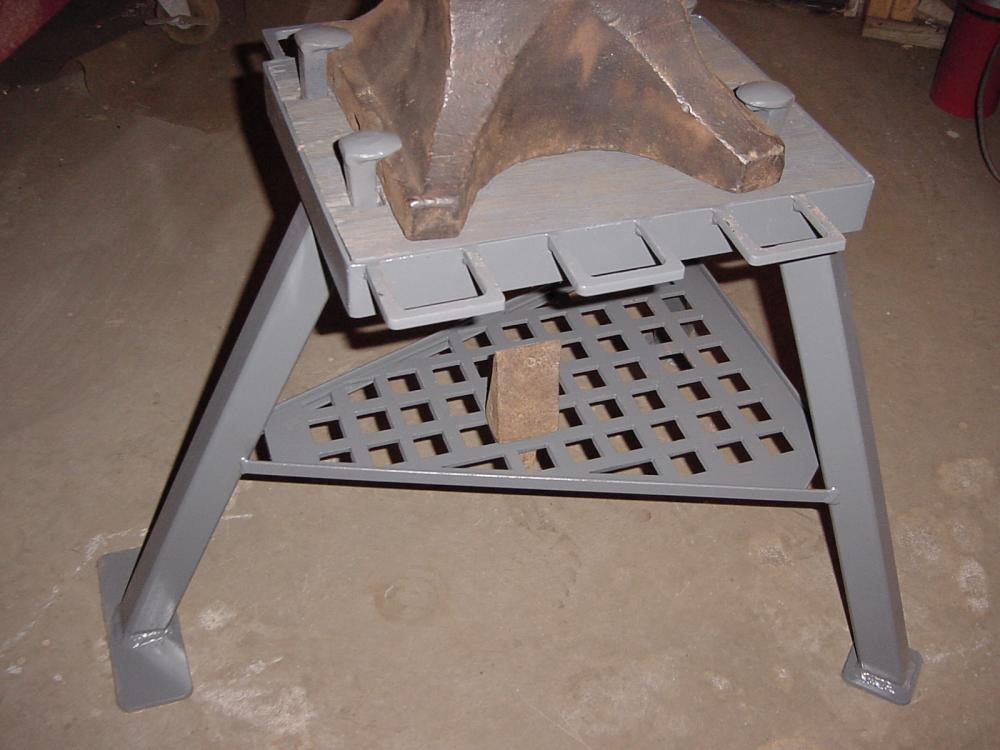
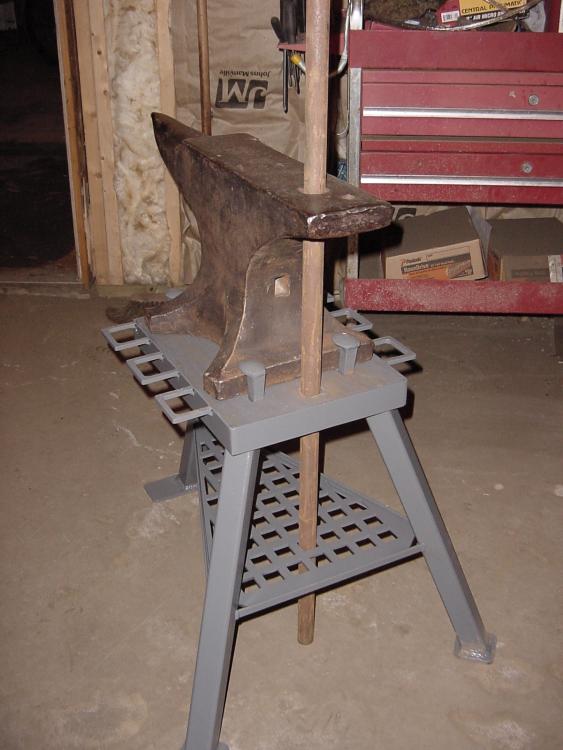
 Here's my 151 pound Peter Wright on a stand I made a while ago. I can store my hardy tools underneath.

 I also have an outdoor wood burner and use charcoal from it for my forge. Don't get a whole lot, but definitely enough to save!Good job, I like the adjustable feet too!Great job! Where did you get the spheres? Or did you make them..?Welcome from Hudson Wisconsin!:)Hope all goes well Frosty... Our thoughts and prayers go out to you...Very nice, I love that finish! Did you hit the entire piece with the brass brush or just the leaves?Thanks for posting the pics of the brands. Gives me some ideas... Great coat rack too!Very nice... it's so shiny it's hard to see in the pics. But I love reflection in the second pic.:DNice job, be careful of your surroundings... I see lots of dead dried leaves and kindling around there, the forge might get hotter than you want...:DCharcoal and propane.The color and weight should obviously be a good clue, but if for some reason you can't tell the difference... bring a magnet. Be careful though... some stainless is not magnetic.Search for Making small things to sell A great thread!I'd show the story behind my log in name, but it's probably not exactly... "family friendly" enough for the forum...:rolleyes:Great job on the railing. Thanks for the pics!