
Chuck in Ms
-
Posts
191 -
Joined
-
Last visited
Content Type
Profiles
Forums
Articles
Gallery
Downloads
Events
Everything posted by Chuck in Ms
-
That will work. Now to make another set with different style jaws...........
-
That anvil will be easy to spot, I hope he gets it back. Not much lower than a thief. Just reminds me to ask a few more questions the next time someone I don't know is offering up an anvil for sale.
-
This is going to be a nice one!
-
Thank you Mr Turley, I had never thought of that. For odd angles and tapers I split a piece of 2" round and welded the flat side to a piece of angle iron. It's kind of tricky to get it in place with the work but it holds great. This was not my idea I read about it somewhere.
-
I understand that the Chestnut population was killed off over here by blight. It was devastating to the entire east coast. However there are claims that structures over 100 years old still stand due to its natural resistance to rot and insects. This information is only from reading as I have no first hand experience with it. The retaining wall or slope will have to be a personal preference for you. I suppose if you are going to raise it a foot or more the retaining wall will be the only way to contain your material. ( Especially if you use marbles ). I took the natural approach and let the slope flow to the surrounding area. I will try to attach a photo here. This is on round poles, I just cut notches with a chain saw to set the beams on. The poles were tapered so I put the small end in the ground and cut the thick end. Cover the bottom end with pitch or tar to prevent wicking of water from damp soil. The trusses are homemade just 2 X 4s fastened together with truss plates. My eight year old son and I built this in about five or six days not counting the forge of course. That took a few weekends in itself. This is not good pictures but its all I have.
-
Yes Sir, that is why I mentioned Grizzer above that is the way to go. Chestnut, that is going to be a touch of class! I have never even seen a piece but have read a lot about it being used in years past. I can't wait to see some framing pictures.
-
Yes Sir, that is why I mentioned Grizzer above that is the way to go. Chestnut, that is going to be a touch of class! I have never even seen a piece but have read a lot about it being used in years past. I can't wait to see some framing pictures.
-
Hand forged copper skillets with tinned interiors
Chuck in Ms replied to yesteryearforge's topic in Copper Alloys
You are an artist Sir! They look great. -
You only mentioned a "slight slope" so let's work with that. Grizzer said what I started typing so try to bring in the fill dirt. As for the pea gravel just spread it out and either tamp it down or start working in there and you will compact it in time. It doesn't seem to keep settling much, I added a little more just once between the anvil and forge. As long as your floor is a little higher than the surrounding area its not going to get wet anymore. The dust is why I added the pea gravel in the first place. If it doesn't hold water now it will not do it when you add gravel and a roof. So my question to you would be can you work with that "slight slope" as is? I bet mine drops five inches from front to back but I never notice it.
-
I would be proud to own one like that. Have fun
-
I don't know what materials are available to you but an 1 1/2 inches of pea gravel spread over your floor works good. It is inexpensive and will tamp down real nice. After a while you may need to add an additional fifty pounds or so where you walk the most but that is about all the maintenance required. If you use it, resist the urge to put it too deep or thick.
-
If you are already concerned about the size of the pre fab, just let it go. You said you could build one like you like in two weeks for less money. So you can get one you don't like that will last 25 years or in two weeks you can have one that is perfect to you that can last 25 years. That being said, I built mine 12 X 16 (feet) and do every thing I want to in half of the shop while the other half has metal storage and the antique tools I use. I have a fab table just outside for larger projects, mainly squaring window grill's or garden gates. Keep in mind I use no electric tools so if you plan on that this would never work for you. Check out Mr Pugh's shop build on here and that will give you a good idea on how to use space. Good Luck either way you go.
-
Very cool, can't wait to see the shop!
-
Welcome to the craft. Don't let the lack of electricity determine the size of your projects. Once you get a good start you will find that with a little planning a lot can be done with hammer and fire.
-
Very nice forge you have there. I disagree with the popular vote about having to line these little forges. If you keep them clean and dry after each use they show no signs of wear after years of work. I have used one for years doing demos and now my kids are starting to use it a lot. It looks as good as the day I bought it. It seems like the liner would trap moisture if stored for a time, which would promote rust that you can't see. As mentioned above it will add considerable weight. You can reach a welding heat by starting a clean fire then place a three or four inch square or round piece of wood on top of the fire and pack damp coal around the wood tight. I use a short round piece of fire wood for this. Once the coal starts to stick together pull the wood out and you have a good deep fire. This will last for a quite a while for you. This is not an industrial forge by any means but I have routinely worked 5/8 square bar with no problems and heated small hammer heads for reshaping very quickly. I hope you give it a try as is before you do any major improvements. It might just surprise you. Good luck however you go sir, Chuck
-
Is Blacksmithing still a dying trade?
Chuck in Ms replied to Everything Mac's topic in Blacksmithing, General Discussion
Wow, what a topic. I want to jump in here somewhere but started trying to quote everyone. Jack of Trades said it best for me. I have family roots in this trade and it is something I am driven to do. Mr Rasch, I am the "hobby smith" you spoke of. My shop is completely traditional and I am currently replacing every store bought item with one of my own making. The fire pot will be the last to go. Does this make me a blacksmith? I like to think yes. I have been doing demos for a few years now but tell the spectators that I am an apprentice blacksmith. Is that correct? I study the craft, attend conferences and hammer it's, visit other shops and blacksmiths whatever I can do to learn. So I think I can say I am an apprentice blacksmith. I take more commissioned work each year with very happy clients across state lines so does that make me a "real blacksmith"? Most importantly my two sons are in the early stages of learning this time honored craft with the oldest participating in demos some. Now to tie this together, I have not done anything different than anyone else reading this. We are all blacksmiths, all learning and teaching. So Blacksmithing is not a dying trade. It is growing more each year. Sorry about the rant but this is personal to me. One disclaimer, my shop is traditional to my idea of traditional only. Thanks Chuck -
Now that is a Great looking hammer. Well done Sir
-
Hey Dale, Sounds like you have plenty of work waiting for you. Try to find a local blacksmith association to visit. They can help you find your vise, they will probably sell coal and more importantly you can learn so much faster than just working and reading alone. Also they might have a library with both books and videos (for members) to check out. Membership dues are usually very inexpensive but the knowledge gained is invaluable. A chain wrapped around the waist of an anvil can help quite that ring as well as a heavy magnet kinda under the tail and on the waist. Just my thoughts on your intro. Chuck
-
Greetings from Afghanistan (though my home is in Fl!)
Chuck in Ms replied to Albert A Rasch's topic in Introduce Yourself
Welcome Sir, I couldn't agree with you more. I have been doing the same with my two boys for the past few years. There is a certain satisfaction gained by working together to make things you need and even saving to purchase items. Only good things can come from your plan. Let's us know how its going from time to time. Chuck Averett Picayune Ms -
Hey Brian, welcome to the site. I can't wait to see some of your finished pieces. The wood and iron mix opens a lot of doors!...... (Pun intended) Just kidding, glad to have you on IFI
-
And I agree with Mr Pugh. The hammer head itself is great but the handle sticking through is what distracted my attention.
-
Hotcut hardy
Chuck in Ms replied to brianbrazealblacksmith's topic in Hot Cuts, Anvil devils, metal cutting on the anvil.
I have known about Brains hot cut for a while but had never seen it in use until last October. I couldn't wait to make one after seeing what he can do with it. I now enjoy cutting pieces at demos just to see the expressions on peoples faces. Used it a lot today at one. Thank you Brian not only for the hot cut design but for all you do for this craft. -
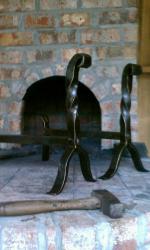
Aesthetically Ugly, Functionally Beautiful Tongs.
Chuck in Ms replied to Ridgewayforge's topic in Tongs
Good for you, that is incredible progress! Keep it up. -
What is the one tool you would make again?
Chuck in Ms replied to Glenn's topic in Tools, general discussion
My blacksmith helper. Made it on the fly a year ago at a demonstration at Starr Homeplace. Use it at the forge, anvil and both vise's . Bring it to all demos now and sometimes use it in the wood working shop. The top rotates 360 on a loose rivet style joint and it adjust up and down from about 24" to 40". The sliding pieces are held in place and guided with collar style straps. The bottom one riveted tight / stationary, the top one riveted loose. I adjust the height then tap down on the top collar and it stays in place, tap up on the collar and it will slide again. Not very artistic but works great and I needed it quick. I have loaded it pretty heavy and it has never slipped on me yet. -
Excellent work, you must have paid attention in class. Welcome, hope to see some more of your art.