Justin Carnecchia
Members
-
Joined
-
Last visited
Everything posted by Justin Carnecchia
-
Lovely horimono, I would love to see some pics of the hamon and hada.
-
John is the person who told me about it. Super nice guy, and he's been making some beautiful damascus.
-
I posted the link to share what I believe to be a relevant and important new development to how people make damascus. It was my understanding that this forum was for just that, a place to exchange ideas and information. It did not occur to me that members/moderators here would have a problem with the ABS or the link posted. I'm moving a little slowly this morning, sorry about re-posting, I didn't realize that is what was happening. Again I'm a little confused about the sales pitch bit, all I can guess is that there is a problem with the ABS. I have no real interest in the politics of ABS non ABS smiths. I see many great smiths doing fantastic work that are not members of the ABS, but many that are. It shouldn't be that big a deal. As for the questions about the technique mentioned above, I am certainly not the person to ask. Like I mentioned I have not had the oppurtunity to try it. This is a big part of the reason I posted this topic, so others could try it. In my mind the free exchange of ideas is what has led to the current renaissance in bladesmithing. The more people trying it the better, and in the end the faster it can be perfected or if it turns out to be crap then rejected. I don't know any of the people in the original discussion on the other forum except for the original poster. So aside from being excited about it and in that excitement wanting to share it, I'm not sure how I was trying to sell it or anything else. Yes I have welded. I can't call myself advanced at pattern welding, but I have welded the basic 1084, 15n20. Also 1095, wrought, mild and various cables. Mainly random patterns and some w's. I have mainly avoided more difficult alloys, or those reported as such since money is tight and failures in the shop affect my household budget. So anyway I'm sorry if I XXXXXX anyone off, that was certainly not my intention. If I broke some kind of rule by linking to another forum a simple pm would have corrected that. A note was inserted after each edit, including this one for language. there is no free information at that link at all. IFI does not give free advertizing. If the ABS wants to advertize and get traffic and new members to their paid membership only site, they can arrange payment with this sites owner.
-
This method as I read it does not involve taking the steel to white hot. It is intended for pattern welding blade steels. From what I know most people have been using 1084 and 15n20, pretty much standard these days for damascus. It has also been reported that it works with mild to high carbon and with some of the tougher welding alloys including 5160. XXXXXXXXXXXXXXXXXXXXXXXXXXXXXXX It is to a discussion on the ABS forum about pattern welding. I would encourage people to read it. The video posted above, I don't feel is relevant to this thread or to bladesmithing. I'm not sure about the reference to "sales pitch". I posted a link to a discussion on pattern welding without flux. I'm not sure that anyone on that forum or myself is trying to "sell" anything. I was however excited to hear about this development, and thought others would be excited. While Borax does work, it has some serious draw backs. The most obvious is that it eats the lining of gas forges. It also has the tendency to leave inclusions, I feel this is especially so when you are setting the weld in a forging press. It also doesn't work to well when forging high alloy steels like 5160. Mostly what I wanted when I started this post was to share this with people who didn't see it on the forum it was originally posted on. I would also love to hear back from others who try it. For those who are interested in learning new techniques, please read the original discussion. For those who think borax works great by all means stick with it. For those who think I am selling something or have some other motive, I don't know what to say. Off site link removed yet again. Poster is apparantly not aware that his link is valid only for registered ABS members. that link sends non members to a Pay for joining page.
-
. I would read it, the whole point is that is works better than flux welding. The biggest problem with the flux, aside from eating kaowool, is that it has a tendency to leave inclusions. Even if your technique is near perfect sometimes you will get them. According to JD Smith, (if you like knives and don't know who he is look him up, it is worth it) he is getting 100% successful flawless welds. What's more he reports that because it is being done in a reducing forge, there is little to no loss from forge scale. Basically what is being reported is that flux welding was developed for coal forges. When smiths started using gas forges they just kept using flux because that is what they were used to. This method apparently (I have not had chance to try it, but I know people who have) is better suited to gas forges. It does require a forge that you can control the atmosphere, and will reach 2300f. Whether it will work in a coal forge has not been established, but if you can maintain a reducing fire it should. Just to note, aside from the 1084 and 15n20 that most of us are using for Damascus and weld easily, this technique has also been used with mild and carbon, and with 1095,L6,5160 billets. I would think that the biggest benefit would be for pattern welding, as inclusions can be quite costly in time and material. Also with many patterns being drawn out on edge perfect welds are a must. For general blacksmithing I don't know if this would be as big a deal. Off site link removed.again
-
Hi, as many of you are probably aware many of todays top smiths stopped using borax in favor of kerosene in the past few years. It has now been taken one step further and people have started welding without any flux. This may well be the biggest advance since gas forges. Not only is forge eating borax not needed, people who are doing it say that the fluxless method works better. JD Smith says he is getting 100% success. I have not tried it, as my forge is in need of relining (again), XXXXXXXXXXXXXXXX . I can't wait to give this a go, and am curious to hear back if anyone here has tried it yet. Mod note: removed commercial link with no real content Admin addition: To be clear, Non ABS members can not access the material from that link, until after PAYING for a membership.
-
Without a controlled heat treat oven you won't be able to anneal or heat treat steels like D2. Likewise they are not appropriate for forging, for the reasons mentioned above. Laminating them would be even more difficult. That said, you can still use them to make knives, just not forged knives. Leave them hard and use stock removal techniques, should make for a servicable knife. For laminated/damascus blades, I would stick with 15n20 and 1084. They are a good match both for welding them and for heat treating.
-
-
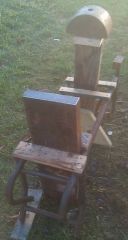 Nice score with the chunks of steel. Both should work quite well. I would work on a better method of mounting them though. The half round in particular is going to lose a lot of energy sitting on that piece of wood like that. I've always used large stumps but anything solid will do. For the slab, you could try a large bucket and pack sand around it. I did that with a piece of railroad track and it worked pretty well.
 -
-
Wow!...that's really your first damascus?
-
It is a very good first effort, I have to say much, much better than my first. Honestly I wouldn't have said anything except that it looks so good I think you can get it right with a little more work. Definately pick up the book, a very informative and interesting read, but don't be afraid to just start hammering too.
-
Very nice. Great lines and well balanced, I like the carbon fiber...although I'd rather see it with a hamon :D .
-
Nice looking blade, it looks like you got some really good activity in that hamon. You appear to be off to a good start on the habaki as well, you should really get the habaki to line up with the edge of the blade though. Aside from not looking quite right, it won't fit properly into the saya. You mentioned Jesus Hernandez's site, it has some good pics, as does "The Craft of the Japanese Sword" (Should be able to find it at your library, a "must read"). As for thickness of the copper, somewhere around 1/8" is good for a tanto sized habaki, I found a piece at homedepot, but what you have looks about right. Looking forward to seeing this project come together.
-
With the guard there are two basic approaches, either a hidden tang with a slot in the guard that the tang goes through, or a full tang in which case you would file a slot in from the back of the guard and then slide it on from the front of the ricasso. Since you have already drilled the tang it would be hard to do a hidden tang at this point. That leaves a tang that slides on from the front. Basically you file a slot into the back of the guard and mate it to the base of the ricasso. You could also do bolsters, or just handle scales with no guard or bolsters. Given that you didn't really plan it out you might just want to do handle scales and take it as a lesson for your next project. Before you start forging you need to think about what kind of guard and handle you want. Also about the overall design of the knife, look at knives that you really like and think about what they have in common. This is where drawing out a full sized picture of your knife really helps, it lets you figure out the design aspects of the knife on paper where changes are very easy to make. Lin Rhea did a really good tutorial on how he does handles and guards that i found really helpful, (Personally I would read through most of the tutorials on that site) http://www.americanbladesmith.com/uploads/file/Techniques%20Master%20Class/Rhea-Installing%20a%20Guard%20and%20Mortised%20Handle.pdf If done properly you end up with a strong joint that has a very clean appearance. The technique does require a filing jig, but their not too expensive and you can make one if moneys tight. If you can get the hang of Lin's guard and handle method, and take some time to plan out your knives from the start your work will progress much more quickly. Keep up the good work and post your next blade, -Justin
-
Nice looking blade, have you decided what you are going to do with the guard? I made the mistake of not planning out the entire knife right from the start when I first started. What has made an enormous difference for me is making a full size drawing of the knife I want to make before I start forging. The drawing should show every detail including the tang, guard, handle and pins. This way you know how everything is going to go together before you start. It is also very helpful from a design point of view and will get you making good looking knives much faster. I have even heard of some smiths taking the drawing and making an aluminum template so when they forge the blade they know exactly if it's right. It is also helpful because you can draw dozens of knives in the time it takes to make one, so you can evolve your designs without having to forge them.
-
Not a bad first effort. I forged maybe a dozen blades before I finally finished one, I still have that first blade I forged but will probably never finish it. Anyway good for you going back and finishing it. Every knife you make has valuable lessons to teach if you're willing to learn. So keep making them and keep learning you're headed in the right direction.
-
Very unusual knife. I would think your going to have to get the handle off the ball, then you should be able to see how it's attached. Honestly though unless the handle is threaded and just screws into the ball I doubt it will be able to be removed or repaired. Can the fletchings be removed? If so maybe you can see inside and tell what's going on. Trying to google Ull knives I got ulu knife, Harvey Hull Knife, and my favorite Dull knife. No Ull though.
-
Thanks John, I'm still waiting to see some of those w's I know you've been working on.
-
Thanks guys. Darren I've been working on a hamon tutorial on my site, I currently have the first half roughly written. That part pertains to the heat treat, I'll try to find some time in the next few days to get the second part on polishing finished. Thanks again, I appreciate it. Justin
-
Hi, I just finished this one up yesterday. Blade is 10.5" (16" overall) W-2 clayed and quenched in water. Guard and spacer are heat blued twisted w's Damascus. Handle is mesquite burl. Overall I am pretty happy with this one, the hamon is probably my best to date, with great activity and a beautiful chatoyance. Thanks for looking, comments are welcome and appreciated. -Justin
-
2" by 72" is pretty much the standard for grinding knives. If nothing else because there is the largest selection of belts. These grinders are not cheap though, $1000+ range. My advice is once you've decided your serious enough to spend that much start saving. Till then make do with what you have. I would recommend you resist the temptation to buy marginal grinders, that you will replace down the road. Personally I have a KMG by Beaumont Metal Works, I have the basic platen set up with a 2hp motor. I will add the small diameter wheels in the near future, and at some point will add a variable speed motor. If I could do it again I would have gotten a variable speed set up to start. Steve is right, good belts in the proper grit make a big difference. I like the Norton Blaze in 50g but they are around $10 a piece, personally the time they save and the added life of the belt is worth it for me. Look around and see what kind of belts you can find for your 4". I worked for a while with a 3" by 18" belt sander held in a vise, it was just slower. If you start taking this seriously then start thinking about a better grinder.
-
What were you doing when it broke? Forging it? Keep the steel red while forging, if it isn't glowing don't hit it. Also from the grain it looks like you let it get to hot for to long. Rich is absolutely right, there is some good info available, you just have to read it. The basic concepts behind proper forging temperatures and grain refinement are easy to understand, but you will have to do some homework. After you have read what is there, if you have questions I'm sure people will be more than happy to help.
-
There is a 400lb Chambersburg air/steam hammer for sale in the Anvilfire tailgating section. Not a self contained but the price isn't bad (depending on condition). I think it's in Maryland.
-
No I wouldn't think you could do much in the way of knives with a case hardened file. GRiley: you can still differentially temper it. You would do the differential tempering after tempering in the oven. Typically you want 2-3 cycles of 1-2 hours each. I usually try for three, two hour cycles. After you have the blade tempered, you can draw the temper on the spine. Remember when tempering time is more important than temperature. there was a recent discussion on this on the ABS forum http://www.americanbladesmith.com/ipboard/index.php?/topic/897-draw-tempering-the-spine/ interesting stuff, but basically run it three times for a couple hours each, then if you want the spine softer hit it with a torch, just be careful not to let the heat get to the edge.