Kerry D
Members
-
Joined
-
Last visited
Everything posted by Kerry D
-
LOL, sorry, the thought of pinching one hadn't even occurred to me. Mostly because I've had only moderate luck using sucker rod as a drift, and sucker rod is a lot tougher than that hex shaft. Sounded like an exercise in futility. The thought of using the the bearing centre as final shaping for the drift did occur to me though.
-
Maybe I got confused, but the hex shafting referenced was to be used as a drift for making the hex end of a combination wrench. Just as an FYI, there was no salvage about using the hex shafting. The combine header is still being used, the bearing was running rough so it got changed. The shafting is in good shape but, from experience, I know it dings easily. That's probably why they use such heavy shafting when other manufacturers use lighter pipe. Edit again: Maybe I misunderstood what you were getting at Charles. I had thought you were talking about using the shafting that the bearing came from to use as a drift.
-
Given how easily the shafting tends to ding up I don't think I would even consider that, especially considering that the shaft is still in use.
-
To the point about rounding a hex head fastner I agree, That's why I was looking at just a hex. I've also got a lot of 1 1/8 wrenches and sockets if it's in a bad enough spot that I figure I need the extra versatility. This is more about figuring out how I can repair something and what would be the simplest and quickest way. I'm wondering about maybe doing one with welding and one by forging. But finding a chunk of suitable bar stock that would be large enough for 1 1/8 might be a challenge locally. May have to let this project sit for a bit. Edit: That should read: "But finding a chunk of suitable bar stock that would be large enough for an 1 1/8 drift (or a drift that goes to that size) might be a challenge locally.
-
I'm looking at replacing a couple of hex ends on a pair of 1 1/8" wrenches, and am looking at two options, first is using a couple of worn out bearings made for a 1 1/8" hex shaft (likely from a JD, they love hex shafts). Second would be to make a hex or 12 point end. Honestly, I'm leaning toward welding on the bearing centres, heating it up to red and then welding and letting it cool in sand. I know that there are a lot of people on here with substantially more welding experience than me, does that sound like a decent plan, or am I better off making an end and saving myself the headache.
-
-
Does anyone know anything about these? It looks like a good unit (Government of Canada is selling as surplus, has been repaired, can't tell which controller it has) but I don't know much about them wrt approximate price, value as a tool etc.
-
-
-
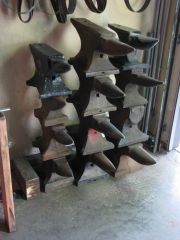
 Is that a flattened cultivator shovel that has had the piece that bolts onto the shank flattened and rounded into a socket? Because if it is, that's kinda brilliant.
 -
Pretty much what everyone else has said, pull the valve and flush out the tank a few times. I haven't tried it with nitrogen when I've done it, that might have done a better job of washing out the aromatic. What I've done that I found works well for me is to drill a hole in the tank at the around the line I want to cut, mark my ring and cut the tank with a jigsaw. I get a nice clean cut, minimal sparks and as long as my blade is sharp I like to think it takes less time than if I had used a grinder. YMMV That said, I haven't worked much with the medium tanks, just the smaller tanks so I can't speak to wall thickness.
-
The bolded section fascinates me. The concept of creating structural members that could be directionally strengthened via layer welding is something that I've puzzled over how to do economically for quite some time. Combine that with the possibility of asteroid mining in about 100 years and this could be the way to go.
-
Wow, I got busy with my real work and lost track of this thread, but thank you all (especially Chuck_Steak) so much for the great information! I was actually looking to repair a dandelion digger that has worn away with use, so med carbon steel will work at least as well as high carbon steel. Now the challenge will be to find one that has lived out its usefulness on the haybine and is still in good enough shape to use as a part.
-
Well, if you're interested, and the parts man is right, these are the straw chopper blades off of a John Deere 9600 combine. There's a boat load of them so if you know any JD dealers or combine specialized mechanics you can likely get as many as you want. I'm a bit far from you to ship 'em ;)
-
I'm only going on what the parts man told me was made of, so you might be right but I'd hope he knows what he's talking about. I can try to forge it, but if it is T9 then I won't be able to work it as per spec, my fire control isn't good enough to soak at those temps consistently. But, like you said, I'll likely have as much as I want so that if it is actually something I can work with then I'll likely have a steady supply. edit: I posted this assuming that you were talking about the chopper blades, but if you were referring to the knife sections then that's about what I expected, something in the 1060 to 1080 range, forge weldable and reasonably nice to work with.
-
I have a couple of questions about cutting steel found in ag applications. First off, is there a general rule about the kind of steel found in swather knife sections (a.k.a. sickle sections), or would I be better off asking the parts person when I buy the part if he or she knows what kind of steel the sections are made of? Secondly, as I am a hobbyist and mostly got into this as a way to get use out of the scrap steel we have around, I like to use worn parts to make things. So when I saw the straw chopper blades from the combine had to be replaced I thought I'd try to find something useful to do with them. Then I found out that they're likely T9 steel and, looking at the AISI sheet on T9, I feel that T9 is beyond my forging skill level at this point. The question now is what can I do with this stuff, or is it best to go to the scrapper? Here's a link to the spec sheet I found if you're wondering what the heck I'm talking about: http://www.steel0.com/AISI_T9.htm
-
-
You do some really beautiful work Mark. That is one great looking rose.
-
That's beautiful. I just may have to do something similar when I reach a high enough skill level.
-
Wow, the few times I've tried to make a work knife it usually ends up looking like a butter knife with a taper, then I grind it into shape. I've gotta work toward something more like this! Beautiful work btw.
-
Is there a drooling icon on this forum? That's how I feel about this pretty little knife.
-
I may be wrong but the sledge looks a bit more like a post maul to me. If it is a maul then it's likely iron, a spark test should tell. You could likely sell it though and buy a dozen sledges... or one really good sledge.
-
I farm just outside of the village of Hughenden, about 50km west of Provost, about the same south-southwest of Wainwright.
-
Sorry, you're right, I just assumed that a lot of people would have had some exposure to a coal stoker. This image is of the backside of the unit, showing the motor, fan, multi-speed sprocket and gearbox(just barely visible under the motor) and feed hopper This image shows where the actual burning takes place. The flighting pushes the up and to the top of the vent plate (the vent plate is mortared down, in a furnace it gets taken apart and cleaned annually) and burning occurs directly over the air vents. The outer ring is the shaker plate, designed to rotate slowly and eliminate ash. In these images the vent plate and shaker plate are quite worn, my house furnace was much less worn when I replaced the shaker and vent plates last year (about 50 years of service) that said, this was apparently a shop furnace so it is set to feed faster than mine was and likely ran much more often. This image I included to give you a better idea of how things are setup. The two prong sprocket at the end of the flighting should give you an idea of how fast the shaker plate rotates, given that the flighting rotates between 3 and 6 rpm. You would need to setup a ash catcher under the stoker if this project was to go through. It would not be a soaker forge but I think it could be a good forge none the less.
-
I'm just wondering if anyone here has converted a coal stoker (furnace) into a forge. I was looking at our old furnace and thinking about what could be done with it after we replace it and I figure that worst case scenario I can convert it into a forge. I'd likely want to rig the blower and feed to a switch or foot pedal and possibly put some larger pulleys on the driven end but that would have to be a matter of experimentation if and when I do this.