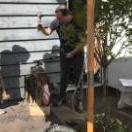
Jobtiel1 Posted October 12, 2022 Author Share Posted October 12, 2022 Little update, I finally finished the chest lock! As you can see it's been in use. I know screws are not the most secure way of attaching a lock, but the lock itself can be opened with a bend nail, so it's there more for the looks. ~Jobtiel Quote Link to comment Share on other sites More sharing options...
anvil Posted October 13, 2022 Share Posted October 13, 2022 nice! Any pics of the works? Quote Link to comment Share on other sites More sharing options...
George N. M. Posted October 13, 2022 Share Posted October 13, 2022 Very nice work, Jobtiel, but I have one suggestion: I would replace the phillips headed screws with something else. They just look out of place to me. Domed rivet heads, diamond headed nails, even slot and dome heaned screws would be an improvement. Keep up the good work. GNM Quote Link to comment Share on other sites More sharing options...
Jobtiel1 Posted October 13, 2022 Author Share Posted October 13, 2022 George, I understand, I have to see how I like it, maybe I'll rivet through the wood using some nails. Anvil, I have some pics but not from before I put it together, I followed the video from DF in the shop for a simple chest lock. Basically it's a bolt that is moved by the key through an indentation on the bottom. There is a ring fixed to the backplate where the key falls in. There is a spring that gives tension to a bend strip that lock in two divots on the top of the bolt, this gives it it's two positions to open and close the lock. There is no additional security so anything that can slide the bolt can open the lock. The spring is from an old recipro sawblade. You still see the lettering. ~Jobtiel Quote Link to comment Share on other sites More sharing options...
anvil Posted October 14, 2022 Share Posted October 14, 2022 Thanks for the innard description. I agree with Georg and use straight slot round head screws for my joinery. It seems to look better, but that's pretty subjective. Nice work! Quote Link to comment Share on other sites More sharing options...
Jobtiel1 Posted November 1, 2022 Author Share Posted November 1, 2022 Well, I tried putting in new screws. I must say I'm surprised and it indeed looks so much better! Thanks for the tip! I have retired the chest as tool chest right now, As I was gifted an antique that is a bit larger and is more suited for woodworking tools, It actually has space for chisels. I will use it now to take stuff camping and also as a sort of travelling tool chest when going to demo's and stuff. ~Jobtiel Quote Link to comment Share on other sites More sharing options...
George N. M. Posted November 1, 2022 Share Posted November 1, 2022 Yes! Much batter. I still think that domed rivets or rose (faceted) nails would be better still but this is a great improvement. I think I prefer non-screws because I have sort of a medieval aesthetic taste and various screws do not fit in with that. "By hammer and hand all arts do stand." Quote Link to comment Share on other sites More sharing options...
ThomasPowers Posted November 2, 2022 Share Posted November 2, 2022 Make sure your "camping chest" doesn't rest in contact with the ground! As I recall the Netherlands tends towards rising damp! Quote Link to comment Share on other sites More sharing options...
Jobtiel1 Posted November 2, 2022 Author Share Posted November 2, 2022 Yes, I still have to decide on whether I will use forged legs or wooden legs. And how to fit them in the chest design. Camping season is largely over anyway so I still have some time to decide! ~Jobtiel Quote Link to comment Share on other sites More sharing options...
ThomasPowers Posted November 2, 2022 Share Posted November 2, 2022 One thing I learned is that making chests sturdy enough to sit on can be a real help in a campsite; I remember a couple of SCA Dukes using one of mine at a feast that had run out of chairs----500#+ with no problems! Quote Link to comment Share on other sites More sharing options...
Jobtiel1 Posted November 3, 2022 Author Share Posted November 3, 2022 That's definitely a good idea, I'd have to try it. The lid construction would not be perfectly suited for sitting, but it has supports on the inside so I think it will be fine. ~Jobtiel Quote Link to comment Share on other sites More sharing options...
ThomasPowers Posted November 3, 2022 Share Posted November 3, 2022 I found that adding bars just under the opening edges helps strengthen a box and makes them easier to carry---just flop the lid open and back and there is a ridge to put your fingers under on both sides for a 2 person carry. Quote Link to comment Share on other sites More sharing options...
Jobtiel1 Posted November 3, 2022 Author Share Posted November 3, 2022 Do you mean an extra piece of wood on the top of the side panels to resist the sideways forces? The front and back panels are rabbeted for this same purpose. for strength of the lid I'm only worried about the middle panel in the lid popping out when someone sits on it, the rest is supported by the chest itself. The idea for some extra grip point for two man carrying is quite good. Seeing it's oak even empty it can be difficult to carry alone. should've made the thing from pine... ~Jobtiel Quote Link to comment Share on other sites More sharing options...
ThomasPowers Posted November 3, 2022 Share Posted November 3, 2022 Drill two spaced holes on each end and put a loop of rope through them and tied inside the box. Make the loops long enough that they will put the carrying hand above the wood when used to lift it. (You can also run a pole through the loops on top of the box to carry a heavy one on several peoples' shoulders. Easy to "pull inside the box" when not needed. My oak one was made from a barn board I found in a flood spoil pile. I adzed it a bit cleaner and did a modified Mastermyr chest from it; forged all the nails in the basement of my house one winter in a 1 soft firebrick forge. Still together 20+ years later and demonstrates that ironworking is my craft! (Wood is what you burn to start the forge!) Quote Link to comment Share on other sites More sharing options...
NoGoodWithUsernames Posted January 23, 2023 Share Posted January 23, 2023 How did you attach the handles? I am working on a small chest like this, and I was thinking of nailing the handles on where the ends pierce through and folding them over into a staple on the inside like you see on really old door hinges. I assume you used screws on yours? How have they held up to being picked up and moved around? Any issues with them pulling out when the box is loaded up pretty heavy? Quote Link to comment Share on other sites More sharing options...
George N. M. Posted January 23, 2023 Share Posted January 23, 2023 NGWUN, I built a couple chests for Martha with iron harware and used "clenched" nails as you suggested. That is the traditional way to attach chest hardware going back to at least medieval times. They have held up well for the last 30 years or so. My only problem is that I want to replace the latch on one of them and it is going to be interesting to dismount the old one while trying to minimize the damage to the wood. GNM Quote Link to comment Share on other sites More sharing options...
NoGoodWithUsernames Posted January 23, 2023 Share Posted January 23, 2023 Thank you for the correct terminology, that is always helpful. Any tips on clenching nails? Quote Link to comment Share on other sites More sharing options...
George N. M. Posted January 24, 2023 Share Posted January 24, 2023 Once the nail is through the chest tap the tip over so it is 90 degrees to the shaft. Then, hit it harder further down the shaft to bend it at the point where it comes out of the wood to drive the bent tip into the back of the wood side of the chest. You could heat the tip with a torch if you can do it without setting the chest on fire. When you mak your nails you may want to forge the tips out a bit thinner so that they will bend over easier. "By hammer and hand all arts do stand." Quote Link to comment Share on other sites More sharing options...
Jobtiel1 Posted January 24, 2023 Author Share Posted January 24, 2023 If you do use forged nails and clench them, make sure you do some test pieces with pre drilled hols of different sizes, square shank nails can act like wedges to split the wood. On the chest I've used 6 small (2 cm) screws. They've hold up fine so far. I haven't picked up the chest much but it loaded pretty heavily and is heavy of itself, and haven't had any problems with the handles. ~Jobtiel Quote Link to comment Share on other sites More sharing options...
anvil Posted January 25, 2023 Share Posted January 25, 2023 clinch nails are good and a test piece is always a good thing to do first. I bend the tip over with scrolling tongs, then tap the shaft parallel with the wood, then set the tip. Quote Link to comment Share on other sites More sharing options...
Frosty Posted January 25, 2023 Share Posted January 25, 2023 Scrolling tongs are good for starting clinched nails. Clinch across the wood's grain for things like lifting handles. Frosty The Lucky. Quote Link to comment Share on other sites More sharing options...
NoGoodWithUsernames Posted January 25, 2023 Share Posted January 25, 2023 Great tips everyone, and thanks for the inspiration Jobtiel. I'll post up a thread with some photos once I've got it completed. Quote Link to comment Share on other sites More sharing options...
Irondragon Forge ClayWorks Posted January 26, 2023 Share Posted January 26, 2023 Hence the term dead as a door nail. Most door hardware had nails that were dead clinched back in the day. Quote Link to comment Share on other sites More sharing options...
Recommended Posts
Join the conversation
You can post now and register later. If you have an account, sign in now to post with your account.