October 1, 20169 yr I have a couple of youtube vids of my attempts at teaching myself blacksmithing I say "teaching myself" because I live in the middle of nowhere and I only get ever other weekend off (truck driver) my forge is two ravioli #10cans tack-welded mouth to mouth, 4.5inch hole cut into it so I could pass a 4" PVC tube down the middle (casting the opening) and then sand and plaster of paris as the refactory. my burners are from a vid that Turner forge did on youtube, but is fairly close to Frosty's T-burner. (mine are only 1/2inch instead of 3/4, with a .025 mig tip and 0-20lbs adjustable regulator) here's a couple of links to my vid's, feel free to let me know what I'm doing wrong
October 3, 20169 yr No, no, NO! Plaster of Paris makes a BAD forge liner, dangerous even. By the look of the steel you're working it's not going to last. I don't know where the POP myth got started maybe as an adaptation from low grade investment for casting but it's really a lousy forge liner. Shoot Wayne Coe an order for some ceramic refractory blanket and maybe a little Plistex to protect it. You will be amazed how hot those two burners of yours will get it then. They'll be melting your work if you don't pay attention. Honest. Get your thumb OFF the hammer handle! You really increase the probability of doing serious joint damage. The shock of impact will be conducted up your thumb, directly to your wrist, then up your arm to your elbow. If you do heavy work it can do damage all the way to your shoulder. For now you might want to forget the knives and make a couple pair of tongs or at least figure out how to use those Channel locks in a more natural position. do you know someone with an arc welder? You can weld a couple pieces of say 3/8" rd. stock on the handles of a pair of slip lock pliers for surprisingly decent pair of tongs. Your blade smithing will improve enormously with some decent tools and practice. You might want to stand next to your anvil with your arms at your side the face should be about wrist level. That's NOT a hard height but it's a good ball park departure point. You're not doing heavy forging or have strikers so the knuckle level is too low. It's hurting my back watching you bend over forging and the way those channel locks have your tong hand so far out of position my eyes are watering. Yeah, I'm watching your video and writing at the same time. You're letting it cool off too much. Listen to this video you can hear the tone change from clunk to clink. Stop hitting it at clink and it should NEVER ring the anvil! At one point you were striking the blade edge on and it had been black a long LONG time. This is a BAD thing to do to poor innocent steel. Correct the belly just like you were laying lumber. Crown UP and all on the anvil at a medium orange heat. It'll straighten faster, more accurately and you won't have to hit it so much. Use a heavier hammer and a slower blow let the hammer's mass keep it moving with the blow, it'll bend the belly in without thickening or curling the edge so much. A little practice ad some coaching and you can make that spine ruler straight. Forging the thick round for a bottom tool shank is a different set of physics. You see in the video how the surface is moving horizontally rather than driving into the center of the bar. this is called "fish mouthing". Too cool too light a hammer and the wrong technique. Big hammer. Let it soak in the fire maybe 5 minutes or more once it's yellow hot to allow the center to come to heat. Your first sets of blows are on the edges at the very end. Drive in at a 45* angle and hit it like you mean it! One blow and rotate it 90* HIT it again and rotate it back. Hit it REALLY hard and rotate it every blow. Not 180* just 90* back and forth. You REALLY need a pair of tongs for this the Channel locks are going to screw the job up royally, you don't have the experience to compensate for how far out of position they put you. Look up "Twist Tongs" and make a couple pair. Just buy a stick 1/4" x 3/4" or heck buy a couple at a big box store, it'll do for now. Anyway, what you need to do is drive the end in till the short taper fits your hardy hole. Then lay it back a LITTLE just so it's resting on the corner between the facet you just forged. Now Smack it HARD right on the corner on top, rotate it, repeat till the new facets meet the first ones. The taper will have lengthened a ways. AFTER they match up lay it back on the next corner and repeat. Do NOT chase blows all over the place hit it in the same place every blow. Do EVERYTHING AT HIGH YELLOW HEAT! If you try forging that stock at black heat like the RR spike you aren't going to get anywhere. About heating anything in that forge, you can close the back off you know make that fire travel full length to escape the other end. Put the piece ALL THE WAY IN! A couple exercises but first WHY turn the work 90* every blow? Take something soft and form it into a square like bar stock. Now pinch it in a little and look at it end on. What does it look like? The two sides you pinched are wider of course but the other two are not only thinner they are pooched out. Now for a little physics as we do it. Steel is moved by lbs per sq/in. Not how much force you hit it with but how much force per sq/in. Looking at the pinched piece with this in mind the pinched sides cover MORE sq/in so the same force blow on that face will have much LESS effect. On top of that the increased surface area in contact with the anvil causes it to shed heat faster. Now turn that piece 90* what do you see? Not only is the the down side narrower but it's rounded so the actual contact area is a SMALL FRACTION of the wider side. NOT a little less A significantly BIG difference say in the 1/1000 the area in contact. The work is now losing heat to the anvil at less than 1/1000 the speed and when you hit it HARD again the same amount of force is applied to 1/1000 the area and takes the most direct path. Think this trick doesn't have an effect? Oh sure the metal isn't going to move 1,000 times as far but it's going to move a LOT farther and it'll stay hot a lot longer. Both GOOD things. No? Watch your video and compare what you're doing and how you're doing it to other Youtube videos but not just ANY youtube videos. hunt up Mark Aspery's and Brian Brazeal's videos and copy how they stand hold the stock and how HARD they hit. Right now you're pitty patting the steel and doing it cold. Listen to your video, just close your eyes and listen. You'll hear the steel cool off. When it's saying THUD it's moving nicely, when it's saying THUMP it's slowing down but still moving okay, it's getting time to start cleaning up little things but when it starts telling you CLINK its past time to put it back in the fire. When it's telling you CLANK! you're damaging it. Bad blacksmith BAD! The finale of your video is all I need to say about why you REALLY NEED tongs. You lost control of the piece because you were using Channel Locks. The other lesson in the finale is about wearing shorts at the anvil. Hmmm? Is there a blacksmith organization within visiting distance? Seriously you only need someone to coach you on your techniques and show you a few tricks and you'd be stylin. I know this sounded like I'm being hypercritical but you asked and provided a 33 minute long video. You're not doing badly for figuring all this out yourself. Frosty The Lucky.
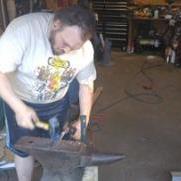
October 5, 20169 yr Author POP: King Of Random on youtube. the metal I'm using for the forge is literally two Ravioli cans, and no. it won't last at these temps, but this was a "figure it out as I go along" kind of situation. my next forge will be Perlite/sodium Silicate and a used (rusted thru) propane tank. actaully I wanted to ask your opinion on perlite and sodium silicate as refactory... Tongs, I have a few but they are "some assembly required" and have to be finished... I don;t know how you feel about advertizing, but I got 5 sets of tongs what I found two professionally made tongs for... anvil height: yeah, I have some 4x6 laying around I am going to make a platform to raise it up 4 inches. I also need to secure the anvil to the stump yet. I work 70+ hours a week on the road, so I only get 60-72 hours off every other weekend... cooling off too much: when I was standing over it I couldn't hear a difference, maybe because I didn't Know you Could hear a difference? (newbie) and yeah, which is one of the reasons I'm using cheap xxxx disposable RR spikes so I can learn to move the metal the way I see in my head (also why I haven't made those tongs yet) before doing anyhing with Expensive metals. youtubes: I've added Mark Aspery and Brian Brazeal to my "watch sooner rather than later" list shorts: it was 95 degrees that day, and I sweat at anything over 70. an apron is in order, once this months bills are paid. now that it's fall, I'll be breaking out long pants and socks sooner. oh, and as for the damage the falling bit of steel caused, there was a deep scratch, but no burns. hurt because that was a fairly heavy bit hitting a tender bit, but no burns (fortunately it wasn't on skin more than 1/10th of a second) I live in the Wisconsin Rapids area (will add that to my profile in a bit) and I KNOW there is at least One Blacksmith int he area (the fastenal guy said so) but I am home so infrquently I don;t really know anyone in town, despite living there for over 10 years now... so I am open to the possibility of groups btw, thank you for taking the time to see how badly I'm xxxxxxx xxxx up (even if I'm not really doing all THAT bad) and offering constructive criticisms here's what the RR spike looked like after I cleaned it up on the grinder/beltsander. I know RR spikes don't heat treat well at all, but I think I wanna harden it when next I get home.
October 5, 20169 yr I strongly suggest your read and FOLLOW the terms of service while you still have that option, we operate a G rated family forum. Language like that will result in your losing your access
October 6, 20169 yr The only REAL mistake you've made so far, well other than language, is doing ANYTHING the "King of RanDUMB" does. The guy is dangerously irresponsible. I won't be surprised to hear that the parents of some kid who permanently disfigured, crippled or killed themself doing something Mr, RanDUMB did sues him into a homelessness for a couple generations. I understand working out of town, I did 60hr weeks in the field for 20 years, about 75% in a tent in the bush. Did a lot of forging in a campfire with whatever was at hand till I made and packed along a RR rail anvil and a pair of tongs. Practice when you can, BE SAFE and have fun. I'll critique when you ask. The tools and materials talk all the time you just need to know what they're saying and pay attention. If you didn't know that then you're missing the story. Now you do and learning their language comes pretty quickly it's immediate cause and effect, you can see what happened, putting 2&2 together is the trick. Watching videos made by the masters then watching yours will show you more than any other self help guide. Get the guy who made the goofy face at the camera to hold it and get some better angles on what you're doing so you can see what's doing what from a different angle. It's not easy to see cause and effect looking straight down over the anvil. One really good angle is level with the face of the anvil and to the side. Good lighting is essential to good video. The angle you were shooting was good light, make sure your camera man pays attention to light angles, back lit stinks. Frosty The Lucky.
November 14, 20169 yr Now many if not most of us have been gigged over language here at some time; so don't worry about it. Just review any post before hitting send and remember that we want to be able to recommend this site to the Pastor's middle school daughters without a problem. It's one of the big plusses to this site---that I can point anybody to it and not worry about what they might trip over. By using low grade refractories that are not insulative you are throwing away money. (I've never understood folks telling me that they couldn't afford to spend US$20 for kaowool but could afford to spend $200 extra on fuel over the life of the forge; so please don't!) You've got some of the basics; Frosty has covered a lot; may I suggest you work on a blade with a straight edge and not bellied as a stretch goal? I started forging working 12 on 12 off or 24 on 24 off 7 days a week in the oilpatch---generally about 3 hours from my house; so I understand a punctuated approach to the forge. Where I was we couldn't have fires so a lot of my off time was spend scrounging scrap from dustbowl abandoned farms and finding equipment at small rural towns.
Join the conversation
You can post now and register later. If you have an account, sign in now to post with your account.