Nick O Posted December 10, 2015 Share Posted December 10, 2015 https://www.youtube.com/watch?v=QaRc96De0tE Quote Link to comment Share on other sites More sharing options...
Jim Coke Posted December 10, 2015 Share Posted December 10, 2015 Greetings Nick, Great job on the hook and the video .. Keep up the good work. Forge on and make beautiful things Jim Quote Link to comment Share on other sites More sharing options...
Daswulf Posted December 11, 2015 Share Posted December 11, 2015 Good Job Nick. a little lighting would help out. Quote Link to comment Share on other sites More sharing options...
Nick O Posted December 11, 2015 Author Share Posted December 11, 2015 3 hours ago, Jim Coke said: Greetings Nick, Great job on the hook and the video .. Keep up the good work. Forge on and make beautiful things Jim thanks 1 hour ago, Daswulf said: Good Job Nick. a little lighting would help out. thanks it was just a video I had to do as an English project also there was rain in the forecast all week and the weather held just long enough for me to film Quote Link to comment Share on other sites More sharing options...
Daswulf Posted December 11, 2015 Share Posted December 11, 2015 28 minutes ago, Nick O said: thanks thanks it was just a video I had to do as an English project also there was rain in the forecast all week and the weather held just long enough for me to film Ah ok cool. Glad the weather held out for ya. Quote Link to comment Share on other sites More sharing options...
Glenn Posted December 11, 2015 Share Posted December 11, 2015 May I suggest you make an S hook a little longer than normal. Next heat the center section and cut it in half. Point the cut end and then bend about 1 inch of the point 90*. Instant drive hook. (grin) Now do the other half the same way. If you look INTO the light the subject will always be dark. Put the light behind you or over your shoulder and the subject will be illuminated and can be seen. Quote Link to comment Share on other sites More sharing options...
JeepinJoe Posted December 11, 2015 Share Posted December 11, 2015 Nice video Nick. Makes me want to go out and heat some steel. Quote Link to comment Share on other sites More sharing options...
Nick O Posted December 11, 2015 Author Share Posted December 11, 2015 9 hours ago, Glenn said: May I suggest you make an S hook a little longer than normal. Next heat the center section and cut it in half. Point the cut end and then bend about 1 inch of the point 90*. Instant drive hook. (grin) Now do the other half the same way. If you look INTO the light the subject will always be dark. Put the light behind you or over your shoulder and the subject will be illuminated and can be seen. thanks 19 minutes ago, JeepinJoe said: Nice video Nick. Makes me want to go out and heat some steel. thanks Quote Link to comment Share on other sites More sharing options...
beammeupscotty Posted December 12, 2015 Share Posted December 12, 2015 Proper technique for forging a point and taper is to forge the point first, then draw out the taper to the desired length. Quote Link to comment Share on other sites More sharing options...
Nick O Posted December 12, 2015 Author Share Posted December 12, 2015 3 hours ago, beammeupscotty said: Proper technique for forging a point and taper is to forge the point first, then draw out the taper to the desired length. thanks for the info Quote Link to comment Share on other sites More sharing options...
NickOHH Posted December 12, 2015 Share Posted December 12, 2015 12 hours ago, beammeupscotty said: Proper technique for forging a point and taper is to forge the point first, then draw out the taper to the desired length. Much easier and faster way thanks to not losing heat as quickly . Quote Link to comment Share on other sites More sharing options...
Glenn Posted December 12, 2015 Share Posted December 12, 2015 I have seen a blacksmith leave a lump of metal on the end of the work piece and form the taper by pushing/forming the taper toward the end of the stock, toward the lump. His explanation was that the taper and stock looses heat the thinner it gets. The lump on the end holds heat so you have a longer time to make the point and taper. When finished cut the lump of metal off and discard. Quote Link to comment Share on other sites More sharing options...
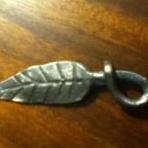
beammeupscotty Posted December 12, 2015 Share Posted December 12, 2015 56 minutes ago, Glenn said: I have seen a blacksmith leave a lump of metal on the end of the work piece and form the taper by pushing/forming the taper toward the end of the stock, toward the lump. His explanation was that the taper and stock looses heat the thinner it gets. The lump on the end holds heat so you have a longer time to make the point and taper. When finished cut the lump of metal off and discard. I imagine it is possible to see people who call themselves blacksmiths doing all sorts of crazy things. That doesn't mean it is correct procedure. I can tell you that traditionally, any smith who regularly wasted material as you describe, during what is likely the most common procedure in blacksmithing, drawing a taper, would not have been considered much of a smith. Not all that long ago decent iron was expensive and was never wasted in the way you suggest. Furthermore, if you know what you are doing, any supposed loss of heat is irrelevant. In fact, maintaining the maximum amount of mass adjacent to where you are forging the point actually helps retain heat in the small section area, as oppose to thinning that area down before you forge the point. Less mass means less heat retention. I could very easily forge the point and taper that the OP did, in a single heat and perhaps even have heat left over for bending. Unlike yourself, I have never seen a competent smith forge a point and taper any other way that point first, taper second which is exactly the way the ABANA training indicates it should be done. The OP's technique is not only inefficient, but he appears to have left a lot of hammer marks on the work and his 90 degree bend for the drive end of the hook is not really square enough to work very well. It seems to me that it behooves those of us with more experience to point out issues with technique when we see them, which is what I was trying to do. Quote Link to comment Share on other sites More sharing options...
Frosty Posted December 12, 2015 Share Posted December 12, 2015 Ayup, disappeared. STUPID IPS BLOATWARE!! Quote Link to comment Share on other sites More sharing options...
Recommended Posts
Join the conversation
You can post now and register later. If you have an account, sign in now to post with your account.