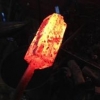
kayakersteve Posted April 19, 2015 Share Posted April 19, 2015 This is my home-made 2 burner propane forge. My experience with gas forges has not been 1st hand up until now. I have done lots of reading and watched lots of videos. Can you more experienced users help diagnose my flame and variation between front and rear burner. Interior is 5x5x13 = 325 cubic inches. Burners are 3/4". Regulator is 0-30, set at around 5 during this video. Thoughts?? Quote Link to comment Share on other sites More sharing options...
Frosty Posted April 19, 2015 Share Posted April 19, 2015 I'm glad you finally showed a shot of the top of the burners so I'd know what you were running. I don't use linear inducer type burners and I don't know why guys are putting the nipple on top of the bell reducer other than to mount the the gas line. Have you looked at Ron Reil's burners? He has them refined to a high degree for home builds.At first look your burners are running too rich, there is a LOT of dragons breath which represents the amount of unburned fuel coming out the door, the occasional yellow feathers in it mean it's developing a LOT of CO. running 0.30" jets and running rich means they're just not drawing enough intake air. This could be because you're running such low psi.I can hear the front burner is running to low, gas burners should roar. The rear burner is performing better but it's still too rich.Seeing two 3/4" burners in 325 cu/in, the dragons breath and the weak sound lead me to believe at first glance, back pressure was preventing the rear burner from drawing properly. However, looking in the front and seeing it was the front burner that was drawing so weakly while the rear one had a nice shape flame and sounded good it makes me think the front burner isn't tuned properly.I'm not familiar with the maker of these burners and could barely hear you over the forge. Just from the look I don't care for the design. Either the maker doesn't understand how they work or he's just too lazy to mount the gas supply properly. The extra length of nipple on the intake lowers the performance by making it induce intake air through an additional 2" or so of pipe for no good reason.Just for a start, turn those puppies up, 5 psi is a target Ron Reil decided early on was the ideal. It's fine for a commercially build burner but we aren't tapering the entire tube, at most the last 1.5" in the flares. Ron tinkered for maybe a year getting his to run as low as 5psi. Turn yours up to 10psi. and see how they work, I'll bet ONE of them will have your forge up to high yellow heat before you work up to 15psi.When I said gas burners roar I mean a 3/4" burner is LOUD, people within 20' will be shouting to talk.Check out Ron Reil's burner pages, I believe they're archived on the ABANA site and see how he mounts the jet. They're right on top of the bell reducer. Making them draw air through a long pipe is like you trying to breath through a straw, you have to suck harder for less air and your burners are burning rich, really rich.Good video, you showed everything I needed to see. Good job of plumbing everything though I put my reg right behind the regulator. I don't use an idle circuit so I've never really looked at them. That's personal preference though, I keep mine running or just shut it off and relight it later if I'm going to be way for a little while say run to the house or something. It'll relight for up to half an hour just by turning the gas back on but I just crack it till I see if it's going to fire back off.Frosty The Lucky. Quote Link to comment Share on other sites More sharing options...
kayakersteve Posted April 19, 2015 Author Share Posted April 19, 2015 Frosty - I will research more on Ron's sight. I appreciate your responses. I did take the front burner apart and blow it out real good. Just not sure about it. My goal was to have propane ready to roll when my coal supply dries up or becomes too expensive to continue with. I will take another look at other burners - got these on a whim after looking at several and in hindsight I wish I would have done more research. I have two very large ventilation exhaust fans running and my CO detector doesn't move - I was afraid I was dumping a lot of CO into shop, but the vents must be handling it. Nonetheless, I want to minimize CO production and get these better tuned or replace the burners. Thanks again Quote Link to comment Share on other sites More sharing options...
teenylittlemetalguy Posted April 19, 2015 Share Posted April 19, 2015 I just want to put in a plug for the Frosty T burners out of pipe fittings. Instead of messing around with this why not take a $10 gamble and build one? Built to as directed they are pretty foolproof ( I should know, mine work fine) the build was easy and I was able to focus on the fun part of all of this and not the boring burner details. Once it is tuned it just sits there and works. My first one is several years old and has had zero maintenance, working fine the whole time. Quote Link to comment Share on other sites More sharing options...
Frozenforge Posted April 19, 2015 Share Posted April 19, 2015 It would appear the the burners are not inducing enought air as Frosty says. I use linear burners and at 5 psi they have a pretty good roar and the flame from the forge is shooting out the openings. The placement of the mig tip in relation to the bell reducer is critical to it pulling in air. I cant tell how far down from the inlet pipe the tip sticks down but if is too high it will not induce air properly.here are a couple pictures of spare burner I have just for other stuff. Yes that is a golf ball I am using for a choke! It fit and no thread cutting!The mig tip comes off the 1/8 brass tube and goes down to where the reducer has just transitioned to the smaller diameter. This burner will run stable from 1 psi up to 40 psi in open air. The choke is set right now for a neutral flame. With no choke it runs lean above a couple psi.I made linear ones cause Ron Reils website was the first one I came across before I discovered IFI. In hind sight I believe the T burners are easier to make and tune but I have not made one yet. When I make my next burner that is what I want to try. Quote Link to comment Share on other sites More sharing options...
ThomasPowers Posted April 20, 2015 Share Posted April 20, 2015 I would never assume that two burners would work on the same pressure due to typical manufacturing variance. Quote Link to comment Share on other sites More sharing options...
hwp Posted May 1, 2015 Share Posted May 1, 2015 (edited) I just want to put in a plug for the Frosty T burners out of pipe fittings. Instead of messing around with this why not take a $10 gamble and build one? Built to as directed they are pretty foolproof ( I should know, mine work fine) the build was easy and I was able to focus on the fun part of all of this and not the boring burner details. Once it is tuned it just sits there and works. My first one is several years old and has had zero maintenance, working fine the whole time. Frosty, have you significantly tweaked your design since 2007? I found your plans in a 2007 edition of the FABA Clinker Breaker (Florida Artist Blacksmith Association newsletter) and built your burner with 1" pipe and .030 mig tip as I have been unable to find .045 tips locally. My flame seems to be igniting in the middle of the 8" barrel (which can be seen in darkness, a swirling blue flame) with clear heat exiting the tip. This is running on a test bench with a straight pipe and not in a forge as I haven't built it yet. I'm running at 5 psi and have turned it up to past 10 psi. I should add I did all this before I found this forum. I have the tip slightly past dead center and have tried it in dead center as well with about the same results. Can you give any suggestions? Thanks. Edited May 1, 2015 by hwp spelling Quote Link to comment Share on other sites More sharing options...
Frosty Posted May 1, 2015 Share Posted May 1, 2015 (edited) I don't know if I'm still building the burners the way they show in the Clinker Breaker, I've made a couple changes since the first set of drawings I posted here. The basic ratios remain the same, I used industry standard and tweaked them slightly so home builds work.A 1" tube should be 8"-9" long with a 0.045" mig tip for the jet and a 1 1/4" x 1" x 1 1/4" T. If you can't buy 0.045" mig tips locally order them online. Even the local decent industrial hardware store (AIH for the Alaska guys) carries a pretty wide range of mig contact tips.I run 0.035" mig contact tips in a 3/4" burner and 1/2" burners run with 0.023" mig tips.I can't think of a way to make a 1" burner run properly with a 0.030" jet. A 3/4" burner would have to be choked down to run with that size jet. I SUPPOSE you could open it up with torch tip files but that'd be a job of work. If you try drilling them out the chances are very good you'll break the bit and it'll be galled in the mig tip so you have to start over with another. Use the FILES, they're intended for this kind of job. Still it's a lot of work, especially if you . haven't done it before. Go slowly, ONE file at a time till you're to spec.Don't worry about what psi someone else's burners work on. As Thomas says home made burners have inherent differences that effect performance. The four I run in my shop forge were all built at the same time on my lathe so alignment is as close as a home build is likely to get and all four are unique. There isn't a big difference but one is my golden bullet and actually melts hard, 3,000f fire brick under the flame, the other three hit welding temps easily but don't melt fire brick. I typically run mine between 10psi and 15 psi and sometimes run it as high as 20psi.When you tune your burners you'll find out at what psi they run best. Listen to them and after a while you'll be able to hear the right roar. At the meeting before last I tuned a new one for one of the guys by ear and was welding in it before the brick got to full heat. By all means put a gauge on it so you can just adjust the heat without having to do it by eye and ear. I have a gauge on mine for just that reason just don't think your forge and mine will produce the same heat on the same pressure.It's all a little knowledge and practice. Forget how low someone else's burner runs they should ROAR like a jet taking off. Folk will be yelling to be understood when they're running. I wear Peltor ear muffs if I'm going to be out there long.If you have more questions and I don't get back, I may be locked out of the forum again, there's some glitch decided to mess with me. PM me or ask Teenylittlemetal guy, Frozenforge or someone in the Alaskan Association sub section. I'll get back or Tristan will, he has a good handle on these things.Frosty The Lucky. Edited May 1, 2015 by Frosty Quote Link to comment Share on other sites More sharing options...
Recommended Posts
Join the conversation
You can post now and register later. If you have an account, sign in now to post with your account.