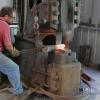
September 9, 201213 yr i call them stop blocks. I think i hate the term -kiss block- it has all the appeal of lip gloss to me..... :P
September 12, 201213 yr We call them pads, and "no wormser they are not so as you can just drive down onto them and keep going, they are there so as when the hammer begins to touch it you know that you are down to size, same as the buffers at the end of the railway line, they are there so as the driver knows where the track ends, he does'nt just drive full speed into them and sit there with the wheels spinning, until he thinks, I'm here know, I'd better stop". He see's the buffers and says to himself, "thats the end, I'll just ease up to them nice and easy like". "That my boy is what a pad is for, so as you can ease up to it nice and easy, not smash it to hell like you have been doing". Then after beating the poor pad undersize, they amaze me by coming up to me and saying,"Phil my job has come out undersize, but the pad was the right size when I started, but its not now". I think the last one got a reply of "run Forrest run" Phil
September 12, 201213 yr I had the opposite problem on a recent job. I have a bit of a hollow in the middle of my dies from wear they could use facing off. I ended up with a bunch of parts forged to a little over 9/16" that were supposed to be 1/2" because the stopper was on the side and I was forging in the middle. Obviously it is a much better problem than undersize. Those of you making parts to drawings how much oversize do you let stay? These were 1 3/4" bars bent and then a section flattened to 1/2".
September 12, 201213 yr When I've worked to drawings they have had tolerances, plus or minus a sixteenth or something like that.
September 12, 201213 yr We call them pads, and "no wormser they are not so as you can just drive down onto them and keep going, they are there so as when the hammer begins to touch it you know that you are down to size, same as the buffers at the end of the railway line, they are there so as the driver knows where the track ends, he does'nt just drive full speed into them and sit there with the wheels spinning, until he thinks, I'm here know, I'd better stop". He see's the buffers and says to himself, "thats the end, I'll just ease up to them nice and easy like". "That my boy is what a pad is for, so as you can ease up to it nice and easy, not smash it to hell like you have been doing". Then after beating the poor pad undersize, they amaze me by coming up to me and saying,"Phil my job has come out undersize, but the pad was the right size when I started, but its not now". I think the last one got a reply of "run Forrest run" Phil perfect analogy! and sililoquy :P
September 12, 201213 yr Danger, Why would you want to make a repetitive taper on a power hammer? because you can? From my perspective it could be!and if you are playing around and it's fun well then good and well, But if it's for a paying job then switch to using eccentric wheels. ie. get 2 steel discs say 2" thick use pi to calculate the diameter that you require(sorry I have to switch to metric here as I understand it better) drill a hole in each say 3mm off center (this will give a 6mm/0.5" taper. into this hole mount a shaft(thicker is better)then using plumbers blocks(bearing sets) mount the two wheels one above the other. link the two with duplexsprockets and chain and attatch a motor and reduction box. when the wheels turn the gap opens and closes evenly. Experimenting with mdf and dowels (squeesing playdough/plasticene) will quickly giv you the exact sizes that you need with no sweat.Great looking smooth and even tapers. This may get me critisized by the luddites out there for sugesting that there may be an easier way than the hammer but tough! P.s. I love my De Moor 200 but if there is a "better" way I'll use it. Good luck Ian
September 15, 201213 yr Found this video of using a kiss block and it seemed appropriate for the thread:
September 15, 201213 yr i call them stop blocks. I think i hate the term -kiss block- it has all the appeal of lip gloss to me..... :P 'stop block' also says what it is without further explanation.
September 16, 201213 yr Danger, Why would you want to make a repetitive taper on a power hammer? because you can? From my perspective it could be!and if you are playing around and it's fun well then good and well, But if it's for a paying job then switch to using eccentric wheels. ie. get 2 steel discs say 2" thick use pi to calculate the diameter that you require(sorry I have to switch to metric here as I understand it better) drill a hole in each say 3mm off center (this will give a 6mm/0.5" taper. into this hole mount a shaft(thicker is better)then using plumbers blocks(bearing sets) mount the two wheels one above the other. link the two with duplexsprockets and chain and attatch a motor and reduction box. when the wheels turn the gap opens and closes evenly. Experimenting with mdf and dowels (squeesing playdough/plasticene) will quickly giv you the exact sizes that you need with no sweat.Great looking smooth and even tapers. This may get me critisized by the luddites out there for sugesting that there may be an easier way than the hammer but tough! P.s. I love my De Moor 200 but if there is a "better" way I'll use it. Good luck Ian What you describe is a "forging roll"...used for production runs of tapers/wedges and some tooling....I have seen some which rolled blades as well as seven stage models with 20" rolls that can make rather intricate forgings in one heat. Ric
September 17, 201213 yr also called rolliing swages, when I were lad, we used to ave set in yon spring shop where you would get sent if you were a naughty boy and you would get to make little wedges by the drum load for a few weeks till you learnt a lesson, (ie don't be a naughty boy). The spring shop was also where Mr Dumbrell had his office so as he could keep an eye on you all day, just by looking out his window. They did have a larger set that was set up as an experiment to roll forge tapered truck spring leaves, but after Mr Dumbrell was thrown backwards onto his bum by the first spring leaf coming out at 100 miles an hour, it was put in the too hard basket and left to accumulate dust again. We then went back to forging and tapering under the hammer as per before. I think that the new owner cut them (the big rolliing swages) up a few years ago sadly. Phil
September 17, 201213 yr I like the idea of forge/rolling/swages. I think everyone has a "the first time I used a rolling..."story. I fed the tongs through on mine. The folks at bulldog use one at about minute 1:10 Ric
September 24, 201213 yr Ric, That made me laugh out loud, sending the tongs through the machine probably wasn't funny at the time though!
September 26, 201213 yr Ric, That made me laugh out loud, sending the tongs through the machine probably wasn't funny at the time though! When I mention that to others with powered rolls I hear the same story. The billet was feeding off center so I tried pulling it back into the center...by the time I saw what was happening it was all I could do the let go. At 33 feet per minute the billet disappears fast. I now have a guard on the thing which would strip my hands off anything I'd be holding onto, BUT it is not something I worry about after adding in and out-feed tables. As with any new tool one plays with it first thing...which is a good way to get hurt. Ric
October 24, 201213 yr What kind of rolling mill is it? 33 f.p.m. seems fast. Were your tongs flattened like a pancake? Brian
Join the conversation
You can post now and register later. If you have an account, sign in now to post with your account.