May 25, 200917 yr I work for an architectural metal company in New York. I have gone and done myself a great disservice by learning to jig and fabricate on the two sweet, sweet Demmeler tables we have in the shop. I'm doing a little side work and I need a table to make a gate but haven't won the lottery so buying a demmeler is out. Does anyone know of anything similar to the the Demmeler system that's less expensive? Jim
May 26, 200917 yr Regular platten tables (acorn) are the industry standard, and are available used, however, they are very heavy and awkward to move. Probably the vast majority of small shops have neither and use a table made of heavy plate. I personaly use 1" plate, but as thin as 1/4" will work, though heavier is better. As far as jigging goes, clamp a section of angle to one edge of the table. This is where the cap rail will go. Lay out the rail on the table, then tack weld small short pieces of angle to the table to clamp the bottom of each post to. As you asemble the rail, clamp each post one at a time, and tack weld the top of the post to the cap or subrail. If there is a lower or bottom rail, tack another piece of angle to hold this. Use spacers or shims to elevate components properly. Pickets do not need to be fixtured, hold in place and tack each end. Use plenty of clamps from the cap-rail to the angle at the edge of the table, and when all is tacked, weld. Alternate the direction of each picket weld(left to right, then right to left etc.) to avoid warping sideways, and when you flip the rail over to weld the other side, be sure to restrain it at at least four or six points before welding.
May 26, 200917 yr May I suggest that if you use aomething as thin as 1/4"pl that you stiffen it from the underside with some channel iron. But, the thicker the better. Arftist has some good easy workable suggestions. I used 4 pipe jacks to build my entry gate! But it is farely simple in design...we didn't want folks to think 'WOW, must be some money behind that gate', for one, they would be so disappointed! Electronic gates are NOT burgular proof either! Don't ask me how I know that....gets my blood boiling! :(
May 26, 200917 yr I use 1/4" with a framework of 1" sq. tube welded around the perimeter (with about a 2inch inset to allow edge clamping) and 2 braces of the same tube welded across the bottom.
May 26, 200917 yr I currently use a 32" x 48" x 3/8" steel plate on top of a 4.1# c-channel frame with 3" x 1/4" square tubing legs. The top overhangs the frame by approx 3" for clamping. I use jigs tack welded to the table top along with magnets ( when they are not near the weld areas ). It's pretty sturdy and will take some pounding. You can find most of these materials at a scrap yard. My first welding table was an old 32" x 32" drain grate. It had a lip around it that could be clamped but the grate allowed for all kinds of setups. All you need is a sturdy flat surface and you get creative with the jigs. I know it doesn't compare to what you use at work but it works! Here's some pics - ( wow the shop was clean when I built that table! ) The table now has a bending brake and a vice mounted to it. You can't see much of the grate but you get the idea. It's sitting on metal saw horses. I've built many projects on it. I paid $20 at a scrap dealer.
May 27, 200917 yr I spent many yrs welding aluminum patio furnature piece work. Got about 2yrs out of a 1/4 in 3X3 top. It dished about 6" in the center. Now in my own shop I have a 5X5 hydraulic lift table with an extra 1/2" plate on top. Best ever was a 2" 3X6 aluminum top. Tables are like anvils heavier is better. Ken
May 27, 200917 yr An alternative to working flat on a heavy bench is to use a length of I beam with box section welded upright at 90 degrees at one end as a datum and construct your gate in a vertical position clamping accordingly.
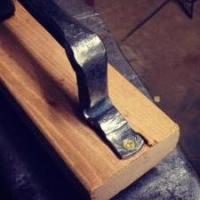
May 27, 200917 yr I use a discarded 2" thick solid core wooden entry door as a table. It was free. Yeah it smokes a little when tacking, but It was free. For jigging, I wood screw angle iron anywhere I need it. Not quite as versatile as a steel table, but it's easier to move and it was free! For welding, I clamp the work to the top of the angle jigging so it won't move. BTW, did I mention that it was FREE!!?? :D
May 27, 200917 yr same here I just have a hevy metal bench i tack weld 25x25 angle brackets to the bench were ever they are required,and spray some spatter guard in the corners and weld away ,flip it over do the same on the reverse side job done. It all depends on how fancy you would like,years ago I made two A frames laid the welding jig on two pieces of pipe tacked welded these to the A frame ,then I was able to rotate the jig 360 deg around which then allowed me to weld both sides up with out removing the gate from the jig until all welds were complete,you just have to make sure you weld in a sequence so it does not twist to much expansion /contraction can be your best friend or your worst enemy Bush bugger:)
June 1, 200917 yr Same here, plain and simple. I got some scrap 3/8 channel @ 12 inchs wide, I cut to peices and welded together. Put the steel plate on a Black and decker shopmate, works good in my small gargage shop.
June 2, 200917 yr I've been thinking about getting a largish piece of 1/2" or better plate from the scrap yard then hauling it over to the water jet shop and having them blow a bunch of holes in a pattern like the table you linked in your original post. Then tapping them with a 1/2" tap. I've had them cut holes in parts before and their tolerances are plenty good for tapping. With the price of even secondary/used steel these days it has moved this thought a ways down the todo list though. Then every time I do a welding project I wish I had done it...
June 8, 200917 yr Author Thanks all. I think I'm just going to find a large plate and put it on a wood frame. That's a good idea. I did, in the course of my research find another system that is probably a little less expensive than bluco. (I'm waiting on a price list.) You can see it here. I think eventually it would be worth it to pay for one of these systems because it makes life SO easy. Especially if you're in an environment where you need to juggle multiple projects at once.
June 14, 200917 yr My bench is 20mm plate and I wouldn't want it any thinner. I wish, now, I had made it bigger area but I was sort of limited on space. Wouldn't want to be without it now though. I just tack on tabs as I need them then grind off when they have served their purpose.
June 15, 200917 yr With a small shop, my "table" is portable. It's a 20" length of 15 X 3 X 3/8 channel. I slide it around my wooden workbench (solid-core door on metal workbench legs) as needed. I can always slide it out a little to clamp on the ground. I got this from a scrap yard, back when those yards sold to little guys like me. The Chinese scrap revolution put a stop to that, although maybe it's better now. I haven't been for a long while. But I got the channel without any use in mind at the time. Thought it might make a nice base to something. What I left behind were some scraps of 3/4" - 1" perforated with 3/4" - 1" round holes. They were around 2' X 3'. Now those would have been nice for a small table. They were gone by the time I was thinking about welding tables.
July 7, 200917 yr I'm in this same boat. I have such a ridiculous setup. But like all setups I had what I had to work with. To me back then the idea of putting a 3/16's top ontop of a wood desk was a good idea. Now the desk is warped in so many ways that trying to lay out anything remotely true on it is just a joke. Plus at 3' x 7' it's just ridiculously to large for small scale fabrication and blademaking. I'm thinking more like a 3'x5' 1" piece of plate with some sort of really thick walled square steel legs and the whole thing bolted down to the concrete. Put a post vice on one side and call it a day lol. It's nice to have the layout size but i'd rather have something that is true then something large and twisted.
July 7, 200917 yr My welding bench in my shed is made up of 25mm box steel with the plate being: 20mm x 1800mm x 1000mm. Now don't ask me in imperial, although I should know seeing that I was brought up with the imperial system then onto the metric. This all happened when I was doing my trade as well, so you can imagine the vacant stares at the theory lessons.
July 7, 200917 yr My welding bench in my shed is made up of 25mm box steel with the plate being: 20mm x 1800mm x 1000mm. Now don't ask me in imperial, although I should know seeing that I was brought up with the imperial system then onto the metric. This all happened when I was doing my trade as well, so you can imagine the vacant stares at the theory lessons. omg lol.. measurements in mm like that mean absolutely nothing to me. It would be like me saying my work bench is 42 Bing cherries across x 13 Fiji apples wide (the ripe ones) x 2 cashews thick. hehe.. but if you can understand your measurement then that's all that really matters. :D
July 7, 200917 yr 20mm x 1000mm x 1800mm translates to approximately 7/8 " x 40" x 72" just in case you were really wondering what it is in imperial. Sometimes in cases like this it is nice to be familiar with both systems. The real beauty of the metric system is the fact that it is all based on base ten system as opposed to the wide variations and odd numbers of the imperial. It is now becoming the world standard for measurement although the imperial system is still being taught in the States I believe. Here in Canada all students are now taught the metric system and the next generations coming up have no idea of what the imperial system is or what an inch, yard, or mile are. If you say it is several miles to somewhere they have no idea how far that is. I guess a lot of the older generation are just going to have to learn the metric system as well although they will probably try to transfer it back to imperial to know for sure. Terry
July 7, 200917 yr You might consider a table made to what ever size and height you need (Make It Bigger) and use box tubing. One by two or one by three, eigth inch wall depending your expected progect weight. First make the outside frame and get it straight checking with string and levels. then put in cross stringers. One down the long middle then side stringers about every twelve or eighteen inches between the middle & sides. This gives you multiple options during use. With no flat table in the way you can adjust heights & positions in all directions and you will have welding & measuring access in all directions. If you need a flat surface you could put a piece of plywood in and bungie cord it down from underneath. Also your project pieces can be bungie corded in place eliminating most peskie magnets. You can make a lower shelf using angle iron and wood. This unit will be light weight and you may have to attach it to the floor. Furher you can add to this table as may be needed later
July 7, 200917 yr If you want a flat table, I suggest you not weld the legs to it . Make the legs out of heavy angle or tube and weld a piece of plate to that and attach it to the table top with machine screws into tapped holes . The high heat input to weld the legs to a heavy plate will distort it enough to be a hassle forever. All my layout tables are 1'' thick and really worth the money if you do any kind of layout and assembly on large projects. I am careful not to weld directly to the table top itself and use a torch carefully or block the work up off the surface to avoid heat distortion. The plate tops have stayed flat and true [ enough for blacksmith work ] for years.
July 8, 200917 yr #1 would be a cast iron acorn table. #2 would be 1 1/2in thick aluminum plate. Don't have either in my shop but have used both. Need creative clamps for the alum but NO spatter sticking and NO warping no matter how hot you weld. Have warped a 5X5ft 5/8 top welding 500lb brush guards. Hope those days are past. Ken
July 22, 200917 yr #1 would be a cast iron acorn table. #2 would be 1 1/2in thick aluminum plate. Don't have either in my shop but have used both. Need creative clamps for the alum but NO spatter sticking and NO warping no matter how hot you weld. Have warped a 5X5ft 5/8 top welding 500lb brush guards. Hope those days are past. Ken Yah thats the thing. You go to the steel yard and truck home some giant piece of steel say 3'x6'x3/4" weld your legs on and then start welding on some large project and the steel desk/table will wick the heat from your torch and welding and before you know it (while you weren't watching out) it has warped the sheet. I've heard some say that 1"-1.5" steel can work but now were talking serious weight. I've just given up on the idea of having a flat non-warped surface. All the prices seem too expensive.
July 23, 200917 yr I built 3 5x5 tables with 3/4 inch tops set on a 5 inch channel frame with a cross brace. They were used to build 500lb guards for earth movers and 750lb robotic tables. No warp or sag after 5 yrs. The 1 1/2 in aluminum one was used for aircraft turbine parts. Flat after 10 yrs. Ken
July 23, 200917 yr I built 3 5x5 tables with 3/4 inch tops set on a 5 inch channel frame with a cross brace. They were used to build 500lb guards for earth movers and 750lb robotic tables. No warp or sag after 5 yrs. The 1 1/2 in aluminum one was used for aircraft turbine parts. Flat after 10 yrs. Ken Was any excessive heating done while something sat ontop of those?
July 23, 200917 yr What is excessive heating? 30-60+ welds on 1/2 by 4 flat bar. sometimes torching out a piece. Sometimes heating to bend or streighten. Best way to warp a welding table is tacking things to it. Ken
Join the conversation
You can post now and register later. If you have an account, sign in now to post with your account.