wd&mlteach
Members
-
Joined
-
Last visited
Everything posted by wd&mlteach
-
Thanks guys for the help and ideas. I had to make all of the tools over again out of larger stock. Frosty, as you pointed out the concrete nails pierced through rather easily. And I have a gentle hand, the kids will not. The mild steel tools did hold up when working with copper. So I think I will have the students make their own tooling and even a custom stamp. I did have trouble with the beeswax holding the workpiece it wants to pop out unless there is a bunch of wax on the top. As far as Altoid containers go, I have access to tinplate sheet. That stuff is pretty soft but will work harden eventually. I have used tinplate for years with for a wall sconce project that was soldered together. I have also made all of my own candle molds out of tinplate. I have never though heated it up enough to anneal it. Will that burn off the tin coating?
-
Well folks, I am hoping this team of experienced folks can help me think this through. So, I am going to be teaching some chasing and Repousse this year and I need to setup classroom tool sets on the cheap side. I have lol 24 kids in a class. Budgets are tight this year in my area in public education. So whatever it will have to be as cheap as possible. Here is my plan so far. I will be teaching a small 3” or less in diameter chasing/Repousse activity. This is a foundational skill activity so it will not be fancy or large at first. Maybe saw them out when finished or use them as is to make a lid or a container. We will be using copper sheet to hammer this all out. To hold the sheet I think I am going to use small tart pans filled with beeswax as it is cheaper than pitch. For the tool sets I have shaped out a simple set of tools using masonry nails with simple forms. I have a bevel, round, square, curve, point, and teardrop. They are all pretty small due to the end of the cut nail. Honestly, I am thinking about making them over again in mild steel as I think they will hold up enough and I can get some bigger sizes. Add in a couple of propane torches for annealing and a few heat guns for placing the sheet or backfilling with beeswax and I think I am set with the basics. Do you think I am missing anything? Or would you do something different?
-
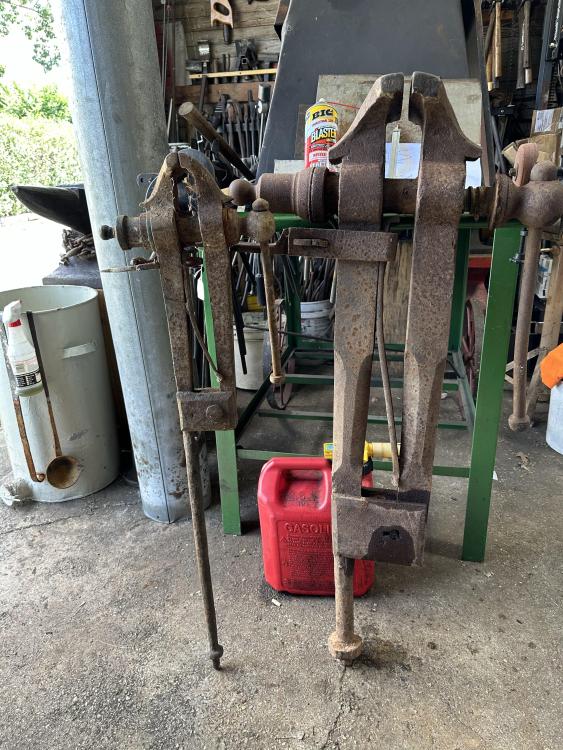
The jaws stand at 41 1/2 inches tall. Right now, I just lagged it to an Ash log that is about 31” tall and about 16” in diameter. I know it is not perfectly stable but it is not lying down and it is not propped up either. Under the foot I have a 1/4” thick steel circular drop with a piece of pipe welded as a cup to set the foot on. It is not stable enough alone to work on yet. Once I figure out a better place for it I will make it permanent but this is Sefer for now. I have another mobile base to weld it to. It was formally a mobile basketball hope base. But I have a mobile base already and I do not have the room for two in my shop. When I get to the point where it will be permanent, what height do you recommend? This is my biggest vise and it is heavy duty. Like you said tough enough for a sledge work. I have three other post vises a 4” that is around 40 pounds(still to be restored), a 5 7/8” vise that is 100 pounds, and a 5 1/4” vise that is 75 pounds. The 100 pounder is on my mobile base and is at 42” tall and the 75 is attached to my workbench at 45” tall. I love the varied height between the two I had mounted before. The one at 42” was great for hammering and twisting stock. The one at 45” was great for filing and intricate work as it was closer to my working height while standing.
-
A weed burner torch also work nice to heat stuff up that is rusted fast. Although I love a good oxy-A torch I do not have one at home. The weed burner was my next best choice and cheaper too. It is a slower much wider cone of heat.
-
An engine crane is on my list for sure. That would have been perfect. But I am out of room in my one car garage. A friend of mine is holding a Bantam Bateman Ironworker for me that I bought a couple of years ago but just do not have the room for it. That thing is about 700 pounds and top heavy. A crane would make moving that so much safer and easier.

-
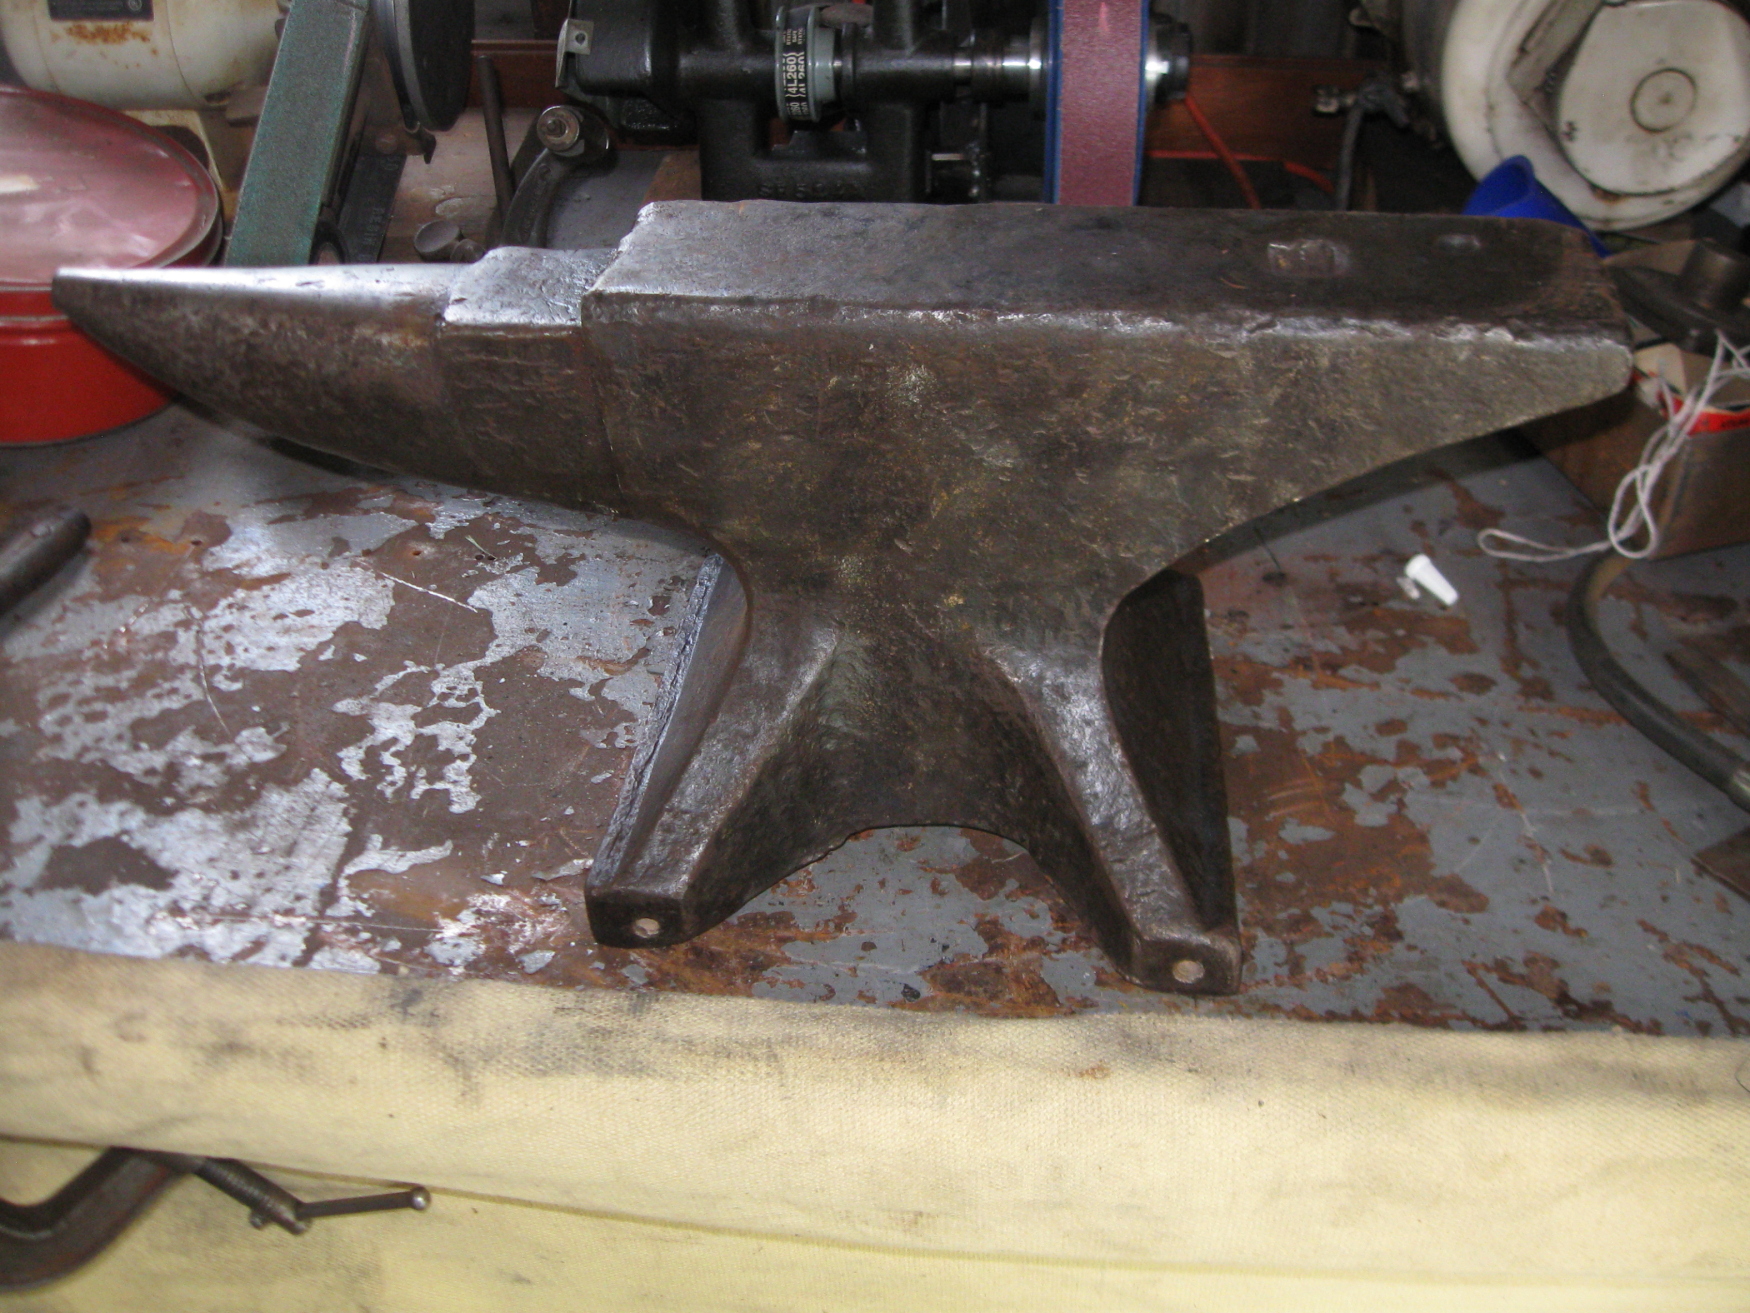
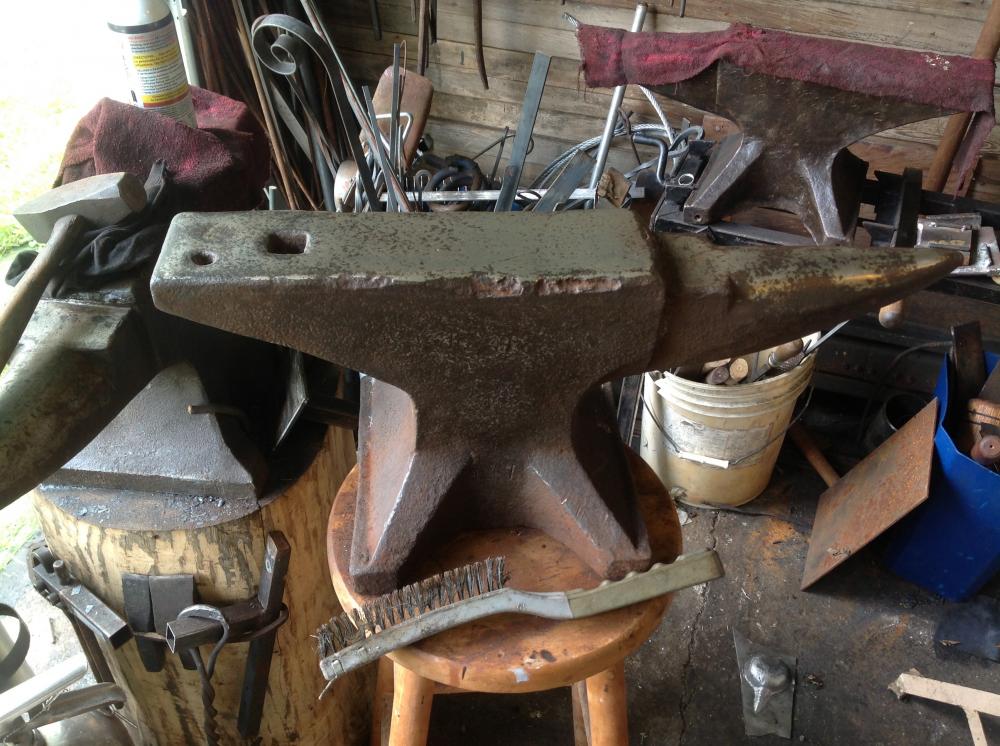
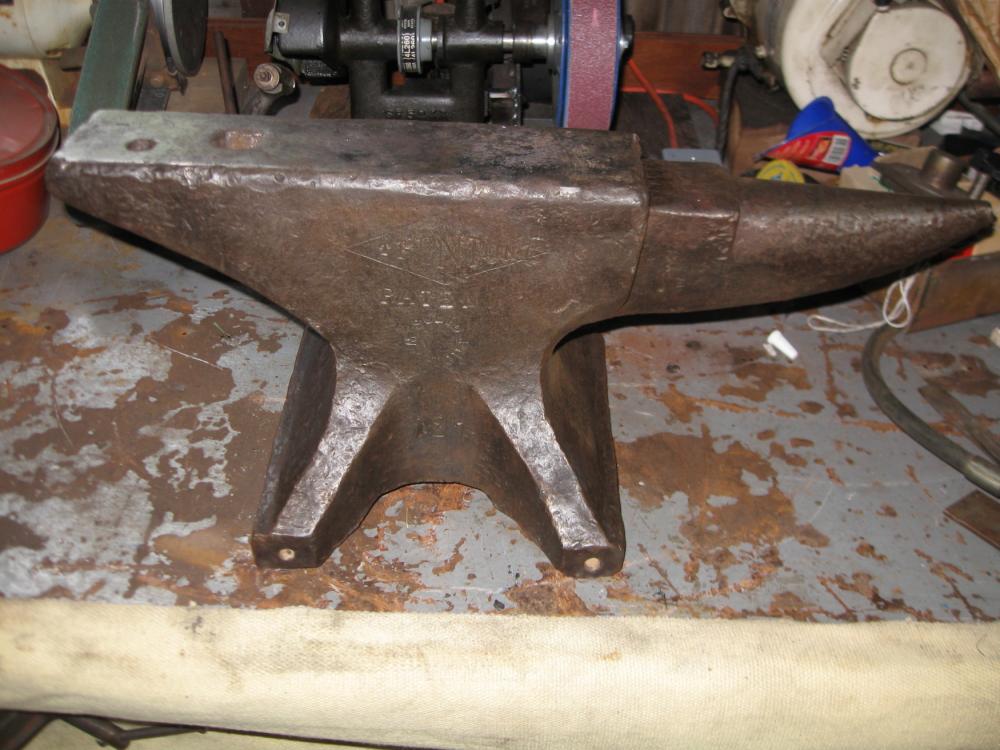
I ended up picking an anvil up a last month. This is a beast of an anvil. The seller listed this as a 150 pound anvil but I could clearly make out the numbers on the side that read 2 3 24. That makes it 332 pounds if my anvil math is correct. I offered them $250 a year ago when I found it on FB market place. And I never heard a response. I searched it out this summer and I saw it was still listed. So I sent them a reminder that my offer still was good and they took it. Unbelievable! It was painted so I really did not know what I was getting into. But I figured it was worth the hour and a half drive to check it out. I figured even if the top plate was destroyed or soft I could still repair it or just cut it up for the wrought iron stock and make other stuff from it. When I showed they had it loaded on an appliance dolly. I walked up to it and dropped a ball bearing on it a few times. It has a nice ring to it so I knew nothing was cracked. The rebound was good but unpredictable do to the dents and damage that I could see in the face. But I knew it was still hard, I could not see any cracks and I could see that the faceplate is almost a 1/2” thick. So I bought it. To get it home I used a landscape trailer with a ramp. I can’t lift that much into the back of my ram 2500. When I got home I moved it into my shop with a harbor freight hand truck that does not provide as much mechanical advantage as an appliance dolly. For over a decade I have quested for a large anvil and this is the biggest one I have found cheap. I would have to say after moving this one around solo this is about as big as I can go and still do it myself. After I got it home I gave it the twisted wire cup wheel treatment and wiped it down with boiled linseed oil. It sat for a bit until I could figure out where to put it. I ended up widening my stand and setting my other mouse hole on the floor. That one is 232 pounds and is remarkable smaller than this one. I know that sounds like a dumb sentence but I did not think 100 pounds difference would be such a big difference. But it is. To set it on the stand I used a folding ladder rated for 350 pounds a couple of 6x6 pieces cut to fit the top rungs of the ladder when it is set in an “A” configuration. This is one of those gorilla ladders similar to a little giant. I did not extend to raise it at all as it was tall enough to keep the legs doubled to be as strong as possible. I lifted it with a chain hoist and that was it. The only work that has been done to the face Was to run a 120 grit flap disk to it. It still has some dents and damage but enough real estate to find a flat spot to hammer as the face is 5 7/8” wide. I may end up fixing the heel in the future but for now I am just using as it is. It is so nice to work on a large anvil. I have smaller ones that have better faces that I can use for putting a smooth finish on. But honestly, I can’t see much of a difference working on this one vs my perfectly smooth PW.


-
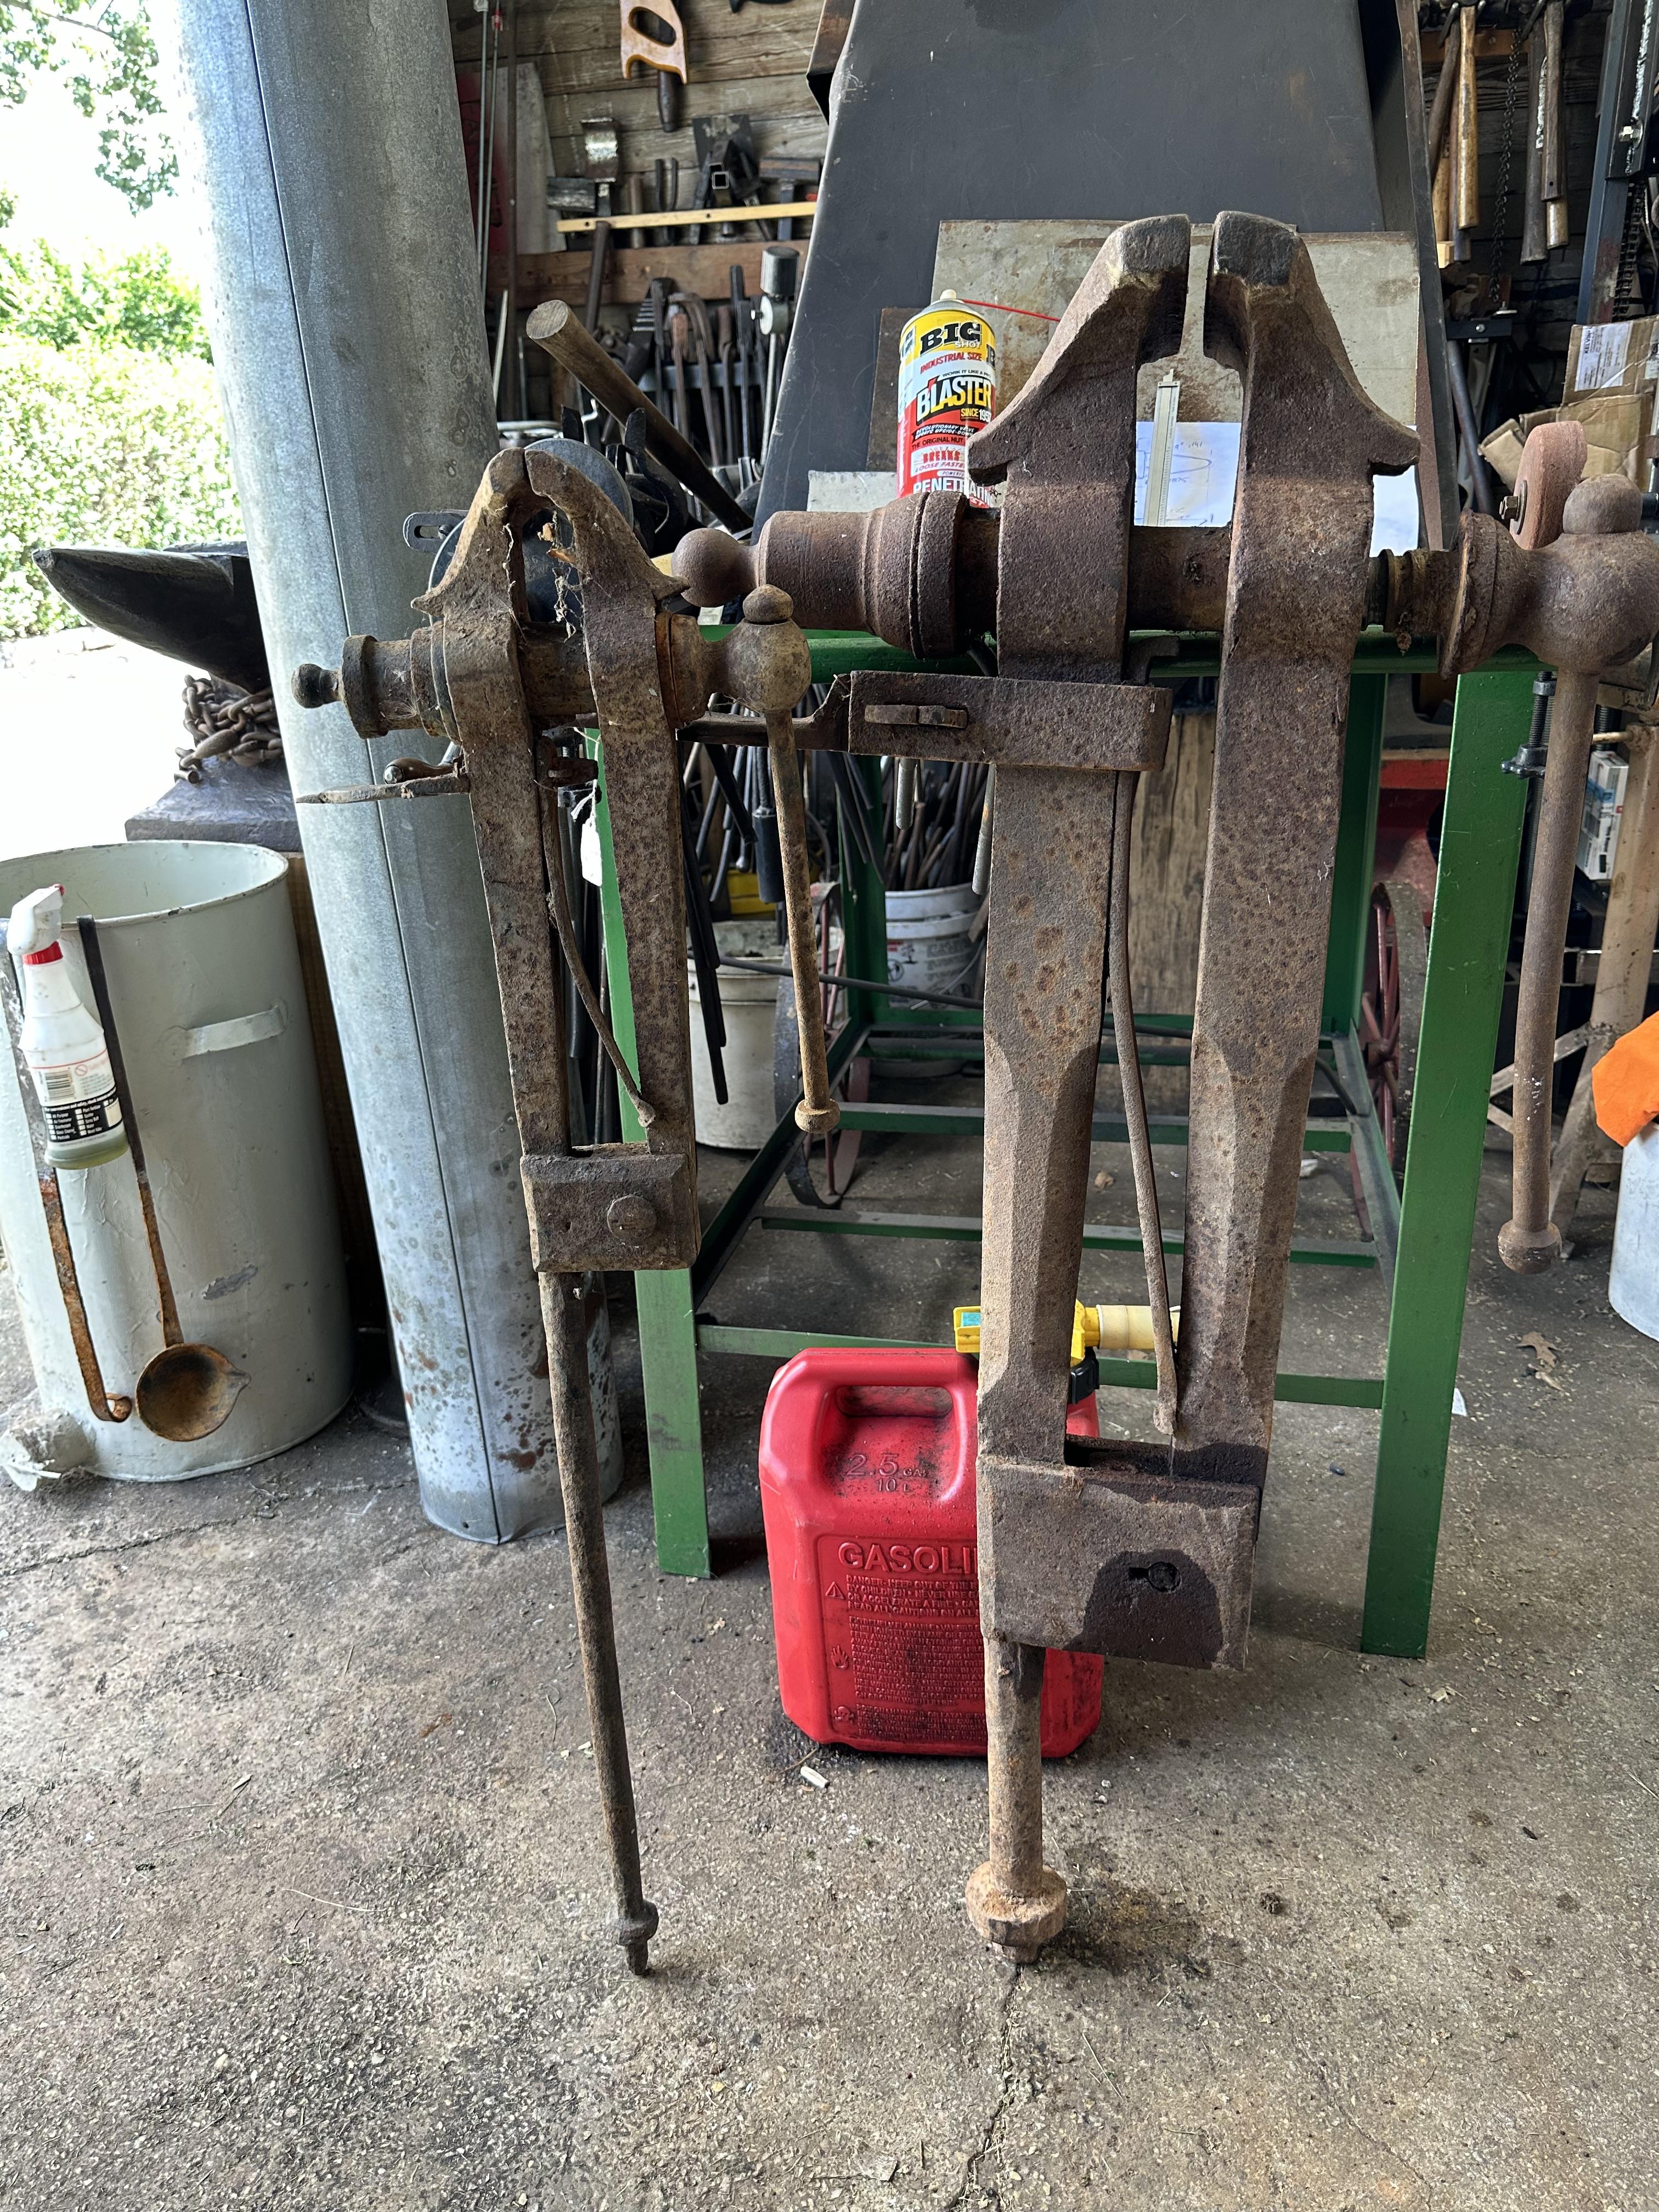
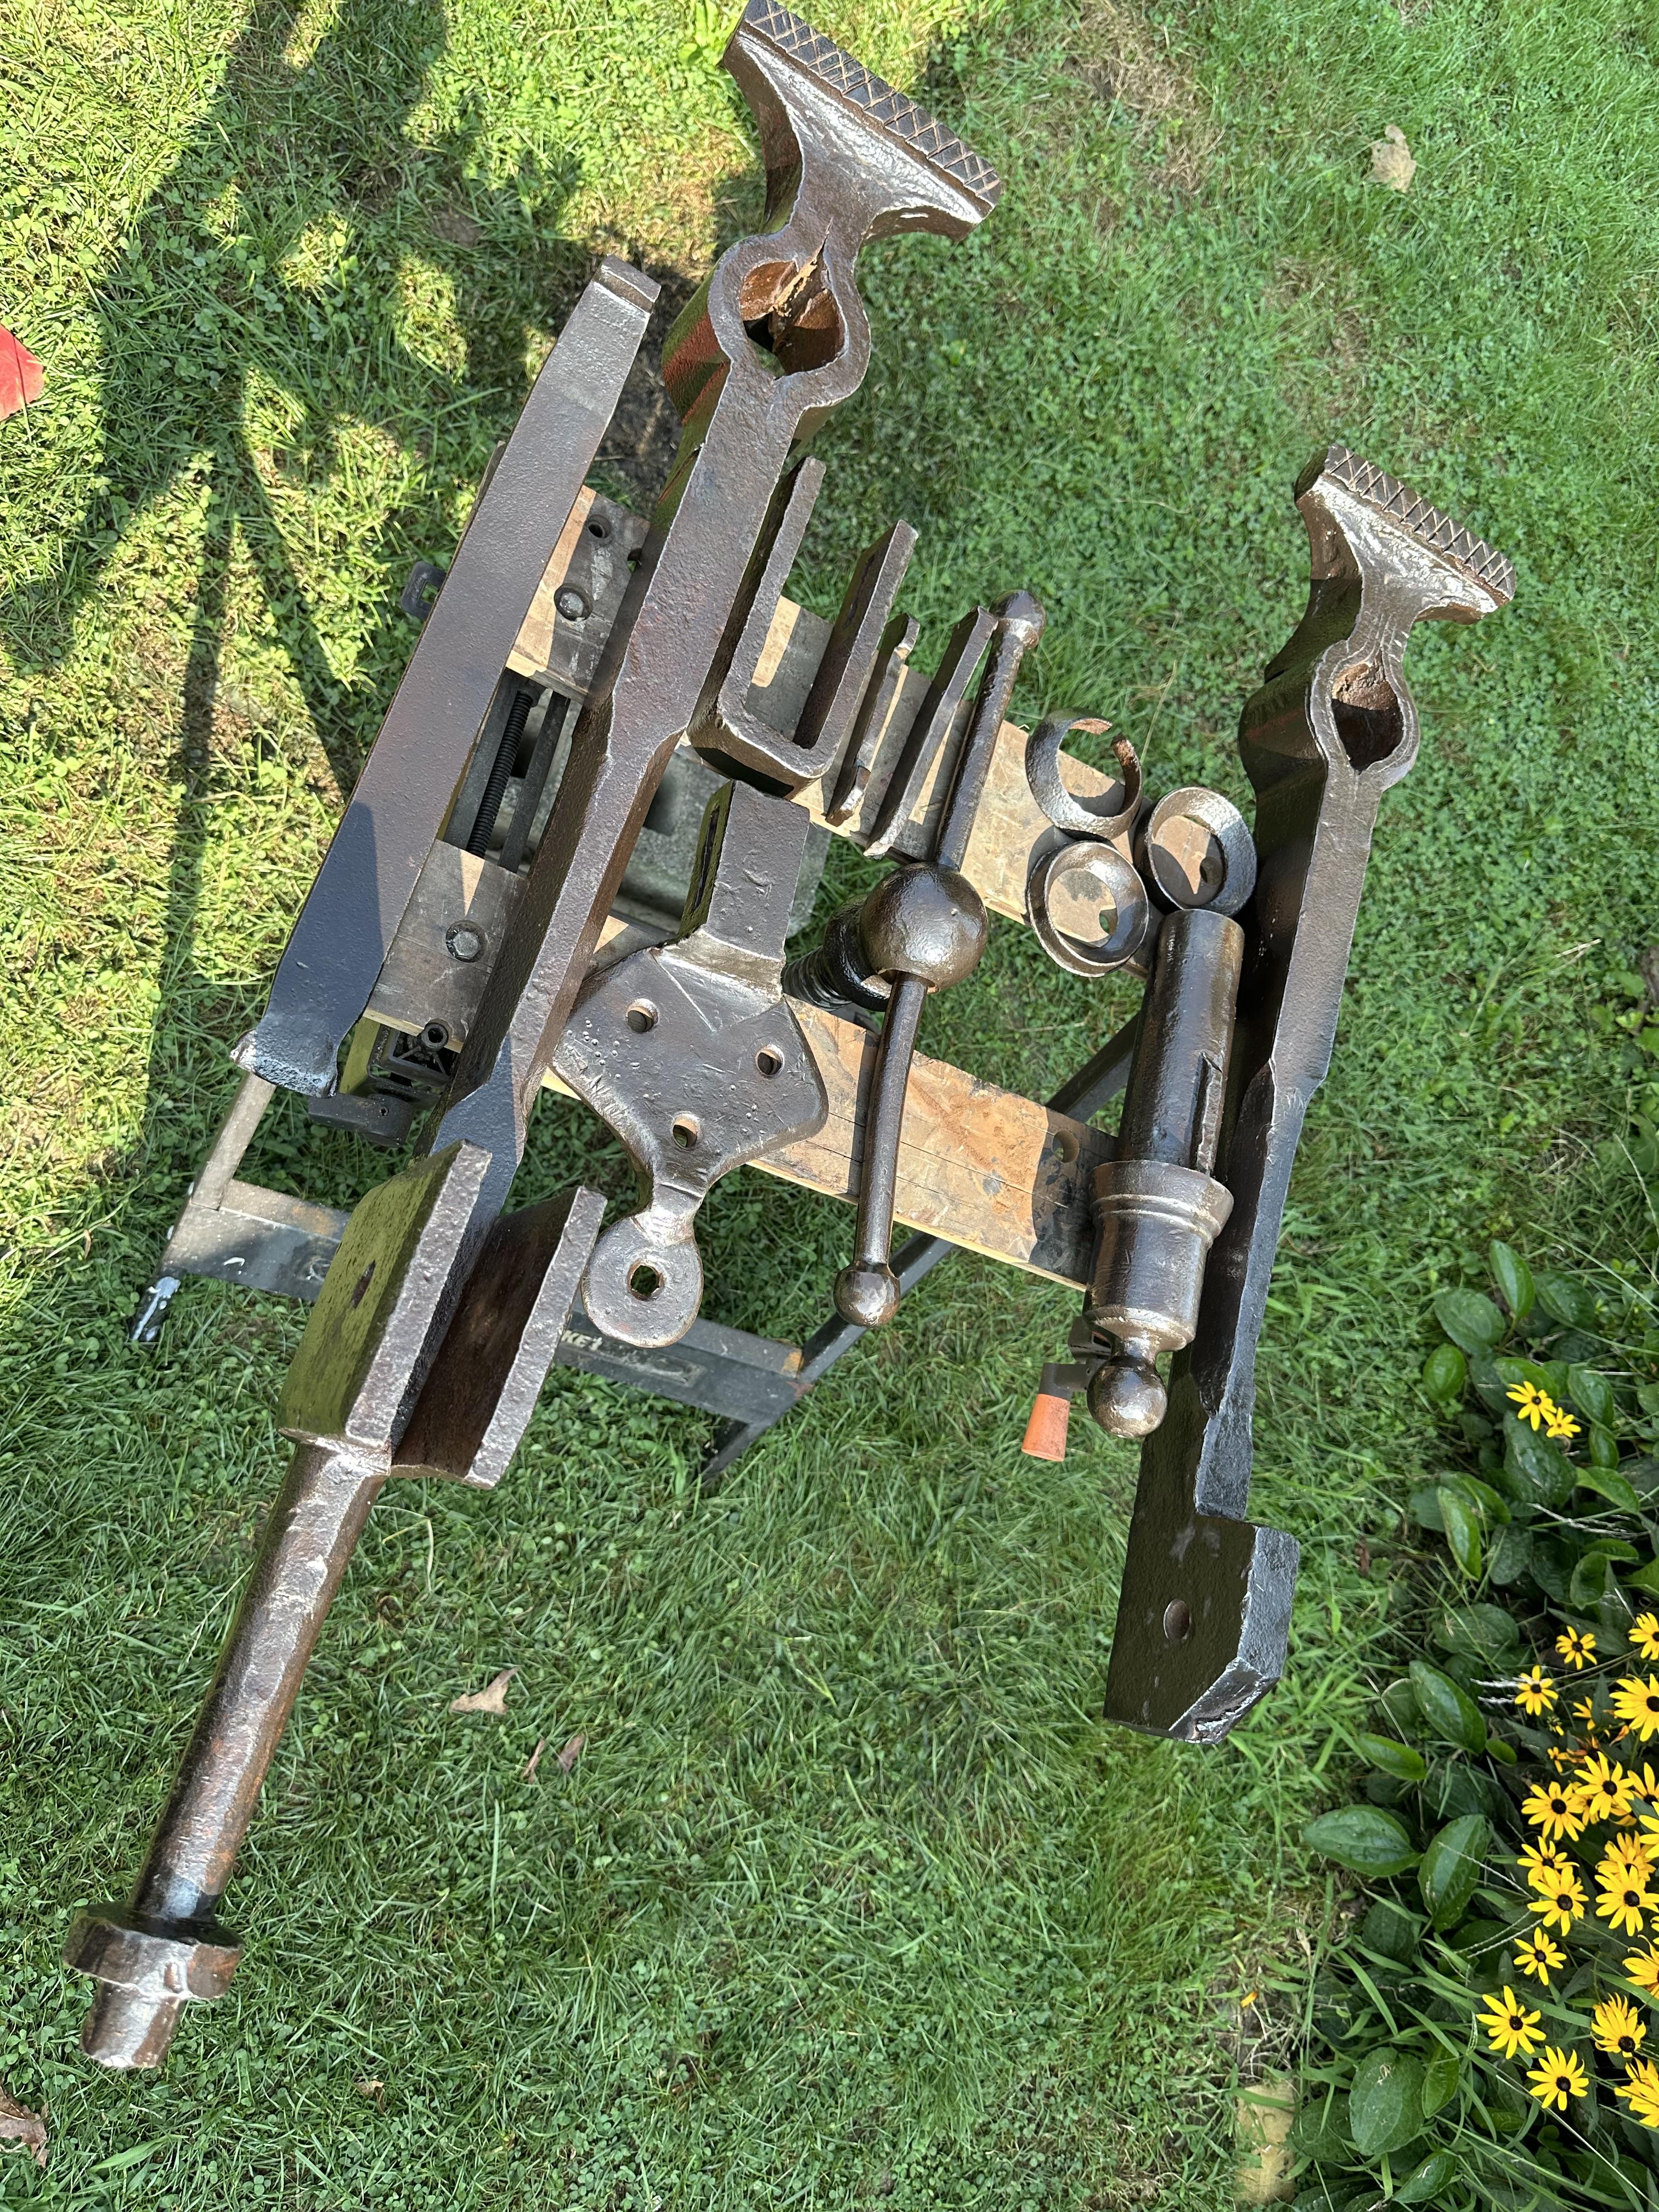
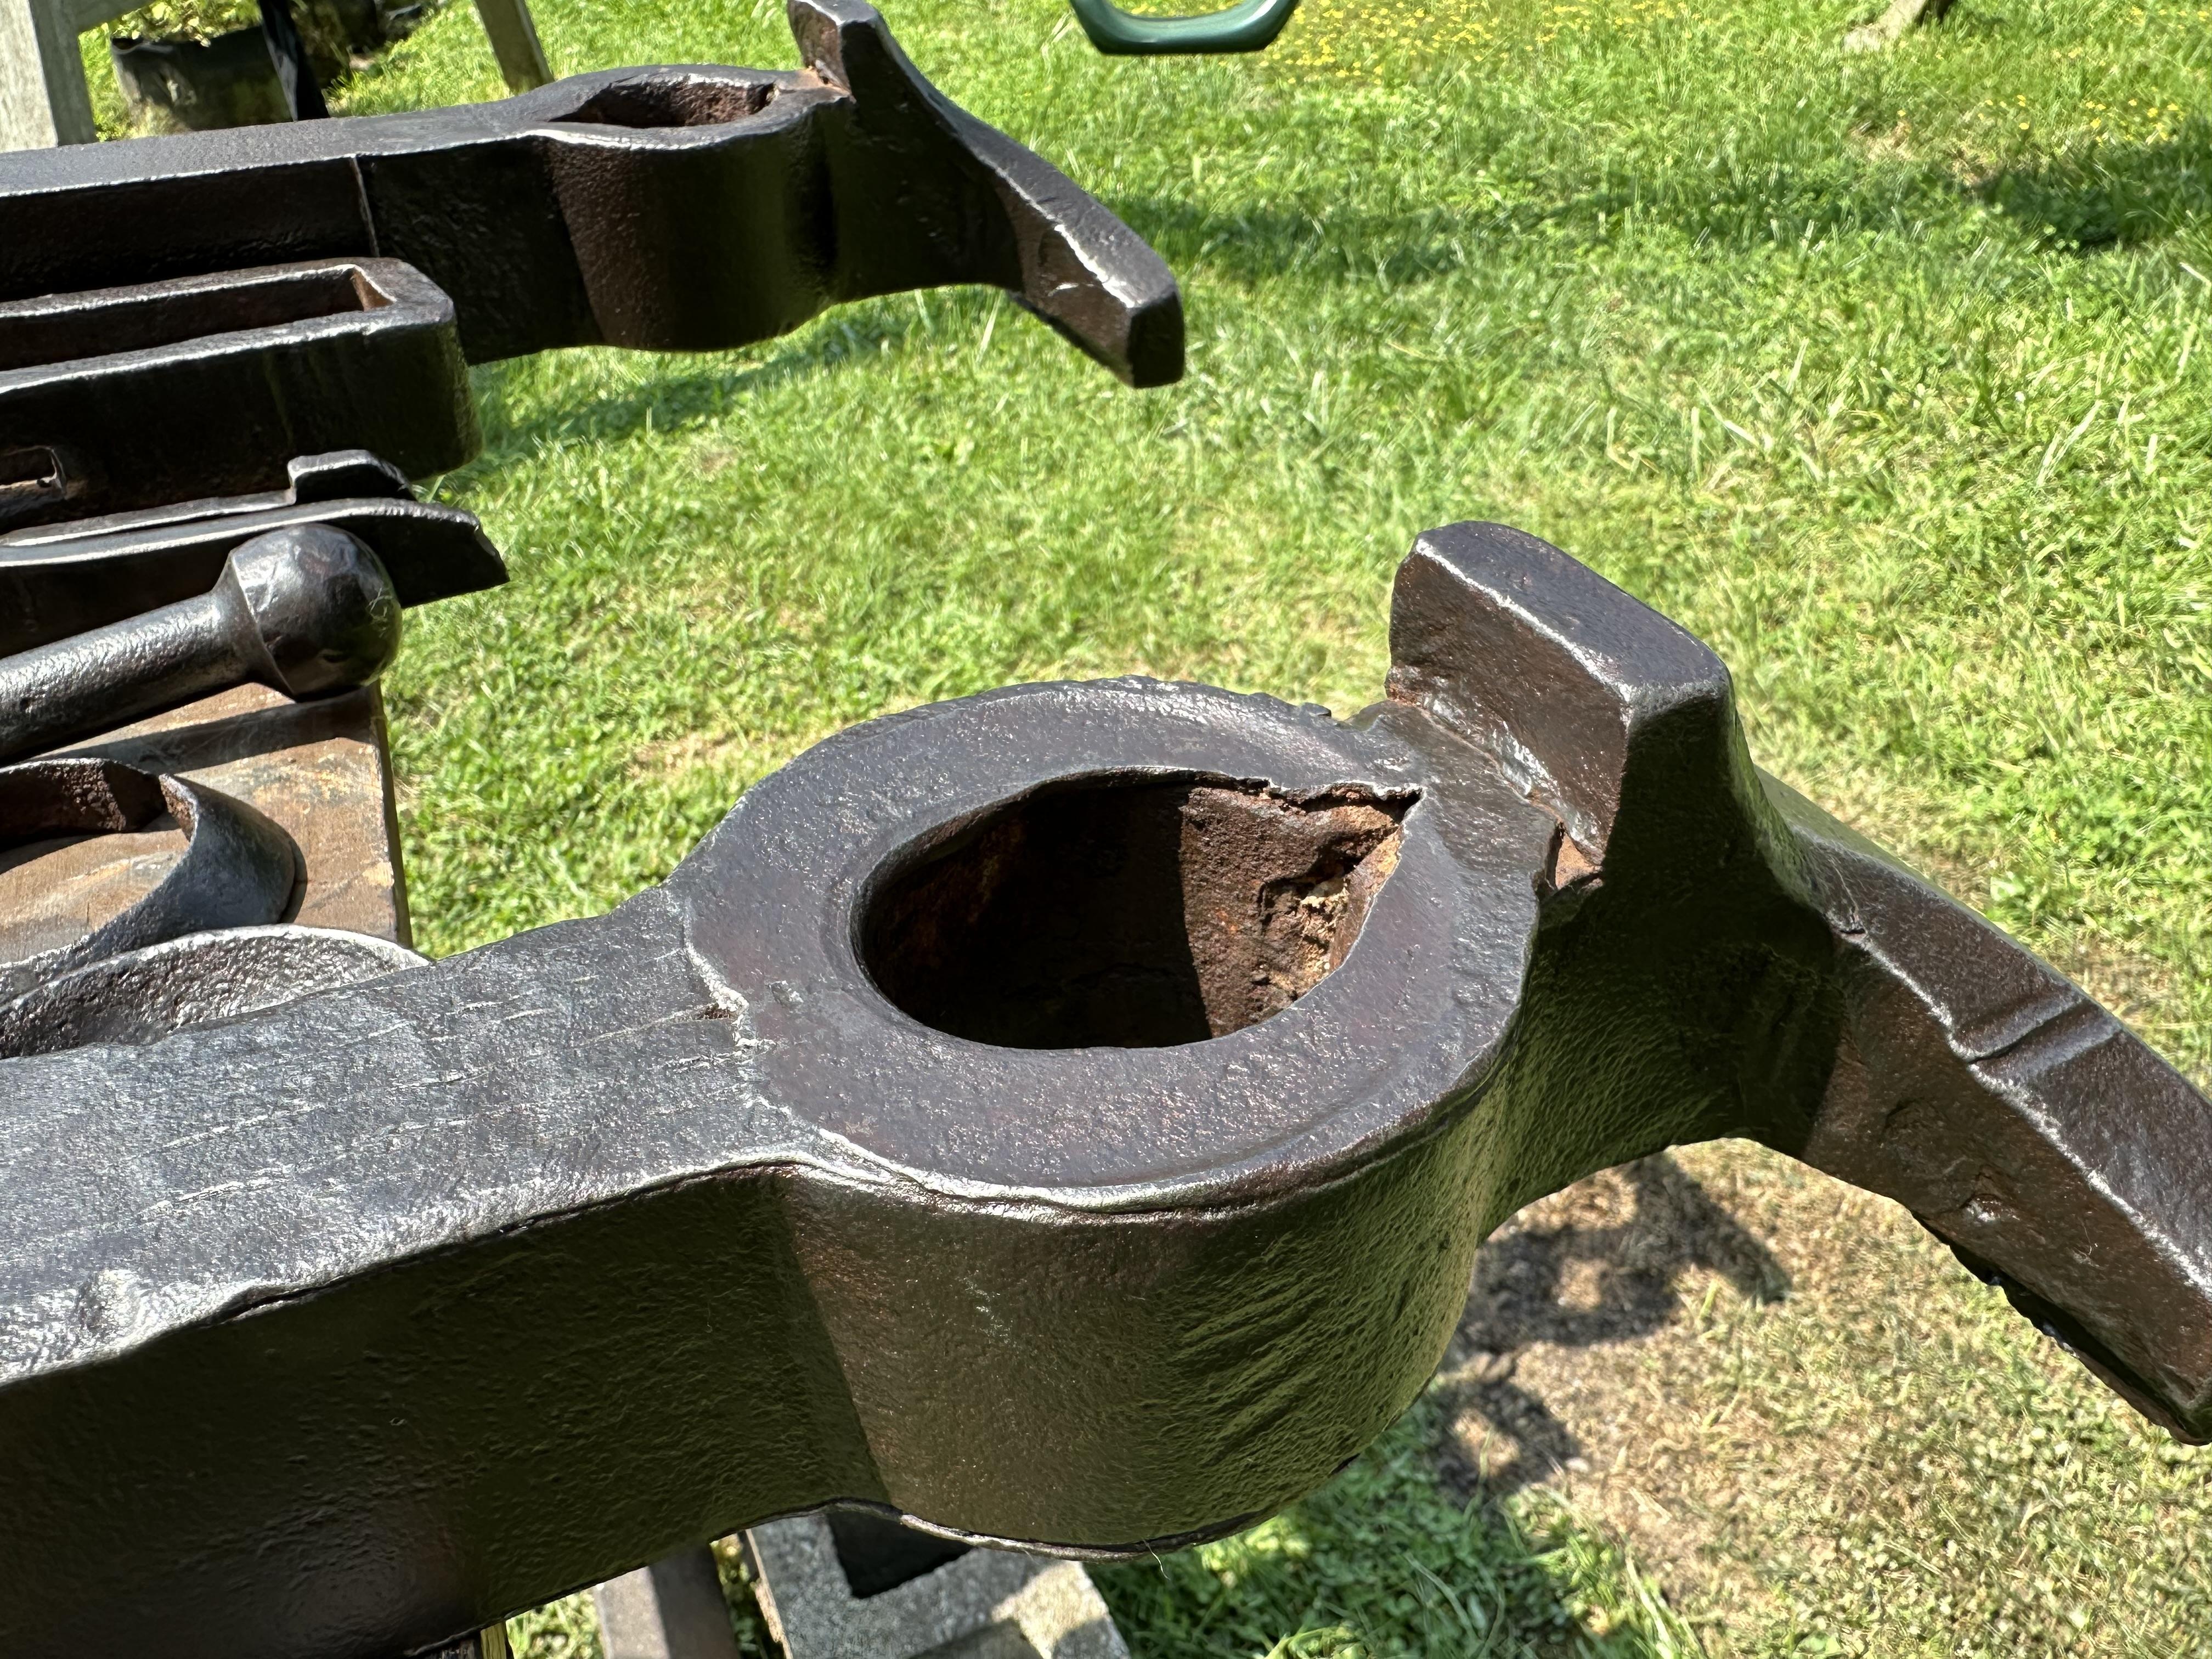
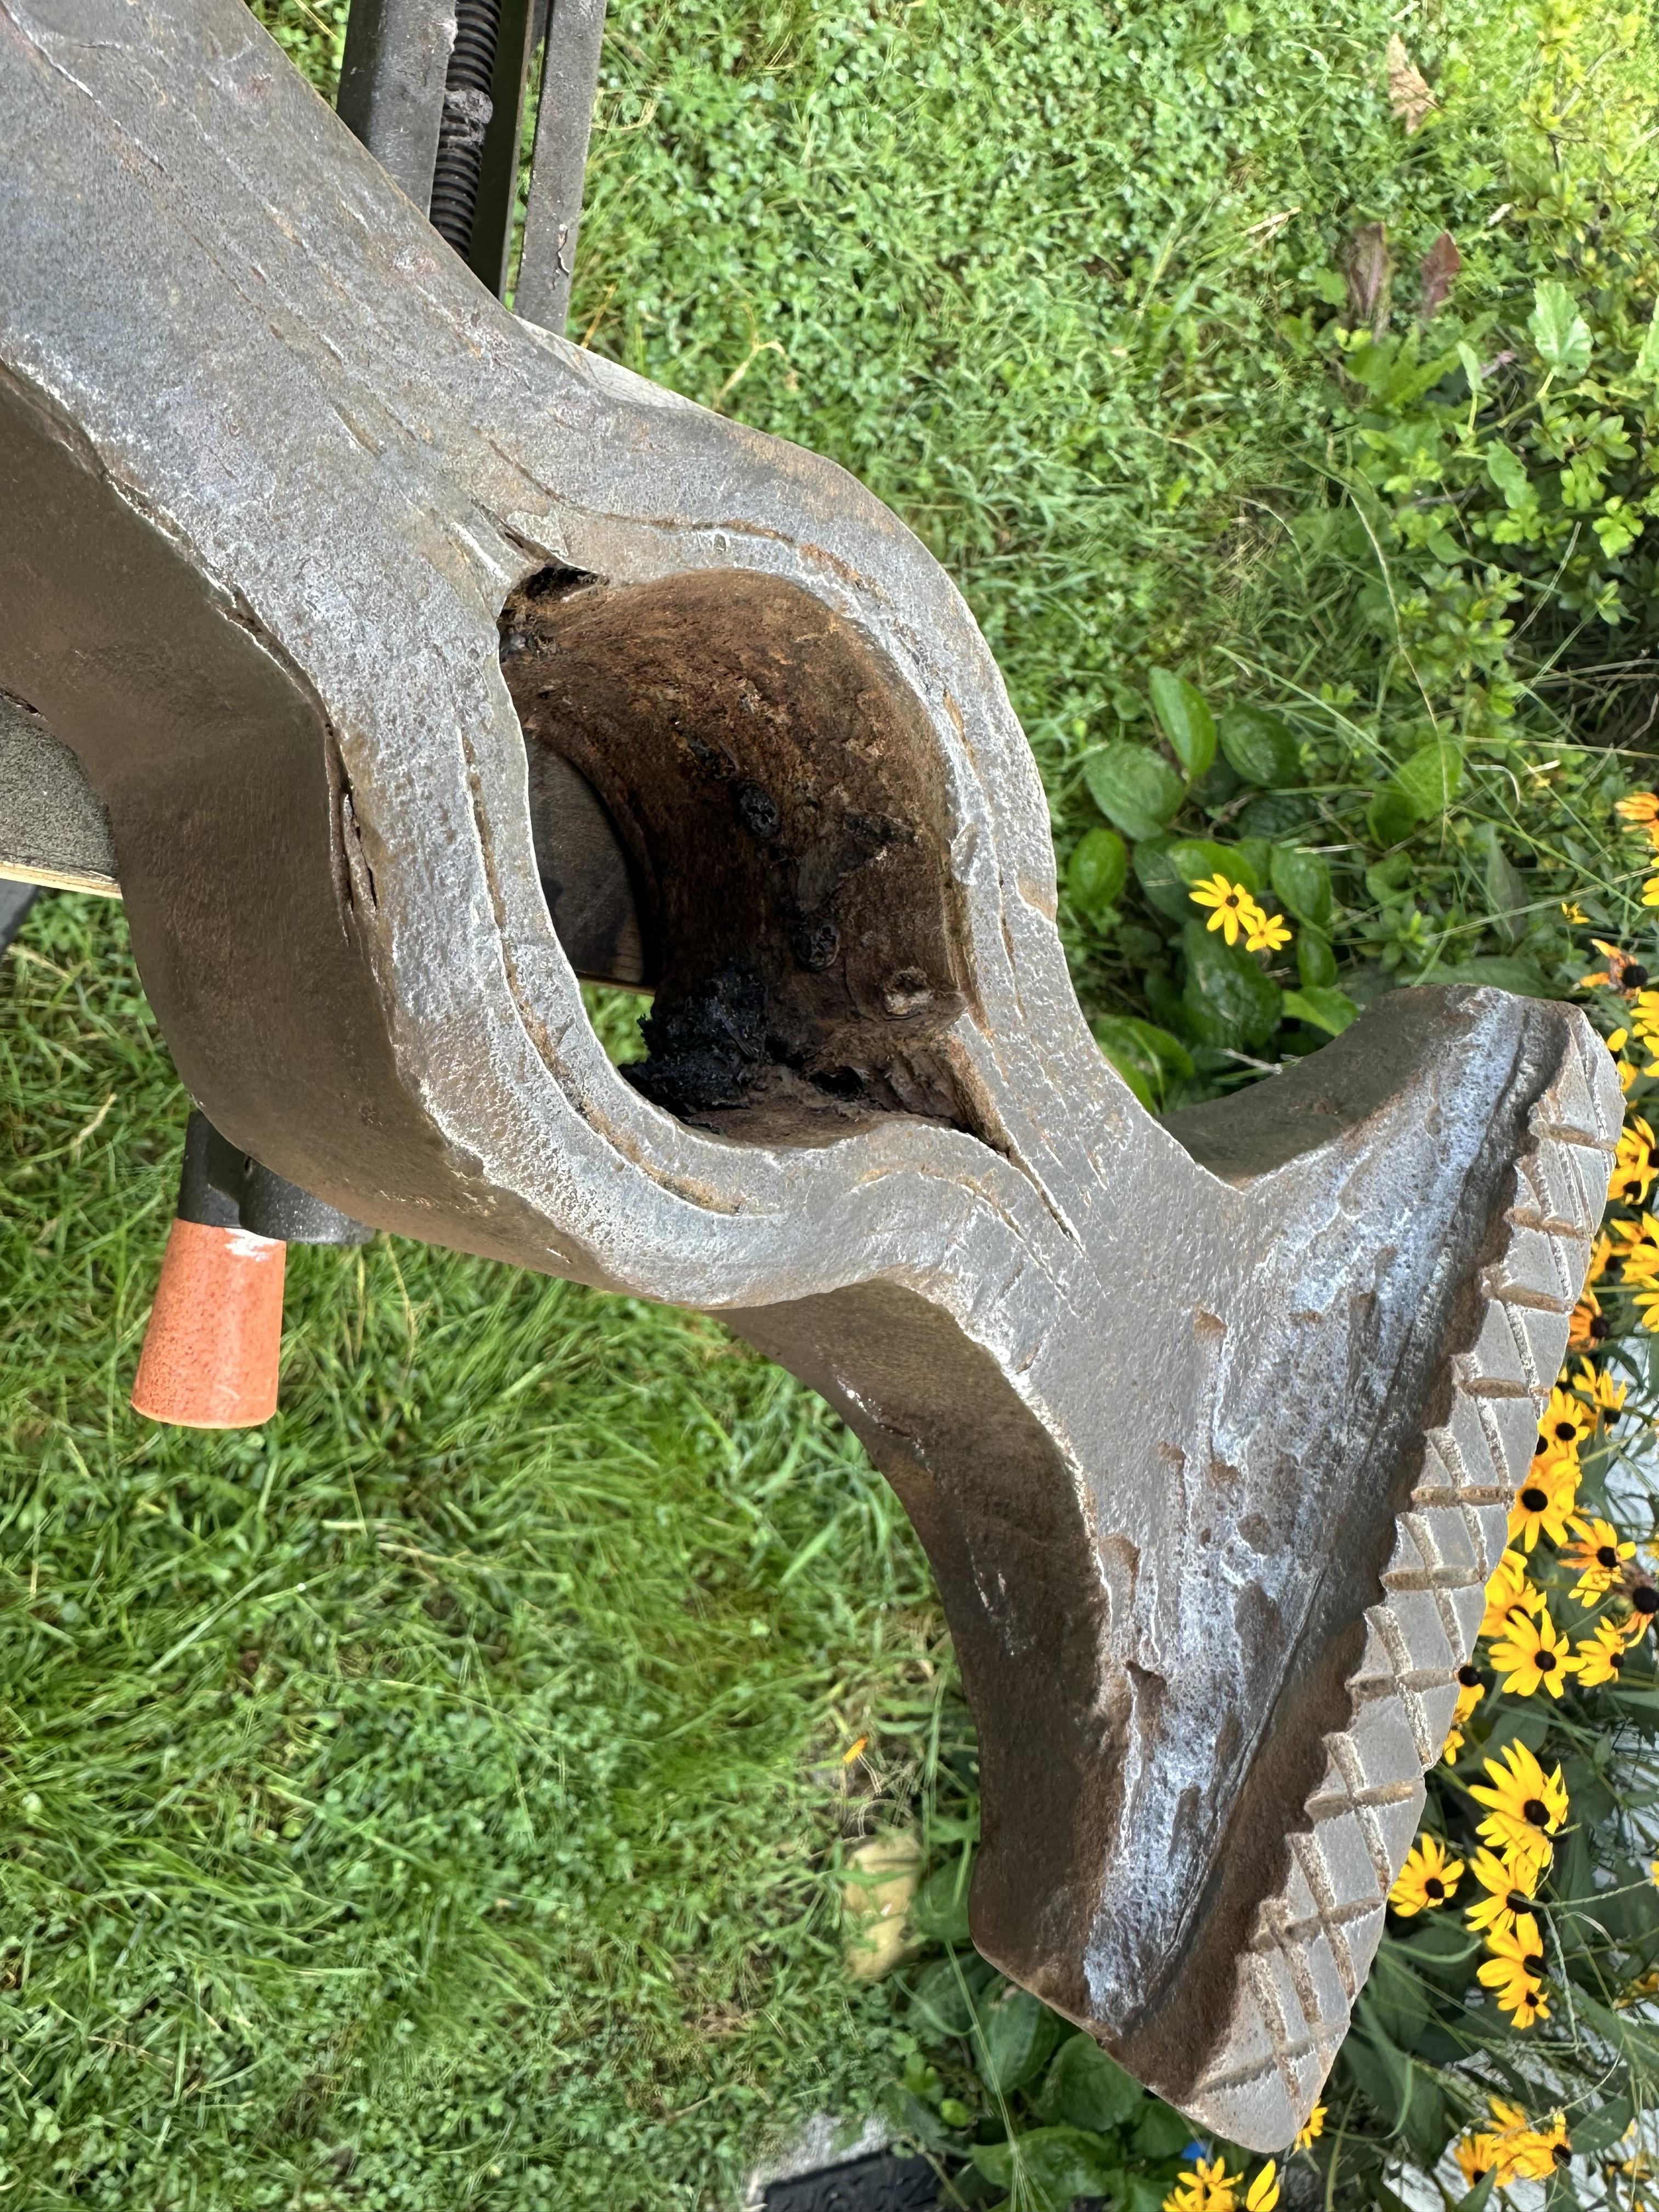
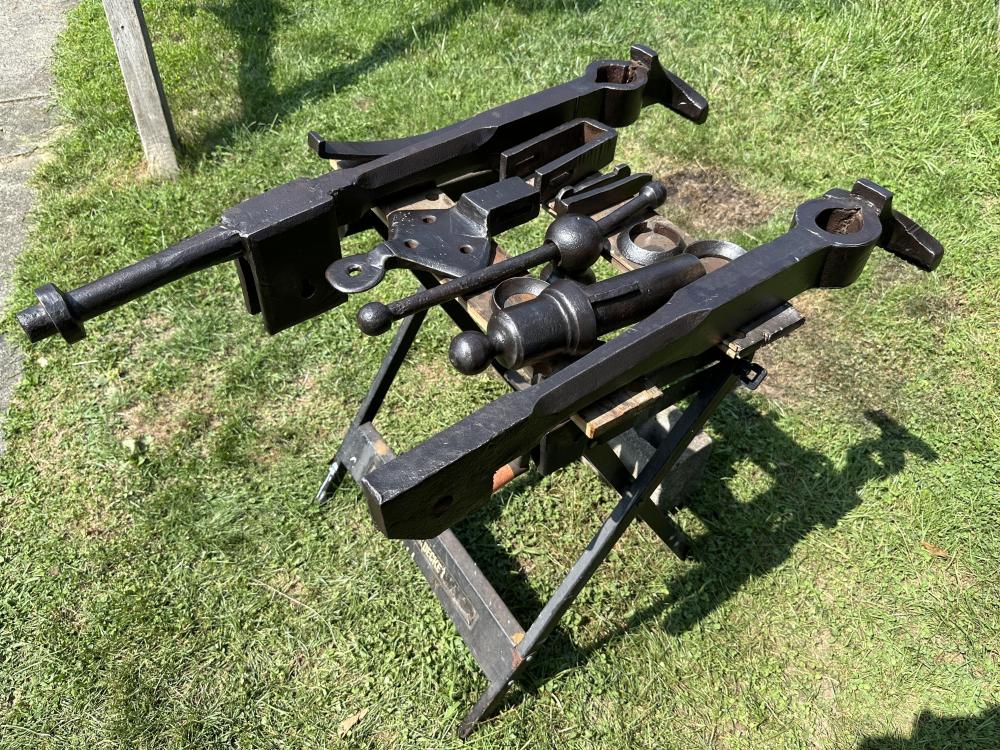
It is a monster, and the biggest one that I own for sure. I put it on the scale today and it came in at 135.5 pounds. The wrought iron lines are just beautiful to me. Those lines along with the tooling marks under the jaws show the manufacturing process and work that was put into this thing years ago. To me these are just simply amazing to see and touch. This vise has a couple of unique characteristics that my other do not. First, there is a plate/washer forge welded to the front jaw where the cup washer from the screw goes. I assume that is to provide a circular face for the force to be applied to. Second, the jaws have some majorly deep lines in them, like 1/8” deep. They are not filed in but instead they look like they were cut in with a hot cut. Third, the screw and screw box have fine decorative lines on them. And lastly, the fixed jaw and the screw box have two purposefully round center punch marks in them. These marks are very similar to the punch marks between the numbers on an anvil in both the depth and the size. I do not know what that means but it is what I see.
-
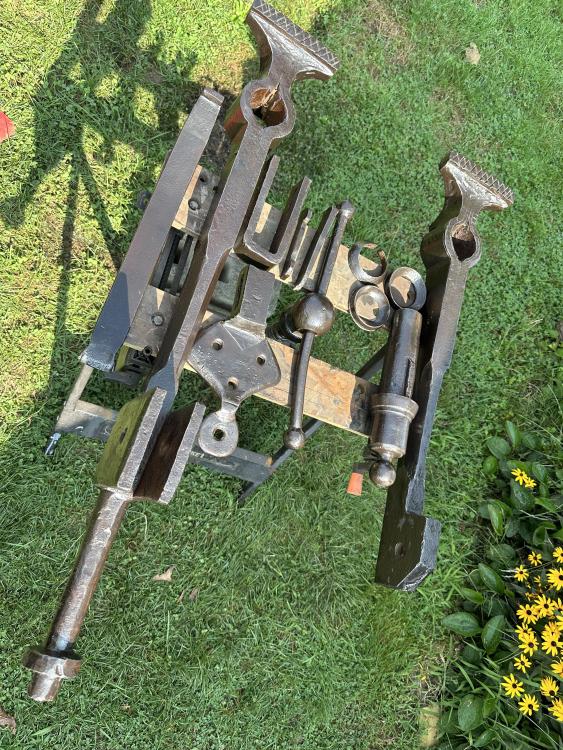
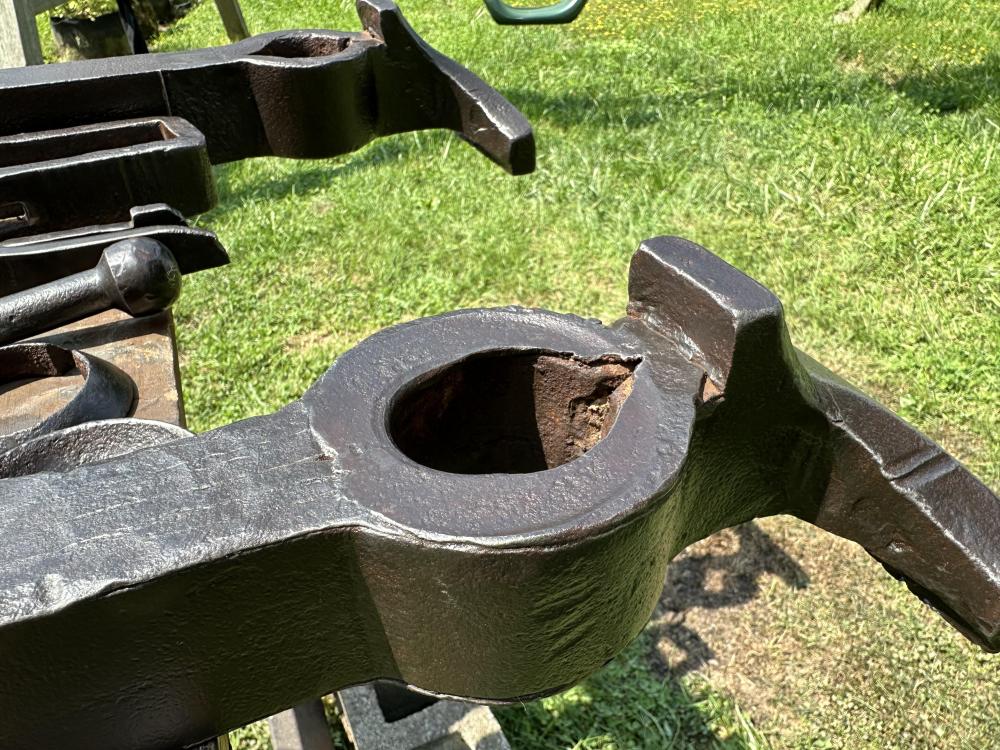
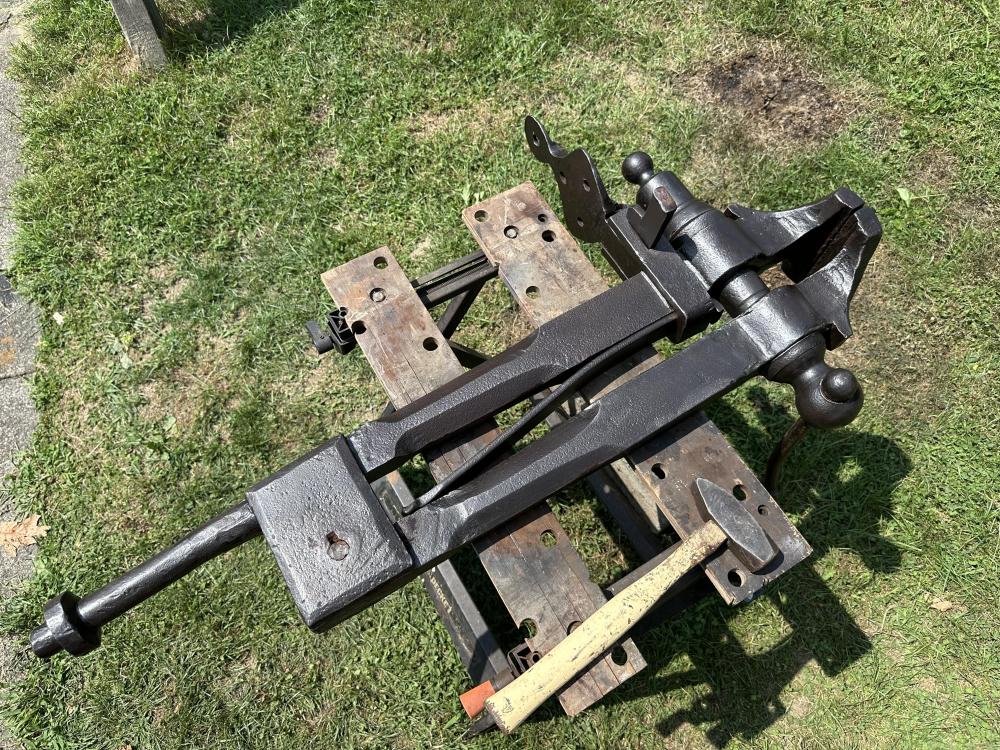
Well it has been quite some time since I posted here. I am still blacksmithing and loving it. I found two vises last week for sale and got them both. Small one has a jaw width of 4” and the bigger one is a 7”. I do not have a scale but the 7” is quite heavy and much larger in scale than my 6” that weighs 100 pounds. I am starting the restoration process now as they both will need some effort to get operational again. The 7” one is first on my list as I have been looking a long time to find one of those “beefy ones” in my price range. The pivot pin’s head is sheared off and it was frozen. Last night I used a weed burner to heat the joint up and free it. I do not have a oxy-a setup at home and this was my next best thing. In the past I have roasted a vise over my coal fire but this one is big and heavy. I did not feel like fighting a big heavy hot thing in the forge. The burner worked nicely to break down the rust and make things movable again. After it was apart I cooled everything down with a hose and packed it back into my shed. This morning I started today to clean it up with a twisted wire cup brush on my grinder. After about two hours of brushing all of the rust was gone. I soaked all of the pieces in Boiled Linseed oil and let them sit in the sun for an hour to warm up and soak in. After an hour or so I wiped the excess oil off and allowed them to dry before reassembly. Now I just have to figure out where to put it and find or make a new pivot pin.

-
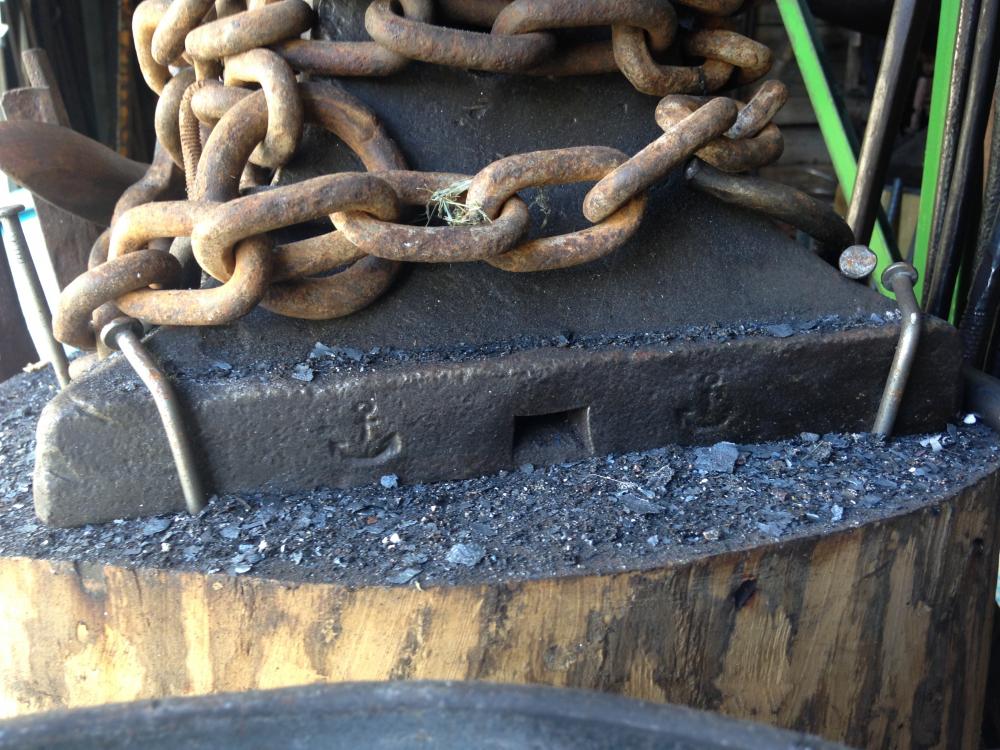
Nice, I too wrap my anvils with chain to help quiet them done. I never thought about welding it together to make a security net around my anvils. That makes a lot of sense. As pointed out earlier, anything that can be thought of can be defeated. But realistic ideas for slowing them down are what I am interested in. Thank you
-
Thanks for the feedback so far. It looks we are already coming to the same conclusions. I know you can't stop them only make it harder/slower. I believe in keeping my stuff locked up when not in use. I will work on making it as tough as I can to take, creative mounting is where that is at. As far as noise makers go I put cow bells on all of my swinging doors. I hope if somebody starts prying on a door to bust the lock, the bells will start making some noise. If not just moving past them makes them ring. It also sounds like a general store on most days. Keeping along the door lines, I have also place old u bolts from a Jeep Wrangler in the tracks of my garage door. Even if they pop the lock, lifting the door is not happening until those are gone. As far as insurance goes, I have talked to my agent and I have raised the coverage for the garage. He recommended that I go through and photograph every tool from anvil to zener diode. Then drop the memory card off with him or upload the photos to a free Google account. I still have to do that individually for each tool. For now, I have gone through and shot a video tour of everything. It is a stopgap until I have time to lay everything out on the floor for family pictures. A few last things that I do now. One of them is to spray paint the handles of everything with glitter spray paint. Glitter, for those of you who do not know, is the Virus of the art world. Once you get it it is easily passed to everything you touch. I know it makes all of my stuff look, well not as manly. Folks who do not know me question it. But I just tell them I like purple and glitter. They just smile and shake their heads. I figure I have a heck of a time getting it off of my clothes after a day working, if somebody takes my stuff they will too. Even if they do strip it off, there will be glitter evidence somewhere. As for my last step in defense, I keep the cutting tip off of my oxy-a setup. I know once they get in they have access to all of my tools. The first tool I will not let them have the hot knife. Yeah, it means walking back in the house every once in awhile. But it keeps the tool away from any unauthorized users, even my boys. Plus, I would hate to foil a would-be theif with a great secure base design. Only to have them get huffy and run the torch over the face just out of spite. Man that would tick me off big time. I toyed with the idea of placing some expanded steel over the windows. I know it is not as heavy as a bar, but if it is done right it would slow them down. But then I threw that out when I realized the sides of my garage are wood boards. All one really needs is a crowbar and they are in.
-
With the prices of anvils constantly rising at insane rates here in the States, it is starting to make me think a little bit more about anvil security. I currently live in the middle of town. My forge is on wheels and when I smith I have my garage door open for the all of the world to see. The folks that live in my neighborhood are nice enough. They know me and seem to like having me do my thing. I have always made it a point to make sure any visitor walks away with something like a hook, bottle opener, or hog-tailed turner. My hopes in befriending all of them is two-fold. Firstly, I hope that they do not turn me in for violating any borough ordinances. And secondly, I want them to know me, my normal hours and to keep an eye out for people other than me messing with my stuff. Currently, two of my anvils are mounted on stumps with spikes hammered over. I know the spikes are not a security option. They are more for keeping the anvils from jumping around when working with them. I have toyed with the idea of ditching the traditional stumps and welding together something a little more substantial. I would then lag the base to the floor and weld caps on the bolts to prevent them from being loosened. I guess, ultimately I could weld the anvils to the bases. But man that would just kill me and some of their value. That being said, I think I would be more disheartened to wake up and find them gone, so welding them is a real option at this point. I also toyed with the idea of drilling and tapping the bottoms and bolting them to the steel or wooden bases from the inside. Steel would be way easier in this respect, but it is possible with the stumps as well. I also know that if somebody wants it bad enough, they will get it. No matter how much I try to devise a way not too. I guess what I am looking for is some sane ideas on anvil security. What do you folks do to keep your anvils from walking away? I have locks on windows and doors, but locks only keep honest people, honest.
-
It is really hard for me to see what you are showing here. Google "casting defect gas porosity" and check out the images to see if they match what you are seeing on your anvil. If they match then I would say you have a good reason to contact the supplier and run this evidence past them. They may be willing to replace the defective piece or they might cut you a discount on what you paid. If it were me I would keep the defects and hope for the discount. I have worked on and own anvils with faces that have contain many, many more defects that yours exhibit. However, I did not pay top dollar for any of my anvils. If I had, my standards would be higher.
-
I have cleaned up a few rusted anvils, but none like that one. That is amazingly rusted for Arizona! The last few I used a cup brush to knock off anything I could that was loose and dusty. After that I evaluate and decide if it is worth a belt sander or not to knock off the really high stuff. It is amazing how far those pits will go. In fact I think some of them will reach to the table.
-
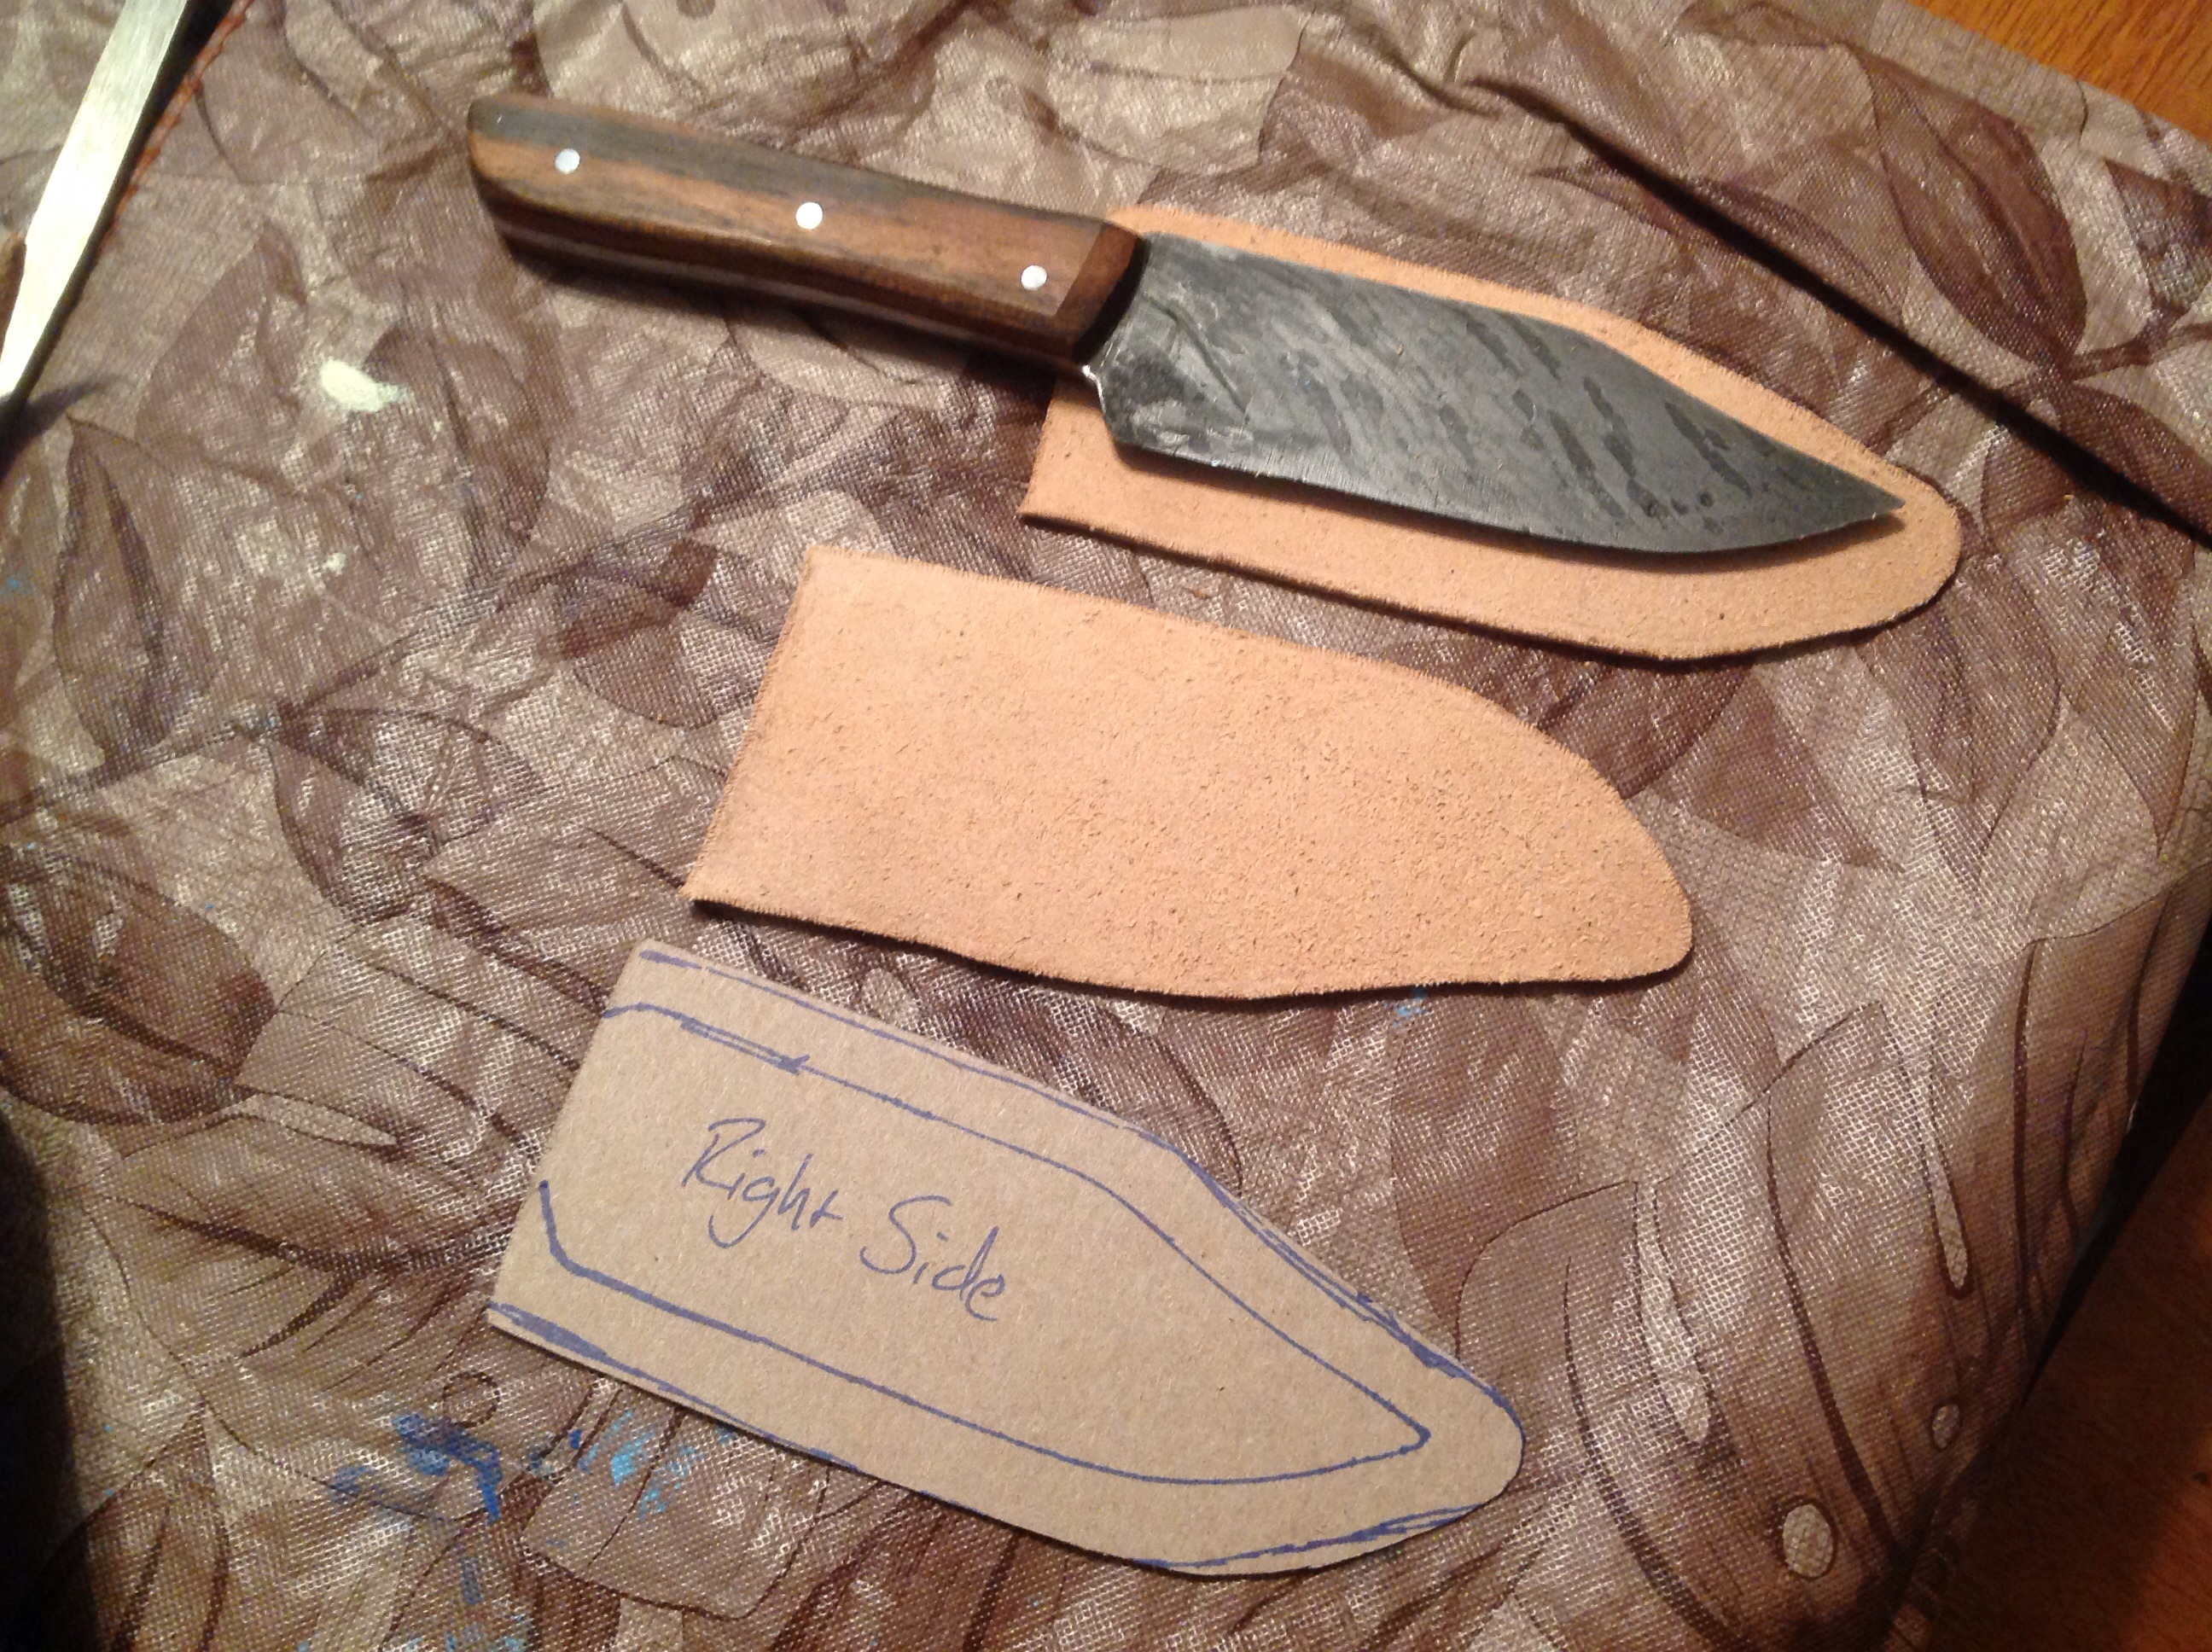
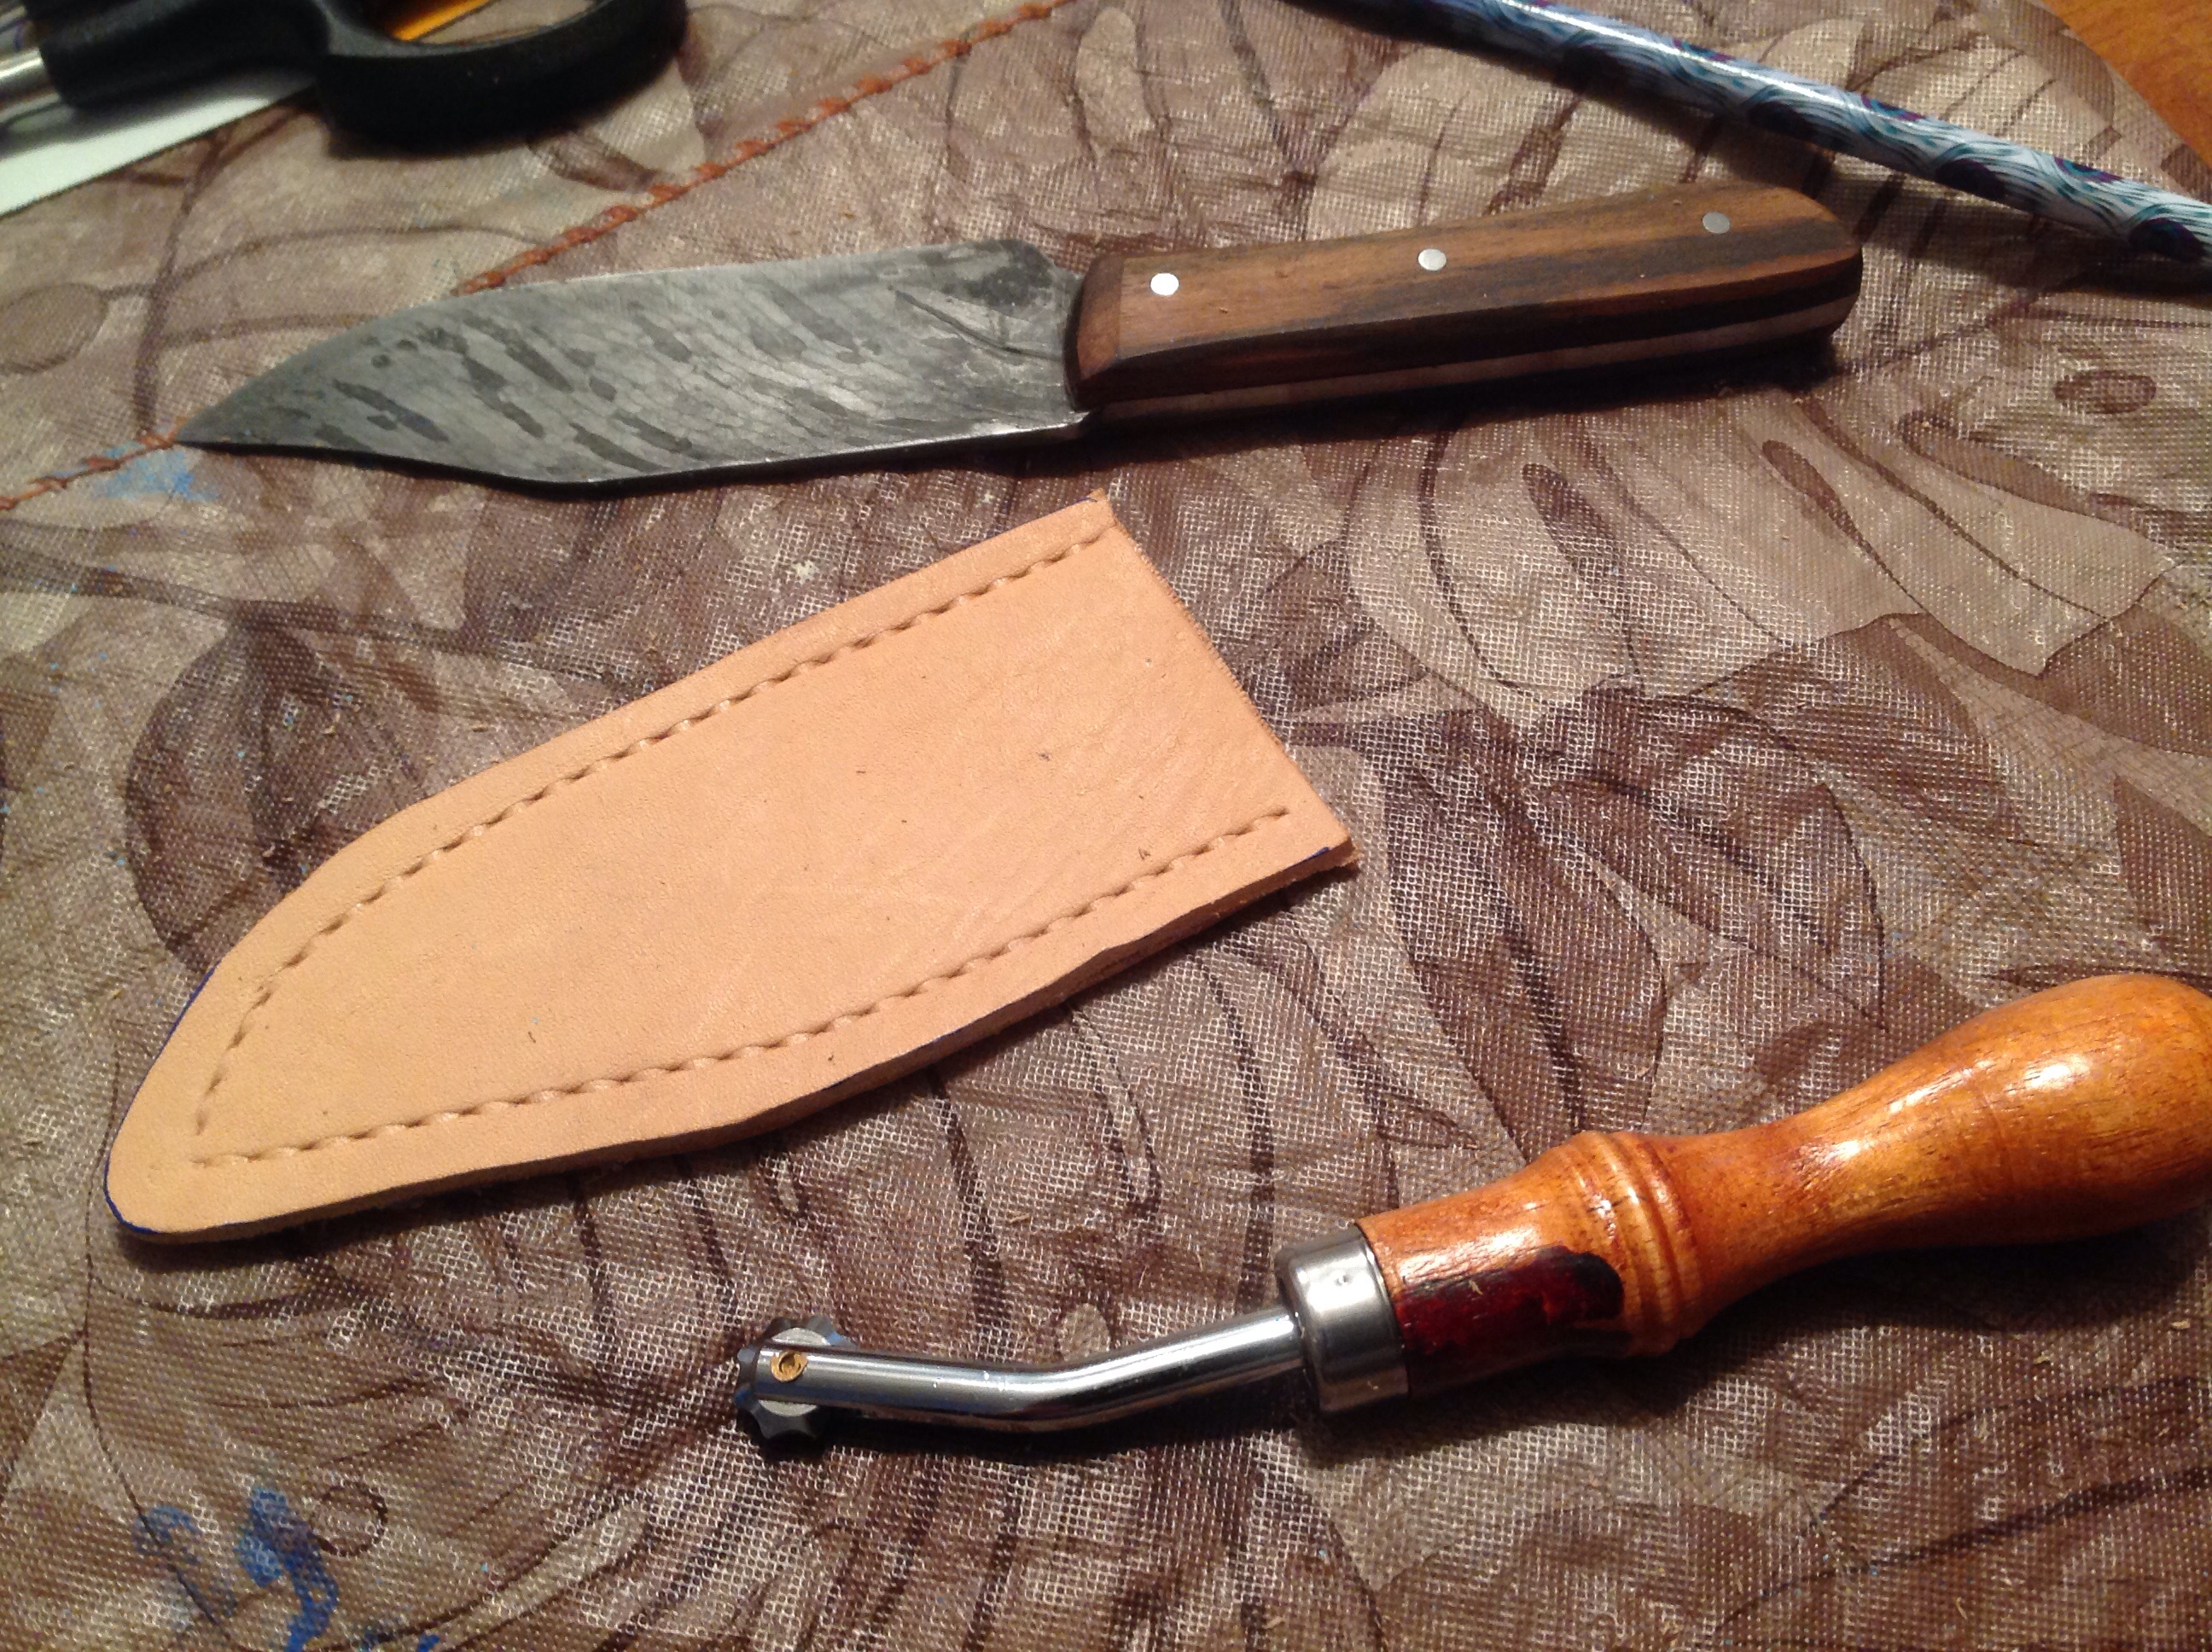
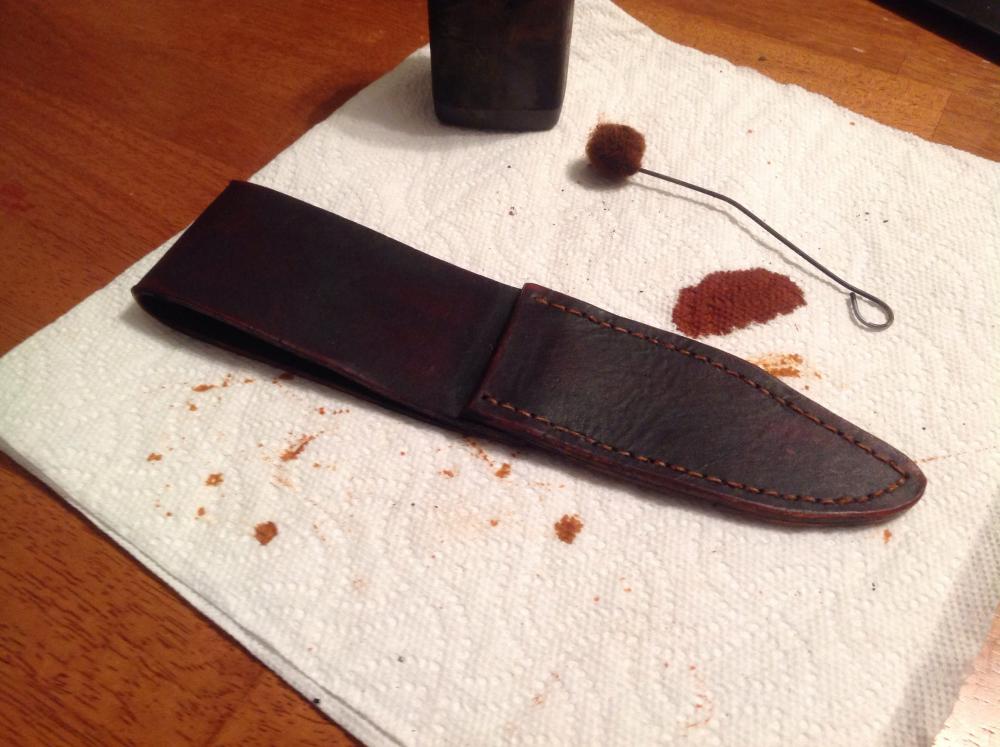
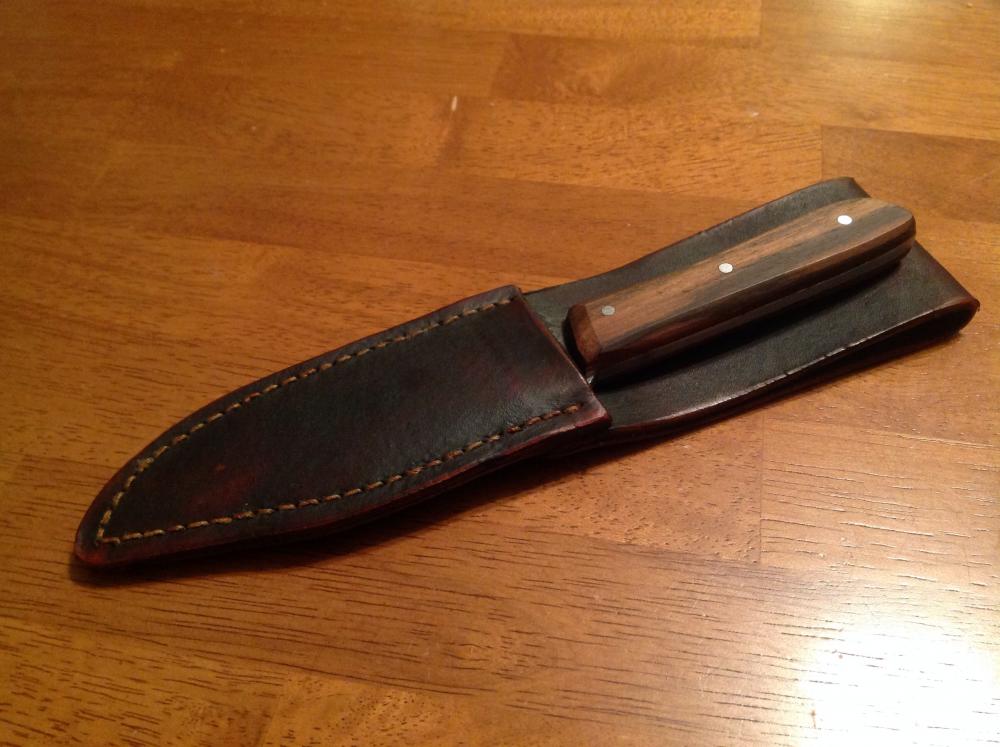
Awesome job, sewing finished leather by hand can be tough. I love my leather apron -Leather Forever! When hand stitching leather I use an overstitching wheel and an awl to punch through the leather. I place a block of oak behind the leather as not to dull the awl or stab myself or the table. I also use a Speedy Stitcher as it is great!


-
Thank you for the information in this post. I found one of these about five years ago at a flea market with some other blacksmithing stuff. At the time I did not know what it was but it looked cool and it was only a few dollars.

-
My guess is a Peter Wright. My 150 has the same anchors stamped on the front foot.
-
I coat my anvils with linseed oil when I see rust starting to breed on them. I put it on just the sides, under the heel, and under the horn. It does darken bright steel a bit. But the sides have a dark patina anyway, so I do not see a problem with it. On the top of each anvil I lay used strips of cotton towels. They are all dirty, greasy and grimy. Heck, one of the towels is what I wipe down my blower with at the end of the day. It soaks up all of the oil that weeps from my blower and collects all of the coal dust from a day of working. The other ones are just used old strips of a bath towels that have been used sometime in their life to clean dirty oily things -mostly oil spills from vehicle work. My shop is completely unheated and you can see through the walls in some spots so it is drafty! This method has kept the rust away for me. Occasionally, when the towels seem a bit dry I spray the towels down with PB Blaster or WD 40. But I do not think tons of oil in the rags would be a necessity. I think it just takes a little oil to keep the rust gremlins away. I think it is more important to keep the temperature swings at bay. I also have my wood lathe in my shed and it does not get tucked in with pretty little blankets that have been soaked in dirty oil. I normally just put a coat of car wax on the bed and cover it with a piece of heavy canvas, or an old welding jacket. It seems that if I keep it under the canvas for storage it does not seem to sweat or rust. I am guessing it has to do with the gradual temperature changes due to the canvas blanket.
-
I also would save the big piece for a future project. Or I would find a scrap yard that might trade me even up for smaller stuff, I have one of those close by that I have been a regular at for about 15 years. I used to try and save all of the drops that I could find at work. Thinking that I can just forge weld these pieces together to make whatever I want. I would wager the old time smiths did this as standardized sock might have been hard to come by. I can see the pattern of different pieces forge welded together in some of the older pairs of tongs that I have. And after my experience I know it works. But after one project I learned that my time is better used by buying standard stock and making that into what I want.
-
According to Anvils in America (Postman, 1998), early Trenton anvils were most likely imported from Europe. Postman suggests that these anvils could have been produced by German or English makers. I would agree as I have owned two early Trenton anvils and they were different. One of them had all of the characteristics of a Peter Wright, except for the name and and stamped stone weight. The other did not, it was almost more generic and plain. I recommend that you pick up a copy of the Postman book as it is wonderful. The book will explain the manufacturing process of the domestic Trentons and several other popular anvils. The book will also clear up most of your other questions related to your anvil.

-
My guess on the mystery anvil is that is is a Peter Wright. It has flats on the feet and an extra handling hole on the front feet. Just like the one pictured as my avatar. My PW also has anchors as maker marks on the front feet.
-
I have no idea what company made the top half of that anvil. But it sure looks like it was broken and then Welded to a plate.
-
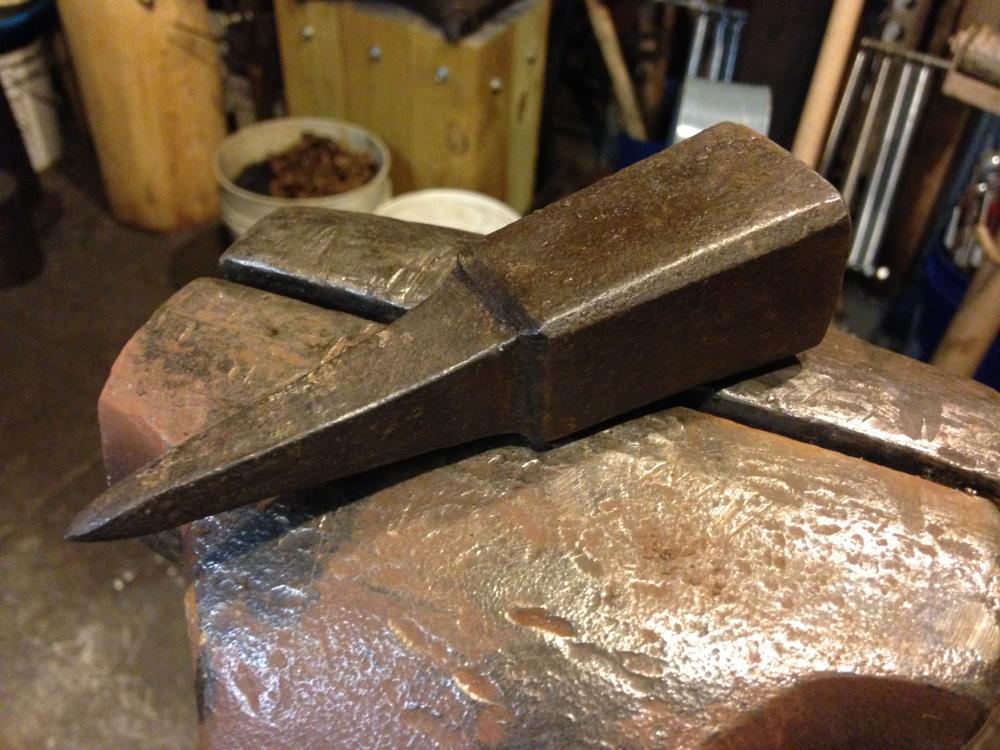
I have one of these anvils at the school and the hole is most definitely round. I never thought of having it square I just always used it as is. All of the bottom tooling I have made for this anvil has had a tapered round shaft to them. Similar to a Brown and Sharp taper. I did make a bending fork for it once. My first attempt had a tapered round shaft. When I first used it I drive down firmly to set it before a torque on it. It worked okay but it did get loose, which did not make me happy. Next, I welded some extra material on the top of the shaft below the bending fork. I filed it square to match the hardy on the anvil. That worked better but eventually after a bunch kids used it the corners rounded and it started to slip. On revision three I decided to think outside the hole and I welded enough angle iron on both sides of the fork to form a saddle across the whole face. It does not move and now the round shaft is more of an alignment pin. I used that setup for a few years and it worked fine. I eventually made a new bender for the kids to use and I keep that clamped in the post vise. The vise is secured better. Even though the anvil is mounted to a stump, it really does not have enough mass to do heavy stock bending. The stump just spins. Even though it is small, that little anvil is one tough little bugger. I would think it would be a lot of work to file that hole out. The steel quality is amazing. If I am ever financially well off and I feel as though I need a brand new anvil, a big Peddinghaus would be my choice.
-
root, Nice anvil and post vise. They should serve you and your family for generations with use -pending you do not feed that mogwai after midnight. Since your are in PA I will put a plug in for the Pennsylvania Artist Blacksmiths' Association. Check out this link for more information www.pabasite.org Our next meeting will be on 2/7/2015.
-
First off, great deat on the anvil. It looks wonderful. And welcome to the site! You Really do dot have to clean it to use it as it can be used as it. However, if you want to clean it, use a twisted wire cup on an angle grinder to knock off all of the rust. Once the rust is off I like to coat it with linseed oil. The linseed oil can tend to darken the iron a bit. Some people like it others do not. I like the looks and the protection more. My shop is not heated and temperature swings cause my anvils to sweat and if they are not protected they rust. I coat everything with the linseed oil before I mount the anvil to a stump. The oil coating will burn off the face and the horn when I use it. To protect the top I have an oil/grease soaked towel that I lay over the top of the anvils. The towels go from tip to tail. They have stopped the rust from appearing between the times I get to use them. Another way to keep the rust off the face is to use it everyday. But so far I haven't figured out a way to accomplish that.
-
Wow, great anvil score. If that trenton was in my classroom I might hide it too! Or at least put a wooden top on it for protection. Right now I have what I think is a little peddinghaus anvil for my high school. That little guy might weigh 60 or 70 pounds. It is tough as nails and doesn't mind the kids taking a whack at it every now and then. Even though my school anvil is solid steel, when I demo with it I explain how anvils were made by forge welding a top onto the wrought iron. I explain that they are to be repected and used appropriately. I explain how hardened metals fracture and chip when struck together. Then I show them how to do forge out a few items. Before I let them work I call a random kid up to give it a try and prove that They learned something. Then it never fails sometime in the future I will hear a kid go over, pick up a hammer and give it a whack -just to hear it ring! I am hoping sometime in the future they take a chunk off of it so I can buy a new bigger one. What will probably happen first will be a rebounding hammer hitting a kid as that anvil is tough. I do warn them of that, it is on the safety test and but they are a lot shorter than I am.