wd&mlteach
Members
-
Joined
-
Last visited
Everything posted by wd&mlteach
-
Knots, you got that right! That setup makes mine look like like a Tinker-Toy. I might have had funding for that kind of item if I found the plate at the scrapyard but I do not have the equipment even to deal with stuff that thick safely. Wow that is certainly awe-inspiring. Thanks for sharing. Heck I do not even have room for the one I am building that one looks like bigger yet.
-
The return springs are not on yet, but they should be here today. Following with the designs I bought, for inspirational purposes, the springs are mounted between the treadle and the cross frame supports. Which is why I went with the solid linkage as you pointed out. I thought about putting a rear spring from a garage door with a cable over the top, connecting to the upper arm. It would have been the cheapest and easiest spring option. However, after some feedback here I elected to go with smaller springs mounted to the treadle. Two reasons. First, as you pointed out earlier smaller springs are easier to work. Second, my pivot point for the swing arm is adjustable and if the springs stay in the front connected to the treadle, their tension will remain constant. If I go with the back spring with an over the top method then the tension would change as I change the pivot point. Or at least that is what I figure would happen. In reality it may not have mattered as much. An engineer I am not, but I do try to design. Thanks for your and the rest of the forum's help so far. If only I could have anticipated the correct angle of the solid linkage. Right now as it sits and is pictured it is wrong, I need to fix that today. The spring mount is too sharp of an angle. Force from the treadle goes directly to the bottom spring pivot and will not lift the arm assembly. Now that I look at it, it almost forms a triangle. I tried lifting the treadle to see how we'll it functioned and I can't, it will not move. In fact I thought it was just really heavy and put some effort behind and lifted the whole machine, oops. I will have to cut the black pipe down and weld it back together.
-
Frosty, I am not sure if we are talking about the same thing as I believe the linkage I made has to be solid. Or it will not work. I used a toplink from the tractor supply that needed modified. The modification I made was to cut off one and weld on black pipe and knurled the barrel of the toplink, then reweld the linkage,
-
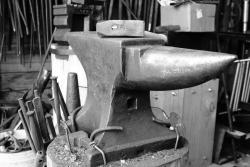
I found another anvil on CL last week, the seller advertised that it was 25 inches long and and 10 inches high. It originally listed for $250. I emailed and setup a time to meet just to check it out but I ran out of time and never got a chance last week. Sunday I checked CL against and I noticed the price dropped to $150, so I thought it would be worth a visit. The ad said no markings, which means bring a wire brush and a bottle of water. After a bit of scrubbing and a baptismal it turned out to be a German Trenton anvil marked at 147 pounds. The guys said he really felt bad about the chipped edge. I said that is a shame and asked him what the lowest he would go. He said 100 and I said that seems fare. It was pitted pretty bad and after a bit with a belt sander enough of it is gone to make it usable. Now I just have to decide which one I should take to school. I have a small anvil there and could an upgrade. But, I also know kids are rough and whatever I take it will never be the same.
-
Small springs make sense. The Hammer is progressing nicely, made the treadle and half of the adjustment rod. I spent quite a bit of time working through what I wanted to do there. The original plans called for a solid rod from the treadle to the lower spring. Since my hammer will be adjustable I can't use a solid rod. I had looked at a bunch of what others had done and it looks to me like they focused around the use of a turnbuckle. I don't have any of those just lying around at the moment. I went online and to four different stores to figure out what would work best. The local True-Value only had some itty bitty ones, the farm store had some bigger ones, and TS had medium ones. All of the ones that would have worked were expensive, like 30 bucks. But none of them were great, as they were not close tolerance, galvanized heavy, and not really robust enough to take a good hammering. I briefly toyed with the idea of making my own out of a right and left nut welded onto flats. I could machine all of the stuff I needed, but at this point I do not have all day to work on this. Then I priced out all-thread and thought maybe I could do something with one nut and a top pice that just spun on a pivot. Something like half of a turnbuckle. But that priced out over 20 away so I was getting close to the pre-made junk turnbuckle. I wandered around TS for quite some time looking at various items like ratcheting load straps and everything else. Eventually I found the winner! A top link! With a little modification it is perfect and robust enough to do the job.
-
What do you guys use for return springs? I have been pricing out springs for about a week or so and I can't find anything in my budget. The cheapest I can find is about 8 dollars a spring. Would garage door springs work? I thought about cutting them with the OA torch.
-
Jim that is a beautiful hammer. I am jealous. I would love to see pictures of tooling.
-
Jim, I did weld it in but it is not the top plate. The top plate or whatever tooling I put in will be removable. The plate tha is welded in is a drop in piece that I cut out to fit the ID of the tube. I then gouged out a rough hole in the center with the OA torch and welded a pice of 1" square tube in the hole, then ground it all flat. This formed the hardie. I can still put the clear out ramp in if cut a hole in the tube I think.
-
Once life settles down a bit then the wife and I are planning on a selling and buying a new bigger place to live. One of my stipulations is that it has a bigger garage/workshop and is out of town. Or at least the capability to have enough land to build one of my own design. As for right now I have what I have and I will make do. Knots I loved of a dual purpose machine and Frosty you a correct, the more complicated a machine gets the less functional it is. Hence the reason why I enjoy blacksmithing more than I like machining. Not that i can't appreciate machine work, because I do. And I do like it but I would just rather hammer something out on my anvil then tram-up an end mill. Here is what I did today, which was not much. I cut a couple smaller channel for side supports and clamped the whole thing together. Tomorrow I plan on welding the smaller channel at the upright and drilling/tapping the anvil side. That way I can break it down into sections light enough for me to move. I have another question I am hoping you folks can answer, did you fill the anvil with weight? Right now the anvil side is a piece of 3x6" tube that is 3/8" thick. it is hollow except for the top 1 1/4". i welded another chunk in there that contains a 1" hardie. I have access to 180 pound of lead bricks that I could shove inside the tube. My other possibility is punching slugs. the last time i was at the scrap yard I climbed a mountain of slugs that I am sure i could get pretty cheap. Most of them were 1/2" round x 1/2" thick. By the way thanks for the feedback so far.
-
Knots, I plan on filling the head with lead. I have nine 20# lead bricks just sitting around to be used for something. This might be just what I was saving them for. The head is pretty heavy already as it is made from 4 inch square tube that is 1/4 thick. The it has two 1 1/4" plates welded to it one is the face and one is fit inside the square tube. I milled two slots in the tube and then welded the square plate up inside. in the process the milled slotes were filled in with with the weld bead. I also will use your "hande" idea as the top of my hammer head. Right now the top is very sharp. Frosty, is this what you are trying to communicate to me? Forgive me for the ipad artwork.
-
Knots, that is a great idea. However, I barely have enough room to fit the treadle hammer in my shed as designed. If I add a planishing hammer to the back or side of the collumn I would be out of room. My smithy is a single car garage and it packed right now. I do want you to know that I did think about your suggestion for a very long time today. I know it is not a Planishing hammer but I even got a small air hammer out just to think about it some more. Even after that I still came up with the same conclusion of not utilizing your suggestion. Here is what I have done so far, it has been slow going these days with a new baby that does not sleep between 12-3:30am, a wife who just had a c-section -housework is all mine, finishing my masters thesis, figuring out how to get six copies of 337 pages printed and bound, graduating, a birthday party for my other son, staying after school with kids working everyday becasue the school years is just about done, and as you pointed out teaching full time as well. By the way thanks for noticing my rarity. Technology Education formerly know as shop teachers are rare and finding some that are interested in and teach a bit of blacksmithing are even more rare. Anyway here is what I have accomplished lately. I will be adding an adjustment to the slide mounted on the channel. I have a weldable sprocket I just need to find about 24" of roller chain to weld on the channel. The farm supply shop that I go to has it in stock, just in 10' lengths. I do not need that much. I also need to decide whether the whole thing should be welded together or not. Welding is faster than drilling and tapping all of those holes, but being able to take it apart is a big plus.
-
I remember something like a 50:1 ratio. So a 3lb hammer would be good for a 150 anvil. But that is what I read, reality is different, see what the other folks tell you. I do know that I have seen a lot of anvils that were missing important pieces and that had to be caused by something.
-
Cigars are what I have been using.
-
Nothing embarrassing about it, and you got a nice deal, enjoy.
-
Dave you are correct that was to be pound not ounce
-
$40 that is my kind of a price! Very nice score! It looks like it is in nice shape. From what I know usually the jaw width is what is measured as to identify vise size, not how far apart it opens. When you get a chance measure the width of the jaw face.
-
Thanks for the additional photos. I have pondering the question of removable tooling myself and your photos help. Did you make a drilling jig so that all of the tooling posts match the recieving holes? I could see case hardening a driling jig for marking where the posts need to be drilled. Also, thanks for sticking the hex wrench in there. I figured that is what you were using but that wrench made it pretty clear. I will also include the safety strap as a face full of hammer is no good.
-
Hooks and nails
-
Wow, that is a great place. There is a place near me that sells mild for 0.45 and tube for 0.55 a pound. If you are short on money I would buy one of the smaller ones to get an idea of what it is that you realy need. The big ones are nice but mild steel weighs 0.2836 oz per cubic inch, a big piece would add up fast if you are not careful.
-
Based on the information I gathered here and my plans, I have started my hammer build. I have the rear tower, the head, and the anvil pillar made. I have decided to go ahead and make the pivot point for the parallel swing arms adjustable. For those of you that have this type of hammer, how much vertical travel is needed/used for the pivot point or slide with this type of hammer? Exploring my options, I have contemplated the use of a hydraulic jack to raise and lower the pivot slide and swing arm assembly. The slide has been inspired by knots, thanks for that suggestion. Here is a quick sketch of what I am looking at.
-
Glad I could help, I am also sorry that I forgot about not posting links to c-list. Porkchop let me know how you make out. If you missed that one I just saw another one pop up tonight that was $80 for a 4 incher. There is a heavy looking five maybe 6 inch vise for 175 closer to me in York. Message me if you want the details.
-
Porkchop if you are still looking for a vise check this one out. It is more than I would spend but might be close enough for a drive. http://reading.craigslist.org/tls/3756551062.html
-
When I bought mine I used this one as reference on what to pay.https://www.blacksmithsdepot.com/page.php?theLocation=/Resources/Product/Blacksmith_Vise/Small_Blacksmith_Vise.xml/ I also used this number to help justify/show my wife what a great deals my vise purchases were. She thought they were cheap enough to be okay with spending the money. And I knew they were great, because who doesn't love a good post vise? When I look at them, especially the early ones, they are beautiful examples of craftsmanship and design. To see each of the forge weld lines of the individual pieces laid over and hammer marks left from when it was made, brings me almost to a standstill much like a forged anvil. They are impressive and to me, museum-quality heirlooms of functionality. If they are not new they are priceless, as they most likely will never be made that way again. If they are new then, they are just prohibitively priced.
-
I have to say that I originally chose the Marx Gade plans for simplicity. Now that I am thinking more about it the in-line may be the way to go if one were to want it adjustable. Unfortunately, I have have the springs sitting here in front of me for the swing style. Had I exhuasted the resources here before my investment, the choice may have been different. Thanks for your input. when i build my power hammer next year, I will look here first. Knots, do you have any wiggle from oyur upright angles when the hammer hits? Would it be better to make the upright out of square tube?
-
Well at least I am not the only one having problems with this posting. Here is the picture that did not show up the three times.