PHDforge
-
Posts
52 -
Joined
-
Last visited
Content Type
Profiles
Forums
Articles
Gallery
Downloads
Events
Everything posted by PHDforge
-
Rockwell Hardness Tester. Model HR-150A
PHDforge replied to jlpservicesinc's topic in Heat Treating, general discussion
Brinell testers use a 10mm ball as the indenter, as stated early it leaves a large depression. It is also not recommended for thin materials due to distortion of the test piece skewing the reading of the diameter measurement at the lip of the indentation.. The Rockwell tester depends upon the scale used and uses different types of indenters. For the C scale it uses a diamond tip. This is very small and I think would not be suitable for PW steels, because you may not know if the test site is in the soft or hard material layer. JLP I agree with your reason for having the tester at your training facility, good educational tool. I also agree with the basic idea of the user accepting responsibility for the use of a particular tool. Unfortunately many users do not. Hence, product liability lawsuits. I am teaching at a different college. My old school had three Rockwell and one Brinell testers. My current place has none. Rockwell testers are easy to use and direct reading. I do have a set of hardness files for now. -
Rockwell Hardness Tester. Model HR-150A
PHDforge replied to jlpservicesinc's topic in Heat Treating, general discussion
I've been teaching mechanical design for a number of years. Testing is good and necessary at times because it establishes a baseline or a starting point and gives a general reliability within reason. No design engineer or manufacturer (here the blacksmith) can account for all the variables possible or conditions for an item to fail. We test our products in multiple ways - test data from standardized tests (hardness for example), tensile test data, actual use test conditions, etc. No single test guarantee's a success item. I try to impart to my students for success for part design that you use all the tools available and testing in one such tool. -
I am a fairly newcomer to blacksmithing. I bought a new forge setup to get started a couple of years ago. The package I chose came with a small electric blower with a rheostat. I found that I didn't have enough control and added a gate value. This improved things. This past summer I was asked to do a demo and was told no electricity at the site. I bought a hand crank blower. I like the hand crank blower much better than the electric fan. You have much better control over your fire. I prefer it now. An added bonus is that your other arm gets a workout too. Bob
-
What did you do in the shop today?
PHDforge replied to Mark Ling's topic in Blacksmithing, General Discussion
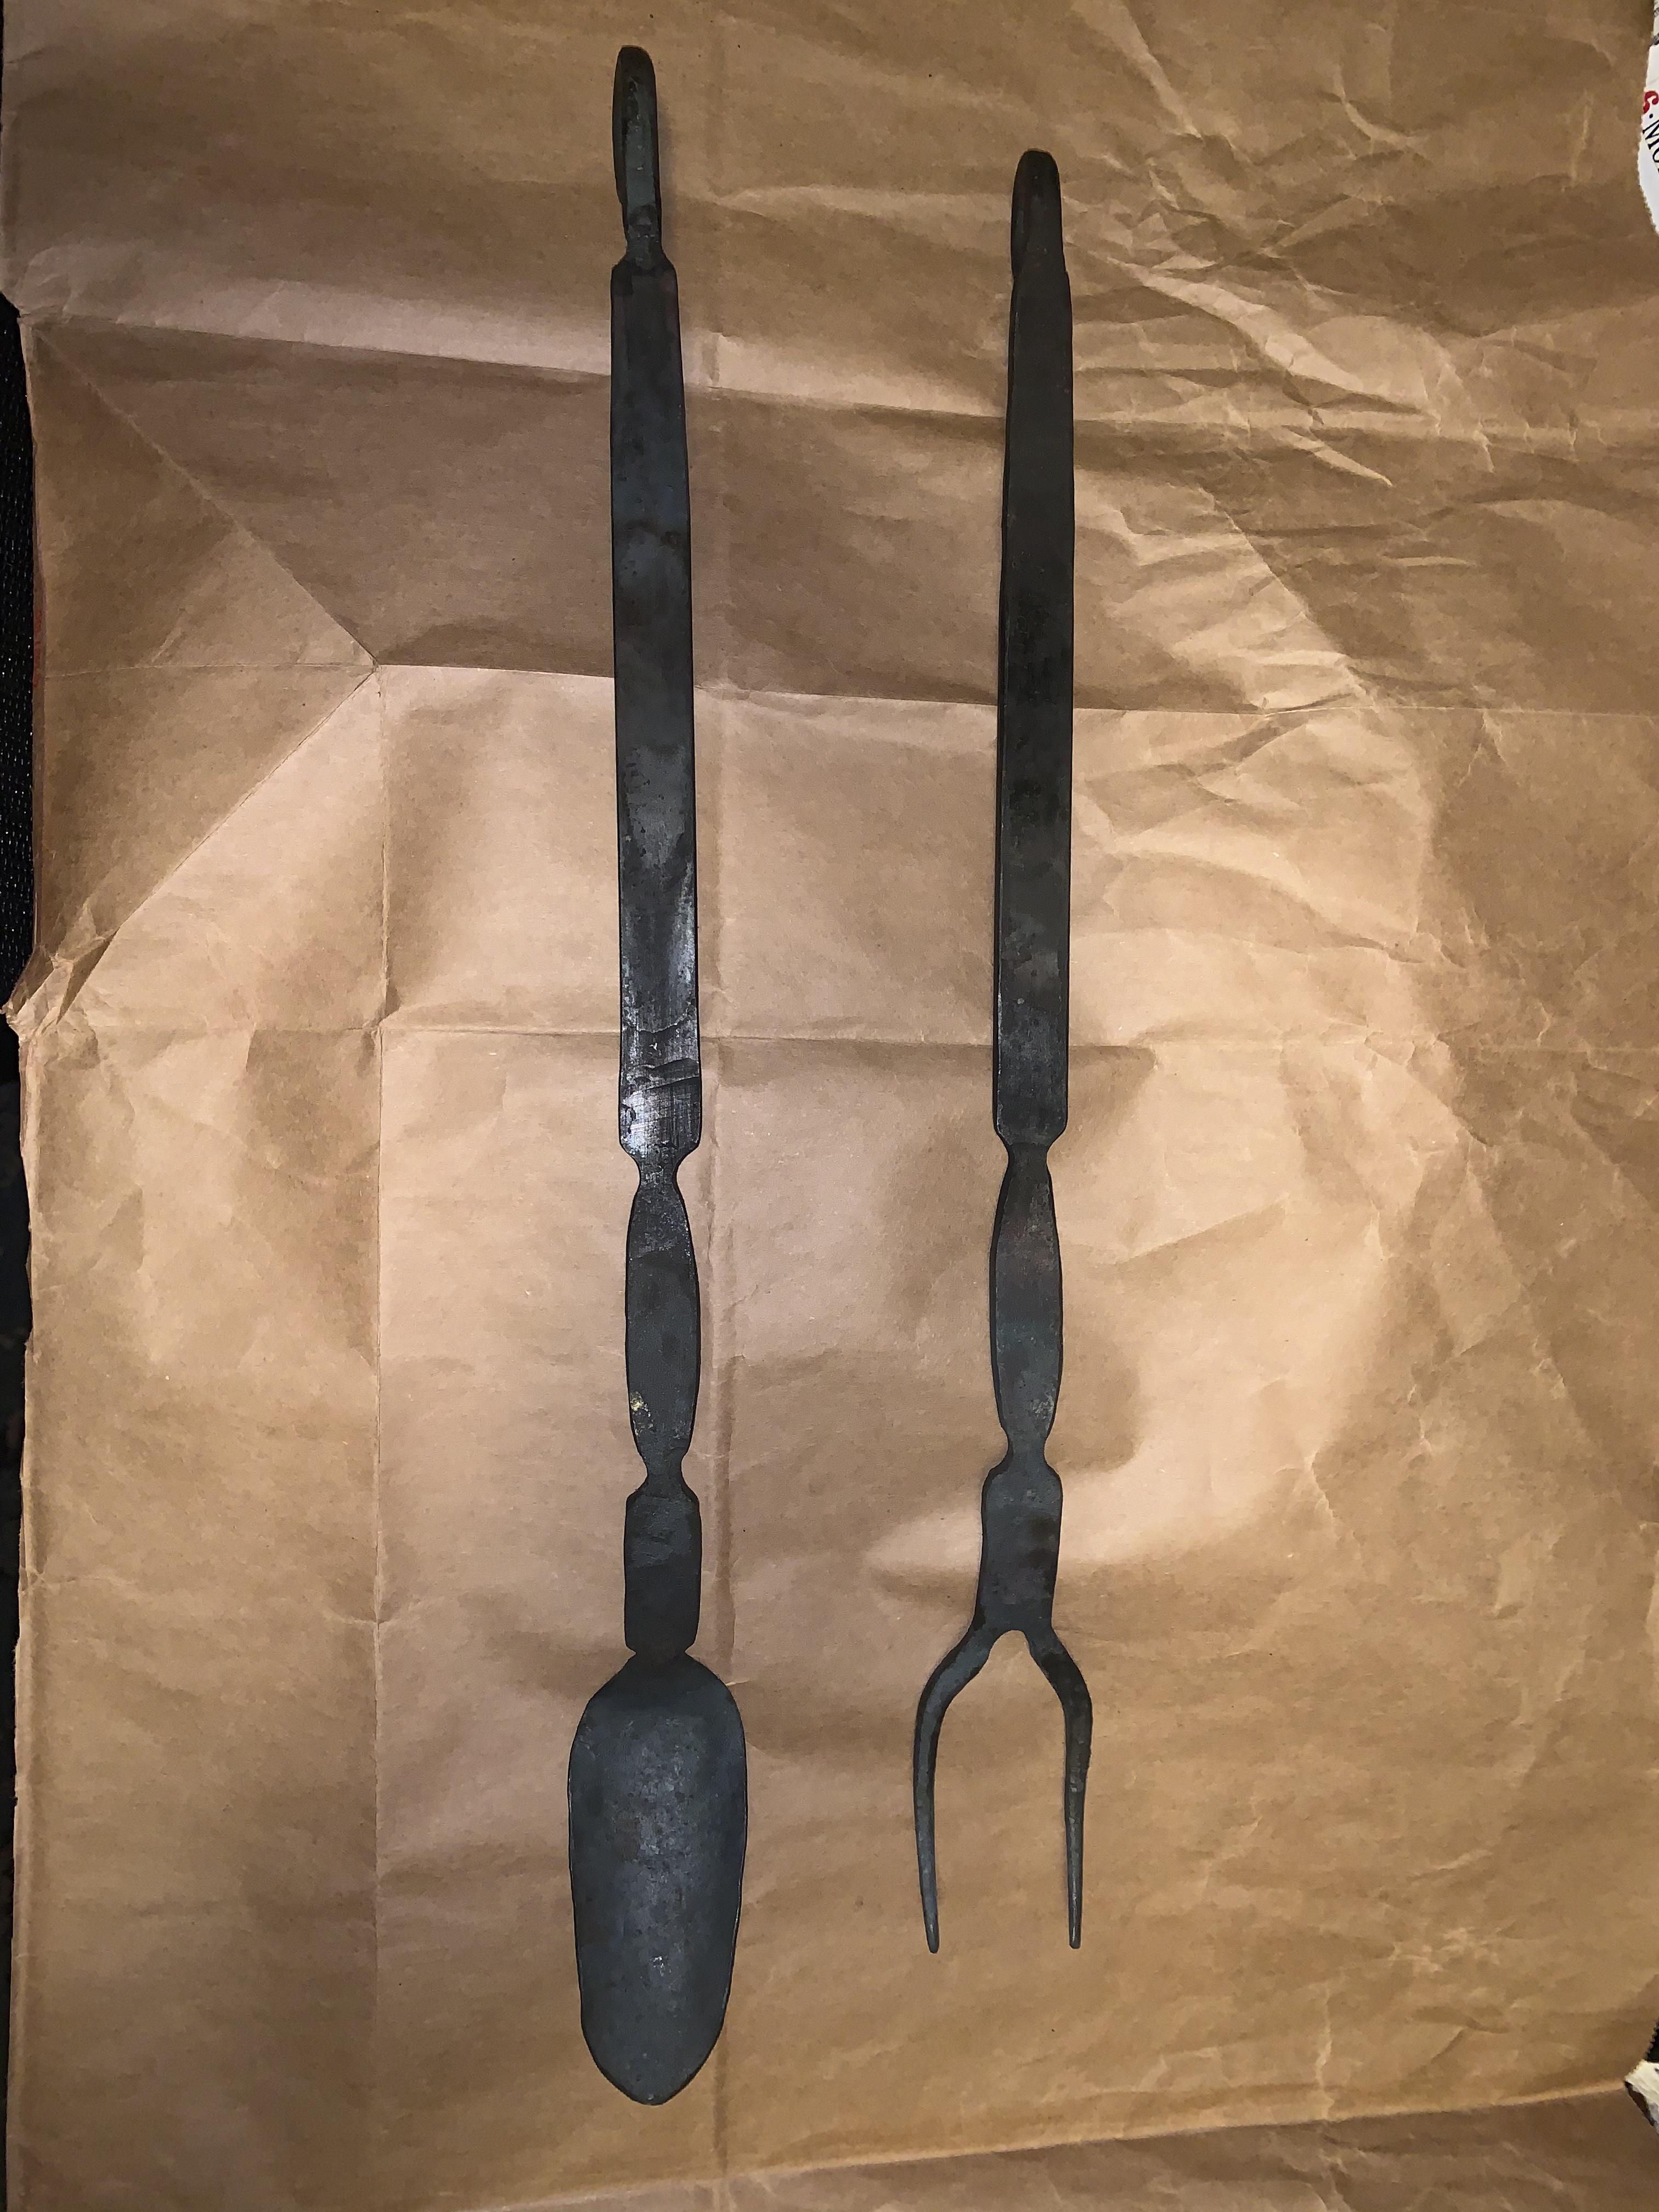
Made a spoon to match a bbq fork I had made. Also I refined the fork a little. Was hoping for a wider spoon shape, but not enough material to spread out. Used 1/4” x 3/4” bar stock.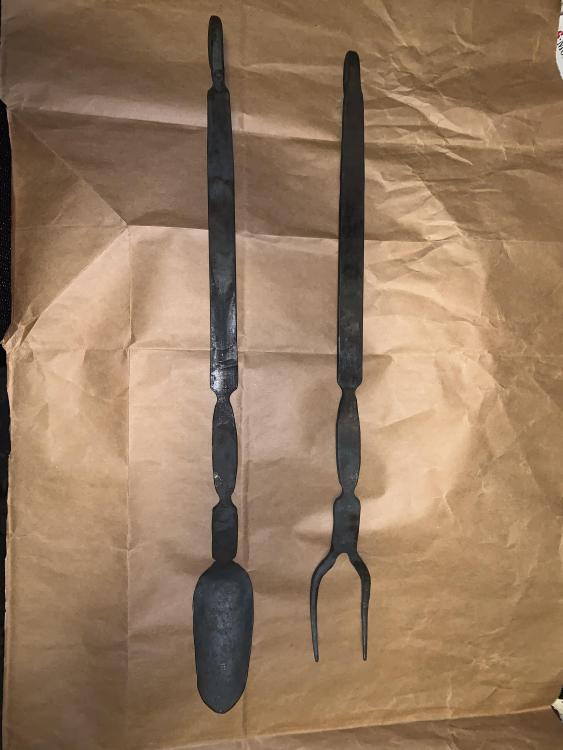
-
What did you do in the shop today?
PHDforge replied to Mark Ling's topic in Blacksmithing, General Discussion
Goods and Frosty, in Mark Asprey’s first book he shows a chisel with one of the side edges with a radius or fuller and the other side sharp, seems like a good tool to have and would work well for the fork. I haven’t had a chance to make one yet. My first fork I had punched a hole at the base for the radius before chiseling the split. demos: I did do some research before attempting it. IFI had some good info. I had read forge welding should be avoided due to the spray of flux. (I am not that good at welding anyway). I had also read that short small projects are best because people don’t stay too long and cycle by through your area. Twisting seems to be the biggest hit. I just finished the second day, which was shortened a bit due to Tropical storm Henri impacting my area (mostly heavy rain). I highly recommend doing a demo. The only drawback, don’t bring too many heavy pieces of equipment or too many tools. Travel light! Bob -
What did you do in the shop today?
PHDforge replied to Mark Ling's topic in Blacksmithing, General Discussion
Worked my first blacksmithing public demo today at a “living history” event in Hillsboro, NH. Made some S hooks, nails, and a gate latch. It went very well. I was surprised by the intent interest of children- I didn’t expect this. My workshop instructor had recommended me for this event. I initially felt that I did not have enough experience, but after encouragement I decided to do it. If you get the opportunity to do a demo, I recommend that you give it a try. It was a fun event. bob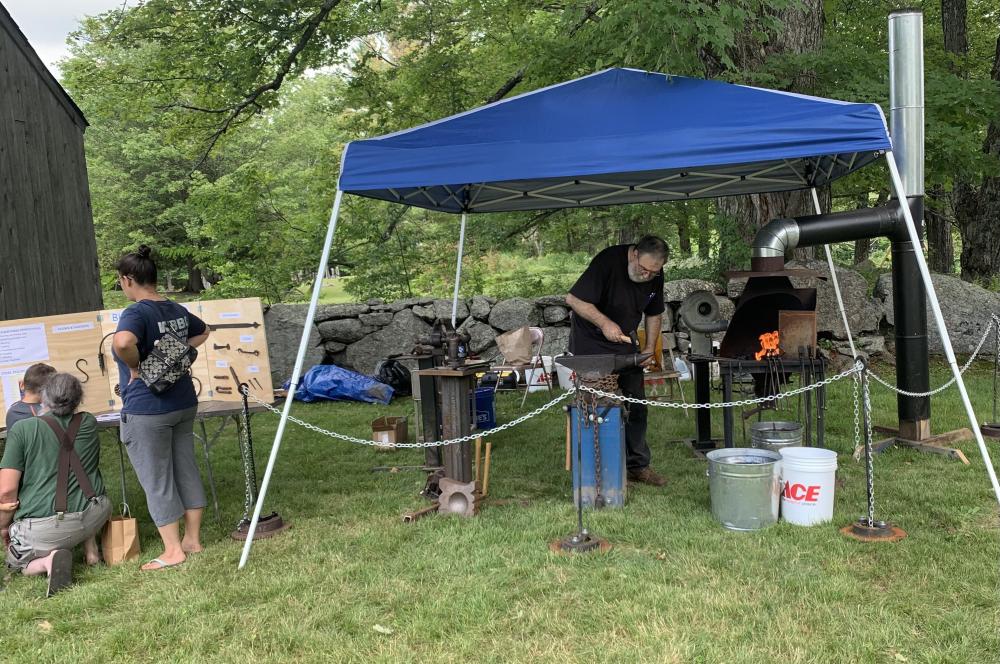
-
Teaching people have Respect versus fear of power tools is important. Too much fear will drive them away. Tools are safe if used properly. I’ve been teaching college machining courses for 29 years. The first two lab weeks are entirely about safety. Safety is constantly monitored by faculty throughout the entire course. We stress thinking before acting and having prior knowledge before attempting any thing. If a student is unsure or questions any procedure they are encouraged to ask for help. There are no stupid or silly questions. Having the proper knowledge is a tool in itself. Bob
-
Drill bits for cutting through 1095 steel
PHDforge replied to MageDK's topic in Drills, Post drills, Mag drills, etc
All good points mentioned earlier. I would like to add two things: 1. Watch for even chip formation from both cutting edges - if not a sign of one edge dull. 2. Listen to the sound of the drilling action- if it does not sound right e.g. high pitch screeching, crunching etc.- stop and check the cutting edges. -
What did you do in the shop today?
PHDforge replied to Mark Ling's topic in Blacksmithing, General Discussion
Am thinking of a machinist magnetic stand with an adjustable stop arm/bar. -
What did you do in the shop today?
PHDforge replied to Mark Ling's topic in Blacksmithing, General Discussion
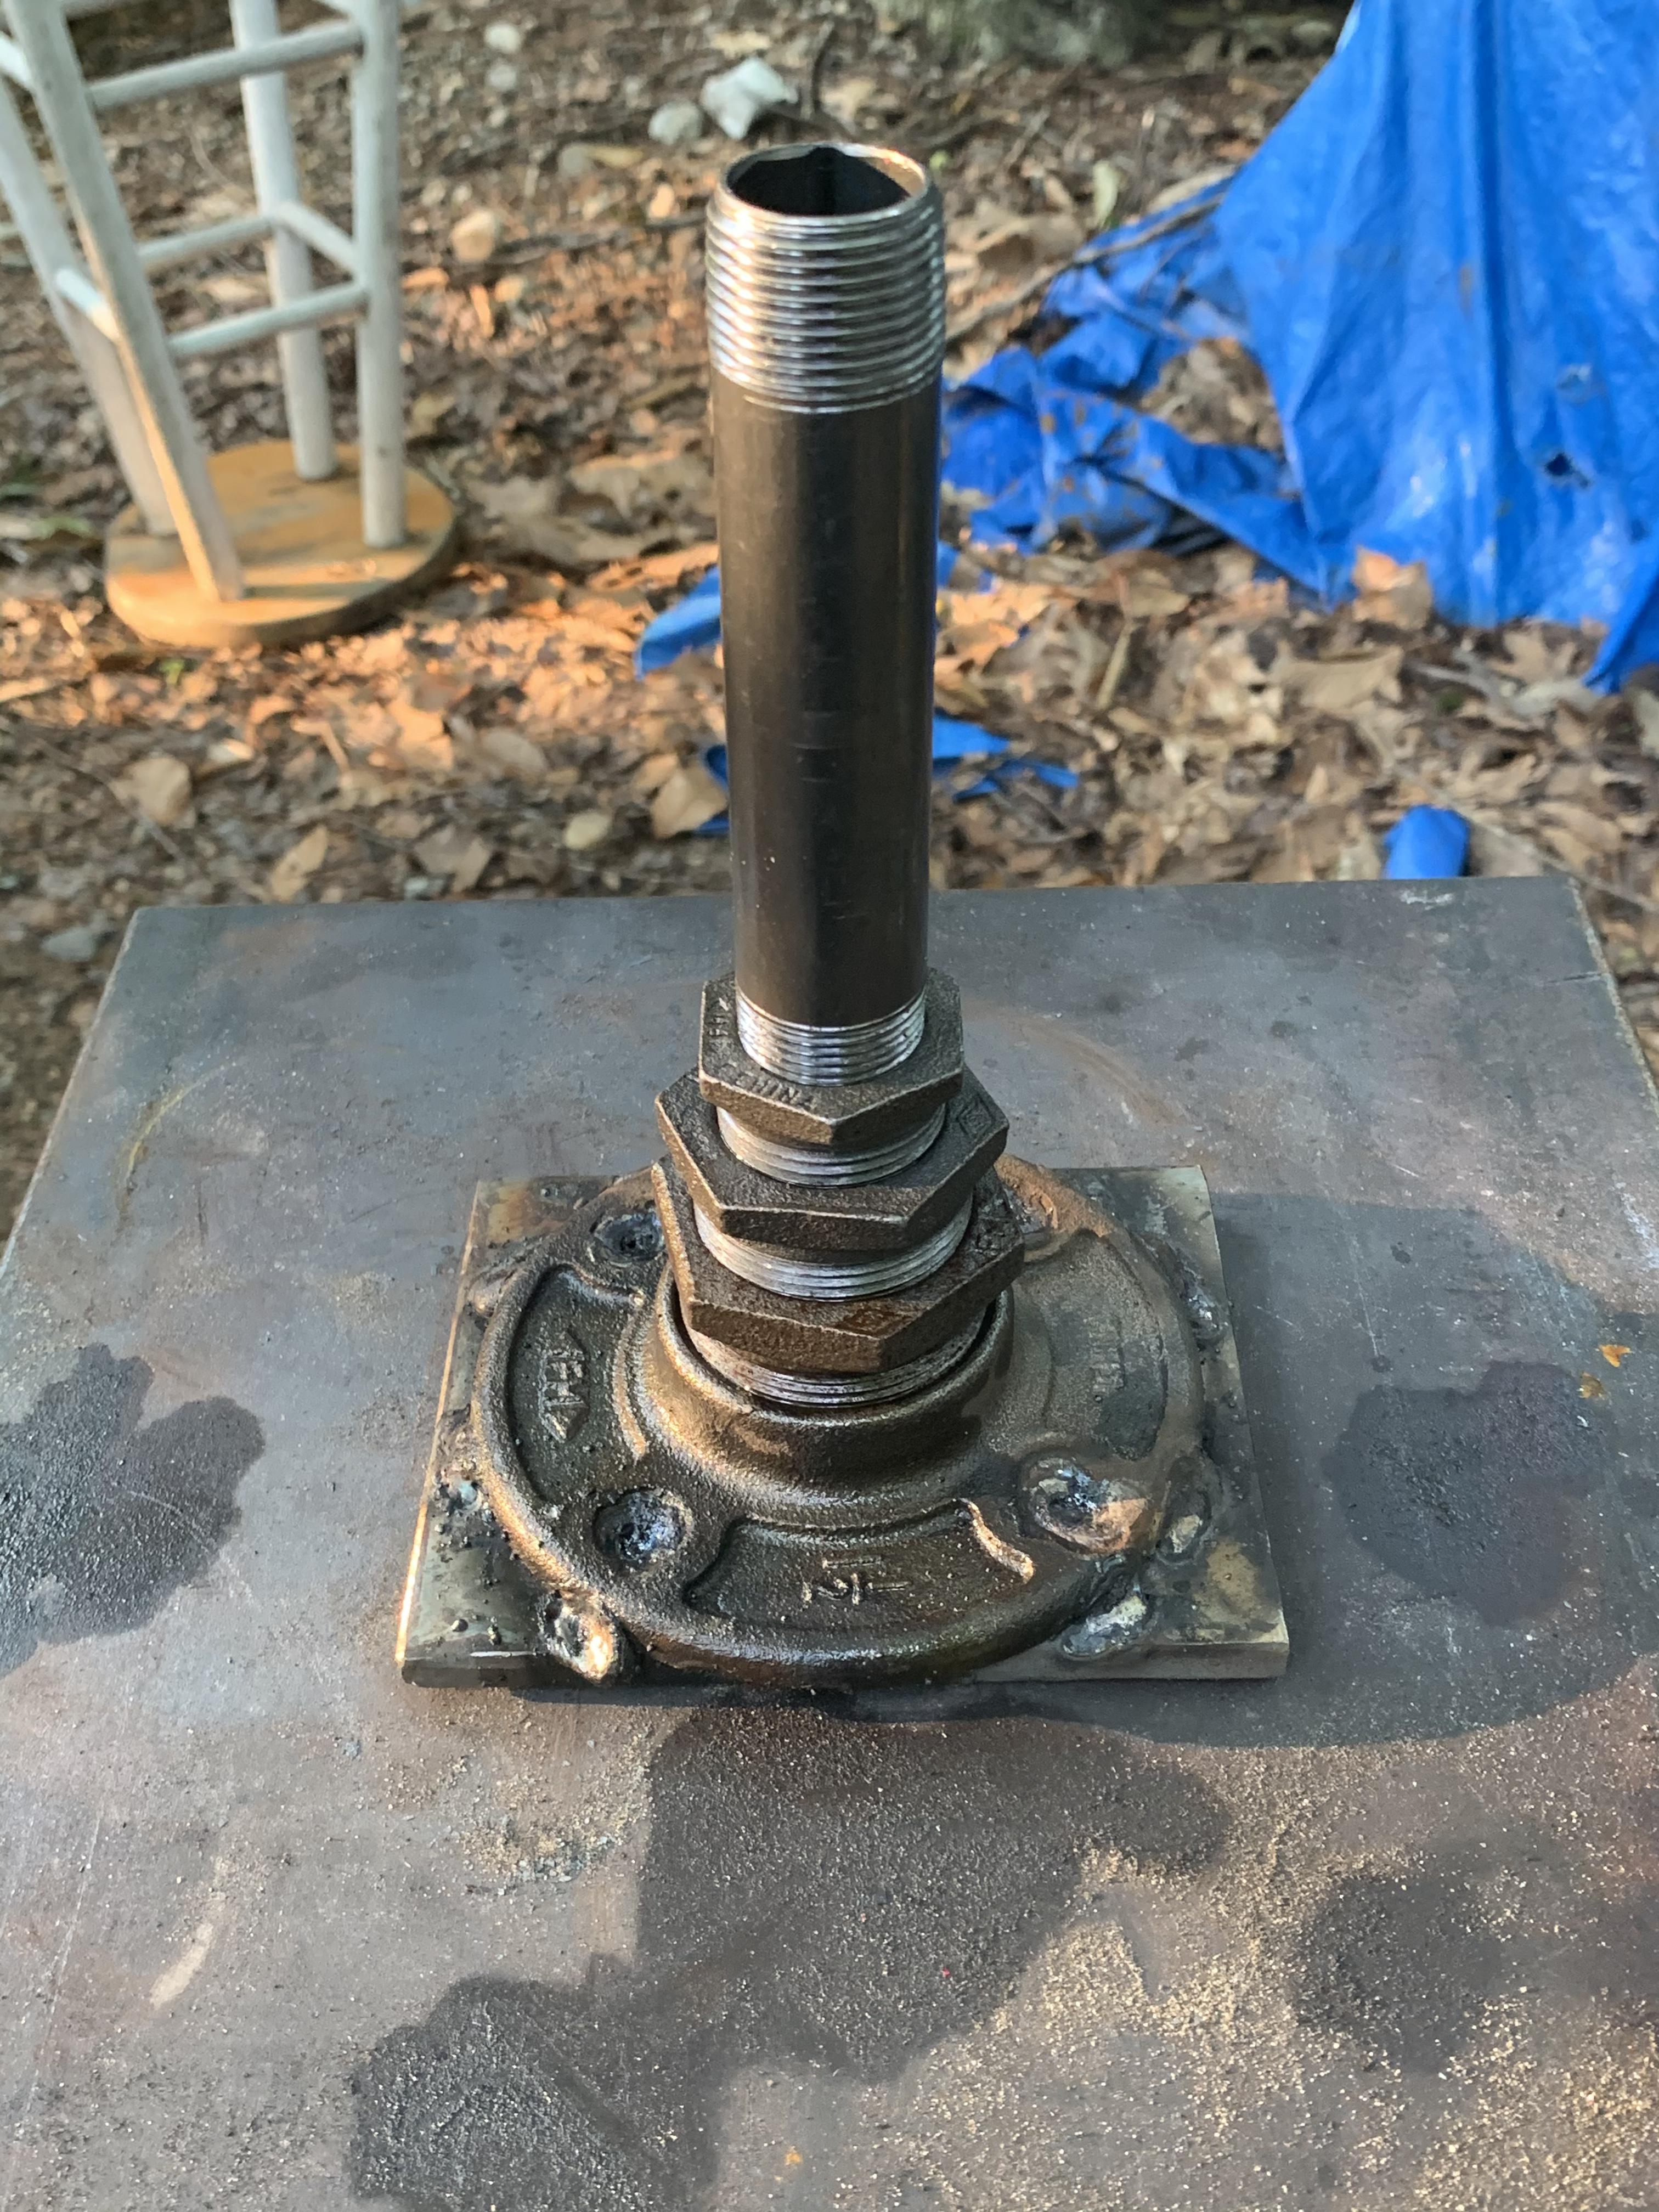
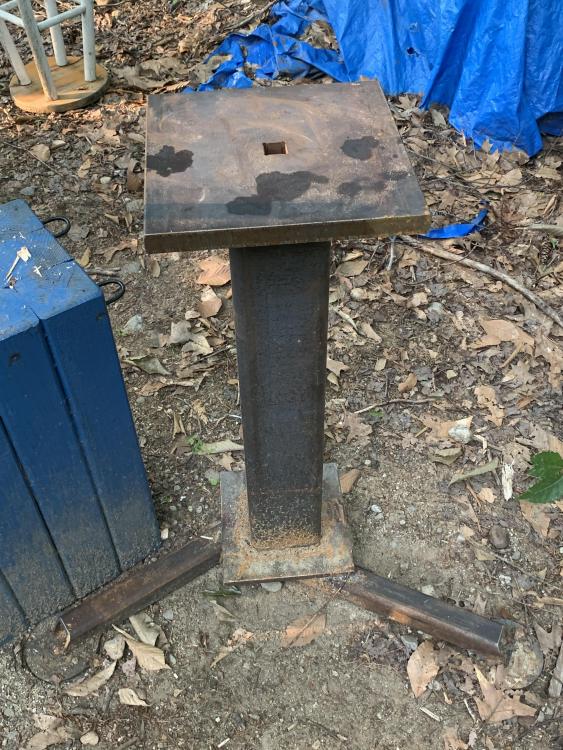
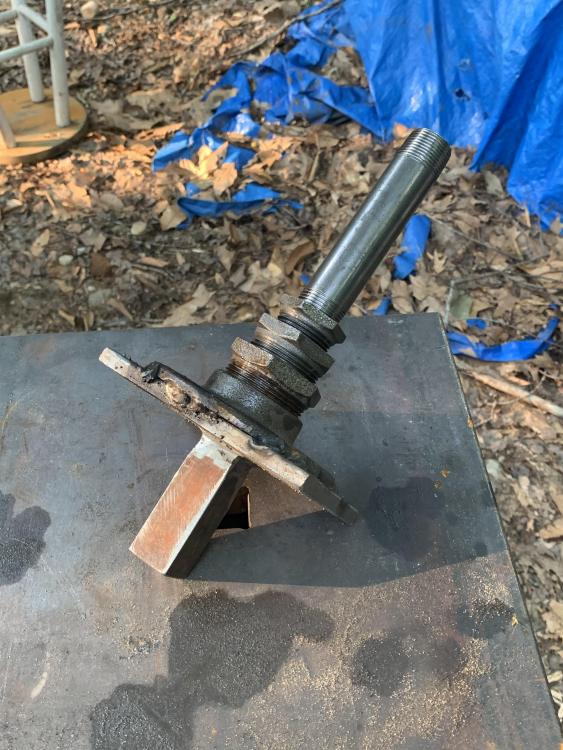
I was trying find a better way to create a simple fixture for wrapping various round loops or arcs, like an “S” hook. first I tried this, simple pipe to a fitting I can hold in the vise. the problem as you would expect is that the nut moves left- right. I recently built a portable hardy hole stand I thought of this idea, make a hardy to hold various pipe fittings. I built this today it is now easy to change pipe sizes using various adaptors. And it is stable in all directions. Mostly all parts available at the hardware store, pipes, adaptors, flange. Thought I would share this idea. Bob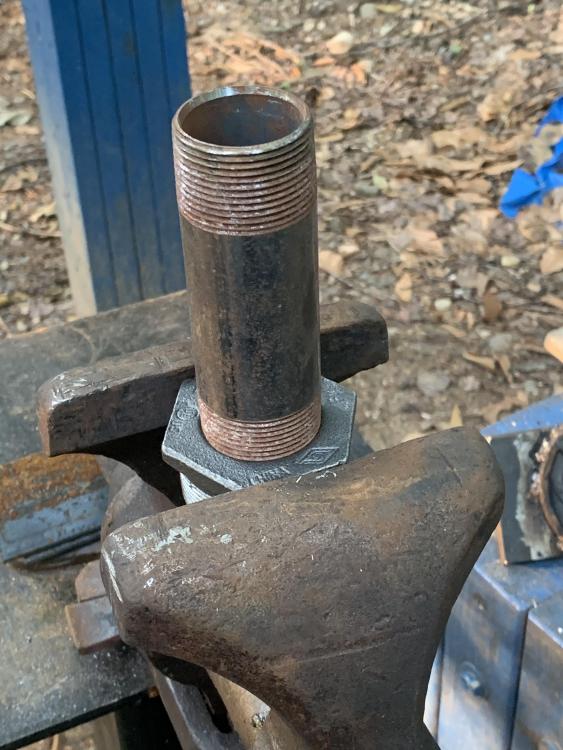

-
The “Trades” have been given a bad rep. Not lowly by any means. Big thing is being employed and employable. Luckily I chose manufacturing and engineering. My students all get jobs with their degrees both associate and bachelor. Too many other non-employable majors out there. Too many good paying trade jobs unfilled.
-
What size is the square hole? I’ve used a HSS square lathe bit as a drift to create a square hole. I ground one end to a round shape to match the pilot hole I drilled first. It worked for a 1/4 square.
-
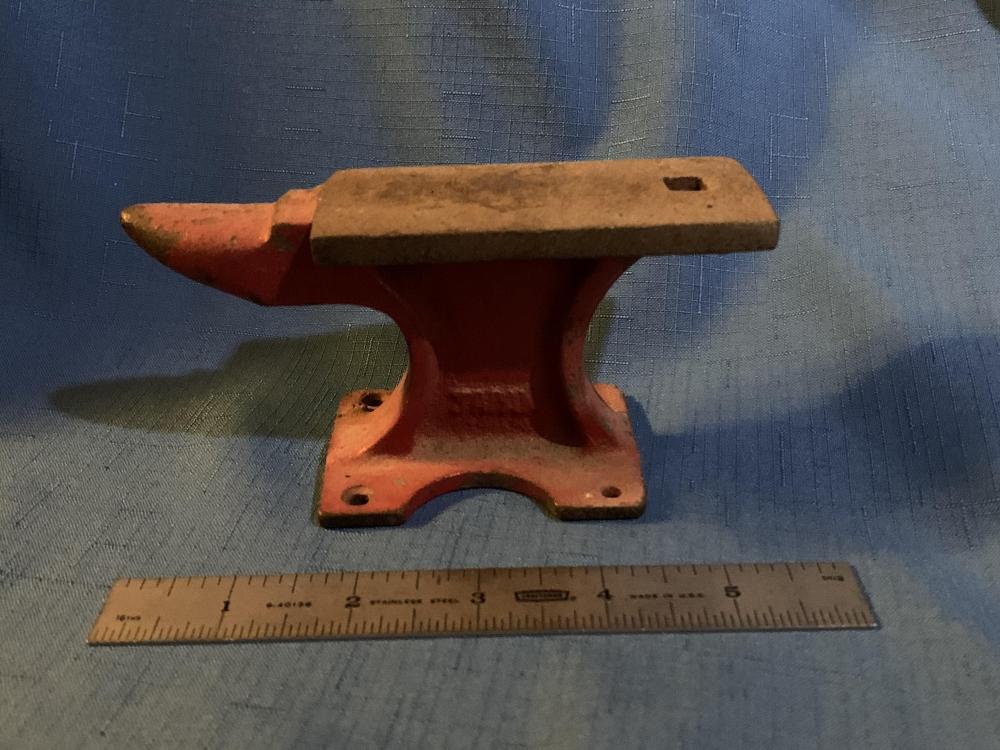
I have one very similar too. It was attached to a work bench that my dad built for me when I was a kid (mid-late 1960s). It is cast and mine appears to have JAPAN in raised letters on one side.
-
Thomas and George: I appreciate your suggestion about trying a higher forge height. I am 6’1” and the forge is setup currently at the height it came. I’ve only worked at one other coal forge setup where I attended several workshop sessions. George, may I ask the height of your two forge setups. thanks
-
I hadn’t thought of raising the forge, but now that you mention it and I look more closely at the picture, it is a good idea. I am still new to blacksmithing and am in the experimenting phase (trying different tools, methods, etc). I bought a hand crank blower this year - and like it better (better fire control ) verses the small squirrel-cage electric blower I had.
-
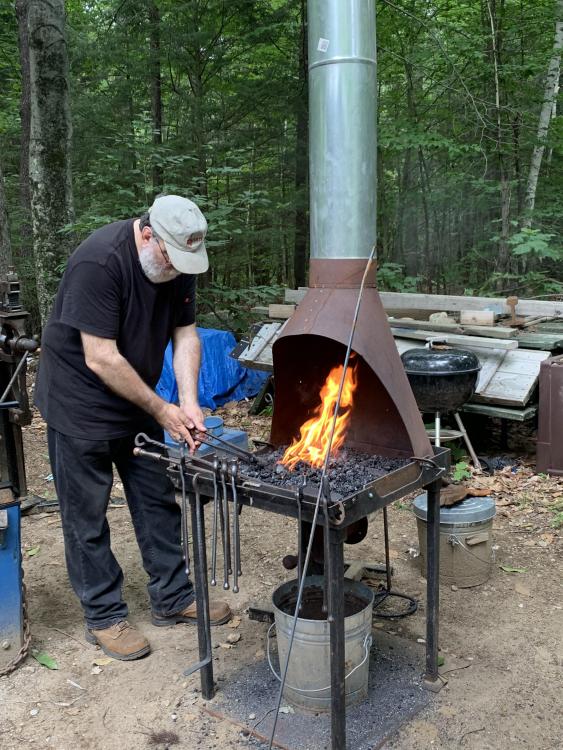
Was working in the forge yesterday, and my wife caught this fire dragon image.
-
We bought from MSC. My previous college had an older (1960ish) Kalamazoo saw, about same size. It is still the main cutoff saw in the machine shop. Good dependable saw brand.
-
Looks like a Clausing Kalamazoo saw, my college bought a new one a couple years ago. Dovetail track for guides and control panel look very similar.
-
What did you do in the shop today?
PHDforge replied to Mark Ling's topic in Blacksmithing, General Discussion
I live in Weare, NH. I do like “delicately”, hadn’t thought of that one. There are several other words that start with a D depending on how well the project is going... -
What did you do in the shop today?
PHDforge replied to Mark Ling's topic in Blacksmithing, General Discussion
Actually it is mechanical engineering, but I have been teaching manufacturing engineering technology for 29 years. Started out with an associate in machine tool processes, worked at various machining jobs, then went back to school and went into teaching. Been around lathes, mills, grinders most of my life. Always had an interest in blacksmithing. My wife kept suggesting take a blacksmith class. Finally did a few years ago and here I am learning and doing blacksmithing as my newest hobby. I was trying think of a name for my forge. Thought about using the PHD, it could be taken as “Pound Harder Darn it” -
What did you do in the shop today?
PHDforge replied to Mark Ling's topic in Blacksmithing, General Discussion
Steamcheng: I too come from a background in machining and find it difficult to let go of the lathe and mill processes to make tools. It’s amazing how much can be done by forming and forging. I try to focus on little to no machine work and more hand work as I learn and practice the blacksmithing techniques. -
Could the word under Wilkinson be “& SONS” stamped upside down?
-
Redressing anvil welded edges
PHDforge replied to PHDforge's topic in Repairing and Modification to Anvils
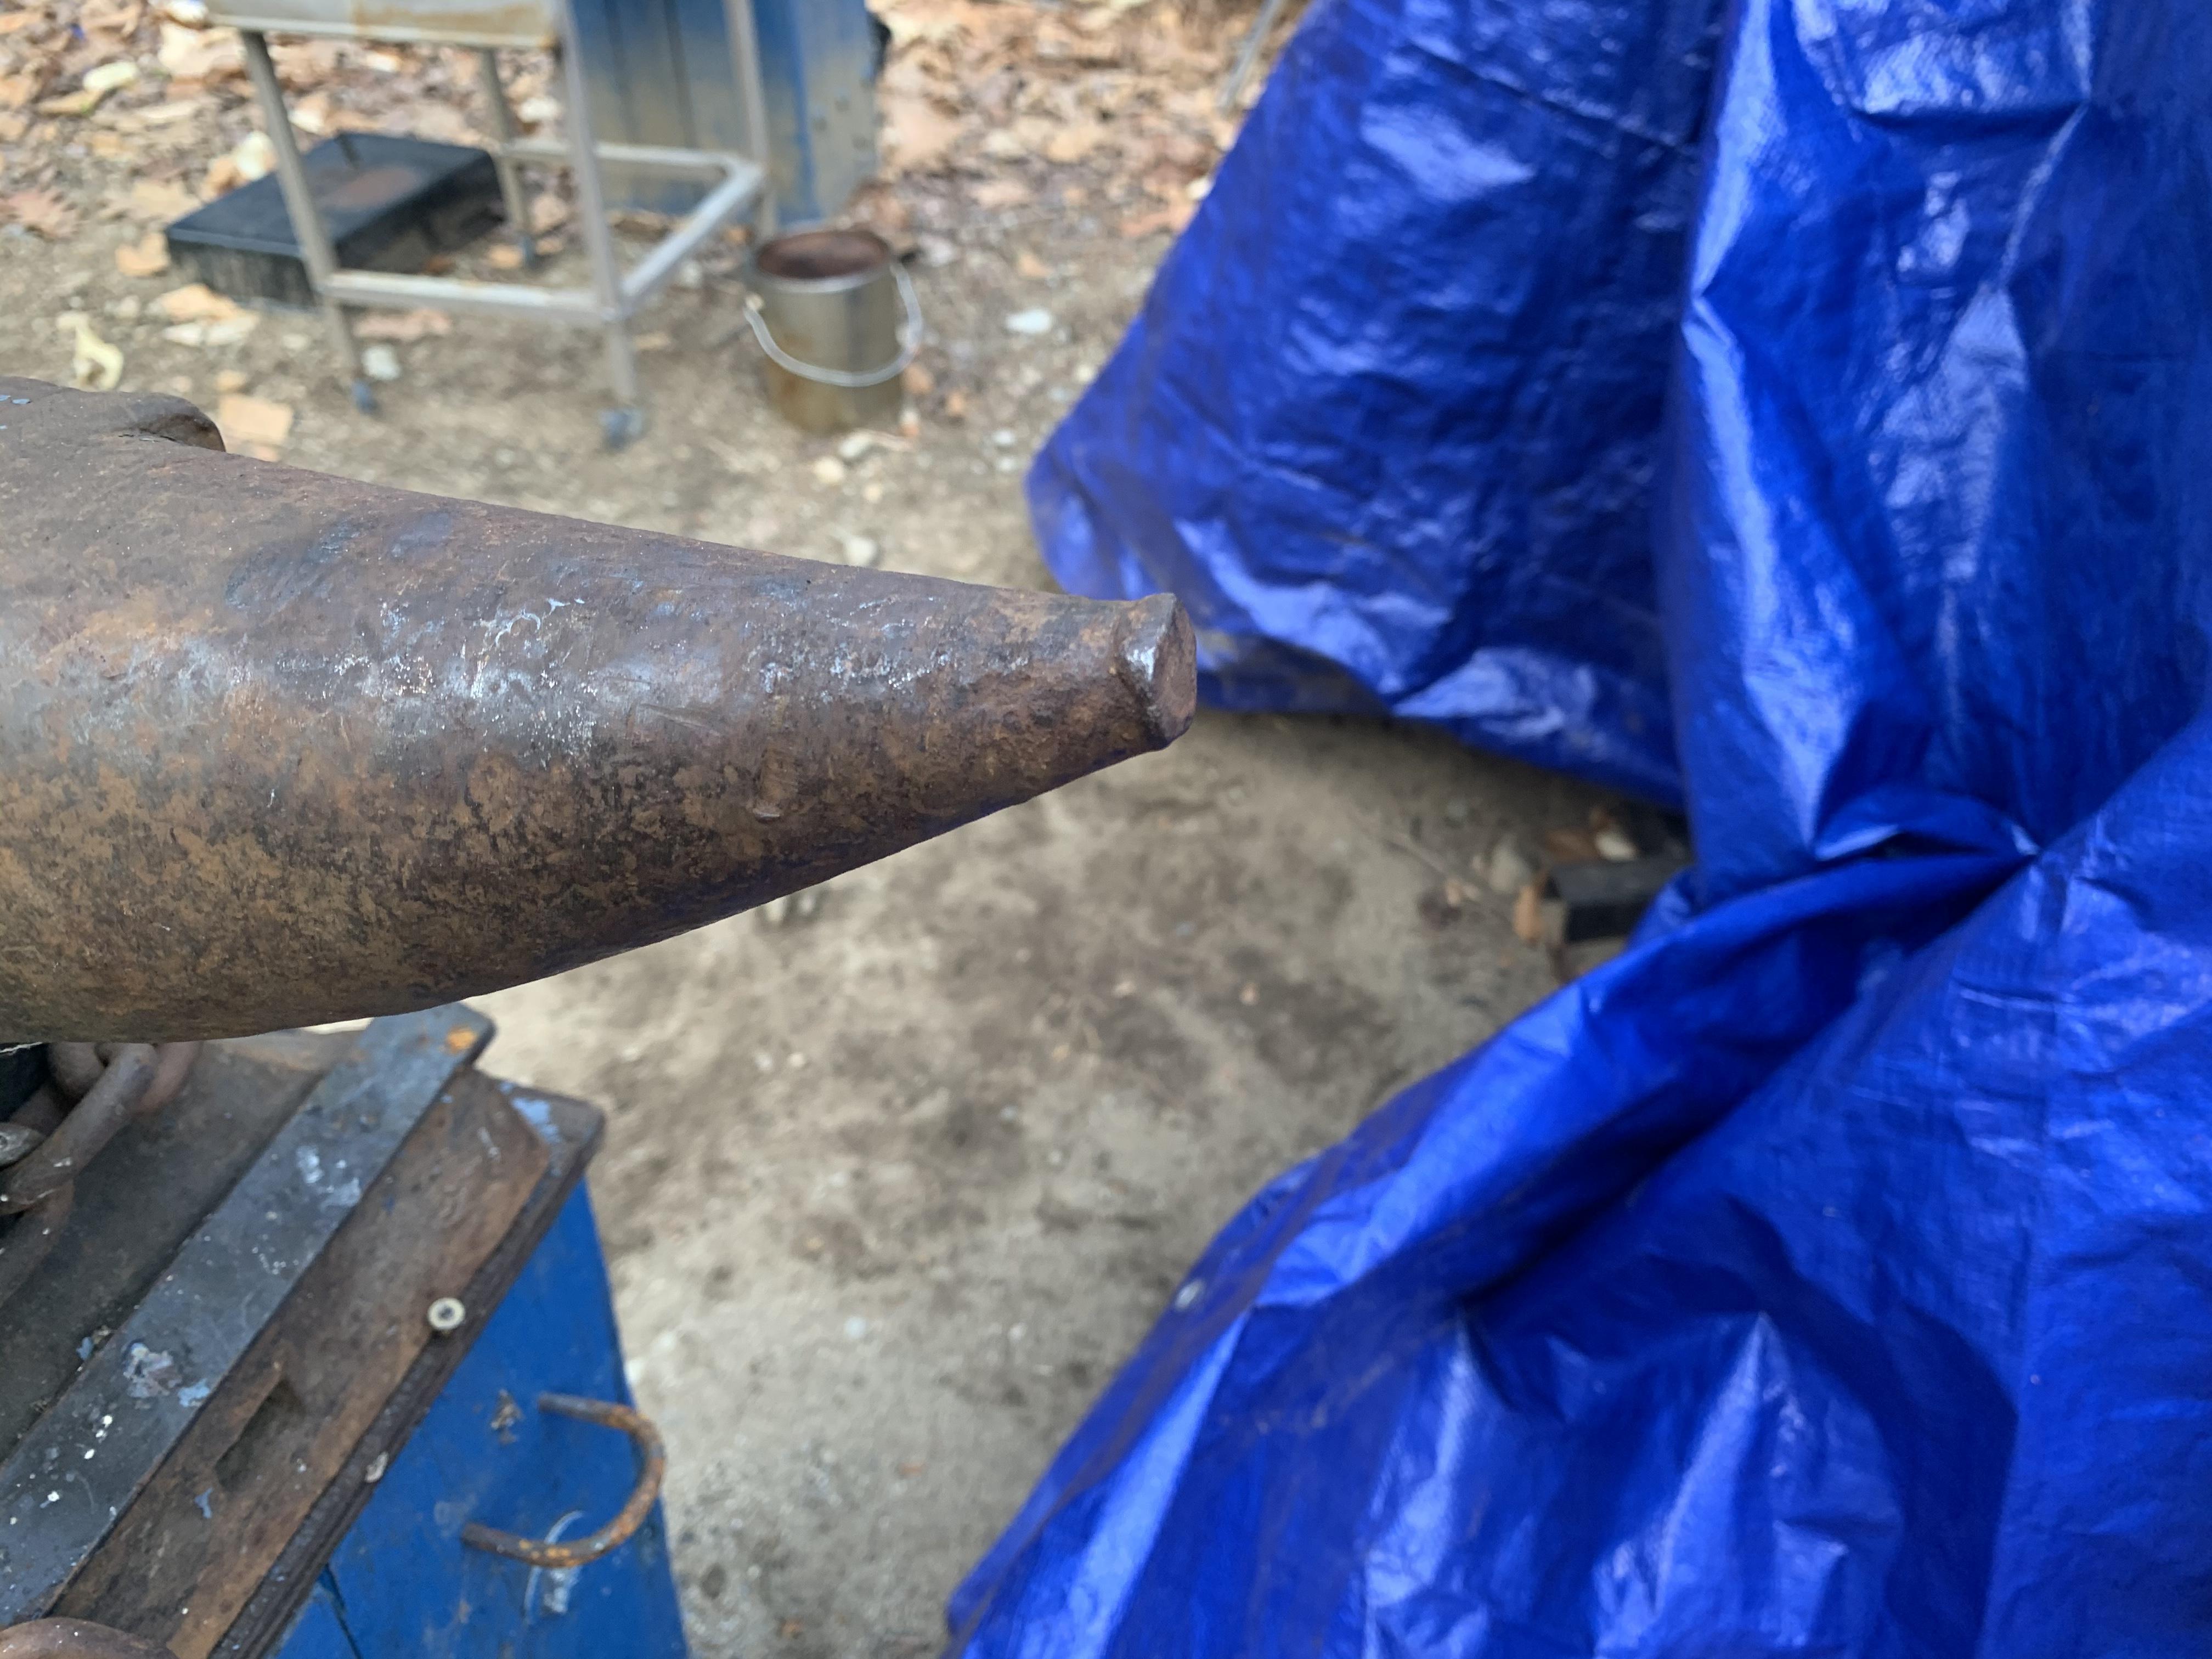
Well, I decided to at least clean up the end of the horn for now. I wanted to be careful so I took a file and removed the mushroomed upset part. This way if I want to put some small diameter over the horn to fine tune it won’t catch on the mushroom. It filed pretty easy, easier than I expected. thanks everyone for the advice. I think I’ll experiment more and be careful about the edges. When I decide upon what best corner radii I need then I will try to clean up the top edges. -
Redressing anvil welded edges
PHDforge replied to PHDforge's topic in Repairing and Modification to Anvils
I feel much better that my anvil doesn’t appear to have been welded. Thanks for the replies. I was worried about the possible damage from such a repair. Here is a picture of the horn.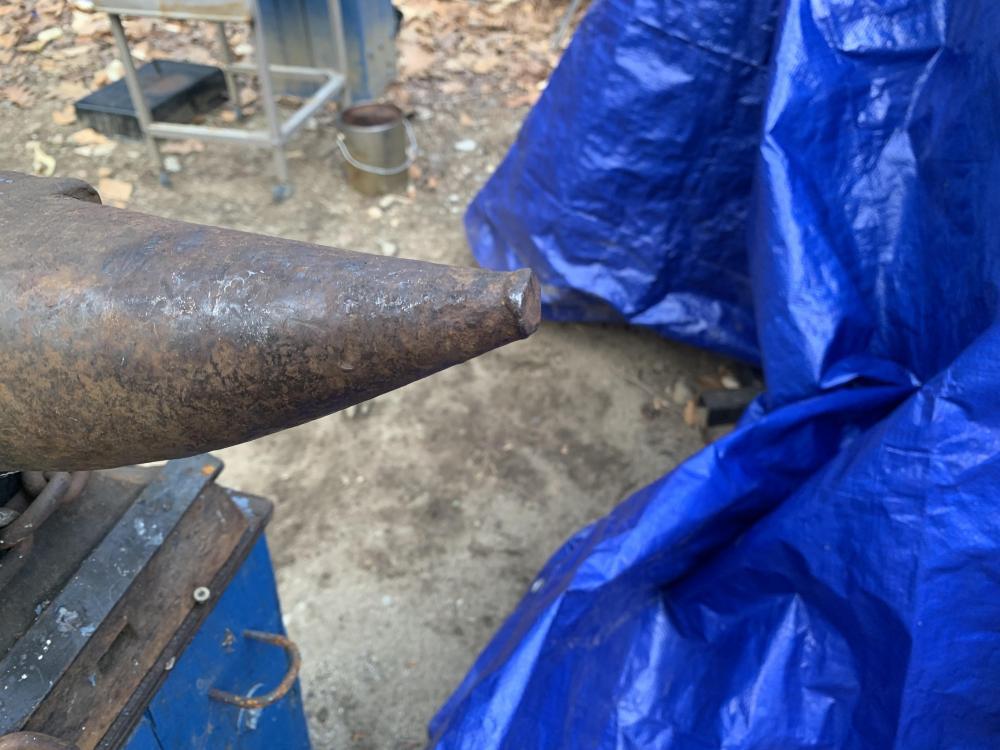
-
Redressing anvil welded edges
PHDforge replied to PHDforge's topic in Repairing and Modification to Anvils
Thanks for the advice. As to the edges not looking like they have been welded: I suspect that some welding might have been done, if you look closely at the two side photos, there appears to be a horizontal line or parallel transition to the top surface. I know that the hardened face plate is not very thick and this line appears to be about 3/8 or 1/2 inches down which would be below the top plate thickness? I suspect this shows the depth of the weld repair from the side view? Am I wrong at suspecting this? When I acquired the anvil I had thought the edge damage was to the top plate, later I noticed these lines on each side. I am reluctant to try to chance anything, because I want to preserve the anvil. My dating using the AIA text puts it in the 1860-1880 range. It has the earlier transition marking or line between top and bottom halves (behind the chain) no England stamp and no Solid Wrought stamp.