jwmelvin
-
Posts
117 -
Joined
-
Last visited
Content Type
Profiles
Forums
Articles
Gallery
Downloads
Events
Everything posted by jwmelvin
-
One difficulty in calculating is that the area gets smaller the thicker you make a coat; also, the corners would represent overlap so you overestimate. But let's use those dimensions to reach a conservative number. Each wall is 7x12, so that is 84 in^2. Four walls means you have a surface area of 336 in^2. Let's go with a round number for density of 100 lb/ft^3 (as reported by a few places online). To cover 336 in^2 with one inch of thickness requires 336 in^3. That's the amount (in volume) you need for each inch of thickness. KOL is generally sold by weight, so we need to convert from in^3 to ft^3 and then multiply by density. There are 12*12*12 in^3/ft^3, so 336 in^3 is 0.194 ft^3, and once multiplied by the density we have 19.4 lb per inch of thickness in your forge. Wayne sells 5 lb. bags, so you would get about 1/2" of thickness out of two bags. My experience with KOL is that I was glad I bought extra.
-
3D printed plastic burner experiments (photo heavy)
jwmelvin replied to Another FrankenBurner's topic in Gas Forges
Yes, I'm using my printed inducers, but haven't used them much (just haven't had time so far) and heat has been a problem. Most significantly, the few times I had the flame burn back in the mixing tube, things heated up very quickly. I haven't noticed that radiant heat is an issue but I only ran the jet nozzle a couple times and now I'm focusing more on the ribbon nozzle. I do think that will be better for heat isolation. My plenum and mixing tube assembly is quite long by others' standards. Plastic inducers are hardly a viable long-term solution, but they have enabled me to experiment and get to know the components a bit. I'd like to cast in aluminum like AFB, though it will be my first attempt at casting, and will have to wait until I build a melting furnace as I don't think my forge is large enough to put a crucible in. I have tried to keep my designs favorable to casting, with the eventual goal in mind. -
The density is listed as 95 to 105 lb/ft^3, so you should be able to figure it out from there.
-
This is all quite interesting. Thank you for continuing to report and to find an approach that works best for you.
-
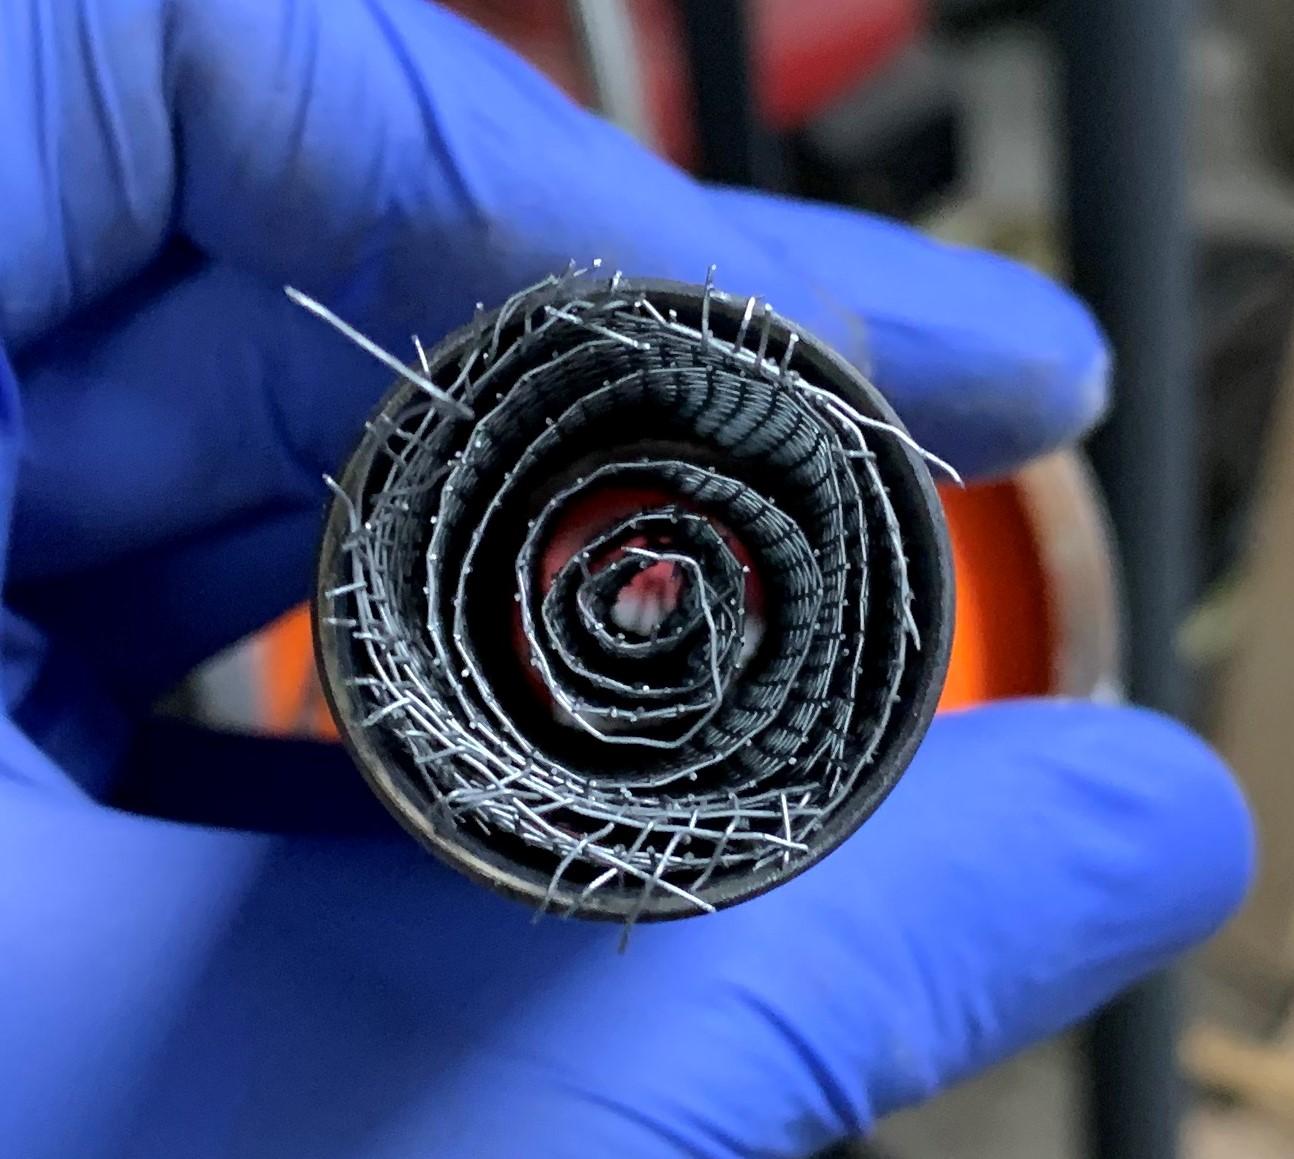
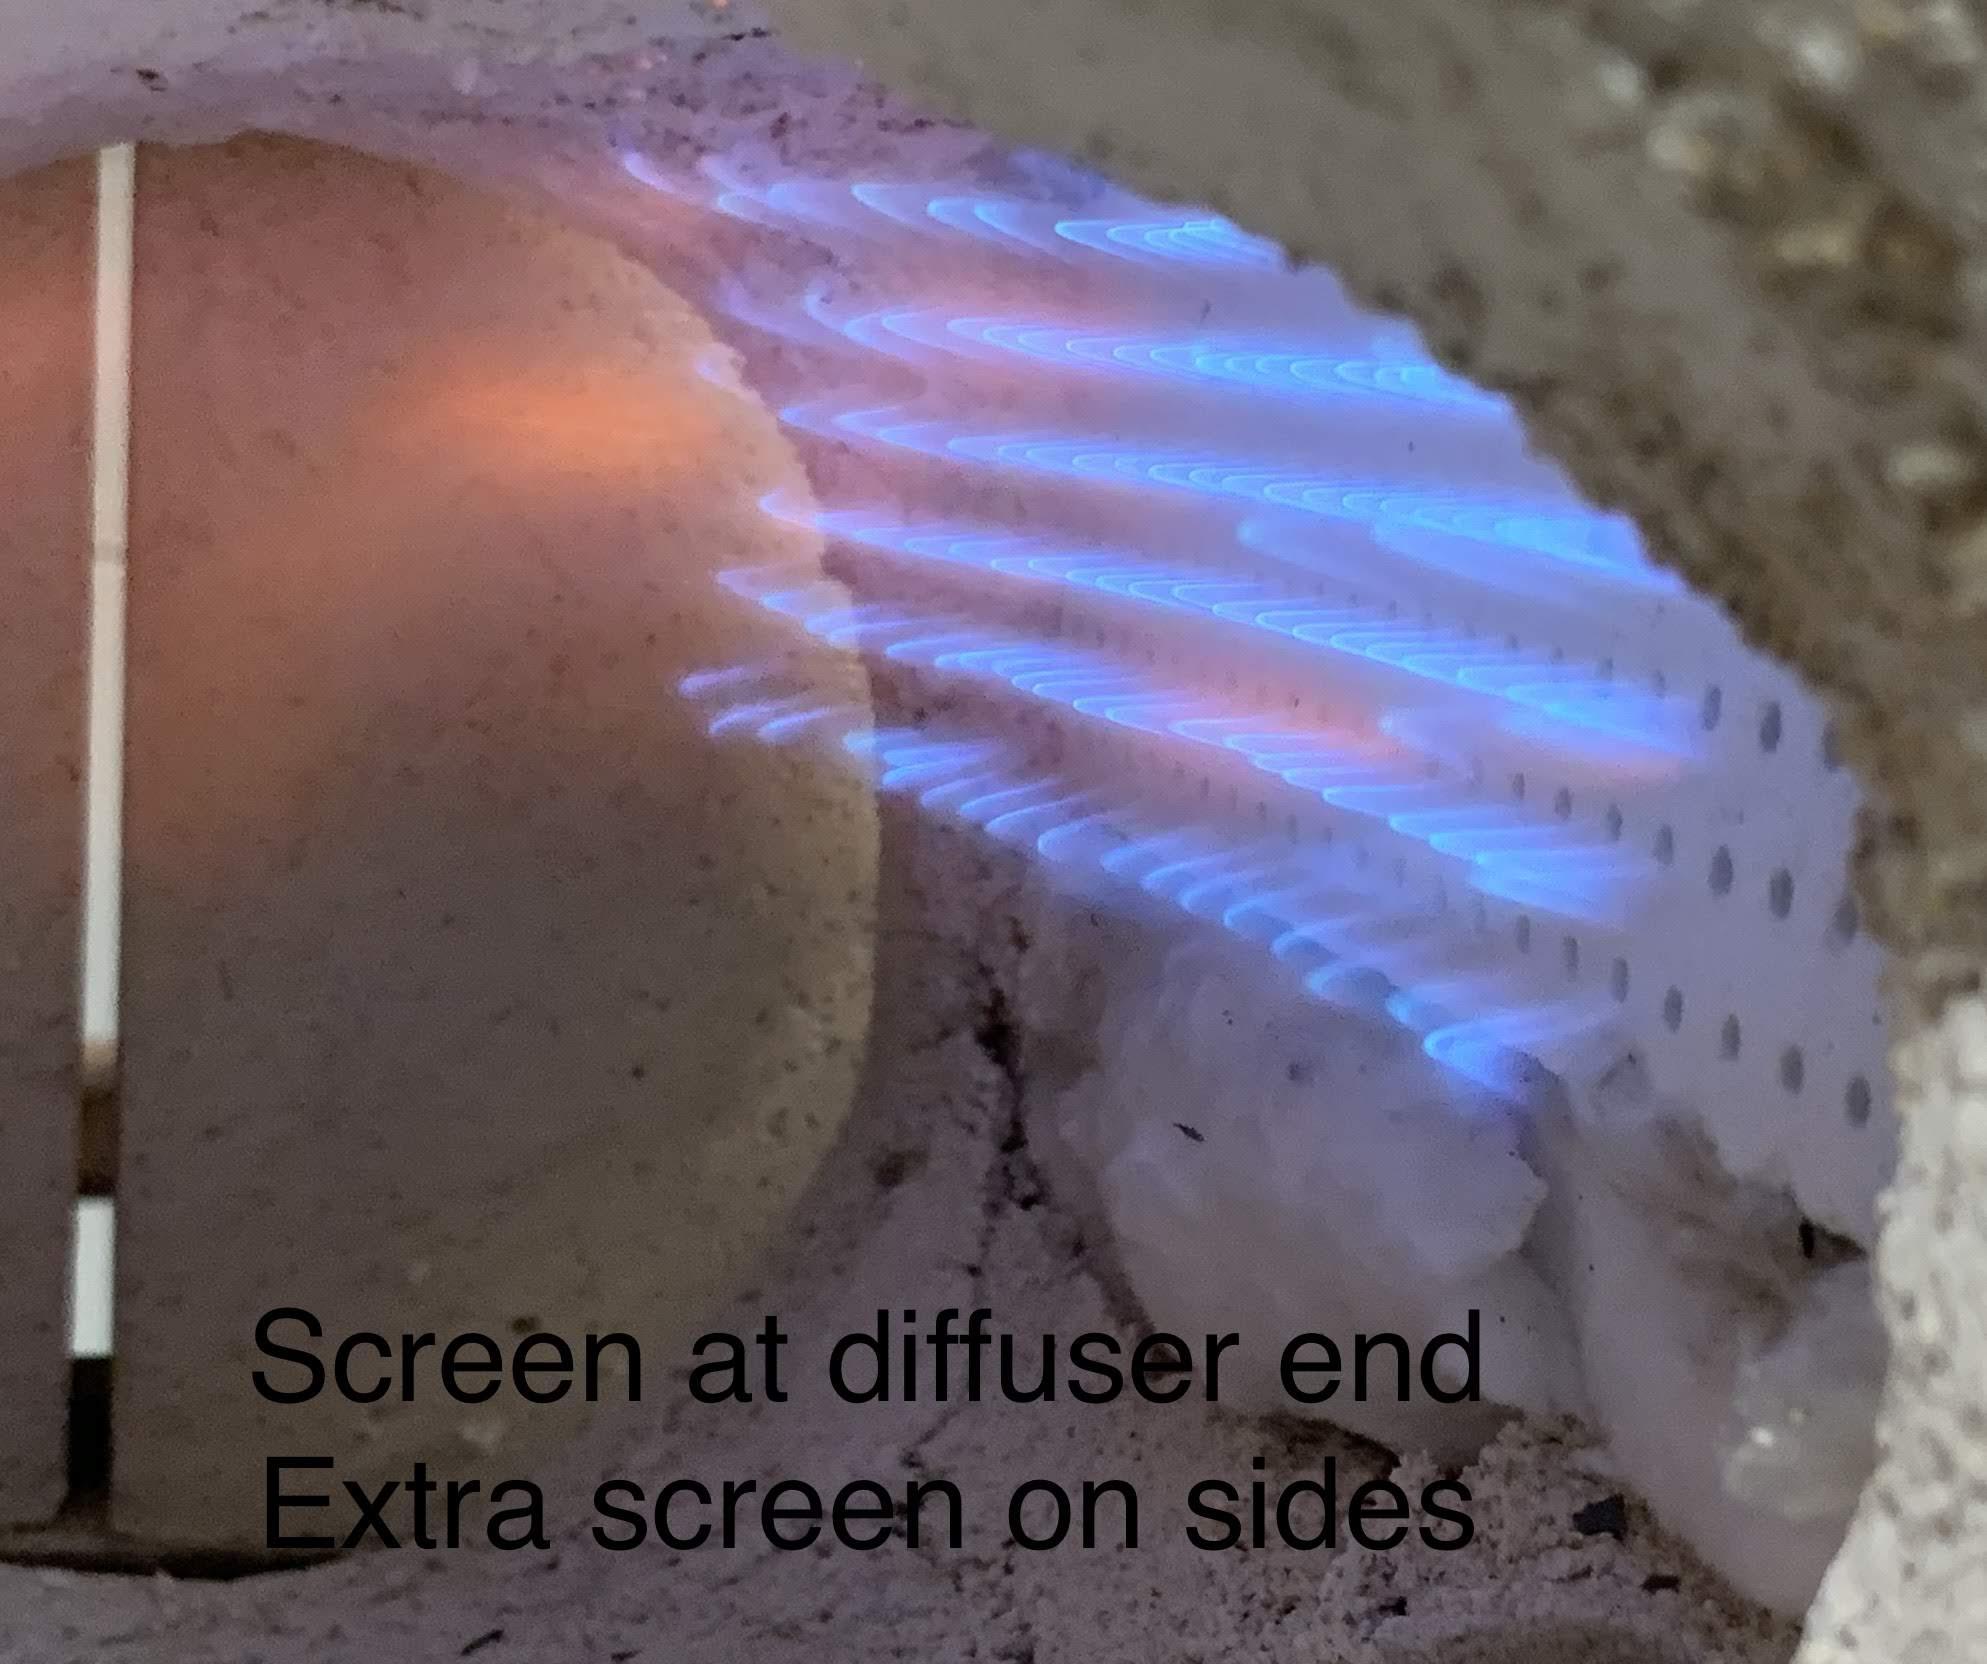
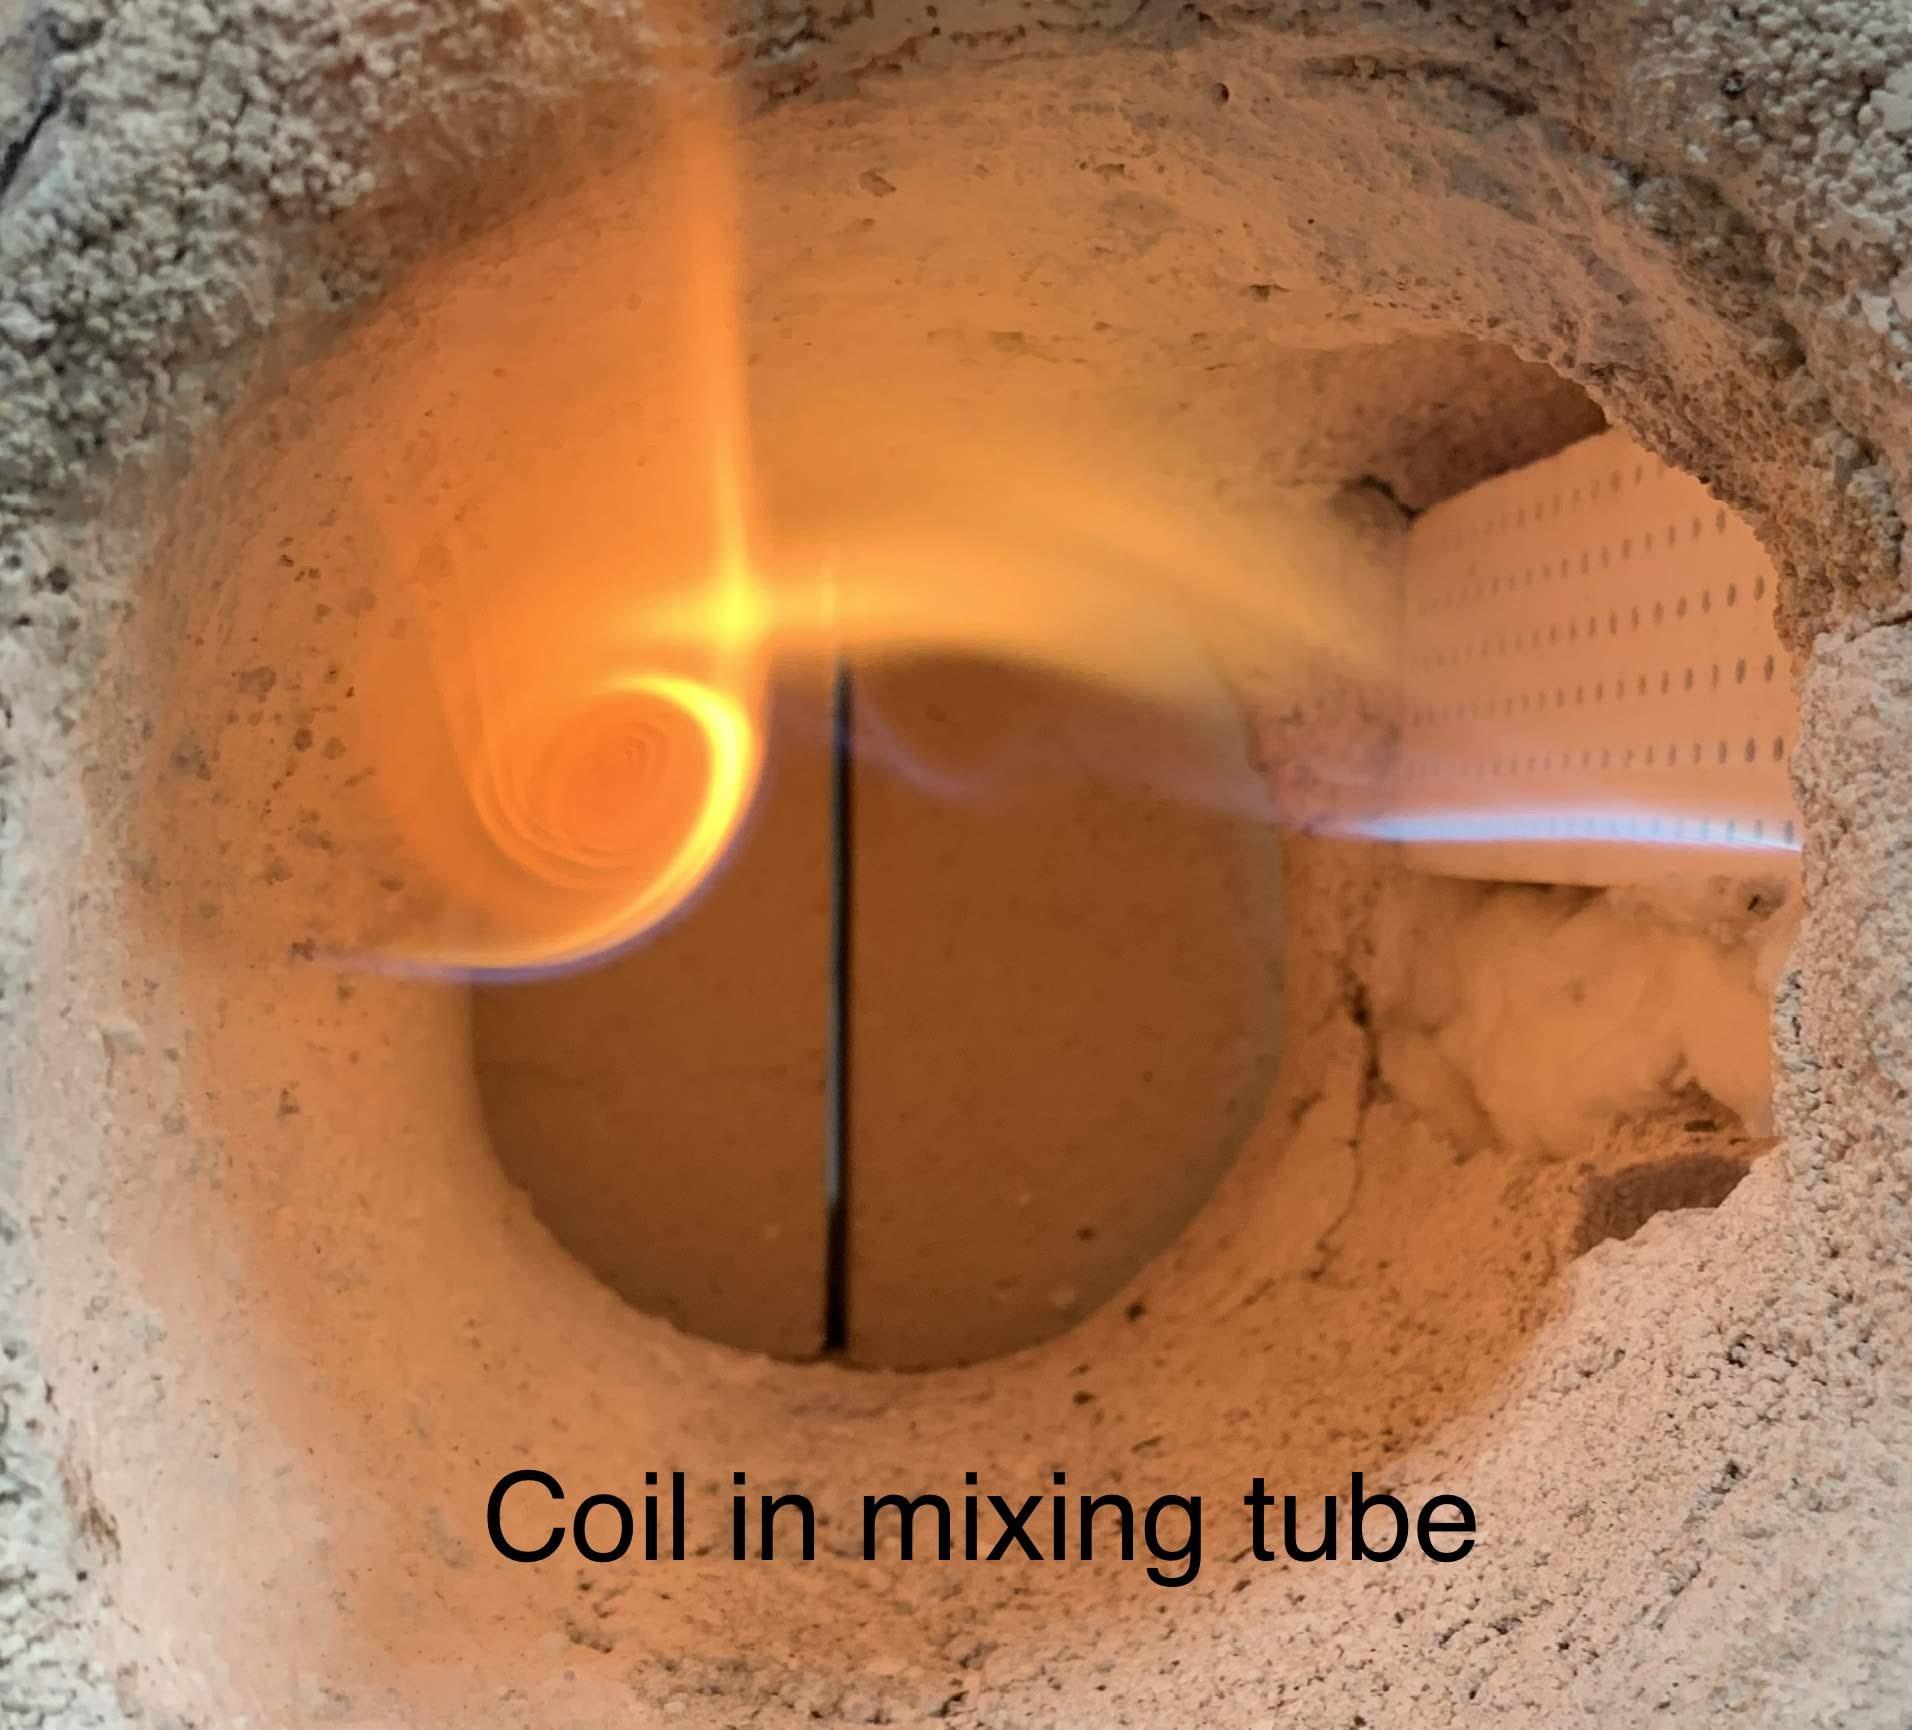
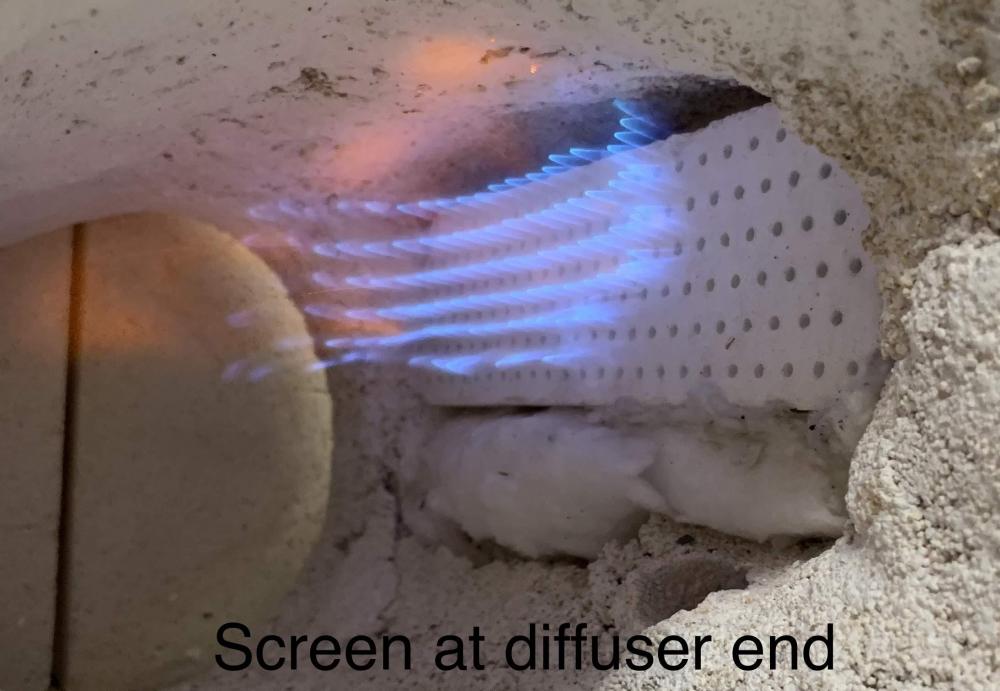
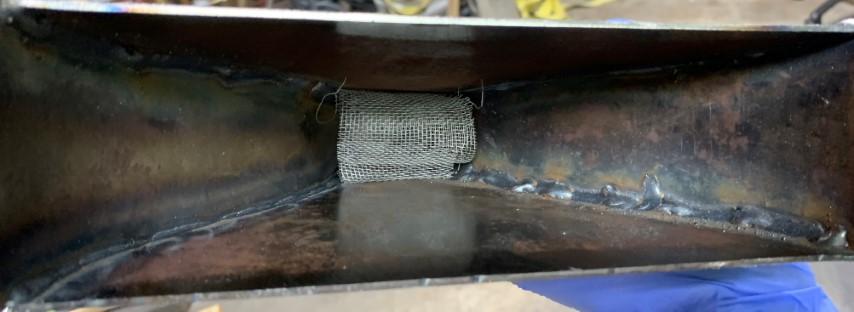
Yes a flat screen didn’t seem to restrict flow much at all. I think I have pretty good mixing so it didn’t offer much benefit either. I was able to stack a few layers over areas of relatively high flow to help even it out and that did seem effective but I think I can accomplish the same thing more efficiently through diffuser design. As for a jet nozzle, using rolled screen in the mixing tube has a dramatic effect on flow and choked the burner. It was no good. As buzzkill says, the vortex-generating inducers seem to be working well to achieve good mix. With a forced-air burner, any drag penalty from mixing screen is easily overcome but with a naturally aspirated burner, it’s questionable. Perhaps with a simpler inducer a single flat screen could offer a meaningful benefit. I do have a plain metal funnel that I’d like to try as an inducer at some point. Edit: it’s also worth pointing out that my screen was generally in an area where the flow had expanded and therefore slowed. So it should have less restriction there than in the mixing tube where flow is faster. In a ribbon burner it seems you can use a large turbulence like impacting the plenum at 90° like Frosty likes. Not so much with a jet burner as the velocity seems more important there?
-
I can understand that motivation. My thought is that smaller outlets overall have a chance of getting down to the quench diameter, which would protect against backfiring through a separate mechanism.
-
Do you intend to improve backfiring? Or heating of the block? I’m wondering what advantage constructed outlets have over smaller-diameter straight outlets.
-
So Dan’s total outlet area is ~982 mm^2 whereas mine is 954 mm^2. Not a big difference. What’s the ID of the mixing tube you use, and what type of inducer? It would be interesting to figure out some differences if the high-output performance seems notably different.
-
Okay sorry. I didn’t want to criticize just don’t understand the warning and didn’t see I could respond. Oh - I can just respond to the email. I’m a doofus, sorry.
-
Thank you Dan. My first ribbon nozzle has 135 nozzles, each is 3 mm (0.118") diameter. That gives a total area that is ~2.2x my mixing tube, so I thought it would be okay for velocity. My single-outlet nozzle (jet nozzle?) has an area that is ~3.4x the mixing tube but it burns in the nozzle so I knew I wanted it a little smaller. The ribbon flames do seem to blow off the block at high pressures. I couldn't decide if that is a problem, so long as the flame stays lit? The current block is 8"x2.5", just like yours. As you say, I will have to try a long burn to see how heat soak affects the burner, particularly for low-output performance. Given how well the PLA core worked, I fully intend to try another block with smaller holes. I'm still a little mad at myself for taking the heat gun to it because it would have been really nice otherwise. I don't think the misoriented outlets really matter much but it does bother me. At some point, reducing the diameter of the outlets will make the core too fragile, but 3 mm was no problem. I think using another refractory mix helped, because it flowed into the mold like magic once I applied vibration. It did take three bags, so it wasn't the cheapest experiment. I wonder if the block could be thinner once the outlets are smaller? Please do try the PLA method if you have access to a 3d printer; not having to build the wood box was also pretty convenient. -- I'm confused a bit by the forum rules, so perhaps someone could help me. I received a warning for misusing the quote feature in this thread and perhaps for posting pictures (the latter seemed like a suggestion to do what I already am). As far as I know, I edited the quotes I used, to limit their extent, and didn't quote any pictures. That is consistent with what I read here. In other forms, the quote function is very useful to provide context for a response and also to get an individual's attention. I understand that username tags are disfavored, but I don't understand the idea of avoiding partial quotes. Also, regarding pictures, I have been editing my pictures to reduce their size, typically aiming for 200-300 kB. Is that still too large? It seems consistent with the advice given in the thread I referenced above. I have to admit this moderator warning is a little frustrating. I'm fine with adopting to whatever conventions you have here, but I made an effort to do that and still apparently broke a norm. But I have no way to respond to that to better understand. I spent a lot of extra time trying to document my efforts, and I do it because I have learned a lot from the forum and believe that sharing information is helpful. If I am taking up too much of your bandwidth, rather than a vague moderator warning, would it be possible to get more direct guidance? Frosty has given me some and I appreciate that.
-
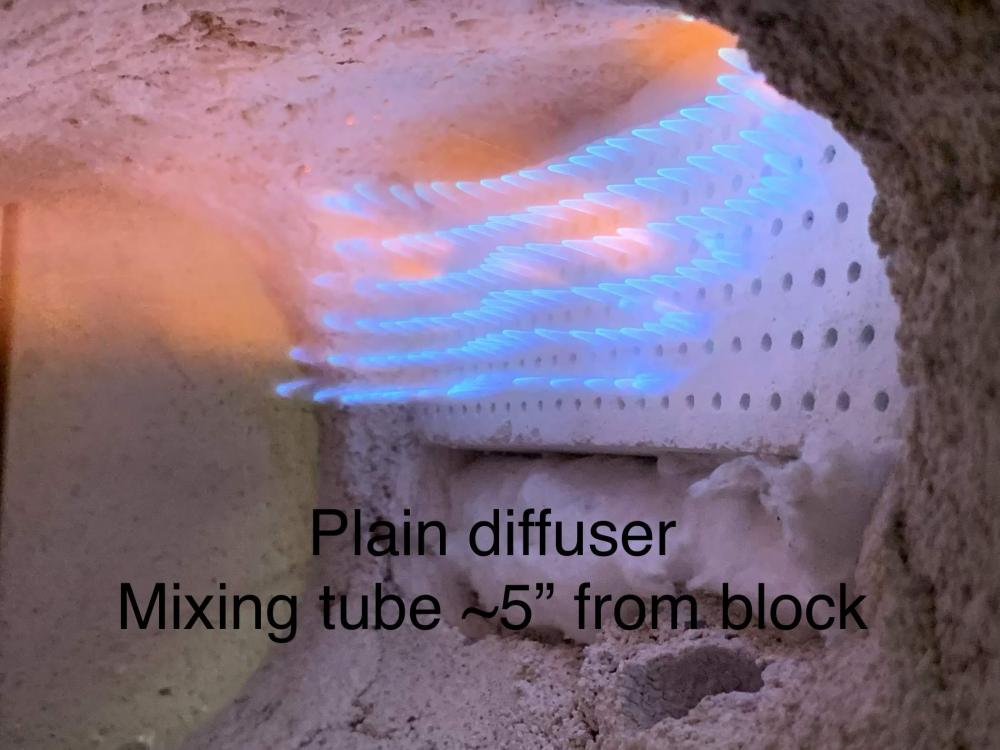
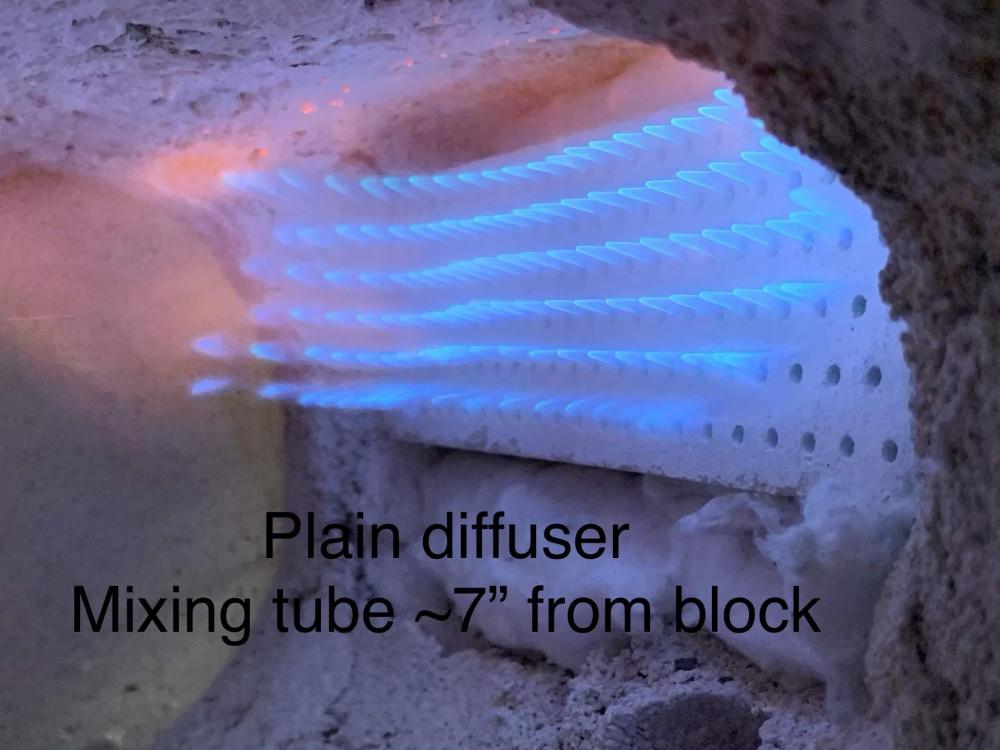
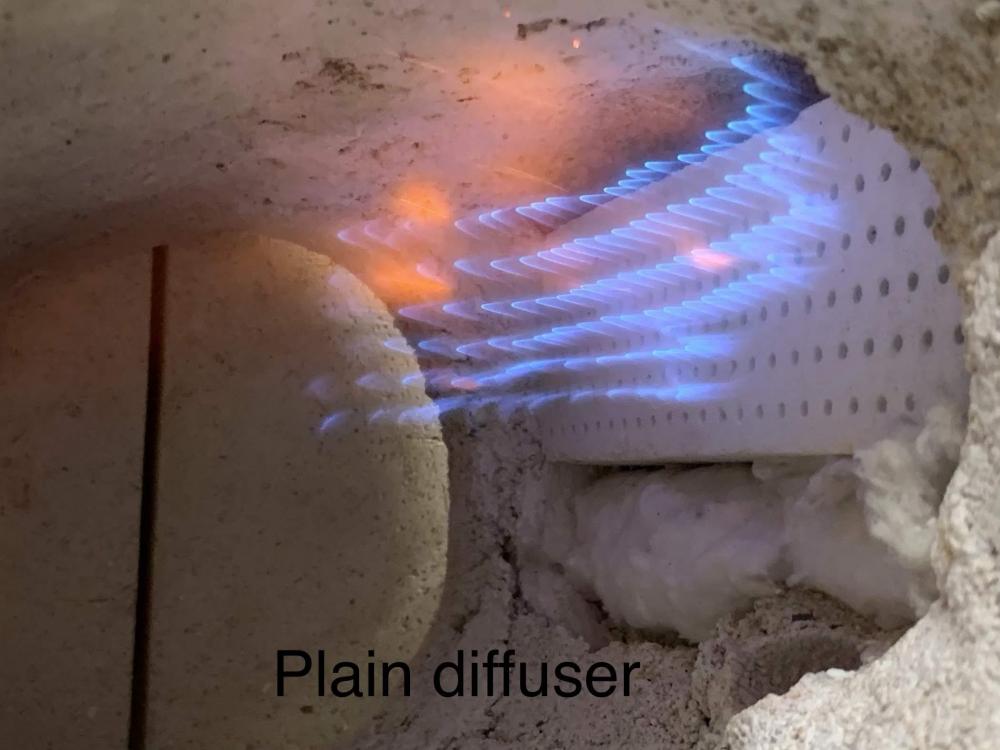
... I couldn't resist trying. In the as-designed setup, the end of the mixing tube is ~9.5" from the back of the nozzle block. I slid it forward to try a couple alternatives. Maximum extension puts the outlet ~5" from the nozzle block; I adjusted for what I thought looked best and it was ~7" from the nozzle block. I find these results interesting.
-
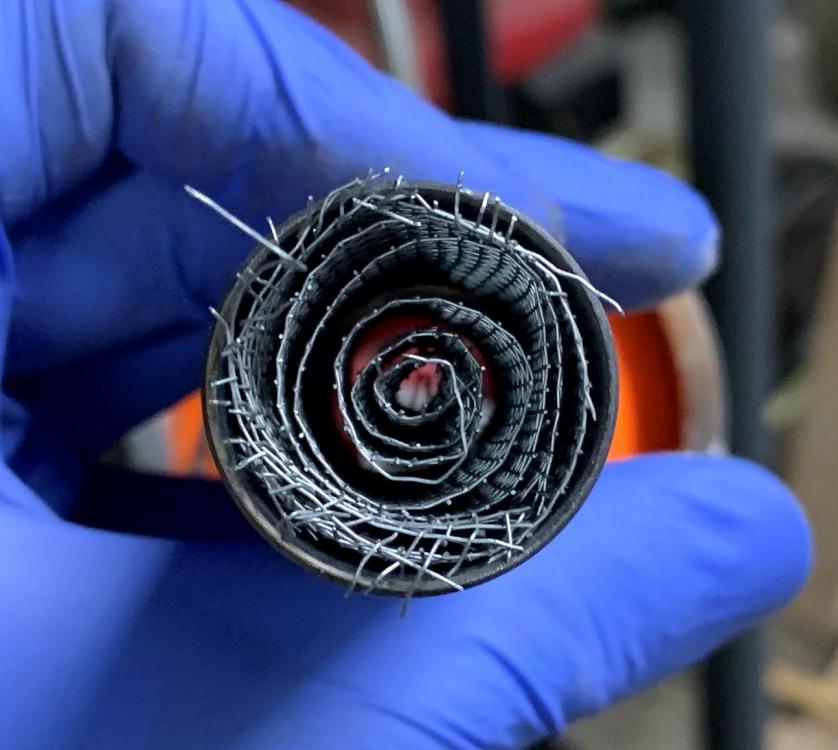
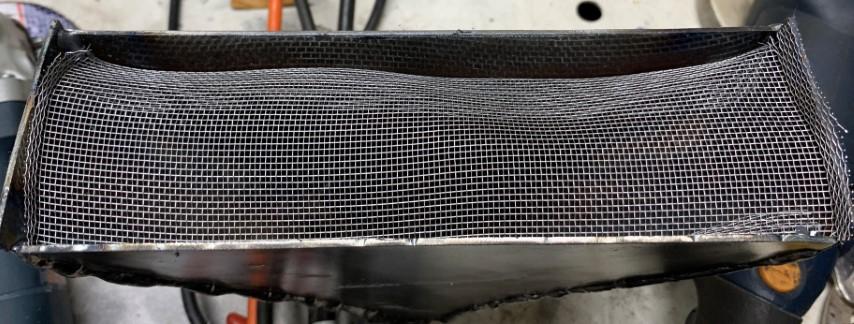
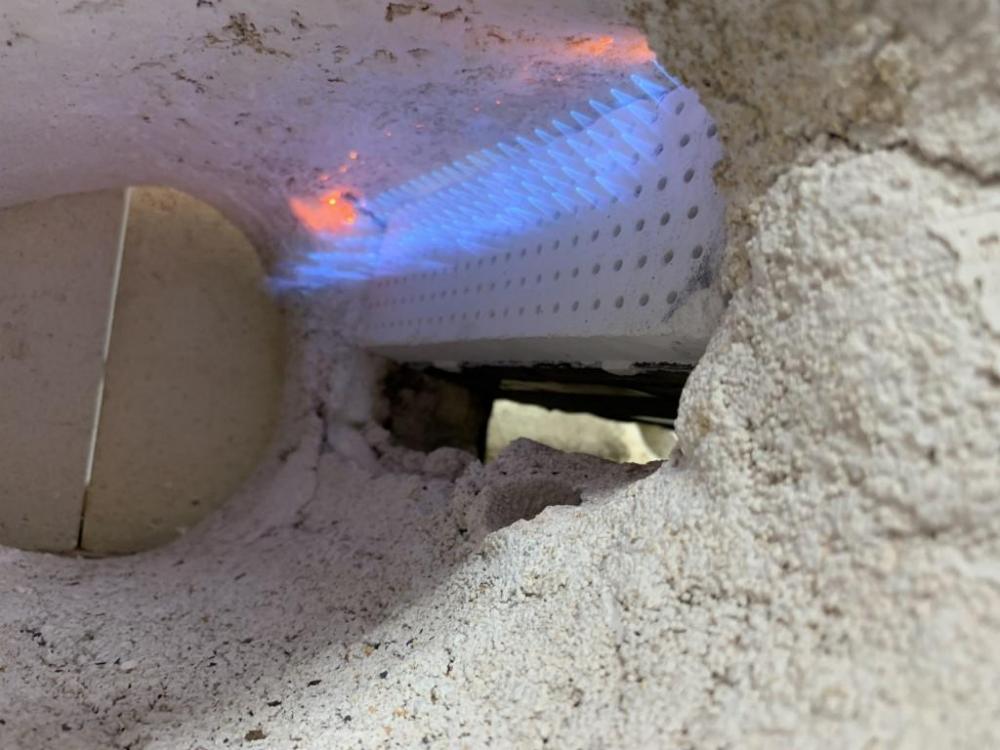
Thanks Mikey. It does seem plenty usable and ready for some temperature testing; I just enjoy playing with the design to figure it out a little better. I did a few experiments for better mixing by using metal window screen in the diffuser, placing screen: (1) flat across the end of the diffuser; (2) same, but with +3 layers on the outer ~1.5" of width; (3) flat at the start of the diffuser expansion; and (4) rolled up in the end of the mixing tube. Here are pictures of (1), (3), and (4): Here are the flames that resulted: It was amusing how much the rolled screen choked the flow; I thought the secondary-flame vortex was neat so I took a picture. The flat screen in the diffuser didn't seem to affect flow much at all. It also didn't do much for the pressure distribution. But adding screen at the sides of the diffuser did help tame the pressure there, to the extent that I think it's an improvement. I wonder what extending the mixing tube into the diffuser would do; I imagine it would move back toward a center-heavy distribution...


-
Oh, I am definitely looking for critique. And I do appreciate your input that a 90° turn is effective; like I said, I would like to try that to see the difference. My hope was to motivate a few people to think about new ideas.
-
Thanks for the thoughts. The poor result with introducing the flow to the plenum along the axis of the outlets is exactly why I made the diffuser. One would not expect a good result (i.e., good pressure distribution at the back of the ribbon block) from just a sudden expansion <2" from the block. My diffuser is steeper (more severe of an expansion) than ideal for expanding flow (~6° included angle) but it is in the best shape to prevent separation of the flow from the walls. I think there is not much back pressure from my ribbon block, which would make it easier to expand the flow and achieve a uniform distribution. I hear what you are both saying about a 90° turn improving uniformity, but that will reduce the overall flow, which I am trying to avoid. It is a compact and simple way to achieve the same thing and I may end up there eventually. Just playing with some other ideas for now. I may try feeding the nozzle with a smaller burner (which I agree would require a smaller gas jet). But I guess I'm wondering what I would be seeking through this: better efficiency, or a lower bottom end? I don't yet know what steady-state temperature I will get from running this at its lowest output. I will pay more attention to the color of the flames in the pictures as compared with what I see. As I remember it, they are reasonably accurate. I remember thinking the low pressure looked quite rich, as reflected in the greenish hue of the flames. The mid pressure looked reasonably good to me, as you say. I figured that would be a typical operating point for the forge so that seemed good. The high pressure was just kind of unstable and had a lot of dragon's breath. I do have some tuning to do on the inducer setup. My intent here is to determine whether one really requires turbulence to achieve a uniform pressure distribution. While that is one way to do so, it is not the most efficient. As you suggest, however, it is a way to achieve mixing and homogenize the pressure distribution. I'm just trying to work on another approach. I may try some tests to see the difference though. Why does a side arm or T inducer produce better outlet pressure? Better than Mikey's style inducer or a linear inducer? I haven't begun to tune my inducer setup for this nozzle, so I'm not ready to jump ship quite yet. As far as updating posts, my intent was to post content relevant to the other threads. I can stay out of your NARB thread if you prefer; that was an update and pointer, and I can see how you prefer I not do that. The flared ribbon-outlet thread was about a particular topic and I think my post there was both relevant and responsive to a prior post. I intentionally did not post media in those updates because I know that you are sensitive to such things. I didn't realize quite how sensitive. I do appreciate your feedback here though, and hope you don't find it too burdensome.
-
Naturally Aspirated Ribbon Burner. Photo heavy.
jwmelvin replied to Frosty's topic in Ribbon Burners
I finally managed to build a plenum for my ribbon nozzle and fire it up for the first time. The results were encouraging. I posted the details in my forge thread; I won't repeat here, but I'm happy to discuss here or there. I appreciate any thoughts you may have. -
I fired up my ribbon nozzle for the first time last night. The small outlets seem to work well for low pressures, so I'm glad I didn't flare them. It wouldn't burn in free air (blew the flame out) but did once installed in the forge. I put all the details in my thread.
-
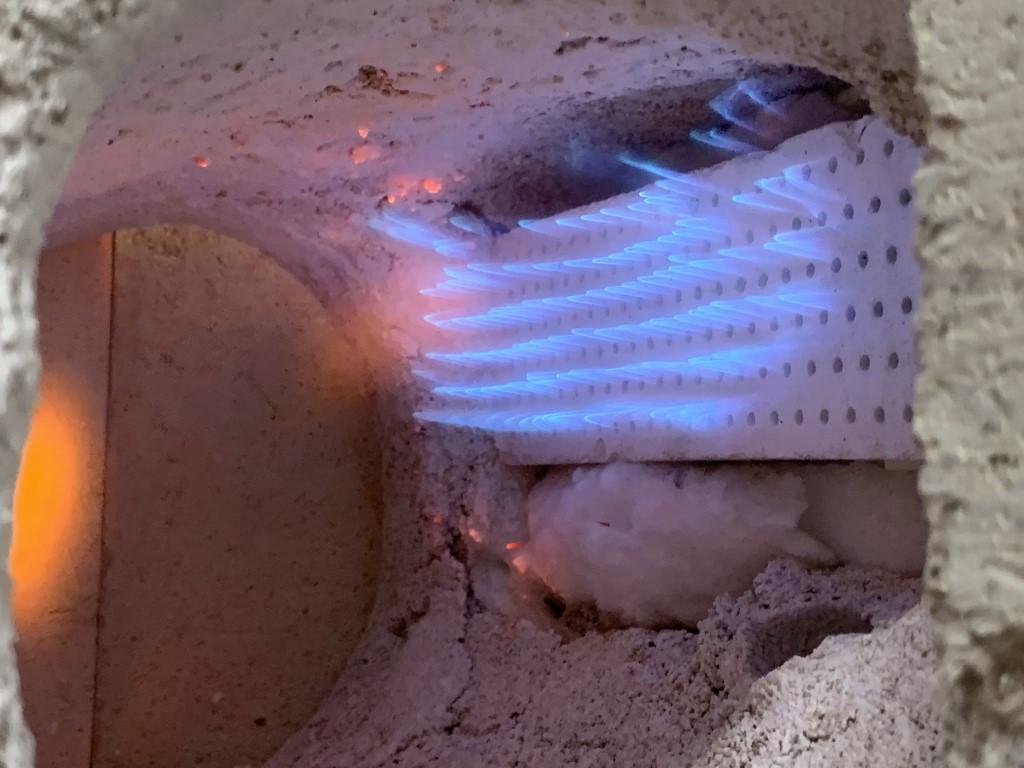
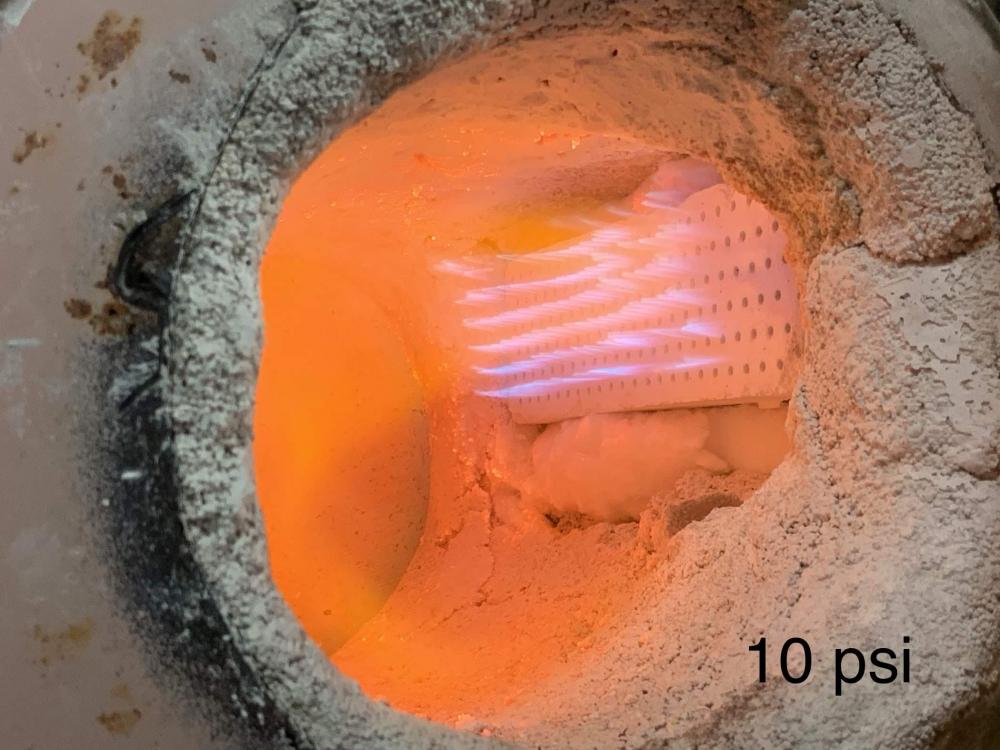
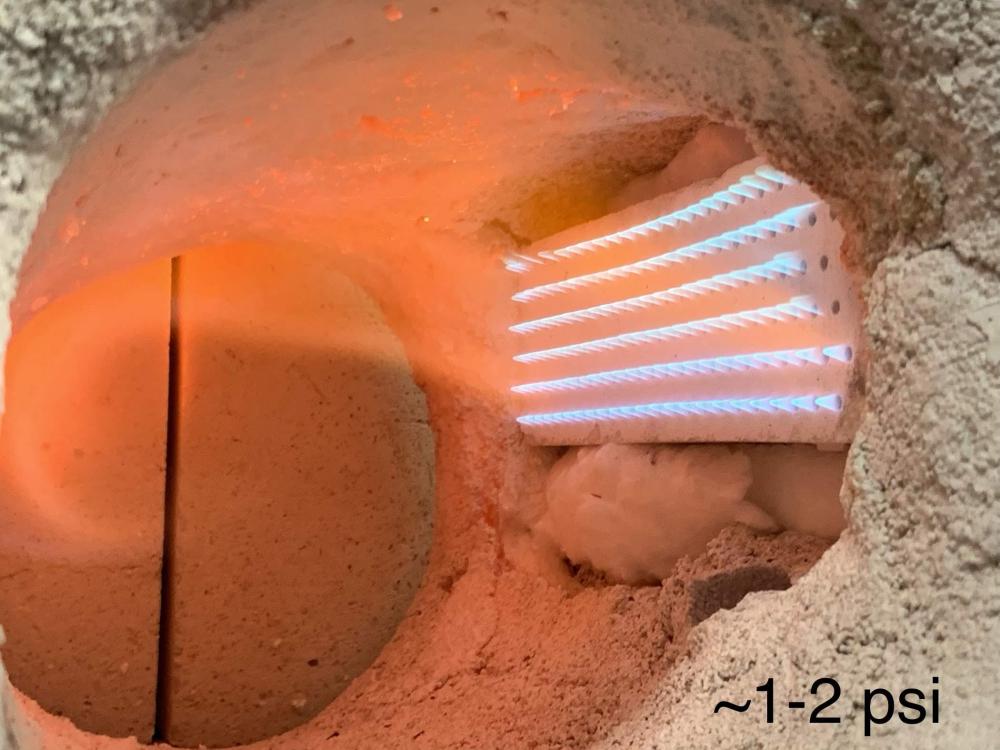
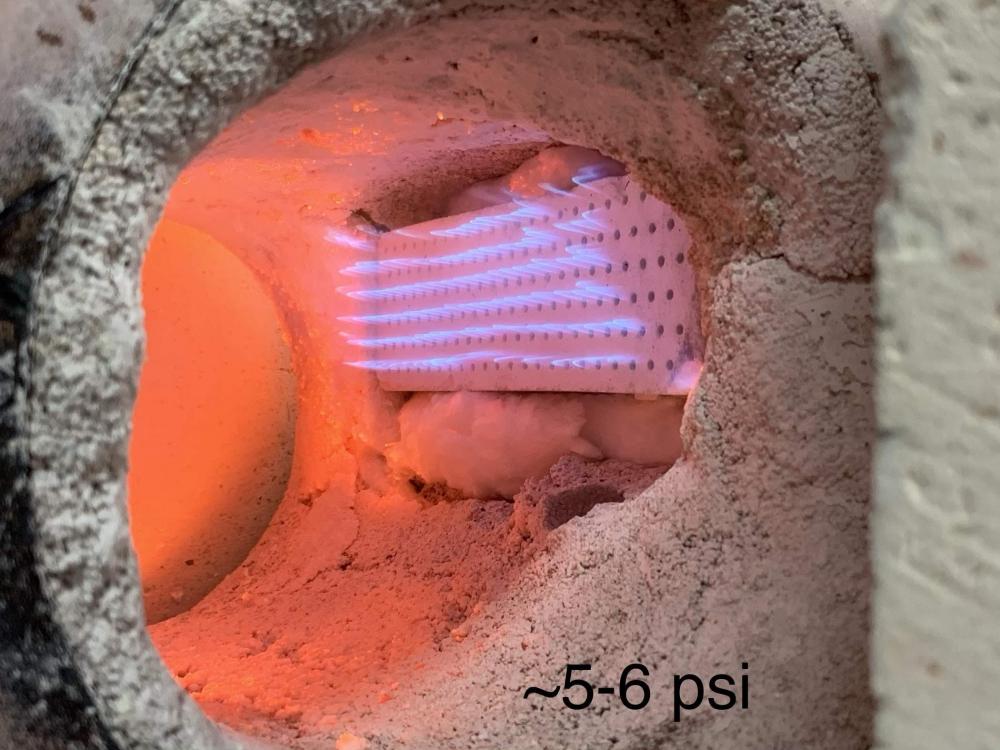
Last night I had a go at making an expander plenum for my ribbon nozzle. This was to please my aerodynamicist brother, who thought the sudden expansion from a mixing tube to the plenum was a waste of energy in the flow. I'm not much of a sheet-metal fabricator but it was fun to play around, and I came up with this: It would not run in free air, as the outlet velocity was too high (video here). So I tried it in the forge and it was stable, though had a fairly uneven pressure distribution (you can see that the flames at the bottom of the ribbon were being blown much farther from the block): I could see that the orientation was not ideal (it was pointing too much at the adjacent forge wall) so I reoriented it and it looked much better (all this so far is at about 5 psi): Once the forge warmed up, the flames looked better (to me). I ran at a series of pressures and it seemed stable from about as low as my regulator could go up to the 10 psi I tried: The forge was still not that hot when I did this, so I'm not sure how it will perform at true operating temperatures, but it was exciting. I'm sure some of the flame nonuniformity comes from me melting the core a bit when prepping it for casting; I was using a heat gun to try and remove the strings but that was ill considered; I tried to straighten them as much as possible but they were nothing like the perfection of the original print. I'm sure I have some nonuniformity in the pressure at the back of the block, as the expansion is too severe, but I wanted to constrain the overall length. I haven't yet tried different mixing tubes and I know that the inducer-jet assembly is not all that well aligned. So some further tuning should help. Here are some videos of it: (1) running on startup; (2) running on startup once reoriented; and (3) running once warmed up a bit, each at about 5 psi. I welcome any guidance or comments. Especially on what to look for when tuning the burner in one direction or another. I need to add a needle valve to better regulate the low output.


-
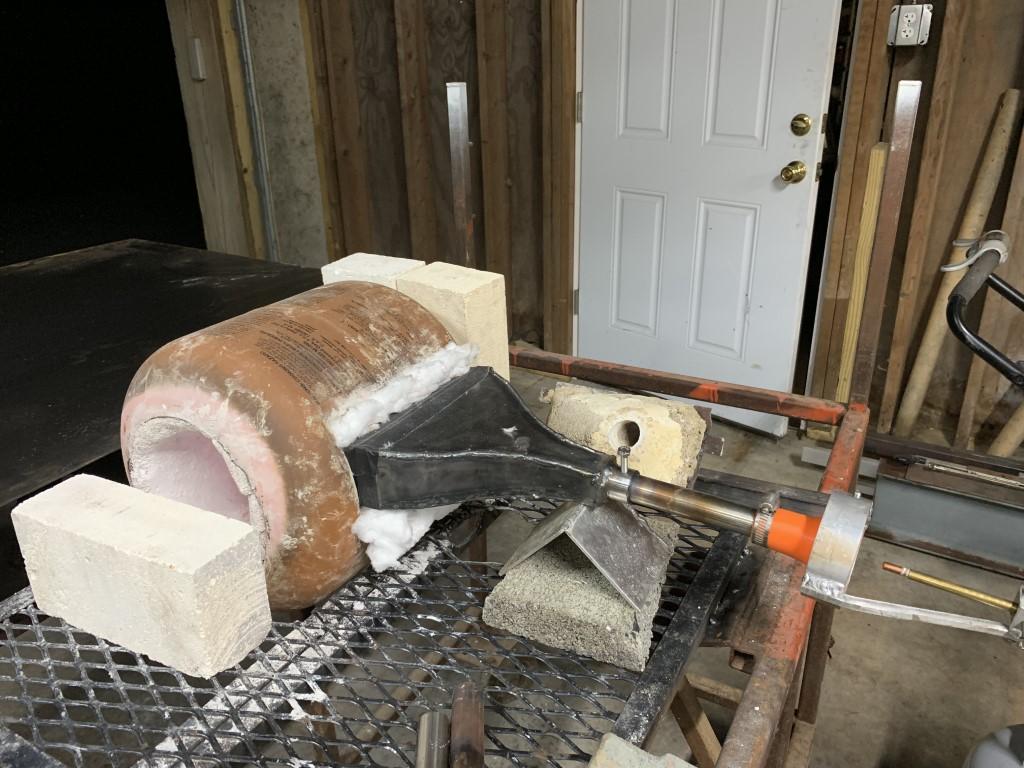
Yup, that’s what happened today. I figured it would be an issue and decided I should line the entry port with KOL. That was my original intent but I made the nozzle too small and it won’t stay lit so I switched to the SS nozzle through a firebrick. At various times with pressures below ~5 psi, I get some oscillation in the induction. Not the crazy chuffing that I’ve seen with other conditions but still made me wonder. I will video next time.
-
Thank you Mikey. I am happy that it's working so far, though it has plenty of ground for improvement. Though it's all so new to me that I'll need to decide how to split my time between learning to work hot metal and improving my tools. I suppose that's pretty common with many such endeavors...
-
What did you do in the shop today?
jwmelvin replied to Mark Ling's topic in Blacksmithing, General Discussion
Good point, thanks. I'll give that a try before I break out the flap disk. -
What did you do in the shop today?
jwmelvin replied to Mark Ling's topic in Blacksmithing, General Discussion
Thanks. It’s somewhat disconcerting to take a flap wheel to my brand new anvil but I accept what you are saying and will do so. Gulp... -
What did you do in the shop today?
jwmelvin replied to Mark Ling's topic in Blacksmithing, General Discussion
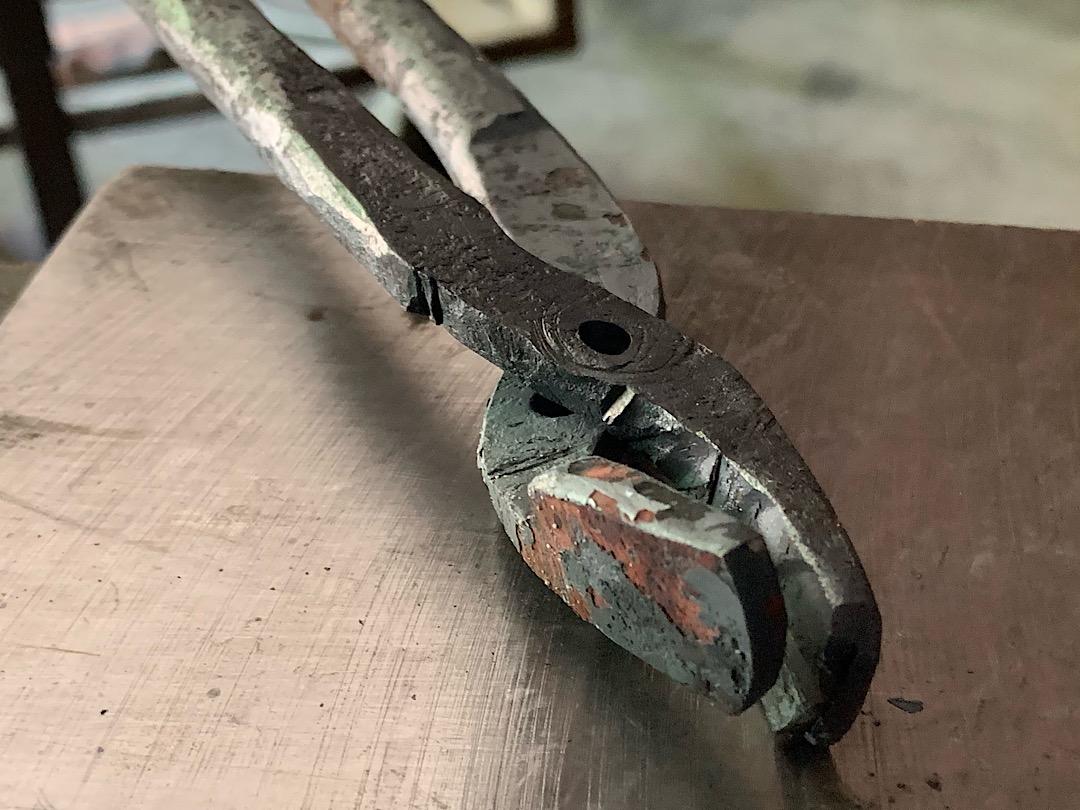
Last night I fired up my forge and made a first attempt at making a thing: ...pretty ugly but a good time. I watched a couple videos and tried again during my lunch break today: ...better, I think? I also punched a hole this time so I can rivet them. I don’t have a 1/4” rivet, only some 5/16” ones and I’m thinking drilling out the hole will take away too much material. It seemed difficult to widen the hole with a punch...
-
Thank you I will certainly try both. I could see the nozzle was too hot and pulled it back later but not as much as you suggest. Yes first time beating hot metal. It’s not easy!
-
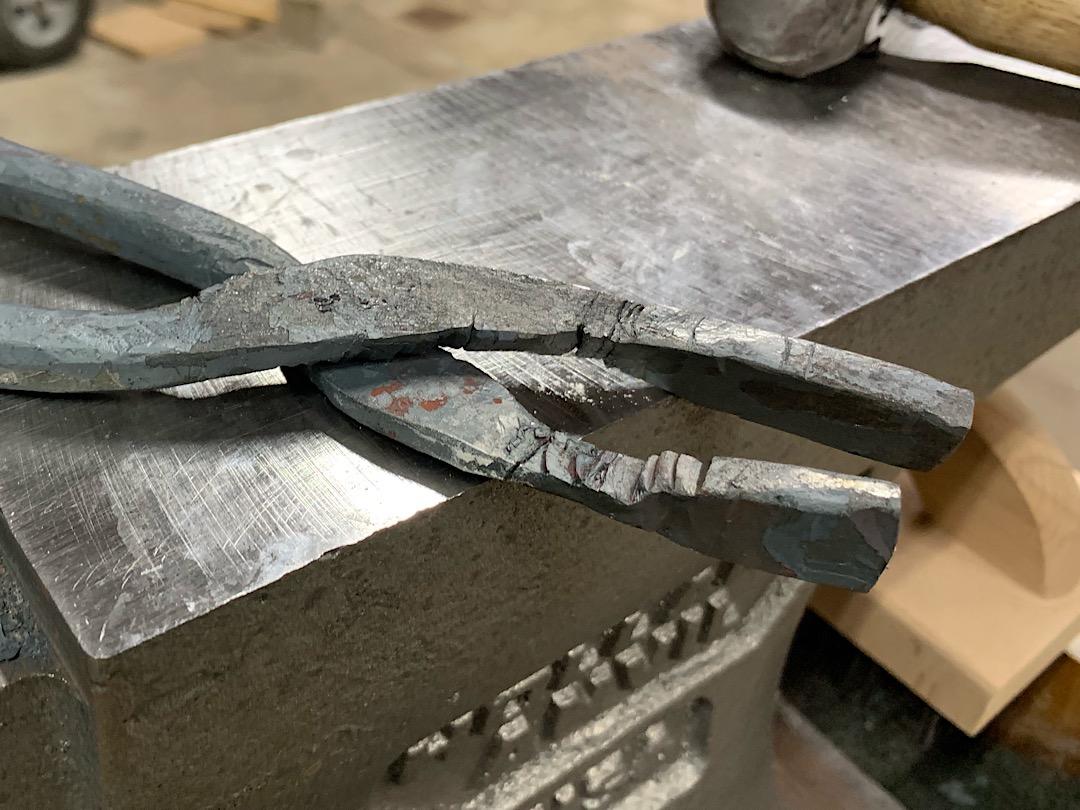
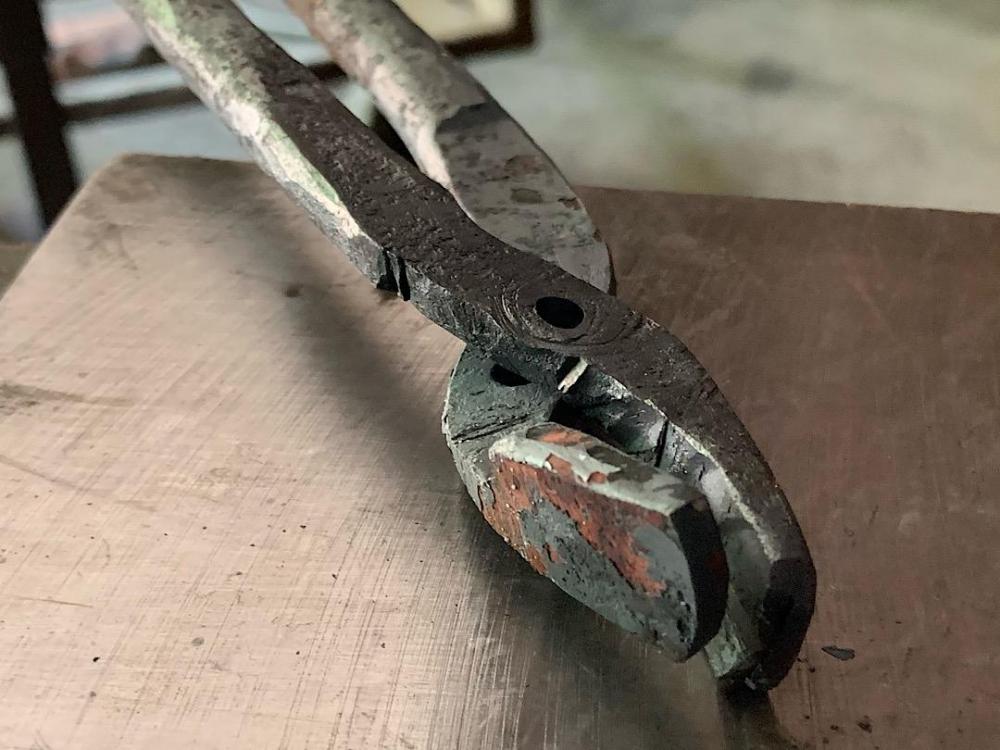
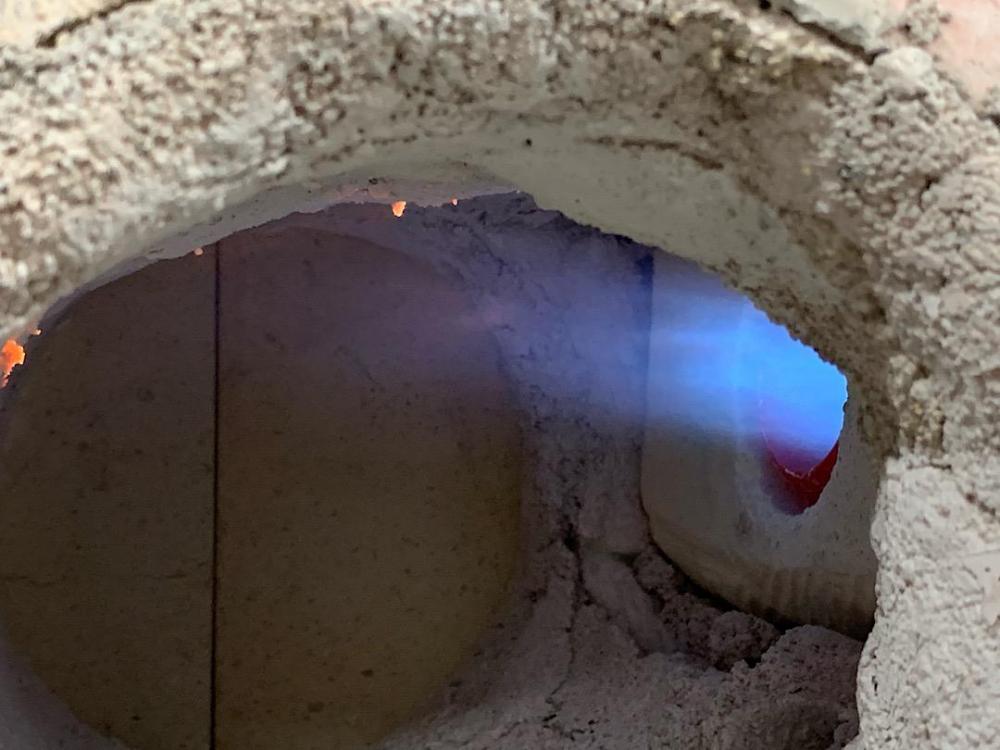
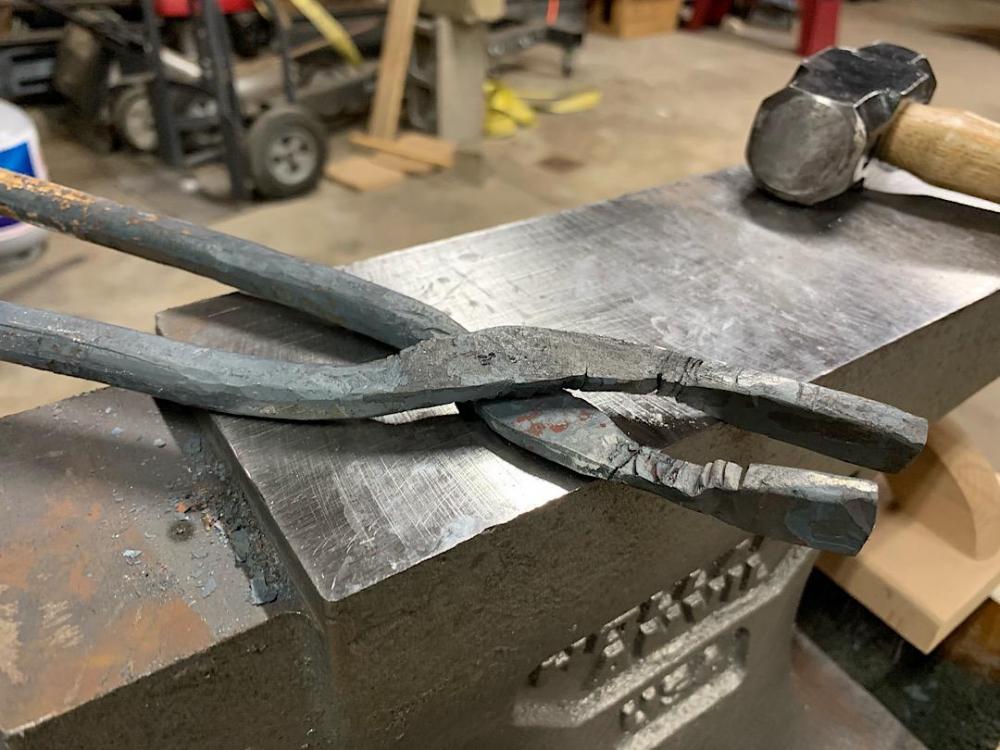
I fired up the forge for my first attempt at bashing metal tonight. It seemed to work pretty well. I was running it at about 7-8 psi. I was too excited to take many pictures. Here is the flame on startup: Once it got really hot it had a hard time pulling air. I think the mixing tube was too short and the inducer softened so that it slipped out of alignment with the mixing tube. It worked fine after I let it cool, lengthened the mixing tube, and continued. The mixing tube felt cool after I restarted. Perhaps the forge temp was high enough during the first burn that it changed the combustion somehow? I was trying to open up the ends to make sure I wasn’t choking it but it had already impaired the inducer at that point. It was fun trying to make a pair of tongs:
-
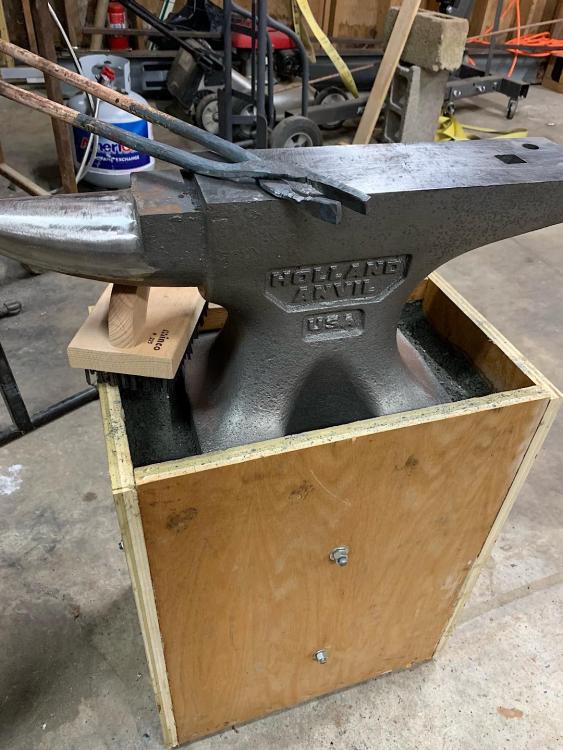
Since I don’t yet know the height I want the anvil, I made a box to fill with stone dust. It was a quick way to try my new anvil. I just fired up my forge for the first real time and tried to bash some metal. Pretty fun. Here is the result; I started a pair of tongs. They are rough but I think I will be able to make them function. Happy first project.