

jwmelvin
-
Posts
117 -
Joined
-
Last visited
Content Type
Profiles
Forums
Articles
Gallery
Downloads
Events
Everything posted by jwmelvin
-
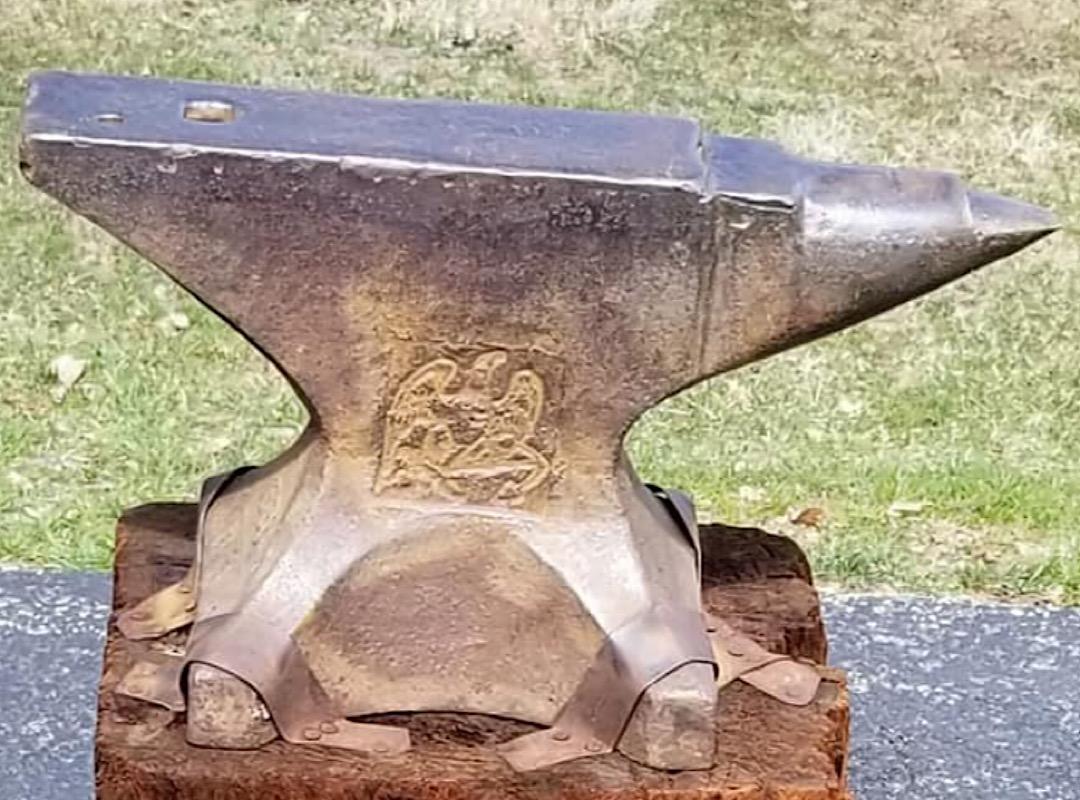
Thanks for the feedback. That’s what was leading me to a new anvil. Just have to decide if the 85 is sufficient or if I have reason enough to get a 140.
-
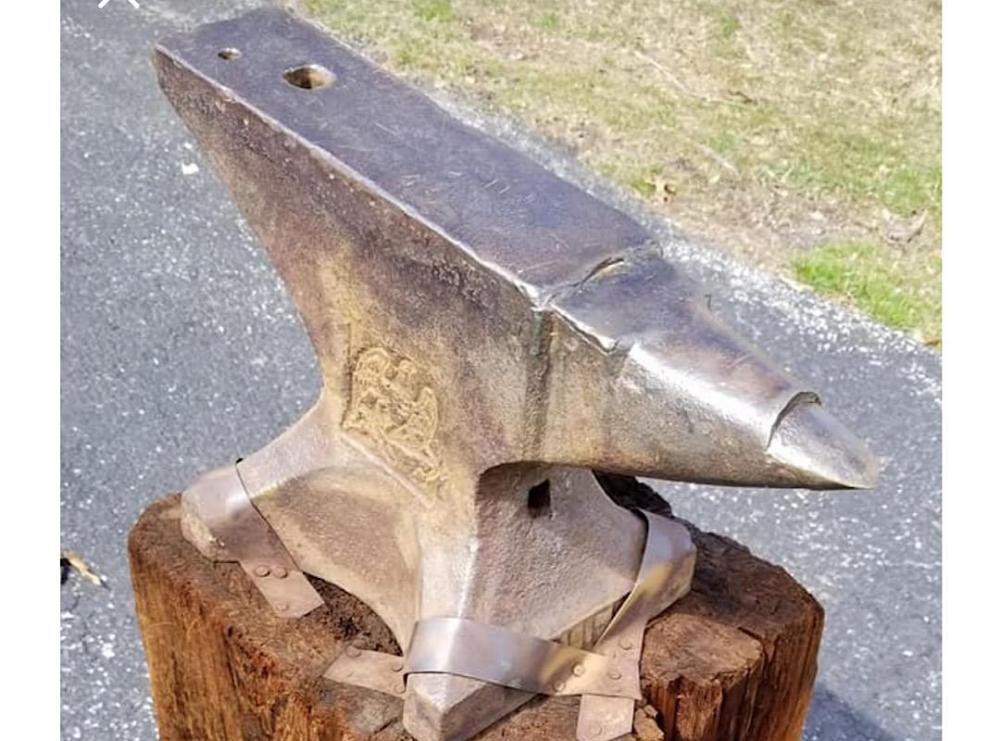
That’s kind of the direction I’m leaning. On the anvils pictured above, the top one wants $540 and the bottom wants $400. How does that strike you?
-
As an add-on to my question above, if my primary interest is knifemaking, would I be better off with a worn (some sway) ~150 lb used anvil or a new 85 lb. from Holland Anvil? I get the sense that bladesmithing may not require as much mass in an anvil but I can imagine larger is better as a general matter. I will make a massive, stable mount for either. It strikes me that a flat surface could be useful from time to time and that I would one day appreciate it if I have one.
-
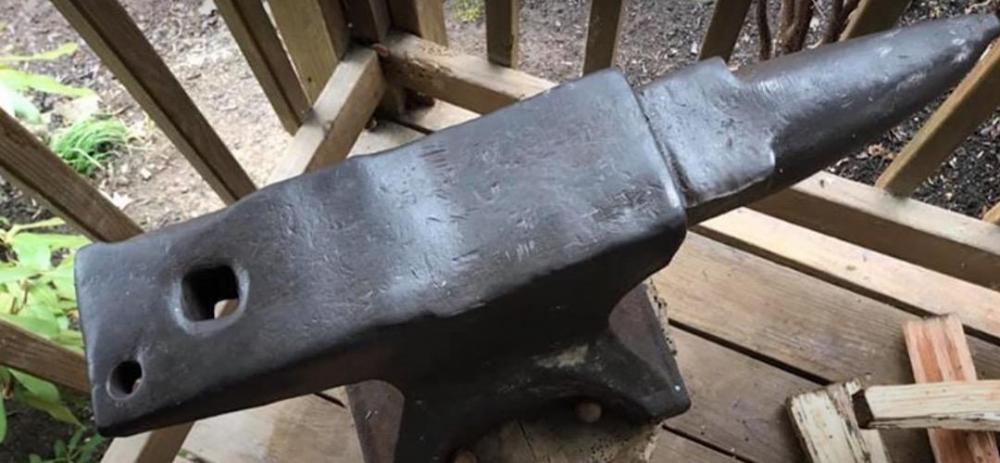
Although I understand the advice that I can make a usable anvil from scrap metal, there aren’t a lot of scrap yards around me in Northern Virginia. I checked on the usual places and wonder if y’all might comment on a couple of my options. a Peter Wright 160: a Fisher Norris 100: Any thoughts on which would be better and how much might be reasonable?


-
What are you going for as the aspect ratio of the outlets? I imagine that is how one would pick the thickness of the block. With a forced burner, a long outlet would create a resistance, and that would help create a uniform distribution across the outlets. But with NA, it may be better to focus on plenum design and use a relatively thin and therefore low-resistance block.
-
Thanks so much, will do. I also got a ceramic thermocouple sheath I will fit so I can monitor and perhaps control temperature. I’m planning to put it below the burner outlet and towards the front opening, so the burner is firing away from the thermocouple.
-
Thank you for following my progress. I’m going slow because of things like this and other things I think of. I am not aware of the drain hole; I thought I had read Forges 101 but must have missed something. Can you tell me more about it (where, how big, and why)?
-
need help identifying old hornless anvil
jwmelvin replied to Brodgz's topic in Anvils, Swage Blocks, and Mandrels
If you do want to sell it, I’m looking for my first anvil... -
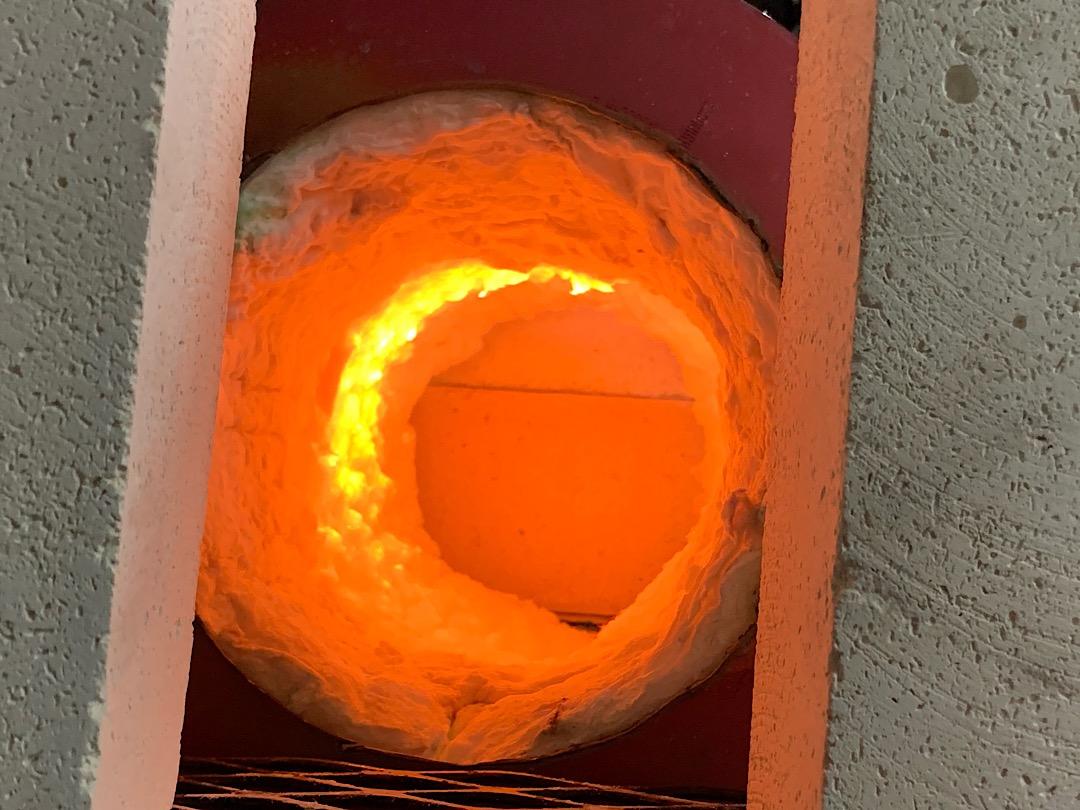
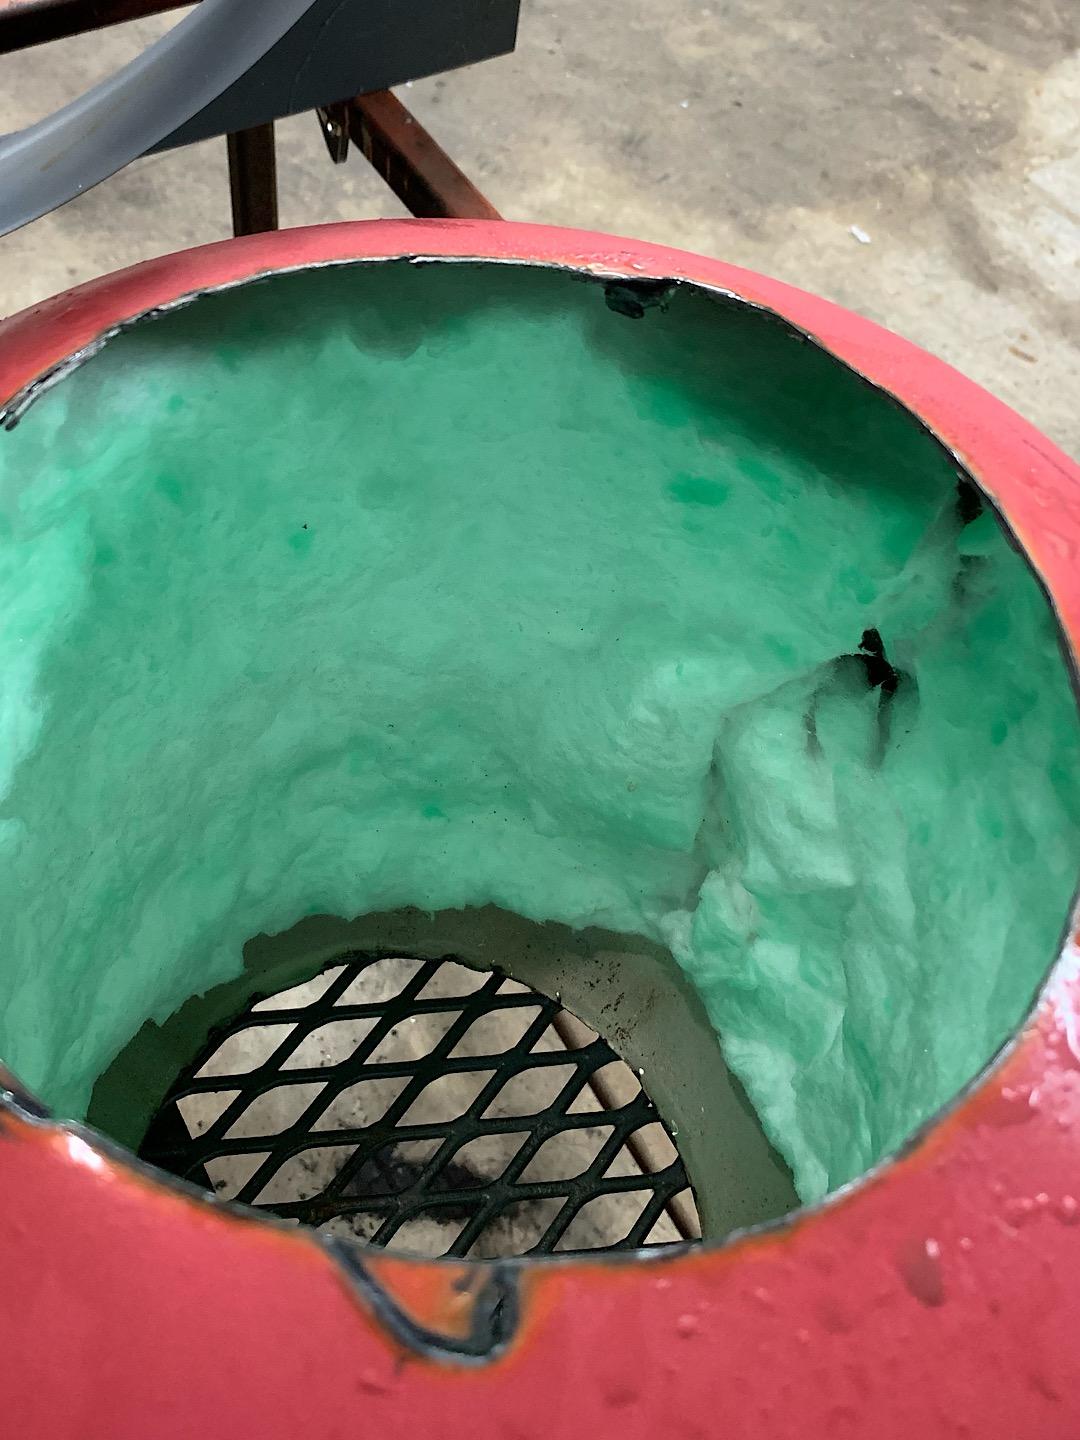
Thanks Mikey. I figured the short tube would expose differences in my inducer design better than a long tube. It was mostly a chance to play around a bit. I do think the new inducer with vortex generators offers an improvement. I started lining the shell. Since I already have 2” soft ceramic, I cut it down into two thinner layers and rigidized as I went. Here are some shots of the process:


-
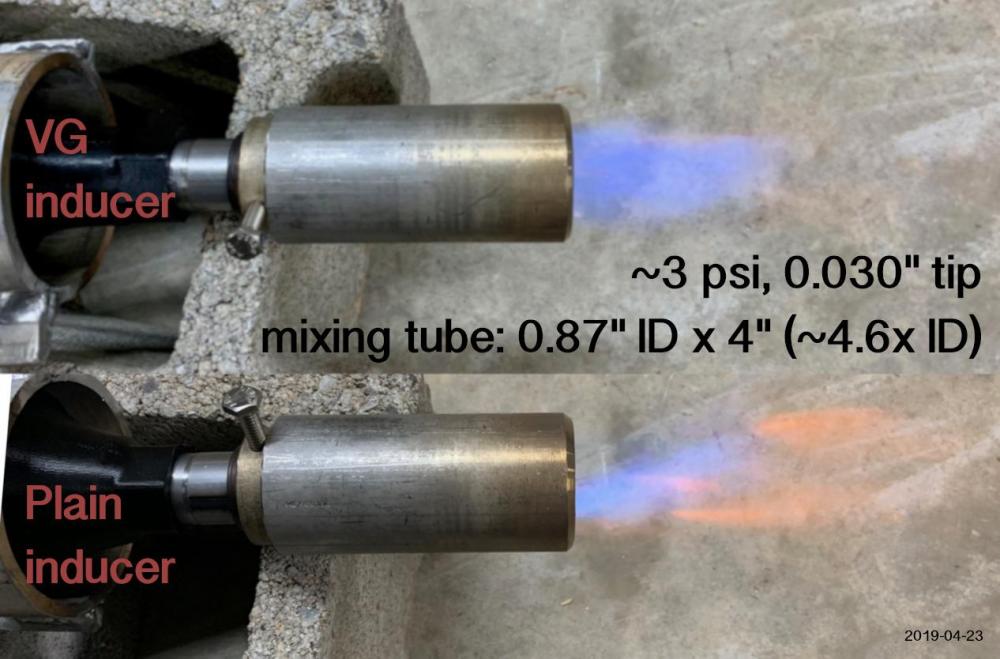
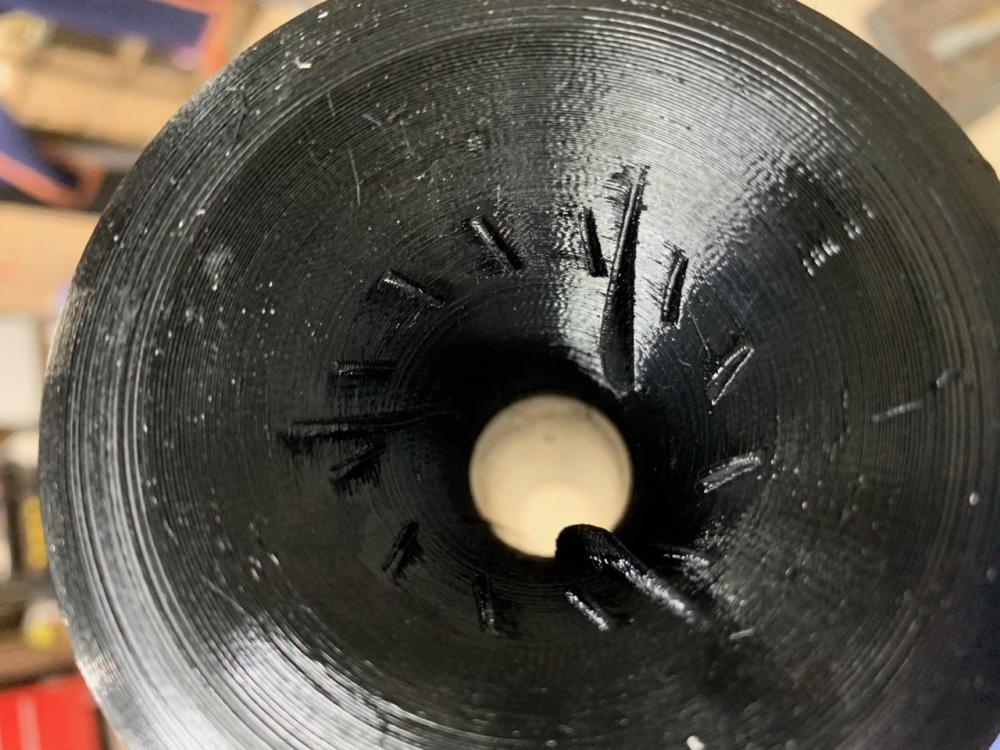
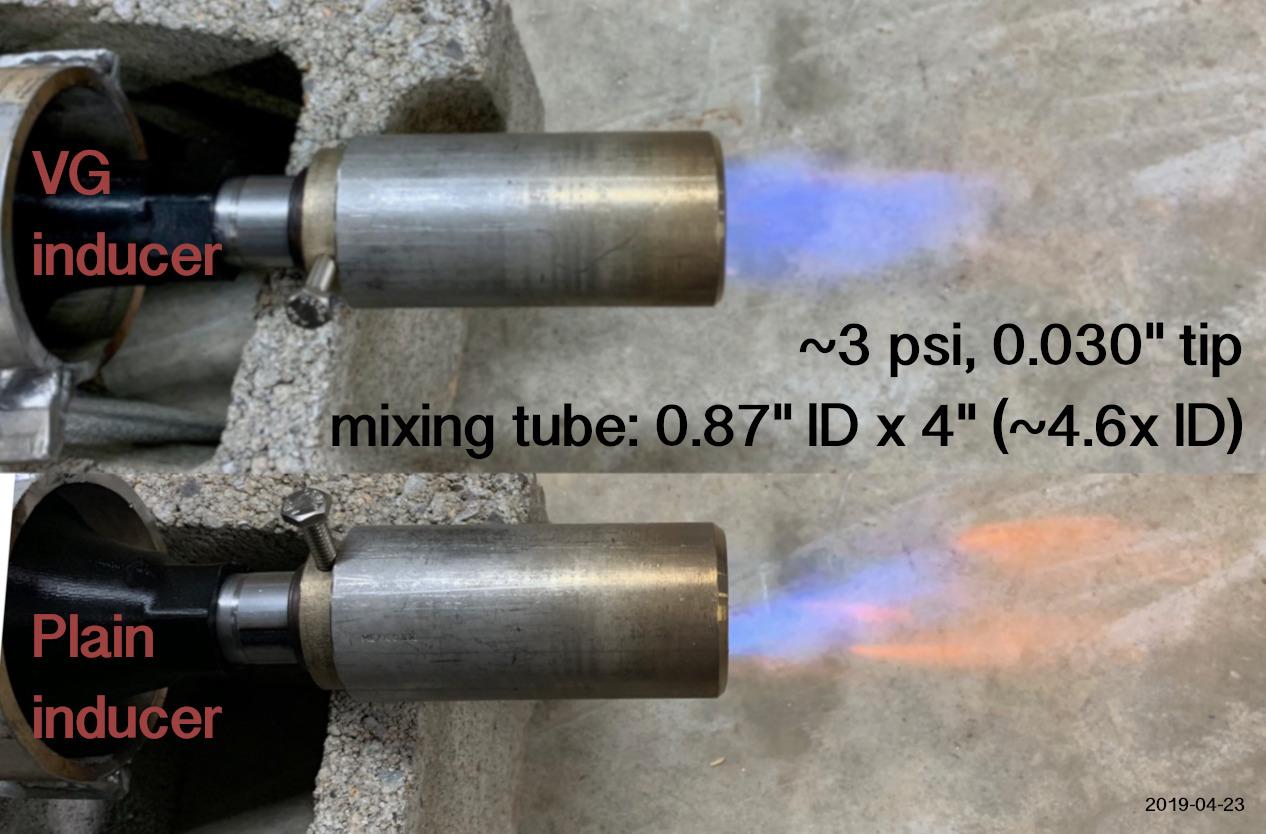
I tried a new idea for the inducer today and it seems to be pretty effective. I call this the VG inducer because it adds a number of small vortex-generators in the mouth, in addition to the larger swirl vanes. (This was at the advice of my brother, who is an aerodynamicist in Formula 1.) Here is a picture showing a comparison to a plain inducer; the only difference between the two setups (as much as possible) comes from the vanes and VGs in the mouth of the inducer. All those features are inside the front lip so it will be easier to choke. This was trying a very short mixing tube (less than 5x as long as its ID), as I figure that's where the immediate benefit of improved mixing will come (and therefore less drag by using a shorter mix tube). I think the result is encouraging. The very minimal vanes and VGs seem to be doing something positive. This was a relatively quick test; I haven't had time to continue the forge or the ribbon nozzle yet. Oh, here's a picture of the VG inducer:
-
Your experiences and stories are helpful, thank you. Sounds like I’ve had better plans than a waste-oil burner.
-
Thank you; sorry for retreading standard ground.
-
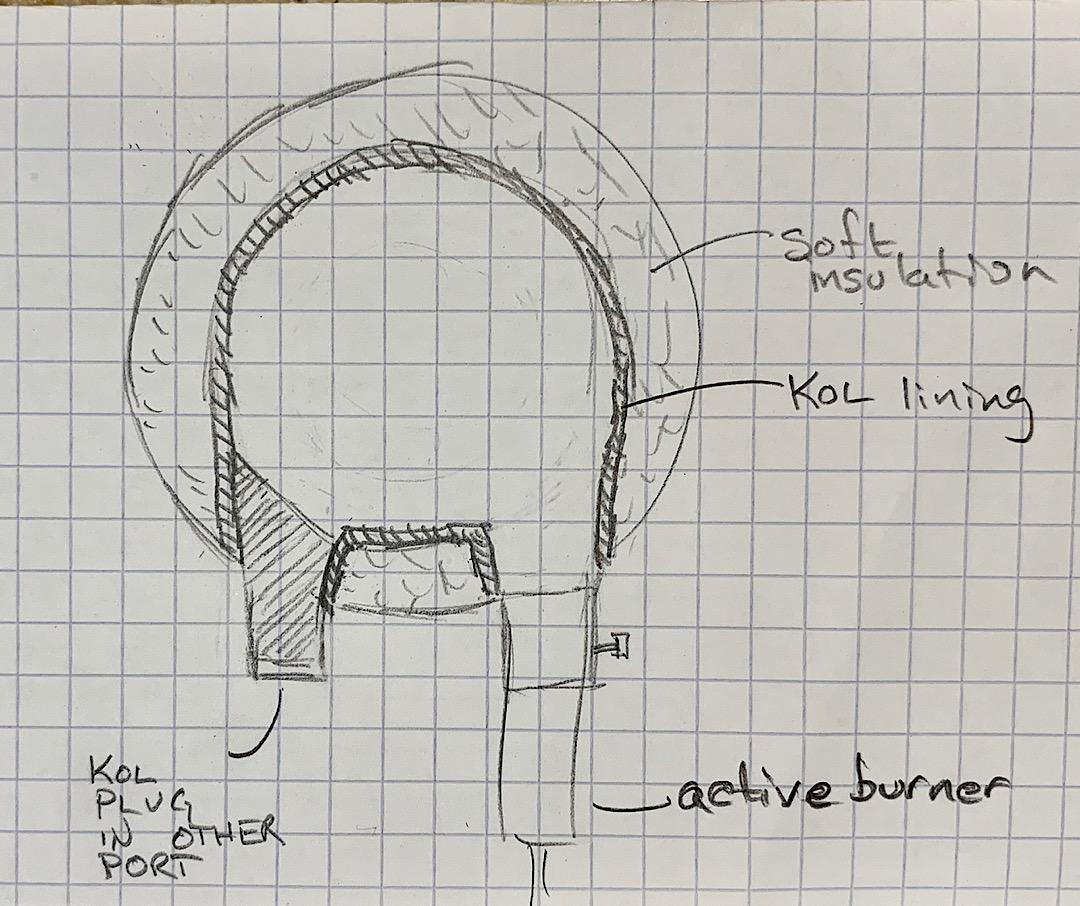
Mine weren’t for use together, but as alternatives. One at a time. My question was about plugging one port when it’s not used.
-
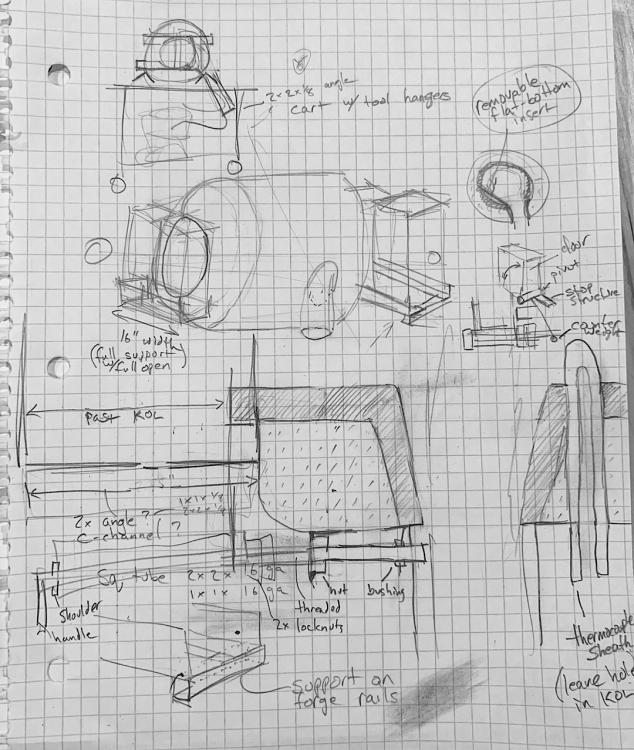
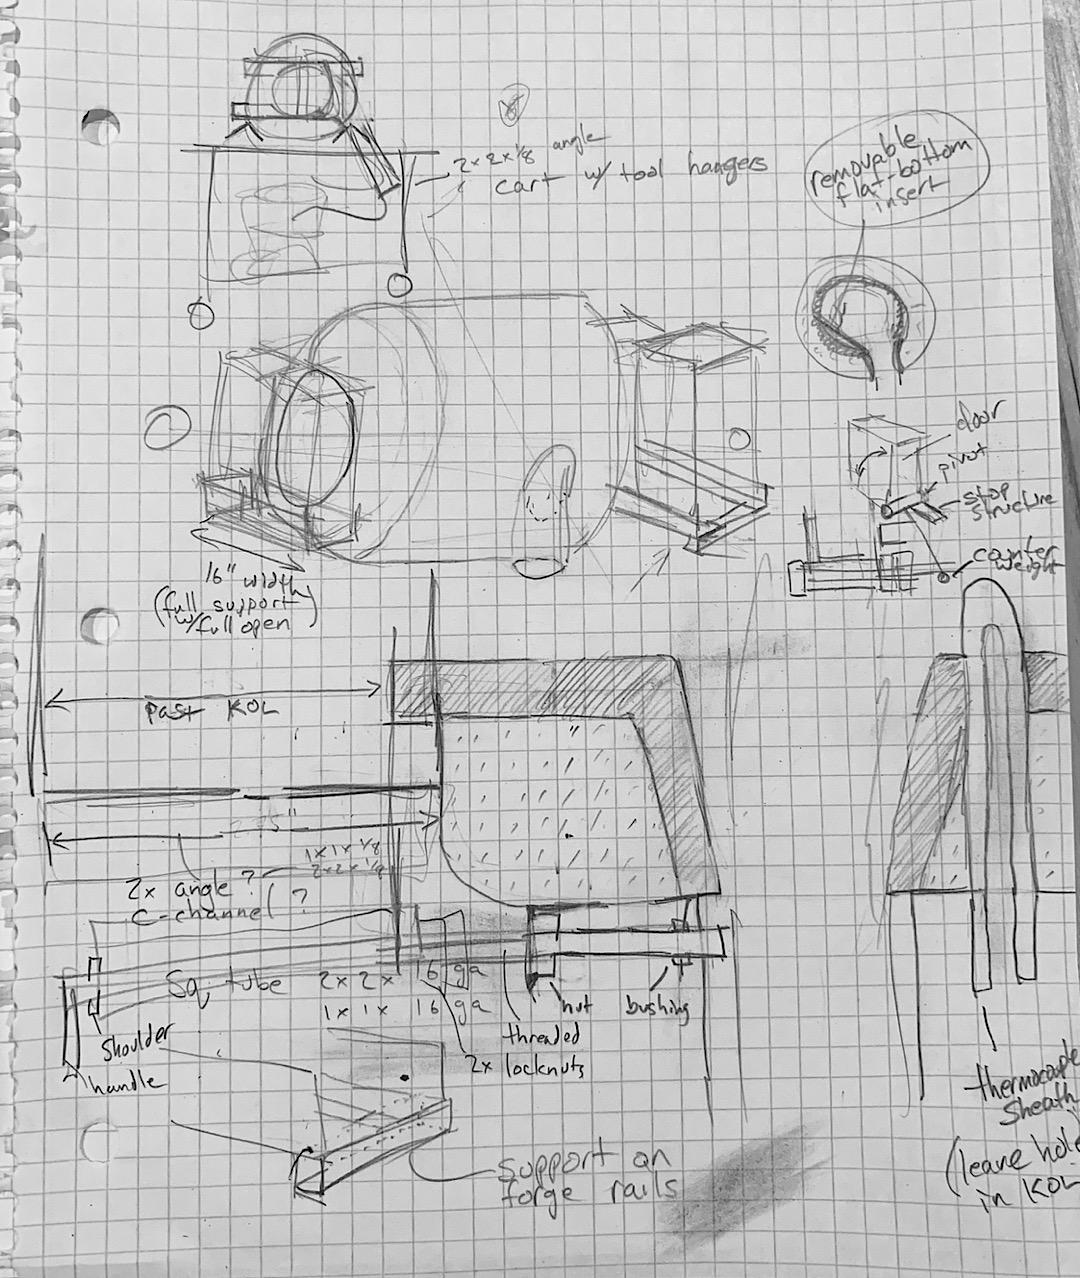
Yes I just vomited a few things into the page. I want to get a sense for some of the details. So, how the two insulators will interface and how the burner port and door openings will work. That’s was the main (largest) side-section. It shows a tube for a thermocouple entering the forge next to the burner. It shows the refractory encapsulating the front edge of the forge and extending past it a bit. Then I started thinking about a door by supporting a couple fire bricks at either end with a sideways shelf. Then I started thinking about a pivoting door that could swing up. And a cart. All made the page just to keep it compact for me. I can make a cleaner one of the main section at least. Really I should just model it in Fusion360. I thought such ports were arranged axially whereas mine will fire roughly at each other. I’ll give it a shot though.
-
YouTube channel Pretty amazing stuff there.
-
Here are some further ideas I’m considering for the build.
-
I like seeing your progress, thanks.
-
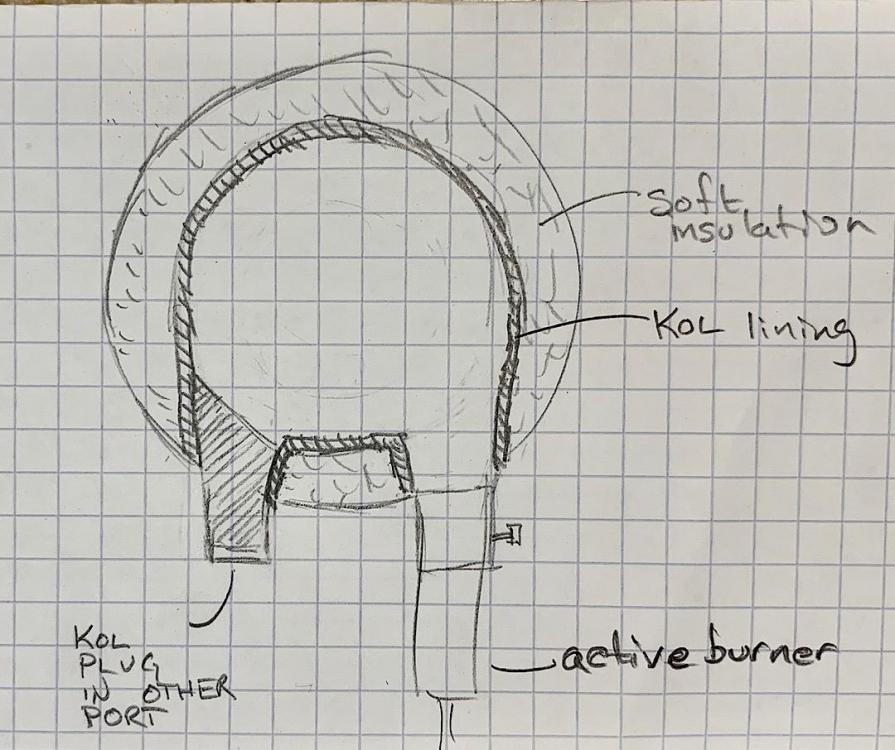
Do you think it would work out to have two burner ports, such that I could make a KOL plug for the one I am not using at a given time? That would allow me to try a ribbon-nozzle and my single nozzle in the same forge. I’d want them spaced apart a little more than I’ve drawn, but I made a sketch of a section through the burner ports to show what I mean. I’d cast the two plugs in place so they would fit well (just have to make sure each port flares out into the chamber a bit so the plug is removable).
-
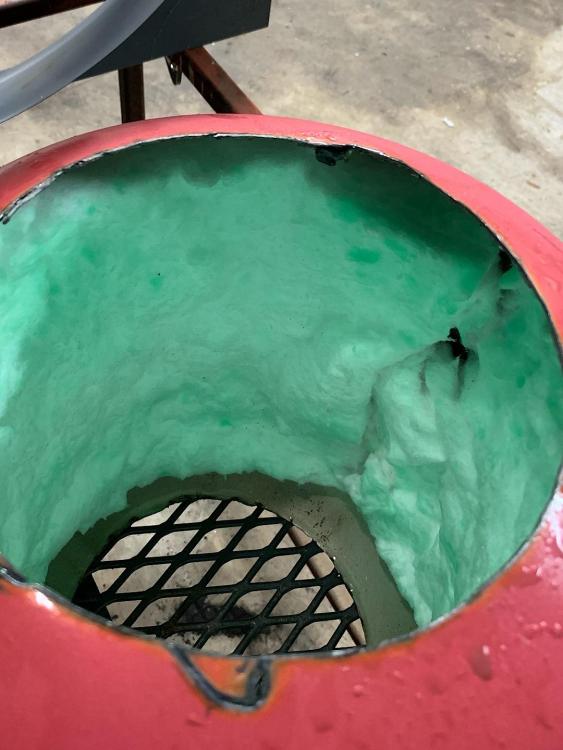
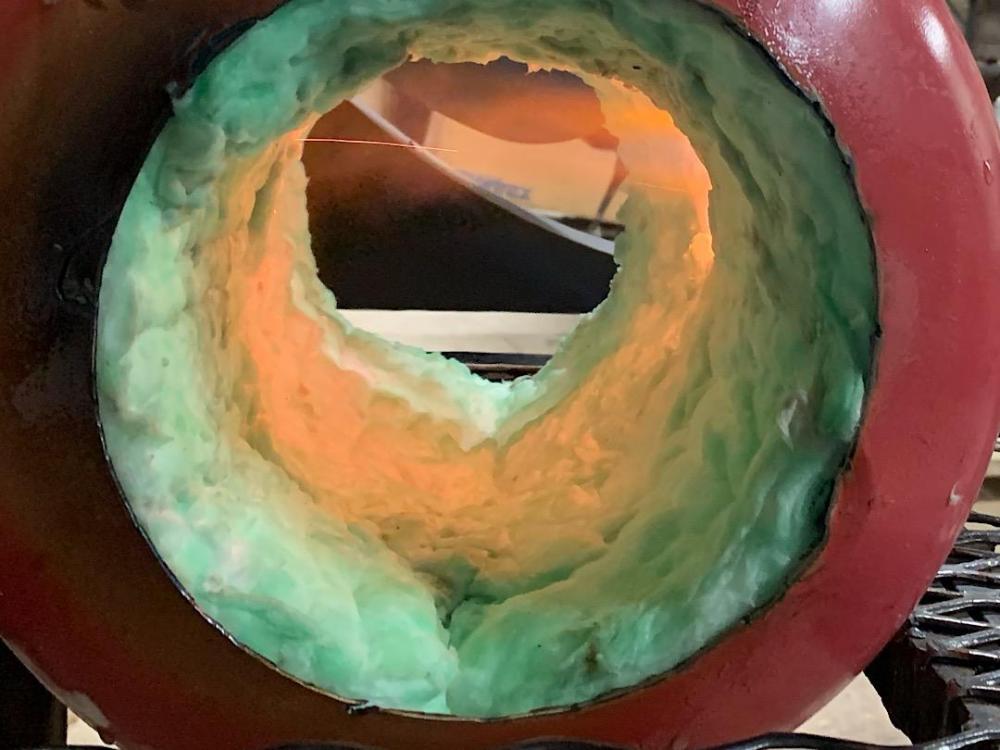
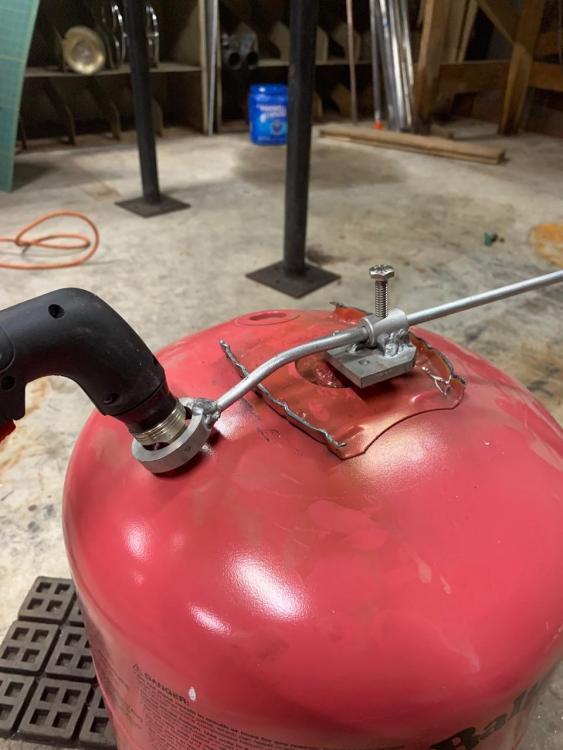
I quite appreciate your help, thank you. I want to make sure I understand. I thought the next step was to line the inside with soft insulation, then rigidize it, then form a layer of KOL30 on the inner barrel of that. I planned for the KOL layer to wrap around the edges of the openings but maybe you meant a cylinder extending out farther than I had in mind? It would be great to use the same equipment for both forging and casting but I have essentially no space restriction so i don’t mind having separate equipment. I figure that way I can optimize the designs. Another factor I’m considering is that I am working on a ribbon-burner nozzle so ultimately I will likely want that in the forge and a different burner in the furnace. Maybe I will adapt this forge into a vertical melting furnace later but I suspect it will be easier to start fresh. I don’t want to waste time building junk, so I’ve been trying to think about my design, but I also enjoy trying a few different approaches so I am hesitant to go all out with my first one. I installed a burner port in the shell:
-
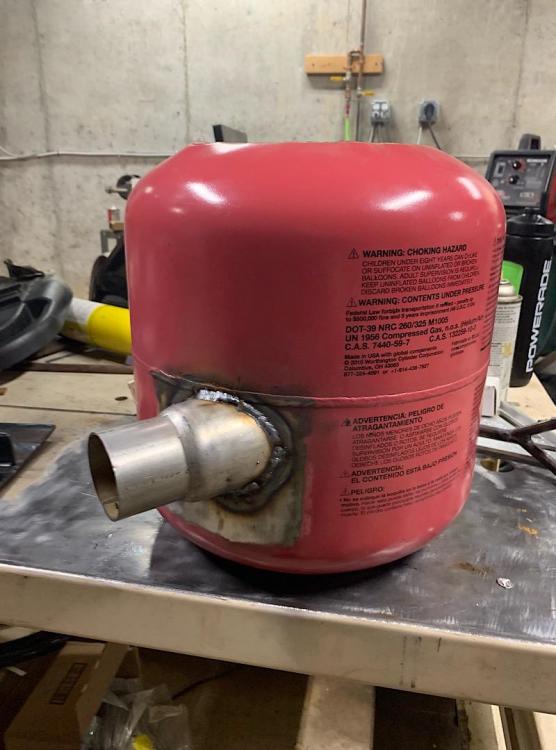
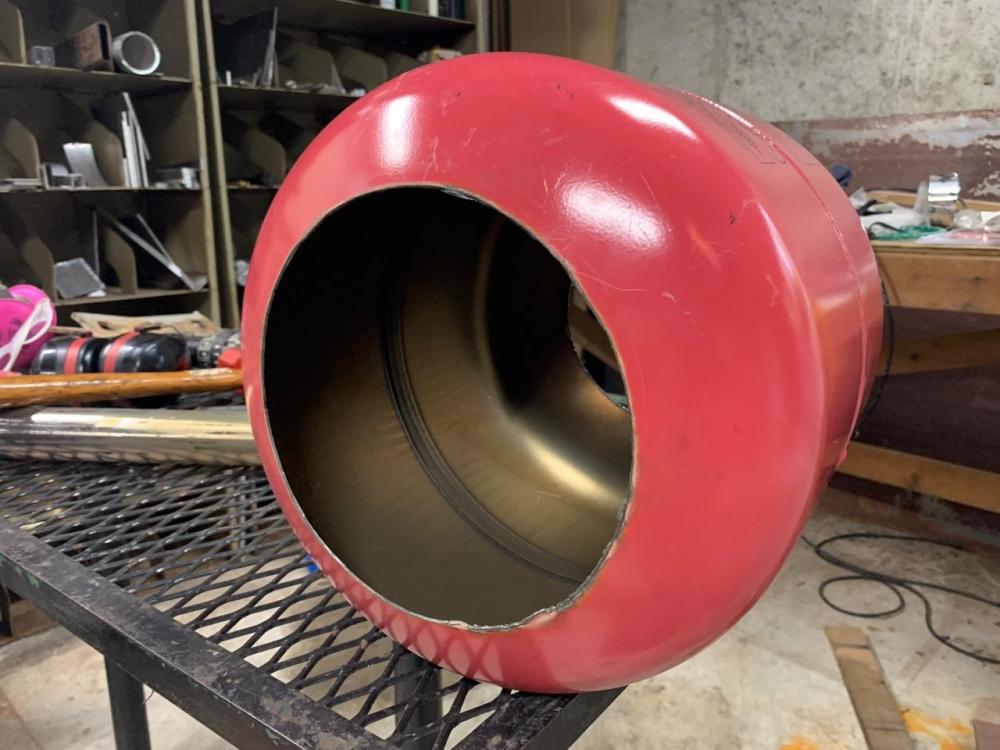
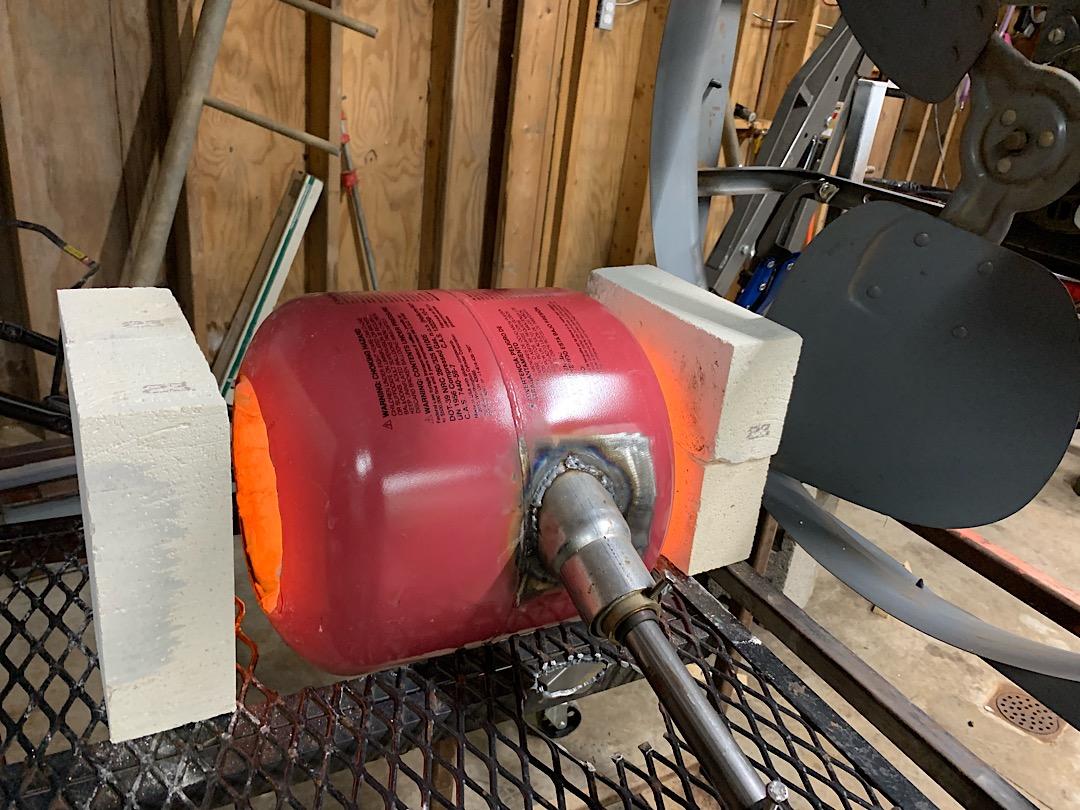
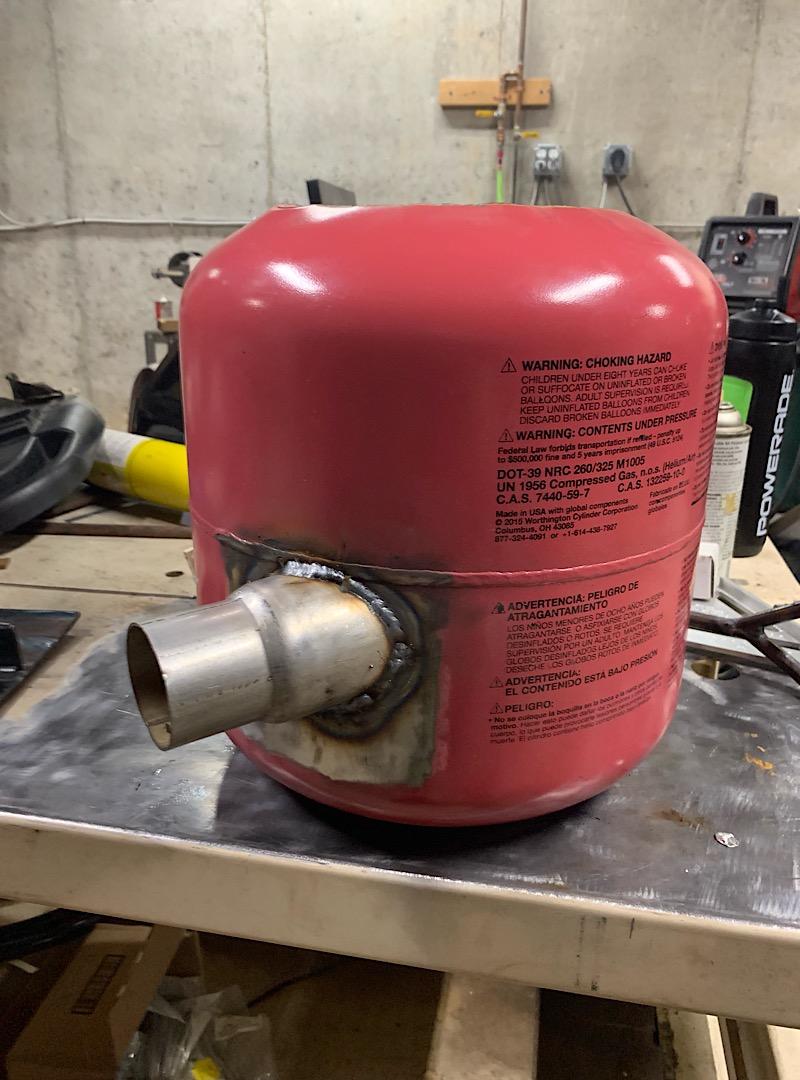
I considered YAMFF, aka Yet Another My First Forge. I'm an engineer by training, though never worked professionally past grad school. Lately I've been putting together a bit of a metal shop to enable various projects, and I added forging and casting to the list, so ended up on this great forum. I feel like I've learned quite a bit so far and realize there is a vast amount unknown to me. I'd like to try a variety of experiments to learn more. I have a working burner, as seen here, and I have some ideas for further variations on that theme, along with trying a ribbon burner, seen here. Rather than spewing on other people's threads, I figured I may as well start my own, also to help me keep track of things I have tried. I cut up a helium cylinder today, which was a fun way to use some tools, and have the shell ready for further adaptation. My kids helped me, which made it fun.
-
Naturally Aspirated Ribbon Burner. Photo heavy.
jwmelvin replied to Frosty's topic in Ribbon Burners
Thanks. ...thinking about how to rig up my little air hammer to vibrate the mold... -
Naturally Aspirated Ribbon Burner. Photo heavy.
jwmelvin replied to Frosty's topic in Ribbon Burners
I'm just getting going with all this (burners, forge, etc.) but I have a working linear-injector burner in nominal 3/4" size with a standard nozzle, and parts ready to assemble a 20-lb-tank forge. I'd like to try the ribbon burner. The drilling-a-firebrick approach seemed interesting so I played a bit with a glass/tile bit; it seems possible but will take a while and also seems tough to get consistent holes. So then it occurred to me that a 3d-printed core might work well for casting a nozzle. PLA apparently burns out well for lost-PLA casting, so I am currently printing a core for my first attempt. I have some of Wayne Coes' castable refractory intended for ribbon burners on order. I went kind of large, thinking I can plug nozzles if I need to increase the nozzle velocity. The core is 138 nozzles over an 8"x2.5" opening, each 4 mm (0.157") diameter with a taper out to 5.6 mm (.220") over the last 7.6 mm (.299") (the nozzle dimensions were for a 6deg expansion, but that's the half angle so perhaps too much?). It's still printing, 18 hours in at this point. It looks like the finish may be a little rough but I'm excited to experiment with these things. I'm hoping I can get the refractory packed around the core okay; I may print a tamping tool that fits around the core pillars. The plan is to burn out the PLA in my forge with my existing burner, though I suppose then I'll have to modify the forge to accept the ribbon burner if that's the direction I want to go..thumb.jpg.a3950f9783672578cf0cfb036ecbef0a.jpg)
-
Thank you Another Frankenburner, that’s helpful.
-
I am, as you suggest, looking to understand more about the various design parameters. I am gathering materials for my forge and will begin assembling that soon but I figure I should learn as much as possible along the way. I’ll likely make a forced-air oil burner too, to see what I can learn from that. That will be for a melting furnace.
-
Any thoughts on best construction techniques to have the burner entry pointing towards the forge ceiling? I'm thinking of building up a refractory layer (kast-o-lite 30) on the blanket there and then using a topcoat of Plistix 900F or the like. This is my first forge, so I don't need it to last forever but I'd like to at least have a reasonable approach; but I would like the burner to enter from the bottom so the burner doesn't superheat after it shuts down.


.jpg.72e0df0cb575ee9b892bb85fa75e24ee.jpg)