MaxwellB
-
Posts
152 -
Joined
-
Last visited
Content Type
Profiles
Forums
Articles
Gallery
Downloads
Events
Everything posted by MaxwellB
-
Just received my order. Planning on mixing up some and lining the wool. Planning on going about 3/8" though over 2" of wool, as per S.O.P. outlined many times in many threads. I have two questions to get the best results: 1) Should I use just plain water to spray on the wool before applying the refractory, or should I use a very loose slip of the KOL before the thicker layers? 2) Should I attempt to sift the KOL and just use the finer particulate or just use as-is and not worry about whether the aggregate is uniform?
-
Yeah, I only mentioned it because he said he already had it. If it's a "what to purchase" thing, then it's plistix.
-
Putting the ITC100 in between wool will be a waste. As would the satanite between the wool and the shell. Check out the Forges 101 section. You'll be amazed at the amount of information collected here over the years. I'm still digging through most of it. What your ideal order should be is Shell > 1" layer of inswool rigidized > 2nd 1" layer of inswool rigidized > Satanite (different people suggest different thicknesses, I'd say go with somewhere between 1/4" - 3/8") > Plistex OR ITC100. Both are IR reflectives, there's no need for both. I think ITC100 is rated higher, so if you already have that go for it. I wouldn't worry about the inside of the shell. If you want to paint the outside, fine, but it'll be more for aesthetics than anything else.
-
Charles, if you've got a boneyard nearby, you could possibly salvage some muffler hangers from some vehicles. These placed under the feet of the forge stand could give you a nice amount of shock resistance. And with the variation in sizes/shapes of them, you could easily find something that works well. They can be a beast to get off the car though, so it might be better to cut the bracket and try to remove at the shop with some spray lube and a punch. How about fabricating a little platform for it to sit on. Some anti-fatigue mat stuff from Grainger/HF/<insert store here> adhered to the bottom of a piece of plywood, and the muffler hangers as feet/bracers for the forge platform could do wonders to be a shock absorber. Might be enough to take a lot of the impact damage out of the equation. Just a thought.
-

Silica Rigidizer for Ceramic Fiber
MaxwellB replied to Rowland's topic in Insulation and Refractories
I'm not sure about particle size or anything like that, but if you look for hydrophilic fumed silica you can find it pretty cheap. I've got some cab-o-sil on the way, if not arrived already in the box I tripped over by my door. It's mentioned on the forums multiple times, and it seems to be the general consensus for a "right" ratio is 1 cup of fumed silica to 16 fl oz of water. Of course, this stuff is definitely in the WEAR YOUR PPE category. So a respirator is definitely high on the list. -
Very nice find JHCC!
-
Definitely. I'm crazy, not stupid.
-
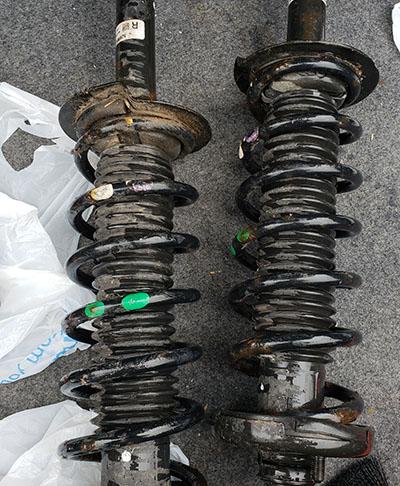
Nice pair of coil springs off a smaller vehicle. Found on the curb. Should make nice practice for punches and other smaller tools. Can't beat curb price points.
-
At this stage in the game it's all about learning. Learning what steels you like working with best. Learning what steels will do what you want in terms of edge retention and hardness. Learning how to work them/heat-treat them. Learning how you want to finish them. Learning what you're lacking in skills so you can focus on bringing that up a few notches... Remember... It's not all about the destination, it's mostly about the journey.
-
If you folded the billet to get 625 layers, and you started with steel cable, you're not going to get a very appealing etch. Unless you added a secondary steel to the mix, that much hammering and folding and hammering again just homogenized the cable. Which is why smiths will use something like 1080 and 15n20 so that the pattern shows. I mean, you might be able to get layers visible if you trapped any scale between the folds or had carbon migration, but everything the same material won't produce the effect you were after. Sorry mate.
-
Same one I've got. Works very well. Although I'm having issues with the second burner, seems like it's combusting a bit early at the lower psi. Also, when the tank gets icy and pressure drops, it seems that's the burner that suffers. Might have to rethink how they have the piping done for them, but that's down the line. I also threw on some refractory and an IR coating, fired up the forge today to forge the Fuglies. Seemed to hold it's heat longer, so the IR definitely helped. Might get me to the point where I can eventually forge weld without needing to do anything else. I'll check out the forge tomorrow or Monday after work and see if the IR needs any patching. Ended up using ITC 100 since some of the other stuff I was seeing couldn't be used over a refractory. Not sure how accurate that was, but I took the dive. Overall I'm happy. Should hopefully last me a decent amount of time.
-
What did you do in the shop today?
MaxwellB replied to Mark Ling's topic in Blacksmithing, General Discussion
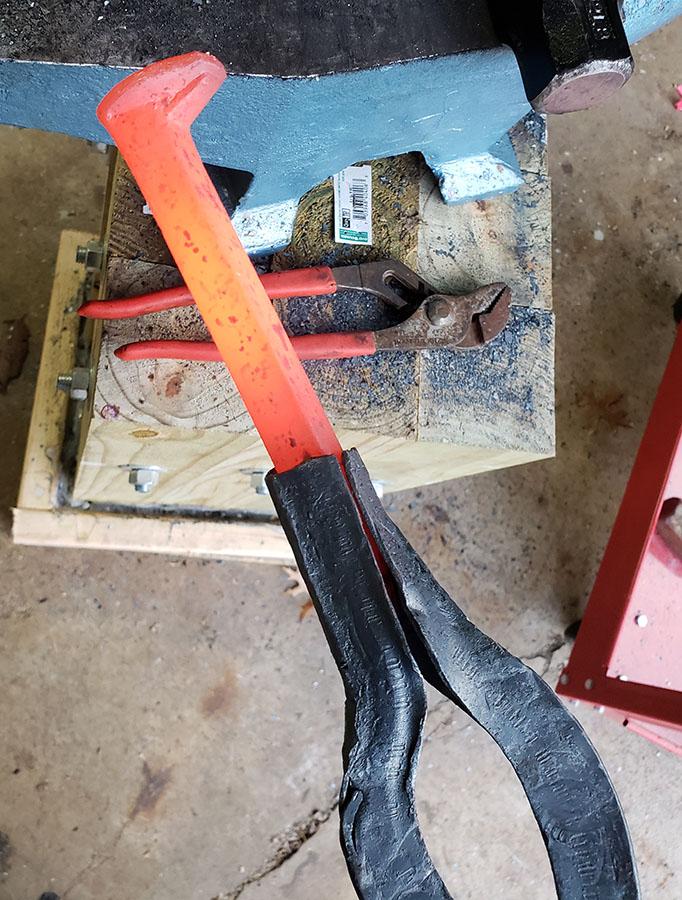
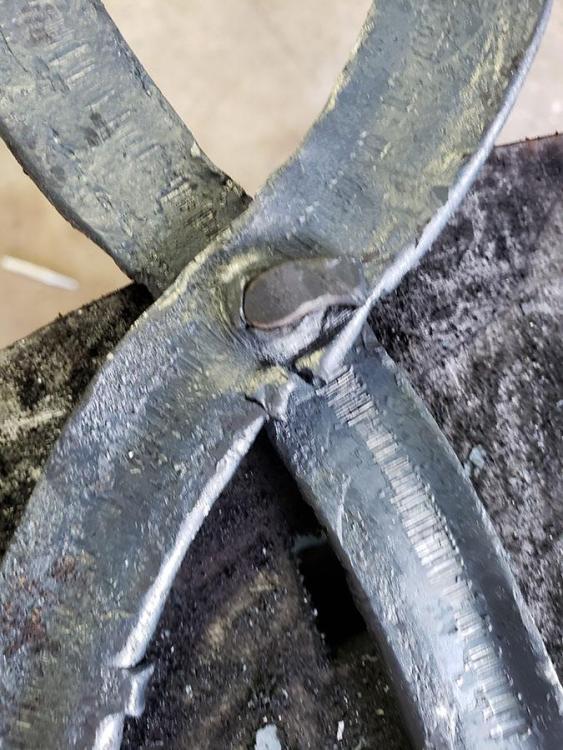
I give you what I'm calling the Fuglies. They're a "special" breed of tongs. They're not pretty, they're surely not comfortable, but they work. Although I did crack one of them. Probably beat it a little too cold, trying to line things up. I made this as a proof of concept. This is from the t-stake I mentioned in another thread. And I cut the rivet too long, so peening it became bending it. Functional. I might take the angle grinder to the jaws just to even them up, and I might try to fold over the reins again to make them a little more comfortable in the hand. But as a first set of tongs, you gotta start somewhere. And if that one crack doesn't cause a self-destruction before I can get a real pair made, I'll consider this a win. Right now, it's on the bubble. Could go either way.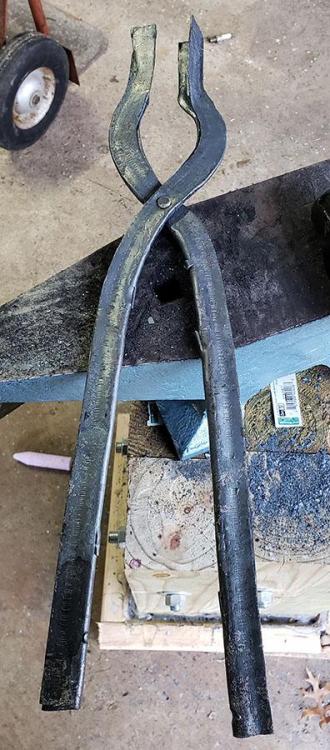

-
I vote etch. I think verdigris has it's place, but not on jewelry. Etch, then clear coat.
-
JHCC, that's really really close to what I was planning on doing. The channel in the stake is the reason I thought I could make a quick and dirty pair of bolt tongs out of one of them. The channel for the jaws is already there. I'll definitely give it a go. Like I said, I'm pretty sure I've got a ton of them in the shed, so if I screw it up three or four times I won't be mad that I pooched material I paid for.
-
They're definitely not new. But they aren't real thick. I stuck one in my forge, brought it up to orange, and was surprised at how easily I was able to flatten it. It moved EXTREMELY easily under a 2lb hammer wielded by a guy who knows squat about smithing. I would probably guesstimate that it's 1/8" thick, tops. My next off day I'll tinker with them some more and report back on any successes or failures.
-
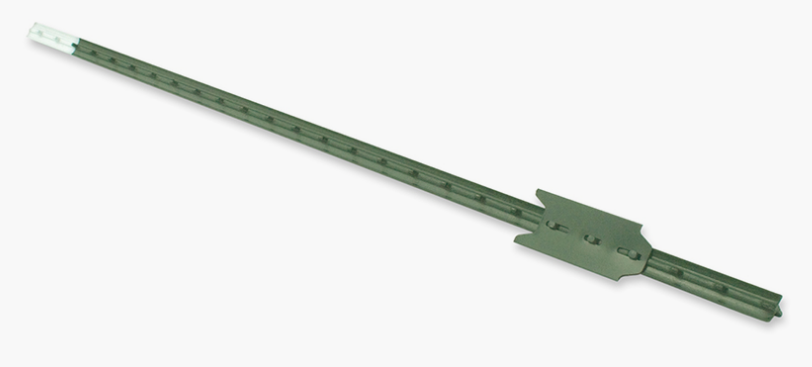
In the past few days I've been tossing garbage out of my garage to make room for a little workshop. In the corner I found a bucket with some odds and ends, like some conduit pipe and broom handles, things like that. One pair of items caught my eye. They were t-stakes (like this, but not exact, but similar enough to get my point across of what they are. Many many moons ago we used to have a garden, and we had a chicken wire fence to keep bigger critters out. We used the stakes in the garden, probably close to 30 or so. I know for a fact I have more that are in the dilapidated shed in my yard. These are well over 20 years old, probably pushing 30. The questions I have are as follows: - Some of the reading I've done have some of these made with galvanized steel and then powder coated. Is there a way to identify if these happen to fall under that category without sticking one in my forge and waiting for white smoke after the paint burns off? - Would something like this make a passable set of beginner tongs if it's safe to work with? I ask because they've got a channel in them already, so making a pair of bolt tongs wouldn't require more than bending the steel between jaw and boss, flattening for the boss and reins, and punching for the rivet. I think. Unless I'm in the wrong frame of mind. These could then be used to make "real" tongs, as I'm pretty sure they're not going to be too comfortable for extended use due to the nature of the bend, and trying to fold it onto itself isn't going to be a key to longevity. I'm probably WAY out in left field with this line of thinking, but I just saw those two stakes and the idea hit me. I wanted to get the valuable input of those who might have tried this before.
-
Thomas, are you looking to adopt another grandkid?
-
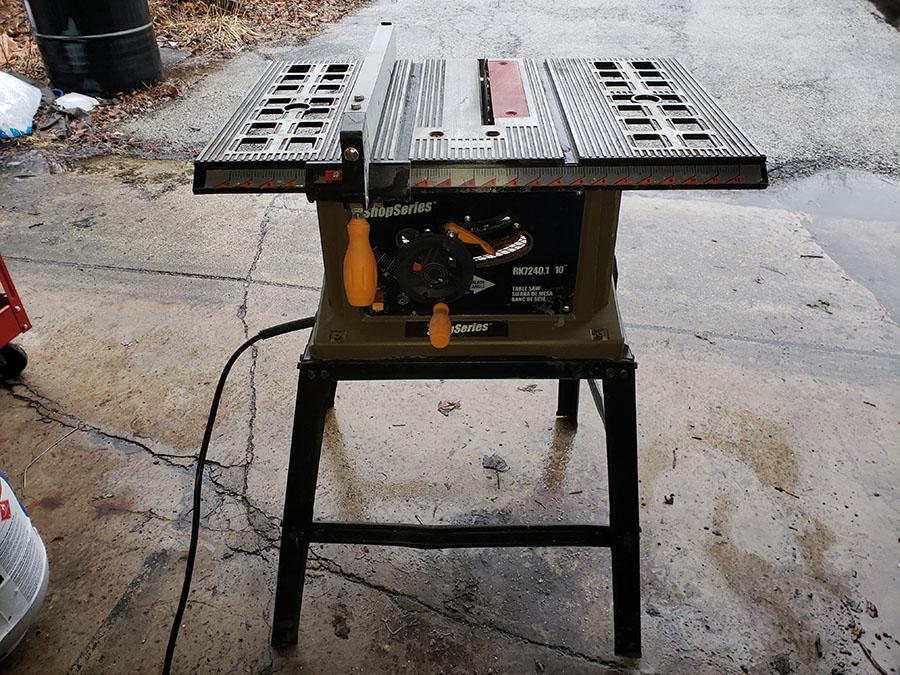
$20 off Craigslist. A nice saw I can cut my knife scales with, and any wood I need to build shelving or stands with. Works pretty good. Will probably need to get inside and spray with some lubricant and put a new blade on. A project for the upcoming week.
-
What did you do in the shop today?
MaxwellB replied to Mark Ling's topic in Blacksmithing, General Discussion
IFC, whenever I hear "Rule of Thumb" I always think of that scene in Boondock Saints right at the beginning. Great movie. -
Yeah. I went for the door because I didn't want to have to worry about trying to rig up something on the back side and the front as well. Got a couple K26s to use on the front end to help keep the heat in. The blocks they came with will probably end up being my sacrificial floor if/when I get around to forging with it. The smaller of the two blocks is almost the perfect size to use as a partition between the two halves if you want to save space/fuel. However, once you rigidize the wool, that may change. And the powder they give you doesn't provide much in terms of stability to the wool, which is why I'm following Lou's lead and slapping Greenpatch on it. Probably will end up going about 1/4" thick. Since the other coating is on there, I'm not expecting to have sag issues with the weight, but I will keep an eye on it.
-
Eventless, that's the same one I got! Just got my Greenpatch today for it. Gonna let everything warm up in the house (detached garage doesn't have heat) and probably coat it tomorrow and burn on Saturday. EDIT: Also, check your burners. If you want to shut off one of the burners, you need to switch the assembly around so that the ball valve is on the same side as the door. Otherwise you'll shut off the front burner. But other than that, looking good.
-
What did you do in the shop today?
MaxwellB replied to Mark Ling's topic in Blacksmithing, General Discussion
Finally got around to test-fitting the anvil on the stand. Need to shave the bottom of the blocks so they're level. There's about 1/4" - 3/8" difference right now. Not enough to be major, but it does rock a touch. Found a rail spike in my garage and stuck it in the forge, gave it a few whacks to test the height of the anvil. Could stand to go down about an inch, which is perfect for when I level the stand. I also have to drill the other set of holes for the bottom so it matches the top. And the magnets definitely reduce the ring on the anvil to almost zero. I'm sure once I secure it all it'll be nice and "quiet".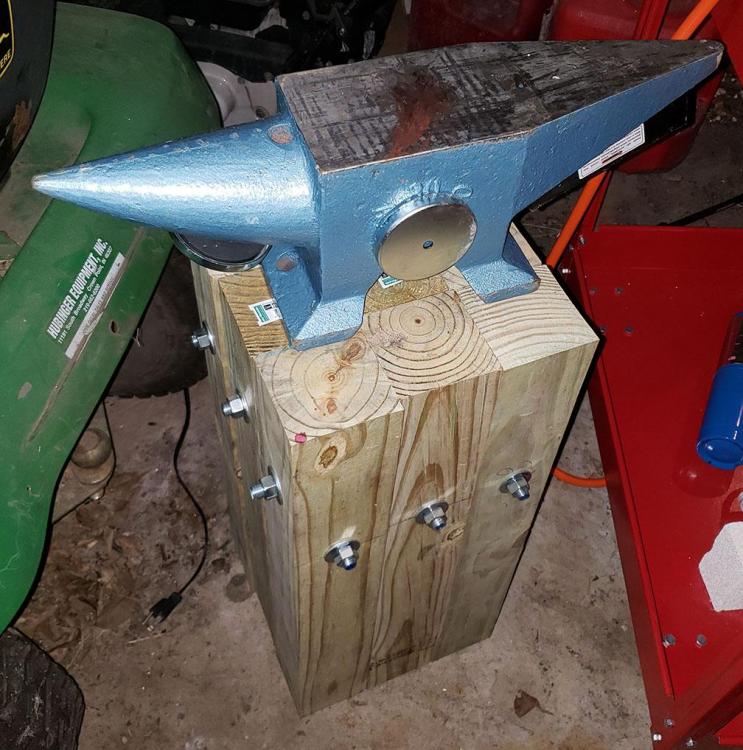
-
Now I know why you use the tagline "Frosty The Lucky". Glad you're still with us!
-
What did you do in the shop today?
MaxwellB replied to Mark Ling's topic in Blacksmithing, General Discussion
Yeah, half or thirds. Right now that slab is 1.25" thick before it gets cut down and squared off. So I'm thinking I'll lose .125" to .25" in the process. And then cut from there. Would make decent starter handles for bottle openers or things like that until I get into the swing of things fully. -
Very nice! Very nice indeed.