MaxwellB
-
Posts
152 -
Joined
-
Last visited
Content Type
Profiles
Forums
Articles
Gallery
Downloads
Events
Everything posted by MaxwellB
-

What did you do in the shop today?
MaxwellB replied to Mark Ling's topic in Blacksmithing, General Discussion
Mac, took me a minute to see the poker. I was focused on that wonderfully full glass and wondering what sort of damage I could do it. I have to settle for some McMasters Canadian, with some Jim Beam orange. What can I say, I'm a cheap date. -
What did you do in the shop today?
MaxwellB replied to Mark Ling's topic in Blacksmithing, General Discussion
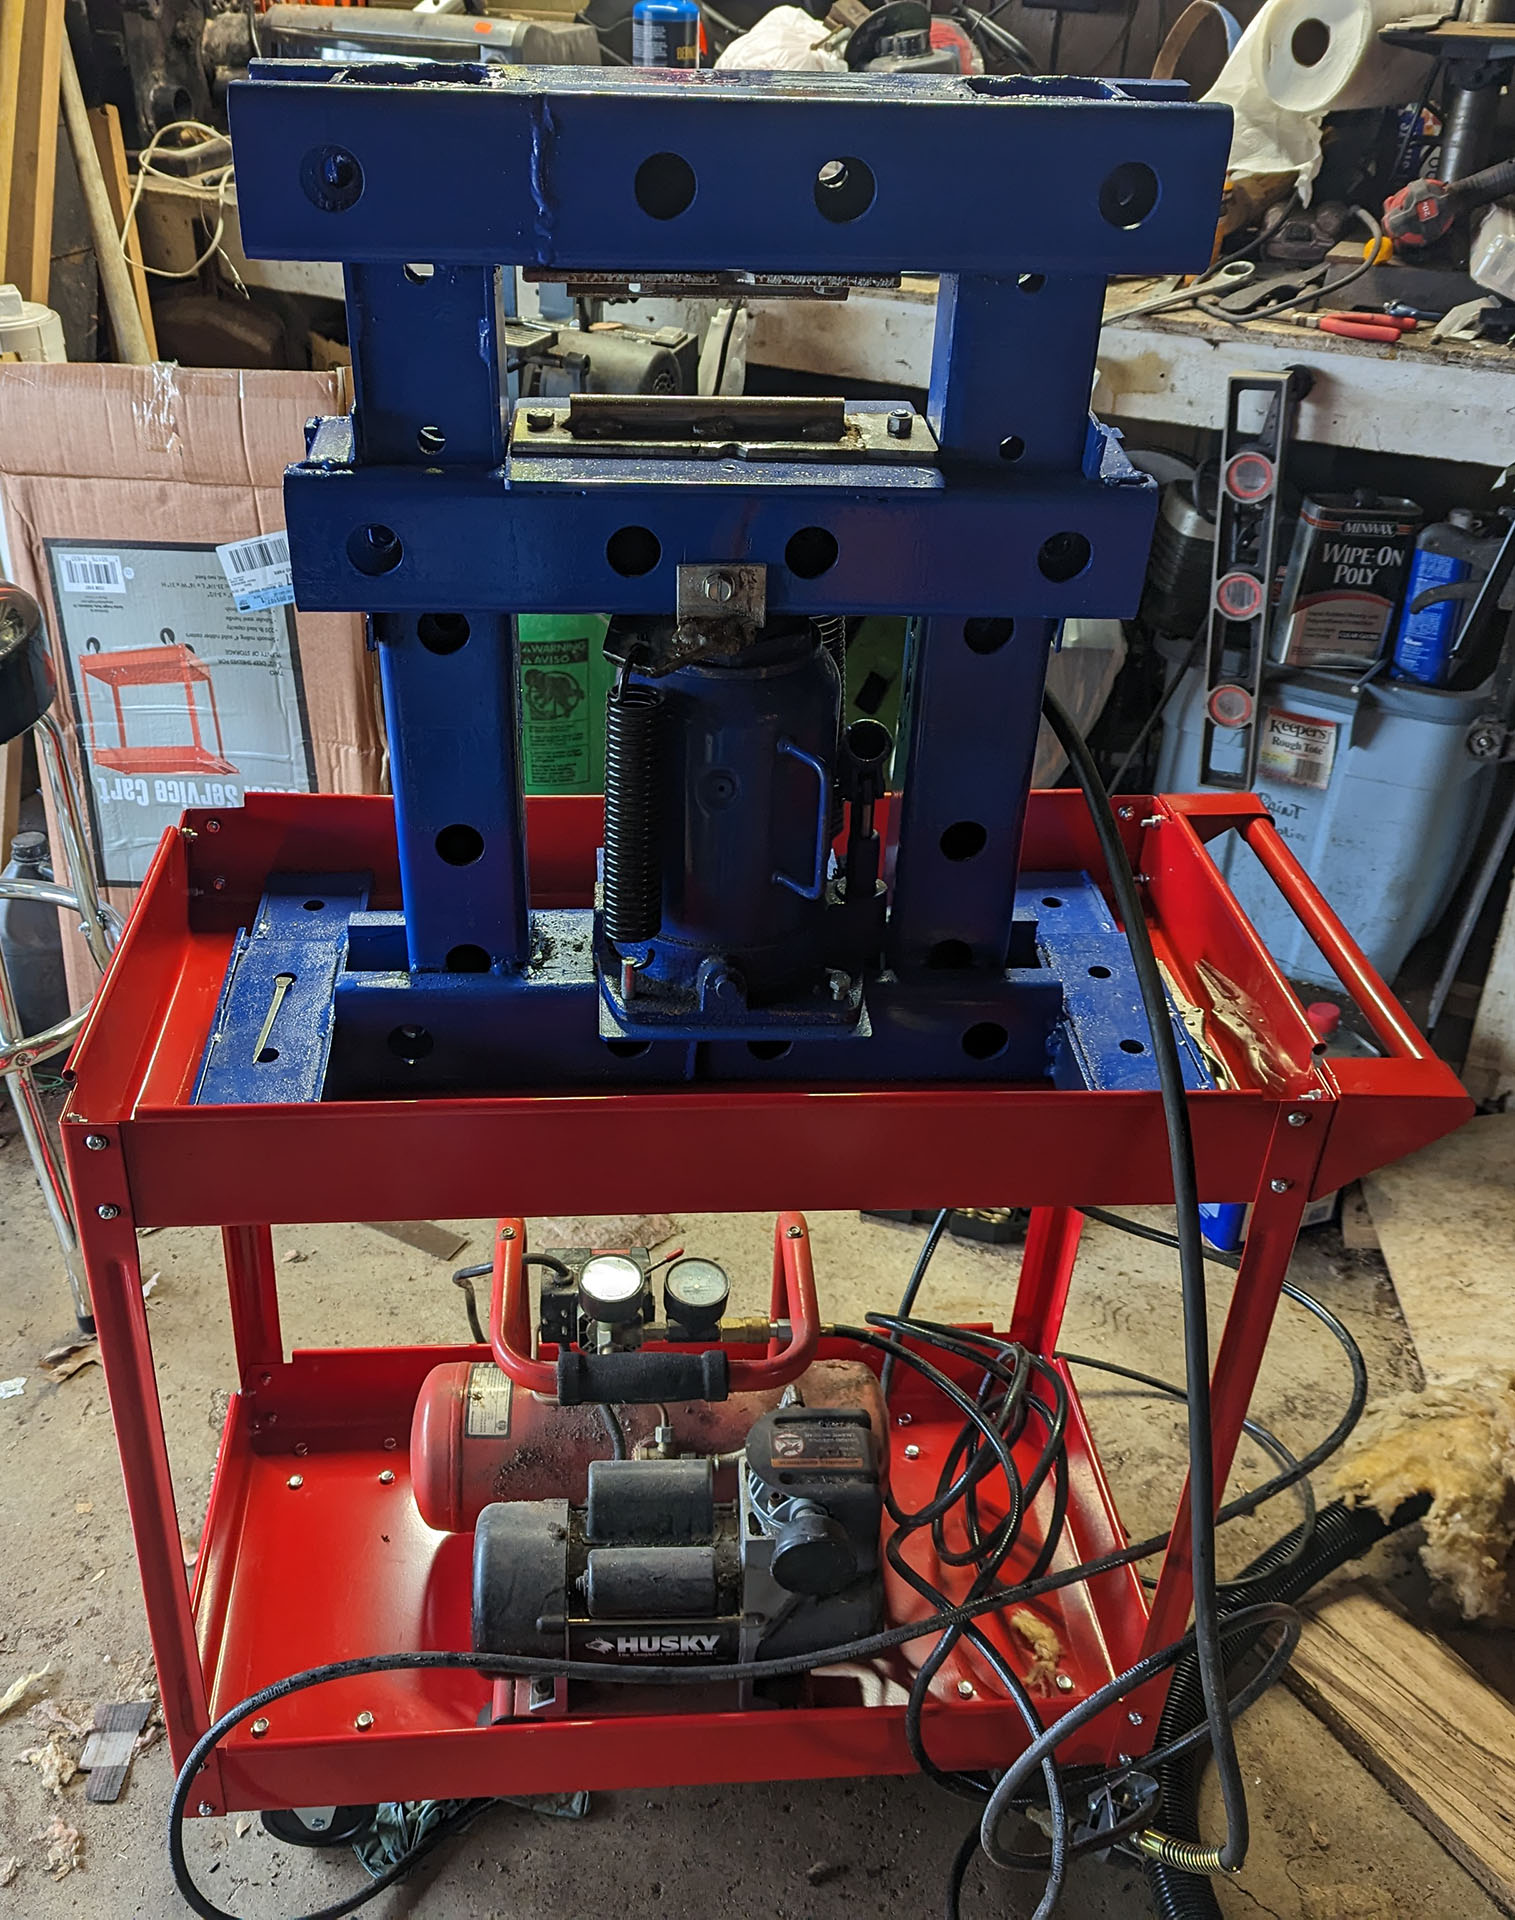
Picked up a cheap-o cart from Harbor today to put the press on. Press is a 32 ton air jack I got for around $140, and the frame was built for free by a friend using scrap steel he had. Now all I have to do is get a compressor that's not a steaming pile.
-
What did you do in the shop today?
MaxwellB replied to Mark Ling's topic in Blacksmithing, General Discussion
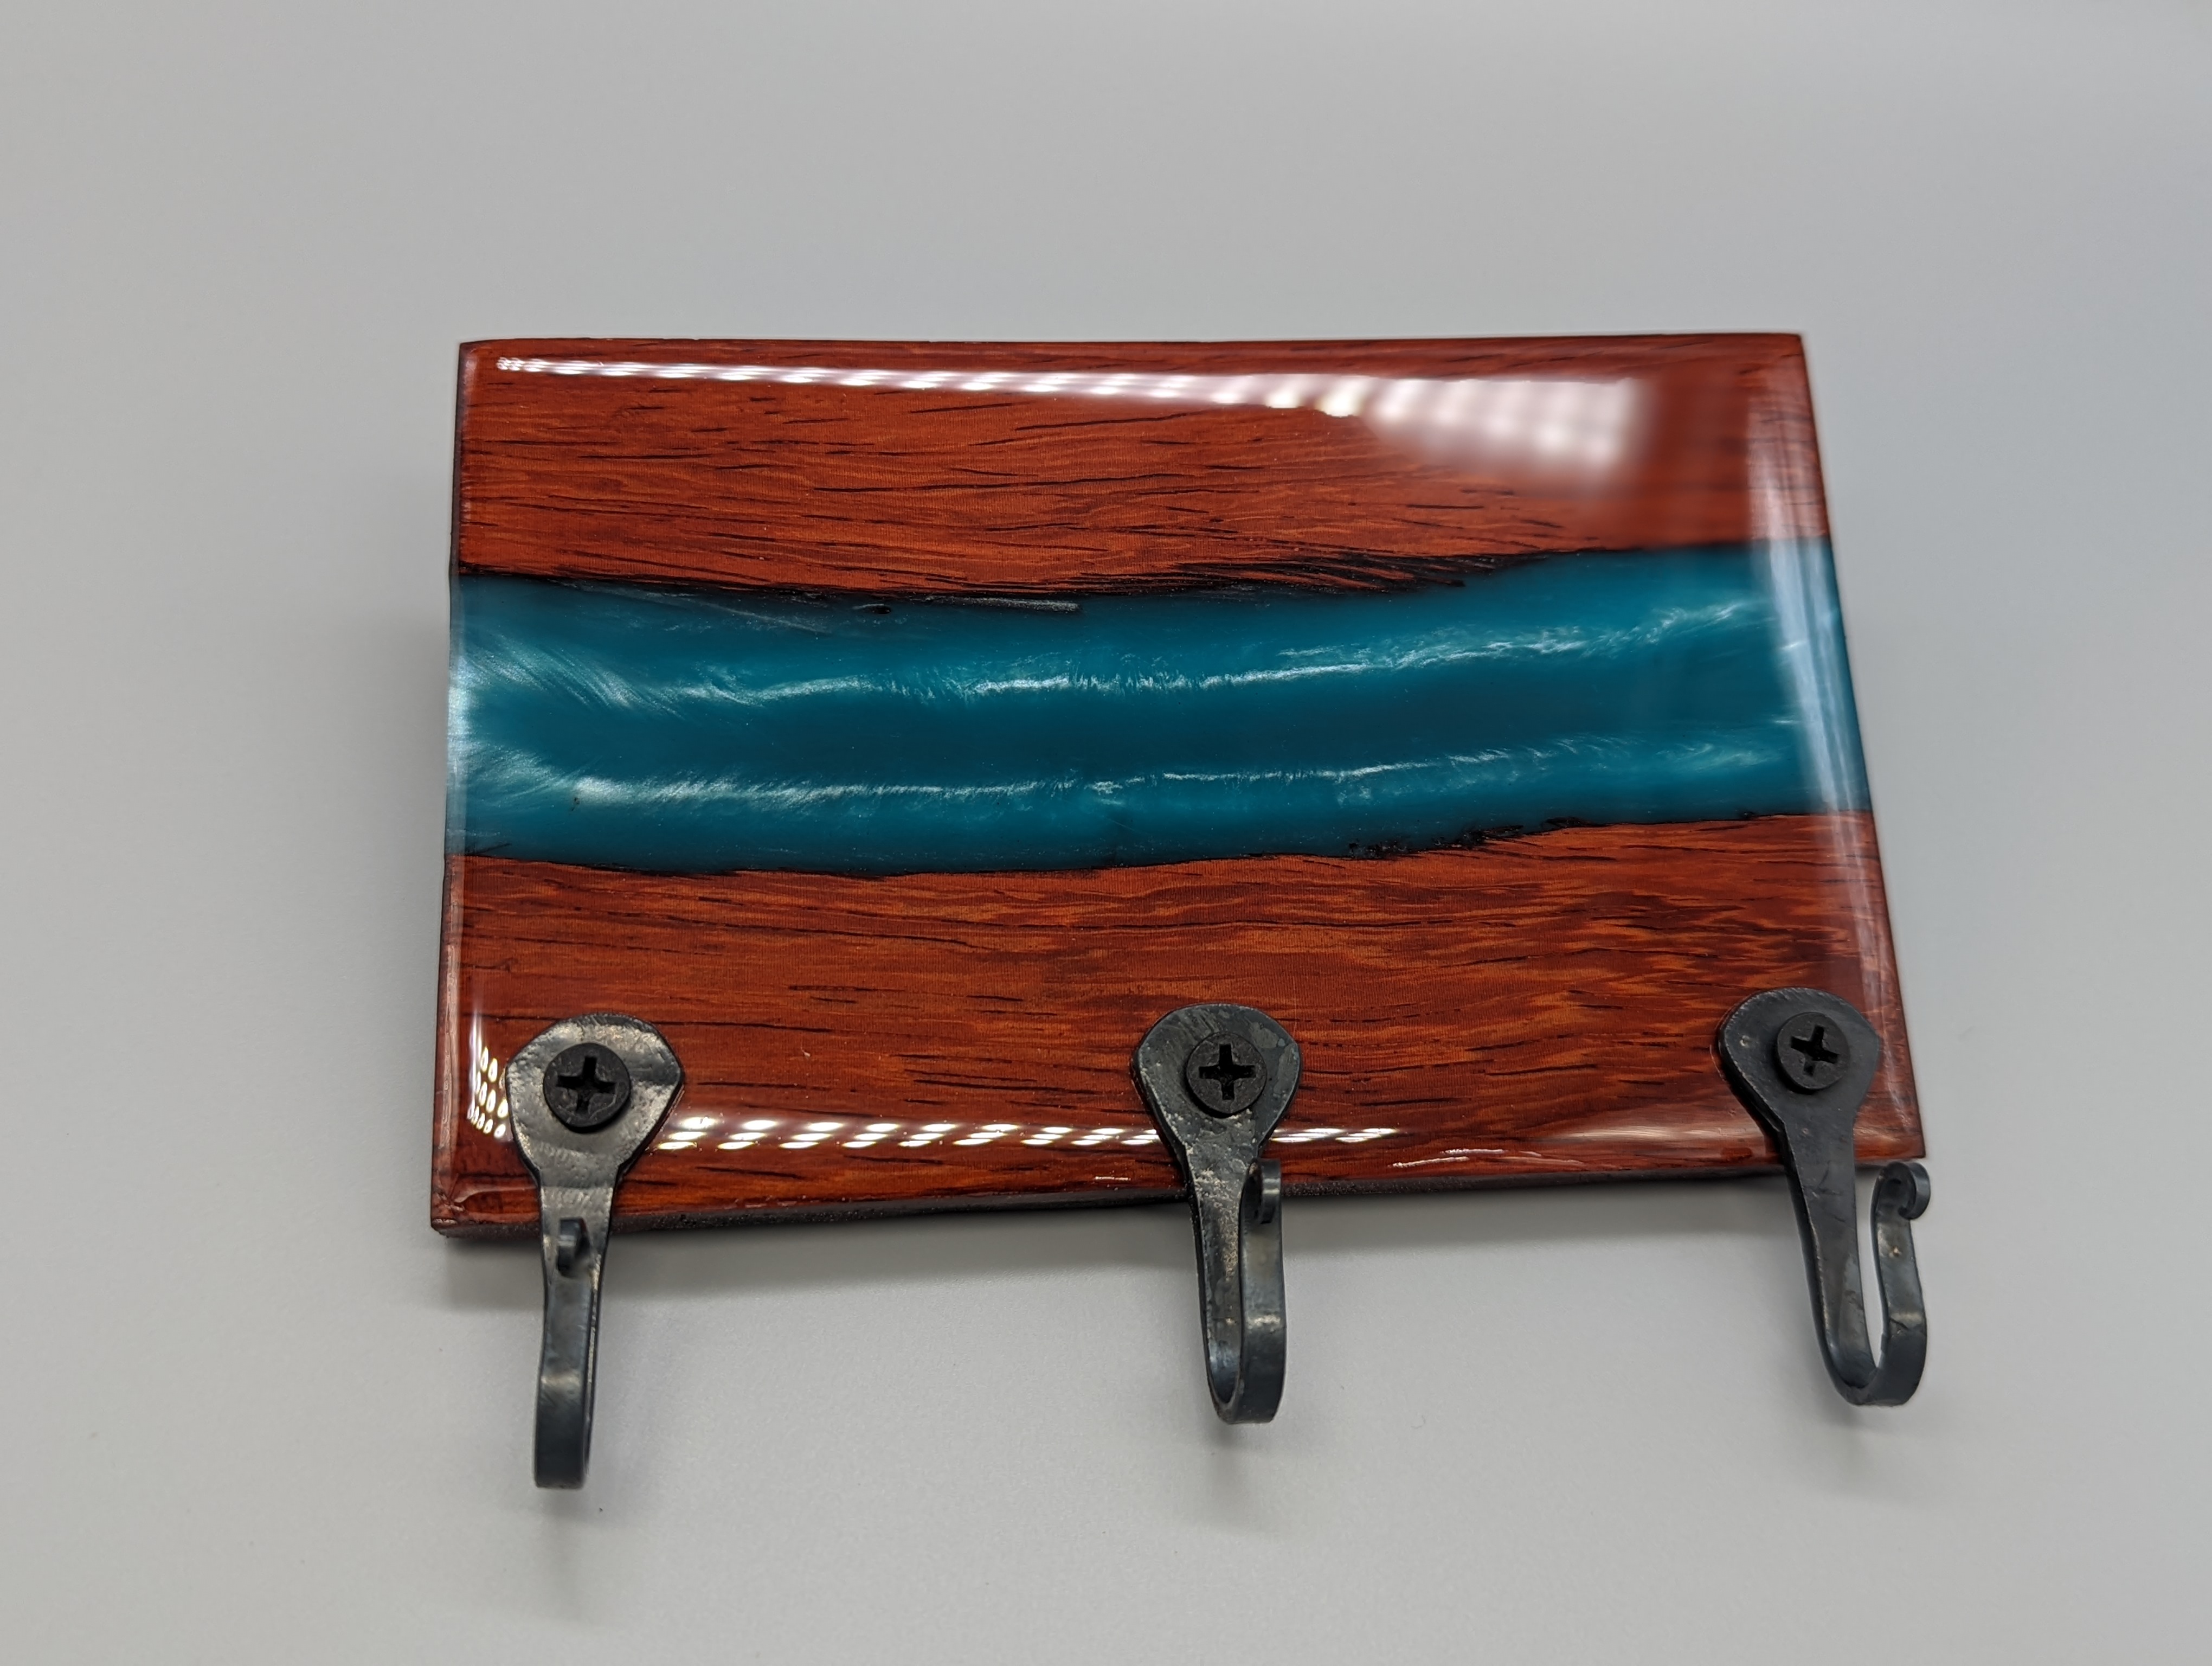
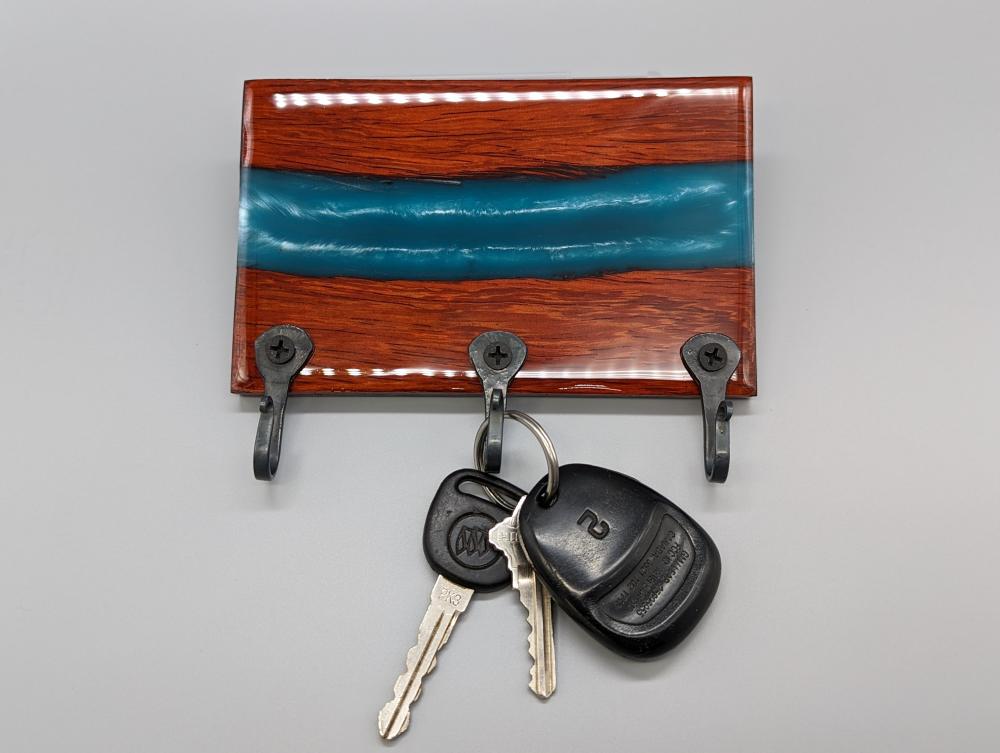
Finished up a key hook board today. Walnut & resin with horseshoe nail hooks.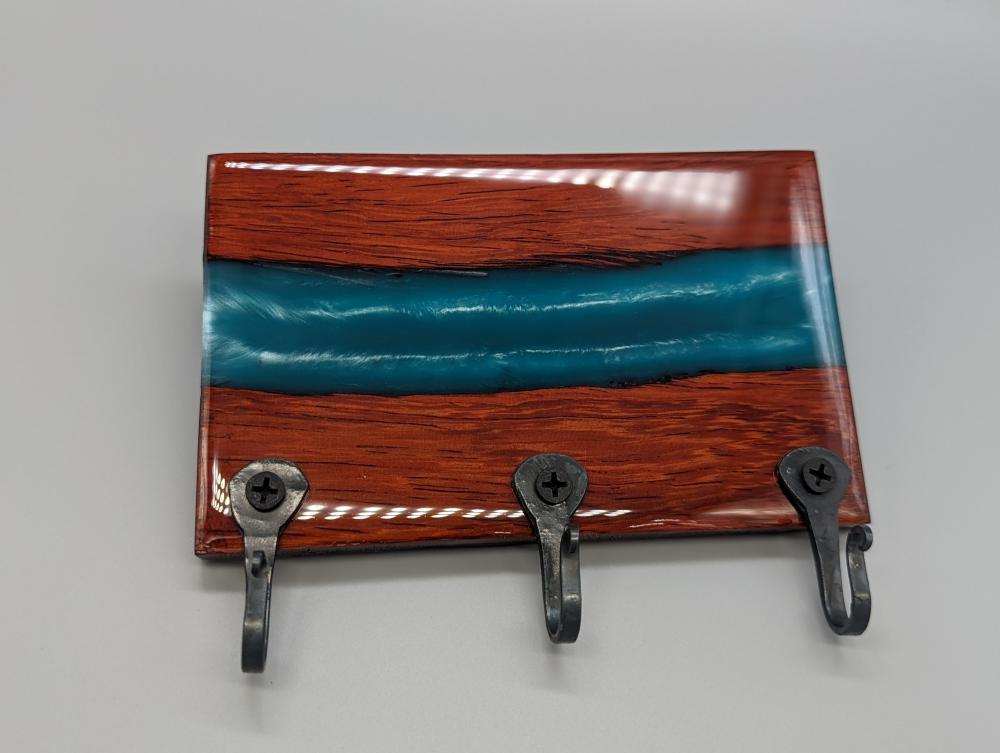
-
Taxes. It always comes down to taxes.
-
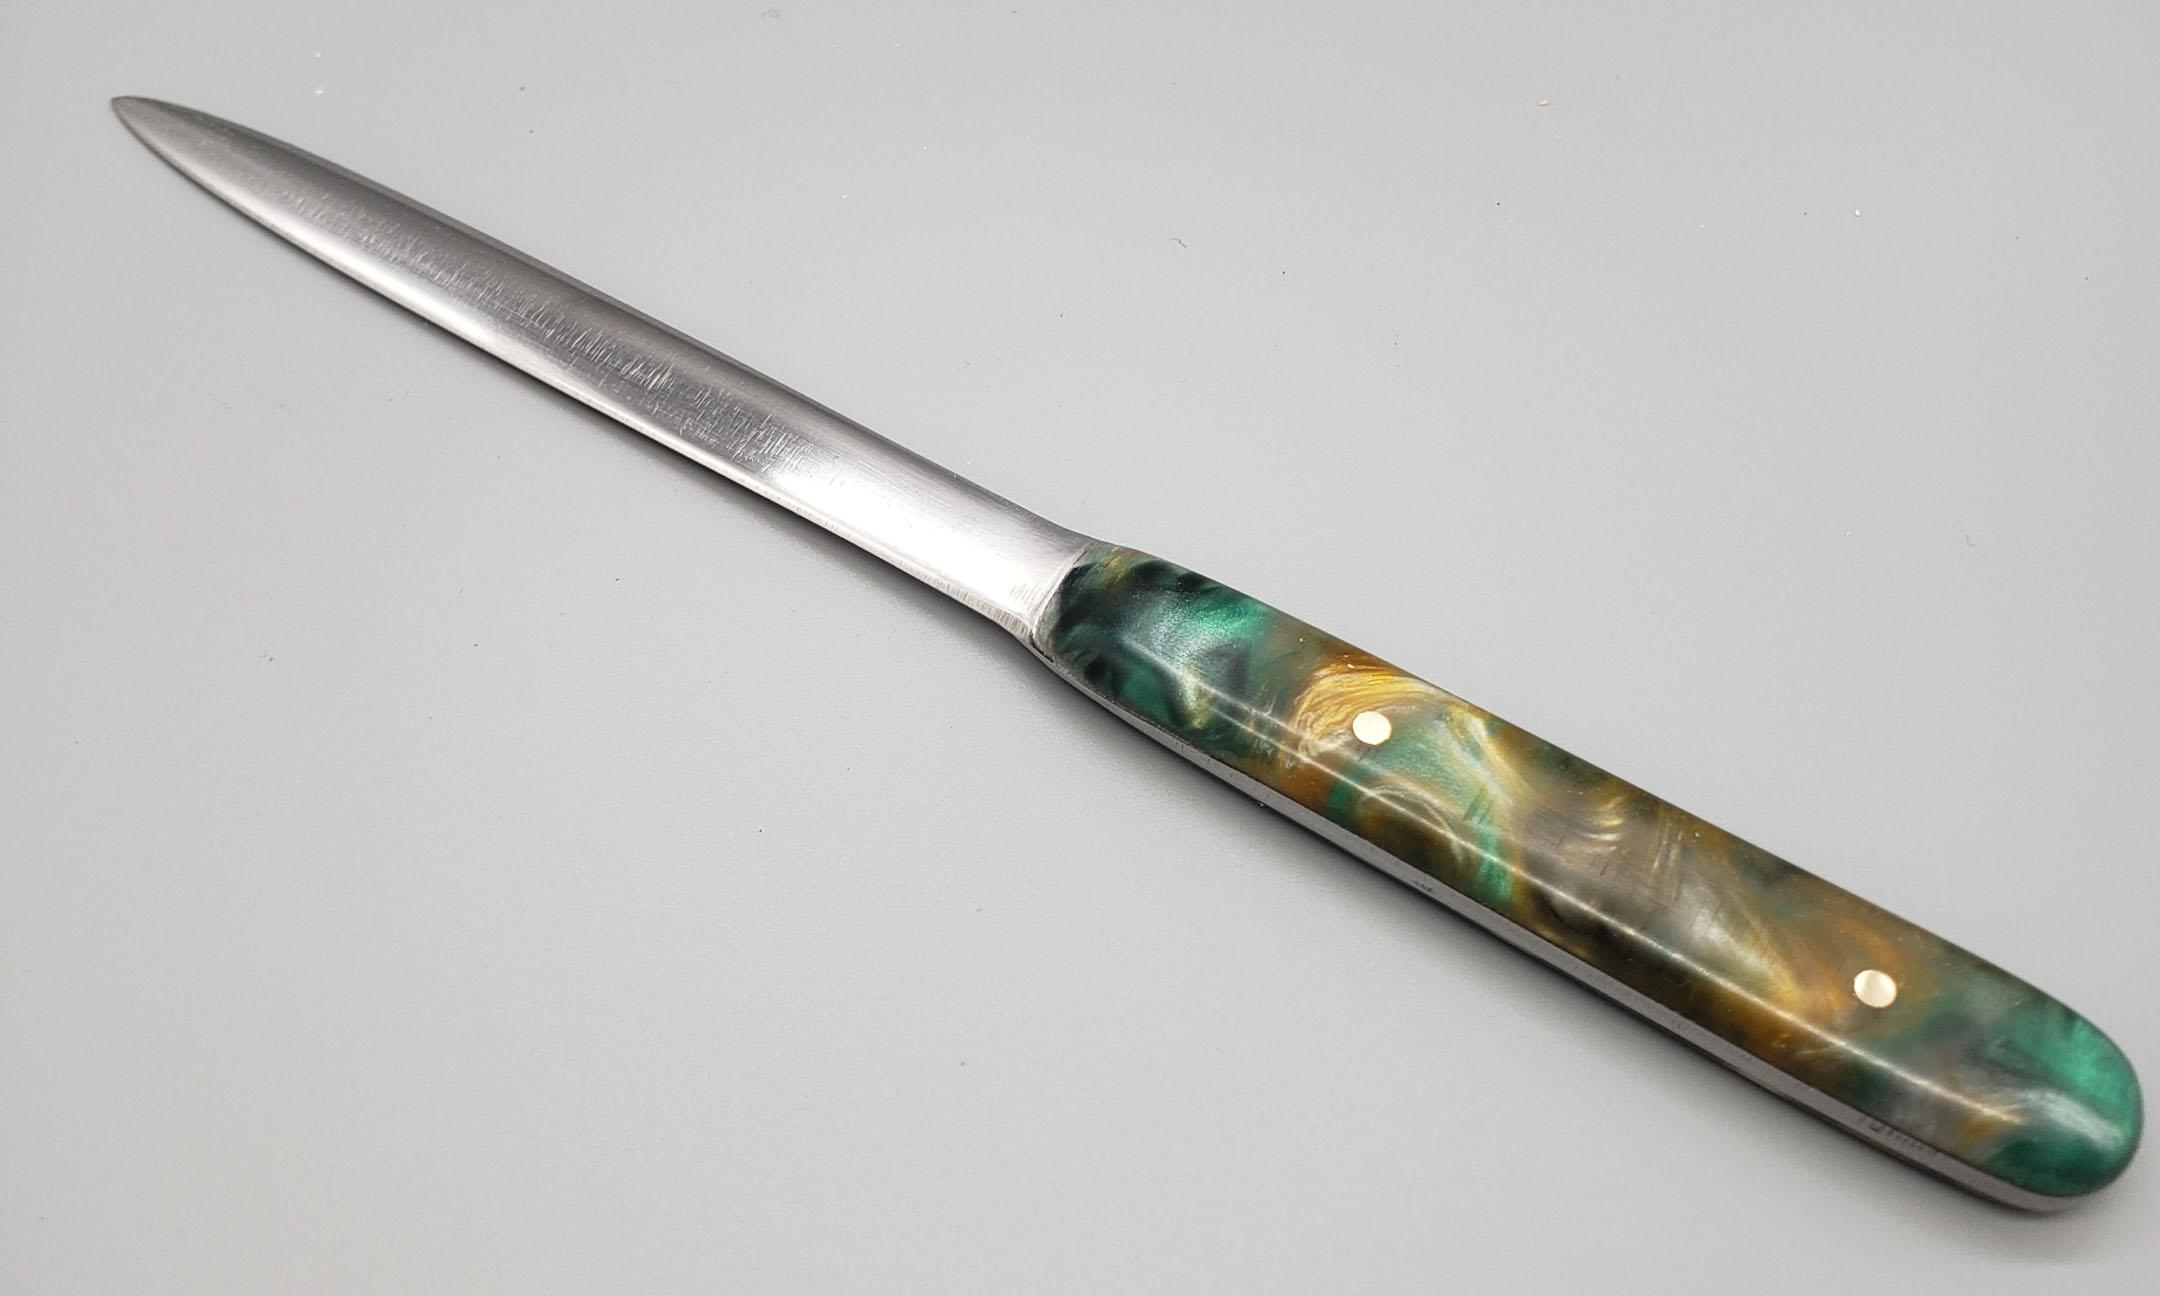
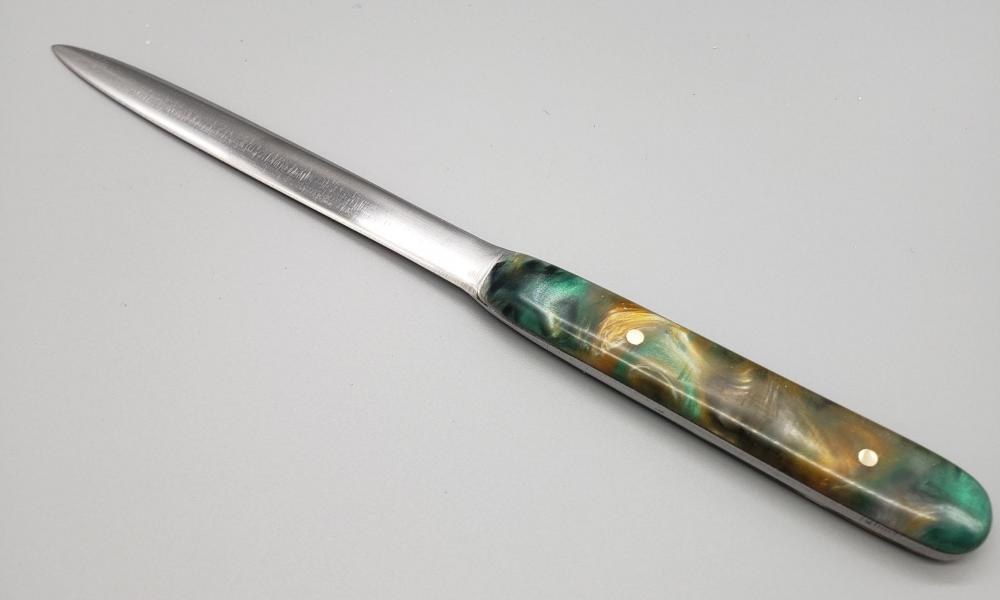
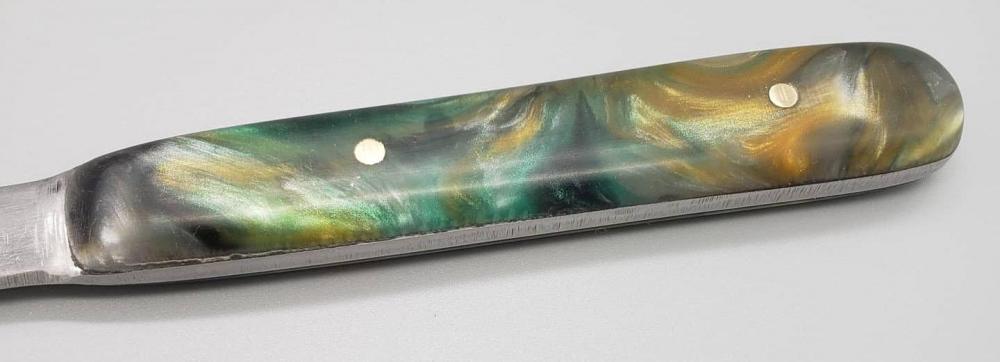
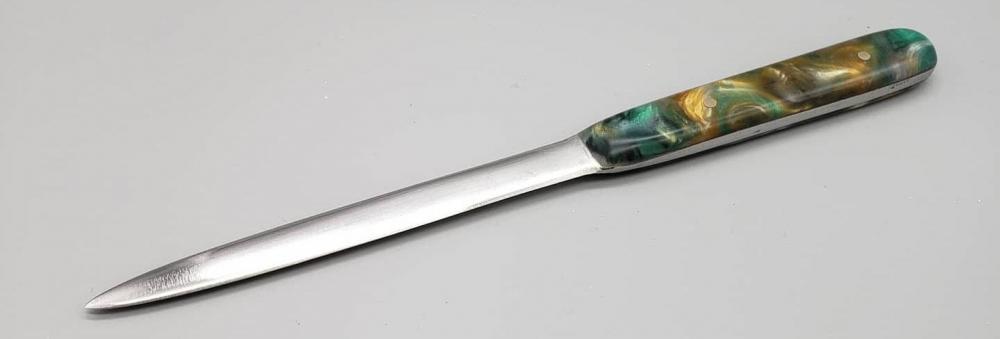
Thanks! And yes, there is a decline in the letter opener business. This was for an older (than me) guy, who still does a lot of things old school. Still writes checks, still buys stamps, that sort of thing. Although I will say that I still get some things by mail that I give a toot about. So I use mine maybe 2x a week? And if I don't have it handy, or can't find it, or just can't be buggered, I just tear the side of the envelope off like a heathen.
-
I would definitely take it into the house and do all the work with it... However I don't have a whole lot of room with the other collections of miscellaneous garbage taking up space. I take care of an elderly parent who is a hoarder. So there's a constant struggle with clearing space off just to have it re-clustered shortly after I turn my back. I have other projects to keep me occupied until warmer weather, so while the box in the garage is taunting me, it's not beyond ignoring. Gives me something to look forward to, getting back into the garage shop and cleaning it out, re-setting up my workspace, and trying to maintain it all over again. Until, of course, I win the lottery and can have my own dedicated shop. Ahh, to dream.
-
Thanks! He was gushing about it. It's not hardened or tempered, because it's just for paper. Hopefully it serves him well.
-
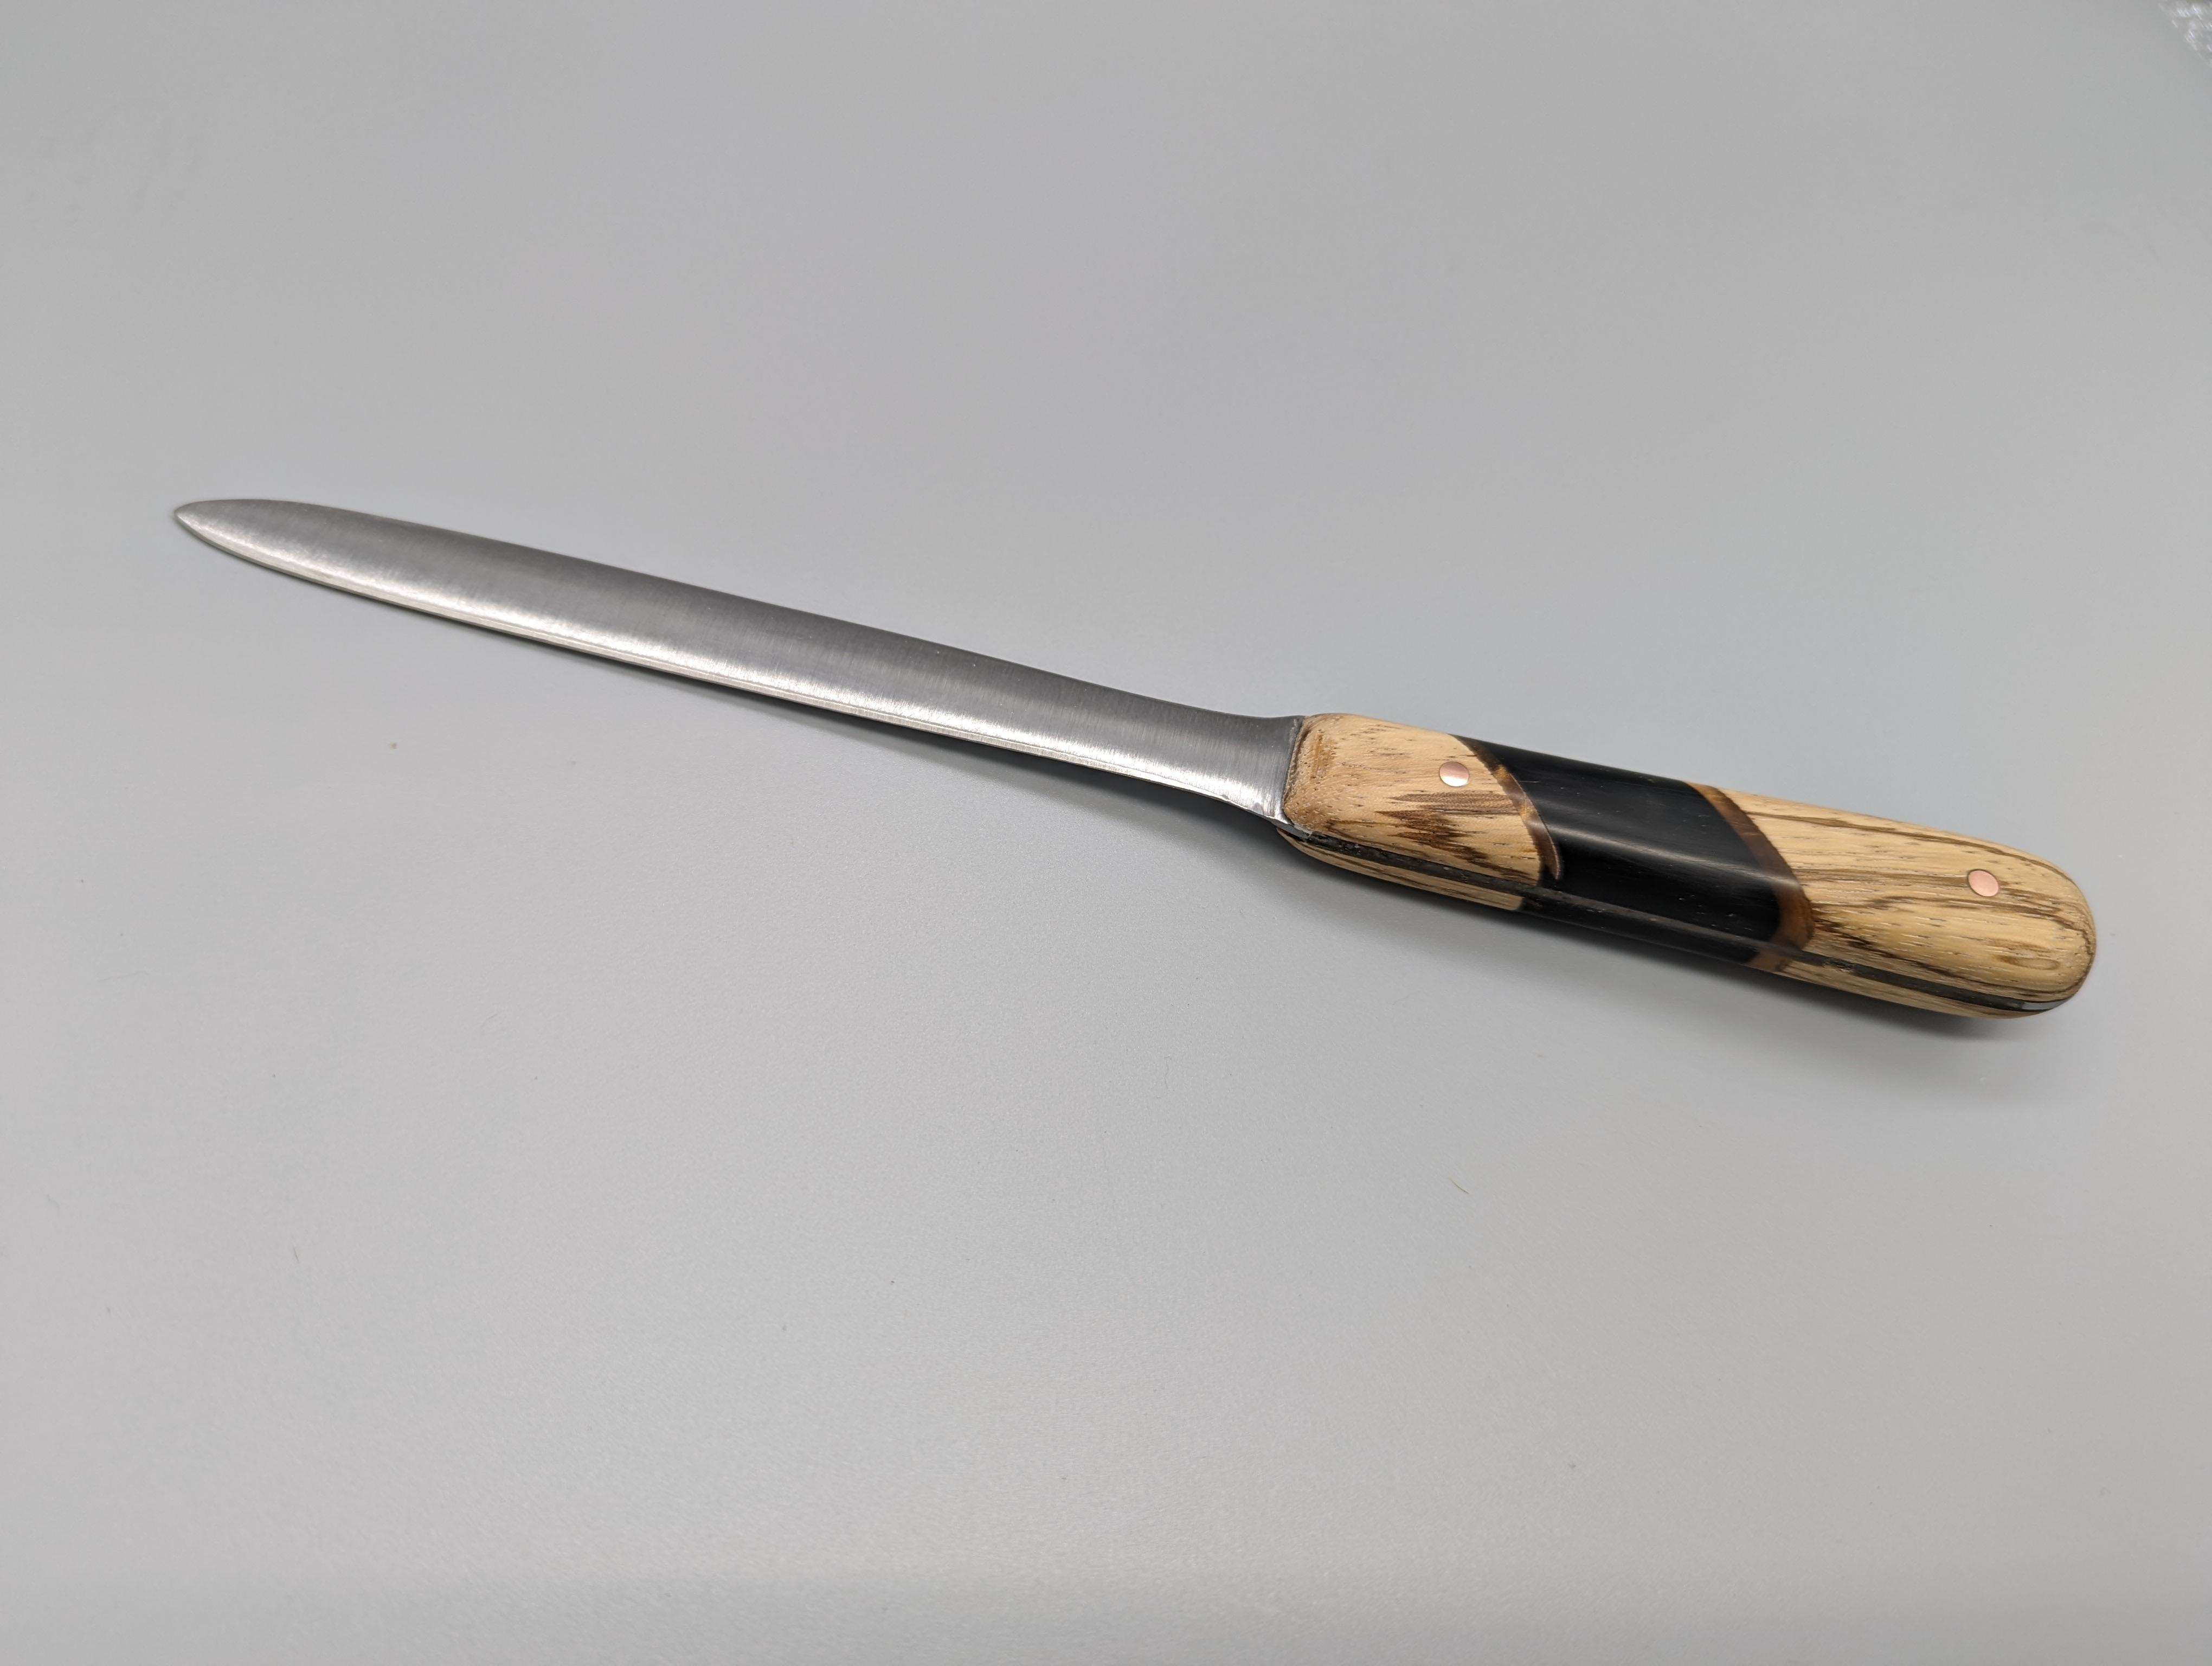
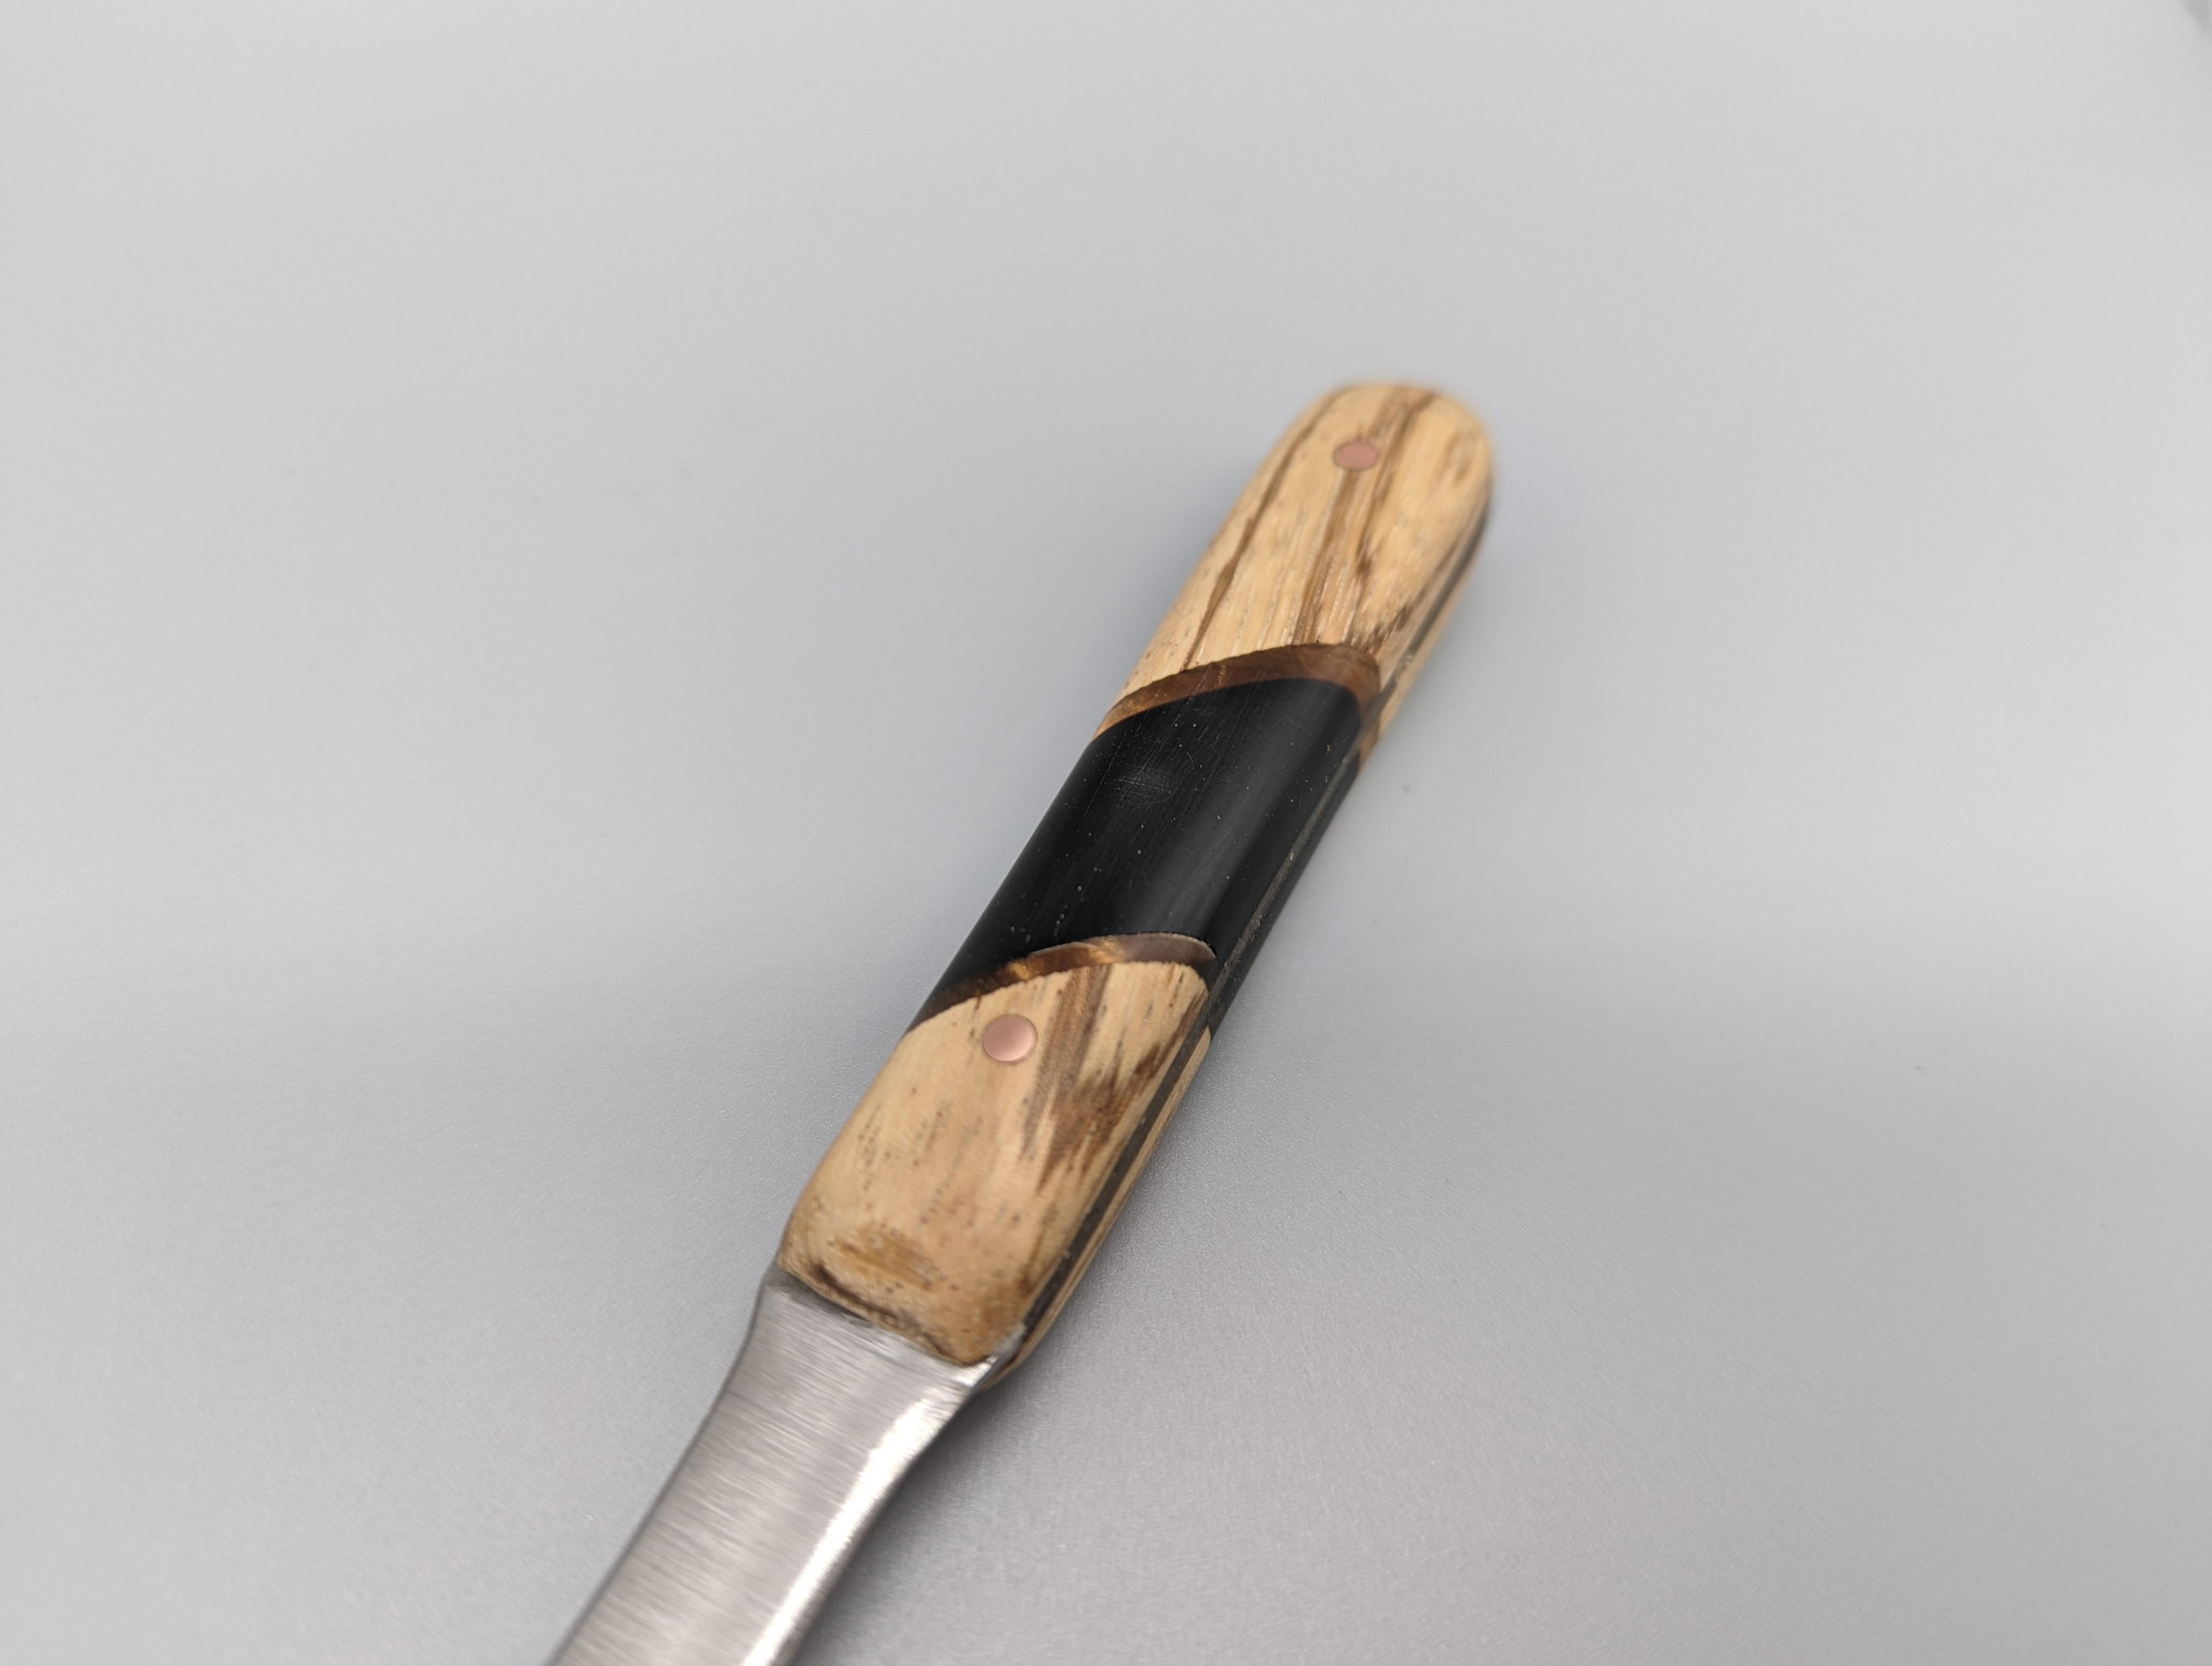
I'm a little late in posting this, but over the holiday break I managed to finish up another letter opener, which was given to a friend who gifted me a butcher block cutting board. Recycled coil spring blade, Zebrawood & resin handle.


-
I just got my Mr. Volcano, and I'm dying to set it up, but I'm worried that the curing/setting/hardening etc. of the rigidizer and the satanite will be hindered by the cold. Not to mention I fear the cold would be detrimental to the setup, as liquid in the mixes might freeze before things are set, and when firing up the burner to cure it'll create issues. So it's sitting in it's box, waiting for warmer weather. I've also got some plistix I'm planning on topping the satanite with. My devils forge is still a great forge, but with it being a 2 burner I'm just wasting fuel as I'm not making that big of items right now. Patience has never been one of my virtues, and the wait for March when I can count on the weather turning and staying that way is killing me slowly.
-
I made this over Memorial Day weekend, realized I hadn't posted it here yet. My first forged item that I'm proud to show others, something that I learned a fair amount during the making of. I've had plenty of compliments on it, and interest from some of the people I've shown it to for one of their own. Blade is from coil spring, handle is epoxy resin and mica powder. There are some pretty obvious flaws to it, but as a first I don't think it's horrible. I'd love feedback too so the ones I make for others will be closer to perfect.
-
People do make "scrapmascus" out of bandsaw blades and higher carbon steel. I'm not sure how well the finished product will be for your use since you're going to have mixed hardnesses in the blade and varying edge retention. Now, what you could do is get your billet prepped and then forge weld on an extra piece of spring steel to make your cutting edge so you have all the prettiness of the damascus pattern that you make and then the cutting edge is a solid, known steel that better takes to heat treat, sharpening evenly, and edge retention.
-
Flexible Graphite sheeting in forge build.
MaxwellB replied to J Hiser's topic in Insulation and Refractories
I read the data sheets as 5000C in a vacuum, which definitely isn't achievable in your average forge. I'm assuming you're still lining everything with ceramic blanket, and this is the inner-most layer? -
A few questions before I start building my propane tank forge
MaxwellB replied to Fallon's topic in Gas Forges
1 & 2 - You don't need to rigidize the first layer if you're doubling up. Only the fire-facing side needs to be ridigized, and since you're looking to put a refractory on top, you don't absolutely have to rigidize at all. It will make the refractory process easier, but for sake of uniformity with other advice, no... Just rigidize the top most layer. 3 - Yes. Your refractory should be completely cured before you apply the IR. You will want to repair any cracks that form during the cure and make sure your refractory is 100% ready to go before applying IR. 4 - KOL doesn't dry. It cures. It acts like cement, where the water creates a chemical reaction within the refractory and triggers the curing process. If you're thinking of mixing up 20lbs of KOL and trying to save the rest, you'll end up with a bucketful of solid stuff. Any excess you have after you coat the walls you could use to build sacrificial plates to put on the floor of the forge, as that will take the most abuse from stock poking and flux and other nasties. -
First thing I would try would be removing the flare and the pipe after the flare, and just trying the burner with the 8" nipple going into the forge. Read what Frosty said yesterday a few times if needed, especially concerning mixing tubes and bell reducers. The guy really knows what he's talking about. I'm building a few of his burner designs myself, and am waiting for one more shipment of (much cheaper online) parts before it's completed. Your forge does look pretty nice though. I especially like the expanded steel stock rest/brick holder.
-
Mikey's got the right idea, probably the quickest and easiest. Another thing you could do is get a 90 degree elbow and put that on the end of the line so your propane hose is coming in at 3 o'clock instead of 12. Add the post and hook, and you're golden.
-
My drums all have removable tops, and contained foodstuffs. Two of them are burn barrels, and the paint burning off the outside while I've got a load of branches and stuff on the inside made pretty sparkles. The insides are all clean as a whistle, so I'm thinking they were either pre-washed before sold, or held stuff in bags or dry goods. There's no staining, no stickiness, no nothing.
-
Wait... You mean we're NOT supposed to cut drums by standing on top of them and making like we're in a log-rolling competition? Well I'll be... Learn something new every day.
-
I've got a cap on it. I've been looking at the different types of dump gates and things like that for making it fancy, but for now the cap works fine. Thomas - I was going to use the cannibalized piece of the other drum as a coal fence/chimney/heat shield combo. Something where I can satisfy keeping coal on top, something to keep heat from going out every which way (which I would assume make things more efficient?), and put a chimney of some sort on there to vent what little smoke I get from adding fresh coal to things since it's wet down to keep dust low.
-
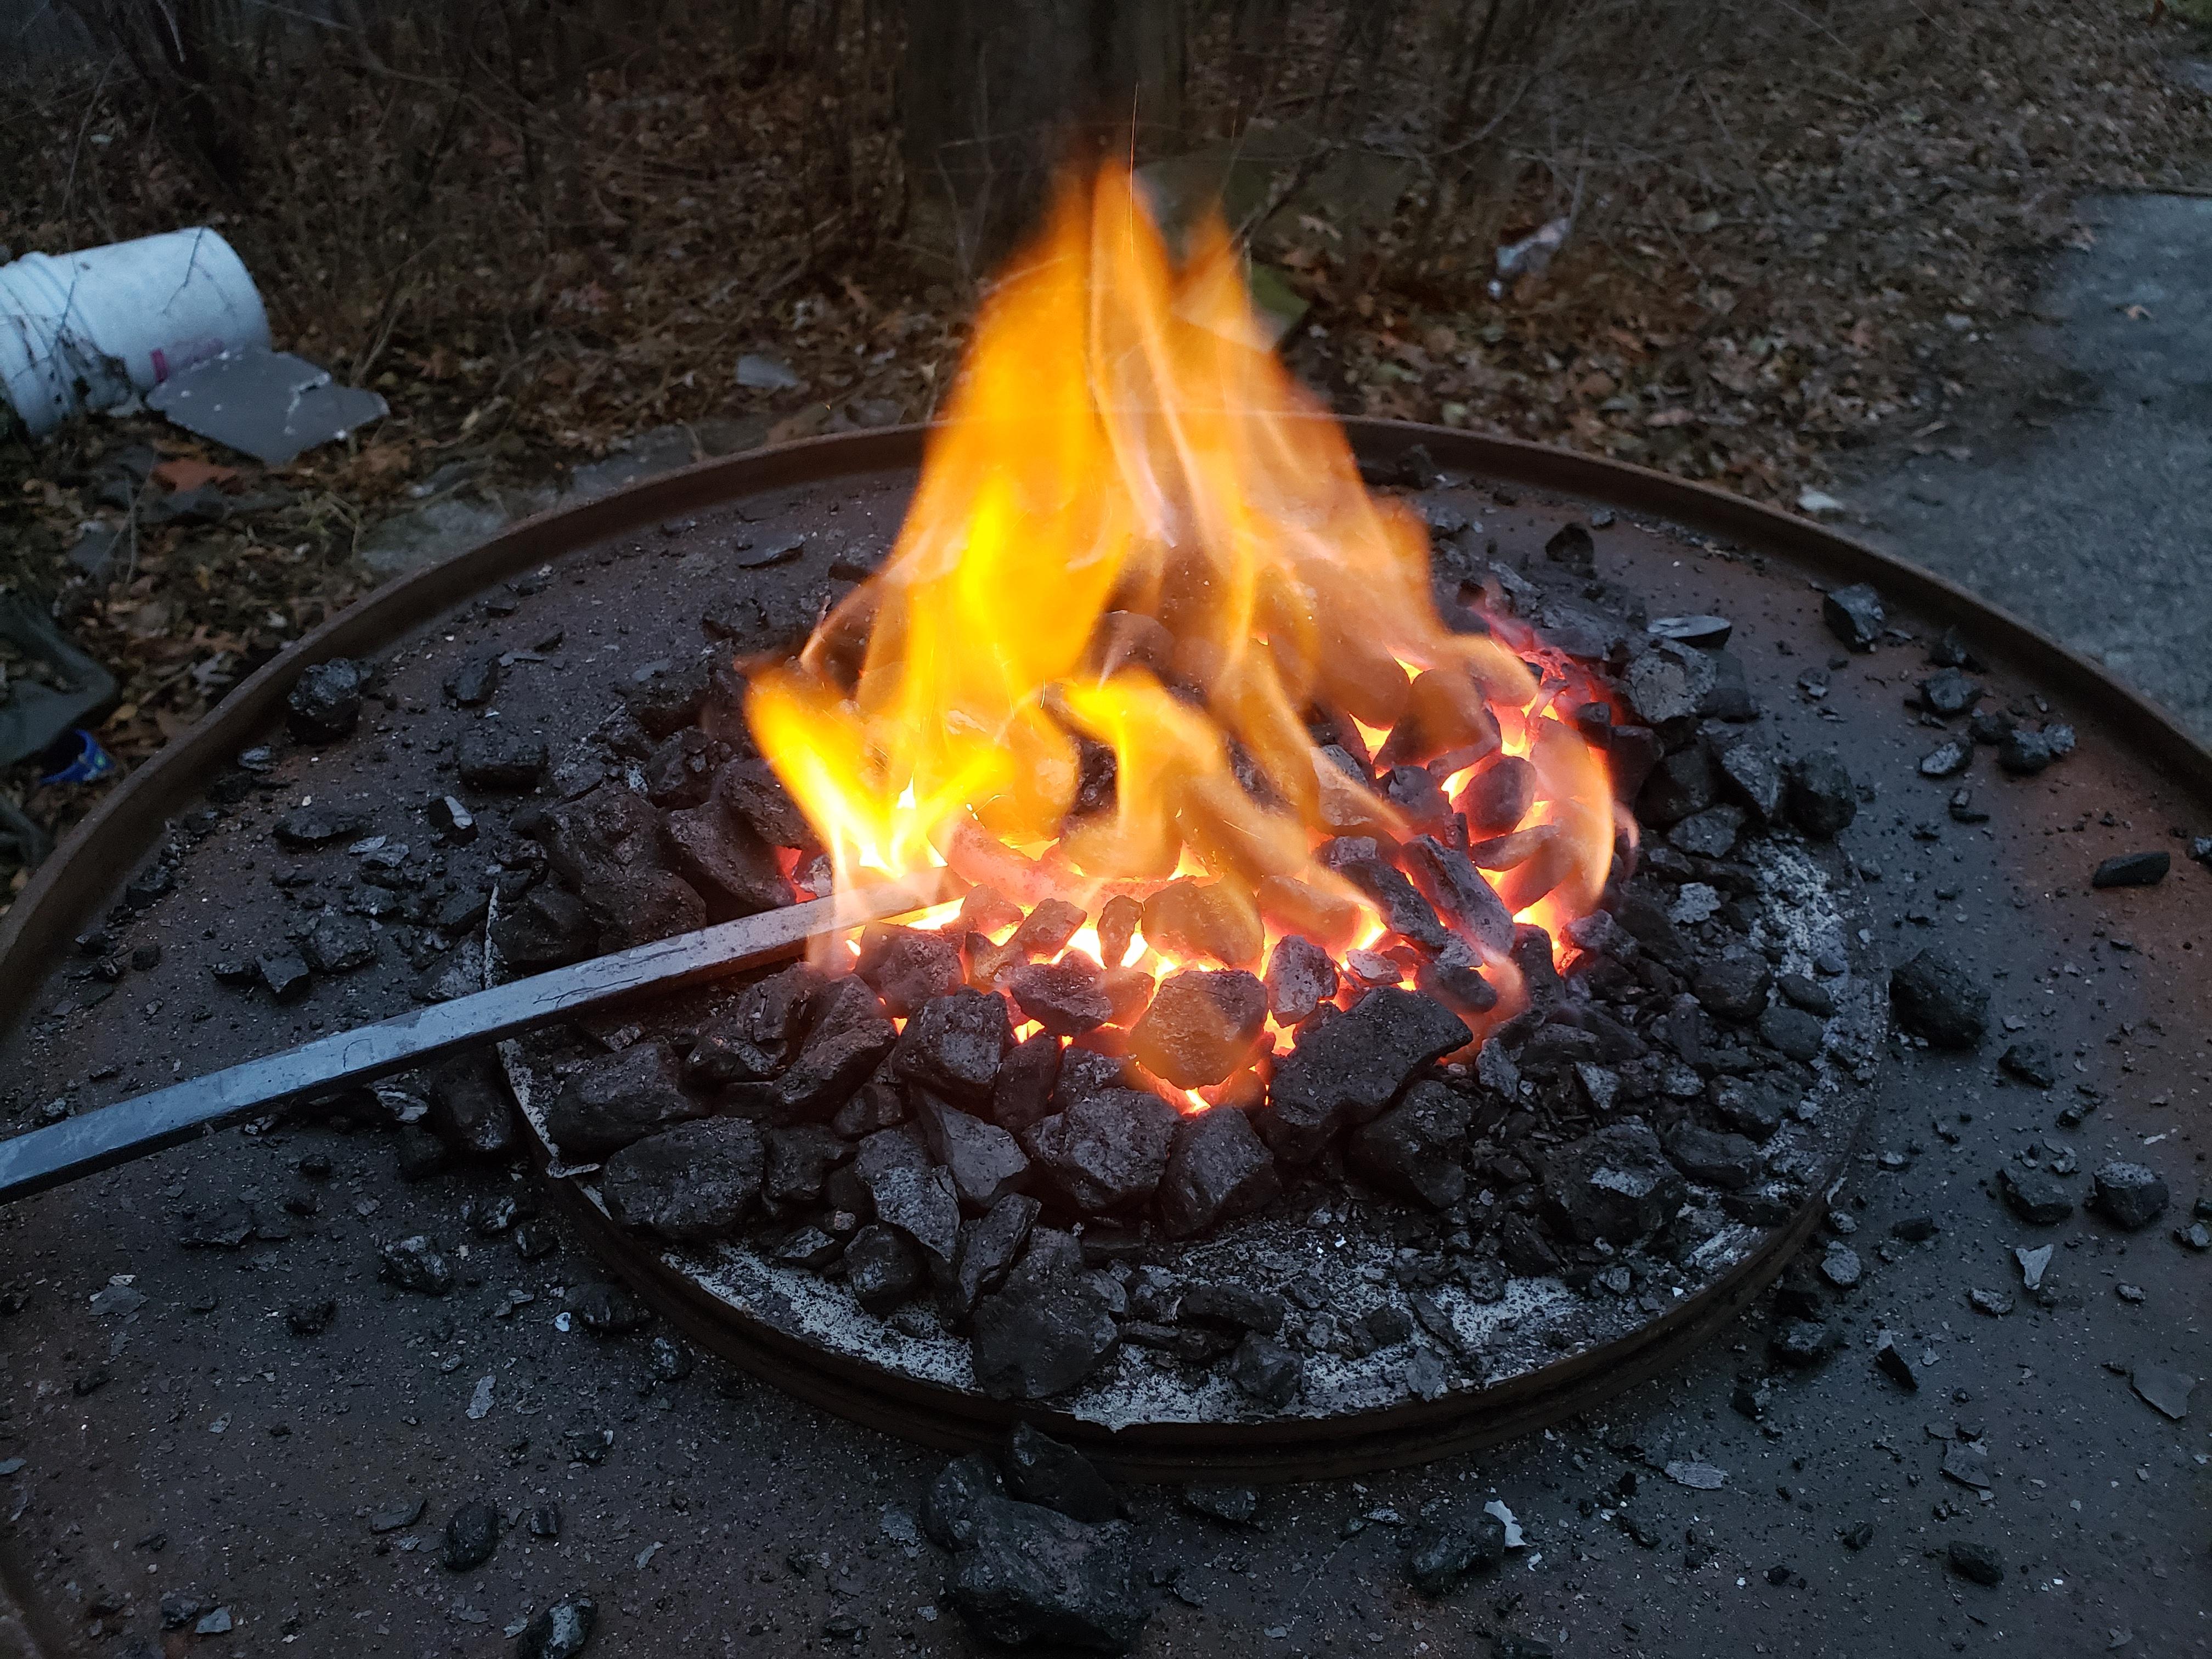
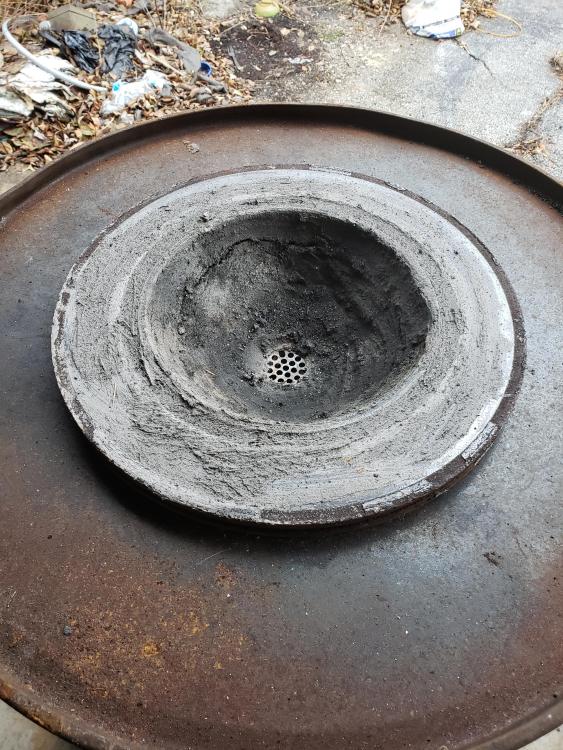
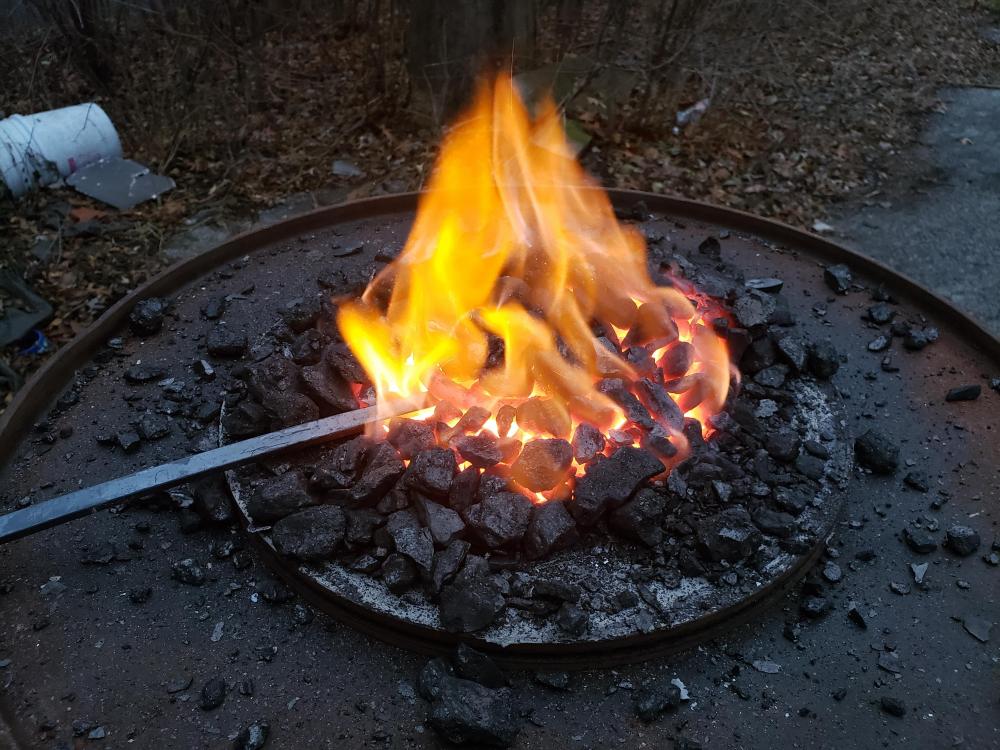
So a bit of an update on this... I built a bigger fire in the pot today, enough to see if I could successfully heat a piece of steel laying across the rim of the rotor. I cut a chunk off a coil spring I have and heated it a little lower than the rim to straighten it out, then laid it across the rim to test. And I have to say, it was a success. So I think I just need to make the attachments of the hair dryer to the pipe more permanent than they are, add the "cap" that'll be cut from another drum, and I'll be in business. Probably should cut an access in the side as well to get to the ash dump now that I'm thinking about it... Hrm. My rotor firepot, "clayed" with leftover Greenpatch: A shot of the "bigger" fire, heating up the mild steel that'd become my quickie coal rake:
-
I did. And I did steal that. It's just tricky trying to get the hair dryer to stay put. I'm thinking chewing gum, shoe strings, bungee cords, and a few liberally applied rolls of duct tape would work well! I just need to work out a different way to fasten the hair dryer to everything. I'll probably end up getting a reducer bushing for one side just to make sure it's all tight going towards the forge, and for the hair dryer side probably straps of some sort. I've got some spare spools of wire that I might use. I haven't thought that far yet, but since I'm off work for the next few days I'll be tinkering much more.
-
TP - That's the idea. I just did that little bit last night to make sure that everything would be good to go for building the big fire. I might build the big one tonight. If not tonight, then definitely tomorrow. I just need to think of a better way of mounting the hair dryer until I get a proper blower on there. And I've gotta cut an access panel in the side of that drum so I can slide the ash bucket in and out much easier. Hopefully I'll have something bigger to contribute to the forums in the next few days.
-
Sham, I just put together a forge very similar to your drum forge. I have mine higher though, so I used the brake rotor in the top and am planning on putting another 1/3 of a drum over it for a coal reserve or the like. How does that work for you? How big is your pipe for the blower? I've got mine set up with 1". I'll have to get a better blower as I don't think the hair dryer will have much life. I did a small little test light tonight with it, to see if everything works like I hoped it would, with just a handful of TSC anthracite over some charcoal. Worked fine with the small amount. Wondering about scaling it up to use bigger stock than the little rivet I buried in the coal just to observe.
-
Been grabbing odds and ends for it for a little while, now that things have slowed down at work. Finally got around to piecing it together over the weekend, and gave it it's first firing tonight. Little fire as I didn't want to put too much fuel in there and be out in the driveway all night. I'll definitely have to redo the hair dryer/blower setup, and hopefully I'll be able to produce a big enough fireball where I'll be able to lay stock across the top of the rotor. It was just a handful of TSC anthracite on top of a couple charcoal briquette starters. Tossed a spare rivet in there to see if I could get it really toasty. All in all, I think it's a success. A larger blower on there, and the other drum I've got cut down to be a "cap" around the top, and I think we'll be in business. I'm down for any feedback too.
-
Satanite isn't for structure, it's why it's called a "refractory". It's job is to absorb and even out heat in a forge, giving you a more uniform temperature across the cavity if the forge is constructed right. Cement on the outside of firebricks could possibly be ok, but the problem is cement holds moisture, and moisture + high heat = steam. Steam expands, and trapped steam can cause cracks, breaks, and potentially explode and send shrapnel into places you don't want sharp, high velocity chunks of cement flying into. If you're looking to hold everything together, you can use angle iron and bolts, similar to this: If everything is round, depending on the size, you can use hose clamps too.
-
The more you add, the more fuel it'll take to bring your forge up to temperature. KOL and other refractory cements will soak up the heat. As such you'll use more fuel to get it up, but you can also use less fuel to keep it at temp versus using bare wool. Having a thicker floor than roof is normal, because the floor takes more abuse. I know this post if a few weeks old, and sorry I didn't see it sooner to chime in, but I wouldn't add more to the roof. That'd be in my opinion a waste of materials, and a waste of fuel to heat that extra mass up. Stick with your 1/2" and slightly thicker floor.