NelsonR
Members
-
Joined
-
Last visited
-
Yeah that's a pretty similar build to what I want to make eventually
-
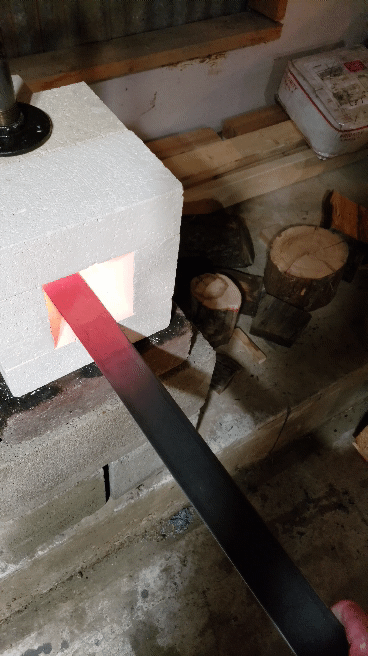
Oh yeah, I should have mentioned that the bottom bricks are k-26, I didn't want to make the whole thing out of those as they act as a hard refractory and take a long time to heat up
-
Yeah I definitely think I could just run it horizontal, however I would like to just restate that this is a very well ventilated shop, and the two windows behind where the forge sits now (the ones covered by the metal flashing) open to the outside, as well as the fact that this will most likely be run in the doorway of the shop (just out of frame) anyway. for the purposed of these shots I ran it in the easiest place I could set it up for just a few minutes to see if I could get everything working properly. Having had a family member who died of CO poisoning I don't take it lightly, rest assured I have taken proper ventilation into account.
-
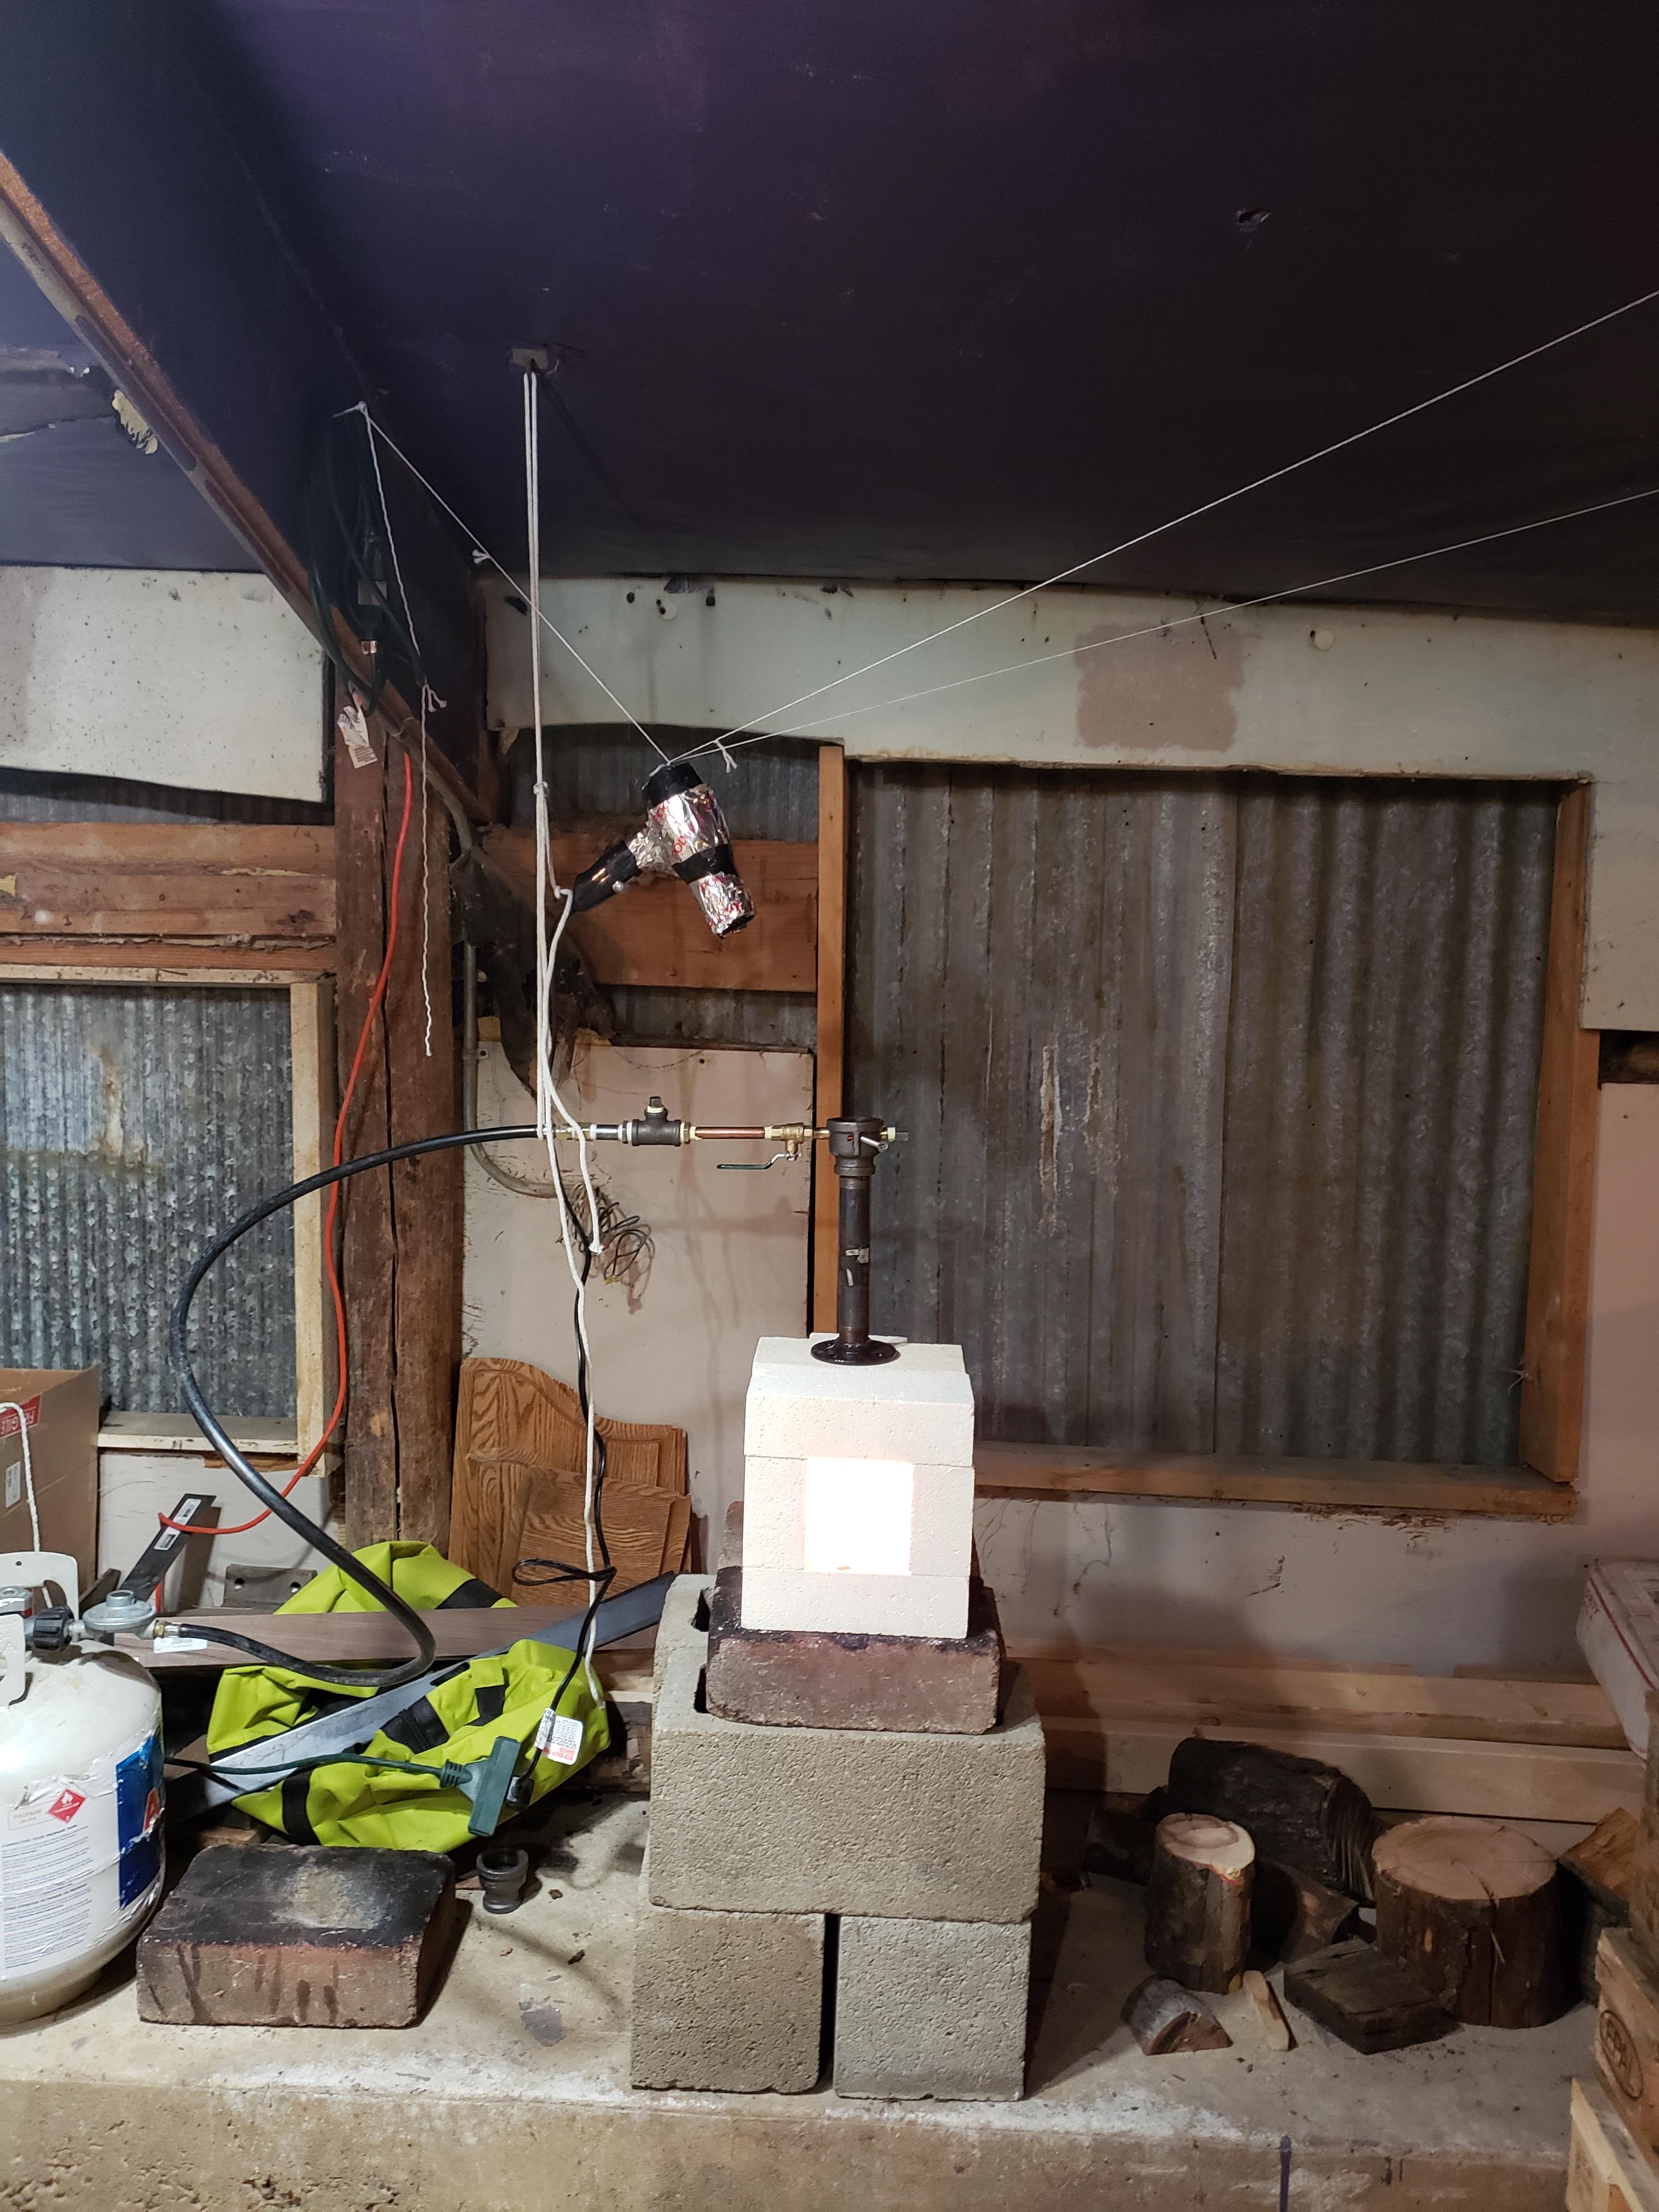
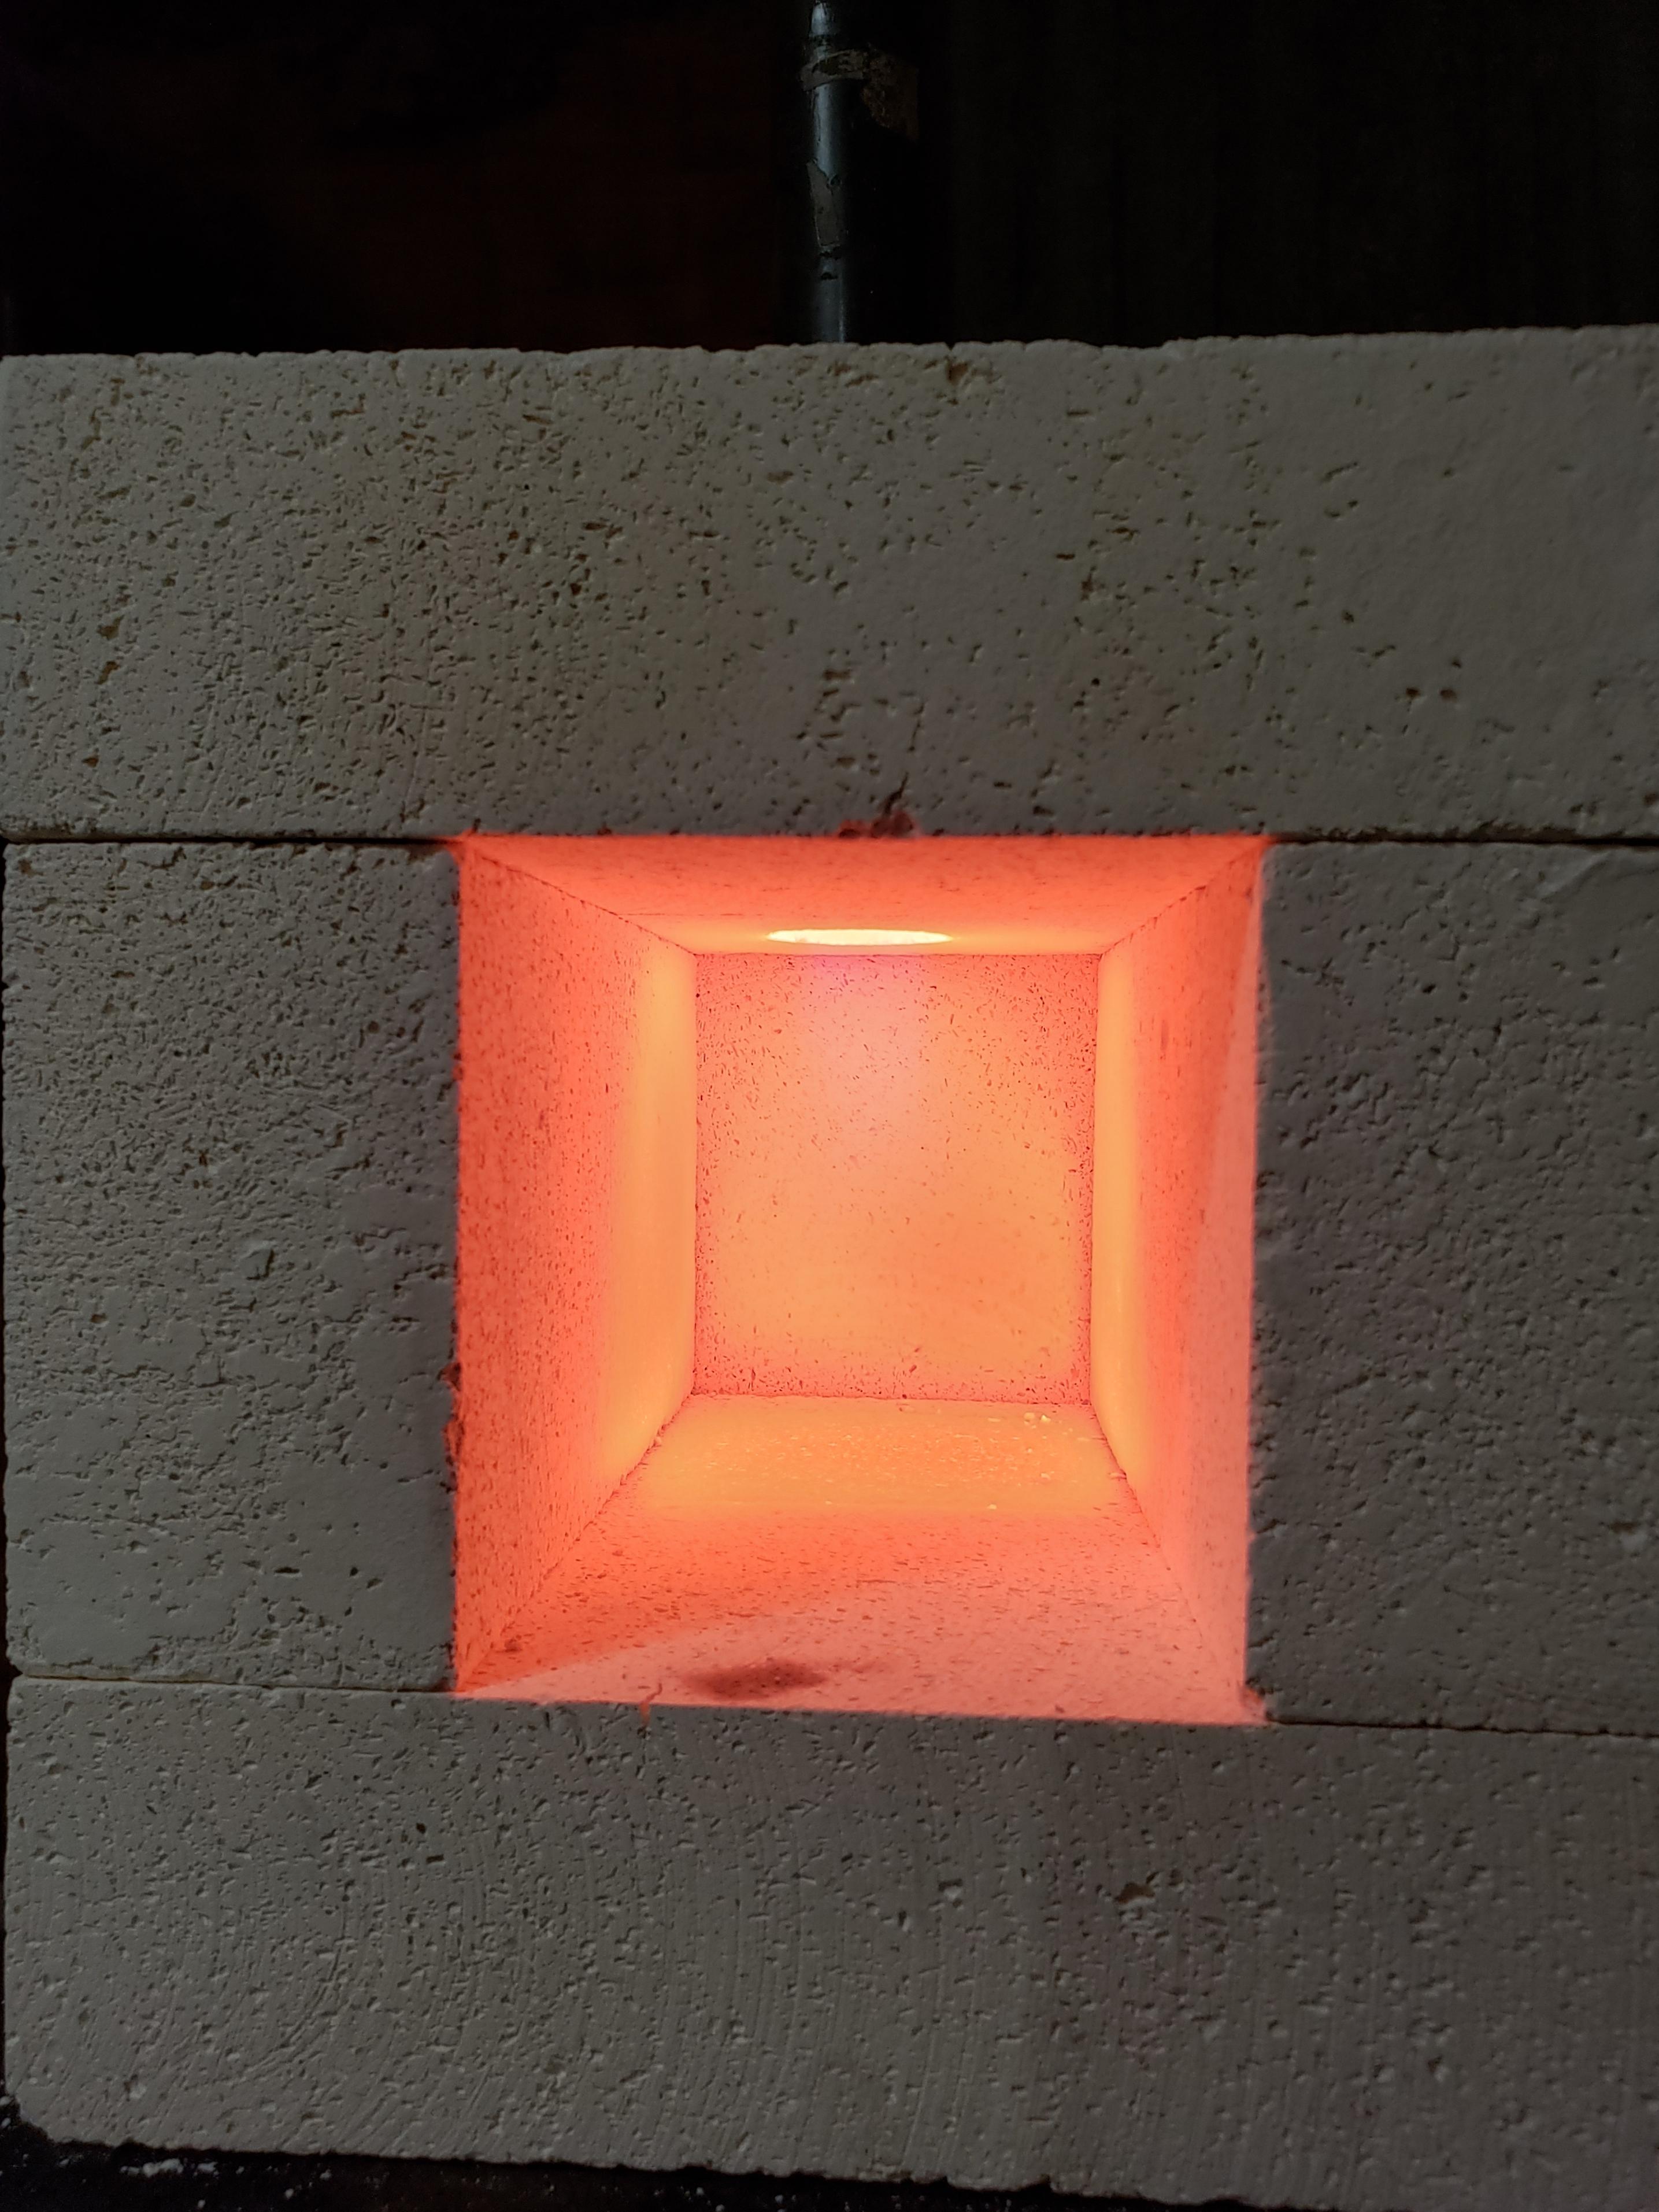
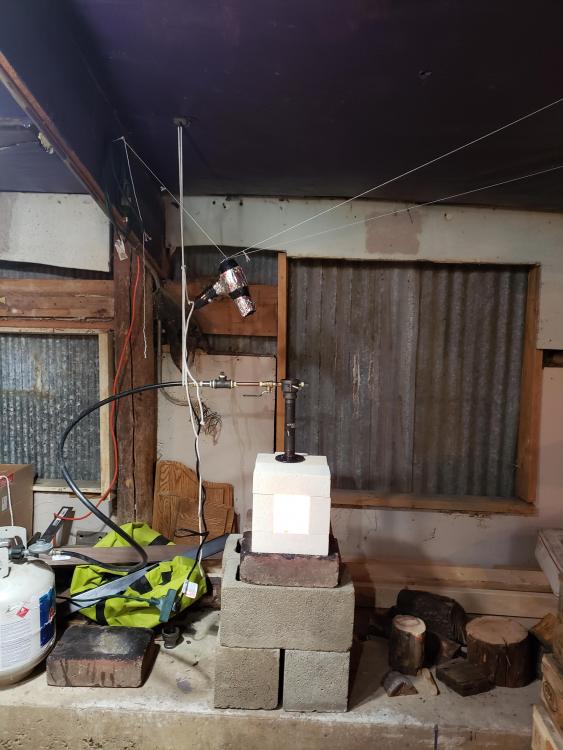
Thanks for the pointers! Didn't really think that through on the ball valve so I'll get that moved. As for the opening I've just been placing an extra firebrick in front and it's been working decently well, these were taken while I was tweaking some things and trying to get a good look at the flame so I had the brick moved to the side. Burner specs are 1"x8" for the burner pipe with a .45 mig tip for the gas nozzle. It burned fine when I had it horizontal, but as soon as I moved it into a vertical configuration it started to burn poorly as the gas flow seemed to be flowing back up the pit. I've ordered a high pressure regulator that I hope will help solve that problem, but for now I have the hair dryer to help mitigate the low pressure. Bell reducer diameter is only 1x1 1/2, I was thinking I might want a little bigger, but as I build all this just with stuff we had laying around the shop I was rather limited. I'll definitely have to make some tweaks as I go, for one I need to find a proper fitting so I can replace to monstrous series of pipes and fittings I currently have to adapt the gas hose to the burner.
-
Yeah that was a concern I had as well, fortunately the warehouse that we are in has pretty decent ventilation, it's about 6000 square feet and riddled with holes and missing windows so I'm not too worried about that, however just to be sure I bought a couple carbon monoxide detectors that will be installing later this week
-
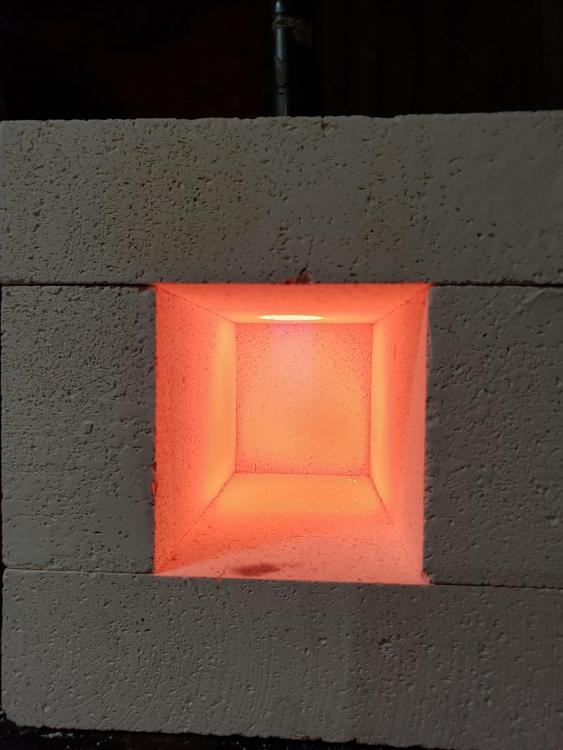
Hello everybody! Ever since I started forging about 7 or so years ago I've only had very minimal contact with gas forges. Except for the occasional trip out to my friends workshop about an hour or so from where I live I've done all my work on my trusty coal forge and have always been very pleased with the results it has given me. Recently though, I have had a growing interest in building a gas forge, mainly driven by the cold temps this winter and a desire to be able to work inside. The build I chose was far from optimal, and I mainly chose it based on material available to me. The forge itself is build with k23 kiln brick that was left a tenant that we used to share our work space with. The burner build is very basic, and although we had trouble getting it to burn well at first I was able to Jerry-rig a setup that gave us a good flame. I'm guessing our main problem was that the only gas regulator I had on hand was pretty low pressure; only around 11 PSI according to the pressure gauge I had. I still have yet to weld up a frame to hold the bricks together and hopefully make it more mobile, but so far I'm pretty pleased with the results. Like I said, I have almost no prior experience in gas builds, so If anyone has suggestions as to what should be improved I would definitely welcome them. I also was wondering about the health concerns associated with firebrick and whether it needs to be coated to prevent dust being put off while in use similar to ceramic wool. These bricks were straight out of the box that they had been stored in, and had quite a bit of dust coating them. I haven't read anywhere that this needs to be done, but just wanted to double check as I have no desire to get silicosis any time soon.
-
Seems that borax has been banned throughout the EU. Although Borax is often the flux of choice due to its low cost and the ability to apply it to metal while hot, it is far from the only flux that can be used to pattern weld. As Thomas mentioned, flux is not even necessary at all to forge weld, although it does make things much easier. Throughout history many different fluxes have been used from sand to clay slurries, only in the past couple centuries being replaced with borax. The most common alternative methods still in use today generally involve hydrocarbons, such as kerosene or WD-40. It is important to note that the are applied to the metal BEFORE firing, as opposed to borax that can be applied while hot.
-
The first forge I ever built, years ago, was an 11" deep coal forge. I figures that since I eventually wanted to go on to forge welding for some of my future projects this would help to ensure that the steel reached high enough temps for a successful weld. Instead it just took a long time to get all the coke burning, and once it got up to heat and would burn through any steel I put in it within just a minute or two. Luckily the mistake was not too costly as I later re-purposed it into a (rather fuel-inefficient) brass foundry, but it helps to teach that bigger isn't always better in blacksmithing.
-
This is true. As long as that's the case, there shouldn't be a problem. Unfortunately I have seen a lot of less than optimal forge builds, so I generally am wary of such large designs for first time forges.
-
While I'm not sure about the cracking (looks to me that either copper or too high of heat could be the culprit), the weld almost certainly failed from the copper. Although, as it has been pointed out, it is not correct to say that that copper will always make a weld fail, it will certainly make it very difficult to weld a mild steel once infiltrated. It is important to note that while there do exist some steel allows that contain copper and can be forge welded, they likely do not have nearly as much copper, and must be very clean and welded in a near zero oxygen environment. I'd be willing to say that if you lost enough copper in your forge to do this, it's probably time to give it a proper clean Best of luck, -NelsonR
-
It seems that I don't think outside of the box enough, that certainly would be a viable option. As I am a man of my word and don't think that anything should ever be said idly, there's $100 up for grabs to anyone that wants to send me a video of this happening, and it would be $100 well spent in my opinion. Blacksmith inception.
-
I'd give $100 to anyone that could hot cut in a forge haha. In seriousness though, this works very well and saves a lot of time compared to simple shaping the metal by hammer. Once my coal forge gets up to a full heat its pretty much just as fast as cutting with a grinder. You can pick up a sufficiently wide chisel at harbor freight for just a few bucks that should work just fine, its what i used for years before finally making a cutoff hardy tool.
-
I think everyone else has covered much more than I could on the topic of the burners. The only thing I would add is that this may not be the right forge build to start with for a couple reasons. I'm obviously not entirely sure what your end setup will be, but it almost certainly will be the hummer of gas forges. I am assuming that you will either A: simply be lining it with Kaowool or some other ceramic blanket or B: be lining it with a ceramic blanket and then pouring castable refractory to fill the rest. Either setup will require a lot of propane to run, as the first leaves you with with a massive amount of airspace to heat, and the second will take a long time and a lot of propane to heat up, as castable refractory acts as much more of a heat sink than soft refractories, such as ceramic blankets and some brick. That is not to say that a forge this size doesn't have its place, but it's an expensive forge to learn on. I in no way want to discourage you from chasing your ambitions, but I would suggest a smaller forge to start out . Even one half the size as the setup you are working on now should be sufficient for the first year or so of forging (maybe less, depending on how often you plan on forging stuff) and it will save you a small fortune (perhaps a slight exaggeration) on propane. In the end, though, the only decision that matters is your's, and your willingness to live with it, Best of luck, Nelson
-
Nice! this is very similar to a build I'm putting together right now to replace my old forge. Let me know how it works!
-
Here's a (slightly blurry) picture of Sassy. She belongs to the plant nursery we rent our space from, but spends most of her time with us.