671jungle
-
Posts
455 -
Joined
-
Last visited
Content Type
Profiles
Forums
Articles
Gallery
Downloads
Events
Everything posted by 671jungle
-

What did you do in the shop today?
671jungle replied to Mark Ling's topic in Blacksmithing, General Discussion
Yea, That has been bothering me. Some configuring around the stump will be needed. I’m not sure if it will stay. It doesn’t give much room for smashing. Could still cut and bury where I want but this is as good as it gets for solidness. Bumping the dimensions up to 16’x10’ would be great! However, we need to follow the fence line. Maybe we can make an exception. I have a bunch of cement board I plan on using for inner walls around the hot work. -
What did you do in the shop today?
671jungle replied to Mark Ling's topic in Blacksmithing, General Discussion
Congrats. I'm still in the refilling bbq bottles stage. I did see a hundo #r a few weeks ago for free on the local online. Unfortunately it wasn't very local. Had to postpone the shop build last year due to unforseen circumstances. It is now head of the to do list. Space has been measured and cleared for a simple dirt or brick floor lean-to design with double doors for equipment and a man door. 16'x8'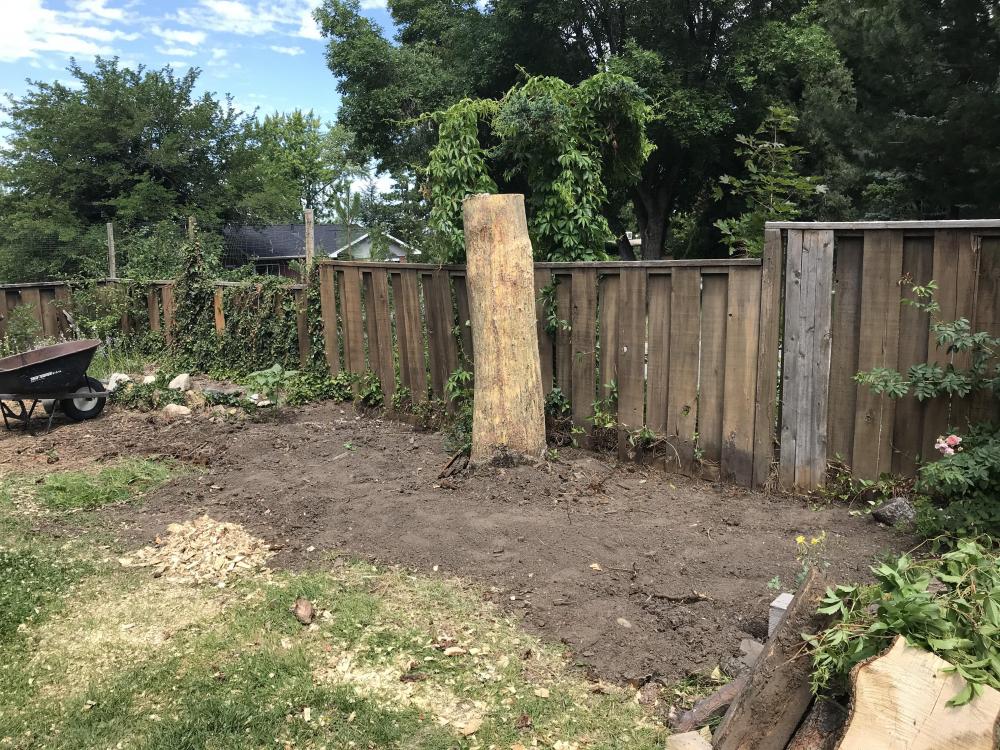
-
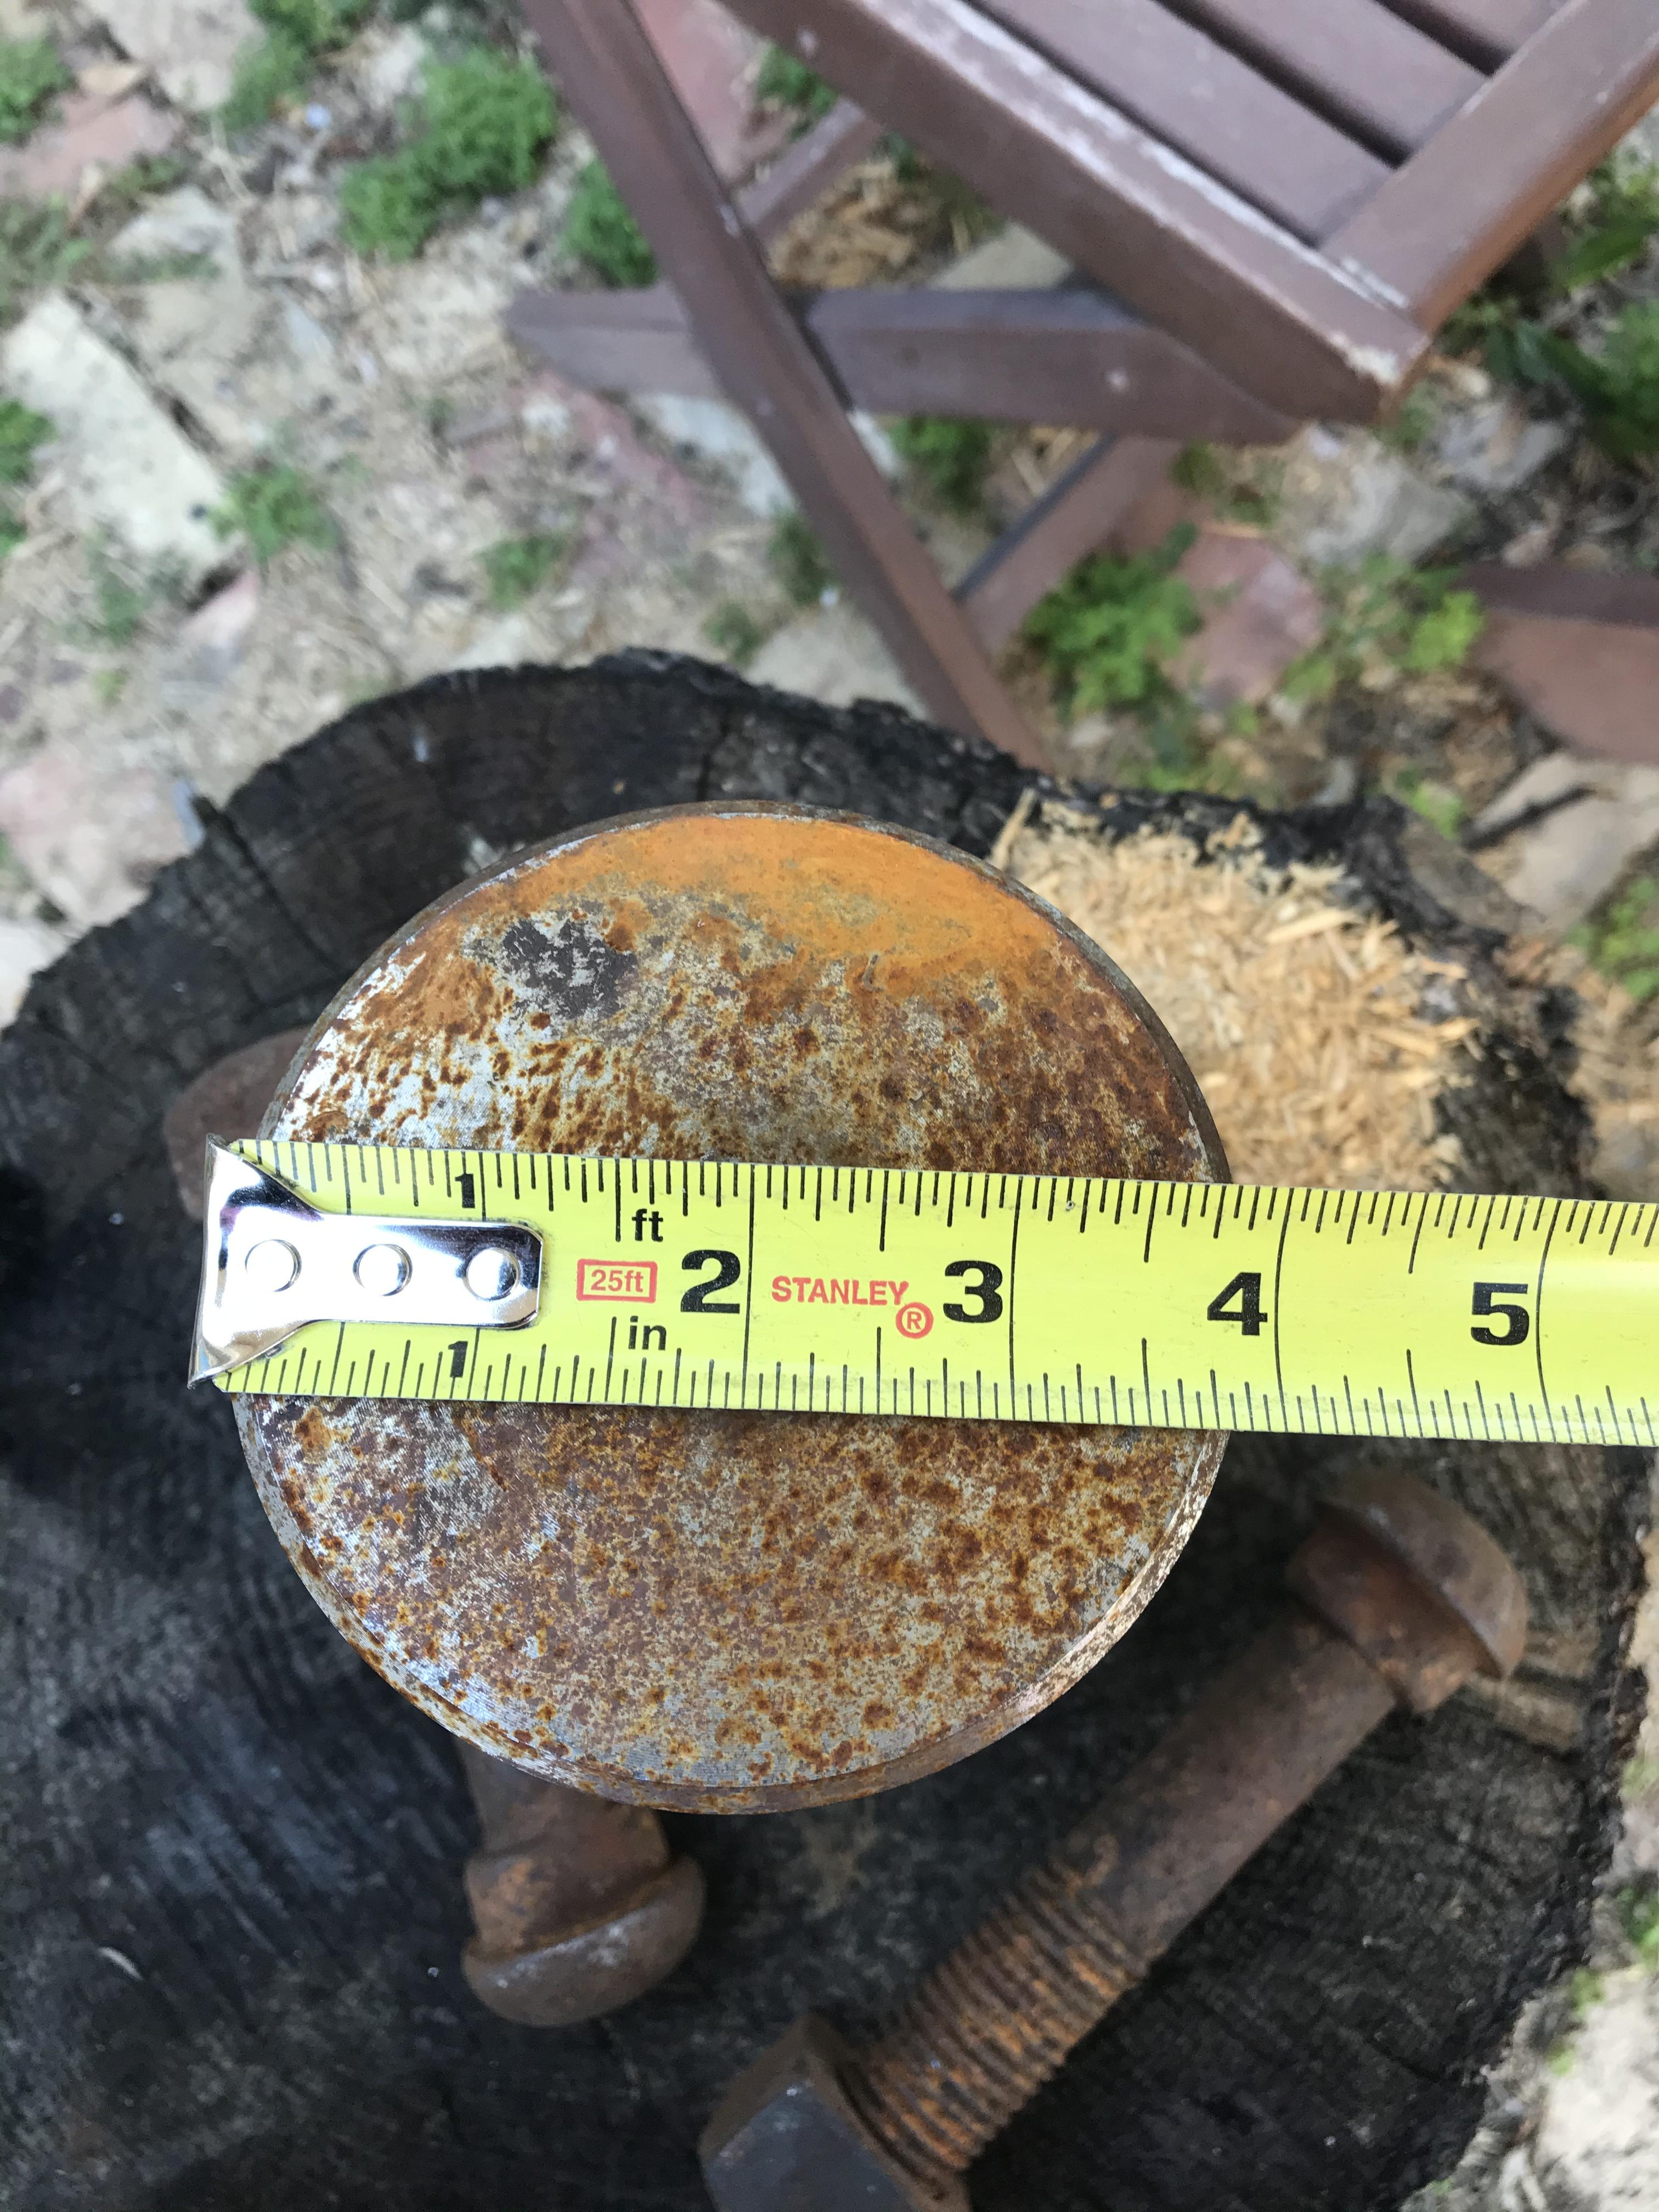
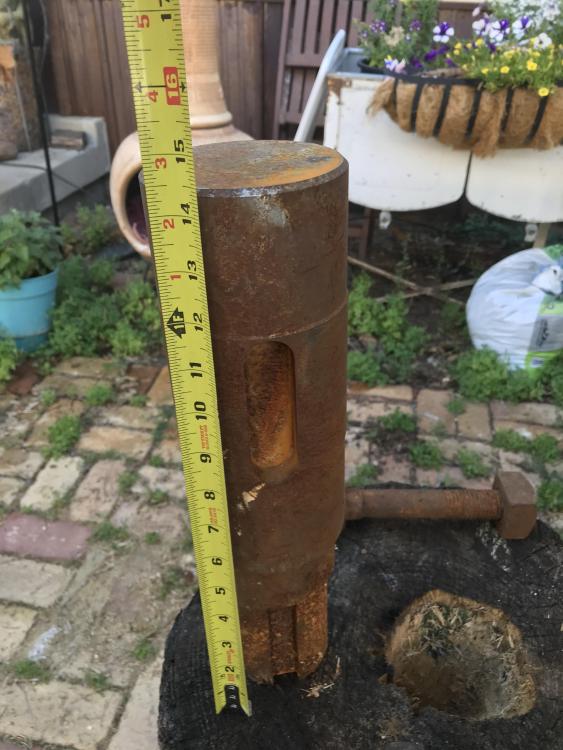
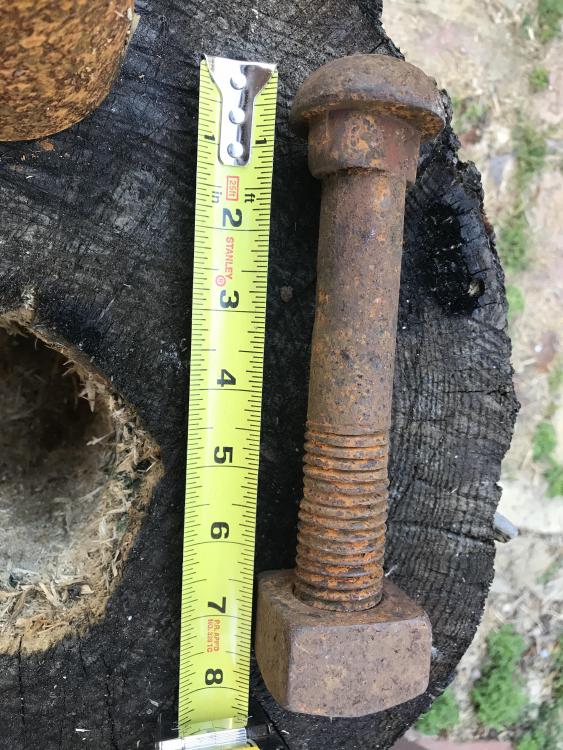
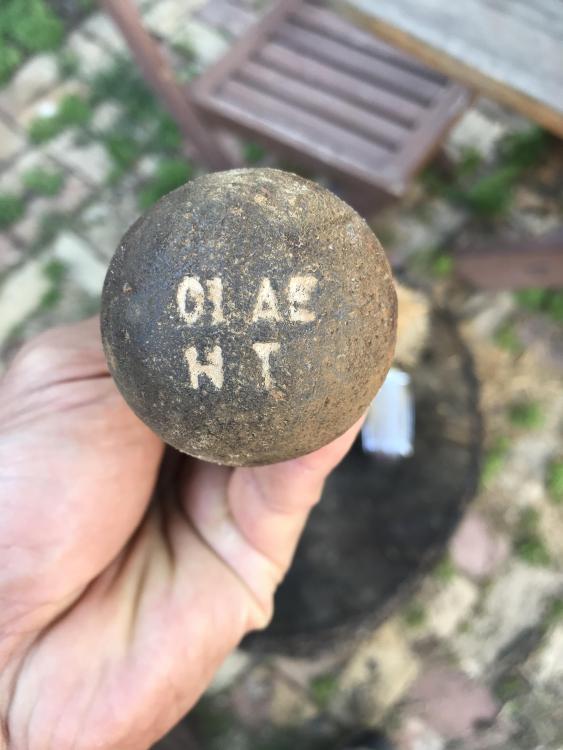
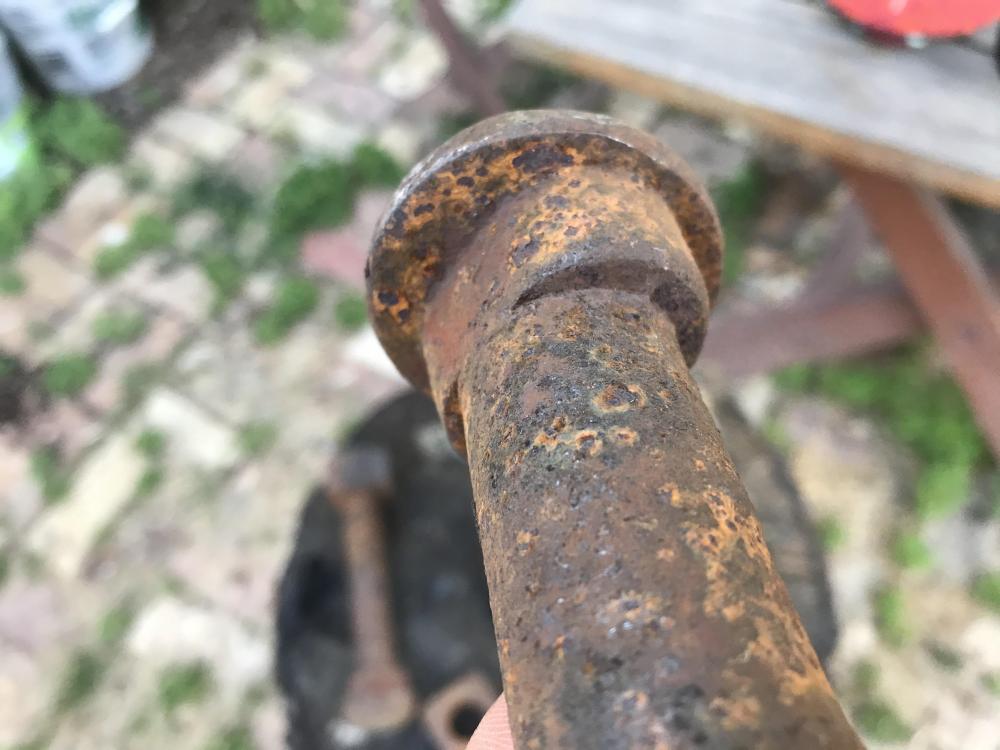
Followed me home awhile ago. On my way to Vernal UT we passed a machine shop In Duchesne Ut with a bunch of big steel drops sitting on their lot. On the way back we kept an eye out for the place so we could stop and ask about it. Well we thought we missed the mark and passed it. Fortunately it was another 50ish miles ahead of us. Stopped in right before the guys were about to clock out and I’m assuming “throw a few back”. Anyway, I told’em why I was interested and was able to trade 2 squash seedlings we had picked up from my Loves dad for this 4140 shaft. I also have some of dem bolts with matching square nuts I picked up at the recycle for free several months back. Crushed some perlite to see the markings.

-
I could not find a way to aim or add another source either. I did however go down a rabbit hole of researching other simulation sites. Very pretty to look at but not much more on customizing environments on the free online versions.
-
I hope this link is ok to post. It is pretty fun to play with and is a great way to get an idea of of how our home-built forges will handle the torches we put in them. https://physics.weber.edu/schroeder/fluids/ I wish the education system had more Teachers with your style.
-
Whoowee! I know what I'm making for dinner! Unfortunately no duck egg. I wish, the ducks around these parts are pretty gross. (City park ducks) Waffles with crispy sides and a moist center is where is at. I do like drowning it all in syrup. Molten metal is something I am not yet comfortable with.
-
Hello Alpha. are you saying your inner space is only 2 1/2” tall? If so then yes, that is probably what is causing inefficiency and too much back pressure. Also, you said “burners”.Do you mean you are putting more than 1 burner in this space? I didn’t do the math but that seems like overkill and probably contributes to the issues. On mounting: the reason burners are mounted on the side or bottom is to increase the hangtime of the flame inside the forge and combust as much fuel as possible creating more heat inside the equipment before the flame leaves as dragonsbreath. One way to help remedy this is to mount the burners on a tangent or a diagonal and by rounding the corners inside the forge. You can always take the burners out for transport if they are an issue. Apologies, I have not been on this thread in a bit I may have missed some other important details to your build. You also said “forges”. So more than one forge. One burner per forge should be ok but I still think the work area is too short. Try backing the burner out of the forge until the flame is stable and back pressure is minimized. Why such a flat forge design? With this design, maybe multiple smaller burners across the top will distribute more heat over that area.
-
Tristan's RR anvil with clamp
671jungle replied to teenylittlemetalguy's topic in Anvils, Swage Blocks, and Mandrels
Did the welding of the rail give you any issues? -
Tristan's RR anvil with clamp
671jungle replied to teenylittlemetalguy's topic in Anvils, Swage Blocks, and Mandrels
that is very impressive. Slick indeed -
What did you do in the shop today?
671jungle replied to Mark Ling's topic in Blacksmithing, General Discussion
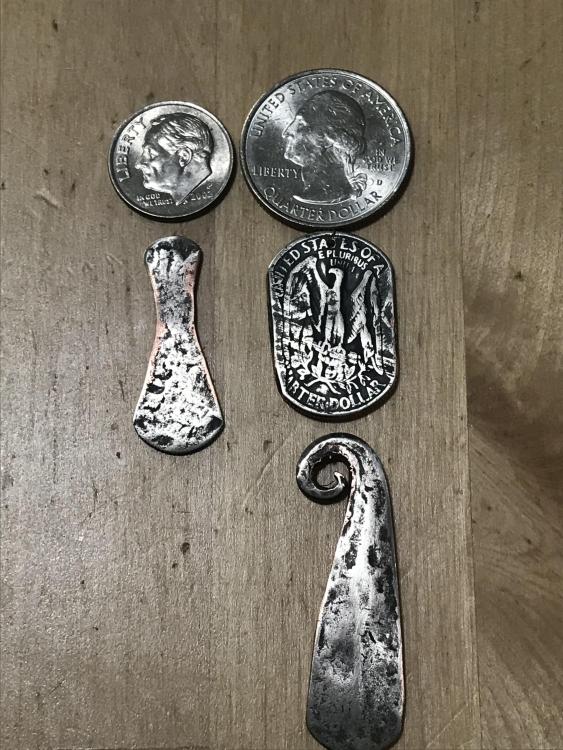
Thanks George, it is a quarter. I plan making more mokume out of quarters and nickels. I was having trouble the first few tries but I think I may have it closer to the right dial. Thank you very much Frosty. That is a very encouraging compliment. Some days when I’m at it, things just don’t move the way I’d like. Most of the frustration is wanting to do a thing but not knowing how or where to start. The help I get from the forum has kept me going and interested. I have found that my fascination with history has grown since being on the forum and reading all the great content and personal stories y’all share. Very cool! Did you punch and drift by yourself? If so how did you hold it? -
What did you do in the shop today?
671jungle replied to Mark Ling's topic in Blacksmithing, General Discussion
Thanks Jaegers. I am thinking of forging a couple chisels to cut the tenon holes and some detail stuff like the feathers and clean up. I have never carved anything before. It is extremely satisfying and easy to get into the flow zone. -
What did you do in the shop today?
671jungle replied to Mark Ling's topic in Blacksmithing, General Discussion
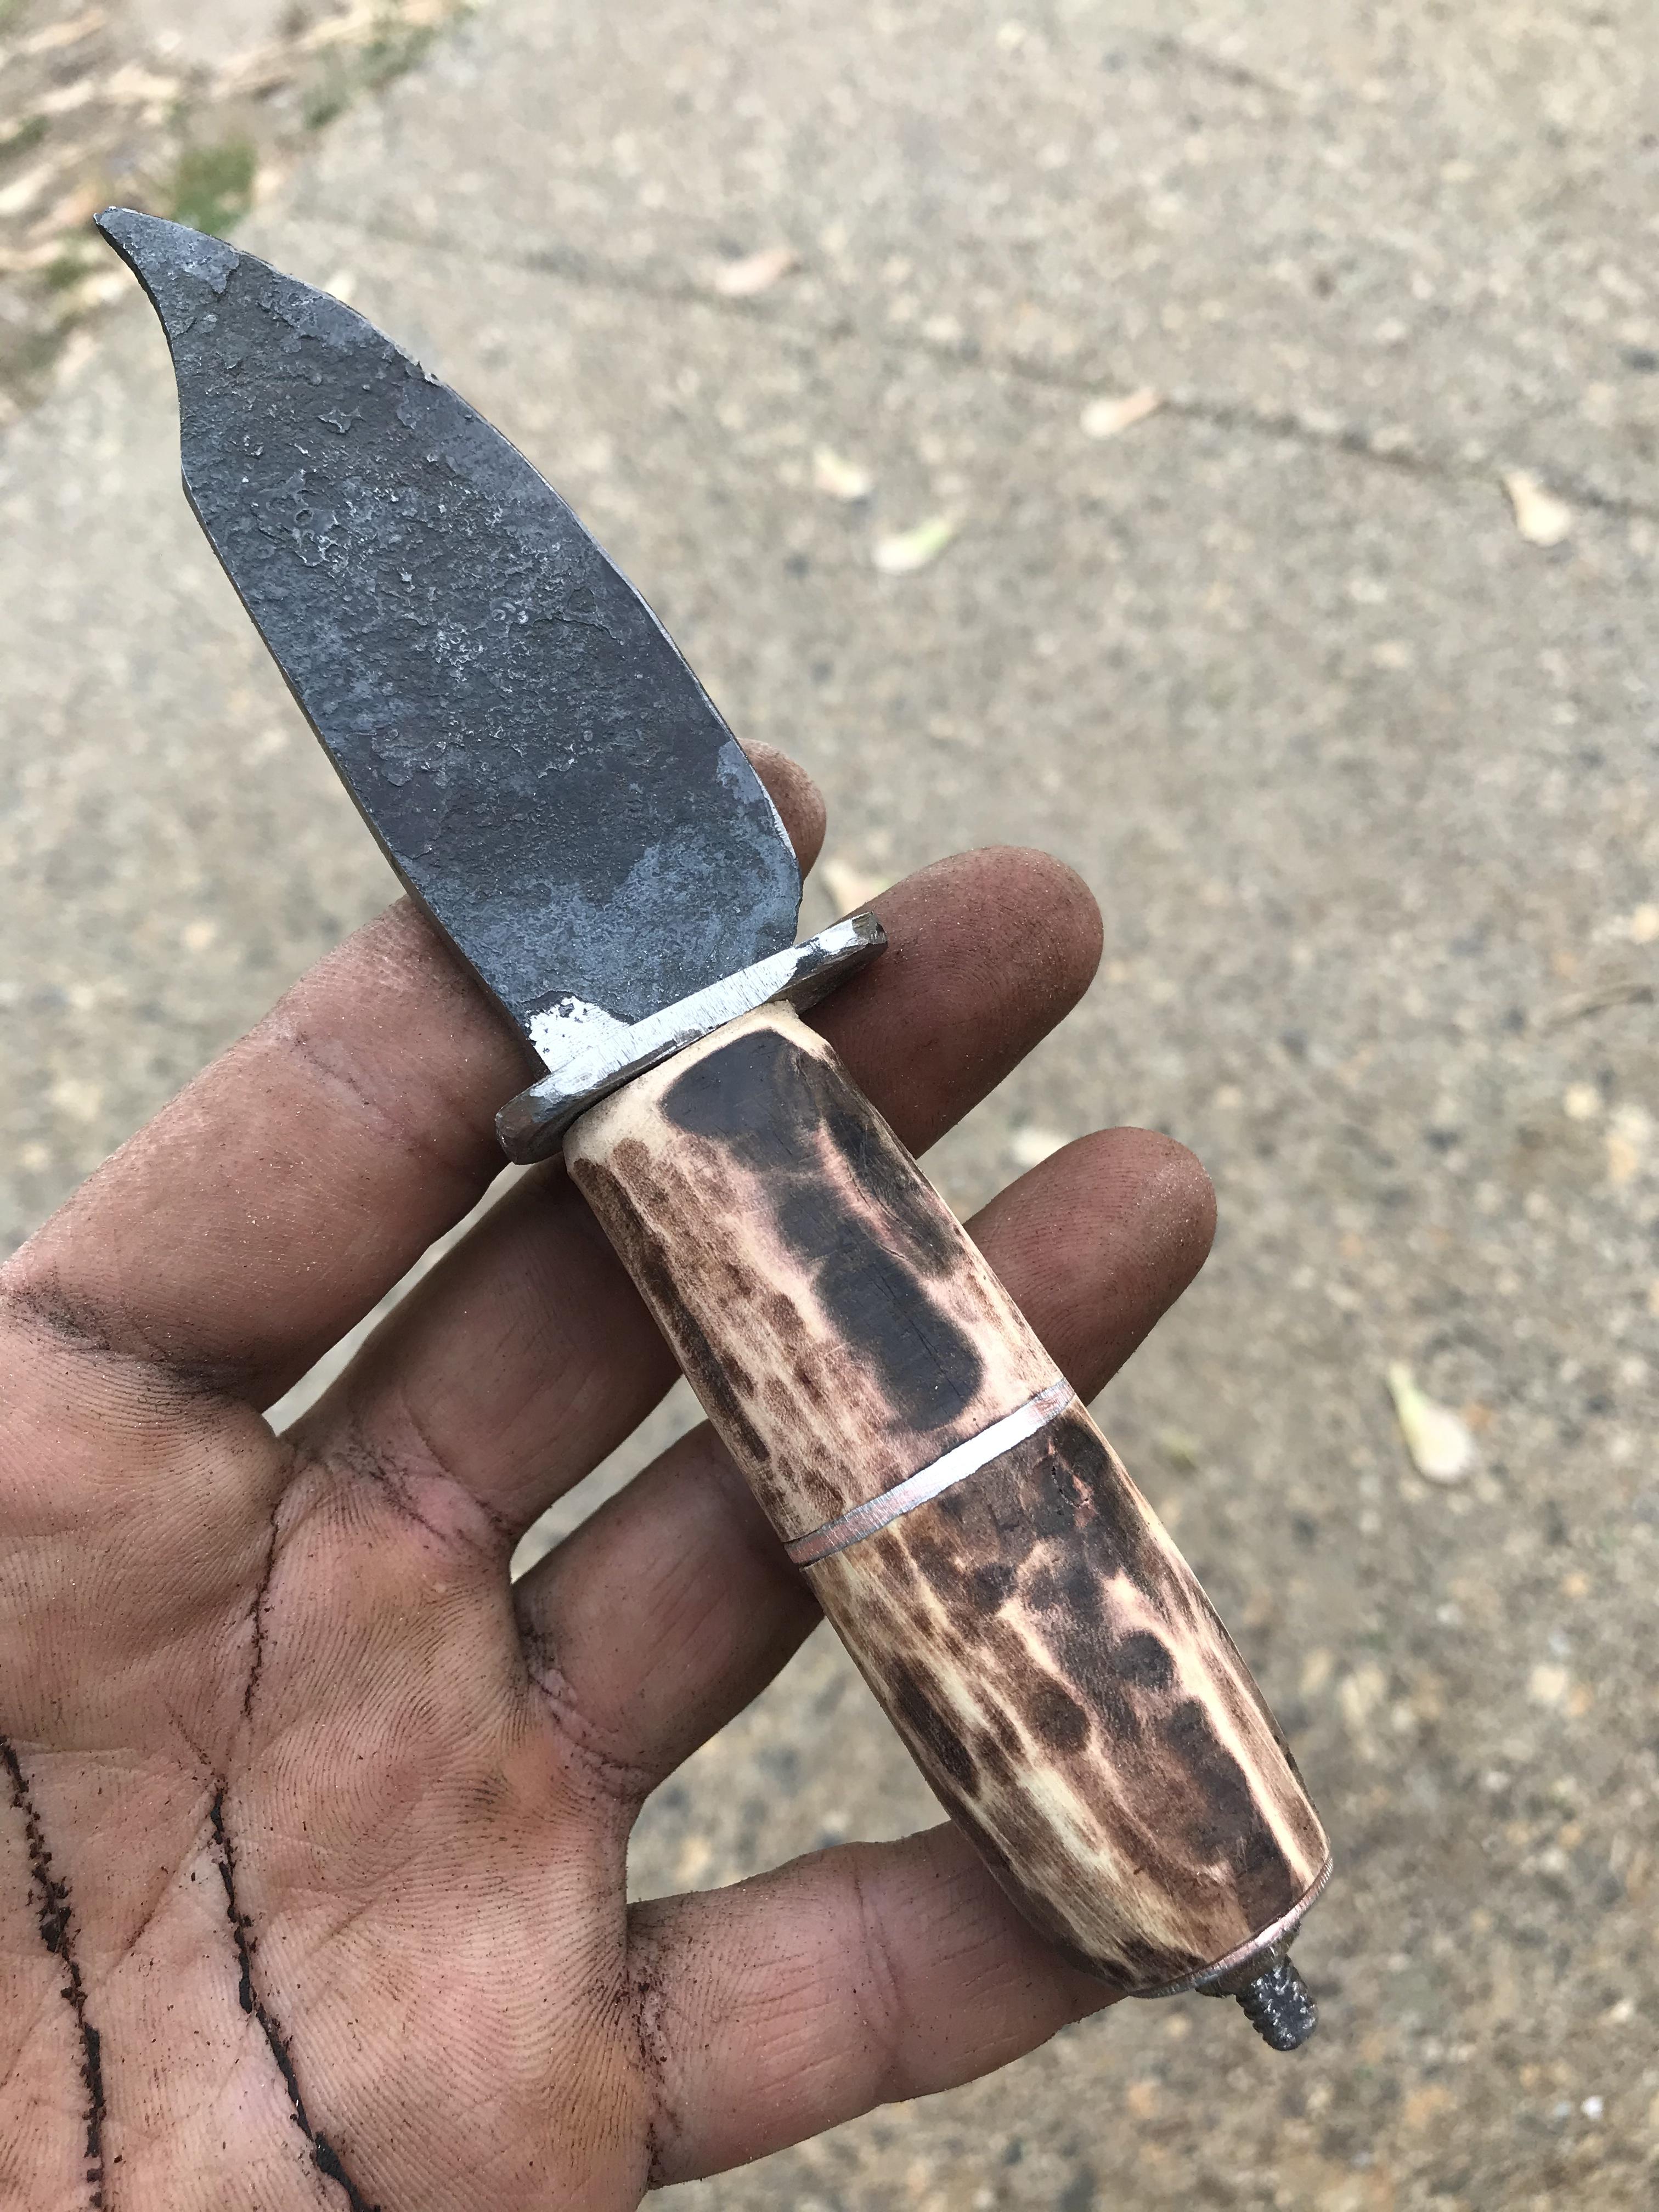
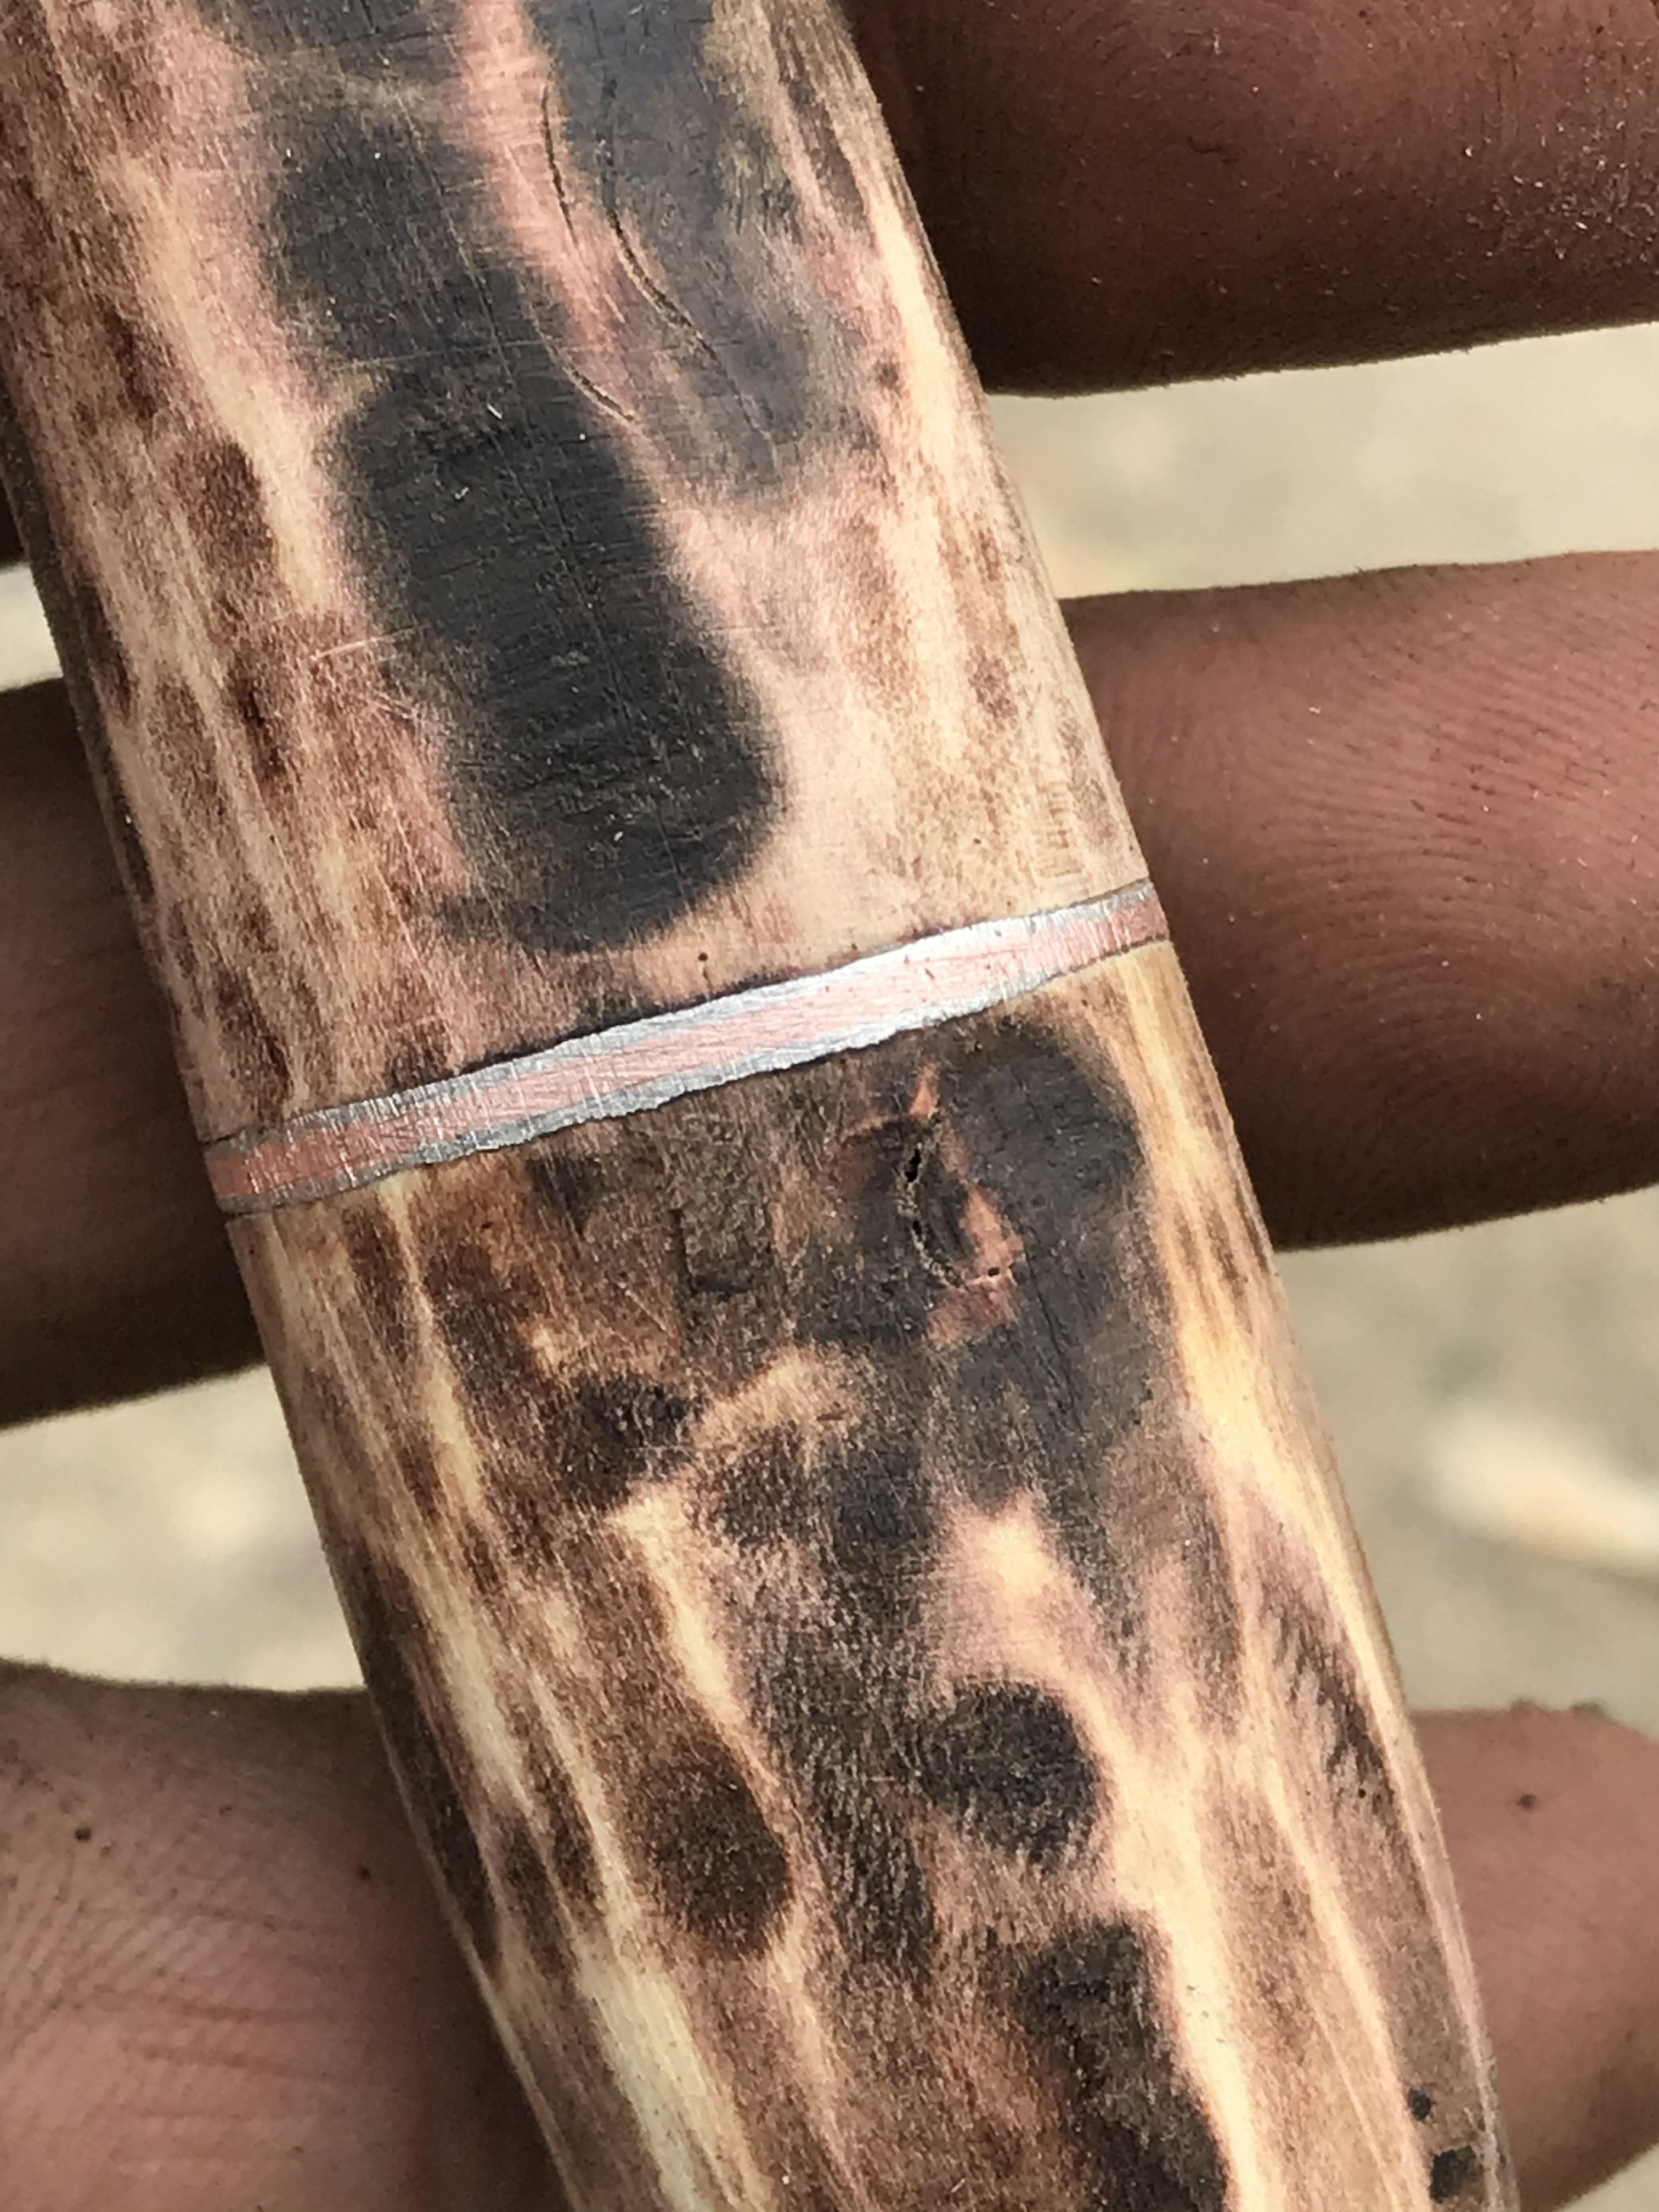
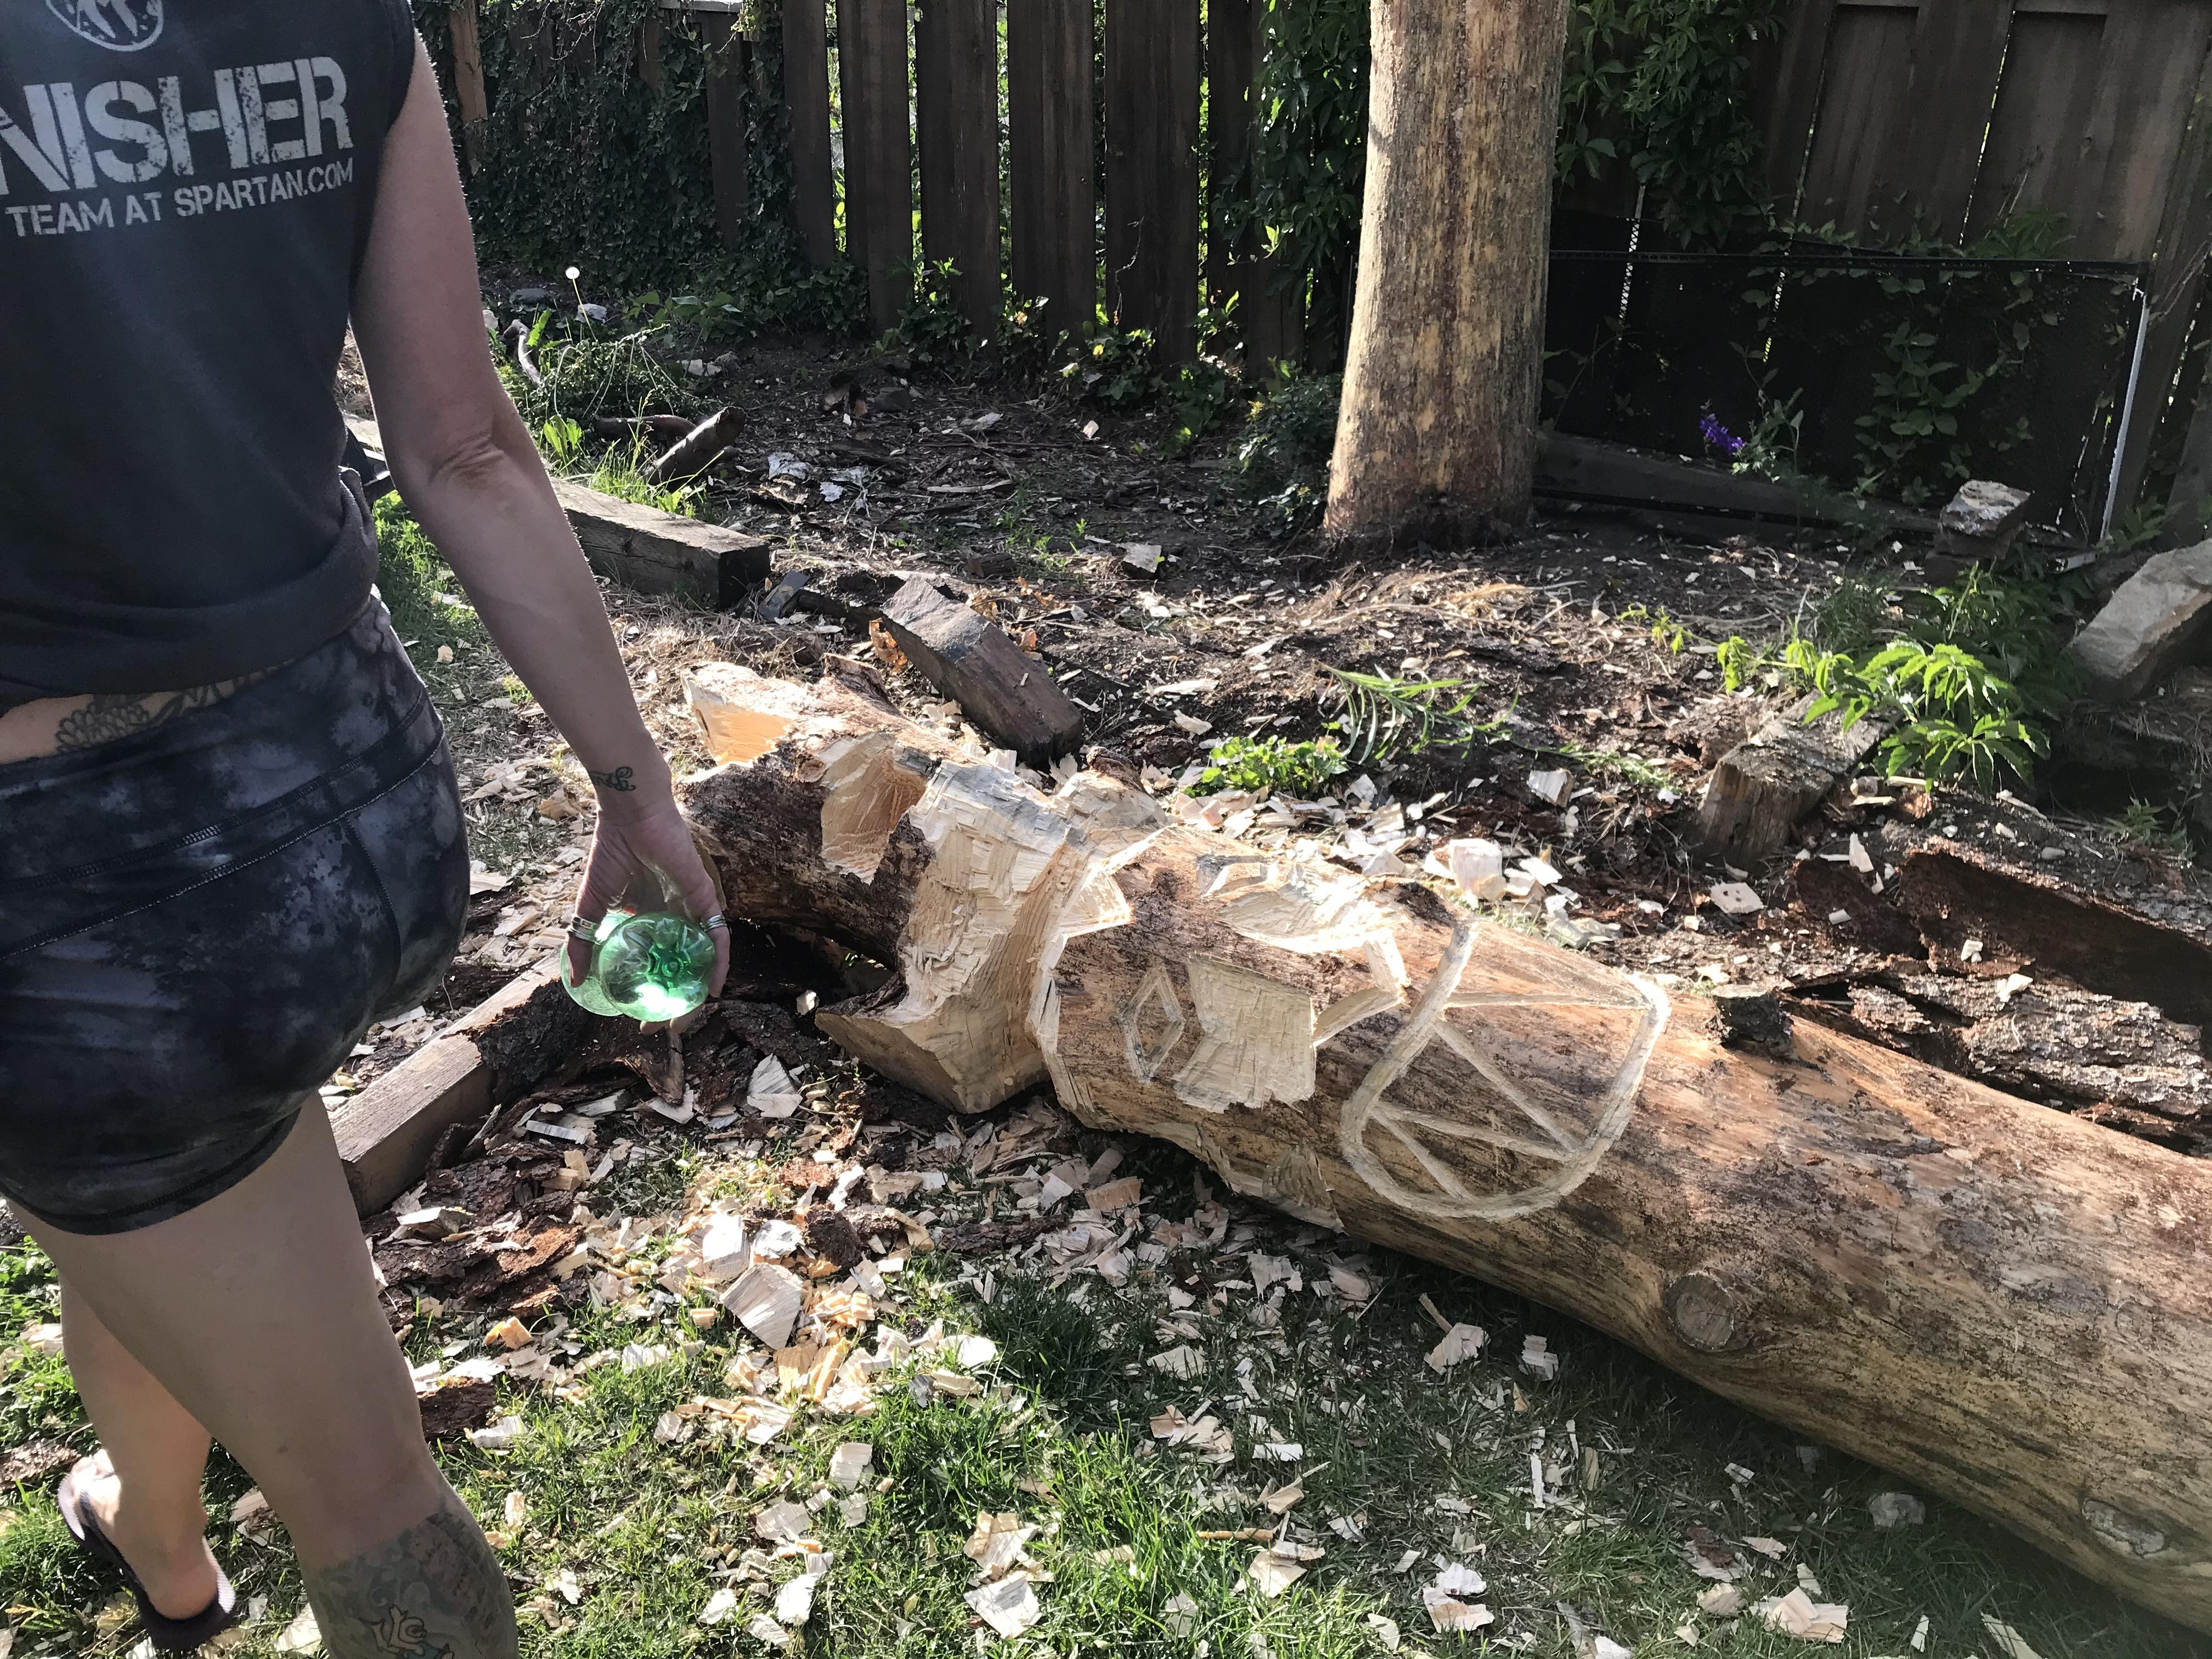
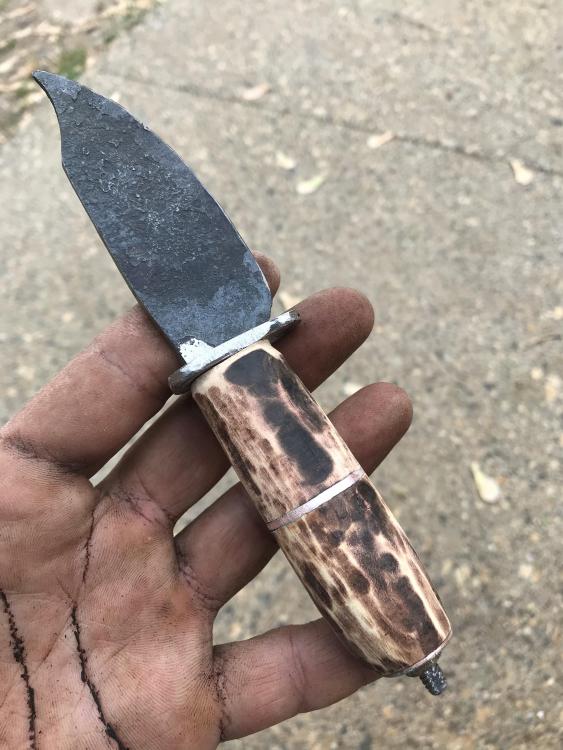
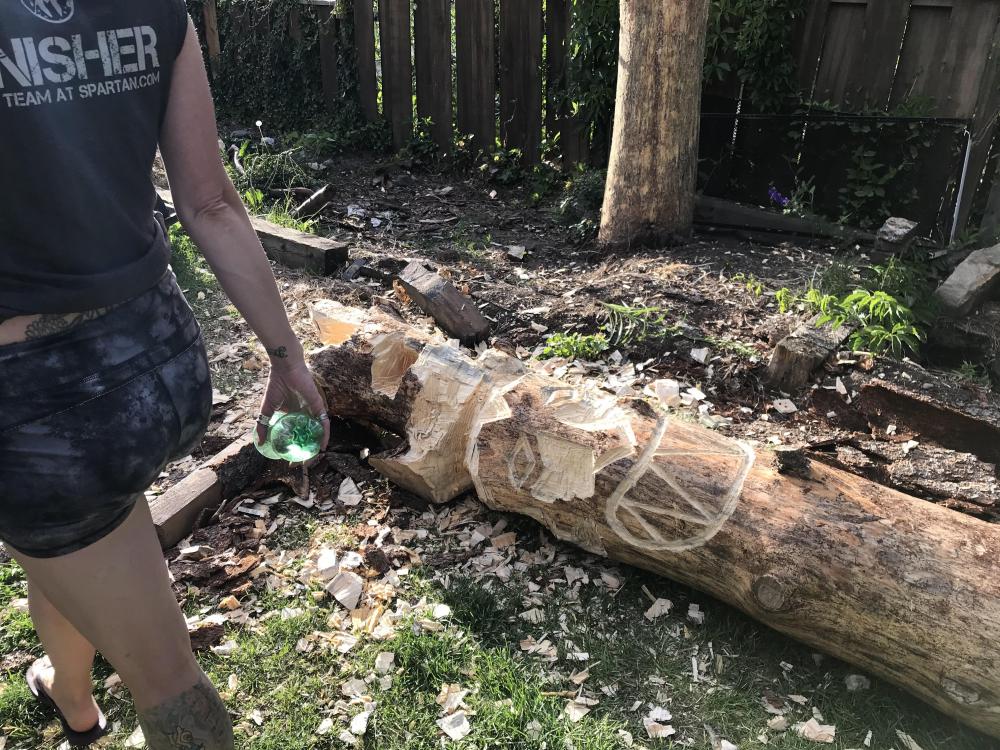
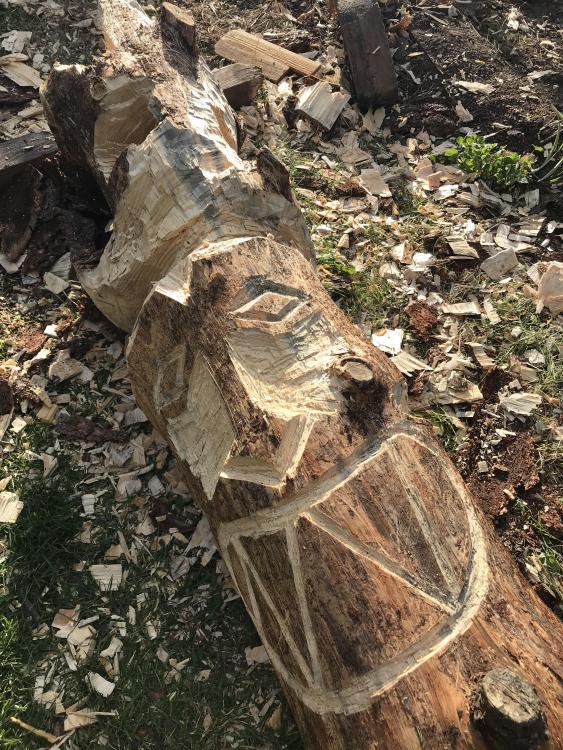
I hope I got the pictures edited correctly. Kinda hard to navigate in my phone. Have not been forging much lately. Really hot and lots of garden work. First attempt at a hidden tang blade I started at the beginning of spring. Not sure what to use as a pommel yet, maybe some mokume gane. Wood is apple, guard is stainless, accents are a quarter and a dime. Also started messing around with a log that I fell last fall. Using a straight edged hatchet by Gerber. I can see and imagine why a carving hatchet Is called such. It will be a short totem pole thing for the yard. I will carve wings that will be tenoned into the side. The top will have a cavity with windows I will fill with glass so the sun shines through. Some of y’all have really progressed in the craft. Congrats to you! One of these days I will be graced and taught by a real blacksmith and maybe cut this learning on my own curve shorter.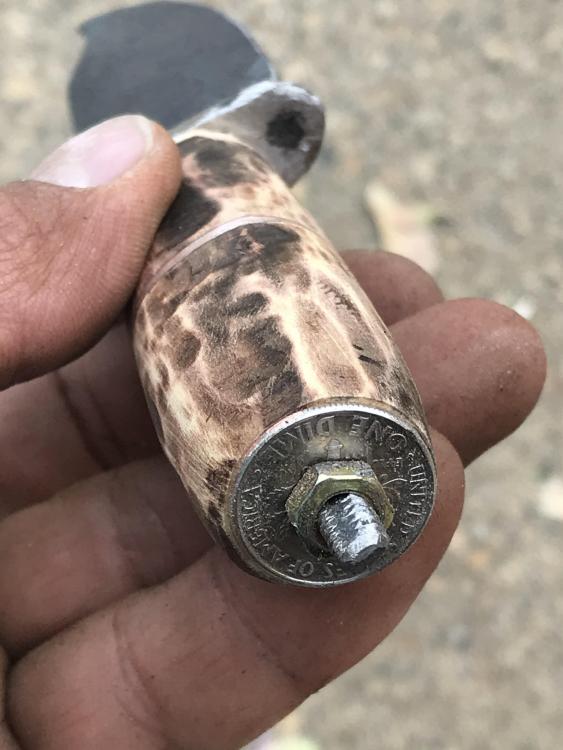

-
What did you do in the shop today?
671jungle replied to Mark Ling's topic in Blacksmithing, General Discussion
Thank you JLP. Sorry to hear about your friend. Sounds like he made quite the impression. I'm sure the ones who learn from you are thankful too. The caliper thing is pretty slick. -
What did you do in the shop today?
671jungle replied to Mark Ling's topic in Blacksmithing, General Discussion
Thank you Chris. I have not got around to it yet. Was there a change in upload settings the last couple months? Tried again at the mokume and had some success. Instead of clamping to apply pressure, I sandwiched everything inside a pipe and let the heavier weight of the top die set everything. I didn't need to hit the billet at all. 100% welds where there was contact. A better fitting sleeve(Pipe) would've kept things inline. I used five nickels and capped with one quarter on each end. Since I could not see the stack inside the sleeve and being the quarters were more copper than the nickels, I felt once I saw the tiniest bit of copper run out from the bottom, the billet was welded or brazed. Let it cool and had to knock it off the bottom and top die with a hammer. It was all welded up nicely. I can see some pattern. Excited to etch. I feel this method is risky since there is no visual on the billet and once it starts sweating it melts into a puddle not long after. Perhaps a "window" can be cut into the sleeve to get a visual or I can just clamp it between two plates like everyone else. -
What did you do in the shop today?
671jungle replied to Mark Ling's topic in Blacksmithing, General Discussion
For some reason I am not able to post any pictures. Anywho, I tried to make some mokume and couldn’t get the quarters to stick. I stuck them in a pipe that had the same ID as the diameter of the quarter to reduce the oxygen exposure and keep the coins in-line. I then cut a couple pressing dies also the same diameter as the coins to fit in either side of the canister and torqued them together with plates . Brought the whole thing up to about a dull red heat and let soak for few minutes. I could not see the coins so I used my judgment to make sure they were up to temp. I pulled it out and pressed in the vice. Only about 5 out of the 10 coins stuck, and it wasn’t pretty. I restocked everything while still hot and let them kinda melt. Now I have a glob of I think cupranickel. If letting the billet melt slightly, will it still show the 2 metals or will it all just be a copper color? -
Material suggestion for different Mokume
671jungle replied to Aion27's topic in General Metal Specific Discussion
Hello Wayne, I am curious about how you dealt with the over hang of the quarters over the nickels while making the billet. Did it delaminate in anyway? -
What did you do in the shop today?
671jungle replied to Mark Ling's topic in Blacksmithing, General Discussion
I’m case anyone was wondering if these could be used as bells. Not much of a ring while suspended by rope. Have not done much forging lately. Started this Bowie awhile back. Been working on getting the dings and scratches out before heat treat. Might do some forging today. Most time has been spent in the garden this spring. Hope y’all are holding up alright! I haven’t been on the fora in a bit, but work will be starting up again soon and more time at a desk. Unfortunately the pic of the Bowie will not load -
Yes, thank you Frankenburner. Sometime i get caught up in thought arrangement. About your smoke stream tests: is it possible that specific inlet shapes coupled with specific nozzle shapes can create a combustion strong enough to compress air into the mixtube?
-
What did you do in the shop today?
671jungle replied to Mark Ling's topic in Blacksmithing, General Discussion
Thanks Frosty! That is a wealth of info! You definitely answered some questions I’ve been asking myself but didn’t have enough knowledge on how to ask. The impact abrasion resistance stuff really interests me. The anvil does not dent unless an errant blow lands. I would like to face anyway just to see the difference. Can’t wait to use some newly acquired terminology on the weld shop guys! -
Aw shucks I don’t what to say. Thank you Mike. I’ve learned that the mind is very capable if one is receptive and unbiased. The teacher plays a big role in proper translation of the knowledge and sometimes wisdom. Combustion fascinates me! Always has. There is a sweet window in an optimal burn whether it be solid or gas fuel. I’ve always said at bbqs, campfires and full moon parties that there is a science to building a fire.
-
Nice burner Trevor. As you know Frosty and Mike are the burner gurus around here and Frankenburner is the next gen. Once you know how to ride the bike it’s easier to go faster. I definitely second Miley’s suggestions on shorter intakes. With your current design, I would apply a choke to determine where max intake air intake is without making the flame “too lean and weak”. This mark is the max opening of the next build. If not enough, a file will get you where you need to be from there.
-
What did you do in the shop today?
671jungle replied to Mark Ling's topic in Blacksmithing, General Discussion
Also, the stain on the wood is from being used as a grinder table the last several months. The metal fines have sat on the wood in the weather and oxidized to create a nice stain. Similar to what JHCC mentioned earlier. I did it unintentionally kindaz. -
Hardening Mild Steel
671jungle replied to Blacksmith Jim's topic in Heat Treating, general discussion
As with most things in life. -
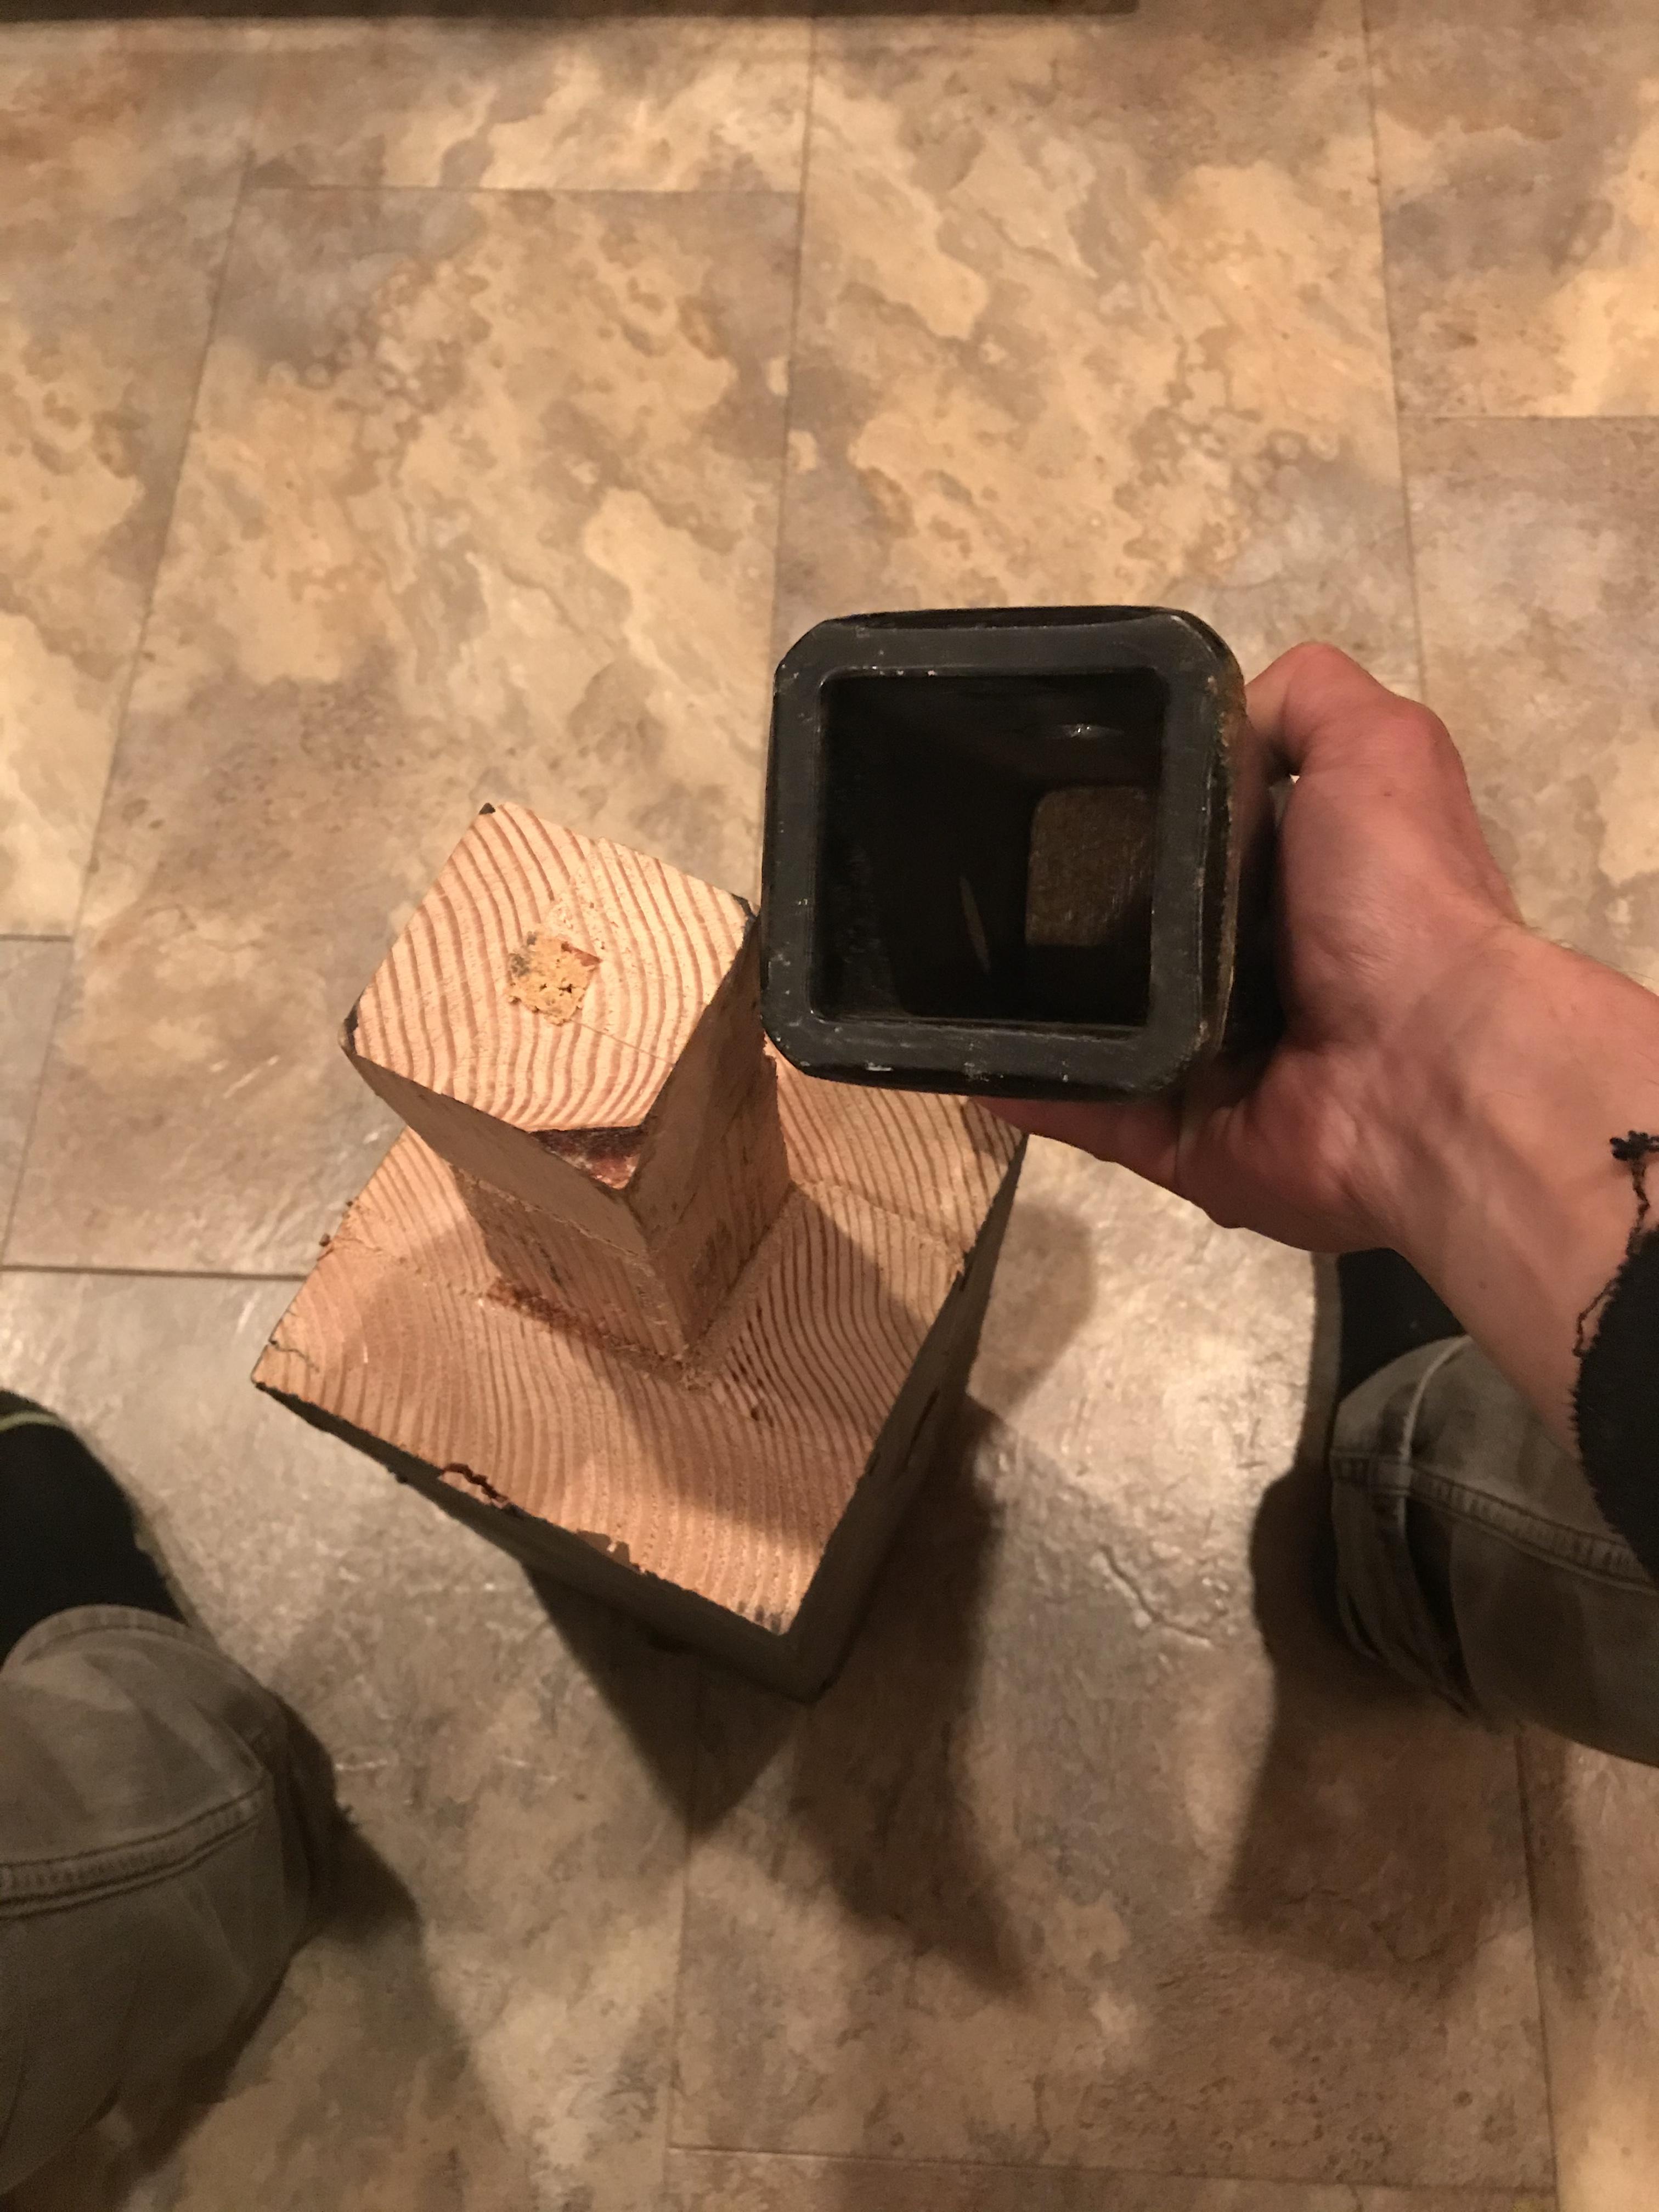
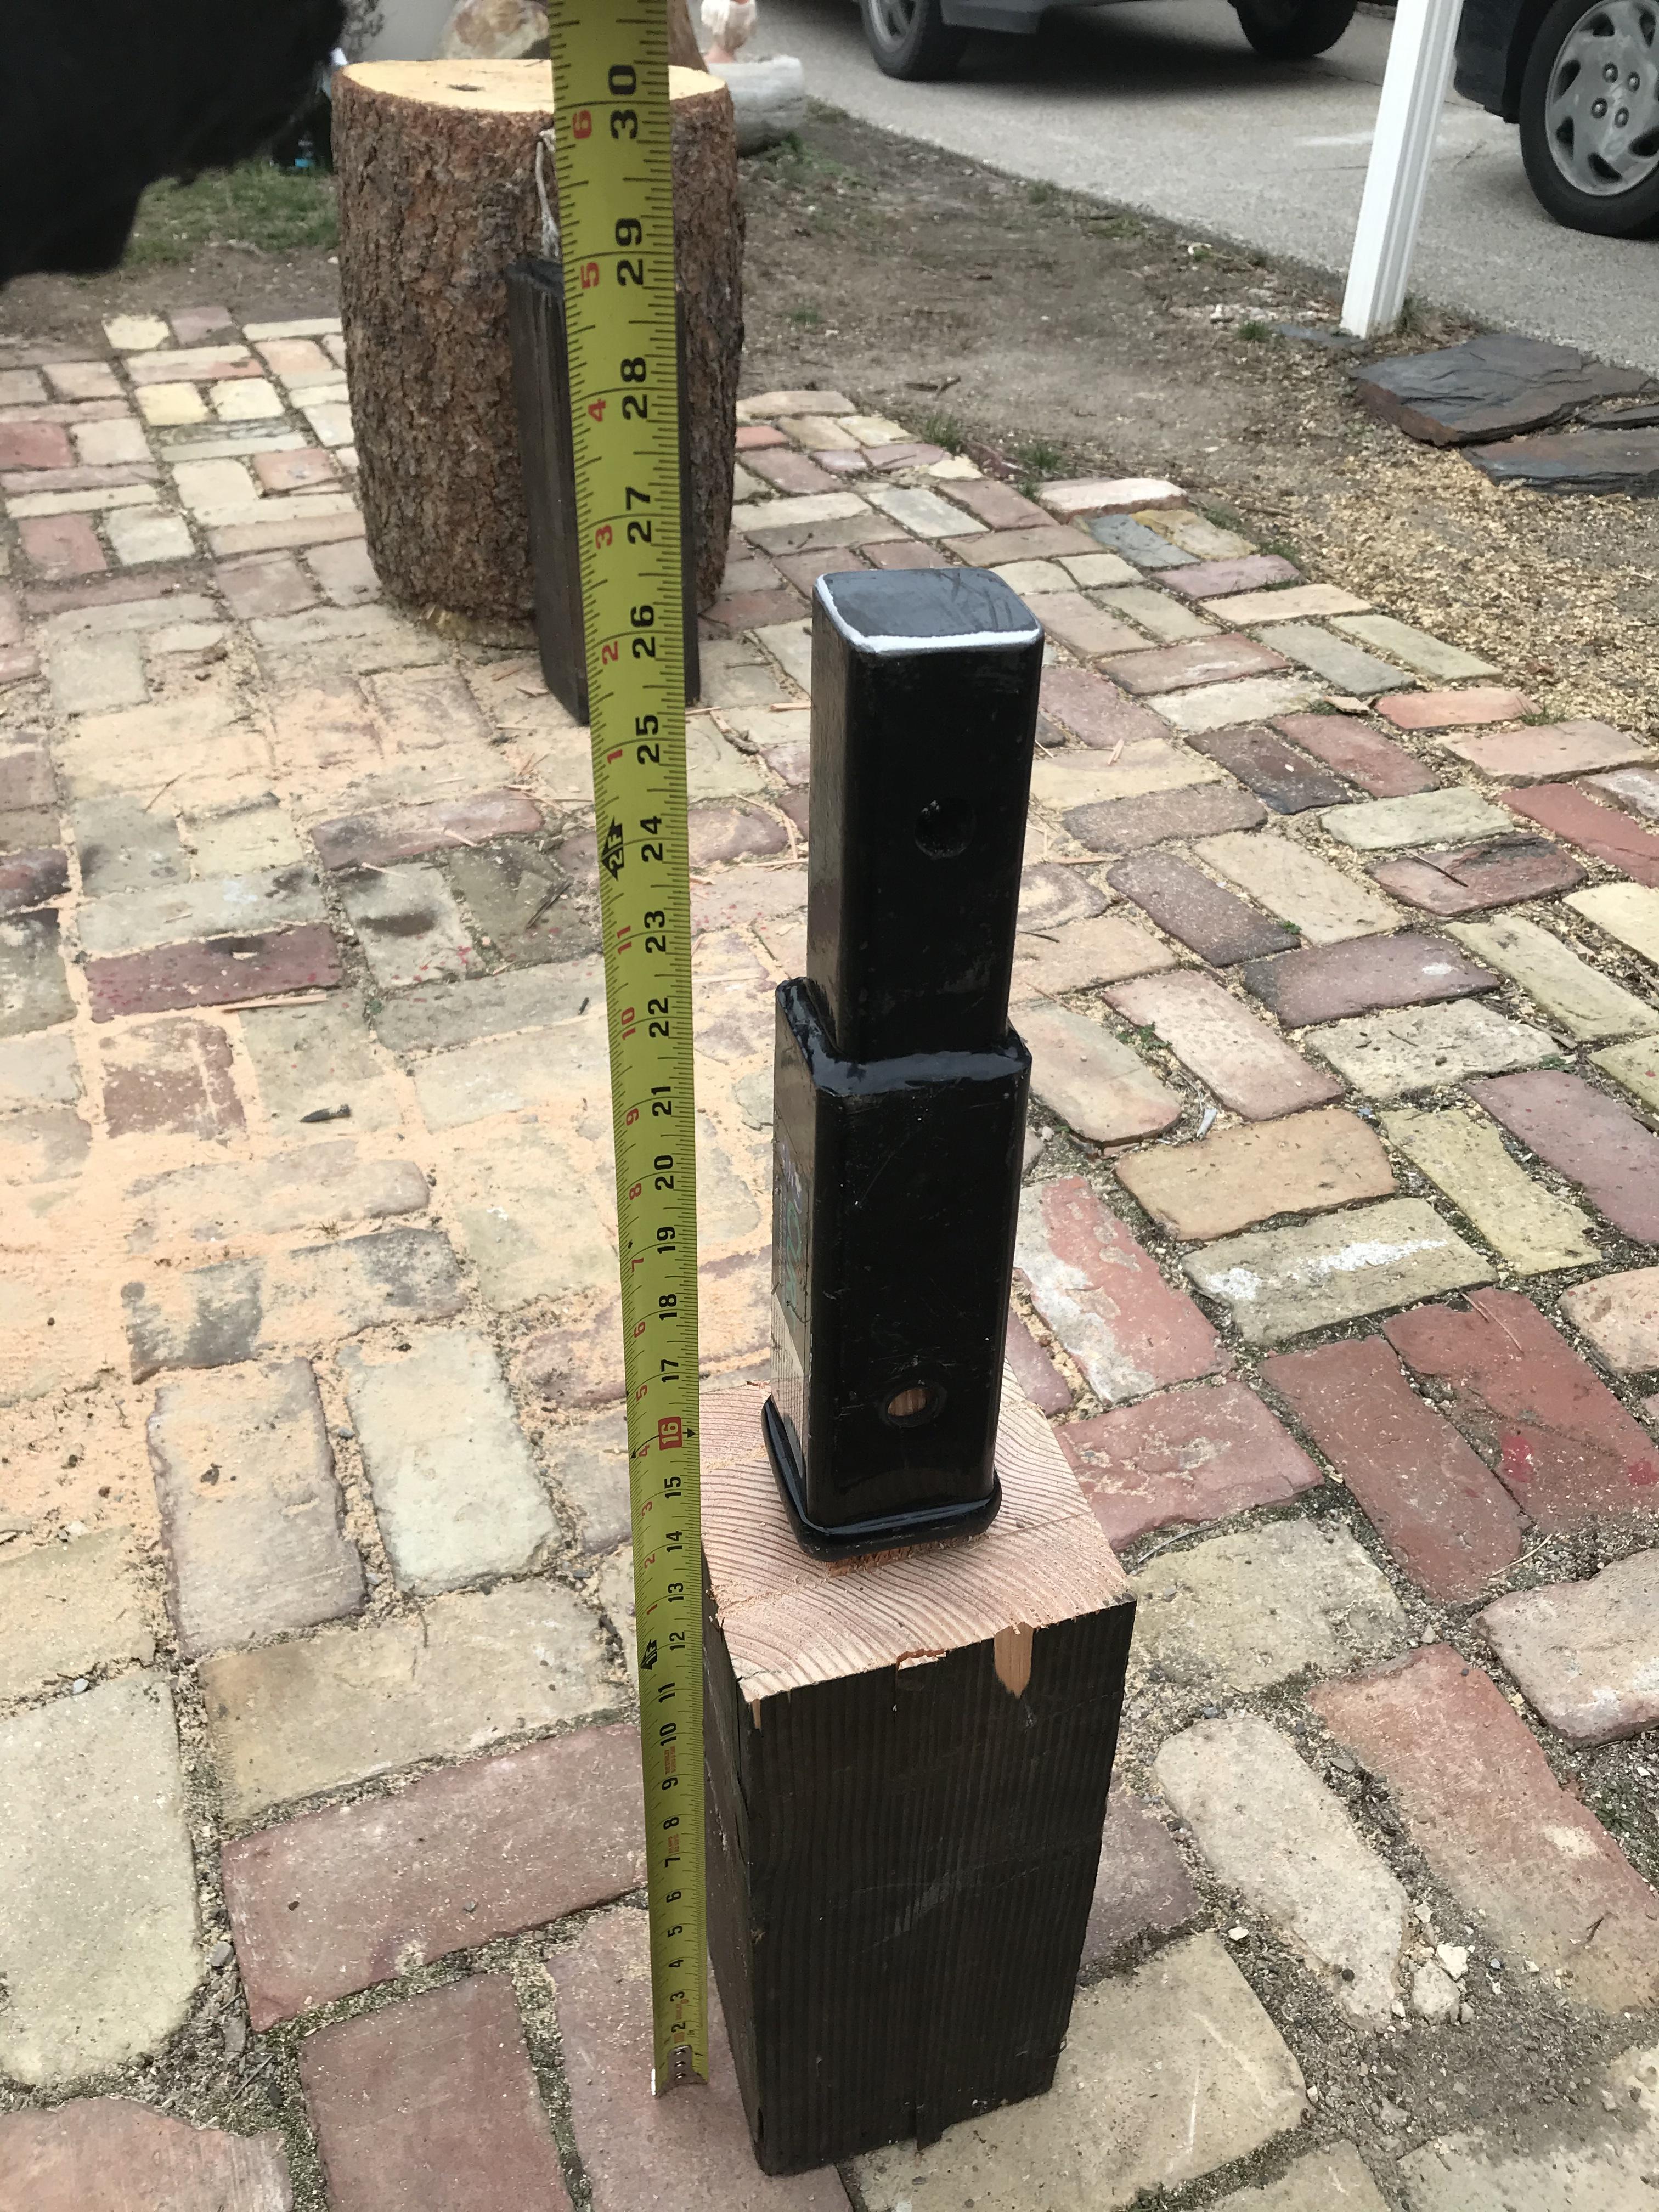
What did you do in the shop today?
671jungle replied to Mark Ling's topic in Blacksmithing, General Discussion
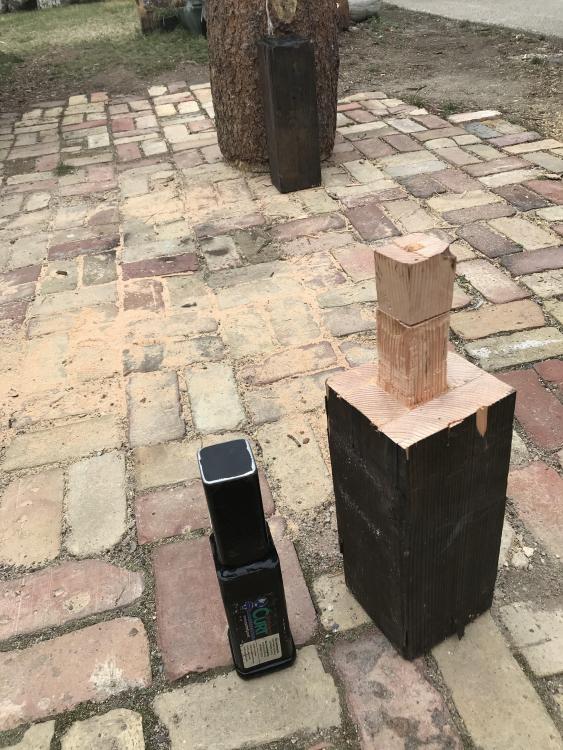
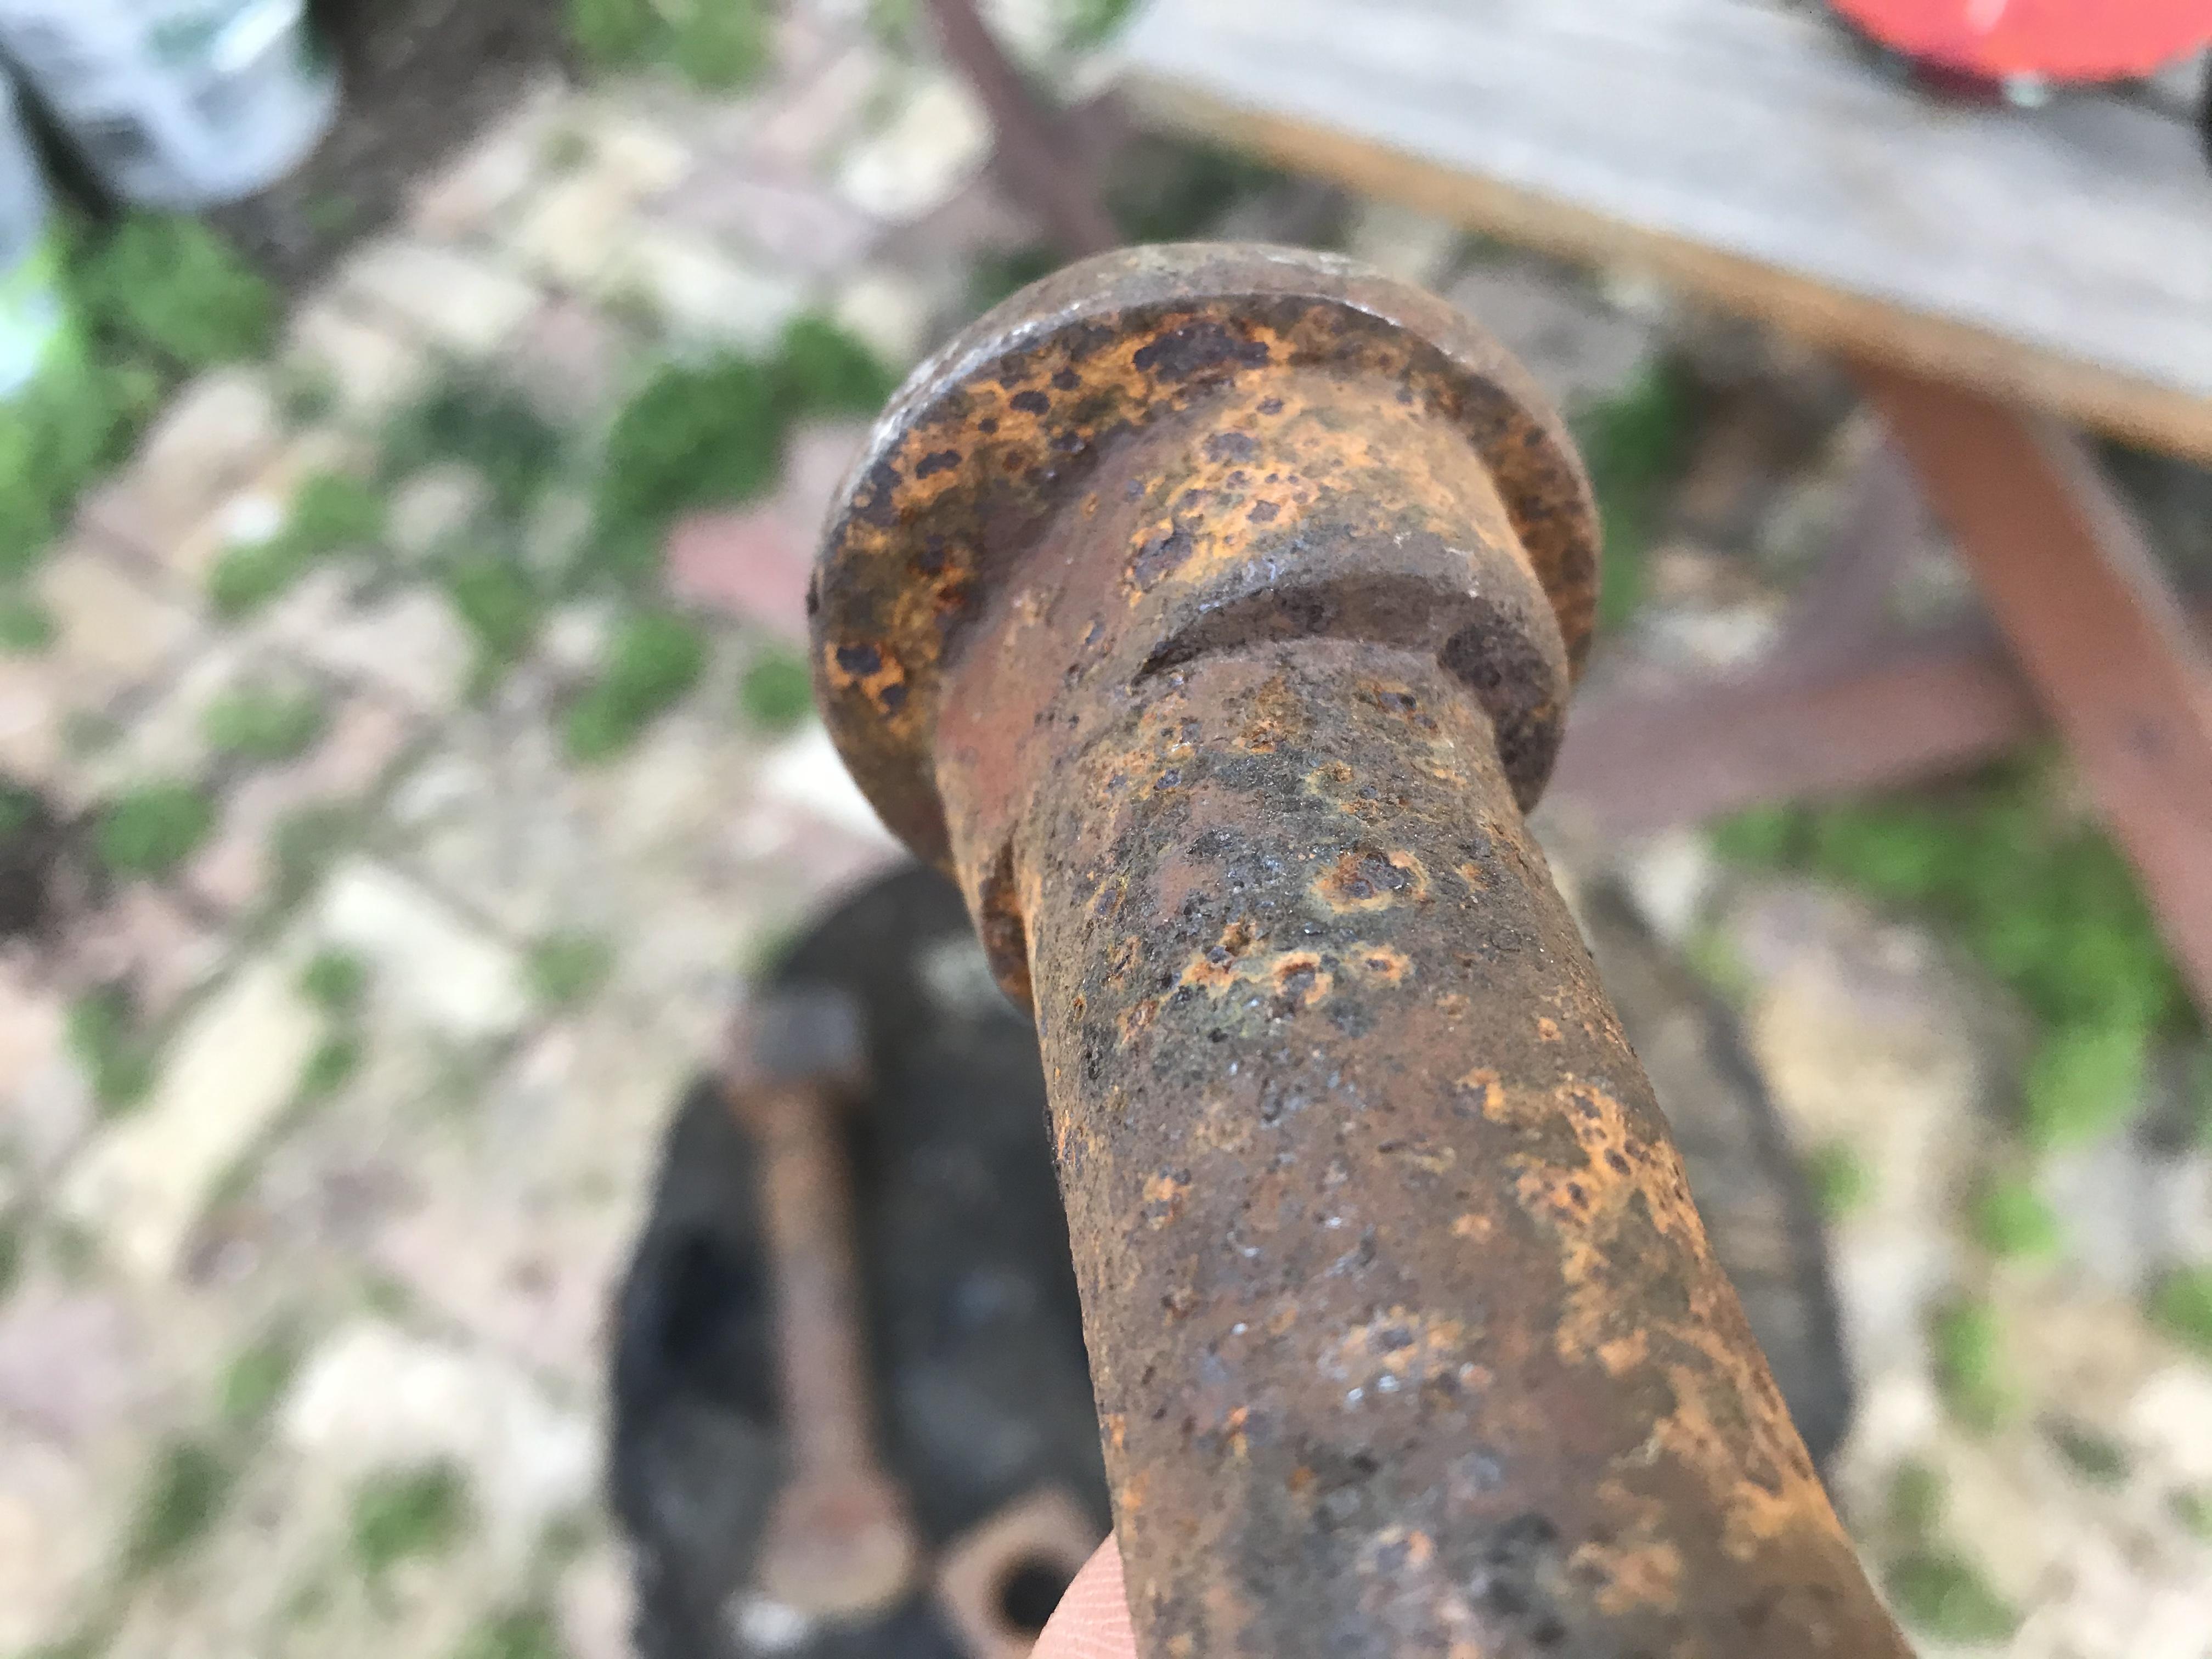
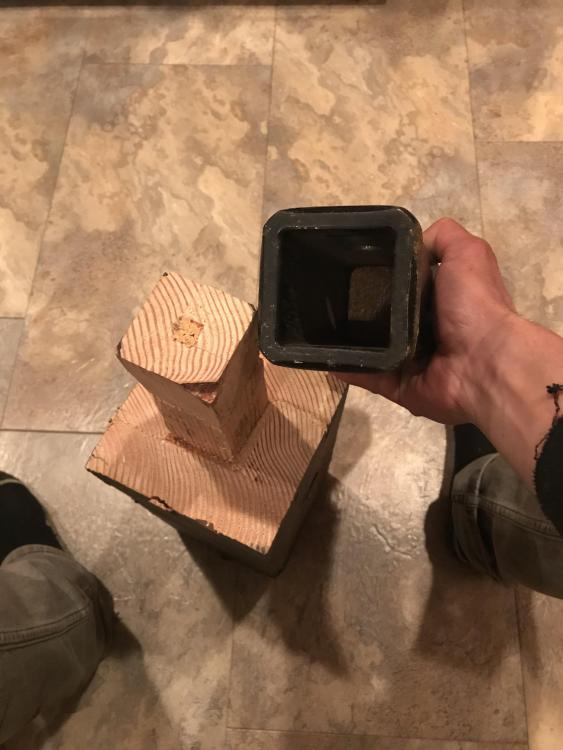
Thanks Frosty! I think it’s for a trailer hitch. The solid part “anvil face” is 2”x2” and about 6 1/2” long is slid into a sleeve and welded. I cut the wood to slide into the other side of the sleeve. I’m assuming it is mild steel and hard facing will be “needed”. I also plan on strapping both the bottom and top of the wood base to avoid splitting in the future.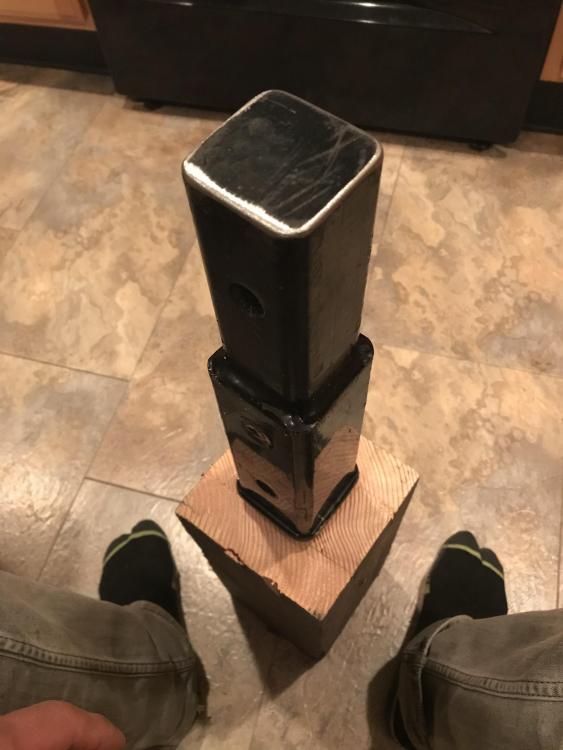
-
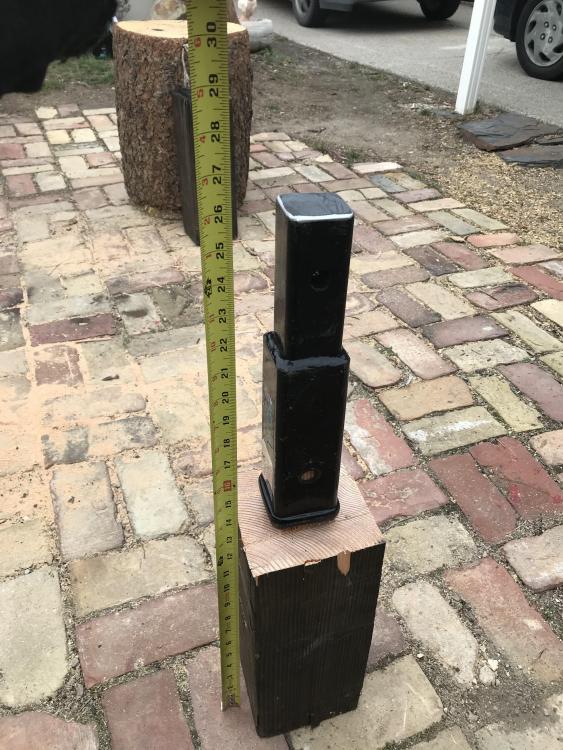
What did you do in the shop today?
671jungle replied to Mark Ling's topic in Blacksmithing, General Discussion
made a lil cold working jewelry anvil for work while sitting down comfortably in a chair or stool. It will be hard faced.