J.P. Hall
-
Posts
58 -
Joined
-
Last visited
Content Type
Profiles
Forums
Articles
Gallery
Downloads
Events
Everything posted by J.P. Hall
-
Thank you for the information. If anybody is looking up heat treat info, [it is available on the Hitachi website]. [Commercial link removed would have been better to just tell us the unfirmation] There is also info for aogami 1 and aogami super under the "YSS" tab on the left.
-
3D printed plastic burner experiments (photo heavy)
J.P. Hall replied to Another FrankenBurner's topic in Gas Forges
Say what you want, previous iterations don't hold a candle to that last attempt. -
Another update: I also tried the "HA" type stones from Falcon. They're much harder which makes them much more conducive to the draw filing method, but they do cut noticeably slower while loading quicker, especially when held in that orientation. I also got some Rhynowet Redline after remembering for the nth time that I wanted to give it a try, and this stuff is just as amazing as I hoped it would be. I've tried several types of wet/dry paper ranging from 3M to Harbor Freight silicon carbide. I've been using the latter for a while because it was cheap, and others I tried didn't last long enough to justify the price. The redline lasts a long time, but the biggest bonus is that it cuts extremely well. I think this has to do with it being aluminum oxide, which has a more regular crystalline structure than silicon carbide. SiC has very long crystals in comparison which I believe is good at leaving scratches, whereas aluminum oxide does a better job of removing material at the surface -- which is what actually helps move through grits. To support this theory, here's was I noticed using each abrasive- both at 220 grit: SiC left scratches easily and felt like it was cutting well, but the scratches didn't seem to "do" much. It left more and more scratches, but the previous scratches weren't really being removed so much as new ones being added into the mix, crosshatching even . The rhynowet felt like it was cutting similarly well, but there seemed to be a much more direct relationship between new scratches and old scratches. Unlike with SiC, the new scratches seemed more like they were "replacing" the previous scratches. I think it's important to note that they both felt like they were cutting similarly well, and (I think) they had similar amounts of swarf/slurry. Windex was used as lube. This is all just my perception and opinion, so take this all with a grain of salt (or something more abrasive). I'm really happy with how well Rhynowet works, but I don't think it replaces polishing stones in every scenario. Rhynowet is better at actually removing material, but I think stones are much better at checking for flatness and keeping things flat without rounding over even very slight corners. Rhynowet is more useful to me in most scenarios, but it's ultimately a matter of priorities. The stones would also make great inexpensive field sharpeners.
-
Stones came in the mail today, type "N" from Falcon tool, 1/4" x 1 " x 6". These are general purpose polishing stones and a bit soft compared to typical EDM stones. They behave pretty much like my synthetic water stone albeit with slightly stronger bond between particles. I lubricated by saturating the stones with windex and occasionally spraying directly onto the blade. I started lengthwise with 220 in a draw filing motion to remove the 220 grinder scratches (the belt seems coarser than 220 to me). I moved the stone almost constantly to avoid dishing it out, and it seemed to wear pretty evenly. If I spent too much time at the tip, it would dish just enough to let light through when the stone was held against a straight edge. Even still, it stayed flatter than the edge, which was just barely convexed on the grinder. It seemed to cut much faster than the 220 grit wet/dry paper I was using. For simplicity of use I'd get a harder variety of stone for use in this orientation. After 220 I skipped 320 and went to 400. This time I used it on a corner, which is how the stones are typically used for mold and die polishing, at 45 degrees to the previous scratches. Because the contact area was smaller than the workpiece, it wore down nice and flat. I made sure to work the entire length of the blade evenly, with the corner of the stone going past the edge or spine on each stroke to avoid making low spots. I was worried the small contact area would round over corners, but it actually showed scratches I had missed with the previous grit where the edge was still slightly convex. Again it removed scratches faster than most paper I've used, possibly faster than rhynowet. The surface finish is not very good. The stones leave a dull finish and the scratches are not as parallel as with paper. However, this seems like a good way to progress through grits while keeping things flat before finishing with paper. If sandpaper is like milling or grinding, I'd liken this to surface scraping. Here's a picture of the 400 grit slurry that shows my stroke pattern

-
What did you do in the shop today?
J.P. Hall replied to Mark Ling's topic in Blacksmithing, General Discussion
There's a stair manufacturer on the the way home from work who leaves a scrap bin out for the public. Mostly fir, pine, and red oak, but occasionally there's a piece of maple or walnut, and sometimes they're thick enough for a hidden tang. They haven't left it out since at least fall, but yesterday it was back. Snagged some square oak bar stock pieces for a backordered favor, and today I noticed an extra bin. I thought I saw some large walnut pieces, but they were almost as dense as I am. A few pictures and forum posts later, and I'm pretty sure I've got a few pieces of Brazilian teak on my hands. I feel like this is the wood equivalent of finding a stack of wrought bars. -
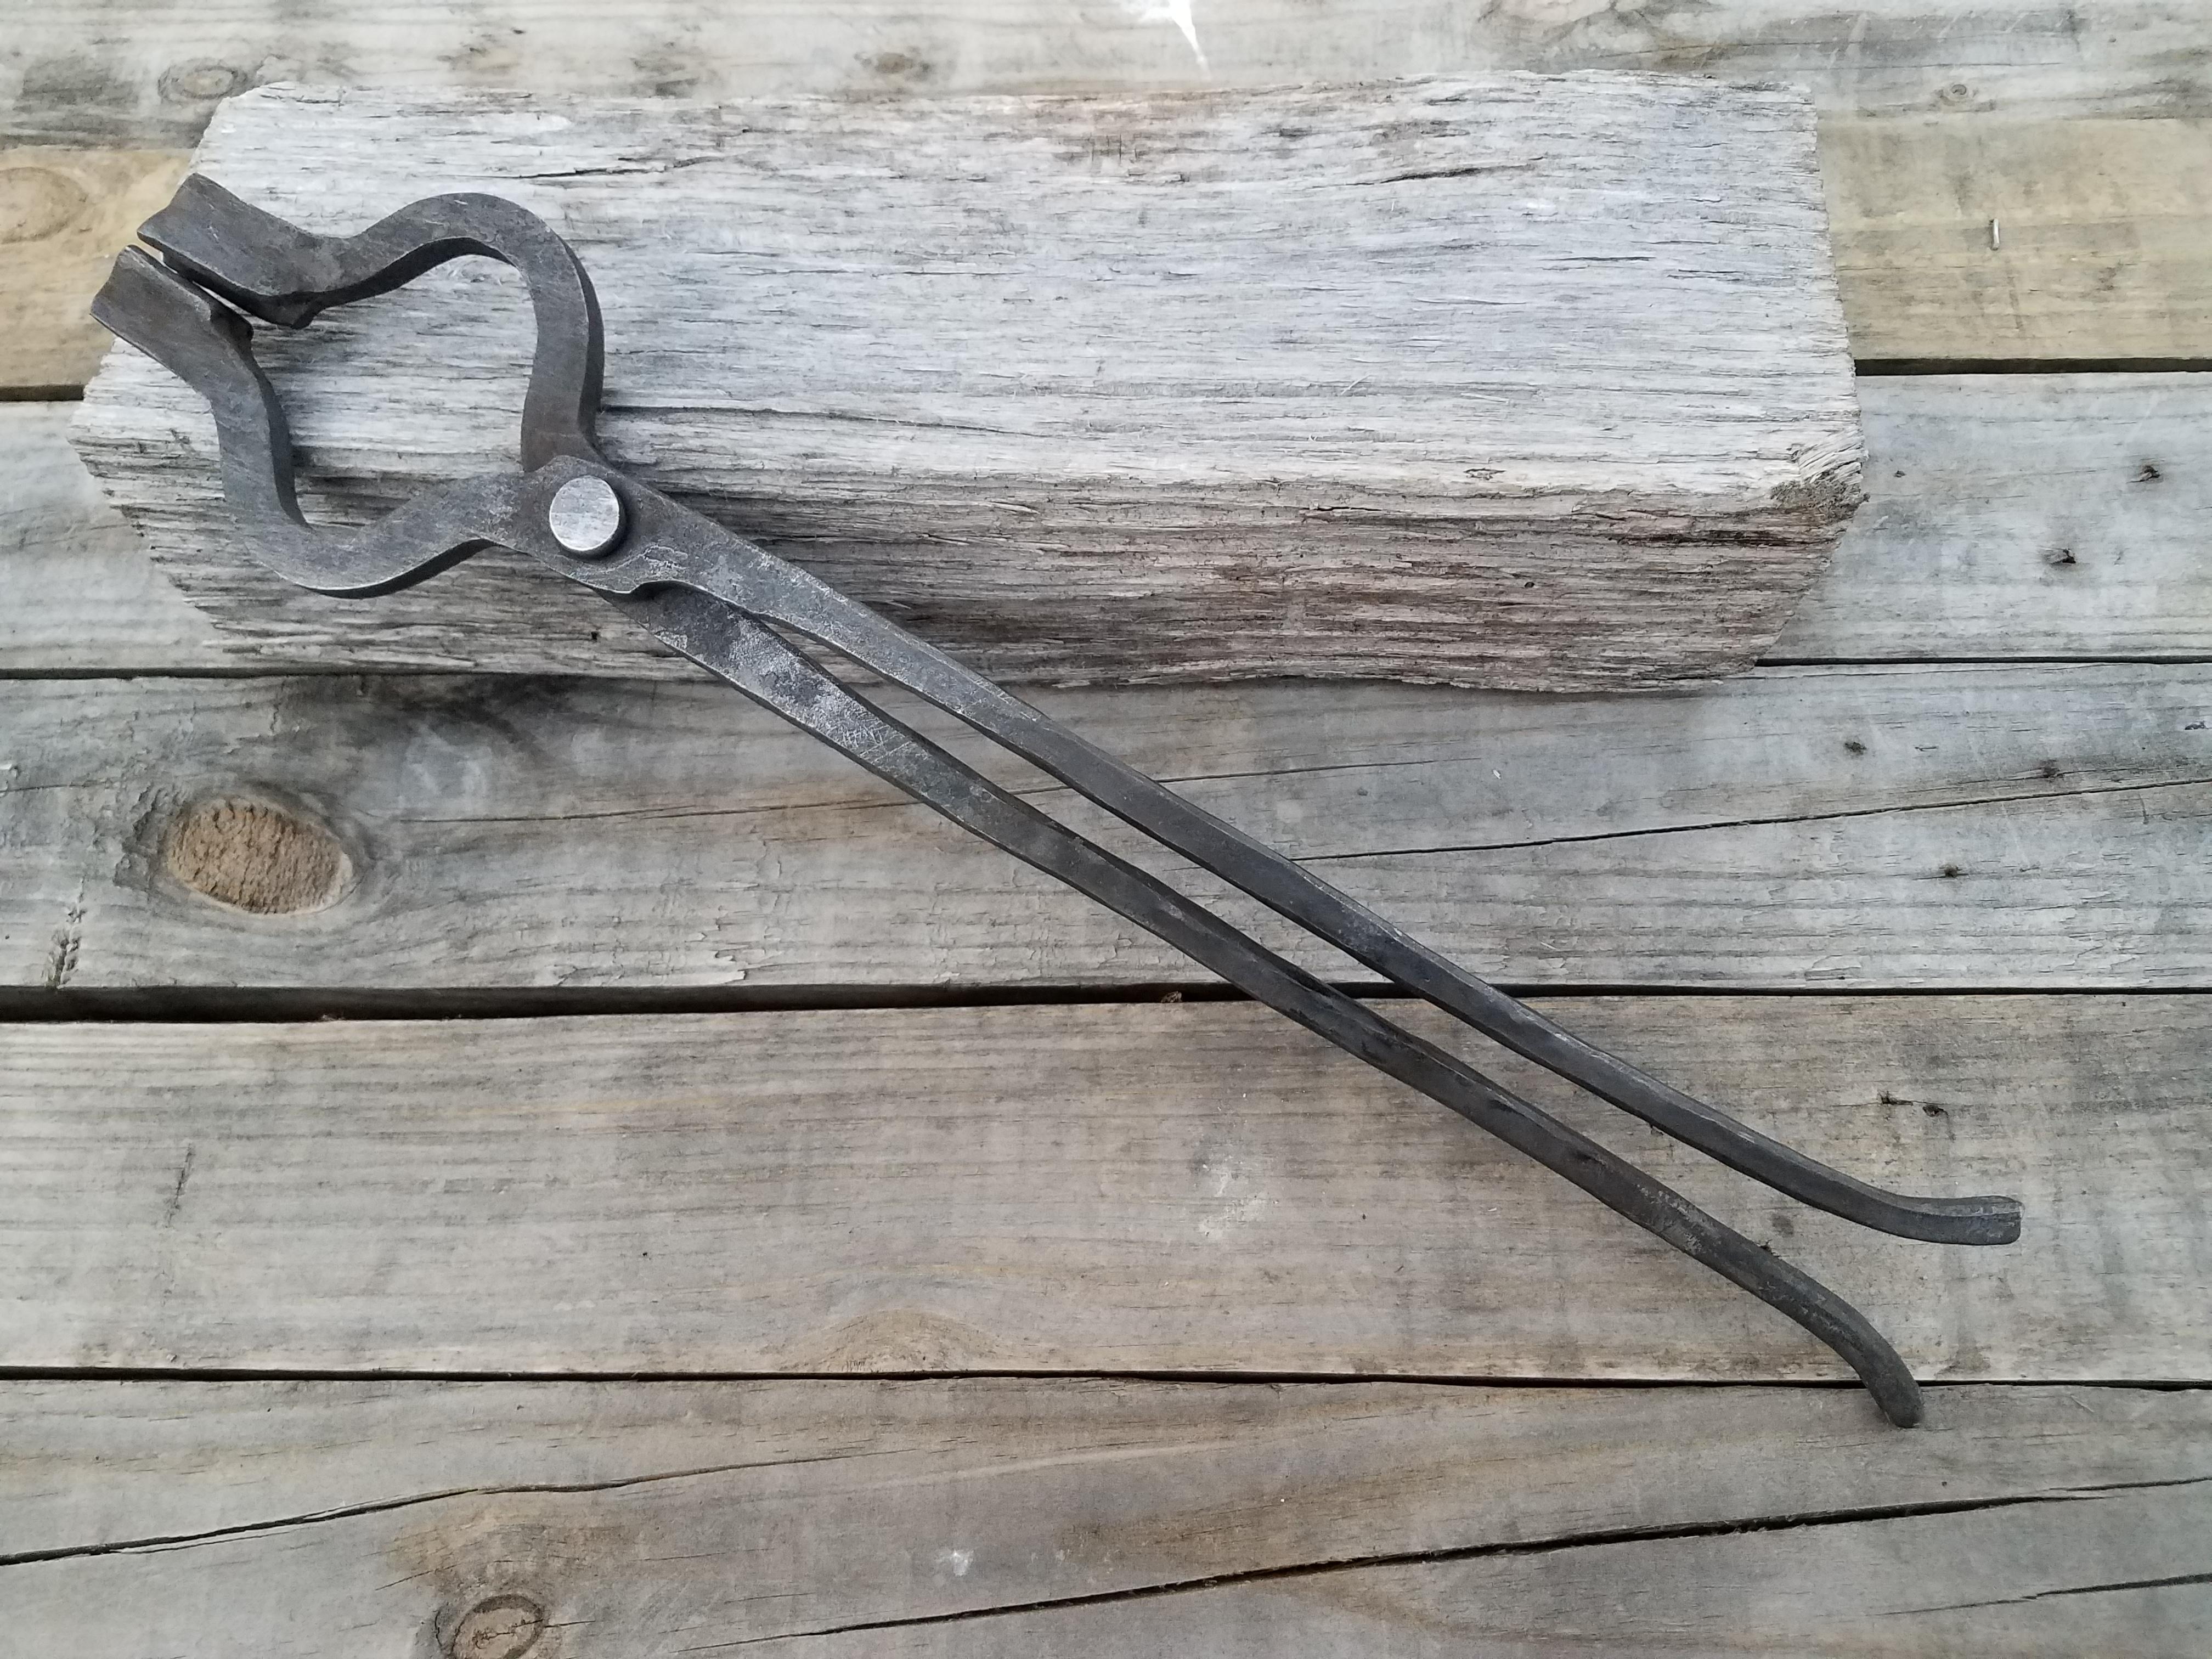
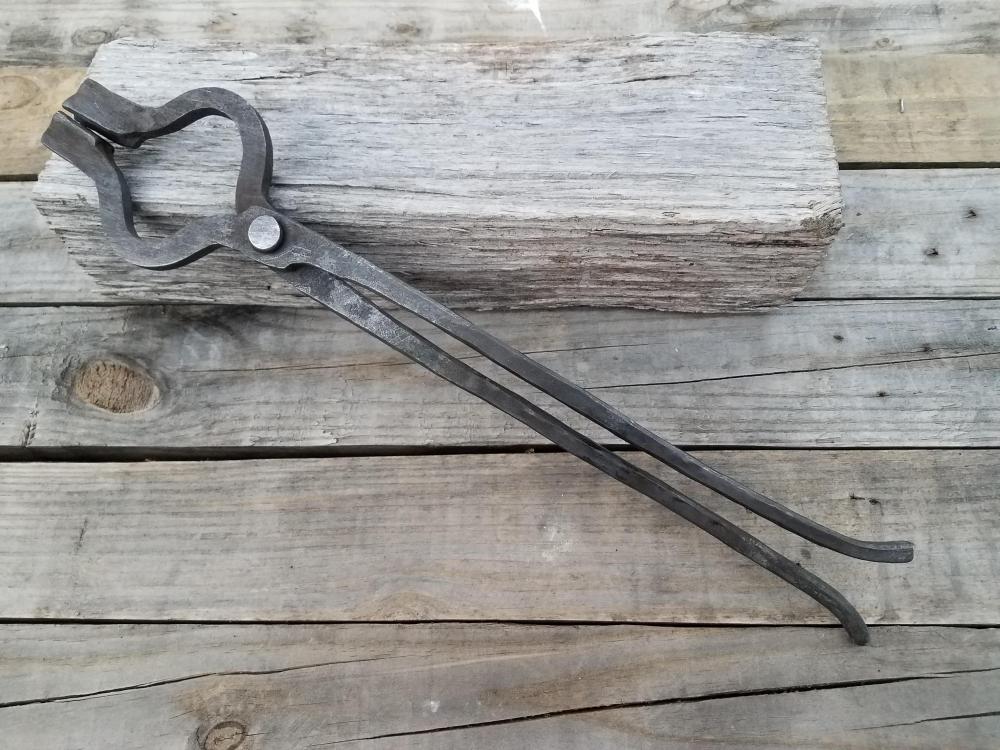
That reminds me, I need to make a new pair of bolt tongs
-
Good advice. I had gotten the silicon carbide for wet grinding, but the short life just wasn't worth it. I reground this knife with 220 grit ceramic and it seems to have worked well. Ceramics have always been my go-to for lower grits. My grinder is a Craftsman 2x42 that I frankensteined for 72" belts. I also replaced the disc sander with a pulley, and mounted a motor behind it to step down the speed when needed. I'm slowly working on a new grinder. Once I get that set up I'll see how it does if I mount it for seated grinding. I prefer to do as much as possible on the grinder, but it's never perfect. At some point, I always manage to round over an edge just a bit, or leave some deep scratches from the edge of the platen, or slightly convex the tip. Slower belt speed definitely helps catch mistakes before they get out of hand, but my lacking technique doesn't let me prevent them in the first place. 220 grit seems to be a good point to leave the grinder and correct these by hand before moving on to finishing.
-
3D printed plastic burner experiments (photo heavy)
J.P. Hall replied to Another FrankenBurner's topic in Gas Forges
And here I was thinking I was cool when I had a third-hand thinkpad and Ubunt 12.something. To be fair, it did give me a great appreciation for command line and unix-like utilities. -
"If it's not written down it didn't happen." My ultimate goal is to save time and frustration. Hand finishing is the biggest pain I've encountered in knifemaking, and also one of the biggest indications of quality work. Whether or not I find something that works for me, I'm hoping this thread will accomplish my goal for other people-- either a method that's faster and/or easier than I know now, or by listing what doesn't work well so that someone doesn't have to waste their time experimenting with. The biggest issue I can see is that if I find something great and execute it poorly, somebody may discount it because I couldn't get it to work. I'm already wondering how diamond cards would do on a fully hardened blade, or with less pressure, etc.
-
Another update- The diamond cards were a bust, but it looks like I wasn't completely off the mark. I was reading about die maker's stones, some of which are called EDM stones, and they seem to be a well kept secret. They supposedly cut fast, don't round over corners, and aren't prohibitively expensive. They seem to fit the use case I had for the diamond stones perfectly, so I ordered a sample set. I'm not sure how they'll do with something this wide, but I'll report back after I test them.
-
3D printed plastic burner experiments (photo heavy)
J.P. Hall replied to Another FrankenBurner's topic in Gas Forges
There are so many cool things going on in this thread. This prototyping is absolutely ingenious. Does the increased friction from a NARB make it any more difficult to keep a reducing flame? -
Awesome. I'm genuinely envious.
-
Kanca New 165# anvil with a soft face
J.P. Hall replied to Omnislug's topic in Anvil Reviews by brand
Polish, etch, repeat... anvil hamon? -
Giving up trying to find a SH Anvil..
J.P. Hall replied to Rojaws's topic in Anvils, Swage Blocks, and Mandrels
I bought a 225# forged no-name with some rough edges and a bit of sway in both directions, and the very next day an absolutely perfect 130# Fisher popped up. I still have not forged on the 225. -
Been meaning to try these for quite a while-- drawn out from 3/8x1" and sized for 1/2" square. They were originally just a proof of concept, so I didn't do any measuring or layout and it shows in their lopsidedness. I tried learning from mistakes I've made with flat and V-bit tongs, namely keeping the boss, jaws, and rivet nice and beefy. This is also the first time I've tapered the reins, which I like because it keeps any inevitable flex away from areas with more structural importance or risk of failure. Definitely some room for improvement but overall I'm pretty happy with how they turned out and they grip much better than my older tongs.
-
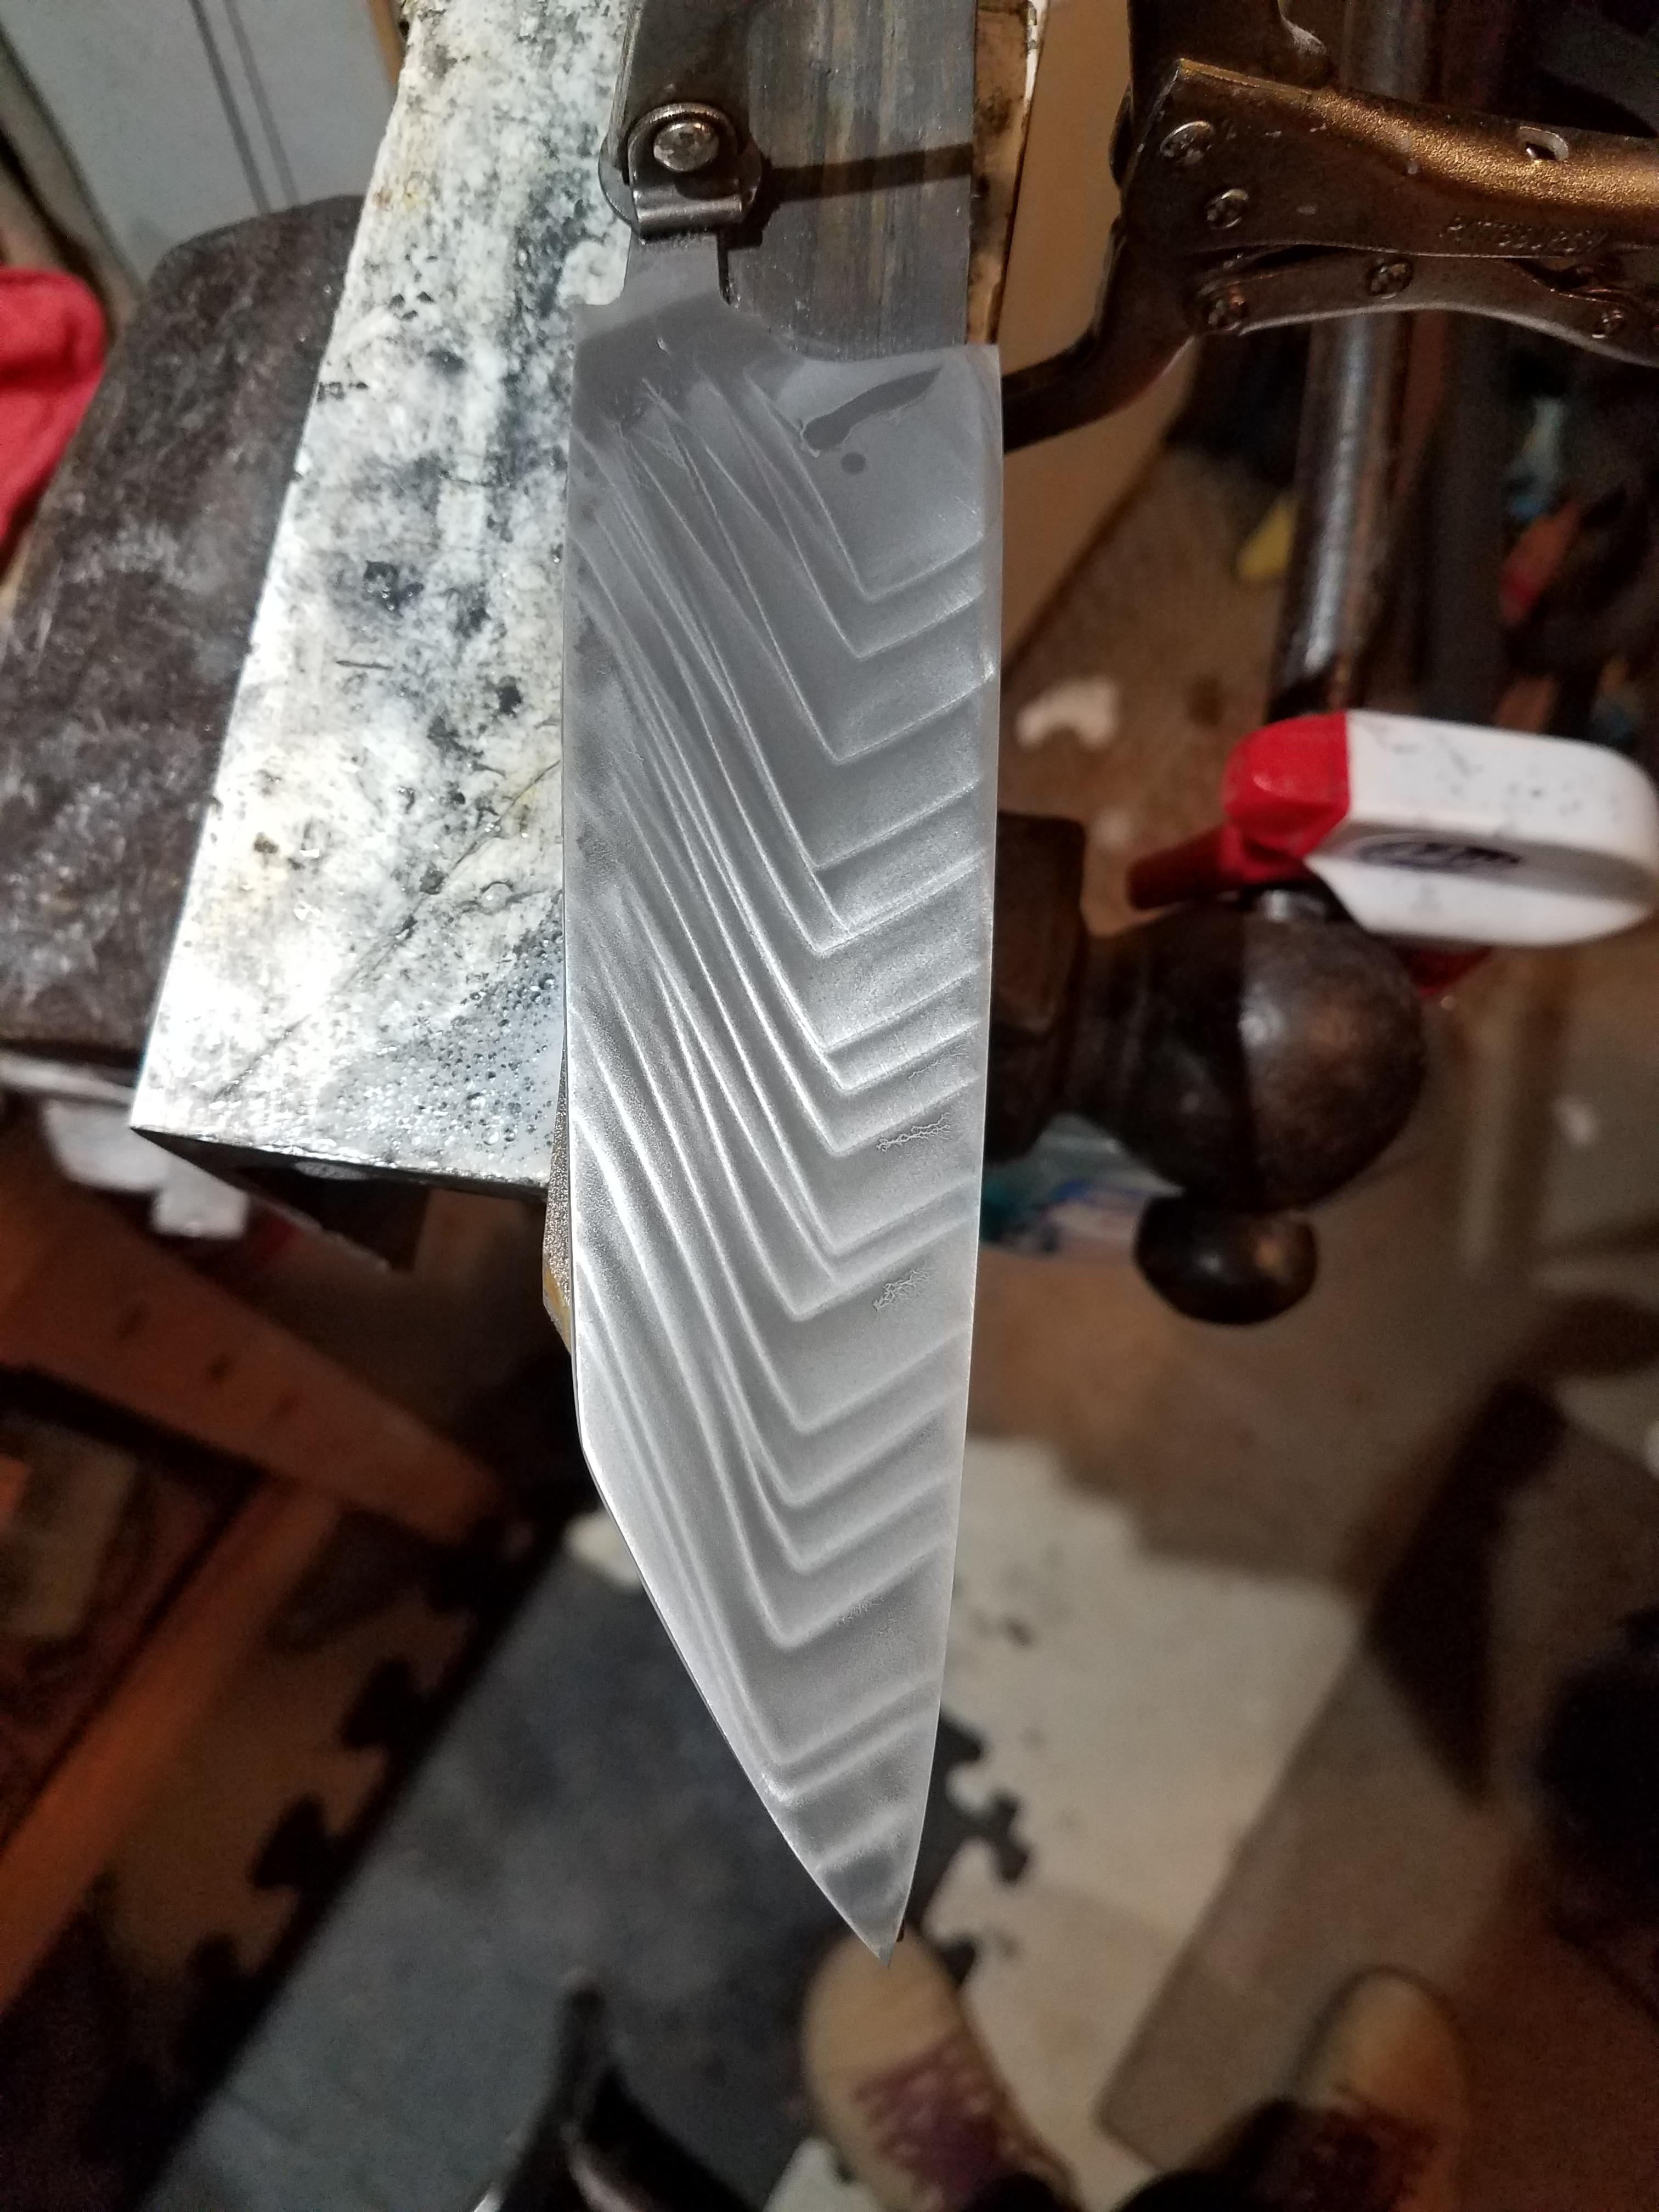
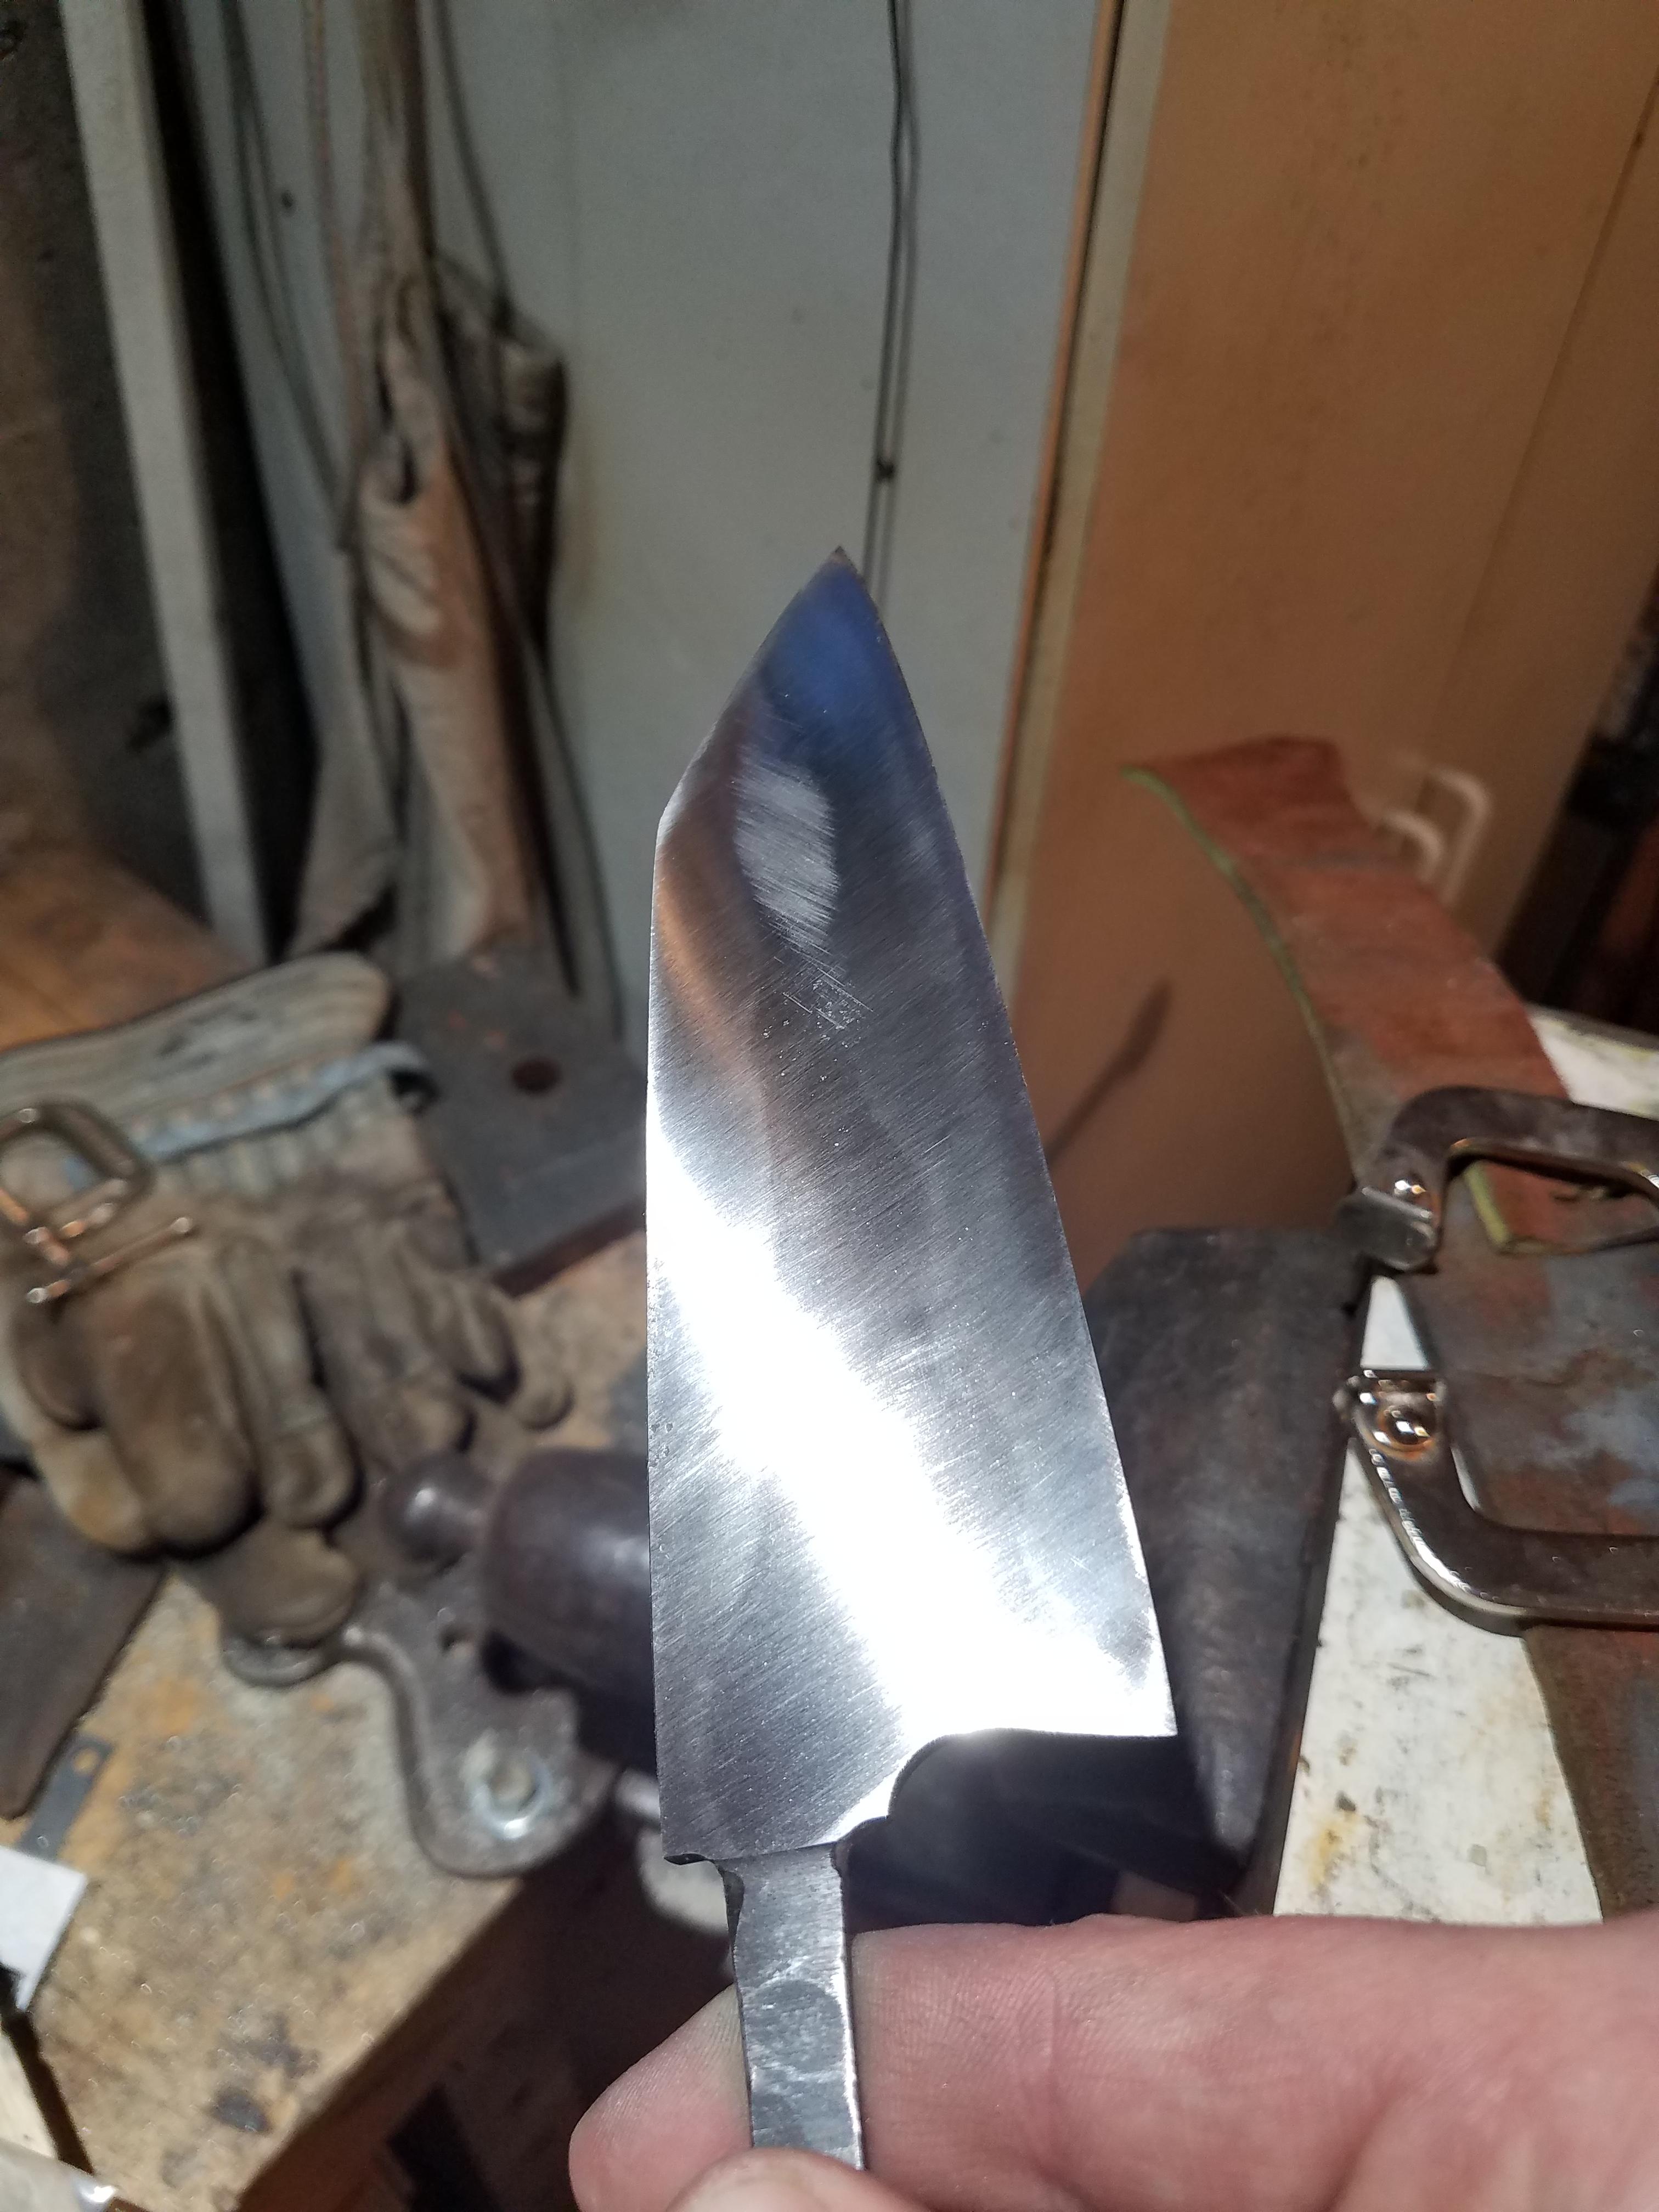
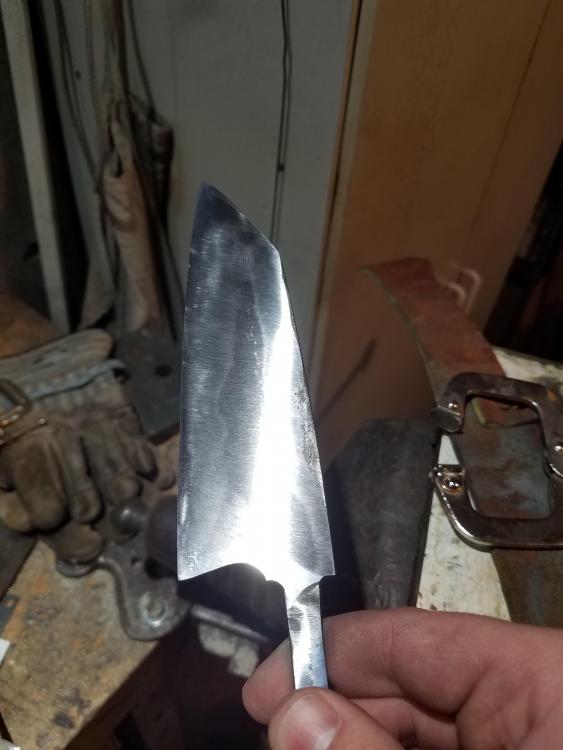
No response from DMT or EZE-LAP. I've elected to keep finish grinding on my 2x42 modded to 2x72, using fresh silicon carbide belts with light pressure. I think I found another contributing factor to the diamond stone failure: I was having a hard time getting scratches out of the center of the bevel and I thought maybe I was using too much pressure or that there was some gunk on the platen causing a hollow grind. At 220 grit, this showed up: accidental clayless hamon. The pesky scratches were contained to the soft area where lower grits were scratching deeper. Anachronist58 mentioned above that soft steel can be particularly rough on diamond laps. The diamond cards I tested were definitely worn more towards the middle rather than uniform across the contact area. I assumed it was due to the bevel being slightly convex and focusing pressure there, but the soft region may have played a significant role. This was definitely an unexpected turn. I had gotten some 1075 from Aldo to try out a hamon eventually, but this was a neat surprise. I may create a thread about my HT to try and determine the biggest contributor between geometry and quench.

-
Frosty, that's a good point. This blade was hardened and tempered, which is why I'm having a hard time narrowing down a root cause. The softer nickel matrix seems beneficial in this case, so there must be something additional going on. I'm leaning toward the main culprit being loose diamond from the stones not being broken in as well as relatively hard swarf eroding the soft matrix to the point that diamonds started to fall out, possibly in a positive feedback loop.
-
In retrospect it makes sense that the nickel would be the point of failure, but since it isn't a problem for smaller amounts of material removal involved in sharpening I didn't consider it. I have a craftsman 2x42 modified for 72" belts. I've used structured abrasive belts before but was hesitant to use them for this for two reasons. One was heat buildup. Structured belts I've seen are AO and/or do not hold up to wet grinding. They build up less heat dry, but it's still much more than hand sanding. Standard abrasive belts build up heat even faster, especially at high grits (even when wetting the belt with a spray bottle), and I wanted to get the edge as thin as possible. If I got that sorted out, the limiting factor would still be technique. I simply need more practice at the grinder to get more even, flat bevels. A more ergonomic setup would help as well, and I'm hoping to make a new 2x72. I felt I'd have more control with hand sanding for the time being. I've used a few different types of paper. 3M wet/dry from home depot, wet/dry from harbor freight, and PSA backed AO. I've heard good things about Rhynowet but put off trying that or other paper in favor of testing out the diamond stones. I'm not sure what literature you have but I'll take a look at whatever it is.
-
EZE-LAP stones came in and the diamond seemed much more aggressive out of the box. The first few strokes felt like very low grit sandpaper and quickly mellowed out. After some use, I noticed that the cutting ability continued to decrease, and the grit was coming off the substrate to almost bare metal in one or two spots. I believe the same thing is happening in the DMT stones, but to a much lesser extent. This is exactly the opposite of what I expected to happen and I've been trying to think of possible causes: -I thought greater contact area, and reduced pressure would increase longevity. It could be that the extra contact is giving the diamonds more opportunity to dig in to the steel, and grab to the point where moving the stone loosens the diamonds in their "sockets" of the nickel substrate -The diamonds are monocrystalline and shouldn't be fracturing. However, it's possible that the first loose diamonds that come off are staying in the slurry and wearing against the other diamonds, or more likely the nickel substrate until more diamonds fall out. This wouldn't be a huge issue with sharpening a thin edge but the large contact area definitely traps more swarf against the stone even with lubrication. Using sandpaper gives more opportunities to clear swarf when switching to a fresh section of paper and giving another spray of lube. DMT advertises a high density of diamond, which could explain why they don't seem to degrade as quickly. More diamonds on the surface would mean less exposed substrate to be worn down by diamonds suspended in the slurry. The EZE-LAP brand felt much more aggressive which may have meant more loose diamonds to come off and abrade the tool. One or both of these could be why the EZE-LAP degraded so quickly. I think the latter makes more sense. So far this doesn't seem like a viable replacement for sandpaper but I'm not ready to discount it completely just yet. The degradation may be preventable: -Diamond stones may simply need a break-in to remove all the loose grit before use. -Something like duo-sharp (perforated substrate on a plastic backing) may be more effective. Loose diamond could clear out into channels or pockets instead of getting trapped against the stone. If that's the case, it may allow for breaking in during use. I'm not certain what the plastic backing would sacrifice in terms of rigidity. This is all speculation so I may reach out to the manufacturers to at least see what other causes there could be, or if there's a good way to break in the stones.
-
Update: the pack of 3 DMT credit card stones came today. One side of the blade was already hand sanded to 220 grit, the other was at 120 from the grinder. I used double sided tape to attach the 320 grit (coarse) to a 1/2" thick steel sanding block. I lubricated with windex and the diamond seemed to cut well on both sides of the knife. After some use I could feel that the area in contact with the steel wasn't quite as aggressive as the first strokes, but I understand that's normal with diamond stones. The grit didn't change after that. My finish grinding isn't perfect, so the bevel is just a tiny bit convex near the edge, so it'll take some work to get all the grinder scratches out. Just for kicks I have a 250 grit diamond card on the way from EZE-Lap on the way to see how it cuts. So far, so good.
-
DMT seems to be the way to go. They're monocrystalline, and from what I've researched the majority of the diamond is below the surface of the nickel. Of all the diamond and bonding types, I'd imagine this would be the most durable. Another hope is that they would last longer hand sanding because of the increased contact area, and thus decreased pressure on individual diamonds compared to sharpening a knife edge. I'm wonder how much people spend on sandpaper, and if these would be worth it even as a long-term consumable
-
I'm currently finish grinding a 6" kitchen knife. I don't mind hand sanding itself, but I find that constantly changing paper gets old pretty quickly. Does anyone have experience using diamond stones for hand sanding? They're rigid and flat, and the a good quality stone shouldn't have any issue with the grit wearing out. They're available in a fairly wide range of grits as well. I haven't seen this discussed, and hopefully it would save a little time and money in the long run, if not just making it a little more pleasant. Decent sized stones would also serve double duty for sharpening. I'm considering getting a set of DMT "credit card" sharpeners to test with a rigid backing. A set of 3 grits (325, 600, 1200) is $25 on amazon. I don't expect that diamond stones would replace sandpaper entirely, but they may help - especially for those still improving their grinding for evening out bevels and getting a more uniform finish before moving on to paper.
-
Naturally Aspirated Ribbon Burner. Photo heavy.
J.P. Hall replied to Frosty's topic in Ribbon Burners
I'd say I also hate it, but I don't not do it enough to reliably compare. -
What did you do in the shop today?
J.P. Hall replied to Mark Ling's topic in Blacksmithing, General Discussion
There's always a relevant XKCD:
-
Naturally Aspirated Ribbon Burner. Photo heavy.
J.P. Hall replied to Frosty's topic in Ribbon Burners
At some point you need to team up with the guy prototyping burner intake heads with a 3d printer: https://www.iforgeiron.com/topic/61034-3d-printed-plastic-burner-experiments-photo-heavy/